Содержание
- Расположение каталога «Автозагрузка» в Виндовс 10
- Способ 1: Прямой путь к папке
- Способ 2: Команда для окна «Выполнить»
- Управление автозагрузкой приложений
- Заключение
- Вопросы и ответы

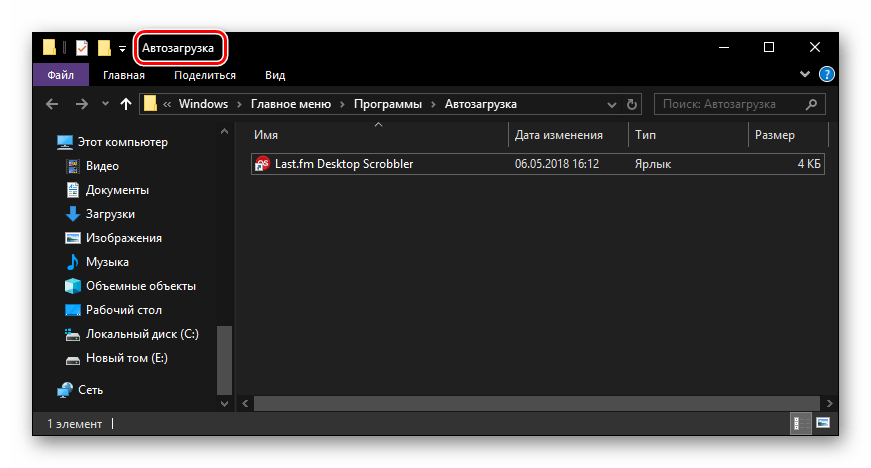
«Автозагрузка» или «Startup» — полезная функция Windows, предоставляющая возможность управления автоматическим запуском стандартных и сторонних программ вместе с загрузкой операционной системы. По своей сути это не только интегрированный в ОС инструмент, но и обычное приложение, а значит, у него есть свое расположение, то есть отдельная папка на диске. В нашей сегодняшней статье мы расскажем, где же находится директория «Автозагрузки» и как в нее попасть.
Как и полагается любому стандартному инструменту, папка «Startup» находится на том же диске, на котором установлена операционная система (чаще всего таковым является C:\). Путь к ней в десятой версии Windows, как и в предшествующих ей, является неизменным, отличается в нем лишь имя пользователя компьютера.
Попасть в директорию «Автозагрузки» можно двумя способами, причем для одного из них даже не потребуется знать точное расположение, а вместе с ним и имя юзера. Рассмотрим все более подробно.
Способ 1: Прямой путь к папке
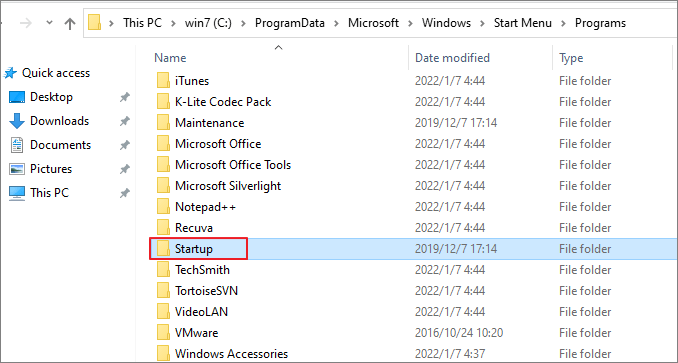
Каталог «Startup», содержащий в себе все программы, которые запускаются вместе с загрузкой операционной системы, в Виндовс 10 располагается по следующему пути:
C:\Users\Username\AppData\Roaming\Microsoft\Windows\Start Menu\Programs\Startup
При этом важно понимать, что буква С – это обозначение диска с установленной Windows, а Username – директория, название которой должно соответствовать имени пользователя ПК.
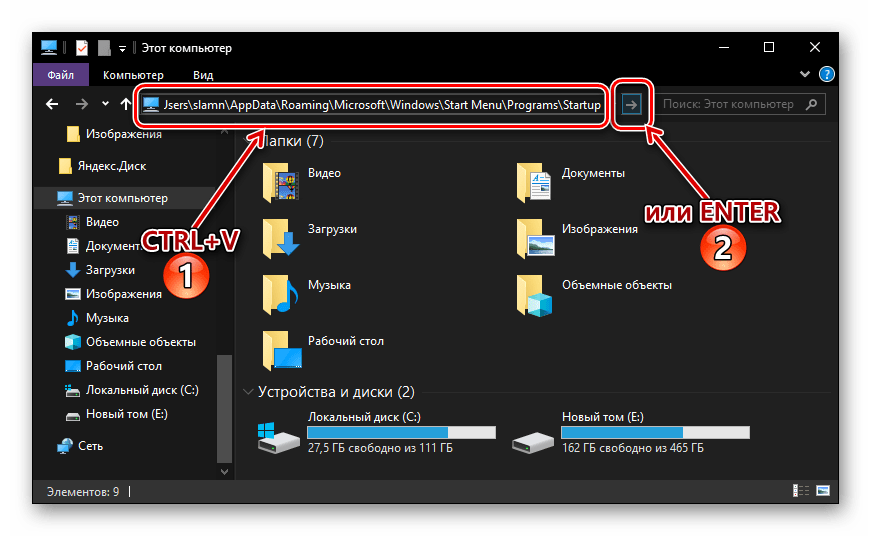
Для того чтобы попасть в данный каталог, подставьте в указанный нами путь свои значения (например, предварительно скопировав его в текстовый файл) и вставьте полученный результат в адресную строку «Проводника». Для перехода нажмите «ENTER» или указывающую вправо стрелку, расположенную в конце строки.
Если же вы захотите самостоятельно перейти в папку «Автозагрузки», для начала включите отображение скрытых файлов и папок в системе. О том, как это делается, мы рассказывали в отдельной статье.
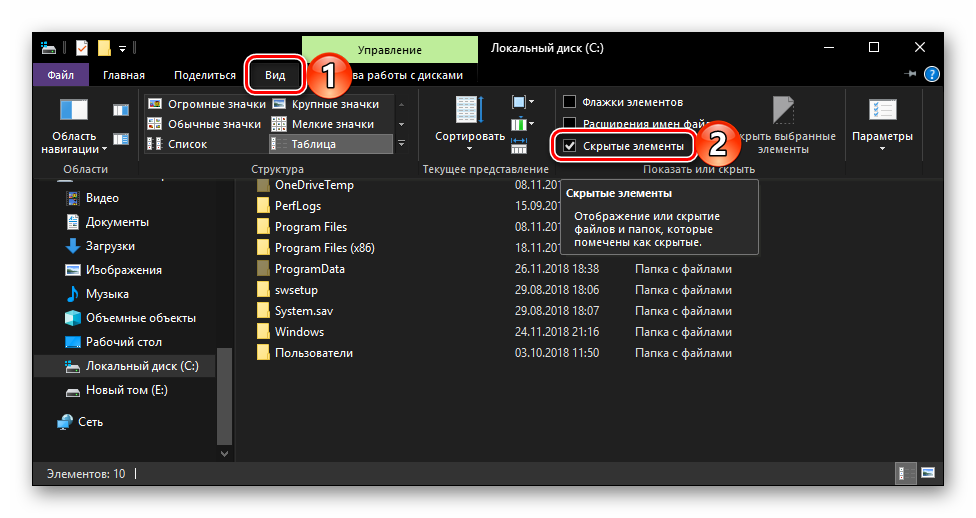
Подробнее: Включение отображения скрытых элементов в ОС Виндовс 10
Если же вы не хотите запоминать путь, по которому располагается директория «Startup», или считаете такой вариант перехода к ней слишком сложным, рекомендуем ознакомиться со следующей частью данной статьи.
Способ 2: Команда для окна «Выполнить»
Получить мгновенный доступ к практически любому разделу операционной системы, стандартному инструменту или приложению можно посредством окна «Выполнить», предназначенного для ввода и выполнения различных команд. К счастью, существует и возможность быстрого перехода в директорию «Автозагрузки».
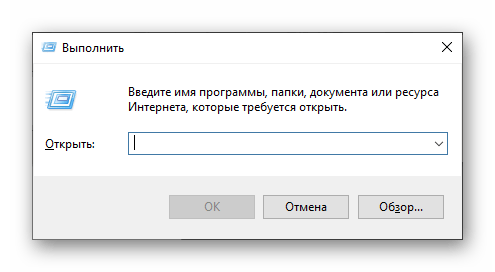
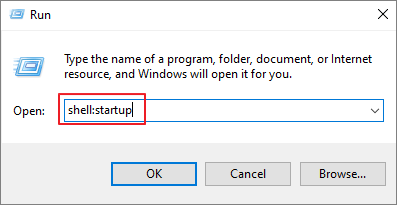
- Нажмите «WIN+R» на клавиатуре.
- Введите команду
shell:startup, после чего нажмите «ОК» или «ENTER» для ее выполнения. - Папка «Startup» будет открыта в окне системного «Проводника».

Используя стандартный инструмент «Выполнить» для перехода в каталог «Автозагрузки», вы не только экономите время, но и избавляете себя от необходимости запоминания довольно длинного адреса, по которому он располагается.
Управление автозагрузкой приложений
Если же поставленная перед вами задача заключается не только в переходе к директории «Startup», но и в управлении данной функцией, наиболее простым и удобным в реализации, но все же не единственным, вариантом будет обращение к системным «Параметрам».
- Откройте «Параметры» Windows, нажав левой кнопкой (ЛКМ) мышки по значку шестеренки в меню «Пуск» или воспользовавшись быстрыми клавишами «WIN+I».
- В окне, которое появится перед вами, перейдите в раздел «Приложения».
- В боковом меню кликните ЛКМ по вкладке «Автозагрузка».


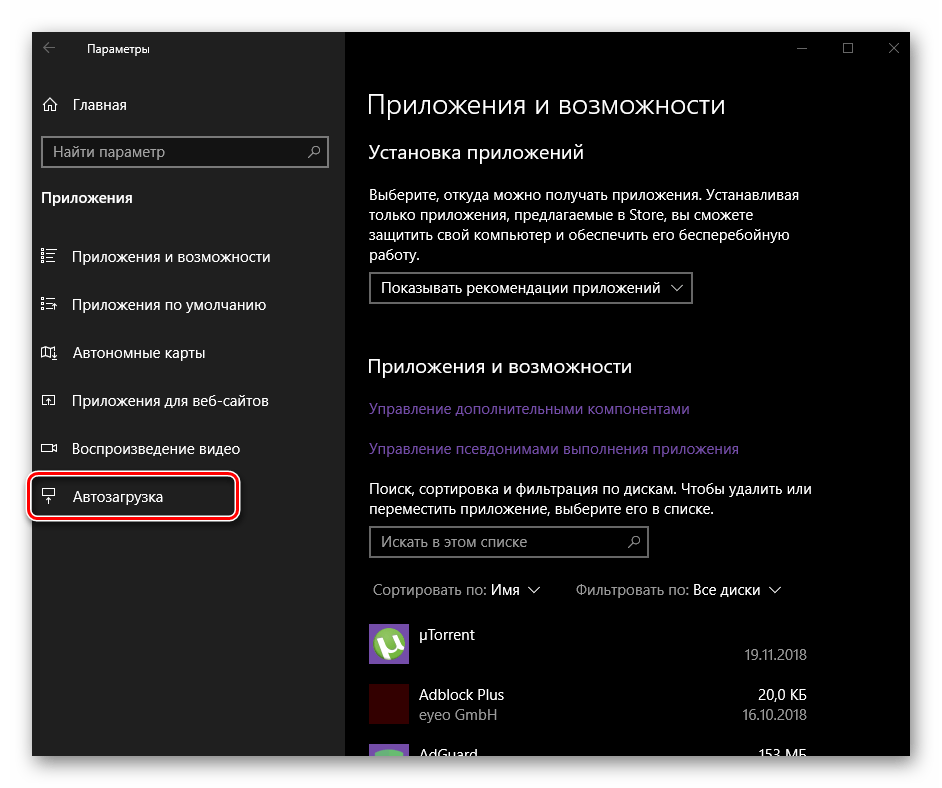
Непосредственно в этом разделе «Параметров» вы можете определить то, какие приложения будут запускаться вместе с системой, а какие нет. Узнать более детально о том, какими еще способами можно настроить «Автозагрузку» и в целом эффективно управлять этой функцией, вы можете из отдельных статей на нашем сайте.

Подробнее:
Добавление программ в автозагрузку Виндовс 10
Удаление программ из списка автозагрузки в «десятке»
Заключение
Теперь вы точно знаете, где находится папка «Автозагрузка» на компьютерах, работающих под управлением Windows 10, а также знаете и о том, как можно в нее максимально быстро попасть. Надеемся, данный материал был полезен для вас и по рассмотренной нами теме не осталось вопросов. Если же таковые имеются, смело задавайте их в комментариях.
The Windows OS (since Windows 95) has a Startup folder that can be used to add applications and processes to the system that a user wants to launch at startup. Windows 11 and Windows 10 also have a Startup folder, although the Startup tab of its Task Manager does do a good job in adding/removing startup programs on Windows, the need to access the Windows startup folder is always there.

There are two types of Startup folders in any Windows version (Windows 10 or 11 included), one for a particular user and the other for all the users of the machine. The items present in the Startup folder for a particular user will launch only when a particular user is logged in, whereas, the items present in the Startup folder for All Users will launch for every user of the system. The method to open these folders is different as discussed below:
Open the Startup Folder of a Particular User
You can open the Startup folder either by the File Explorer or using the Run Command box.
Use the File Explorer to Open the Startup Folder for a Particular User
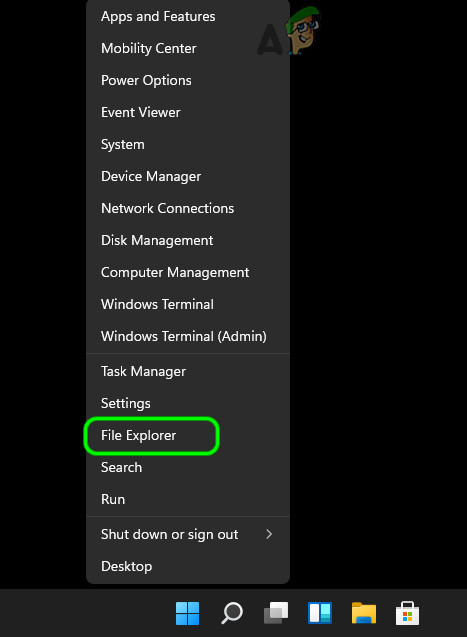
- Right-click Windows and select File Explorer.

Open File Explorer from the Quick Access Menu in Windows 11 - Now open This PC and double-click on your system drive (usually, the C drive).

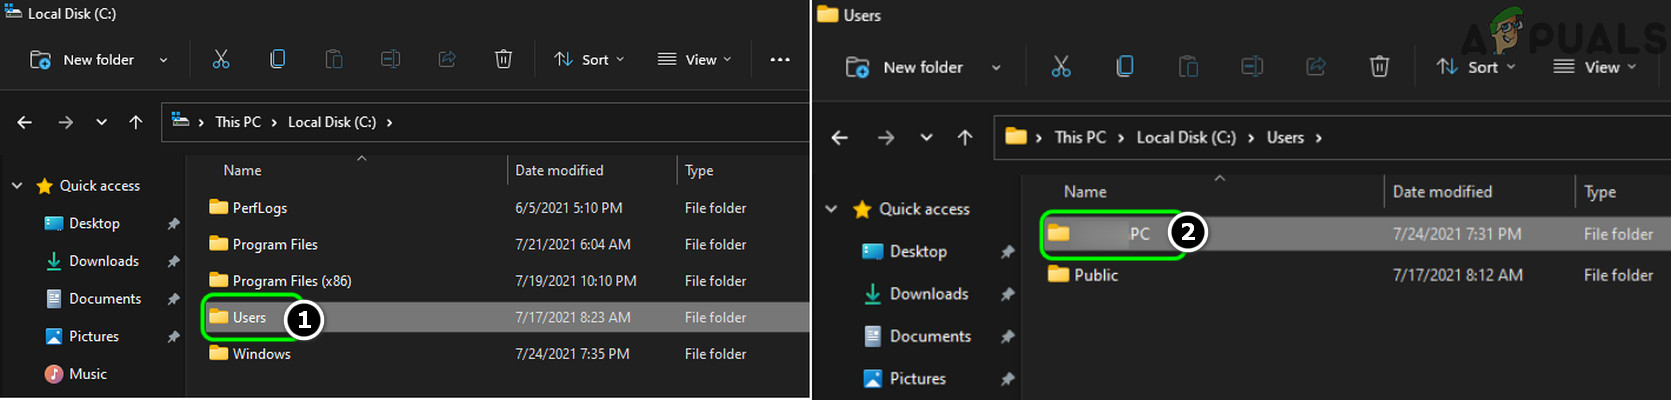
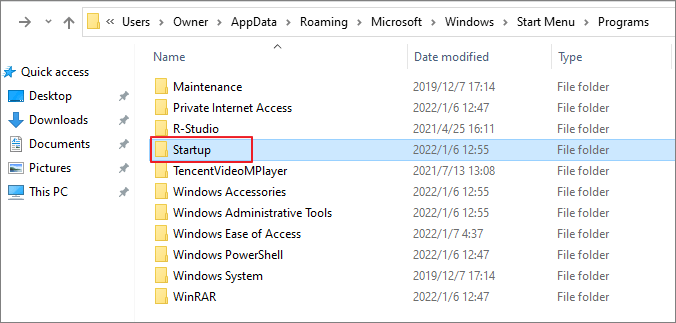
Open the System Drive of Windows 11 - Then select the Users folder and open the folder with your username.

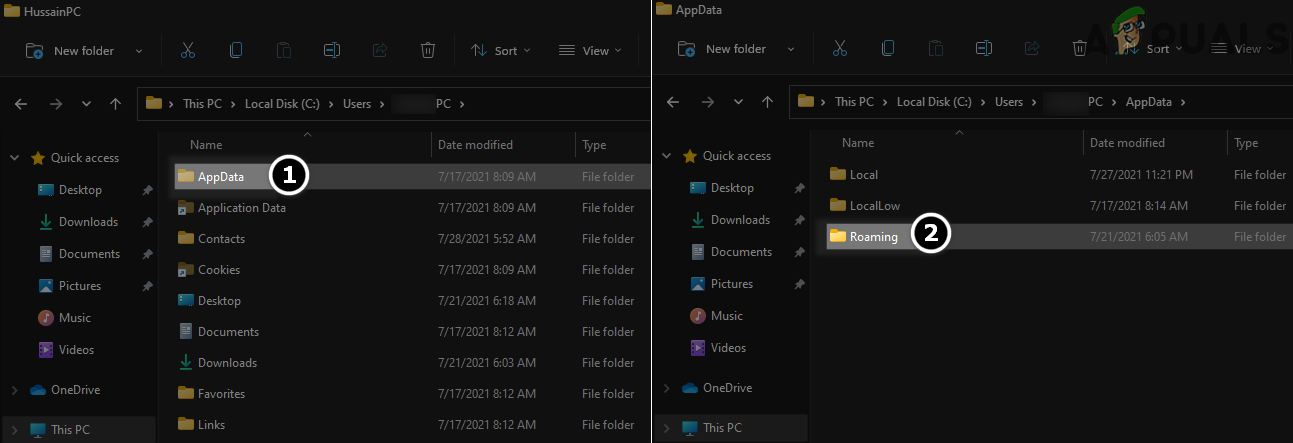
Open Your User Folder in the Users Directory - Now open the AppData folder (you may have to show the hidden files of the system) and double-click on Roaming.

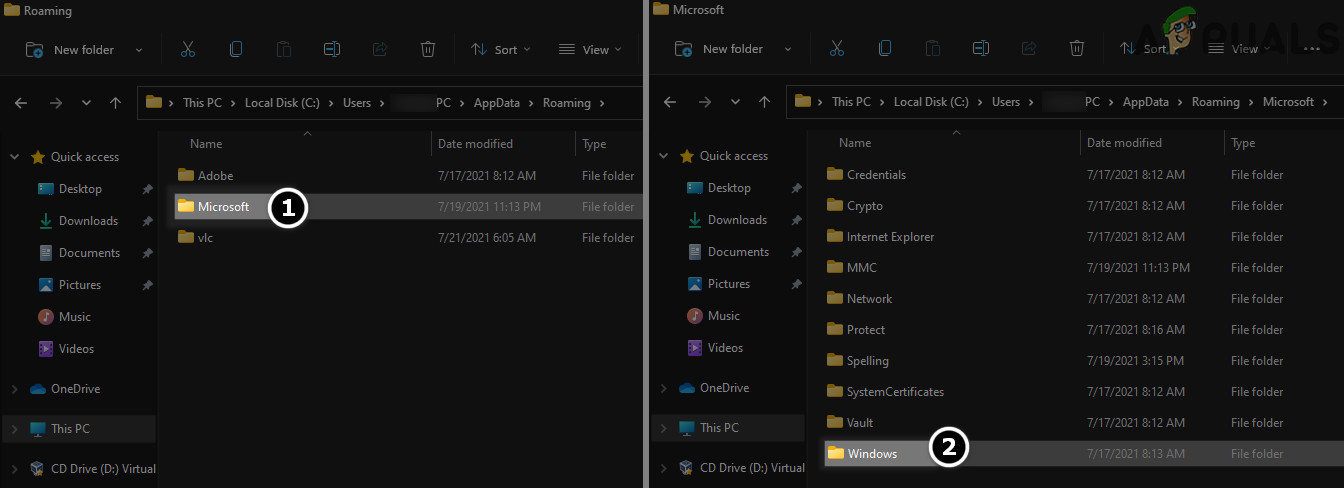
Open the Roaming Folder in the AppData Directory - Now open the Microsoft directory and double-click the Windows folder.

Open the Windows Directory in the Microsoft Folder - Then open the Start Menu directory and double-click on the Programs folder.

Open the Programs Folder in the AppData Directory - Now open the Startup folder and ta-da, you are in the Startup folder.

Open the User Startup Folder in Windows


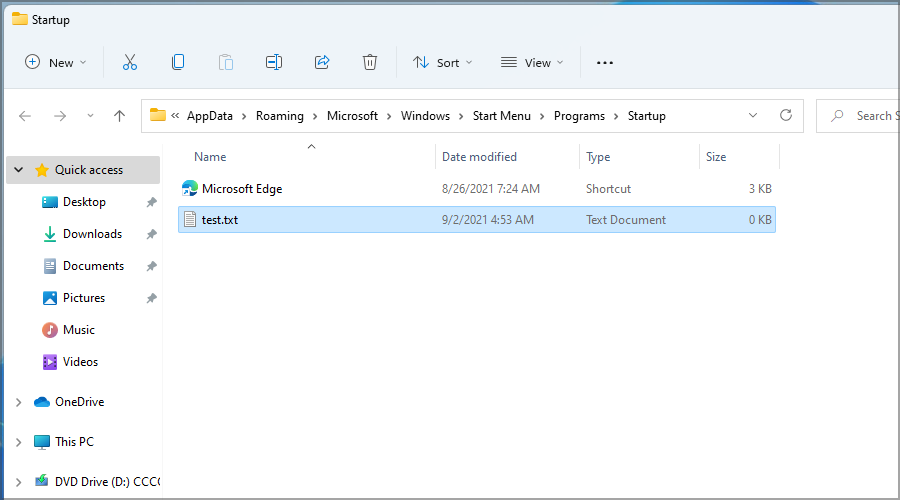
The complete path of the folder will be as under:
C:\Users\<yourusername>\AppData\Roaming\Microsoft\Windows\Start Menu\Programs\Startup
Use the Run Command Box to Open the Startup Folder of a Particular User
Although you can open the Startup folder from the File Explorer, this process is a lengthy one, but some Run command box cmdlets can achieve the same with less effort.
Use the AppData and Users Commands
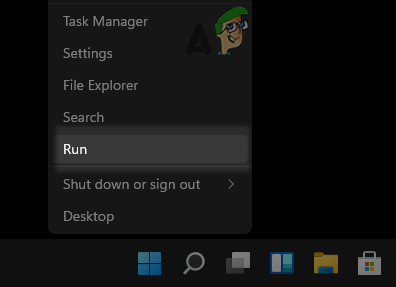
- Right-click on Windows and select Run.

Open the Run Command Box from the Quick Access Menu - Now execute the following:
%appdata%\Microsoft\Windows\Start Menu\Programs\Startup

Open Startup Folder - Hurray, you have opened the Startup folder of Windows 10.
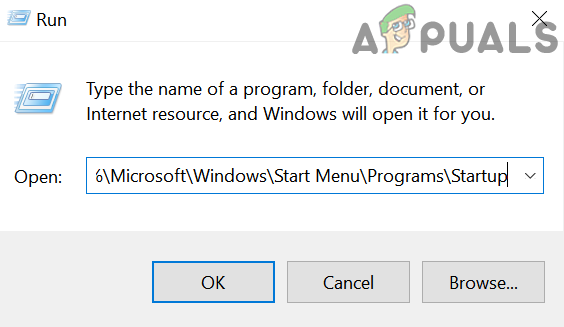
- You can also open the Startup folder by executing the following cmdlet in the Run command box:
\users\%username%\AppData\Roaming\Microsoft\Windows\Start Menu\Programs\Startup
Use the Shell Command:
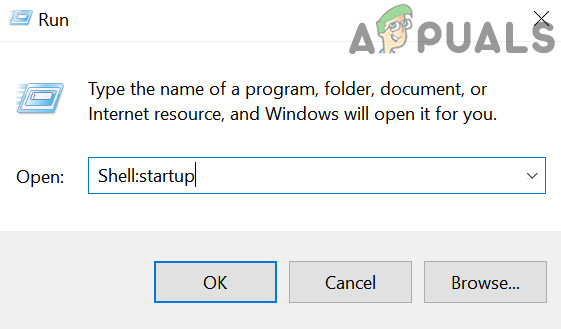
But it is quite difficult to remember the above-mentioned commands (although you can find them in the list of recent Run commands) but no need to worry, there is the following shorter command that can be used to open the Startup folder:
Shell:startup
Fun fact: You can copy the cmdlets mentioned in the Run command box section, paste it into the address bar of the File Explorer, and ta-da, it will still open the Startup folder of a particular user.
Open the Startup Folder for All Users of the Machine
You can open the Startup folder for all users by the File Explorer or through the Run command box.
Use the File Explorer to Open the Startup Folder for All Users
- Right-click Windows and open File Explorer.
- Now in the left pane, select This PC and open your system drive (usually, C drive).
- Then open the ProgramData folder (if the folder is not shown, make sure the viewing of the hidden and protected system files is enabled) and double-click on the Microsoft folder.
- Now open the Windows directory and double-click on the Start Menu folder.
- Then open the Programs directory and double-click on the Startup folder.

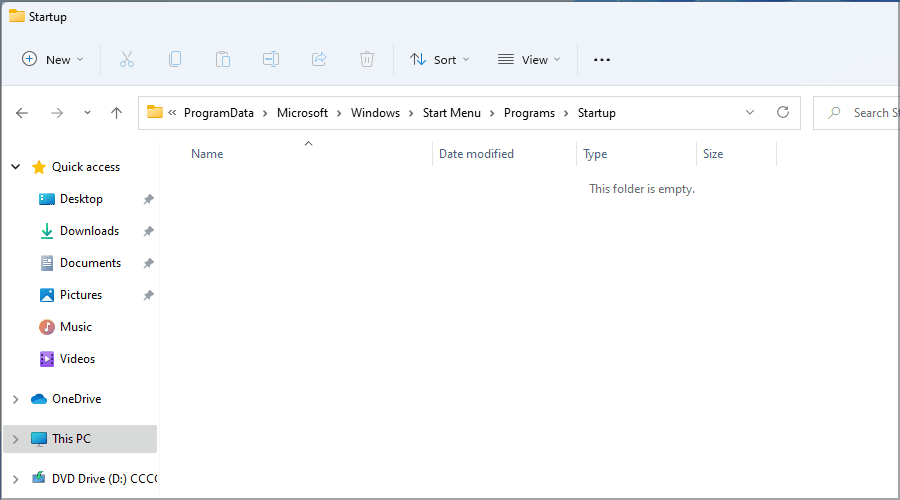
Open the Startup Folder for All Users in Windows - You are now in the Startup folder.
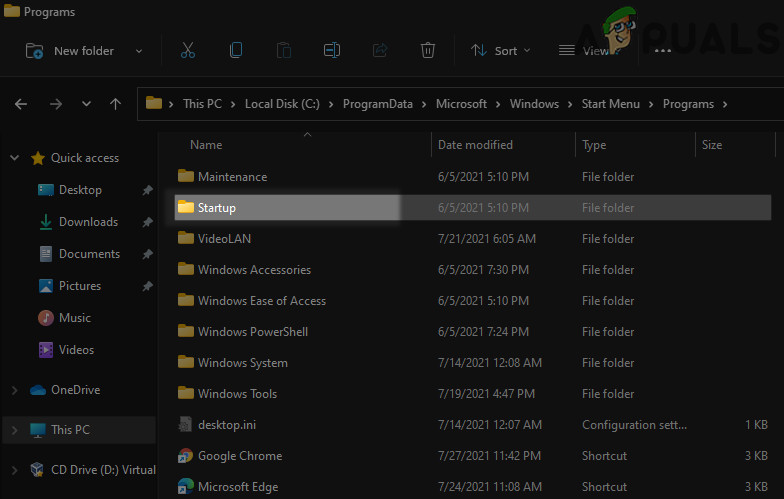
The complete path to the Startup folder for All Users will be as under
C:\ProgramData\Microsoft\Windows\Start Menu\Programs\StartUp
Use the Run Command Box to Open the Startup Folder for the All User
The Startup folder for All Users can also be opened by the Run command box.
Use the ProgramData path
- Right-click Windows and select Run.
- Now execute the following:
%ProgramData%\Microsoft\Windows\Start Menu\Programs\StartUp

Open the Startup Folder of All Users Through the Run Command Box - There you are, in the Startup folder for all users.

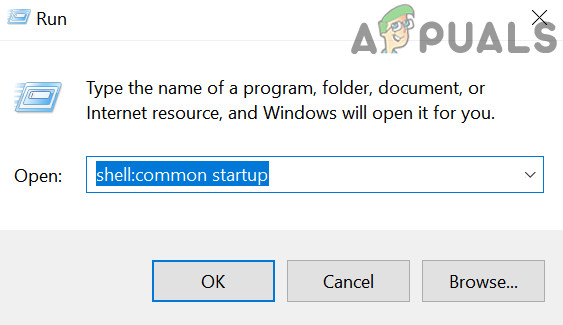
Use the Shell Command
You can also use the following shorter cmdlet in the Run command box to open the Startup folder for All Users:
shell:common startup
Remove an Item from the Startup Folder
Removing an item from the Startup folder (either for a particular user or All Users) is a straightforward process, simply delete the application/process/shortcut from the Startup folder.
Add An Item to the Startup Folder
Adding an application/process to the Startup folder of the Windows 10 is a bit trickier process (as compared to the deletion process), as discussed below:
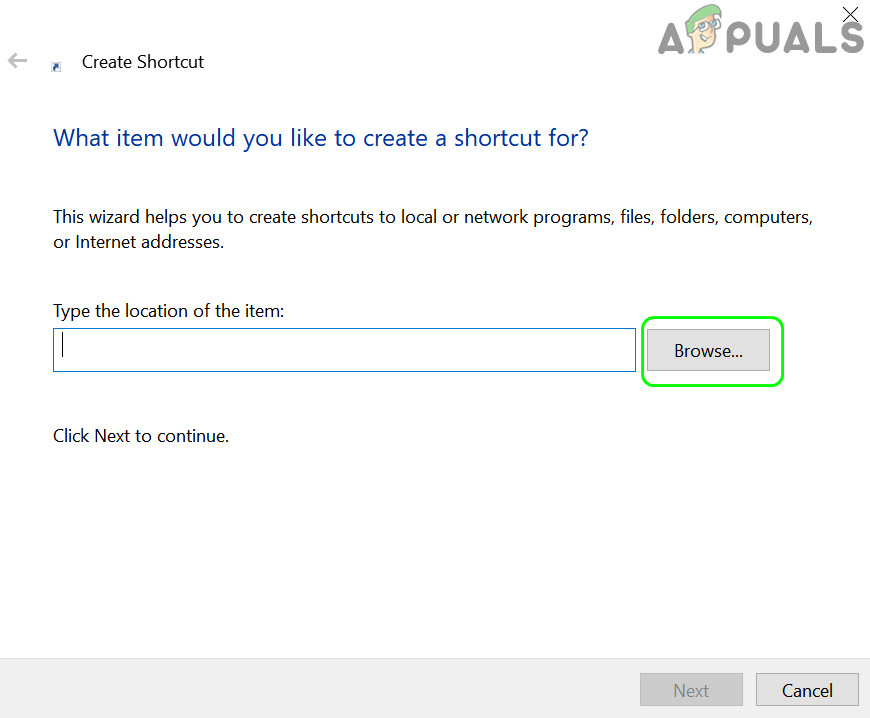
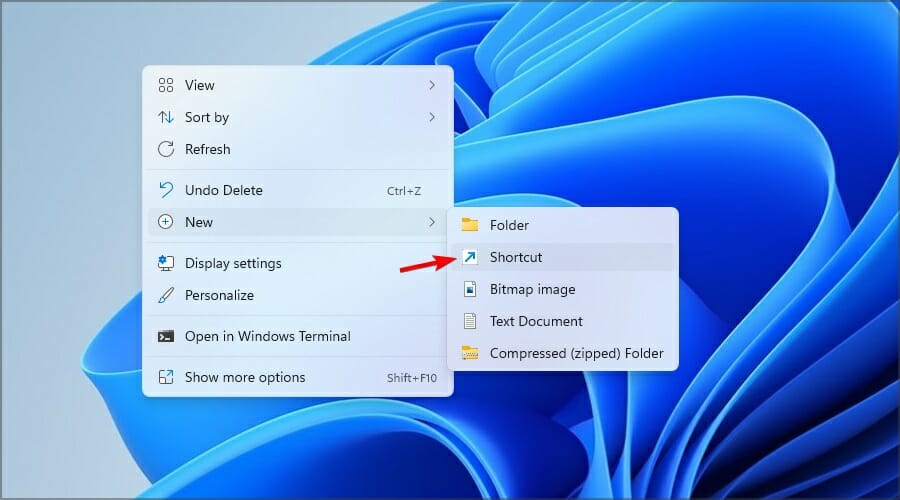
- Open the Startup folder (either for a particular user or All Users) and right-click on the empty area.
- Now hoover over New and select Shortcut.

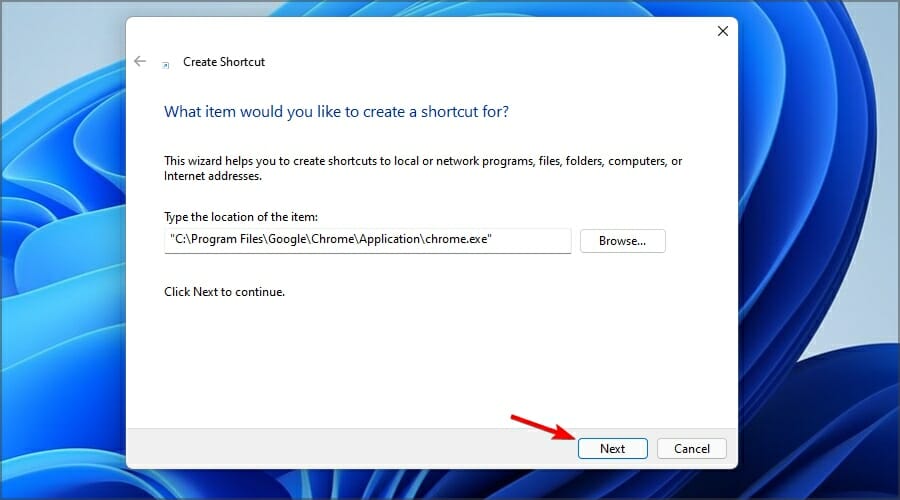
Create a New Shortcut in the User Startup Folder - Then click on the Browse button and navigate to the folder where the application/process is located. For example, to add Chrome, navigate to the following path and select Chrome.exe:
This PC>> C>> Program Files (x86)>> Google>> Chrome>> Application>>

Browse for the Application to be added in the Startup Folder in the Shortcut Window - Now click on the OK button and in the resulting screen, click on Next.

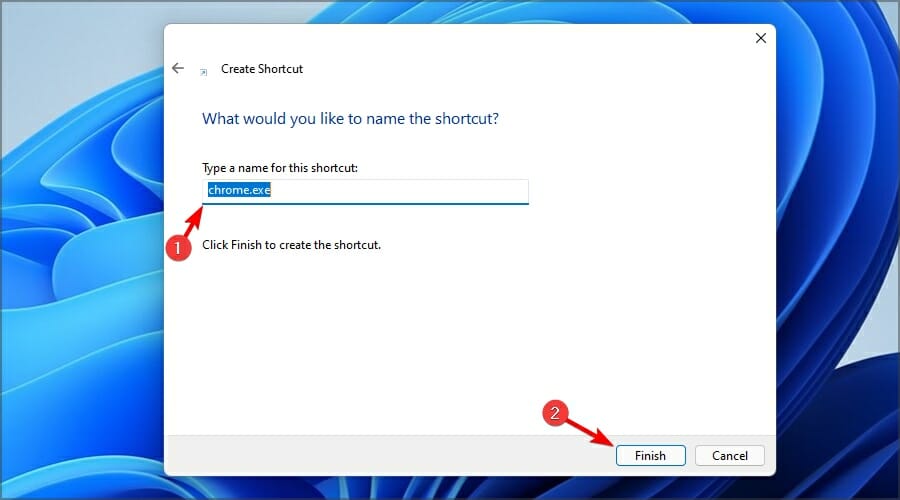
Add Chrome’s Shortcut to the Startup Folder - Then enter the name of the Shortcut (like Google Chrome) and click on Finish.


Kevin Arrows
Kevin Arrows is a highly experienced and knowledgeable technology specialist with over a decade of industry experience. He holds a Microsoft Certified Technology Specialist (MCTS) certification and has a deep passion for staying up-to-date on the latest tech developments. Kevin has written extensively on a wide range of tech-related topics, showcasing his expertise and knowledge in areas such as software development, cybersecurity, and cloud computing. His contributions to the tech field have been widely recognized and respected by his peers, and he is highly regarded for his ability to explain complex technical concepts in a clear and concise manner.
The Windows Startup folder is a hidden and important system folder, and any program in the startup folder will automatically start and run when the computer is turned on. You will learn the full guide of the Windows 10 Startup folder, including:
Where Is the Startup Folder in Windows 10
The startup folder keeps shortcuts of programs that needed to run with Windows. You can find and access the Startup folder in Windows 10/11 through the following paths:
The current users’ Startup folder location is located at:
- C:\Users\Username\AppData\Roaming\Microsoft\Windows\Start Menu\Programs\Startup
The Startup folder locations for all users is located at:
- C:\ProgramData\Microsoft\Windows\Start Menu\Programs
Find Windows 10 Startup folder in Command
Or, you can access Windows 10 Startup folder in Command.
Step 1. Press Win+ R keys to open the Run box.
Step 2. Type shell:startup and hit «OK» to open the Current Users Startup folder.
Or type shell:common startup and hit «Enter» to open the All Users Startup folder.

Show Hidden Files on Windows 10
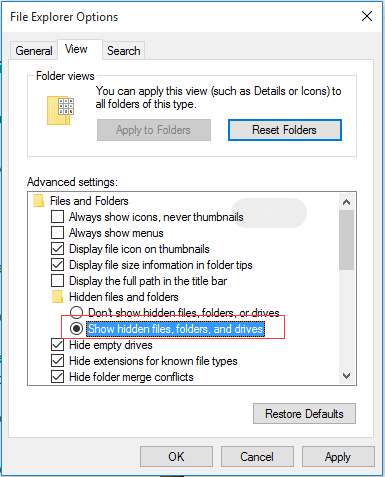
Note that AppData is a system-protected and hidden folder. To access it, you need to change some settings to show hidden files.
Step 1. Press Win + E to open Windows File Explorer.
Step 2. In the top toolbar, click «View» tab > «Options».
Step 3. Click the View tab in Folder Options windows, tick «Show hidden files, folders and drives».
Step 4. Uncheck the «Hide protected operating system files» option if it is selected.
Step 5. Then, click «OK» to save all the changes.
How to Change What Programs Run in Startup Folder on Windows 10
How do I change programs that run at the Startup folder Windows 10? You can easily add or remove an app from the Startup folder by taking the steps below.
Add an App to Run at Startup Folder
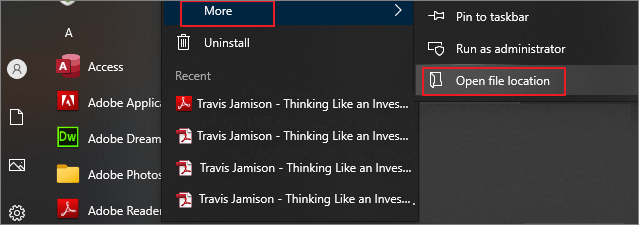
Step 1. Find the app you need to start automatically. Right-click it, select «More», and then select «Open file location». This will open the location where the program saves its shortcut. If there is no Open file location option, this means that the application cannot run at startup.
Step 2. Go to the Startup folder location on your computer or open it using the command above.
Step 3. Copy and paste the application shortcut to the Startup folder. Then, it will start automatically when Windows boots.
Remove Windows 10 Startup Programs in Startup Folder
Step 1. Access the Startup folder in this file path: C:\Users\Username\AppData\Roaming\Microsoft\Windows\Start Menu\Programs\Startup
Step 2. Right-click the program you don’t want to open at startup and click «Delete». Then, the app won’t start when you boot the computer.
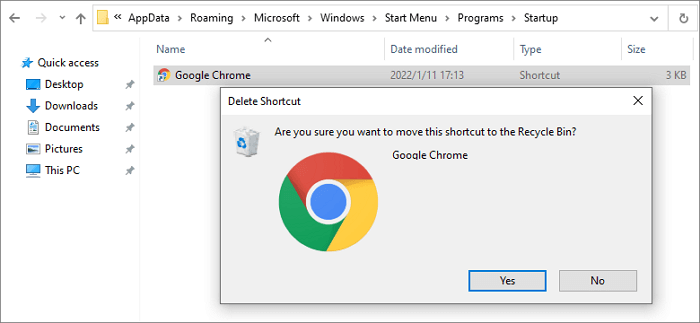
The program shortcut will remain in the Recycle Bin until you empty it.
How to Fix Windows 10 Startup Folder Not Working in 4 Simple Ways
Every time you log into the computer, your favorite program already opens automatically, this will save you a lot of time. What if the program no longer opens automatically? How to fix Windows 10 startup folder not working? Try these methods.
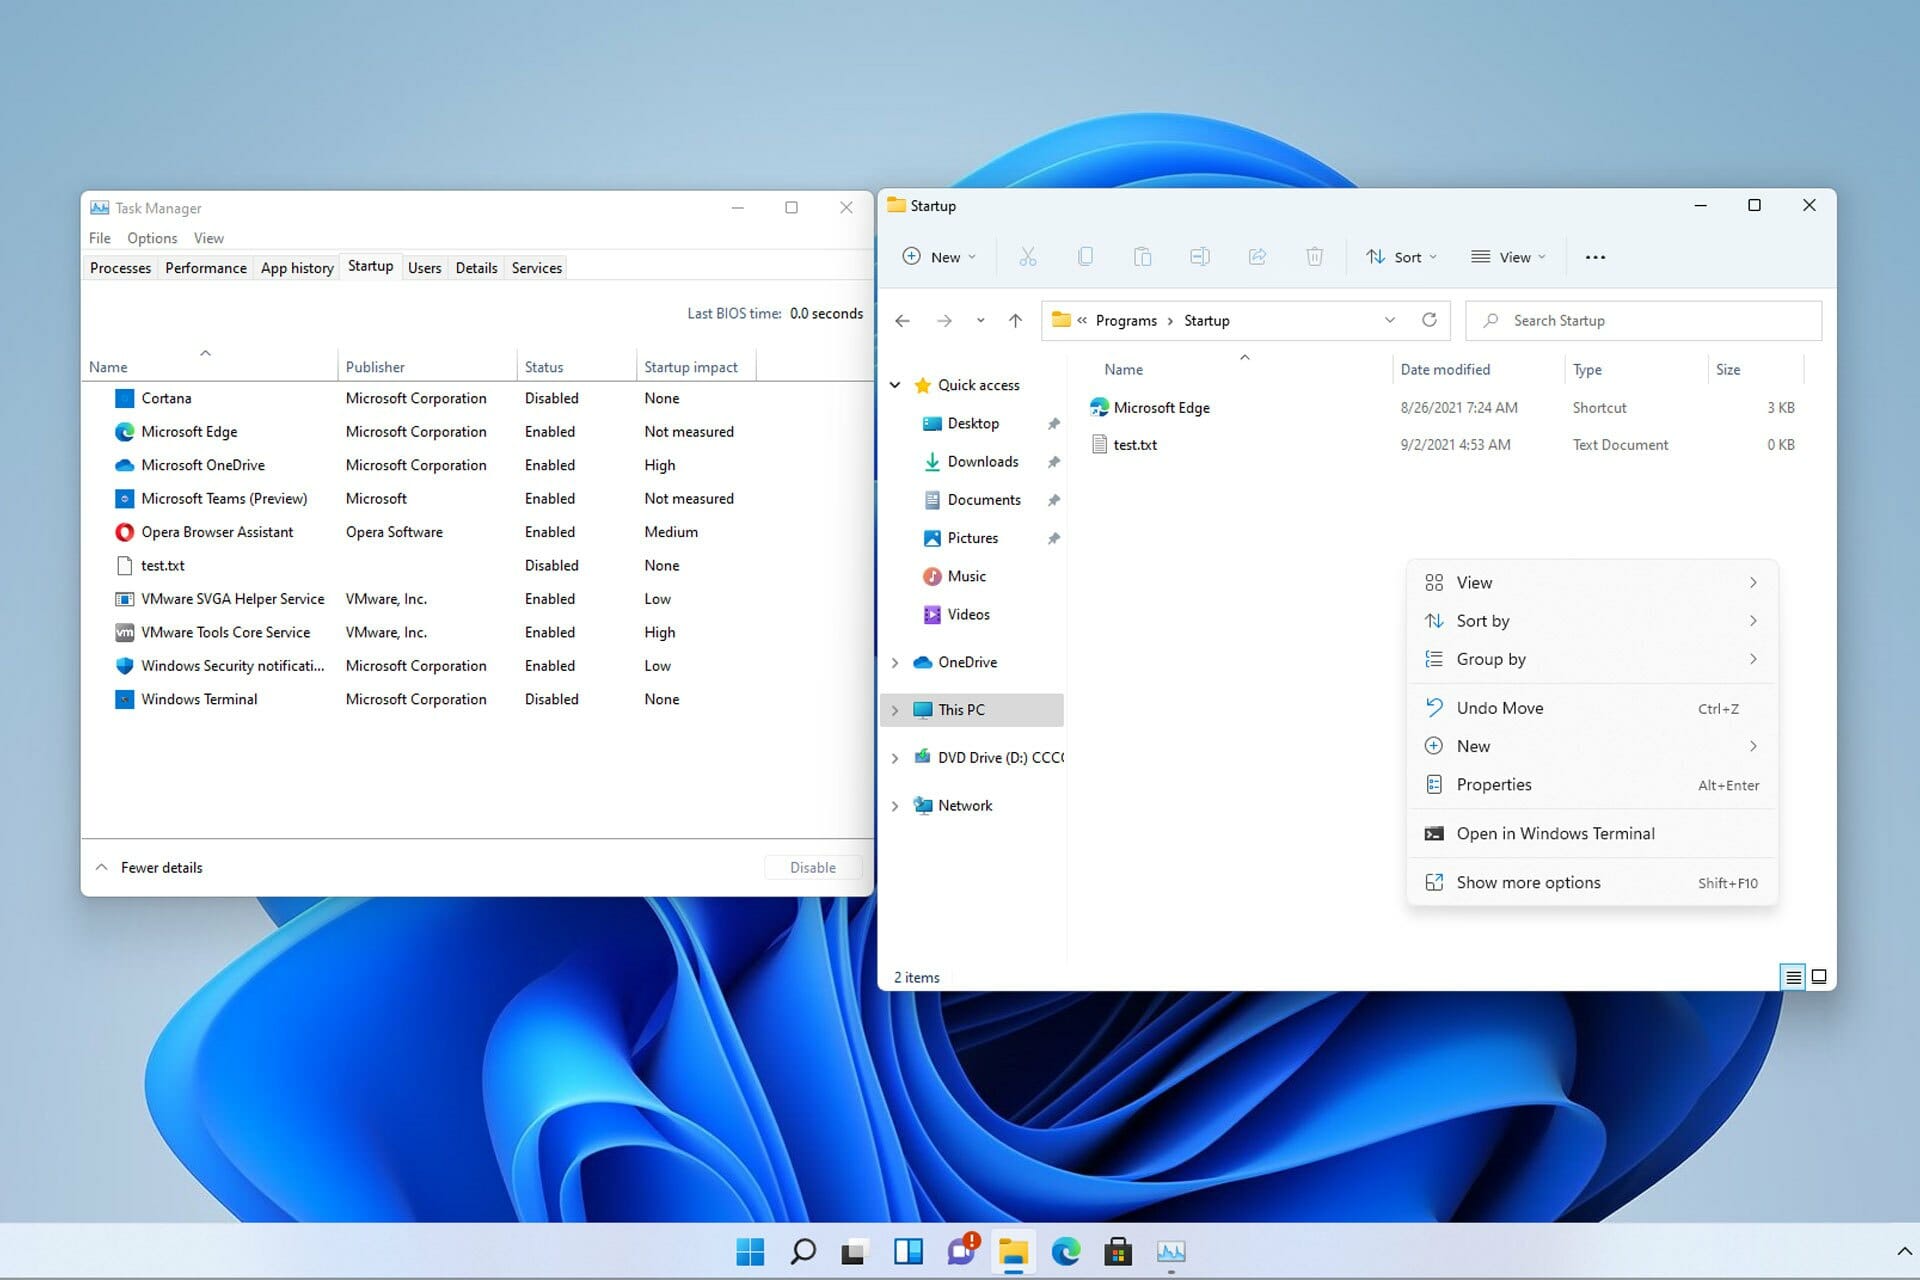
Fix 1. Check Windows Startup in Task Manager
Go to Task Manager to find the application that prevents the Startup folder from loading apps.
Step 1. Pres CTRL + SHIFT + ESC or CTRL + ALT + Delete keys to open Task Manager .
Step 2. Click the «Startup» tab in the Task Manager window.
Step 3. Right-click the program you want to boot automatically and choose «Enable».
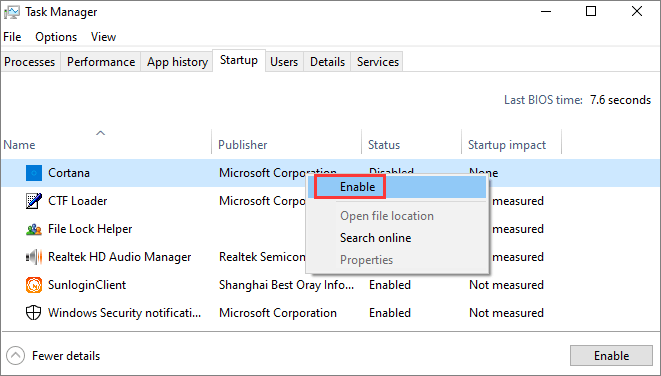
Step 4. Restart your PC and check if the program runs automatically.
Fix 2. Copy the App’s Shortcut Manually
Step 1. Press Windows + R to open the Run command line.
Step 2. Type shell:startup in the Run box to open the Startup folder.
Step 3. Copy the program’s shortcut and paste it into the Startup folder.
Step 4. Restart your PC and check for changes.
Fix 3. Create a Batch File to Force a Program to Start
You can try creating and running the batch file that enables you to run any program at the startup:
Step 1. Open a New text document.
Step 2. In the document, paste the following lines. Change the file path with your own program’s location.
@echo off
C:\Program Files (x86)\Google\Chrome\Application\chrome.exe
Exit
Step 3. Click «File > Save As…». Change the TXT’s extension to .bat.
Step 4. Double-click the batch file to run it. Next time you start your system, the program will run simultaneously.
Fix 4. Edit Windows 10 Registry
If all the above-given solutions fail to fix Windows 10 startup folder not working issue, then you may finally try to edit your registry.
Step 1. Open the search bar > type regedit in the search bar. Click «Registry Editor» in the search results.
Step 2. Go to the following path to make changes to the certain registry key:
HKEY_LOCAL_MACHINE\Software\Microsoft\Windows\CurrentVersion\Run
Step 3. Right-click on the empty space and choose «New > String Value».
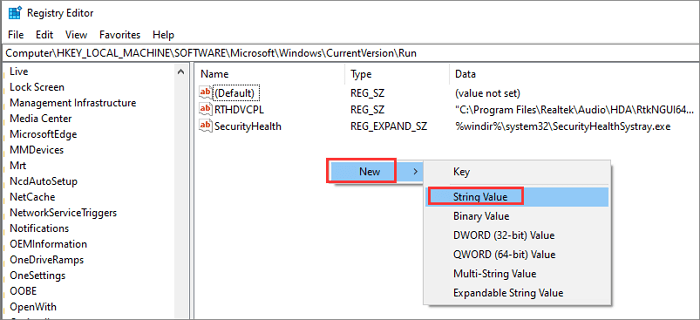
Step 4. The value name is exactly the same as the name of the program to run.
Step 5. Next, right-click on the newly-created value and choose «Modify».
Step 6. In the Value Data Field, paste the path of the.EXE (executable) for the program you want to run.
Step 7. Finally, save the changes and restart your computer.
How to Restore Startup Folder on Windows 10/11
Some users reported that the Startup folder and programs disappeared on Windows 10 due to uncertain causes. If you run into the same problem and want to restore the lost Startup folder on a Windows computer, try EaseUS data recovery software.
EaseUS Data Recovery Wizard is developed with the most advanced data recovery algorithms that cover all storage media like HDD, SSD, external devices, memory cards, USB drives, and other devices. You can easily use this software to recover permanently deleted files and folders due to accidental deletion, hard drive formatting/corrupting, OS crash, virus attack, etc.
This tool still enables you to repair corrupted files after data recovery. Document recovery, photo recovery, and video recovery in all file formats are supported. Download this full-round file recovery and repair tool to get back lost folders.
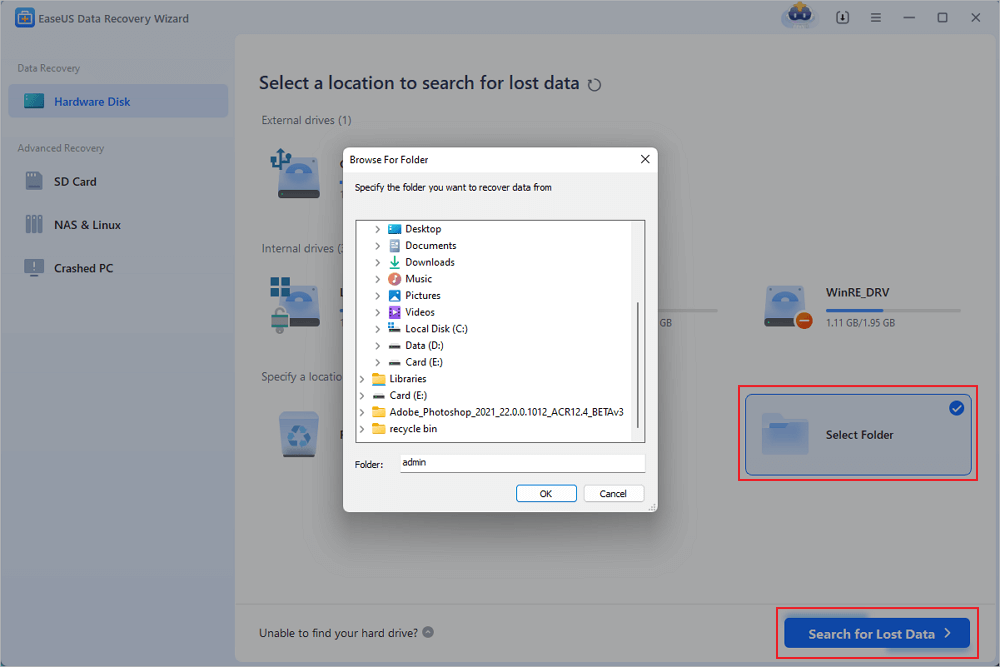
Step 1. Select a folder to scan for lost files
Launch EaseUS Data Recovery Wizard. Choose «Select Folder» under Specify a location. Click «Browse» to choose the location where you lost the folder and click «OK» to scan the lost folder.
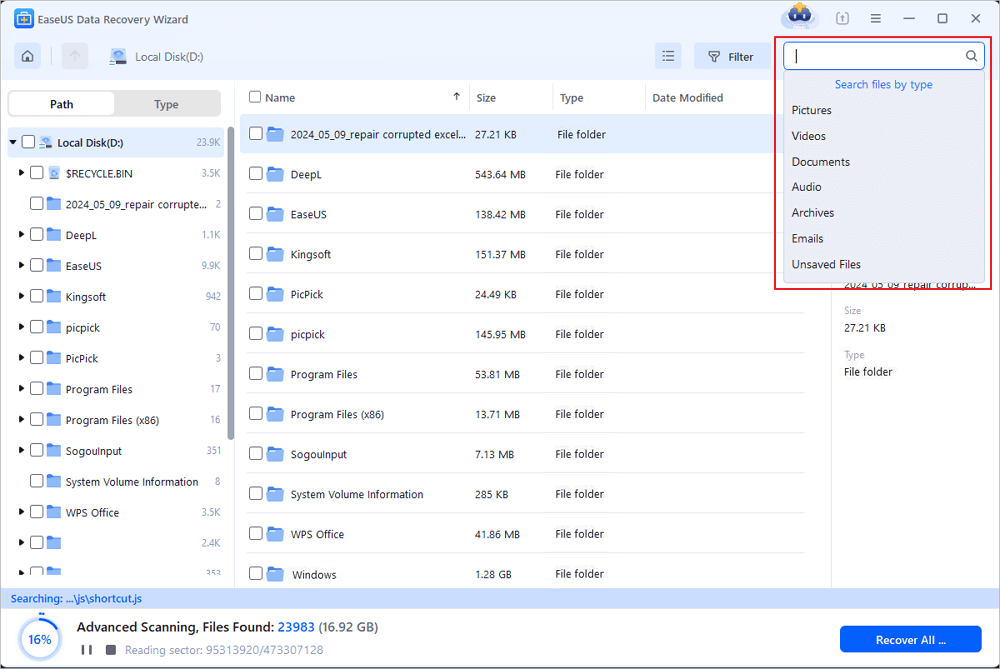
Step 2. Find and preview found files in the lost folder
If you remember the folder name, type the folder name in search box to quickly find the lost files. Then, open the found folder and double-click to preview scanned files. Or you can use the Filter feature to find a certain type of files.
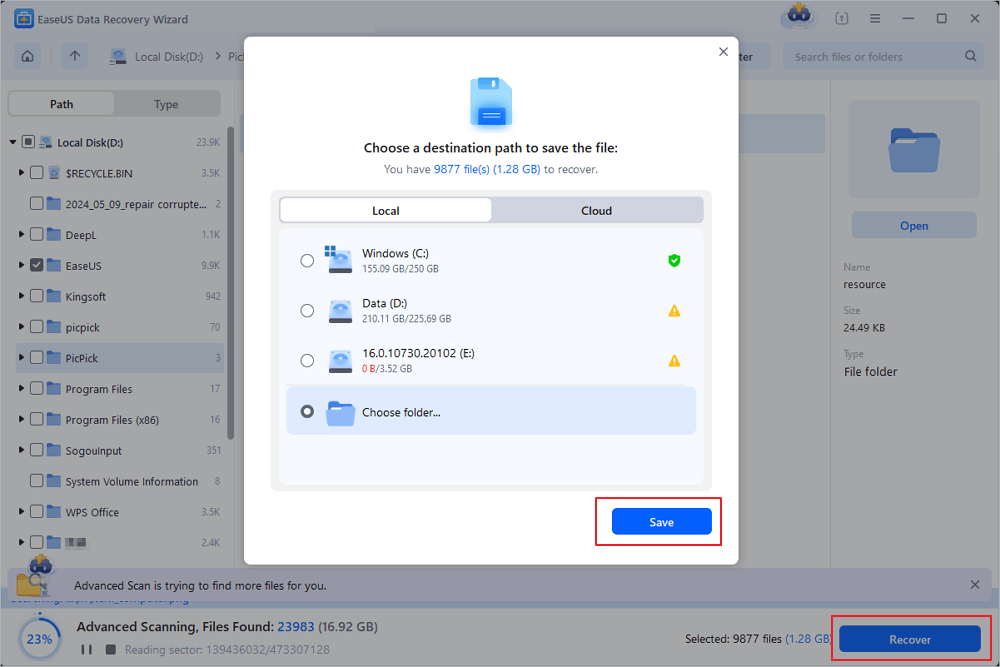
Step 3. Recover and save the lost folder
Last, select the folder and files you need, click «Recover» and choose a new & secure location on your PC to keep the recovered data.
Concluding Words
The startup folder on a Windows computer is helpful to manage the startup programs in an easy way. The Windows 10 Startup folder location is: C:\Users\Username\AppData\Roaming\Microsoft\Windows\Start Menu\Programs\Startup. You can also access the Startup folder with shell:startup command.
This post also shows you several useful ways to fix the Startup folder not working problem and how to use EaseUS data recovery software to restore deleted or lost Startup folder with simple clicks.
Get apps to automatically launch when the PC is turned on
by Milan Stanojevic
Milan has been enthusiastic about technology ever since his childhood days, and this led him to take interest in all PC-related technologies. He’s a PC enthusiast and he… read more
Updated on
- To access the Startup folder in Windows 11, you just need to open it like any other directory from File Explorer.
- There are two Startup Folders, one for the computer and another for specific user accounts.
- Adding too many apps to the Startup Folder can affect the boot time, but a few should do no harm.
Startup applications have been there in the OS like forever. These are the ones that start automatically when you boot Windows. And to add one to the list, all you got to do is drop a shortcut in the Startup Folder in Windows 11.
Remember, the apps you configured using the built-in settings to launch at startup don’t appear in the folder, and as a result, the Startup Folder could be empty at times. But, for apps that don’t offer a setting, you can always use the Startup Folder in Windows 11.
What type of files works with the Startup folder?
Although the Startup directory is commonly used to start applications, it also works with all other file types, be it a text document or a PDF.
If you want to run any specific file as your PC starts, just move it to this folder, and that’s it. This can come in handy if you have a script to run on every boot, for instance. The option to run another file type is missing in the Startup tab of the Task Manager.
How can I use the Windows 11 Startup folder?
- Press Windows + E or click the File Explorer icon in the Taskbar.

- Navigate to the following directory:
C:\ProgramData\Microsoft\Windows\Start Menu\Programs\Startup - Next, go to the desktop, right-click anywhere, choose New, and then select Shortcut from the menu.
- Click the Browse button.
- Browse and select the desired application.
- Click Next to proceed.
- Enter the name of the new shortcut and click Finish.
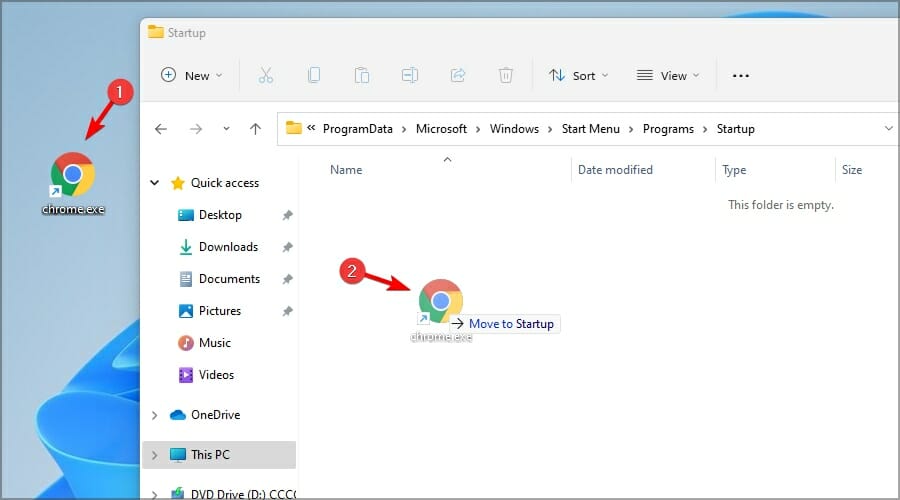
- Move the shortcut to the Startup directory.
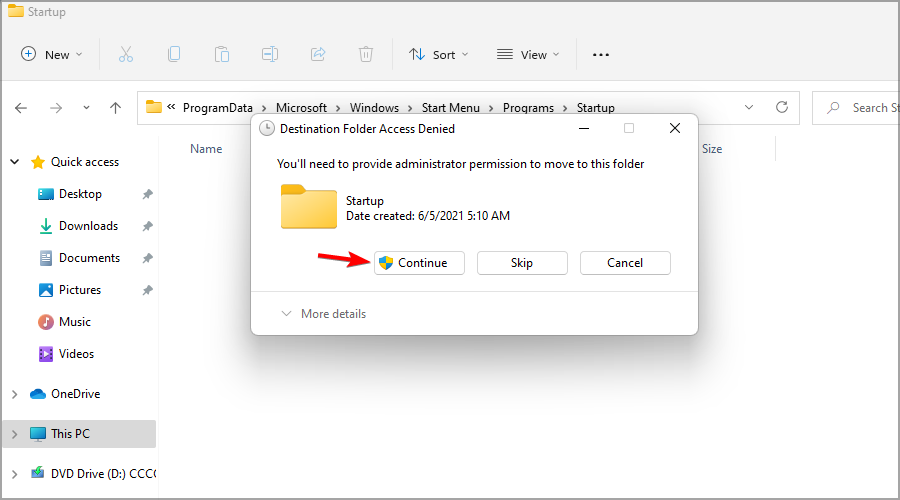
- When the confirmation dialog appears, click on Continue.


After making these changes, the shortcuts in your Startup folder will start automatically when your system boots. Keep in mind that these changes affect all user profiles on your PC.
If you want to configure startup apps for a particular user, paste the shortcut in this location instead while replacing Username with the actual account name:C:\Users\Username\AppData\Roaming\Microsoft\Windows\Start Menu\Programs\Startup
Alternatively, you can press Windows + R to open Run and use the following command to access the current user’s Startup Folder in Windows 11:shell:startup
Adding too many applications to the Startup Folder will increase the boot time and affect the performance of Windows. So, it’s recommended that you only add the critical ones.
Also, if the computer is running slow, find out how to make Windows 11 run faster.
Are you currently using the Startup directory on your PC? Let us know in the comments section below.
![]()
Каждый наверняка сталкивался с вопросом о том, как добавить программу в автозагрузку в Windows, или, что более интересно, как убрать программу из автозагрузки в Windows. Ведь помимо полезных и нужных программ там любят селиться различного рода вирусы, трояны, рекламки и др. замедляющий загрузку и работу компьютера софт.
Итак, для начала разберемся, где искать программы, загружаемые Windows автоматически.
- Глобальный каталог программ для автозагрузки (разред реестра) для всех пользователей Windows
- Каталог программ для автозагрузки (раздел реестра) для каждого отдельного, зарегистрированного пользователя в системе
- Специальная папка «Автозагрузка» в профиле каждого отдельного, зарегистрированного пользователя в системе или профиле «для всех»
- Файлы заданий планировщика Windows
Начнем с первого. Глобальный каталог программ для автозагрузки Windows представляет собой разрел в реестре Windows, попасть в который можно с помощью редактора реестра regedit или других сторонних программ. ПРЕДОСТЕРЕГАЮ вас использования любых сторонних программ для работы с реестром Windows — вы можете получить неработоспособную систему. Поскольку каталог глобальный, вам понадобится запустить редактор реестра regedit от имени администратора. Сделать это можно открыв меню «Пуск» и введя в поисковую строку фразу «regedit» (А в Windows XP это Пуск —> Выполнить) .

Далее по щелчку правой кнопки мыши выбираем в открывшемся меню пунк «Запустить от имени администратора». Возможно вас попросят ввести пароль, если он был установлен. Открыв редактор слева вы увидите дерево из папок, вернее сказать разделов реестра Windows. Смело разворачивайте его по следующей схеме
HKEY_LOCAL_MACHINE —> SOFTWARE —> Microsoft —> Windows —> CurrentVersion —> Run
Нажав на «Run» вы получите справа список программ, загружаемы автоматически для всех пользователей системы. Здесь вы можете удалить программу из автозагрузки, выделив её мышью и нажав клавишу «delete», вы можете отредактировать запись по двойному клику мышкой, а наконец вы можете добавить программу в автозагрузку кликнув по пустому полю правой кнопкой мыши и выбрав «создать —> строковый параметр». После появления нового параметра, дайте ему имя (например имя желаемой программы) и, дважды кликнув по параметру, укажите путь к программе в открышемся окошке, например C:\Program Files\7-Zip\7zFM.exe
Абсолютно то же самое справедливо и для пользовательского раздела реестра. Разница в том, что программа, указанная в пользовательском разделе, будет загружаться только при входе этого конкретного пользователя, а не глобально. Путь к разделу следующий
HKEY_CURRENT_USER —> SOFTWARE —> Microsoft —> Windows —> CurrentVersion —> Run
Теперь переходим к особой папке — «Автозагрузка». Она хранится как профиле каждого отдельного, зарегистрированного пользователя в системе, так и в специальном профиле «для всех», распространяющем свое действие на всех зарегистрированных в системе пользователей. Действительно, ярлыки на программы, помещенные в эту папку будут запускать указанные программы при входе пользователя в систему. Это поведение схоже с разделами в реестре Windows, однако пользоваться папкой проще, ведь все мы умеем создавать ярлыки на свои любимые программы. Найти эту папку можно в зависимости от версии системы по следующим путям
Автозагрузка программ в Windows XP для конкретного пользователя:
C:\Documents and Settings\ИМЯ_МОЕГО_ПОЛЬЗОВАТЕЛЯ\Главное меню\Программы\Автозагрузка
Автозагрузка программ в Windows XP для всех пользователей:
C:\Documents and Settings\All Users\Главное меню\Программы\Автозагрузка
Автозагрузка программ в Windows 7для конкретного пользователя:
C:\Users\ИМЯ_МОЕГО_ПОЛЬЗОВАТЕЛЯ\AppData\Roaming\Microsoft\Windows\Start Menu\Programs\Startup
Автозагрузка программ в Windows 7для всех пользователей:
C:\ProgramData\Microsoft\Windows\Start Menu\Programs\Startup
Автозагрузка программ в Windows 8 для конкретного пользователя:
C:\Users\ИМЯ_МОЕГО_ПОЛЬЗОВАТЕЛЯ\AppData\Roaming\Microsoft\Windows\Start Menu\Programs\Startup
Автозагрузка программ в Windows 8 для всех пользователей:
C:\ProgramData\Microsoft\Windows\Start Menu\Programs\Startup
Указанные пути скорее всего будут скрыты от глаз пользователя (это настройка по-умолчанию). Чтобы попасть по назначению, откройте «Проводник Windows» и скопируйте путь в его адресную строку. Затем просто перетащите ярлык для вашей программы в эту папку и вы увидите, что уже при следующем входе в систему, программа будет запущена автоматически. Удалив же ярлык, вы тем самым сможете отключить автозагрузку программ в Windows.
И наконец, третий способ запускать программы автоматически в Windows это планировщик. Планировщик — специальная программа, которая запущена всегда (если вы её специально не выключали). Она следит за временем и запускает программы, когда это было указано, и «при загрузке» там тоже есть. Как же найти планировщик и посмотреть, какие задания у него присутствуют, какие можно удалть, какие добавить? Откройте меню «Пуск» и введите в поисковую строку фразу «Планировщик» (А в Windows XP это Панель управления —> Назначенные задания). Запустите планировщик от имени администратора.
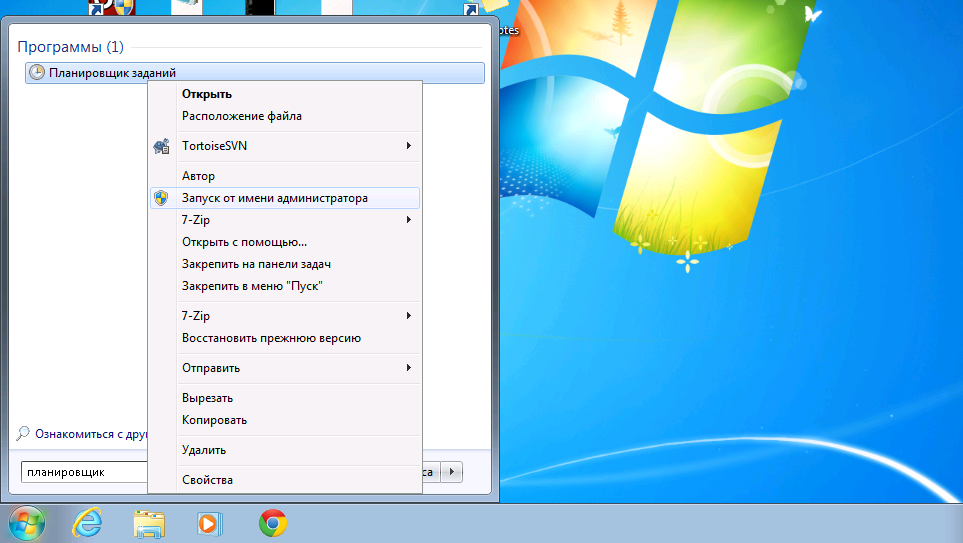
В Windows XP это будет просто папка с файлами заданий, а в Windows старше XP это будет целый редактор заданий. Наподобие regedit, слева у него будет дерево папок, в которых размещаются задания, справа подробности. По двойному клику мышкой вы сможете редактировать задания, выделив задание и нажав клавишу «delete» — удалить, а также при помощи мастера создать новое.
В завершении хочется устроить небольшой FAQ по теме:
«Какие программы должны быть в автозагрузке Windows?»
Никакие. При свежеустанвленной системе там пусто. Это потом, различные драйвера, обновляльщики и вирусы наполняют список всем, чем только возможно
«Какие программы удалить из автозагрузки»?
Какие хотите. Никто, кроме вас не знает, чем мы любите пользоваться и, что вы хотите, чтобы запускалось автоматически. Если вы обнаружили программу, вам неизвестную, попробуйте поискать её описание в интернете.
«Что такое службы Windows и какие из них можно отключить?»
Это материал отдельной статьи. И вот с этим нужно быть осторожнее.