Hi Guys, Today I am Going to tell you How to Fix “Your Windows Insider Build ran into a problem and needs to restart. We’re just collecting some error info, and then we’ll restart for you.” Error in Windows 10,11?
Check Out This: How to Fix “Some of these settings are hidden or managed by your organization” in Windows 10 & 11?
Are you Looking for the Commonly Searched Term “How to Solve “Your Windows Insider Build ran into a problem and needs to restart. We’re just collecting some error info, and then we’ll restart for you.” Error in Windows 10,11?” (or) “How to Solve GSOD Error in Windows 10,11?”.
You are at the Right Place to Get Your Answers & Solve the Issue/Error.
Let’s See About it.
Steps For How to Fix “Your Windows Insider Build ran into a problem and needs to restart. We’re just collecting some error info, and then we’ll restart for you.” Error in Windows 10,11?
Method 1: Restart Your Computer
Just Restart Your PC.
*Note – Most of the Times Restarting Your PC Would Fix this Issue.
Method 2: Uninstall Recently Installed Windows Updates
Step 1: First of all Go to Settings and Navigate to the Windows Update Option and Open Installed Apps Option.
Step 2: Now Uninstall the Recently Installed Windows Update.
Restart Your PC.
Method 3: Uninstall Recently Installed Programs/Applications
Step 1: First of all Go to Settings and Navigate to the Apps Option and Open Installed Apps Option.
Step 2: Now Uninstall the Recently Installed Apps or Uninstall Unwanted Applications.
Restart Your PC.
Method 4: Update Your Graphics Card Drivers
Step 1: First of all Download the Latest Version of Your Graphics Card Driver Via the Link Given Below.
Download Here – https://www.nvidia.com/Download/Find.aspx
(Or)
Step 1: Download & Update Graphics Card Driver Via the Geforce Experience.
Geforce Experience – https://www.nvidia.com/en-us/geforce/geforce-experience
Step 2: After Downloading the Drivers Just Install it.
Method 5: Disable Hardware Acceleration
Step 1: First of all Open Google Chrome and click on the three vertical dots (Kebab Menu) Which usually Exist on the top right corner.
Step 2: Now Select Settings Option From the Menu.
Step 3: Navigate to Advanced Tab and Click the System Option Turn Off/Disable the Option “Use hardware acceleration when available”.
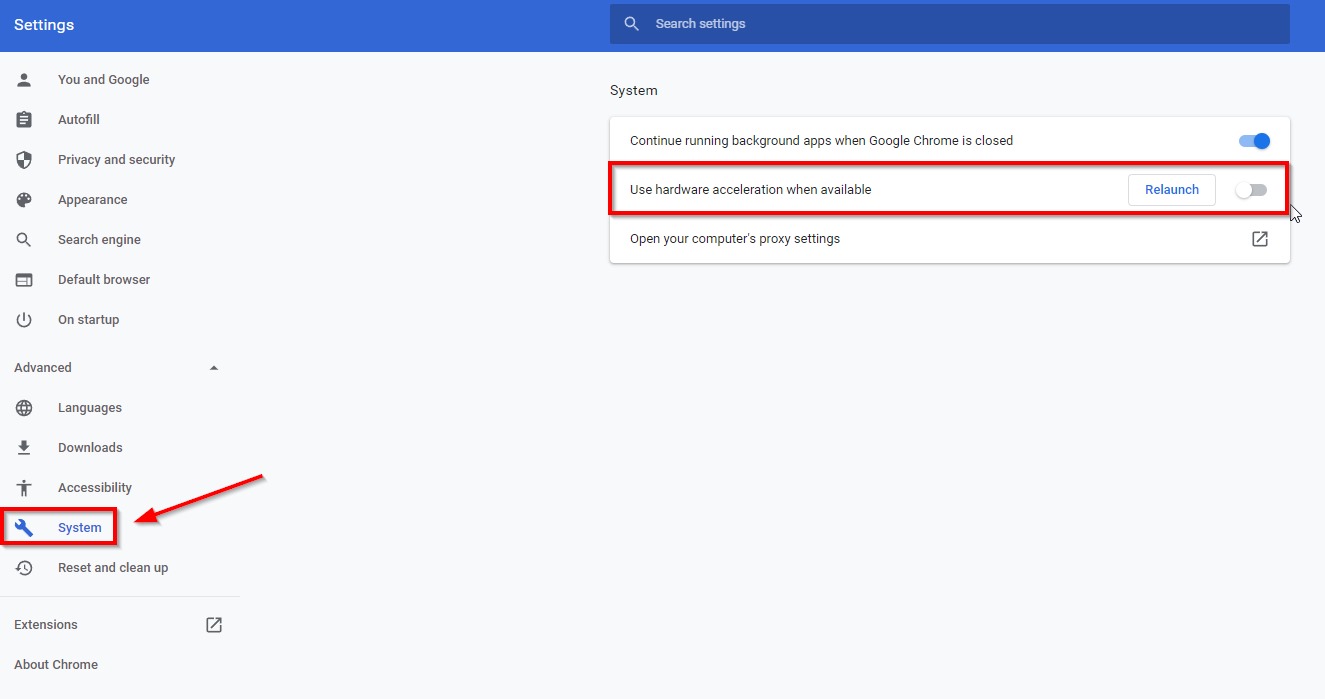
Hit the Relaunch Button.
Method 6: Update Your OS to Latest Builds Versions
Update Your OS to Latest Build Version via Windows Update or Download ISO From the Official Link.
Official Microsoft Links
Download Official Windows 10 ISO Here
Download Official Windows 11 ISO Here
Method 7: Reinstall OS
Reinstall the OS. You can Download ISO From the Official Link.
Official Microsoft Links
Download Official Windows 10 ISO Here
Download Official Windows 11 ISO Here
Method 8: Unplug Externally Connected Devices
Try to Unplug the Externally Connected Devices If Connected.
Restart Your PC.
Method 9: Reset Windows 11
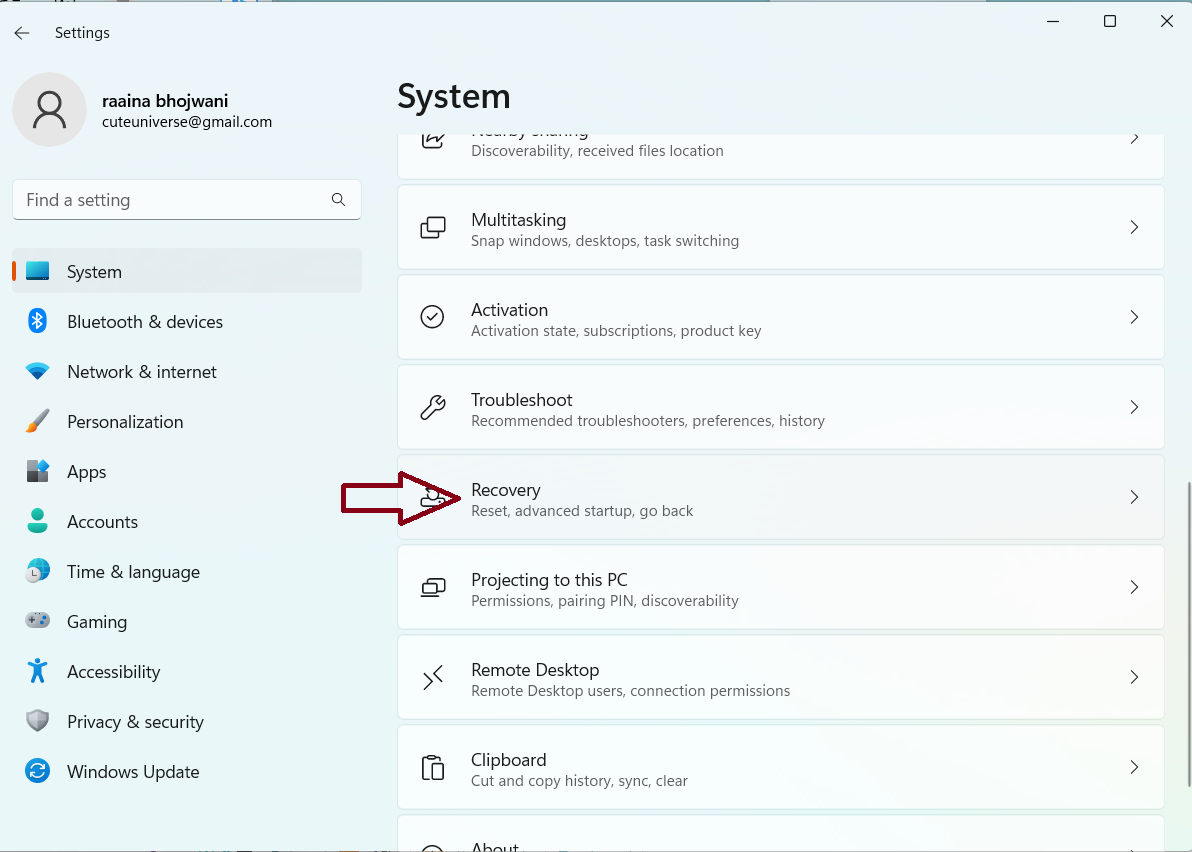
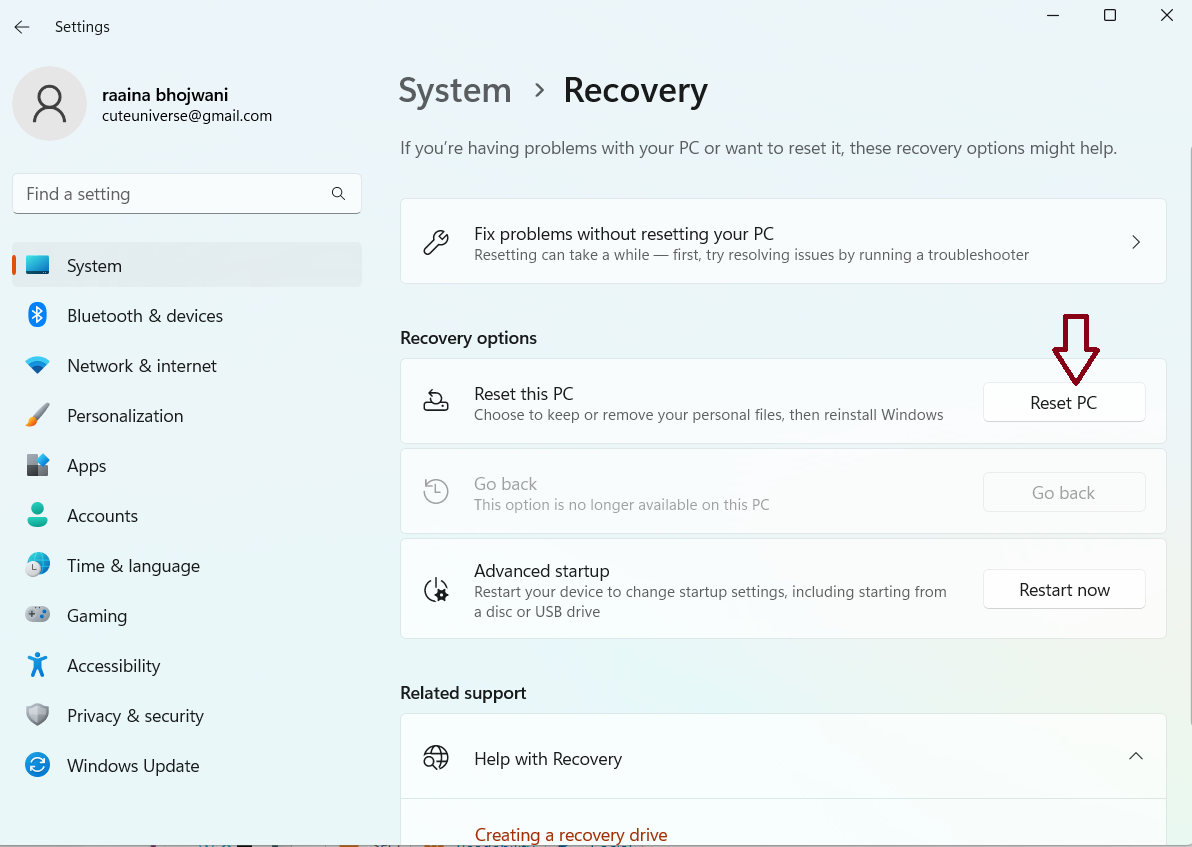
Step 1: Goto Settings and Navigate to System and Open Recovery Settings And Press the Get Started/Reset PC Button Under Reset this PC Option.
Step 2: Take A Full Backup Before Resetting your Pc or Create a System Restore Point.
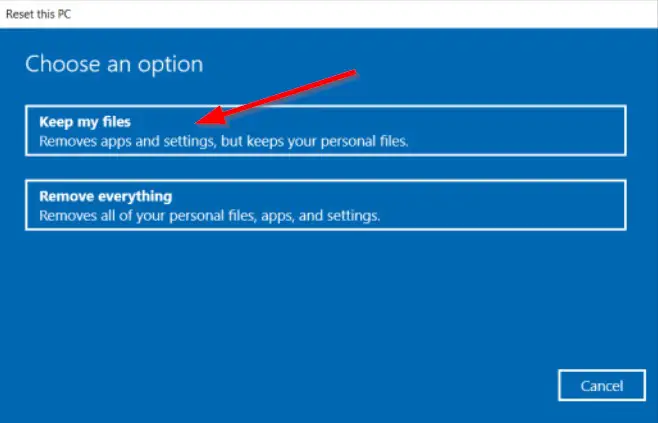
Step 3: On Reset this Pc Window, Choose to Keep my files (or) Remove Everything option and Reset the Pc.
That’s It. You’re Done. Have a Nice Day.
@@@ Leave Comments @@@
##Stay Safe Guys And Live Happily ##

Basically an Instrumentation Engineer But Very much Interested in Blogging. I’m a Passionate Blogger and an Expert in Search Engine Optimization And Always Looking Forward to Learn New Things. I Would Fix & Provide Solution to the Most Common Issues Related to PC,Laptops,Mobiles,OS, Hardwares and Softwares.
-
Home
-
News
- [Best Fixes] Windows 11 Green Screen of Death
By Stella | Follow |
Last Updated
When you use the Windows 11 Insider preview build, you might discover that your Windows 11 goes to a green screen every few days. Is it a serious problem? What should you do to fix it? In this MiniTool post, we will show you some solutions to Windows 11 Green Screen of Death.
Windows 11 Green Screen of Death
If everything is OK, the official Windows 11 will be released in October this year. Now, the Windows 11 Insider preview build has been released to Insiders in both the Dev and Beta Channels. If you want to experience this new Windows version before others, you can join the Windows Insider Program and upgrade your computer to Windows 11.
Yes, I do it.
The Windows 11 Insider preview build is just the beta version. There should be many bugs in it. For example, I discover that I always come across Windows 11 Green Screen of Death every few days. I search this issue on the internet and find many users are bothered by it.

If Windows 11 goes to a green screen, what should you do to fix it? Now, we will show you some available methods.
Way 1: Restart Your Computer
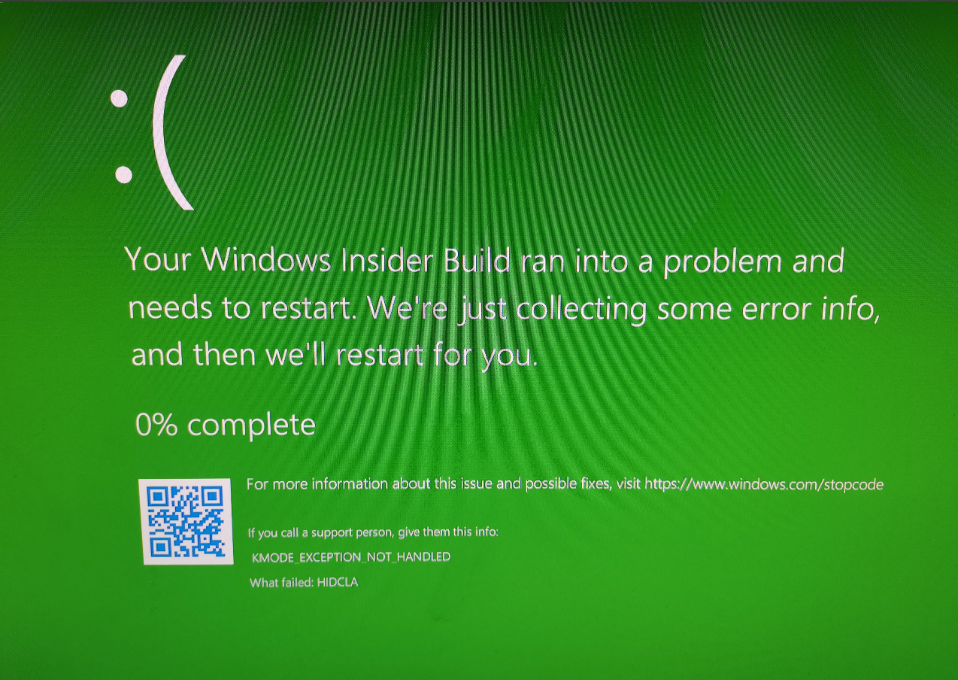
The Windows 11 green screen always shows an error:
Your Windows Insider Build ran into a problem and needs to restart. We’re just collecting some error info, and then we’ll restart for you.
You can also see a stop code like 0xc000021a, CRITICAL_PROCESS_DIED, SYSTEM_SERVICE_EXCEPTION, etc.
Like the error message saying, after collecting information, your computer will restart. But according to my experience, the computer doesn’t automatically restart. If your computer is also like this, you can press the Power button for seconds to force close your computer. After that, you can press the Power button again to restart your device. In most cases, your computer should start normally.
You can consider Windows 11 green screen as an error collection process. So, you should not worry about it. However, if your Windows 11 boots into the green screen, you need to take other measures to fix it. If the green screen shows you a stop code, you can search for the error code on the internet to find solutions. In this post, we also show you some universal solutions that can fix Windows 11 Green Screen of Death.
Way 2: Update the Graphic Card Driver
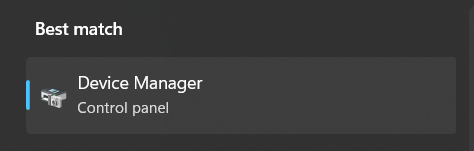
- Click the search icon on the taskbar and use it to search for device manager.
- Select the first result to open Device Manager.
- Expand Display adapters.
- Right-click the graphic card driver and select Update driver.
- Follow the on-screen wizard to complete the update process.
- Restart your computer to execute the change.

If your Windows 11 goes to a green screen after you install a new program, that program might be the cause. You can uninstall it to have a try.
1. Go to Start > All apps.

2. Find the target app and right-click it.
3. Select Uninstall.

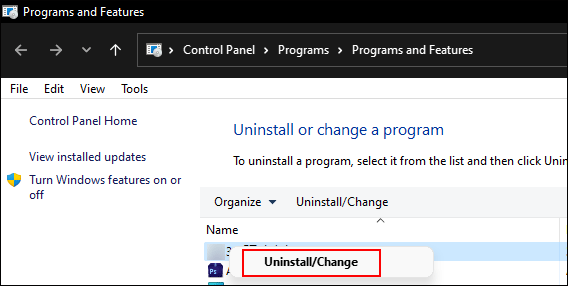
4. You will see the Uninstall or change a program Then, right-click the app you want to remove and select Uninstall/Change.
5. Follow the on-screen guide to uninstall that program.
Way 4: Unplug Peripherals from Your Computer
The third-party peripherals connected to your Windows 11 computer can also be the cause of Windows 11 Green Screen of Death. Some of these devices may get damaged or corrupted. You don’t know which one is the culprit. So, you can remove all of them from your computer and then check whether the issue disappears. If yes, you can re-connect them one by one to find out which one causes this issue.
Way 5: Upgrade Windows 11
Keeping your computer up-to-date can also fix bugs on your PC. In Windows 11, you can do this to update your system:
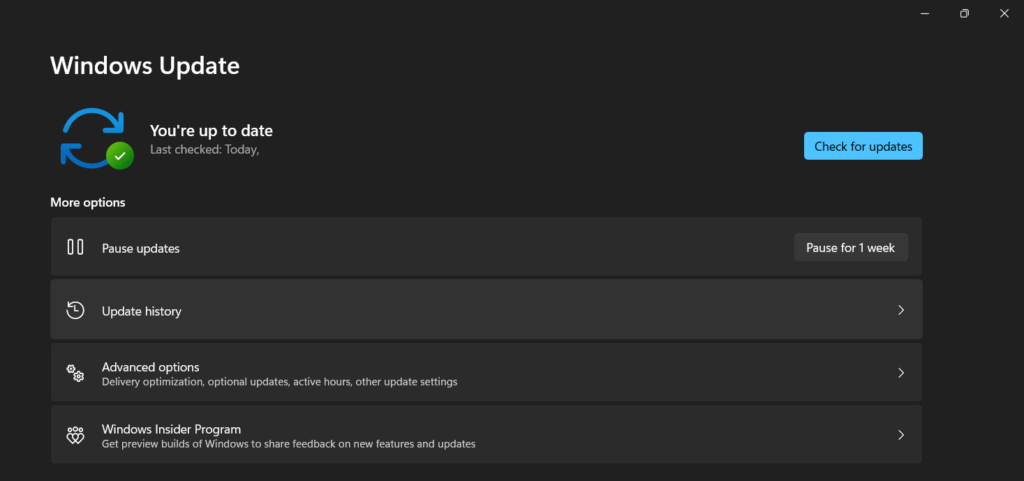
Go to Start > Settings > Windows Update > Check for updates.

Way 6: Uninstall Windows 11 Update
If you hate this issue and don’t want to use Windows 11 currently, you can uninstall Windows 11 update and go back to Windows 10. When the stable and official Windows 11 version is released, you can try it then.
Way 7: Reset Windows 11
Another available method is to reset Windows 11.
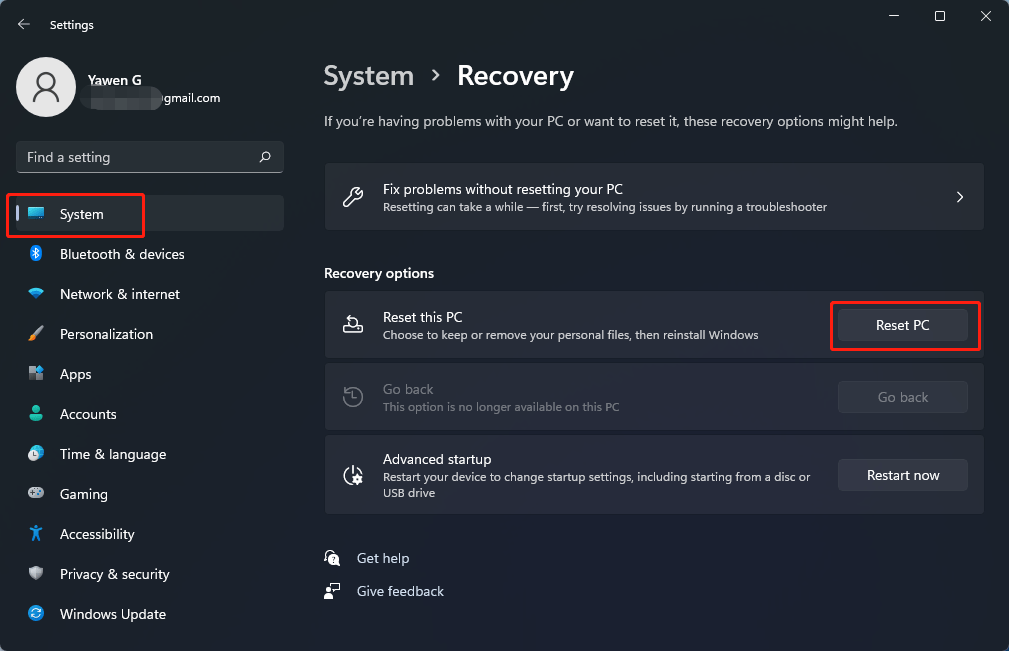
Go to Start > Settings > System > Recovery > Reset PC.
These are the universal fixes for Windows 11 Green Screen of Death. We hope they are helpful to you.
About The Author

Position: Columnist
Stella has been working in MiniTool Software as an English Editor for more than 7 years. Her articles mainly cover the fields of data recovery including storage media data recovery and phone data recovery, YouTube videos download, partition management, and video conversions.
If you are a Windows 11 Insider Preview Build and encounter the error message “Your Windows Insider build ran into a problem,” you might be experiencing difficulties while trying to install or update the latest Windows Insider build. Fortunately, there are several troubleshooting steps you can take to fix the issue. Whether it involves uninstalling third-party antivirus software, finding and disconnecting malfunctioning hardware, or exploring other solutions, this guide aims to provide you with helpful tips to overcome the problem and successfully install or update your Windows Insider build. By following these steps, you can ensure a smoother and more reliable experience as a Windows Insider, enabling you to access the latest features and improvements offered by Microsoft.
Page Contents
Fix 1: Scan for Viruses or Malware on the System
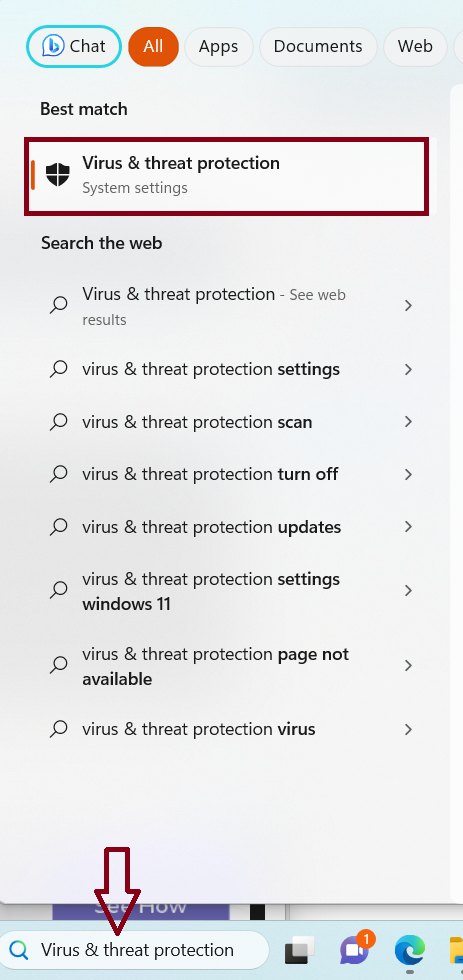
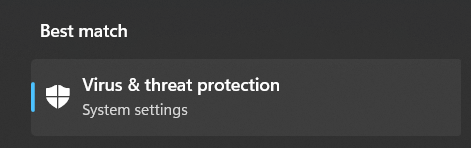
1. Open “Virus & threat protection” by searching it in the Search bar.
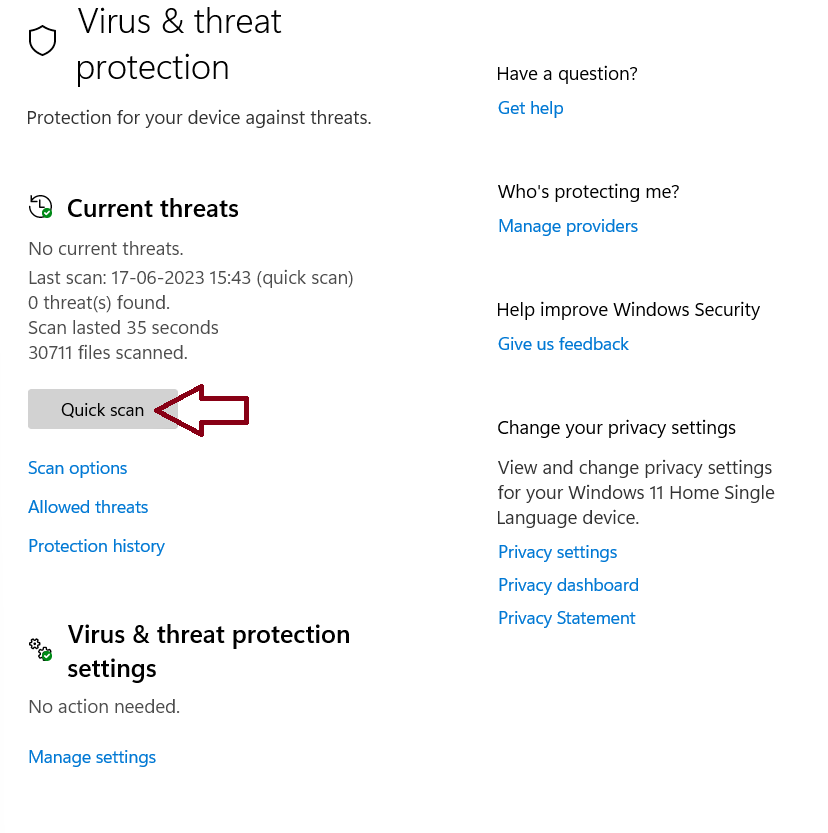
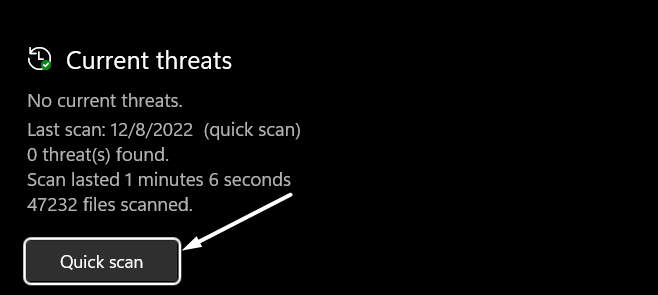
2. Click on “Quick scan”.
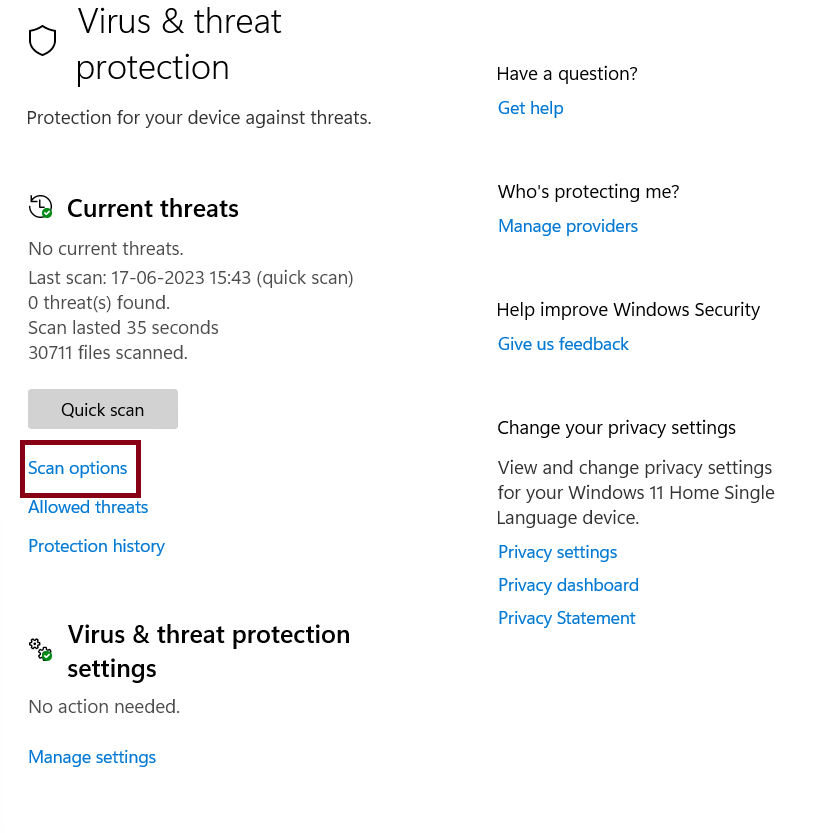
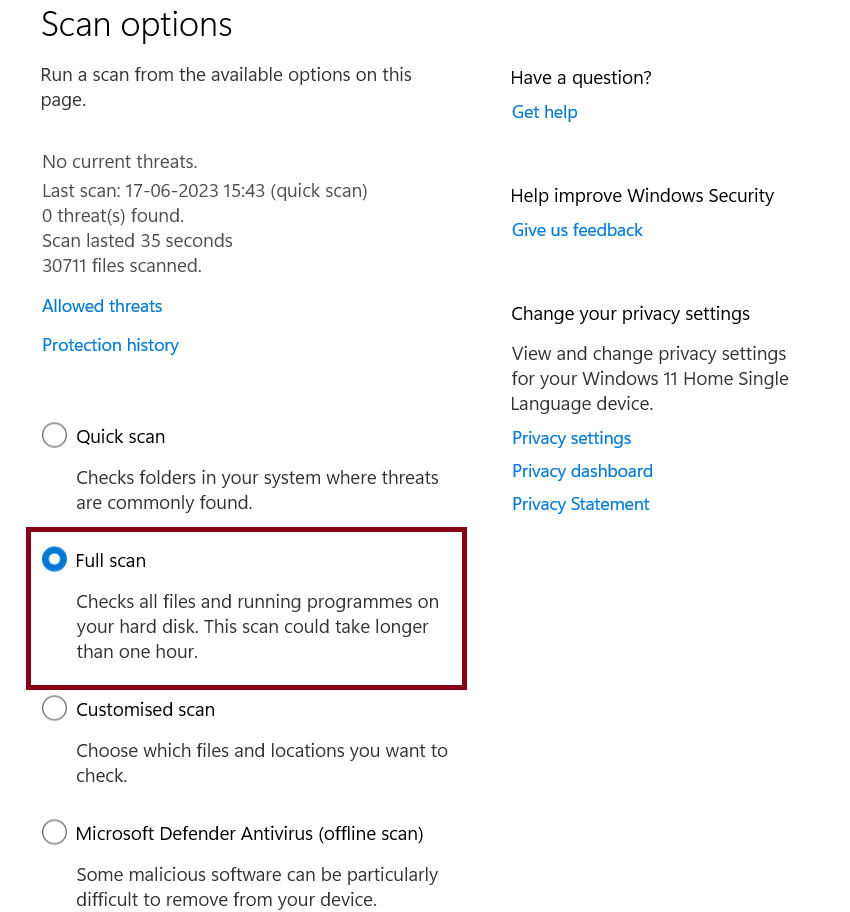
3. Once the quick scan is completed, click on “scan options”.
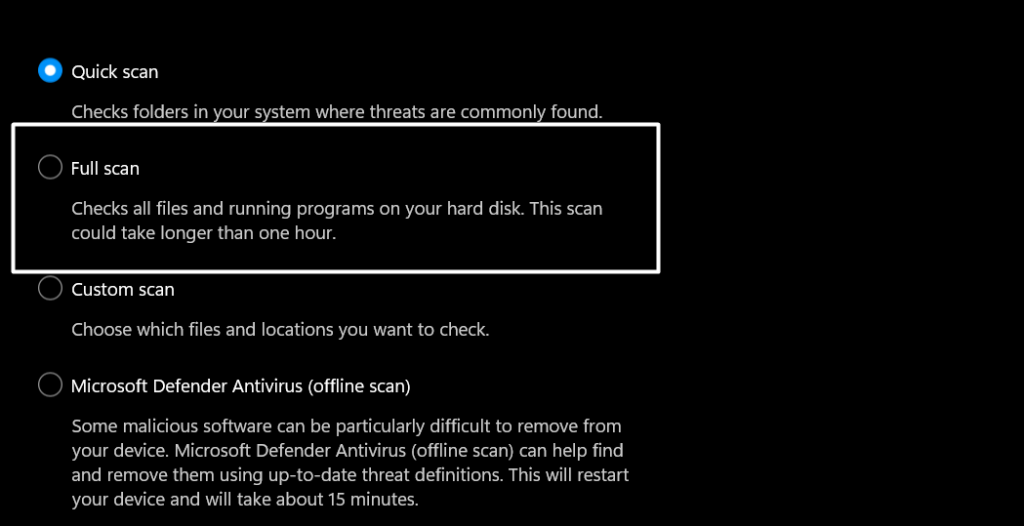
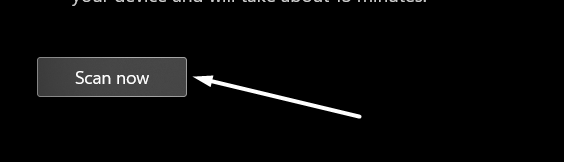
4. Click on “Full scan” > then click on the “Scan now” button.
5. Restart your computer after the scan gets completed.
Fix 2: Update display drivers
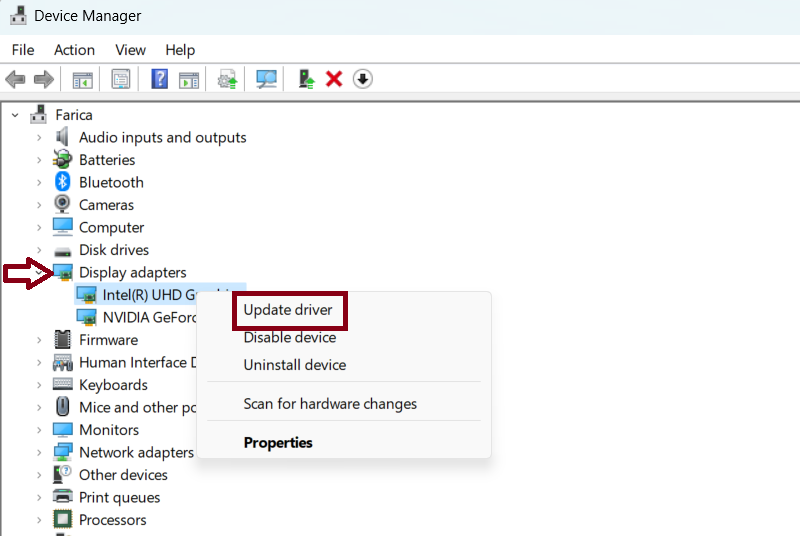
1. Open Device Manager.
2. Click on “Display adapters”.
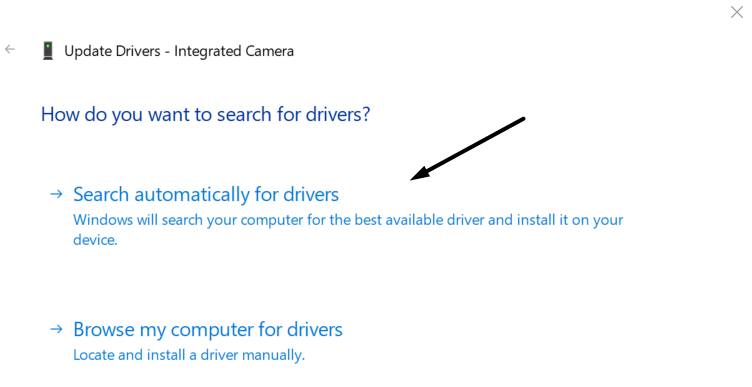
3. Right-click on display/graphic driver and choose “Update driver”.
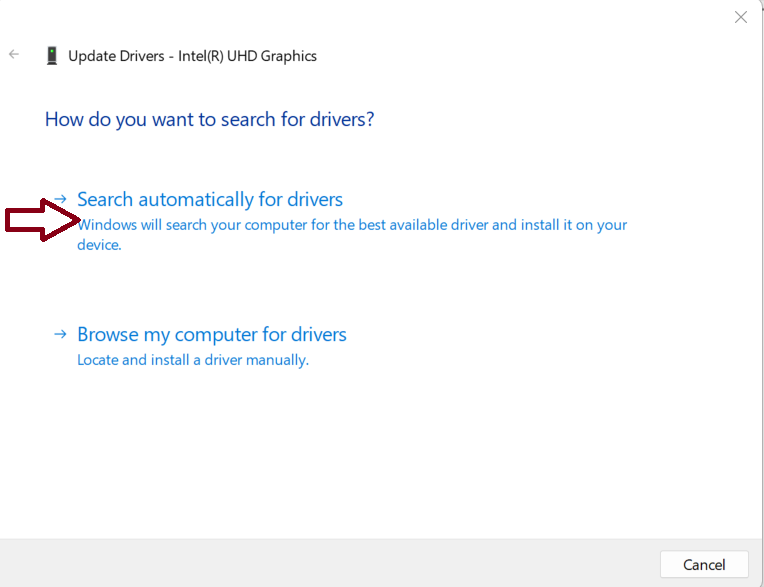
4. Click on “Search automatically for drivers”.
5. Once drivers are updated, restart your computer.
Fix 3: Uninstall third-party antivirus program to Fix Your Windows Insider build ran into a problem issue
If your Windows Insider build ran into a problem, one potential solution is to uninstall any third-party antivirus program installed on your system. Third-party antivirus software, although designed to protect your computer, can sometimes interfere with the installation and functioning of Windows Insider builds. To resolve this issue, you can go to the Control Panel or the Settings app in Windows and locate the installed antivirus program. Uninstall it from your system and then attempt to install or update the Windows Insider build again. By removing the third-party antivirus program, you eliminate any potential conflicts and increase the chances of a successful installation or update.
Fix 4: Run SFC, DISM, & CHKDSK Scan To Fix & Repair Corrupted System Files
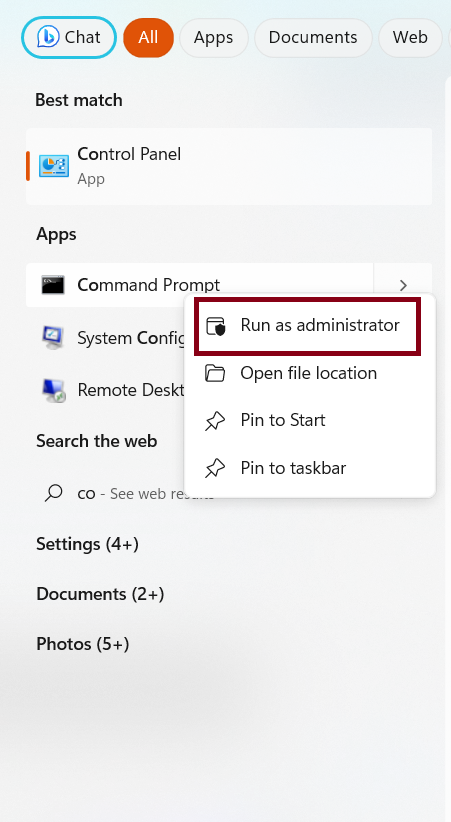
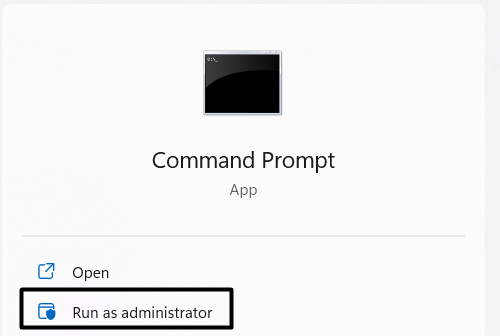
1. Open Command Prompt as an administrator.
2. Type this command and press Enter to execute it:
sfc /scannow
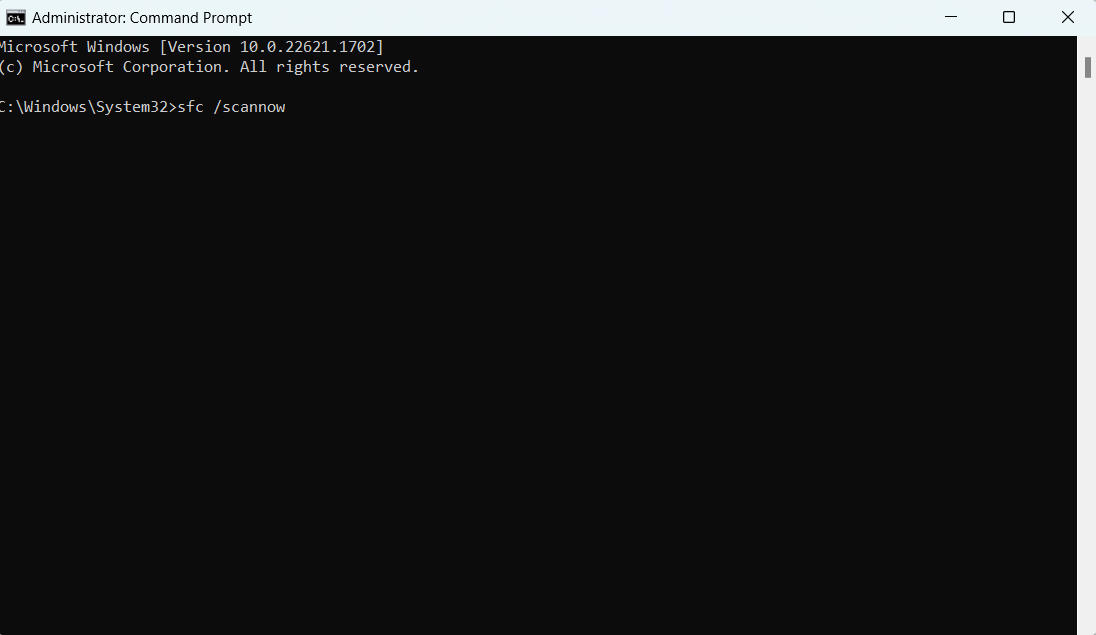
3. Next execute this command:
chkdsk /r /x C:
4. Now execute this command:
DISM.exe /Online /Cleanup-Image /Restorehealth
5. Restart your computer.
Fix 5: Uninstall malfunctioning Windows 11 updates
1. Open Control Panel.
2. Click on “Programs and Features”.
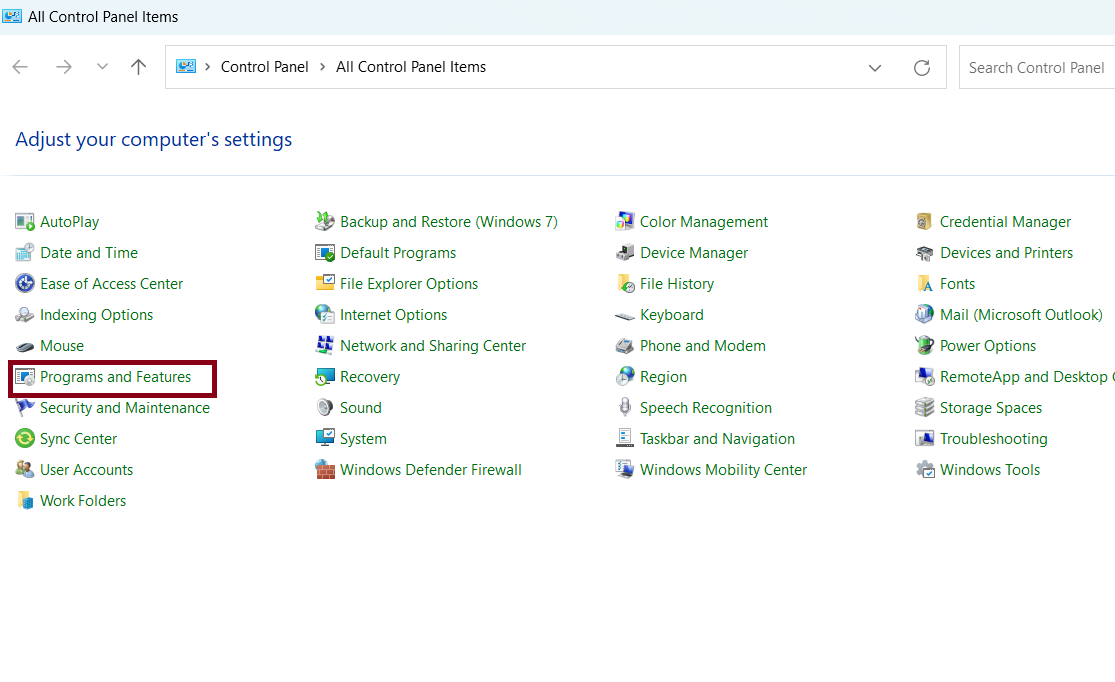
3. Click on “View installed updates”.
4. Click on “Uninstall” next to the Windows update that you want to uninstall.
5. Restart your computer after the update has been uninstalled.
Fix 6: Use PC in Safe Mode
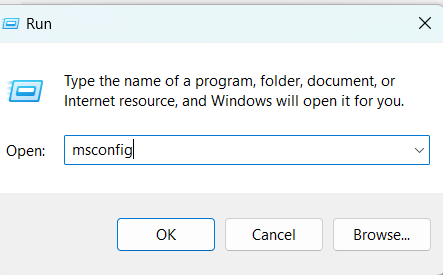
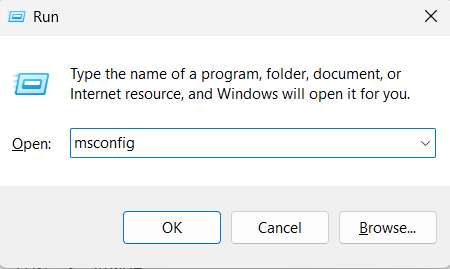
1. Open the Run prompt. Type msconfig and hit Enter key to open the System Configuration window.
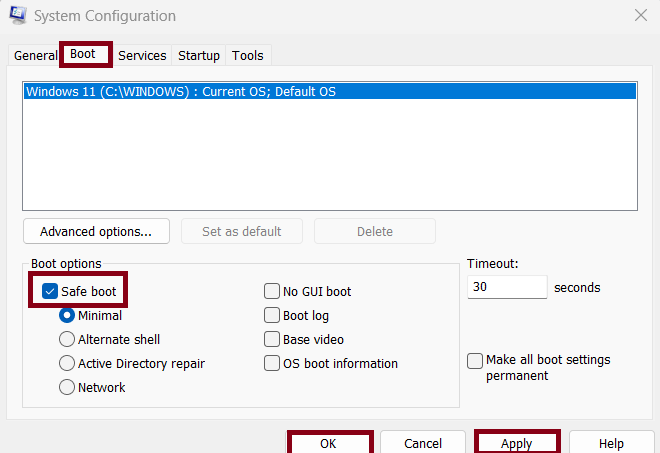
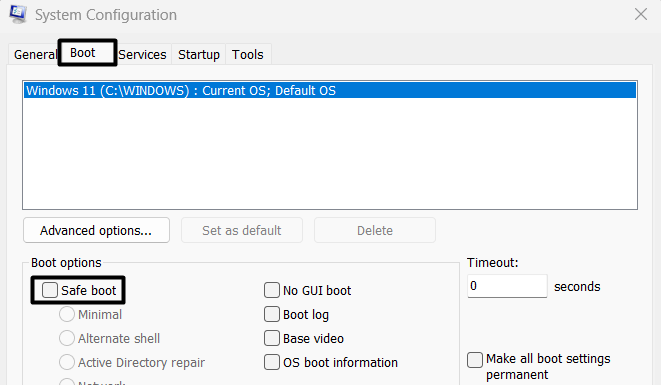
2. Click on the “Boot” tab.
3. Check on the “Safe boot” checkbox.
4. Click on Apply > OK.
5. Restart your computer.
Fix 7: Find & Disconnect the Malfunctioning Hardware Connected
Another troubleshooting step you can take is to find and disconnect any malfunctioning hardware connected to your system. Faulty hardware components, such as a malfunctioning graphics card or incompatible peripheral devices, can sometimes cause compatibility issues with Windows Insider builds. To address this, start by disconnecting any external devices connected to your computer, such as printers, scanners, or USB devices. If the issue persists, you can open your computer’s case and carefully disconnect any internal hardware that you suspect may be causing the problem, such as an additional graphics card or RAM modules. By removing the potentially malfunctioning hardware, you eliminate the possibility of it interfering with the Windows Insider build and increase the chances of a successful installation or update. However, exercise caution when handling hardware components and consider seeking assistance from a professional if needed.
Fix 8: Run the built-in driver verifier
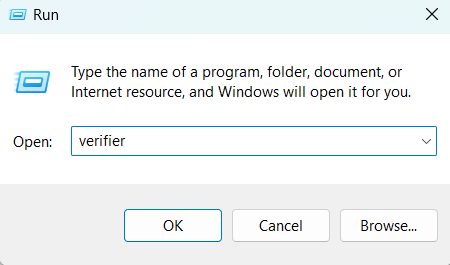
1. Open the Run prompt. Type “verifier” and hit Enter key to open the Driver Verifier Manager window.
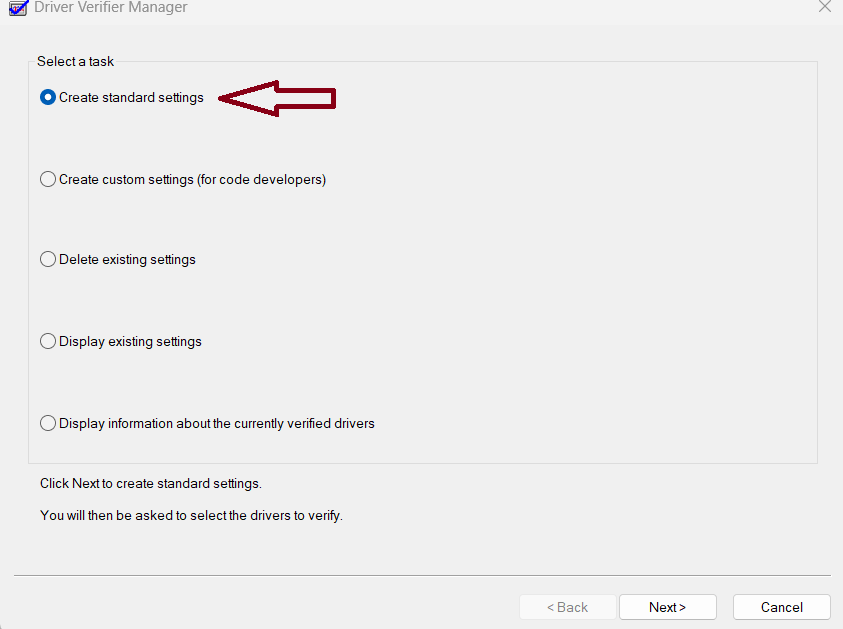
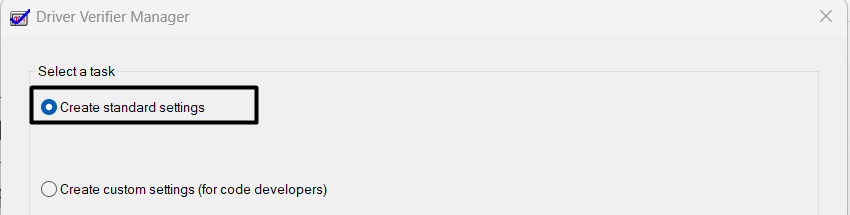
2. Click on “Create standard settings” > “Next”.
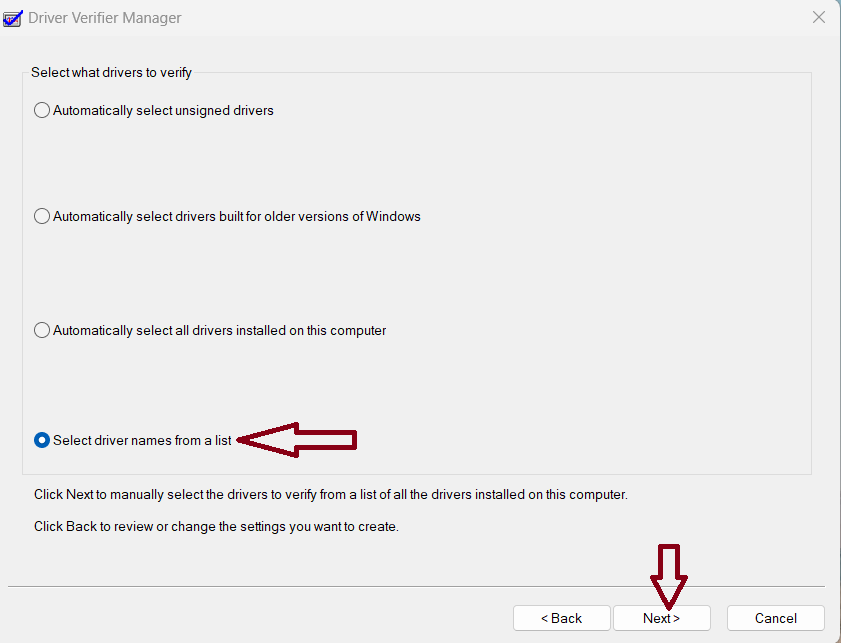
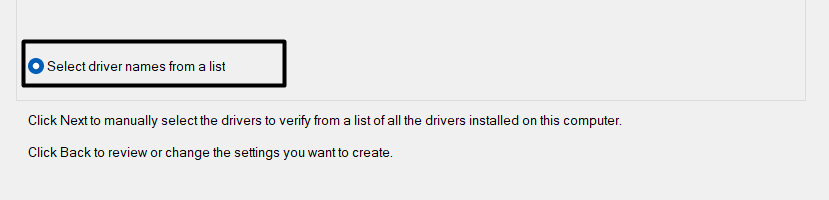
3. Click on “Select driver name from a list” > “Next”.
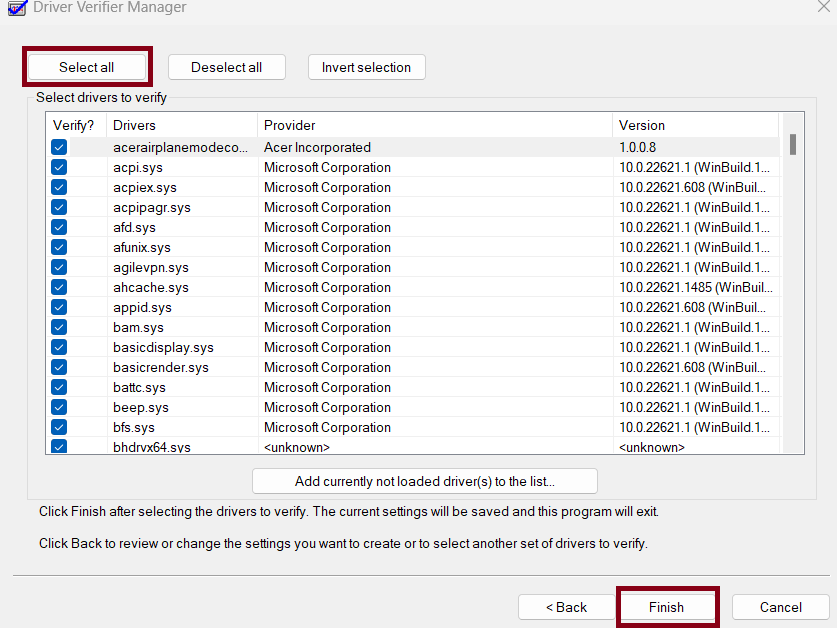
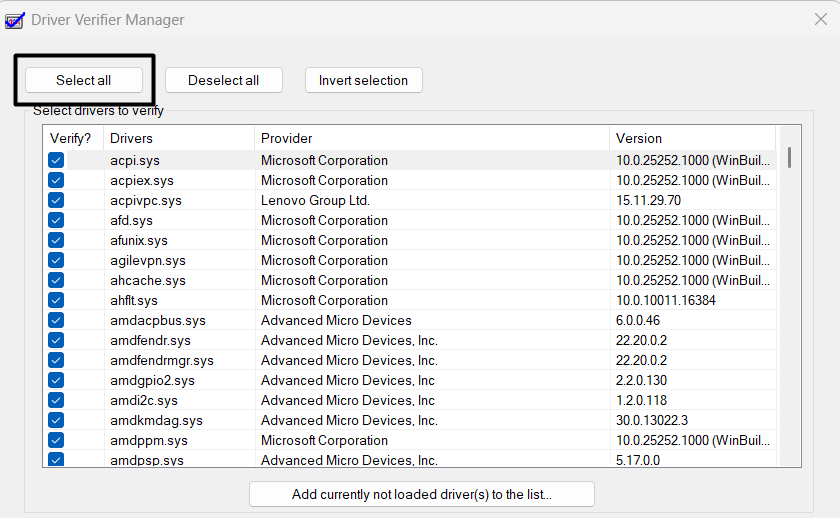
4. Click on “Select all” > “Finish”.
5. Close the Driver Verifier Manager window and restart your computer.
Fix 9: Leave Windows 11 Insider program to fix Your Windows Insider build ran into a problem issue
1. Open Settings by pressing the Windows + I keys.
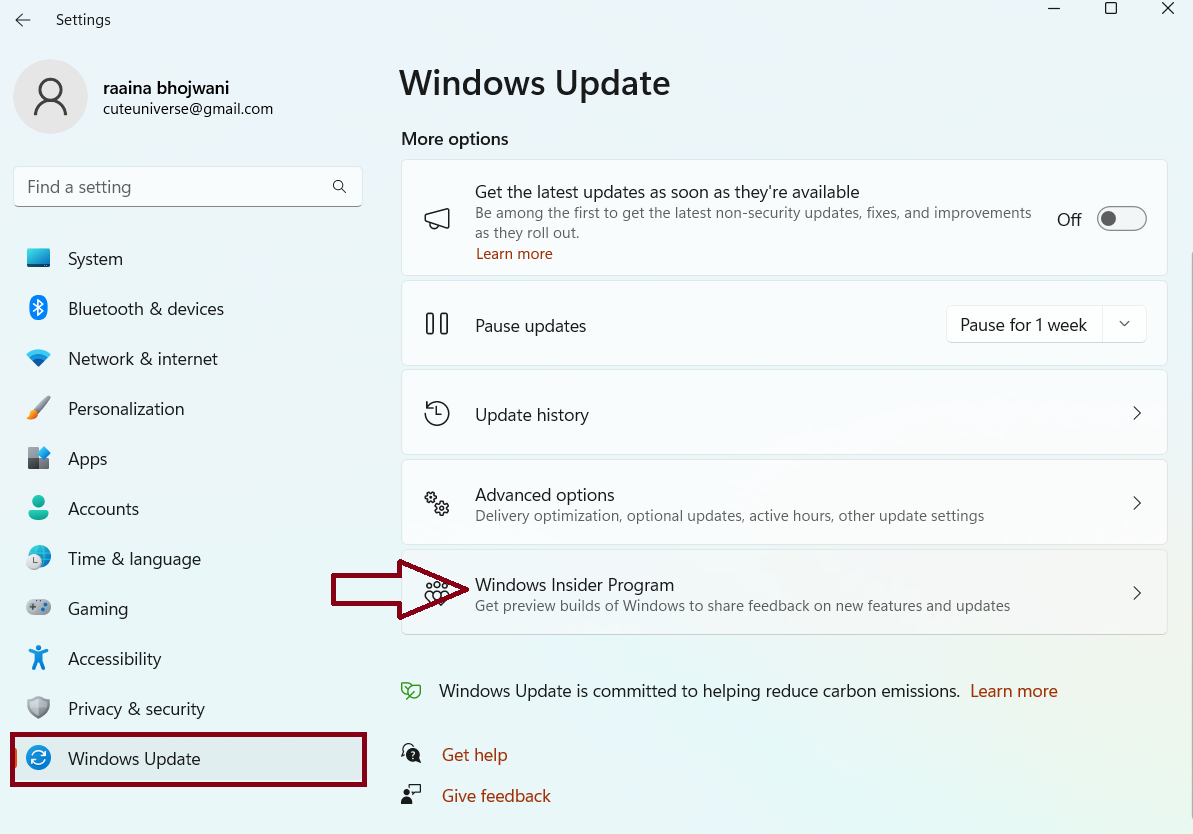
2. Click on “Windows Update” > “Windows Insider Program”.
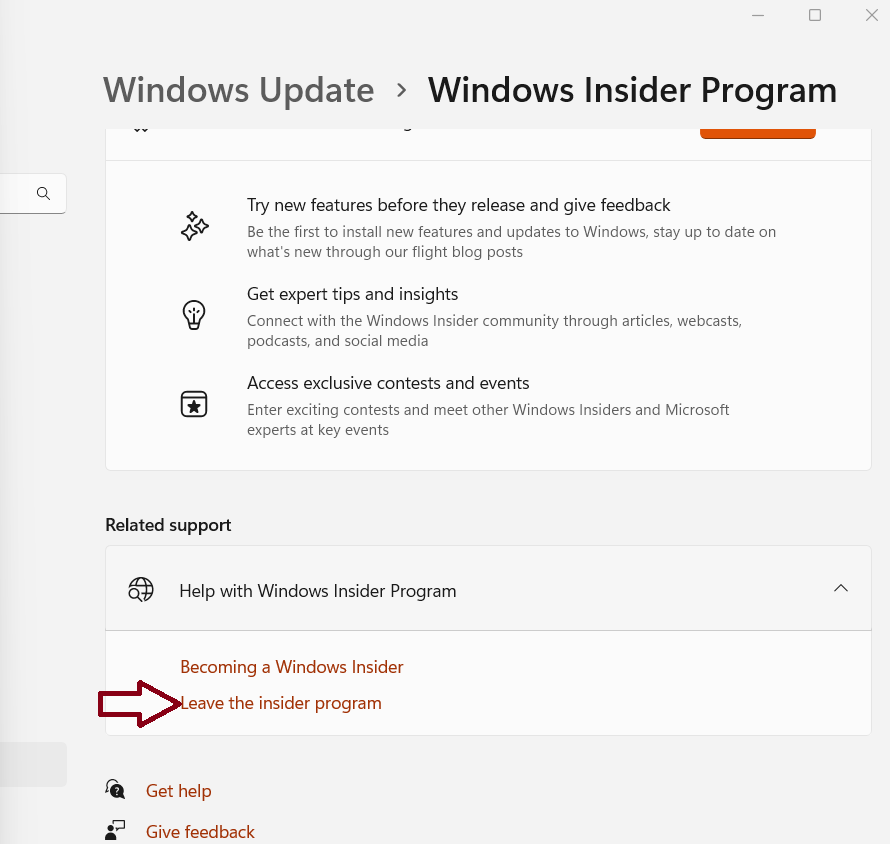
3. Click on “Stop getting preview builds” > “Leave the Insider Program”.
Fix 10: Reset your Windows 11 PC to Fix Your Windows Insider build ran into a problem issue
1. Open Settings by pressing the Windows + I keys.
2. Click on Recovery.
3. Click on the Reset PC button.
That’s it!
How To Fix Your Windows Insider Build Ran Into A Problem And Needs To
Immerse Yourself in Art, Culture, and Creativity: Celebrate the beauty of artistic expression with our How To Fix Your Windows Insider Build Ran Into A Problem And Needs To resources. From art forms to cultural insights, we’ll ignite your imagination and deepen your appreciation for the diverse tapestry of human creativity. Admin the than sfc currently you party update pls pc third 3 note run prompt uninstall other are you on antimalware drivers public have is device software Hi- do did- from command basic scannow you it- not antivirus there 2 already ones build with if release- your 1 a are on you rights- the several things can
Windows Insider Build Ran Into A Problem Microsoft Community
Windows Insider Build Ran Into A Problem Microsoft Community
1 2 sd sumit d vm volunteer moderator replied on may 27, 2020 report abuse hi, green screen indicates you are using an insider build of windows 10. insider builds are unstable and should never be used on the primary computer you may have to reinstall windows anytime. You must use self help support, meaning that you sink or swim using resources such as articles, books, forums, experience, friends, help files, etc. that is an important reason not to use previews on primary or production devices.

Fix Your Windows Insider Build Ran Into A Problem On Windows 11
Fix Your Windows Insider Build Ran Into A Problem On Windows 11
If you’re on windows 10, go to settings > update & security > windows insider program. under pick your insider settings, you’ll see your current channel. if you’re on windows 11, go to settings > windows update > windows insider program. under choose your insider settings, you will see your current channel. A1 replied to pantdiwash512 may 31 2021 01:29 pm hello! have you set your privacy settings to fully transfer diagnostic data to microsoft? what’s your current windows build? is edge the default browser? are you using windows hello? is microsoft account sync enabled? 0 likes. | volunteer moderator replied on october 14, 2020 report abuse hi, i was using my pc when suddenly this green screen appeared saying windows insider build ran into a problem and needs to restart. we’re just collecting some error info, and then you can restart. and i gave a qr code and a stop code: kmode exception not handled. Most insiders just use the built in windows defender for antivirus. some also use malwarebytes but even that has issues with our latest build 18329. i would recommend going to another computer and downloading the windows media creation tool and clean install the latest public build.
Error Your Insider Build Ran Into A Problem And Needs To Restart
Error Your Insider Build Ran Into A Problem And Needs To Restart
| volunteer moderator replied on october 14, 2020 report abuse hi, i was using my pc when suddenly this green screen appeared saying windows insider build ran into a problem and needs to restart. we’re just collecting some error info, and then you can restart. and i gave a qr code and a stop code: kmode exception not handled. Most insiders just use the built in windows defender for antivirus. some also use malwarebytes but even that has issues with our latest build 18329. i would recommend going to another computer and downloading the windows media creation tool and clean install the latest public build. Hi. there are several basic things you can do other than the ones you already did. 1) if you have third party antivirus antimalware software on your pc, uninstall it. 2) run sfc scannow from a command prompt with admin rights. 3) update device drivers ( pls note the build you are currently on is not public release. English the green screen of death windows 10 is a new type of error that often occurs when using a windows insider build or windows creators. if you are also struggling to fix the vexing issue, you come to the right place. this post of minitool will walk you through step by step guides to fix the error. on this page : about green screen of death.

Critical Service Failed 5a Your Windows Insider Build Ran Into A
Critical Service Failed 5a Your Windows Insider Build Ran Into A
Hi. there are several basic things you can do other than the ones you already did. 1) if you have third party antivirus antimalware software on your pc, uninstall it. 2) run sfc scannow from a command prompt with admin rights. 3) update device drivers ( pls note the build you are currently on is not public release. English the green screen of death windows 10 is a new type of error that often occurs when using a windows insider build or windows creators. if you are also struggling to fix the vexing issue, you come to the right place. this post of minitool will walk you through step by step guides to fix the error. on this page : about green screen of death.

Insider Build Ran Into A Problem Stop Code 0xc0000145 Green Screen
Insider Build Ran Into A Problem Stop Code 0xc0000145 Green Screen
Your Windows Insider Build Ran Into A Problem And Needs To Restart
Your Windows Insider Build Ran Into A Problem And Needs To Restart
windows #buildran #needstorestart youtu.be he0n6z2c6 s. in this video i try and fix my windows 10 machine which went into a loop after i updated it to the latest insider preview in the fast how to fix blue screen error in windows 11 & windows 10 with error message saying that: “your device ran into a problem and how to fix your device ran into a problem and needs to restart [14 ways]: bit.ly 3rmlwqn visit my website for more your device ran into a problem and needs to restart your pc ran into a problem and needs to restart your device ran into a download windows boot genius ( bit.ly 2cc8eyx) to boot up windows computer from various scenarios, such as black how to disable automatic restart after blue screen error windows 11, windows 10 of course, let us know your opinion. please like 100% fixed your device ran into a problem and needs to restart windows 10 11 8 | blue screen of death error there are 4 when i scheduled to check disk repair the next time when i restart my system. scanning and repairing on drive c: takes place on how to fix critical process died blue screen error on windows 10 &11 passfab fixuwin tinyurl 3f9ae6yz can help
Conclusion
After exploring the topic in depth, it is clear that the article provides useful information concerning How To Fix Your Windows Insider Build Ran Into A Problem And Needs To. Throughout the article, the writer illustrates a deep understanding about the subject matter. Notably, the section on X stands out as particularly informative. Thanks for this article. If you need further information, please do not hesitate to contact me via social media. I am excited about hearing from you. Furthermore, here are a few similar posts that might be useful:
Related image with how to fix your windows insider build ran into a problem and needs to
Related image with how to fix your windows insider build ran into a problem and needs to
Microsoft lets Windows users enroll in the Windows Insider Program and use some of Windows’ upcoming features before regular users. No doubt, it’s a great way to test the new Windows features. But it requires you to stake your user experience. This is because preview builds aren’t completely stable and optimized. You can face any issue anytime, which can ruin your mood in seconds.
Sometimes, these minor issues also lead to big issues, like Green Screen of Death (GSoD). Many users face the Green Screen of Death error while using their PC and wonder whether it’s fixable or not. Fortunately, the GSoD is repairable, and you can fix it. Here in this troubleshooting guide, we’ve mentioned 15 ways to fix the Green Screen of Death error with ease.
Green Screen of Death (GSoD) is a critical Windows error that occurs when your Windows Build Preview runs into a problem. There could be varied reasons behind this problem. But one of the main causes is hardware malfunctions. When this error occurs, it shows the “Your Windows Insider Build ran into a problem and needs to restart. We’re just collecting some error info, and then we’ll restart for you” error message on a green background.
What Are the Types Of Green Screen of Death Errors?
All users get different stop error codes on the green screen, depending on what the issue is. In this section, we’ve mentioned all the common GSoD error codes. Check them out below.
- MANUALLY_INITIATED_CRASH: The error code explains itself that it appears when you manually initiate the GSoD. To get this error, you can create a new key or file in the Windows Registry named CrashOnCtrlScroll.
- CRITICAL_PROCESS_DIED: This error occurs when an essential system component fails to run or suddenly stops functioning for an unknown reason.
- SYSTEM_SERVICE_EXCEPTION: This GSoD error is a bit complex to understand. It appears when an exception hinders the execution of a process from kernel to user mode.
- CLOCK_WATCHDOG_TIMEOUT: The error appears when you have two or more processors, and one of them stops functioning properly. You get the GSoD error with this error stop code as soon as this happens.
- PAGE_FAULT_IN_NON_PAGED_AREA: Lastly, this error code usually appears when Windows doesn’t find the matched or required file in the system’s storage to complete the already running process.
What Are The Most Common Causes Of Green Screen of Death Error?
These are some of the most common culprits that can lead to the Green Screen of Death issue.
- Corrupted System Files and Disks
- Problematic Windows Updates
- Corrupted Graphic Drivers
- Less System Ram
- Malware and Threats
- Damaged USB Peripherals
- Third-Party Antivirus Program
- Overclocked CPU
Fix Green Screen of Death Error in Windows 11
Here in this section, we’ve mentioned 15 possible workarounds that can help you fix GSoD. Before moving ahead, we want you to ensure that your Windows 11 PC is already running on the latest build. You can move to Settings > Windows Update to check for the latest updates and install them. Once this is checked, continue and try other troubleshooting methods.
1. Find & Disconnect the Malfunctioning Hardware Connected
One of the most common reasons behind the GSoD error is corrupted external devices connected to the PC. It’s likely that the external devices connected to the PC, like hard drives, keyboards, etc., have some faults, because of which GSoD appeared.
To check this, we suggest you to disconnect all external devices one by one and check the status of the issue after removing every device. If the issue disappears after de-attaching a particular external device, we suggest not plugging the same device again into the system to avoid this issue.
2. Scan for Viruses or Malware on the System
We all download files from various sources on our PC and never think that the files could contain malware that can harm the computer. You’ve likely unintentionally installed a malicious program or file on your PC, which made the system’s settings buggy. As a result, it resulted in this error.
To check whether the malware is the culprit, you can quickly run a virus scan. You can use the integrated Malware Removal tool to scan and remove all the malicious apps and files from the system. Follow the below-mentioned steps for further assistance:
1. Press the Windows key on your keyboard to open the Windows Search Box and type Virus & threat protection.

2. Now, select Virus & threat protection from the Best match section to open security-related settings.
3. Next, click on Quick scan in the Current threats section and wait for the estimated time mentioned on the screen.
4. Once the quick virus scan is completed, click on Scan Options in the Current threats section and select the Full scan option.
5. Lastly, click on the Scan now option to check all the files and apps on your hard disk to find infected files.
6. Once the full virus scan is completed, reboot the PC and use it for a few minutes (minimum 15 – 20 minutes).
If the issue GSoD error still appears, follow the other troubleshooting methods mentioned in this guide.
3. Remove Unwanted Applications
Keeping a lot of apps on the system is fine unless they’re using so many system resources. But keeping programs that can interfere with the system’s components and lead to the Green Screen of Death error isn’t good.
In that case, we suggest removing all the apps from the system that you haven’t used or updated for a long time. We’ve mentioned the steps below to uninstall apps from your Windows 11 PC:
1. Open the Settings app on your Windows 11 PC and move to the Apps section from the left navigation pane.

2. Click on the Installed apps option in the Apps section to view all the apps installed on the computer. Now, look for the program that you haven’t used for a long time and uninstall it from your Windows 11 PC.

3. Once the app is found, click on the three dots at the end of the block and select Uninstall from the menu.

4. Lastly, select Uninstall once again from the dialog box to uninstall the selected app from your Windows 11 PC.

4. Uninstall Third-Party Antivirus Program
When we download new updates on our PC, it installs a lot of files to the system. But the antivirus tool doesn’t know whether the file is safe or not since it isn’t in their database. Due to this, it marks the files as a potential risk and shows the error. If you’ve any third-party antivirus tool installed on your Windows PC, uninstall it and check the issue’s status.
5. Update Display Drivers
In some cases, it’s found that the system’s outdated display drivers can also lead to the Green Screen of Death issue. It could be possible that your PC’s display drivers aren’t compatible with the new update, which is why you got the error.
You need to update your graphic drivers to the latest version to make sure they’re now compatible with the new updates. We suggest following the mentioned methods to update the display/graphic drivers:
1. First, open Device Manager on your Windows 11 PC using the Windows + R key combination and type devmgmt.msc.
2. Search for Display adapters in Device manager, double-click on it to expand the section, and view all the display drivers installed on the system.

3. Now, select a display/graphic driver, right-click on it to open the contextual menu, and then select the Update driver option from the menu.

4. Select Search automatically for drivers and let the system search for new driver updates and install them automatically.
5. Once all the display/graphic drivers are updated, reboot your Windows 11 PC, and check if the issue is resolved.
6. Run Built-in Driver Verifier
Most versions of Windows come with a built-in driver troubleshooter tool called Driver Verifier. This tool lets you find and fix issues with graphics and kernel-mode drivers in a few easy steps.
If updating the display drivers from Device Manager doesn’t fix the issue, consider using the Driver Verifier tool to repair them. Follow the below-mentioned steps to use the Driver Verifier tool:
1. Open the Run utility on your Windows PC, type verifier in the Run’s search box, and press the Enter key.

2. Once the Driver verifier window is opened, select the Create standard settings option and click the Next button.
3. Now, choose the Select driver names from a list option on the Select what driver to verify dialog and click on the Next.
4. Next, tap on the Select all option and click on the Finish option to save the recently made changes.
5. Once all the settings are saved, close the Driver verifier tab, and then restart your system to check if the issue is resolved.
7. Run SFC, DISM, & CHKDSK Scan To Fix & Repair Corrupted System Files
Some GSoD errors, like PAGE_FAULT_IN_NON_PAGED_AREA arise because of corrupted or missing essential system files. It could be possible that some of your system files are corrupted or missing, which caused this issue.
To ensure whether a corrupted or missing system file is the issue, you can try running the SFC, DISM, and CHKDSK scans. Running these scans will fix all the corrupted files and driver errors in a few seconds. We’ve explained the entire process in the below-mentioned steps:
1. To start, open Command Prompt on your Windows 11 PC with admin rights using the search utility.
2. You have to start the process by running the SFC Scan. Running SFC Scan will search for the corrupted files on the system and replace them with the backed-up version. So, execute the SFC command by entering the mentioned command in the console.
sfc /scannow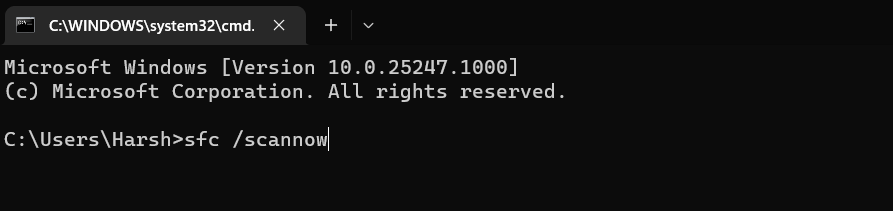
3. Once the SFC Scan is completed, execute the CHKDSK command to find and fix all kinds of hard drive errors.
chkdsk /r /x C:
4. Once the CHKDSK scanning process is completed, execute the DISM command in the console to scan the operating system and repair all its problems.
DISM.exe /Online /Cleanup-Image /Restorehealth
5. Lastly, restart the PC and check the issue’s status. Suppose the issue appeared because of corrupted system files. It would have been fixed now.
8. Disable Hardware Acceleration on Your System
Many users said that Hardware Acceleration could also lead to this issue. Hardware Acceleration helps reduce the system’s latency and improve performance. But in exchange for that, it uses a lot of system resources, which sometimes overclocks the CPU and shows this error.
They also added that disabling the system’s Hardware Acceleration can fix the GSoD issue. You can also disable the Hardware Acceleration feature on your Windows 11 PC by executing the mentioned steps and see if it makes any changes to the situation:
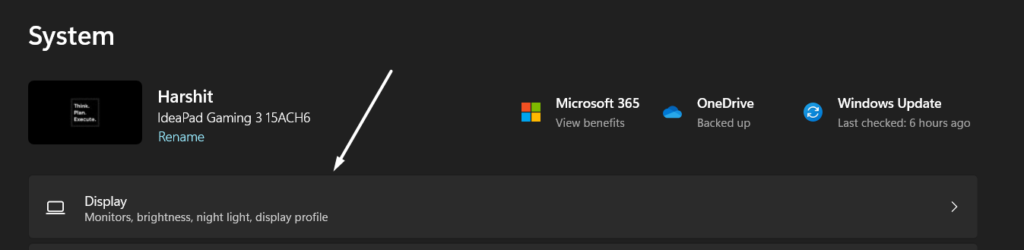
1. Open the Settings app on your Windows PC and navigate to the Display section from the System category.
2. Now, scroll down, select the Graphics option from the Related settings section, and then click on Change default graphic settings.

3. Now turn off the Hardware-accelerated GPU scheduling option in the Default graphic settings section.

4. After making the changes, restart your Windows 11 system to have your changes take effect.
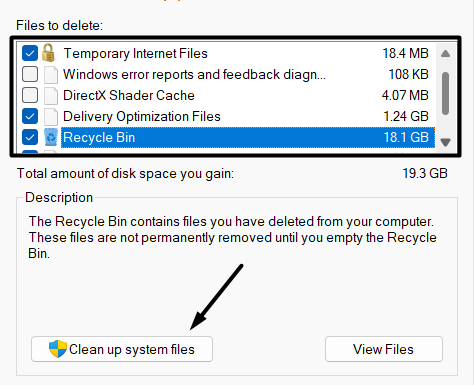
9. Perform Disk Cleanup
Low disk space could be one of the reasons for the GSoD error. It’s possible that your computer’s storage is low, so the system couldn’t install new preview builds and showed this error.
In that case, we suggest you delete the corrupted program files, temporary internet files, thumbnails, etc., from the system and free up some space. You can easily find and delete all these files using the built-in Disk Cleanup tool. You can follow the mentioned steps to learn how to use the Disk Cleanup tool to do this:
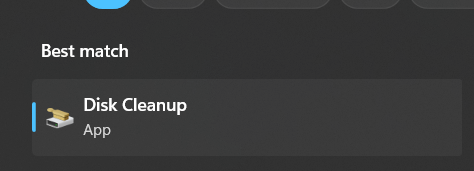
1. Open the Windows Search Box, type Disk Cleanup tool in the search box, and select the Disk Cleanup tool from the Best match section.
2. Once the Disk Cleanup utility is launched, select the below-listed type of files to delete, as these aren’t necessary to store.
- Downloaded Program Files
- Temporary Internet Files
- Recycle Bin
- Delivery Optimization Files
- Temporary Files
- Thumbnails
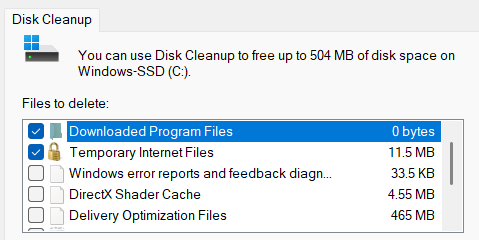
3. Now, click on the Cleanup system files option to delete all the selected data from the system to free up some storage.
4. Once all the selected files and folders are deleted, reboot the PC, and check the status of the issue.
10. Uninstall Malfunctioned Windows 11 Updates
During the research, we found that some users started getting the GSoD error after installing a Windows update. It could be possible that the update they installed wasn’t fully polished and had some issues, which led to this issue.
If you also started getting the GSoD error after updating the PC, we suggest uninstalling that particular problematic update from the system that caused this issue. You can simply view and uninstall the specific update from the Control Panel. So, check the listed steps to know the exact process of doing this:
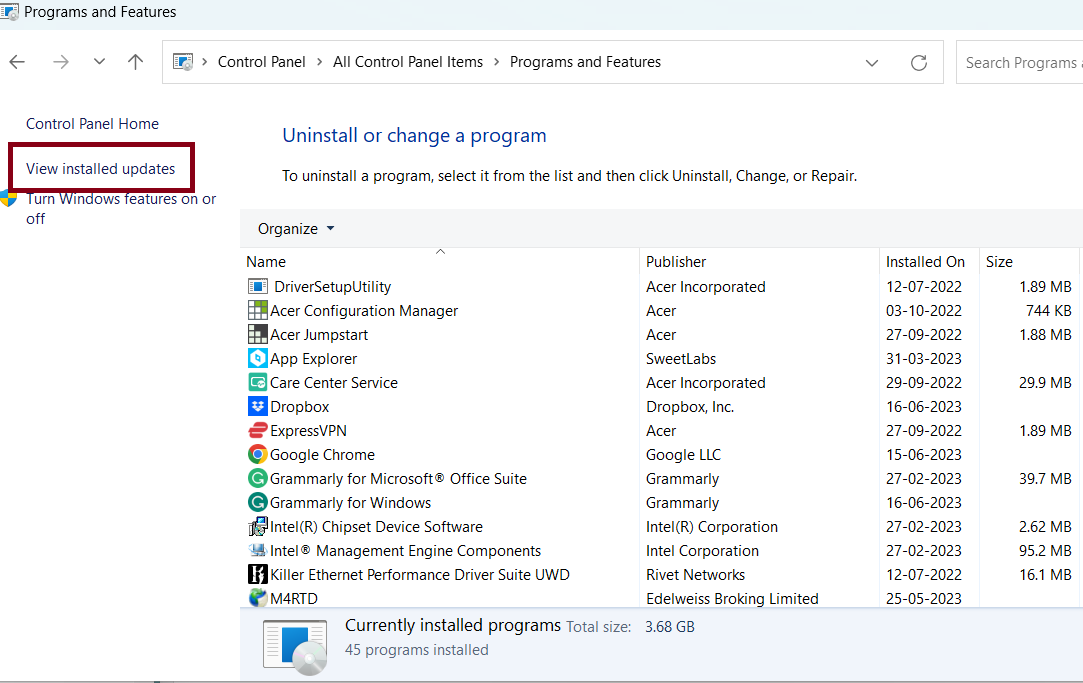
1. Open the Control Panel on your Windows 11 PC and select the Program option in the Control Panel window.

2. Now, select the Programs & Features option, and then select the View installed updates option from the left-navigation pane.

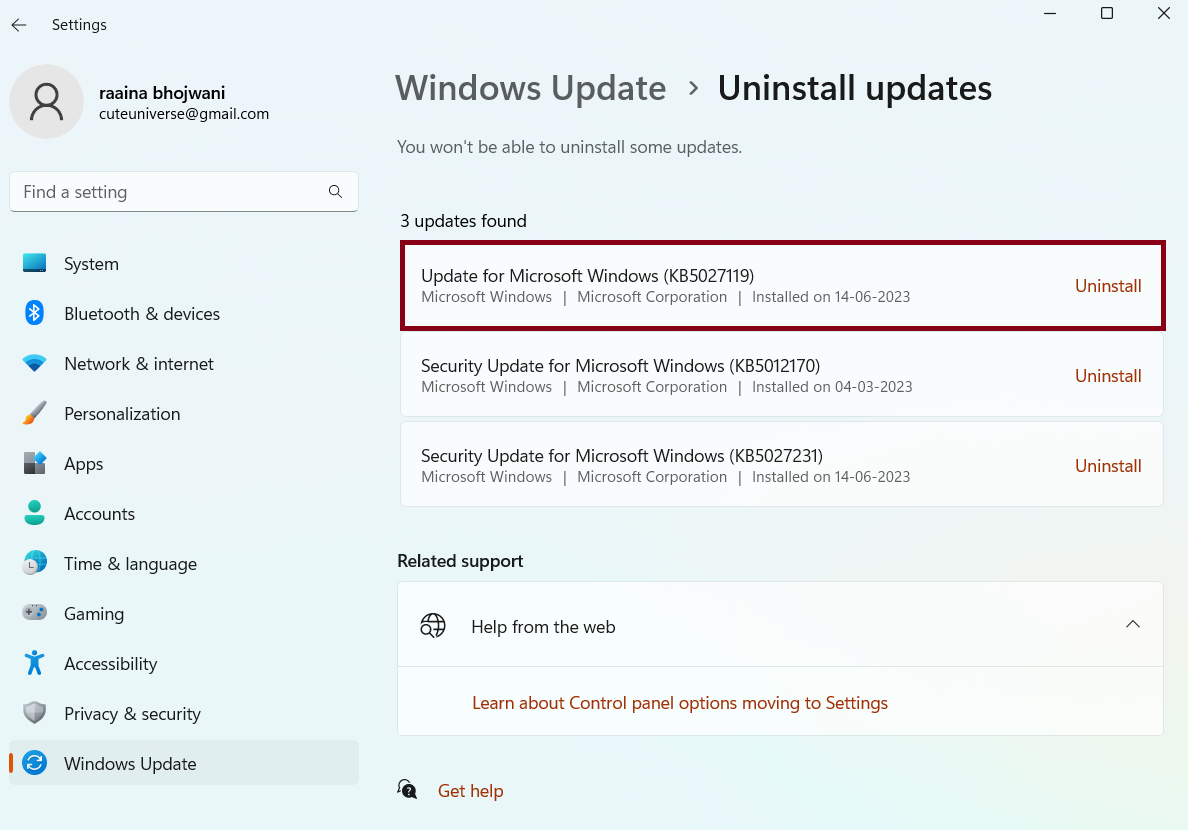
3. Once the Uninstall Updates window is opened, click on the Uninstall option next to the Windows update you want to uninstall from the system.
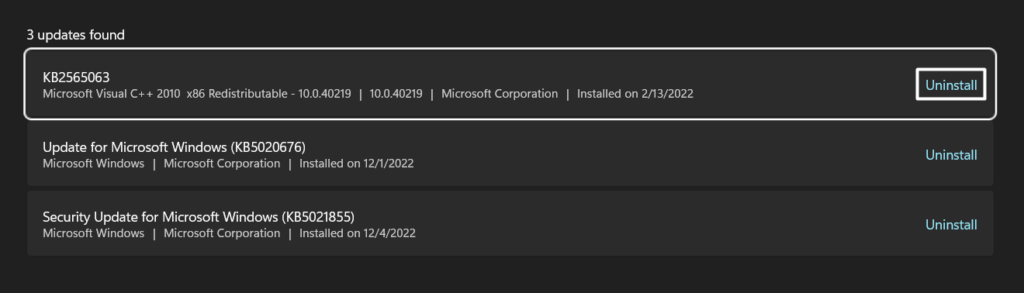
4. Once the update is uninstalled, restart your Windows 11 PC and check the status of the issue with the PC.
11. Reset BIOS
It could be possible that your system’s CPUs are excessively clocked, which is why you’re facing the GSoD error. In that case, we suggest resetting BIOS settings to revert all the overclocking settings to the default and make them work again properly.
It’s pretty easy to reset BIOS settings, but you need to be more attentive while resetting them, as a single misstep can lead to a huge issue. So, follow the below-mentioned steps to do the same with ease:
1. Start by rebooting your Windows 11 PC and entering the BIOS mode. The steps to enter BIOS mode differ from OEM to OEM.
2. Once you’ve entered the BIOS mode, search for the Reset option in the BIOS menu and click on it to open the reset settings.
3. Lastly, click on Save to save the changes and exit BIOS mode to view the changes made.
4. Now, reboot your Windows 11 PC normally using the Power button and check if the GSoD problem is fixed.
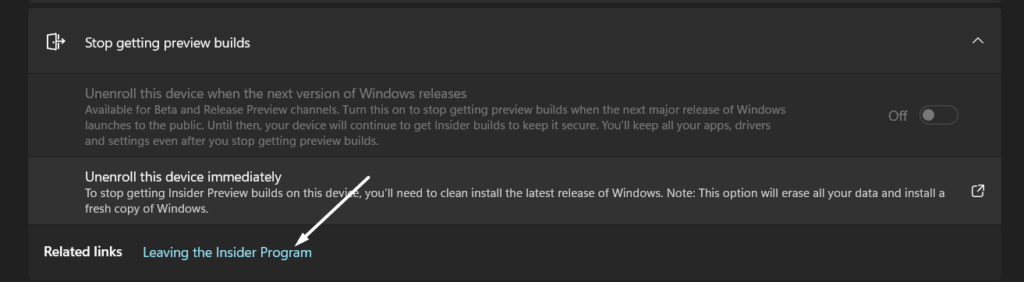
12. Leave Windows 11 Insider Program
If removing the malfunctioned Windows updates doesn’t resolve the issue, we suggest you leave the Windows Insider Program. Once you leave the Windows Insider Program, you’ll start receiving the regular Windows 11 updates again with the least amount of issues. So, if you want to leave the Windows Insider Program, check the below-mentioned steps:
1. Open the Settings app on your Windows 11 PC and navigate to the Windows Update section to open update-related settings.

2. Move to the Windows Insider Program section and expand the Stop getting preview builds section.

3. Finally, click on the Leaving the Insider Program option, which will send you to a new page asking you to confirm that you want to leave the program.
13. Use PC In Safe Mode
Do you know that booting up the system in Safe Mode can help you find the main culprit and fix it? No! Right? Safe Mode allows you to start the OS in a very basic state with only essential Windows services and programs.
It doesn’t boot third-party programs with the system, so you can easily identify and fix the problem. You can try to boot your Windows 11 PC into Safe Mode and see if it fixes the issue. Here are the steps to start your Windows 11 PC in Safe Mode:
1. Open the Run dialog, type msconfig in the Run dialog’s search box, and press the Enter key to open the System Configuration tab.
2. Now, move to the Boot section from the General section in the System Configuration tab and tick the Safe Boot option in the Boot options section.
3. Then, click on Apply, then OK, and lastly, close the System Configuration window. Once done, restart the system.

3. Once the system restarted with Safe Mode, use it and check if the issue is still there. If it doesn’t appear again, we suggest using the PC in Safe Mode until the BSoD issue is fixed.
14. Reset Your Windows 11 PC
When you run your system into Safe Mode, Windows impose some limitations on you. For instance, you can’t download and install all kinds of programs on the computer like you used to. You also can’t start certain system services which aren’t required to run Windows properly.
So, if you don’t want to use your PC with these limitations, there’s no option other than reinstalling the Windows OS. If you’re ready to do this, follow the mentioned steps to reset your Windows 11 PC and reinstall the Windows.
1. To start, open the Settings app on your Windows 11 PC and navigate to the Recovery section of the app.

2. Now, select the Reset PC option next to Reset this PC in the Recovery options section to proceed ahead.
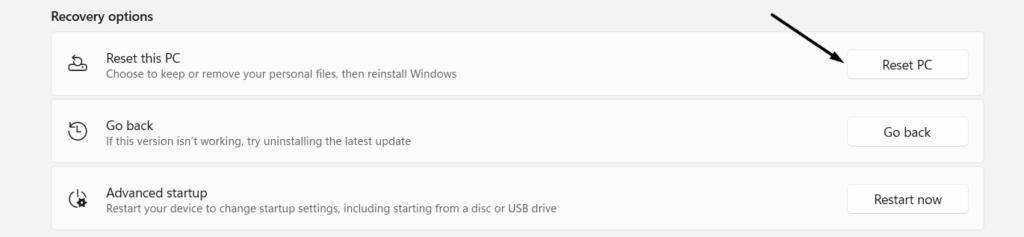
3. Finally, select the Remove everything option on the pop-up to clear all your personal files and settings data from the PC.

15. Contact Microsoft Support
If none of the mentioned troubleshooting methods fix the GSoD issue, contact Microsoft customer support. They’re the only ones who can provide a working solution to get out of this devastating situation. We suggest trying practical solutions first and then moving to this solution.
This is because they’ll also first suggest the basic solutions that are easily available out there. And if those don’t work, they’ll move ahead and do something from their end to resolve the issue.
Frequently Asked Questions
What Does a Green Screen of Death Mean?
Green Screen of Death (GSoD) is a critical Windows error that occurs when the Windows Build Preview runs into a problem. It could be any kind of problem, such as not finding the required system file, lack of system storage, etc. But one of the most common causes of this issue is the malfunctioned hardware connected to the system.
Why Does My Windows 11 Have a Green Screen?
There could be various reasons behind the GSoD error. But one of the most common reasons is faulty hardware. It could be possible that external hardware devices, like hard drives, keyboards, etc., attached to the system have some issues. Some other reasons are corrupted graphic drivers, third-party antivirus programs, etc.
Is the Green Screen of Death Fixable?
Fortunately, the Green Screen of Death can be easily fixed. There are some troubleshooting methods that can help in fixing this issue with ease. You can try the above-mentioned solutions to get rid of GSoD with ease.
How Do I Fix the Green Screen of Death on Windows 11?
There are several ways to fix the Green Screen of Death in Windows 11. But the most working solution is to leave the Windows Insider Program and reset the computer. Once you leave the Insider Program, your system will stop receiving the preview builds updates.
How Do I Fix the Blue Death Screen on Windows 11?
The easiest solution to fix the BSoD and GSoD errors is to update the display/graphic drivers to the latest version. If doing this doesn’t resolve the issue, you can try reinstalling the system’s graphic drivers. Doing so will fix all the issues with the drivers and make sure the same issue won’t appear again.
Green Screen of Death Error Is Fixable in Windows 11
Green Screen of Death is one of the most irritating Windows errors. Also, it’s a rare Windows error that only appears to users who partake in the Windows Insider Program. Fortunately, fixes to resolve the GSoD issue are readily available and easy to implement. We’ve already shared some of the most working solutions in this guide.
Luckily, those solutions helped many users get rid of the GSoD issue on Windows 11, so you can try them and see if they work. We hope these solutions help you fix the error and give you some relief. Before saying goodbye, tell us which solutions helped you fix the error.