According to different situations, the answers to how to fix your PC ran into a problem vary. Here’s quick navigation for all solutions, you can directly jump to the part you’re interested in:
| Cases | Step-by-step Troubleshooting |
|---|---|
| Case1. You can boot Windows |
Fix 1. Boot into safe mode, then boot normally…Full steps Fix 2. Check and repair disk errors with CHKDSK…Full steps Fix 3. Leave enough space for system drive…Full steps Fix 4. Check system log in Event Viewer…Full steps |
| Case2. You can’t boot Windows |
Fix 1. Perform System Restore with point…Full steps Fix 2. Perform System Image Recovery…Full steps Fix 3. Restore Registry configuration with CMD…Full steps |
| Case3. Stuck in Windows loop |
Fix 1. Perform Startup Repair to fix the issue…Full steps Fix 2. Perform System Image Recovery…Full steps Fix 3. Restore the Registry in Command Prompt…Full steps Fix 4. Enter Safe Mode to uninstall software…Full steps |
Applies to: Fix «Your PC ran into a problem and needs to restart» issue on the latest Windows 10 20H2 October Update, Windows 10 2004, Windows 10 1909/1903/1809/1803/1709, and more. If you know little about computers and can’t fix system startup errors, you can use EaseUS Data Recovery Services. The technical team can help you solve system startup errors, including system failure, BSOD, unbootable devices, etc.
Consult with EaseUS data recovery experts for one-on-one manual recovery service. We could offer the following services after FREE diagnosis:
- Fix Windows boot issues, including BSOD
- Fix Windows error and configure Windows environment
- Restore the system when it fails to boot
- Optimize Windows computer to make it run quickly
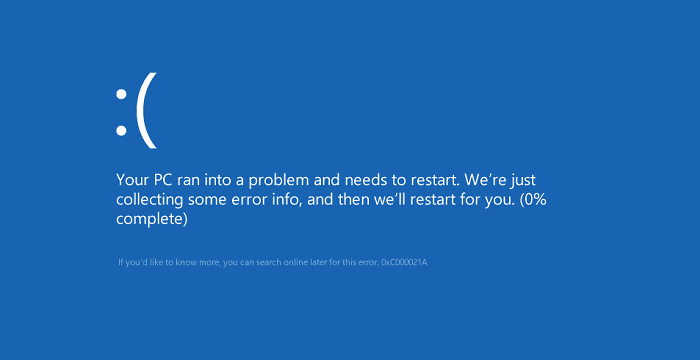
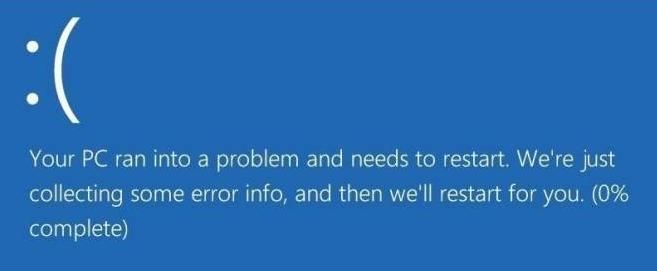
Some Windows users have encountered a situation where their operating system crashes unexpectedly and displays the dreaded blue screen of death. There are various underlying causes that can result in a crash, and the system will report different error messages and information. Among the blue screens, ‘Your PC ran into a problem and needs to restart’ happens most frequently.
Symptoms
The error «Your PC ran into a problem and needs to restart. We’re just collecting some error info, and then we’ll restart for you» may occur during the Windows startup process or during normal use.
Causes
Each stop/error code indicates the possible causes of the issue. However, there are various error messages (100+) related to «Your PC ran into a problem and needs to restart». Thus, there are so many reasons why you encounter the error. But I narrow them down to the following factors:
- Changes in registry
- Corrupted system files
- Problematic driver
- Virus/malware infection
- Loose hard drive connection
- Improper shutdown of the system
These causes may also lead to other blue screen errors like DPC Watchdog violation, Automatic Repair loop, and more.
EaseUS Data Recovery Wizard
- Recover inaccessible files from unboot computers.
- Recover files from formatted hard drive, emptied recycle bin, memory card, flash drive, digital camera, and camcorders
- Support data recovery for sudden deletion, formatting, hard drive corruption, virus attack, system crash under different situations
11 Fixes for Your PC Ran Into a Problem and Needs a Restart in Windows 11/10/8/8.1
If you are faced with the error, there is a slim chance that your computer will work properly after a restart. In more common situations, your PC will restart and prepare an automatic repair, which generally doesn’t work and will show you «Your PC did not start correctly». Or you are just stuck at the «Your PC ran into a problem and needs to restart» loop. Specify your situation and carry out the corresponding fixes to have a try.
- Notice:
- You’d better visit this page with another device instead of your computer since some of the solutions below require you to restart your computer. Besides, whether you can boot your computer or not, if the error code says «INACCESSIBLE BOOT DEVICE», do check your hard drive connection and remove the peripherals that are attached to your computer.
Situation 1. You Can Boot Windows
Even if you can still boot your computer, you need to apply some troubleshooting steps to prevent such an error from happening again. But you are the lucky ones that can fix the error much more easily with a bootable computer.
Method 1. Boot into Safe Mode and then Boot Normally
Safe Mode is a diagnostic mode of Windows. It starts your PC with the minimal necessary programs and services. In Safe Mode, you can fix some system-related problems by uninstalling incompatible software/driver, deleting problematic files, removing viruses, and more. Even if you do nothing, booting into Safe Mode is useful to repair some system errors by helping the storage system to be reaccessed.
On a functional computer, you can enter Safe Mode via Settings:
Step 1. In Windows 10, click «Start» > «Settings» > «Update & Security» > «Recovery».
Step 2. In the «Advanced startup» section, choose «Restart now».
Step 3. After the restart, choose «Troubleshoot» > «Advanced Options» > «Startup Settings» > «Restart».
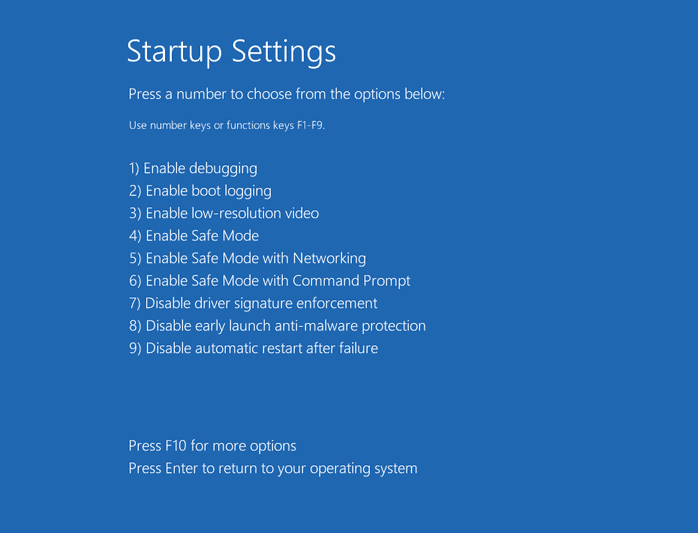
Step 4. Now you will see the «Startup Settings» screen. You can choose one of the three Safe Mode options: «Enable Safe Mode», «Enable Safe Mode with Networking», or «Enable Safe Mode with Command Prompt».
Step 5. Restart your computer and see whether it boots properly.
Method 2. Check the Disk
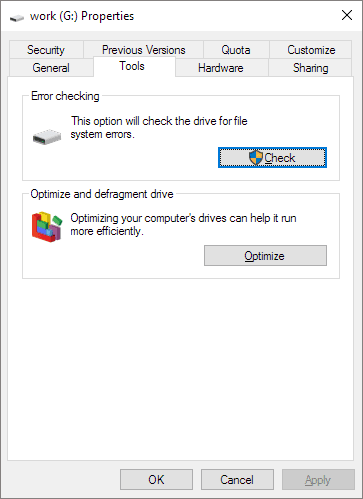
Check the disk is identical to running the CHKDSK command, which is used to fix disk errors like bad sectors and file system errors. If «Your PC ran into a problem and needs to restart» appears with «INACCESSIBLE_BOOT_DEVICE», it may be caused by the file system errors on your hard drive. That’s why checking the disk is necessary.
Step 1. Go to «This PC». Right-click your drive and choose «Properties».
Step 2. Go to the «Tools» tab and click «Check» > «Scan drive».
Method 3. Leave Enough Space for System Drive
The Windows operating system and some applications installed need sufficient free space to function properly. If your system drive, generally a C drive, is almost out of space, you should consider extending the system partition to create more space for your OS.
Method 4. Check System Log in Event Viewer
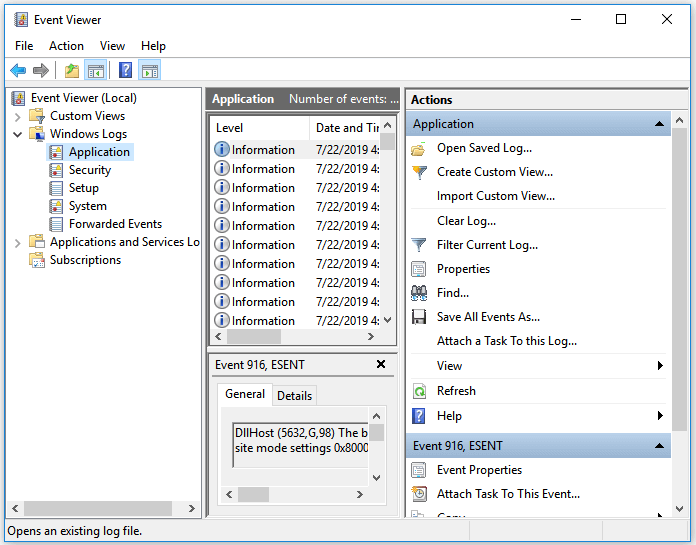
Checking the system log in Event viewer is helpful to find the culprit of the «Your PC ran into a system» error in Windows 11/10/8/8.1, especially for a problematic device or driver.
Step 1. Click «Start» and enter the event viewer.
Step 2. Right-click «Event Viewer» and choose «Run as administrator».
Step 3. Expand «Windows Logs» and choose «System».
Step 4. Check the errors that occurred simultaneously with the blue screen and fix the error according to the information.
Of course, there are other ways to try, including updating the device driver in Device Manager and running hardware diagnostics provided using the Windows built-in feature. If the solutions above fail, continue to carry out these methods to cope with the problem.
Related reading: How to Fix Windows 10 Error Code 0xc00000e When Boot Computer
Situation 2. You Can’t Boot Windows and See «Your PC did not start correctly»
In some cases, your PC will restart and prepare a startup repair automatically after the error message appears, resulting in the «Your PC did not start correctly» screen. Here you can see two options: Restart and Advanced options.
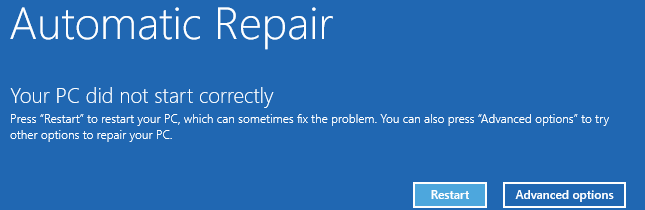
If you click «Restart», it’s almost inevitable the computer will come with the same error screen. Thus, you should choose «Advanced options» instead. Afterwards, continue to choose «Troubleshoot» > «Advanced options».
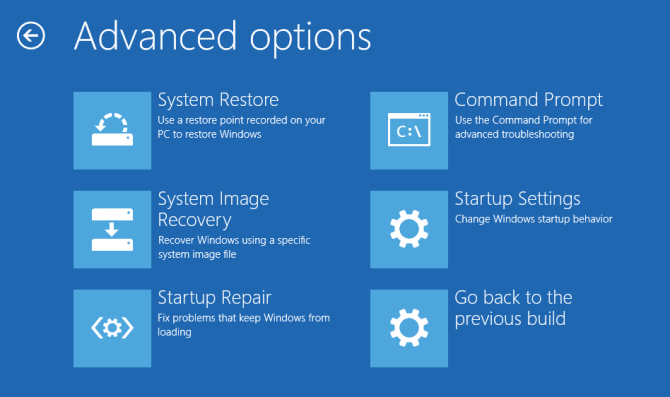
Here you will see five or six options, depending on your Windows version, including System Restore, System Image Recovery, Command Prompt, Startup Settings, and Go back to the previous build. Here is a brief explanation:
- If you have created a restore point, then using the System Restore feature will bring your computer back to a functional state. If not, this option is useless.
- Similarly, if you have created a system image, you can perform a System Image Recovery to bring your system back to life. If not, it’s just not the option for you.
- In this case, the computer had tried a Startup Repair and failed. Therefore, it’s unnecessary to try it again.
- In Command Prompt, you can use command lines to execute operations.
- In Startup Settings, you can enter Safe Mode, disable automatic restart after failure, and more.
- The «Go back to the previous build» will bring your computer back to an earlier version.
Method 1. Perform System Restore
If you have a system restore point available, you can perform a system restore:
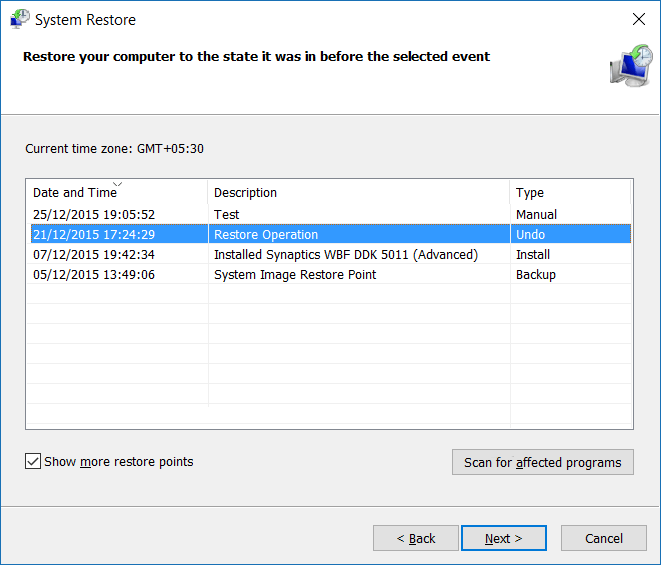
Step 1. In the Windows Boot Options menu, select «Troubleshoot» > «Advanced Options» > «System Restore».
Step 2. Choose a previous working state (data) to restore your computer.
Step 3. Wait until Windows restores your system. Then restart the computer.
Method 2. Perform System Image Recovery
Alternatively, you can perform a system image recovery if you have created a system image before the issue arise.
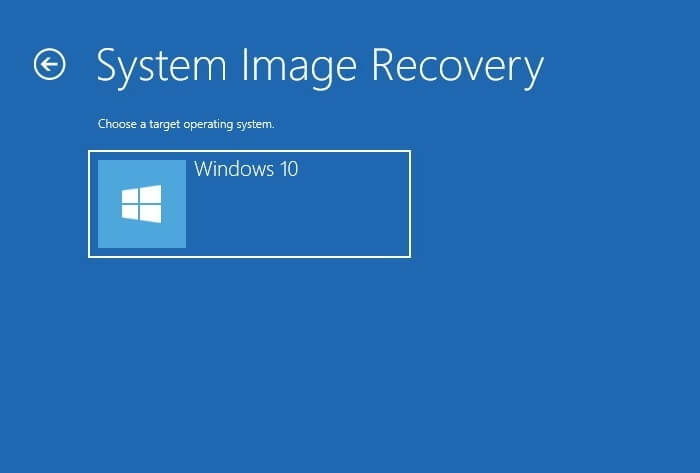
Step 1. Connect the external hard drive that contains the system image to your computer.
Step 2. In the Windows Boot Options menu, select «Troubleshoot» > «Advanced Options» > «System Image Recovery».
Step 3. Choose the system image you want to recover.
Step 4. In the Re-image your computer wizard, select the system image, and click «Next».
Step 5. Follow the wizard to format the disks and restore the system.
Step 6. Restart your computer.
Method 3. Restore Registry Configuration
Don’t have any restore point or system image? No worry. Based on the details above, here I recommend you select «Command Prompt» to restore the registry.
The registry is a database that contains the configuration data for the Windows operating system and most of the applications. That is why changes in the registry may influence the functionality of your computer or programs. Registry files may get deleted accidentally by yourself or by some program. And that could result in serious problems just like «Your PC ran into a problem and needs to restart». Luckily, the changes can be reverted with the registry backup files, which you can complete via Command Prompt.
Step 1. Choose «Command Prompt» among the options.
Step 2. Select the account and enter the password.
Step 3. In Command Prompt, enter the following command in order:
- C:
- CD Windows\System32
- CD config
- DIR
- CD regback
- DIR CD..
- REN default default1
- ren sam sam1
- ren security security1
- ren software software1
- ren system to system1
- CD regback
- copy * c:\windows\system32\config
Step 4. Type exit. In the «Choose an option» screen, choose «Turn off your PC» and then start your computer.
Simply speaking, the commands above serve the purpose of replacing the existing system32 config files, which might have been changed incorrectly, with the ones in the backup folder. This method will certainly work if the «Your PC ran into a problem» error is caused by registry changes.
If restoring the registry comes in vain, you can choose «Startup Settings» and enter Safe Mode to try more solutions.
Situation 3. You Are Stuck in the «Your PC ran into a problem» Loop
Unlike either of the two cases above, you have no options available to choose from. All you have is the repeated restart and error circle. In a situation like this, you can either recover data from the corrupted OS or fix the problem with the Windows installation CD/DVD. If you don’t have an installation disc, you can create a Windows installation media as a substitute. With the Windows installation media, you can repair your computer via the Advanced options which you have no access to currently.
Preparation: Steps to access the Advanced options via the Windows installation media:
Step 1. Create a Windows installation media according to the official guide supplied by Microsoft.
Step 2. Connect the bootable media to your computer and boot your computer from the device.
Step 3. Wait for the installation files to load.
Step 4. In the Windows Setup window, choose «Next».
Step 5. Click «Repair your computer» in the Setup window and choose «Troubleshoot» > «Advanced options».
In situation 2, I have explained what these Advanced options can do. To fix the «Your PC ran into a problem and needs to restart» in Windows 10/11, you can apply the following solutions in order.
Method 1. Perform Startup Repair
Startup Repair enables you to fix certain system problems that might prevent Windows from booting up. It is always a good option when there is a boot failure on the computer.
Method 2. Perform System Recovery/System Image Recovery
The precondition to use such options is that you have a restore point or system image available. If not, switch to other workable ways.
Method 3. Restore the Registry in Command Prompt
Did you change the registry on your computer recently? If you did, enter Command Prompt and follow the steps detailed in situation 2 to bring the registry to an earlier working state.
Method 4. Enter Safe Mode
As mentioned above, Safe Mode is a diagnostic mode that allows you to perform some troubleshooting steps. In Safe Mode (with Command Prompt), you can do a lot of things to cope with the issue, like:
- Uninstall incompatible software
- Update driver
- Remove virus/malware
- Run System File Checker tool
To uninstall problematic software:
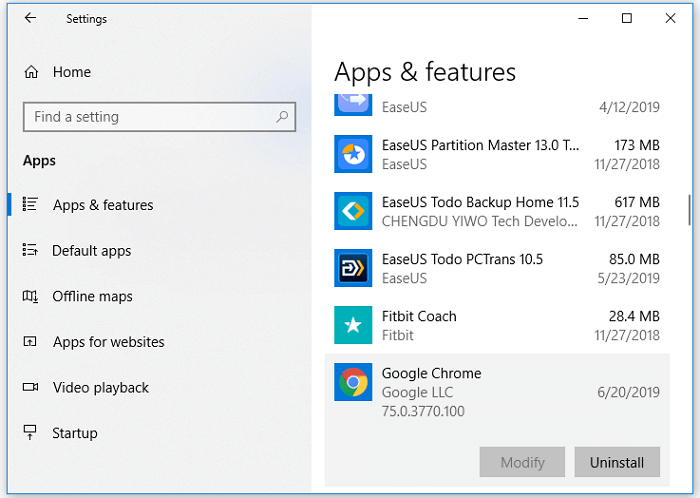
Step 1. Go to «Start» > «Settings» > «Apps» > «Apps & features».
Step 2. Click the target software and click «Uninstall».
To update the hard drive/motherboard driver: Since your computer cannot boot properly, you need to update the hard drive driver or motherboard with a CD or USB that contains the driver. You can download the driver from the manufacturer’s website.
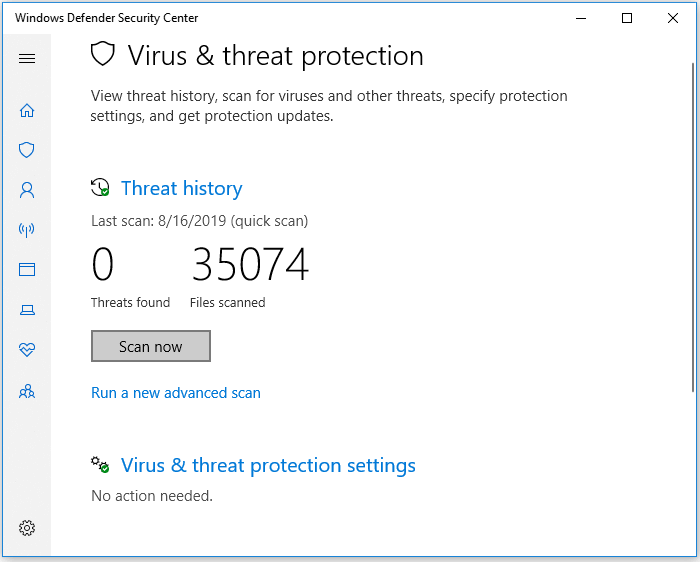
To remove the virus: Use the anti-virus software or Windows defender to finish the task. I will show you how to run Windows Defender.
Step 1. Go to «Settings» > «Update & Security» > «Windows Security».
Step 2. Click «Virus & threat protection».
Step 3. In the «Threat history» section, click «Scan now» to scan for viruses on your computer.
To run the System File Checker tool:
It’s no doubt that missing or damaged system files will cause problems on the computer, either minor or serious. The BSOD «Your PC ran into a problem and needs to restart» may also result from system file errors. Fortunately, the Windows System File Checker tool is able to check and repair missing or damaged system files. In Command Prompt, enter sfc /scannow to start repairing the system files.
Extra Tip: Recover Data after Fixing «Your PC ran into a problem»
If you have, unfortunately, lost some files after taking the methods to troubleshoot the ‘Your PC ran into a problem and needs to restart’ error in Windows 10/11, try the EaseUS Data Recovery Wizard — EaseUS data recovery software to retrieve them. This software can recover files due to deletion, format, system crash, and more. Once data loss is found, launch the software and rescue your files as soon as possible.
Step 1. Select a drive and start scanning
Launch EaseUS Data Recovery Wizard and hover over the partition where you lost data. This could be an internal hard disk, external disk, USB, or SD card. Then, click «Scan».

Step 2. Check and preview scanned files
Use the file format filter on the left or upper right corner to narrow the scan results until you find the files you need. Then, you can click the «Preview» button or double-click a file to preview its content, if you’d like.

Step 3. Recover lost data to a secure location
Click the checkbox next to the file and click «Recover» to restore the lost data to a secure place. We recommend that you do not store the recovered data on the disk where you lost it earlier.

Let’s Move and Get Rid of the Problem
The «Your PC ran into a problem and needs to restart» problem is annoying. But with the workable solutions provided here, you should feel relieved because there are still ways to rescue your computer. If you are clear about what leads to your current situation, you can solve the problem in a more direct way. If not, specify your situation and carry out the potential fixes to remove the error.
Hope you can solve the «Your PC ran into a problem and needs to restart» successfully.
“Your PC ran into a problem and needs to restart” is a common blue screen of death error messages. To fix it here in this guide, we will provide different solutions. These fixes will cover all the standard reasons responsible for the blue screen of death on Windows 10.
Try them one by one to get rid of computer screen error and restart your system properly without rebooting in a loop.
To completely optimize your Windows 10 system, try using Advanced System Optimizer software. Offered by Systweak, this PC cleaning tool is thoroughly tested and trusted by millions of users.
Download for Windows
Now, let’s begin with answering the question of how to fix your PC ran into a problem and needs to restart Windows 10.
Also Read: Best Cleaner for Windows 10
Below is quick navigation to solutions click Detailed information to know more about them.
| Fixes | Troubleshooting Steps |
| Can boot Windows | Boot in Windows 10 safe mode followed by booting normally > run CHKDSK > system log… Detailed information |
| Update Drivers | Head to Device Manager update driver or can use Smart Driver Care to update outdated driver Detailed information |
| Cannot boot Windows | Do a system restore > image recovery> restore registry Detailed Information |
| Stuck in restart loop | Startup repair > system recovery > restore registry > safe mode Detailed information |
Different BSOD Error Messages
Blue Screen of Death displays various error messages most commonly, “Your PC ran into a problem and needs to restart.” Besides, there are others too. Here we enlist those other stop code error messages also:
KERNEL_SECURITY_CHECK_ERROR
DPC_WATCHDOG_VIOLATION
FAULTY_HARDWARE_CORRUPTED_PAGE
Stop Code: 0xC000021A
INACCESSIBLE_BOOT_DEVICE
CRITICAL_PROCESS_DIED
BAD_SYSTEM_CONFIG_INFO

Reason for BSOD Message on Windows 10
Each stop code error tells the possible reason for the problem. Your PC ran into a problem and needs to restart error message can occur due to various reasons. Here are some of the common causes of computer error messages.
- Changes in registry
- Damaged or corrupt system files
- Faulty device driver
- Improper hardware connection
- Wrong system shutdown
- Infected system
These issues lead to BSOD error messages accompanied by Windows 10 stop code registry error, Automatic Repair loop; your PC will automatically restart in one minute, etc.
Now, that we know, the reason let’s learn about the fixes.
9 Fixes to Troubleshoot Your PC Ran Into a Problem and Needs to Restart in Windows 10
Generally, after receiving a PC error message, your system restarts automatically and runs automatic repair. In most cases, this doesn’t work, and you end up getting Your PC did not start correctly, or Your PC ran into a problem and needs to restart the loop. Carry out the following solutions to fix the BSOD problem in Windows 10.
Solution One –
After encountering the error message if your system boots usually, then follow the steps below to troubleshoot the problem and avoid facing the stop code error message.
1. Boot Windows In Safe Mode
If the problem you are facing is related to corrupt system files, malware, or some driver related issue booting Windows in Safe Mode can help fix the problem.
To boot into Safe Mode on a PC that boots regularly, follow the steps below:
- In Windows search, type Settings and press enter.
- Click Update & Security > Recovery.
- Advanced startup > Restart now
- Once PC restarts, select Troubleshoot > Advanced Options > Startup Settings > Restart
- You’ll now see Startup Settings. Select from any of three Safe Mode options:
Enable Safe Mode
Enable Safe Mode with Networking
Enable Safe Mode with Command Prompt - Restart your system.
This should fix the problem, and you will now be able to restart your system without encountering stop code: your PC ran into a problem error message.
2. Run CHKDSK Command
Fix bad sectors on disk as this might be the cause of the problem you are facing. To do so, follow the steps below:
- Right-click This PC and select Properties from the context menu
- Tools > Check > Scan drive.


Since this method is secure and works like CHKDSK, we used this. Once your disk is checked for errors and all bad sectors are fixed, run your system. You should now not face, “Your PC ran into a problem and needs to restart” with “INACCESSIBLE_BOOT_DEVICE”, error message.
3. Free up Space on System Drive
Many times if sufficient space is not available on C drive (system drive) you might face this error message. To fix it, clear junk files from the system drive or extend disk partition to create space.
4. Check System Log
Examining Event Log to find the reason behind the Blue Screen of Death is a great idea to fix things. To do so, follow the steps below:
- Event Viewer in Windows search > Run as administrator
- Unhide Windows Logs > System
- Look for the errors that occur during the time of Blue Screen of Death and fix them as per the given information.


Now, check your system. You should now not face your PC ran into problems.
If this doesn’t help, move to the next steps.
5. Update Outdated Driver
Manually updating system drivers are tricky; therefore, to make things simple and easy, we recommend using Smart Drive Care.
Developed by Systweak, this driver updating tool scans your system for a corrupt and incompatible drive. Once they are detected, it shows you a list giving you full control over whether to update or not. Being into business for 20+ years, Systweak knows what customers want. Hence, the company offers both free and paid versions (60-day-money back guarantee). Moreover, it takes backup of old drivers allowing you to revert changes if anything goes wrong.

- Once downloaded, install the program.
- Next click Start Scan Now to run a scan and identify outdated drivers
- Afterward, if you are using the paid version, you can update all drivers at once. However, if you are using the free version, you will need to update them one by one.
Now, try and see the Blue Screen of Death message on Windows 10 with stop code Your PC ran into a problem that should be fixed.
6. Run Automatic Repair
When you encounter Your PC ran into a problem and need to restart you will get Automatic Repair screen with two options at the bottom right corner.

Most of the time users use Restart option but it doesn’t work hence we will use Advanced options.
So, click Advanced options > Troubleshoot. Here look for Advanced options as clicking on it will give different options that will help solve the problem.
A short description of all the terms:
- System Restore lets you revert a computer to an older functional state.
- Command Prompt allows using command lines to run certain operations.
- System Image Recovery by using the system image created by you can give a new life to your PC. If no image is created, use another option.
- Startup Settings helps change Windows startup behavior by enabling Safe mode and inactivating automatic system restart when you encounter when Blue Screen of Death occur.
- Startup Repair is used to repair corrupt files
Now, that you know the meaning of each option let’s learn how to perform system restore.
To perform System Restore follow the steps below:
- Select System Restore from Advanced Options.
- Pick a date when your system was working fine > Restore
- Wait for the process to complete > restart your system.
Image Recovery
- Insert the disk which has a system image.
- Select System Image Recovery from Advanced options
- Under Re-image your computer > choose system image > Next

- Follow on-screen instructions
- Restart your system

7. Revert Registry Configuration
If none of the above steps works for you as you don’t have a system image or restore point don’t worry use Command Prompt and restore registry.
To do so, follow the steps below:
- Click Command Prompt
- If you are using multiple accounts select the one you are facing the problem with and enter password
- Next, enter following command in Command Prompt window:
C:
CD Windows\System32
CD config
DIR
CD regback
DIR
CD..
REN default default1
ren sam sam1
ren security security1
ren software software1
ren system to system1
CD regback
copy * c:\windows\system32\config
- Exit command prompt and restart PC.
The above commands will help replace system32 config files that have been altered or corrupted. If the error message Your PC ran into a problem is caused due to registry errors, this method will work.
Stuck in Your PC ran into a problem and needs to restart the loop.
Unlike the above two cases in this, your system keeps on restarting automatically in a loop. To fix it you can try recovering data from corrupt OS drivers or can use Windows Installation Disk.
If you don’t have one, you’ll have to create one. To do so read how to create.ISO using Media Creation Tool.
Once created, follow the steps to use it.
- Attach bootable media to the system with errors and let the installation files load.
- You’ll now see Windows Setup, choose Next.
- Hit Repair your computer followed by Troubleshoot then Advanced options
- Perform either of the operations based on the above explanation.
If you choose Safe Mode – the diagnostic mode to fix Windows problem, try performing the following things:
- Uninstall corrupt software
- Update outdated system driver
- Run malware
- Run SFC
8. Uninstall corrupt software
Settings > Apps > Apps & features
Select the application you think is problematic > Uninstall
9. Scan system using Windows Defender
- In Windows search bar type Settings
- Look for Update & Security
- In the new window click Windows Security from the left pane.

- Now click Virus & threat protection option present in the right pane./

- Expand Scan options.

- Choose the type of scan and click Scan Now


Fix detected infections
Run sfc/scannow
Type Command Prompt in Windows search
Here enter SFC/scannow command, let it run.
This should fix Your PC and run into problems.
Final Words
Using the above solutions, you can fix the most dreaded message “Your PC ran into problems and needs to restart on Windows 10. You should now be relieved as you know how to fix the Blue Screen of Death with different stop code errors.
Hope you were able to resolve Your PC ran into a problem error message using the steps explained. If you face any problem, do leave us a comment, and we will try our best to help.
Summary: While there are many blogs related to Blue Screen of Death (BSOD) errors, this blog particularly addresses the error- ‘Your PC ran into a problem and needs to restart’ and ways to fix it. This BSOD error may lead your system to malfunction or crash altogether. Read this complete guide to learn the best ways to get rid of this error. You can also use Stellar Data Recovery Professional, a powerful data recovery tool to recover your data lost due to this error. You may download the trial version for free.

Contents
- Simple Methods to Fix Error – ‘Your PC Ran into a Problem and Needs to Restart’
- Conclusion
Sometimes, after installing a certain Windows update or while working on your PC, you may encounter an error message- ‘PC ran into a problem and needs to restart’ on your screen. (See Image 1). It is a Blue Screen of Death (BSOD) error that may appear with different stop codes such as:
- MEMORY MANAGEMENT
- SYSTEM THREAD EXCEPTION NOT HANDLED
- CRITICAL_PROCESS_DIED
- IRQL_NOT_LESS_OR_EQUAL
- UNMOUNTABLE BOOT VOLUME
- WHEA_UNCORRECTABLE_ERROR
- PFN_LIST_CORRUPT
You may also receive error codes such as 0xc0000001, 0x000000f4, 0x80070005, etc.

The ‘PC ran into a problem and needs to restart’ error may occur due to reasons such as,
- Problematic Windows update
- Corrupt or faulty device drivers
- Missing or corrupted system files
- Problematic third-party app/software
- Incorrect memory dump settings
It may cause your PC to shut down or restart unexpectedly, get stuck at a booting loop, or even lead to a total system crash. To help you fix this BSOD error, we have mentioned all the best possible troubleshooting methods.
Note: If the data is important, recover it using a professional data recovery tool, and then fix it.
Simple Methods to Fix Error – ‘Your PC Ran into a Problem and Needs to Restart’
Scenario 1: If you are able to boot your PC into Safe Mode
Method 1: Uninstall Problematic Windows Update
If you face the error “your pc ran into a problem” after installing a specific Windows 10 update, start your PC in safe mode and try to uninstall the problematic update. Follow these steps:
a. Press Windows + I to open Settings and navigate to Update & Security. (See Image 2)

b. Follow View update history > Uninstall updates. (See Image 3)

c. Locate the recently installed Windows update that is causing the problem.
d. Right-click on the update and click Uninstall. (See Image 4)

e. After uninstalling the Windows update, restart your system normally and check if the error still persists.
Method 2: Update Device Drivers
Sometimes corrupt, missing, or incompatible device drivers may result in the “your pc ran into a problem” error. You may try to fix the issue by updating the device drivers. To do so,
a. Press Windows + X to open Device Manager.
b. Select the driver with a Yellow exclamatory mark and follow the instruction to Update Driver. (See Image 5)

c. Select the Search automatically for updated driver software option. (See Image 6)

d. Windows will find a latest driver software. You may update the driver and check if the issue is fixed.
Method 3: Roll Back/Disable/Uninstall Drivers
If updating the driver doesn’t work, you may rollback, disable, or uninstall the driver by following the given steps:
Roll Back Driver
a. Open Device Manager and expand the device that has the driver for rollback.
b. Right-click on the driver and select Properties > Driver > Roll Back Driver. (See Image 7)

c. Choose a reason from the available option and click Yes. (See Image 8)

Disable Driver
If the previous method doesn’t work or the option to roll back the driver is unavailable, you may disable the faulty driver with the help of the following steps:
a. Go to Device Manager and select and expand the device with the faulty driver you want to disable.
b. Right-click the selected driver and go to Properties > Driver > Disable Device > OK. (See Image 9)

Uninstall Driver
If you have tried to update, roll back and even disable drivers, but still facing this BSOD error, you may uninstall the corrupt or faulty driver and try to reinstall the compatible one with the following steps:
a. Open Device Manager, expand the device carrying the faulty driver and right-click on the driver.
b. If you see the option to “Uninstall device” from the available options, select it, and proceed.
c. If you see the Properties option, open it and go to Driver > Uninstall Device > OK. (See Image 10)

Method 4: Uninstall Problematic Third-Party Application/Software
Sometimes, a malicious or corrupt third-party app/software or program may be the cause of this error. You may uninstall the problematic program or software in Safe Mode using the given troubleshooting steps:
a. Open Settings and go to Apps. (See Image 11)

b. In the Apps & features window, select the application/software that may cause the problem, click on it, and select Uninstall. (See Image 12)

c. Once this process is completed, restart your system to check if the error is resolved.
Method 5: Modify the Memory Dump Setting
You may try modifying the emory dump settings to fix the error message “PC ran into a problem.” To do so, follow the given steps:
a. Click on View advanced system settings. (See Image 13)

b. Go to the Advanced tab, and under the Start-up and Recovery, click Settings. (See Image 14)

c. On the next prompt, uncheck Automatically reset.
d. Under Write debugging information, select Complete memory dump from the drop-down list. (See Image 15)

e. Save the changes, restart the Windows, and see if the error is fixed.
Method 6: Run SFC (System File Checker)
Sometimes, corrupted system files may cause this BSOD error and such other errors. To fix this error, run SFC and DISM scans. Follow the below-said steps:
a. Press Windows + X and choose Command Prompt (Admin).
b. When Command Prompt screen appears, type SFC/scannow command and hit Enter. (See Image 16)

c. Once the process is done, check if the issue got fixed.
If the error is still there, you may run the DISM command.
a. Open Command Prompt, run it as an administrator, and type the following commands:
- DISM /Online /Cleanup-Image /CheckHealth
- DISM /Online /Cleanup-Image /ScanHealth
(See Image 17)

b. Once done, reboot your PC.
Scenario 2: If you can’t boot into Safe Mode
Method 7: Perform Startup Repair
If you cannot boot into the Safe mode due to the “your pc ran into a problem and needs to restart windows 10’ error, you can perform the startup repair with the following steps:
a. Boot your system using a USB installation media (created using Windows’ media creation tool).
b. When you see the Windows Setup screen, click Repair your computer. (See Image 18)

c. While you enter in Automatic Repair environment, click Advanced options. (See Image 19)

d. Follow Troubleshoot > Advanced options. (See Image 20)

e. From the Advanced options screen, click Startup Repair, and proceed. (See Image 21)

f. Select your account and enter the password. (See Image 22)

g. Click Continue and follow the instructions given on the screen to complete the Startup Repair procedure. Check if the problem is fixed.
Method 8: Perform System Restore
Another troubleshooting method is System Restore that you may perform to fix the error “your pc ran into a problem.”
To perform System Restore, follow the given steps:
a. Enter in Automatic Repair environment and choose Advanced options as explained above.
b. Go to Troubleshoot > Advanced options > System Restore. (See Image 23)

c. Click Next. On the next prompt, click Scan for affected programs. (See Image 24)

d. Follow Click > Finish on the next prompt. (See Image 25)

Note: You may end up losing your essential data on performing this method.
Therefore, it is suggested to take the backup of your data first. You may also recover data with an efficient data recovery tool such as Stellar Data Recovery Professional.
This DIY (do-it-yourself) software helps you restore all kinds of data, including files, folders, documents, photos, videos, audio, etc. from Windows PCs and storage drives such as HDDs, SSDs, external USB drives & optical media. You can also get back data from lost or missing Windows partitions. The software features a ‘Create recovery drive’ utility, enabling you to create a bootable media drive to retrieve important files, folders, and more from a completely crashed, unbootable, or BSOD affected systems.
Method 9: Reset this PC
You may also try resetting the PC to get rid of the “pc ran into a problem and needs to restart” error. This method helps you remove unwanted applications, software, programs, settings, drivers, and more, causing problems for the system. You may also choose to keep files while resetting the system or delete everything stored on the PC.
a. Open Settings and go to Update & Security.
b. Navigate to Recovery and follow Reset this PC > Get Started. (See Image 26)

c. If you want to save your data, select Keep my files, or if the data is not very important, you may choose Remove everything.
d. You can select Remove everything to get rid of faulty or corrupt system settings, drivers, apps, software, etc. (See Image 27)

e. On the next prompt, click Just remove your files, and then click Next. (See Image 28)

f. On the next screen, a warning message will appear. Click Next.
g. Afterward, click Reset when prompted, and click Continue. (See Image 29)

Method 10: Reinstall Windows
You may try reinstalling Windows 10 if you can’t fix the error ‘PC ran into a problem and needs to restart’ using the above troubleshooting methods. To do so, you will have to use the same USB installation media, which you used to boot into the system to perform Startup Repair, System Restore, and Resetting PC. Remember while you reinstall the Windows on a drive, it will clean the entire data stored on it. This process requires drive formatting and builds new partitions in the system. Therefore, we recommend to recover your essential data first using a reliable data recovery tool and then proceed with the re-installation.
Conclusion
“Your PC ran into a problem and needs to restart,” is a BSOD error, which can occur due to corrupt system files, device drivers, application/software, and virus attacks, etc. Such blue screen errors cause the system to shut down or restart unexpectedly, get stuck at a booting loop, or even lead to system crash. To fix this error, you may try the troubleshooting methods described above. However, a few methods, such as performing System Restore, or Windows re-installation, may lead to data loss. You may recover lost or inaccessible data with a powerful data recovery tool such as Stellar Data Recovery Professional. The software can extract data from Windows PCs, laptops, and all kinds of storage media devices such as HDDs, SSDs, USBs, and Memory cards. Additionally, you may restore data from BSOD affected, unbootable, or completely crashed systems.
About The Author
Mansi Verma
Mansi Verma is a Senior Technology Writer at Stellar®. She is a Tech enthusiast, holding over 8 years of experience in Data Recovery, IoT, Artificial Intelligence, and the Robotics technology domain. She loves researching and providing DIY solutions to solve Windows technical issues. In her spare time, she likes reading novels, and poetry. She also enjoys Travelling, Rafting, Trekking, etc.
Попробуйте наш инструмент устранения неполадок
Выберите операционную систему
Выберите язык програмирования (опционально)
‘> 
Когда ваш компьютер продолжает давать сбой, это очень неприятно. Подсказка « На вашем компьютере возникла проблема, и его нужно перезагрузить »Совсем не помогает. После перезагрузки компьютера вы снова получаете ошибку. Но не волнуйтесь. Вы можете исправить ошибку, следуя приведенным ниже инструкциям.
Темы, которые вы можете прочитать :
- Что вызывает эту ошибку?
- Рекомендуемые методы исправления ошибки
Что вызывает эту ошибку?
Если бы вы спросили меня, что вызывает эту ошибку, я бы ответил: «Извините. Я не знаю’. Но, пожалуйста, не разочаровывайтесь. Возможно, вы все еще можете исправить это одним из способов, описанных в этой статье.
На самом деле это распространенная ошибка синего экрана. Когда ваш компьютер не может работать должным образом из-за некоторых проблем, Windows продолжает давать сбой, и вы получаете синий экран. Ошибки синего экрана могут быть вызваны многими проблемами. Но у большинства из них одни и те же причины.
Согласно Microsoft, 70 процентов ошибок синего экрана вызваны кодом стороннего драйвера. , и 10 процентов вызваны проблемами с оборудованием . Ниже вы познакомитесь с методами, которые устраняют наиболее частые причины.
Помимо сообщения «Ваш компьютер столкнулся с проблемой и его необходимо перезагрузить», вы также можете увидеть на экране сообщение об ошибке остановки, например DRIVER_IRQL_NOT_LESS_OR_EQUAL, BAD POOL HEADER. Внизу статьи вы можете найти Статьи по Теме об исправлении конкретных кодов ошибок остановки.
Рекомендуемые методы исправления ошибки
Здесь 5 методы вы можете попробовать исправить ошибку. Возможно, вам не придется пробовать их все, просто двигайтесь вниз в верхней части списка, пока не найдете тот, который вам подходит.
- Снимите внешнее оборудование
- Обновите драйверы
- Проверить наличие обновлений Windows
- Удалить недавно установленное программное обеспечение или приложения
- Устранить перегрев компьютера
Метод 1. Удалите внешнее оборудование
Вероятно, проблема вызвана неисправностью внешнего оборудования. Если вы подключили внешнее оборудование, например USB-устройство, внешний жесткий диск, отключите их. Затем проверьте, правильно ли работает компьютер.
Способ 2: Обновите драйверы
Вероятно, проблема вызвана неисправными драйверами. Итак, чтобы исправить ошибку, попробуйте обновить драйверы.
ВАЖНЫЙ : Вам нужно будет войти в Windows на проблемном компьютере, чтобы попробовать этот метод. Если вы не можете войти в Windows, перезапустите его в безопасном режиме , затем попробуйте решение.
Вы можете обновить драйверы вручную. Если у вас нет времени, терпения или навыков работы с компьютером, чтобы обновить драйвер вручную, вы можете сделать это автоматически с помощью Водитель Easy .
Driver Easy автоматически распознает вашу систему и найдет для нее подходящие драйверы. Вам не нужно точно знать, на какой системе работает ваш компьютер, вам не нужно рисковать, загружая и устанавливая неправильный драйвер, и вам не нужно беспокоиться о том, чтобы сделать ошибку при установке.
Вы можете автоматически обновлять драйверы с помощью БЕСПЛАТНОЙ или Pro версии Driver Easy. Но с версией Pro требуется всего 2 клика (и вы получаете полную поддержку и 30-дневную гарантию возврата денег):
1) Скачать и установите Driver Easy.
2) Запустите Driver Easy и нажмите Сканировать сейчас . Driver Easy просканирует ваш компьютер и обнаружит проблемы с драйверами.
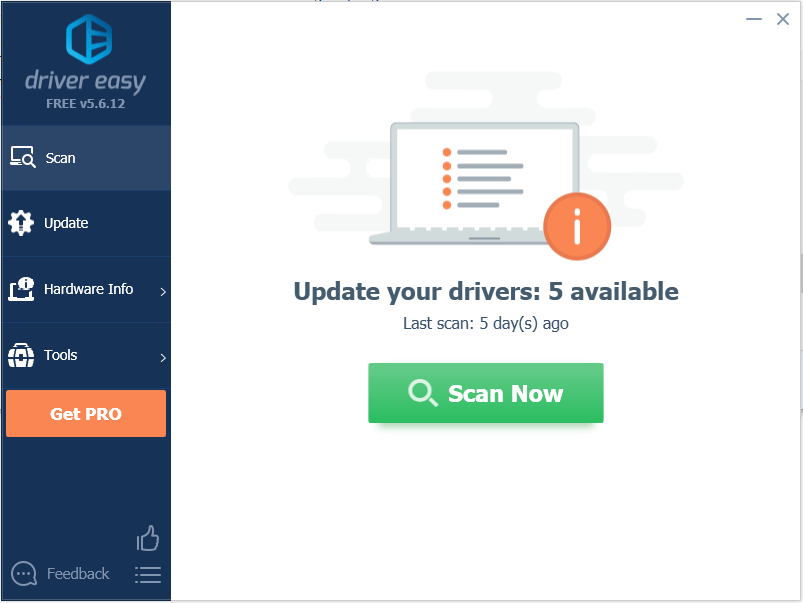
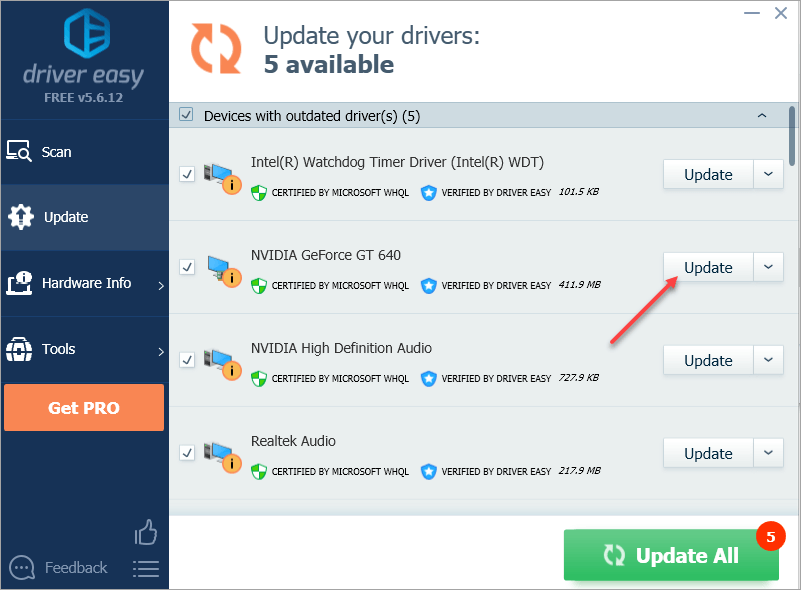
3) Щелкните значок Обновить рядом с одним устройством, чтобы автоматически загрузить и установить правильную версию драйвера (вы можете сделать это в БЕСПЛАТНОЙ версии).
Или нажмите «Обновить все», чтобы автоматически загрузить и установить правильную версию всех драйверов, которые отсутствуют или устарели в вашей системе (для этого требуется версия Pro — вам будет предложено выполнить обновление, когда вы нажмете «Обновить все»).
Метод 3: проверьте наличие обновлений Windows
В случае некоторых неизвестных проблем очень поможет проверка и обновление обновлений Windows. Итак, чтобы исправить ошибку, вы можете проверить и установить обновления Windows.
ВАЖНЫЙ : Вам нужно будет войти в Windows на проблемном компьютере, чтобы попробовать этот метод. Если вы не можете войти в Windows, перезапустите его в безопасном режиме , затем попробуйте решение.
Если вы используете Windows 10 , обратитесь к этим шагам, чтобы проверить и установить Центр обновления Windows:
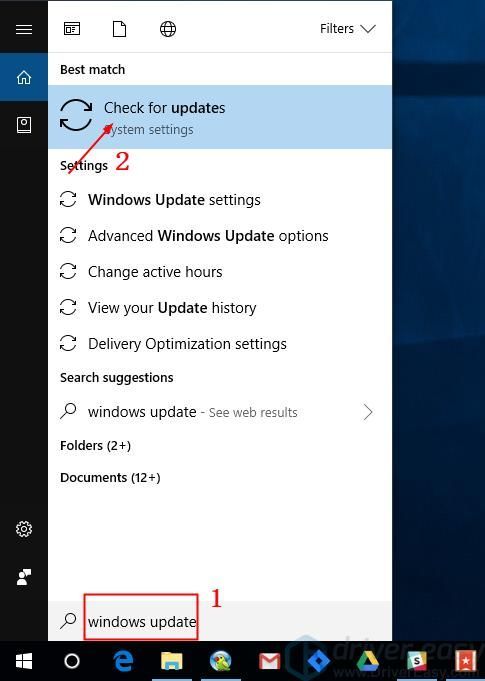
1) Тип Центр обновления Windows в строке поиска, затем щелкните Проверить обновления во всплывающем меню.
2) Щелкните значок Проверить обновления кнопка.
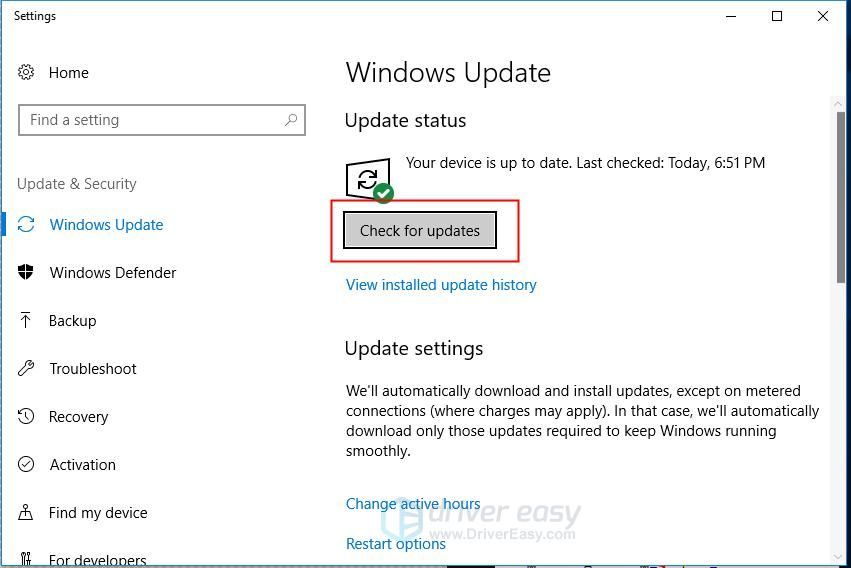
3) После завершения проверки установите все обновления.
4) После установки всех обновлений проверьте, правильно ли работает компьютер.
Если вы используете Windows 7 обратитесь к этим шагам, чтобы проверить и установить Центр обновления Windows.
1) Щелкните значок Начало меню и щелкните Все программы .
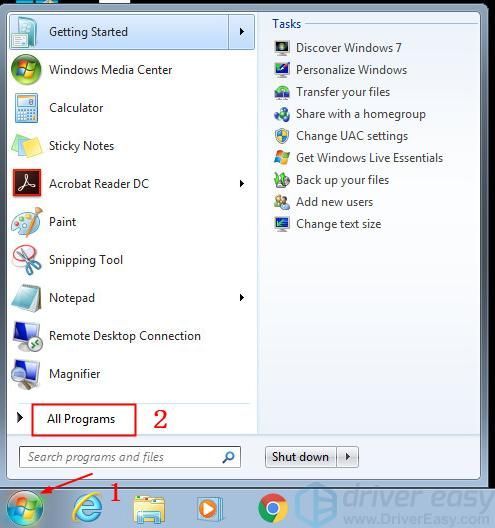
2) Нажмите Центр обновления Windows .
3) Щелкните значок Проверить обновления кнопка.

4) После завершения проверки обновлений установите все обновления.
5) После установки всех обновлений проверьте, правильно ли работает компьютер.
Метод 4. Удалите недавно установленное программное обеспечение или приложения.
Если ошибка возникла после установки нового программного обеспечения или приложения, вероятно, причиной является это программное обеспечение или приложение. В этом случае удалите это программное обеспечение или приложение, чтобы увидеть, решена ли проблема.
Метод 5: исправить перегрев компьютера
Перегрев компьютера может вызвать появление синего экрана. Проверьте, не перегревается ли ваш компьютер.
Если температура вашего компьютера достигает 90 градусов Цельсия или выше, вы, вероятно, испытываете чрезмерное нагревание. Вы можете использовать прибор для контроля температуры, чтобы проверить температуру.
Чтобы временно устранить проблему с перегревом, выключите компьютер на время, может быть, на 30 минут. После этого перезагрузите его, чтобы проверить, правильно ли работает компьютер.
Перегрев компьютера может быть вызван неработающим охлаждающим вентилятором, сломанным радиатором, пылью на корпусе и т. Д. Если ваш компьютер продолжает перегреваться, обратитесь за помощью в местную мастерскую по ремонту компьютеров.
Надеюсь, что приведенные выше инструкции помогут вам устранить ошибку синего экрана. Если у вас возникнут вопросы, не стесняйтесь оставлять свои комментарии. Я хотел бы услышать любые идеи или предложения.
Статьи по Теме
(Исправлено) Ошибка синего экрана нарушения сторожевого таймера DPC
Как исправить сбой состояния питания драйвера в Windows 10
Плохой заголовок пула в Windows 10 (решено)
Ошибка TDR видео (atikmpag.sys) в Windows 10 (решено)
Больше…
«Your PC ran into a problem and needs to restart» is an error message which may appear in computers running Windows 10 or 8 OS (or Windows 8.1) for different reasons from computer to computer.
More specifically, this problem can appear after a Windows or driver update, after power failure or system file corruption, due to a virus attack or due to a memory issue.
When the «Your PC ran into a problem and needs to restart. We’re just collecting some error info, and then we’ll restart for you. . (100% complete)» error message appears on the screen, the computer is unresponsive to user commands and after the percentage measurement is completed, the system restarts automatically or freezes and the only way to close and restart Windows is by using the computer’s power button.
This troubleshooting guide contains detailed instructions on how to resolve the «PC Ran Into a Problem and Needs To Restart» error/problem in Windows 10, Windows 8 or Windows 8.1 OS.

How to fix the «PC Ran Into a Problem and Needs To Restart» Windows 10, 8/8.1 error.
Case A. Windows can Start Normally or in Safe Mode.
Case B. Windows CANNOT Start Normally or in Safe Mode.
Case A. Windows can Start Normally or in Safe Mode.
Notes:
1. Follow the solutions mentioned below only if you can login to Windows Normally or in Safe Mode.
2: If you cannot apply the following solutions in Normal Mode then Start Windows in Safe Mode.
To Start Windows 10 or Windows 8 in Safe Mode:
1. From Windows GUI or from the Login Screen: Hold down the SHIFT key and chose Power > Restart.
2. After restart, choose: Troubleshoot > Advanced Options > Startup Settings & click Restart.
3. At Startup Settings, press the F4 key (or the «4») to start Windows into Safe Mode.
3. If Windows can start in Safe Mode, then before applying any of the solutions below, just try to restart your computer and let Windows to start Normally. (This solution in sometimes resolves the «PC Ran Into a Problem and Needs To Restart» error).
4. Before you continue to troubleshoot the «PC Ran Into a Problem and Needs To Restart» problem, make sure that your computer is clean from viruses and malware programs. Detailed instructions on how you can do that you can find in this guide: Quick Malware Scan and Removal Guide.
5. To make your life easier you can enable the F8 – Advanced Boot Options menu – by following these instructions.
How to fix the «PC Ran Into a Problem and Needs To Restart» problem if you can start Windows Normally or in Safe Mode.
Solution A1. Modify Memory Dump setting.
Solution A2: Force Windows to Full Shutdown.
Solution A3: Start in Safe Mode -Update essential device drivers
Solution A4. Scan & Repair Windows System files.
Solution A5. Perform a System Restore.
Other Solutions to fix the «PC Ran Into a Problem…»
Solution 1. Modify Memory Dump setting
First try to modify Memory Dump setting in System Properties:
1. Press “Windows” ![]() + “R” keys to load the Run dialog box.
+ “R” keys to load the Run dialog box.
2. Type “control sysdm.cpl” and press Enter.

3. At Advanced tab click at «Start-up and Recovery« Settings.
4. Uncheck the Automatically Restart checkbox and then by using the drop-down arrow, set the «Write debugging information» to Complete memory dump.

5. Press OK twice and restart your computer.
Solution 2: Force Windows to Full Shutdown.
Perform a full shutdown of Windows in order to re-initialize Windows at boot. To do that:
1. While holding the SHIFT key down press Shutdown.

2. Power ON your computer.
3. Check if the «Your PC ran into a problem and needs to restart» problem disappears. If it does, then disable the fast start-up feature permanently.
Solution 3: Check your computer’s stability in Safe mode and Update essential device drivers.
In some cases the «Your PC ran into a problem and needs to restart« error can be caused due to an outdated or corrupted device driver. To troubleshoot this issue start Windows in Safe Mode and see if the error persists.
Step 1. Start Windows 8 in safe mode
1. Press “Windows” ![]() + “R” keys to load the Run dialog box.
+ “R” keys to load the Run dialog box.
2. Type “msconfig” and press Enter to open System Configuration settings.

3. At Boot tab select (Check) the Safe boot option and click OK.

4. Restart your computer.
Step 2: Update essential device drivers.
If the «Your PC ran into a problem and needs to restart» error doesn’t appear while in Safe Mode, then you probably have a problem with a software or a hardware device driver. In this case:
A. First Try to uninstall your Antivirus Software.
B. Try to perform a clean boot and identify which service or program causes the problem.
C. Finally uninstall and then re-install some essential device drivers on your system to find out if one of them causes the problem. To do that, uninstall the following drivers in this order (one each time and then restart)
-
- Display Adapter Driver
- Wireless Adapter Driver
- Ethernet Adapter Driver
Attention: After removing a driver, perform a system restart and check if the error persists before proceeding to uninstall the next device driver. When you find which device’s driver causes the «Your PC ran into a problem and needs to restart» problem, then proceed to download and re-install the latest driver version (for that device) from the manufacture’s website without uninstalling the rest device drivers from your system.
– To uninstall a device driver from your system:
1. Press “Windows” ![]() + “R” keys to load the Run dialog box.
+ “R” keys to load the Run dialog box.
2. Type devmgmt.msc and press Enter to open Device Manager.

3. At device manager, expand Display Adapters, right-click on the installed Video adapter (e.g. AMD Radeon) and select Uninstall.

4. When the Uninstall operation is completed, remove also any software related to the uninstalled device from the installed programs (Control Panel > Programs and Features).
5. Restart your computer.
6. Install the latest driver for the uninstalled device(s).
7. Restart your computer and then check if the «Your PC ran into a problem and needs to restart» problem still occurs.
Solution 4. Scan & Repair Windows System files.
The «Your PC ran into a problem and needs to restart» error message may be due to a corrupted file system. To resolve this, use the sfc /scannow (System File Checker) command to repair Windows system files. *
* Note: The sfc /scannow command must be executed from a elevated Command Prompt in order to work properly.
1. Open an elevated command prompt (with Administrative privileges). To do that:
- Right-click at the screen’s bottom-left corner and from the pop-up menu, choose “Command Prompt (Admin)”.

2. In the command prompt window, type the following command & press Enter:
- sfc /scannow

3. Wait until Windows scans and repairs system files.
4. When the System file check and repair is completed, restart your computer and check if your computer works smoothly.
Solution 5. Perform a System Restore.
Try to restore your system to an earlier working state:
1. Boot into Windows Normally or in Safe Mode.
2. Press the Windows ![]() + R keys to load the Run dialog box.
+ R keys to load the Run dialog box.
3. Type the following command to open the System Restore utility and press Enter.
- rstrui

4. At the first screen press Next.

5. Select a previous restore point from the list* and choose Next.
* Note: To show all available restore points, check the “Show more restore points” checkbox.

6. At the last screen, review your choices and press Finish.

7. Wait until “System Restore” process is completed.
8. Restart your computer.
Case B. Windows CANNOT Start Normally or in Safe Mode.
Notes:
1. Follow the solutions mentioned below only if you CANNOT login to Windows Normally or in Safe Mode.
2. To apply the solutions mentioned below, you need to boot your system from a Windows Installation media (USB or DVD). If you haven’t a Windows installation media, then you can create one directly from Microsoft.
How to fix the «PC Ran Into a Problem and Needs To Restart» problem if you CANNOT start Windows Normally or in Safe Mode.
Solution B1. Modify SATA Mode in BIOS.
Solution B2. Change SATA Mode values in registry.
Solution B3. Perform a System Restore.
Other Solutions to fix the «PC Ran Into a Problem…»
Solution 1. Modify SATA Mode in BIOS Settings.
1. Power On your computer and press the appropriate key (DEL or F1 or F2 or F10) to enter BIOS settings. *
* Note: The way to enter into BIOS Settings depends on the computer manufacturer. To Enter into your BIOS Settings, pay attention at the first screen as your computer starts and try to find a message like this:
«DEL to enter setup»
«Press ESC to Enter Setup»
«BIOS Configuration: F2»
«F10 to Enter Setup»
2. Load Default Settings (Load Optimal Defaults)

3. Then look at all BIOS screens to locate the SATA Configuration setting.*
* Note: This setting is usually found under the Advanced section and can be named (depending on manufacturer) as: «SATA Mode» or «SATA Controller Mode» or «SATA Operation» or «Configure SATA as«.
4. Make sure that the SATA Mode (Type) is set to AHCI or IDE and NOT in RAID.*
* Notes:
1. Caution: If you have configured two or more Hard Drives in RAID mode, then leave this setting as is, exit from BIOS setup without saving and continue to the next solution.
2. If the SATA Mode is set to AHCI then change it to IDE. If the SATA Mode is set to IDE then change it to AHCI.

5. Save Changes and Exit BIOS Settings and try to boot on Windows.

6. If your computer doesn’t boot again, then revert the SATA setting back to what it was and proceed to the next solution.
Solution 2. Change SATA Mode values in registry.
Important: Apply this solution only if you prompted in BSOD screen to search online for this error: INACCESSIBLE BOOT DEVICE
The next solution is to modify the Windows Registry Offline as follows:
1. Boot your computer from the Windows Installation Media.
2. At Language options screen, click Next.
4. Select Repair your computer.
5. Then select Troubleshoot > Advanced Options > Command Prompt.
6. At command prompt type regedit to launch the registry editor.
7. Highlight the HKEY_LOCAL_MACHINE key.

8. From File menu select Load Hive (to load the offline registry).

9. Navigate to the disk where Windows installed on (e.g. «C:»).
10. Open the system file found in «%Windir%\system32\config\» directory. (e.g. «C:\Windows\system32\config\system»)

11. Type a Key Name for the offline registry (e.g. «Offline«) and press OK.

12. Double-click to expand the HKEY_LOCAL_MACHINE key and you should a new key under it, named with the name you typed before (e.g. ‘Offline» in this example).

13. Expand this new key & navigate (from the left pane) to this subkey: *
HKEY_LOCAL_MACHINE\Offline\ControlSet001\services\msahci
* Note: If you have Window 8, Windows 10 & Server 2012, then navigate to the “StorAHCI” key
(e.g. : “HKEY_LOCAL_MACHINE\Repair\ControlSet001\services\storahci”) , because in these Operating Systems the MSAHCI has been replaced by StorAHCI.

14. At the right pane double click at Start (DWORD) and change its value data to 0 (zero). ClickOK when finish.

15. Perform the same steps and set the Start value to 0 modification to these sub keys:
- HKEY_LOCAL_MACHINE\Offline\ControlSet001\services\pciide
- HKEY_LOCAL_MACHINE\Offline\ControlSet001\services\iaStorV
16. When you finish with the modifications, highlight the key you created before (e.g. «Offline«) and from the File menu choose Unload Hive to write back the changes you made to the offline Registry.

17. Close the Registry editor, the Command prompt window and Restart your computer.
18. Enter BIOS settings and specify the SATA mode (IDE-ATA, AHCI or RAID) according your needs or leave the default settings.
19. Exit BIOS settings, remove the Windows Installation media and let Windows to start normally.
Solution 3. Perform a System Restore.
To restore your system to an earlier working state:
1. Boot your computer from the Windows Installation Media.
2. At Language options screen, click Next.
3. Select Repair your computer.
4. Then select Troubleshoot > Advanced Options > System Restore.
5. Select a previous working state (date) to restore your computer.
6. Wait until Windows restores your system and restart.
7. Boot to Windows Normally.
Other solutions to bypass the ‘Your PC ran into a problem and needs to restart’ error:
1. Check and repair file system errors.
2. Diagnose your hard disk for hardware problems.
3. Diagnose your Memory RAM for problems.
4. Disconnect any external device (e.g. Storage device, Printer, etc.)
Good luck! Let me know if this guide has helped you by leaving your comment about your experience. Please like and share this guide to help others.