XCP-ng Windows PV Tools 8.2.2.200-RC1
Before Installing
- Make backups/snapshots before installing!
- Test first on non-production VM’s!
Changes since 8.2.2-beta
- xcp-ng/xcp#181 — Install
Vatescertificate in computerstrusted vendors storeto get the drivers silently installed - Out of beta mode, now considered a Release Candidate! with this very version 8.2.2.200


Changes since 8.2.1-beta1
- all is build using Visual Studio Community 2017 (instead of Visual Studio 2012)
- win-xenbus
- BalloonReleasePfnArray() is broken in several ways — xcp-ng/win-xenbus@75324b9
- win-xenvbd
- Back-port rsp_event manipulation changes from master — xcp-ng/win-xenvbd@db03232
Know Issues
- Branding is not 100% ready (e.g.
XCP-ng XCP-ng<— duplicate names)
Instructions
- XCP-ng Wiki -> Guest Tools -> Windows Guest Tools
Content
- PV-Drivers 8.2.2
- Management Agent (
Note: because of mistakes in the upstream implementation the Management Agent is compiled as a 32bit application) - VSS-Driver (manual install!)
Help / Community Support
- Discussion: https://xcp-ng.org/forum
- Issue Tracker: https://github.com/xcp-ng/xcp/issues
- IRC: #xcp-ng and #xcp-ng-dev on irc.freenode.net
XCP-ng Windows PV Tools 8.2.2-beta
Before Installing
- Make backups/snapshots before installing!
- Do not install in production! Test first!
Changes since 8.2.1-beta1
- all is build using Visual Studio Community 2017 (instead of Visual Studio 2012)
- win-xenbus
- BalloonReleasePfnArray() is broken in several ways — xcp-ng/win-xenbus@75324b9
- win-xenvbd
- Back-port rsp_event manipulation changes from master — xcp-ng/win-xenvbd@db03232
Instructions
- XCP-ng Wiki -> Guest Tools -> Windows Guest Tools
Content
- PV-Drivers 8.2.2
- Management Agent (
Note: because of mistakes in the upstream implementation the Management Agent is compiled as a 32bit application) - VSS-Driver (manual install!)
Help / Community Support
- Discussion: https://xcp-ng.org/forum
- Issue Tracker: https://github.com/xcp-ng/xcp/issues
- IRC: #xcp-ng and #xcp-ng-dev on irc.freenode.net
XCP-ng Client Tools for Windows 8.2.1-beta1
XCP-ng tools — это набор программного обеспечения, разработанных специально для работы с серверным виртуализационным решением XCP-ng. XCP-ng — это свободная и открытая версия популярной системы виртуализации XCP, которая включает в себя множество функций и инструментов для управления виртуализированными окружениями. Однако для использования этих функций на компьютерах под управлением операционной системы Windows необходимо установить дополнительные инструменты. В данной статье мы рассмотрим процесс установки и использования XCP-ng tools для Windows.
Установка XCP-ng tools на компьютере под управлением Windows — это простой процесс, который позволяет пользователю получить доступ ко всем функциям и возможностям XCP-ng. Для начала необходимо загрузить установочный файл с официального сайта XCP-ng и запустить его на компьютере. После запуска установочного файла, следуйте инструкциям мастера установки, выбирая нужные опции и параметры в зависимости от своих потребностей. По завершении установки XCP-ng tools на компьютере будет создан ярлык для доступа к программе.
Использование XCP-ng tools позволяет управлять виртуальными машинами, хранить и передавать данные, контролировать доступ и многое другое. Интерфейс программы интуитивно понятен и прост в использовании. С помощью XCP-ng tools можно создавать и настраивать виртуальные машины, изменять их параметры, мониторить работу серверов и выполнять административные задачи. Благодаря совместимости XCP-ng tools с операционной системой Windows, пользователь может легко работать с программой и управлять всеми своими виртуализированными окружениями.
В заключение, XCP-ng tools для Windows предлагает удобный способ установки и использования всех функций и возможностей XCP-ng на компьютере под управлением операционной системы Windows. Благодаря этому набору инструментов, пользователи могут управлять виртуализированными окружениями, создавать и настраивать виртуальные машины, контролировать доступ и реализовывать множество других задач для эффективного управления своими серверами.
Содержание
- XCP-ng tools для Windows
- Установка
- Использование
Для установки XCP-ng tools на Windows необходимо выполнить следующие шаги:
- Скачайте установочный пакет XCP-ng tools с официального сайта XCP-ng.
- Запустите установочный файл и следуйте инструкциям мастера установки.
- После завершения установки, откройте XCP-ng Center — инструмент для управления виртуализацией XCP-ng.
- В XCP-ng Center добавьте подключение к вашему XCP-ng серверу, указав адрес сервера и учетные данные.
- После успешного подключения, вы сможете управлять вашими виртуальными машинами, создавать и изменять их параметры, а также выполнять другие операции.
Примечание: Для более продвинутого управления и мониторинга вы также можете использовать другие инструменты, такие как Xen Orchestra, которые предоставляют более широкий набор функций и возможностей.
Таким образом, установка и использование XCP-ng tools на Windows позволяют эффективно управлять виртуализацией XCP-ng с помощью удобного графического интерфейса.
Установка
Для установки XCP-ng tools на Windows необходимо выполнить следующие шаги:
- Загрузите установочный файл с официального сайта XCP-ng.
- Запустите установочный файл и следуйте инструкциям мастера установки.
- Выберите путь для установки XCP-ng tools на вашем компьютере.
- Подтвердите установку, нажав кнопку «Далее».
- Дождитесь завершения установки XCP-ng tools.
- Запустите XCP-ng tools, чтобы начать использование на вашем компьютере.
После успешной установки XCP-ng tools вы сможете настроить и управлять вашими виртуальными машинами на сервере XCP-ng. Установка данного программного обеспечения позволит вам получить полный доступ к функционалу XCP-ng через удобный интерфейс Windows.
Использование
После установки XCP-ng tools на Windows, вы можете начать использовать его функциональность для управления вашим XCP-ng сервером.
Одним из ключевых инструментов XCP-ng tools является XenCenter, который предоставляет графический интерфейс для управления вашим сервером. Вы можете запустить XenCenter из меню «Пуск» или щелкнув на ярлыке на рабочем столе.
После запуска XenCenter укажите IP-адрес или имя сервера, чтобы подключиться к нему. Вам также потребуется указать имя пользователя и пароль для входа.
После успешного подключения вы увидите основной интерфейс XenCenter, который позволяет вам управлять виртуальными машинами, хранилищами данных, сетями и другими ресурсами вашего сервера.
Кроме того, XCP-ng tools также предоставляет командную строку Xen-подобного интерфейса, называемую XenAPI. Через этот интерфейс вы можете выполнять различные операции на вашем сервере, например, создавать и удалять виртуальные машины, управлять сетями и хранилищами данных, выделять и освобождать ресурсы и многое другое.
Для работы с XenAPI вы можете использовать команду «xe» в командной строке Windows. Для просмотра доступных команд и параметров вы можете выполнить команду «xe help».
Использование XCP-ng tools для Windows позволяет вам эффективно управлять вашим XCP-ng сервером, предоставляя удобный и универсальный интерфейс для выполнения различных операций.
Loading
The possibilities are endless when you consider setting up your own home lab, including using multiple hypervisors and playing around with each feature. From running your own server for web hosting and experimenting with media servers to diving deep into Kubernetes, it’s a journey that’s both exciting and rewarding. Many are familiar with VMware vSphere and open-source hypervisor Proxmox for home labs. However, more are learning about and want to experiment with XCP-ng. I want to take you guys through a few of the basics with XCP-ng and how you can use it for a home lab server build.
Table of contents
- Why XCP-ng for Home Labs?
- Building the XCP-ng Home Lab: A Cost-Effective Venture
- XCP-ng Home Lab Tips and Tricks
- Installation
- Creating a Storage Volume
- Thin Provisioning
- Installing Xen Orchestra (XOA)
- Running Xen Orchestra updates
- Creating ISO Storage
- Uploading an ISO
- Creating new virtual machines
- Installing XCP-ng Tools
- Cloning and copying virtual machines
- Viewing host metrics
- Frequently Asked Questions
- Can I run XCP-ng on my gaming PC?
- How does XCP-ng impact power consumption?
- Is there any benefit in using XCP-ng over VMware for test labs?
- I’ve seen the term “Xen Orchestra.” How does it relate to XCP-ng?
- I’m a beginner and just setting up my home lab. Any advice on managing the network?
- With XCP-ng, can I host my own web servers and media servers simultaneously?
- How secure is my data when using XCP-ng in a home lab setup?
- Wrapping up
- Other links you may like
Why XCP-ng for Home Labs?
XCP-ng is a great hypervisor for home labs that many may feel is a little closer to a VMware-like experience with the Xen Orchestra interface that allows fairly easy management of your XCP-ng environment.
It allows you to host a virtual machine or many VMs to test Windows, Linux (Ubuntu Server as an example), and other operating systems. XCP-ng offers flexibility and scalability with many enterprise features like cloning, built-in backups, snapshots, XO SAN, etc., and connects these network devices effectively.

Home labs are great for testing and having a sandbox environment and running test labs in a contained environment like XCP-ng offers peace of mind. You can experiment without affecting your main production equipment or compromising your internet access.
The software can run on various hardware, from a Raspberry Pi to a high-end server. If you’re starting a Mini PC (often built as a gaming PC) is a great way to have a “server” and low power bills with power efficiency and have fairly easy cable management. Home lab servers running on mini PCs allow you to run a full-blown home lab with multiple VMs, media servers, web servers, and more and have these services available at all times without spending thousands of dollars.
Building the XCP-ng Home Lab: A Cost-Effective Venture
Beyond the initial hardware investment, considerations like power consumption come into play. You can monitor and manage your power bill effectively depending on the server and the number of virtual machines you run. But again, choosing efficient hardware is key to not having exorbitant electricity costs.
You can also download XCP-ng for free, install it on your home lab hardware in a few minutes, and start creating your first virtual machines.
Download XCP-ng from here: XCP-ng – XenServer Based, Community Powered.
With XCP-ng, you can always add more virtual machines, integrate additional network systems, add additional hosts, etc.
XCP-ng Home Lab Tips and Tricks
Let’s go through a few XCP-ng home lab tips and tricks to start building your home lab server.
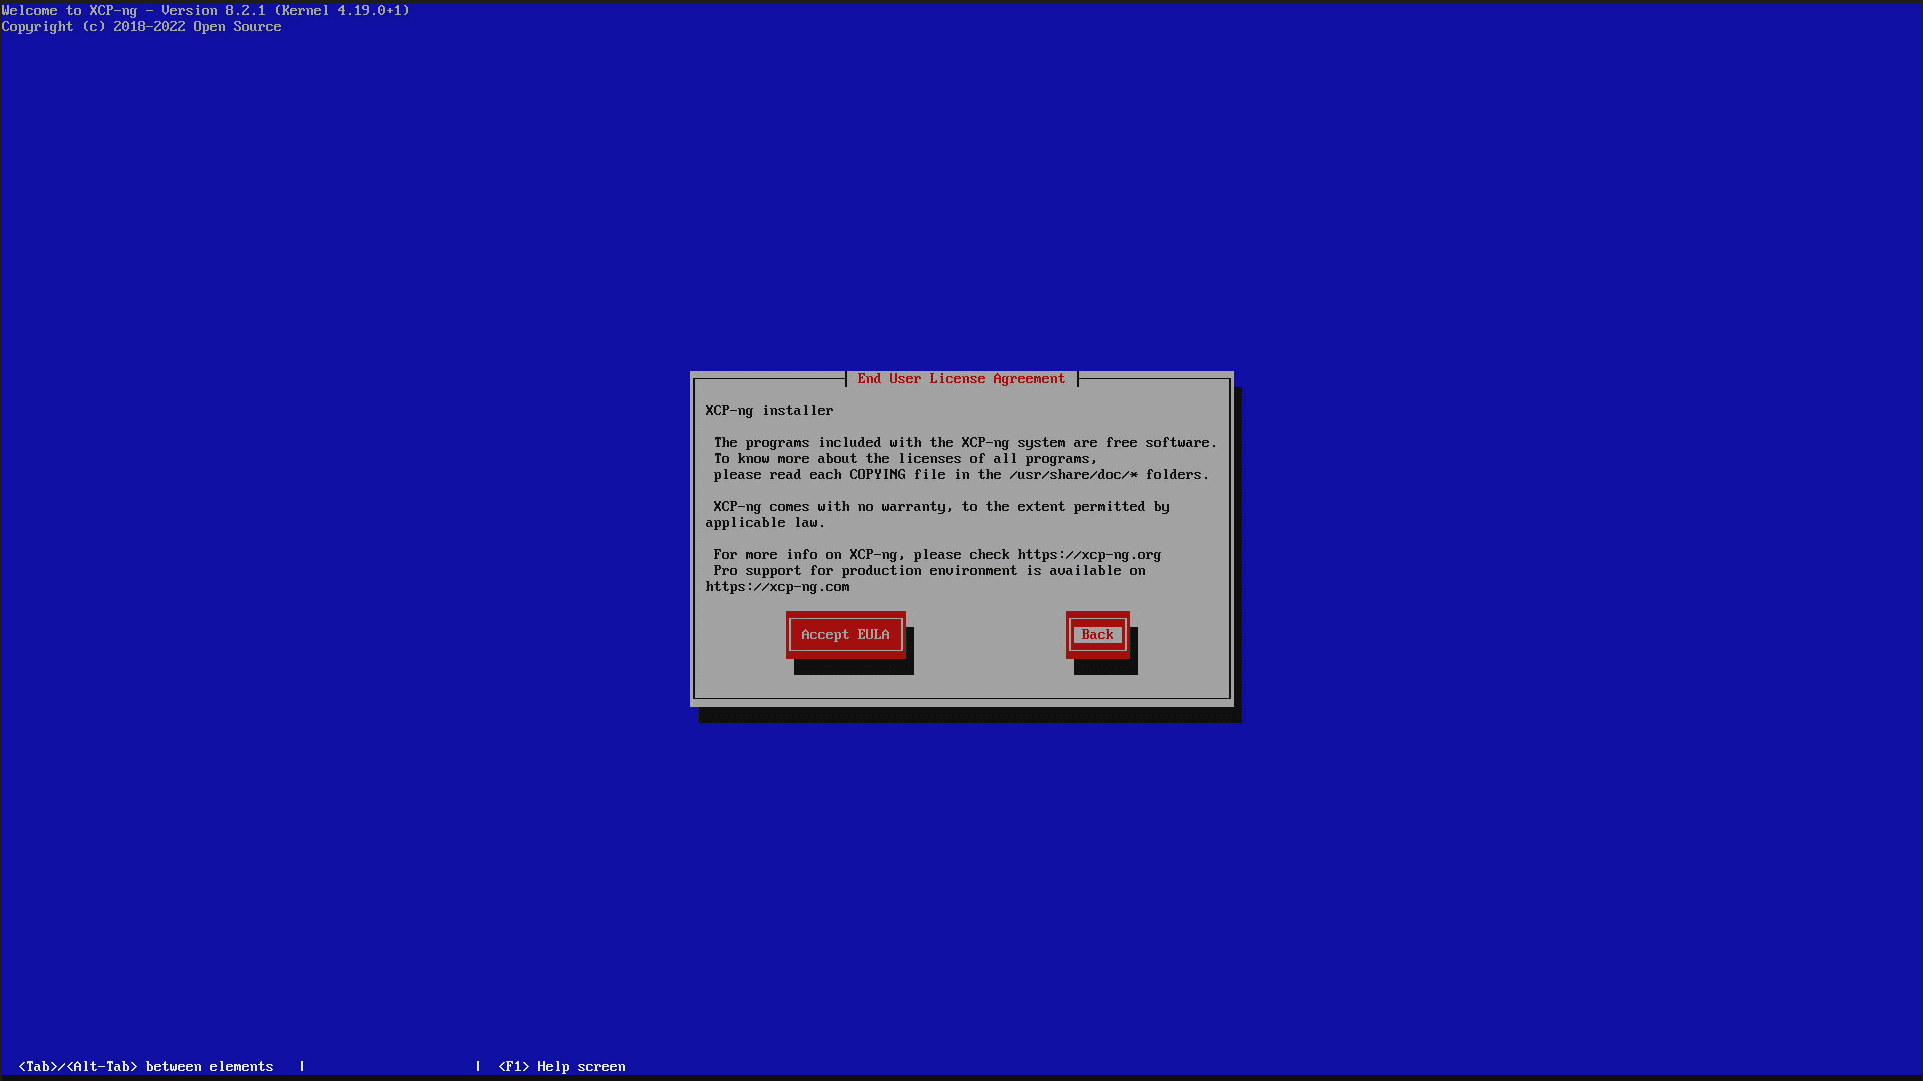
Installation
Start with downloading the latest stable XCP-ng release. Once you’ve got it on a USB drive, booting up your server and following the instructions will set the core system in place.
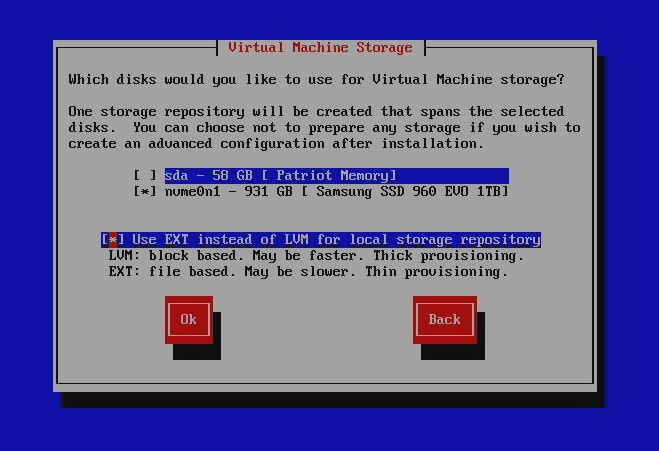
Here you see that I have an NVMe drive available for installation.

One of the choices you will be able to make is how you wat to setup your storage. You can choose between LVM and EXT. Note with EXT you can do thin provisioning but it is a little slower.

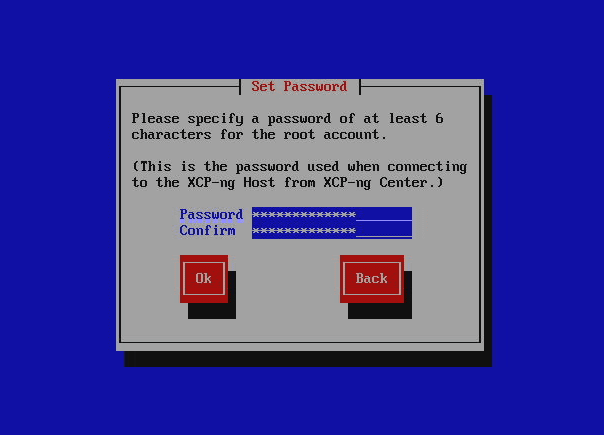
Setting up your XCP-ng password.
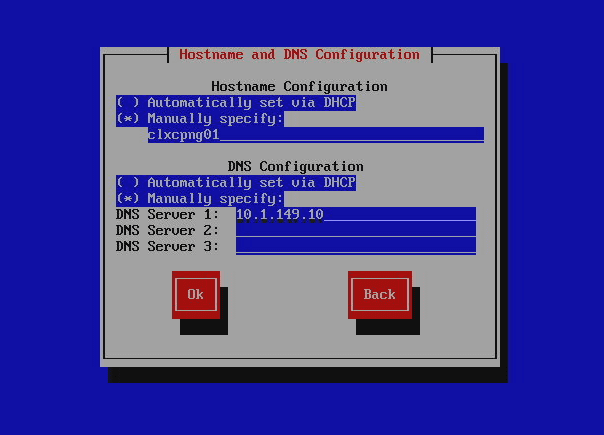
The network configuration screen.
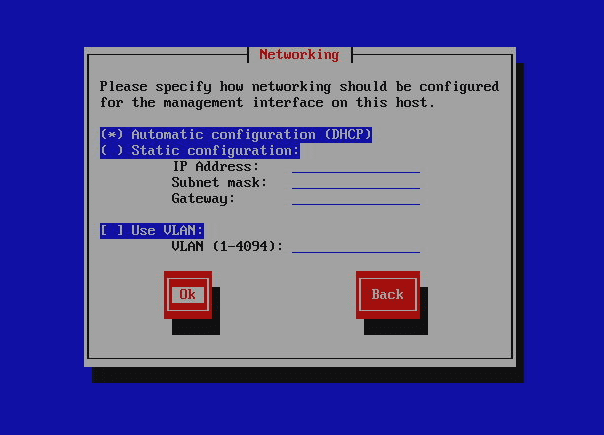
Setting XCP-ng to a static IP address.
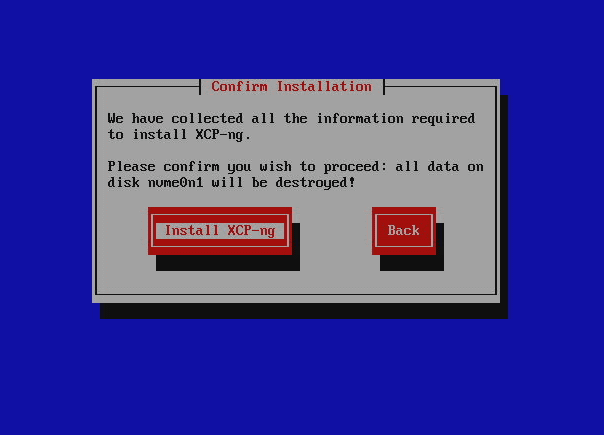
At the end of the installation and ready to install (Note I haven’t shown every single screen to the last screen but the installation is very intuitive).
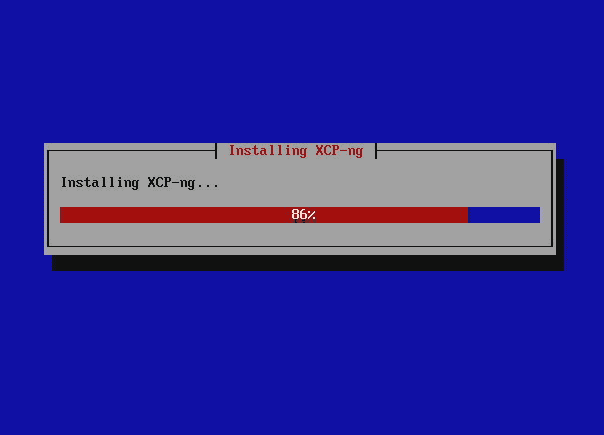
The installation begins.
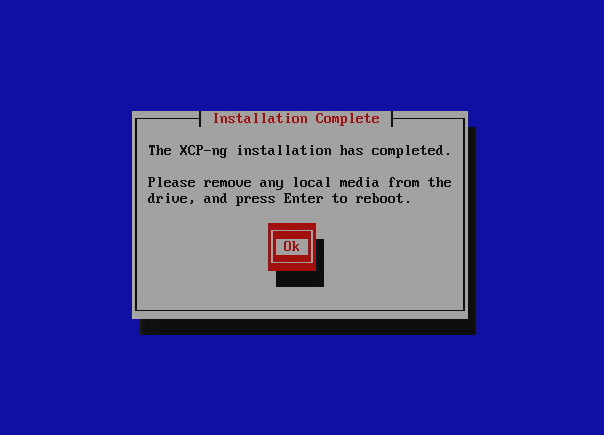
Remove the media and reboot the server to complete the installation.
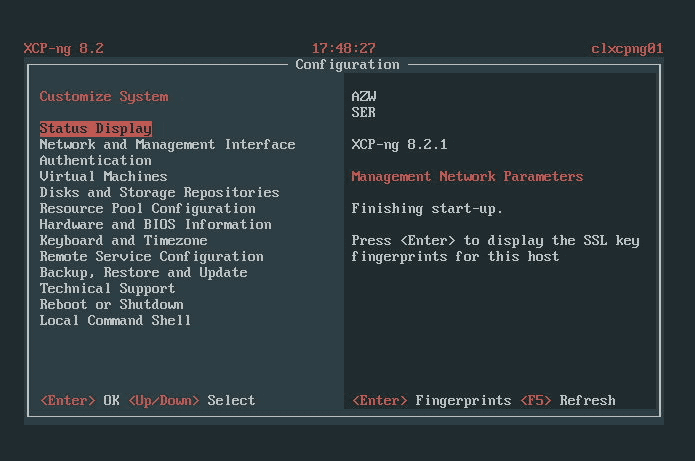
Below is a look at the console of the XCP-ng server.
Creating a Storage Volume
After XCP-ng’s installation, creating a storage volume becomes crucial. Whether you’re storing data for VMs or setting up a media server, ensure you’ve got ample storage.
Thin Provisioning
To maximize storage utilization, thin provisioning is the key. It ensures that virtual machines use only the storage they need, optimizing your resources. As mentioned earlier, you will want to use EXT for thin provisioning.
Installing Xen Orchestra (XOA)
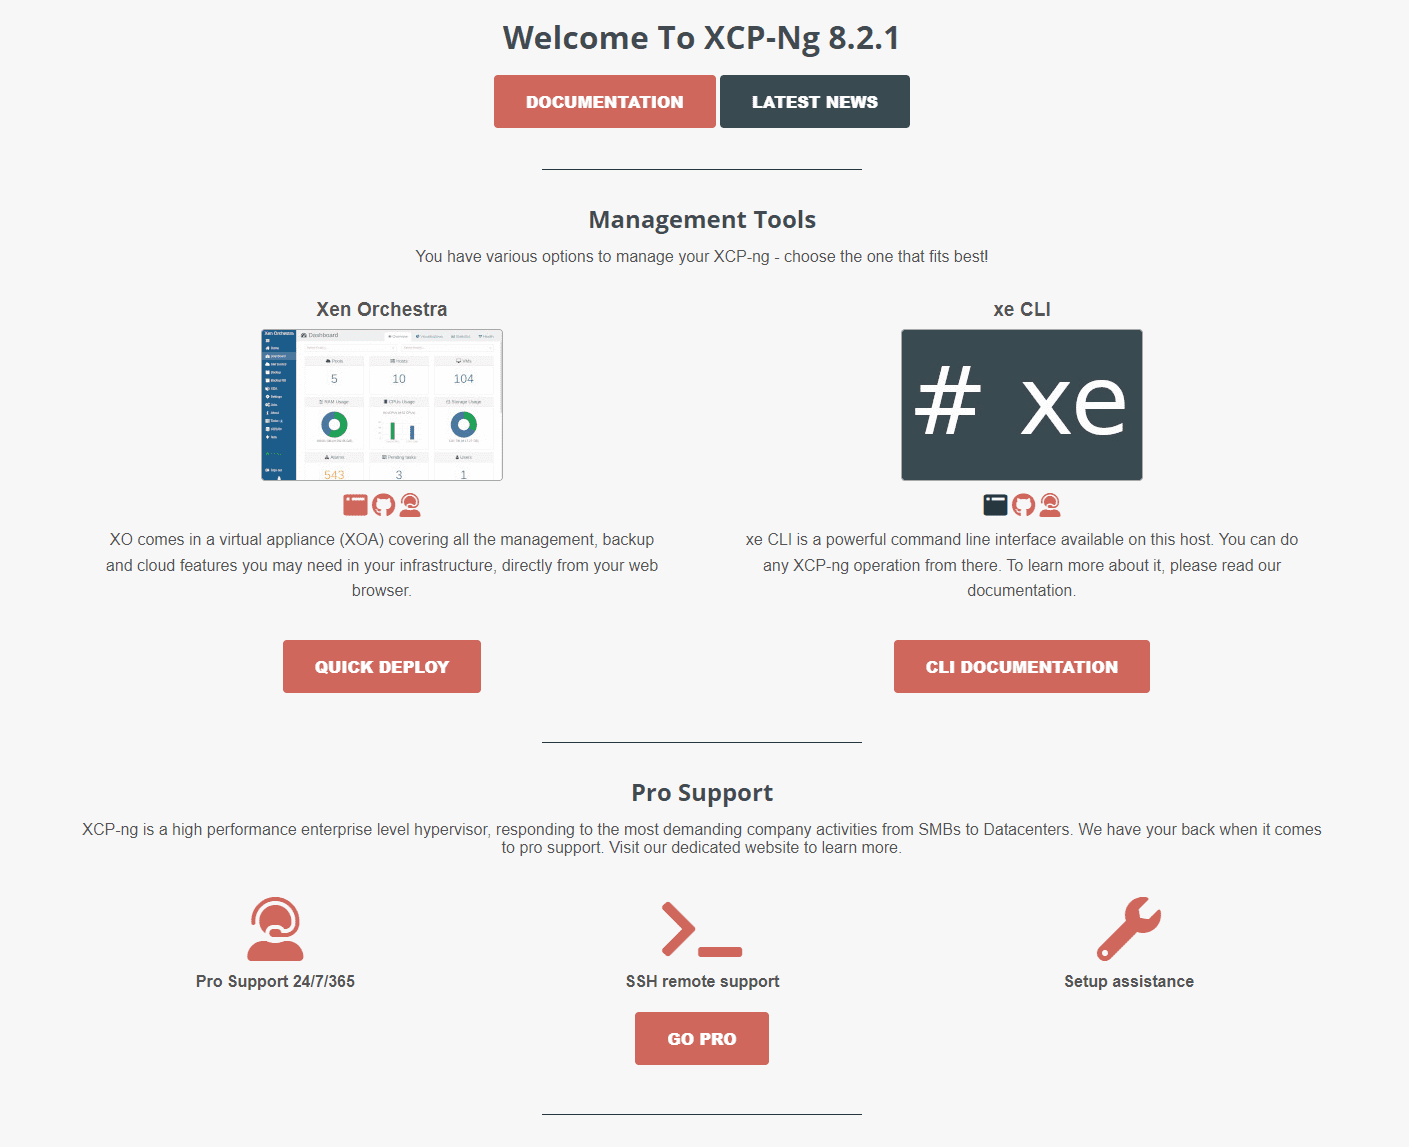
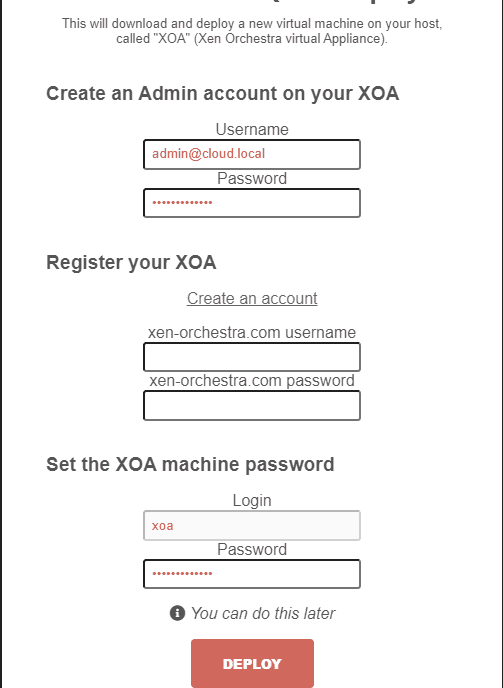
Xen Orchestra is crucial for managing your XCP-ng setup. The web-based interface provides an easy way to control, monitor, and test your VMs and servers. To install Xen Orchestra, the process is straightforward. Browse to the IP or FQDN of your XCP-ng server and pull up the page. You will see the option for Quick Deploy.
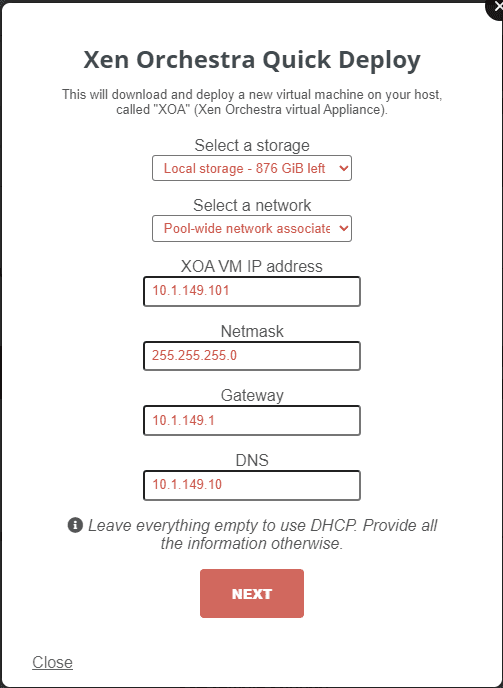
On the Quick Deploy page, set the configuration for the XO VM, including the storage and IP address information.
Set the user credentials.
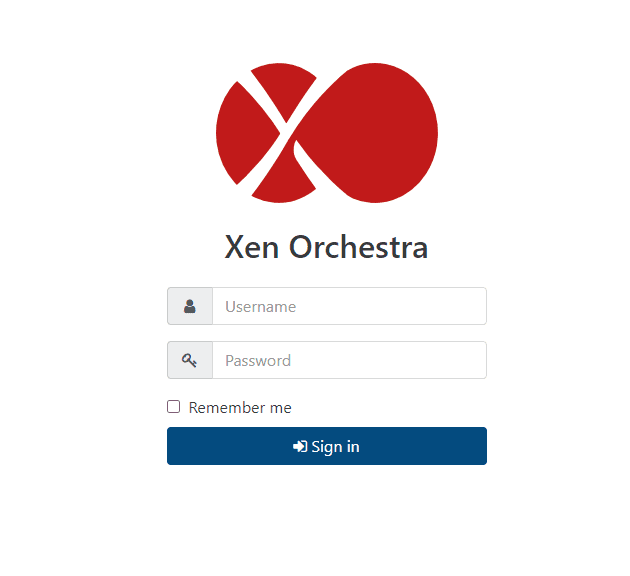
After XO is deployed, you can browse to the login screen.
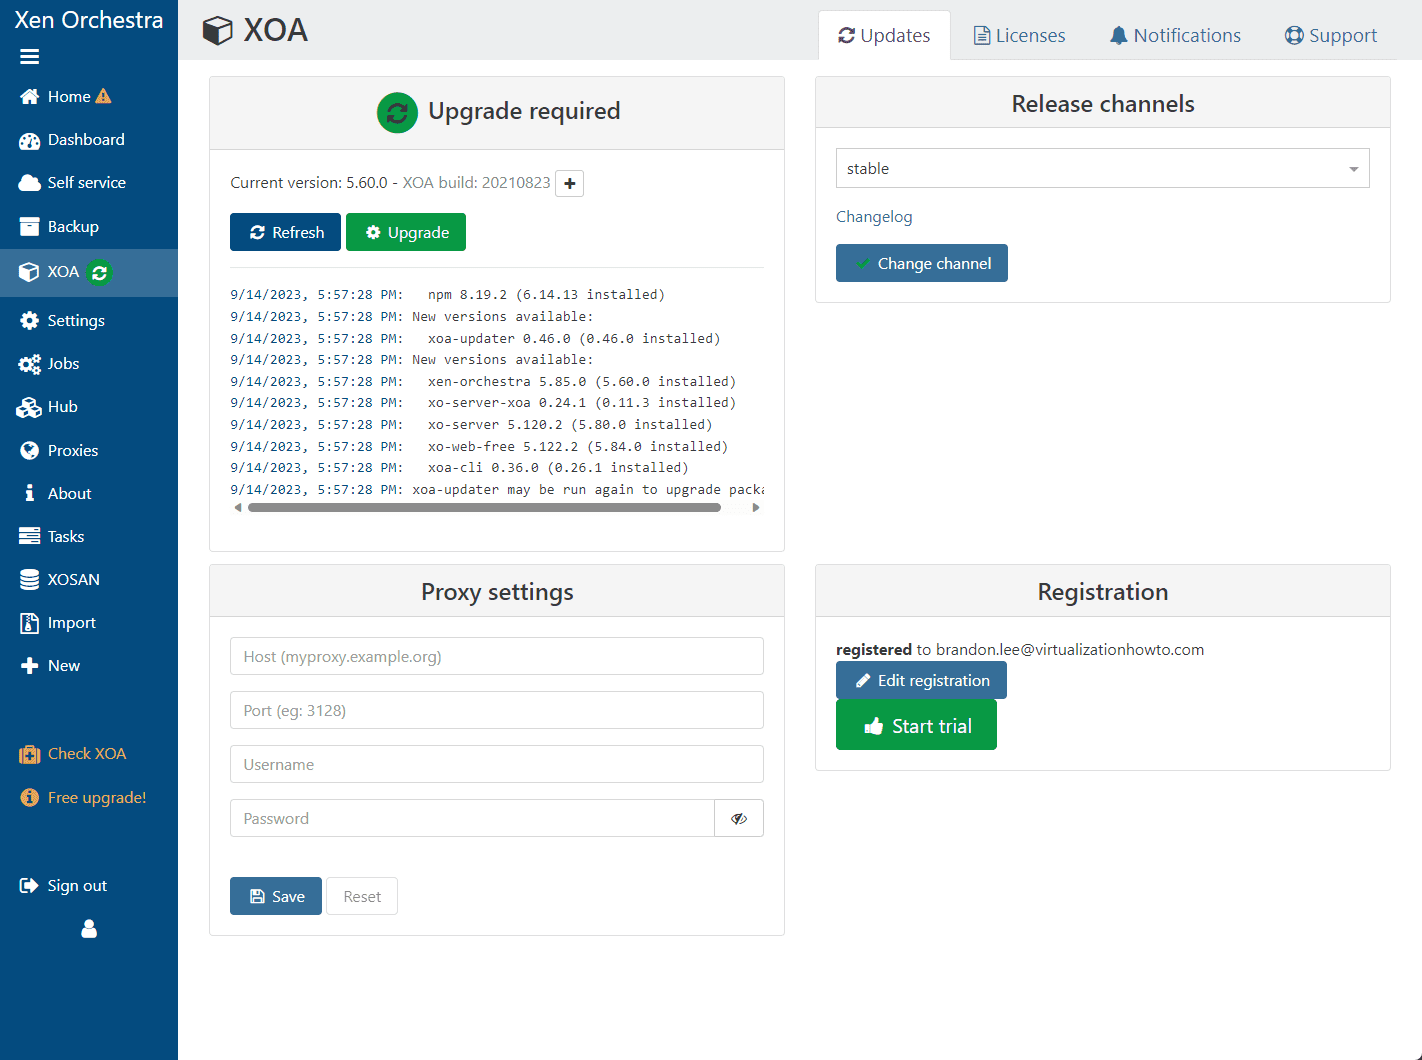
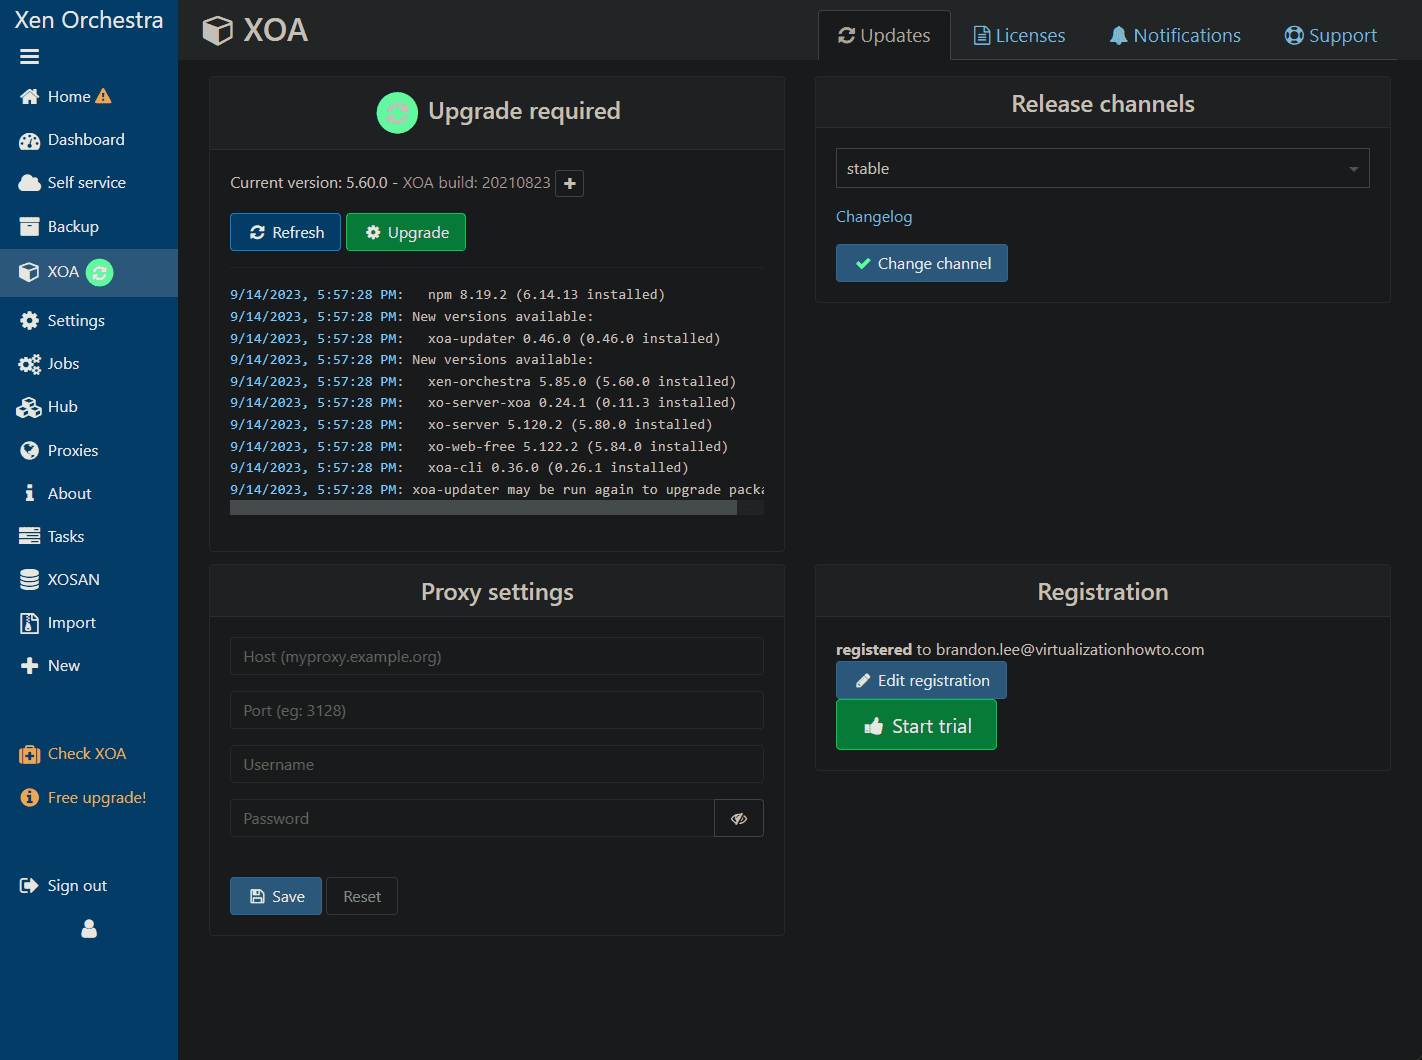
Running Xen Orchestra updates
Now we can login to XO and run any updates that are available. After logging into XO, you can navigate to the XOA screen and check for updates. Most likely, it will prompt you for this proactively. ***Note*** you do need to “register” with Xen orchestra to do this. Just follow the prompts to register and update.
While there isn’t a native dark mode, there are several plugins out in the store that will allow you to effectively be able to do this.
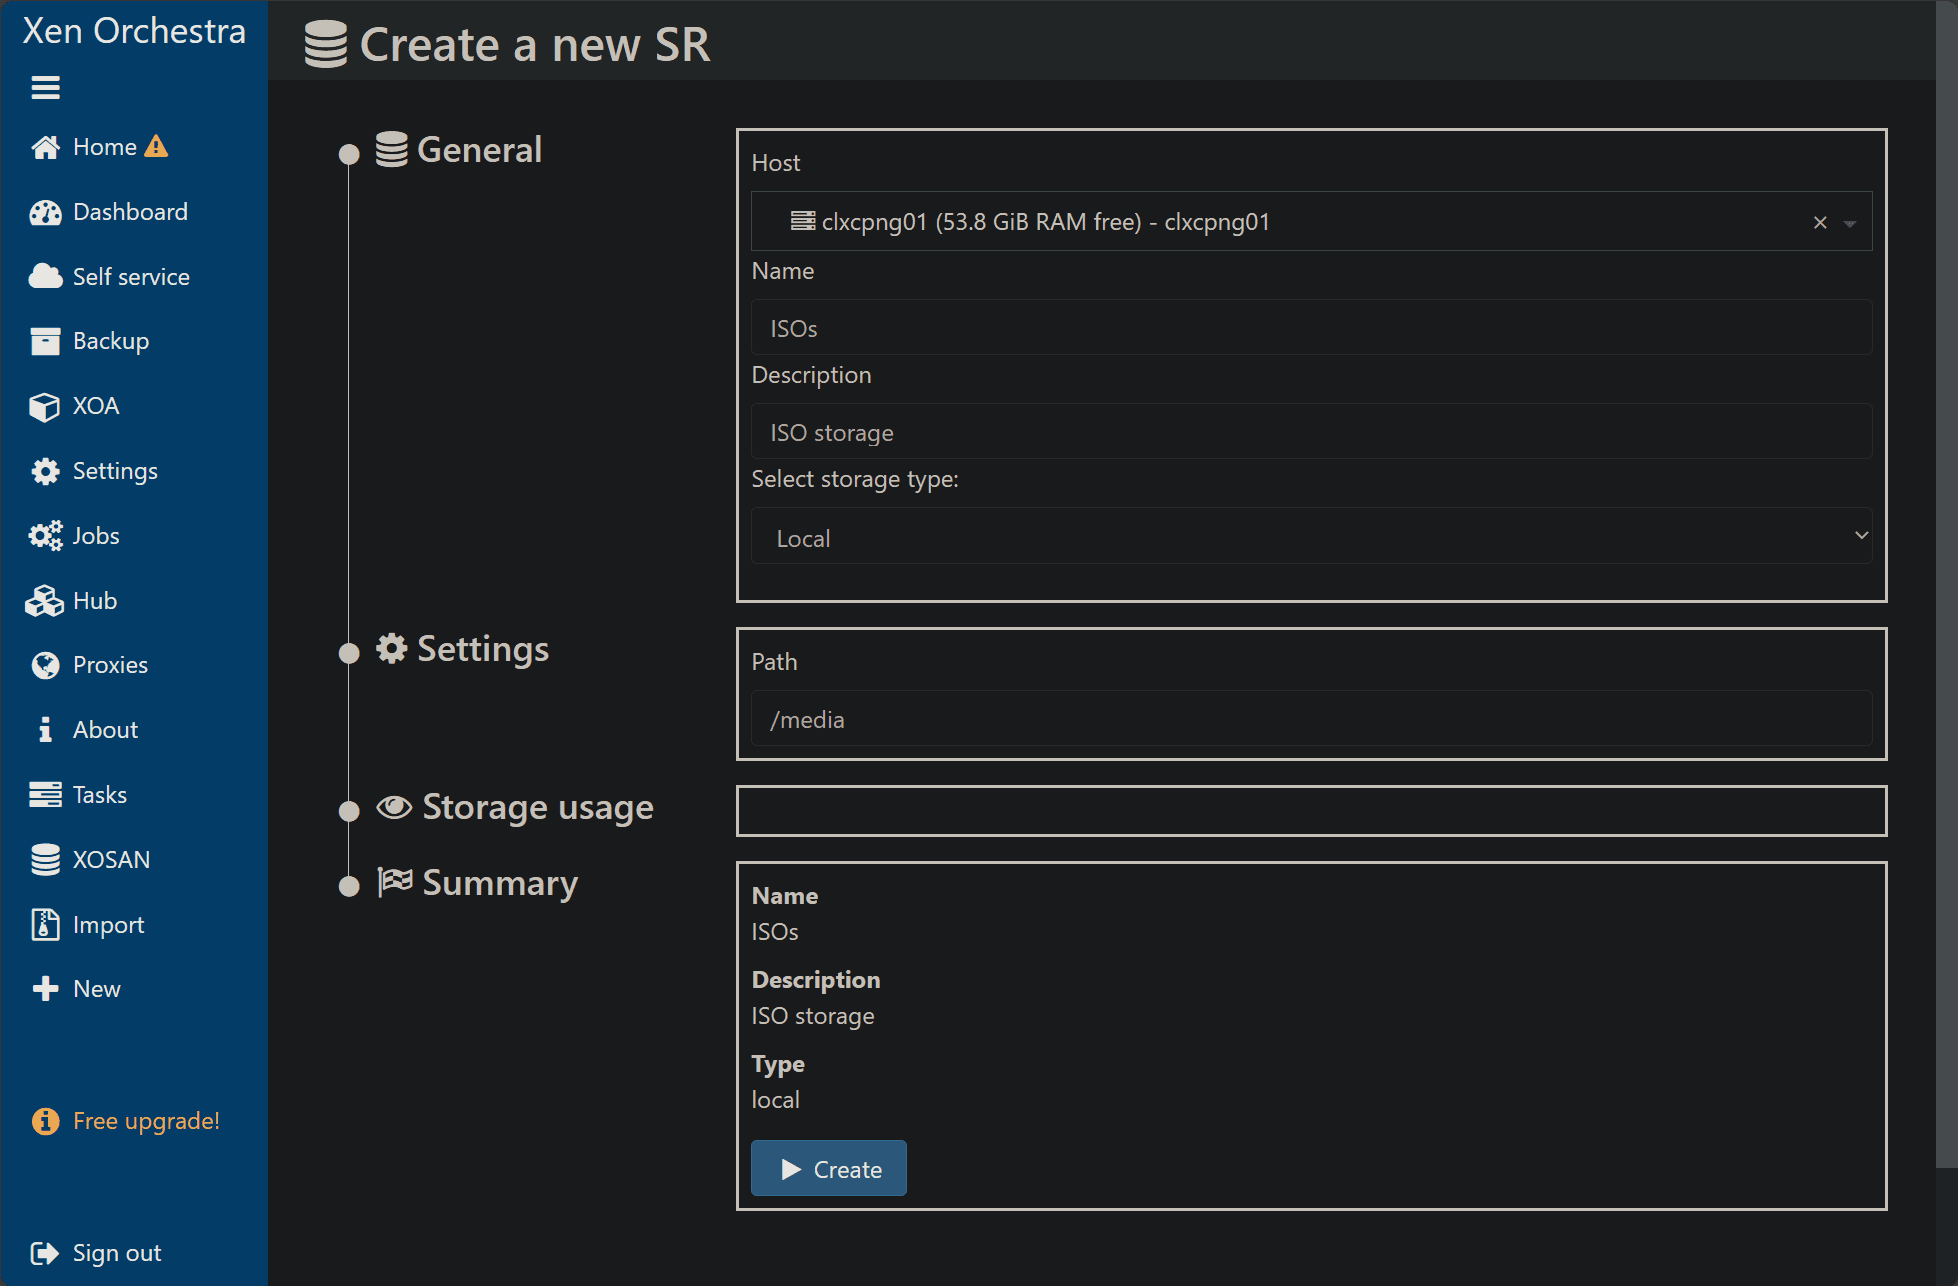
Creating ISO Storage
Often, you’d need to upload software or OS packages in the form of ISOs. Creating a dedicated storage for this streamlines the process.
Uploading an ISO
With storage in place, uploading ISOs, whether it’s for Linux, Windows, or other systems, becomes a straightforward task.
Drag and drop your ISO in the box.
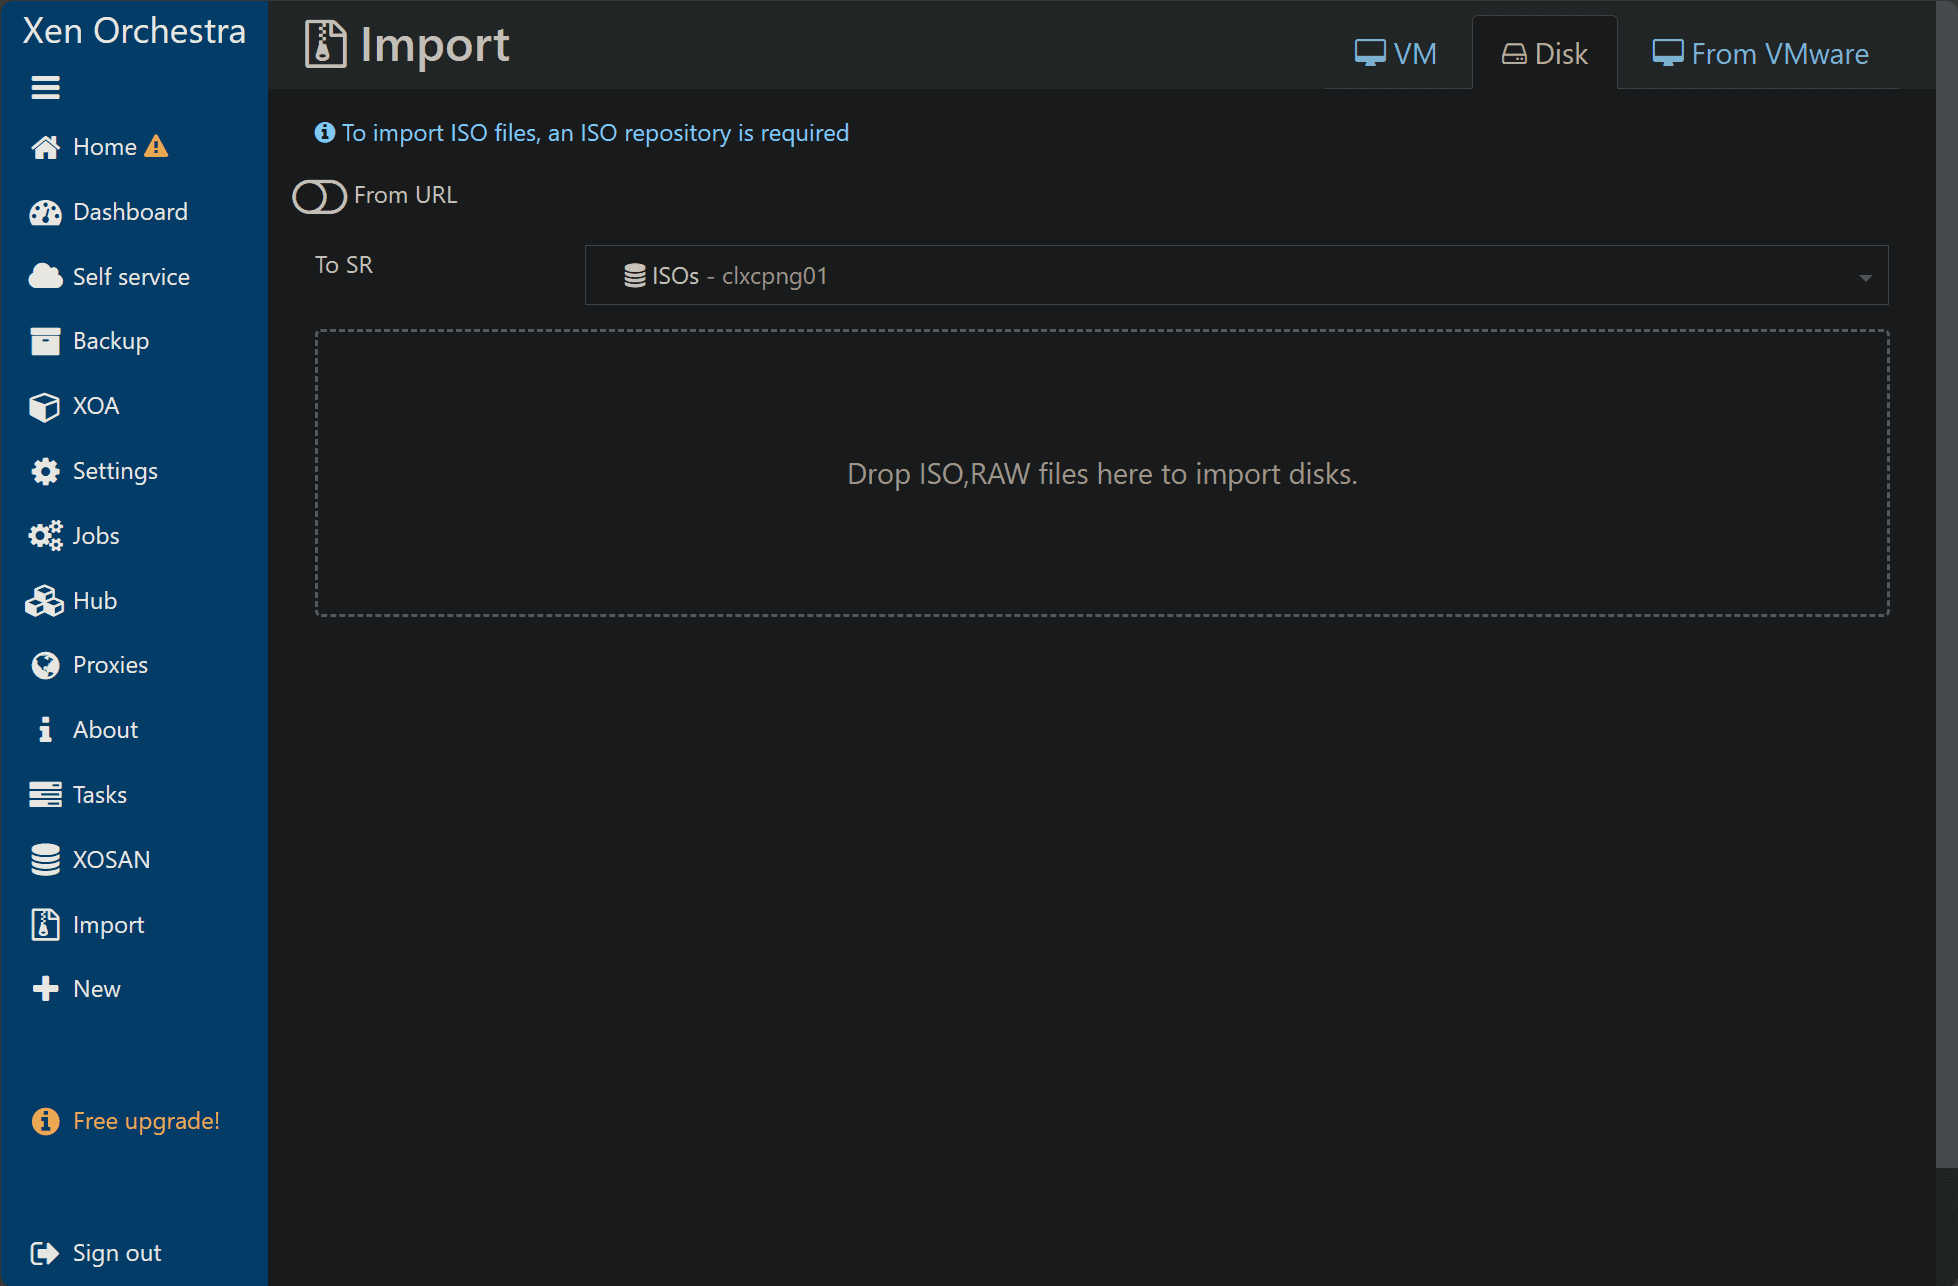
You will see the ISO ready to import. Click the Import button.

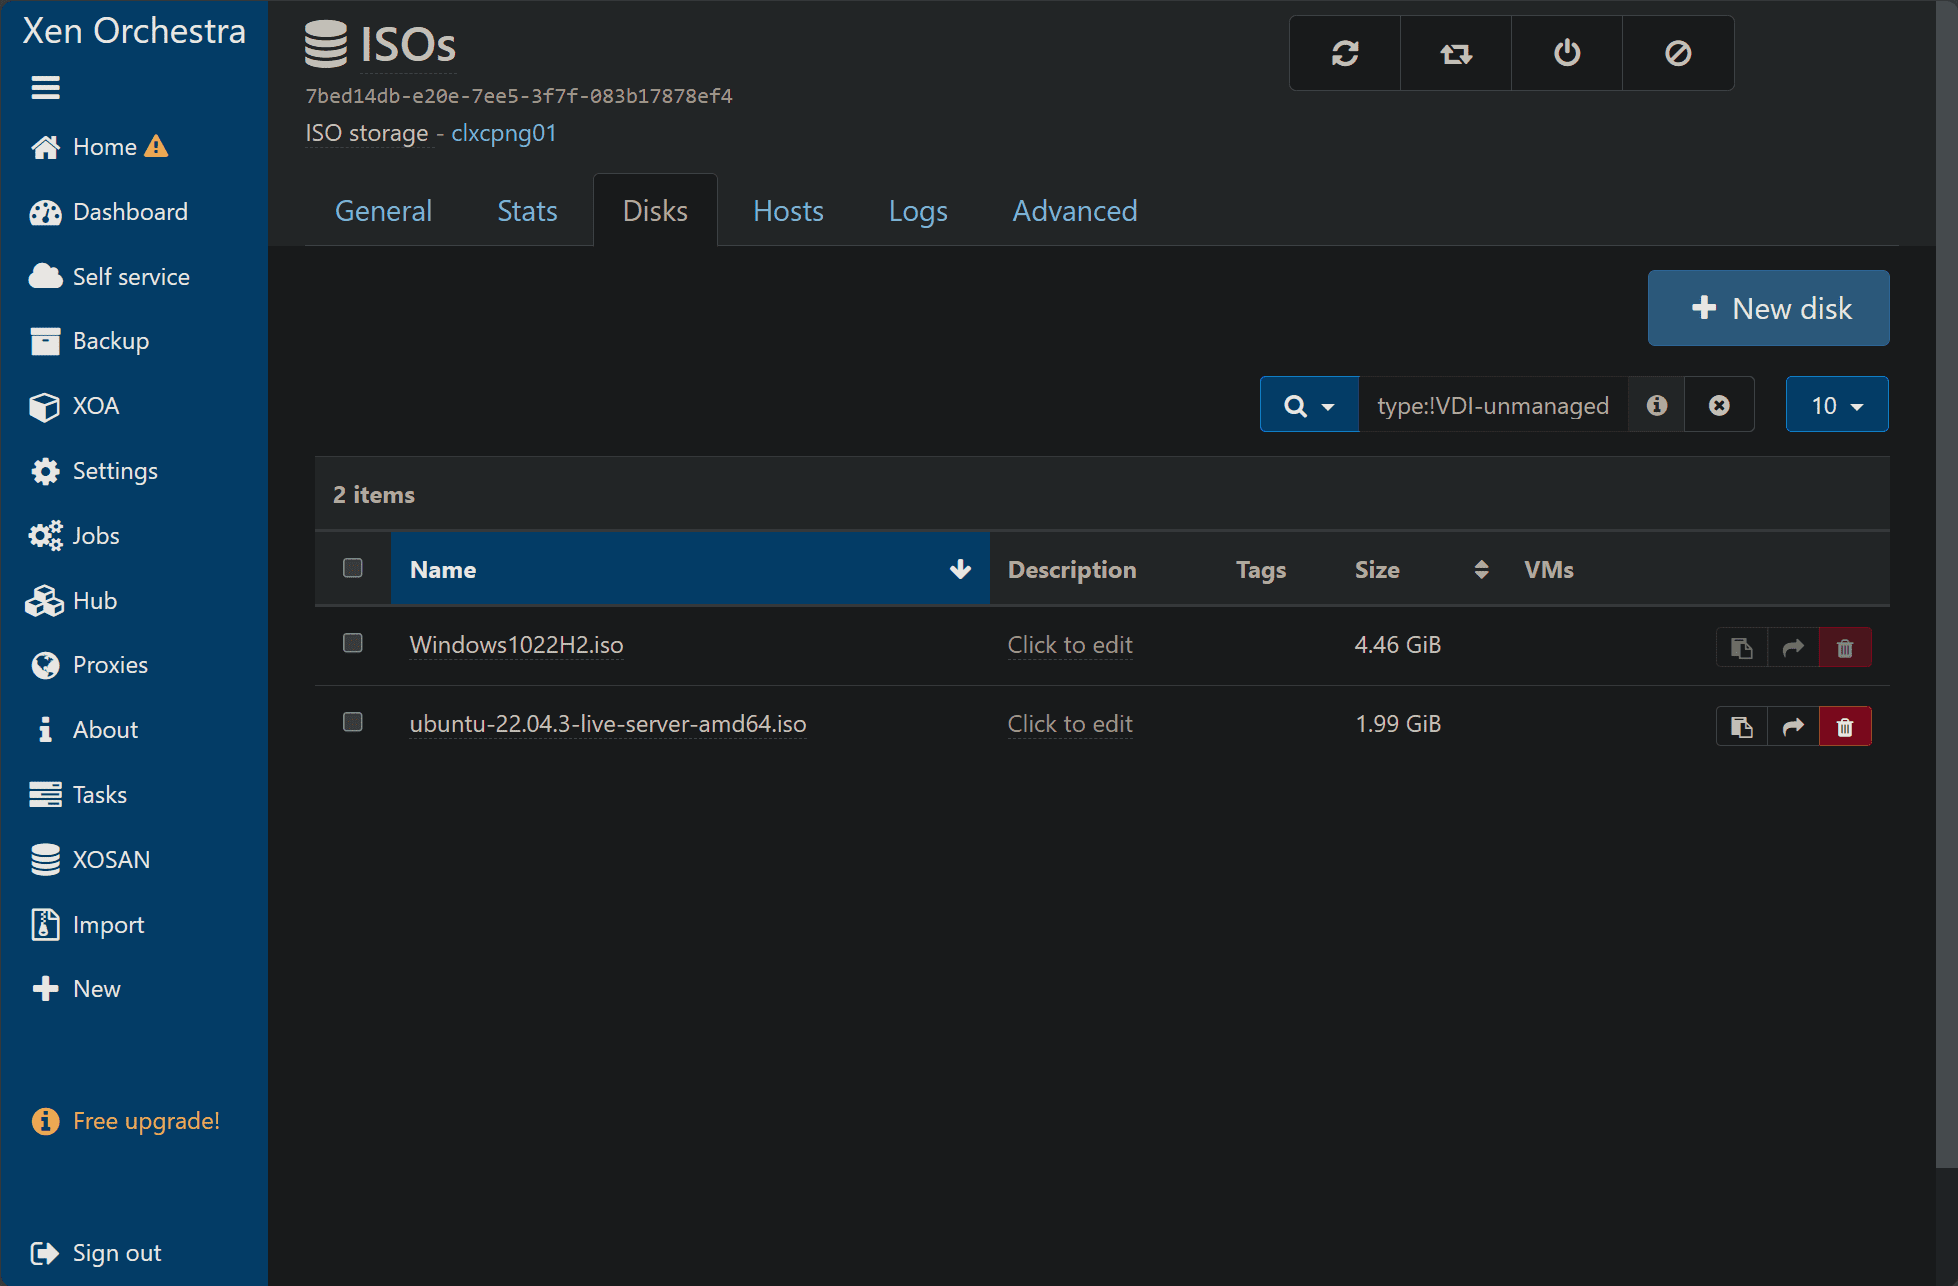
The ISOs are now uploaded to the ISOs repository.
Creating new virtual machines
Below we are creating a new Windows 10 virtual machine.

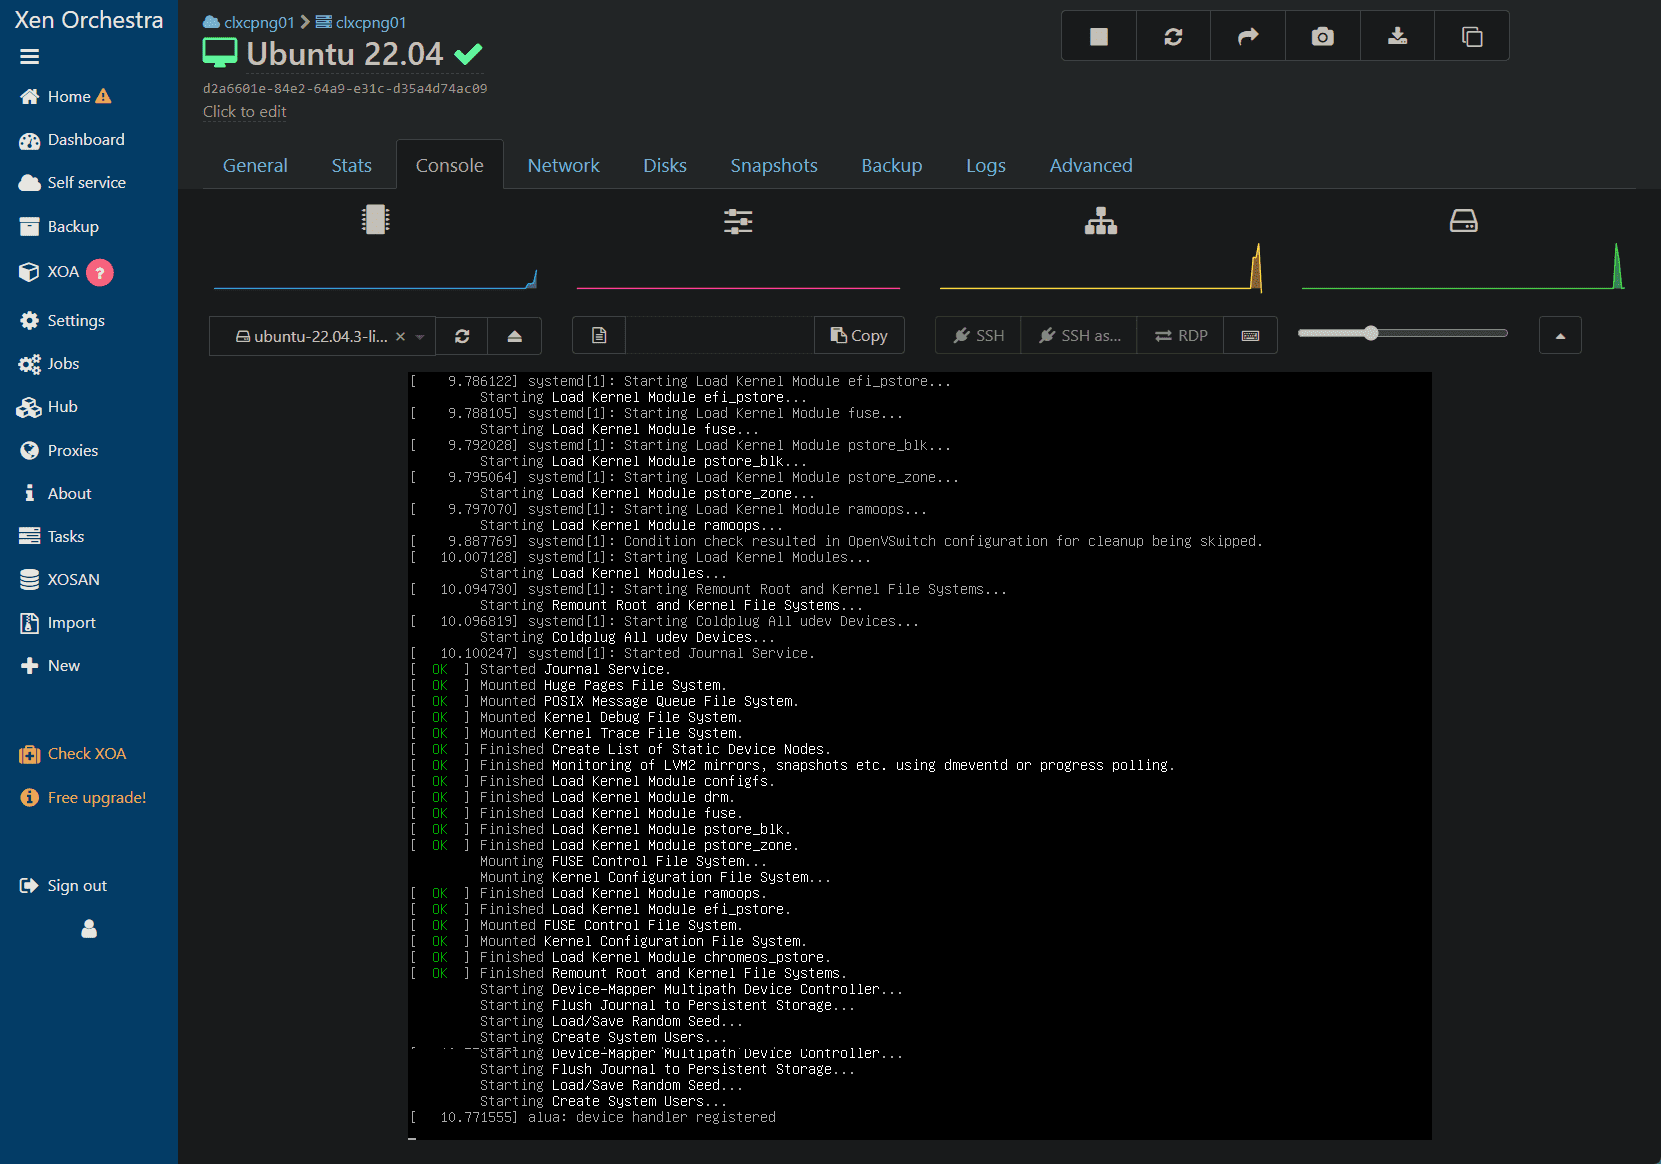
LInux VMs are equally as easy. We are using the Ubuntu 22.04 ISO uploaded.
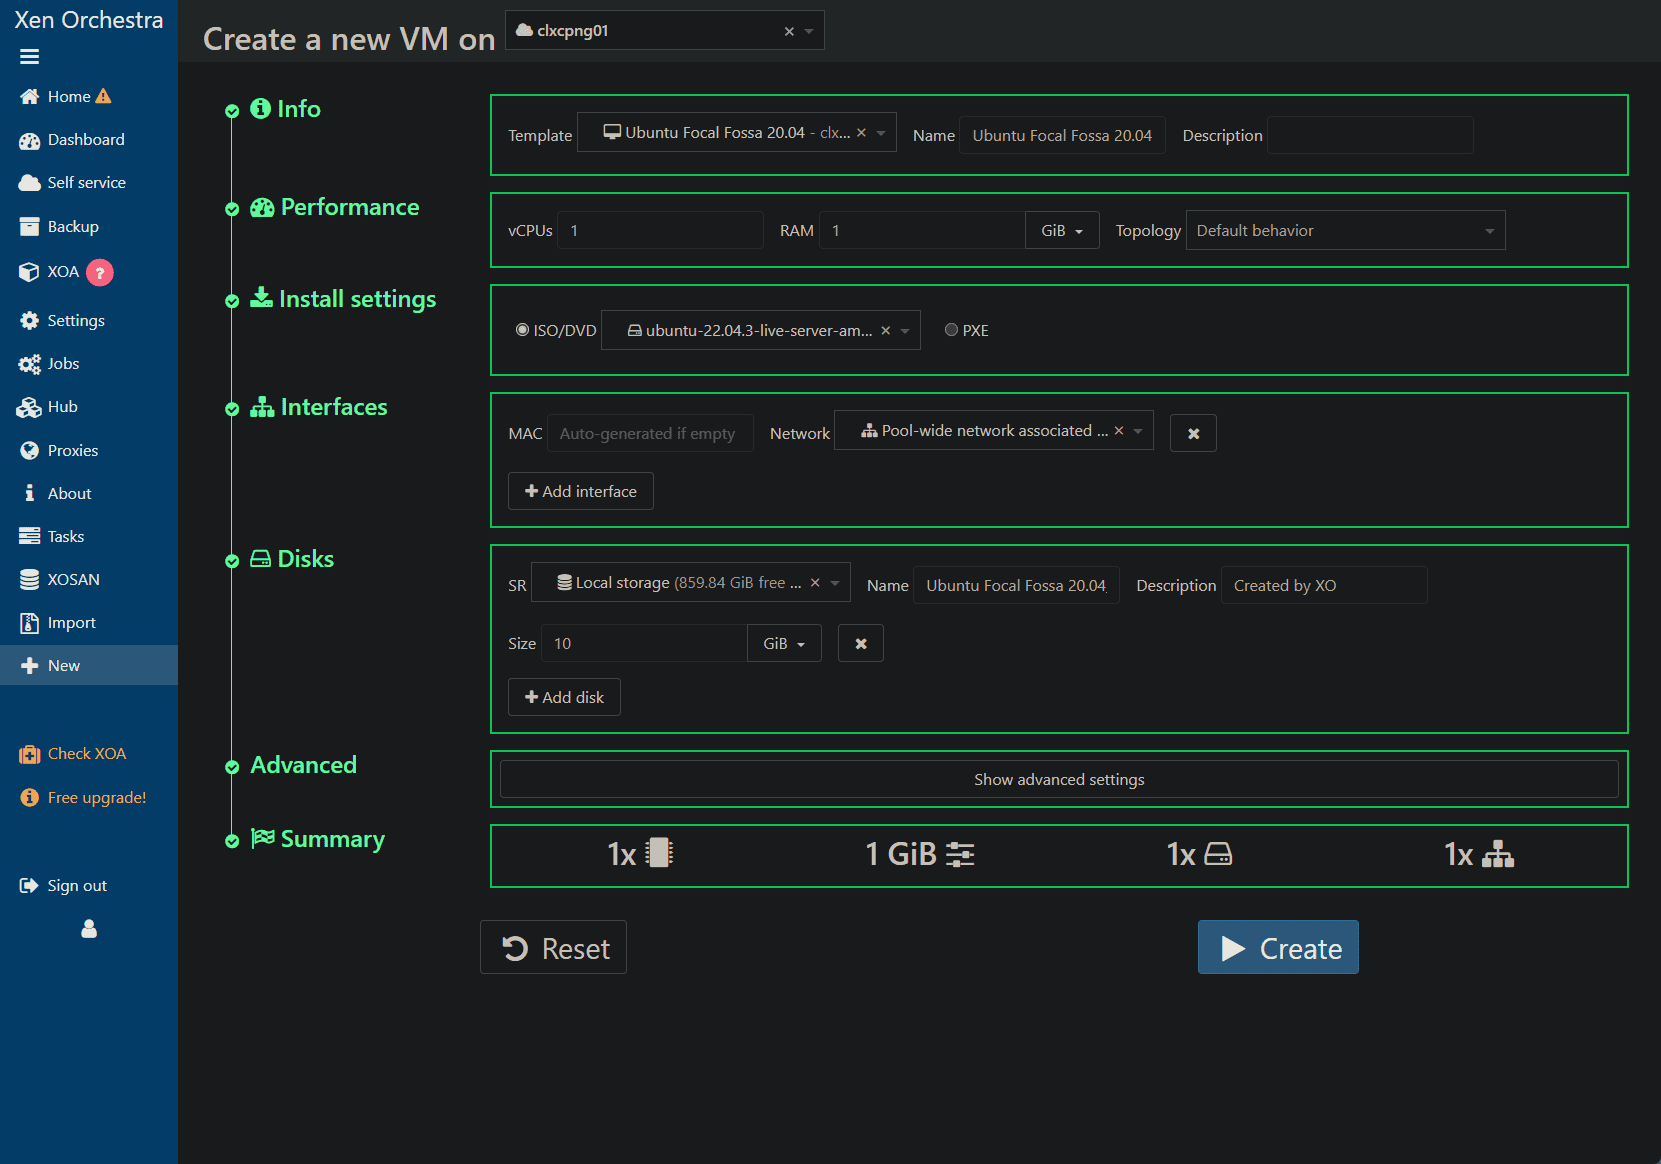
Installing Ubuntu Server.
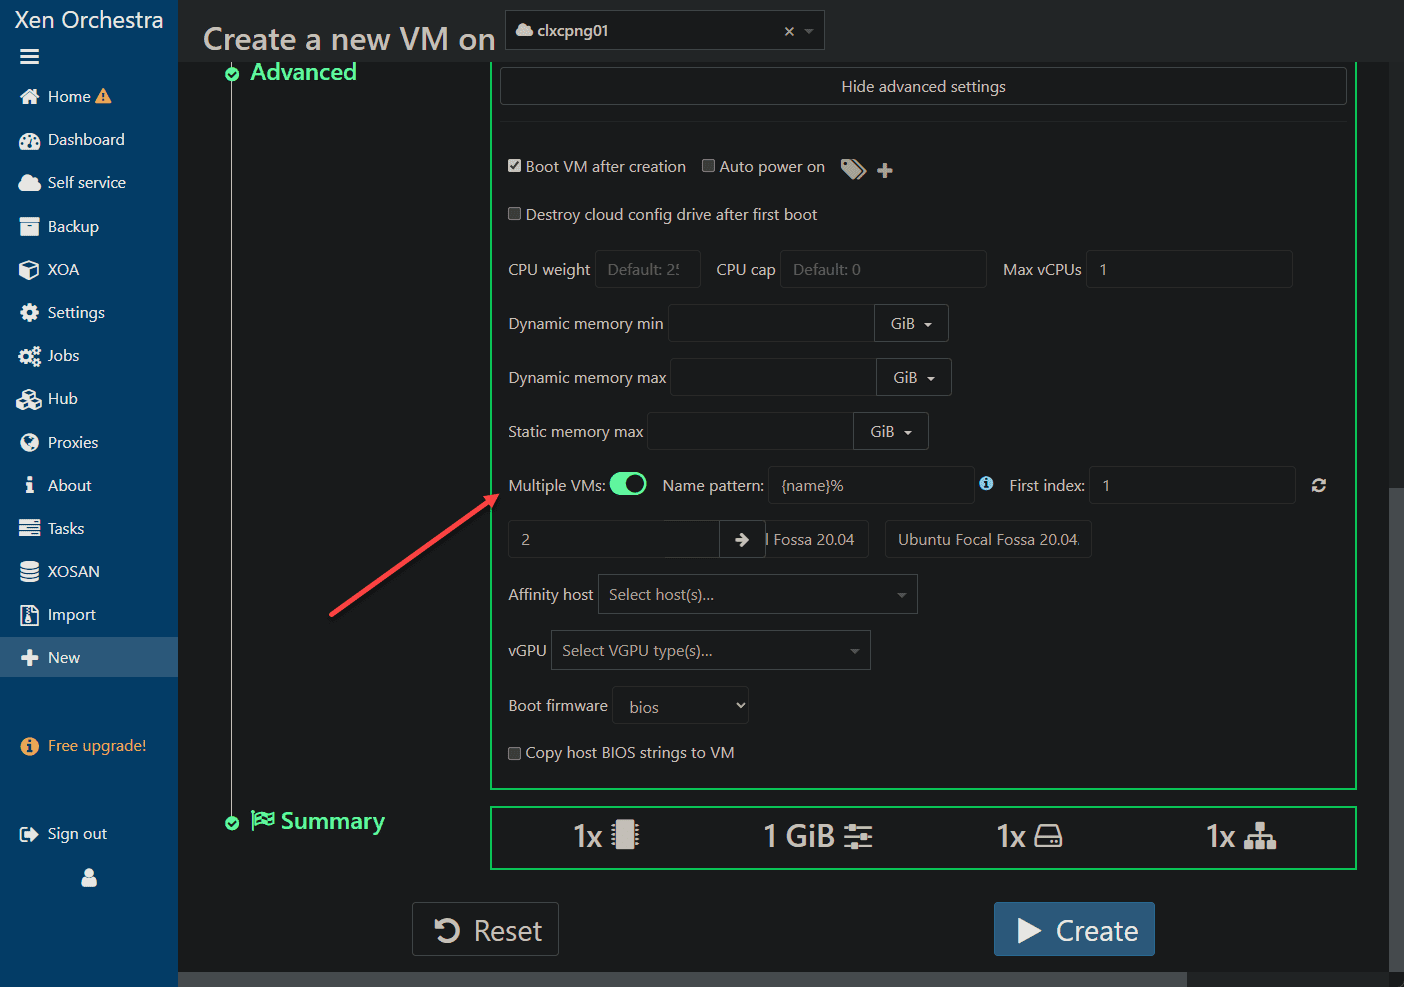
XCP-ng also has some interesting advanced options when creating new virtual machines. It has the options built into the GUI to create multiple VMs during the new VM creation process.
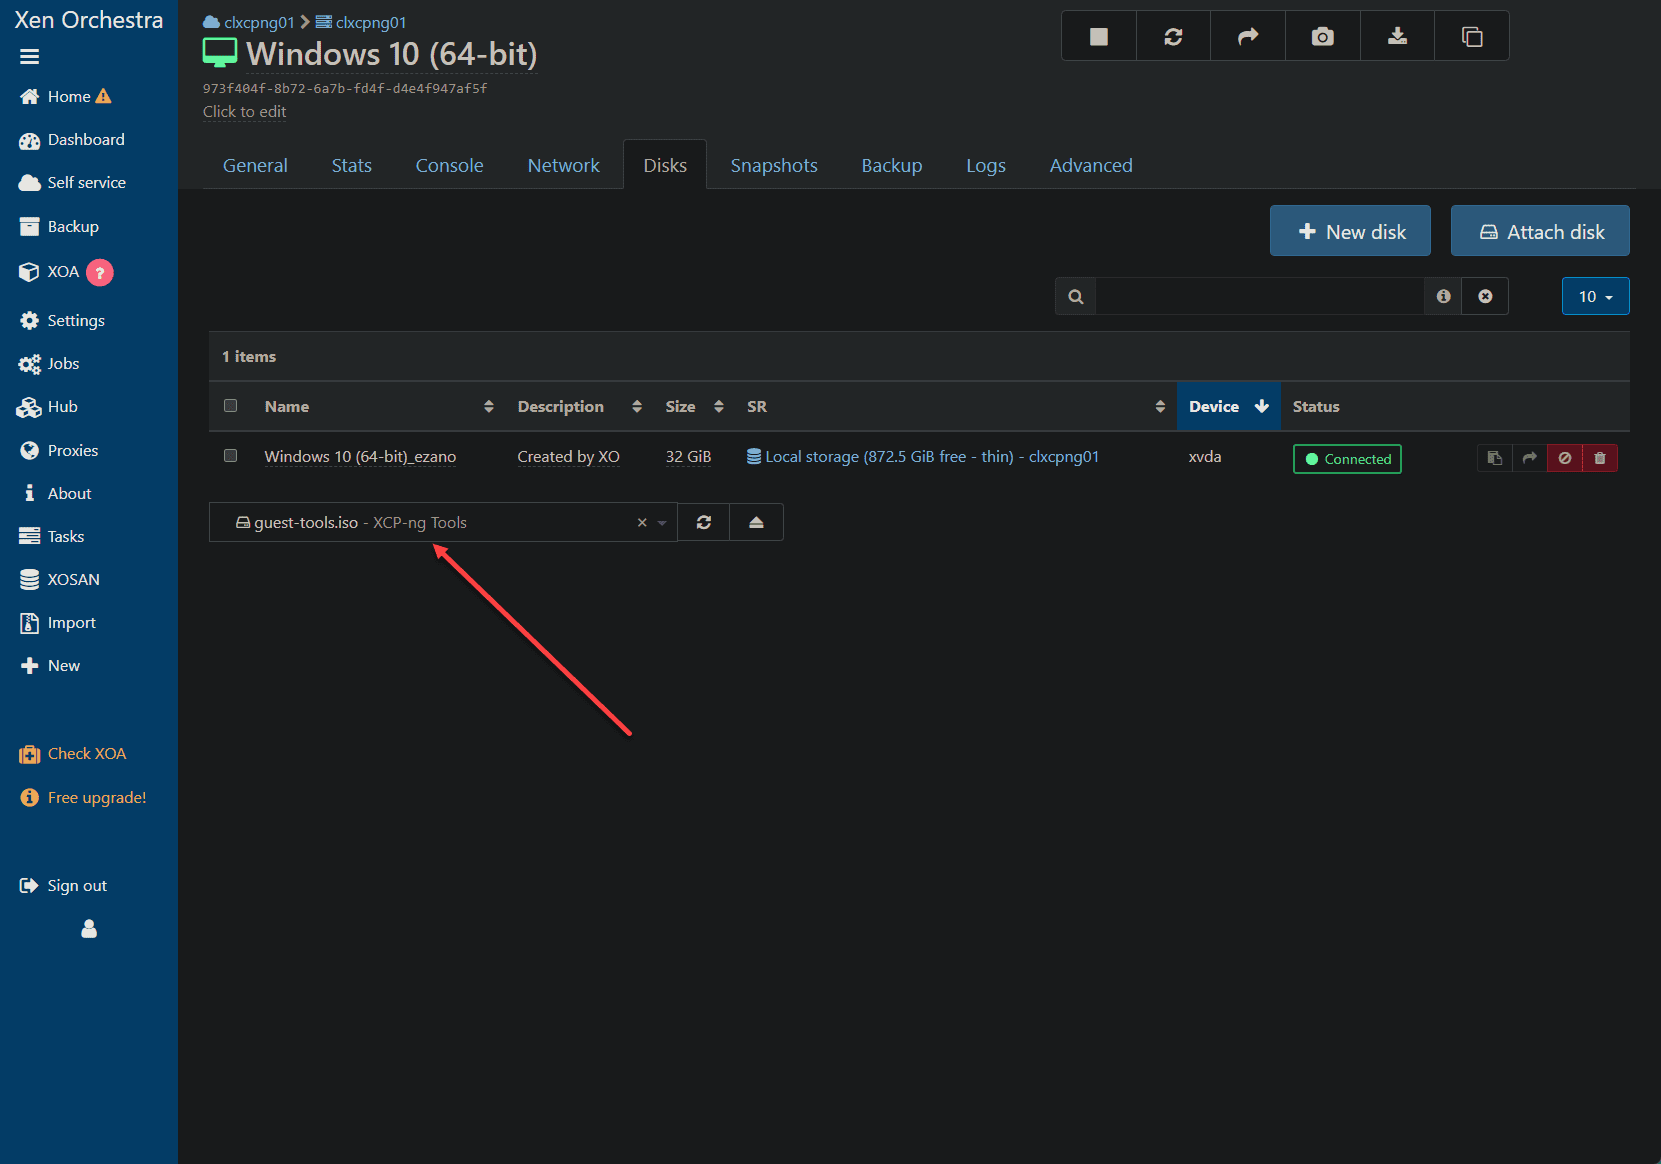
Installing XCP-ng Tools
These tools act as a bridge, enhancing the interaction between the host (XCP-ng) and the VMs. They play a critical role in ensuring smooth operations.
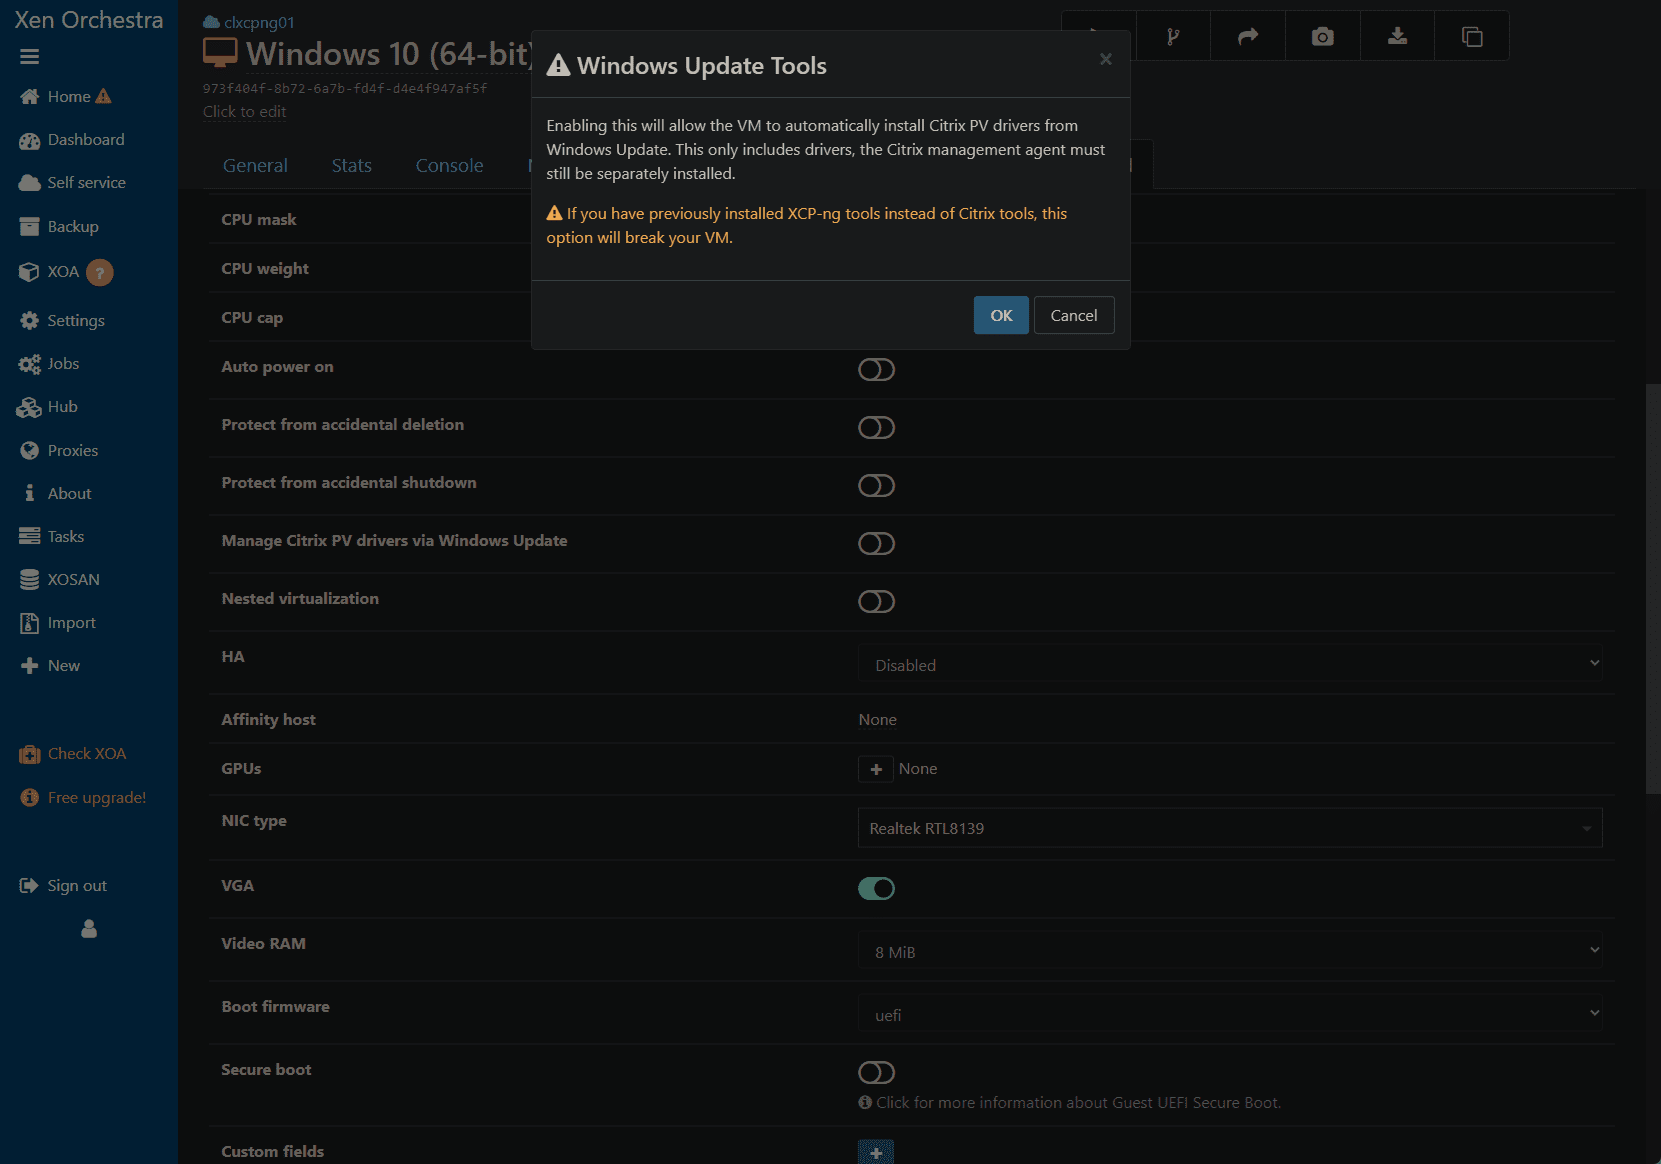
Flag on the option Manage Citrix PV drivers via Windows Update. This is how you install the drivers in Windows.
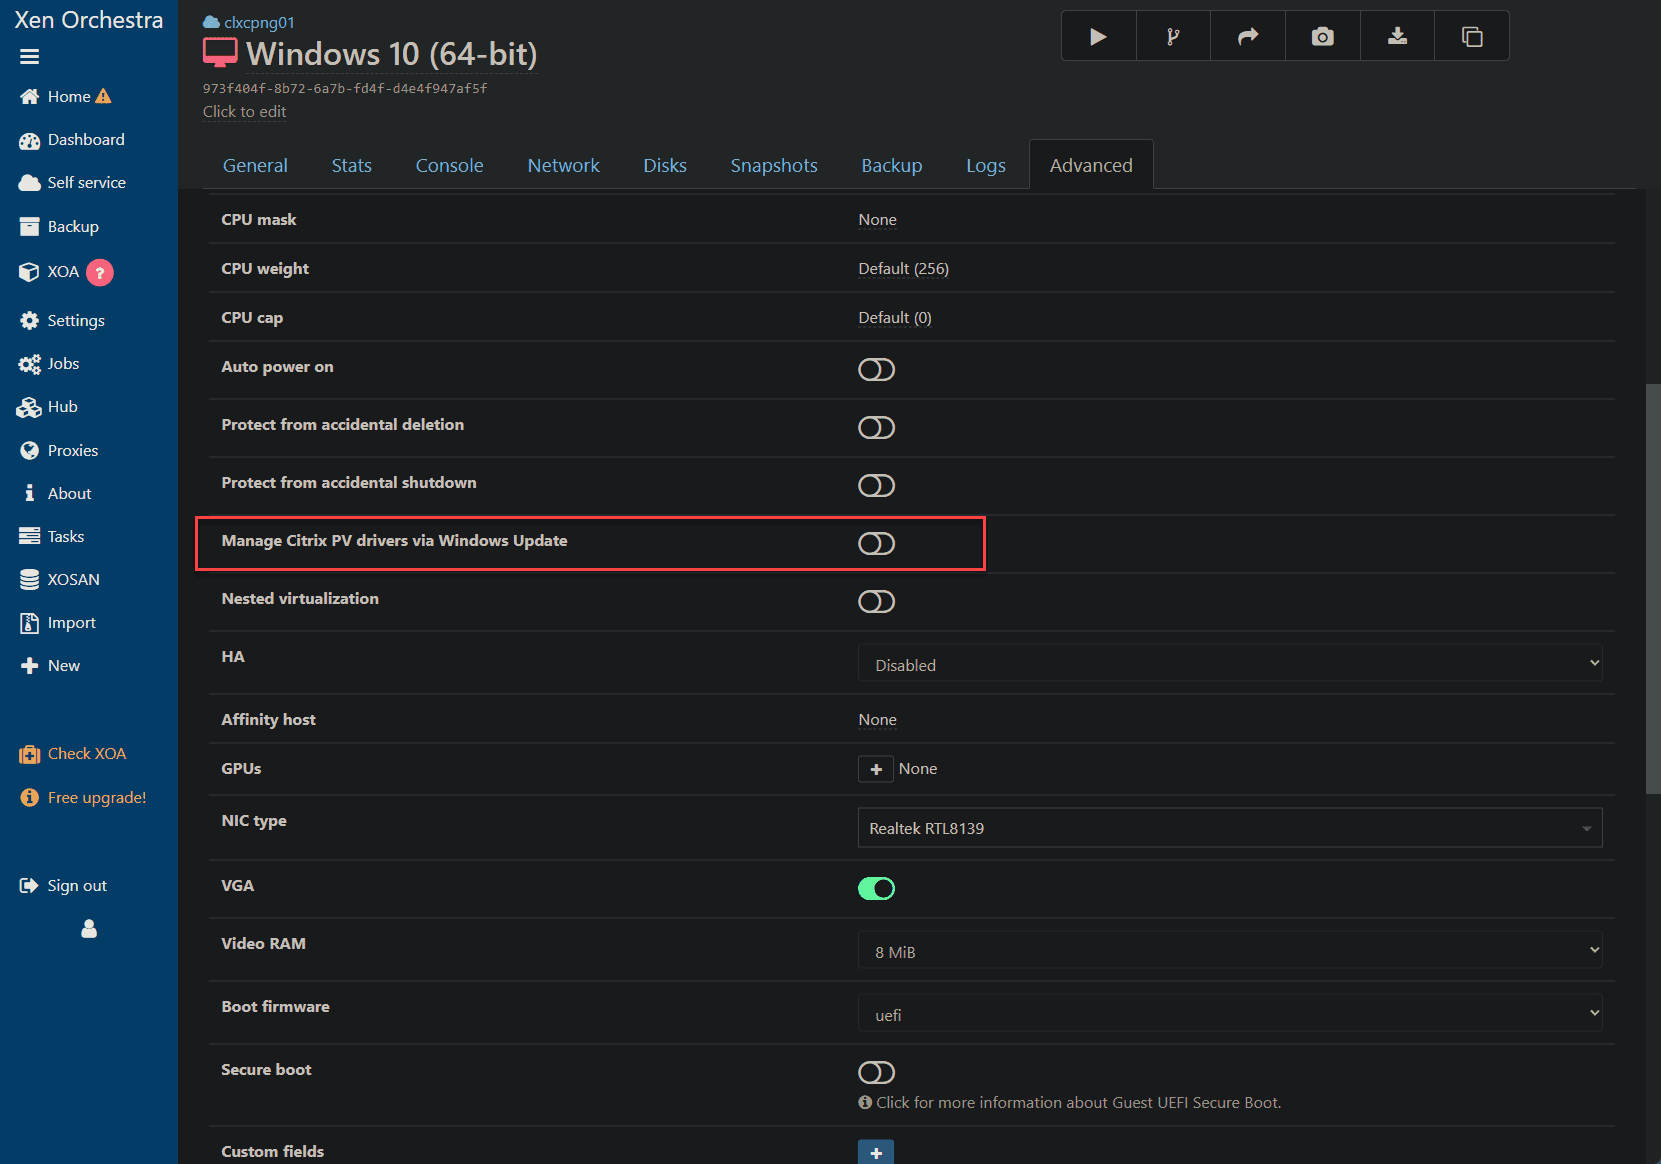
You will see the info dialog box pop up about using the Windows Update Tools option.
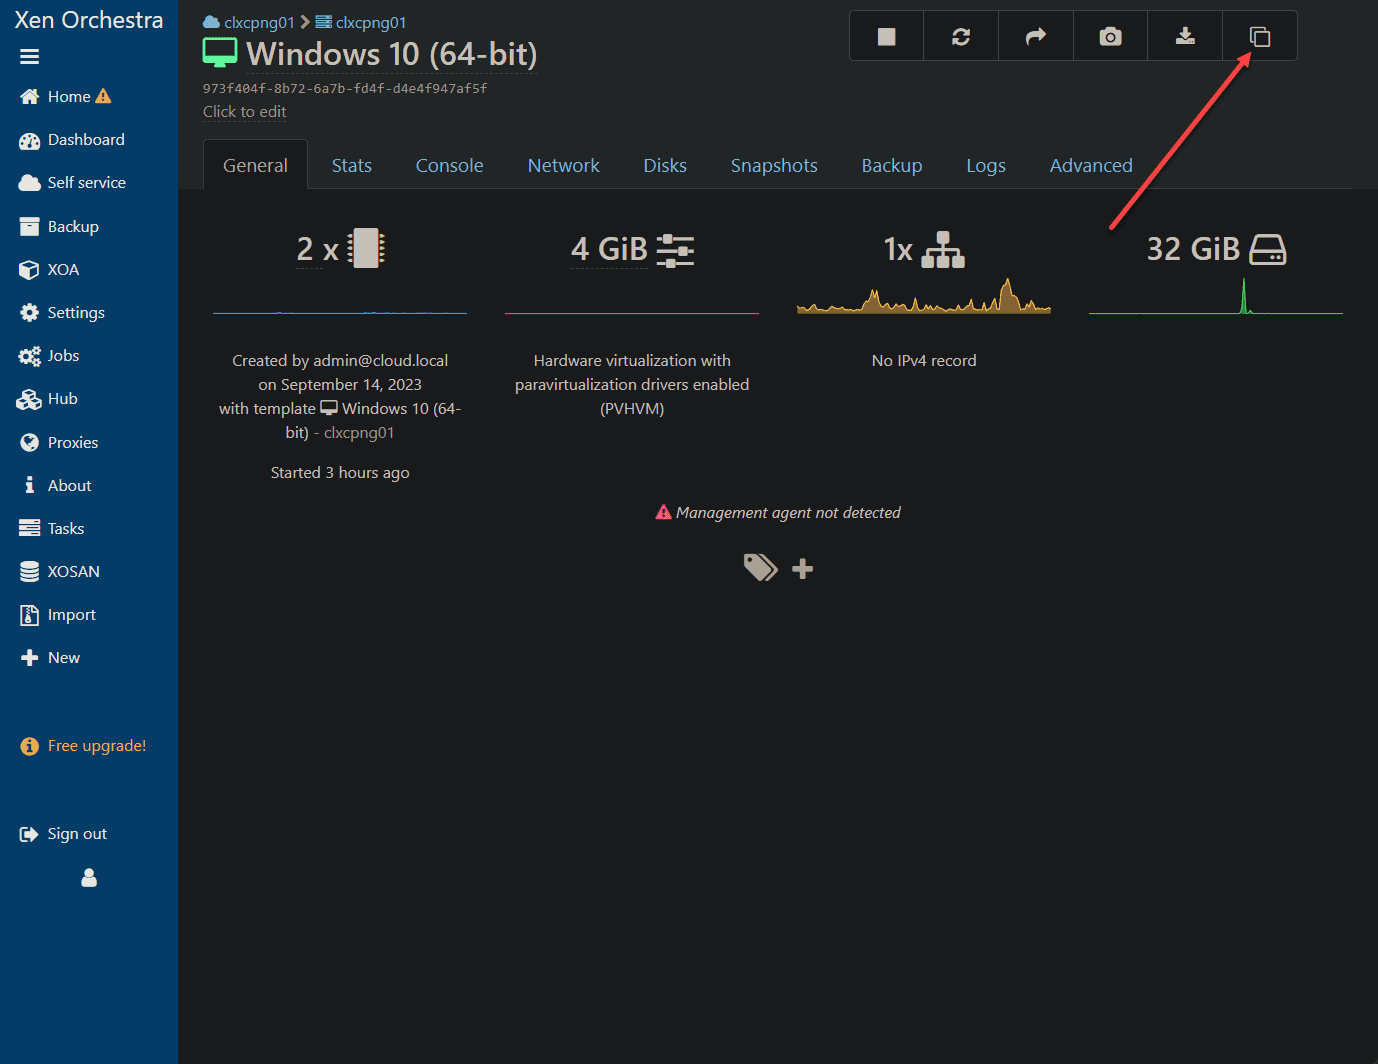
Cloning and copying virtual machines
At the top right hand corner, click the double square icon to “copy” a VM. This is essentially cloning.
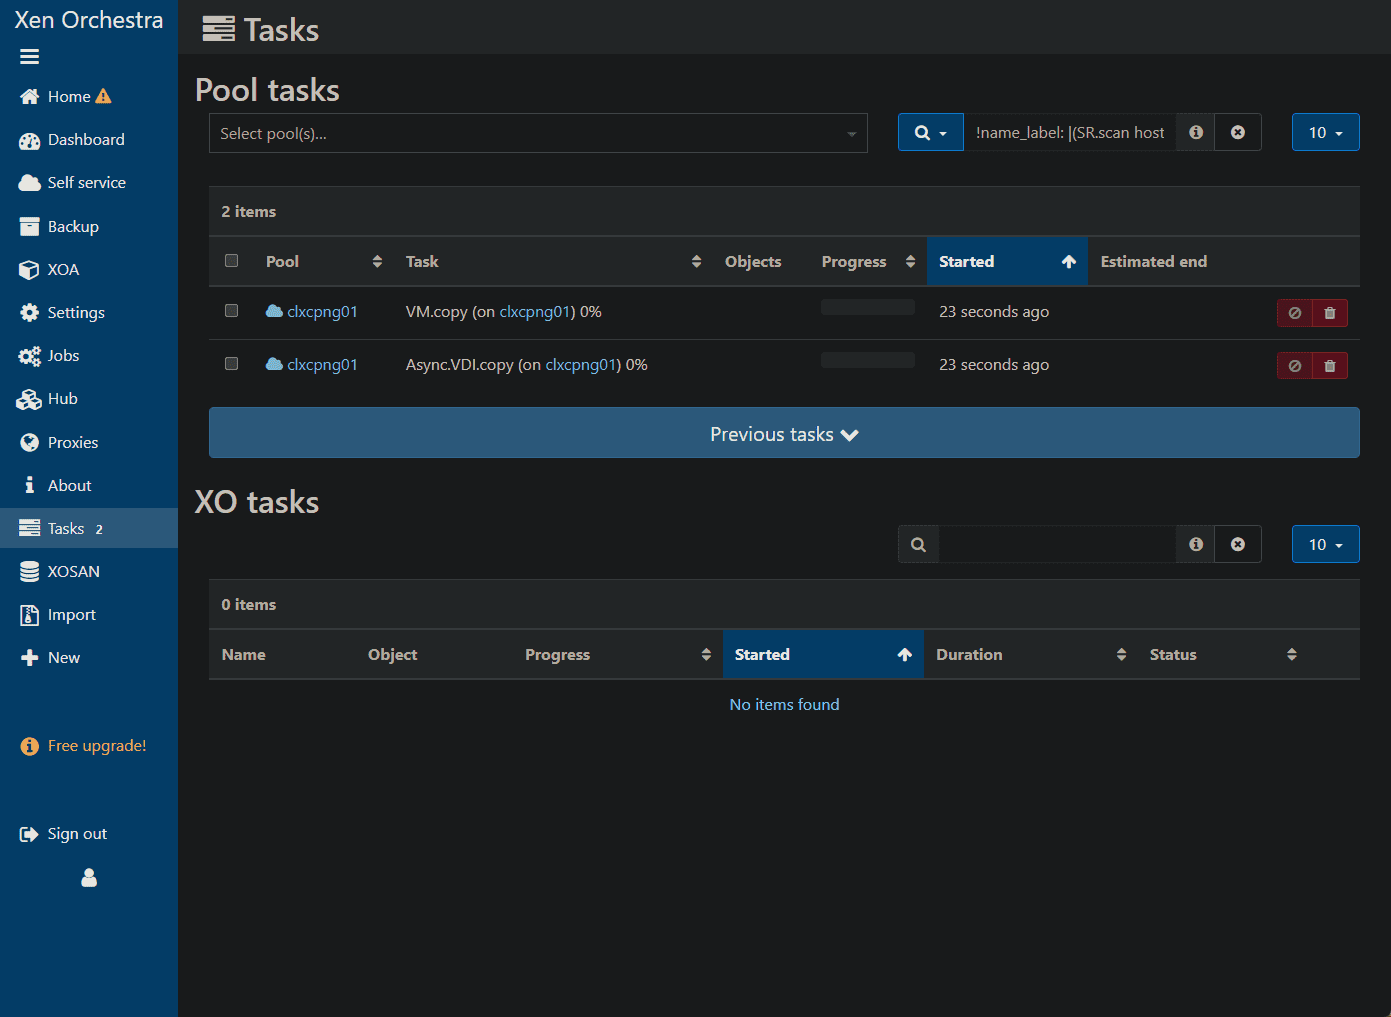
Here you can see the copy tasks associated with the operating after clicking the copy button.
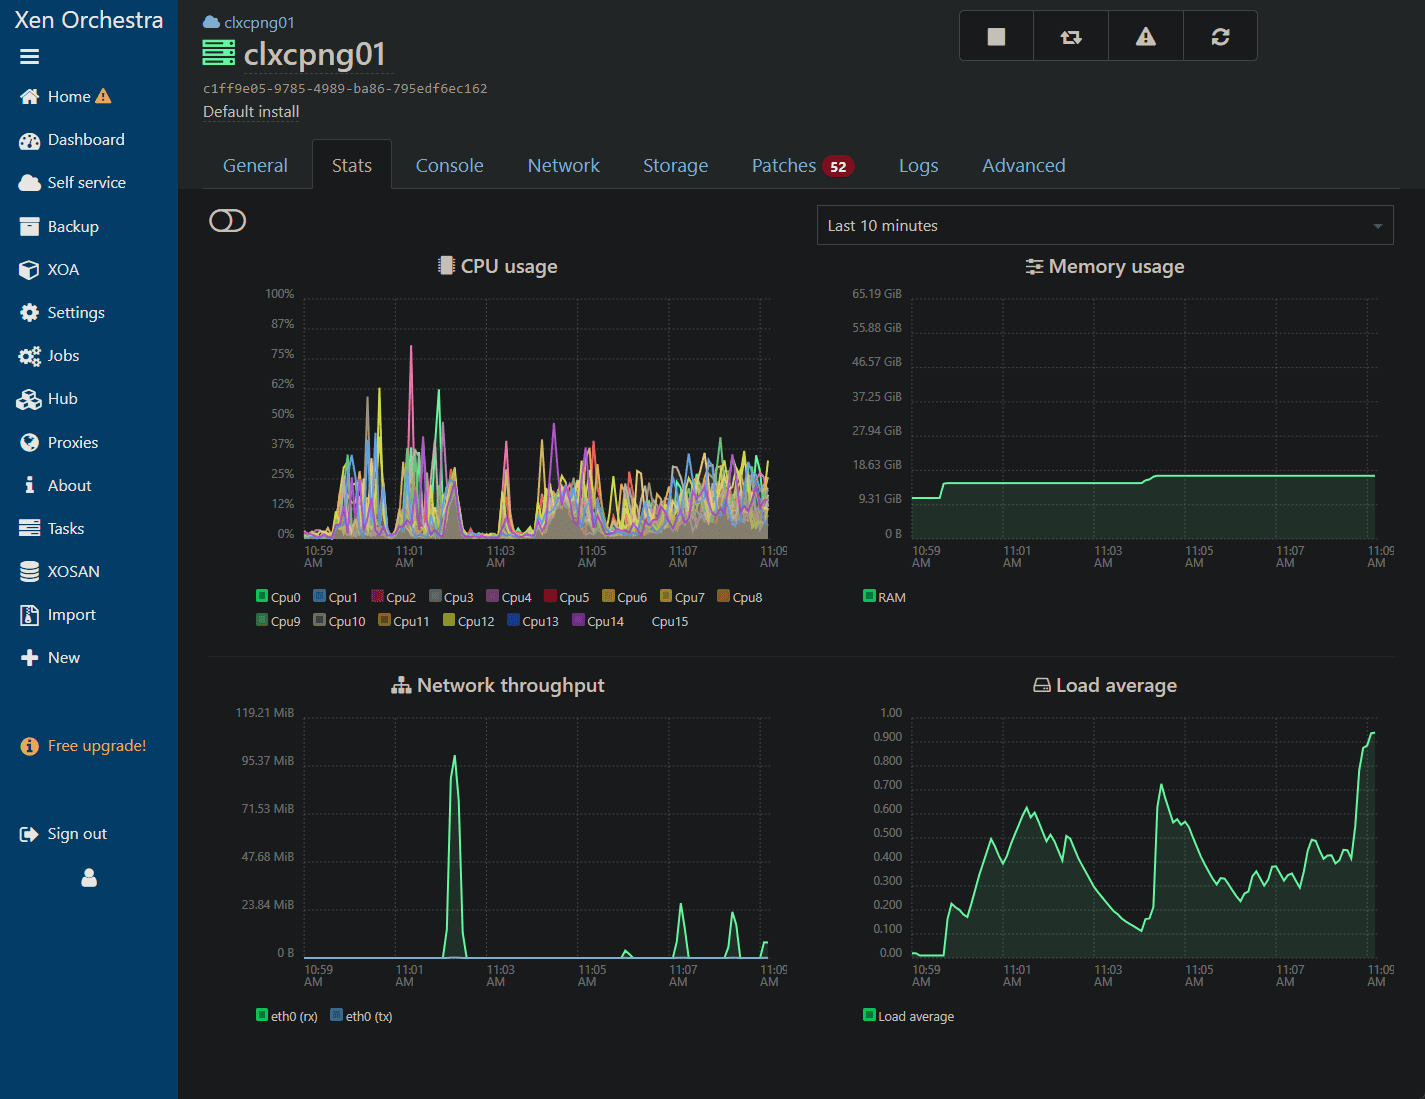
Viewing host metrics
You can view the host metrics in the Xen Orchestra dashboard.
Frequently Asked Questions
Can I run XCP-ng on my gaming PC?
Absolutely! XCP-ng is versatile and can be installed on various hardware, from Raspberry Pi devices to enterprise-grade servers. A gaming PC usually has ample resources, making it suitable for running multiple virtual machines. However, always ensure you have a backup of your games and data before diving in.
How does XCP-ng impact power consumption?
Power consumption largely depends on the hardware you use for your home lab. While small devices like Raspberry Pi will hardly make a dent in your power bill, powerful servers can increase it. Monitoring usage and maybe even considering energy-efficient hardware options if running 24/7 is essential.
Is there any benefit in using XCP-ng over VMware for test labs?
Both platforms have their strengths. XCP-ng is open-source, and for many, this is a primary attraction because it offers flexibility and the ability to tweak settings for specific requirements. VMware, on the other hand, is well-established with vast community support. Your choice might depend on your familiarity, budget, and specific use-cases like web hosting or testing out new software packages.
I’ve seen the term “Xen Orchestra.” How does it relate to XCP-ng?
Xen Orchestra (often abbreviated as XOA) is a web-based interface designed to manage XCP-ng installations. It provides a user-friendly environment to control, test, and monitor virtual machines, access data, and much more. Think of it as the command center for your XCP-ng setup.
I’m a beginner and just setting up my home lab. Any advice on managing the network?
Certainly! When setting up a home lab, especially when using XCP-ng for virtualization, network management becomes crucial. Ensure you invest in reliable network devices and emphasize cable management. It not only keeps things tidy but helps troubleshoot connectivity issues faster. Also, explore concepts like VLANs for segmenting traffic and enhancing security in your home lab environment.
With XCP-ng, can I host my own web servers and media servers simultaneously?
Yes, you can. XCP-ng’s virtualization capabilities allow you to run multiple virtual machines, each serving a different purpose. You could have one VM as a web server for web hosting, another dedicated to being a media server, and others for testing various Linux distributions or Windows setups.
How secure is my data when using XCP-ng in a home lab setup?
Data security is paramount, especially when experimenting. While XCP-ng provides robust tools for virtualization, always ensure you have backups, employ best security practices like regular updates, and use firewalls. Consider VPNs and other security layers to keep your data safe if internet access is required.
Wrapping up
You will find that XCP-ng is a very capable and fully-featured open-source hypervisor for testing and running a home lab environment. It has many enterprise features and using Xen Orchestra provides an intuitive interface for operating things.
Building a home lab with XCP-ng is not just about the fun of seeing all the flashing lights or boasting about server racks. It’s a journey into virtualization, testing, and learning. Whether you’re a newbie getting your feet wet or an enterprise professional looking for a playground, XCP-ng is an excellent choice. And with the right tips and tricks, the virtualization world is at your fingertips.
Other links you may like
This how to install XCP-ng and set up a VM using a Windows PC.
«XCP-ng» is the hypervisor and «XCP-ng Center» is the application that you can use to manage your XCP-ng server from your Windows PC. It’s just a user interface so there is no hypervisor data stored on the Windows PC.
Prereqs
- Windows PC to work from.
- Server to install the hypervisor on.
- Harddrive that is 46GB or larger, 70GB recommended.
- More info here: https://docs.citrix.com/en-us/citrix-hypervisor/system-requirements.html
- Monitor & keyboard if you’re installing locally.
- USB media or remote out-of-band management on the server (iDrac, iLO, IPMI etc)
Step 1
Download ISO file for XCP-ng from https://xcp-ng.org/download
It’s about 0.5 GB.
Step 2
Option 1 — Use USB stick
Create a bootable USB by
- Download a software to write to USB
- Etcher — https://www.balena.io/etcher/
- Rufus — https://rufus.ie/
- Install downloaded software
- Write XCP-ng ISO to USB stick
- Plug the USB stick into the server
Option 2 — Use remote server management (advanced option)
Prepare to install ISO remotely by
- Share the folder on your Windows PC where you have the XCP-ng ISO file.
- Prepare the server so that the management port is connected to the same network, it has an IP address and you have the login and password needed. Usually these settings are in the BIOS.
- Use your web browser to log into the servers IP and set up remote media pointing to the share on your Windows PC.
Step 3
Start up the server and install XCP-ng.
If it doesn’t try to boot from the USB you need to go into the BIOS settings and change boot order.
Install is pretty straight forward except that you want to decide where you want to run your VMs. Either you can use the boot disk or if you can use another drive or raid array if you have that. Make sure you select thin provisioning, it may not be the default.

After XCP-ng is installed and the server rebooted you end up in a management console.

Note the hypervisors management network IP because you need it later.
Step 4
Download XCP-ng Center from https://github.com/xcp-ng/xenadmin/releases
Make sure you pick the latest release.
Step 5
Install XCP-ng Center.

XCP-ng Center is a fork of Citrix Xencenter and they are virtually identical.
Step 6
Inside XCP-ng Center pick «Add New Server» and enter the IP of the hypervisors management interface.
Now you can access the hypervisor settings from the XCP-ng Center.
Step 7
For you to be able to create a VM, XCP-ng needs a network share where it can access ISO files so that you can actually install an OS on your VM.
Create it it by
- Share a folder on your Windows PC or use local NAS if you have one.
- Copy or download the ISO of the OS you want to install and put it in the shared folder.
- In XCP-ng select «New Storage» and select ISO library and «Windows File Sharing». Enter location of your Windows share (easiest by using IP address and share name) and the login/password needed. If everything worked you should be able to see «SMB ISO library» in XCP-ng Center under your hypervisor. Inside that you’ll see the ISO files stored on your shared Windows folder.
Step 8
Create a VM by clicking «New VM».
XCP-ng uses templates to set some basic minimum for the OS you intend to install. Pick the OS you are installing or the closest one to it. If you are installing something that is not there at all, you can pick «Other install media».
Select your ISO file when it asks for installation media. Pick how many cores and memory you need. And add a virtual disk or change the size of the one it suggests if needed. Then finally network settings and you are done.
XCP-ng will create the VM and automatically boot it up. In XCP-ng Center you can see the VM under your hypervisor in the left pane. If you click the «Console» tab you can see the screen and interact with the VM. Go through with the installation of the OS here.
Resources
If you get stuck you may want to have a look at Citrix documentation since XCP-ng is a fork of Citrix Hypervisor (earlier called Citrix Xenserver) so most things are identical.
https://docs.citrix.com/en-us/xencenter/current-release/
Normally you can do everything you need with the XCP-ng Center for your day to day things. If you however need to do more advanced things there are CLI commands you need to run on the hypervisor. For that the Citrix documentation is indispensible.
If you want to talk to others, XCP-ng has a user forum.
https://xcp-ng.org/forum/
There is also quite a few videos that will take you through installation and other things on youtube.
https://www.youtube.com/results?search_query=xcp-ng
Enjoy!