1. Overview
Windows Subsystem for Linux (WSL) allows you to install a complete Ubuntu terminal environment in minutes on your Windows machine, allowing you to develop cross-platform applications without leaving Windows.
In this tutorial, we’ll show you how to get up and running with Ubuntu on WSL. These instructions will work on both Windows 10 or Windows 11.
Whilst WSL is a powerful tool for all users, some features, such as the ability to run graphical Linux applications, are only available on Windows 11. Please check out our Windows 11 tutorial for more information.
2. Install WSL
Installing WSL is now easier than ever. Search for Windows PowerShell in your Windows search bar, then select Run as administrator.

At the command prompt type:
wsl --install
And wait for the process to complete.
For WSL to be properly activated, you will now need to restart your computer.
3. Download Ubuntu
WSL supports a variety of Linux distributions, including the latest Ubuntu release, Ubuntu 20.04 LTS and Ubuntu 18.04 LTS. You can find them by opening the Microsoft store app and searching for Ubuntu.
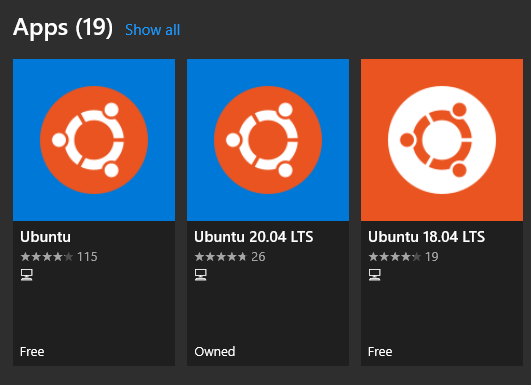
Choose the distribution you prefer and then click on Get as shown in the following screenshot:

Ubuntu will then install on your machine.
The one line install!
There is a single command that will install both WSL and Ubuntu at the same time.
When opening PowerShell for the first time, simply modify the initial instruction to:
wsl --install -d ubuntu
This will install both WSL and Ubuntu! Don’t forget to restart your machine before continuing.
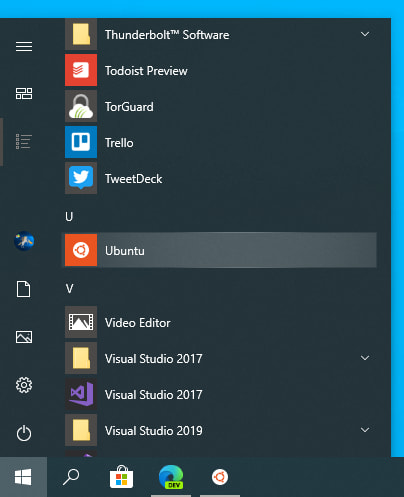
Once installed, you can either launch the application directly from the store or search for Ubuntu in your Windows search bar.
4. Configure Ubuntu
Congratulations, you now have an Ubuntu terminal running on your Windows machine!
If Ubuntu returns an error during this initial installation, then the most common issue is that virtualisation is disabled in your device’s BIOS menu. You will need to turn this on during your device’s boot sequence. The location of this option varies by manufacturer, so you will need to refer to their documentation to find it.
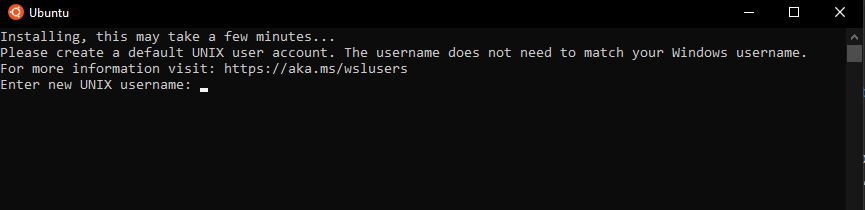
Once Ubuntu has finished its initial setup you will need to create a username and password (this does not need to match your Windows user credentials).
Finally, it’s always good practice to install the latest updates with the following commands, entering your password when prompted.
sudo apt update
Then
sudo apt upgrade
Press Y when prompted.
5. Install your first package
Installing packages on Ubuntu is as easy as using a single command. Below, you will see how to install bpython, a simple python interpreter for trying out ideas, featuring some nice usability features like expected parameters and autocompletion.
To check that you have the latest package lists, type:
sudo apt update
Then install bpython:
sudo apt install bpython
To run the application type:
bpython
And you’re ready to go!

6. Customising your Terminal with Windows Terminal Preview
Since you’re likely to be using your Ubuntu terminal a fair bit, it’s always nice to do some customisation. We recommend installing Windows Terminal Preview to get the most user-friendly setup. You can find it in the Microsoft Store.

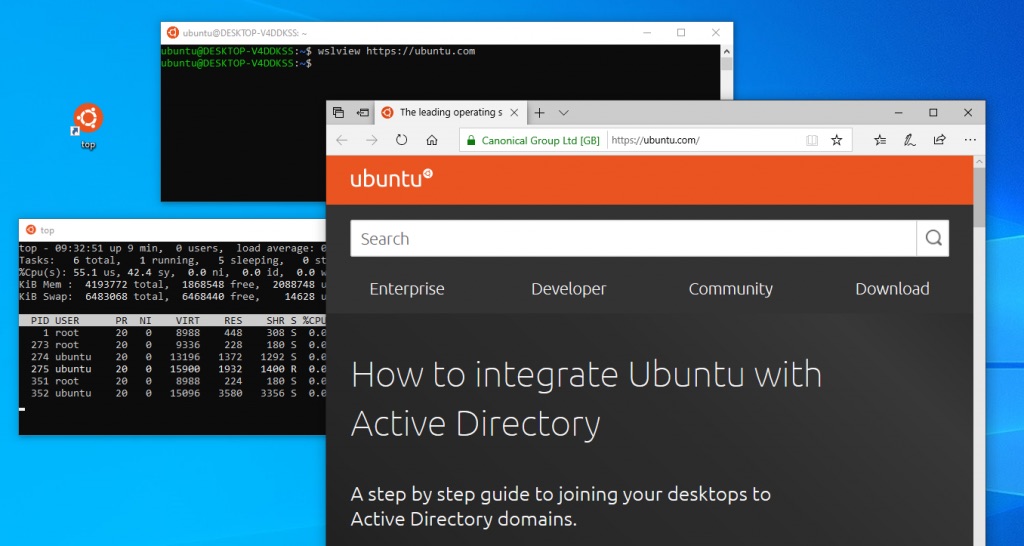
Windows Terminal allows you to open multiple Terminal instances as tabs, so you can have PowerShell running alongside Ubuntu. It also includes a number of customisation options. In the below screenshot, we’ve changed the tab name and colour, and configured the terminal appearance to use the Tango Dark theme and the Ubuntu font!
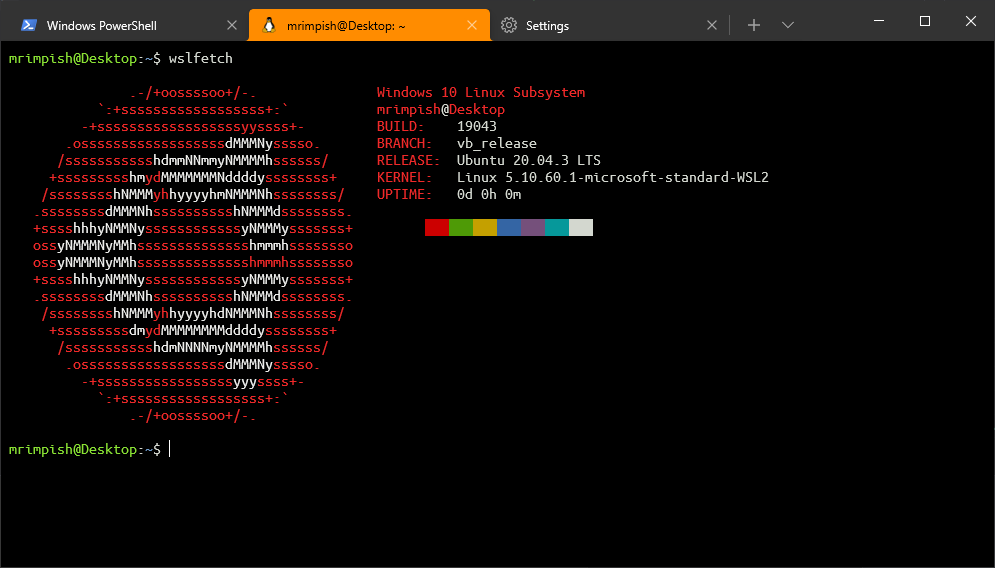
These customisations can be applied universally using the Appearance menu in Settings or to individual profiles which each have their own Appearance menu. Try it yourself to find something you feel comfortable with!

7. Enjoy Ubuntu on WSL!
That’s it! In this tutorial, you’ve seen how to install WSL and Ubuntu, set up your profile, and install your first package. You also got some tips on how to customise your experience.
We hope you enjoy working with Ubuntu inside WSL. Don’t forget to check out our blog for the latest news on all things Ubuntu.
Further Reading
- Install Ubuntu on WSL2 on Windows 11 with GUI Support
- Working with Visual Studio Code on Ubuntu on WSL2
- Enabling GPU acceleration on Ubuntu on WSL2 with the NVIDIA CUDA Platform
- Setting up WSL for Data Science
- WSL on Ubuntu Wiki
- Ask Ubuntu
Was this tutorial useful?
Thank you for your feedback.
Search code, repositories, users, issues, pull requests…
Provide feedback
Saved searches
Use saved searches to filter your results more quickly
Sign up
Windows Subsystem for Linux (WSL) — подсистема ОС Windows 10, позволяющая разработчикам, тестировщикам запускать нативные приложения Linux, писать скрипты, выполнять команды непосредственно из Windows. В обновлённой Windows 10 (2004) появилась 2я версия WSL, в которой используется полноценное ядро Linux с возможностью запуска приложений и контейнеров Docker, реализована высокая скорость загрузки, небольшой объем потребляемых ресурсов, управление в фоновом режиме, обновление ядра. Таким образом вы сможете запускать ELF64 программы, которые могут получать доступ к файловой системе Windows без использования сторонних порто (таких как Cygwin).
Образ ядра Linux (версия ядра 4.19) в Windows 10 представляет собой легкую виртуальную машину, для запуска которой не нужно ставить полноценную роль Hyper-V. Системные вызовы Linux транслируются на лету в вызовы Windows без использования эмулятора (в отличии от WSL1).
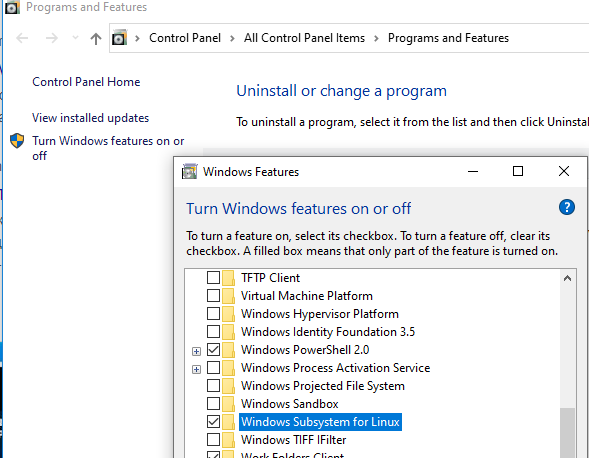
Изначально компонент WSL отключен. Чтобы его включить, вам необходимо зайти в Пуск -> Панель управления -> Программы и компоненты -> Включение и отключение компонентов Windows (Control Panel\All Control Panel Items\Programs and Features\Turn Windows features on or off), активировать галочку Подсистема Windows для Linux (Windows Subsystem for Linux), нажать кнопку ОК, и перезагрузить компьютер.
Вы можете включить компоненты WSL в Windows 10 с помощью dism:
dism.exe /online /enable-feature /featurename:VirtualMachinePlatform /all /norestart
dism.exe /online /enable-feature /featurename:Microsoft-Windows-Subsystem-Linux /all /norestart
или PowerShell
Enable-WindowsOptionalFeature -Online -FeatureName Microsoft-Windows-Subsystem-Linux
Enable-WindowsOptionalFeature -Online -FeatureName VirtualMachinePlatform
В Windows Server 2004 Semi-Annual Channel (SAC) для установки компонента WSL используется командлет Install-WindowsFeature:
Install-WindowsFeature -Name Microsoft-Windows-Subsystem-Linux
После этого также необходимо перезагрузить компьютер.
В настройка BIOS/UEFI компьютера должна быть включена поддержка аппаратной виртуализации: Intel VT (Intel Virtualization Technology) или AMD-V.
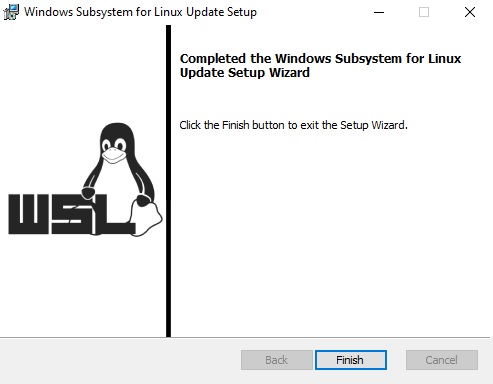
Теперь вам нужно выполнить обновление WSL до версии 2. Для этого требуется зайти на сайт https://docs.microsoft.com/ru-ru/windows/wsl/wsl2-kernel, скачать файл wsl_update_x64.msi, установить его. По завершении увидите картинку
Чтобы сделать WSL2 архитектурой по умолчанию для новых дистрибутивов, в PowerShell выполните команду:
wsl --set-default-version 2
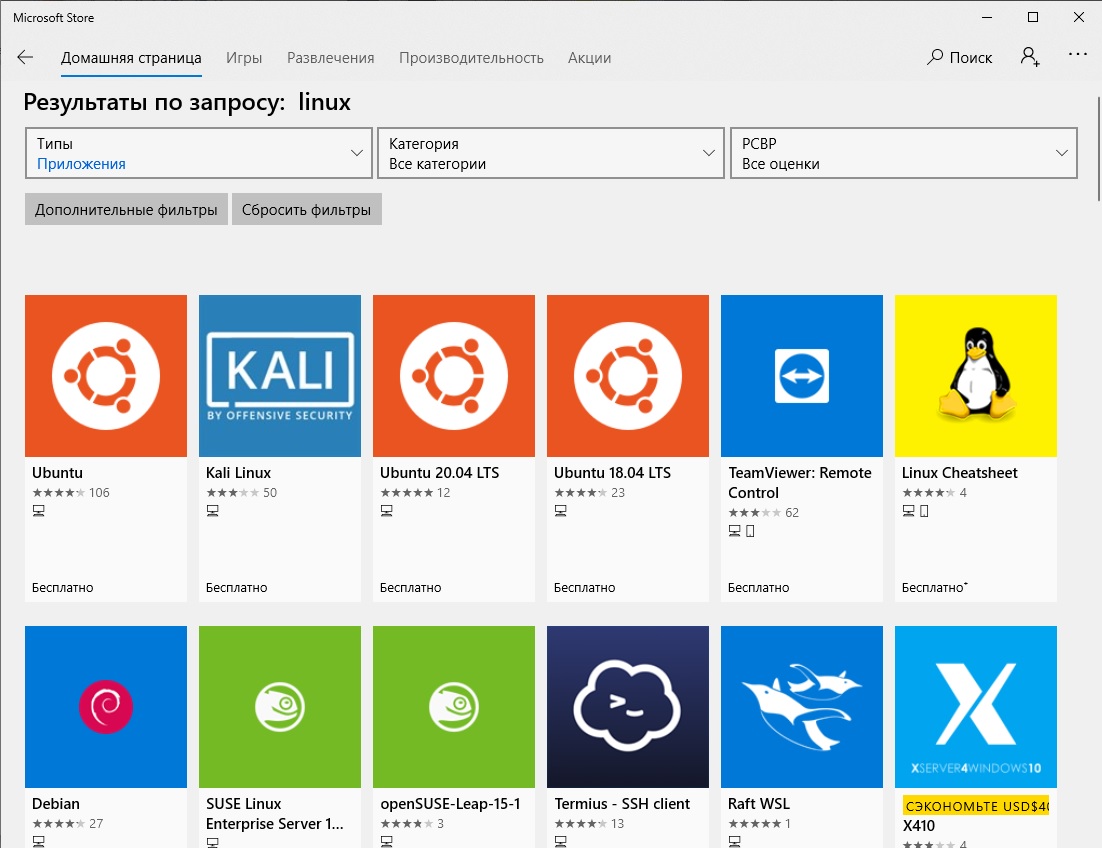
Далее вам необходимо открыть Microsoft Store, в поиске ввести слово “Linux”. В появившемся списке выберите нужный дистрибутив. Доступные Ubuntu, Debian, Kali Linux, Linux Cheatsheet, SUSE Linux Enterprise Server15, openSUSE Leap 15-1, Pengwin Enterprise, Fedora Remix for WSL или другие. В нашем примере мы будем использовать Ubuntu 20.04 LTS, нажмите кнопку Получить.
Если у вас отключен Windows Store или вы хотите установить дистрибутив WSL в Core редакции Windows Server, вы можете скачать дистрибутив Ubuntu с помощью PowerShell командлета Invoke-WebRequest:
Invoke-WebRequest https://aka.ms/wslubuntu2004 -OutFile ubuntu-2004.zip –UseBasicParsing
Распакуйте архив:
Expand-Archive -Path .\ubuntu-2004.zip
Запустите установку образа Linux с помощью файла Ubuntu.exe.
Также вы можете скачать образ в виде appx файла и установить его с помощью командлета Add-AppxPackage.
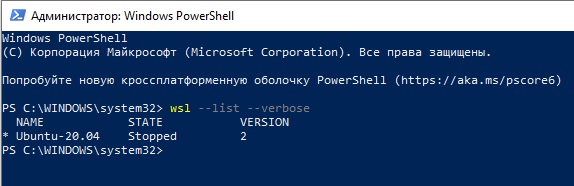
После установки можно проверить используемую версию WSL с помощью команды
wsl --list –-verbose
Если у вашей среды Linux указана версия 1, нужно изменить ее на WSL2 командой:
wsl --set-version Ubuntu-20.04 2
Файл жёсткого диска с образом виртуальной машины ОС Linux Ubuntu 20.04 будет располагаться в профиле пользователя: C:\Users\234\AppData\Local\Packages\CanonicalGroupLimited.Ubuntu20.04onWindows_79rhkp1fndgsc\LocalState.
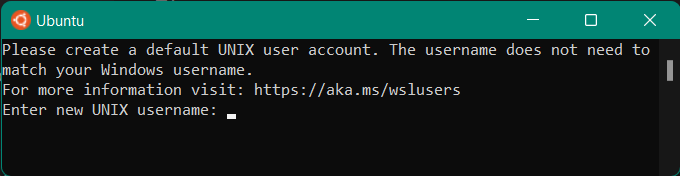
После установки дистрибутива в стартовом меню появляется ярлык на него. Для запуска Ubuntu зайдите в меню Пуск, нажмите на соответствующем ярлыке и получите в отдельном окне полноценную командную оболочку Bash. Запускать WSL можно и с помощью команды wsl. При первом запуске образа в командной строке Bash вам будет предложено создать пользователя и пароль (которые не должны совпадать с учётной записью Windows). Чтобы выполнять команды с правами root, необходимо использовать дополнительный ключ (префикс) sudo. В WSL есть общие команды для Bash и CMD, и тут нужно не забывать, что система Linux чувствительна к регистру.
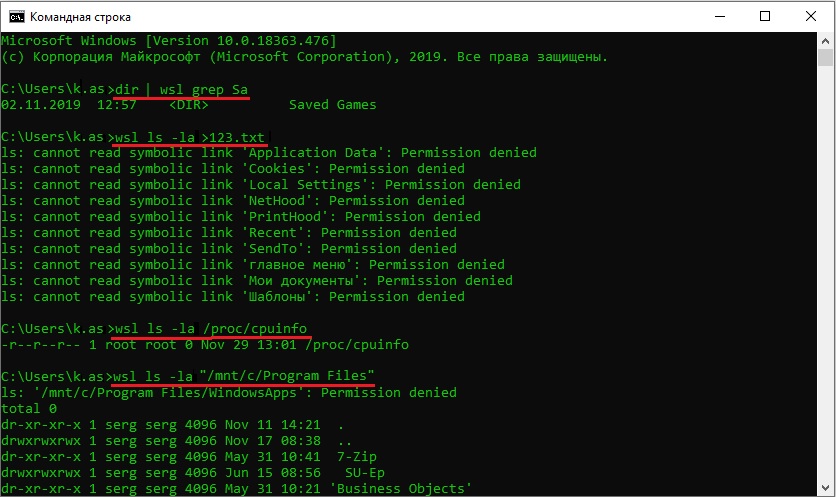
Вы можете выполнить Linux-команды из CMD. Для этого необходимо вначале указать “WSL”. Например, для просмотра списка файлов и папок в каталоге Windows, выполните:
wsl
ls /mnt
ls/mnt/c
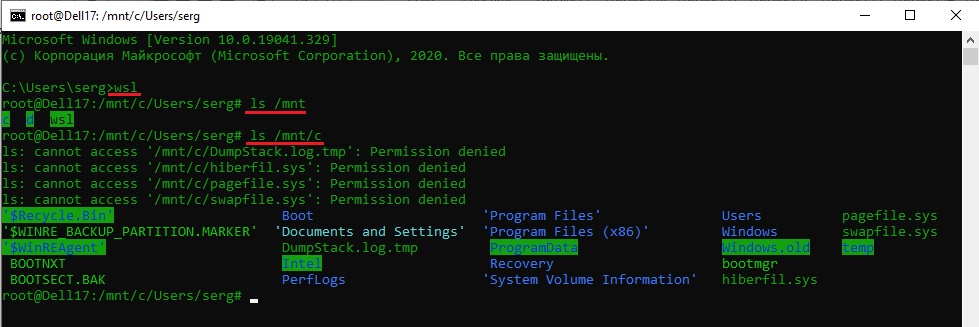
dir | wsl grep Sa
wsl ls ‑la > 123.txt
wsl ls ‑la /proc/cpuinfo
wsl ls ‑la “/mnt/c/Program Files”
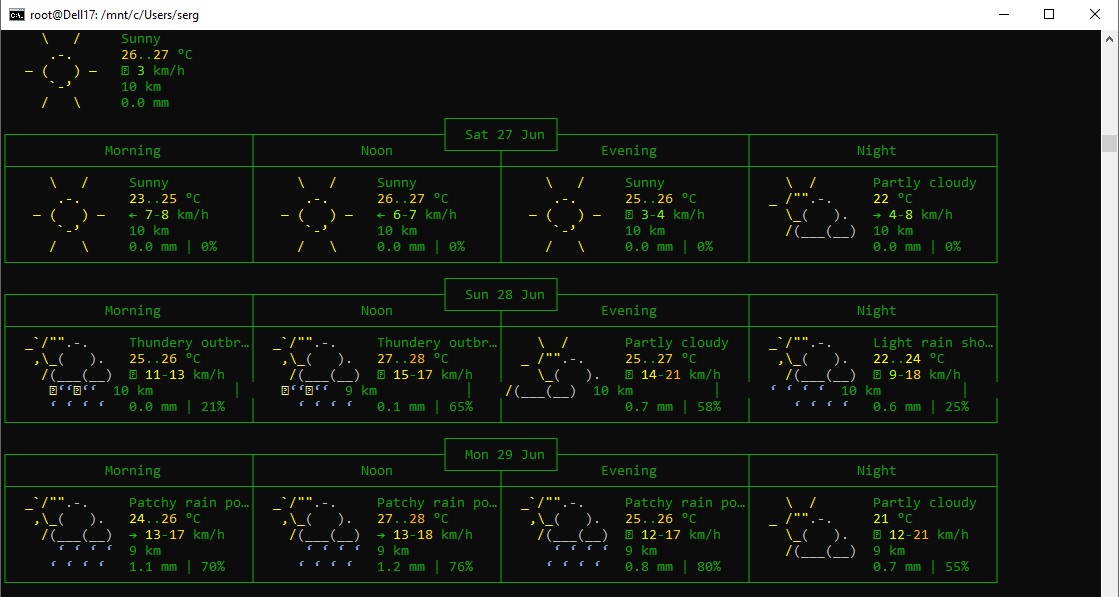
Также вы можете открыть проводник командой explorer.exe, калькулятор – calc.exe, блокнот – notepad.exe, paint – mspaint.exe, календарь – cal, погоду – curl wttr.in
Ещё один пример взаимосвязи 2х систем – вы можете открыть в Windows файл из WSL-дистрибутива по сетевому пути. Для этого в CMD наберите путь к файлу:
notepad \\wsl$\Ubuntu-20.04\home\1122.txt
Из окна консоли вы можете обновить список пакетов в Ubuntu с помощью команд:
sudo apt-get update
sudo apt-get upgrade
После обновления Ubuntu папка …/LocalState будет занимать 1.5 Гб.
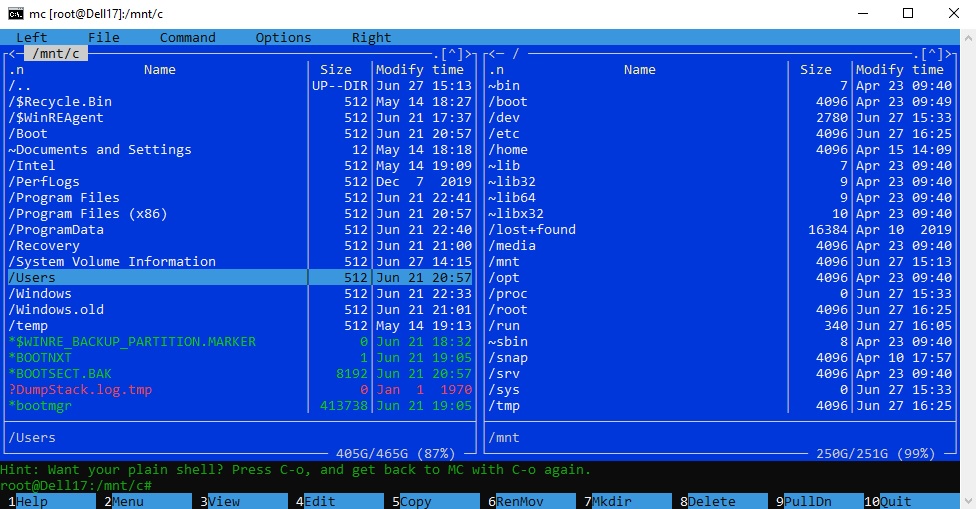
Из командной строки Linux можно не только просмотреть Windows-файлы и каталоги, но и получить к ним доступ. Чтобы удобнее копировать файлы, просматривать директории и их содержимое, установите файловый менеджер Midnight Commander с помощью команды
sudo apt-get install mc
Вы можете запустить Midnight Commander как в командной оболочке Bash, так и внутри CMD. На скриншоте ниже показано, что в двух панелях MC показывается список файлов с обеих ОС.
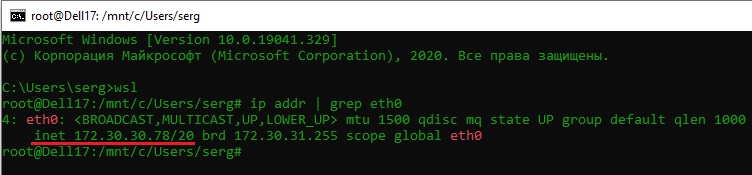
Можно отобрахить сетевые настройки (IP адрес) IP-адрес Linux-системы:
ip addr | grep eth0
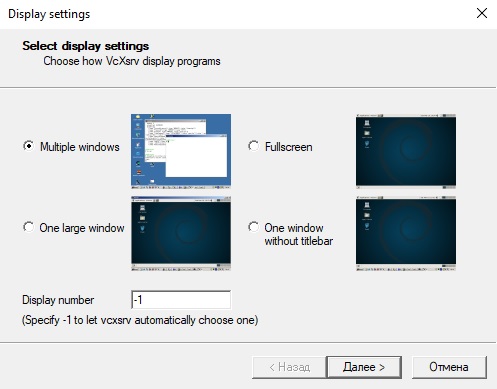
В WSL не предусмотрена работа приложений с графическим интерфейсом. Тем не менее вы можете попробовать их установить и использовать. Чтобы запускать графические приложения в Linux, нужно скачать и установить в Windows программу VcXsrv Windows X Server (https://sourceforge.net/projects/vcxsrv/).
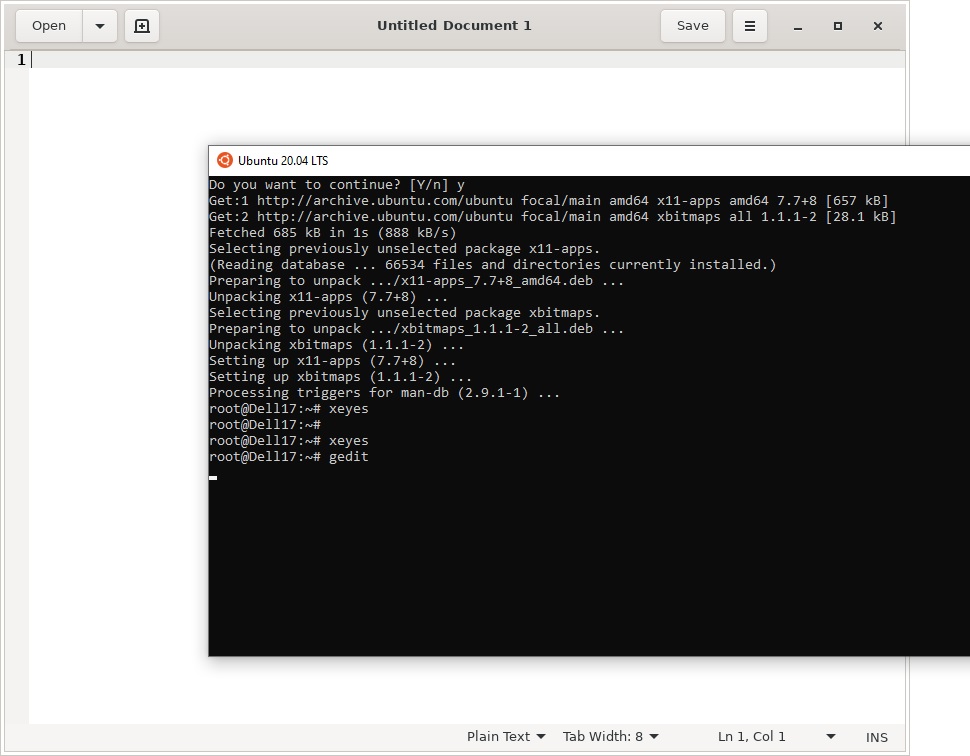
С помощью пакетного менеджера apt-get установим несколько графических программ: например, браузер, текстовый редактор или что-то ещё:
sudo apt-get install gedit
sudo apt-get install firefox
sudo apt-get install x11-app
Затем создайте файл в директории root:
cd /~
vim .bash_login
впишите строку
export DISPLAY=$(cat /etc/resolv.conf | grep nameserver | awk '{print $2}'):0
сохраните запись
Esc -> :wr -> :q
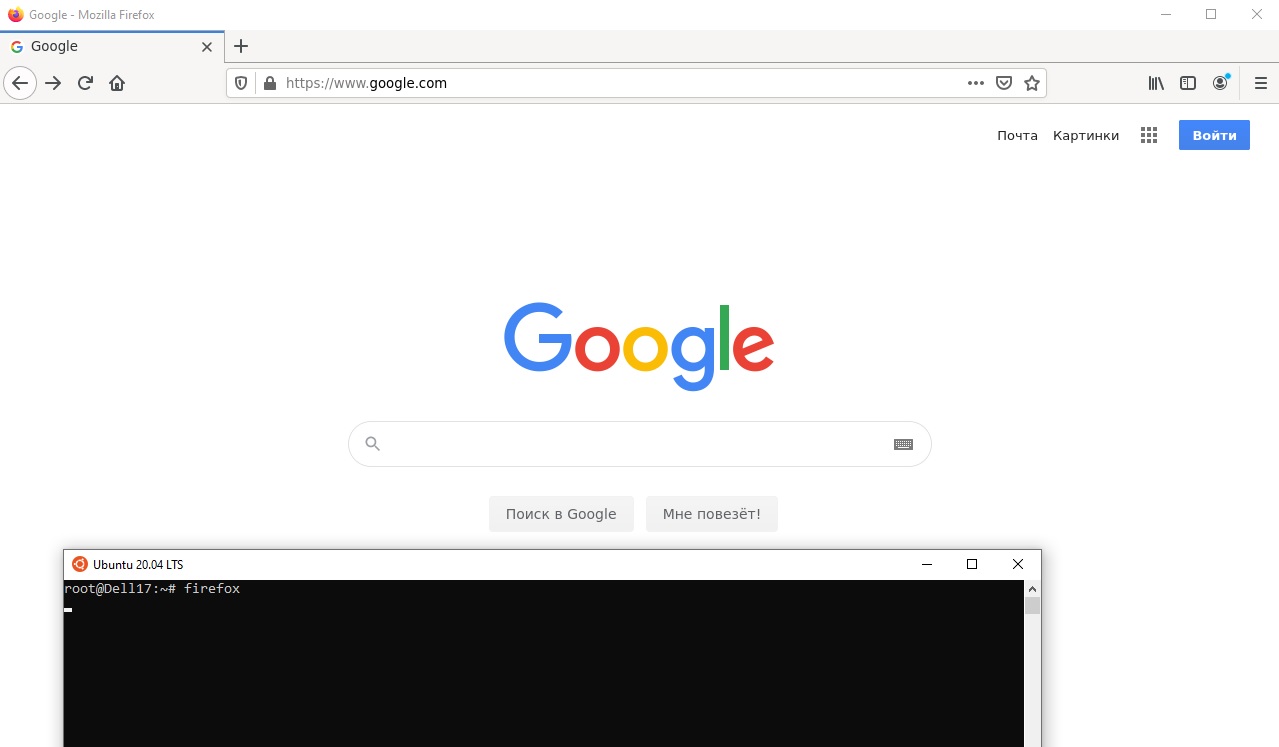
Теперь можете запустить графические программы Linux через WSL командами:
firefox
или
gedit
Вы можете установить в Windows 10 несколько дистрибутивов Linux и запускать одновременно в разных окнах WSL. Вывести весь перечень установленных дистрибутивов можете с помощью команды:
wsl --list –all
чтобы завершить работу всех запущенных дистрибутивов и ядра WSL 2, выполните команду:
wsl --shutdown
Table of Contents
Зачем нужен Windows Subsystem for Linux 2 (WSL2)? Самый частый ответ — простое использованое Linux программ в среде Windows. Docker самая распространенная причина для установки WSL2.
Что надо для WSL2
- убедиться что в BIOS включена виртуализация, ищите пункт меню:
- процессор Intel: VT-x, Intel Virtualization Technology, VTx
- процессор AMD: SVM Mode, AMD-V, Virtualization Technology
- версия Windows 11 или 10 не ниже версии 2004 (сборка 19041 ~декабрь 2019)
- права администратора
Всего несколько команд
Установим само ядро wsl и запустим дистрибутив Ubuntu для работы в консоли.
Открывайте PowerShell с правами Администратора. Самый простой вариант по мне -> WIN+X и выбрать Терминал Windows (Администратор).
Выполняйте команду:
По-умолчанию, установится WSL2 с GUI и Ubuntu . Установка займет определенное время, подождите.
Если ошибка 0x80072eff
В процессе, можете увидеть ошибку Во время установки произошла ошибка, но установка может быть продолжена. Компонент: 'Ядро WSL' код ошибки: 0x80072eff.
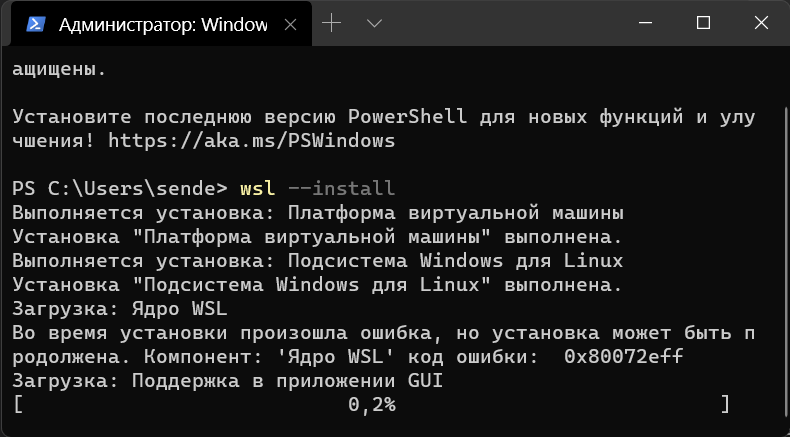
А значит, все автоматически не сработало, не беда. Перезагружайтесь и снова запустите PowerShell от Администратора.
- Запустите обновление wsl
- Завершите работу wsl
- Запустите заново wsl
- Запустите установку Ubuntu (если надо более специфический дистр, посмотрите все варианты
wsl -l -o)
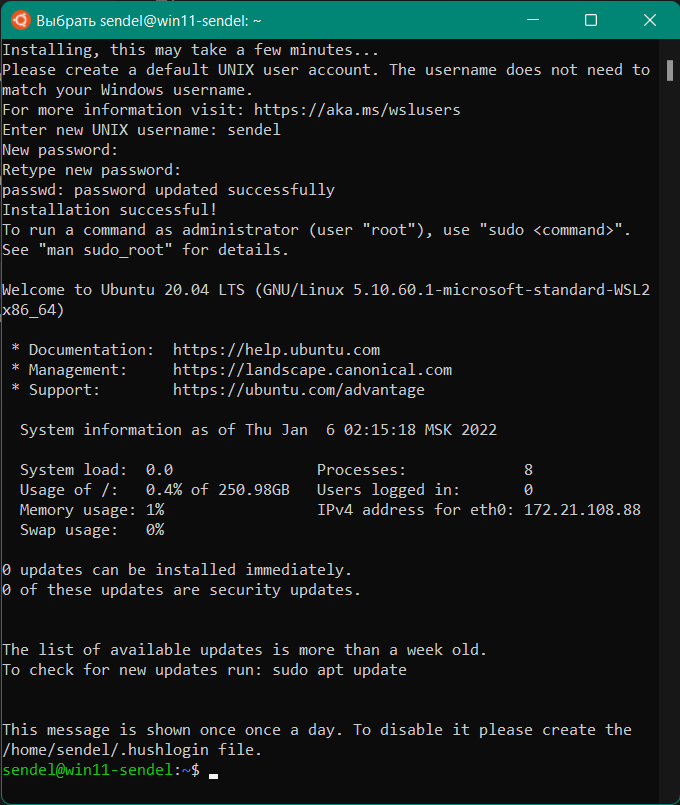
Успешная установка Ubuntu
После установки, введите имя пользователя и пароль для Ubuntu, и вам будет доступна среда Linux.
Рекомендуется сделать одну команду, обновить список пакетов:
и наслаждаться 
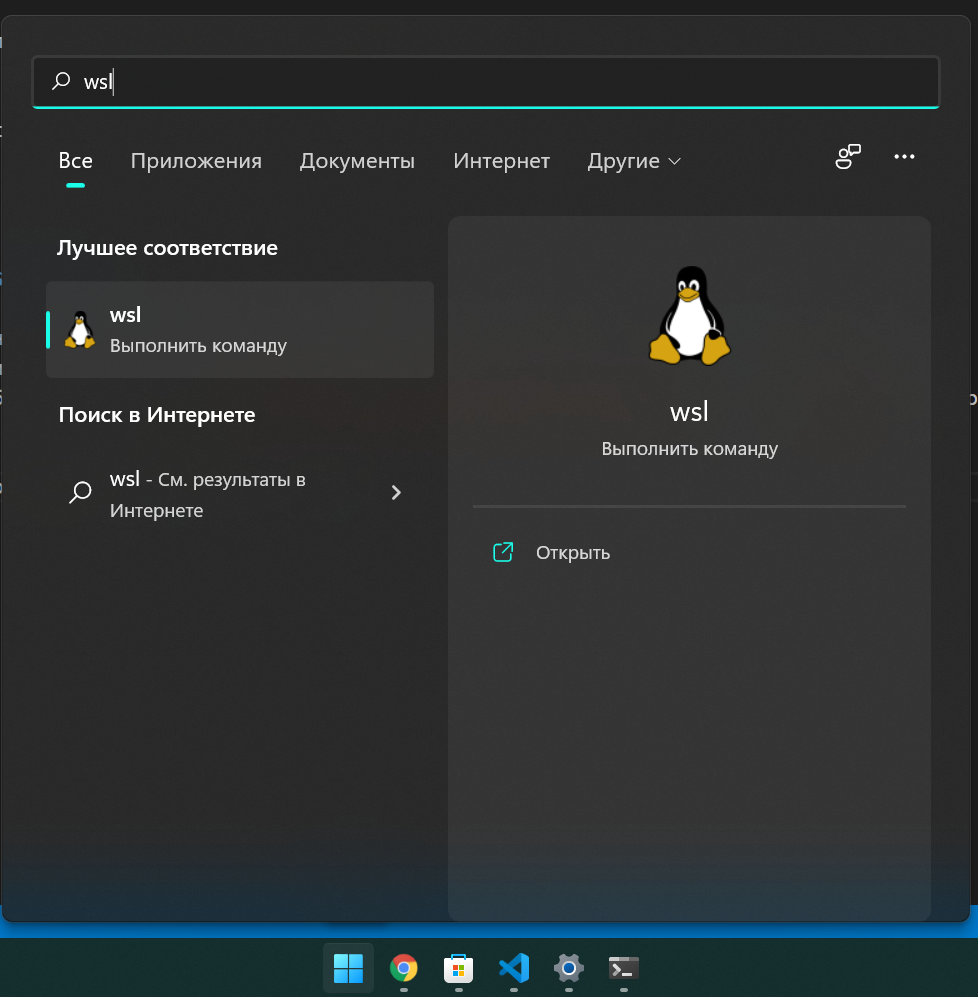
Как зайти в WSL консоль
- запускайте команду
wsl. (например, в настройках среды разработки указать wsl это для терминала по-умолчанию) - можете вынести из Пуска, ярлык Ubuntu на панель задач.
- или поставить обновленный Microsoft Terminal, и в нем настроить при запуске сразу открывать консоль wsl, рекомендую.


If you want to try out the improved Windows Subsystem for Linux 2 (aka WSL 2) in the latest Windows versions here’s how — I cover everything you need to do to install it, in this post.
WSL 2 is a big upgrade to the original WSL Microsoft introduced in 2017. More than a simple version bump, WSL 2 is faster, more versatile, and uses a real Linux kernel for the first time.
Plus, new Linux kernel updates will be released as Windows 10 software updates — which is kinda crazy when you think about it!
Improved performance was Microsoft’s motivation for created the souped-up WSL2. And it figured the best way to do that was to add full system call compatibility, i.e. put a real Linux kernel right at the heart of things.
“[This] new architecture presents a better platform for the WSL team to deliver features that make WSL an amazing way to run a Linux environment in Windows,” say Microsoft of the tech.
The crazy shows no sign of abating either as Microsoft plans to let users run desktop Linux apps on Windows 10 and leverage GPU-intensive tasks.
And the best news is that it is much easier to install WSL on Windows 10, as this updated guide shows.
Requirements
To install WSL 2 on Windows 10 you need the minimum:
- Windows 10 May 2020 (2004), Windows 10 May 2019 (1903), or Windows 10 November 2019 (1909)
- A computer with Hyper-V Virtualization support
I’d be mighty surprised if anyone who’s reading this guide doesn’t meet those requirements but, if you don’t you can use WSL 1 rather than WSL 2.
What’s awesome is that if you use Windows 10 May 2020 (2004) update or later you can install WSL2 with a single command, or a single click — no hassle.
Installing WSL 2 on OS Build 2004 (or later)
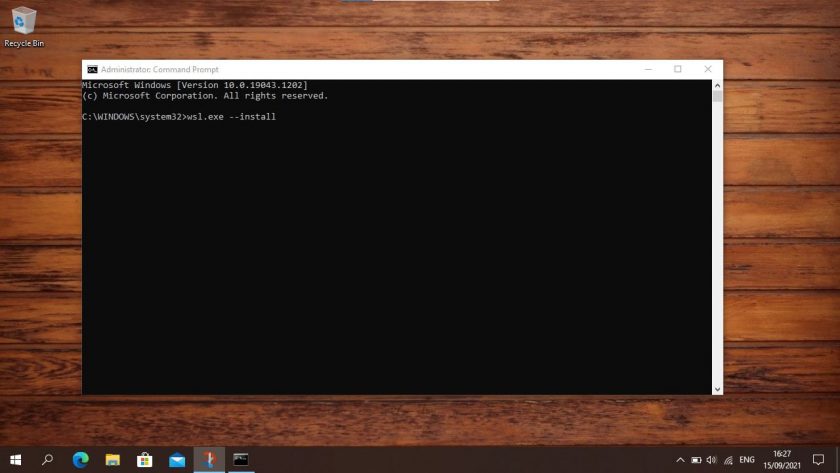
To install WSL 2 on Windows 10 OS Build 2004 or later you can open a command prompt (with Administrator permissions) and type in the following command:
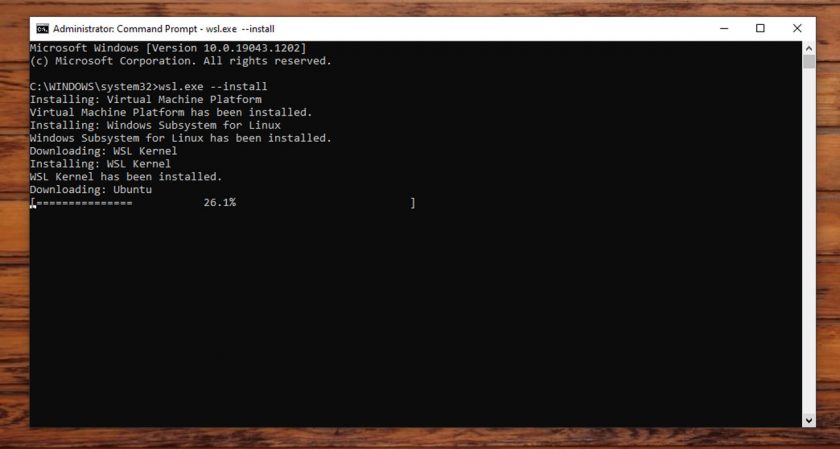
wsl.exe --install
As soon as you hit enter the process gets to work enabling WSL, any optional features required, fetches the latest WSL Linux kernel version, and installs Ubuntu as the default distro:
Once done, reboot your computer. Log in to Windows 10 and the command prompt will open again. This time you’ll be walked through setting up Ubuntu with a username and password (these don’t need to be the same as your Windows username and password).
Once done you can you can launch the ‘Ubuntu’ app from the Start Menu to get started, or install the Microsoft Terminal app to start exploring your newly-installed Ubuntu install — don’t forget to run an apt update && apt upgrade though — this is a REAL Ubuntu system, after all!
Install WSL 2 (Old Method)
If you use an older version of Windows 10 you can still install WSL 2 (Microsoft backported WSL 2 to older versions of Windows 10 in Windows Update KB4566116) but the process isn’t as simple as in the 2004 update.
To install WSL 2 on Windows 10 (OS Build 1909 or 1903) you need to follow 4 steps:
- Enable WSL 2
- Enable ‘Virtual Machine Platform’
- Set WSL 2 as default
- Install a Linux distro
I walk through each step in turn below. I recommend using the PowerShell app, which you need to run as an administrator. You can find PowerShell in the Windows Start Menu.
Note: it is possible to install WSL 1 using a GUI too but it’s much faster to use the command line, and since WSL is a CLI tool it kinda makes sense too!
Step 1. Enable WSL
Regardless of which version of WSL you want to use you first need to enable it. To do this open the PowerShell tool as an Administrator and run the command below. Be careful not to mistype or leave out any character in the command:
dism.exe /online /enable-feature /featurename:Microsoft-Windows-Subsystem-Linux /all /norestart
Only want to use WSL 1? You can skip to step 4.
Step 2. Enable ‘Virtual Machine Platform’
WSL 2 requires Windows 10’s “Virtual Machine Platform” feature to be enabled. This is separate from Hyper-V and hands some of the more interesting platform integrations available in the new version of the Windows Subsystem for Linux.
To enable Virtual Machine Platform on Windows 10 (2004) open PowerShell as Administrator and run:
dism.exe /online /enable-feature /featurename:VirtualMachinePlatform /all /norestart
To enable Virtual Machine Platform on Windows 10 (1903, 1909) open PowerShell as Administrator and run:
Enable-WindowsOptionalFeature -Online -FeatureName VirtualMachinePlatform -NoRestart
To ensure all of the relevant bits and pieces fall neatly in to place you should restart your system at this point or you may find that things don’t work as intended.
Step 3. Set WSL 2 as default
Open PowerShell as Administrator and run this command to set WSL 2 as the default version of WSL:
wsl --set-default-version 2
You can (at any time) configure a distro to run in WSL 1 mode if you need to.
Step 4. Install a distro
With WSL and the necessary virtualisation tech all in place all that is left for you to do is pick and install a Linux distro from the Microsoft Store.
Several different distros are available, including OpenSUSE, Pengwin, Fedora Remix, and Alpine Linux. But my personal recommendation is (naturally) Ubuntu 20.04 LTS (though 18.04 LTS and 16.04 LTS are also available).
To install Ubuntu on Windows 10 open the Microsoft Store app, search for “Ubuntu 20.04”, and hit the “Get” button:
Ubuntu 20.04 LTS on the Microsoft Store
Whilst you in the Microsoft Store I highly recommend that you also install the open source Windows Terminal app. This tool is designed to give you the best possible WSL experience:
Windows Terminal on the Microsoft Store
5. Use WSL 2
When you installed Ubuntu (or a different Linux distro) a shortcut was added to the Start Menu. Use this to “open” Ubuntu (or whichever distro you chose). The first time you run the distro things will seem a little slow. This is expected; the distro has to unpack and decompress all of its contents — just don’t interrupt the process.
You will also be promoted to set a username and password for use on the distro. Try to pick something you won’t forget.
Convert Ubuntu on WSL 1 to WSL 2
If you use WSL 1 you can upgrade an existing WSL 1 installation to WSL 2. To convert an existing WSL 1 distro to WSL 2 run the following in PowerShell, e..g,:
wsl.exe --set-version Ubuntu 2
You should replace ‘Ubuntu’ with the name of whichever distro your WSL 1 install runs.
Let me know if this guide worked for you in the comments!