Время на прочтение
6 мин
Количество просмотров 86K
Раньше моей рабочей машиной был ноутбук, созданный Apple. Я мог делать на нём практически всё что угодно: разрабатывать программы, писать тексты, сочинять музыку, да и много чего ещё. Но мне не давали покоя мысли о том, что я привязан к экосистеме Apple, о том, что я зависим от прихотей этой компании. Поэтому я приступил к поискам чего-то нового.
Я начал собирать рабочую станцию под задачи машинного обучения. Поставил в неё, кроме прочего, отличный процессор, много памяти, достойную видеокарту. Практически все мои задачи я решал в Ubuntu. Правда, для работы с текстами мне нужен был Microsoft Office. Онлайновый Office тогда ещё не появился, и, давайте называть вещи своими именами, LibreOffice — это просто ужас какой-то. Для меня решением стала двойная загрузка в конфигурации Ubuntu — Windows 10. Мне невероятно понравилось то ощущение свободы, которое испытываешь, переходя с ОС от Apple на Ubuntu. А возможности, которые открываются перед тем, кто сам собирает свой компьютер, практически бесконечны.
Двойная загрузка в течение долгого времени полностью меня устраивала. А когда я миллион раз ей воспользовался, появилась технология WSL (Windows Subsystem for Linux, подсистема Windows для Linux). Когда это случилось, я начал решать некоторые свои Linux-задачи в Windows. Правда, даже так, многого для полноценной работы мне ещё не хватало. Но теперь, с выходом WSL 2, у меня возникает такое ощущение, что новая версия WSL способна кардинальным образом изменить ситуацию. Сегодня я предлагаю поговорить о том, как, с помощью WSL 2, перенести задачи по разработке программ из Linux в Windows 10. Я расскажу о новых возможностях WSL 2, и о том, что можно ожидать от этой подсистемы в будущем.
Обзор WSL 2
WSL 2 — это новая версия подсистемы Windows для Linux. В этой версии имеются некоторые изменения, определяющие то, как Linux-дистрибутивы взаимодействуют с Windows.

Microsoft любит Linux
В этом релизе WSL в распоряжении пользователя оказывается улучшенная производительность файловой системы и полная совместимость с системными вызовами. Конечно, у нас есть возможность запускать Linux либо на WSL 1, либо на WSL 2, и, более того, переключаться между разными версиями WSL можно в любое время. WSL 2 — это результат серьёзного усовершенствования базовой архитектуры системы, её новые возможности основаны на технологии виртуализации и на функционале ядра Linux. При этом Microsoft берёт на себя заботу о мелких деталях, поэтому пользователь WSL может просто заниматься своими делами, ни на что не отвлекаясь.
Установка
Microsoft обещает, что в ближайшем будущем установка WSL 2 будет выполняться очень просто, и что Linux можно будет обновлять с использованием механизма обновлений Windows. Пока же процесс установки WSL 2 требует некоторых усилий, но, на самом деле, ничего страшного тут нет.
В этом примере мы установим на Windows 10 Ubuntu 20.04. Надо отметить, что процесс установки будет одним и тем же для всех дистрибутивов Linux, доступных в Microsoft Store. Для начала нужно включить компонент Windows Subsystem for Linux. Для этого надо открыть PowerShell от имени администратора и выполнить следующую команду:
dism.exe /online /enable-feature /featurename:Microsoft-Windows-Subsystem-Linux /all /norestart
Далее, нужно обновить WSL до WSL 2. Для этого Windows 10 должна быть обновлена до версии 2004. В BIOS должна быть включена технология виртуализации Intel. Снова воспользуемся PowerShell с административными привилегиями и выполним такую команду:
dism.exe /online /enable-feature /featurename:VirtualMachinePlatform /all /norestart
Для завершения установки WSL и обновления до WSL 2 перезагрузите компьютер. Затем нужно установить WSL 2 в качестве версии WSL, используемой по умолчанию при установке новых дистрибутивов Linux. Для этого, всё так же, пользуясь PowerShell с правами администратора, выполним эту команду:
wsl --set-default-version 2
После того, как вы выполните эту команду, может появиться такое сообщение:
WSL 2 requires an update to its kernel component. For information please visit https://aka.ms/wsl2kernel

Сообщение, выдаваемое при попытке установки WSL 2 как подсистемы Windows для Linux, используемой по умолчанию
Перейдите по указанной ссылке и установите соответствующий MSI-файл, благодаря которому на вашу машину будет установлено ядро Linux для WSL 2. После того, как ядро будет установлено, выполните вышеприведённую команду снова. Теперь она должна завершиться успешно, не выдавая подобного сообщения.
Теперь осталось лишь установить нужный дистрибутив Linux. Для этого надо открыть Microsoft Store и поискать там Ubuntu 20.04 LTS. После установки дистрибутива в меню Пуск должен появиться ярлык для запуска Ubuntu. Запустите систему и следуйте инструкциям для завершения установки (в целом, завершение установки заключается в создании нового пользователя).
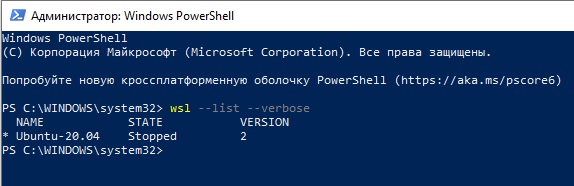
Для того чтобы проверить, действительно ли дистрибутив установлен на WSL 2, выполните такую команду:
wsl --list --verbose
Если оказалось, что используется WSL 1, то переключиться на WSL 2 можно, воспользовавшись командой такого вида:
wsl --set-version <distribution name> <versionNumber>
Вот и всё. Теперь в вашем распоряжении имеется полноценный дистрибутив Ubuntu, работающий в Windows 10.
Настройка рабочей среды для программиста
Теперь, когда в вашем распоряжении оказалась рабочая Ubuntu, вы можете устанавливать всё, что вам может понадобиться. Например, если вы — дата-сайентист, вы можете установить самый свежий дистрибутив Anaconda. Если вы — фронтенд-разработчик, то вас, например, могут заинтересовать Angular, npm и многое другое. Здесь же мне хотелось бы сосредоточиться на двух инструментах. Это — Visual Studio Code и связка Docker + Kubernetes.
▍Visual Studio Code
VS Code — это редактор кода, которому отдаёт предпочтение множество разработчиков. Одна из сильных сторон этого редактора заключается в поддержке бесконечного множества расширений. А теперь, когда мы включили WSL 2, совершенно необходимым расширением для VS Code можно назвать Remote Development.
Это расширение позволяет удалённо работать над кодом, который имеется в среде, создаваемой средствами WSL 2, в контейнере, или даже на удалённой виртуальной машине, доступ к которой осуществляется по SSH. Данное расширение позволяет, например, создать проект в ОС Linux, работающей в WSL 2, и использовать для работы над этим проектом редактор VS Code, установленный в Windows 10.
Собственно говоря, VS Code отличается огромными возможностями. Это и интеллектуальная система IntelliSense, и интеграция с git, и отладчик, и терминал, и очень много чего ещё. Полагаю, с настройкой VS Code вы справитесь и очень скоро сможете сделать из этого редактора именно то, что нужно вам.
▍Docker + Kubernetes
Docker для Windows сделан на «хорошо», но не на «отлично». На самом деле, именно Docker заставлял меня постоянно «прыгать» между Windows и Ubuntu. Например, мне приходилось делать это тогда, когда нужно было создать новый образ Docker. А вот WSL 2 отличается полной поддержкой Docker. Это, полагаю, такая возможность новой подсистемы, которая делает работу с Docker даже удобнее, чем в Linux.
Для того чтобы включить эту возможность, нужно перейти в настройки Docker Desktop и включить опцию Use the WSL 2 based engine.

Включение поддержки Docker для WSL 2
Более того, перейдя в раздел настроек Kubernetes, можно включить возможность запуска локального кластера Kubernetes, просто установив соответствующий флажок.

Включение Kubernetes
Теперь можно перезапустить Ubuntu в WSL 2 и выполнить следующие команды:
docker version
kubectl version
Результаты выполнения подобных команд покажут, что в вашем распоряжении теперь есть Docker и Kubernetes.
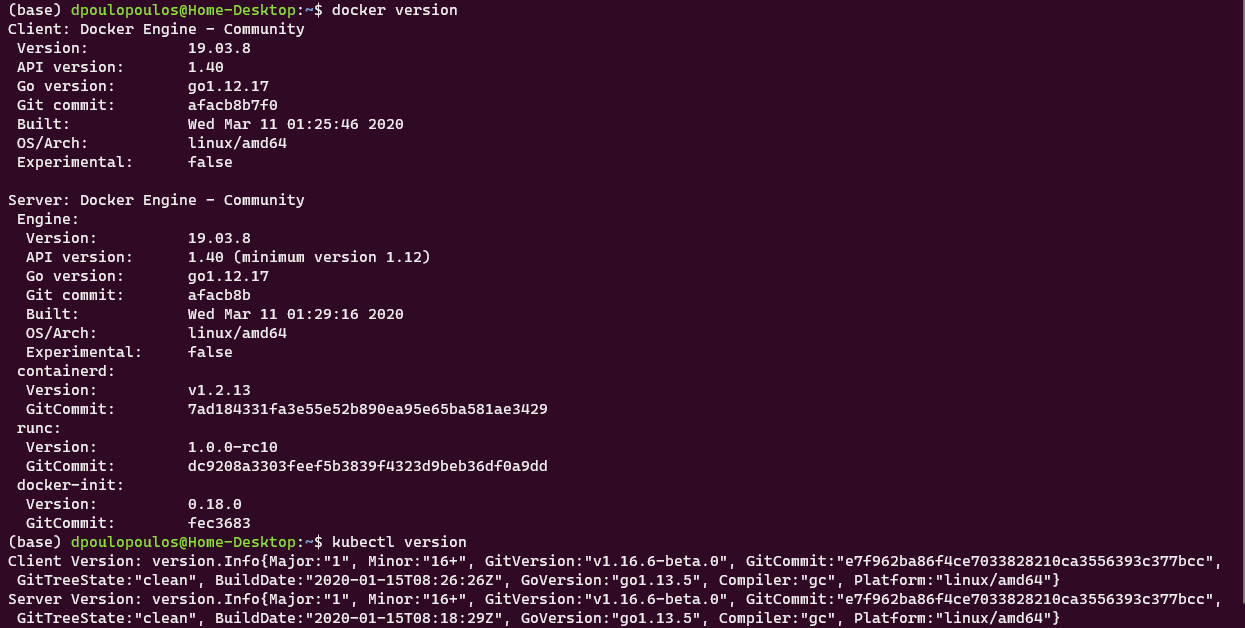
Docker и Kubernetes работают в среде WSL 2
Бонус: новый терминал Windows
В качестве дополнительной полезной программы вы можете установить из Microsoft Store новый терминал Windows. В описании к нему сказано, что перед нами новое современное приложение — быстрое, эффективное и мощное. Оно предназначено для пользователей, работающих с инструментами командной строки и с соответствующими средами, наподобие PowerShell. Среди его главных возможностей можно отметить следующие: поддержка вкладок и панелей, поддержка Unicode и UTF-8, ускорение вывода текста средствами GPU, поддержка пользовательских тем, стилей и настроек.
Вот видео про новый терминал Windows.
Более того, новый терминал очень хорошо выглядит, а его внешний вид поддаётся настройке. Настройки можно выполнять, пользуясь особым JSON-файлом. Здесь можно найти темы для терминала. Вот материал, в котором можно почитать подробности о терминале.
Планы развития WSL
В WSL 2 ещё недостаёт некоторых возможностей, но подсистема Windows для Linux развивается в правильном направлении. В ближайшее время установить WSL можно будет с помощью одной команды. Для этого достаточно будет открыть терминал Windows и выполнить в нём следующее:
wsl.exe --install
Кроме того, WSL 2 будет той версией подсистемы, которая, при первой установке WSL, устанавливается по умолчанию.
Надо отметить, что разработчики очень ждут от WSL следующих возможностей: поддержка видеокарт и поддержка приложений с графическим интерфейсом.
С момента выхода WSL 1 команду разработчиков этой подсистемы чаще всего просили о внедрении в WSL поддержки CUDA или GPU Compute. В последний код команды разработчиков WSL, систем виртуализации, DirectX, Windows Driver работают над этой возможностью. Поэтому — следите за новостями.
Обучение модели, использующей технологии глубокого обучения, в WSL 2 (с использованием CUDA)
Более того, на подходе и поддержка графических приложений для Linux. Например, в Linux-системах, установленных на WSL, можно будет пользоваться текстовыми редакторами или IDE. На Windows-машине можно будет даже разрабатывать GUI-приложения для Linux!
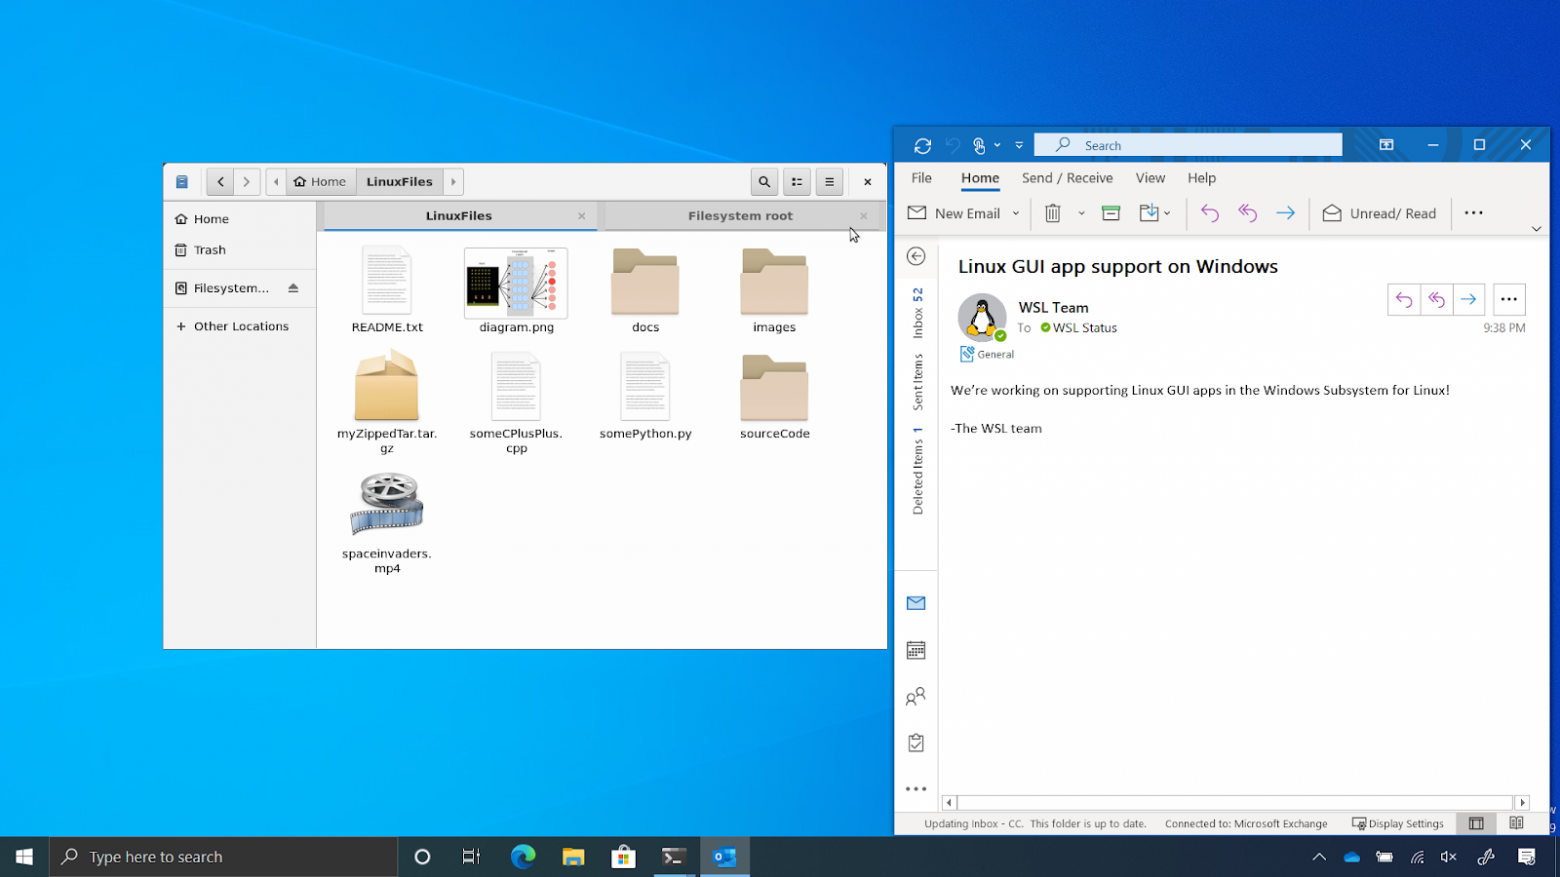
Поддержка графического интерфейса Linux в WSL 2
Итоги
Сегодня мы поговорили о том, как, пользуясь WSL 2 можно превратить Windows-компьютер в рабочую станцию программиста, пользующегося Linux. В распоряжении такого программиста оказывается высокая производительность и множество полезных возможностей, набор которых, со временем, пополнится. Поэтому я и могу говорить о том, что двойная загрузка умерла.
А вы пользуетесь WSL 2?


Windows Subsystem for Linux (WSL) — подсистема ОС Windows 10, позволяющая разработчикам, тестировщикам запускать нативные приложения Linux, писать скрипты, выполнять команды непосредственно из Windows. В обновлённой Windows 10 (2004) появилась 2я версия WSL, в которой используется полноценное ядро Linux с возможностью запуска приложений и контейнеров Docker, реализована высокая скорость загрузки, небольшой объем потребляемых ресурсов, управление в фоновом режиме, обновление ядра. Таким образом вы сможете запускать ELF64 программы, которые могут получать доступ к файловой системе Windows без использования сторонних порто (таких как Cygwin).
Образ ядра Linux (версия ядра 4.19) в Windows 10 представляет собой легкую виртуальную машину, для запуска которой не нужно ставить полноценную роль Hyper-V. Системные вызовы Linux транслируются на лету в вызовы Windows без использования эмулятора (в отличии от WSL1).
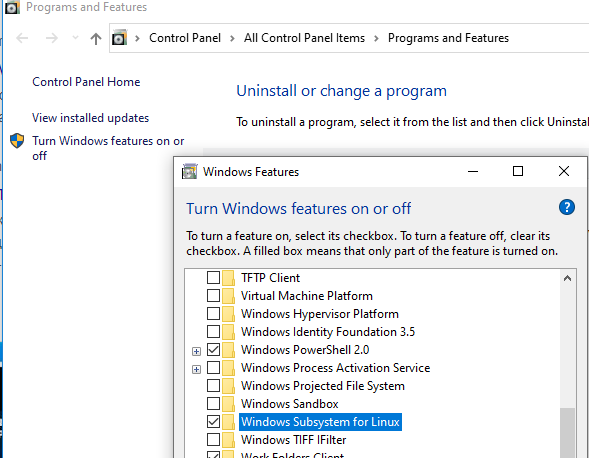
Изначально компонент WSL отключен. Чтобы его включить, вам необходимо зайти в Пуск -> Панель управления -> Программы и компоненты -> Включение и отключение компонентов Windows (Control Panel\All Control Panel Items\Programs and Features\Turn Windows features on or off), активировать галочку Подсистема Windows для Linux (Windows Subsystem for Linux), нажать кнопку ОК, и перезагрузить компьютер.
Вы можете включить компоненты WSL в Windows 10 с помощью dism:
dism.exe /online /enable-feature /featurename:VirtualMachinePlatform /all /norestart
dism.exe /online /enable-feature /featurename:Microsoft-Windows-Subsystem-Linux /all /norestart
или PowerShell
Enable-WindowsOptionalFeature -Online -FeatureName Microsoft-Windows-Subsystem-Linux
Enable-WindowsOptionalFeature -Online -FeatureName VirtualMachinePlatform
В Windows Server 2004 Semi-Annual Channel (SAC) для установки компонента WSL используется командлет Install-WindowsFeature:
Install-WindowsFeature -Name Microsoft-Windows-Subsystem-Linux
После этого также необходимо перезагрузить компьютер.
В настройка BIOS/UEFI компьютера должна быть включена поддержка аппаратной виртуализации: Intel VT (Intel Virtualization Technology) или AMD-V.
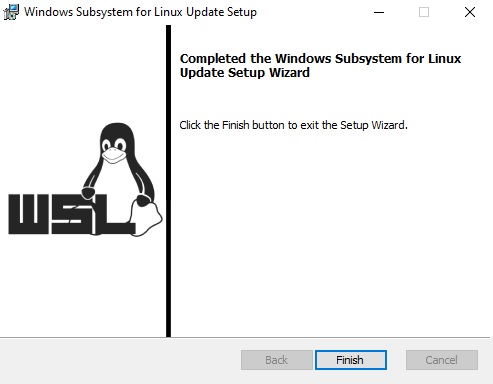
Теперь вам нужно выполнить обновление WSL до версии 2. Для этого требуется зайти на сайт https://docs.microsoft.com/ru-ru/windows/wsl/wsl2-kernel, скачать файл wsl_update_x64.msi, установить его. По завершении увидите картинку
Чтобы сделать WSL2 архитектурой по умолчанию для новых дистрибутивов, в PowerShell выполните команду:
wsl --set-default-version 2
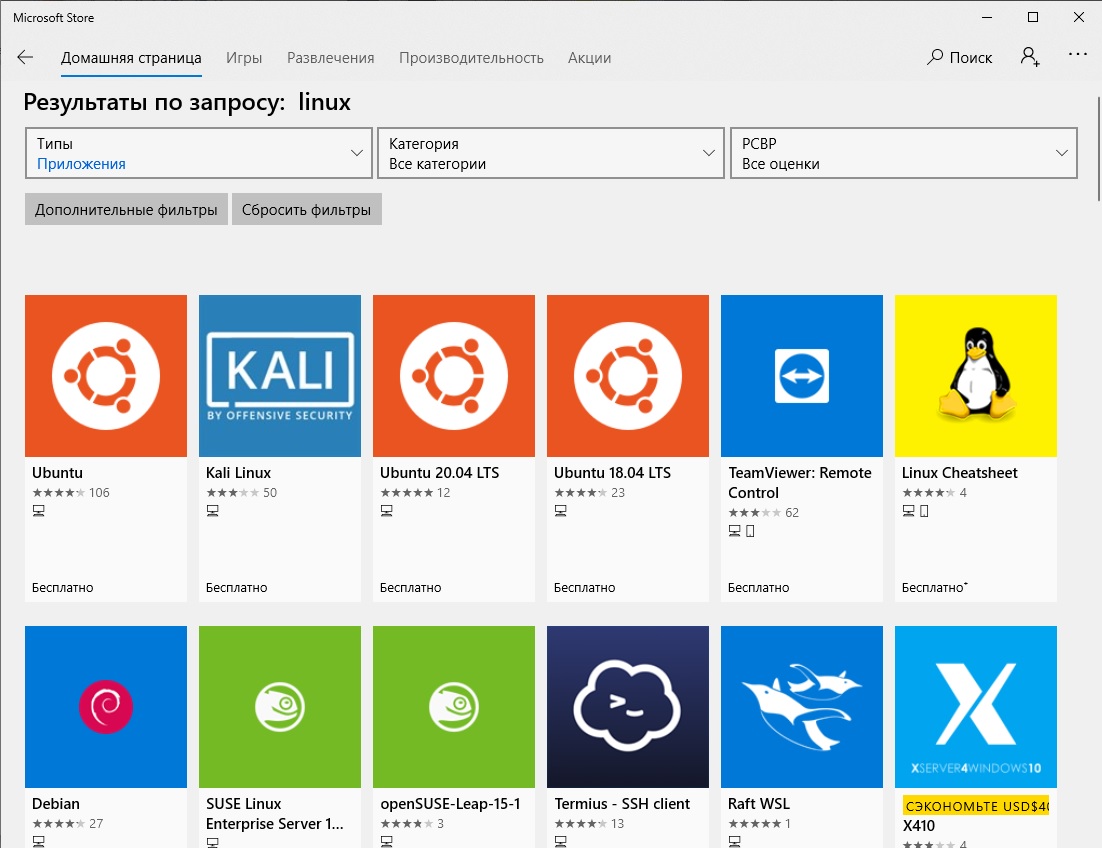
Далее вам необходимо открыть Microsoft Store, в поиске ввести слово “Linux”. В появившемся списке выберите нужный дистрибутив. Доступные Ubuntu, Debian, Kali Linux, Linux Cheatsheet, SUSE Linux Enterprise Server15, openSUSE Leap 15-1, Pengwin Enterprise, Fedora Remix for WSL или другие. В нашем примере мы будем использовать Ubuntu 20.04 LTS, нажмите кнопку Получить.
Если у вас отключен Windows Store или вы хотите установить дистрибутив WSL в Core редакции Windows Server, вы можете скачать дистрибутив Ubuntu с помощью PowerShell командлета Invoke-WebRequest:
Invoke-WebRequest https://aka.ms/wslubuntu2004 -OutFile ubuntu-2004.zip –UseBasicParsing
Распакуйте архив:
Expand-Archive -Path .\ubuntu-2004.zip
Запустите установку образа Linux с помощью файла Ubuntu.exe.
Также вы можете скачать образ в виде appx файла и установить его с помощью командлета Add-AppxPackage.
После установки можно проверить используемую версию WSL с помощью команды
wsl --list –-verbose
Если у вашей среды Linux указана версия 1, нужно изменить ее на WSL2 командой:
wsl --set-version Ubuntu-20.04 2
Файл жёсткого диска с образом виртуальной машины ОС Linux Ubuntu 20.04 будет располагаться в профиле пользователя: C:\Users\234\AppData\Local\Packages\CanonicalGroupLimited.Ubuntu20.04onWindows_79rhkp1fndgsc\LocalState.
После установки дистрибутива в стартовом меню появляется ярлык на него. Для запуска Ubuntu зайдите в меню Пуск, нажмите на соответствующем ярлыке и получите в отдельном окне полноценную командную оболочку Bash. Запускать WSL можно и с помощью команды wsl. При первом запуске образа в командной строке Bash вам будет предложено создать пользователя и пароль (которые не должны совпадать с учётной записью Windows). Чтобы выполнять команды с правами root, необходимо использовать дополнительный ключ (префикс) sudo. В WSL есть общие команды для Bash и CMD, и тут нужно не забывать, что система Linux чувствительна к регистру.
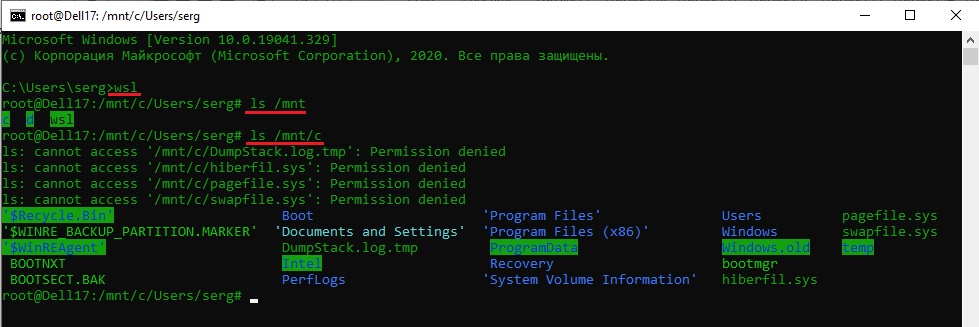
Вы можете выполнить Linux-команды из CMD. Для этого необходимо вначале указать “WSL”. Например, для просмотра списка файлов и папок в каталоге Windows, выполните:
wsl
ls /mnt
ls/mnt/c
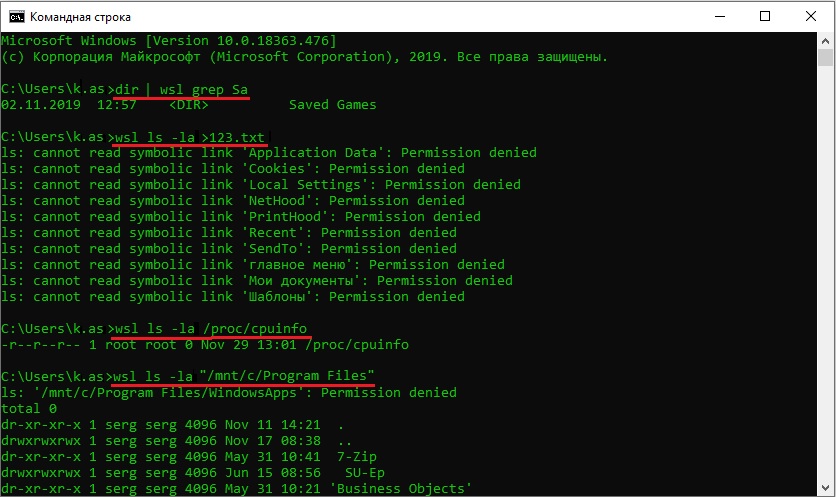
dir | wsl grep Sa
wsl ls ‑la > 123.txt
wsl ls ‑la /proc/cpuinfo
wsl ls ‑la “/mnt/c/Program Files”
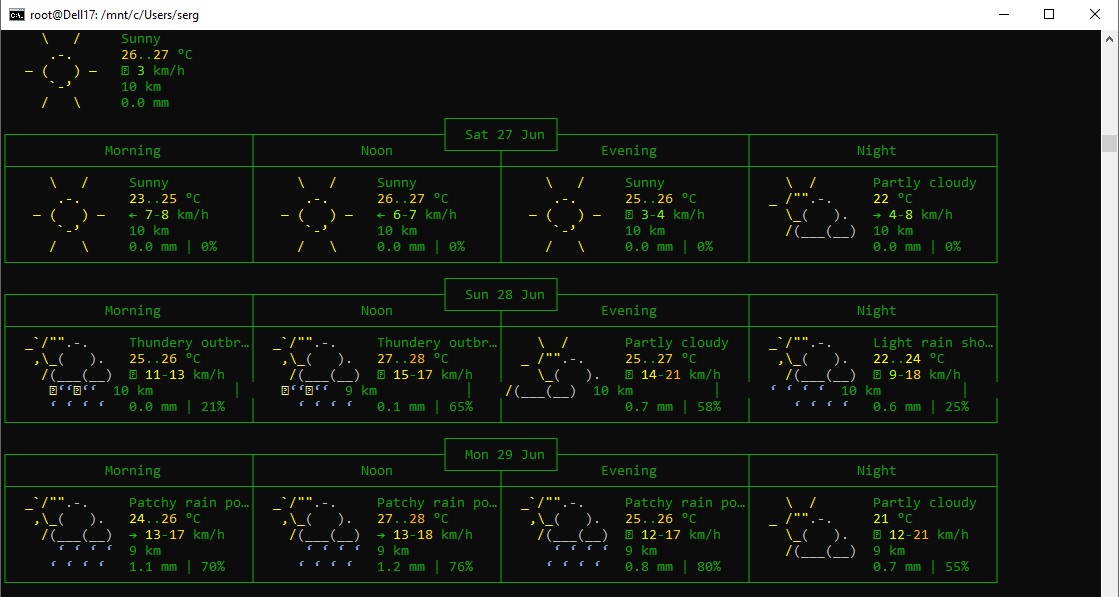
Также вы можете открыть проводник командой explorer.exe, калькулятор – calc.exe, блокнот – notepad.exe, paint – mspaint.exe, календарь – cal, погоду – curl wttr.in
Ещё один пример взаимосвязи 2х систем – вы можете открыть в Windows файл из WSL-дистрибутива по сетевому пути. Для этого в CMD наберите путь к файлу:
notepad \\wsl$\Ubuntu-20.04\home\1122.txt
Из окна консоли вы можете обновить список пакетов в Ubuntu с помощью команд:
sudo apt-get update
sudo apt-get upgrade
После обновления Ubuntu папка …/LocalState будет занимать 1.5 Гб.
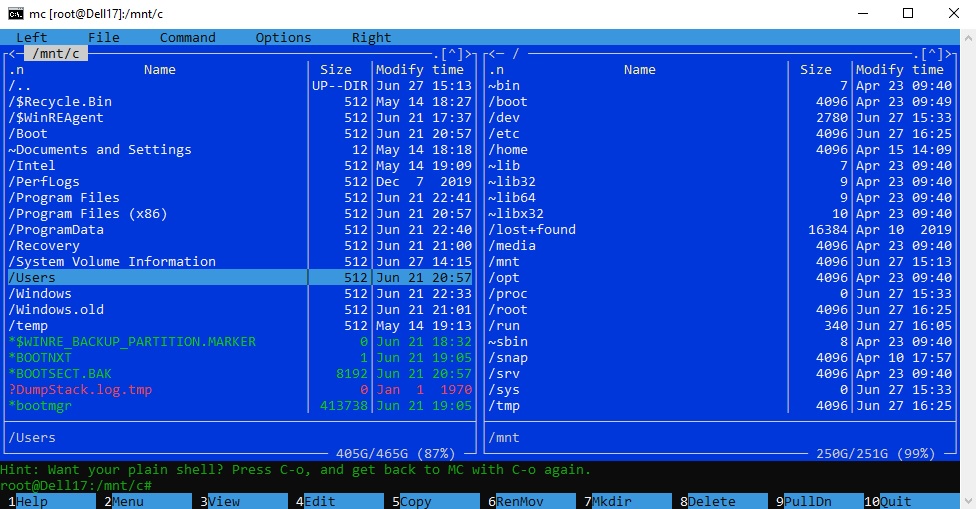
Из командной строки Linux можно не только просмотреть Windows-файлы и каталоги, но и получить к ним доступ. Чтобы удобнее копировать файлы, просматривать директории и их содержимое, установите файловый менеджер Midnight Commander с помощью команды
sudo apt-get install mc
Вы можете запустить Midnight Commander как в командной оболочке Bash, так и внутри CMD. На скриншоте ниже показано, что в двух панелях MC показывается список файлов с обеих ОС.
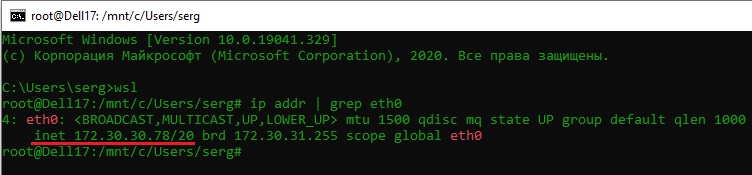
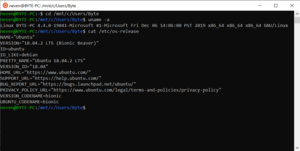
Можно отобрахить сетевые настройки (IP адрес) IP-адрес Linux-системы:
ip addr | grep eth0
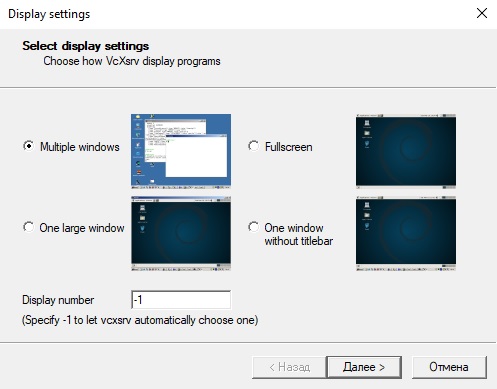
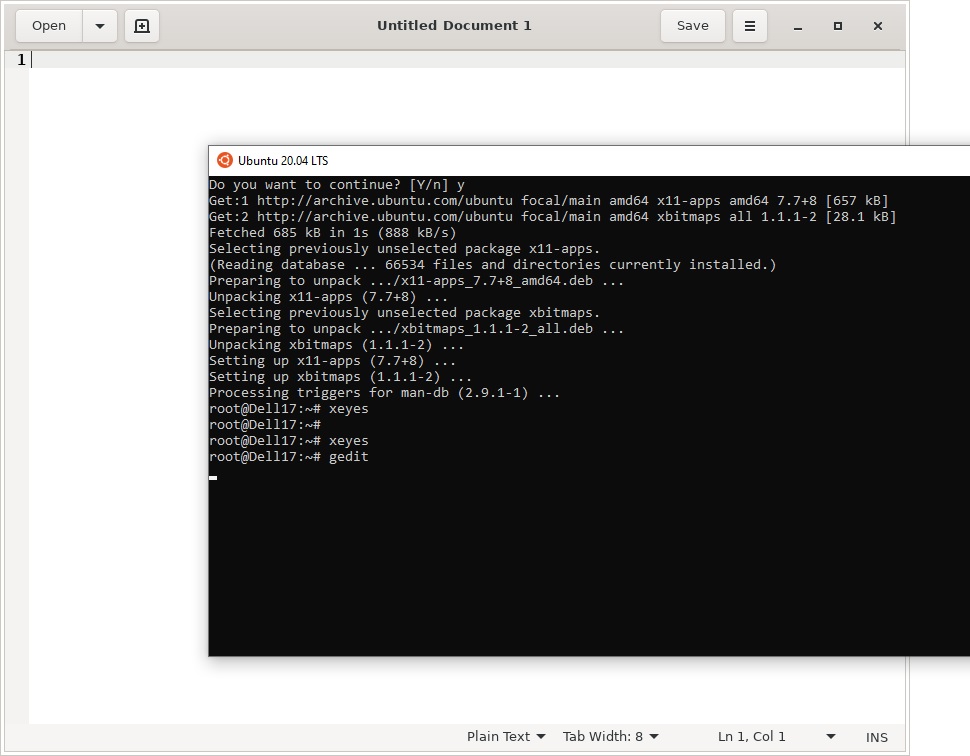
В WSL не предусмотрена работа приложений с графическим интерфейсом. Тем не менее вы можете попробовать их установить и использовать. Чтобы запускать графические приложения в Linux, нужно скачать и установить в Windows программу VcXsrv Windows X Server (https://sourceforge.net/projects/vcxsrv/).
С помощью пакетного менеджера apt-get установим несколько графических программ: например, браузер, текстовый редактор или что-то ещё:
sudo apt-get install gedit
sudo apt-get install firefox
sudo apt-get install x11-app
Затем создайте файл в директории root:
cd /~
vim .bash_login
впишите строку
export DISPLAY=$(cat /etc/resolv.conf | grep nameserver | awk '{print $2}'):0
сохраните запись
Esc -> :wr -> :q
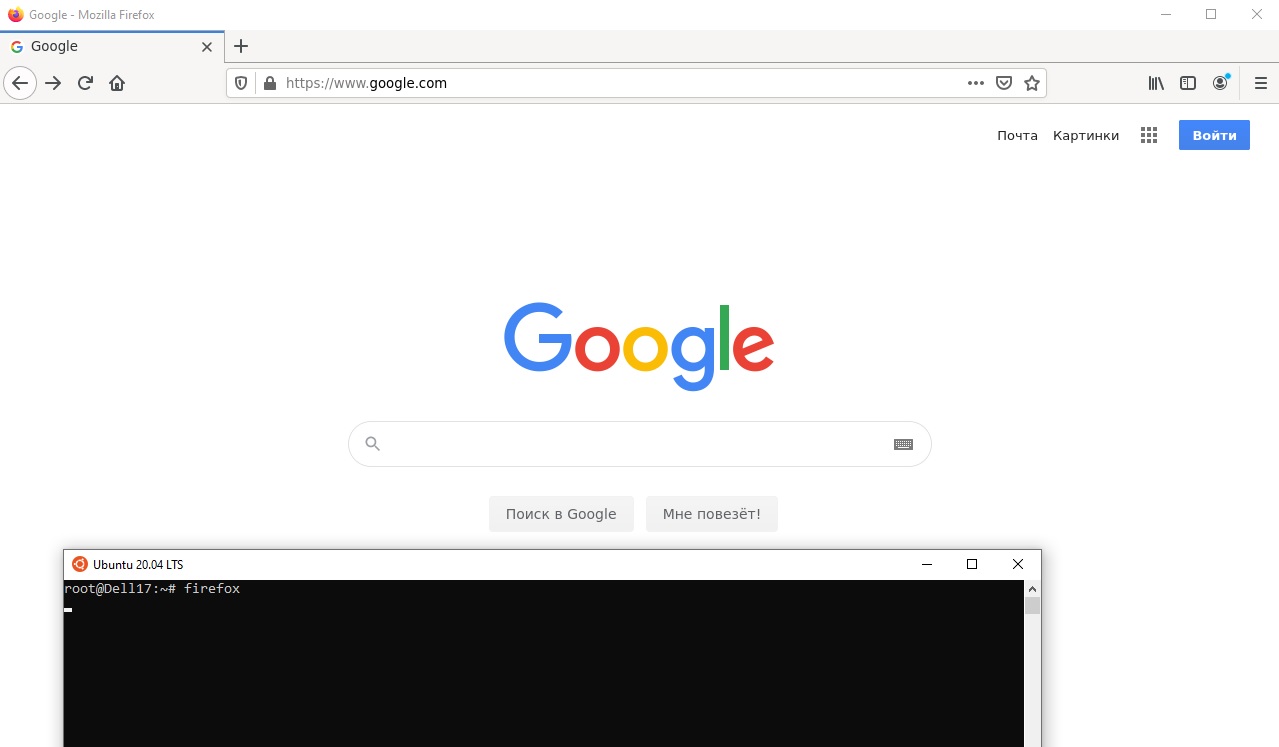
Теперь можете запустить графические программы Linux через WSL командами:
firefox
или
gedit
Вы можете установить в Windows 10 несколько дистрибутивов Linux и запускать одновременно в разных окнах WSL. Вывести весь перечень установленных дистрибутивов можете с помощью команды:
wsl --list –all
чтобы завершить работу всех запущенных дистрибутивов и ядра WSL 2, выполните команду:
wsl --shutdown
From Wikipedia, the free encyclopedia
 |
|
Bash running on Windows 10 |
|
| Other names | WSL |
|---|---|
| Developer(s) | Microsoft |
| Initial release | August 2, 2016; 7 years ago |
| Stable release |
WSL 2 1.2.5 |
| Preview release |
WSL 2 2.0.1 |
| Repository | github |
| Operating system | Windows 10, Windows 10 LTSB/LTSC, Windows Server 2016, Windows Server 2019, Windows 11, Windows Server 2022 |
| Predecessor | Windows Services for UNIX |
| Type | Compatibility layer, Virtualization |
| License | Subsystem: Proprietary commercial software; Linux kernel: GNU GPLv2 (only) with some code under compatible GPL variants or under permissive licenses like BSD, MIT |
| Website | learn |
Windows Subsystem for Linux (WSL) is a feature of Windows that allows developers to run a Linux environment without the need for a separate virtual machine or dual booting. There are two versions of WSL: WSL 1 and WSL 2. WSL 1 was first released on August 2, 2016, and acts as a compatibility layer for running Linux binary executables (in ELF format) by implementing Linux system calls on the Windows kernel.[3] It is available on Windows 10, Windows 10 LTSB/LTSC, Windows 11,[4] Windows Server 2016, Windows Server 2019 and Windows Server 2022.
In May 2019, WSL 2 was announced,[5] introducing important changes such as a real Linux kernel,[6] through a subset of Hyper-V features. WSL 2 differs from WSL 1 in that WSL 2 runs inside a managed virtual machine that implements the full Linux kernel. As a result, WSL 2 is compatible with more Linux binaries than WSL 1, as not all syscalls were implemented in WSL 1. Since June 2019, WSL 2 is available to Windows 10 customers through the Windows Insider program, including the Home edition.[7] WSL is not available to all Windows 10 users by default. It can be installed either by joining the Windows Insider program or manual install.[8]
History[edit]
Microsoft’s first foray into achieving Unix-like compatibility on Windows began with the Microsoft POSIX Subsystem, superseded by Windows Services for UNIX via MKS/Interix, which was eventually deprecated with the release of Windows 8.1. The technology behind Windows Subsystem for Linux originated in the unreleased Project Astoria, which enabled some Android applications to run on Windows 10 Mobile.[9] It was first made available in Windows 10 Insider Preview build 14316.[10]
Whereas Microsoft’s previous projects and the third-party Cygwin had focused on creating their own unique Unix-like environments based on the POSIX standard, WSL aims for native Linux compatibility. Instead of wrapping non-native functionality into Win32 system calls as Cygwin did, WSL’s initial design (WSL 1) leveraged the NT kernel executive to serve Linux programs as special, isolated minimal processes (known as «pico processes») attached to kernel mode «pico providers» as dedicated system call and exception handlers distinct from that of a vanilla NT process, opting to reutilize existing NT implementations wherever possible.[11]
WSL beta was introduced in Windows 10 version 1607 (Anniversary Update) on August 2, 2016. Only Ubuntu (with Bash as the default shell) was supported. WSL beta was also called «Bash on Ubuntu on Windows» or «Bash on Windows». WSL was no longer beta in Windows 10 version 1709 (Fall Creators Update), released on October 17, 2017. Multiple Linux distributions could be installed and were available for install in the Windows Store.[12]
In 2017 Richard Stallman expressed fears that integrating Linux functionality into Windows will only hinder the development of free software, calling efforts like WSL «a step backward in the campaign for freedom.»[13]
Though WSL (via this initial design) was much faster and arguably much more popular than the previous UNIX-on-Windows projects, Windows kernel engineers found difficulty in trying to increase WSL’s performance and syscall compatibility by trying to reshape the existing NT kernel to recognize and operate correctly on Linux’s API. At a Microsoft Ignite conference in 2018, Microsoft engineers gave a high-level overview of a new «lightweight» Hyper-V VM technology for containerization where a virtualized kernel could make direct use of NT primitives on the host.[14] In 2019, Microsoft announced a completely redesigned WSL architecture (WSL 2) using this lightweight VM technology hosting actual (customized) Linux kernel images, claiming full syscall compatibility.[6] Microsoft announced WSL 2 on May 6, 2019,[5] and it was shipped with Windows 10 version 2004.[15] It was also backported to Windows 10 version 1903 and 1909.[16]
GPU support for WSL 2 to do GPU-accelerated machine learning was introduced in Windows build 20150.[17] GUI support for WSL 2 to run Linux applications with graphical user interfaces (GUIs) was introduced in Windows build 21364.[18] Both of them are shipped in Windows 11.
In April 2021, Microsoft released a Windows 10 test build that also includes the ability to run Linux graphical user interface (GUI) apps using WSL 2 and CBL-Mariner.[19][18] The Windows Subsystem for Linux GUI (WSLg) was officially released at the Microsoft Build 2021 conference. It is included in Windows 10 Insider build 21364 or later.[20]
Microsoft introduced a Windows Store version of WSL on October 11, 2021, for Windows 11.[21] It reached version 1.0.0 on November 16, 2022 with added support for Windows 10.
Notable releases[edit]
| Release / Feature | Preview build | Public build |
|---|---|---|
| WSL (Beta) (Bash on Ubuntu on Windows) | Windows 10 build 14316 | Windows 10 version 1607 (Anniversary Update) |
| WSL (no longer Beta) | Windows 10 build 16251 | Windows 10 version 1709 (Fall Creators Update) |
| WSL 2 (lightweight VM) | Windows 10 build 18917 | Windows 10 version 2004 (also backported to 1903 and 1909) |
| WSL 2 GPU support | Windows 10 build 20150 | Windows 11 (also Windows 10 21H2) |
| WSL 2 GUI support (WSLg) (last version) | Windows 10 build 21364 | Windows 11 |
| Version | Comment |
|---|---|
| 0.47.1 | First version |
| 0.67.6 | systemd support |
| 1.0.0 | Generally available; Windows 10 support |
Features[edit]

WSL is available in Windows Server 2019 and in versions of Windows 10 from version 1607, though only in 64-bit versions.
Microsoft envisages WSL as «primarily a tool for developers – especially web developers and those who work on or with open source projects».[22] In September 2018, Microsoft said that «WSL requires fewer resources (CPU, memory, and storage) than a full virtual machine» (which prior to WSL was the most direct way to run Linux software in a Windows environment), while also allowing users to use Windows apps and Linux tools on the same set of files.[22]
The first release of WSL provides a Linux-compatible kernel interface developed by Microsoft, containing no Linux kernel code, which can then run the user space of a Linux distribution on top of it, such as Ubuntu,[23][24][25][26] openSUSE,[27] SUSE Linux Enterprise Server,[28][29][12] Debian[30] and Kali Linux.[31] Such a user space might contain a GNU Bash shell and command language, with native GNU command-line tools (sed, awk, etc.), programming-language interpreters (Ruby, Python, etc.), and even graphical applications (using an X11 server at the host side).[22]
The architecture was redesigned in WSL 2,[5] with a Linux kernel running in a lightweight virtual machine environment.
wsl.exe[edit]
The wsl.exe command is used to manage distributions in the Windows Subsystem for Linux on the command-line. It can list available distributions, set a default distribution, and uninstall distributions.[32] The command can also be used to run Linux binaries from the Windows Command Prompt or Windows PowerShell.[33] wsl.exe replaces lxrun.exe which is deprecated as of Windows 10 1803 and later.[34]
WSLg[edit]
Windows Subsystem for Linux GUI (WSLg) is built with the purpose of enabling support for running Linux GUI applications (X11 and Wayland) on Windows in a fully integrated desktop experience.[35] WSLg was officially released at the Microsoft Build 2021 conference and is included in Windows 10 Insider build 21364 or later.[20] However, with the introduction of Windows 11, WSLg is finally shipping with a production build of Windows, bringing support for both graphics and audio in WSL apps.[36]
FreeRDP is used to encode all communications going from the RDP Server (in Weston) to the RDP Client (mstsc on Windows) according to the RDP protocol specifications.[37]
Prerequisites for running WSLg include:
- Windows 11 or Windows 10 Insider Preview builds 21362-21390.[35][38]
- A system with virtual GPU (vGPU) enabled for WSL is recommended, as it will allow you to benefit from hardware accelerated OpenGL rendering.[35]
Design[edit]
WSL 1[edit]

LXSS Manager Service is the service in charge of interacting with the subsystem (through the drivers lxss.sys and lxcore.sys), and the way that Bash.exe (not to be confused with the Shells provided by the Linux distributions) launches the Linux processes, as well as handling the Linux system calls and the binary locks during their execution.[39] All Linux processes invoked by a particular user go into a «Linux Instance» (usually, the first invoked process is init). Once all the applications are closed, the instance is closed.
WSL 1’s design featured no hardware emulation / virtualization (unlike other projects such as coLinux) and makes direct use of the host file system (through VolFS and DrvFS)[40] and some parts of the hardware, such as the network, which guarantees interoperability. Web servers for example, can be accessed through the same interfaces and IP addresses configured on the host, and shares the same restrictions on the use of ports that require administrative permissions, or ports already occupied by other applications.[41] There are certain locations (such as system folders) and configurations whose access/modification is restricted, even when running as root, with sudo from the shell. An instance with elevated privileges must be launched in order to get «sudo» to give real root privileges, and allow such access.[22]
WSL 1 is not capable of running all Linux software, such as 32-bit binaries,[42][43] or those that require specific Linux kernel services not implemented in WSL. Due to a lack of any «real» Linux kernel in WSL 1, kernel modules, such as device drivers, cannot be run. WSL 2, however, makes use of live virtualized Linux kernel instances. It is possible to run some graphical (GUI) applications (such as Mozilla Firefox) by installing an X11 server within the Windows (host) environment (such as VcXsrv or Xming),[44] although not without caveats, such as the lack of audio support (though this can be remedied by installing PulseAudio in Windows in a similar manner to X11) or hardware acceleration (resulting in poor graphics performance). Support for OpenCL and CUDA is also not being implemented currently, although planned for future releases.[45][46] Microsoft stated WSL was designed for the development of applications, and not for desktop computers or production servers, recommending the use of virtual machines (Hyper-V), Kubernetes, and Azure for those purposes.[22]
In benchmarks WSL 1’s performance is often near native Linux Ubuntu, Debian, Intel Clear Linux or other Linux distributions. I/O is in some tests a bottleneck for WSL.[47][48][49] The redesigned WSL 2 backend is claimed by Microsoft to offer twenty-fold increases in speed on certain operations compared to that of WSL 1.[6] In June 2020, a benchmark with 173 tests with an AMD Threadripper 3970x shows good performance with WSL 2 (20H2) with 87% of the performance of native Ubuntu 20.04.0 LTS. This is an improvement over WSL 1, which has only 70% of the performance of native Ubuntu in this comparison. WSL 2 improves I/O performance, providing a near-native level.[50]
A comparison of 69 tests with Intel i9 10900K in May 2020 shows nearly the same relative performance.[51] In December 2020, a benchmark with 43 tests with an AMD Ryzen 5900X shows good performance with WSL 2 (20H2) with 93% of the performance of native 20.04.1 LTS. This is an improvement over WSL 1, which has only 73% in this comparison.[52]
WSL 2[edit]

Version 2 introduces changes in the architecture. Microsoft has opted for virtualization through a highly optimized subset of Hyper-V features, in order to run the kernel and distributions (based upon the kernel), promising performance equivalent to WSL 1. For backward compatibility, developers don’t need to change anything in their published distributions. WSL 2 settings can be tweaked by the WSL global configuration, contained in an INI file named .wslconfig in the User Profile folder.[53][54]
The distribution installation resides inside an ext4-formatted filesystem inside a virtual disk, and the host file system is transparently accessible through the 9P protocol,[55] similarly to other virtual machine technologies like QEMU.[56] For the users, Microsoft promised up to 20 times the read/write performance of WSL 1.[5] From Windows an IFS network redirector is provided for Linux guest file access using the UNC path prefix of \\wsl$.
WSL 2 requires Windows 11,[57] or Windows 10 version 1903 or higher, with Build 18362 or higher, for x64 systems, and Version 2004 or higher, with Build 19041 or higher, for ARM64 systems.[8]
WSL 2 and Windows 11 are in good shape with 95% performance of native Ubuntu 20.04 LTS.[58]
See also[edit]
- Azure Sphere
- FreeBSD § OS compatibility layers
- SmartOS § Virtualization
- Windows Terminal
- Xenix
References[edit]
- ^ «Release 1.2.5 · microsoft/WSL». GitHub. Retrieved 4 July 2023.
- ^ «Release 2.0.1 · microsoft/WSL». GitHub. Retrieved 27 September 2023.
- ^ Leeks, Stuart (2020). Windows Subsystem for Linux 2 (WSL 2) Tips, Tricks, and Techniques: Maximise Productivity of Your Windows 10 Development Machine with Custom Workflows and Configurations. Birmingham: Packt Publishing. pp. 18–19. ISBN 978-1-80056-352-0. OCLC 1202451000.
- ^ June 2021, Darren Allan 23 (23 June 2021). «Windows 11 could seamlessly run graphical Linux apps». TechRadar. Retrieved 29 June 2021.
- ^ a b c d Craig Loewen (6 May 2019). «Announcing WSL 2». Windows Command Line Tools For Developers.
- ^ a b c mscraigloewen. «About WSL 2». docs.microsoft.com.
- ^ «WSL 2 Post BUILD FAQ». Windows Command Line Tools For Developers. 14 May 2019.
- ^ a b craigloewen-msft (24 February 2022). «Install WSL on Windows 10». Microsoft.
- ^ Bright, Peter (6 April 2016). «Why Microsoft needed to make Windows run Linux software». Ars Technica. Condé Nast.
- ^ Aul, Gabe (6 April 2016). «Announcing Windows 10 Insider Preview Build 14316». Windows Experience Blog. Microsoft.
- ^ «Windows Subsystem for Linux Overview». Windows Subsystem for Linux. Retrieved 22 April 2018.
- ^ a b «What’s new in WSL in Windows 10 Fall Creators Update — Windows Command Line». Windows Command Line. 11 October 2017. Retrieved 15 October 2021.
- ^ Heath, Nick (20 September 2017). «Will Microsoft love Linux to death? Shuttleworth and Stallman on whether Windows 10 is free software’s friend». TechRepublic. Archived from the original on 1 December 2022. Retrieved 18 February 2022.
- ^ Microsoft Ignite (2 October 2018), OS internals: Technical deep-dive into operating system innovations — BRK3365, archived from the original on 9 November 2021, retrieved 7 May 2019
- ^ «WSL 2 will be generally available in Windows 10, version 2004 — Windows Command Line». Windows Command Line. 13 March 2020. Retrieved 15 October 2021.
- ^ «WSL 2 Support is coming to Windows 10 Versions 1903 and 1909 — Windows Command Line». Windows Command Line. 20 August 2020. Retrieved 15 October 2021.
- ^ «GPU accelerated ML training inside the Windows Subsystem for Linux — Windows Developer Blog». Windows Blog. 17 June 2020. Retrieved 16 October 2021.
- ^ a b «The Initial Preview of GUI app support is now available for the Windows Subsystem for Linux — Windows Command Line». Windows Command Line. 21 April 2021.
- ^ Foley, Mary Jo (21 April 2021). «New Windows 10 test build adds first preview of Linux GUI apps on WSL». ZDNet. Retrieved 23 April 2021.
- ^ a b Abrams, Lawrence (29 May 2021). «Hands on with WSLg: Running Linux GUI apps in Windows 10». Bleeping Computer. Retrieved 30 May 2021.
- ^ «A preview of WSL in the Microsoft Store is now available! — Windows Command Line». Windows Command Line. 11 October 2021. Retrieved 16 October 2021.
- ^ a b c d e «Frequently Asked Questions for WSL». Microsoft. Retrieved 13 November 2016.
- ^ Harsh, Mike (30 March 2016). «Run Bash on Ubuntu on Windows». Building Apps for Windows. Microsoft.
- ^ Finley, Klint (30 March 2016). «Why Microsoft Making Linux Apps Run on Windows Isn’t Crazy». Wired. Condé Nast.
- ^ Kirkland, Dustin (30 March 2016). «Ubuntu on Windows – The Ubuntu Userspace for Windows Developers». Ubuntu Insights. Canonical.
- ^ Hammons, Jack (9 April 2016). «Bash on Ubuntu on Windows». MSDN. Microsoft.
- ^ Get openSUSE Leap 42 — Microsoft Store
- ^ Get SUSE Linux Enterprise Server 12 — Microsoft Store
- ^ Yegulalp, Serdar (12 May 2017). «Windows Subsystem for Linux welcomes Suse and Fedora options». InfoWorld. Retrieved 16 September 2017.
- ^ «Debian GNU/Linux for WSL now available in the Windows Store». Windows Command Line Tools For Developers. Retrieved 7 March 2018.
- ^ «Kali Linux in the Windows App Store». Retrieved 9 March 2018.
- ^ Manage and configure Windows Subsystem for Linux
- ^ Windows Subsystem for Linux interoperability with Windows
- ^ Command Reference for Windows Subsystem for Linux
- ^ a b c Welcome to WSLg, Microsoft, 7 November 2021, retrieved 7 November 2021
- ^ Salter, Jim (7 October 2021). «The best part of Windows 11 is a revamped Windows Subsystem for Linux». Ars Technica. Retrieved 7 November 2021.
- ^ «Installing WSLg». GitHub. 27 April 2022. Retrieved 27 April 2022.
- ^ «Clarify Windows 10 vs 11 and build numbers (#485) · microsoft/wslg@5ddd8d2». GitHub. Retrieved 28 May 2022.
- ^ Jack Hammons (22 April 2016). «Windows Subsystem for Linux Overview». Windows Subsystem for Linux blog on MSDN.
- ^ Jack Hammons (15 June 2016). «WSL File System Support». Windows Subsystem for Linux blog on MSDN.
- ^ Jack Hammons (8 November 2016). «WSL Networking». Windows Subsystem for Linux blog on MSDN.
- ^ «Please enable WSL to run 32 bit ELF binaries». Windows Developer feedback (Microsoft/UserVoice). Archived from the original on 23 August 2019. Retrieved 21 January 2018.
- ^ «Support for 32-bit i386 ELF binaries». GitHub.
- ^ «Windows 10’s Bash shell can run graphical Linux applications with this trick». PC World. Retrieved 10 September 2018.
- ^ «GPU not accesssible for running tensorflow and installing CUDA · Issue #1788 · Microsoft/WSL». GitHub. Retrieved 10 September 2018.
- ^ «OpenCL & CUDA GPU support». Windows Developer feedback (Microsoft/UserVoice). 15 September 2016. Archived from the original on 7 July 2018. Retrieved 10 September 2018.
- ^ «Windows Subsystem for Linux». Phoronix.
- ^ Larabel, Michael (12 October 2018). «A Look At The Windows 10 October 2018 Update Performance With WSL». Phoronix.
- ^ Larabel, Michael (5 November 2018). «The WSL Improvements In The Windows 10 October 2018 Update». Phoronix.
- ^ Larabel, Michael (24 June 2020). «Ubuntu 20.04 vs. Windows 10 WSL/WSL2 Performance In 170+ Benchmarks». Phoronix.
- ^ Larabel, Michael (17 June 2020). «Windows 10 May 2020 Performance For WSL vs. WSL2». Phoronix.
- ^ Larabel, Michael (16 December 2020). «Windows Subsystem For Linux / WSL2 Performance With The AMD Ryzen 9 5900X». Phoronix.
- ^ Loewen, Craig (26 July 2019). «What’s new for WSL in Insiders Preview Build 18945». Microsoft devblog. Archived from the original on 26 July 2019. Retrieved 26 July 2019.
In this new update we’ve added the ability to start using global config options for WSL. These options are targeted towards power users who want to further customize their WSL experience.
- ^ Hillis, Ben (25 July 2019). «MicrosoftDocs/WSL | Build 18947». GitHub. Archived from the original on 26 July 2019. Retrieved 26 July 2019.
- ^ «A Deep Dive Into How WSL Allows Windows to Access Linux Files». Windows Command Line Tools For Developers. 30 May 2019. Retrieved 24 June 2019.
- ^ Jujjuri, Venkateswararao; Van Hensbergen, Eric; Liguori, Anthony; Pulavarty, Badari (13–16 July 2010). «VirtFS—A virtualization aware File System pass-through» (PDF). Linux Symposium.
- ^ «Comparing WSL 1 and WSL 2». Microsoft Learn. 4 October 2022. Retrieved 18 October 2022.
- ^ Larabel, Michael (29 September 2021). «Windows 11 WSL2 Performance is Quite Competitive Against Ubuntu 20.04 LTS / Ubuntu 21.10». Phoronix.
Further reading[edit]
- Barnes, Hayden (2021). Pro Windows Subsystem for Linux (WSL): Powerful Tools and Practices for Cross-Platform Development and Collaboration. Apress. ISBN 978-1484268728.
- Leeks, Stuart (2020). Windows Subsystem for Linux 2 (WSL 2) Tips, Tricks, and Techniques: Maximise productivity of your Windows 10 development machine with custom workflows and configurations. Packt Publishing. ISBN 978-1800562448.
- Singh, Prateek (2020). Learn Windows Subsystem for Linux: A Practical Guide for Developers and IT Professionals. Apress. ISBN 978-1484260371.
External links[edit]
- WSL on Microsoft Learn
- WSL on GitHub
- WSL2-Linux-Kernel on GitHub
- Brown, Pete (22 July 2016). «Fun with the Windows Subsystem for Linux». Windows Developer Blog. Microsoft.
Howdy neighbor. Have you heard the news about WSL2? As of June 2020, WSL is available to the general public. I figured this would be a good opportunity to share my findings with you, the general public. But more specifically, Flatiron Students using WSL.
What is the Windows Subsystem for Linux?
The Windows Subsystem for Linux (WSL) lets developers run a Linux environment directly on Windows 10 without the overhead of a virtual machine. It’s an unmodified OS, but highly integrated into Windows.
WSL1 was groundbreaking and translated Linux system calls to Windows equivalents. This could be slow and several features weren’t available. WSL2 uses Hyper-V virtual machine technology so Linux compatibility is excellent and file access is up to 20x faster than before.
Table of Contents:
- Windows 10 Requirements
- Updating and Configuring Windows 10
- Enabling Windows Subsystem for Linux (WSL) && Virtual Machine Platform
- Installing Ubuntu
- Upgrading to WSL Packages and Ubuntu Version
- Flatiron Local Environment Set Up
- Install Ruby Version Manager
- Gem Installations
- Configure Git
- Node Version Manager
- Visual Studio Code
- Generating a SSH Key
- Updating Learn Config
- Creating Flatiron Folders
- Adding Flatiron Customization To Your Terminal
Windows 10 Requirements
WSL2 is compatible with the Home, Pro, or Server editions of Windows but not Windows’ 10 S (although you can often upgrade to the Home edition for free).
The Windows May 2020 update is essential — that’s version 2004 or above. Choose the Settings cog from the Start menu, then select System followed by About. The Windows specifications are shown at the bottom of the panel:

NOTE: Some PCs report that version 2004 is currently unavailable in the Windows Update panel. Alternatively, you can try downloading the [Windows Update Assistant][]. If this does not work, you may not be able to upgrade until Microsoft has released a fix for your device
WARNING: Fiddling with your BIOS settings can trash your PC! Be careful when making changes. Consult your manufacturer’s help pages or search for online advice about your specific make and model.
That warning out of the way, hardware virtualization will be active on most devices, but you can check by rebooting, and opening the BIOS panels — typically by hitting the DEL, F2, or F10 key as the system starts. Look for Virtualization Technology, VTx or similar options. Ensure they are enabled, save, and reboot the device.
Finally, ensure your C: drive has at least 1GB of spare disk space — ideally more. You may be able to free up some space in Settings, System, Storage or using the Disk clean-up tool in Windows Administrative Tools.
Updating and Configuring Windows 10
- Make sure to run: Windows Update Assistant. When the update is complete, your system build should be greater than 19000. Please verify this is true before continuing.

Enabling Windows Subsystem for Linux (WSL) && Virtual Machine Platform
Windows Subsystem Linux (WSL) is not automatically enabled on windows. So, to start off, we need to enable it!
- Go to your Windows Search bar and type in
Turn Windows Features On or Off. Click on the result that matches your query. It will be in your Control Panel. You should see something like this:

- Scroll down until you see «Windows Subsystem for Linux» — ensure its box is checked!
- Scroll up a bit until you see «Virtual Machine Platform.» Turn this feature on as well.
When that’s complete, it should look like this:

- Click
ok. This will prompt Windows to completely restart. Do so, grab some water, and let’s continue!
Installing Ubuntu
-
Open up Microsoft Store. Search for «Ubuntu»
-
Choose «Ubuntu» (do NOT choose 16.04 LTS, 18.04 LTS, or 20.04LTS)

-
Search for, and open the newly installed Ubuntu application.
-
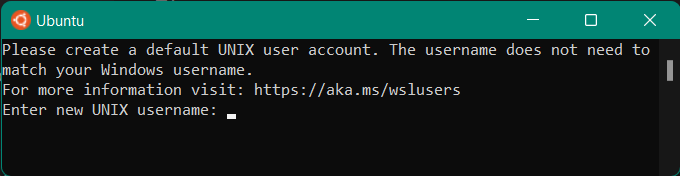
Choose a username — I suggest picking a really simple username (like a short nickname).
NOTE:
- Ubuntu will not accept capital letters in a username
- Ubuntu will not accept numbers at the start of a username
- Choose a password — I suggest picking a really really simple password.
NOTE:
- When you start typing a password, it will look as though nothing is happening. Thats totally normal, it’s just a security feature.
- Type whatever password you would like, and press enter.
- It will prompt you to confirm your password, retype the same password and hit enter.
Once you have set up a username and password, you should return to a normal bash prompt (what does that even mean!?). It should look something like this:

Upgrading to WSL Packages and Ubuntu Version (via Command Prompt as Admin)
At this point, you’ve already installed WSL1, we just need to run a few commands to update it to WSL2. The next few commands are a little quirky, but, extremely important.
-
Click this link — it will download the necessary msi package. The package’s name should be something along the lines of:
wsl_update_x64.msi. -
Double click on the package and follow the necessary prompts to install. (It should take approx 30 seconds to install.)
-
Now, in your Windows Search bar, search for an application named
Command Prompt. click Run as Administrator.

-
Inside Command Prompt (running as administrator), copy and paste the code below:
wsl --set-default-version 2

-
The following command will change your version of Ubuntu from 1, to 2. Run:
wsl.exe --set-version Ubuntu 2
Annnddd That’s it for WSL2 you should be good to go on your WSL2 installation. Let’s move on to our Learn Local Environment installation.
Flatiron Tools
Okay, so now we can start setting up our Ubuntu system with Flatiron tools! First, let’s close and reopen Ubuntu. Then run the commands below.
-
Run the following command in your Ubuntu terminal. This will make sure your currently installed packages in your Ubuntu system are up to date:
-
Then run the following command to install a few important packages. (copy the entire block of code)
sudo apt-get install git-core curl zlib1g-dev build-essential libssl-dev libreadline-dev libyaml-dev libsqlite3-dev sqlite3 libxml2-dev libxslt1-dev libcurl4-openssl-dev software-properties-common libffi-dev libpq-dev libgdbm-dev libncurses5-dev automake libtool bison gnupg postgresql postgresql-contrib
Ruby Version Manager
Next, we’ll install RVM, also known as RVM. I’ve purposefully listed commands 3 through 7 separately. Do not run them all at the same time — run them in succession. The combined 5 commands will install RVM.
-
Run:
sudo apt-get install software-properties-common -
Run:
sudo apt-add-repository -y ppa:rael-gc/rvm -
Run:
-
Run:
For all intents and purposes, RVM is now installed. However, to start using it, you must SHUT DOWN YOUR UBUNTU TERMINAL AND REOPEN IT AGAIN.
Moving right along, let’s install the Ruby version compatible with Flatiron labs, we want to download ruby 2.6.1 and set it as our default:
-
This following will install Ruby version 2.6.1, which is what Flatiron uses for its curriculum. Run:
-
The following will set Ruby version
2.6.1to be our default Ruby. Run:
Gem Installations
-
The following will install a Ruby gem named Bundler. (follow the hyperlink if you are curious as to what Bundler does) Run:
-
The following will allow you to use commands like «learn open«, «learn test«, and «learn submit«. For more information on the Learn gem, follow that hyperlink! Run:
Before we continue, let’s configure our new installed learn-co gem. We’ll do part of the configuration now, and another part later!
-
First run:
cd ~ -
Next run:
learn whoami
That last command will ask you to to retrieve some information and bring it back to terminal. That information can be found on your learn.co profile page. So, head to learn.co, click on your profile picture in the top right, then click on the «Your Profile» link. On your profile page, scroll to the bottom and copy your OAuth token. YOU ONLY NEED TO COPY EVERYTHING AFTER «OAuth token:». For example, mine looks like this:9cd7da7faf8d978cb613008bdb56e4fc2dsdfs642sdfds91eb70b5d8d3b2820fd91 -
Copy your token and paste it into terminal.
If all goes well, your terminal should display some information about you, similar to this:➜ learn whoami Connecting to Learn... Authenticating... Name: Dwayne 👾 Username: dwyn Email: dwayne.harmon@flatiron.com Learn Dir: /Users/dharmon/Development/code
-
The following will install the lovely debugging tool Pry. Seriously ask yourself, where would you be without Pry!? Run:
-
As if Rails needs an introduction! (but just incase, follow the hyperlink!) Run:
-
Nokogiri has many uses — You will primarily use it to scrape websites so definitely install it and check out the documentation. Run:
That should be all for necessary gems. Let’s move on to configuring our version control!
Configure Git
- This (and the next 2 commands) will set up git in your system. When you enter these commands, your terminal will not say anything — don’t worry, it definitely worked! Run:
git config --global color.ui true
For the next few commands, make sure to input your specific information:
-
Please please please replace your YOUR_GITHUB_USER_NAME, with your actual github username. For example, mine would look something like: git config —global user.name «dwyn» Run:
git config --global user.name YOUR_GITHUB_USER_NAMEAlternatively, you could just put your first and last name, like so:
git config --global user.name "First_Name Last_Name" -
The following is essentially repeating the same process, but with the email address tied to your github account. Run
git config --global user.email YOUR_GITHUB_EMAIL_ADDRESS
Node Version Manager
Node Version Manager is a tool that allows programmers to seamlessly switch between different versions of Node. I would say it’s akin to Ruby Version Manager, but for Node. Node allows developers to write JavaScript code that runs directly in a computer process itself instead of in a browser.
-
The following will install NVM, baby! Run:
curl -o- https://raw.githubusercontent.com/nvm-sh/nvm/v0.35.1/install.sh | bash -
Let’s refresh your terminal! Run:
-
The following will install Node.JS! Run:
Water Break!
Take a moment to close your eyes, focus on your breathing, maybe even hydrate a bit.
Visual Studio Code
There are plenty of text editors out there. As of today 8.1.2020, do yourself a favor and just use Visual Studio Code.
- Open this link in a new tab to download Visual Studio SCode. Choose the Windows download, not the Linux download.
NOTE:
As VSCode is installing, make sure to check all check boxes so that it installs for your entire system.
-
To configure your Ubuntu terminal to be available in VSCode:
- Open VSCode
- Open the Command Palette via
F1orCtrl+Shift+p - Begin typing the following:
Terminal: Select Default Shelluntil you
see it. Select that option.

◦ Once you select it, a few options will pop up. You want to select WSL Bash C:\WINDOWS\System32\wsl.exe.
-
Now, you can use your Ubuntu terminal in VSCode. Select «New Terminal» in
the «Terminal» drop-down, or typeCtrl+Shift+ ` (ctrl + shift + backtick) in order to use it! -
Install the Remote — WSL extension for VSCode. The Remote — WSL extension extension lets you use WSL as your full-time development environment right from VS Code!
Generating a SSH Key
You can either communicate with your remote repositories via HTTPS or SSH.
Let’s use SSH so you will not have to authenticate with
your GitHub username and password everytime you run learn save , learn submit , or any other commands push code to GitHub.
- Run:
-
You will be asked where to save the new ssh file. Just press enter to save it in the default location.
-
You will be asked for a passphrase — DO NOT ENTER A PASSPHRASE! Simply press enter, twice.
You will know the process is complete once you have some randomly generated ASCII art in your terminal. Now, let’s retrieve the contents of that file.
- Run:
This should print out a really long string of characters starting with ssh. It will look something like this:
```
ssh-rsa AAAAB3NzaC1yc2EAAAADAQABAAABgQDI0n1zGPzhpwJRCwn0KeI8BybeyZP1XJWaGnv
BMJNfzvXVhRGX5TxZ6Aq2hvHtDVE0ST9O1L2PU802RN5in6mpwCWoeJx9HXKoI3KW1nAYMJH8Lj
R1I2nbm7cSZjg732CdElc3uwTMf0cU7S2oocH5vTYpBT20NsdfsdsdfsdQaHdfAlop6VVckZKNZ
bPLNiW1MO2rk7Hw1j6r6bDM1nFwV+uDzxJ7+uEBXpl6bsxVn7X8AmwZdLSYz6wTq1lXWTy46tfk
kFPNFyu5akkYoTym3jnQpKdW6AOVl89dXfRira4+DF7mQt3+kcfqHVsC7nN4s5T2Ju2KrVYiKF4
yo89CXd7Yu6EQx7JeRlw+kxtzgYo1enMnp4hAawgxCkWlEqWyJQkNVZ6Wq+/gcHezJr2PoUc3lT
X61TUcoCXV3QkjJDmnsSiwVDUqypCEBtNZyKMX5ZjSESPaj24C3F/yOdWIQu40iUR8oOT86Xo9+
waR/nIobxaqWLJ4I8vfVqXsrh0ZTU= dharmon@skynet.attlocal.net
```

Just keep in mind, yours will look similar… not the same!
-
copy whatever your ssh key is, and follow this link: Github New SSH.
-
In the top input field, enter something meaningful. Such as, computer name, purpose for the key and date are solid options.
-
Paste your ssh key in the lower box. After you’ve completed both, your page should look similar to this:

- Click «Add SSH key«, and that’s all! Your ssh key has been generated on your computer, and linked to Github! Yeth!
Updating Learn Config
First things first, let’s completely close VSCode, and Ubuntu. Then, let’s re-open only Ubuntu.
-
Reopen Ubuntu and run:
This command should open a
.learn-configconfig file in VSCode. -
You want to update this file so that it looks similar to the text below: (With your username slightly different)
---
:learn_directory: "/Users/YOUR-UBUNTU-USERNAME/development/flatiron/labs"
:editor: code
- Save this file, and close it.
Creating Flatiron Folders
You’ll notice that we set up our .learn-config file with a path destination of /Users/YOUR-UBUNTU-USERNAME/Development/Flatiron/labs. For this to actually work, we have to make sure those folders exist in your Linux operating system. To do this, run the following command in Ubuntu:
- Run:
cd ~ && mkdir development && mkdir development/flatiron && mkdir development/flatiron/labs
Now you have the directories you need! learn open should work seamlessly by adding your most current lab to the
labs directory we just made.
Adding A Flatiron Customization To Your Terminal
-
Start out by making a backup for your
.bashrc -
We will want a tool for converting Windows endings to Unix endings for our new
.bashrcsudo apt-get install dos2unix -
download the new
.bashrccurl -R "https://raw.githubusercontent.com/flatiron-school/dotfiles/master/.bashrc-windows" >> $HOME/.bashrc -
We’ll use our converter to convert our bashrc to use the right unix endings:
And you’re all set! Try running learn open in your terminal. If you are currently on a lab that requires coding, learn open will find that lab, fork it, clone it, and open it in Visual Studio Code for you!
Resources
- Setting up a SSH Key with GitHub
- Microsoft Documentation: Windows Subsystem for Linux
- Basic Linux Commands
The Complete Developer’s Guide to Windows Subsystem for Linux 2 - Ruby Version Manager
Table of Contents
Зачем нужен Windows Subsystem for Linux 2 (WSL2)? Самый частый ответ — простое использованое Linux программ в среде Windows. Docker самая распространенная причина для установки WSL2.
Что надо для WSL2
- убедиться что в BIOS включена виртуализация, ищите пункт меню:
- процессор Intel: VT-x, Intel Virtualization Technology, VTx
- процессор AMD: SVM Mode, AMD-V, Virtualization Technology
- версия Windows 11 или 10 не ниже версии 2004 (сборка 19041 ~декабрь 2019)
- права администратора
Всего несколько команд
Установим само ядро wsl и запустим дистрибутив Ubuntu для работы в консоли.
Открывайте PowerShell с правами Администратора. Самый простой вариант по мне -> WIN+X и выбрать Терминал Windows (Администратор).
Выполняйте команду:
По-умолчанию, установится WSL2 с GUI и Ubuntu . Установка займет определенное время, подождите.
Если ошибка 0x80072eff
В процессе, можете увидеть ошибку Во время установки произошла ошибка, но установка может быть продолжена. Компонент: 'Ядро WSL' код ошибки: 0x80072eff.
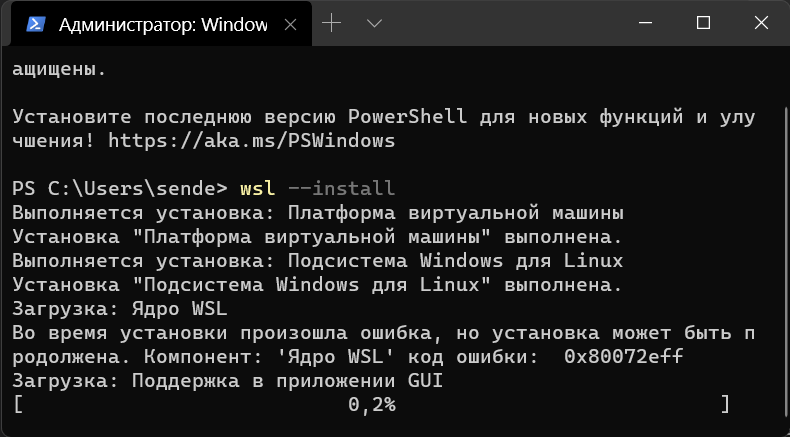
А значит, все автоматически не сработало, не беда. Перезагружайтесь и снова запустите PowerShell от Администратора.
- Запустите обновление wsl
- Завершите работу wsl
- Запустите заново wsl
- Запустите установку Ubuntu (если надо более специфический дистр, посмотрите все варианты
wsl -l -o)
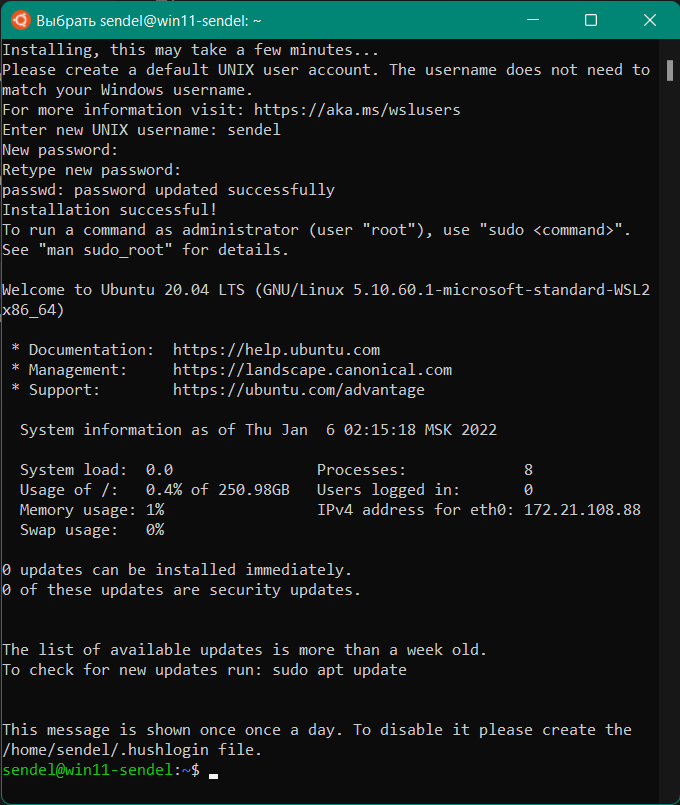
Успешная установка Ubuntu
После установки, введите имя пользователя и пароль для Ubuntu, и вам будет доступна среда Linux.
Рекомендуется сделать одну команду, обновить список пакетов:
и наслаждаться 
Как зайти в WSL консоль
- запускайте команду
wsl. (например, в настройках среды разработки указать wsl это для терминала по-умолчанию) - можете вынести из Пуска, ярлык Ubuntu на панель задач.
- или поставить обновленный Microsoft Terminal, и в нем настроить при запуске сразу открывать консоль wsl, рекомендую.