Время на прочтение
2 мин
Количество просмотров 48K
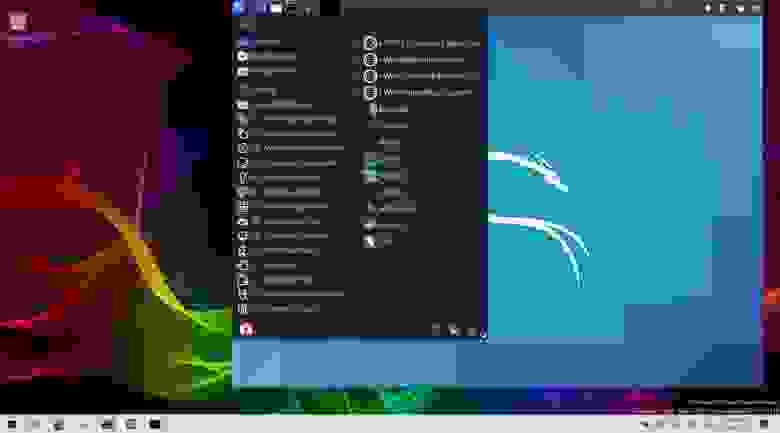
Команда разработчиков Kali Linux представила графический интерфейс для подсистемы Windows для Linux (WSL). Решение называется Win-Kex (Windows + Kali Desktop EXperience). Теперь можно запускать популярный дистрибутив для пентеста на ПК с Windows 10 в WSL2 с GUI.
Специалисты портала Bleeping Computer проверили, что это действительно работает. Они опубликовали свою инструкцию по установке и запуску Kali Linux с графическим интерфейсом для подсистемы Windows для Linux (WSL2).
Установка Kali Linux с GUI возможна только на ПК с ОС Windows 10 версии 2004.
На подготовительном этапе необходимо в ОС активировать подсистему Windows для Linux.
Открыть PowerShell (сейчас и далее под администратором) и запустить:
Enable-WindowsOptionalFeature -Online -FeatureName Microsoft-Windows-Subsystem-LinuxПерезагрузить ПК.
Открыть PowerShell и запустить:
dism.exe /online /enable-feature /featurename:VirtualMachinePlatform /all /norestartdism.exe /online /enable-feature /featurename:Microsoft-Windows-Subsystem-Linux /all /norestartПерезагрузить ПК.
Далее необходимо скачать и установить WSL2.
Потом нужно открыть PowerShell и запустить:
wsl --set-default-version 2Далее нужно установить Kali Linux из магазина Microsoft Store.
Чтобы поменять тип установки kali-linux с WSL1 на WSL2 нужно в PowerShell запустить:
wsl --set-version kali-linux 2Далее нужно выполнить установку и запустить Kali Linux.
Потом нужно установить пакет Win-KeX.
sudo apt update && sudo apt install kali-win-kexили
sudo apt update
sudo apt dist-upgrade
sudo apt install -y kali-win-kex
Можно также установить расширенную сборку Kali Linux.
sudo apt install kali-linux-largeПосле окончание установки GUI для Kali Linux запускается командой «kex».
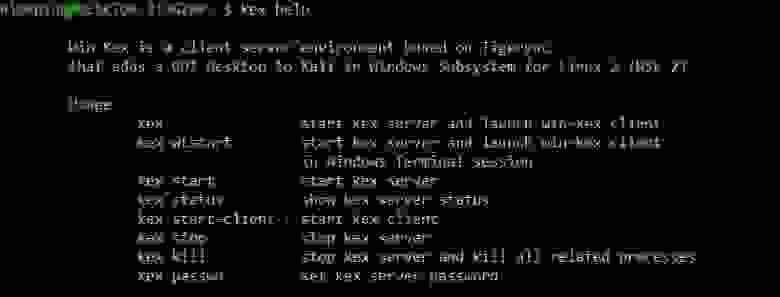
Видеоинструкция по установке Kali Linux на ПК с Windows 10 в WSL2 с GUI за 5 минут.
 Уже некоторое время в Windows 10 присутствует возможность установить различные дистрибутивы Linux с помощью компонента «Подсистема Windows для Linux» или WSL, однако лишь в виде терминала без графического интерфейса. Начиная с Windows 10 2004 WSL обновился до версии 2.0, благодаря чему появились новые возможности и, в рамках этих возможностей появилась Kali Linux для WSL2 с поддержкой графического интерфейса или Win-Kex.
В этой инструкции подробно об установке графического интерфейса Kali Linux в Windows 10 версии 2004 или новее, а также дополнительная информация, например, о том, как включить русский язык интерфейса в установленной системе.
Установка Kali Linux с графическим интерфейсом в Windows 10
Порядок установки Kali Linux с графическим интерфейсом (GUI) для подсистемы Windows для Linux будет состоять из следующих шагов (напоминаю: необходима версия Windows 10 2004 или новее):
- Включите компонент «Подсистема Windows для Linux». Сделать это можно в Панель управления — Программы и компоненты — Включение или отключение компонентов Windows. После установки перезагрузите компьютер.

- Этот шаг можно пропустить, если у вас включены компоненты Hyper-V, иначе запустите Windows PowerShell от имени администратора (можно сделать через правый клик по кнопке «Пуск» и выполните команду
dism.exe /online /enable-feature /featurename:VirtualMachinePlatform /all /norestart
- Скачайте и установите обновление ядра Linux WSL2 со страницы https://docs.microsoft.com/ru-ru/windows/wsl/wsl2-kernel
- Перезагрузите компьютер, запустите PowerShell от имени администратора и выполните команду
wsl --set-default-version 2
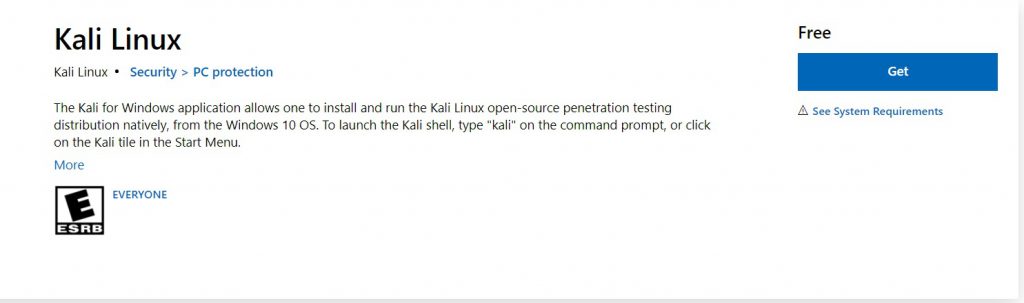
- Зайдите в магазин приложений Windows Store, используйте поиск чтобы найти и установить Kali Linux.

- После завершения установки в PowerShell от имени администратора выполните команду:
wsl --set-version kali-linux 2
- Запустите Kali Linux (пункт будет доступен в меню «Пуск»), выполните первоначальную настройку (имя пользователя и пароль), после чего по порядку выполните следующие команды (требуется подключение к Интернету, последний шаг может занять много времени.
sudo apt update
sudo apt dist-upgrade
sudo apt install -y kali-win-kex
- В ходе выполнения последней команды вам будет предложено выбрать клавиатуру. Я оставил значения по умолчанию, но, возможно, стоило выбрать русскую, так как в дальнейшем при включении русского языка интерфейса в ряде случаев кириллица не отрисовывается (не знаю, есть ли связь, лишь предположение).
- По завершении установки введите команду kex для запуска Kali Linux с графическим интерфейсом. При первом запуске вам будет предложено создать отдельный пароль, можно от этого отказаться.


В результате запустится Kali Linux с графическим интерфейсом в полноэкранном режиме. Для выхода из полноэкранного режима можете вызвать меню клавишей F8 и отключить опцию «Full Screen».
Если вам потребуется включить русский язык интерфейса для Kali Linux, у меня сработал следующий метод:
- В графическом интерфейсе Kali Linux запускаем терминал, вводим команду
sudo dpkg-reconfigure locales
- Выбираем ru_RU UTF-8 на двух экранах (отметку ставим пробелом, переключаемся на кнопку Ok клавишей Tab).
- Закрываем окно терминала и окно графического интерфейса, в терминале из которого мы запускали графический интерфейс вводим kex stop (если приглашение ввода не отображается, попробуйте изменить размер окна — у меня встретился такой баг).
- Снова запускаем kex — в результате интерфейс будет на русском языке.


А в целом, хотя я еще и не придумал, для чего мне это использовать (возможно, попробую запускать пакеты от bitnami для экспериментов с сайтами), но на первый взгляд всё работает исправно и быстро: быстрее, чем в виртуальной машине.
In this article, we are going to shows how to Install Kali Linux on Windows 10 WSL. If you are interested to Install Kali Linux on Windows 10 WSL then this post is ideal for you.
Kali Linux is very popular operating system. It is a Debian derived Linux distribution that is maintained and funded by Offensive Security. It is developed for information security tasks such as Penetration Testing, Security research, Reverse Engineering and digital forensics. The official website of kali Linux is Kali.org.
If you know that how to use Linux and it’s terminal commands, architecture system and file management then you can go with Kali Linux. And if you are not good in Linux, then you will go first start with ubuntu distribution and after sufficient practice, you could try for Kali Linux.
The Windows Subsystem for Linux (WSL) allows you to run a GNU/Linux environment including most command-line tools, utilities, and applications directly on Windows system.
WSL2 is an improvement version of WSL. It comes with features such as file system performance boost, full system call compatibility, Managed VM, built with a new architecture, full Linux Kernel and many more.
Requirements to install WSL 2 on Windows 10:
- Windows 10 May 2020 (2004), Windows 10 May 2019 (1903), or Windows 10 November 2019 (1909) or later
- A computer with Hyper-V Virtualization support
With the help of WSL, you can easily install full Linux operating system in your Windows 10. You just need to enable WSL (Windows Subsystem for Linux) in your Windows 10 system.
How to Install Kali Linux on Windows 10 WSL
Simply follow below steps to install Kali Linux on Windows 10 WSL:
Step 1 : Enable WSL in Windows 10
First of all, you will need to enable WSL in your Windows system. To enable it, simply open PowerShell terminal as administrator.
Click on Start icon -> search for PowerShell -> right-click Windows PowerShell app -> choose to run as administrator.

Next, run the command below in the Windows PowerShell console as show below:
dism.exe /online /enable-feature /featurename:Microsoft-Windows-Subsystem-Linux /all /norestartThe command above will display a successful message similar as below:
Deployment Image Servicing and Management tool
Version: 10.0.19041.844Image Version: 10.0.19042.985
Enabling feature(s)
[==========================100.0%==========================]
The operation completed successfully.
Step 2 : Enable Virtual Machine Platform
Run the commands below from the same PowerShell console to enable the Virtual Machine platform in your Windows system:
dism.exe /online /enable-feature /featurename:VirtualMachinePlatform /all /norestartIf you have Windows 10 version lower than 2004 in your system, use the commands below:
Enable-WindowsOptionalFeature -Online -FeatureName VirtualMachinePlatform -NoRestartNext, restart your computer for changes to apply. If you forget to start then the below command doesn’t work.
After restart of your computer, launch the PowerShell as administrator again and run the commands below to set WSL 2 as the default version of WSL:
wsl --set-default-version 2If you get an error, download and install it manually from the link below:
https://wslstorestorage.blob.core.windows.net/wslblob/wsl_update_x64.msi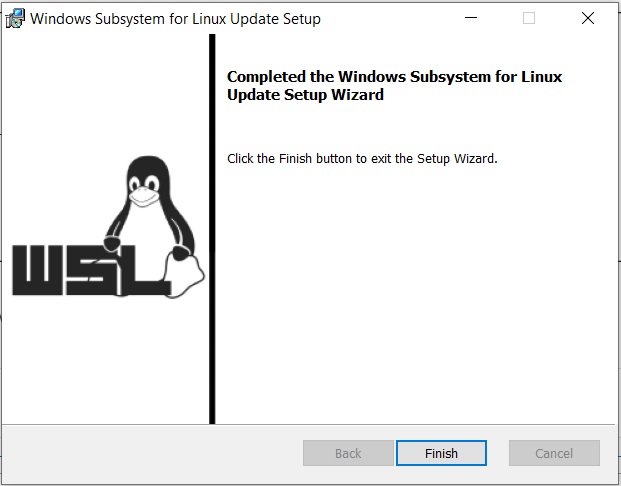
Now, run the command above again to set WSL 2 as the default version of WSL:
wsl --set-default-version 2Step 3 : Install Kali Linux in Windows 10
At this stage, WSL 2 is installed and ready to be used. So now you can easily install Linux operating system in your Windows 10 system.
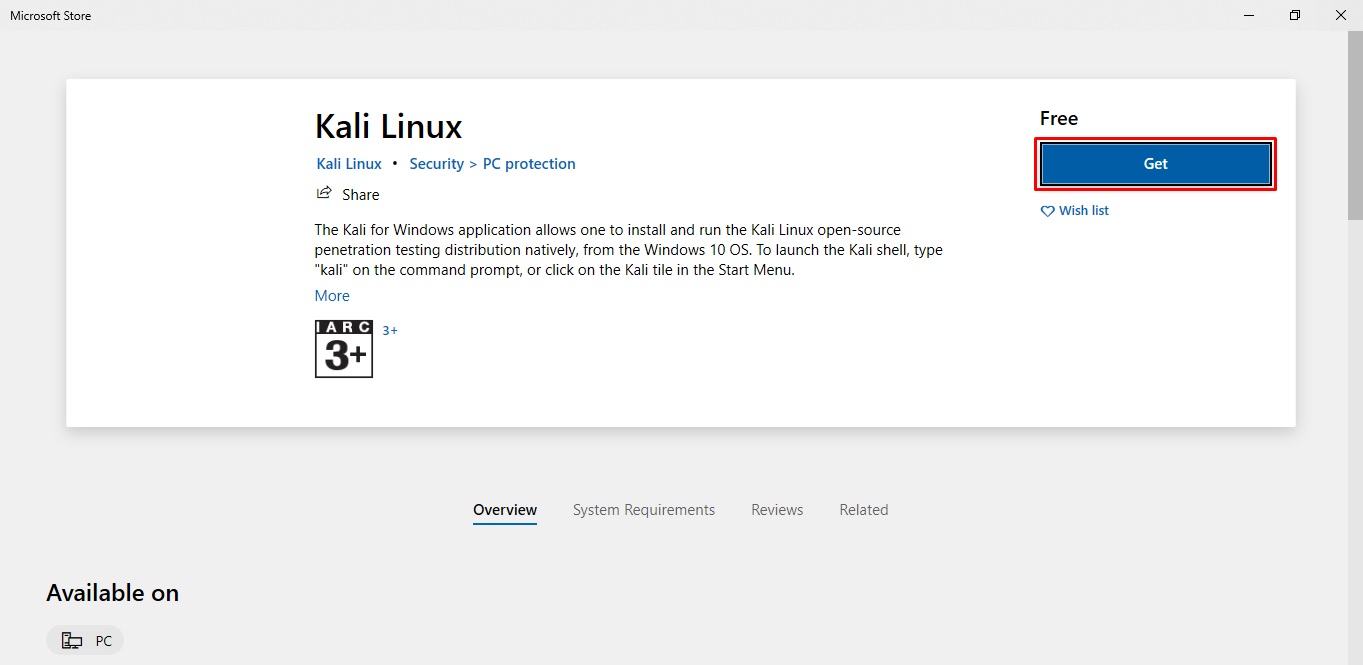
Click on the below button to download and install Kali Linux from Microsoft Windows store.
Next, click on the Get button to Download and Install kali Linux. After downloading and installing, you will get a Launch button.
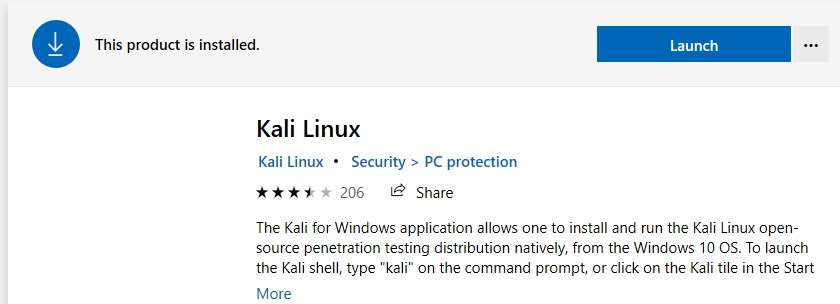
Simply click on Launch Button and when prompt, create your account as show below :
Installing, this may take a few minutes…
Please create a default UNIX user account. The username does not need to match your Windows username.
For more information visit: https://aka.ms/wslusers
Enter new UNIX username: studiesonline
New password:
Retype new password:
passwd: password updated successfully
Installation successful!
Use some troubleshooting commands when you get issues above. Run the below troubleshooting commands and launch kali Linux again:
wsl --set-default-version 1
bcdedit /set hypervisorlaunchtype auto start
Step 4 : Launch Kali Linux in Windows 10
To launch Kali Linux in Windows system, simply search it in windows search bar and launch it.
That’s all
If you face any error and issue in above steps , please use comment box below to report.
If our tutorials helped you, please consider buying us a coffee. We appreciate your support!
Thank you for your support.
Before you start, make sure your Windows 10 OS is up to date as version 1903 or higher can run this. To check the version, click Windows Start Button and type System Information, next to Version you’ll see your current number.
If lower than version 1903, go to Settings and Update to get latest changes.
Okay, now you’re good to go!
1. Setup Subsystem for Linux
Right click Windows Start Button and open Windows PowerShell (Admin). Copy/paste:
dism.exe /online /enable-feature /featurename:Microsoft-Windows-Subsystem-Linux /all /norestart

Then copy/paste:
dism.exe /online /enable-feature /featurename:VirtualMachinePlatform /all /norestart

If you have any issues or need more info, see Windows Subsystem for Linux Installation Guide for Windows 10.
2. Download Kali Linux .appx file
Click this link to start download of Kali Linux. [https://aka.ms/wsl-kali-linux-new]
May take a couple of minutes depending on your internet speed.
Once downloaded, run file to install.

For any other Linux distro, see Manually download Windows Subsystem for Linux distro packages.
3. Setup Kali
Great! Now Kali Linux is installed via WSL, now setup your username and password.

I recommend also running sudo apt update && upgrade to ensure all packages are current.
If you have feedback, please send me a message via Twitter.
This is Day 7 of #100DaysOfHacking, subscribe to the newsletter and see the journey!
Happy Hacking.
Setup Kali Linux in Windows 10 WSL2
Table of Contents
This article will explain how you can install Kali Linux directly inside your Windows 10 without having to run the Kali setup. This will save you a lot of time that is required to setup a Kali VM in Windows and you won’t have to go through fixing the errors which can encounter during Kali installation.
Install WSL2 in Windows 10
This article assumes you have already installed WSL2 in your Windows 10. The more information about WSL2 and its installation steps are covered in following article:
If you have not installed WSL2, please check this article first and then come back here to start setting up your Kali Linux environment.
Install Kali Linux
- To install Kali Linux (or any other GNU/Linux distribution), open Run dialog (Windows key + R), then type “
ms-windows-store:” without quotes and hit enter. This will launch Microsoft Store app. - Click on the search, type “Linux” and hit enter. You will see all the popular Linux apps.
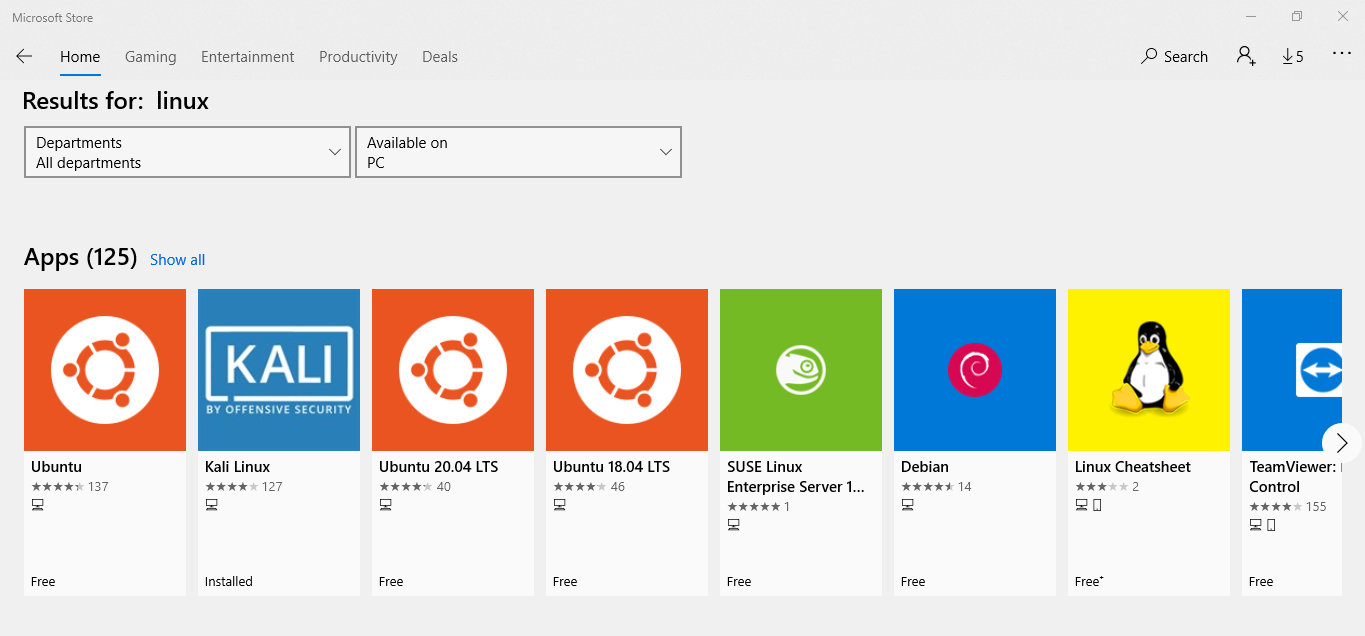
-
- Select Kali Linux and click on Install (or Get) button. If it asks you to login with Microsoft account, just click on No, thanks. This will start downloading and installing the Kali Linux which could take a while.
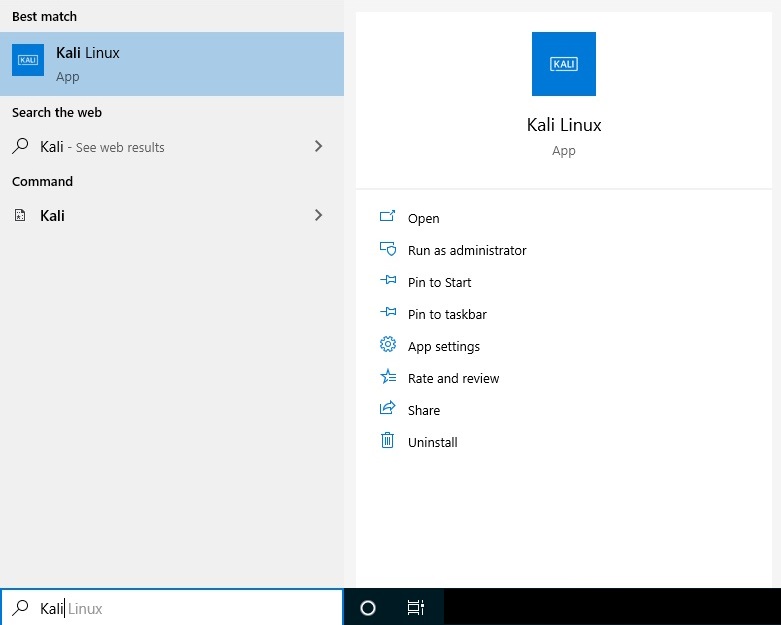
- To launch the Kali linux, click on start and type “Kali” to search.
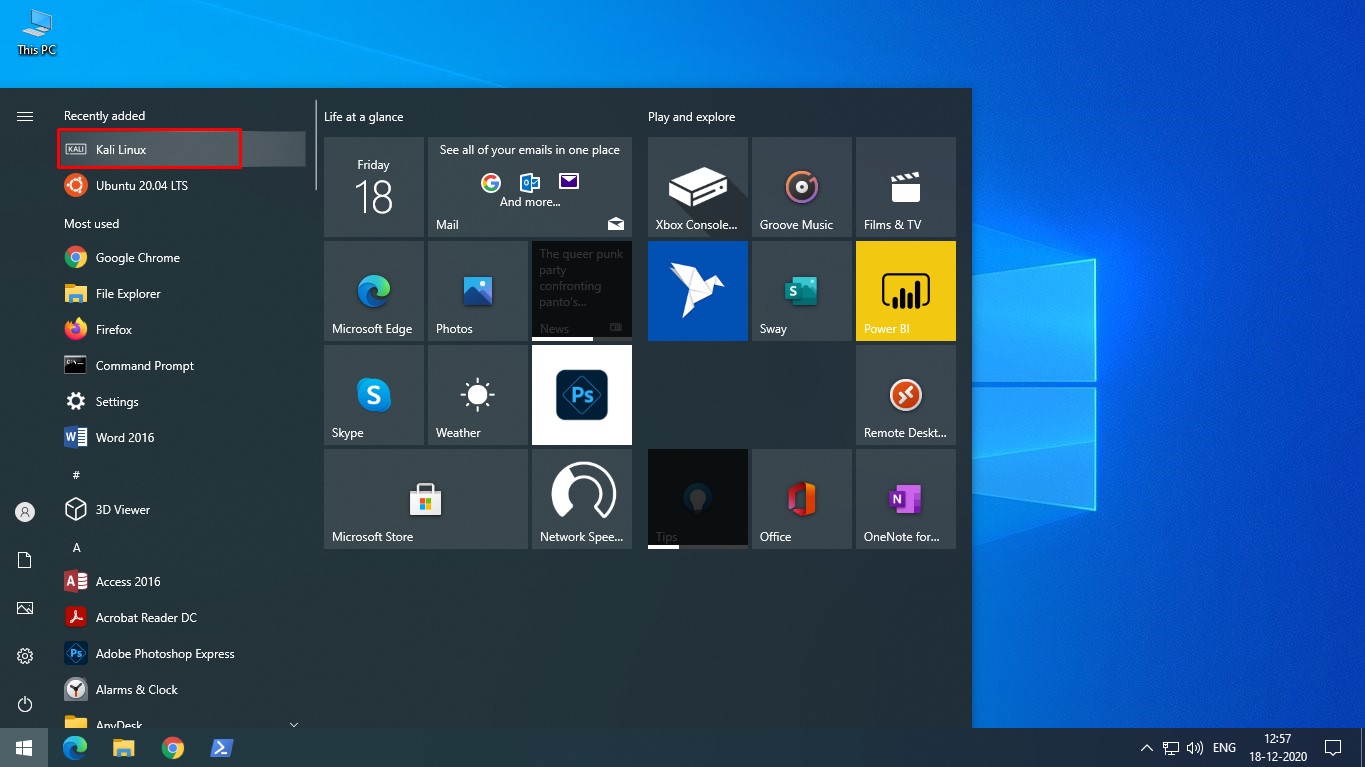
Tip: The most recently installed app “Kali Linux” will probably be displayed on top of start menu.
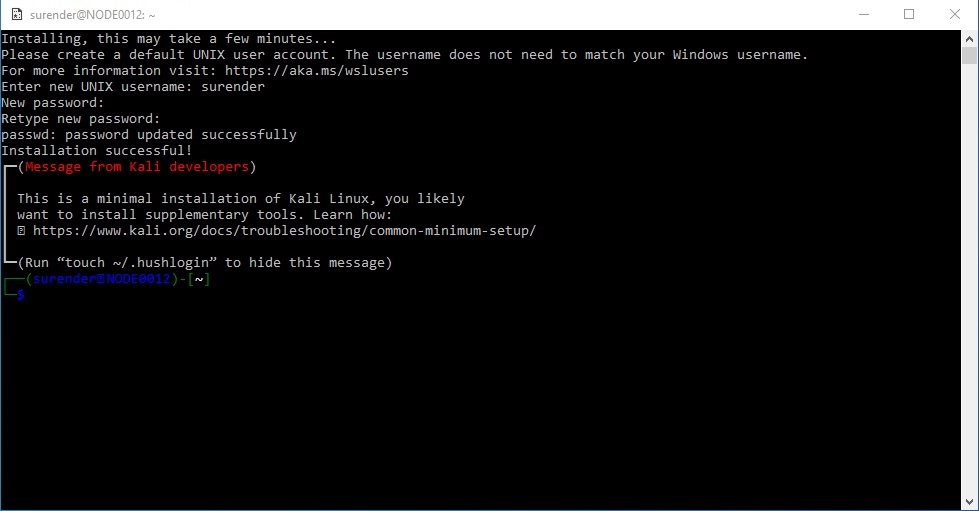
- Click on “Kali Linux” and it will display a terminal window with a text “
Installing, this may take a few minutes”. This will happen only for the first time.
-
- Once done, you will be asked to type a user name and then set a password. After typing password twice, you will be logged in to your Kali Linux environment. This is just a minimal installation of Kali linux. In the next step, we will convert the minimal installation to full including GUI and tools.
-
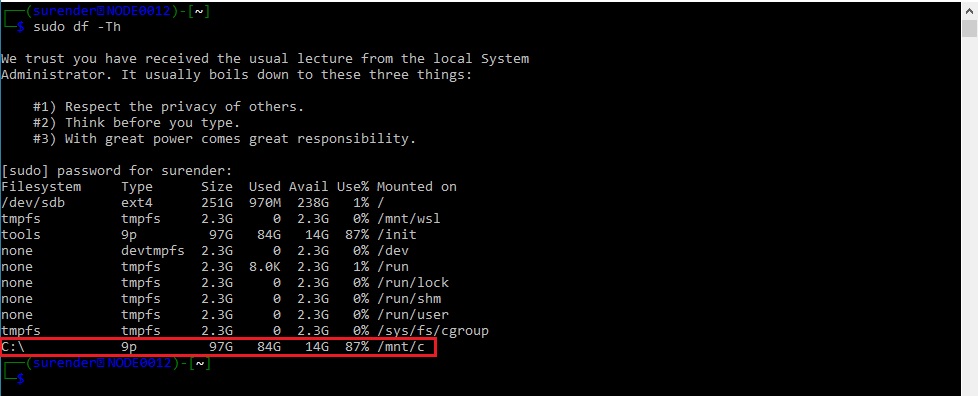
- The good thing is that your Windows C: drive is automatically mounted to /mnt/c directory in Kali linux. So you can browse and seamlessly transfer the files across Windows and Kali. Take a look at the following image:
- Now that we have a mimimal Kali install running in a terminal. We can run commands in terminal to convert it into full GUI. The
sudo apt update && sudo apt install kali-desktop-xfce -ycommand will do that. But instead of installing XFCE desktop environment, we will install Kali Desktop Experience for Windows (aka Win-KeX).
- Now why would we install Win-KeX instead of XFCE which is default desktop environment for Kali Linux? Because “Win-KeX” offers a Kali Desktop Experience for WSL2 which is tightly integrated with Windows. It provides following features:
- Window Mode: Starts a Kali Linux desktop in a dedicated window
- Seamless Mode: Share the Windows desktop between Windows and Kali apps
- Shared clipboard: Allows copy/paste between Windows and Kali Linux apps
- Multi-session support: Supports Root and regular user sessions
- Sound support
Leave the terminal window open and proceed to the next step in order to install Win-KeX.

Install Win-KeX in Kali Linux
- Type the following commands in terminal and hit enter. When prompted, enter the password you set in Step 5.
sudo apt update -y && sudo apt install kali-win-kex -y
It could take a while depending upon the speed of your computer and internet connection. Wait for installation to finish.
Run Win-KeX in Kali Linux
WSL2 allows you to run Win-KeX in three modes.
- Window Mode: Window mode helps keeping the Windows and Kali environments visually apart. Kali linux will run in a dedicated window. To start Win-KeX in Window mode with sound support, type the following command in terminal and hit enter:
win-kex --win -s
- Enhanced Session Mode (ARM only): Enhanced Session Mode runs the Kali Linux desktop session in a separate window using protocols and clients native to Windows. This is supported on ARM devices only. To start Win-KeX in Enhanced Session Mode with sound support, type the following command and hit enter:
win-kex --esm --ip -s
- Seamless mode: Seamless Mode runs a Kali Linux panel on the screen top of the Windows desktop. It removes the visual segregation between linux and window apps which provides a great platform to run a penetration tests in Kali Linux and copy the results straight into a Windows app. To start Win-KeX in Seamless mode with sound support, type the following command and hit enter:
win-kex --sl -s
Now you know How to run Kali Linux in WSL2 without having to install and maintain a VM in VirtualBox or Hyerp-V. But wait a minute; When you want to start Kali Linux, you will have to repeat following two steps every time:
- Open cmd.exe (or PowerShell console) in Windows and then type
wsl -d kali-linuxcommand - And then type
win-kex --sl -scommand to run WinKex in seamless mode
If you don’t want to repeat these steps every time, proceed to the next step of this article.
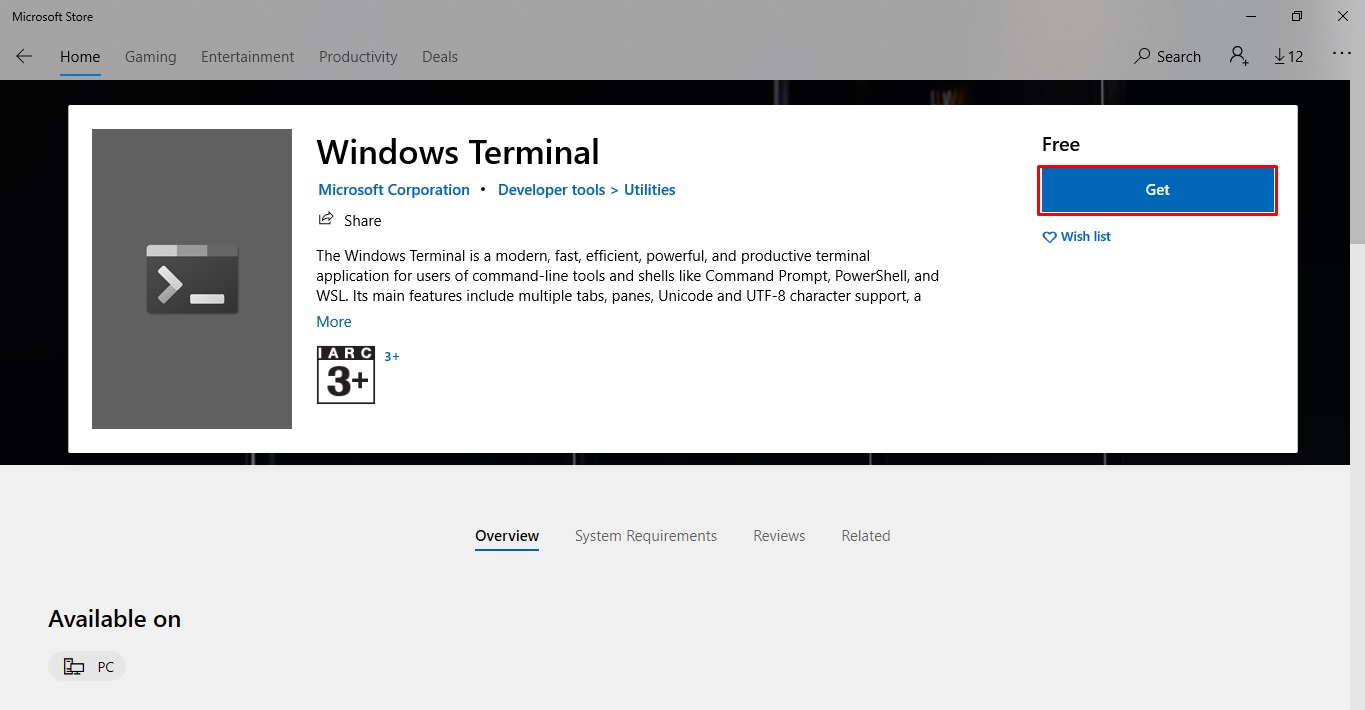
Install Windows Terminal
- Open Run dialog (Windows key + R), then type “
ms-windows-store:” without quotes and hit enter. This will launch Microsoft Store app. - Click on the search, type “Windows Terminal” and hit enter.
-
- Click on Windows Terminal app from search results and click on Install (or Get) button. If it asks you to login with Microsoft account, just click on No, thanks. This will start downloading and installing the Windows Terminal app.
- We will now create a shortcut in Windows Terminal which will help us start the Kali Linux automatically in just a single click.
Now launch Windows Terminal app and press “Ctrl + ,” keys simultaneously to open terminal settings. It will open “settings.json” file in “Code Writer” app so don’t freak out.
-
- In settings.json file, look for the lines marked with Red box in image, copy the marked section and then paste it right below (as marked by the Green box)
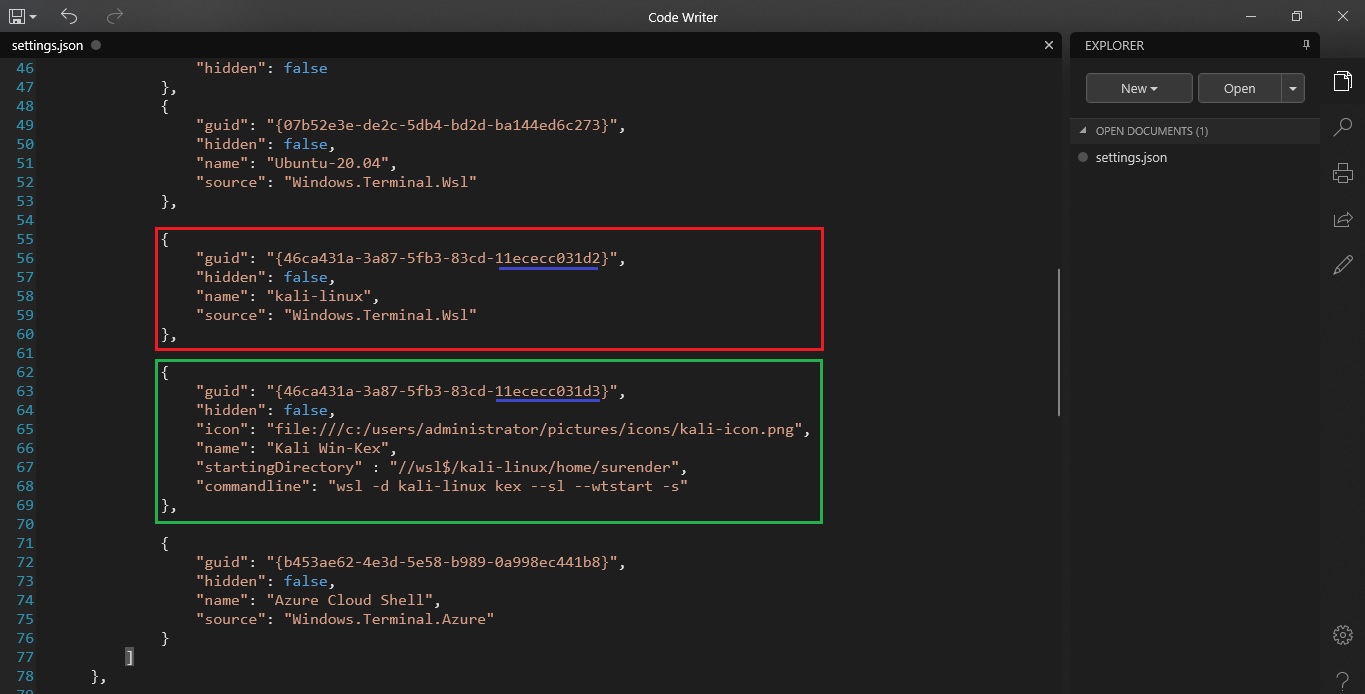
Look at the “commandline” argument’s value. This is the actual command which will run Kali Linux in seamless mode when you click on Windows Terminal shortcut. You can download the kali icon from here.
If you want to run Kali in Window mode, set the “commandline” value to wsl -d kali-linux kex --wtstart -s . You must slightly change the “guid” value marked with Blue underline otherwise you won’t see the new shortcut in Windows Terminal. You can also change other values if you like and then save the file.
-
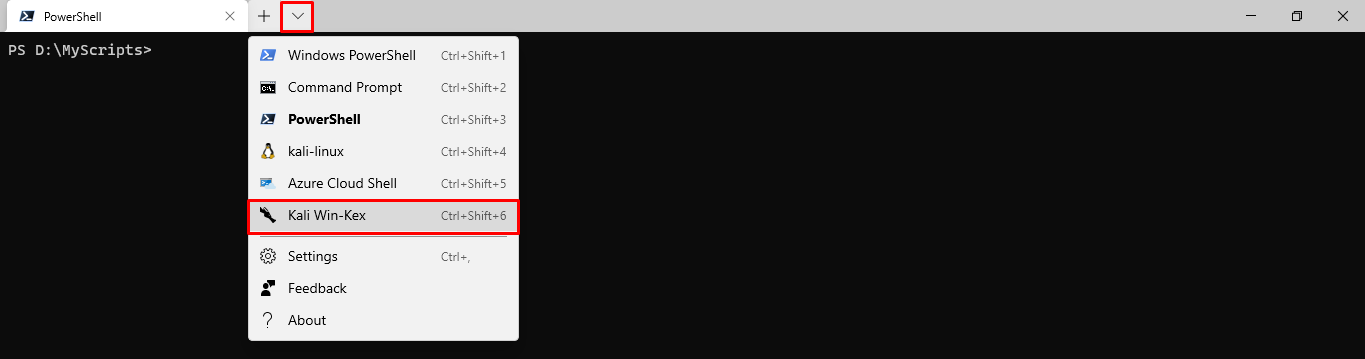
- Now close the Windows Terminal and launch it again. Then click on the dropdown icon and choose the Kali Win-KeX option to launch it.
-
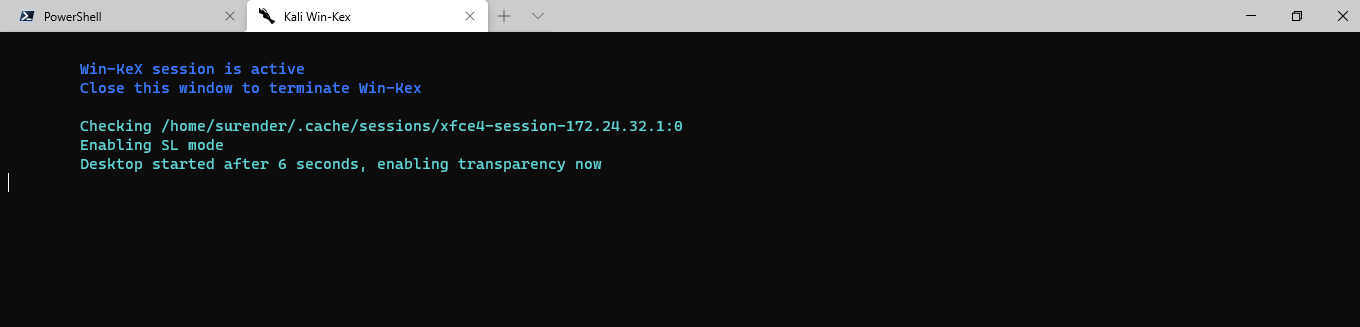
- This will launch Kali Win-KeX in seamless mode and you will see a new window running Kali desktop.
That’s it. Now you’re running Kali Linux in Windows 10 in seamless mode where you can change through apps opened in Windows as well as Kali Linux by pressing “Alt + Tab ” or “ Windows logo + Tab ” keys.
If you want to close the Kali window, just close the Kali Win-KeX tab in Windows Terminal.
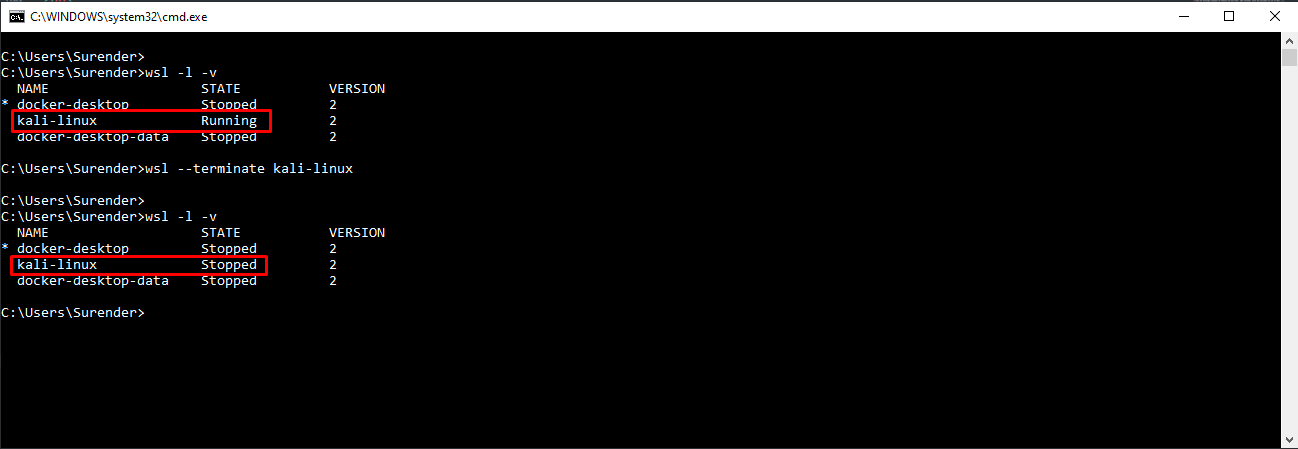
Tip: Closing the Kali Win-KeX tab in Windows Terminal doesn’t actually terminate the “kali-linux” WSL distribution. You can run wsl -l -v command in cmd.exe or PowerShell console and you will still see it Running.
To terminate the WSL instance, you need to run wsl -t kali-linux command manually as shown in image below.
Fixing Errors in Kali Linux
- If you see a message saying Started Win-KeX SL on Windows Terminal but don’t see any Window for Kali Linux, it is most likely that your Windows Firewall or Antivirus Firewall is blocking the application. You need to add the following application to trusted apps list in your Firewall.
\\wsl$\kali-linux\usr\lib\win-kex\VcXsrv\vcxsrv.exe
- If you see an error like Failed to execute child process “dbus-launch” (No such file or directory). You need to connect to Kali linux by running “
wsl -d kali-linux” command in cmd.exe (or PowerShell console) and then execute the following commands:sudo service xrdp stop sudo apt-get install dbus-x11 sudo service xrdp start