Windows 7 Enterprise Windows 7 Home Basic Windows 7 Home Premium Windows 7 Professional Windows 7 Starter Windows 7 Ultimate More…Less
Symptoms
When you install Windows 7 Service Pack 1 (SP1), you may receive the following error message:
Error 0x8024200D
Cause
This issue can occur if Windows 7 Service Pack 1 (SP1) was downloaded by Windows Update but has not yet been installed, or if the installation has become corrupt. For more information about this service pack, click the following article number to view the article in the Microsoft Knowledge Base:
976932 Information about Service Pack 1 for Windows 7 and for Windows Server 2008 R2
Resolution
To have us fix this problem for you, go to the «Fix it for me» section. If you prefer to fix this problem yourself, go to the «Let me fix it myself» section.
Fix it for me
To fix this problem automatically, click the Fix it button or link. Then click Run in the File Download dialog box, and follow the steps in the Fix it wizard.
Notes
-
This wizard may be in English only. However, the automatic fix also works for other language versions of Windows.
-
If you are not on the computer that has the problem, you should save the Fix it solution to a flash drive or a CD and then run it on the computer that has the problem.
Uninstall Windows 7 Service Pack 1
To resolve this issue, uninstall Service Pack 1 by using the DISM command. To do this, follow these steps for your version of Windows 7.
For the 32-bit version of Windows 7
-
Click Start, and then type cmd in the Search box.
-
Right-click cmd.exe, and then click Run as administrator.
-
Type the following command, and then press Enter:
dism.exe /online /remove-package /packagename:Package_for_KB976932~31bf3856ad364e35~x86~~6.1.1.17514
-
After the removal is complete, type exit, and then press Enter.
-
Restart the computer.
For the 64-bit version of Windows 7
-
Click Start, and then type cmd in the Search box.
-
Right-click cmd.exe, and then click Run as administrator.
-
Type the following command, and then press Enter:
dism.exe /online /remove-package /packagename:Package_for_KB976932~31bf3856ad364e35~amd64~~6.1.1.17514
-
After the removal is complete, type exit, and then press Enter.
-
Restart the computer.
Determine whether you installed the Beta version of Windows 7 SP1
If you installed the Beta version of Windows 7 SP1, you need to uninstall the Beta version and then install the released version of Service Pack 1. To Uninstall the Beta version, follow these steps for your version of Windows 7.
Note If you uninstalled the Beta version of Windows 7 SP1 and you continue to receive the error, you may have remnants of the Beta version on your PC. These steps will also clean any remnants of the Beta version from your PC.
For the 32-bit version of Windows 7
-
Click Start, and then type cmd in the Search box
-
Right-click cmd.exe, and then click Run as administrator.
-
Type the following command, and then press Enter:
dism.exe /online /remove-package /packagename:Package_for_KB976932~31bf3856ad364e35~x86~~6.1.1.17105
-
After the removal is complete, type exit, and then press Enter.
-
Restart the computer.
For the 64-bit version of Windows 7
-
Click Start, and then type cmd in the Search box.
-
Right-click cmd.exe, and then click Run as administrator.
-
Type the following command, and then press Enter:
dism.exe /online /remove-package /packagename:Package_for_KB976932~31bf3856ad364e35~amd64~~6.1.1.17105
-
After the removal is complete, type exit, and then press Enter.
-
Restart the computer.
More Information
When you install Windows 7 or Windows Server 2008 R2 SP1 you may also receive error 0x800f081f.
When you check the CBS log(C:\Windows\Logs\CBS\cbs.log), you will find the errors like below:
2011-03-03 21:38:06, Error CBS Exec: Failed to pre-stage package: Package_for_KB976933~31bf3856ad364e35~amd64~cs-CZ~6.1.7601.17514, file: TsUsbGD.sys, source: \\?\C:\Windows\Servicing\Packages\amd64_tsgenericusbdriver.inf_31bf3856ad364e35_6.1.7601.17514_none_9872c8452ac8f816\TsUsbGD.sys, sandbox: (null) [HRESULT = 0x800f081f — CBS_E_SOURCE_MISSING]
2011-03-03 21:38:06, Info CBS Failed to gather all required files. [HRESULT = 0x800f081f — CBS_E_SOURCE_MISSING]
You can use the following methods to resolve the issue:
-
Run System Update Readiness Tool (KB947821). It should resolve the error in most of cases
-
If the System Update Readiness Tool does not resolve the issue, it may be that you have a pre-release version of the RSAT tools installed on the system.
To resolve this issue, do the following:
-
Uninstall the pre-release RSAT tools
-
Reboot the system
-
Install the release version of the RSAT tools (http://www.microsoft.com/download/en/details.aspx?FamilyID=7d2f6ad7-656b-4313-a005-4e344e43997d&displaylang=en)
-
Reinstall Windows 7 SP1
-
Need more help?
Want more options?
Explore subscription benefits, browse training courses, learn how to secure your device, and more.
Communities help you ask and answer questions, give feedback, and hear from experts with rich knowledge.
- Remove From My Forums

ошибка при обновлении
-
Вопрос
-
выбивает ошибку при обновке WindowsUpdate_8024200D» «WindowsUpdate_dt000».
Ответы
-
Попробуйте восстановить исходное состояние компонентов windows update:
http://support.microsoft.com/kb/971058/ru
Так же можно выполнить шаги , описанные тут:
http://support.microsoft.com/kb/947821/ru
-
Предложено в качестве ответа
7 мая 2014 г. 7:04
-
Помечено в качестве ответа
Dmitriy VereshchakMicrosoft contingent staff
7 мая 2014 г. 7:04
-
Предложено в качестве ответа
-
http://windows.microsoft.com/ru-ru/windows7/windows-update-error-8024200d
Ошибка Центра обновления Windows 8024200d
Если отображается сообщение об ошибке Центра обновления Windows 8024200d, это означает, что загрузка или установка обновления не была завершена. Средство проверки готовности системы к обновлению для Windows устраняет некоторые условия, вызывающие возникновение
данной ошибки. Чтобы использовать данное средство, выполните следующие действия.-
Перейдите на веб-страницу
статьи базы знаний. В разделе Сведения для опытных пользователей выберите выпуск Windows и тип системы компьютера, а затем щелкните ссылку, чтобы загрузить средство проверки готовности системы к обновлению. Чтобы определить
выпуск Windows, см. статью
Просмотр информации о компьютере. -
Снова запустите Центр обновления Windows.
Примечание
-
Как правило, длительность сканирования не превышает 15 минут, однако на некоторых компьютерах этот процесс может занимать больше времени. Индикатор выполнения Центра обновления Windows не обновляется в процессе сканирования,
и при 60% готовности ход выполнения может приостановиться. Такое поведение является предсказуемым. Несмотря на это, сканирование продолжается и отменять обновление не следует.
-
Если средство проверки готовности системы к обновлению не помогло решить проблему, обратитесь к другим возможным решениям, приведенным в
данной статье .
Не ищи Бога, не в камне, не в храме — ищи Бога внутри себя. Ищущий, да обрящет.
-
Изменено
piligrim2180
4 мая 2014 г. 21:56 -
Предложено в качестве ответа
Dmitriy VereshchakMicrosoft contingent staff
7 мая 2014 г. 7:04 -
Помечено в качестве ответа
Dmitriy VereshchakMicrosoft contingent staff
7 мая 2014 г. 7:04
-
The Windows Update Error 8024200D (WU_E_UH_NEEDANOTHERDOWNLOAD) means that the Windows Update handled can’t install the update because the update downloaded is invalid and corrupted. This error is most commonly encountered on Windows 7.

If you are affected by this error code, you are likely to experience this behavior every time Windows Update attempt to install an update that has failed on the first try. This problem has been patched with newer Windows builds but remains prevalent with older builds.
The main reason why you’ll see this error is a WU inconsistency that can be fixed either by resetting the entire Windows component or by bypassing it entirely by downloading and installing the update manually using the Windows Update Catalog.
Update: This problem can also occur due to a corrupted Windows Update database.
Here’s a list of confirmed methods that you can use to troubleshoot this error:
1. Install the failing update manually
If you’re looking for a quick fix that will bypass a local issue that triggers the 8024200d error, use the Windows Update Catalog to install the failing update manually.
This method is only recommended if you only have one update that is throwing the 8024200d WU error when you attempt to install it.
Important: Keep in mind that going this route will not effectively address the root source of the issue. Even if this allows you to bypass the error and install the problematic update, it will not address the root cause of the issue. If you want to fix root the issue, continue troubleshooting with the remaining methods below even if this method allows you to install the failing update.
Here’s how to use the Windows Update Catalog to bypass the 8024200d error:
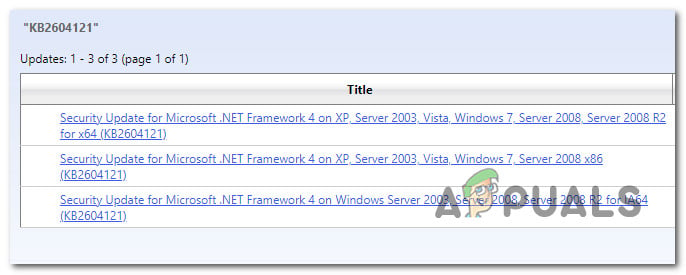
- Launch the homepage for the Microsoft Update Catalog in your web browser.
- Use the search box in the upper-right corner of the Microsoft Update Catalog page to discover the update that failed to install.

Searching for the failing update inside Windows Update Note: You can grab the update code from the WU error message inside the Windows Update page.
- From the list of results, identify the update applicable to your Windows version.

Identify the correct update Note: Consider the CPU architecture and Windows version while looking for an appropriate update, after analyzing the findings.
- After identifying the required update, click the Download option and wait until the download is complete.
- Once the download is complete, double-click the executable file you just downloaded from the Downloads folder.
- Follow the on-screen instructions to complete the sideloading of the next Windows update.
- Now that the update is installed, reboot your PC and see if the 8024200d has disappeared from the Windows update screen.

2. Run the Windows Update Troubleshooter
Running the Windows Update troubleshooter is a great way to try and fix this issue using the built-in tools provided by Microsoft.
If you are experiencing the 8024200D error due to a common WU inconsistency, running the Windows Update Troubleshooter and applying the recommended fix should help you resolve this issue.
Note: The Windows Update Troubleshooter provides a collection of automated repair strategies that may be used to treat the most common causes of a failing Windows update.
If Windows Update Troubleshooter manages to identify the cause of the error, follow the instructions to apply the recommended solution.
Here’s how to run the Windows Update Troubleshooter and apply the recommended fix:
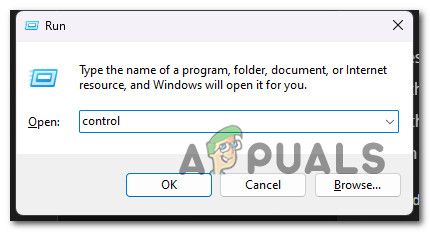
- Press the Windows key + R to open the Run dialog box.
- Type “control” and hit the Enter key to enter the Control Panel interface.

Open up the classic Control Panel interface - Click “Yes” when prompted by User Account Control to grant administrator permissions.
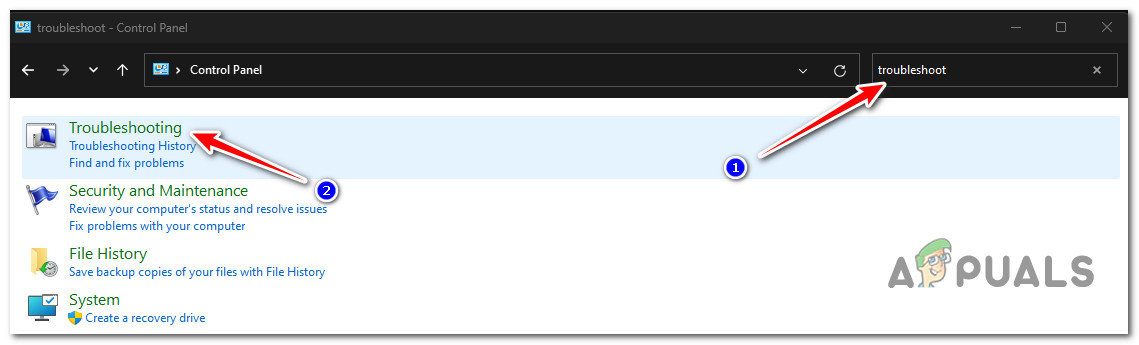
- Utilize the Control Panel’s search function to look for “troubleshoot” (top-right corner of the screen).
- From the list of search results, click on Troubleshooting.

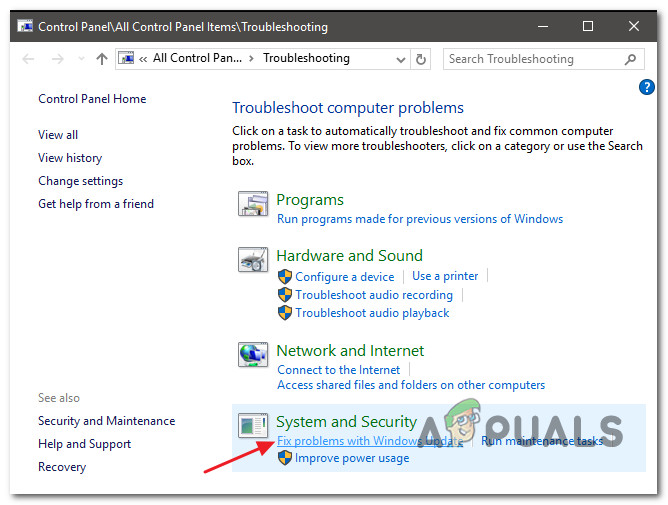
Open up the Troubleshooting tab - Under System and Security, click on Fix problems with Windows Update.

Find and Fix Problems with Windows Update Note: If you are running Windows 11, you may see different displays moving forward.
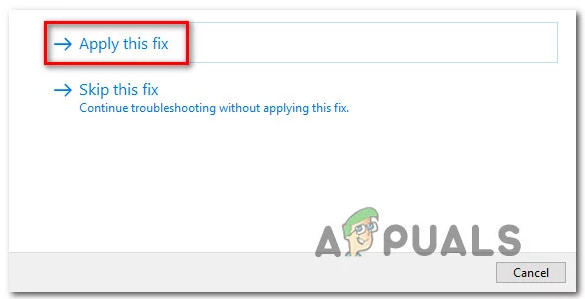
When asked by the Windows Update Troubleshooter, click Next and wait for the initial scan to complete. - Click Apply this Fix if you find a possible solution to implement it in the current situation.

Apply this fix - Once the solution is effective, restart your computer and attempt to reapply the unsuccessful update.
3. Reset the BITS & Cryptographic Services
Another scenario where you might see the 8024200d error when installing a pending Windows update is if two very important service dependencies (Background Intelligent Transfer Service and Cryptographic Service) do not receive content link headers.
Note: This is an old issue that is patched on Windows 11 and Windows 11 but still occring on Windows 7.
To fix this issue, you’ll need to reset both services & rename the two folders where Windows Update stores temporary Windows Files (Catroot 2 & Software Distribution). However, in order to complete this methods, you’ll also need to disable a series of additional WU dependencies to make sure there’s no interference.
Here’s a quick guide on how to do this:
- To open the Run dialog box, press the Windows key + R.
- Then, to start a Command Prompt with elevated privileges, type “cmd” into the text box and press Ctrl + Shift + Enter.
Open up an elevated CMD prompt Note: Grant administrator access by choosing Yes when asked by the UAC (User Account Control) window.
- To stop all WU-related services, type the following commands in the following order at the elevated Command Prompt and press Enter after each command:
net stop wuauserv
net stop cryptSvc
net stop bits
net stop msiserver
Note: By following these steps, the Windows Update Service, MSI Installer, Cryptographic Service, and BITS Service will all be killed manually.
- Use the following commands to remove and rename the SoftwareDistribution and Catroot2 folders once all relevant services have been stopped:
ren C:\Windows\SoftwareDistribution SoftwareDistribution.old
ren C:\Windows\System32\catroot2 Catroot2.old
Important: These folders are responsible for storing updated files required by the WU component. If you rename these folders, your operating system will be compelled to build new, healthy copies.
- After the folders have been cleaned up, execute the following commands to enable the previously deactivated services:
net start wuauserv
net start cryptSvc
net start bits
net start msiserver
- Restart your computer when it has restarted to verify if the issue has been resolved.
4. Run SFC & DISM Scans
File corruption that interferes with the auto-updating capability of Windows installation is one of the most common reasons of the 8024200d error while attempting to install a pending system update.
In this case, it’s recommended to perform a few system file scans utilizing built-in tools System File Checker (SFC) and Deployment Image Servicing and Management (DISM).
Note: Although SFC and DISM are fairly similar, we recommend running both checks in short succession to enhance the likelihood of recovering corrupt system files.
Our recommendation is to start with a simple SFC scan. You can deploy this tool without an active connection to the internet.
Important: It is imperative to maintain the CMD window active after initiating this process, even if the application seems frozen. This is a common occurrence, especially on Windows 7. Stopping the operation before it’s finished, this might result in logical problems on your HDD or SSD.
Once the SFC scan is finished, follow it up with a DISM scan with admin access without restarting your PC. DISM uses a component of Windows Update to obtain healthy replacements to replace corrupt system files. Because of this, you’ll need to ensure that you have a stable internet connection before beginning this operation.
Before commencing this operation, you must thus ensure that you have access to a reliable Internet connection.
After the DISM scan is complete, restart your computer to verify if the 8024200d error has been addressed.
5. Install Update in Clean Boot Mode
It’s also possible that you’re dealing with this issue due to a scenario where a 3rd party application, startup item or service that is interfering with the Windows Update procedure.
If this scenario is applicable, one way to get around the 8024200d error is to is to achieve a clean boot state before attempting to install the update again.
Note: A clean boot forces your system to load just the required Windows apps and services. Once the clean boot state has been reached, no third-party services, processes, or starting items will be permitted to run.
Here’s a quick guide on achieving a clean boot state before reinstalling the problematic update that’s triggering the 8024200d error:
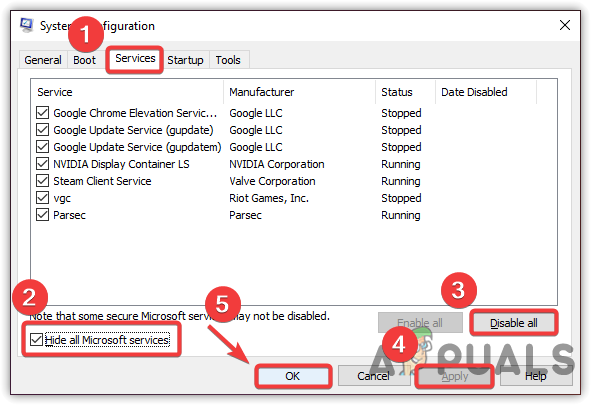
- Follow the steps outlined in this article to achieve a clean boot state.

Achieve a clean boot state - Once you restart your PC in clean boot mode, press Windows key + R to open up a Run dialog box.
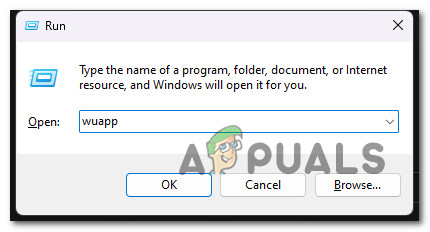
- Next, type ‘wuapp’ inside the text box of Run, then press Ctrl + Shift + Enter to open up an elevated Windows Update instance.
Open up the Windows update menu via Run box Note: This command will only work for Windows 7. If you’re on Windows 10 or Windows 11, use ‘ms-settings:windowsupdate’ instead.
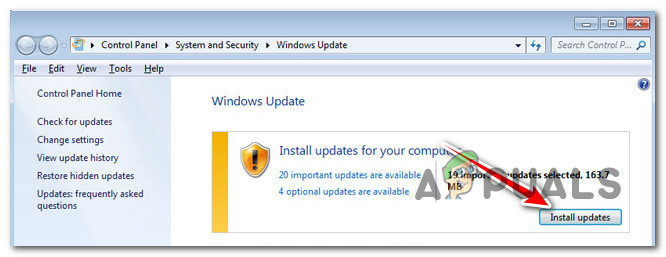
- Inside the Windows Update screen, click on Check for Updates.
- If the problematic update is available to install again, click on Install updates and see if it installs without the same 8024200d error.

Install pending updates
6. Delete Update logs & reinstall the update
Inconsistent WU log files can also cause this error. This is even more likely you have multiple updates that are all failing with the 8024200d and you started to experience this issue after an unexpected system shutdown while the update was installing.
In this case, you’re probably dealing with an issue affecting the integrity of servicing packages, manifests or WU underlying components.
To address this issue, you’ll need to access a series of hidden directories and delete the update logs before retrying the update.
Here’s how to do this:
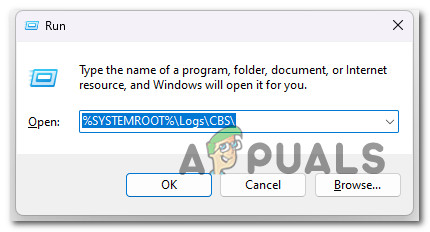
- Press Windows key + R to open up a Run dialog box.
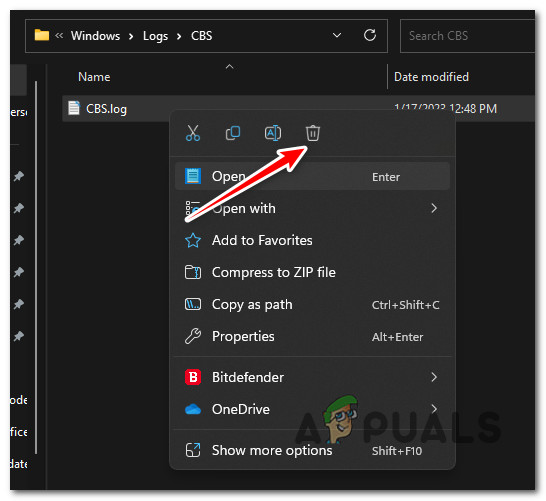
- Next, type ‘%SYSTEMROOT%\Logs\CBS\’ and press Ctrl + Shift + Enter to the first hidden folder with admin access.
Open up the CBS folder - At the User Account Control (UAC), click Yes to grant admin access.
- Inside the location, delete the cbs.log by right-clicking on it and clicking Delete from the context menu.

Deleting the CBS log Note: If the CBS folder contains a secondary log file named CheckSUR.log delete that as well.
- Once both files have been deleted, restart your PC and see if the problem is now fixed.
7. Perform a repair install
If you’ve come this far and you still can get past the 8024200d and install the pending update, you are likely dealing with file corruption that you will not be able to fix without replacing the entire suite of Windows files.
In this case, doing an in-place repair (repair install) or a clean installation are your only options on getting back to a state where Windows is able to install pending updates automatically.
A clean installation is a simpler option, but the main disadvantage is that you cannot preserve your data – including applications, games, and personal files (unless you back them out first).
If you’re looking for a method to save you from losing data, go for a repair install procedure. The main advantage is that you get to keep your data, including applications, games, files present on the OS drive and even certain user preferences.
Vectra86, сведения об ошибке из WindowsUpdate.log:
Кликните здесь для просмотра всего текста
2019-08-16 09:22:03:305 5804 c78 Handler :::::::::::::
2019-08-16 09:22:03:306 5804 c78 Handler :: START :: Handler: CBS Install
2019-08-16 09:22:03:306 5804 c78 Handler :::::::::
2019-08-16 09:22:03:395 5804 c78 Handler Starting install of CBS update DF2A0E82-0BA0-4327-B470-ECDD68A24781
2019-08-16 09:22:03:863 5804 c78 Handler CBS package identity: Package_for_RollupFix~31bf3856ad364e35~amd64~~7601.24511.1.9
2019-08-16 09:22:03:865 5804 c78 Handler Installing express with source=C:\Windows\SoftwareDistribution\Download\15d147703e0b083c4fa1124d090e2075 , workingdir=C:\Windows\SoftwareDistribution\Download\15d147703e0b083c4fa1124d090e 2075
2019-08-16 09:22:08:202 1028 1720 Report REPORT EVENT: {6112D2EA-2314-430C-86F1-9B0B6BCFFE1E} 2019-08-16 09:22:03:202+0300 1 181 101 {AAAC3765-DA59-4597-82B4-B05E6B206BB8} 201 0 AutomaticUpdates Success Content Install Installation Started: Windows successfully started the following update: Ежемесячный набор исправлений качества системы безопасности для систем Windows 7 на базе процессоров x64 (KB4512506), 08 2019 г.
2019-08-16 09:22:26:326 5804 1c10 Handler WARNING: CBS called ResolveSource
2019-08-16 09:22:31:285 5804 1c10 Handler FATAL: CBS called Error with 0x800f081f,
2019-08-16 09:22:31:285 5804 c78 Handler FATAL: Completed install of CBS update with type=0, requiresReboot=0, installerError=1, hr=0x8024200d
2019-08-16 09:22:31:285 1028 1c64 AU >>## RESUMED ## AU: Installing update [UpdateId = {AAAC3765-DA59-4597-82B4-B05E6B206BB8}]
2019-08-16 09:22:31:285 1028 1c64 AU # WARNING: Install failed, error = 0x8024200D / 0x8024200D
2019-08-16 09:22:31:285 5804 c78 Handler :::::::::
2019-08-16 09:22:31:286 5804 c78 Handler :: END :: Handler: CBS Install
2019-08-16 09:22:31:286 5804 c78 Handler :::::::::::::
Сведения об ошибке 0x8024200D:
0x8024200D — WU_E_UH_NEEDANOTHERDOWNLOAD — The update handler did not install the update because it needs to be downloaded again.
Ошибка установки обновления из-за того, что обновления было некорректно скачано.
Информация из CBS.log:
Кликните здесь для просмотра всего текста
2019-08-17 07:07:37, Info CBS Calling client to resolve source, cannot find file ‘rdpcorets.dll’ at path: \\?\C:\Windows\SoftwareDistribution\Download\15d147703e0b083c4fa1124d090e2075\am d64_microsoft-windows-r..s-regkeys-component_31bf3856ad364e35_7.1.7601.23713_none_7fad1d2fc274167d\rdpcorets.dll
2019-08-17 07:07:37, Error CBS Exec: Failed to pre-stage package: Package_1779_for_KB4512506~31bf3856ad364e35~amd64~~6.1.1.9, file: rdpcorets.dll, source: \\?\C:\Windows\SoftwareDistribution\Download\15d147703e0b083c4fa1124d090e2075\am d64_microsoft-windows-r..s-regkeys-component_31bf3856ad364e35_7.1.7601.23713_none_7fad1d2fc274167d\rdpcorets.dll, sandbox: (null) [HRESULT = 0x800f081f — CBS_E_SOURCE_MISSING]
2019-08-17 07:07:37, Info CBS Failed to gather all required files. [HRESULT = 0x800f081f — CBS_E_SOURCE_MISSING]
2019-08-17 07:07:37, Info CBS Failed to gather all missing files for package: Package_for_RollupFix~31bf3856ad364e35~amd64~~7601.24511.1.9 [HRESULT = 0x800f081f — CBS_E_SOURCE_MISSING]
В частности был не скачан компонент обновления rdpcorets.dll.
Добавлено через 6 минут
Выполните очистку папок SoftwareDistribution и Catroot2. См. пункт 2 статьи Устранение неполадок с Центром обновления Windows и ошибок при установке обновлений
Далее скачайте файл обновления из Каталога Центра обновления Майкрософт и запустите установку обновления из скачанного файла.
Если обновление не установиться, то пришлите файлы WindowsUpdate.log и CBS.log снова.
-
Home
-
News
- How to Repair Windows Update Error 8024200d on Your PC
By Alin |
Last Updated
Some users reported that they encountered the error code 8024200d when trying to install some Windows updates like KB2930275, KB2925418, KB2929961, or KB2929733. How to fix this issue? This post of MiniTool Partition Wizard will give you the answers.
I have been unsuccessful in installing Windows updates KB2925418, KB2929961, KB2930275, and KB2929733. All fail with error 8024200d.
—from Microsoft Community
The Windows update error 8024200d (WU_E_UH_NEEDANOTHERDOWNLOAD) most commonly appears on Windows 7, but it can also occur on other versions of Windows. It indicates that the Windows Update handler can’t install the update because the update downloaded is invalid and damaged.
What Causes the Error Code 8024200d
The Windows update error may occur for various reasons. Here, we summarize some possible causes, such as:
- Corrupted system files
- Corrupted Windows Distribution folder
- Problematic installation of programs
- Virus or malware attacks
You can try the methods below to fix the error code 8024200d.
Way 1. Disable Third-Party Security Software
Some antivirus programs or firewall settings may interfere with Windows updates and cause the error code 8024200d3. To fix this issue, you can temporarily disable your security software and try to install the update again.
Way 2. Run the Windows Update Troubleshooter
You can follow the steps below to run the Windows Update troubleshooter to diagnose and fix common problems with Windows updates.
Step 1. Go to Settings > Update & Security > Troubleshoot > Additional troubleshooters.
Step 2. Then click Windows Update and select Run the troubleshooter.
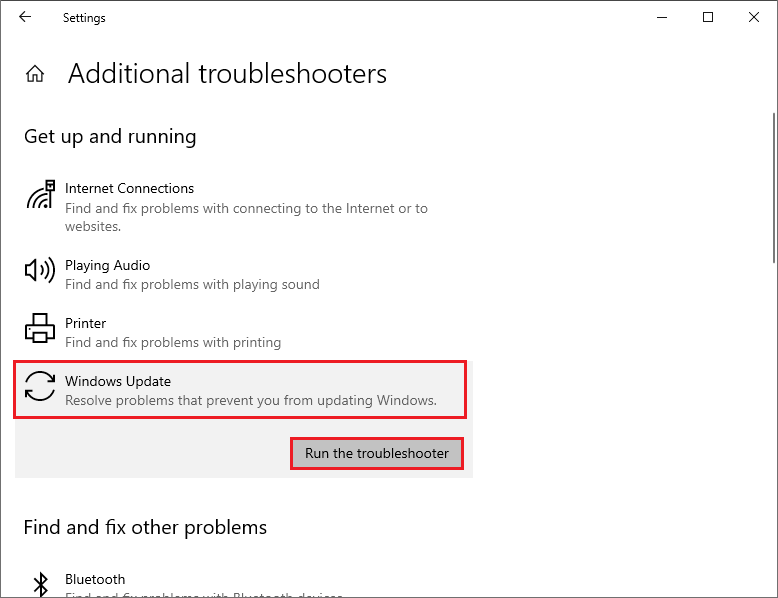
Step 3. In the pop-up window, follow the on-screen wizard to complete troubleshooting. Once done, restart your system and view if the error disappears.
Way 3. Run SFC and DISM
To get rid of the Windows update error 8024200d, you can run SFC and DISM to repair corrupted system files.
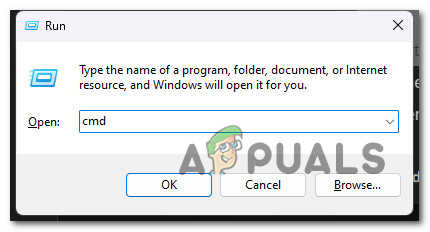
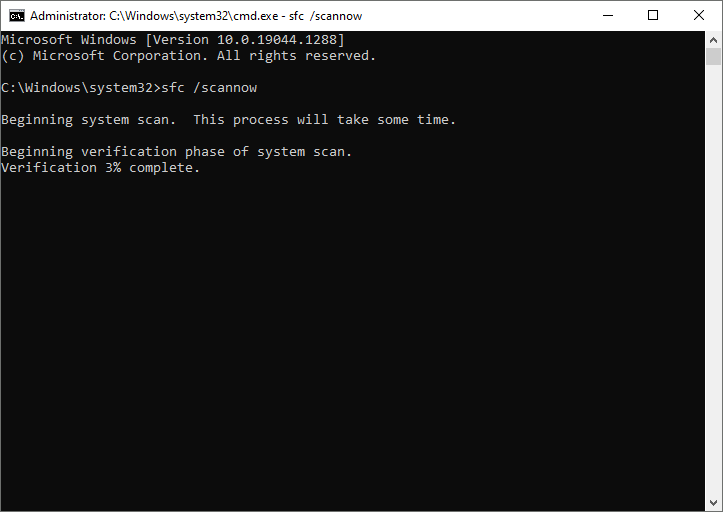
Step 1. Press Win + R to open the Run dialog box. Then type cmd and press Ctrl + Shift + Enter to run Command Prompt as administrator.
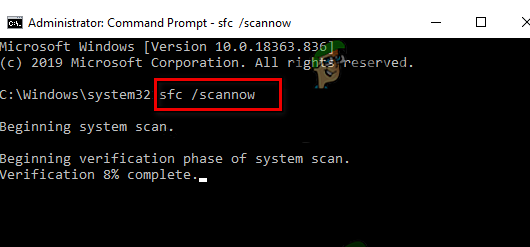
Step 2. Type sfc /scannow and press Enter to run SFC. Once the process ends up, reboot your computer.
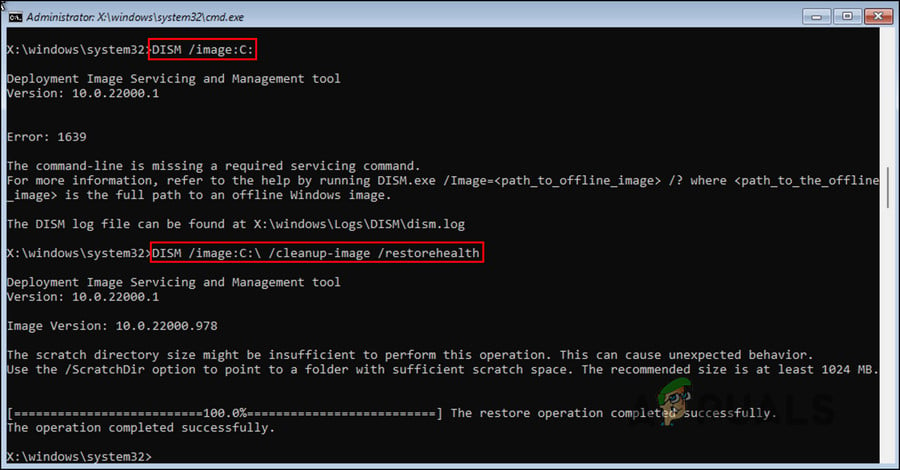
Step 3. If the issue still exists, run Command Prompt as administrator again, type the following commands, and press Enter after each one to run DISM.
DISM /Online /Cleanup-Image /CheckHealth
DISM /Online /Cleanup-Image /ScanHealth
DISM /Online /Cleanup-Image /RestoreHealth
Way 4. Reset the Windows Update Components
Another possible cause of the Windows update error 8024200d is that the services that handle the update and download process are not working properly. You can try to restart this service with this guide: How to Reset Windows Update Components in Windows 11/10?
Way 5. Clear and Expand the System Partition If Necessary
You can check if your system partition has enough free space to install the update. The system partition is usually labeled as C: in File Explorer. If it is almost full, the error code 8024200d may happen. You can use MiniTool Partition Wizard – a professional partition manager to resize your system partition and allocate more space to it.
Click the following button to download and install MiniTool Partition Wizard and then follow this guide: How to Make Windows System Partition Bigger? Solutions Are Here.
MiniTool Partition Wizard FreeClick to Download100%Clean & Safe
Way 6. Manually Download and Install the Update
If none of the above methods works, you can try manually downloading and installing the latest Windows updates by using Media Creation Tool or from Microsoft Update Catalog. You can follow this guide: [Tutorial] How to Download & Install Windows 10 Updates Manually.
In addition to the above methods, you can try installing the update in Clean Boot mode or uninstalling recently installed software to fix the error code 8024200d.
Conclusion
Is this post helpful to you? Do you have any suggestions or other nice methods to fix the Windows update error 8024200d? You can feel free to share them with us in the following comment part.
About The Author
Position: Columnist
Alin is a new member of MiniTool. Her articles are mainly about disk & partition management, data recovery, and hard disk issues. She is enthusiastic about acquiring computer knowledge and helping users to solve problems with computers. To provide more useful and professional solutions, she will keep learning and know more computer knowledge.