Important This update is no longer offered.
References
Learn about the terminology that Microsoft uses to describe software updates.
More Information
For users that are encountering issues with Windows Live Mail 2012 caused by this update, we recommend that you to reinstall Windows Essentials.
Need more help?
Want more options?
Explore subscription benefits, browse training courses, learn how to secure your device, and more.
Communities help you ask and answer questions, give feedback, and hear from experts with rich knowledge.
Need Space in PC or only want to remove or uninstall Update for windows live virus On PC ( Windows 7, 8, 10, and Mac )? but how to, after it still having files in C: drive? If the application run on the pc, windows 7, 8, & 10 so you can uninstall using Control Panel or CMD Or If this applicaion run in Mac so you know that how to uninstall in MAC. With this article, you will able to delete or kick out all of those files also after uninstalling the Update for windows live virus.
Are you bored, or tired of using Update for windows live virus? Now, wanna kick-off this software from your PC ( Windows 7, 8, 10, and Mac )? There is no condition to follow up before installing, so, you can remove it without getting any confusion about it.
There are 10 methods that users can adapt if they want to uninstall Update for windows live virus :
Method #1
- Go to Start Menu, then click on the Control Panel.
- In Control Panel, under programs, go through the list of the ones that are installed on your computer
- Right-click on Update for windows live virus, and then click on uninstall a program
- Follow the prompt on the screen, and you will get to see a progress bar that will take you to remove the Update for windows live virus from the computer.


Method #2
The second method involves uninstaller.exe, through which Update for windows live virus can be uninstalled. Just follow the instructions below to execute this step:
- Go to the installation folder of Update for windows live virus.
- Find a file that is named uninstall.exe or unins000.exe
- Double click on the file, and then follow the instructions that appear on the screen.


Method #3
The third method involves System Restore. For those who don’t know, System Restore is a utility, which helps the user restore their system to its previous state. System Restore removes all those programs, which interfere with the operation and performance of the computer.


If you have created a system restore point before you installed Update for windows live virus, then you can use this software to restore the system, and remove such unwanted programs. However, before you do so, make sure that you save all the important data.Follow the steps below to know more from this method:
- Close all the files and programs, which are currently running on your PC
- Open Computer from the desktop, and then select Properties
- System Window will open
- On the left side and click on System Protection
- System Properties will open.
- Then do click on the option of System Restore, and a new window will again open.
- Now, choose the ‘different restore point’ option, and click on Next.
- You have to select a date and time from the given options; when you select a date, the drivers that you installed after the chosen date won’t work.
- Click on Finish and then Confirm the ‘Restore Point’ on the screen.
- When you click Yes to confirm, the Update for windows live virus would be uninstalled.
Method #4
If you have an antivirus, then you can use it to uninstall Update for windows live virus.There is much malware or Update for windows live virus software in the computer applications that we download nowadays. They have become very difficult to remove from the system, like Trojan and spyware.
- If you cannot remove Update for windows live virus with the above methods.
- It means that there is malware or Update for windows live virus in it, and only a good antivirus can be used for removing it.
You can either download Norton Antivirus or AVG antivirus, as these are reputable software and will surely remove the malware, Update for windows live virus on the system. 
Method #5
If you want to uninstall Update for windows live virus, then you can do so using Command Displayed in the Registry. A registry is a place where all the settings of Windows, along with information, are stored. This also includes the command to uninstall a software or program.
You can try this method with Update for windows live virus as well, but it is a very risky method. If you make any mistake and delete the wrong information, then the system is most likely to crash. It would become difficult for you to bring it back from deletion.

To execute this method, To follow the steps given below:
- Hold Windows + R together, and then Run command
- When the command box opens, type Regedit in the box and then click on OK
- You have to navigate and find the registry key for the Update for windows live virus
- You will see an uninstall string on the next window; double click on it, and also copy ‘Value Data’
- Again hold Windows + R keys, and run the Command; paste the value data that you just copy and click on OK
Follow what comes on the screen and then uninstall Update for windows live virus.
Method #6
The seventh method is to uninstall the Update for windows live virus using a third-party uninstaller.
At times, those who don’t have any knowledge of computer language, won’t be able to manually uninstall the software fully.
Many files occupy the hard disk of the computer, so it is best to use third-party software to uninstall them.

Method #7
There are some codes that users can type into the command prompt, and they would be able to uninstall the Update for windows live virus. For example, if they want to remove the package, then just type.
sudo apt-get remove Update for windows live virus
If you want to uninstall Update for windows live virus and its dependencies as well, then type:
sudo apt-get remove –auto-remove Update for windows live virus
For those who don’t know, some of the dependencies of Update for windows live virus are GCC-5, libc6, libgcc1, Update for windows live virus dev, and gc++-5.

Method #8
If the user wants to remove the configuration and data files of Update for windows live virus, then they need to run the following code on the Command Prompt:
sudo apt-get purge Update for windows live virus

Method # 9
It depends on you that are you willing to kick-out the data or you want to remove the configuration data or data files, along with the dependencies, then the following code is most likely to work for you:
sudo apt-get auto-remove -purge Update for windows live virus

To uninstall Update for windows live virus on mac because anytime we need space or only want to remove from pc due to some viruses and also many problems which are needed to remove or uninstall from pc.
So I will show you some steps of uninstalling Update for windows live virus on the mac so follow my this step or method if you have still confusion so you may contact with us for uninstall of Update for windows live virus on pc or mac.
How to Uninstall Update for windows live virus on Mac?
For uninstalling Update for windows live virus on the mac so as I told you that there is a simple method to uninstall apps on mac. As there are installed some apps on your Mac and now you want to remove or uninstall from your pc successfully and want to install some other apps on my mac so follow my these steps to uninstall Update for windows live virus on mac.
Method #1
In method 1, you have to open mac on your pc as I’m showing in the image follow the images to uninstall Update for windows live virus on your mac.

In the image, there is a Update for windows live virus app on your mac dashboard and now we have to uninstall it from our mac we will uninstall this app and will remove it in of mac now double-click-on-app showing in the image.

Now you double-clicked on the app mac will ask that are you sure to uninstall Update for windows live virus click on the Delete button so go to Trash of mac to uninstall completely from mac. Showing in image trash bin click on trash bin and go inside there will be Update for windows live virus which we had to delete before so have to uninstall completely from mac.

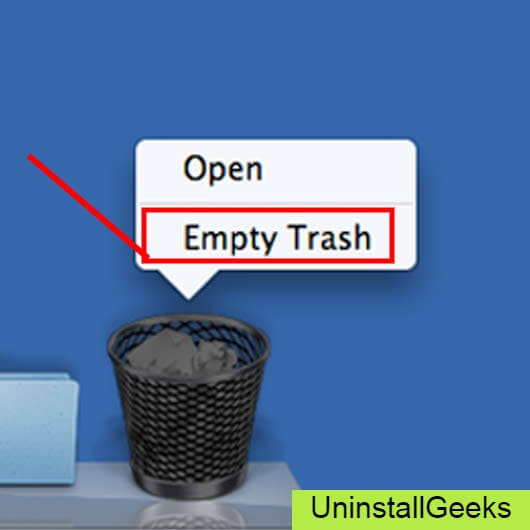
Not right-click on trash to remove all data or app which we had uninstalled before seeing in the image. Click on Empty Trash the whole data which is in the trash will auto remove successfully.
Now we uninstalled Update for windows live virus on the mac so as you see that how to uninstall or remove any app on the mac so if you liked this so share once. This method doesn’t require any antivirus or uninstaller software from them we are to uninstall.
I described only a simple method of uninstalling Update for windows live virus on mac. This method more people are using but some people take it is too hard uninstalling in mac but in this step, anyone can understand this simple method.
How To Install?
For those who don’t know much about Update for windows live virus, they might lean more towards uninstalling it. These Update for windows live virus create an environment, where users can create a high GPU-accelerated application. If you want to install this Update for windows live virus, then make sure that your system is compatible with it.
Firstly, verify that the system you are using has a Update for windows live virus capable GPU, and then download the Update for windows live virus. Install it, and then test that the software runs smoothly on the system. If it doesn’t run smoothly, then it could be because its communication with the hardware is corrupted.


Conclusion
There are other methods of uninstalling the Update for windows live virus as well as in pc or windows, but these could be difficult for those, who don’t have much technical expertise. Execute these methods, and they will surely work. These methods don’t require the user to have much knowledge of the technical side of an operating system. They can follow simple steps and uninstall Update for windows live virus.
Windows Live Mail – это бесплатное приложение электронной почты от компании Microsoft. Оно позволяет удобно работать с почтовыми ящиками Outlook.com, MSN, Hotmail и другими популярными почтовыми сервисами. Однако со временем программное обеспечение может устареть и стать непригодным для использования. В таком случае необходимо обновить Windows Live Mail, чтобы продолжать пользоваться всеми его возможностями.
В этой пошаговой инструкции мы расскажем, как обновить Windows Live Mail без особых усилий. Следуйте нашим рекомендациям, и ваша почтовая программа будет работать снова в полной мере.
Шаг 1: Перед обновлением Windows Live Mail необходимо проверить наличие последних обновлений для вашей операционной системы. Убедитесь, что у вас установлена последняя версия Windows. Если необходимо, запустите процесс обновления и дождитесь его завершения.
Шаг 2: Перейдите на официальный сайт Microsoft и найдите раздел загрузки Windows Live Mail. Обычно эту программу можно найти на странице поддержки и загрузок для вашей операционной системы. Нажмите на ссылку «Скачать», чтобы начать загрузку.
Шаг 3: Когда загрузка завершится, найдите установочный файл в папке загрузок и запустите его. Следуйте инструкциям мастера установки, чтобы успешно обновить Windows Live Mail.
Шаг 4: После завершения установки перезагрузите компьютер, чтобы изменения вступили в силу. Теперь вы можете запустить Windows Live Mail и наслаждаться его обновленными функциями и улучшенной производительностью.
Обновление Windows Live Mail – это простая и быстрая процедура, которая поможет вам оставаться на связи и эффективно работать со своей электронной почтой. Следуйте нашей пошаговой инструкции, чтобы получить все преимущества обновленного приложения от Microsoft.
Содержание
- Проверьте актуальность версии Windows Live Mail
- Перейдите на официальный сайт Windows Live Mail
- Скачайте последнюю версию Windows Live Mail
- Установите обновление Windows Live Mail на компьютер
- Перезагрузите компьютер и запустите Windows Live Mail
Проверьте актуальность версии Windows Live Mail
Прежде чем обновить Windows Live Mail, рекомендуется проверить актуальность версии вашего почтового клиента. Возможно, у вас уже установлена последняя версия программы и дополнительные действия не требуются.
Чтобы узнать версию Windows Live Mail, выполните следующие шаги:
- Откройте Windows Live Mail на вашем компьютере.
- Щелкните по кнопке «Справка» в верхнем меню программы.
- Выберите пункт «О программе» из выпадающего списка.
В открывшемся окне будет указана версия Windows Live Mail. Если эта версия не является последней, рекомендуется обновить почтовый клиент для получения всех актуальных функций и исправления возможных ошибок.
Перейдите на официальный сайт Windows Live Mail
Для начала процесса обновления Windows Live Mail вам необходимо открыть веб-браузер и перейти на официальный сайт Windows Live Mail. Введите «Windows Live Mail» в поисковой строке вашего браузера или воспользуйтесь следующей ссылкой: https://www.microsoft.com/ru-ru/download/details.aspx?id=1771.
После того, как вы перешли на сайт Windows Live Mail, найдите ссылку для скачивания последней версии программы. Обычно эта ссылка располагается на главной странице сайта или на странице загрузки. Нажмите на ссылку скачивания, чтобы начать загрузку установочного файла Windows Live Mail.
Скачайте последнюю версию Windows Live Mail
Чтобы обновить Windows Live Mail, вам необходимо скачать и установить последнюю версию программы. Выполните следующие шаги:
1. Откройте веб-браузер и перейдите на официальный сайт Microsoft.
2. Найдите раздел «Загрузки» или «Продукты» на основной странице Microsoft.
3. В поисковой строке введите «Windows Live Mail» и нажмите Enter.
4. В результате поиска выберите ссылку, которая ведет на страницу загрузки Windows Live Mail.
5. На странице загрузки найдите кнопку «Скачать» или «Загрузить» и нажмите на нее.
6. Подтвердите свои действия в диалоговом окне загрузки и сохраните файл установщика Windows Live Mail на вашем компьютере.
7. По завершению загрузки, откройте папку, в которой был сохранен файл установщика, и запустите его.
8. Следуйте инструкциям на экране для установки Windows Live Mail на ваш компьютер.
После завершения установки, Windows Live Mail будет обновлен до последней версии и готов к использованию.
Установите обновление Windows Live Mail на компьютер
Чтобы получать последние обновления и исправления для Windows Live Mail, вам необходимо установить обновления операционной системы Windows. Вот пошаговая инструкция, как установить обновление Windows Live Mail на ваш компьютер:
- Откройте меню «Пуск» и выберите «Настройки».
- В меню настроек выберите «Обновление и безопасность».
- На странице «Обновление и безопасность» выберите «Windows Update» в левой панели.
- Нажмите кнопку «Поиск обновлений».
- Подождите, пока компьютер найдет все доступные обновления.
- Найдите обновление для Windows Live Mail и отметьте его для установки.
- Нажмите кнопку «Установить» и подождите, пока обновление будет загружено и установлено.
- Перезапустите Windows Live Mail, чтобы применить обновление.
После установки обновления Windows Live Mail будет работать с улучшенной производительностью и стабильностью. Регулярно проверяйте наличие новых обновлений, чтобы быть уверенными, что вы получаете все последние функции и исправления для Windows Live Mail.
Перезагрузите компьютер и запустите Windows Live Mail
После успешной установки и обновления Windows Live Mail, важно перезагрузить компьютер. Это поможет обновлениям вступить в силу и избежать потенциальных проблем.
Когда ваш компьютер снова запустится, откройте Windows Live Mail, щелкнув на его значок на рабочем столе или через меню «Пуск».
Если у вас впервые установлен Windows Live Mail, вам нужно будет ввести данные вашей учетной записи, такие как адрес электронной почты и пароль. После ввода данных нажмите на кнопку «Войти» или «Далее», чтобы войти в свою учетную запись.
Если у вас уже установлен Windows Live Mail и вы обновили его, при запуске программы вам необходимо будет автоматически войти в систему с вашими существующими учетными данными. Если это не произошло, введите свои учетные данные в соответствующих полях и нажмите на кнопку «Войти» или «Далее».
После успешной авторизации в Windows Live Mail вы увидите свою почту, папки и другие настройки, которые были сохранены до обновления. Вы также можете увидеть изменения и обновления интерфейса и функциональности программы.
Теперь вы можете безопасно пользоваться обновленной версией Windows Live Mail и наслаждаться ее новыми возможностями и улучшенной работой.

Microsoft yesterday announced the availability of update to Windows Live Essentials. Apart from full SSL support in Windows Live Mail, the update includes bug fixes, performance improvements across the whole suite of apps. Here are the changes,
- Mail: We fixed a sorting issue in the Sent items folder and improved the upload reliability and instrumentation in Photo mail.
- Messenger: We fixed a couple of stability issues and made various changes for improved voice and video quality. We fixed an issue that was causing sound to be lost after upgrading, and we improved performance when displaying the MSN Today page in the main window.
- Photo Gallery: We implemented various bug fixes for crashes related to launching Photo Gallery through Autoplay and facial recognition.
- And more: We made many other usability, performance, and stability improvements across the suite of Windows Live Essentials apps.
The update will be available for download from Windows Live Essential website and Microsoft Download center and also will be pushed as optional update to existing Windows Live users.
Windows Live team also announced few changes to the login/signin page of Windows Live services.
You can read more on the reason why they simplified the login screen and more at Windows team blog.

How to Update Windows Live Mail?
Do this by going to your Control Panel then click Windows Update then choose Check for updates. If there is no updates for Windows Live Essentials Windows Live Essentials Four versions of Windows Server Essentials were released along with their Windows Server siblings: 2012, 2012 R2, 2016, and 2019. https://en.wikipedia.org › wiki › Windows_Server_Essentials Windows Server Essentials Wikipedia, proceed to doing a clean removal of Windows Live Essentials.
How do I Update Windows Live Mail in Windows 10?
Download Windows Live Essentials from Archive.org. You can download via torrent or your browser.
Run the file to install the app.
Select the Select programs to install option.
Uncheck all apps you do not want to install. Make sure Mail is checked.
Click Install.
How do I Refresh Windows Live Mail?
Select Tools > Options… from the menu.
Go to the General tab.
Make sure Check for new messages every __ minutes is checked.
Decide on how often you want Windows Live Mail, Windows Mail or Outlook Express to look for new mail.
Click OK.
What is the Latest Version of Windows Live Mail?
What is the latest version of Windows Live Mail? The latest version is Windows Live Mail 2012, called » Wave 5 «, available to Windows Vista, Windows 7, and Windows 8. If you are running Windows XP, the latest version available for you is Windows Live Mail 2009 » Wave 3 «.
Is there an Update for Windows Live Mail 2011?
Today, we released an update for Windows Live Essentials 2011 in all 48 languages. You can download the update now at the Windows Live Essentials website.
Is Windows Live Mail Still Supported in Windows 10?
Windows Live Mail is designed to run on Windows 7 and Windows Server 2008 R2, but is also compatible with Windows 8 and Windows 10, even though Microsoft bundles a new email client, named Windows Mail, with the latter.
How to Install and Configure Windows Live Mail 2011
Go to Windows Live Mail 2011 page, click Download now, and Run. Windows Live Essentials Windows Live Essentials Four versions of Windows Server Essentials were released along with their Windows Server siblings: 2012, 2012 R2, 2016, and 2019. https://en.wikipedia.org › wiki › Windows_Server_Essentials Windows Server Essentials Wikipedia 2011 installation starts and click on Choose the programs you want to install. Uncheck all products and only leave selected Mail and click Install. Now just wait for the installation to be finished and then click Close.
Can Windows Live Mail be Updated?
A: Windows Live Mail is no longer supported by Microsoft and no longer available to download. If you still have this on your PC, it may be possible to get it working again. But if you need to reinstall it, you may not have much luck finding a copy to download.
How do I Upgrade my Windows Live Mail?
Do this by going to your Control Panel then click Windows Update then choose Check for updates. If there is no updates for Windows Live Essentials, proceed to doing a clean removal of Windows Live Essentials.
Does Windows 10 Support Windows Live Mail 2011?
It requires Windows 7, Windows Server 2008 R2, Windows 8, or Windows 10. Windows Vista is no longer supported. There are no significant differences from Windows Live Mail 2011, save the discontinuance of support for Vista and DeltaSync.