| Информация о файле | Описание |
|---|---|
| Размер файла: | 392 kB |
| Дата и время изменения файла: | 2020:03:04 14:30:30+00:00 |
| Тип файла: | Win64 EXE |
| Тип MIME: | application/octet-stream |
| Предупреждение! | Possibly corrupt Version resource |
| Тип компьютера: | AMD AMD64 |
| Метка времени: | 2097:07:30 03:17:10+00:00 |
| Тип PE: | PE32+ |
| Версия компоновщика: | 14.10 |
| Размер кода: | 270848 |
| Размер инициализированных данных: | 121344 |
| Размер неинициализированных данных: | 0 |
| Точка входа: | 0x4f010 |
| Версия ОС: | 10.0 |
| Версия образа: | 10.0 |
| Версия подсистемы: | 10.0 |
| Подсистема: | Native |
| Номер версии файла: | 10.0.16299.125 |
| Номер версии продукта: | 10.0.16299.125 |
| Маска флагов файлов: | 0x003f |
| Флаги файлов: | (none) |
| Файловая ОС: | Windows NT 32-bit |
| Тип объектного файла: | Driver |
| Подтип файла: | 7 |
| Код языка: | English (U.S.) |
| Набор символов: | Unicode |
| Наименование компании: | Microsoft Corporation |
| Описание файла: | Volume Shadow Copy driver |
| Версия файла: | 10.0.16299.125 (WinBuild.160101.0800) |
| Внутреннее имя: | volsnap.sys |
| Авторское право: | © Microsoft Corporation. All rights reserved. |
| Название продукта: | Microsoft® Windows® Operating System |
| Версия продукта: | 10.0.16299.125 |
✻ Фрагменты данных файлов предоставлены участником Exiftool (Phil Harvey) и распространяются под лицензией Perl Artistic.
Question
Issue: How to fix Volsnap.sys Blue Screen Error in Windows?
Hello. Over the past week, I have experienced a Blue Screen Error a number of times. The problem seems to surfacing from something called Volsnap.sys. Any tips on how to stop this would be appreciated.
Solved Answer
Volume Shadow Copy driver files, such as Volsnap.sys, are considered a type of Win64 EXE (Driver) file. They are associated with the SYS file extension, developed by Microsoft for the Windows operating system. The volume shadow copy driver is usually located in the C:\\Windows\\System32\\drivers directory.
Volume Shadow Service (VSS) coordinates the actions that are required to create a consistent shadow copy (also known as a snapshot or a point-in-time copy) of the data that is to be backed up. The shadow copy can be used as-is, or it can be used in scenarios such as the following:[1]
- You want to back up application data and system state information
- You are data mining
- You are performing disk-to-disk backups
- You need fast recovery from data loss by restoring data to the original Logical Unit Number (LUN)
The Volsnap.sys Blue Screen Error (BSOD) can occur due to many reasons but primarily because of the RAM[2] or Hard Disk issues, incompatible firmware, VSS issue, or malware[3] infection. Also, some software could have messed up system files or settings.

If you’ve recently been getting errors with volsnap.sys, it’s recommended to uninstall any programs recently that may cause this error. If this does not resolve your issue or you have not installed any programs recently try recovering Windows back to an earlier version. We show how to do all of these things in the guide below.
If you want to avoid a tedious troubleshooting process that could take a while, you can try using a repair tool like FortectMac Washing Machine X9 that can fix various system errors, corrupted files, registry issues, and most BSODs.
Method 1. Use Windows Startup Repair
Fix it now!
Fix it now!
To repair damaged system, you have to purchase the licensed version of Fortect Mac Washing Machine X9.
- Navigate to the Windows 10 Advanced Startup Options menu (on many pc’s, hitting F11 as soon as you power on will get you to the Windows 10 Advanced Startup Options

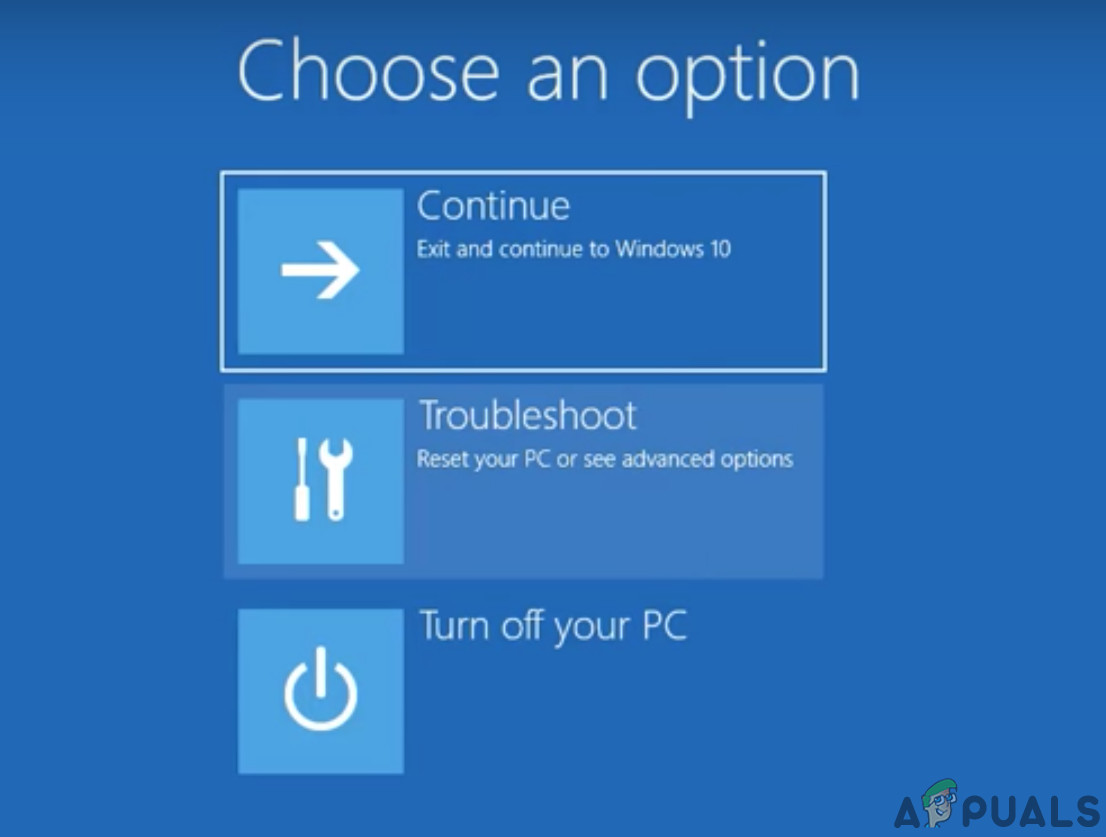
- Once your computer has booted, select Troubleshoot
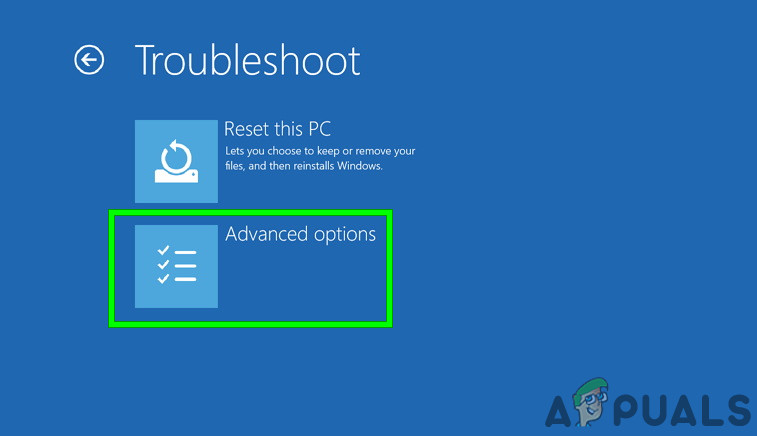
- Click Advanced options
- Click Startup Repair
Method 2. Use Windows Restore
Fix it now!
Fix it now!
To repair damaged system, you have to purchase the licensed version of Fortect Mac Washing Machine X9.
- Click System Restore
- Select your username

- Enter your password
- Select a restore point from the menu and follow the prompts (if you have no restore points, you can’t use this method)
Method 3. Perform a Disk Cleanup
Fix it now!
Fix it now!
To repair damaged system, you have to purchase the licensed version of Fortect Mac Washing Machine X9.
- Boot the system in the Safe Mode
- Press the Windows button and then type disk cleanup and click on it
- Wait for a little while so the Windows could complete its operation of identifying the junk files
- Find the Temporary files, tick the box in front of it and choose OK

- If you want to have more space to be released, tick the box in front of the category to clean it
- Restart
Method 4. Stop Volume Shadow Service
Fix it now!
Fix it now!
To repair damaged system, you have to purchase the licensed version of Fortect Mac Washing Machine X9.
- Boot your system in the Safe Mode
- In Safe Mode, Press Windows Button and type services and press Enter
- Scroll down the list of services to find Volume Shadow Copy and right-click it and then click on stop

- Double click this service to open its properties page
- In front of the startup type, click on the drop-down menu and select disabled
- Apply and OK
- Restart
Method 5. Run the Bootrec Command
Fix it now!
Fix it now!
To repair damaged system, you have to purchase the licensed version of Fortect Mac Washing Machine X9.
- Boot from the Windows 10 installation media
- After booting into setup, select Repair Computer
- Select Troubleshoot
- Click Advanced Options

- Select Command Prompt
- Once Command Prompt opens, type in the command below and make sure you click Enter:
BOOTREC /FIXMBR
BOOTREC /FIXBOOT
- Type in Exit and restart your PC
Method 6. Replace the Corrupted Volsnap.sys File
Fix it now!
Fix it now!
To repair damaged system, you have to purchase the licensed version of Fortect Mac Washing Machine X9.
- If you can boot into the system either normally or via Safe Mode, boot into the system press the Windows button and type cmd in the search bar on your desktop
- Right-click Command Prompt and select Run as administrator
- If you cannot boot into the system then you should use installation media to boot into the system
- After booting into setup, select Repair Computer
- Select Troubleshoot
- Click Advanced Options.
- Select Command Prompt
- Type and click Enter:
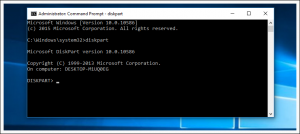
Diskpart
list volume

- Find the name of your windows drive, write exit to exit the diskpart and then just go to the volume by C:\\ or E:\\ or whatever the name of your windows partition is
- Then run the copy command and path to the old volsnap.sys file, for example:
copy C:\\windows.old\\windows\\system32\\drivers\\volsnap.sys C:\\windows\\system32\\drivers\\volsnap.sys
- You should use your system’s partition where Windows was installed
Method 7. Reinstall Windows
Fix it now!
Fix it now!
To repair damaged system, you have to purchase the licensed version of Fortect Mac Washing Machine X9.
If all else fails and you can’t even reset your Windows computer, you can reinstall the OS entirely. You won’t even need an activation number or any proof of purchase, either. Just make sure you have more than 4GB of space available, as that’s how much space the file you’ll download takes up. Here’s how to reinstall Windows 10:
- Download the ISO file
- Select Create installation media for another PC and click Next

- Select ISO file and click Next
- Click Finish
- Open the Windows ISO file you downloaded
- Open Setup and click Next
- Click Accept (Be prepared to wait; this next part may take a while)

- Click Install
- Wait for your system to restart and install Windows
Repair your Errors automatically
ugetfix.com team is trying to do its best to help users find the best solutions for eliminating their errors. If you don’t want to struggle with manual repair techniques, please use the automatic software. All recommended products have been tested and approved by our professionals. Tools that you can use to fix your error are listed bellow:
do it now!
Download Fix
Happiness
Guarantee
do it now!
Download Fix
Happiness
Guarantee
Compatible with Microsoft Windows
Compatible with OS X
Still having problems?
If you failed to fix your error using FortectMac Washing Machine X9, reach our support team for help. Please, let us know all details that you think we should know about your problem.
Fortect — a patented specialized Windows repair program. It will diagnose your damaged PC. It will scan all System Files, DLLs and Registry Keys that have been damaged by security threats.Mac Washing Machine X9 — a patented specialized Mac OS X repair program. It will diagnose your damaged computer. It will scan all System Files and Registry Keys that have been damaged by security threats.
This patented repair process uses a database of 25 million components that can replace any damaged or missing file on user’s computer.
To repair damaged system, you have to purchase the licensed version of Fortect malware removal tool.To repair damaged system, you have to purchase the licensed version of Mac Washing Machine X9 malware removal tool.
To stay completely anonymous and prevent the ISP and the government from spying on you, you should employ Private Internet Access VPN. It will allow you to connect to the internet while being completely anonymous by encrypting all information, prevent trackers, ads, as well as malicious content. Most importantly, you will stop the illegal surveillance activities that NSA and other governmental institutions are performing behind your back.
Unforeseen circumstances can happen at any time while using the computer: it can turn off due to a power cut, a Blue Screen of Death (BSoD) can occur, or random Windows updates can the machine when you went away for a few minutes. As a result, your schoolwork, important documents, and other data might be lost. To recover lost files, you can use Data Recovery Pro – it searches through copies of files that are still available on your hard drive and retrieves them quickly.
Click here follow the steps to fix C Windows System32 Drivers Volsnap Sys and related errors.
|
|
|
|
To Fix (C Windows System32 Drivers Volsnap Sys) error you need to |
|
|
Step 1: |
|
|---|---|
| Download (C Windows System32 Drivers Volsnap Sys) Repair Tool |
|
|
Step 2: |
|
| Click the «Scan» button | |
|
Step 3: |
|
| Click ‘Fix All‘ and you’re done! | |
|
Compatibility:
Limitations: |

C Windows System32 Drivers Volsnap Sys Error Codes are caused in one way or another by misconfigured system files
in your windows operating system.
If you have C Windows System32 Drivers Volsnap Sys errors then we strongly recommend that you
Download (C Windows System32 Drivers Volsnap Sys) Repair Tool.
This article contains information that shows you how to fix
C Windows System32 Drivers Volsnap Sys
both
(manually) and (automatically) , In addition, this article will help you troubleshoot some common error messages related to C Windows System32 Drivers Volsnap Sys error code that you may receive.
Note:
This article was updated on 2023-10-03 and previously published under WIKI_Q210794
Contents
- 1. What is C Windows System32 Drivers Volsnap Sys error?
- 2. What causes C Windows System32 Drivers Volsnap Sys error?
- 3. How to easily fix C Windows System32 Drivers Volsnap Sys errors
What is C Windows System32 Drivers Volsnap Sys error?
The C Windows System32 Drivers Volsnap Sys error is the Hexadecimal format of the error caused. This is common error code format used by windows and other windows compatible software and driver vendors.
This code is used by the vendor to identify the error caused. This C Windows System32 Drivers Volsnap Sys error code has a numeric error number and a technical description. In some cases the error may have more parameters in C Windows System32 Drivers Volsnap Sys format .This additional hexadecimal code are the address of the memory locations where the instruction(s) was loaded at the time of the error.
What causes C Windows System32 Drivers Volsnap Sys error?
The C Windows System32 Drivers Volsnap Sys error may be caused by windows system files damage. The corrupted system files entries can be a real threat to the well being of your computer.
There can be many events which may have resulted in the system files errors. An incomplete installation, an incomplete uninstall, improper deletion of applications or hardware. It can also be caused if your computer is recovered from a virus or adware/spyware
attack or by an improper shutdown of the computer. All the above actives
may result in the deletion or corruption of the entries in the windows
system files. This corrupted system file will lead to the missing and wrongly
linked information and files needed for the proper working of the
application.
How to easily fix C Windows System32 Drivers Volsnap Sys error?
Follow these steps to fix your problem:
It is highly suggested that you carry out all the steps in exact manner to effectively get rid of your problem.
Scan the Computer with Reimage Repair Tool
This repair tool is free to download as well as easy to use. It scans, detects and repairs your computer for system errors like C Windows System32 Drivers Volsnap Sys. The tool is powerful enough to find malicious items that are hidden on the computer.
1. Download Reimage Repair Tool from the link below. Save the file to your Desktop so that we can access the file easily.
Reimage Repair Tool Download Link (right-click and save to your Desktop)
2. After downloading, navigate to the file location and double-click it. This will start the installation procedure. User Account Control will prompt if you want to run the program, click Yes to continue.

3. On initial launch of the program, it will display a welcome screen as shown in the image below. Leave the checkbox unticked to allow the repair tool to start an automatic scan and click Install to start the installation procedure.

4. Reimage will now install itself on your computer. The tool will download necessary updates so Internet connection is required at this point.

5. The tool will automatically start a preliminary scan of your machine to help determine the health of your PC.

6. Once the scan is complete Reimage will tell you which areas of your PC are damaged and if a repair is necessary. If it is, click on the Start Repair button in the bottom right corner.
7. After Reimage has finished it’s repair your computer should be fixed. You may need to restart your computer to complete the process.
How does it work?
This tool will scan and diagnose, then repairs, your PC with patent
pending technology that fix your windows operating system registry
structure.
basic features: (repairs system freezing and rebooting issues , start-up customization , browser helper object management , program removal management , live updates , windows structure repair.)
The Volsnap.sys Blue Screen Error (BSOD) can occur due to many reasons but primarily because of the RAM or Hard Disk Issues, incompatible firmware, VSS issue, corrupt drivers or malware infection.
What causes Volsnap.sys Blue Screen Error (BSOD)?
After deeply going through the user reports and analyzing them, we can conclude that this error can occur due to primarily software related problems and some of them are:
- Junk Files: Junk files conflicting with the applications/Windows results in Volsnap.sys Blue Screen Error (BSOD).
- Volume Shadow Service: Volume shadow service can cause this problem when it is triggered wrongly or stuck in the loop.
- Boot Problem: If your system’s boot files and tables are not in place then it can result in the Volsnap.sys Blue Screen Error (BSOD).
- Corrupted Volsnap.sys File: Corrupted Volsnap.sys can cause this error.
- Antivirus/Firewall Issue: If any of the system’s files wrongly detected by Anti-virus as malware can cause the Volsnap.sys Blue Screen Error (BSOD).
- RAM: If RAM is having a problem in its proper operation then it can cause Volsnap.sys Blue Screen Error (BSOD)
- Corrupted System Files/Volumes: If any of the system files/volumes are corrupted then it can force the system to Volsnap.sys Blue Screen Error (BSOD).
- Conflicting Update: Microsoft is known to release buggy updates and any buggy update can cause the Volsnap.sys Blue Screen Error (BSOD).
- Conflicting Drivers: Newly installed hardware driver can cause Volsnap.sys Blue Screen Error (BSOD).
- Outdated Device Drivers: Outdated device drivers can cause Volsnap.sys Blue Screen Error (BSOD).
- Outdated Windows: Outdated OS can cause Volsnap.sys Blue Screen Error (BSOD).
- Corrupted Windows: Corrupted Windows Installation can cause Volsnap.sys Blue Screen Error (BSOD).
- BIOS problem: Outdated/incompatible BIOS can cause the Volsnap.sys Blue Screen Error (BSOD).
Before starting the troubleshooting process please make sure to have a thorough look at our article on Most Common Fixes of BSOD.
Solution 1: Clean Up the Junk Files
Junk system files are usually old configurations of your system which get accumulated over time and are not required by the system anymore. These files also include junk data of your Web browser, for example, old cookies, etc. Microsoft Store also deposits junk files with time.
Even though the junk files are not used by the system, there can be times when these files conflict with any essential settings of applications or even with the Windows OS. It is always recommended to clean up this accumulated junk files from your system every now and then. You can use the Windows built-in Disk cleaner to clean up the system from these junk files. This cleaning may solve the problem of Volsnap.sys BSOD error.
- Boot the system in the Safe Mode.
- Press the Windows button and then type “disk cleanup”. Then click on the Disk Cleanup in the list that pops out.

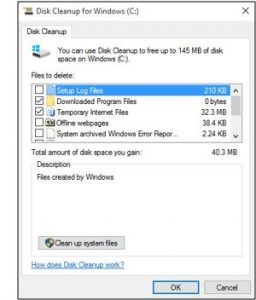
Disk Cleanup in Windows Search Box - Wait for a little while so the Windows could complete its operation of identifying the junk files.

Disk Cleanup Starting - In the resulting Window, drag down the scroll bar a bit to find the Temporary files Check the CheckBox in front of it and choose OK.

Temporary Files in Disk Cleanup - If you want to have more space to be released, tick the box in front of the category to clean it.


Restart your computer to see if it is finally clear of the Volsnap.sys Blue Screen Error (BSOD).
Solution 2: Stop Volume Shadow Service
Windows Service Volume Shadow Copy which is also known as the Volume Snapshot Service (VSS) is a Windows technology for creating backup copies/snapshots of the PC. The kernel driver of this VSS service is volsnap.sys and the error we are facing is also referring to this, so, this service can be the cause of the error we are facing. To make sure that this service is not the culprit, we should stop this service. Follow the steps mentioned below to stop this service.
- Boot your system in the Safe Mode.
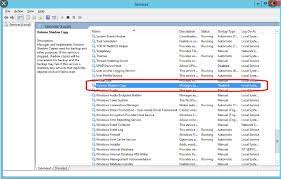
- In Safe Mode, Press Windows Button and type “services” and press enter to open the Services.

Type Services in Windows Search Box - Scroll down the list of services to find “Volume Shadow Copy” and Right Click it and then click on stop. If it is already stopped nothing is required to do.

Stop Volume Shadow Copy - Double click this service to open its properties page.
- In front of the startup type, click on the drop-down menu and select the “disabled”.

Disable Volume Shadow Copy - “Apply” and “OK”.


“Restart” the System and check if Volsnap.sys Blue Screen Error (BSOD) has left your system.
Solution 3: Run Bootrec Command
Whenever users experience a BSOD, we recommend that they make that their system’s boot files and tables are in place. For this purpose, Windows has a built-in utility known as Bootrec. Bootrec command is used to repair MBR and boot.
- Boot from the Windows 10 installation media.
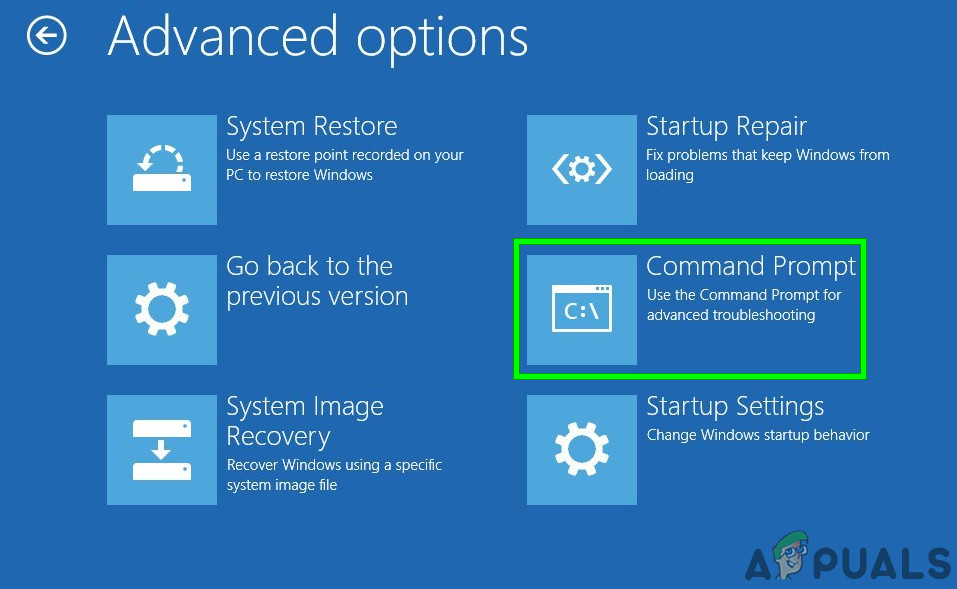
- After booting into setup, select Repair Computer.
- Select Troubleshoot.

Troubleshoot in Windows RE - Click Advanced Options.

Advanced options in Troubleshoot screen - Select Command Prompt.

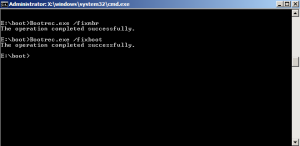
Click Command Prompt - Once Command Prompt opens, type in the command below and make sure you click Enter afterwards:
BOOTREC /FIXMBR
and press Enter.
- Once the command is completed, in the Command Prompt type
BOOTREC /FIXBOOT
and press Enter.
- Wait for the operation to be completed and then Type in Exit.
Once you’re done, restart your device and check if the issue is resolved.
Solution 4: Replace Corrupted Old volsnap.sys File
The main cause of this error could be Volsnap.sys file. Replacing this file can solve the problem. We can get another copy of the Volsnap.sys from Windows.old folder (windows.old\windows\system32\drivers\). Windows.old folder is created when you upgrade from one version of Windows to another. The Windows.old folder consists of all the files & data from the previous installation of Windows. You can also copy from Windows Installation media or another working PC.
For Windows.old Folder
- If you can boot into the system either normally or via safe mode, boot into the system Press Windows button and type cmd in the search bar on your desktop and right-click Command Prompt& select Run as administrator. And move to step 7.

Run Command Prompt as Administrator - If you cannot boot into the system then you should use installation media to boot into the system.
- After booting into setup, select Repair Computer.
- Select Troubleshoot.
Troubleshoot in Windows RE - Click Advanced Options.
Advanced options in Troubleshoot screen - Select Command Prompt.
Click Command Prompt - Once you get to the command prompt type:
Diskpart

Diskpart Command - Then to list all partitions type
list volume

List Volume Command - Find the name of your windows drive, write exit to exit the diskpart and then just go to the volume by C:\ or E:\ or whatever the name of your windows partition is.
- Then run the copy command and path to the old volsnap.sys file for example.
copy C:\windows.old\windows\system32\drivers\volsnap.sys C:\windows\system32\drivers\volsnap.sys
- You should use your system’s partition where Windows was installed.


For Windows Installation Media.
There are a lot of cases when Windows.old folder is not available or deleted. In that case, you can boot into the Windows Installation media (use step 2 to 6 in the For windows.old folder section to open the command prompt)
- When in command prompt type
x:\sources
- Then search widows drive e.g. if it was “D:\” then select it and enter copy command with correct drive letter e.g. D:\
copy x:\windows\system32\drivers\volsnap.sys D:\windows\system32\drivers\volsnap.sys
- Reboot PC
Using an Ubuntu live USB.
You can use the Ubuntu live USB to copy the Volsnap.sys file. To create an Ubuntu live USB please consult our article on How to Create an Ubuntu Bootable USB.
When logged in the Ubuntu
- Copy Volsnap.sys file from the Windows.old folder and go to the Windows Installation Drive and then move to windows\system32\drivers\ and paste there.
- If Windows.old folder is not available and Windows Installation Media is available, insert the installation media into the system and then open the installation media and navigate to
windows\system32\drivers\
and copy the Volsnap.sys file and go to the Windows Installation Drive and then move to
windows\system32\drivers\
and paste there.
- If you have copied from another system on a USB, then insert that USB into the system and copy the Volsnap.sys file from it and go to the Windows Installation Drive and then move to
windows\system32\drivers\
and paste there.
After when you have copied the file, by using any method, restart the system and see if the problem is solved.
Solution 5: Reset Windows
Windows 10 allows its users to reset their PCs’ OS to its factory settings and all the applications, drivers, services that did not come with the computer will be uninstalled. Also, all changes made by the user to the system’s settings & preferences are nullified. For the personal files and data of the user which is stored on the computer, the user will be prompted to opt-out from either to keep them or remove them while resetting the computer
- Ensure your PC is off.
- Press the power button to turn on your PC and when you see the Windows logo hold the power button down until PC shuts down automatically.
- Repeat thrice.
- Automatic Repair screen will pop up.
- Then wait for Windows to diagnose your PC.

Diagnosing Your PC - When the “Startup Repair” screen appears and says it could not repair your PC then Click Advanced options.

Automatic Repair - Click Troubleshoot in the Windows Recovery Environment.
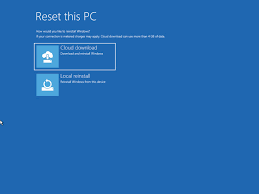
Troubleshoot in Windows RE - On the Troubleshoot screen, click Reset this PC.

Reset This PC - Choose whether you want to keep or delete your files and apps.

Keep or Remove Files - Click “Reset” to proceed


Follow the instructions shown on the screen and when the reset process is complete, check if the Volsnap.sys Blue Screen Error (BSOD).
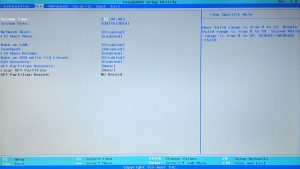
Solution 6: Update BIOS
BIOS is the main component of any system which is the first thing that starts up after the system is powered on. BIOS connects & loads all the attached devices and then OS is loaded.

So, updating the BIOS may solve the problem if the blue screen was occurring because of this (even though this is very rare).
Warning: Proceed at your own risk as interrupting or failing to update the BIOS at any point might brick your computer and non-recoverable damage to the whole system.
To update BIOS of your system, follow our undermentioned articles.
- Updating Gateway Desktop or Laptop BIOS
- Updating Dell BIOS
- Updating BIOS On A HP Desktop/Laptop
Hopefully, the Volsnap.sys Error is solved, and you can use the system without any problem.

Kevin Arrows
Kevin Arrows is a highly experienced and knowledgeable technology specialist with over a decade of industry experience. He holds a Microsoft Certified Technology Specialist (MCTS) certification and has a deep passion for staying up-to-date on the latest tech developments. Kevin has written extensively on a wide range of tech-related topics, showcasing his expertise and knowledge in areas such as software development, cybersecurity, and cloud computing. His contributions to the tech field have been widely recognized and respected by his peers, and he is highly regarded for his ability to explain complex technical concepts in a clear and concise manner.
If you are facing volsnap.sys error Blue Screen error in your Windows 10 computer in the middle of your work on computer or while starting/restarting Windows 10 computer, then you are in right place for the solution. Here, you will be guided with easy steps/methods to resolve the issue. Let’s starts the discussion.
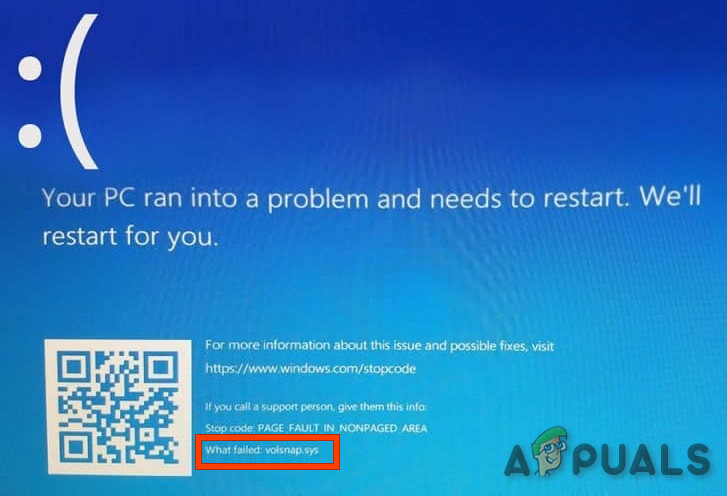
‘volsnap.sys error Blue Screen’ error: It is common Windows Problem considered as Blue Screen of Death (BSOD) error. This BSOD error is appeared with some text saying ‘Your PC ran into a problem and needs to restart. We’ll restart for you’ and also appeared with some Windows Stop Code like ‘Page fault in Nonpaged Area’ error or others. volsnap.sys error BSOD error indicates that you are unable to access your Windows desktop for some reasons means you can’t work anymore once BSOD error is appeared.
Several users reported about this BSOD error and explained this error is appeared usually in the middle of their work on computer or when they start/restart their Windows 10 computer. There could be several reasons behind this issue including corruption in system files or registry, hard disk system images, malware or viruses infections in computer, missing or corrupted volsnap.sys file in computer, and issue with memory or hardware attached/integrated into computer.
This BSOD error can also be occurred due to interference of your third-party antivirus software installed in your computer. It might possible your third-party antivirus/firewall is blocking some system files or drivers that are required to functions for some security reasons or due to its over security reasons. In such case, you can disable or uninstall your antivirus/firewall in order to fix the issue.
Another possible reason behind this issue can be corrupted/outdated or incompatible drivers installed in your computer and outdated Windows OS. Outdated or incompatible BIOS could also be a reason behind the issue. It is possible to resolve the issue with our instructions. Let’s starts the discussion.
How to Fix volsnap.sys error Blue Screen error in Windows 10?
Method 1: Fix ‘volsnap.sys error Blue Screen’ error with ‘PC Repair Tool’
‘PC Repair Tool’ is easy & quick way to find and fix BSOD errors, DLL errors, EXE errors, problems with programs/applications, malware or viruses issues, system files or registry issues, and other system issue with just few clicks.
Method 2: Run Disk Cleanup tool in Windows 10
This issue can also be occurred due to stored junk system files, temporary files, junk data of your browser, Microsoft Store or other system applications or services in your computer. You can clear these junk files or temp files using Disk Cleanup tool in order to fix the issue.
Step 1: Make sure your System is booted into Safe Mode. If not, boot your system into Safe Mode.
Step 2: Now, type ‘Disk Cleanup’ in Windows Search and open it from results appear and select your main drive like ‘C:’ drive from dropdown and hit ‘OK’ button
Step 3: This will scan your computer to find junk files. In the opened result window, check the checkboxes relating ‘Temporary files’, and you can also check another checkboxes as well if you want to delete, and then hit ‘OK’ button
Step 4: Once done, restart your computer and check if the error is resolved.
Method 3: Stop Volume Shadow Service (VSS) in Windows 10
Sometimes, this error can be occurred due to Volume Shadow Service running in your computer. You can stop the service in order to fix the issue.
Step 1: Press ‘Windows + R’ keys on keyboard, type ‘services.msc’ in the opened ‘Run’ window and hit ‘Ok’ button to open ‘Services’ window
Step 2: In the opened window, find and right-click on ‘Volume Shadow Copy’ service, and select ‘Stop’ option to stop the service. If the service is already stopped from running, then nothing is required to do.
Step 3: Now, double-click on service to open its ‘Properties’. In ‘Properties’ window, select ‘Disabled’ option from ‘Startup Type’ dropdown and hit ‘Apply’ and ‘OK’ button to save the changes. Once done, restart your computer and check if the error is resolved.
Method 4: Run Bootrec Command in Windows 10
You can run Bootrec command in your computer in order to repair MBR and Boot, resolve BSOD error.
Step 1: At first, insert a bootable Windows 10 Installation Media USB/DVD into your computer and boot your computer from this bootable drive
Step 2: When Windows 10 setup run, select ‘Repair computer’ option
Step 3: Select ‘Troubleshoot > Advanced Options > Command Prompt’ and type the following commands one-by-one in Command Prompt and hit ‘Enter’ key after each line to execute.
BOOTREC /FIXMBR
BOOTREC /FIXBOOT
Exit
Step 4: Once executed, restart your computer and check if the error is resolved.
Method 5: Replace Corrupted old volsnap.sys file
This error can be occurred if volsnap.sys is corrupt or missing. You can replace the old volsnap.sys file and get another copy of volsnap.sys from Windows.old older which is created when you upgrade from one version of Windows to another
If you are able to boot in normal mode or Safe mode:
Step 1: If you are able to boot into computer in normal mode or Safe Mode, press ‘Windows + X’ keys on keyboard and select ‘Command Prompt as Administrator’
Step 2: Executes the following commands one-by-one
Diskpart
list volume
Step 3: Here, using ‘List Volume’ command, you can get the name of your Windows drive and then execute the following command
copy C:\windows.old\windows\system32\drivers\volsnap.sys C:\windows\system32\drivers\volsnap.sys
Step 4: Once executed, restart your computer and check if the error is resolved.
If you are unable to boot into your Windows 10 computer:
Step 1: Insert Windows 10 Installation media bootable DVD/USB into your computer and boot your computer with this bootable drive
Step 2: When Windows Setup run, select ‘Repair computer > Troubleshoot > Advanced Options > Command Prompt’, and then follow ‘step 2 to step 4’ of above method to replace corrupted volsnap.sys file with correct one.
Method 6: Run SFC scan and CHKDSK scan in Windows 10

Step 1: Open ‘Command Prompt as Administrator’ in Windows computer and type the following commands one-by-one and hit ‘Enter’ key after each to execute
sfc /scannow
chkdsk c: /f /r
Step 3: Once executed, restart your computer and check if it works for you.
Method 7: Update Windows 10 drivers
You can update all Windows 10 drivers to latest update version in order to fix the issue.
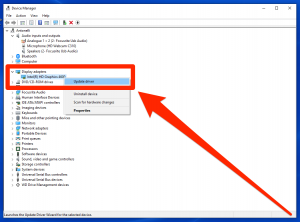
Step 1: Open ‘Device Manager’ in Windows 10 via Windows Search and look for the problematic drivers
Step 2: Right-click on driver you want to update, and select ‘Update Driver’. Follow on-screen instructions to finish update. Once done, restart your computer and check if error is resolved.
Download or reinstall Windows 10 drivers [Automatically]
You can also update your all Windows drivers with ‘Automatic Driver Update Tool’. You can get this tool through button/link below.
Method 8: Reset Windows 10
If the issue is still persist, then you can try to fix the issue by performing Windows 10 reset in computer. This will reset Windows OS to its factory settings and all applications, drivers, services that didn’t come with computer will be uninstalled.
Step 1: Turn OFF your computer. Now, press ‘Power’ button to turn ON your PC and when Windows LOGO appear, hold ‘Power’ button down until PC shuts down automatically. Repeat trice
Step 2: When ‘Automatic Repair Screen’ appear, select ‘Startup Repair > Advanced Options > Troubleshoot > Reset This PC > Keep my files or Remove Everything’ and click ‘Reset’ to proceed
Step 3: Once finished, restart your computer and check if volsnap.sys error Blue Screen error is resolved.
Method 9: Update BIOS of your computer
This issue can also be occurred due to outdated or incompatible version of BIOS installed in your computer. You can update BIOS in order to fix the issue. Updating BIOS process may differ according to your PC’s motherboard you have. So, you should follow your PC’s motherboard manufacturer’s guideline in order to update BIOS. You can visit your PC’s motherboard manufacturer official website and follow their instructions to get the BIOS update and install in your computer. Once installed, please check if the error is resolved.
Conclusion
I am sure this post helped you on How to fix volsnap.sys error Blue Screen error in Windows 10 with several easy steps/methods. You can read & follow our instructions to do so. That’s all. For any suggestions or queries, please write on comment box below.