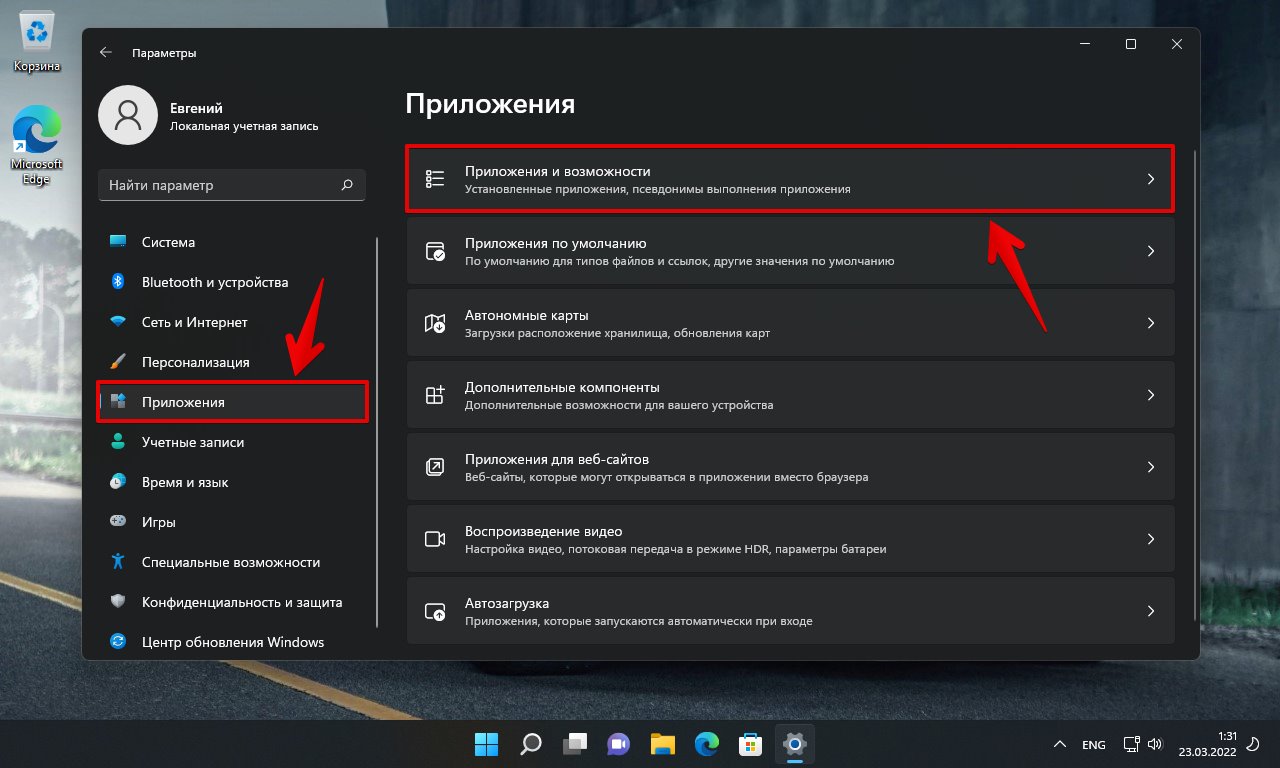
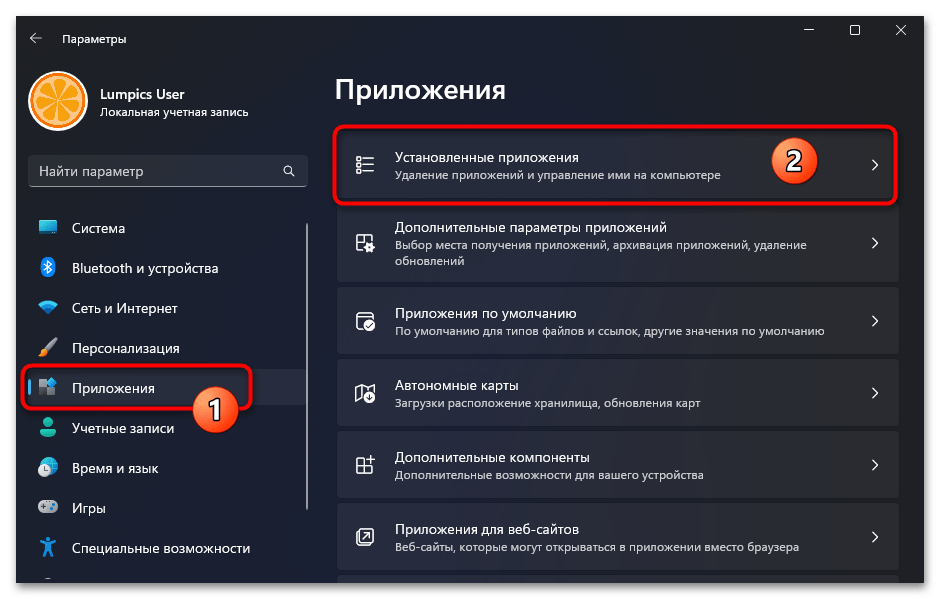
Для того, чтобы удалить WSL переходим в «Параметры» Windows 11, нажав горячие клавиши «Win+I». В окне параметров в левой части меню щелкаем по пункту «Приложения», а затем по плитке «Приложения и возможности».
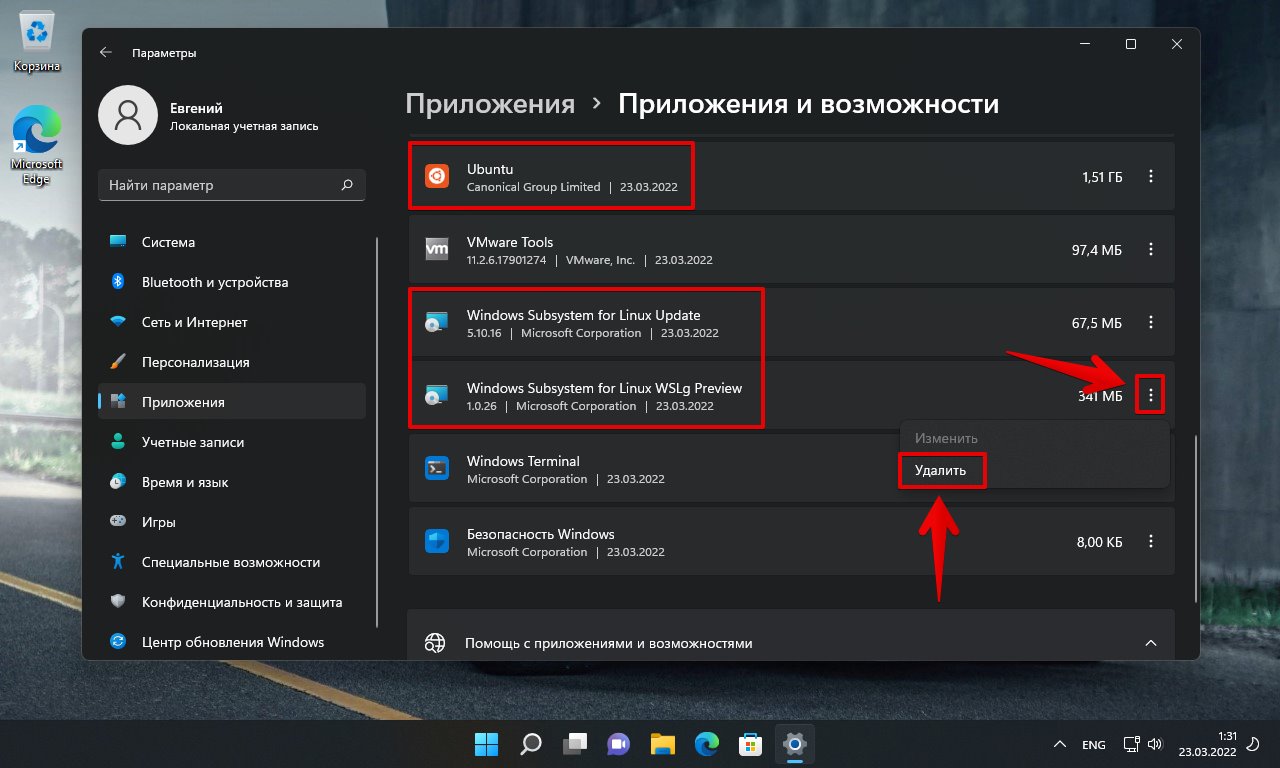
Удаляем «Ubuntu», «Windows Subsystem for Linux Update» и «Windows Subsystem for Linux WSLg Preview» — напротив каждого удаляемого элемента нажимаем на кнопку с тремя точками и во всплывающем меню выбираем «Удалить».
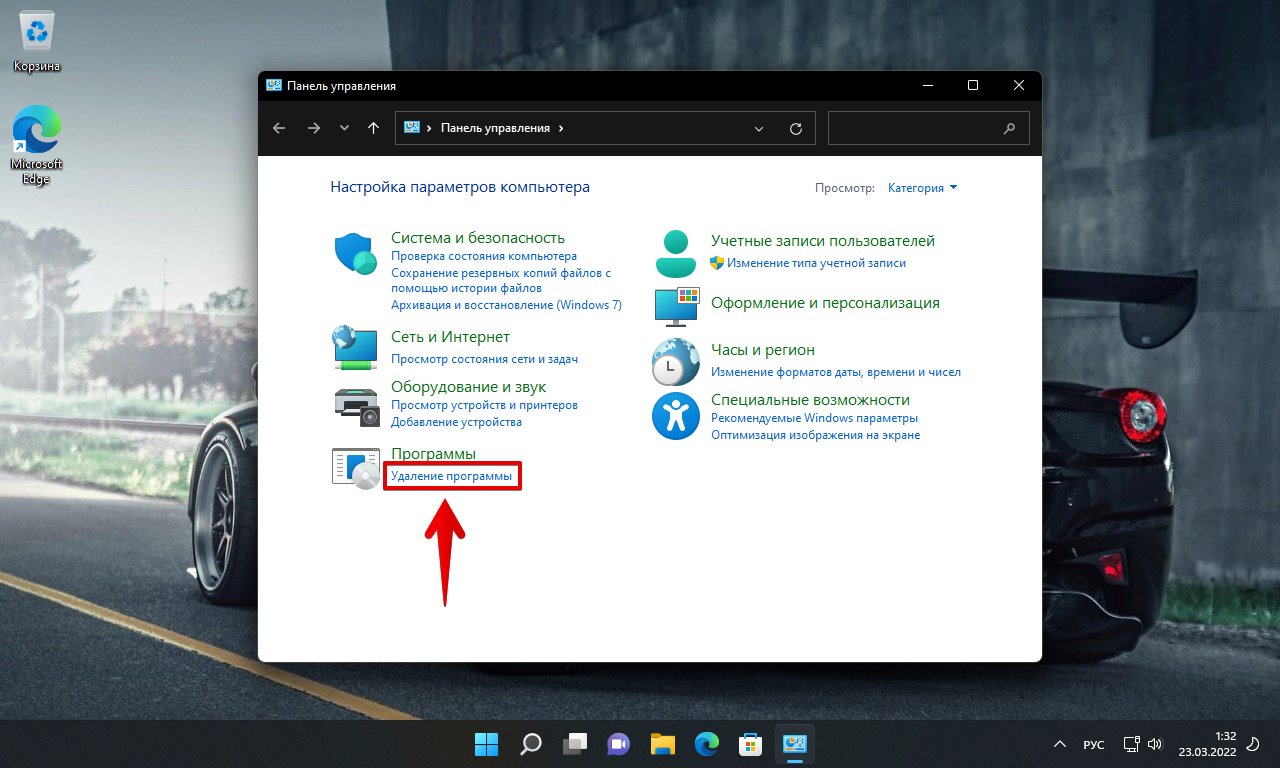
Затем переходим в «Панель управления» — воспользуемся поиском Windows 11, в поисковой строке набираем запрос «Панель управления» и щелкаем по найденному приложению в разделе «Лучшее соответствие».

В окне панели управления щелкаем по ссылке «Удаление программы».
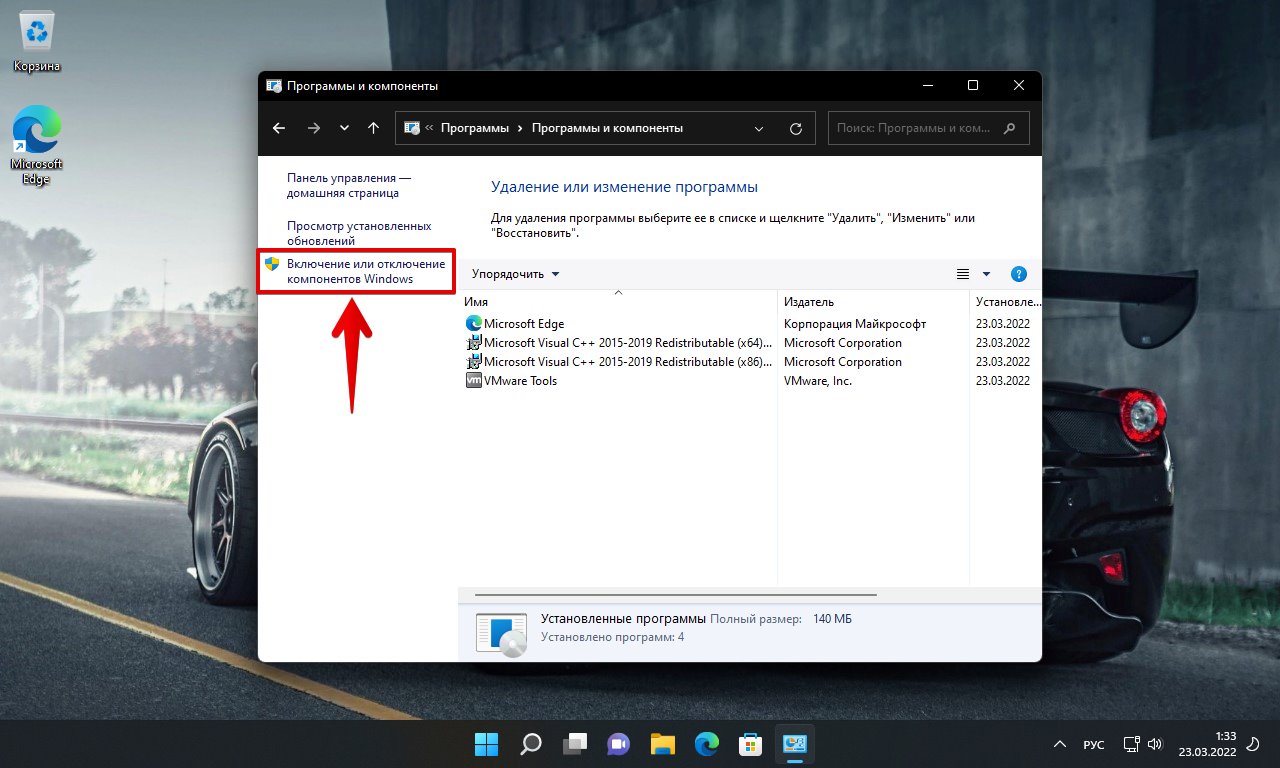
Затем щелкаем по «Включение или отключение компонентов Windows» в правой части окна «Программы и компоненты».
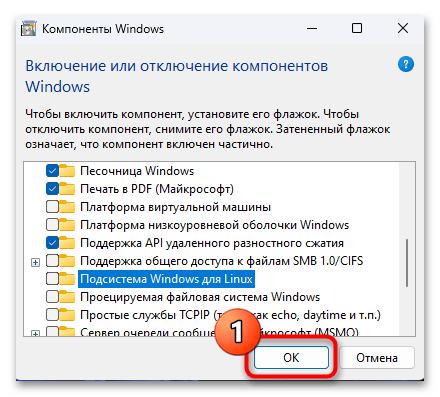
В окне «Компоненты Windows» снимаем галочку с «Подсистема Windows для Linux» и нажимаем кнопку «ОК».

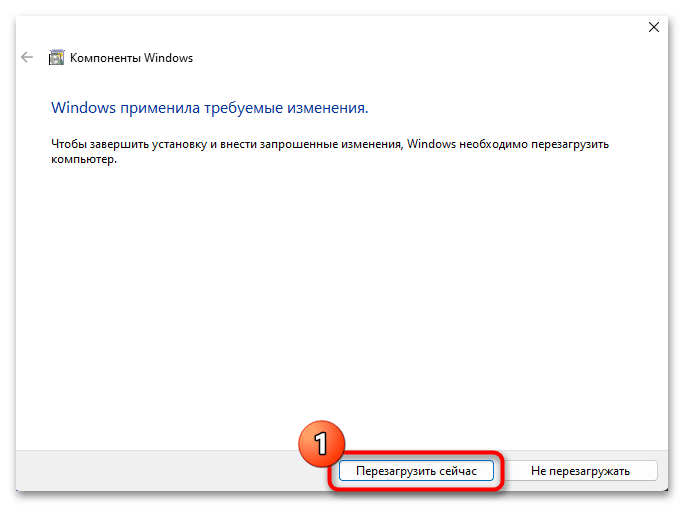
Для завершения удаления нажимаем кнопку «Перезагрузить компьютер».

После перезагрузки WSL будет удалена с нашего ПК.
Содержание
- Удаление дистрибутивов Linux
- Шаг 1: Отмена установки дистрибутивов Linux в WSL
- Шаг 2: Деинсталляция приложений
- Удаление связанных с WSA компонентов Win 11
- Вариант 1: «Компоненты Windows»
- Вариант 2: Консоль
- Вопросы и ответы

Удаление дистрибутивов Linux
Первым шагом на пути отказа от использования «Подсистемы Windows для Linux» в среде ОС от Microsoft, в том числе одиннадцатой версии, должна стать деинсталляция развёрнутых на ПК дистрибутивов UNIX-систем. Полное удаление любого адаптированного для функционирования через WSA дистрибутива Линукс выполняется в два этапа, и далее продемонстрировано, как это сделать относительно всех последних без исключения.
Шаг 1: Отмена установки дистрибутивов Linux в WSL
Сначала удаляем созданные Linux в подсистеме Windows 11 данные, созданную первой файловую систему, а также отменяем регистрацию всех Linux-дистрибутивов в WSL. Фактически всё это осуществляется путём запуска единственной консольной команды.
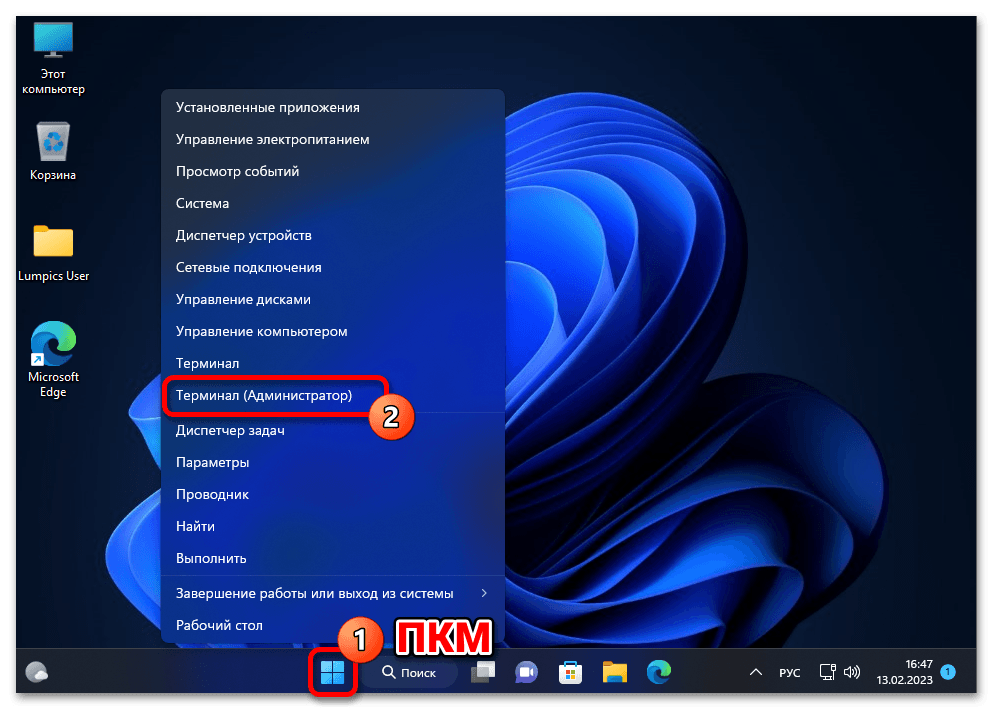
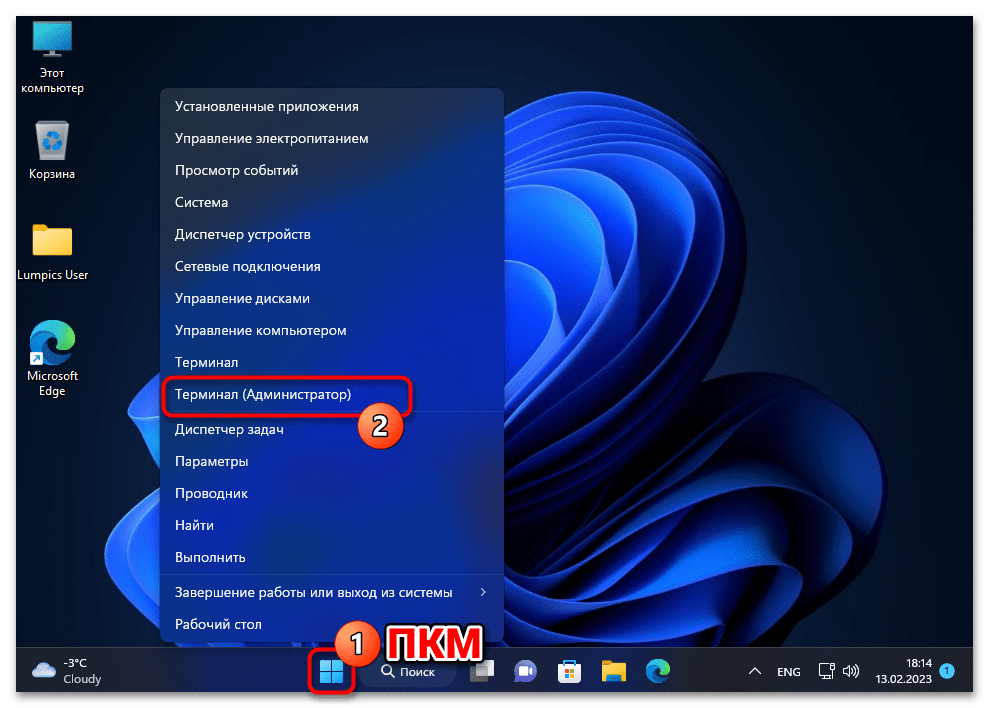
- Обязательно с повышенными привилегиями («от имени Администратора») открываем «Терминал» либо классическую «Командную строку» Windows 11. (Первое выполнимо, к примеру, из контекстного меню элемента «Пуск» на «Панели задач» операционки,

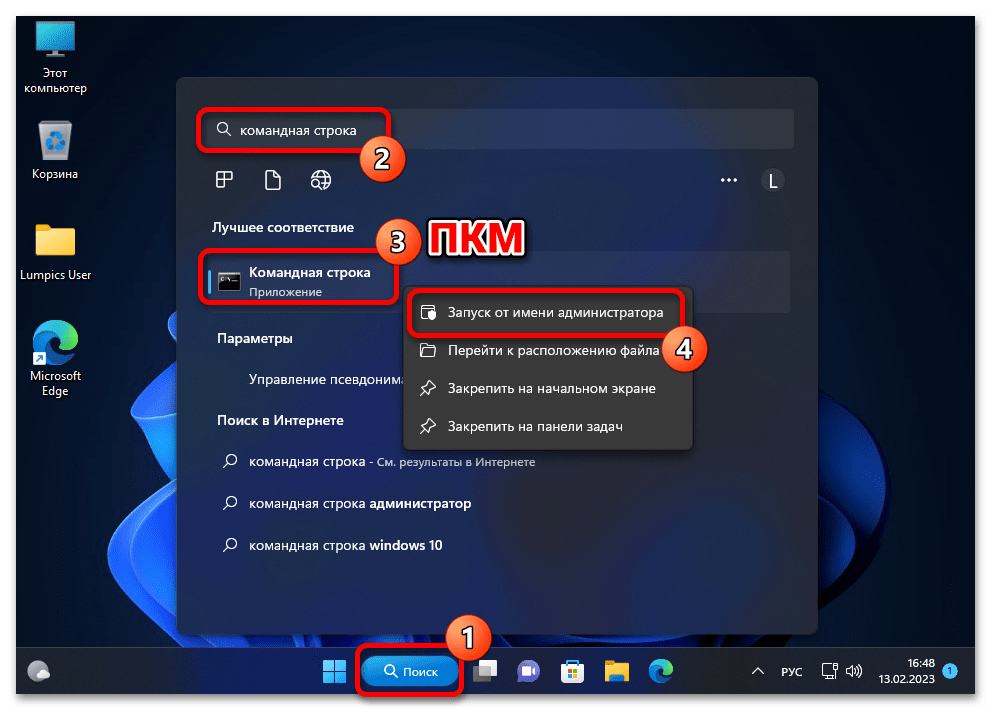
а второе проще всего реализовать средствами системного «Поиска».)

Читайте также:
Как открыть приложение «Терминал» в Windows 11
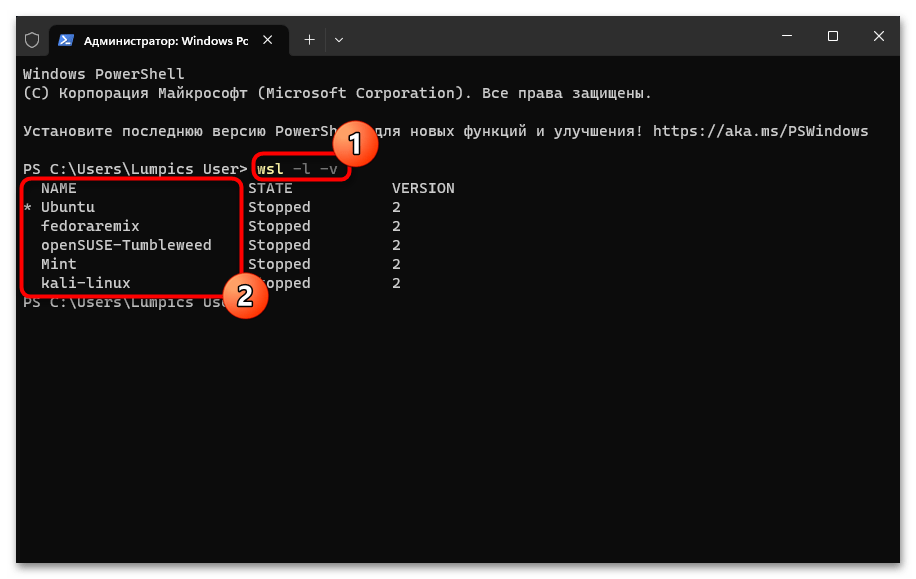
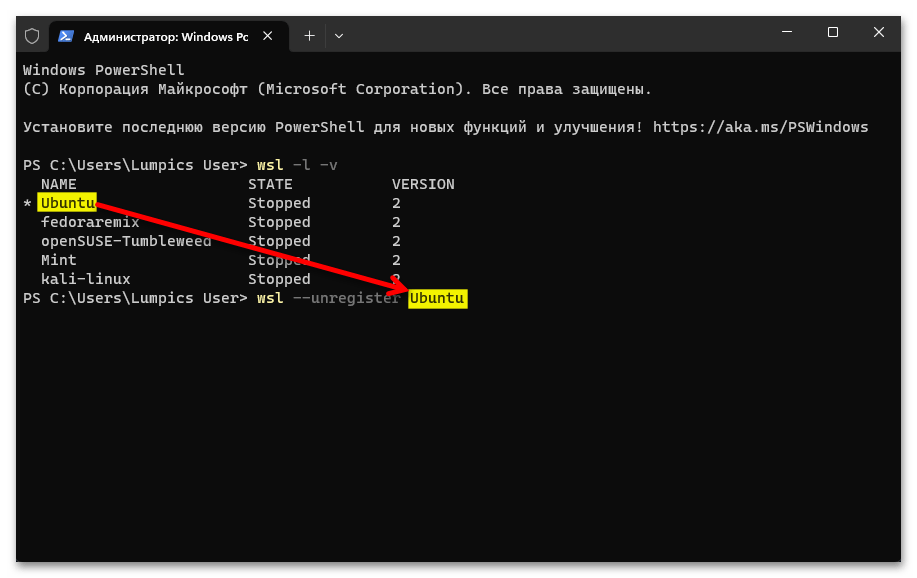
Запуск «Командной строки» от имени Администратора в Windows 11 - Сначала определяем, какие (и сколько) дистрибутивы Linux установлены в подсистеме WSL, а также выясняем их точные имена. С такой целью отправляем на выполнение команду:
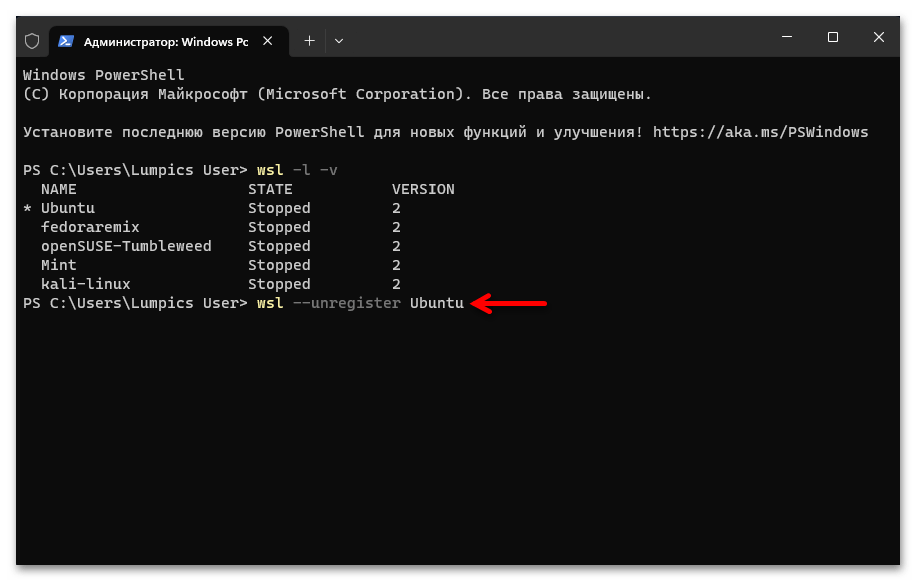
wsl -l -v - Чтобы деинсталлировать отдельный дистрибутив Linux из «Подсистемы Виндовс для Линукс», вводим в консоль следующее указание:
wsl --unregister ИМЯ_ДИСТРИБУТИВА
(
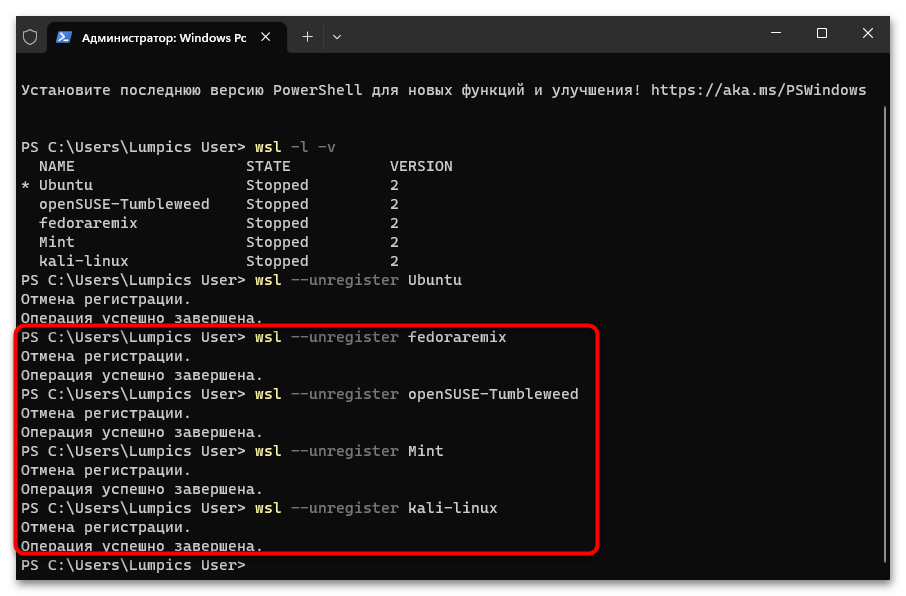
ИМЯ_ДИСТРИБУТИВАзаменяем на точное значение такового в полученном по результату выполнения предыдущего пункта этой инструкции перечня) - Нажав «Enter» на клавиатуре, отправляем введённую команду на выполнение, после чего дожидаемся завершения процедуры «Отмена регистрации» – в консоли появится оповещение «Операция успешно завершена».
- Повторяем процедуру отмены регистрации и удаления данных относительно всех других добавленных в подсистему дистрибутивов Линукс.
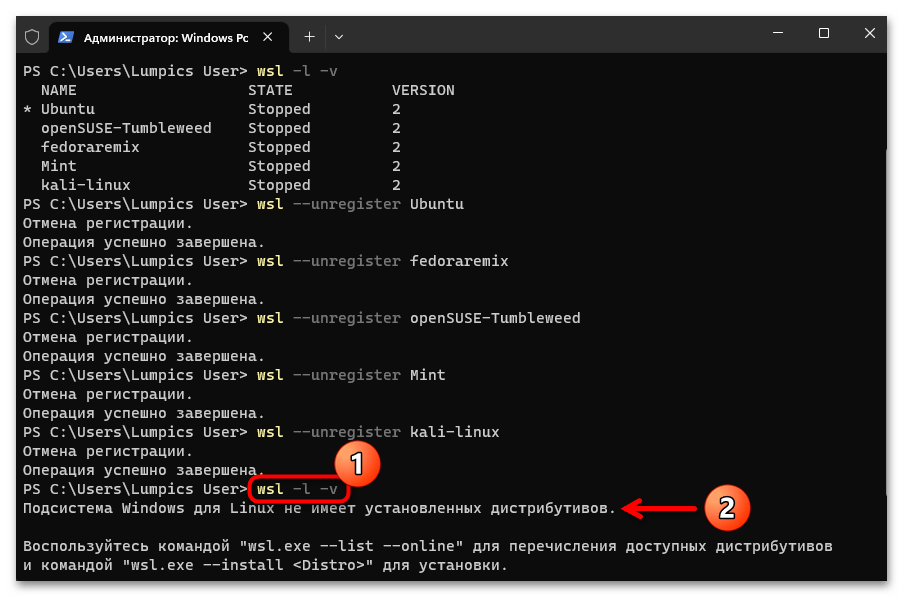
- Чтобы убедиться в том, что все дистрибутивы исключены из «Подсистемы Windows для Linux», по завершении выполнения вышеуказанного повторно запускаем команду
wsl -l -v.

Рассмотренная выше операция очистит WSL непосредственно от данных Линукс-дистрибутивов, однако их инсталляционные пакеты останутся на компьютере (и будут доступны для развёртывания, к примеру, путём обычного открытия из «Главного меню» Windows 11), продолжат занимать место на диске, и в целом отображаться в интерфейсе ОС от Microsoft как установленные, поэтому не стоит игнорировать выполнение следующего пункта настоящих рекомендаций.
Шаг 2: Деинсталляция приложений
С целью полного избавления от следов всех ранее эксплуатируемых вариантов Линукс в Виндовс 11 необходимо деинсталлировать приложения дистрибутивов, через которые они и были интегрированы в «Подсистему Виндовс для Линукс». Это выполняется точно так же, как удаление любого полученного из Майкрософт Стор софта, а практически реализуется минимум двухвариантно.
Читайте также: Удаление встроенных и полученных из Microsoft Store приложений в Windows 11
Вариант 1: «Параметры»
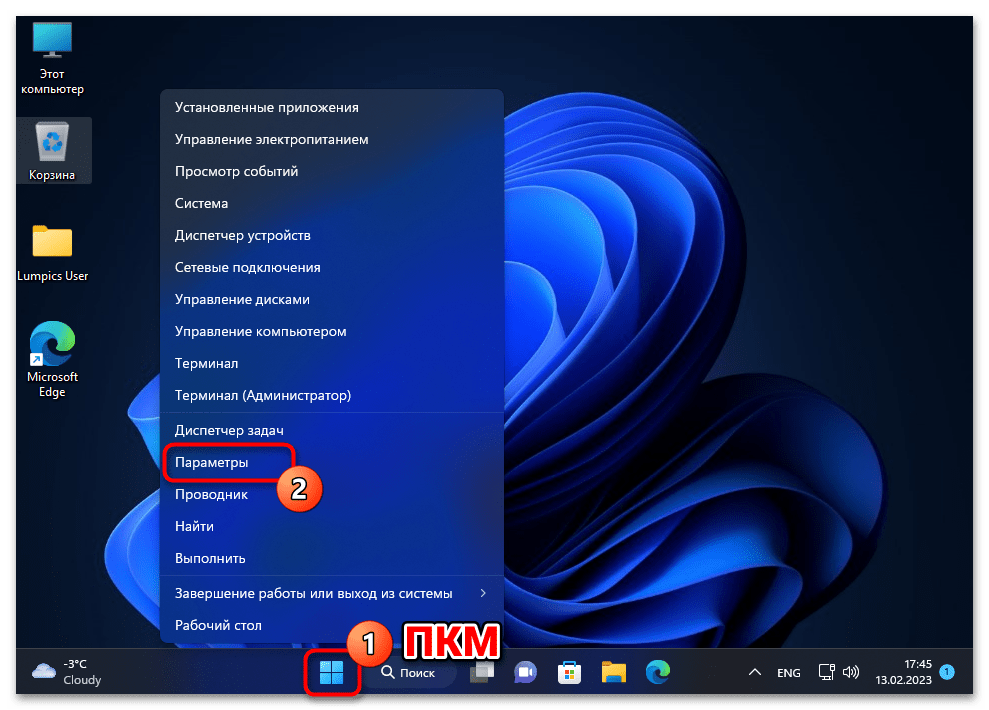
- Открываем (к примеру, нажав «Win»+«X» или вызвав соответствующий пункт из меню дополнительных функций кнопки «Пуск» на «Панели задач») «Параметры» Windows 11.
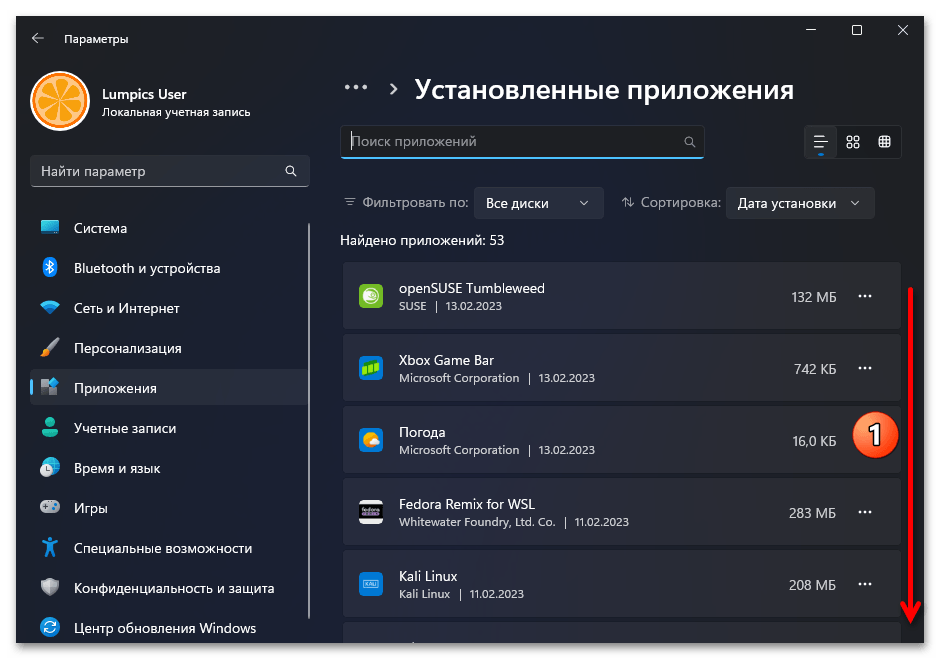
- Из меню слева окна «Параметров» ОС переходим в раздел «Приложения», затем открываем «Установленные приложения».
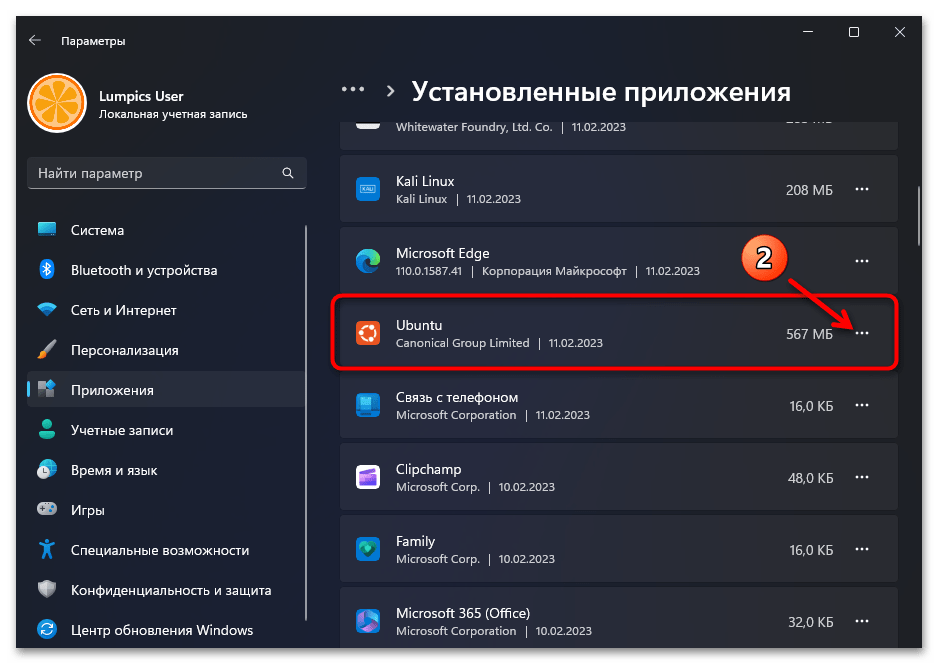
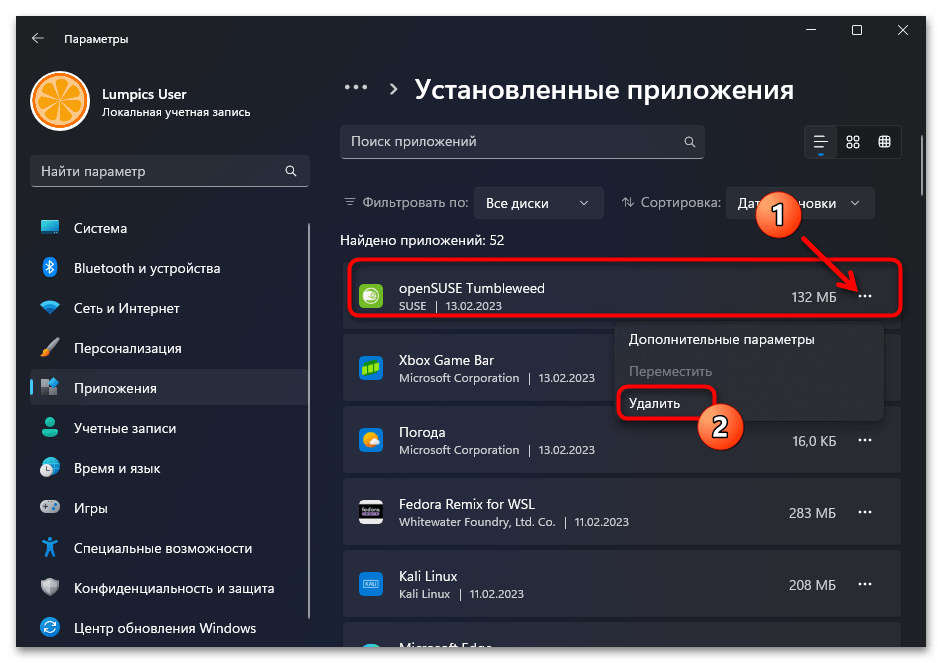
- Находим блок с наименованием деинсталлируемого дистрибутива Линукс в перечне доступного в Виндовс 11 софта,

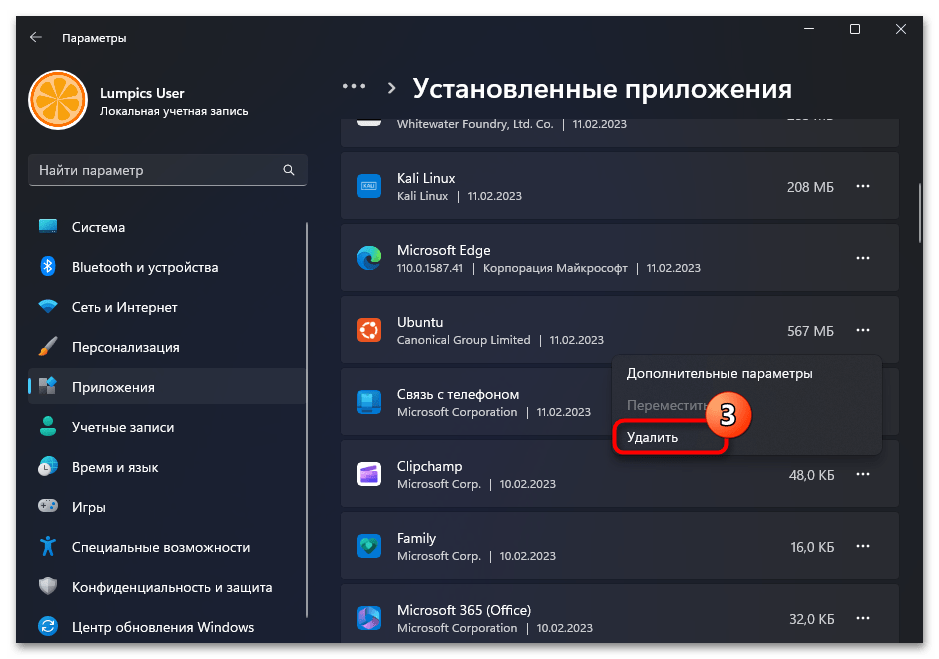
кликаем по расположенным в его правой части трём точкам,

выбираем «Удалить» в отобразившемся меню.
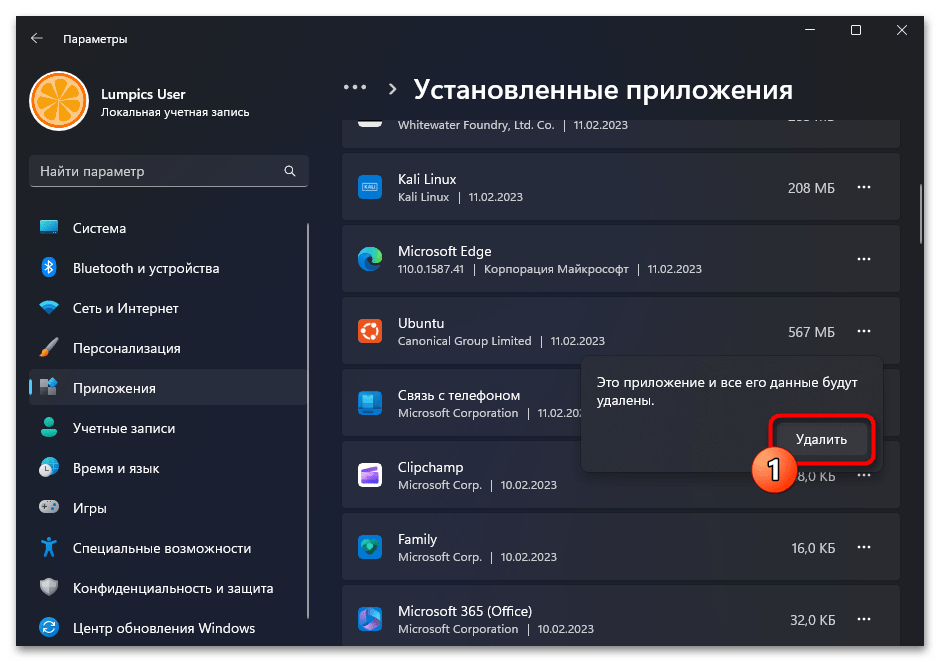
- Подтверждаем свои намерения, кликнув «Удалить» в следующем меню,

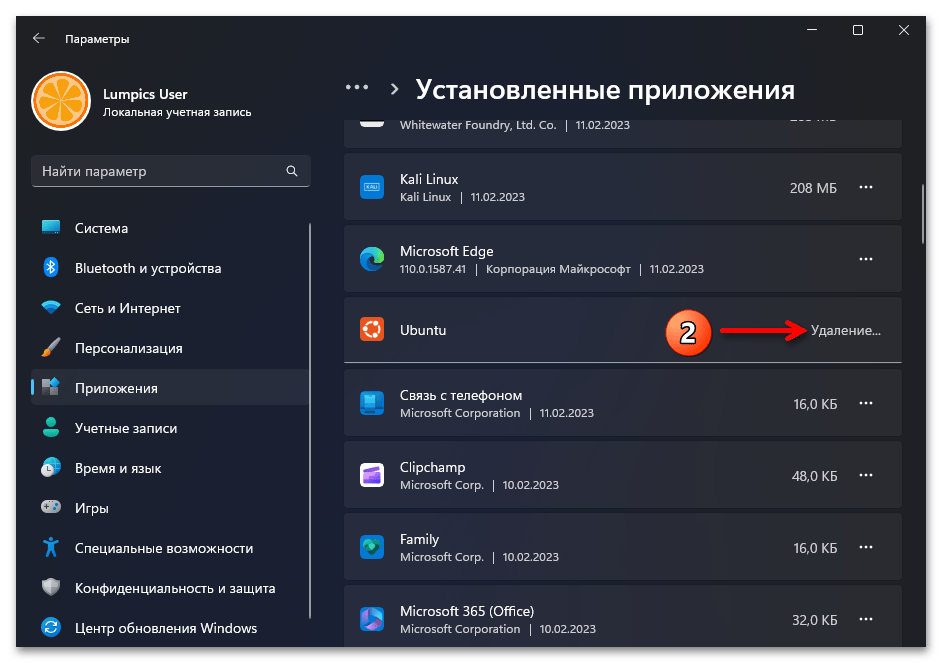
затем ожидаем завершения деинсталляции софта.
- Повторяем выполнение шагов №№3-4 выше относительно всех дистрибутивов Linux, которые обнаруживаются в перечне инсталлированных в Виндовс 11 приложений.
Вариант 2: Диспетчер пакетов Windows
Те, кто для решения различных задач в Windows предпочитают использовать консоль, могут выполнить удаление приложений Linux при помощи программы командной строки «Диспетчер пакетов» («winget»). Один из возможных алгоритмов реализации такого подхода:
- От имени Администратора открываем «Терминал» (в примере далее) или классическую «Командную строку» Виндовс.
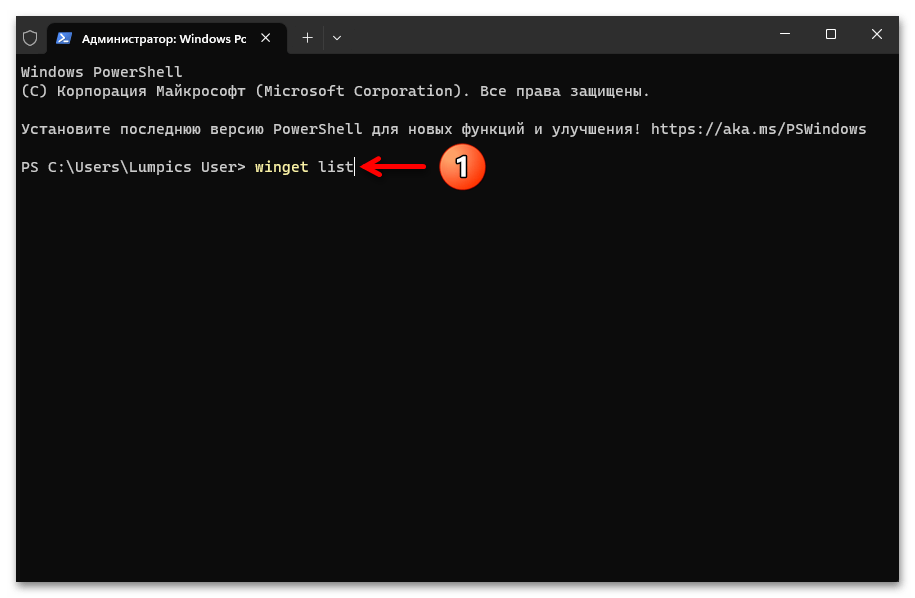
- Отправляем на выполнение команду вывода списка установленных в операционке приложений:
winget list
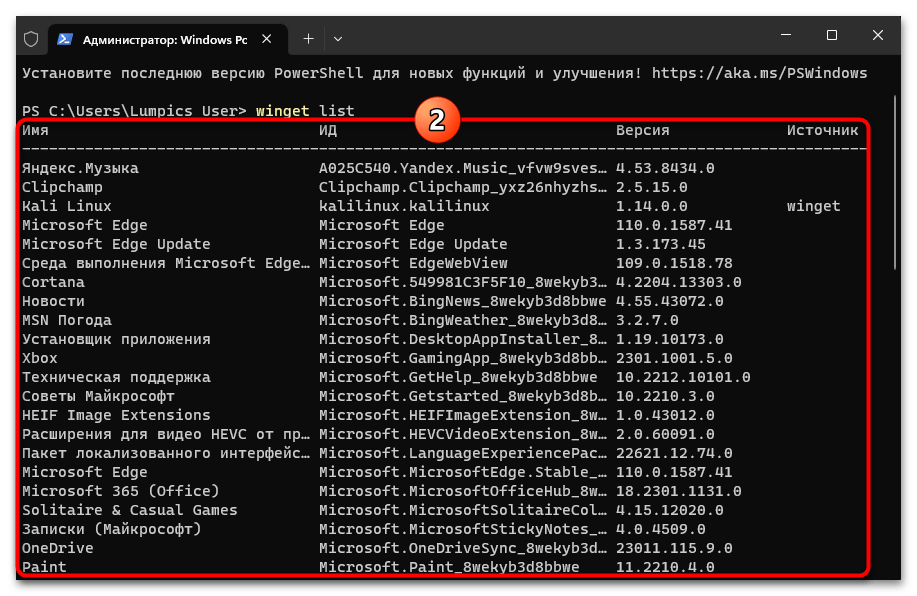
Немного ожидаем, пока перечень софта будет сформирован и представлен в виде ответа консоли.
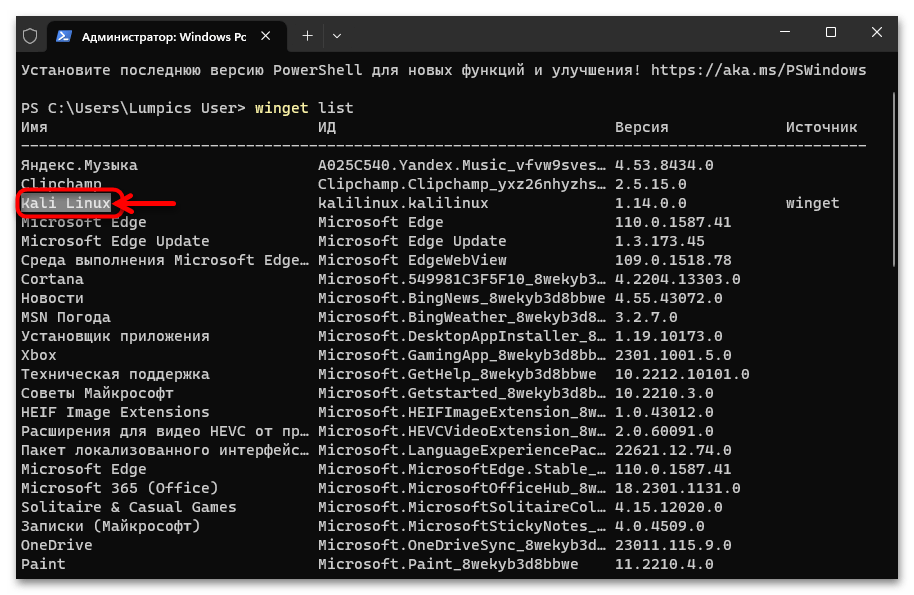
- В столбце «Имя» находим наименование удаляемого из системы приложения-дистрибутива Linux, запоминаем его. (Возможно, удобнее и проще будет скопировать Имя в буфер обмена – выделяем текстовое значение параметра мышкой, нажимаем «Ctrl»+«C» на клавиатуре ПК.)
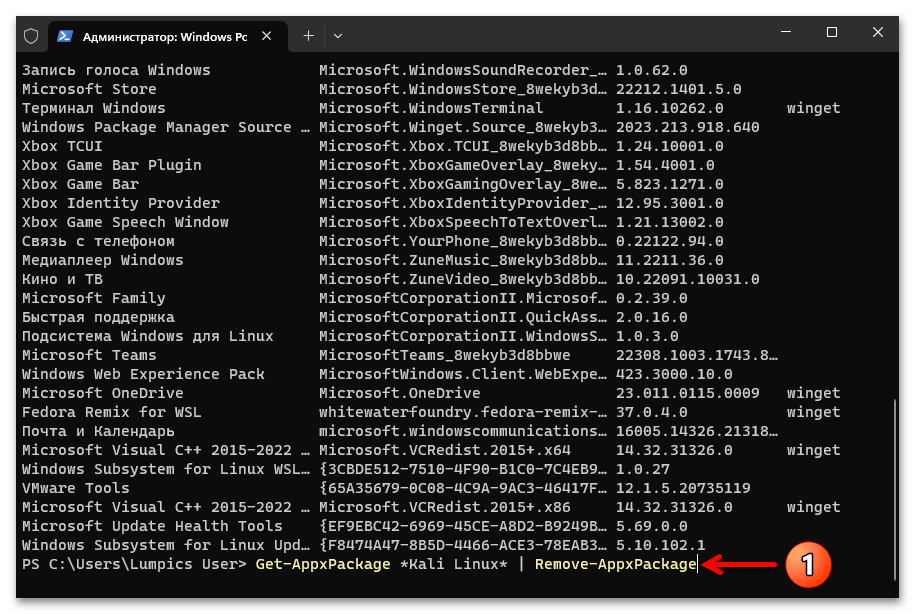
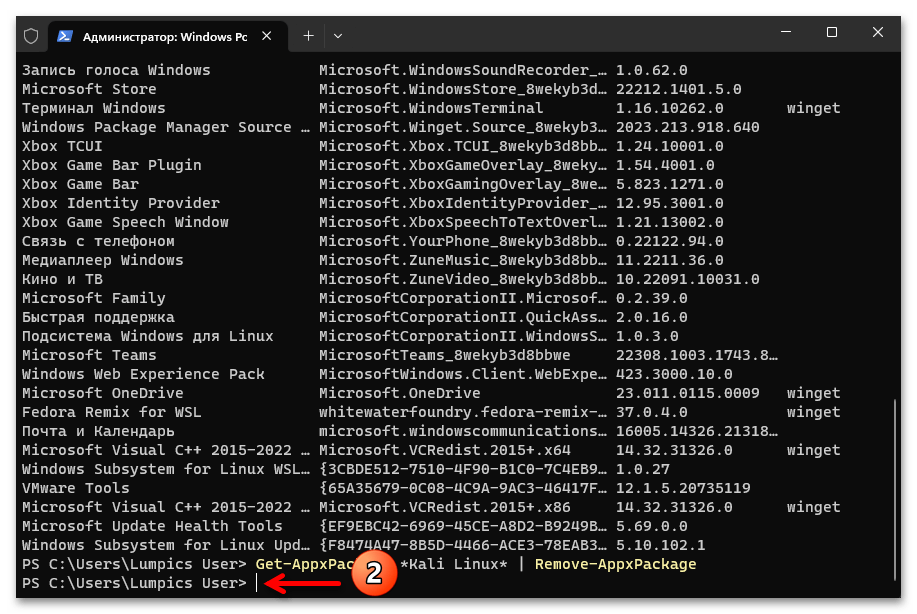
- Вводим команду удаления приложения-дистрибутива Линукс из системы, её синтаксис следующий (ИМЯ_ДИСТРИБУТИВА_LINUX заменяем на полученное на шаге выше значение «Имя», вставка данных в консоль выполнима путём нажатия клавиатурной комбинации «Ctrl»+«V»):
Get-AppxPackage *ИМЯ_ДИСТРИБУТИВА_LINUX* | Remove-AppxPackage
Нажимаем «Ввод» на клавиатуре, чтобы запустить выполнение указания, ожидаем окончания инициированной операции – в консоли отобразиться приглашение к вводу следующих команд.
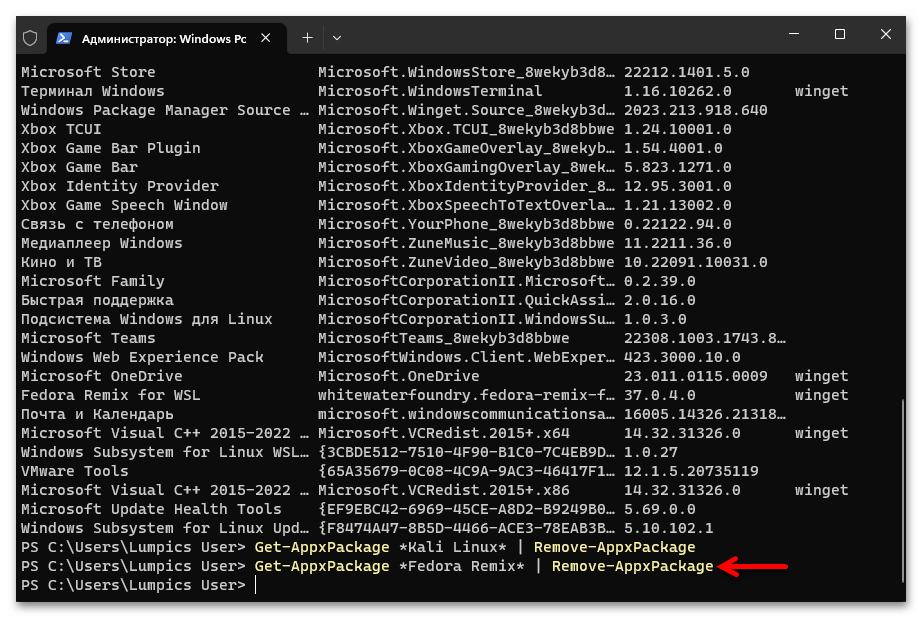
- Повторяем процедуру деинсталляции относительно всех демонстрируемых перечнем-ответом на команду
winget listдистрибутивов Linux.
Удаление связанных с WSA компонентов Win 11
По сути, после деинсталляции всех дистрибутивов Линукс по предложенным выше инструкциям каких-либо видимых признаков присутствия WSA в Windows 11 не останется, и если есть вероятность, что подсистема потребуется когда-нибудь в будущем, далее можно ничего не предпринимать. Если же целью является действительно полное удаление «Подсистемы Windows для Linux» из состава ОС, выполняем одну из двух следующих инструкций.
Вариант 1: «Компоненты Windows»
Вероятно, наиболее привычный и удобный с точки зрения пользователей Windows метод включения и удаления необязательных компонентов операционки, включая WSA, подразумевает эксплуатацию специализированного элемента «Панели управления».
Читайте также: Включение или отключение компонентов Windows 11
- Открываем окно «Панели управления» «Компоненты Windows». Это выполнимо различными путями, далее один из них:
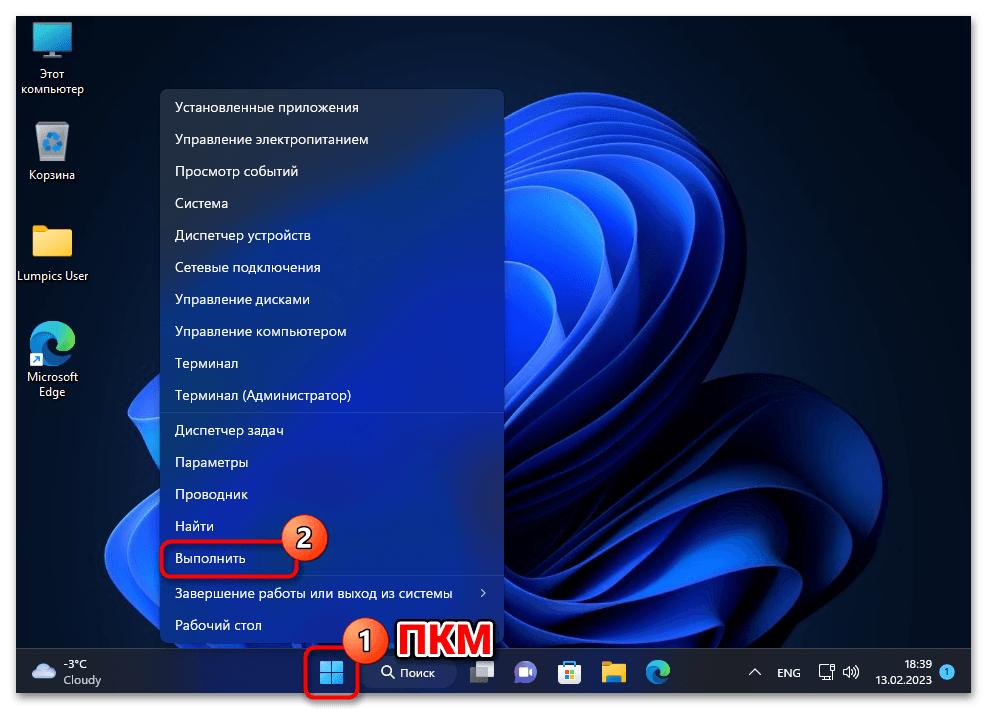
- Вызываем (из контекстного меню кнопки «Пуск» на «Панели задач» или нажав «Win» + «R» на клавиатуре) системную оснастку «Выполнить».
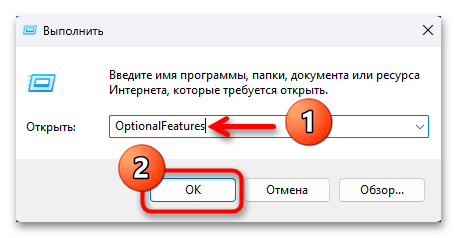
- Вводим в поле «Открыть» отобразившегося окошка следующую команду, после чего кликаем «ОК» или нажимаем «Ввод» на клавиатуре:
OptionalFeatures
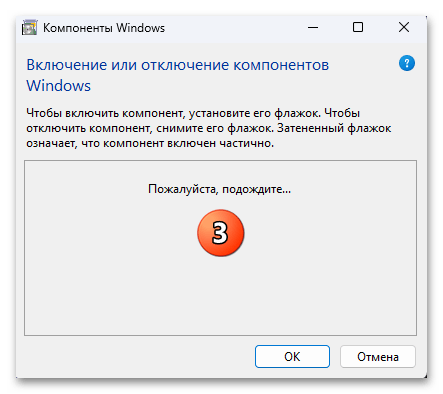
В результате откроется требуемый в нашем случае инструментарий:


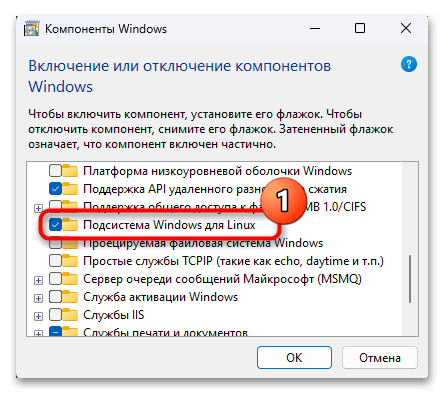
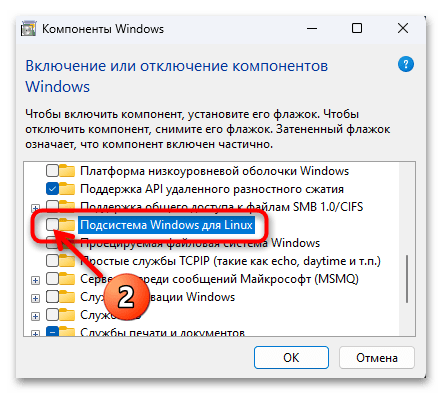
- Прокручиваем список записей в окне «Компоненты Windows»,

снимаем галочку с чекбокса слева пункта «Подсистема Windows для Linux».
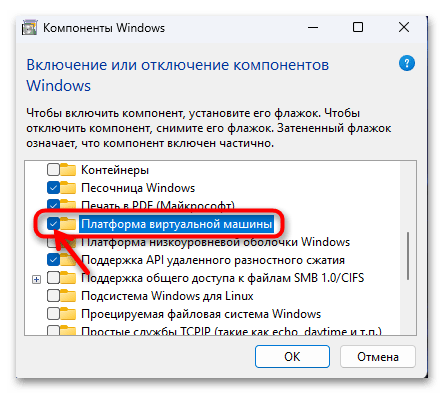
- При желании (когда не требуется для функционирования другого, отличного от WSA софта) можно удалить также «Платформу для виртуальной машины» — убираем отметку с обозначающего её чекбокса.
- Кликаем «ОК» в окошке включения/выключения компонентов операционки,

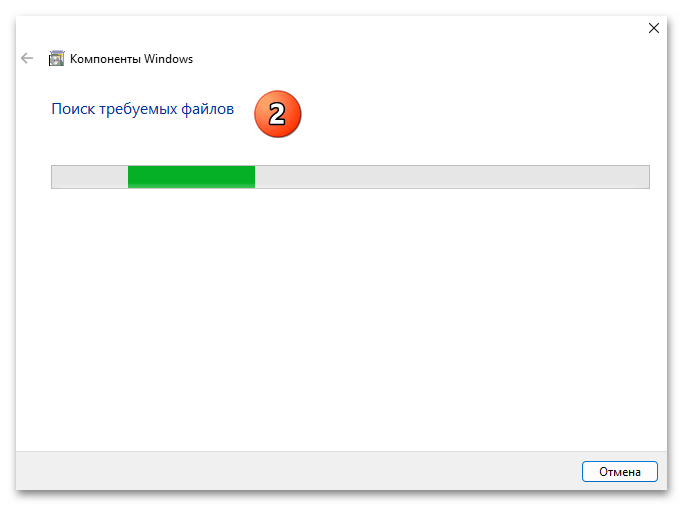
после чего ожидаем, пока система выполнит подразумевающие удаление выбранных объектов манипуляции в автоматическом режиме.
- Щёлкаем «Перезагрузить сейчас» в окне с оповещением «Windows применила требуемые изменения»,

ждём, пока завершится перезапуск ПК и

осуществляемое в этом процессе окончательное удаление «Подсистемы Windows для Linux» из Windows 11.
Вариант 2: Консоль
Второй вариант действий по удалению компонента «Подсистема Виндовс для Линукс» и (при необходимости) «Платформы виртуальной машины» из Windows 11 подразумевает использование средств программы командной строки для изменения образов ОС от Microsoft под названием DISM.
- Открываем (обязательно, с правами Администратора) «Терминал» или «Командную строку».
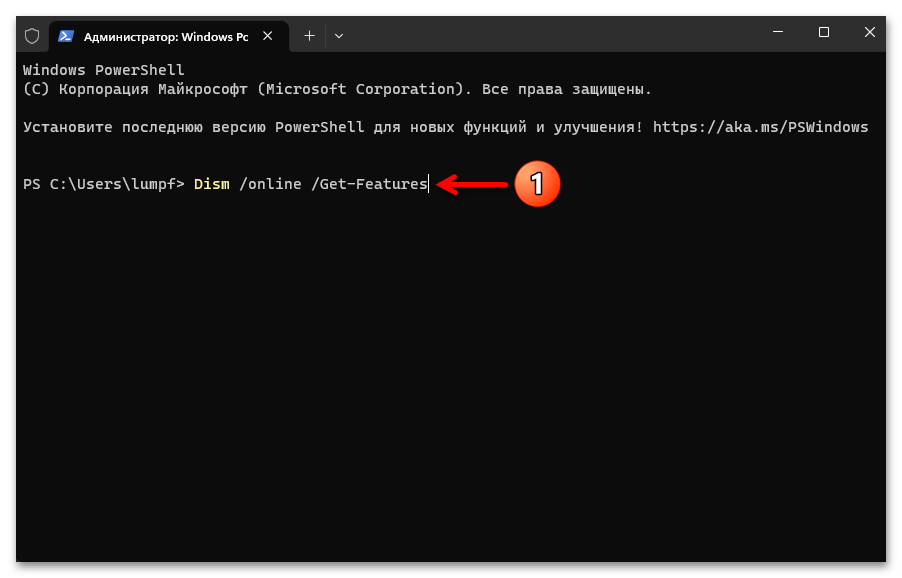
- Для начала можно проверить факт включённости «Подсистемы Windows для Linux» в Win 11, — с такой целью при помощи следующей команды запрашиваем список всех компонентов ОС:
Dism /online /Get-Features
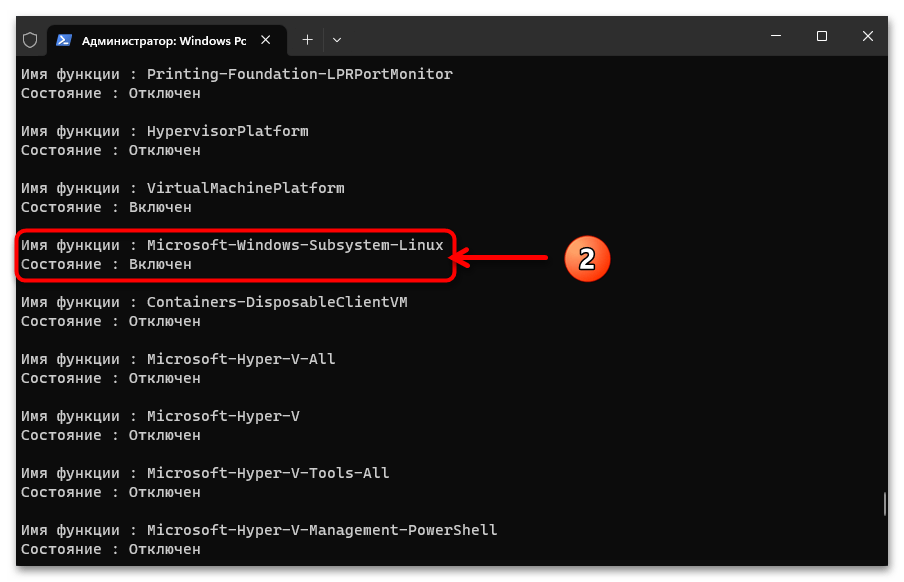
Прокручиваем полученный в консоли перечень, находим в нём запись «Microsoft-Windows-Subsystem-Linux», убеждаемся, что «Состояние» компонента «Включён», и затем переходим к выполнению следующего пункта этой инструкции.
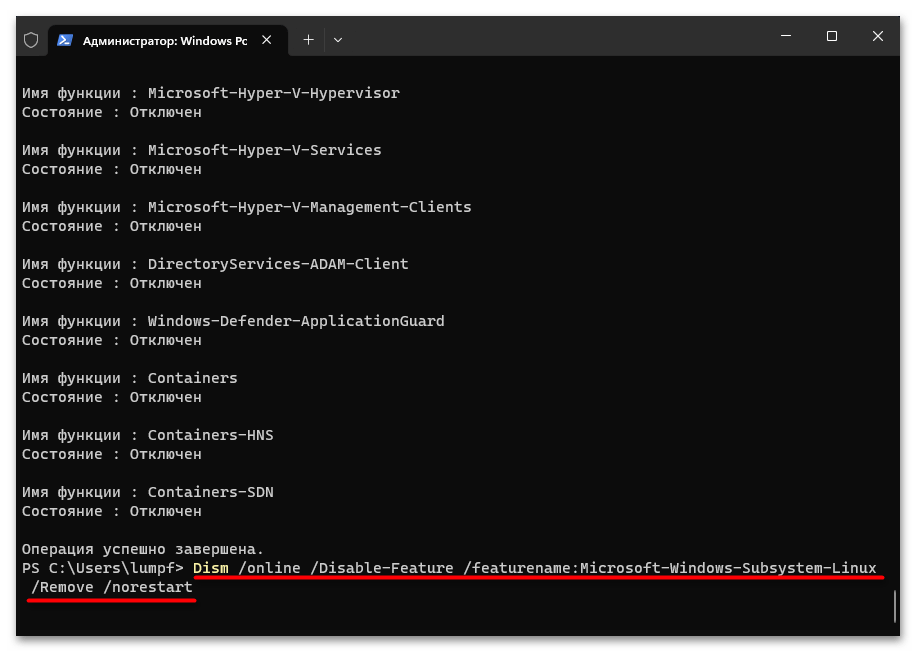
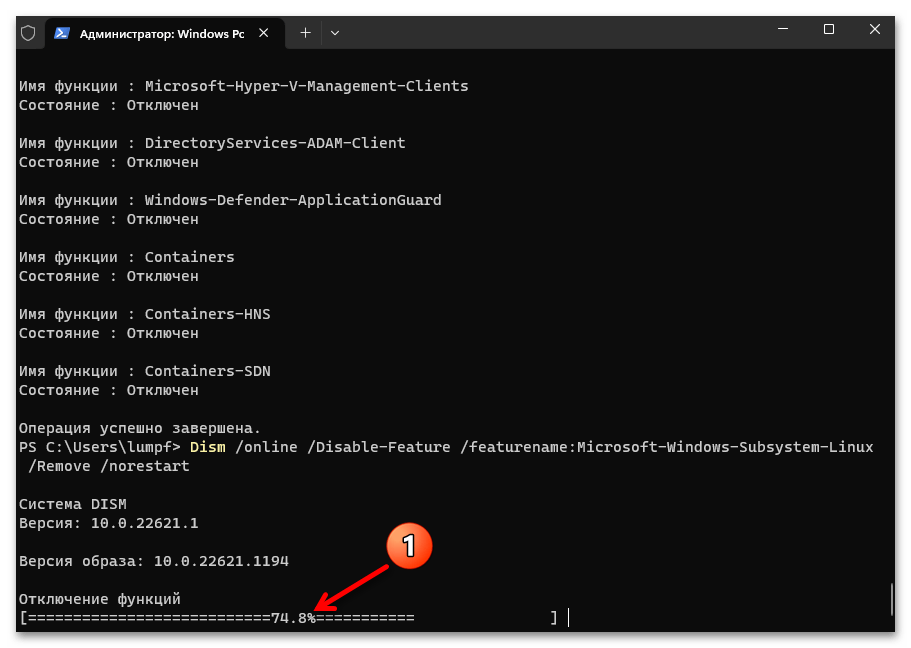
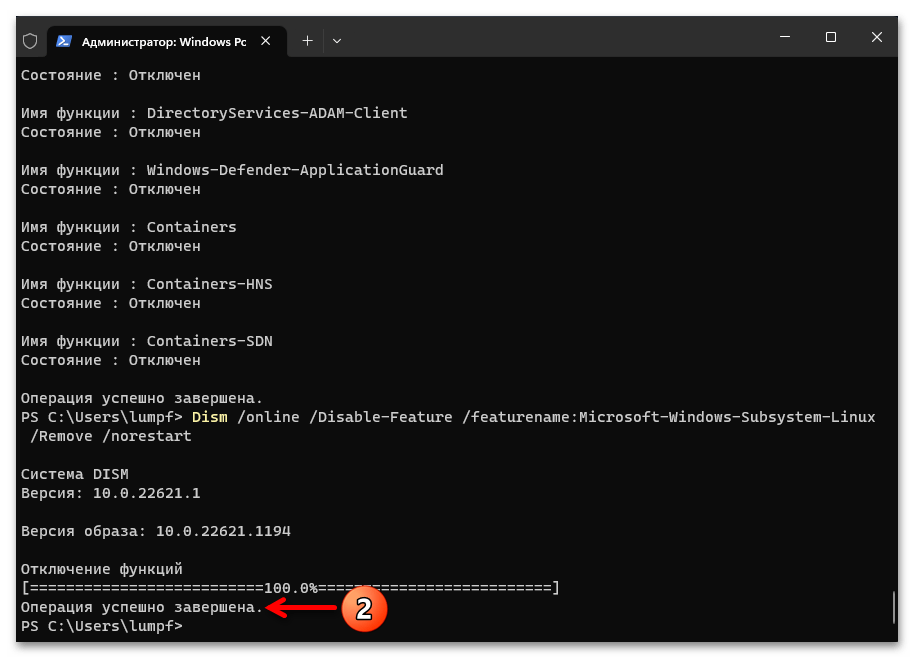
- Пишем в консоли (или копируем из текста этой статьи и затем вставляем в окно «Терминала»/«Командной строки») такое указание:
Dism /online /Disable-Feature /featurename:Microsoft-Windows-Subsystem-Linux /Remove /norestart - Нажимаем «Enter», ожидаем

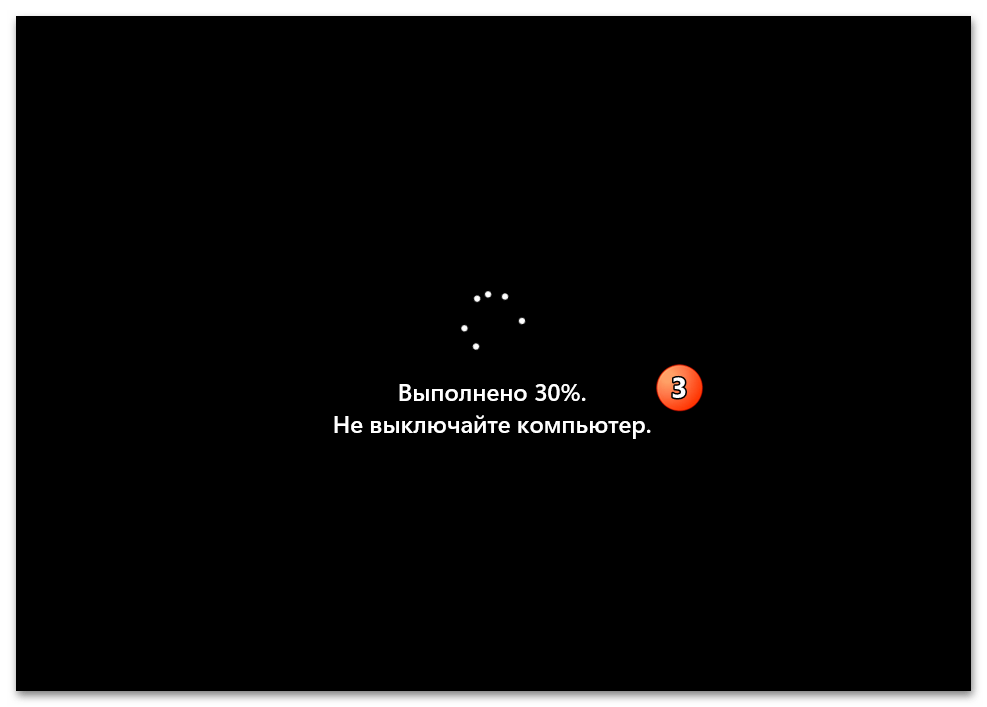
завершения удаления компонента WSA из системы.
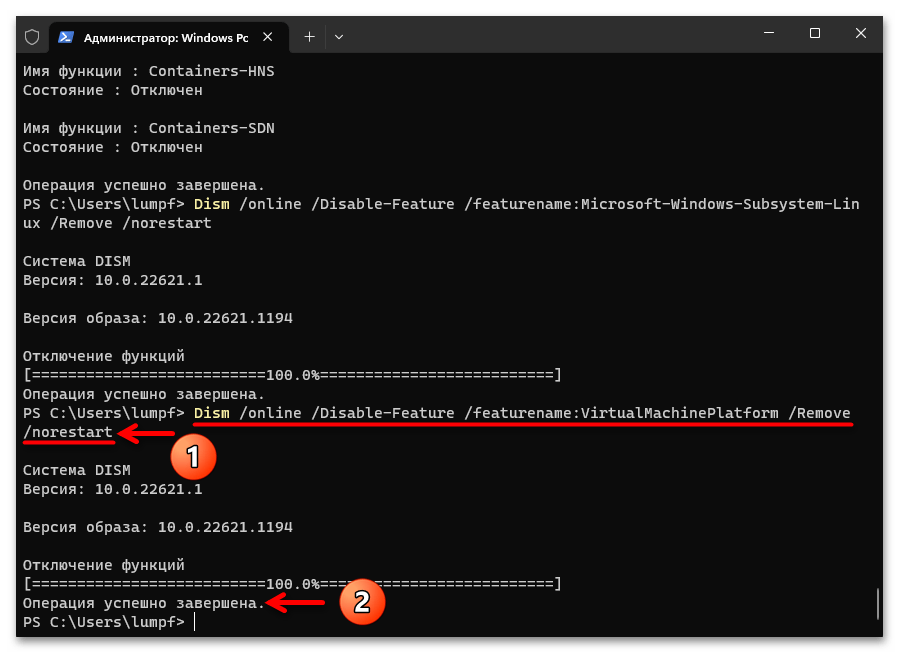
- При необходимости и действуя по аналогии с компонентом WSA «выключаем» через консоль «Платформу виртуальной машины», — команда будет следующей:
Dism /online /Disable-Feature /featurename:VirtualMachinePlatform /Remove /norestart
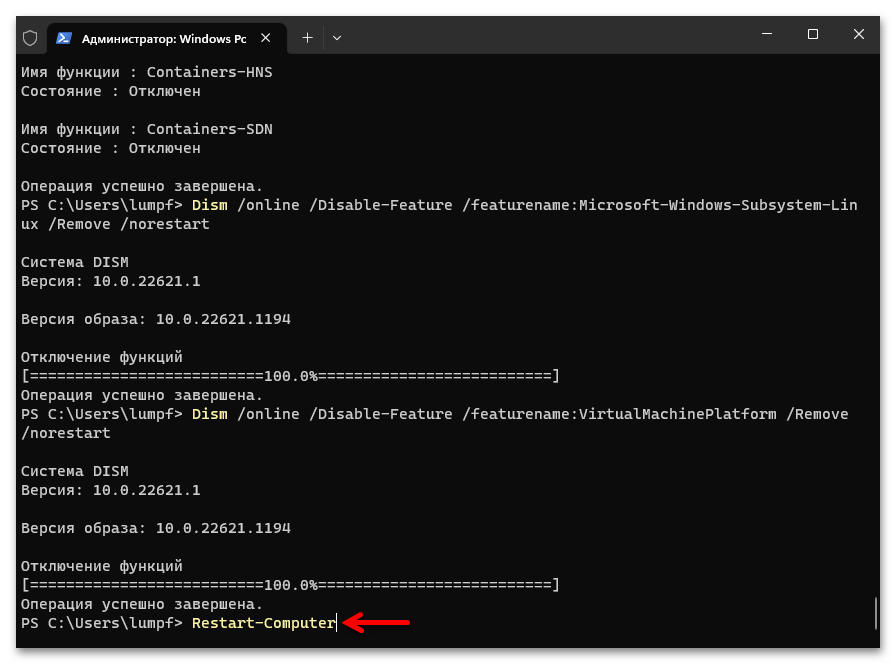
- Завершив запуск деактивирующих компоненты Win 11 непосредственно команд, перезапускаем компьютер. С этой целью, к примеру, через «Терминал» можно отправить на выполнение следующее указание:
Restart-Computer

Читайте также: Как перезагрузить компьютер под управлением Windows 11
- После перезапуска ПК и проведения в этом процессе системой автоматически манипуляций

полное удаление «Подсистемы Windows для Linux» из Windows 11 следует считать завершённым.


Еще статьи по данной теме:
Помогла ли Вам статья?
-
Home
-
News
- How to Uninstall WSL on Windows 11 & Windows 10? See a Guide!
By Vera | Follow |
Last Updated
If you need to uninstall Windows Subsystem for Linux, you can do this task on Windows 10/11. It is not simple as program uninstallation. Refer to this post from MiniTool and find the guide on how to uninstall WSL easily.
About WSL
Windows Subsystem for Linux, also known as WSL, is a feature in Windows operating system that is primarily designed for developers, especially web developers. WSL enables you to run a Linux system with Linux command-line tools and GUI apps on Windows 11/10. This won’t break anything important on your PC.
In the earlier time, Microsoft released the first version – Windows Subsystem for Linux (WSL) that supports a direct translation between Linux and Windows. While WSL2 uses a lightweight virtual machine to integrate it into your Windows workflow. Any Linux distribution can run on either the WSL 1 or WSL 2 architecture, which depends on their configuration.
To run a Linux system on Windows 10/11, you need to install WSL and here a related post is helpful – How to Install Windows Subsystem for Linux (WSL) on Windows 11.
When anything goes wrong or you no longer need to use this platform, you may want to uninstall WSL. Well then, can you uninstall WSL from your computer? It is possible and just follow the guide below now.
How to Uninstall WSL on Windows 10/11
How to uninstall WSL on Windows 11/10? It is not easy to completely remove WSL from your PC since this isn’t similar to uninstalling a program. You need to do three steps – delete the Linux distro, uninstall other components and disable this platform. Do the operations about WSL uninstall Ubuntu in order:
Step 1: Uninstall Linux Distro
1. In Windows 11/10, press Win + I at the same time to open Settings.
2. Go to Apps > Apps & features.
3. Choose a Linux distribution like Ubuntu and click Uninstall (Windows 10). For Windows 11, click the three dots and click Uninstall. Then, click Uninstall again to confirm the operation.
Tips:
You can type the Linux distribution like Ubuntu into the text of App list to find your installation.

Step 2: Delete Windows Subsystem for Linux Components
After uninstalling the Linux distribution from Windows 11/10, other elements of the Windows Subsystem for Linux functionality should be also removed.
1. In the Settings window, go to App > Apps & features.
2. Choose Windows Subsystem for Linux WSLg Preview and click Uninstall > Uninstall. In Windows 11, you need to click three dots and click Uninstall.

3. Find Windows Subsystem for Linux Update and uninstall it.
Step 3: Disable Windows Subsystem for Linux
This is the last step you should do and see what you should do:
1. In Windows 11, click Apps > Optional features and click More Windows features under the Related settings section to open the Windows Features In Windows 10, navigate to Apps > Apps & features > Option features > More Windows features.
Tips:
Alternatively, you can type windows features into the search box and click Turn Windows features on or off.
2. In the Windows Features interface, locate Virtual Machine Platform and Windows Subsystem for Linux, then uncheck the boxes of these two options.
3. Click OK to save the changes and restart your computer.

After the restart, you completely uninstall WSL on Windows 11/10. If you change your mind and want to run a Linux distribution like Ubuntu, you can still reinstall WSL on your computer.
About The Author

Position: Columnist
Vera is an editor of the MiniTool Team since 2016 who has more than 7 years’ writing experiences in the field of technical articles. Her articles mainly focus on disk & partition management, PC data recovery, video conversion, as well as PC backup & restore, helping users to solve some errors and issues when using their computers. In her spare times, she likes shopping, playing games and reading some articles.
I was fooling around a bit with the Linux/Bash subsystem for Win10.
But then I decided to stay with Cygwin for now. So I uninstalled it — or thought I did.
Now I’ve installed Cygwin and put its bin directory first in the PATH.
In cmd.exe , when I type bash , it will start the Cygwin’s Bash.
But when I do Win+R and type bash, I still get the prompt:
Windows Subsystem for Linux has no installed distributions.
…bla-bla-bla…
How do I get rid of the Linux/Bash subsystem entirely, so it will instead pick up Cygwin’s Bash from the PATH?
![]()
robinCTS
4,3274 gold badges20 silver badges29 bronze badges
asked Apr 27, 2018 at 21:54
![]()
3
If your OS has been upgraded to the Fall Creators Update, you should be able to issue the command wslconfig.
You could of course try uninstalling first by using the command lxrun /uninstall /full.
If its still there, you can try unregistering the distro:
-
First you need to know which distro is installed by using
wslconfig /l -
From the list choose the distro (e.g. Ubuntu) you want to uninstall and type the command
wslconfig /u Ubuntu
![]()
robinCTS
4,3274 gold badges20 silver badges29 bronze badges
answered Jul 10, 2018 at 1:30
![]()
Casey SVCasey SV
7391 gold badge5 silver badges4 bronze badges
3
In order to disable WSL, one has to go back into
Control Panel -> programs-features -> turn on/off Windows features and deselect Windows Subsystem for Linux, and Save.
answered Apr 27, 2018 at 22:11
![]()
RopRop
1,2111 gold badge8 silver badges11 bronze badges
3
Edit — This would only work on Windows Server, not on Client OS.
Similar to what Rop suggested, but you can also use Powershell to completely remove the Windows Subsystem for Linux, with the advantage of not having to look for it in Control Panel. Note that you will have to run this as an administrator.
Remove-WindowsFeature Microsoft-Windows-Subsystem-Linux
List all the features available, filtering for Linux:
Get-WindowsFeature | Where-Object Name -like '*linux*' | Select-Object Name
answered Apr 6, 2020 at 16:54
![]()
AbrahamAbraham
1861 silver badge5 bronze badges
2
Just a few notes for experimenters, but for Windows 10 client o/s, you can use the following:
(Get-WindowsOptionalFeature -Online -FeatureName '*linux*') | Select-Object FeatureName
Then:
Disable-WindowsOptionalFeature -Online -FeatureName Microsoft-Windows-Subsystem-Linux
Or the analogue:
Enable-WindowsOptionalFeature -Online -FeatureName Microsoft-Windows-Subsystem-Linux
You can use other tooling to the same affect, such as dism.exe (as illustrated here: https://evidencen.com/wsl2/)
answered Mar 11, 2021 at 12:22
![]()
I combined removing Ubuntu-18.04
wslconfig /l
wslconfig /u 'Ubuntu-18.04'
and with adding and launching Ubuntu-20.04 from the Windows store
to successfully get WSL 2.0 running again it stopped working. I was getting
[process exited with code 4294967295]
when I launched wsl 2.
![]()
Greenonline
2,25511 gold badges24 silver badges31 bronze badges
answered Aug 5, 2020 at 17:13
![]()
I can’t seem to get a clean uninstall of WSL. I had WSl2 installed and was having DNS problems so I wanted to uninstall everything and go back to WSL 1.
I turn off the feature, delete the distros, delete the «WSL update app», make sure HyperVisor and Windows Subsystem for Linux are disabled in «Programs and Features», and reboot.
It looks like it’s uninstalled.
But then when I try to install the minimum WSL again (ie just enabling WSL in Windows Programs and Features, rebooting, and downloading a distro, when I launch the distro I get
«… WLS 2 requires an update to its kernel component..»
Why is it complaining about WSL2? I’m just trying to install WSL1? My guess is that there is some registry bit or something that still makes it look like I’m trying to use WSL 2.
Any ideas on how to get a truly clean uninstall of WSL so I can get back to version 1?
answered Jul 30, 2021 at 17:17
![]()
1
Windows 10:
- search: «optional features» (-> manage optional features)
- second last entry on page: more windows features
- second last entry: WSL
answered Jun 3, 2021 at 19:01
![]()
You must log in to answer this question.
Not the answer you’re looking for? Browse other questions tagged
.
Not the answer you’re looking for? Browse other questions tagged
.
On Windows 10, you can uninstall the Windows Subsystem for Linux 2 (WSL2) when you no longer need to use the platform, and in this guide, you will learn how to complete the task. WSL2 is the second version of Microsoft’s integration to run Linux on Windows 10 using a lightweight virtual machine instead of a direct translation between Linux and Windows available with the first version.
As a result of this change, you now get an actual Linux kernel with a solution that improves performance and app compatibility while maintaining the same experience as the original version of WSL. (See also the video tutorial to complete this task on the Pureinfotech YouTube channel.)
Although the ability to run Linux on Windows 10 is a useful feature for developers and users who need access to both operating systems, it might come a time when you no longer need the platform, or you may need to reset it to fix problems.
Whatever the reason, you can permanently remove WSL2 by uninstalling all the components or resetting distros individually if they are causing issues.
This guide will teach you the steps to completely remove the WSL2 integration on Windows 10.
The uninstall process of the Windows Subsystem for Linux 2 requires multiple steps, including removing the distro, kernel update, and other components.
Step one: Uninstall Linux distros from WSL2
To uninstall a distro of Linux on Windows 10, use these steps:
-
Open Settings on Windows 10.
-
Click on Apps.
-
Click on Apps & features.
-
Select the distribution of Linux and click the Uninstall button.

-
Click the Uninstall button again.

Once you complete the steps, you may need to repeat the steps to continue removing additional distros as required.
Step two: Uninstall Windows Subsystem for Linux update
To uninstall the WSL 2 Linux kernel update, use these steps:
-
Open Settings.
-
Click on Apps.
-
Click on Apps & features.
-
Select the “Windows Subsystem for Linux update” item and click the Uninstall button.
-
Click the Uninstall button again.

After you complete the steps, you can remove the remaining components.
Step three: Uninstall WSL2 components
To disable the Windows Subsystem for Linux components, use these steps:
-
Open Settings.
-
Click on Apps.
-
Click on Apps & features.
-
Under the “Related settings” section, click the “Programs and Features” option from the right side.
-
Click the “Turn Windows features on or off” option.
-
Clear the “Virtual Machine Platform” option.
-
Clear the “Windows Subsystem for Linux” option.

-
Click the OK button.
-
Click the Restart now button.


Once you complete the steps, the Windows Subsystem for Linux will be completely uninstalled from Windows 10.
If you change your mind, you can always set up the environment again with these instructions.
We may earn commission for purchases using our links to help keep offering the free content. Privacy policy info.
All content on this site is provided with no warranties, express or implied. Use any information at your own risk. Always backup of your device and files before making any changes. Privacy policy info.