1. Overview
Windows Subsystem for Linux (WSL) allows you to install a complete Ubuntu terminal environment in minutes on your Windows machine, allowing you to develop cross-platform applications without leaving windows.
What you will learn:
- How to enable and install WSL on Windows 10 and Windows 11
- How to install and run a simple graphical application that uses WSLg
- How to install and run a much more advanced application that uses WSLg
Note: As of November 2022, WSL is now available as a Windows Store app for both Windows 10 and Windows 11. This means previous tutorials related to installing WSL as a Windows feature are no longer required.
What you will need:
- A Windows 10 or Windows 11 physical or virtual machine with all the updates installed
2. Install WSL
WSL can be installed from the command line. Open a powershell prompt as an Administrator (we recommend using Windows Terminal) and run:
wsl --install
This command will enable the features necessary to run WSL and also install the default Ubuntu distribution of Linux available in the Microsoft Store. It is recommended to reboot your machine after this initial installation to complete the setup.
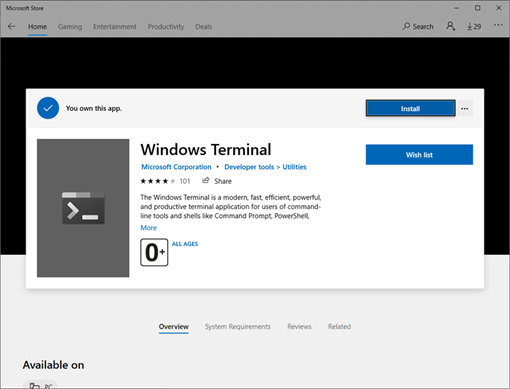
You can also install WSL from the Microsoft Store.
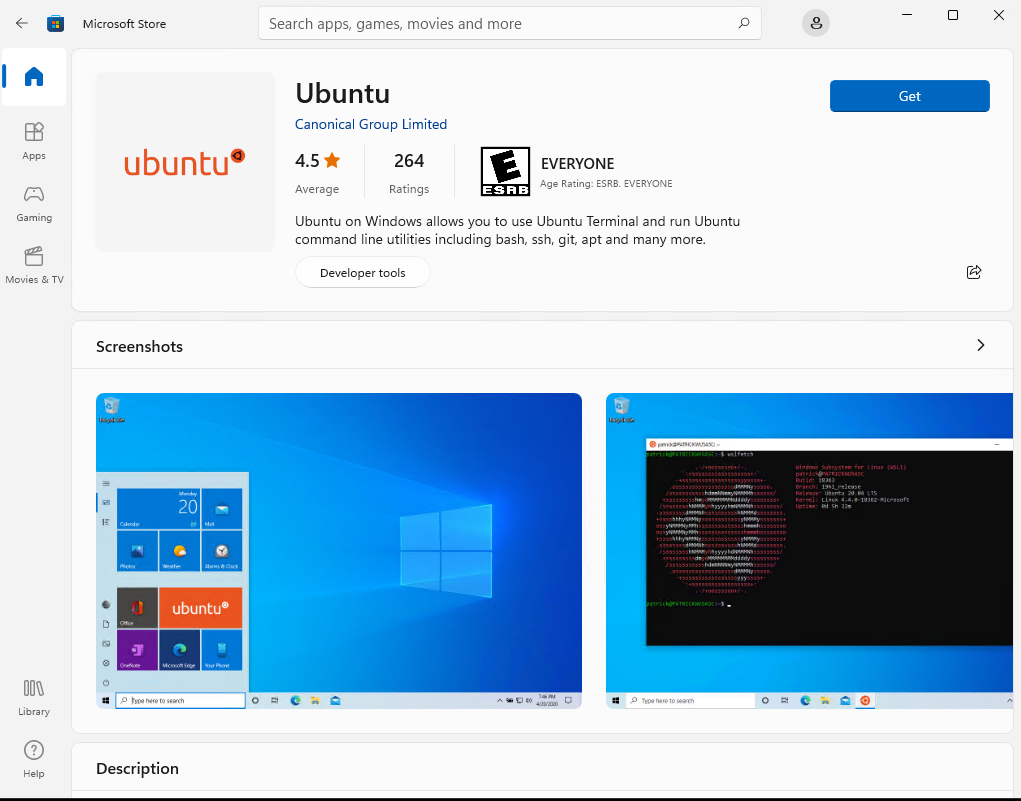
Installation of WSL from the Microsoft Store
Duration: 3:00
The WSL app is availble to install directly from the Microsoft Store like other Windows applications.
To install the WSL application from the Microsoft Store, open it and search for Windows subsystem.
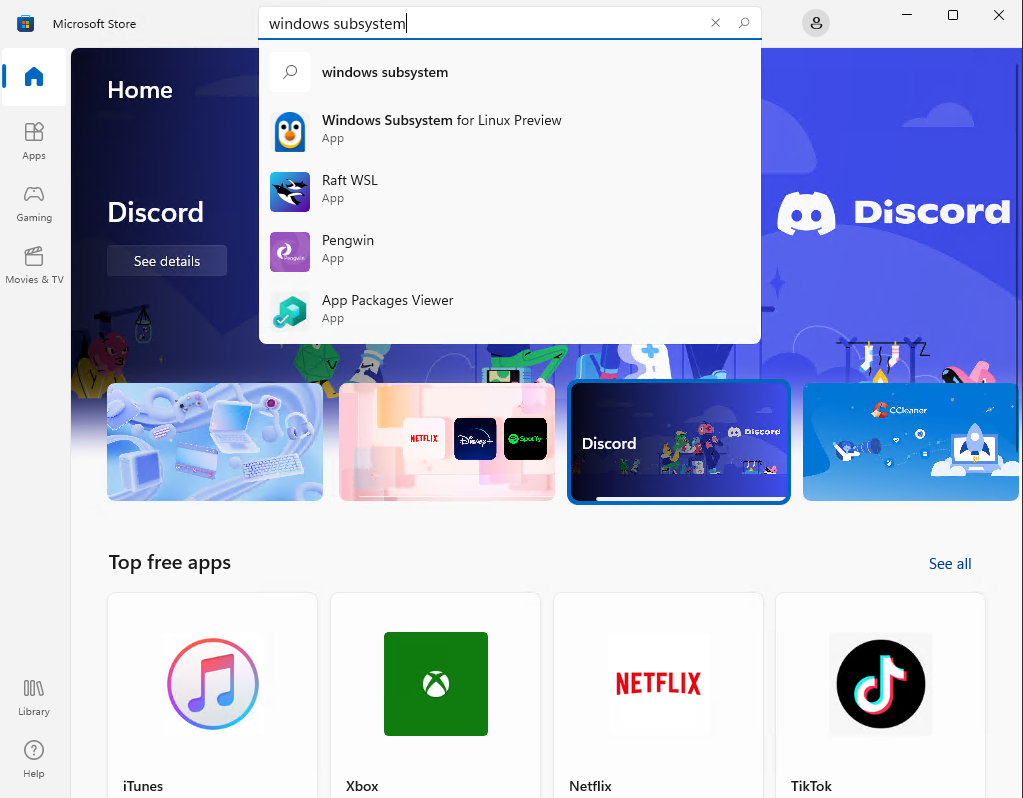
Click on the item Windows Subsystem for Linux to open the corresponding application page.
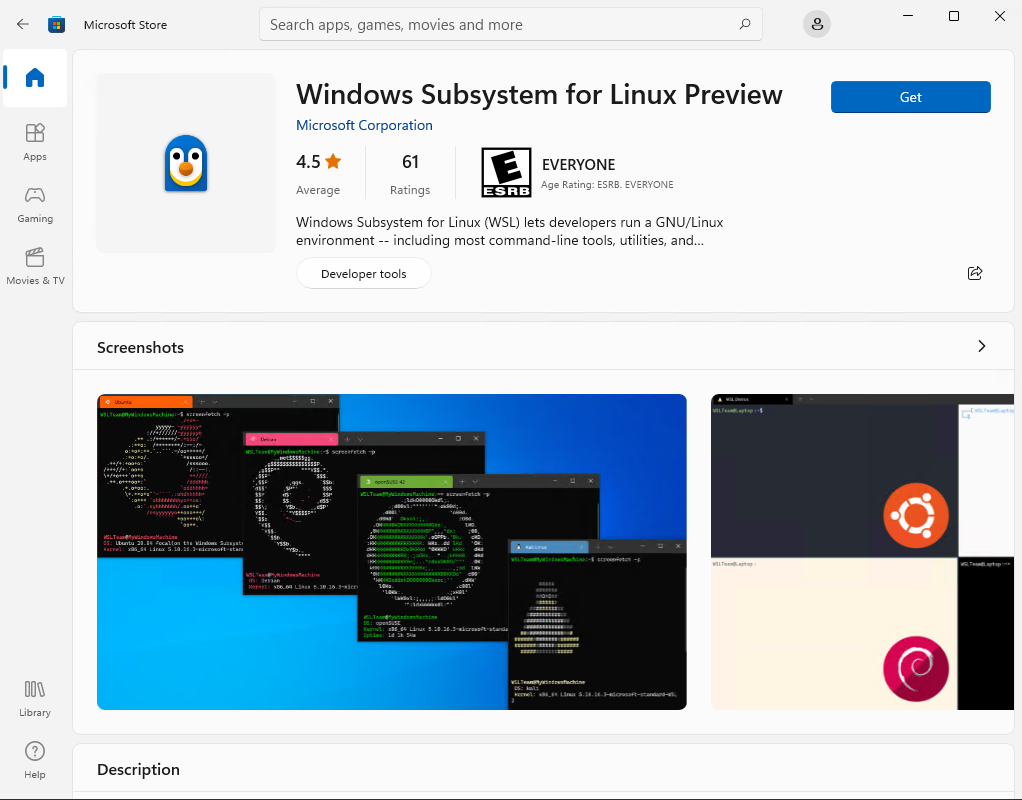
Click on Get to download and install the application.
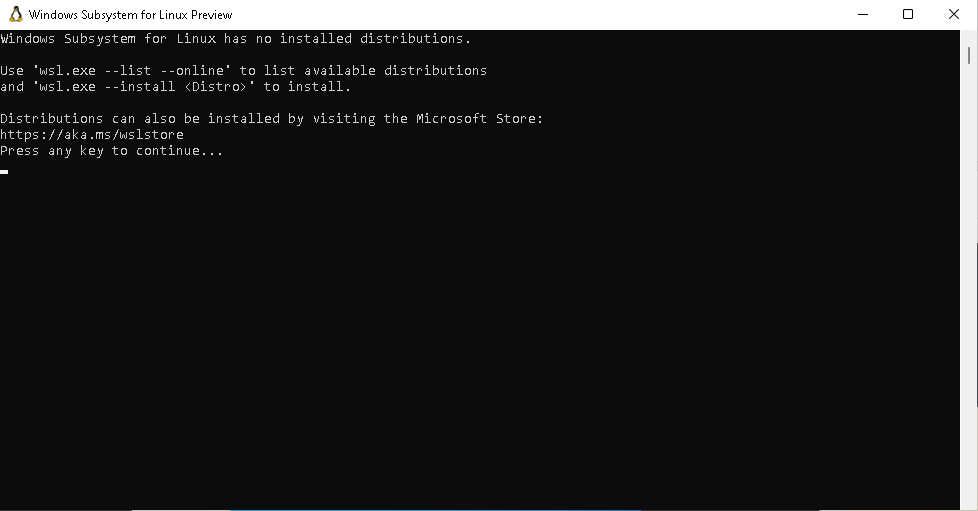
Upon installation, you can click on Open, but it will not do much since there is no Linux distribution installed.
However, if you really want to open the WSL application without installing a distribution, you’ll see a nice and short help message that you must follow in order to make something useful with WSL:
You can now proceed with the installation of Ubuntu.
3. Download Ubuntu
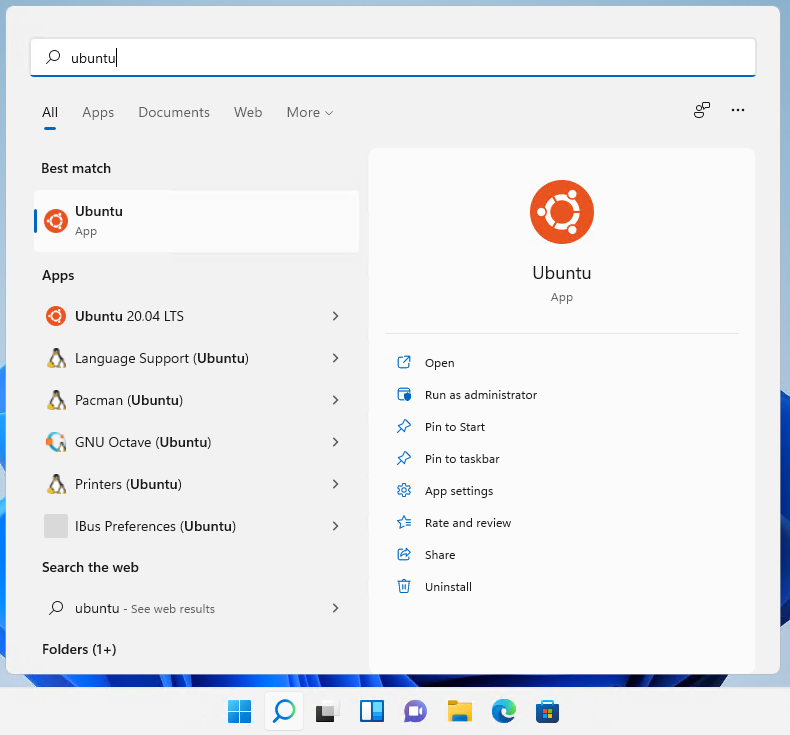
WSL supports a variety of Linux distributions including the latest Ubuntu release, Ubuntu 20.04 LTS and Ubuntu 18.04 LTS. You can find them by opening the Microsoft Store app and searching for Ubuntu.
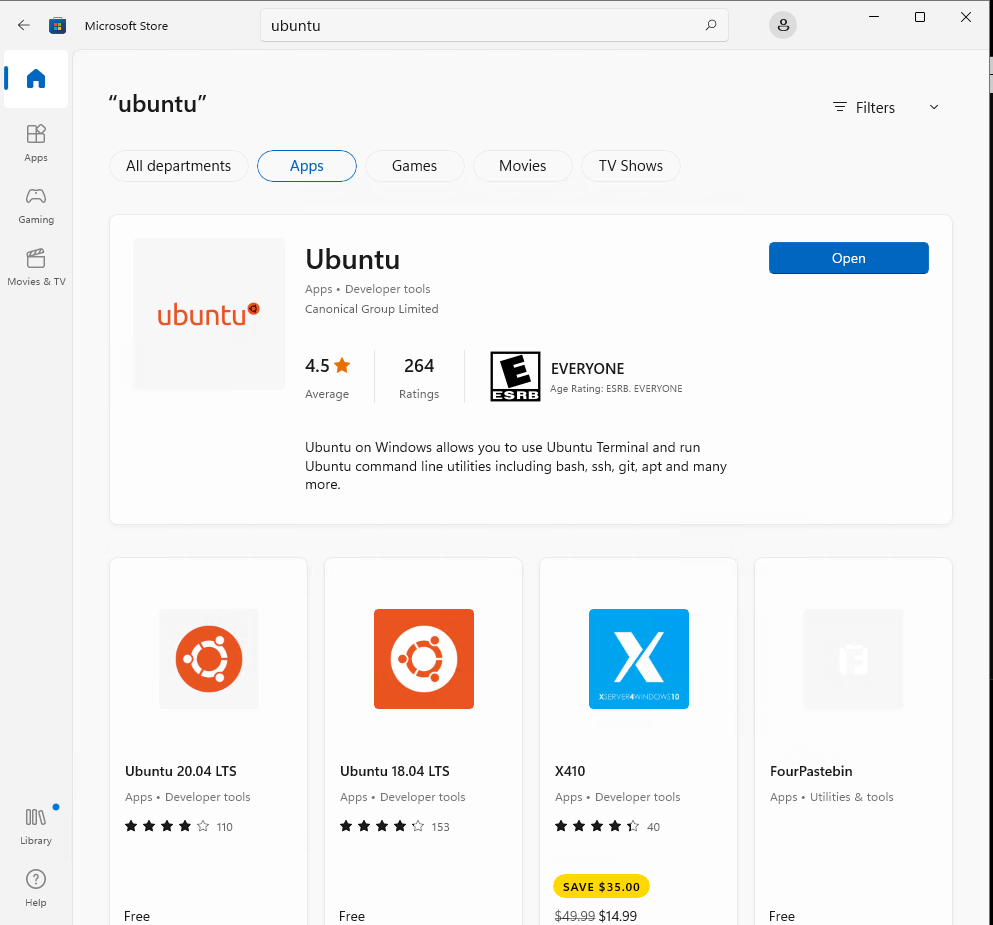
Choose the distribution you prefer and then select Get.
Which version should I choose?
There are three types of Ubuntu releases published to the Microsoft Store:
- Ubuntu with a version number e.g. Ubuntu 20.04.x. This will always be 20.04 and upgrades won’t be proposed.
- Ubuntu without a version number. This is the latest LTS version of Ubuntu after the first point release. At the time of writing, it is Ubuntu 22.04. It will remain Ubuntu 22.04 until the first point release of the next LTS release of Ubuntu, for example 24.04.1 in 2024.
- Ubuntu Preview is a daily build of the latest development version of Ubuntu. You should install it if you want to live on the edge but not for production workload as it doesn’t receive the same amount of QA as stable releases and may break at any time.
Ubuntu will then install on your machine.
Once installed, you can either launch the application directly from the store or search for Ubuntu in your Windows search bar.
Install Ubuntu from the command line
It is possible to install the same Ubuntu applications available on the Windows Store directly from the command line.
In a Powershell terminal you can run:
wsl --list --online to see all available distros.

You can install a distro using the NAME by running:
wsl --install -d Ubuntu-20.04

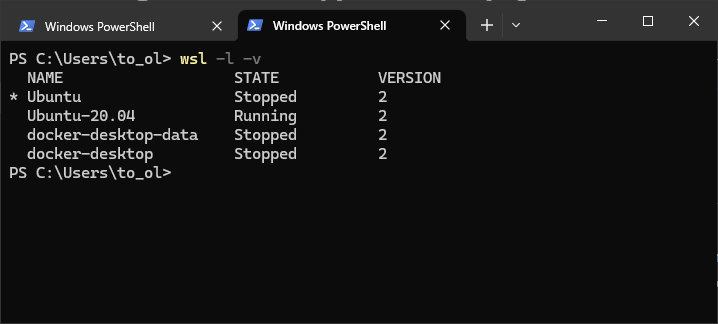
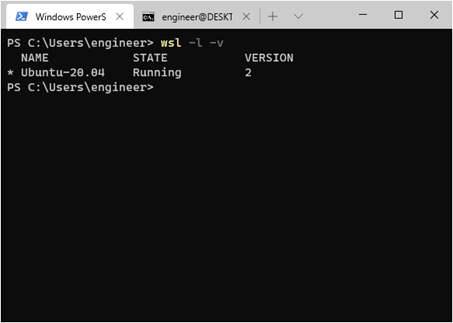
Use wsl -l -v to see all your currently installed distros and which version of WSL they are using:
4. Configure Ubuntu
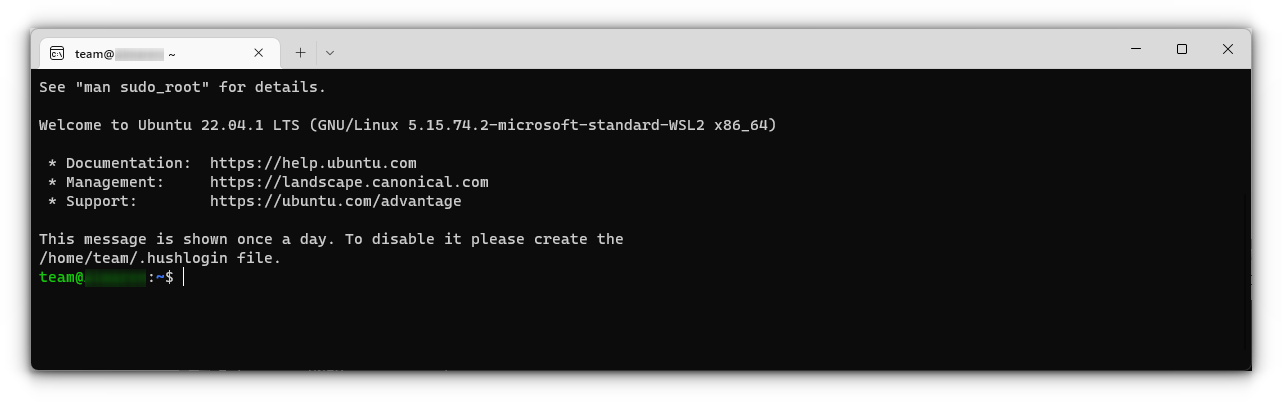
Congratulations, you now have an Ubuntu terminal running on your Windows machine!
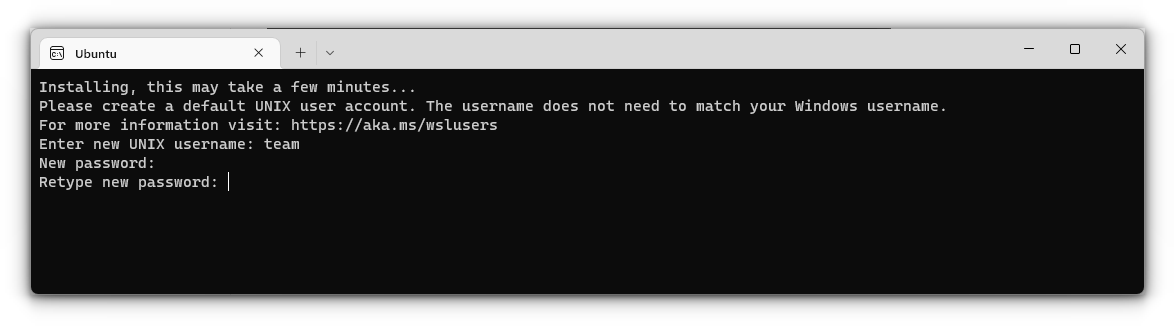
Once it has finished its initial setup, you will need to create a username and password (this does not need to match your Windows user credentials).

Finally, it’s always good practice to install the latest updates with the following commands, entering your password when prompted.
sudo apt update
Then
sudo apt full-upgrade
Press Y when prompted.
(Optional) Enable systemd
In September 2022, Microsoft announced support for systemd in WSL. This long-awaited upgrade to WSL unlocks a huge number of quality of life features for managing processes and services. This includes snapd support, which enables users to take advantage of all of the tools and apps available on snapcraft.io.
To enable systemd you will need make a small modification to /etc/wsl.conf in your Ubuntu distribution.
Run `sudo nano /etc/wsl.conf’ to open the file and insert the following lines:
[boot]
systemd=true
Then restart your distro by running wsl --shutdown in powershell and relaunching.
5. Install and use a GUI package
WSL2 comes with WSLg enabled by default. WSLg allows you to run graphical linux applications.
To check that you have the latest package lists, type:
sudo apt update
Then, start with some basic X11 applications:
sudo apt install x11-apps
To run the xeyes, a “follow the mouse” application, type:
xeyes &
The & at the end of the line will execute the command asynchronously. In other words, the shell will run the command in the background and return to the command prompt immediately.
The first launch of a GUI application takes a few seconds while WSL is initializing the graphics stack. Next executions of GUI applications are much faster.
Leave xeyes opened and run the calculator xcalc with:
xcalc
When you move the cursor over the calculator, xeyes follows the cursor. This shows that several GUI applications can interact together.
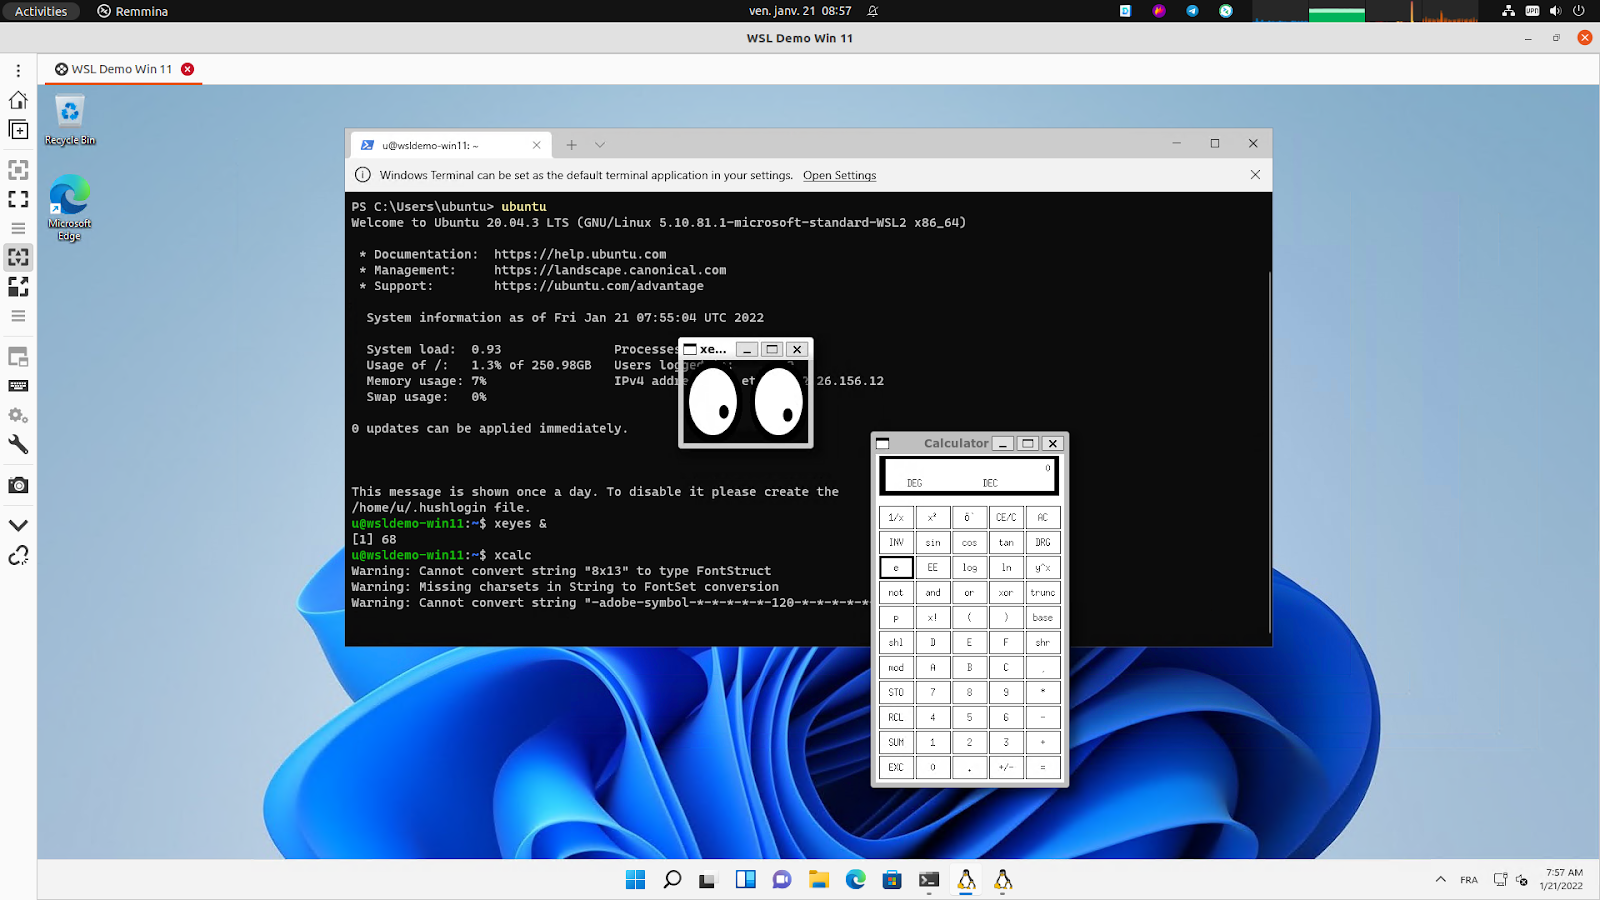
Note that applications running under WSLg display a little penguin at the bottom right corner of their icons in the Windows taskbar. That’s one way you can distinguish applications running on Windows or Ubuntu (besides the window decoration and styling).
![]()
Close xeyes and xcalc by pressing the cross icon on the top right corner of each X application window.
Xcalc and xeyes are very basic X Windows applications but there are plenty of choices in the Linux ecosystem corresponding to your needs and available out of the box on Ubuntu.
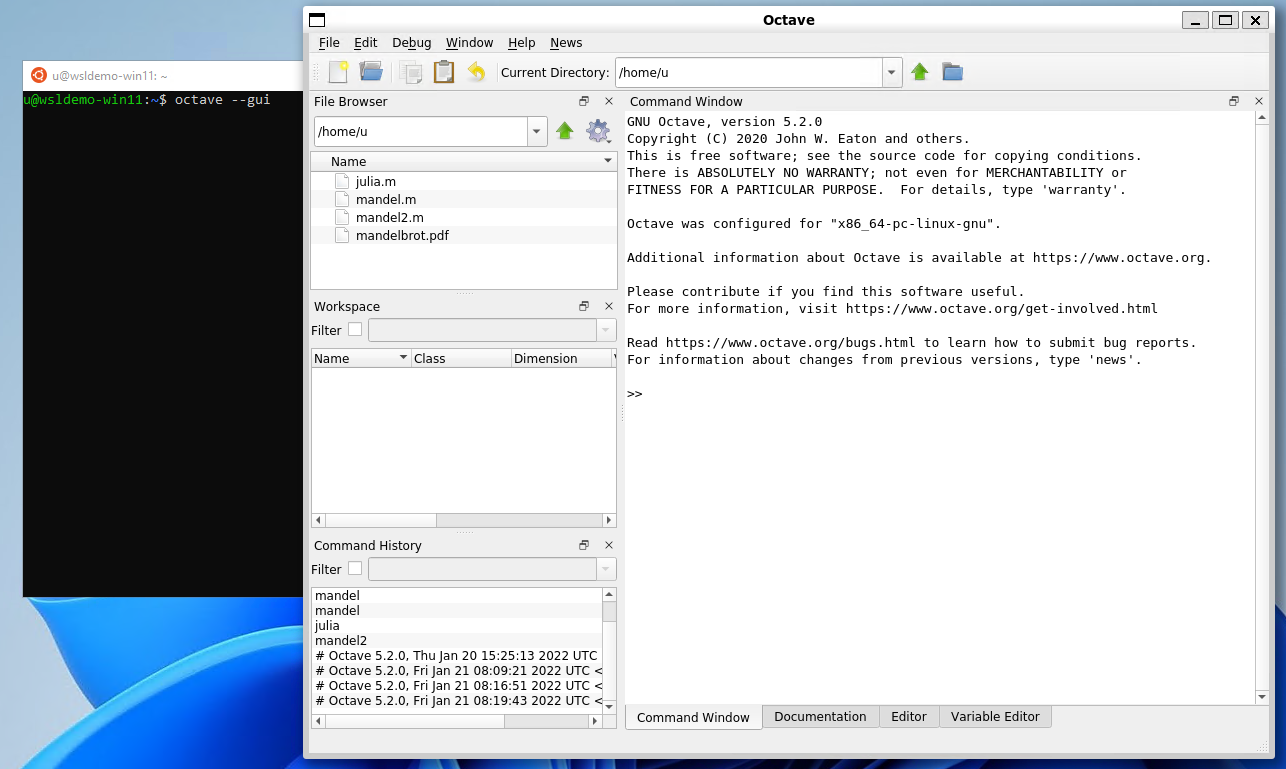
In the following example, we will use GNU Octave to perform numerical computation.
We will use it to calculate and draw a beautiful Julia fractal. The goal here is to use Octave to demonstrate how WSLg works, not to go through the theory of fractals.
First thing is to install the software like we did for x11-apps, from the terminal prompt run:
sudo apt install octave
Then start the application:
octave --gui &
Do not forget the ampersand & at the end of the line, so the application is started in the background and we can continue using the same terminal window.
In Octave, click on the New script icon to open a new editor window and copy/paste the following code:
#{

Inspired by the work of Bruno Girin ([Geek Thoughts: Fractals with Octave: Classic Mandelbrot and Julia](http://brunogirin.blogspot.com/2008/12/fractals-with-octave-classic-mandelbrot.html))

Calculate a Julia set

zmin: Minimum value of c

zmax: Maximum value of c

hpx: Number of horizontal pixels

niter: Number of iterations

c: A complex number

#}

function M = julia(zmin, zmax, hpx, niter, c)

%% Number of vertical pixels

vpx=round(hpx*abs(imag(zmax-zmin)/real(zmax-zmin)));

%% Prepare the complex plane

[zRe,zIm]=meshgrid(linspace(real(zmin),real(zmax),hpx),

linspace(imag(zmin),imag(zmax),vpx));

z=zRe+i*zIm;

M=zeros(vpx,hpx);

%% Generate Julia

for s=1:niter

mask=abs(z)<2;

M(mask)=M(mask)+1;

z(mask)=z(mask).^2+c;

end

M(mask)=0;

end
This code is the function that will calculate the Julia set.
Save it to a file named julia.m. Since it is a function definition, the name of the file must match the name of the function.
Open a second editor window with the New Script button and copy and paste the following code:
Jc1=julia(-1.6+1.2i, 1.6-1.2i, 640, 128, -0.75+0.2i);

imagesc(Jc1)

axis off

colormap('default');
This code calls the function defined in julia.m. You can later change the parameters if you want to explore the Julia fractal.
Save it to a file named juliatest.m.
And finally, press the button Save File and Run.

After a few seconds, depending on your hardware and the parameters, a Julia fractal is displayed.
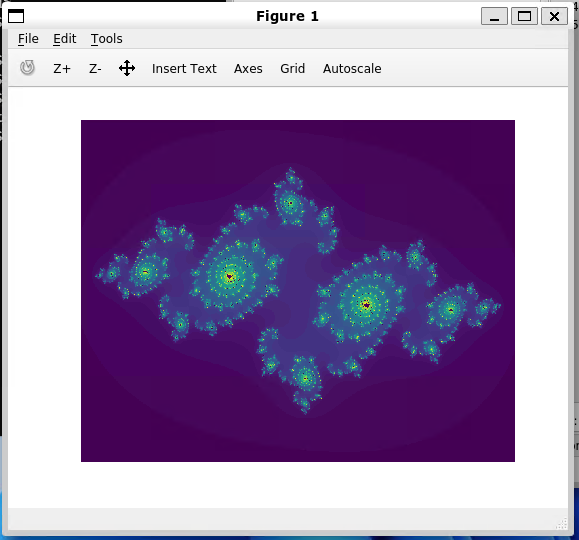
Like Octave, this window is displayed using WSLg completely transparently to the user.
Enjoy!
6. Enjoy Ubuntu on WSL!
That’s it! In this tutorial, we’ve shown you how to install WSL and Ubuntu on Windows 11, set up your profile, install a few packages, and run a graphical application.
We hope you enjoy working with Ubuntu inside WSL. Don’t forget to check out our blog for the latest news on all things Ubuntu.
Further Reading
- Enabling GPU acceleration on Ubuntu on WSL2 with the NVIDIA CUDA Platform
- Setting up WSL for Data Science
- Working with Visual Studio Code on Ubuntu on WSL2
- Microsoft WSL Documentation
- Whitepaper: Ubuntu WSL for Data Scientists
- WSL on Ubuntu Wiki
- Ask Ubuntu
Was this tutorial useful?
Thank you for your feedback.
Время на прочтение
9 мин
Количество просмотров 82K

Введение
Данная статья предназначена вниманию системных администраторов, которые подготавливают типовые рабочие места на компьютерах под управлением ОС Windows 10, в том числе для разработчиков ПО.
Следует отметить, что существует определенная проблема, связанная с невозможностью интеграции ПО, полученного в on-line магазине Microsoft Store для использования в пользовательском образе Windows 10. Не вдаваясь в подробности уточню, что данная проблема связана с тем, что установленные из Microsoft Store программы связываются со служебной учетной записью Administrator, и при завершении создания пользовательского образа утилитой sysprep возникают обусловленные этим обстоятельством ошибки.
Рассмотренный в данной статье способ позволить избежать такой проблемы при подготовке образа ОС Windows 10 с предварительно настроенной подсистемой WSL2, а также с заранее подготовленным и настроенным образом ОС Ubuntu 20.04 с GUI KDE Plasma, который в свою очередь может иметь свой набор пользовательского ПО.
В сети Интернет имеется большое количество примеров и руководств по настройке подсистем WSL (т.е. WSL1 и сравнительно новой WSL2), с настройкой GUI интерфейса для linux систем на базе ОС начиная с версии Ubuntu 16.04 и заканчивая Ubuntu 20.04, но в основном это касалось рабочих столов на основе т.н. «легковесного» xfce4, имеющий вполне объяснимые ограничения в пользовательских настройках. Но что касается GUI KDE Plasma для Ubuntu 20.04, в сети не нашлось какой-либо существенной информации. Но именно этот вариант предоставляет конечному пользователю практически неограниченный набор настроек как внешнего вида системы, так и настроек оборудования, конечно с учетом текущих возможностей интеграции linux-систем, реализованных в подсистеме WSL2.
Установка требуемого набора ПО и настройка WSL2
Проверяем текущую версию Windows, для этого в строке поиска Windows вводим команду winver и получаем примерно следующее:

Важно, чтобы ОС имела версию 1903 или 1909 (указанные версии ОС должны быть с установленным накопительным обновлением KB4566116), либо 2004 (номер сборки не менее чем 19041), остальная информация не имеет значения. Если номер версии меньше, то для корректного повторения результатов, изложенных в данной статье, рекомендуется обновиться до последней версии Windows.
Для удобства дальнейших действий устанавливаем бесплатный Windows Terminal, используя Microsoft Store (также существует возможность загрузки из других источников):
Устанавливаем X Server X410 через тот же Microsoft Store, это ПО платное, но имеется бесплатный период в 15 дней, что вполне достаточно для проведения различных тестов.

В качестве бесплатной альтернативы X410 скачиваем и устанавливаем X-сервер VcXsrv.
В любом удобном месте на диске создаем каталог, в котором будем хранить наши файлы. В качестве примера создадим каталог C:\wsl.
Скачиваем и устанавливаем автономный установщик Ubuntu 20.04, распаковываем полученный файл с помощью архиватора (например 7-zip). Переименовываем распакованный каталог с длинным именем Ubuntu_2004.2020.424.0_x64 во что-то более приемлемое, например Ubuntu-20.04 и копируем его в каталог C:\wsl (далее по тексту просто \wsl).
Скачиваем и распаковываем в каталог \wsl кроссплатформенный звуковой сервер PulseAudio v.1.1., также вносим исправления в его конфигурационные файлы.
В файле \wsl\pulseaudio-1.1\etc\pulse\default.pa в разделе Load audio drivers statically редактируем строку:
load-module module-waveout sink_name=output source_name=input record=0
а в разделе Network access редактируем строку:
load-module module-native-protocol-tcp auth-ip-acl=127.0.0.1 auth-anonymous=1
В файле \wsl\pulseaudio-1.1\etc\pulse\daemon.conf раскомментируем и изменяем строку
exit-idle-time = -1
Настраиваем подсистему WSL2 в соответствии с документацией Microsoft. Единственное замечание — дистрибутив Ubuntu мы уже скачали, и устанавливать его будем на следующем шаге. В основном, настройка сводится к включению дополнительных компонентов «Подсистема Windows для Linux» и «Платформа виртуальной машины», и последующей перезагрузки для применения изменений в настройках компьютера:

При необходимости скачиваем и устанавливаем пакет обновлений для ядра Linux в WSL2.
Запускаем Windows Terminal и выбираем режим работы Command Prompt нажатием клавиш Ctrl+Shift+2.
В первую очередь устанавливаем режим работы WSL2, для этого вводим команду:
wsl --set-default-version 2
Переходим в каталог с автономным загрузчиком Ubuntu 20.04, в моем случае это \wsl\Ubuntu-20.04 и запускаем файл ubuntu2004.exe. При появлении запроса имени пользователя указываю имя engineer (можно ввести любое другое имя), ввести свой пароль и подтвердить введенный пароль для указанной учетной записи:
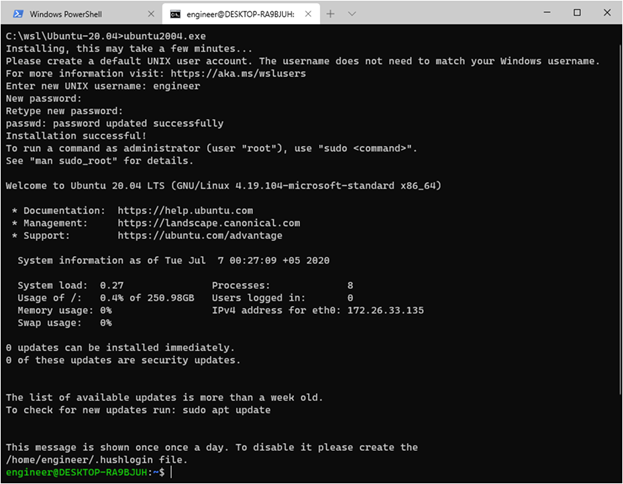
Появилась строка приглашения терминала, ядро Ubuntu 20.04 установлено. Проверим правильность настройки режима WSL2, для этого в Windows Terminal выбираем закладку Windows PowerShell и вводим команду:
wsl -l -v
результат выполнения должен быть такой:
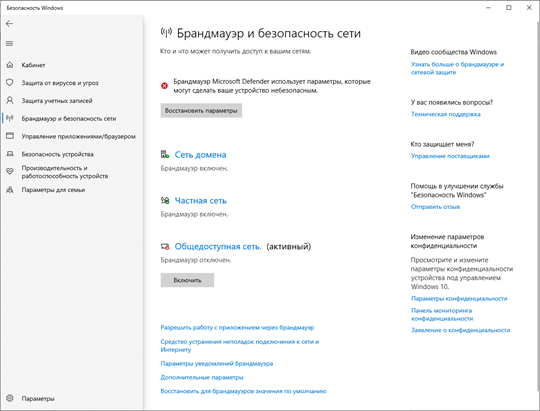
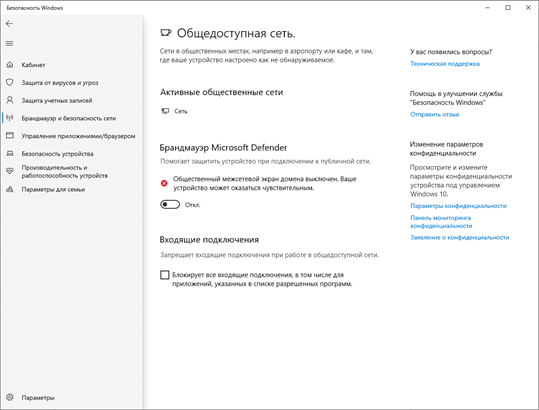
Настраиваем брандмауэр Microsoft Defender, т.е. отключаем его для общедоступной сети:
Настройка Ubuntu 20.04
В Windows Terminal снова выбираем закладку Command Prompt и устанавливаем обновления для Ubuntu 20.04. Для этого в командной строке вводим:
sudo apt update && sudo apt upgrade –y
Устанавливаем рабочий стол KDE Plasma:
sudo apt install kubuntu-desktop -y
установка занимает до 30 минут в зависимости от производительности компьютера и пропускной способности канала доступа в Internet, при появлении запроса установщика подтверждаем OK.
Устанавливаем русскую локализацию и словари Ubuntu 20.04. Для этого в командной строке вводим:
sudo apt install language-pack-ru language-pack-kde-ru -y
sudo apt install libreoffice-l10n-ru libreoffice-help-ru -y
sudo apt install hunspell-ru mueller7-dict -y
sudo update-locale LANG=ru_RU.UTF-8
sudo dpkg-reconfigure locales # примечание: выбираем ru_RU.UTF-8 UTF-8, см. скриншоты ниже.
sudo apt-get install --reinstall locales

Добавляем последнюю версию рабочего стола KDE Plasma:
sudo add-apt-repository ppa:kubuntu-ppa/backports
sudo apt update && sudo apt full-upgrade -y
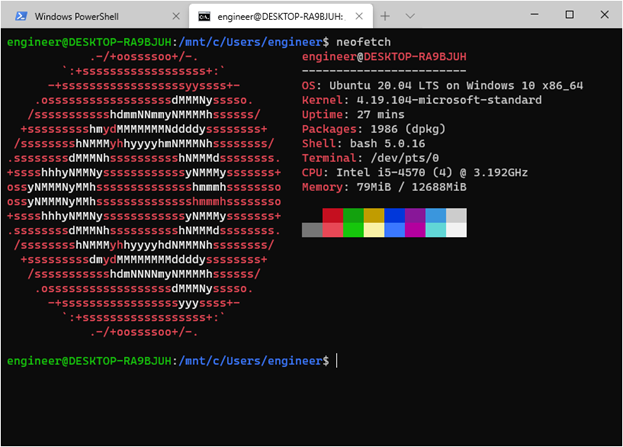
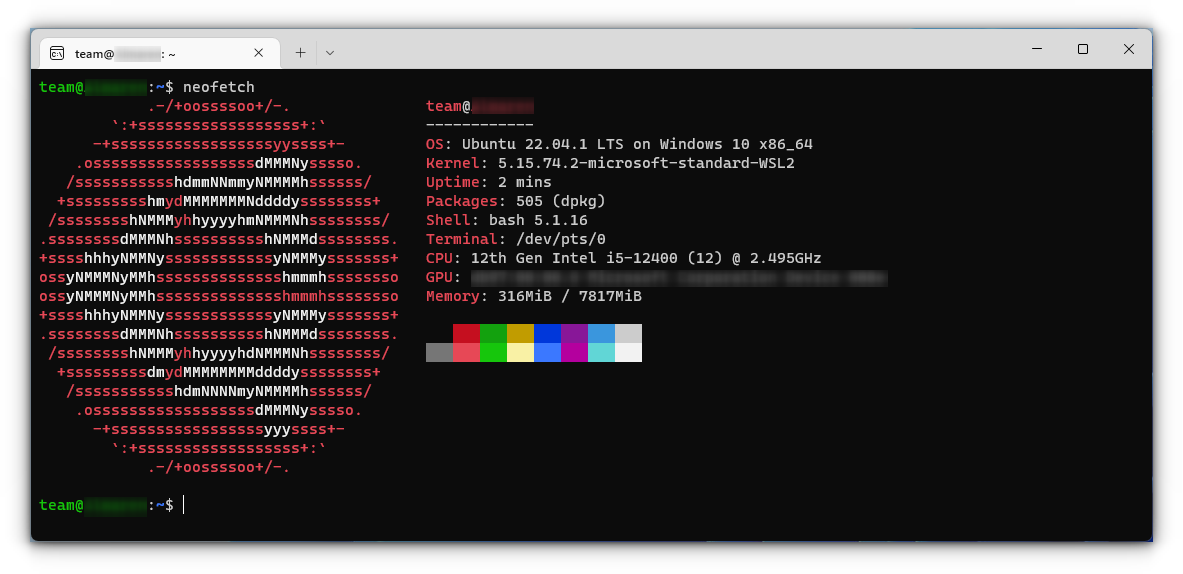
Добавляем свой набор консольных приложений, например mc и neofetch:
sudo apt install mc neofetch -y
Проверяем, что получилось, вводим в командную строку neofetch, см. скриншот:
Редактируем конфигурационный файл WSL /etc/wsl.conf:
sudo nano /etc/wsl.conf
в открывшееся пустое окно текстового редактора копируем текст:
[automount]
enabled = true
root = /mnt
options = «metadata,umask=22,fmask=11»
mountFsTab = true
[network]
generateHosts = true
generateResolvConf = true
[interop]
enabled = true
appendWindowsPath = true
сохраняем изменения (Ctrl+O), подтверждаем операцию и выходим из текстового редактора (Ctrl+X).
Экспортируем настроенный образ Ubuntu-20.04 в созданный нами каталог \wsl. Для этого в Windows Terminal снова выбираем закладку Windows PowerShell и вводим команду:
wsl --export Ubuntu-20.04 c:\wsl\Ubuntu-plasma-desktop
созданный образ поможет нам автоматизировать операции запуска/переустановки настроенной Ubuntu 20.04, при необходимости позволит легко перенести на другой компьютер.
Подготовка bat-файлов и ярлыков на рабочий стол Windows
С помощью редактора Notepad++ создаем bat-файлы (обязательно в кодировке OEM-866 для корректного вывода символов кириллицы):
Файл Install-Ubuntu-20.04-plasma-desktop.bat — предназначен для автоматизации первоначальной установки созданного образа Ubuntu 20.04 на компьютере с уже настроенной подсистемой WSL2 и X-сервером. Если имя пользователя и пароль отличается от указанных в примере, то необходимо внести соответствующие изменения в этот bat-файл:
@echo off
wsl --set-default-version 2
cls
echo Ожидайте окончания установки дистрибутива Ubuntu-20.04...
wsl --import Ubuntu-20.04 c:\wsl c:\wsl\Ubuntu-plasma-desktop
wsl -s Ubuntu-20.04
cls
echo Дистрибутив Ubuntu-20.04 успешно установлен!
echo Не забудьте сменить учетную запись по умолчанию «root» на существующую учетную запись пользователя,
echo либо используйте предустановленную учетную запись «engineer», пароль: «password».
pause
Файл Reinstall-Ubuntu-20.04-plasma-desktop.bat — предназначен для переустановки подготовленного образа Ubuntu 20.04 на компьютере.
@echo off
wsl --unregister Ubuntu-20.04
wsl --set-default-version 2
cls
echo Ожидайте окончания переустановки дистрибутива Ubuntu-20.04...
wsl --import Ubuntu-20.04 c:\wsl c:\wsl\Ubuntu-plasma-desktop
wsl -s Ubuntu-20.04
cls
echo Дистрибутив Ubuntu-20.04 успешно переустановлен!
pause
Файл Set-default-user.bat — для установки пользователя «по умолчанию».
@echo off
set /p answer=Введите существующую учетную запись в Ubuntu (engineer):
c:\wsl\Ubuntu-20.04\ubuntu2004.exe config --default-user %answer%
cls
echo Учетная запись пользователя %answer% в Ubuntu-20.04 установлена по умолчанию!
pause
Файл Start-Ubuntu-20.04-plasma-desktop.bat — собственно запуск рабочего стола KDE Plasma.
@echo off
echo ===================================== Внимание! ============================================
echo  Для корректной работы GUI Ubuntu 20.04 в WSL2 необходимо использовать X Server.
echo  Примечание: в случае использования VcXsrv Windows X Server необходимо раскомментировать
echo  строки в файле Start-Ubuntu-20.04-plasma-desktop.bat, содержащие "config.xlaunch" и
echo  "vcxsrv.exe", и закомментировать все строки, содержащие "x410".
echo ============================================================================================
rem start "" /B "c:\wsl\vcxsrv\config.xlaunch" > nul
start "" /B x410.exe /wm /public > nul
start "" /B "c:\wsl\pulseaudio-1.1\bin\pulseaudio.exe" --use-pid-file=false -D > nul
c:\wsl\Ubuntu-20.04\Ubuntu2004.exe run "if [ -z \"$(pidof plasmashell)\" ]; then cd ~ ; export DISPLAY=$(awk '/nameserver / {print $2; exit}' /etc/resolv.conf 2>/dev/null):0 ; setxkbmap us,ru -option grp:ctrl_shift_toggle ; export LIBGL_ALWAYS_INDIRECT=1 ; export PULSE_SERVER=tcp:$(grep nameserver /etc/resolv.conf | awk '{print $2}') ; sudo /etc/init.d/dbus start &> /dev/null ; sudo service ssh start ; sudo service xrdp start ; plasmashell ; pkill '(gpg|ssh)-agent' ; fi;"
rem taskkill.exe /F /T /IM vcxsrv.exe > nul
taskkill.exe /F /T /IM x410.exe > nul
taskkill.exe /F /IM pulseaudio.exe > nul
Файл Start-Ubuntu-20.04-terminal.bat — запуск графического терминала без рабочего стола KDE Plasma.
@echo off
echo ===================================== Внимание! ============================================
echo  Для корректной работы GUI Ubuntu 20.04 в WSL2 необходимо использовать X Server.
echo  Примечание: в случае использования VcXsrv Windows X Server необходимо раскомментировать
echo  строки в файле Start-Ubuntu-20.04-plasma-desktop.bat, содержащие "config.xlaunch" и
echo  "vcxsrv.exe", и закомментировать все строки, содержащие "x410".
echo ============================================================================================
rem start "" /B "c:\wsl\vcxsrv\config.xlaunch" > nul
start "" /B x410.exe /wm /public > nul
start "" /B "c:\wsl\pulseaudio-1.1\bin\pulseaudio.exe" --use-pid-file=false -D > nul
c:\wsl\Ubuntu-20.04\Ubuntu2004.exe run "cd ~ ; export DISPLAY=$(awk '/nameserver / {print $2; exit}' /etc/resolv.conf 2>/dev/null):0 ; export LIBGL_ALWAYS_INDIRECT=1 ; setxkbmap us,ru -option grp:ctrl_shift_toggle ; export PULSE_SERVER=tcp:$(grep nameserver /etc/resolv.conf | awk '{print $2}') ; sudo /etc/init.d/dbus start &> /dev/null ; sudo service ssh start ; sudo service xrdp start ; konsole ; pkill '(gpg|ssh)-agent' ;"
taskkill.exe /F /T /IM x410.exe > nul
rem taskkill.exe /F /T /IM vcxsrv.exe > nul
taskkill.exe /F /IM pulseaudio.exe > nul
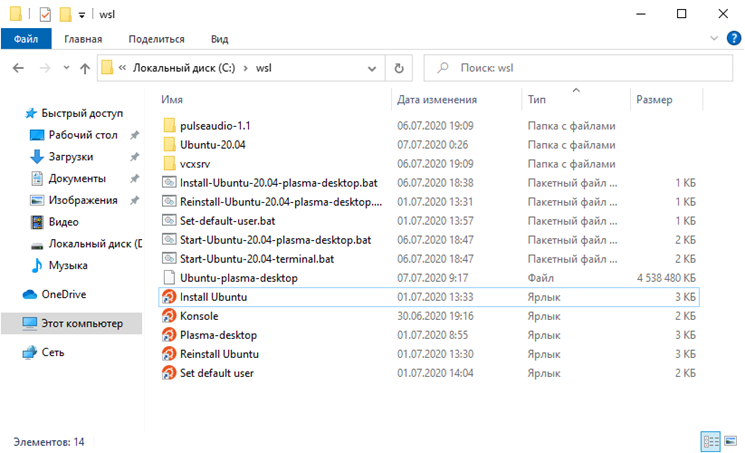
Также для удобства использования в каталоге \wsl подготавливаем ярлыки, указывающие на соответствующие bat-файлы. После чего содержимое каталога \wsl выглядит следующим образом:
Запуск рабочего стола KDE Plasma
Проверяем, что все подготовительные действия выполнены, пробуем запустить ярлык Plasma-desktop. Появляется запрос пароля, вводим пароль для учетной записи и… окно закрывается. В первый раз это нормально. Пробуем еще раз — и видим знакомую панель задач KDE Plasma. Настраиваем требуем внешний вид панели задач, на примере для удобства использования панель переносится в правую часть экрана и центрируется. Проверяем настройки локализации, при необходимости добавляем русский язык:

При необходимости выносим ярлыки для установленных linux-приложений на панель задач KDE Plasma.
Если Ubuntu 20.04 требует выйти из учетной записи пользователя для применения изменений в настройках, или Вам необходимо перезагрузить ОС, для этого в Windows Terminal введите команду:
wsl -d Ubuntu20.04 --shutdown
С помощью ярлыка Plasma-desktop или Konsole можно запустить GUI KDE Plasma Ubuntu 20.04. Например, установим с помощью Konsole графический редактор GIMP:

После окончания установки запускаем из Konsole графический редактор GIMP:

GIMP работает, что и требовалось проверить.
А вот как работают различные linux-приложения в KDE Plasma в WSL2:

настроенная панель задач KDE Plasma находится в правой части экрана. а видео в окне Firefox воспроизводится со звуком.


При необходимости можно настроить доступ к Ubuntu20.04 по SSH и RDP, для этого необходимо установить соответствующие службы командой:
sudo apt install ssh xrdp -y
примечание: для включения парольного доступа по SSH необходимо отредактировать файл /etc/ssh/sshd_config, а именно параметр PasswordAuthentication no необходимо установить в значение PasswordAuthentication yes, сохранить изменения и перезагрузить Ubuntu20.04.
При каждом запуске Ubuntu20.04 меняется внутренний ip-адрес, перед настройкой удаленного доступа необходимо уточнить текущий ip-адрес с помощью команды ip a:
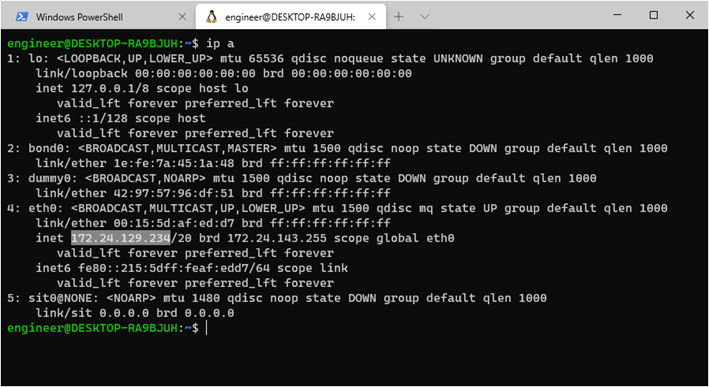
Соответственно, этот ip-адрес необходимо внести в настройки сессий SSH и RDP перед запуском.
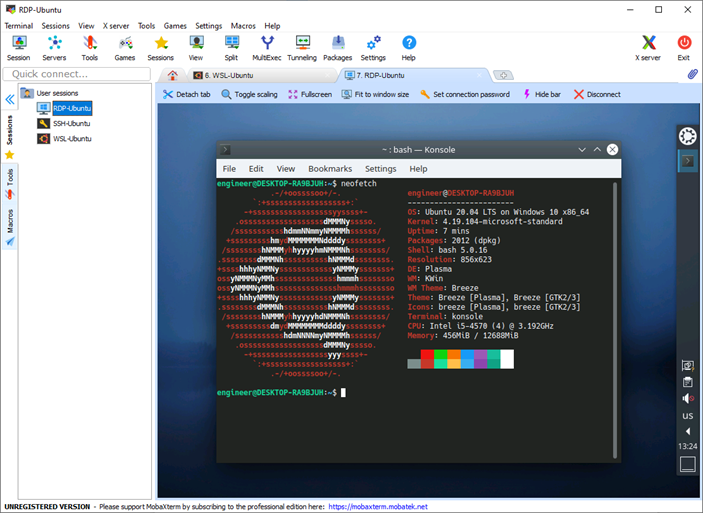
Вот так выглядит удаленный доступ по SSH с помощью MobaXterm:

А вот так выглядит удаленный доступ по RDP:
Использование X-сервера vcxsrv вместо x410
Запускаем и настраиваем vcxsrv, внимательно устанавливаем соответствующие флажки:
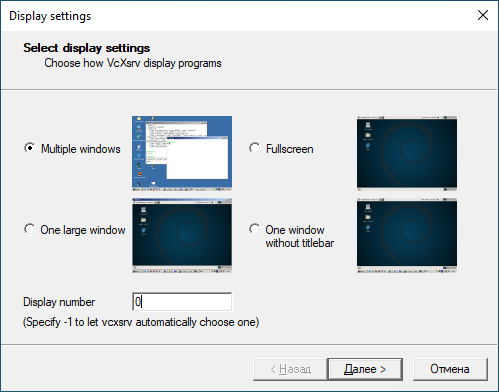

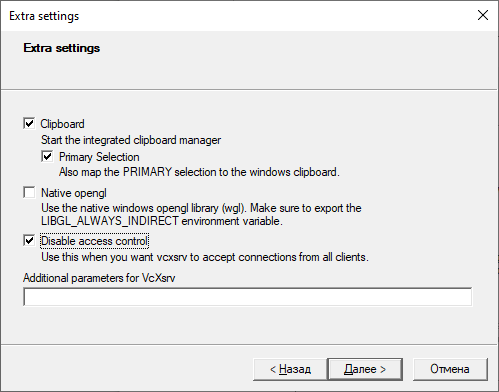

Сохраняем настроенную конфигурацию в каталоге \wsl\vcxsrv со стандартным именем config.xlaunch.
Редактируем bat-файлы Start-Ubuntu-20.04-plasma-desktop.bat и Start-Ubuntu-20.04-terminal.bat в соответствии с имеющимися в них инструкциями.
Запускаем ярлык Plasma-desktop, и вот что получаем:

Рабочий стол KDE Plasma полностью закрывает рабочий стол Windows, для переключения между окнами linux- и windows-приложений используем известную комбинацию клавиш Alt+Tab, что не совсем удобно.
Кроме того, выяснилась неприятная особенность X-сервера vcxsrv – он «падает» при запуске некоторых приложений, в частности того же GIMP или LibreOffice Writer. Возможно следует подождать, когда разработчики уберут замеченные «баги», но это не точно… Так что для получения приемлемых результатов лучше использовать X Server Microsoft x410.
Заключение
Все-таки надо отдать должное компании Microsoft, продукт WSL2 получился вполне рабочим, и на мой неискушенный взгляд — весьма удачным. И насколько мне известно, разработчики продолжают усиленно его «допиливать», и возможно — через годик-другой, данная подсистема предстанет во всей своей функциональной полноте.
Welcome to WSLg
WSLg is short for Windows Subsystem for Linux GUI and the purpose of the project is to enable support for running Linux GUI applications (X11 and Wayland) on Windows in a fully integrated desktop experience.
WSLg provides an integrated experience for developers, scientists or enthusiasts that prefer or need to run Windows on their PC but also need the ability to run tools or applications which works best, or exclusively, in a Linux environment. While users can accomplish this today using a multiple system setup, with individual PC dedicated to Windows and Linux, virtual machine hosting either Windows or Linux, or an XServer running on Windows and projected into WSL, WSLg provides a more integrated, user friendly and productive alternative.
WSLg strives to make Linux GUI applications feel native and natural to use on Windows. From integration into the Start Menu for launch to appearing in the task bar, alt-tab experience to enabling cut/paste across Windows and Linux applications, WSLg enables a seamless desktop experience and workflow leveraging Windows and Linux applications.

Installing WSLg
Pre-requisites
-
WSLg is supported on both Windows 11 and Windows 10. Windows 10 users must ensure their Windows 10 installation is fully up to date by visiting Windows Update and installing all available updates.
-
WSLg is available both as part of the Windows 11 WSL inbox support as well as through the Windows Subsystem for Linux from the Microsoft Store. It is highly recommended to use the Microsoft Store version of WSL, which supports both Windows 10 and Windows 11, and contains the most up to date version of WSL and WSLg.
-
Make sure to update your graphics driver to the latest driver available from your GPU manufacturer’s website to benefit from GPU acceleration in your WSL environment.
Install instructions (Fresh Install — no prior WSL installation)
From a command prompt with administrator privileges, run the command wsl --install -d Ubuntu, then reboot if prompted.
After reboot the installation will continue. You’ll be asked to enter a username and password. These will be your Linux credentials, they can be anything you want and don’t have to match your Windows credentials.
Voilà! WSL and WSLg are installed and ready to be used!
Install instructions (Existing WSL install)
If you have an existing WSL installation without WSLg and want to update to the latest version of WSL which includes WSLg, run the command wsl --update from an elevated command prompt.
Please note that WSLg is only compatible with WSL 2 and will not work for WSL distribution configured to work in WSL 1 mode. Verify that your Linux distro is configured for running in WSL 2 mode, if not switch to WSL 2. While you can continue to run Linux distro in WSL 1 mode after installing WSLg if you so desired, a distro configured to run in WSL 1 mode will not be able to communicate with WSLg and will not be able to run GUI applications.
You can list your currently installed distro and the version of WSL they are configured for using the following command from an elevated command prompt.
If running in version 1 mode, switch to version 2. This can take a while.
wsl --set-version _distro_name_ 2
Restart WSL by running this command from an elevated command prompt, make sure to save any pending work first:
Updating WSL + WSLg
To update to the latest version of WSL and WSLg released for preview, simply run wsl --update from an elevated command prompt or powershell.
You’ll need to restart WSL for the changes to take effect. You can restart WSL by running wsl --shutdown from an elevated command prompt. If WSL was currently running, it will shutdown, make sure to first save any in progress work! WSL will be automatically restarted the next time you launch a WSL application or terminal.
First Launch
If you have installed the Ubuntu Linux distro per these instructions, you’ll find an Ubuntu icon in your start menu, launch it. This will launch the WSL 2 VM, launch the Ubuntu WSL distro in that VM and give you a terminal to interact with it. Voilà! You’re running Linux on Windows!
If you would like to explore additional Linux distributions built for WSL, you can use the wsl --list --online command from an elevated command prompt to enumerate the list of available distributions for your system. You can have multiple Linux distributions installed within WSL and they will happily coexist side-by-side, so don’t be scared to experiment and try things out.
Congrats you are done and ready to use GUI apps!
Install and run GUI apps
If you want to get started with some GUI apps, you can run the following commands from your Linux terminal to download and install some popular applications. If you are using a different distribution than Ubuntu, it may be using a different package manager.
## Update list of available packages
sudo apt update

## Gedit
sudo apt install gedit -y

## GIMP
sudo apt install gimp -y

## Nautilus
sudo apt install nautilus -y

## VLC
sudo apt install vlc -y

## X11 apps
sudo apt install x11-apps -y

## Google Chrome
cd /tmp
sudo wget https://dl.google.com/linux/direct/google-chrome-stable_current_amd64.deb
sudo dpkg -i google-chrome-stable_current_amd64.deb
sudo apt install --fix-broken -y
sudo dpkg -i google-chrome-stable_current_amd64.deb

## Microsoft Teams
cd /tmp
sudo curl -L -o "./teams.deb" "https://teams.microsoft.com/downloads/desktopurl?env=production&plat=linux&arch=x64&download=true&linuxArchiveType=deb"
sudo apt install ./teams.deb -y

## Microsoft Edge Dev Browser
sudo curl https://packages.microsoft.com/repos/edge/pool/main/m/microsoft-edge-dev/microsoft-edge-dev_118.0.2060.1-1_amd64.deb -o /tmp/edge.deb
sudo apt install /tmp/edge.deb -y
Once these applications are installed, you’ll find them in your start menu under the distro name. For example Ubuntu -> Microsoft Edge. You can also launch these from your terminal window using the commands:
xcalc,xclock,xeyesgimpgedit ~/.bashrcnautilusvlcgoogle-chrometeamsmicrosoft-edge
WSLg Architecture Overview

User Distro
The user distro is essentially the WSL distribution you are using for your Linux work. You can use the command wsl --list --online from an elevated Windows command prompt to list the WSL distributions available on your system. You can run multiple user distros side-by-side and they will peacefully coexist, so don’t be afraid of trying out new distro. Each user distro will be paired with a unique instance of the system distro, but you can still interact across GUI applications running in different user distro seamlessly, such as cut/paste between them. The underlying containerization of the various userspace should be invisible to you.
All user and system distros for a particular Windows user run within the same WSL virtual machine against a single instance of the Linux kernel. Different Windows users on a PC have their own VM and instance of WSL. Your Linux environment is guaranteed to always be your own and not shared with other Windows users on the same PC.
WSLg System Distro
The system distro is where all of the magic happens. The system distro is a containerized Linux environment where the WSLg XServer, Wayland server and Pulse Audio server are running. Communication socket for each of these servers are projected into the user distro so client applications can connect to them. We preconfigure the user distro environment variables DISPLAY, WAYLAND_DISPLAY and PULSE_SERVER to refer these servers by default so WSLg lights up out of the box.
Users wanting to use different servers than the one provided by WSLg can change these environment variables. User can also choose to turn off the system distro entirely by adding the following entry in their .wslconfig file (located at c:\users\MyUser\.wslconfig). This will turn off support for GUI applications in WSL.
[wsl2]
guiApplications=false
The system distro is based on the Microsoft CBL-Mariner Linux. This is a minimal Linux environment, just enough to run the various pieces of WSLg. For details on how to build and deploy a private system distro please see our build instructions.
Every WSL 2 user distro is paired with its own instance of the system distro. The system distro runs partially isolated from the user distro to which it is paired, in its own NS/PID/UTS namespace but shares other namespaces such as IPC, to allow for shared memory optimization across the boundary.
While a user can get a terminal into the system distro, the system distro is not meant to be used directly by users. Every instance of the system distro is loaded read-only from its backing VHD. Any modifications, made to the in-memory instance of the system distro (such as installing new packages or creating a new file), are effectively discarded when WSL is restarted. The reason we do this is to enable a servicing model for the system distro where we replace the old one with the new one without having to worry about migrating any user data contained within. We use a read-only mapping such that the user gets a well known discard behavior on any changes, every time WSL is restarted, instead of getting a surprise when WSL is serviced.
Although the Microsoft published WSLg system distro as read-only, we do want to encourage folks to tinker with it and experiment. Although we expect very few folks to actually need or want to do that, we’ve shared detailed instruction on our contributing page on how to both build and deploy a private version of the system distro. Most users who just want to use GUI applications in WSL don’t need to worry about those details.
WSLGd
WSLGd is the first process to launch after init. WSLGd launches Weston (with XWayland), PulseAudio and establishes the RDP connection by launching mstsc.exe on the host in silent mode. The RDP connection will remain active and ready to show a new GUI applications being launch on a moment’s notice, without any connection establishment delays. WSLGd then monitors these processes and if they exit by error (say as a result of a crash), it automatically restarts them.
Weston
Weston is the Wayland project reference compositor and the heart of WSLg. For WSLg, we’ve extended the existing RDP backend of libweston to teach it how to remote applications rather than monitor/desktop. We’ve also added various functionality to it, such as support for multi-monitor, cut/paste, audio in/out, etc…
The application integration is achieved through an RDP technology called RAIL (Remote Application Integrated Locally) and VAIL (Virtualized Application Integrated Locally). The main difference between RAIL and VAIL is how pixels are transported across from the RDP server to the RDP client. In RAIL, it is assumed that the Server and Client are running on different physical systems communicating over the network and thus pixels need to be copied over the RDP transport. In VAIL, it is understood that the Server and Client are on the same physical system and can share memory across the Guest/Host VM boundary. We’ve added support for both RAIL and VAIL to the libweston RDP backend, although for WSLg only the VAIL support is effectively used. While building WSLg, we first implemented RAIL while the necessary pieces enabling the switch to VAIL were being developed in parallel. We decided to keep that support in as it could reuse in other interesting scenarios outside of WSLg, for example for remoting application from a Pi running Linux. To share memory between the Linux guest and Windows host we use virtio-fs.
RAIL-Shell
Weston is modular and has various shells today, such as the desktop shell, fullscreen shell (aka kiosk), and automative shell. For WSLg we introduced a new shell called the RAIL Shell. The purpose of the RAIL Shell is to help with the remoting of individual windows from Linux to Windows, as such the shell is very simplistic and doesn’t involve any actual widgets or shell owned pixels.
FreeRDP
Weston leverages FreeRDP to implement its backend RDP Server. FreeRDP is used to encode all communications going from the RDP Server (in Weston) to the RDP Client (mstsc on Windows) according to the RDP protocol specifications. It is also used to decode all traffic coming from the RDP Client into the RDP server.
Pulse Audio Plugin
For audio in (microphone) and out (speakers/headphone) WSLg runs a PulseAudio server. WSLg uses a sink plugin for audio out, and a source plugin for audio in. These plugins effectively transfer audio samples between the PulseServer and the Weston RDP Server. The audio streams are merged by the Weston RDP Server onto the RDP transport, effectively enabling audio in/out in the Weston RDP backend across all scenarios (Desktop/RAIL/VAIL style remoting), including WSLg.
WSL Dynamic Virtual Channel Plugin (WSLDVCPlugin)
WSLg makes use of a custom RDP virtual channel between the Weston RDP Server and the mstsc RDP Client running on the Windows host. This channel is used by Weston to enumerate all Linux GUI applications (i.e. applications which have a desktop file entry of type gui) along with their launch command line and icon. The open source WSLDVCPlugin processes the list of Linux GUI applications sent over this channel and creates links for them in the Windows start menu.
OpenGL accelerated rendering in WSLg
While WSLg works with or without virtual GPU support, if you intend to run graphics intensive applications such as Blender or Gazebo, it is best to be running on a system with a GPU and driver that can support WSL. An overview of our vGPU architecture and how we make it possible for Linux applications to access the GPU in WSL is available at our DirectX blog.
Support for OpenGL accelerated rendering is made possible through the work our D3D team has done with Collabora and the Mesa community on creating a d3d12 Gallium driver.
Support for Linux, including support for WSLg, has been upstream and part of the Mesa 21.0 release. To take advantage of this acceleration, you’ll need to update the version of Mesa installed in your user distro. It also requires that your distro vendor chose to build and publish the new d3d12 Gallium driver to their package repository. We’re working with the various WSL distro publishers to inform them of these changes.
Please note that for the first release of WSLg, vGPU interops with the Weston compositor through system memory. If running on a discrete GPU, this effectively means that the rendered data is copied from VRAM to system memory before being presented to the compositor within WSLg, and uploaded onto the GPU again on the Windows side. As a result, there is a performance penalty proportionate to the presentation rate. At very high frame rates such as 600fps on a discrete GPU, that overhead can be as high as 50%. At lower frame rate or on integrated GPU, performance much closer to native can be achieved depending on the workload. Using a vGPU still provides a very significant performance and experience improvement over using a software renderer despite this v1 limitation.
WSLg Code Flow
WSLg builds on the great work of the Linux community and makes use of a large number of open source projects. Most components are used as-is from their upstream version and didn’t require any changes to light up in WSLg. Some components at the heart of WSLg, in particular Weston, FreeRDP and PulseAudio, required changes to enable the rich WSLg integration. These changes aren’t yet upstream. Microsoft is working with the community to share these contributions back with each project such that, over time, WSLg can be built from upstream component directly, without the need for any WSLg specific modifications.
All of these in-flight contributions are kept in Microsoft mirror repos. We keep these mirrors up to date with upstream releases and stage our WSLg changes in those repos. WSLg pulls and builds code from these mirror repos as part of our Insider WSLg Preview releases. These mirrors are public and accessible to everyone. Curious developers can take a peek at early stages of our contribution by looking at code in those mirrors, keeping in mind that the final version of the code will likely look different once the contribution reaches the upstream project and is adapted based on the feedback receives by the various project owners. All of our mirrors follow the same model. There is a main branch which correspond to the upstream branch at our last synchronization point. We update the main branch from time to time to pick update from the upstream project. There is also a working branch that contains all of our in-flight changes. WSLg is built using the working branch from each of the mirror projects.
The projects that WSLg maintains mirrors for will change over time as in-flight contributions evolve. Once some contributions are upstream, it may no longer be necessary to maintain a mirror, at which point it will be removed and WSLg will start to leverage the upstream version of the component directly. As we light up new functionality in WSLg, new mirrors may be introduced to stage contributions to new components. As such, expect the list of mirrors to change overtime.
At this point in time, we have the following project mirrors for currently in-flight contributions.
| Project | Upstream Repo | WSLg Mirror |
|---|---|---|
| Weston | https://github.com/wayland-project/weston | https://github.com/microsoft/Weston-mirror |
| FreeRDP | https://github.com/FreeRDP/FreeRDP | https://github.com/microsoft/FreeRDP-mirror |
| PulseAudio | https://github.com/pulseaudio/pulseaudio | https://github.com/microsoft/PulseAudio-mirror |
The following is a high level overview of the currently in-flight contributions to each project contained within these mirrors.
Weston
WSLg leverages Weston as the Wayland compositor bridging the Linux and Windows worlds using RDP technology to remote application content between them. Weston already had an RDP backend, but it was limited to single-monitor-desktop remoting. We’ve greatly enhanced that RDP backend to include advanced functionality, such as multi-monitor support, clipboard integration for copy/paste, and audio in/out. We’ve enabled new remoting modes called RAIL (Remote Application Integrated Locally) and VAIL (Virtualized Application Integrated Locally), where individual applications, rather than desktops/monitors, are remoted. These changes are not specific to WSLg; they add functionality to the existing RDP backend and are reusable in other scenarios as well (i.e. using the new Weston RDP backend to remote application running on a Raspberry Pi to another device running an RDP client).
To enable rich integration in WSLg, we’ve also added a small plugin to the RDP backend specific to WSLg. In Weston, the plugin is responsible for attaching to the user distro and searching for installed applications (aka the desktop file). The plugin sends the Windows host a list of all applications found along with their launch commands and icons. On the Windows host, an open source mstsc plugin part of the WSLg project uses that information to create shortcuts for these Linux applications to the Windows Start Menu.
We’ve also fixed several bugs impacting various applications. Generally, these were problems that impacted Weston in all modes and were not specific to WSLg.
FreeRDP
Weston currently uses FreeRDP for its RDP Backend. WSLg continues to leverage FreeRDP and we have added support for a new RDP Protocol/Channel to enable VAIL optimized scenario as well as support for the WSLg plugin. We’ve also fixed various bugs that were impacting interops with mstsc or causing instability.
PulseAudio
For PulseAudio, our contributions focused on a sink and a source plugin that shuffle audio data between PulseAudio and the Weston RDP backend such that the audio data can be integrated over the RDP connection back to the host. There are no changes to the core of PulseAudio outside of adding these new plugins.
Contributing
If you would like to tinker with or contribute to WSLg, please see our CONTRIBUTING page for details, including how to build and run private a version of WSLg.
Reporting a non-security issues
For non-security related issues, such as reporting a bug or making a suggestion for a new feature, please use this project’s issues tracker.
Reporting security issues
To report security issues with WSLg or any other Microsoft products, please follow the instructions detailed here.
Trademarks
This project may contain trademarks or logos for projects, products, or services. Authorized use of Microsoft trademarks or logos is subject to and must follow Microsoft’s Trademark & Brand Guidelines. Use of Microsoft trademarks or logos in modified versions of this project must not cause confusion or imply Microsoft sponsorship. Any use of third-party trademarks or logos are subject to those third-party’s policies.
When Microsoft released WSL first, it was revolutionary as it allowed to run Linux commands on Windows.
A few years later, Microsoft took it to the next level by releasing WSL 2. The new version of WSL allowed running GUI Linux apps on Windows.
It’s not that Windows has a dearth of GUI apps. But when working in the Linux environment inside WSL, using the GUI apps could come in handy.
For example, you have to edit a config file and are uncomfortable with the command line text editors like Nano. You use Gedit GUI text editor to make the changes. It simplifies the life of Windows users who have to use Linux for their work.
Wondering how to run Linux GUI apps on Windows? There are the main steps for that:
- Enable WSL 2 and install a Linux distribution with it
- Install appropriate graphics driver for WSL
- Install and use GUI Linux apps
Let’s see about the steps in detail.
Requirements
As stated above, running Linux GUI applications is not available for all Windows versions. To do this, your system should be:
- For x64 systems: Version 1903 or later, with Build 18362 or later.
- For ARM64 systems: Version 2004 or later, with Build 19041 or later.
- The installed Linux distribution should use WSL2
Remember that, the requirements above are solely for running Linux GUI apps. WSL is supported for some of the Windows 10 versions also. Please refer to the dedicated article detailing how to install WSL in Windows for more about WSL and its uses.
Step1: Installing Linux Distribution with WSL 2
This is a lot easier on Windows 11 which comes with built-in support for WSL 2.
On Windows 11
You can use the Microsoft Store but I find it easier to use the command line.
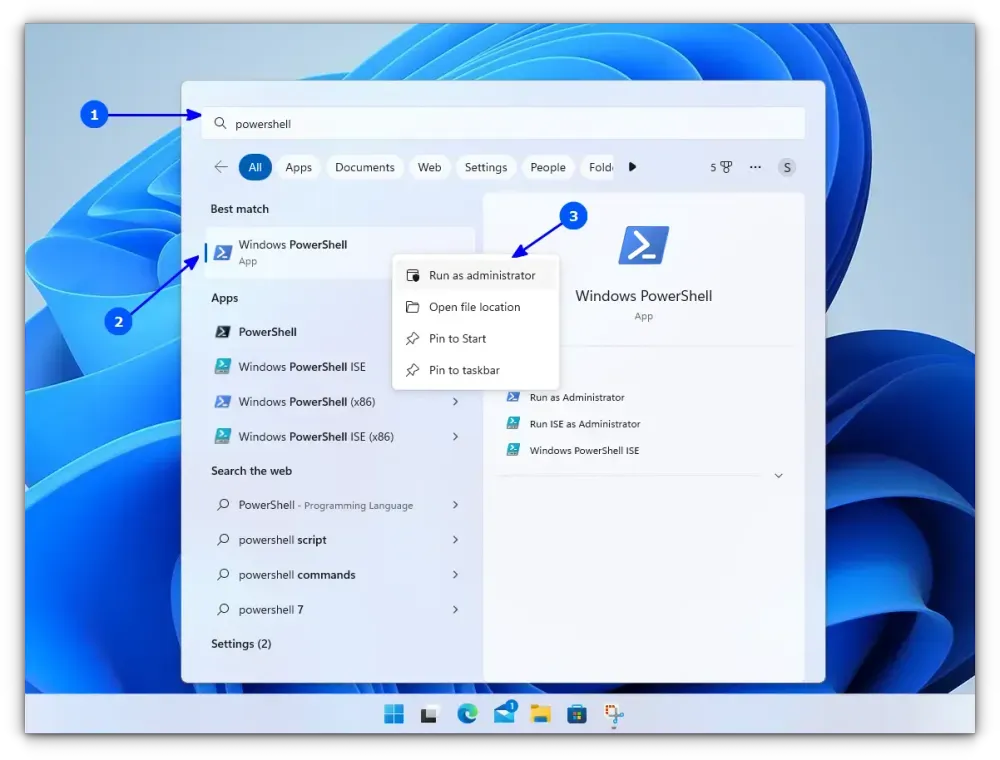
You need to open PowerShell with admin privileges. For this, search for Powershell in the start menu, right-click on Powershell and select Run as Administrator.
Enter the following command to install WSL.
wsl --installBy default, Ubuntu will be installed as the Linux distribution. If you want to install any other distribution, use the command below:
wsl --list --onlineThis will list all the available Linux distributions. Once you decide on the distribution, use the below command to install it.
wsl --install <Distribution Name>Once finished downloading and installing, you need to reboot to apply the changes.
On Windows 10
This is a bit complicated and takes some time and effort to run WSL version 2 on Windows 10.
Ensure that the Windows Subsystem for Linux feature is turned on. Execute the following command in Powershell with admin rights:
dism.exe /online /enable-feature /featurename:Microsoft-Windows-Subsystem-Linux /all /norestartReboot the device once the command is completed.
After this, you need to enable the Virtual Machine Platform feature. Open the Powershell with admin privileges and enter the following command:
dism.exe /online /enable-feature /featurename:VirtualMachinePlatform /all /norestartOnce again, restart the device to complete the WSL install and update to WSL 2.
Now, download the Linux Kernel Update Package for x64 machines from the official website. If you are using ARM64 devices, use this link to download the latest kernel update package.
If you are not sure about the device architecture, enter the command below in Powershell to get the type:
systeminfo | find "System Type"When the file is downloaded, double-click on it and finish the installation of the Kernel update package. Now, open PowerShell and run this command to set WSL 2 as the default version when installing a new Linux distribution:
wsl --set-default-version 2Once WSL2 is set as the default version, you can now install the Linux distribution of your choice.
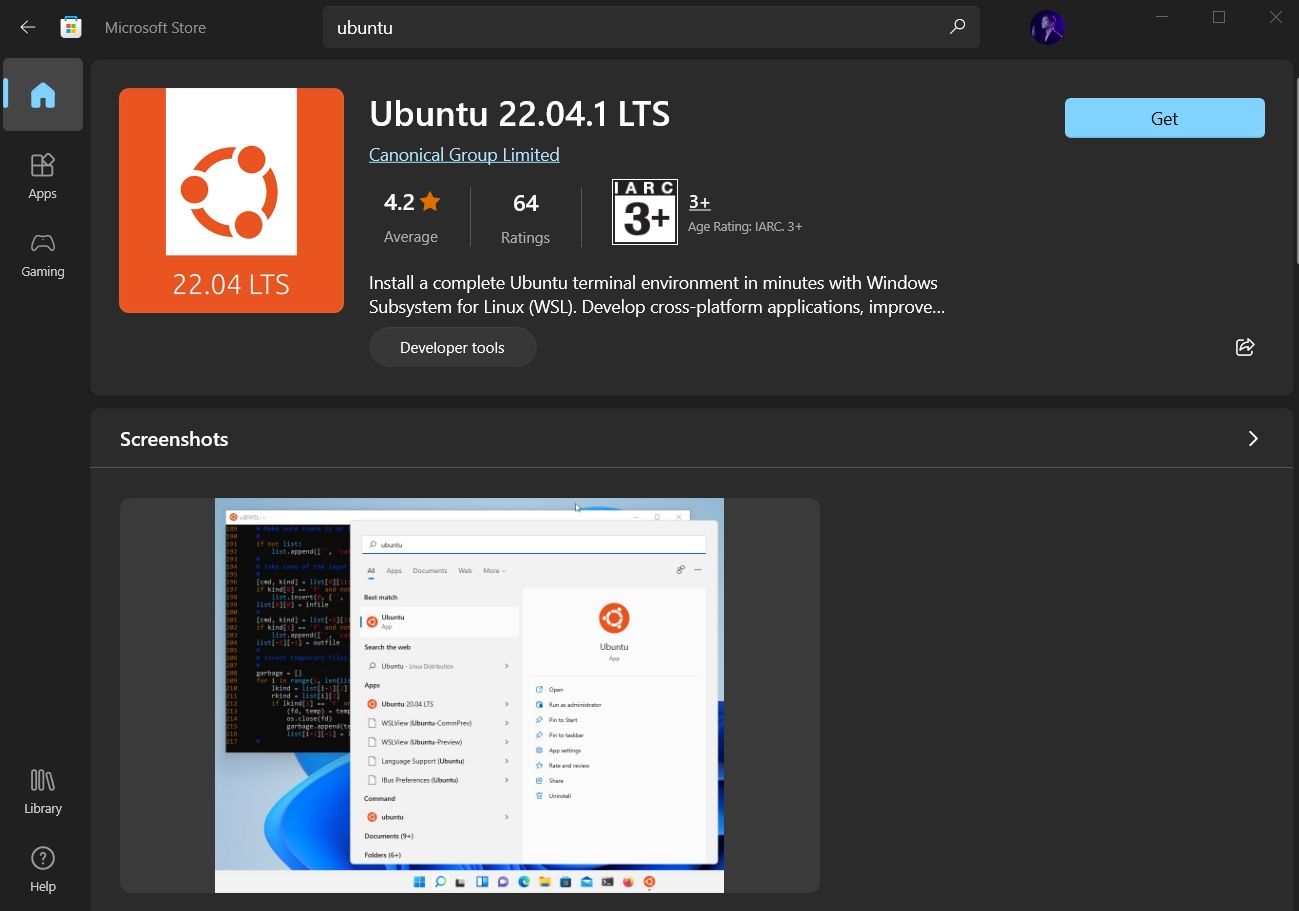
Go to Windows Store and install Ubuntu.
🛠️ Configure the newly installed Ubuntu
Whether you installed WSL and Ubuntu using the Microsoft Store or the command line, you need to configure it.
Here’s how it is done:
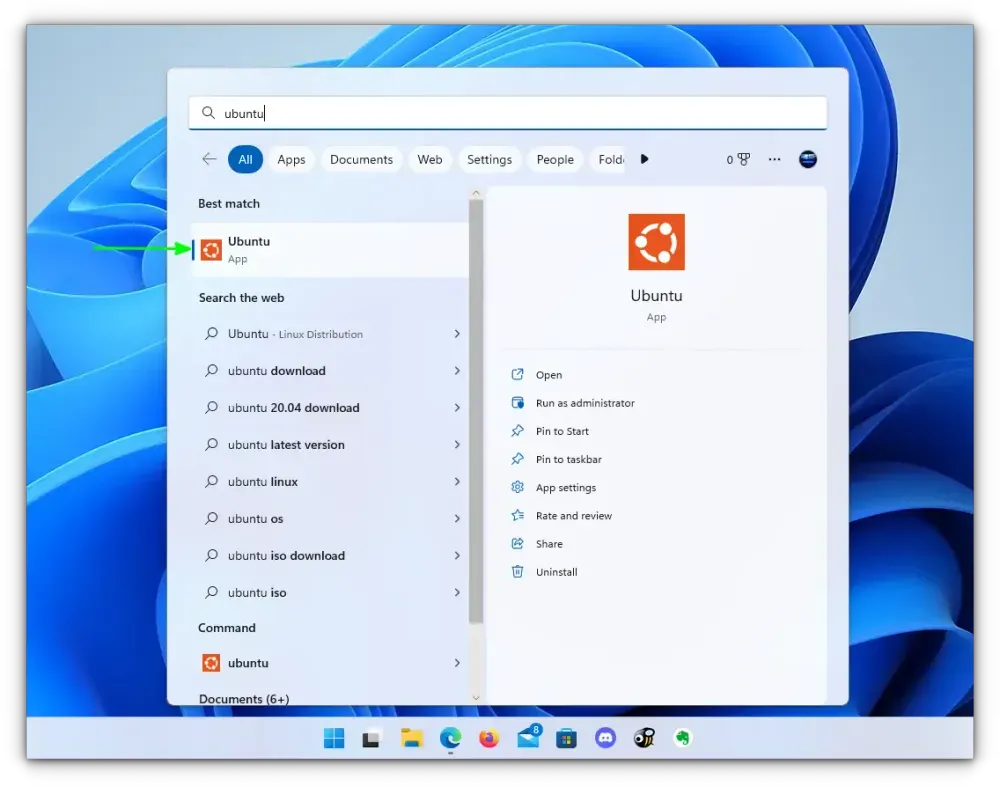
Once you rebooted after installing Ubuntu, search for Ubuntu in Start Menu and open it.
It will ask you to enter a UNIX Username and Password. Enter these details and press enter key.
You will now be inside the terminal window of Ubuntu.
Once logged in, you need to update the installed Ubuntu. For this, enter the following commands one by one:
sudo apt update
sudo apt full-upgrade
After completing the update, you are good to go with Ubuntu in WSL.
Step 2: Installing GUI Applications
Once you are all set with the Linux distribution inside WSL, now is the time to install the Linux GUI application. It is done in two parts as described below.
Download and Install Graphics drivers
To run GUI apps, you need to install appropriate graphics drivers. You can use the following link to download the drivers according to your provider.
- Intel GPU Driver for WSL
- AMD GPU Driver for WSL
- NVIDIA GPU Driver for WSL
Once installed, you are all done.
Install some GUI Apps
Now, go to your Ubuntu app and install any GUI app using the APT package manager. You should note that running apps from other sources like flatpak are problematic within WSL.
For this article, I installed the Gedit text editor using the following command:
sudo apt install gedit -yThis will install several MB of packages including required libraries. Once completed, you can run the following command to start the GUI Gedit app in Windows:
gedit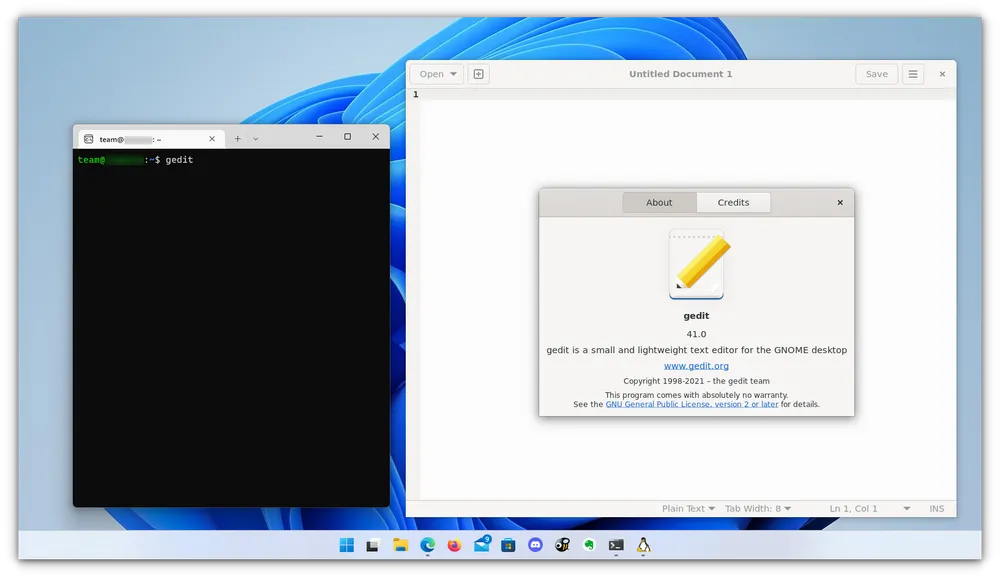
Similarly, you can install all the popular applications available to Linux, including Nautilus file manager, GIMP, etc. You can refer to the official documentation for more about running GUI applications in WSL.
Wrapping Up
With WSL, Microsoft has provided a comfortable way of using Linux within Windows. It keeps on improving with each major version. Running GUI Linux apps on Windows feature is proof of the same.
As you can see, it is rather simple to use WSL 2 on Windows 11. Running it on Windows 10 takes some effort.
I hope you find this tutorial helpful. Let me know if you face any difficulties.