WSABuilds 

MagiskOnWSA (For Windows™ 10 and 11) 
Windows Subsystem For Android™ (WSA) with Google Play Services and (or) Magisk
Downloads
WSABuilds Builds Status (⚠️❗IMPORTANT: Read Before Downloading❗⚠️)
Builds Status and Stability
Known Issues that may affect your WSA experiences:
- GApps Issues : LSPosed/MagiskOnWSALocal#595
- Folder Issue : Long folder name for the WSA Folder (auto generated by the MagiskOnWSALocal script) may cause WSA to not start. Rename the folder to
WSAafter extracting and before installing WSA. - Installed Magisk Modules disappear after install and subsequent reboot (WSA v2307): #154
| WSA Version: | ||
|---|---|---|
| v2210.40000.7.0 | ✅ | ✅ |
| v2211.40000.10.0 | ✅ | ✅ |
| v2211.40000.11.0 | ✅ | ✅ |
| v2301.40000.4.0 | ✅ | ✅ |
| v2301.40000.7.0 | ✅ | ✅ |
| v2302.40000.6.0 | ✅ | ✅ |
| v2302.40000.8.0 | ✅ | ✅ |
| v2302.40000.9.0 | ✅ | ✅ |
| v2303.40000.2.0 | ✅ | ✅ |
| v2303.40000.3.0 | ✅ | ✅ |
| v2303.40000.4.0 | ✅ | ✅ |
| v2303.40000.5.0 | ✅ | ✅ |
| v2304.40000.5.0 | ⚠️ | ⛔ |
| v2304.40000.6.0 | ⚠️ | ⛔ |
| v2304.40000.7.0 | ✅ | ⛔ |
| v2304.40000.10.0 | ✅ | ⛔ |
| v2305.40000.2.0 | ✅ | ⛔ |
| v2305.40000.3.0 | ✅ | ✅ |
| v2305.40000.4.0 | ✅ | ✅ |
| v2305.40000.5.0 | ✅ | ✅ |
| v2305.40000.6.0 | ✅ | ✅ |
| v2306.40000.1.0 | ✅ | ✅ |
| v2306.40000.2.0 | ✅ | ✅ |
| v2306.40000.3.0 | ✅ | ✅ |
| v2306.40000.4.0 | ✅ | ✅ |
| v2307.40000.2.0 | ✅ | ✅ |
| v2307.40000.3.0 | ✅ | ✅ |
| v2307.40000.5.0 | ✅ | ✅ |
| v2307.40000.6.0 | ✅ | ✅ |
| v2308.40000.1.0 | ✅ | ✅ |
| v2308.40000.2.0 | Update Skipped to allow time for adjusting the Docs and the build script (MagiskOnWSALocal). Sorry for any Inconvenence. Updates will resume as normal after this. |
|
| v2308.40000.3.0 | ✅ | ✅ |
| v2309.40000.2.0 | ➖ | ➖ |
| Indicator Keys | |||
|---|---|---|---|
| ✅ | Stable | Everything works as intended. If you think that the build is not stable, please open a GitHub Issue or report the issue in our Discord |
|
| ⚠️ | Unstable | Experience may not be smooth due to known bugs or issues | Click on the Emoji for more information |
| ⛔ | Not Working | Build is not working. DO NOT DOWNLOAD! | Click on the Emoji for more information |
| ➖ | No Information Yet | Not enough information to confirm status. Please join the Discord and confirm whether or not the builds are working. |
| Download Variant | ||
|---|---|---|
| Differences: | Follows the «WSA Preview Program Channel» | Follows the «WSA Retail» or «Insider Fast Channel» |
| Builds are generally newer than the «WSA Retail» and «Insider Fast Channel» | Builds are generally more stable than the builds in the «WSA Preview Program Channel» | |
| Current Version: | 2309.40000.2.0 | 2308.40000.3.0 |
| Release Date: | Builds Released: 27/09/2023 | Builds Released: 19/09/2023 |
| Update Frequency: | Multiple Updates Every Month | One Update Every Month |
It is recommend to check this table regularly to see if there is a newer update avaliable for WSA for the Stable Builds and Pre-Release Builds |
| Operating System | Download Page | Download Mirror |
|---|---|---|
|
|
|
|
|
|
||
|
|
|
|
|
|
||
|
|
|
|
|
|
|
|
|
|
|
|
|
|
Custom Builds: |
|
|
|
|
|
Requirements
Windows Build Number |
Windows™ 11: Build 22000.526 or higher. | Windows™ 10: 22H2 10.0.19045.2311 or higher.
May work on Windows™ 10: 20H1 10.0.19041.264 or higher.1 1. You may need to install KB5014032 then install KB5022834 to use WSA on these older Windows 10 builds |
Custom/modfied Windows OS installations (such as ReviOS, Tiny 10/11 and Ghost Spectre etc.) may have issues with running WSA.
|
||
RAM |
|
|
Processor |
CPU Architecture: x86_64 or arm64 | |
| Your PC should meet the basic Windows™ 11 requirements i.e Core i3 8th Gen, Ryzen 3000, Snapdragon 8c, or above | N/A
This is a bit of a hit or miss, but it is highly recommended that your processor is listed in the supported CPU lists for Windows 11 requirements |
|
GPU |
Any compatible Intel, AMD or Nvidia GPU. GPU Performance may vary depending on its compatibility with Windows Subsystem For Android™ Users with Intel HD Graphics 530 and olderWSA may not start or graphical glitches will occur when Intel HD Graphics 530 and Older iGPUs are used. This is a known issue, but unfortunately there are no fixes that I currently know of, plus, these GPUs are too old and do not meet Windows 11 requirements and hence are not official supported. Follow this guide to switch to another iGPU/dGPU/eGPU that you may have or Microsoft Basic RendererUsers with Nvidia GPUsNvidia GPUs are known to cause problems. If Windows Subsystem For Android™ does not start or there are graphical glitches when an Nvidia GPU is used, follow this guide to switch to another iGPU/dGPU/eGPU that you may have or Microsoft Basic Renderer |
|
Storage |
Solid-state drive (RECOMMENDED) OR Hard Disk Drive (HDD) (NOT RECOMMENDED) |
|
| Minimum Storage Requirements: You must have at least 10GB free on the system drive (C:\) | ||
Partition |
NTFS ONLY
Windows Subsystem For Android™ can only be installed on a NTFS partition, not on an exFAT partition |
|

Windows Features Needed |
Virtual Machine Platform Enabled | |
| Windows Hypervisor Platform Enabled | ||
| These optional settings are for virtualization and provide components that are needed to run WSA. You can enable these settings by pressing the Windows Key + R on your keyboard and typing «OptionalFeatures.exe» into the box, pressing enter and selecting the features above followed by pressing apply | ||
Virtualization |
The Computer must support virtualization and be enabled in BIOS/UEFI and Optional Features.
Guide on how to enable |
Installation
Note
If you have the official Windows Subsystem For Android™ installed, you must completely uninstall it to use MagiskOnWSA.
Important
In case you want to preserve your data from the previous installation (official or MagiskOnWSA), you can backup Userdata.vhdx, located at %LOCALAPPDATA%\Packages\MicrosoftCorporationII.WindowsSubsystemForAndroid_8wekyb3d8bbwe\LocalCache\userdata.vhdx before uninstallation and restore it after installation. A guide for this process is located further down in this README.
- Go to the Releases page
- In the latest release, go to the Assets section and download the Windows Subsystem For Android™ version of your choosing (do not download «Source code»)
- Extract the .7z archive and rename the folder (that you extracted) to
WSA - Delete the .7z archive
- Move the newly extracted folder to a suitable location (Documents folder is a good choice), as you will need to keep the folder on your PC to use MagiskOnWSA
Note
If you’re updating WSA, merge the folders and replace the files for all items when asked
-
Open the Windows Subsystem For Android™ folder: Search for and double-click
Run.bat-
If you previously have a MagiskOnWSA installation, it will automatically uninstall the previous one while preserving all user data and install the new one, so don’t worry about your data.
-
If the popup windows disappear without asking administrative permission and Windows Subsystem For Android™ is not installed successfully, you should manually run Install.ps1 as administrator:
-
Press Win+x and select Windows™ Terminal (Admin)
-
Input the command below and press enter, replacing {X:\path\to\your\extracted\folder} including the {} with the path of the extracted folder
cd "{X:\path\to\your\extracted\folder}" -
Input the command below and press enter
PowerShell.exe -ExecutionPolicy Bypass -File .\Install.ps1
-
The script will run and Windows Subsystem For Android™ will be installed
-
If this workaround does not work, your PC is not supported for WSA
-
-
-
Once the installation process completes, Windows Subsystem For Android™ will launch (if this is a first-time install, a window asking for consent to diagnositic information will be shown instead. Sometimes two identical windows will show, this is fine and nothing bad happens if you click OK in both windows)
-
Click on the PowerShell window, then press any key on the keyboard, the PowerShell window should close
-
Close File Explorer
-
Enjoy
Notice (Applicable for both Windows 10 and 11):
- You can NOT delete the Windows Subsystem For Android™ installation folder.
WhatAdd-AppxPackage -Register .\AppxManifest.xmldoes is to register an appx package with some existing unpackaged files,
so you need to keep them as long as you want to use Windows Subsystem For Android™.
Check https://learn.microsoft.com/en-us/powershell/module/appx/add-appxpackage?view=windowsserver2022-ps for more details. - You need to register your Windows Subsystem For Android™ appx package before you can run Windows Subsystem For Android™.
For WSABuilds and MagiskOnWSALocal users, you need to runRun.batin the extracted dir.
If the script fails, you can take the following steps for diagnosis (admin privilege required):-
Open a PowerShell window and change working directory to your Windows Subsystem For Android™ directory.
-
Run the command below in PowerShell. This should fail with an ActivityID, which is a UUID required for the next step.
Add-AppxPackage -ForceApplicationShutdown -ForceUpdateFromAnyVersion -Register .\AppxManifest.xml
-
Run the command below in PowerShell. This should print the log of the failed operation.
Get-AppPackageLog -ActivityID <UUID>
-
Check the log for the reason of failure and fix it.
-
Updating
How do I update without losing any of my apps and data on Windows Subsystem for Android (WSA)
Important
Make sure that WSA has been turned off from the settings and that tools such has WSA-System-Control, WSA-Sideloader, WSAPacman etc are not running.
- Download the latest build (that you want to update to)
- Make sure Windows Subsystem For Android is not running (Click on «Turn off» in the WSA Settings and wait for the spinning loader to disappear)
- Using 7-Zip, WinRAR or any other tool of choice, open the .7z archive
- Within the .7z archive, open the subfolder (Example: WSA_2xxx.xxxxx.xx.x_xx_Release-Nightly-with-magisk-xxxxxxx-MindTheGapps-xx.x-RemovedAmazon)
- Select all the files that are within this subfolder and extract them to the current folder where the file for Windows Subsystem For Android (the folder you extracted, and installed WSA from) are located
- When prompted to replace folders, select «Do this for all current items» and click on «Yes»
- When prompted to replace files, click on «Replace the files in the destination»
- Run the
Run.batfile - Launch Windows Subsystem For Android Settings app and go to the
Abouttab using the sidebar - Check if the WSA version matches the latest version/ the version number that you want to update to
Join the Discord if you are having any difficulties
Uninstallation
Note
If you want to preseve your data, make a backup of the %LOCALAPPDATA%\Packages\MicrosoftCorporationII.WindowsSubsystemForAndroid_8wekyb3d8bbwe\LocalCache\userdata.vhdx file. After uninstalling, copy the VHDX file back to the %LOCALAPPDATA%\Package\MicrosoftCorporationII.WindowsSubsystemForAndroid_8wekyb3d8bbwe\LocalCache folder. For a more comprehensive and detailed guide, take a look at the Backup and Restore section in this README markdown
To remove WSA installed through WSABuild:
- 1.) Make sure that Windows Subsystem For Android™ is not running
- 2.) Search for
Windows Subsystem For Android™ Settingsusing the built-in Windows Search, or through Add and Remove Programs and press uninstall
- 3.) Delete the WSA folder that extracted you extracted and Run.bat was run from to install WSA (MagiskOnWSA folder)
- 4.) Go to
%LOCALAPPDATA%/Packages/and check if the folder:MicrosoftCorporationII.WindowsSubsystemForAndroid_8wekyb3d8bbweis still present:- If the folder is still present: Delete it
- If you get an error that states that the file(s) could not be deleted, make sure that WSA is turned off
- If the folder does not exist: Skip this step
- If the folder is still present: Delete it
To remove WSA installed from the Microsoft Store:
- 1.) Search for
Windows Subsystem For Android™ Settingsusing the built-in Windows Search, or through Add and Remove Programs and press uninstall
Backup and Restore Userdata
Backing Up Your Userdata
In order to make a backup of your WSA data you must copy the Userdata.vhdx (which includes, but is not limited Android Apps and their data, settings etc.), located at %LOCALAPPDATA%\Packages\MicrosoftCorporationII.WindowsSubsystemForAndroid_8wekyb3d8bbwe\LocalCache\userdata.vhdx, to a safe location
Restoring Your Backup
Before attempting to restore your backup, you must remove WSA if installed. Then before you run the Run.bat script (to reinstall WSA after removing it), you need to remove these lines from Install.ps1, located in the your extracted WSA folder:
The Lines (as shown below) that you need to remove in
Install.ps1may vary depending on the type of WSA Build that you are trying to install.
Android Settings:
Start-Process "wsa://com.android.settings"
Official Magisk:
Start-Process "wsa://com.topjohnwu.magisk"
Magisk Delta:
Start-Process "wsa://io.github.huskydg.magisk"
Magisk Alpha:
Start-Process "wsa://io.github.vvb2060.magisk"
Google Play Store:
Start-Process "wsa://com.android.vending"
Amazon Appstore:
Start-Process "wsa://com.amazon.venezia"
After running the script, do not run WSA at all, and go to %localappdata%\Packages and (if the folders do not exist, create them) in MicrosoftCorporationII.WindowsSubsystemForAndroid_8wekyb3d8bbwe\LocalCache\ paste the userdata.vhdx
Now run WSA and your userdata should hopefully be restored
FAQ
Help me, I am having problems with the MagiskOnWSA Builds
- Open an issue in Github or join the Discord and describe the issue with sufficent detail
Help me, I am having problems with installing Windows Subsystem For Android™ on Windows™ 10
- I am not working on the patch, and nor claim to. Open an issue in the Discord or Github, and I will try to assist you with the problem if possible. For full support visit the project homepage and open an issue there: https://github.com/cinit/WSAPatch/issues/
How do I get a logcat?
-
There are two ways:
or
-
Location in Windows —>
%LOCALAPPDATA%\Packages\MicrosoftCorporationII.WindowsSubsystemForAndroid_8wekyb3d8bbwe\LocalState\diagnostics\logcat
Can I delete the installed folder?
- No.
How can I update Windows Subsystem For Android™ to a new version?
- As Explained Installation instructions. Download the latest Windows Subsystem For Android™ Version and replace the content of your previous installation and rerun Install.ps1. Don’t worry, your data will be preserved
How do I update Magisk?
- Do the same as updating Windows Subsystem For Android™. Wait for a new MagiskOnWSA release that includes the newer Magisk version, then follow the Installation instructions to update
Can I pass SafetyNet/Play Integrity?
- No. Virtual machines like Windows Subsystem For Android™ cannot pass these mechanisms on their own due to the lack of signing by Google. Passing requires more exotic (and untested) solutions like: kdrag0n/safetynet-fix#145 (comment)
What is virtualization?
- Virtualization is required to run virtual machines like Windows Subsystem For Android™.
Run.bathelps you enable it. After rebooting, re-runRun.batto install Windows Subsystem For Android™. If it’s still not working, you have to enable virtualization in your BIOS/UEFI. Instructions vary by PC vendor, look for help online
Can I remount system partition as read-write?
- No. Windows Subsystem For Android™ is mounted as read-only by Hyper-V. You can, however, modify the system partition by creating a Magisk module, or by directly modifying the system.img file
I cannot adb connect localhost:58526
-
Make sure developer mode is enabled. If the issue persists, check the IP address of Windows Subsystem For Android™ on the Settings —> Developer page and try
Magisk online module list is empty?
-
Magisk actively removes the online module repository. You can install the module locally or by
Step 1
adb push module.zip /data/local/tmpStep 2
adb shell su -c magisk --install-module /data/local/tmp/module.zip
How do I uninstall Magisk?
- Request, using Issues, a Windows Subsystem For Android™ version that doesn’t include Magisk from the Releases page. Then follow the Installation instructions
Can I switch between OpenGApps and MindTheGapps?
- No. GApps will no longer function. Do a complete uninstallation before switching
How do I install custom Magisk or GApps?
- To request a build with custom Magisk or GApps, feel free to open an issue in the Issues page You can also achieve this by using the MagiskOnWSALocal Script and following the provided instructions located in the repo.
Usage Guides
GPU Guide:
Sideload Guide/Installing an APK:
Moving WSA to another drive or partition:
Installing KernelSU
Installing BusyBox
Localhost Loopback Guide
Having Issues?
Common Issues:
Custom Builds Requests
❓Want to request a prebuilt custom build❓
If you can’t find the build that you are looking for, I will be happy to fufill any custom build requests.
Open an issue in the [Issues page](https://github.com/MustardChef/WSABuilds/issues) with the information below.
[!IMPORTANT]
- State the Device Model (Default: Pixel 5)?
— Root Solution (Magisk, KernelSU or none)?
— If you want a WSA build with Magisk, what variant of magisk would you like?
— Would you like GApps (Google Play Store and Play Services (GMS))?
— Would you like to keep the Amazon Appstore?
[!IMPORTANT]
- State the Device Model (Default: Pixel 5)?
— Root Solution (Magisk, KernelSU or none)?
— If you want a WSA build with Magisk, what variant of magisk would you like?
— Would you like GApps (Google Play Store and Play Services (GMS))?
— Would you like to keep the Amazon Appstore?
Credits
- Microsoft: For providing Windows Subsystem For Android™ and related files. Windows Subsystem For Android™, Windows Subsystem For Android™ Logo, Windows™ 10 and Windows™ 11 Logos are trademarks of Microsoft Corporation. Microsoft Corporation reserves all rights to these trademarks. By downloading and installing Windows Subsystem For Android™, you agree to the Terms and Conditions and Privacy Policy
- YT-Advanced: For providing and continuing the development of the script made by LSPosed, the Github Action workflow guide is based on his Github Repo. I do not claim his work and the work of the many contributers as my own and nor intend to do so.
- Cinit and the WSAPatch Guide: Many thanks for the comprehensive guide, files and support provided by Cinit and the contributers at the WSAPatch repository. Windows™ 10 Builds in this repo rely on the hard work of this project and hence credit is given where due
- StoreLib: API for downloading WSA
- Magisk: The Magic Mask for Android
- The Open Google Apps Project: Script the automatic generation of up-to-date Google Apps packages
- KernelSU: A Kernel based root solution for Android
- WSAGAScript: The first GApps integration script for WSA
- MagiskOnWSA:
DeprecatedIntegrate Magisk root and Google Apps into WSA - MagiskOnWSALocal: Integrate Magisk root and Google Apps into WSA
- Icons8: Icons used in this repo were obtained from Icon8. To view the links to the specific icons used in this Markdown, press here
The repository is provided as a utility.
Android is a trademark of Google LLC. Windows™ is a trademark of Microsoft LLC.
В Windows 11 вы можете использовать Windows Subsystem for Android (WSA) для установки и запуска Android приложений. Windows Subsystem для Android работает по аналогии с WSL (Windows Subsystem для Linux). Ядро Android устанавливается в виде легкой виртуальной машины и не требует установки роли Hyper-V. На данный момент подсистема Windows для Android официально доступна только для участников Windows Insiders. Однако вы можете установить Windows Subsystem for Android и на обычном образе Windows 11.
Установка в Windows Subsystem for Android в Windows 11
Чтобы установить виртуальную машину с Android, ваш компьютер должен поддерживать аппаратную виртуализацию Intel VT (Intel Virtualization Technology) или AMD-V. Проверьте, что она включена в BIOS/UEFI.
Можно проверить поддержку виртуализации в Windows такой командой PowerShell:
Get-ComputerInfo -property "HyperV*"
HyperVRequirementDataExecutionPreventionAvailable : True
HyperVRequirementSecondLevelAddressTranslation : True
HyperVRequirementVirtualizationFirmwareEnabled : True
HyperVRequirementVMMonitorModeExtensions : True
В нашем примере виртуализации поддерживаются и включены.
Также рекомендуется как минимум 8 Гб RAM на компьютере для нормальной работы Android подсистемы и приложений.
Установите компонент Windows VirtualMachinePlatform (понадобится перезагрузка):
Enable-WindowsOptionalFeature -Online -FeatureName VirtualMachinePlatform
Теперь нужно скачать установочный файл Windows Subsystem for Android в формате MSIXBUNDLE из Microsoft Store. Ранее мы показывали, как скачать установочный APPX файл любого приложения из Microsoft Store. Здесь все действия выполняются аналогично.
- Перейдите на https://store.rg-adguard.net/ (этот сервис позволяет получить прямые ссылки на установочные файлы приложений в Microsoft Store);
- Вставьте в поле поиска URL ссылку
https://www.microsoft.com/store/productId/9P3395VX91NR
и выберите Slow; - Найдите в списке
MicrosoftCorporationII.WindowsSubsystemForAndroid_1.8.32828.0_neutral_~_8wekyb3d8bbwe.msixbundle
и скачайте файл (1.2 Гб); - Откройте Windows Terminal и выполните следующую команду для установки файла msixbundle:
Add-AppxPackage -Path "C:\Users\root\Downloads\MicrosoftCorporationII.WindowsSubsystemForAndroid_1.8.32828.0_neutral___8wekyb3d8bbwe.Msixbundle"
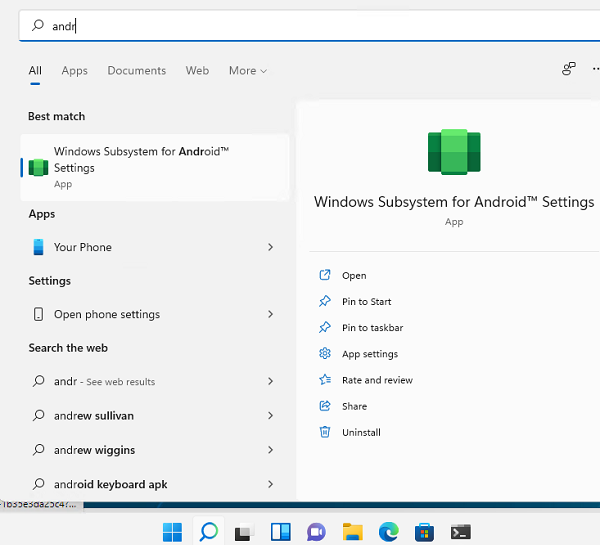
- После этого в стартовом меню Windows 11 появится пункт Windows Subsystem for Android Settings.
Установка приложений Android в Windows 11
Теперь вы можете установить приложения Android. На данный момент установка Android приложений доступна только с американских IP адресов для инсайдеров Windows 11 в канале Beta и только через Amazon AppStore (устанавливается вместе с WSA). Ограничений довольно много….
Но вы можете установить любую программу Android с помощью APK файла в режиме отладки.
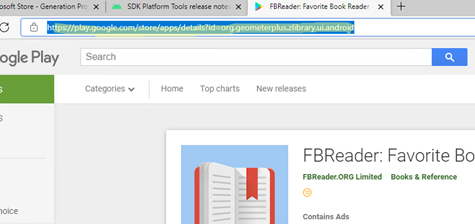
Чтобы скачать APK файл любого приложения из Google Play, скопируйте его URL адрес. В этом примере я хочу скачать FBReader (привычная мне fb2/epub читалка для Android).
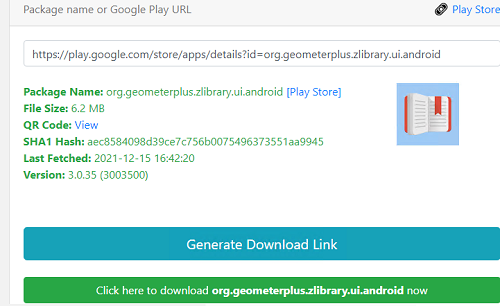
Перейдите на сайт http://apps.evozi.com/apk-downloader/ , вставьте URL адрес приложения в Google Play и нажмите Generate Download Link. Скачайте установочный apk файл приложения на диск.
Скачайте Android SDK Platform для Windows (https://developer.android.com/studio/releases/platform-tools ) и распакуйте в каталог C:\tools\platform-tools.
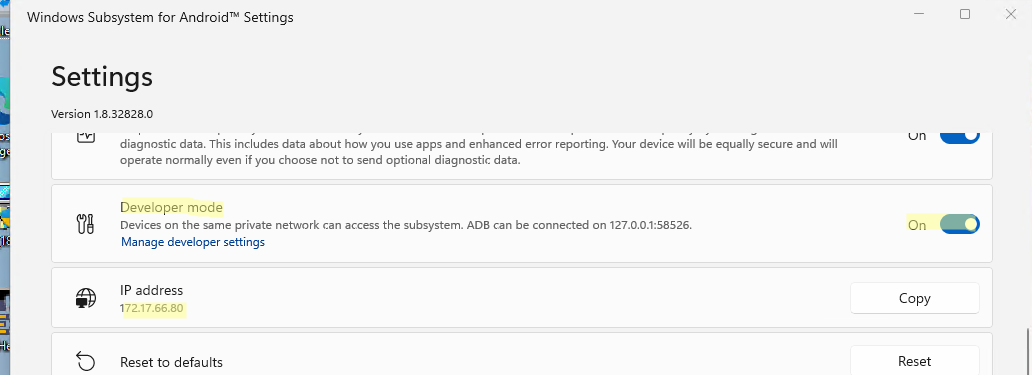
Включите режим разработчика (Developer Mode) в настройках Windows Subsystem for Android. Нажмите на кнопку Refresh в поле IP address и дождитесь, пока вашему инстансу будет присвоен IP адрес. Скопируйте его (иногда он указан вместе с портом в формате 127.0.0.1:58526).
Откройте консоль PowerShell и перейдите в каталог с Android SDK:
cd C:\tools\platform-tools
Подключитесь к виртуальной машине Android по полученному ранее IP адресу:
./adb.exe connect 172.17.66.80
connected to 172.17.66.80:5555
Убедитесь, что вы подключены только к одному устройству Android:
adb devices
Для установки приложения Android из полученного ADK файла, выполните команду:
./adb install "C:\Users\root\Downloads\org.geometerplus.zlibrary.ui.android_3003500_apps.evozi.com.apk"
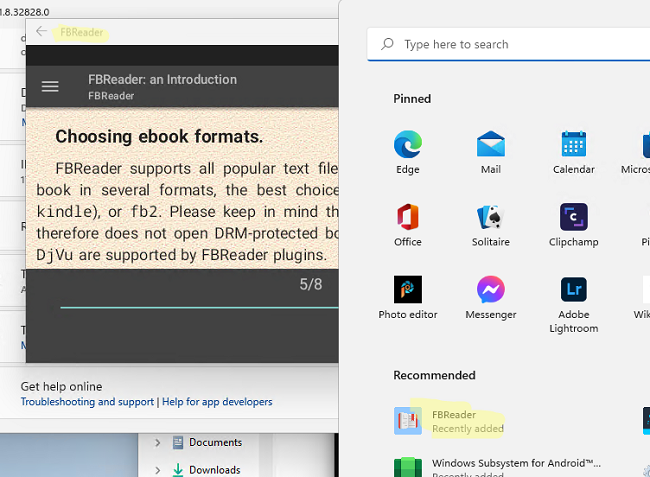
После этого ярлык приложения Android появится списке установленных программ в стартовом меню Windows. Запустите его.
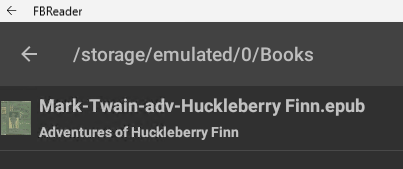
В моем случае программа FBreader в видит только свою эмулированную файловую систему Android. Чтобы скопировать файл (книгу) в каталог books на Android, нужно опять воспользоваться adk:
./adb push "C:\Users\root\Downloads\Mark-Twain-adv-Huckleberry Finn.epub"/storage/emulated/0/books
Epub файл теперь доступен в из приложений Android.
Чтобы скопировать файл из Android в Windows, используется команда adb pull:
adb pull "/storage/emulated/0/books/file.fb2 C:\Users\root\Downloads
Вам для этого не требуется использование программы Windows Insider. С помощью этого гайда вы сможете скачать систему Windows Subsystem for Android и устанавливать приложения Android.
Естественно, это все стоит делать на свой страх и риск, так как Microsoft еще занимается тестированием этой технологии.
Включение виртуализации
1. Включение соответствующего параметра в UEFI. Эту информацию найдете отдельно для вашей материнской платы.
2. Запускаете через Пуск Включение или отключение компонентов Windows.
3. Ставите галки напротив этих двух параметров и перезагружаете систему.
Установка Windows Subsystem for Android
1. Идем на сайт, который позволяет генерировать ссылки для скачивания приложений из магазина Microsoft в обход самого магазина.
3. Скачиваем самый тяжелый пакет с расширением .msixbundle. На момент написания статьи его SHA-1 хэш: 0c4b3430bcd37be562f54322c79fb14f11ce1348.
4. Запускаем Powershell от имени администратора (можно запустить новый Windows Terminal и в нем открыть Powershell вкладку).
5. Используем команду Add-AppxPackage -Path <path_to_msixbundle_file>, где последний параметр это путь к скачанному файлу.
6. Если установка прошла успешно, то вы сможете запустить Windows Subsystem for Android.
Установка ADB
1. Идем на сайт Google и качаем версию для вашей системы.
2. Распаковываете в какое-нибудь удобное для вас место и прописываете путь к этой папке в PATH.
Установка сторонних приложений Android
1. Включите режим разработчика в настройках Windows Subsystem for Android.
2. Для первичной настройки запустите управление параметрами Android
3. Запустите командную строку и подключитесь к adb с помощью команды adb connect <IP>, где в качестве параметра IP следует использовать указанный в настройках разработчика.
4. Скачайте с известных вам сайтов нужный вам APK.
5. Используйте команду adb install <PATH>, где последний параметр это путь к скачанному APK.
6. Запускайте приложение.


