To troubleshoot the following problems, select any heading to see more info. Next, follow the steps to try to get things working again.
If you can’t see Start or your taskbar, the taskbar may be hidden. To see it, try these steps.
-
Press the Windows logo key + I, then select Personalization > Taskbar .
-
Select Taskbar behaviors to expand it.
-
Clear the Automatically hide the taskbar box.
-
Press the Windows logo key + I to open Settings.
-
Select Windows Update, then select Check for updates. Install any available updates and restart your computer if required.
Check for updates
Note: Need another way to get to Settings? Press the Windows logo key + R, then type ms-settings: (note the colon) in the Open box. Select OK to open Settings.
If you didn’t have any updates that required a restart, it’s still a good idea to restart your device to make sure any pending updates are installed.
To restart your device when you can’t access Start , press Ctrl + Alt + Delete, select Power and then select Restart .
Note: You can also manually shut down your device by pressing and holding the power button. Shutting down this way risks losing unsaved data, so first be sure to save and close everything you’re working on. If you shut down this way, you can restart your device by pressing the power button again.
While it’s likely you have the most recent drivers, if you’re still having trouble with the Start menu, you can try fixing it by manually updating your graphics or audio drivers. For more info, see Update drivers manually in Windows.
-
Press Ctrl + Shift + Esc to open Task Manager. You may need to select More details at the bottom of the window to see everything.
Note: If you tapped or selected a browser window before you pressed Ctrl + Shift + Esc, you’ll get the browser task manager. Close the browser task manager, tap or select a non-browser window, and then continue with the steps below.
-
Select the Processes tab.
-
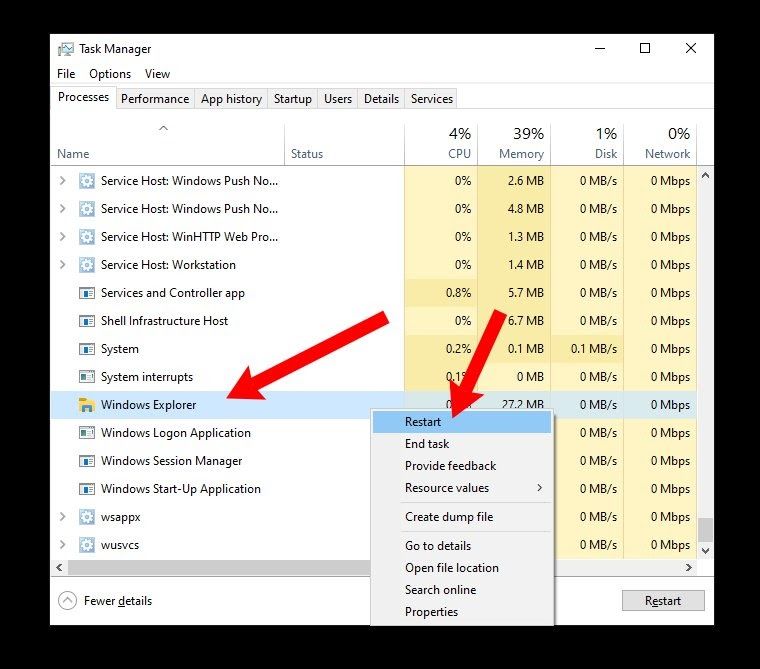
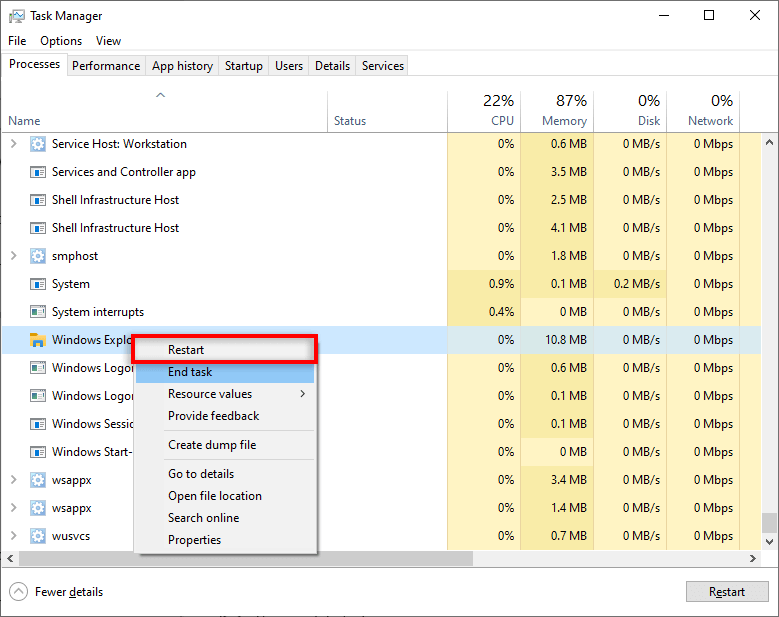
Scroll down to Windows Explorer, select it, then select Restart.
The process may take a few seconds, and your taskbar and Start menu may not be visible while Windows Explorer restarts. You can close Task Manager when the process is complete.
If you still can’t fix your problem with the Start menu, try signing in with an administrator account. To see which account you’re signed in with:
-
Select Start .
-
Right-click your profile image or name.
-
Select Change account settings. If you see «Administrator» near your name, then you’re using an administrator account.
If you aren’t using an administrator account and you don’t have one, you can create an account and set it as an administrator account.
Create the new administrator account
-
Press the Windows logo key + I.
-
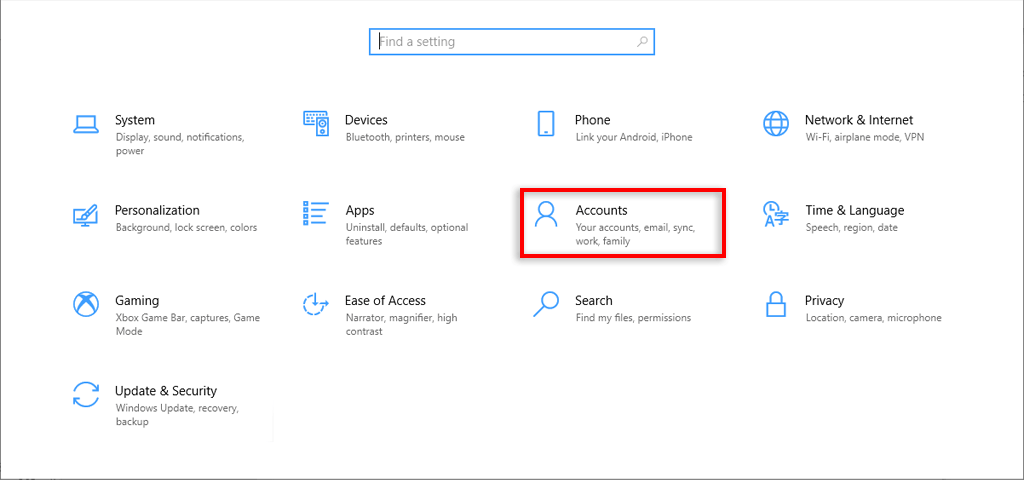
Select Accounts > Family & other people (or Other users , if you’re using Windows 11 Enterprise).
-
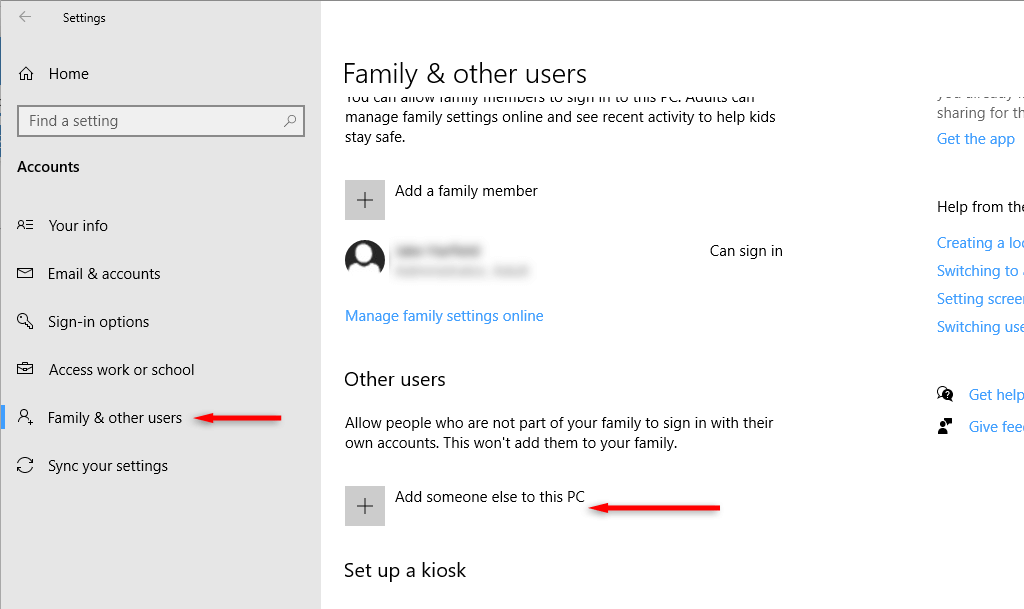
Under Other users , select Add someone else to this PC or Add account.
-
Provide the requested info and follow the prompts to create the account.
Make the new account an administrator account
-
Under Family & other people (or Other users , if you’re using Windows 11 Enterprise), choose the account you created, and then select Change account type.
-
Under Account type, select Administrator > OK.
Sign out of your account and then sign in to your new account. If everything is fixed, move your personal data and files to the new account.
To move your personal files from your old account to your new account, try opening File Explorer, expanding This PC, selecting OSDisk (C:), and looking in the Users folder, where you should see folders for both accounts. You can then copy and paste your files from the old account folder to similar locations in the new account folder. Or if you prefer, you can upload your files from your old account to OneDrive, and then sign into the new account and download the files from OneDrive.
If the problem still isn’t fixed, try deleting your old administrator account
Warning: If you delete an administrator account that’s associated with a Microsoft account and you don’t have a backup copy of your BitLocker key, you’ll be locked out the device and you’ll lose all data. You won’t be able to use the device until you do a clean install.
-
Press the Windows logo key + I.
-
Select Accounts > Family & other people (or Other users , if you’re using Windows 11 Enterprise).
-
Under Other users, select the old administrator account, then select Remove > Delete account and data.
-
After the old account is removed, restart your device and sign in with the new account again.
Associate the Microsoft account with the new administrator account (if you were using a local account to sign in):
-
In Settings , select Accounts > Your info .
-
Select Sign in with a Microsoft account instead and enter your account info. You’ll see this link only if you’re using a local account, and you may not see it if your device is on a network.
Note: Need another way to get to Settings? Press Windows logo key + R, then type ms-settings: (include the colon) in the Open box. Select OK to open Settings.
If you can’t see Start or your taskbar, the taskbar may be hidden. To see it, try these steps.
-
Press the Windows logo key + I to get to Settings, then select Personalization > Taskbar .
-
Turn on Lock the taskbar.
-
Turn off Automatically hide the taskbar in desktop mode or Automatically hide the taskbar in tablet mode.
-
Press the Windows logo key + I to open Settings.
-
Select Update & security > Windows Update , and then select Check for updates. Install any available updates and restart your computer if required.
Check for updates
Note: Need another way to get to Settings? Press the Windows logo key + R, then type ms-settings: (note the colon) in the Open box. Select OK to open Settings.
If you didn’t have any updates that required a restart, it’s still a good idea to restart your device to make sure any pending updates are installed.
To restart your device when you can’t access Start , press Ctrl + Alt + Delete, select Power and then select Restart .
Note: You can also manually shut down your device by pressing and holding the power button. Shutting down this way risks losing unsaved data, so first be sure to save and close everything you’re working on. If you shut down this way, you can restart your device by pressing the power button again.
While it’s likely you have the most recent drivers, if you’re still having trouble with the Start menu, you can try fixing it by manually updating your graphics or audio drivers. For more info, see Update drivers manually in Windows.
-
Press Ctrl + Shift + Esc to open Task Manager. You may need to select More details at the bottom of the window to see everything.
-
Select the Processes tab.
-
Scroll down to Windows Explorer, select it, then select Restart.
The process may take a few seconds, and your taskbar and Start menu may not be visible while Windows Explorer restarts. You can close Task Manager when the process is complete.
If you still can’t fix your problem with the Start menu, try creating a new local administrator account.
If you’re signed in with your Microsoft account, remove the link to that account first by doing the following (if that’s not how you’re signed in, skip to creating a new administrator account):
-
Press the Windows logo key + I.
-
In Settings, select Accounts > Your info (in some versions, it may be under Email & accounts instead).
-
Select Sign in with a local account instead. You’ll see this link only if you’re using a Microsoft account, and you may not see it if your device is on a network.
-
Type your Microsoft account password and select Next.
-
Choose a new account name, password, and password hint, then select Finish and sign out.
Create the new administrator account
-
Press the Windows logo key + I.
-
In Settings, select Accounts > Family & other users (or Other users , if you’re using Windows 10 Enterprise).
-
Under Other users , select Add someone else to this PC.
-
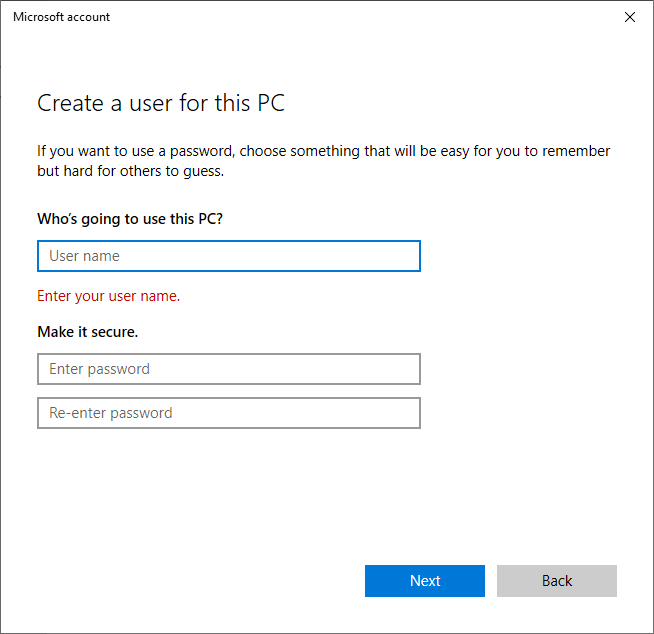
On Windows 10 Home and Windows 10 Professional, provide a name for the user and a password, and then select Next. On Windows 10 Enterprise, select I don’t have this person’s sign-in information, and then select Add a user without a Microsoft account.
-
Set a user name, password, and password hint. Then select Next > Finish.
Make the new account an administrator account
-
Press the Windows logo key + I.
-
In Settings, select Accounts , then select Family & other users.
-
Under Your family (or Other users , if you’re using Windows 10 Enterprise), choose the account you created, and then select Change account type.
-
Under Account type, select Administrator > OK.
Sign out of your account and then sign in to your new account. If everything is fixed, move your personal data and files to the new account.
To move your personal files from your old account to your new account, try opening File Explorer, expanding This PC > OSDisk (C:), and looking in the Users folder, where you should see folders for both accounts. You can then copy and paste your files from the old account folder to similar locations in the new account folder. Or if you prefer, you can upload your files from your old account to OneDrive, and then sign into the new account and download the files from OneDrive.
If the problem still isn’t fixed, try deleting the old administrator account
Warning: If you delete an administrator account that’s associated with a Microsoft account and you don’t have a backup copy of your BitLocker key, you’ll be locked out the device and you’ll lose all data. You won’t be able to use the device until you do a clean install.
-
Press the Windows logo key + I.
-
In Settings, select Accounts , then select Family & other users.
-
Under Other users, select the old administrator account, then select Remove > Delete account and data.
-
After the old account is removed, restart your device and sign in with the new account again.
If you were using a Microsoft account to sign in before, associate the Microsoft account with the new administrator account.
-
In Settings , select Accounts > Your info (in some versions, it may be under Email & accounts instead).
-
Select Sign in with a Microsoft account instead and enter your account info. You’ll see this link only if you’re using a local account, and you may not see it if your device is on a network.
Note: Need another way to get to Settings? Press Windows logo key + R, then type ms-settings: (include the colon) in the Open box. Select OK to open Settings.
Need more help?
Want more options?
Explore subscription benefits, browse training courses, learn how to secure your device, and more.
Communities help you ask and answer questions, give feedback, and hear from experts with rich knowledge.
Find solutions to common problems or get help from a support agent.
Restarting Windows Explorer from Task Manager can sometimes help
by Ivan Jenic
Passionate about all elements related to Windows and combined with his innate curiosity, Ivan has delved deep into understanding this operating system, with a specialization in drivers and… read more
Updated on
Reviewed by
Alex Serban

After moving away from the corporate work-style, Alex has found rewards in a lifestyle of constant analysis, team coordination and pestering his colleagues. Holding an MCSA Windows Server… read more
- If the Start button isn’t working, installing the latest updates can fix that.
- Restarting or ending certain processes can help you fix this issue on your PC.
XINSTALL BY CLICKING THE DOWNLOAD
FILE
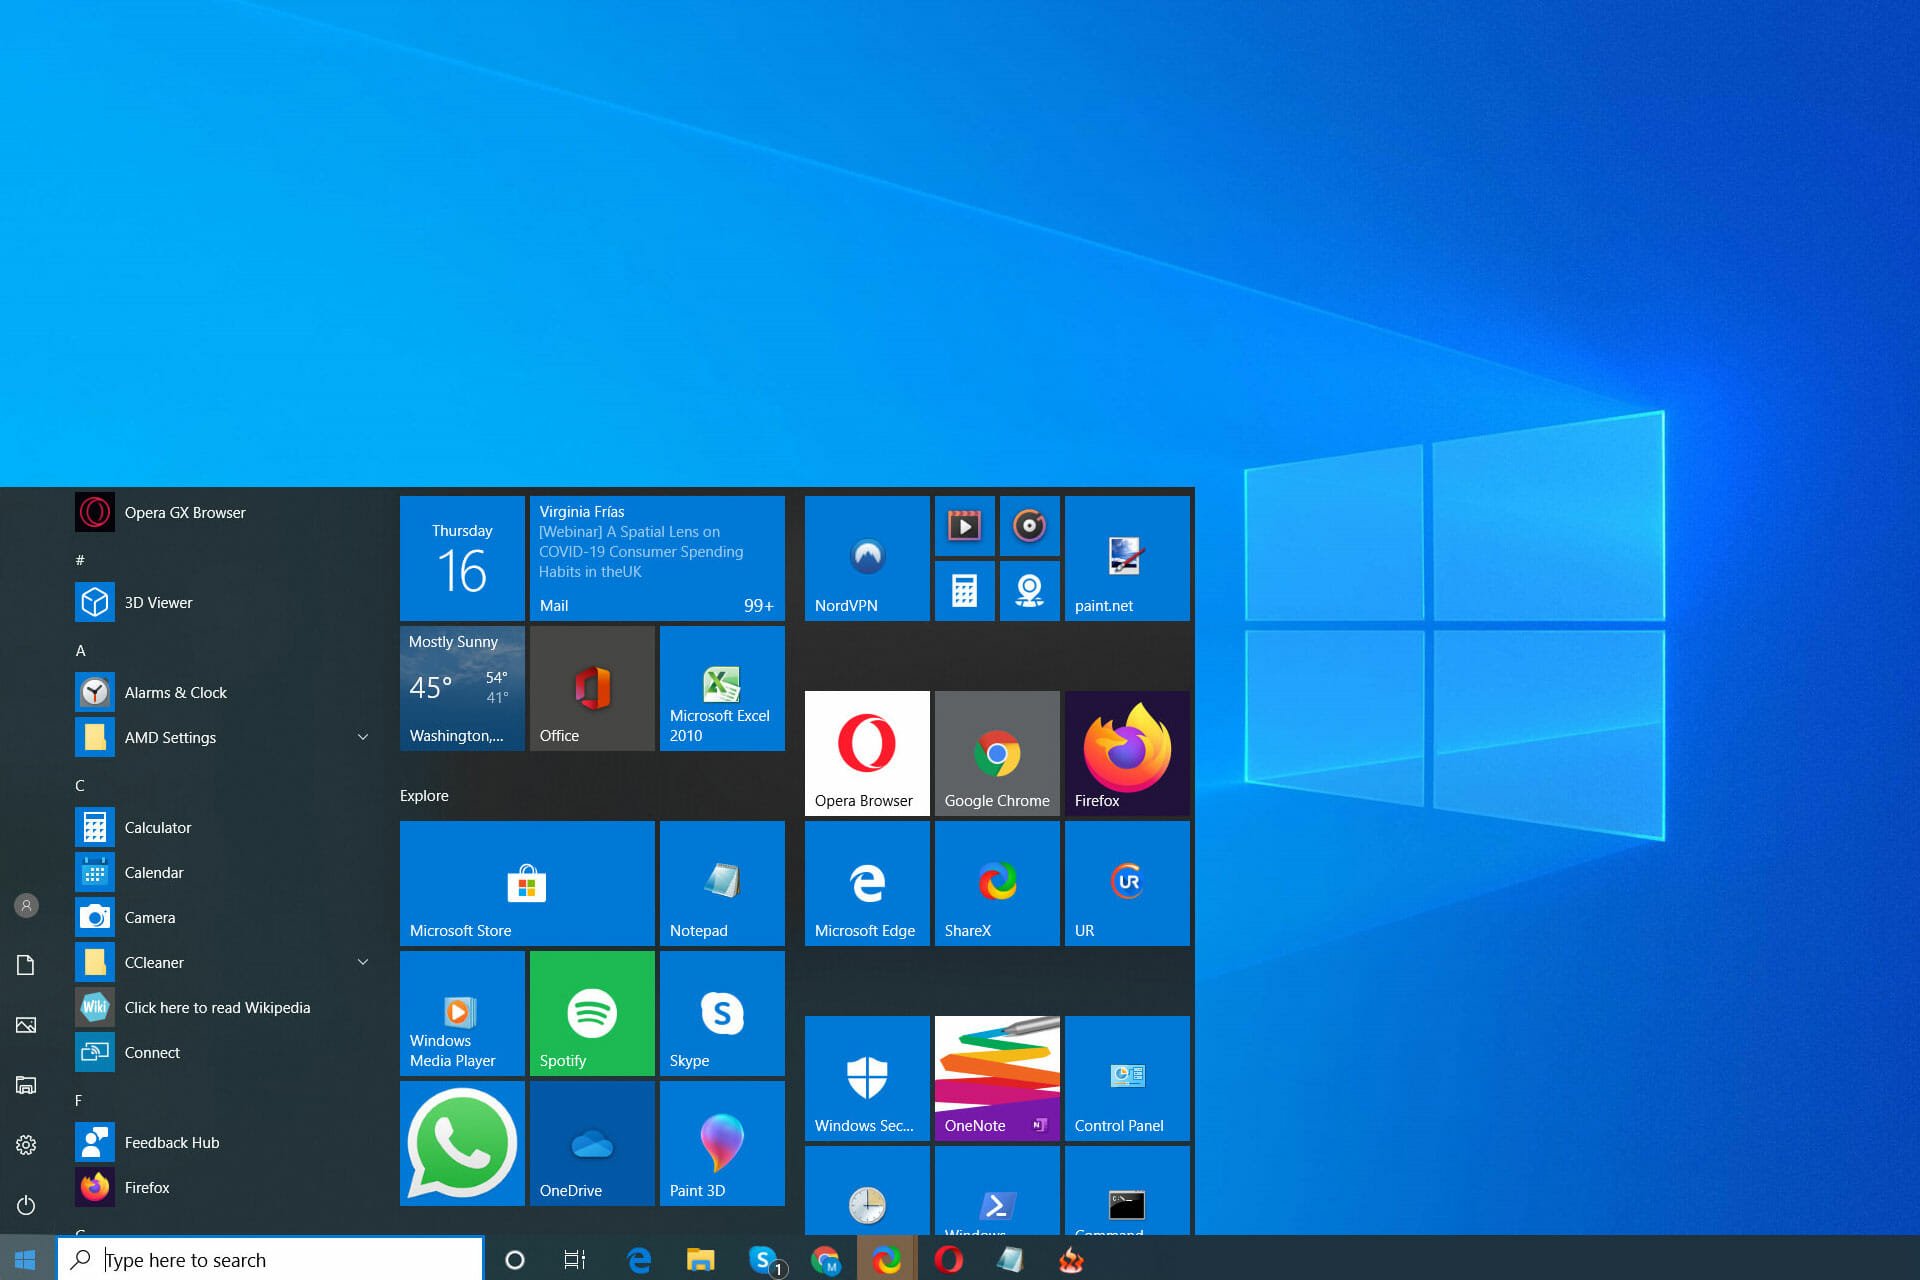
If your Windows 10 Start button is not working, you might have some issues accessing certain features on your PC.
Start Menu is an integral part of Windows, but unfortunately, many reported that Start Menu isn’t working at all for them.
This can be a major problem, and in today’s guide, we’re going to tackle this issue and show you how to fix it properly.
Why is the Start button not working on Windows 10?
There are several reasons why the Start menu isn’t working on Windows 10, and here are the most common ones:
- System glitches – If Start menu has disappeared or you’re having any other issue with it, it’s possible that there’s a glitch on your system.
- Issues with the Windows Explorer process – In case this happens, you just need to open Task Manager and end restart the process.
- Corrupted registry – Sometimes corrupted registry can cause this issue. You can use Registry Editor to fix the issue.
Start Menu is integral to Windows, but many users reported various issues. Speaking of issues, here are some common problems that users reported:
- Windows 10: Start Menu and Cortana not working
- Start Menu and Cortana are closely related, and if one of those features isn’t working, try installing the latest updates and check if that helps.
- Windows Start button not working on Windows 10, quit working on Windows 10
- Many users reported that the Start button stopped working on their Windows 10 PC.
- To fix this problem, you might have to use Powershell and re-register all preinstalled applications.
- Start Menu button is frozen, won’t open on Windows 10
- This is another common problem with Start Menu; a temporary glitch usually causes it.
- Sign out of your account and log back in to fix the problem.
- Start Menu crashing in Windows 10, missing in Windows 10
- According to users, sometimes Start Menu could be crashing or even missing on your PC.
- You might have to create a new user account and switch to it to fix the problem.
What to do if Start Menu and Taskbar are not working on Windows 10?
There are all sorts of issues that can occur with the Start Menu, and many reported an unresponsive Taskbar in Windows 10.
This can be a problem, but it can be fixed by restarting the Windows Explorer process.
In some rare instances, you might get a Critical error in Start Menu, and if this happens, it’s advised to repair your profile or installation.
Luckily for you, fixing these issues isn’t hard, and in today’s guide, we’ll show you how to do it.
How we test, review and rate?
We have worked for the past 6 months on building a new review system on how we produce content. Using it, we have subsequently redone most of our articles to provide actual hands-on expertise on the guides we made.
For more details you can read how we test, review, and rate at WindowsReport.
What can I do when the Start button is not working in Windows 10?
1. Check for Windows updates
- Press Windows Key + I to open the Settings app.
- Now go to the Update & Security section.

- In the right pane, click the Check for updates button.

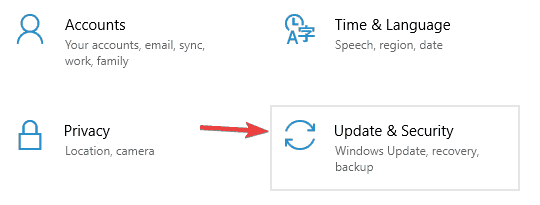
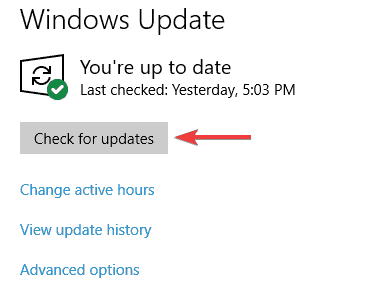
Updates will be downloaded automatically in the background if any updates are available. Once your system is up to date, check if Windows 10 Start button and search are still not working.
2. Use the PowerShell to fix this issue
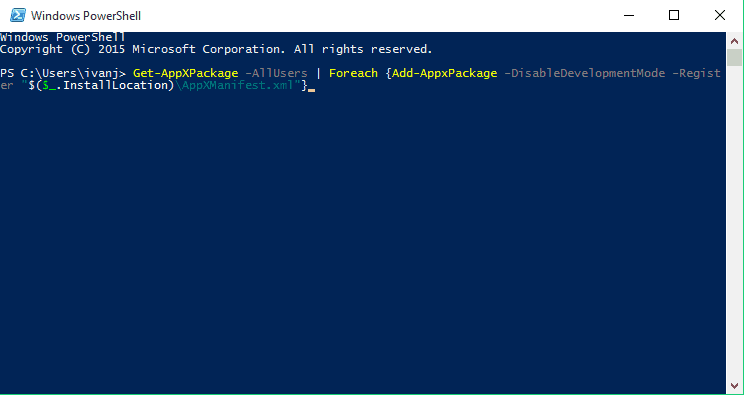
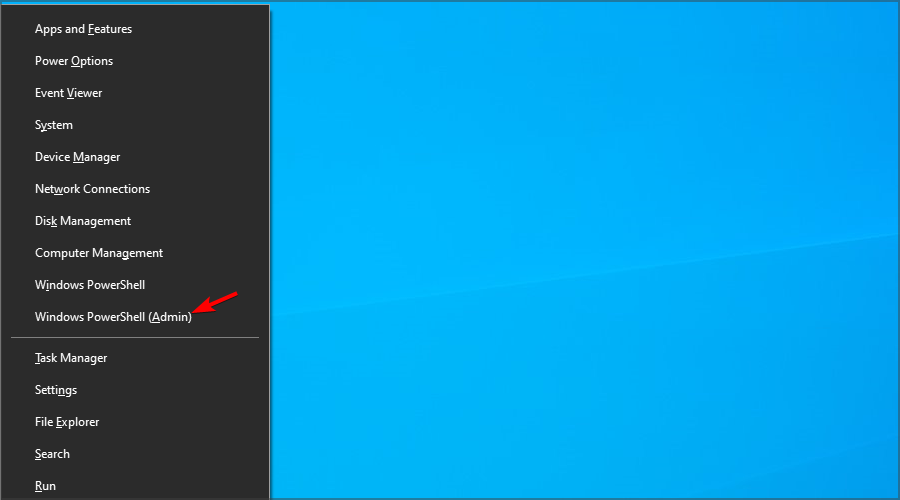
- Press Windows key + X and choose Windows PowerShell (Admin).

- Paste this into PowerShell:
Get-AppXPackage -AllUsers | Foreach {Add-AppxPackage -DisableDevelopmentMode -Register "$($_.InstallLocation)AppXManifest.xml"}
- Press Enter to run it.

That would be all, and your Start button should be working now.
You can try this workaround if your Windows button is not working. This isn’t a permanent solution, but it gets the job done and fixes the issue temporarily, so if the problem manifests itself again, you might need to repeat this process.
For the permanent solution, make sure that you check for the latest Windows 10 updates regularly.
3. Sign out of your account
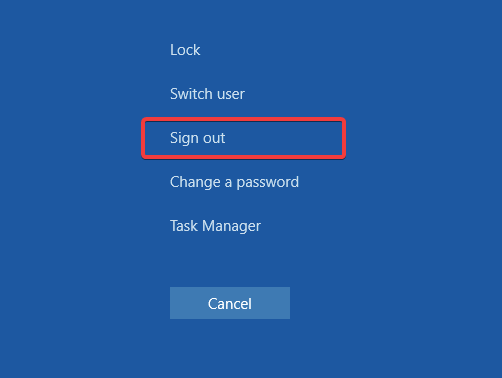
- Press Ctrl + Shift + Del.
- Now click the Sign out button.

- Wait for a few moments and sign back into your account.
After signing back in, check if the problem is still there.
Sometimes, Windows 10 Start Menu and Taskbar are not working due to glitches. But, according to users, the simplest way to fix this problem is to sign out of your account and log back in.
Since your Start Menu and Start button aren’t working, you’ll need to sign out using the steps we mentioned
4. Restart Windows Explorer
- Press Ctrl + Shift + Esc to open Task Manager.
- Locate Windows Explorer on the list.
- Right-click it and choose Restart from the menu.


Once Windows Explorer restarts, check if Windows 10 Start Menu is still not working. Remember that this is a temporary solution, so you’ll have to repeat it once the problem reappears.
Many users reported that you could fix the problem with the Start Menu button simply by restarting Windows Explorer.
The Start Menu is a part of Windows Explorer, and by restarting Windows Explorer, you’ll force Start Menu to restart as well.
- Windows 10/11 taskbar not working / responding
- Windows 11’s Start menu is not working? Here’s what to do
- How to Remove Common Program Groups From Start Menu
- Fix: Background Apps are Grayed Out on Windows 10
5. End certain processes
- Press Windows Key + X and choose Windows PowerShell (Admin) from the menu.
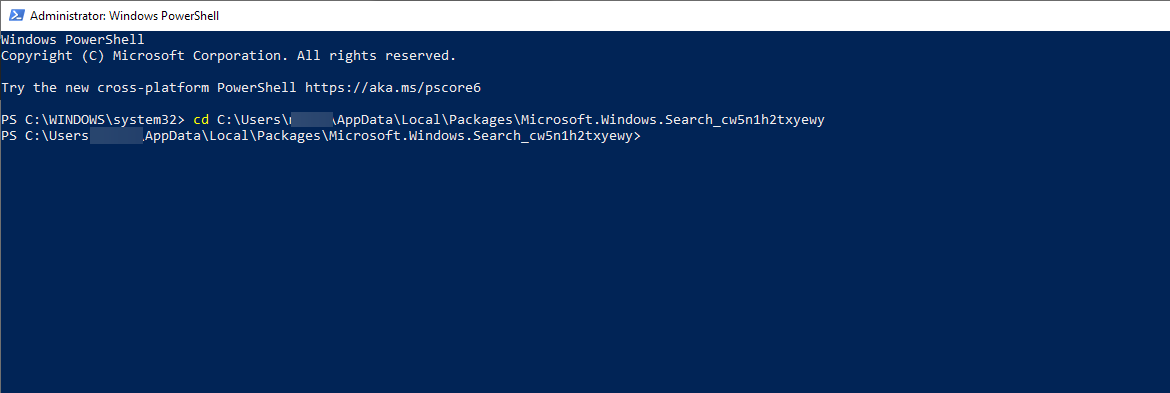
- When PowerShell starts, run the command below and hit Enter.
cd C:\Users\Your_username_here\AppData\Local\Packages\Microsoft.Windows.Search_cw5n1h2txyewy
- Next, type the following two commands and hit Enter after each one.
Taskkill /F /IM SearchUI.exeRD /S /Q Settings
After the commands execute, the damaged files will be rebuilt, and you should be able to use Start Menu again without issues.
Sometimes Windows 10 can’t open Start Menu or Search due to certain Cortana files. According to users, you can fix this problem simply by deleting these files from PowerShell.
These are just temporary files; your PC will recreate them, so there’s no need to worry.
6. Modify your registry
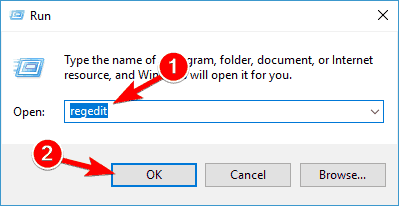
- Press Windows key + R and enter regedit. Press Enter or click OK.

- In the left pane, navigate to this key:
HKEY_LOCAL_MACHINE\SYSTEM\CurrentControlSet\Services\WpnUserService
- In the right pane, double-click Start DWORD, set Value data to 4, and click OK.

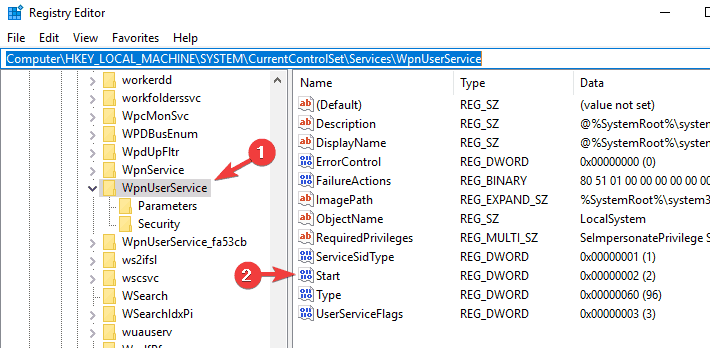

After making these changes, restart your PC and check if the problem is resolved.
Occasionally, issues with the Start Menu button can occur due to Dropbox. Note that Dropbox can sometimes interfere with Windows processes, leading to this and many other problems.
However, you should be able to fix this problem by making a few changes to your registry.
7. Create new values in your registry
- Start Registry Editor.
- In the left pane, navigate to this key:
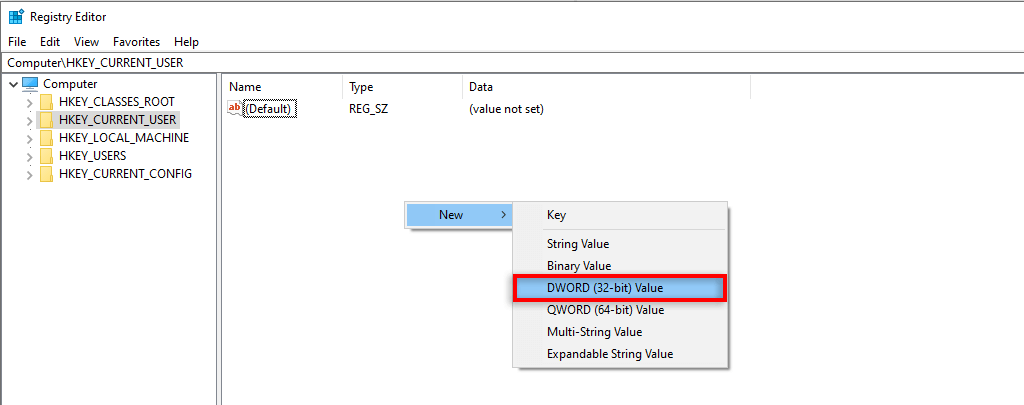
HKEY_CURRENT_USER\Software\Microsoft\Windows\CurrentVersion\Explorer\Advanced - In the right pane, right-click the empty space and choose New and then DWORD (32-bit) value.

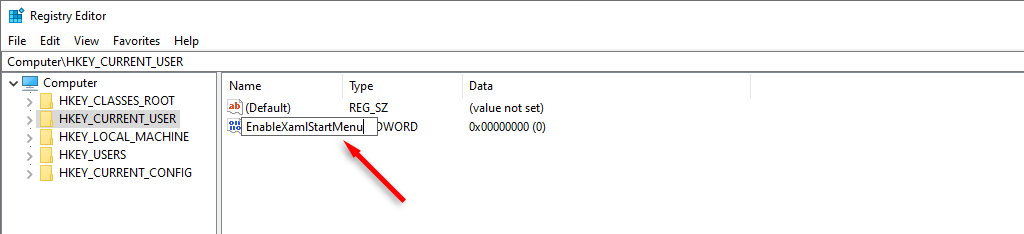
- Enter EnableXamlStartMenu as the name of the new DWORD.

After doing that, close Registry Editor and restart Windows Explorer from the Task Manager. Once the Explorer restarts, your Start Menu should be working again.
The problem might be related to your registry if you’re having issues with the Start Menu button. According to users, they managed to fix this problem simply by creating new value in their registry.
8. Enter Safe Mode
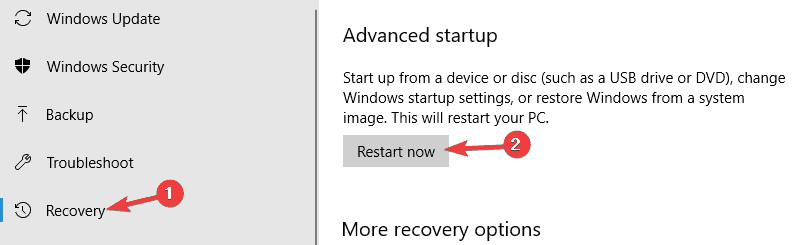
- Open the Settings app and go to the Update & Security section.
- From the menu on the left, choose Recovery. In the right pane, click Restart now button in the Advanced startup section.

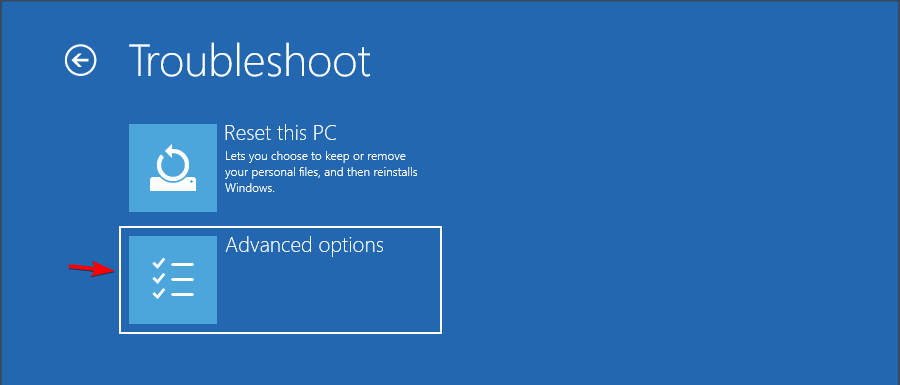
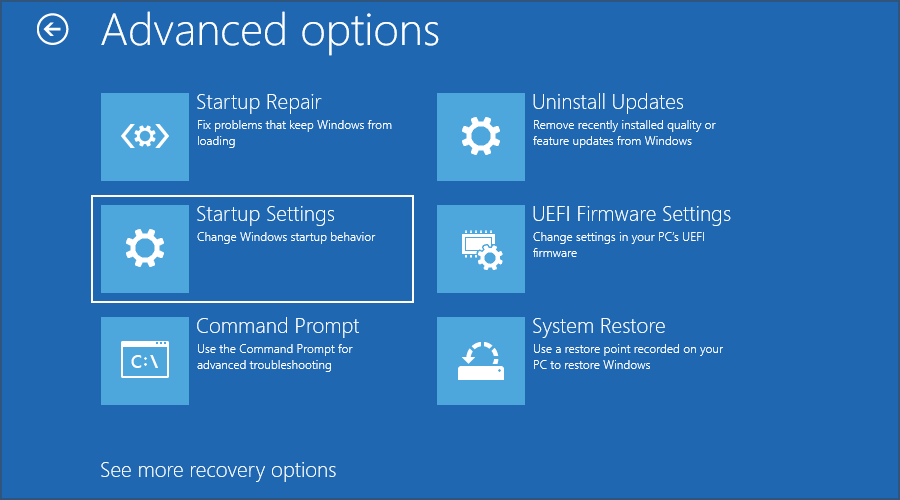
- A list of options will appear. Choose Troubleshoot and then choose Advanced options.

- Next select Startup Settings, and click the Restart button.
- Once your PC restarts, select any version of Safe Mode by pressing the appropriate key.
Once you enter Safe Mode, check if everything is working. If so, restart your PC, boot back to your account, and check if the issue is resolved.
According to users, you might be able to solve this problem simply by entering Safe Mode. This is quite simple to do, following the above steps.
9. Create a new user account
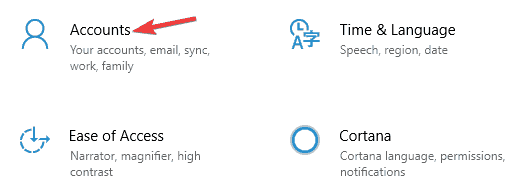
- Open the Settings app and go to the Accounts section.

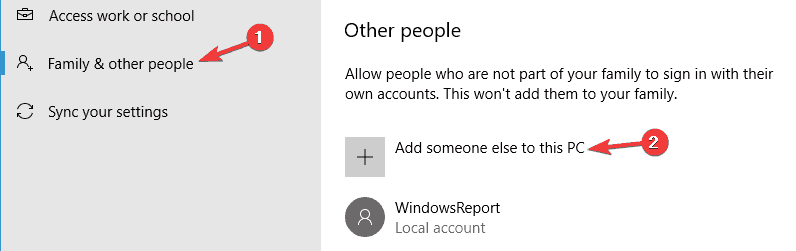
- Navigate to Family & other people in the left pane. In the right pane, click Add someone else to this PC.

- Choose I don’t have this person’s sign-in information, then Add a user without a Microsoft account.
- Enter the desired user name and click Next.


After creating a new user account, switch to it, and check if that solves your problem.
If the problem doesn’t appear on the new account, you’ll need to move your files to the new account and check if that solves your problem.
We believe you must have repaired the Start Menu button not working issue by now. Note that these solutions are not written in any particular order, and we recommend starting with whatever solution looks most appropriate to your situation.
Remember that this isn’t the only issue you can encounter, and many reported that Windows Tiles won’t show in Start Menu.
If you have any comments, suggestions, or maybe some other solutions for this problem, write them down in the comments section.
![]()
Windows 10 has come a long way since it was first launched in 2015. Each update brings a lot of new features, and Microsoft has embraced the open source community in a way that was once thought impossible.
Still, like with any operating system, there are bugs. And one of the more common bugs people running Windows 10 have faced is that the Start Menu suddenly stops working.
Sometimes the open Start Menu freezes up and is unresponsive, and other times it won’t open at all when you click the Start Menu button.
Whatever specific issue you’re having with the Windows 10 Start Menu, we’ll go over some quick and not so quick fixes in this article.
How to restart Windows Explorer
Windows Explorer, which is now called File Explorer, is the application you use to browse your file system and open programs and files. But it also controls things like the Start Menu, the taskbar, and other applications.
If you have an issue with the Start Menu, the first thing you can try to do is restart the “Windows Explorer” process in the Task Manager.
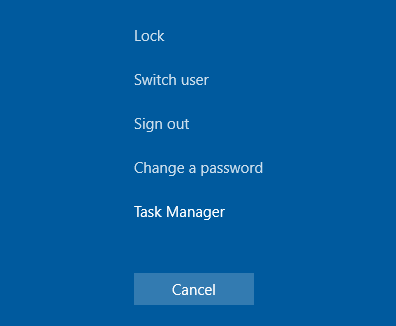
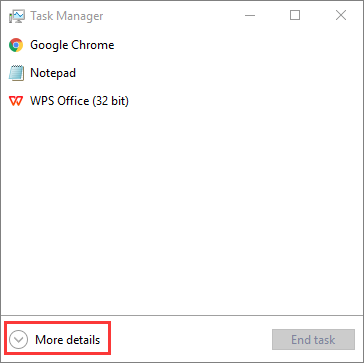
To open the Task Manager, press Ctrl + Alt + Delete, then click the “Task Manager” button.
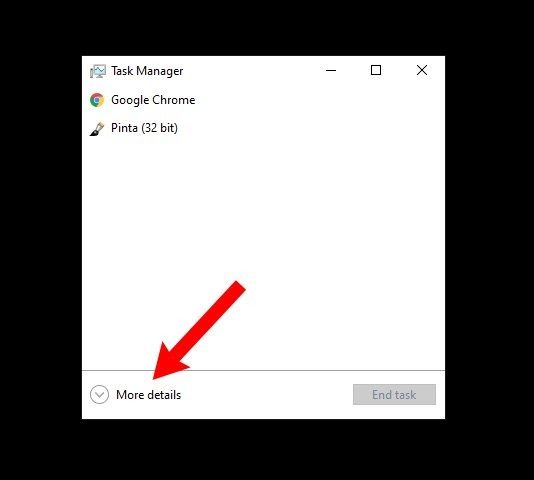
Click “More details” to see a full list of open programs and background processes you’re running:
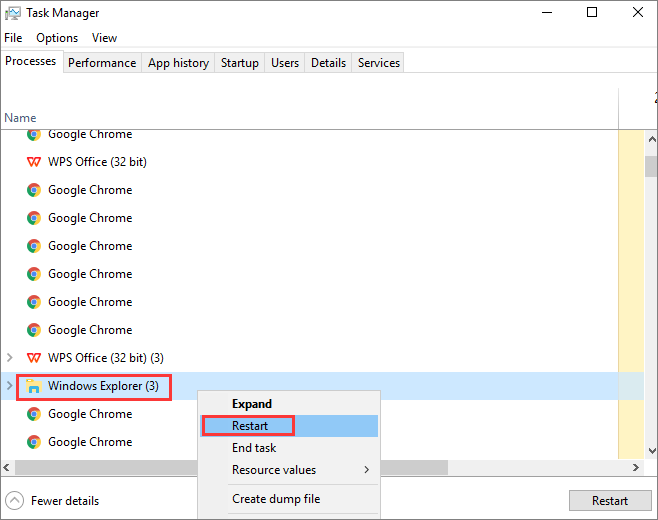
Scroll through the list until you find the “Windows Explorer” process. Then right click on “Windows Explorer” and select “Restart”:
There will be a brief flash while Windows restarts Windows Explorer/Finder, along with the taskbar and Start Menu.
After that, try to open the Start Menu. If it’s still not working normally, try one of the other fixes below.
How to repair corrupt or missing Windows system files
Sometimes an update goes awry, or you accidentally deleted an important file while digging around the filesystem.
If the Start Menu is still giving you trouble, or other core Windows apps are crashing, then you can try to restore any missing or corrupt Windows system files.
To do this, you’ll need to open the Windows Command Prompt as an administrator and run the System File Checker program.
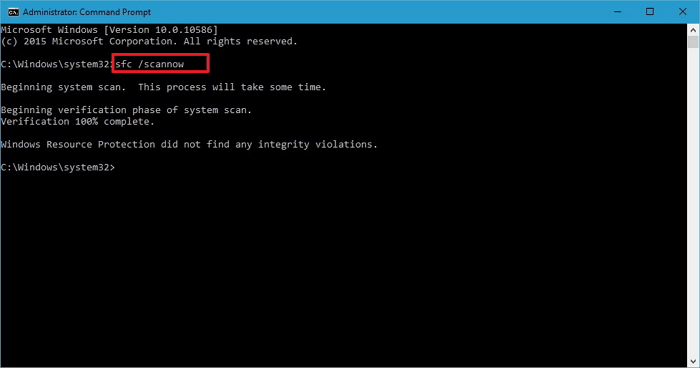
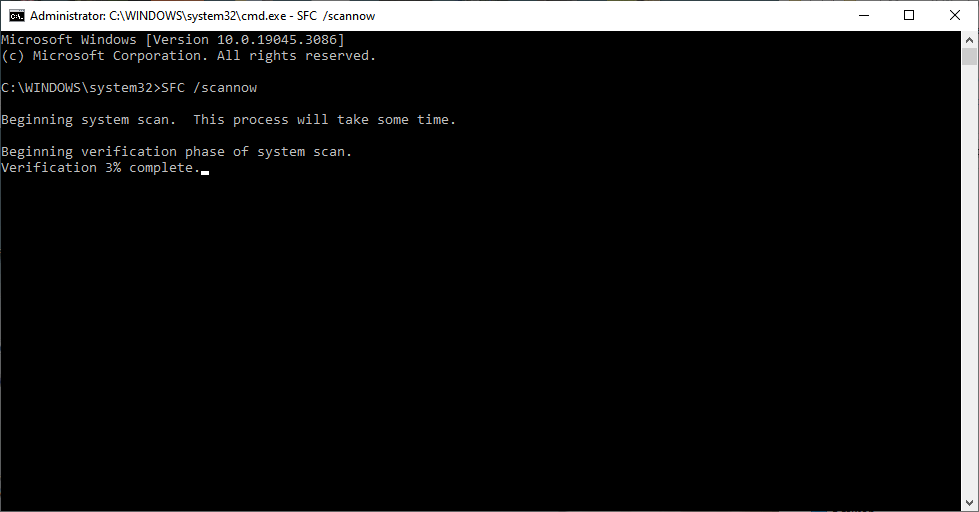
Once you open Command Prompt as an administrator, run the command sfc /scannow:
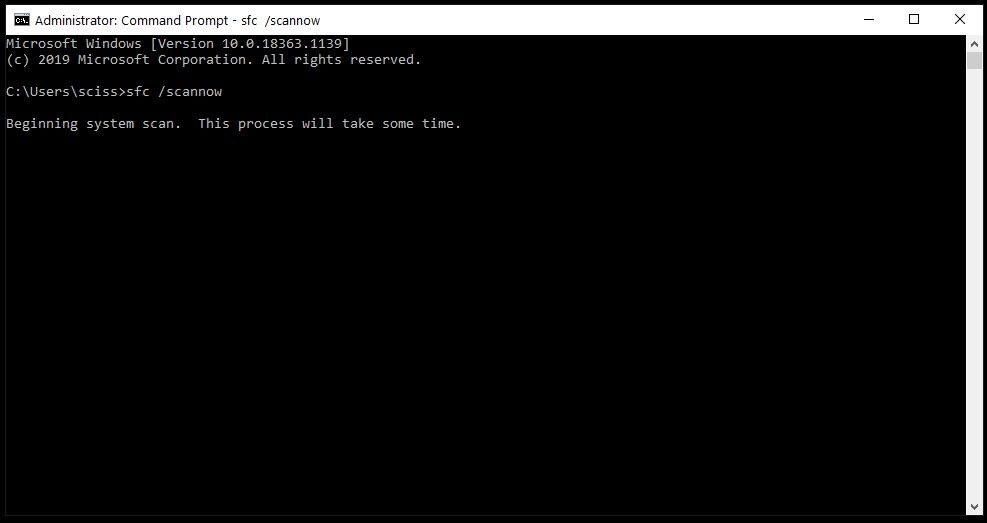
System File Checker will start going through all your system files and replace any corrupt or missing files with a cached copy.
This process can take a little while, so feel free to do something else for 5-10 minutes. Just be careful not to close the window while sfc is doing its thing.
Once System File Checker is finished, you’ll either see a report of all the files it replaced, or if everything was fine, you’ll see a message like this:
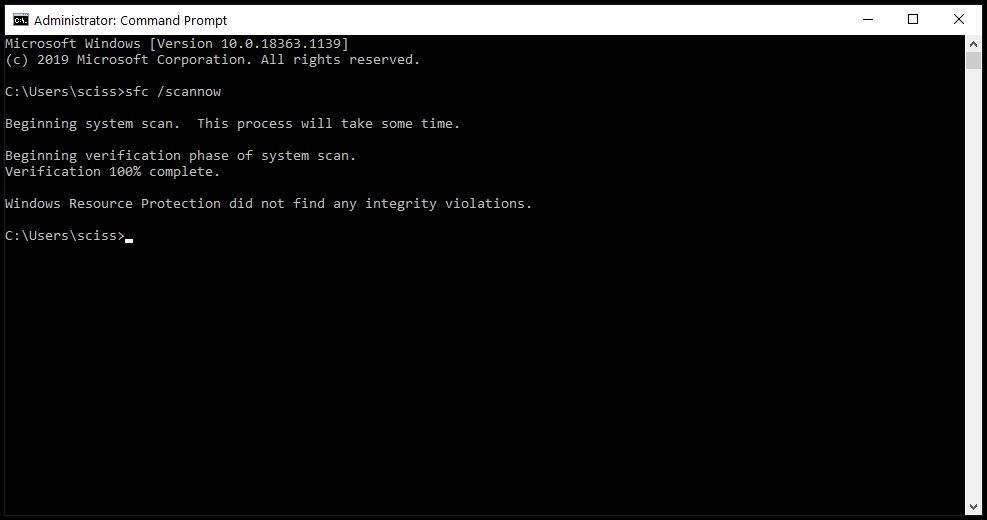
If System File Checker replaced any corrupt or missing system files, save all of your open work and restart your computer. Once you log back in, try to open the Start Menu to see if that fixed your issues.
Note: You could also use Powershell to run the sfc /scannow command, but remember that you’ll need to open an elevated Powershell terminal.
The next thing you can try is to reset the Start Menu entirely, along will all the Windows 10 apps that were preinstalled or installed from the Microsoft Store.
To do this, you’ll need to open PowerShell as an administrator – Command Prompt won’t work for the command you’ll run.
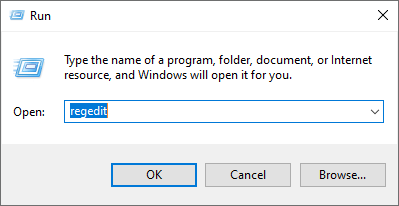
There are many ways to open PowerShell, but one of the fastest ways is to use the Run program.
Use the shortcut Windows Key + R to open the Run program, enter «powershell», then hold down «Ctrl + Shift» and click the «OK» button:
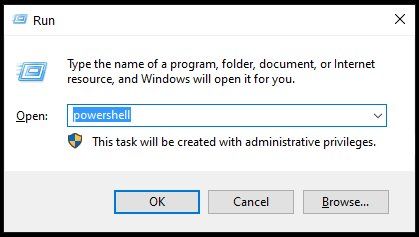
This should open up a PowerShell terminal with administrative privileges.
In the PowerShell terminal, run the following command:
Get-AppXPackage -AllUsers | Foreach {Add-AppxPackage -DisableDevelopmentMode -Register "$($_.InstallLocation)\AppXManifest.xml"}
The Get-AppXPackage command will attempt to reinstall all the default Windows apps, including the Start Menu and search bar.
It will also register a manifest file for each program it reinstalls. You don’t need to worry about the manifest files, though – it’s just something Windows needs to run each program.
Give it 5-10 minutes, and make sure you don’t close the PowerShell window until it’s finished.
Note: You may see some scary looking errors pop up as the Get-AppXPackage command is running. Don’t worry about them – most are just warnings about why a program can’t be reinstalled:
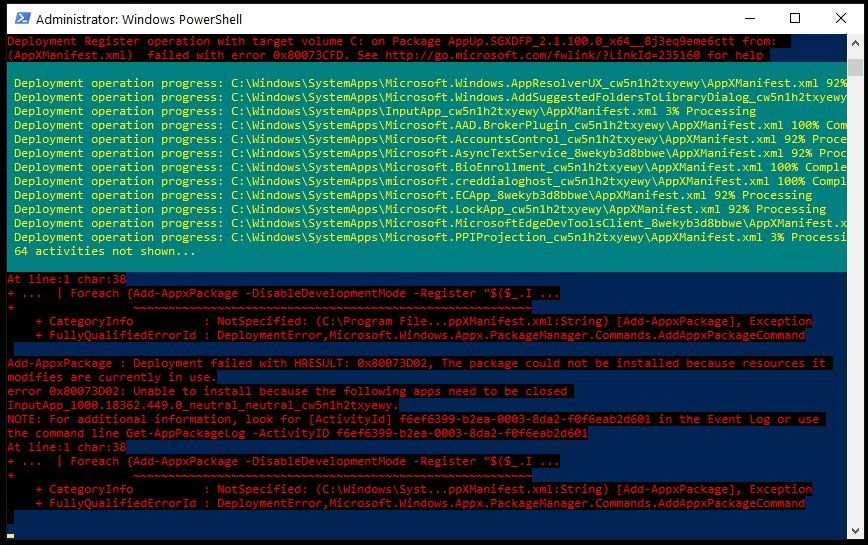
When the Get-AppXPackage command is finished, restart your computer, log in, and try to open the Start Menu.
How to reset your Windows 10 installation
If none of the above methods fixed the Start Menu, the last thing you can try is to do a factory reset of your Windows 10 installation. But keep in mind that this is an «almost-scorched-earth» method, and should only be used as a last resort.
Resetting your Windows 10 installation should keep all of your personal files intact (documents, pictures, videos, and so on), but will uninstall all the other drivers and programs you’ve installed. Basically this resets your computer to the state it was in when you first turned it on.
Before going any further, make backups of all your important files using a flash drive, external HDD/SSD, and/or an online file host like Google Drive or Dropbox.
In fact, make two backups. You probably won’t need them, but it doesn’t hurt.
When you’ve finished backing up all your files, open a PowerShell terminal – use the shortcut Windows Key + R, enter «powershell», then click the «OK» button.
In the PowerShell terminal, run the command systemreset to bring up the Windows reset wizard.
Next, click the «Keep my files» button:
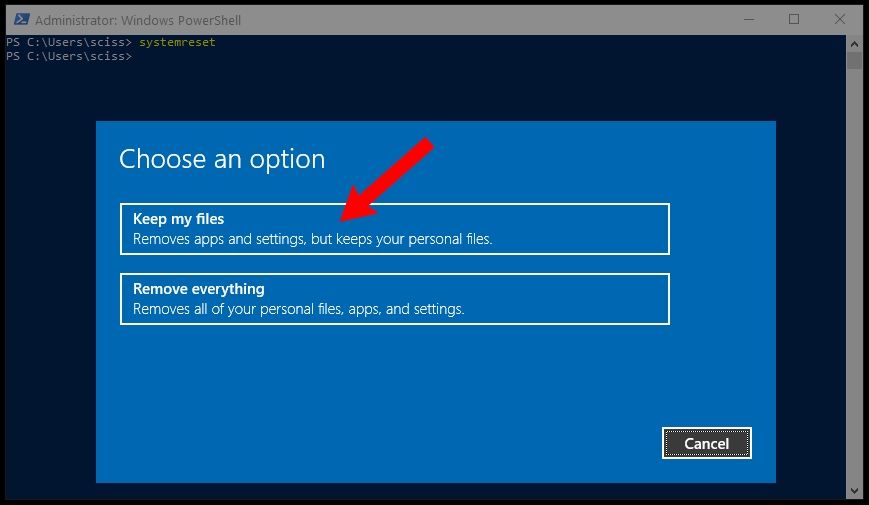
Wait a moment while the wizard analyzes your system. Then, you’ll see a list of all the programs that’ll be removed:
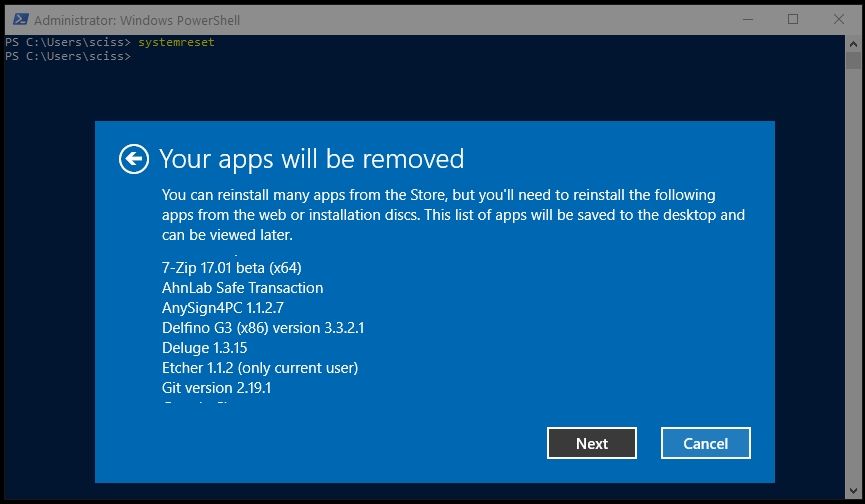
Click the «Next» button, and follow the instructions to reset your Windows 10 installation.
Once you’re finished resetting Windows and creating a new user, the Start Menu should be working again.
So those are all the ways to fix the Windows 10 Start Menu, listed from easiest to hardest.
Did any of these methods work for you? Is there another way to open the Start Menu that I missed? Let me know about it on Twitter.
Learn to code for free. freeCodeCamp’s open source curriculum has helped more than 40,000 people get jobs as developers. Get started
The start button is one of the most important components of a Windows computer. This guide shows you how to fix Windows 10 start menu not working issue in various ways.
| Workable Solutions | Step-by-step Troubleshooting |
|---|---|
| 1. Sign out and sign in account | The start menu won’t work if there’s a problem with your user account. Sign out of your account…Full steps |
| 2. Restart Windows Explorer | Windows Explorer is the application used to view your programs and files. Restart Windows Explorer…Full steps |
| 3. Run SFC scanner | Windows has a system file checker that fixes corrupted system files and fixes start menu freezing…Full steps |
| 4. Use the DISM tool | If the SFC method fails, you can use a different command — DISM to repair the damaged system file to fix…Full steps |
| More effective solutions | Fix Windows 10 start menu not working issue by checking Windows update, creating new values in Registry…Full steps |
Since its first release in 2015, Windows 10 has more and more users. Up to now, the proportion of Win10 users has been close to 80%. Each update brings a lot of new features that delight users. However, users will also encounter various problems in the use of Windows 10.
And Windows 10 start menu not working or not opening is one of the common issues that bother many users. Sometimes, the start menu will crash and not respond, and sometimes it won’t open at all when you click the start menu button.
In this post, we are going to talk about why Windows 10 start menu not working won’t open and freeze, and how to fix this issue effectively.
Before we jump to the fixes, we should have a brief understanding of the causes of the Windows 10 start menu not opening. The main reasons include:
- Some operating system files related to the start menu are corrupted
- Cortana temporary files are corrupted
- An unspecific Windows update bugs cause the start menu to freeze
- The start menu under a specific Windows account crashed
- Windows Explorer on your system is expired or contains corrupted files
How to Fix Windows 10 Start Menu Not Working — 7 Fixes
Now that we know these factors may cause these start menu not working problem, we can take the methods below to troubleshoot. And if you think this passage is useful in fixing Windows 10 start menu not working, click the social buttons to share.
Note: You should back up your important files before trying any of the following solutions. None of us can afford to lose essential data.
Way 1. Sign Out and Sign in Your Account
If there is a problem with your user account, the start menu will be is crashing or missing. In this case, you can try fixing the problem by signing out and signing into your user account.
Note: Signing out your account will close all the documents and applications you are running. Remember to save your files before logging out.
Step 1. Press Ctrl + Alt + Delete keys at the same time. Click «Sign out».
Step 2. Wait for a few moments. Then, you will be on the login screen again.
Step 3. Type your password to sign back into your account. Check if the start menu works properly. If not, try other methods below.
Way 2. Restart Windows Explorer
File Explorer controls and serves the start menu, taskbar, and other applications. If it fails and doesn’t work correctly, you may have the Windows 10 start menu not opening issue. To solve the problem, you can try to restart the File Explorer in Task Manager.
Step 1. Press Ctrl + Alt + Delete keys and click «Task Manager».
Step 2. Click «More details» to see a full list of open programs and background processes you’re running on Windows 10.
Step 3. Scroll through the list to find «Windows Explorer». Right-click it and choose «Restart».
Wait for the process to finish. After Windows Explorer restarting, click and open the start menu and see if it works. If the start menu is still not working normally, move to the next method.
Way 3. Run SFC Scanner for Corrupt System Files
Corrupted system files can make Windows misbehave, including the start menu not working. You can use the Windows built-in SFC scanner to scan and repair the system file to solve the problem.
Step 1. Right-click the «Start» button and select «Command Prompt (Admin)».
Step 2. Type sfc /scannow and press Enter to run a full system scan.
Way 4. Use DISM Tool
If the SFC tool is not useful, don’t fret, continue using the DISM tool to scan and repair your system to fix Windows 10 start menu freezing issue.
Step 1. Press Win + R to open Run dialog and type: cmd to open «Command Prompt».
Step 2. Type the following command and hit «Enter».
Dism /Online /Cleanup-Image /RestoreHealth
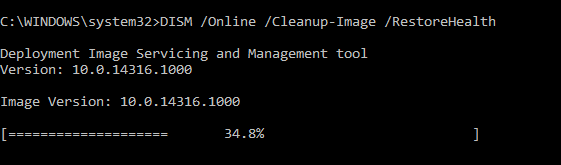
Step 3. Wait for the process to complete. Then, restart your computer and check if the start menu opens correctly.
Way 5. Check for Windows Updates
If the Windows 10 start menu not working problem is related to system bugs or defects, then you can fix the problem by upgrading your system to the latest version.
Microsoft is constantly improving its Windows 10 operating system, so keeping your system up to date is a good idea.
Step 1. Press Windows + I to open Windows Settings.
Step 2. Click «Update & Security» and select «Check for updates» under Windows Update.
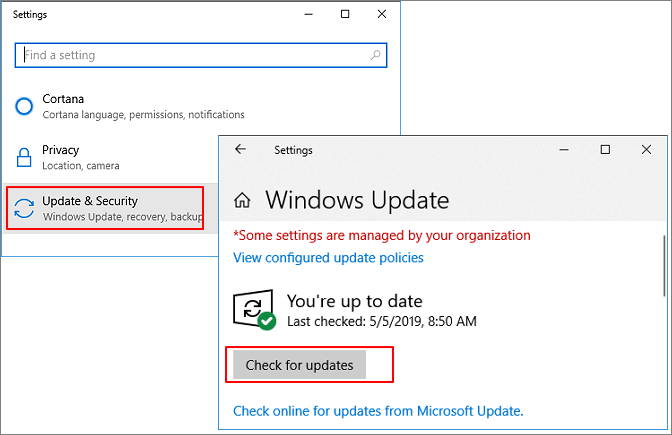
Step 3. If there a new Windows update, click «Install Now» and follow the instructions to upgrade to the latest Windows 10 version.
Way 6. Create New Xaml Start Menu Values in Registry
The Windows 10 start menu not opening issue may also have something to do with your registry.
When Microsoft switches to the new Windows 10 Start Menu, it includes starting the XAML process that runs the menu. Ensure the Xaml Start Menu is enabled to creating and setting the EnableXamlStartMenu in the Windows registry.
Some users report that they have managed to solve this problem by creating new value in the registry. Try this solution as demonstrated below.
Step 1. Press Win + R keys to open the Run box. Type regedit to start the Registry Editor.

Step 2. Navigate to: Computer/HKEY_CURRENT_USER/Software/Microsoft/Windows/CurrentVersion/Explorer/Advanced.
Step 3. In the right panel, right-click the empty space and choose «New > DWORD (32-bit) value».
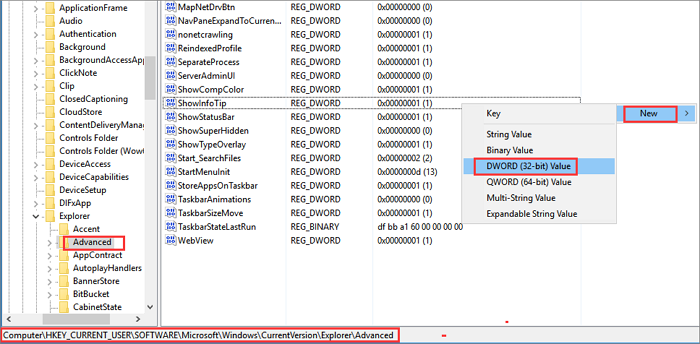
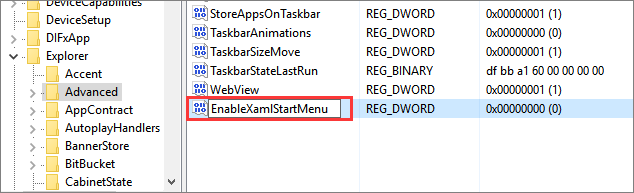
Step 4. Type EnableXamlStartMenu as the name of the new DWORD. Then, exit Registry Editor and restart Windows Explorer. In this way, the start menu should work again.
Way 7. Improve System Performance
To make all the utilities of Windows 10 work well, including the start menu, you need to ensure that the operating system is running in a good environment, for example, the system disk needs to be large enough, and the system disk is SSD.
If your system drive (C drive) is out of space, Windows 10 can’t run properly and you’ll have a lot of problems. To extend the C drive easily, you can apply EaseUS Partition Master, which can allocate free space from other drives to the system drive without losing any data.
Free download this Windows 10 disk management tool to increase your C drive with the step-by-step guides below. If you want to upgrade your system disk from HDD to SSD and migrate OS to SSD, EaseUS Partition Master can help you out.
Option 1. Extend System C drive with unallocated space
- 1. Right-click on the System C: drive and select «Resize/Move».
- 2. Drag the system partition end into the unallocated space so to add it to the C: drive. And click «OK».
- 3. Click «Execute Task» and «Apply» to execute the operations and extend the C drive.
Option 2. Extend System C drive without unallocated space
- 1. Right-click a big partition with enough free space on the system disk, select «Allocate Space».
- 2. Select the system drive at the Allocate Space From (*) To section, and drag the end of System C drive into the unallocated space. Click «OK» to confirm.
- 3. Click «Execute Task», it will list the pending operations, and click «Apply» to save the changes and extend the C drive.
0:00-0:26 Extend System Drive with Unallocated Space; 0:27-0:58 Extend System Drive without Unallocated Space.
To Sum Up
Windows 10 start menu not working or not opening can be very annoying as you can’t access the apps and settings there. There are multiples ways to resolve this issue. For example, you can check and repair corrupted system files with SFC and DISM tools, restart Windows Explorer, upgrade Windows 10 to the latest version, and more.
Hopefully one of the methods in this article can solve Windows 10 start menu freezing problem and you can use it normally.
The Start Menu is one of the fundamental parts of the Windows operating system. In fact, almost everything can be done from the Start Menu. When the Windows Start button stops working, using your PC suddenly becomes much harder.
In this article, we’ll explain 11 ways to fix the Start button when it stops working in Windows 10 and Windows 11.
1. Restart Your PC
Many seemingly unsolvable problems can be quickly fixed with a restart. If your Start Menu isn’t working (it doesn’t open when you press the Start key), you’ll have to use the buttons on your PC case to restart.
To do so, press the Restart button. If you don’t have a restart button, press and hold the power button for 5-10 seconds. Wait 30 seconds, then press the power button again to restart it.
If the Windows Start button still isn’t working when your PC reboots, move on to the next step.
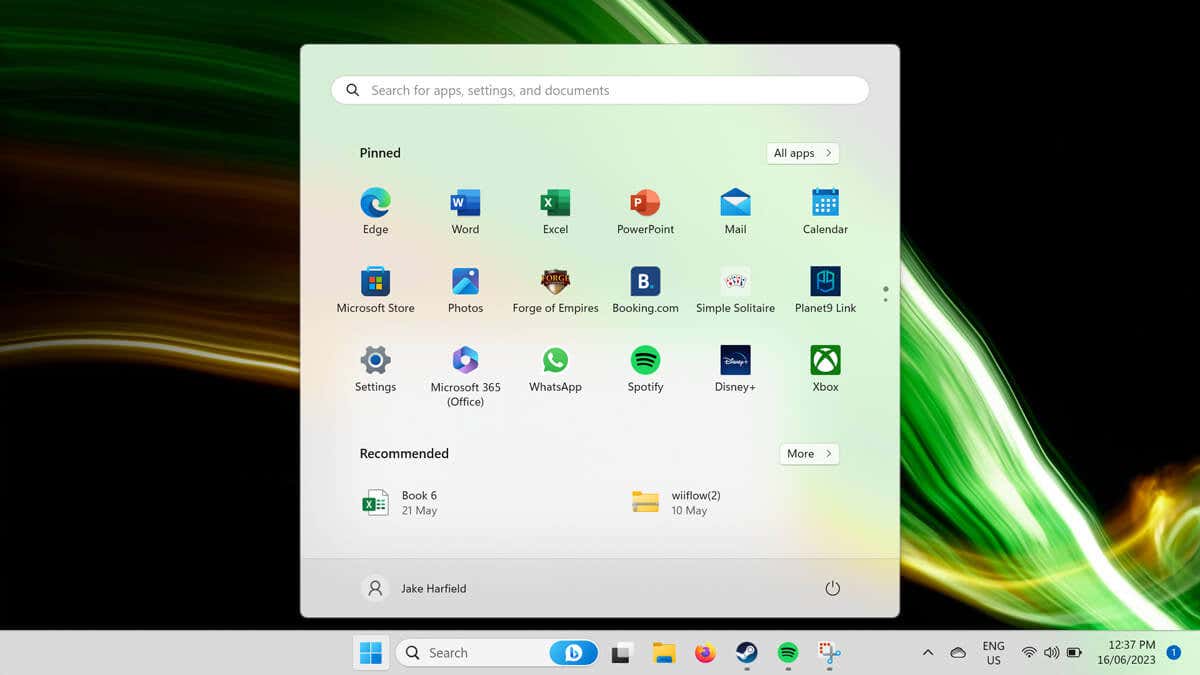
2. Check If the Start Menu Is Hidden
If you can’t see the Start Menu or taskbar, you may have accidentally hidden them. To find out whether this is the case, you can lock the taskbar:
- Press the Windows key + I to open Settings.
- Select Personalization.
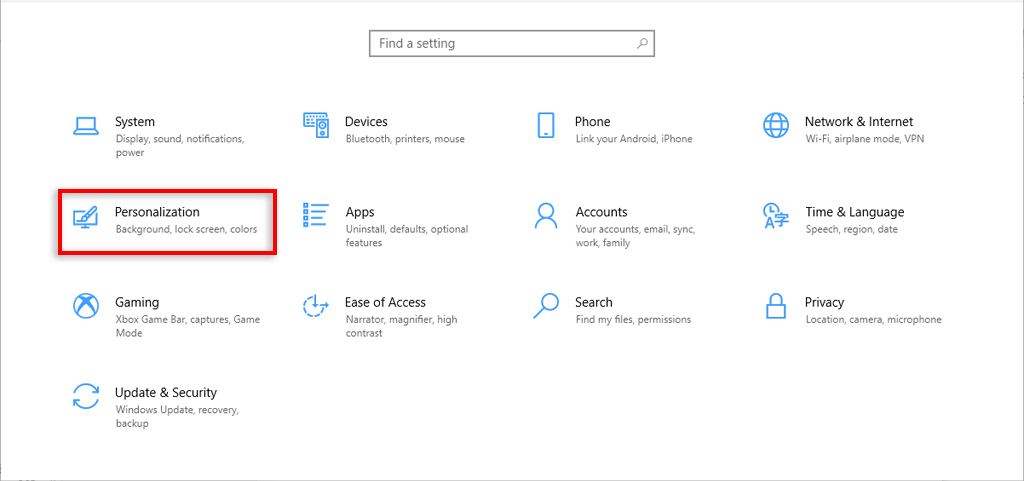
- Select Taskbar.
- Toggle on Lock the taskbar.
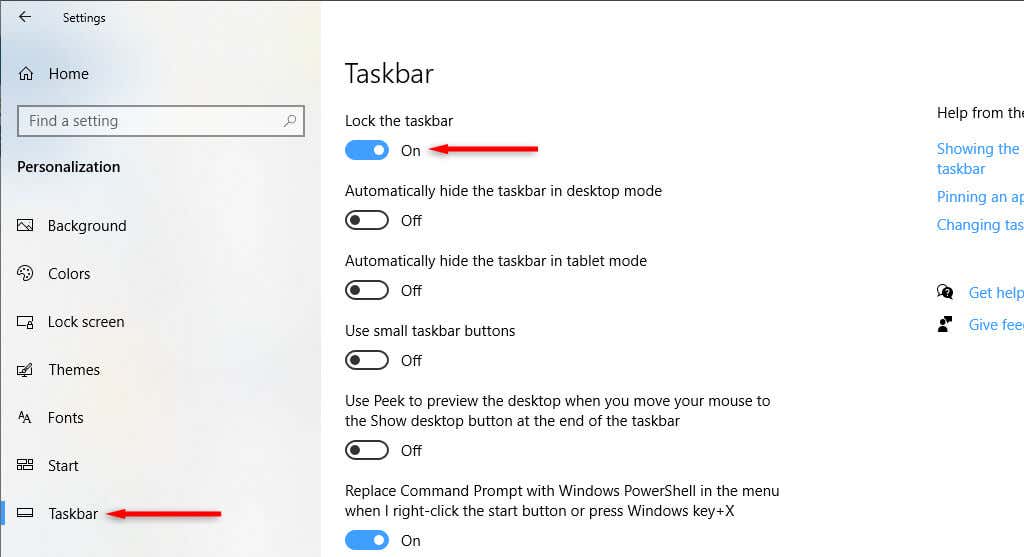
- Make sure that Automatically hide the taskbar in desktop mode is toggled off.
3. Check for Malware and Viruses
Malware often causes your PC to malfunction. To check whether your PC has malware, open your antivirus software and select Scan Now. If you don’t have a third-party antivirus installed, you can use Windows Defender as follows:
- Press the Windows key + I to open Settings.
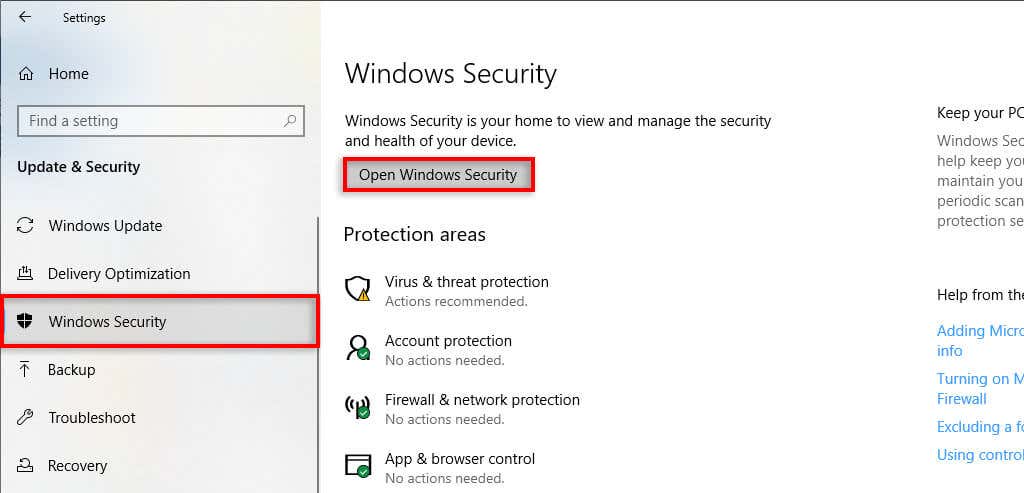
- Select Update & Security.

- Select Windows Security.
- Select Open Windows Security.
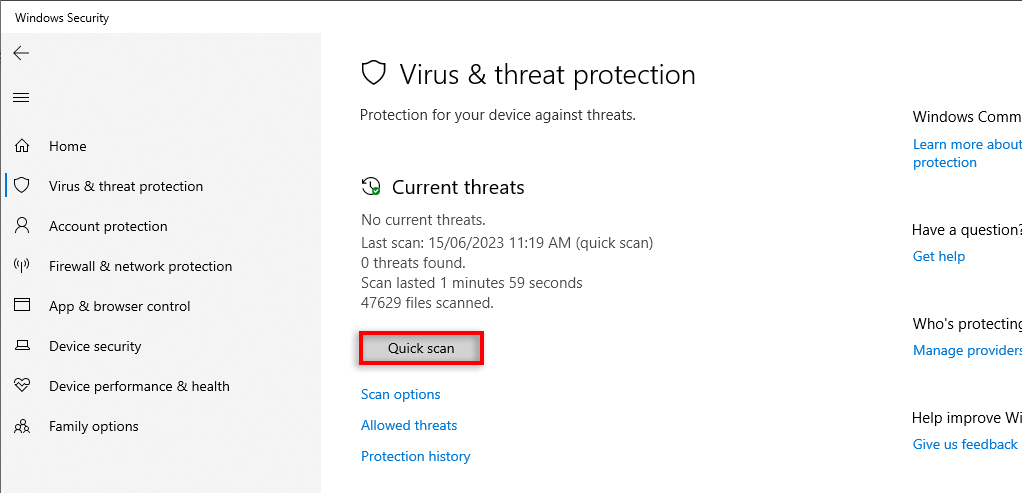
- In the left-hand pane, select Virus & threat protection.
- Select Quick scan.
4. Update Windows to the Latest Version
Updating Windows often adds new features and resolves residual glitches. Occasionally, the Start menu error can be caused by a faulty Windows update, and updating to the latest version can help.
To update Windows:
- Press Windows key + I to open Settings.
- Select Update & Security.
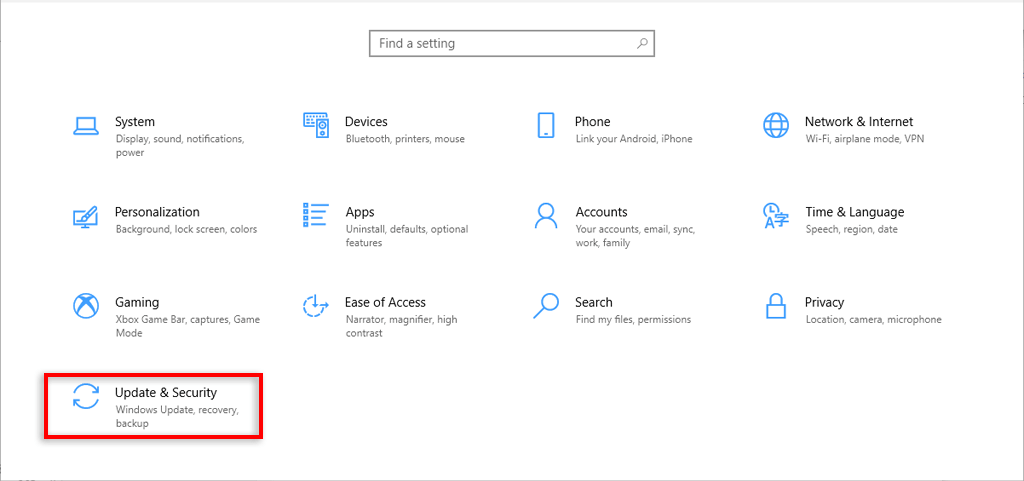
- Select Check for updates.
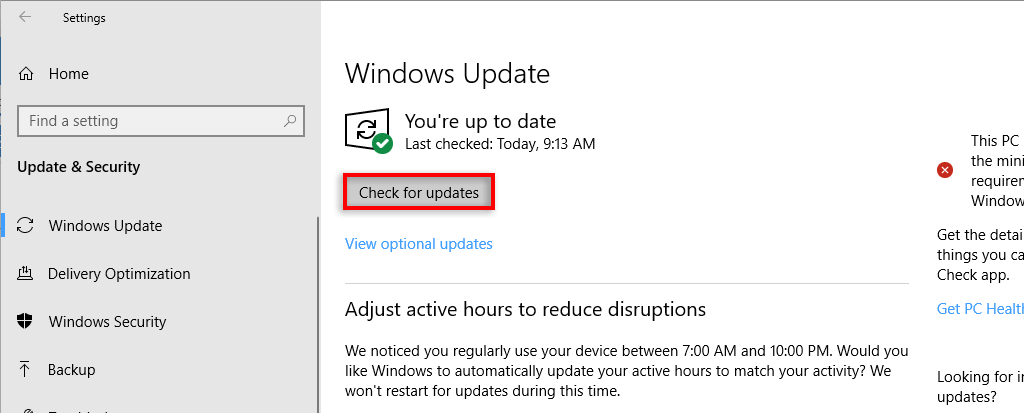
- If the system finds a new Windows update, download it, then restart your computer as above.
5. Restart Windows Explorer Process
Often, temporary glitches are caused when system processes function incorrectly. To check whether this is the case, restart the process using the Task Manager. In the case of a broken Start Menu, it’s usually the Windows Explorer task at fault.
- Press Ctrl + Shift + Esc (or Ctrl + Alt + Del) to open Task Manager.
- Select the Processes tab.
- Select More details to see a complete list of processes.
- Scroll down and find Windows Explorer (this may appear as “File Explorer”).
- Right-click the process and select Restart.
- Wait for Explorer to boot up again, then try to access your Start Menu as usual.
6. Change User Account
For some reason, a broken Start Menu is often associated with a particular user account. To check, sign out and enter another account — even if it’s a guest account. Since you can’t access the Start Menu, you’ll have to restart to do this.
If the Start Menu works on the other account, it’s a user account issue. Unfortunately, besides updating Windows, we aren’t sure why this error occurs or how to fix it.
One less-than-perfect solution is creating a new user account and migrating your files. While this can be a pain, a new account will resolve the Start Menu glitch and let you use Windows as usual.
To do so:
- Press the Windows key + I to open Settings.
- Select Accounts.
- Select Family & Other Users.
- Select Add someone else to this PC.
- Select I don’t have this person’s sign-in information.
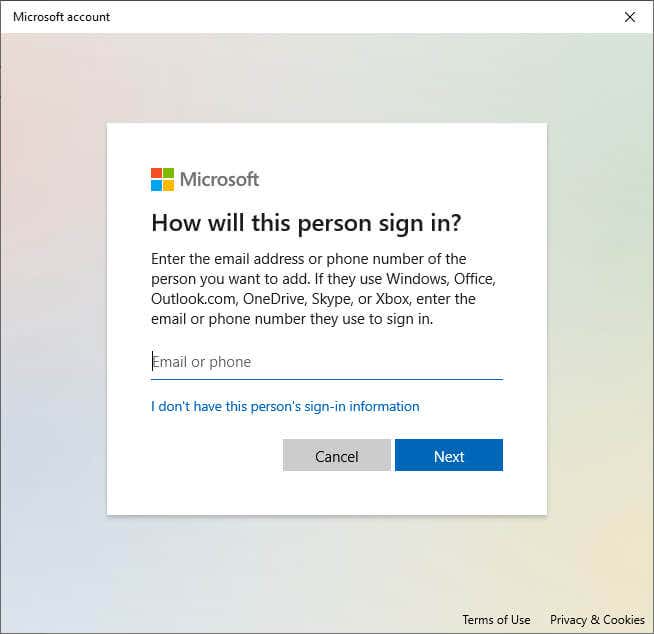
- Select Add a user without a Microsoft account.
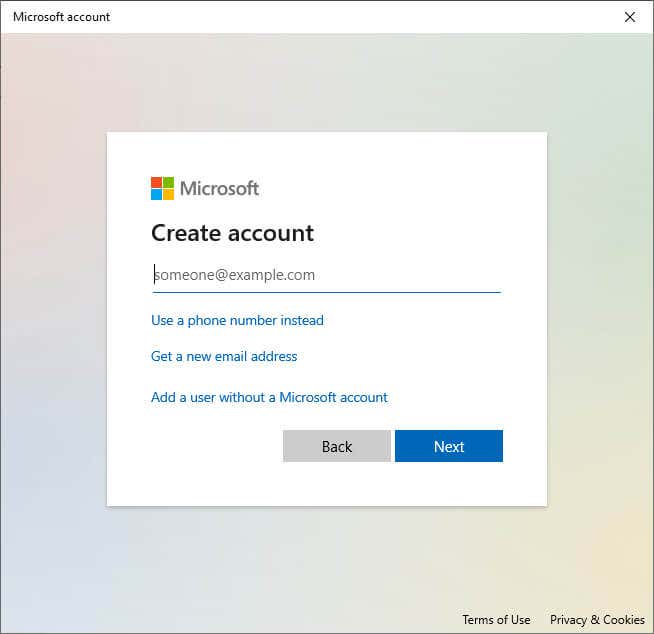
- Enter your new username and password, then select Next.
7. Use Windows PowerShell to Re-register Built-in Apps
Re-registering apps with PowerShell is a temporary workaround to help you get the Start Menu running again. This sets your apps (like the Start Menu) to factory defaults and can resolve common glitches.
To re-register the Start Menu:
- Press the Windows key + R to open the Run dialog box.
- Type “PowerShell” and press Enter.

- Paste the following command and hit Enter:
Get-AppXPackage -AllUsers | Foreach {Add-AppxPackage -DisableDevelopmentMode -Register “$($_.InstallLocation)\AppXManifest.xml”}

- Wait for PowerShell to finalize, then check if your Start Menu is working.
Note: Since this is only a temporary fix, you may have to repeat this process every time you restart your computer.
8. Disable Cortana’s Temporary Files
Cortana can cause Windows Explorer and other essential Windows services to malfunction, especially on Windows 10. To resolve the Start button not working problem, you can disable the temporary Cortana files using the Command Prompt.
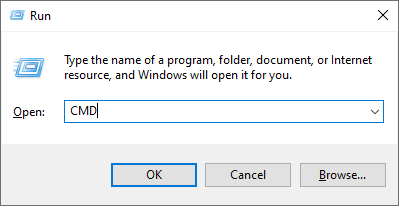
- Press the Windows key + R to open Run.
- Type “CMD” and press Ctrl + Shift + Enter to open it as administrator.
- When the Command Prompt window opens, type the following command, replace USER with your username, and press Enter:
CD/d “C:\Users\USER\AppData\Local\Packages\Microsoft.Windows.Cortana_cw5n1h2txyewy”
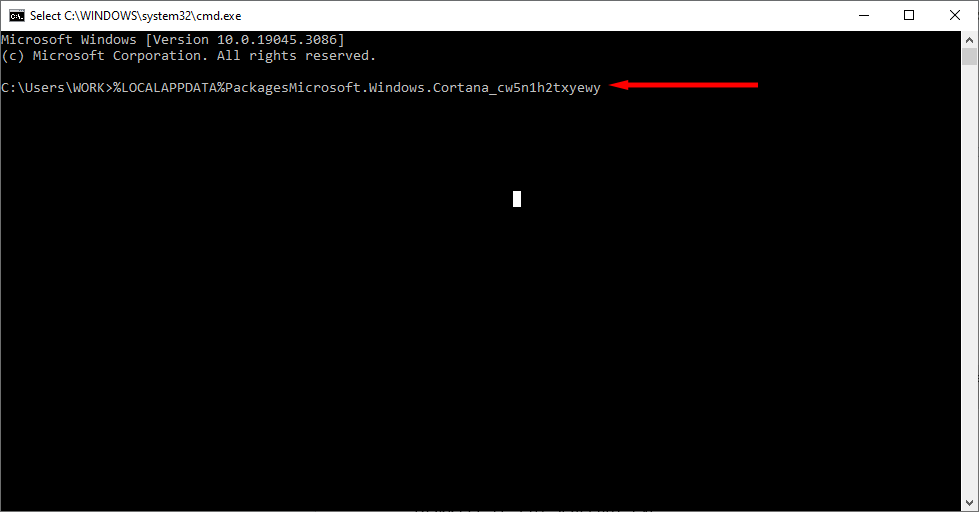
If that file path can’t be found, try:
CD/d “C:\Users\USER\AppData\Local\Packages\Microsoft.Windows.Search_cw5n1h2txyewy”
- Then, type the following and hit Enter:
Taskkill /F /IM SearchUI.exe
- Finally, type the following and press Enter:
RD /S /Q Settings
- Now, try pressing the Start Menu button.
Note: If the above file paths can’t be found or the commands don’t work, you can try manually renaming the folders by navigating to the file path in Windows File Explorer. This might cause Cortana to reset, fixing the issue at hand.
9. Use the System File Checker
Windows provides the System File Checker (SFC) to troubleshoot and fix corrupted system files. If none of the above methods have worked, you can use this to find out what’s causing the Start Menu glitch.
- Press the Windows key + R to open Run.
- Type “CMD” and press Enter.
- When the Command Prompt window opens, type the following command and press Ctrl + Shift + Enter to open it as administrator:
SFC /scannow
- Wait for the scan to complete. If the wizard reports no integrity violations, it cannot find out what is causing the problem. If it resolves the issues, you should receive the message “Windows Resource Protection found corrupt files and successfully repaired them.” If not, you’ll have to replace the broken files manually.
10. Create New Registry for the Start Menu
If your Windows key still isn’t working, you can try creating a new registry entry for the Start Menu:
- Press the Windows button + R to open Run.
- Type “Regedit” and press Enter.
- Select HKEY_CURRENT_USER then right-click on the screen and select New > DWORD (32-bit) Value.
- Name the file “EnableXamlStartMenu.”
- Restart your PC.
11. Perform a System Reset
If all else fails, the final resort is to reset Windows. To perform a system reset:
- Press the Windows key + I to open Settings.
- Select Update & Security.
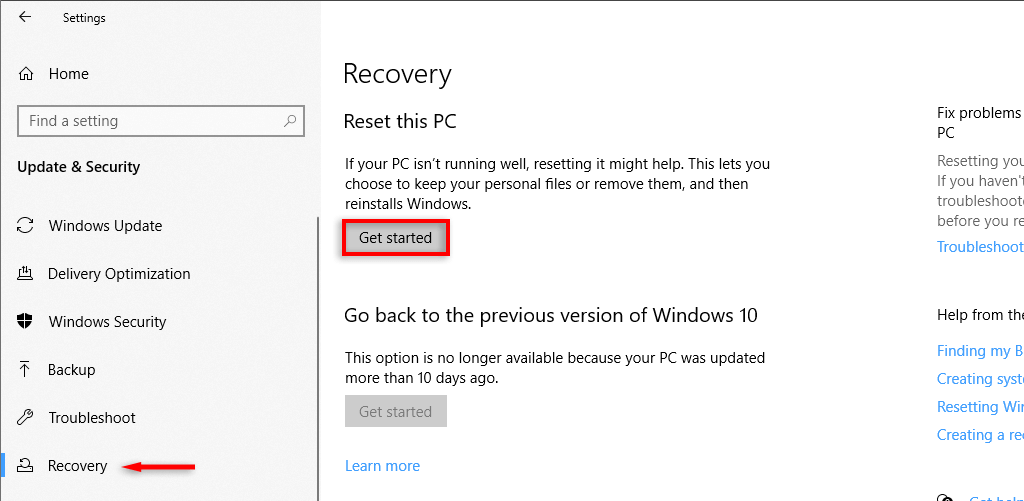
- Select Recovery from the left-hand menu.
- Under “Reset this PC”, select Get started. You’ll be able to choose to keep your files.
Note: If even this step fails, your only option is to uninstall and reinstall Windows completely. With a fresh install, you should be completely free of the Start Menu button glitch.
Get Your Start Menu Up and Running Again
It can be frustrating when something fundamental like the Start Menu stops working. Mainly because without it, even accessing the tools you need to fix the glitch becomes harder.
Hopefully, these fixes have helped you get your Windows 11 or Windows 10 Start Menu button working once again.