Here we’re going to show you how to mount an NFS file share in Windows Server 2016 both temporarily and persistently so that it will automatically mount after a reboot.
There are a couple of different ways this can be done, including mapping a network drive or adding a network location, which we’ll discuss here.
Our NFS Server: In this example we already have an NFS server setup on a CentOS 7 Linux system which is available at 192.168.1.14 and we have exported the /root/nfs directory with NFS. See our guide on creating an NFS server in Linux here if you need information on how to do this.
Install NFS Client
Before we can mount any NFS shares on our Windows server, we must first install the NFS client feature. This can be done through the graphical user interface (GUI) using server manager, however that takes a lot longer so we’ll use some PowerShell.
First we’ll use the Get-WindowsFeature cmdlet to search for available features that contain the string ‘NFS*’ in the Name field.
PS C:\> Get-WindowsFeature -Name NFS*

As we can see NFS-Client is available for install but not currently installed.
Next we use the Install-WindowsFeature cmdlet to install the NFS-Client feature, as shown below.
PS C:\> Install-WindowsFeature -Name NFS-Client

Once complete we should see that the installation has completed successfully, no reboot is required for this feature, we can begin using it straight away.
Mount NFS Temporarily
We can use the mount command in command prompt to quickly mount our NFS share and confirm that it’s working. Note that the mount command used here is in command prompt rather than PowerShell, using it in PowerShell will fail as it is a different command.
C:\Users\Administrators> mount \\192.168.1.14\root\nfs X:
X: is now successfully connected to \\192.168.1.14\root\nfs

The command completed successfully.

At this point we can browse to “This PC” and we should see the NFS share mounted under Network Locations.
There is an issue with this however, this mount is not persistent meaning that if we perform a restart of the Windows server it will not be there afterwards. Luckily there are a few ways we can permanently map to the NFS file share.
Mount NFS Persistently
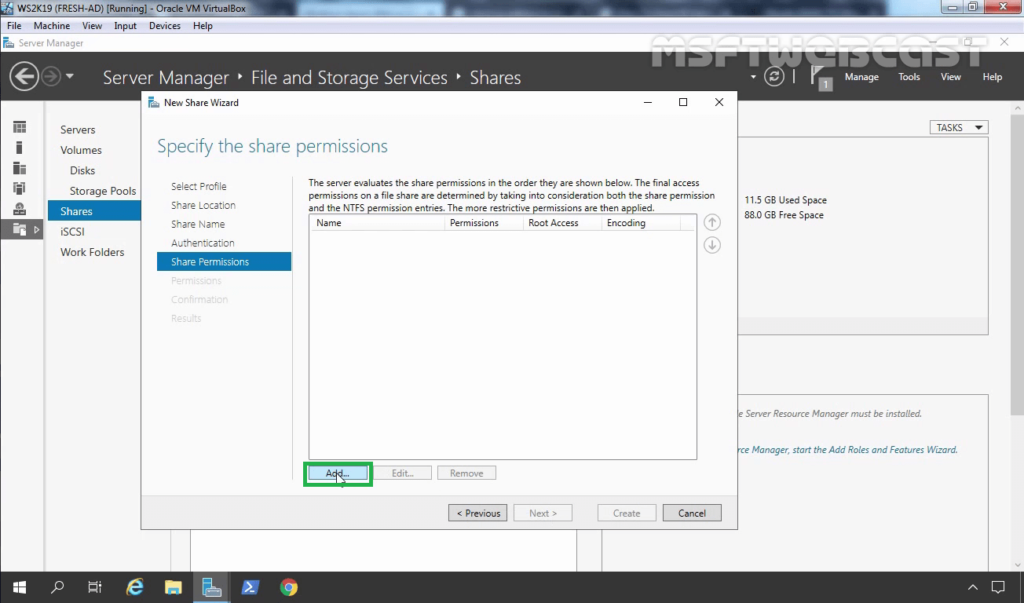
Most of the time we will want our NFS mount to survive a system reboot and mount automatically after boot so that we don’t have to manually mount it every time.
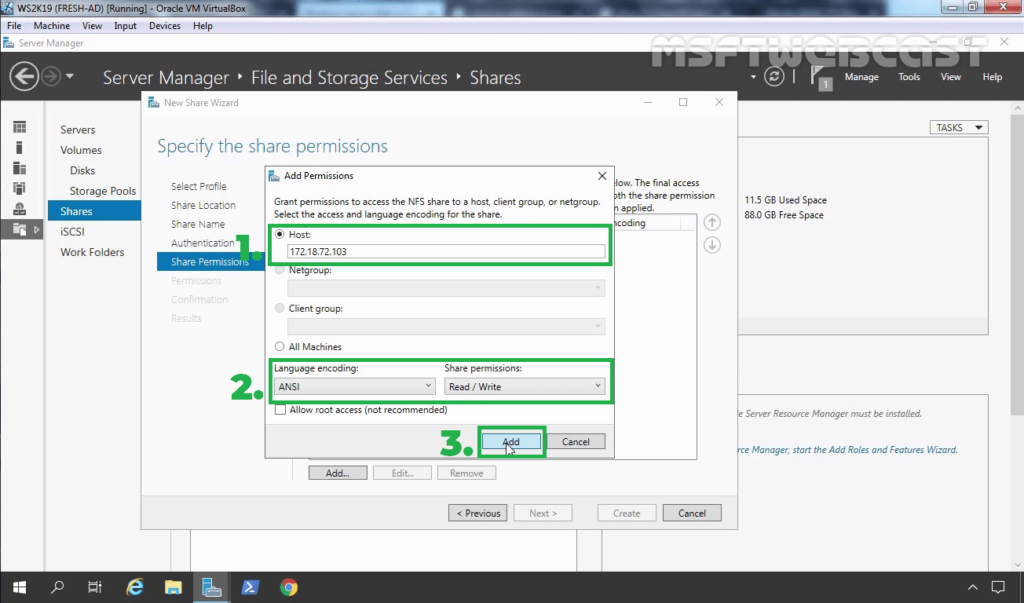
There are a couple of different ways that we can achieve this task:
- Map Network Drive
- Add A Network Location
Map Network Drive
I personally prefer this method, as we can see the space remaining much more easily.
-
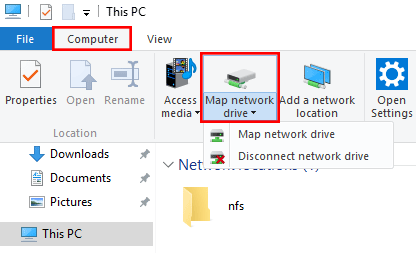
First open up “This PC” and select Computer from the menu at the top. From here click on Map network drive, as shown below.

-
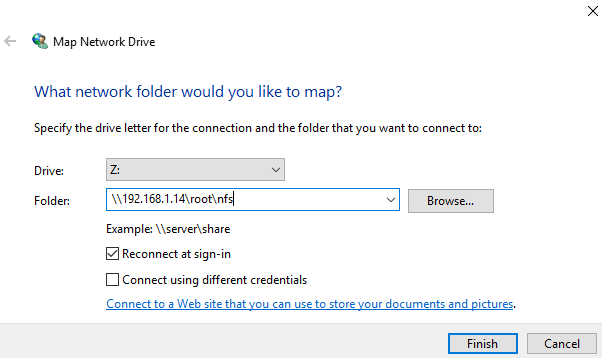
The Map Network Drive window will open, select the drive letter that you want to assign to the NFS share, followed by the IP address or hostname of the NFS server as well as the path to the exported NFS directory. Click the Finish button when complete.

You may see a pop up window showing that the connection is being attempted. Once complete the shared NFS folder will open up.
-
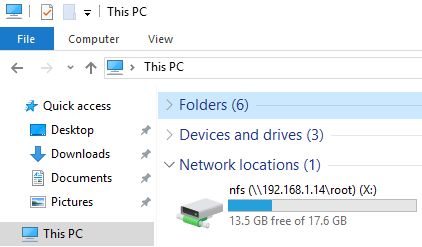
When you view “This PC” you will see the mapped network drive under Network location. This method is better than adding the network location as we’ll discuss next as it clearly shows how much disk space on the NFS share is in use and how much is still available.

Add A Network Location
This will basically create a shortcut to the mounted NFS directory for you to access at any time, it will also be available after restart just like the map network drive method above.
-
First open up “This PC” and right click in the white space area and select “Add a network location”.

-
On the welcome screen click Next to proceed.

-
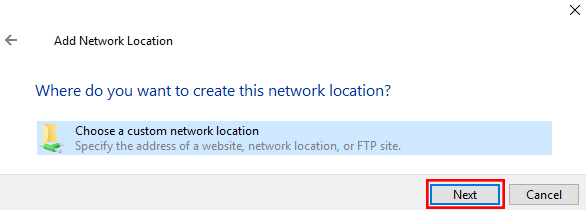
Select that you want to choose a custom network location, followed by the Next button.

-
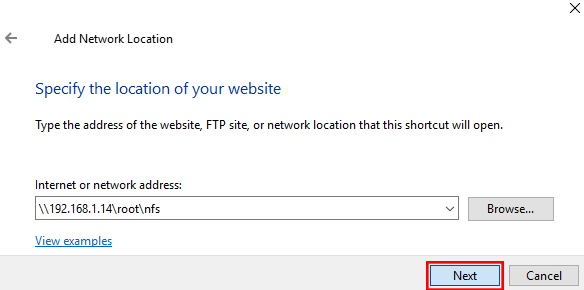
Enter in two back slashes, followed by the IP address or hostname of your NFS server, followed by the path that is being exported by the NFS server. Click Next once you’ve filled this in.

-
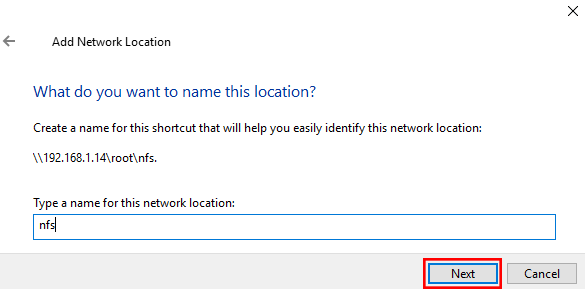
You can now select a custom name for the network location, click Next once you’ve set one.

-
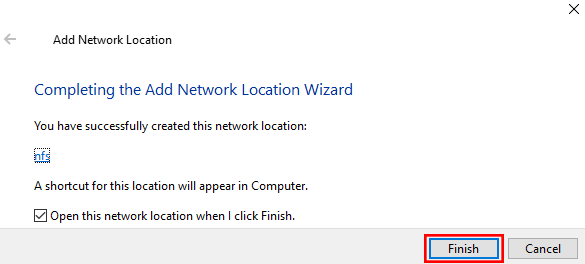
To complete the process, simply click the Finish button on the completion screen.

-
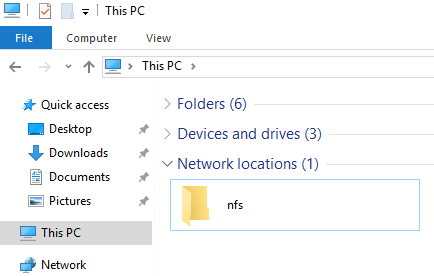
We can optionally open the NFS mount now, or we can browse to “This PC” and see the folder shortcut listed under the “Network locations” setting as shown below.

As mentioned note that this does not show the disk space in use like the network drive mapping option.


Summary
We have shown you how to install the NFS client feature in Windows Server 2016, and then mount an NFS share from a Linux server both temporarily through command prompt with the mount command, and persistently so that the NFS share is mounted automatically after the server has been restarted.
By doing this we can easily access files from a Unix or Linux based operating system over NFS from Windows.
Сегодня мы разберемся, как установить и настроить клиент NFS (Network File System) в Windows Server 2012 R2 / Windows 8. Итак, чтобы подключить каталог (шару) с NFS сервера в Windows Server 2012 R2 / Win 8, нужно, как и в предыдущих версиях Windows, установить отдельный компонент — клиент NFS (Client for NFS). Дополнительно, для возможности управления настройками NFS подключения, можно установить компонент служб NFS (Services for Network File System).
Клиент NFS входит в состав ОС Microsoft, начиная с Windows 7. В Windows 2012 / 8 клиент NFS получил небольшие изменения. Теперь NFS клиент поддерживает аутентификацию по протоколу Krb5p — Kerberos версии 5 (в дополнение к Krb5 и Krb5i, поддержка которых появилась еще в Windows 7), поддерживаются большие NFS пакеты – до 1024KB (в Win 7 максимальный размер пакета 32KB)
Клиент NFS можно установить через GUI или с помощью Powershell. Для установки в графическом режиме, откройте консоль Server Manager и выберите компонент (Features) под названием Client for NFS. 
По умолчанию вместе с этим компонентом не устанавливается графическая консоль управления NFS, чтобы исправить это, установим опцию Services for Network File System Management Tools в разделе Remote Server Administration Tools -> Role Administration Tools -> File Services Tools. 
Для установки NFS-клиента в Windows 8 нужно активировать компонент Services for NFS ->Client for NFS, через установку/удаление компонентов (Turn Windows features on or off) в Панели управления (Control Panel -> Programs -> Programs and Features).
Примечание. В отличии от Windows 7, в которой NFS клиент присутствовал в редакциях Enterprise и Ultimate, в Windows 8 клиент Network File System поддерживается только в старшой версии — Windows 8 Enterprise.
Все перечисленные выше компоненты системы можно установить всего одной командой Powershell:
Install-WindowsFeature NFS-Client, RSAT-NFS-Admin

После окончания установки, запустите консоль Services for Network File System Managemen и откройте окно свойств NFS клиента (Client for NFS).
.")
В настройках NFS клиента можно задать:
- Используемый транспортный протокол (Transport protocols) – по умолчанию TCP+UDP
- Тип монтирования NFS шар: hard или soft
- На вкладке File Permissions указываются дефолтные права для создаваемых папок и файлов на NFS шарах
- На вкладке Security указываются протоколы аутентификации, с помощью которых можно аутентифицироваться на NFS сервере

После настройки установки, администраторы смогут смонтировать NFS каталог с помощью команды mount:
Mount \\lx01.abc.lab\nfs z:

В этом примере мы смонтировали под буквой Z: каталог NFS, расположенный на сервере lx01.abc.lab.
После монтирования, подключенный таким образом каталог на NFS сервере доступен в системе как отдельный диск с буквой Z:\ .
Смонтировать NFS шару можно и с помощью Powershell:
New-PSdrive -PSProvider FileSystem -Name Z -Root \\lx01.abc.lab\nfs
Примечание. Подключенный таким образом nfs каталог будет доступен только внутри сессии Powershell, в которой была выполнена команда монтирования. Чтобы смонтировать NFS каталог в системе на постоянной основе, в конце Powershell команды нужно добавить ключ –Persist.
Отключить смонтированный каталог можно так:
Remove-PSdrive -Name Y
I have recently been testing and working through some scenarios where I require the NFS client on a Windows machine to access some NAS shares over the NFS protocol, not much has changed I believe between Windows Server 2016 and Windows Server 2019 but thought it might help some to see how easy it is to get going.
I am picking up at this stage with my fully patched and ready to go Windows Server running 2019. As mentioned previously I want to use this machine to access my NFS share which doesn’t matter what it is or what it is for but this Windows machine is running in Microsoft Azure and I am access Azure NetApp Files over the NFS protocols, Azure NetApp Files can be presented over both NFS and SMB and I will have additional posts about this later.
Installing the Client for NFS
I am pretty sure this could also be achieved through the system manager and selecting the Add Features dialog and working through the wizard approach, I have been purposely doing a lot more of my tasks through PowerShell so that I can re-use and make my tasks quicker, this is something I have picked up from my learnings around Infrastructure as Code. For that reason, I am using PowerShell. I am sure someone else had documented the process through the system manager and UI.
First of all, let’s see what NFS based features we have available to us by running the below command.
Get-WindowsFeature -Name NFS*

As you can see from the image above, we have one feature available to us, “Client for NFS” by installing this it will allow us to mount NFS exports to our Windows machine so we can access the data within.
To install this feature run the following command.
Install-WindowsFeature -Name NFS-Client

That’s it, it’s that simple, hardly not worth mentioning. That’s the NFS Client installed on our machine, next we need to make sure from the NAS server point of view that the IP address of this windows machine can access that data.
As I said before I am using Azure NetApp Files, this export is configured in the following screen when configuring Azure NetApp Files. I will provide a step by step walkthrough of this process after this initial post.

As you can see from the above, I have allowed all clients from all subnets using the export policy (This is the default setting for ANF), my advice is that if this was production you should to create more secure export policies.
Mounting the share
Now we have our NFS Client and we have our export policy from whichever NAS device you are looking to mount onto your Windows, next we actually need to mount the share for use.
Some people will ask now, why you are using NFS when you can use SMB, certain applications, certain environments may require this method and protocol. If this was a traditional Windows environment and this share was going to house predominately user shares and home drives, then absolutely the way to do this would most likely be with the SMB protocol.
Next up is open up a command prompt with Administrator privileges, the mount command is going to be the command you use and then you will be using the NAS IP Address followed by the share name and then which letter you would like to mount this to on your Windows system.
Mount 10.1.1.4:/vZillaANFShare n:

Providing you have the correct configuration, mostly down to the export policy on your NAS device then this process should take seconds. And then by seeing the success message as per above but then checking this now as a mapped network drive as per below.

Quick post hope that it is useful for somebody. This was something I was working on so that I could test Azure NetApp Files without access to Azure Active Directory services (due to corporate policy) this stopped me from being able to use SMB but allowed me to test the functionality via NFS on Windows and Ubuntu.
Justin Parisi did a great blog on this at the start of the year – Windows NFS? WHO DOES THAT???
2019-11-12
In this article, I will explain how you can install and configure an NFS Server on a Windows 2019 Server. I will also show you the steps to create an NFS shared folder and mount the shared folder on Linux clients.
What is the Network File System (NFS)?
Network File System (NFS) provides a file-sharing solution that lets you transfer files between computers running Windows Server and other non-Windows operating systems such as Linux or UNIX using the NFS protocol.
NFS in Windows Server includes Server for NFS and Client for NFS. A computer running Windows Server can use Server for NFS to act as an NFS file server for other non-Windows client computers.
Client for NFS allows a Windows-based computer running Windows Server to access files stored on a non-Windows NFS server.
Understanding Test lab:
For this, we will use the virtual test lab created in VirtualBox.
- WS2K19-DC01: Domain Controller and DNS
- UBUNTU1804: Ubuntu OS, NFS client.
Install Server for NFS role service in Windows Server 2019:
To install the Server for NFS role service in Windows Server 2019, follow the below steps:
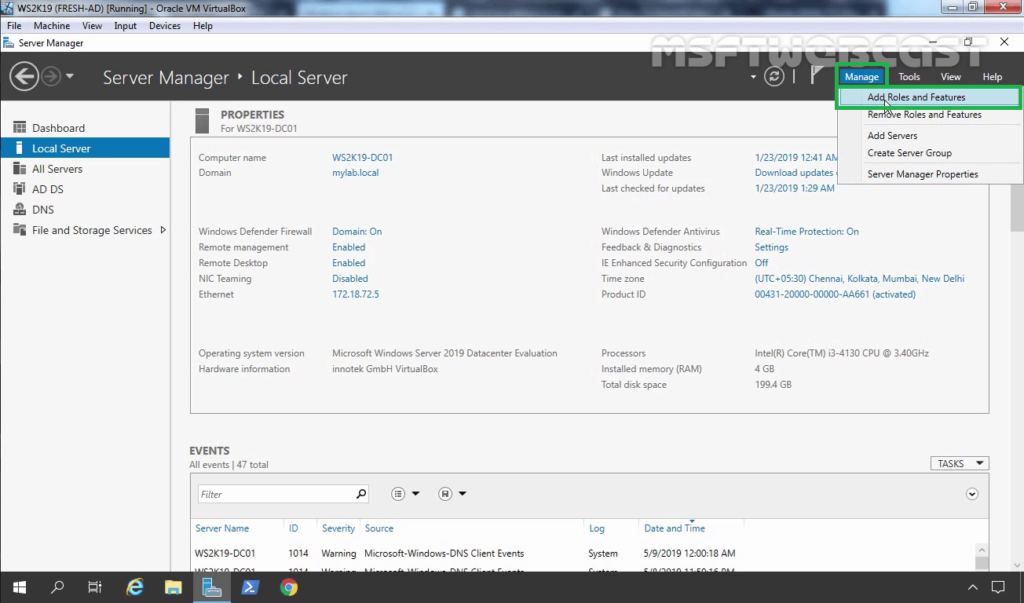
1. Open Server Manager. Click on Tools and select Add Role and Features.
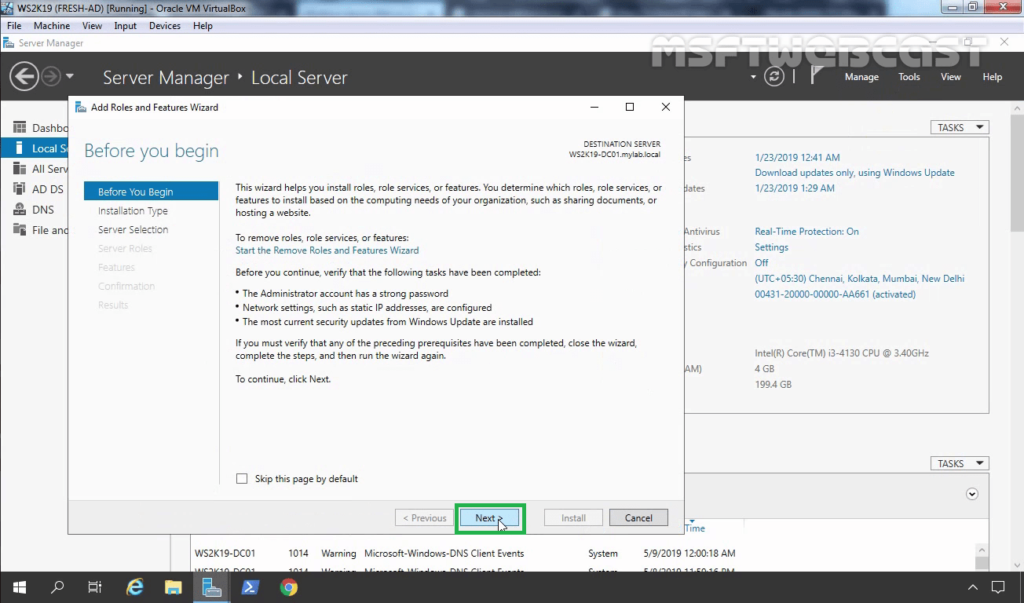
2. On the Before you begin page, click Next.
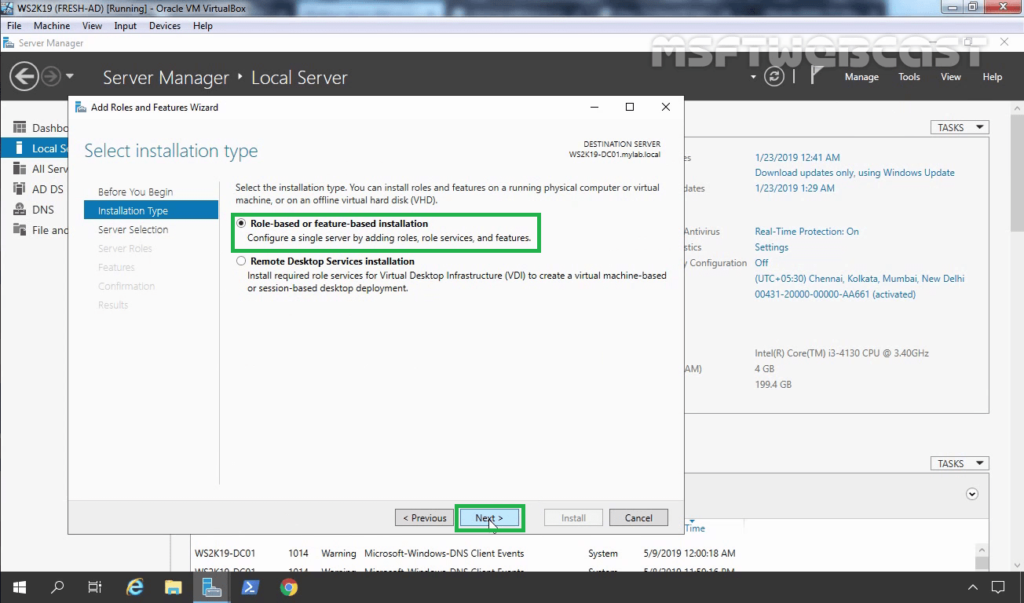
3. Select Role-based or feature-based installation and click Next.
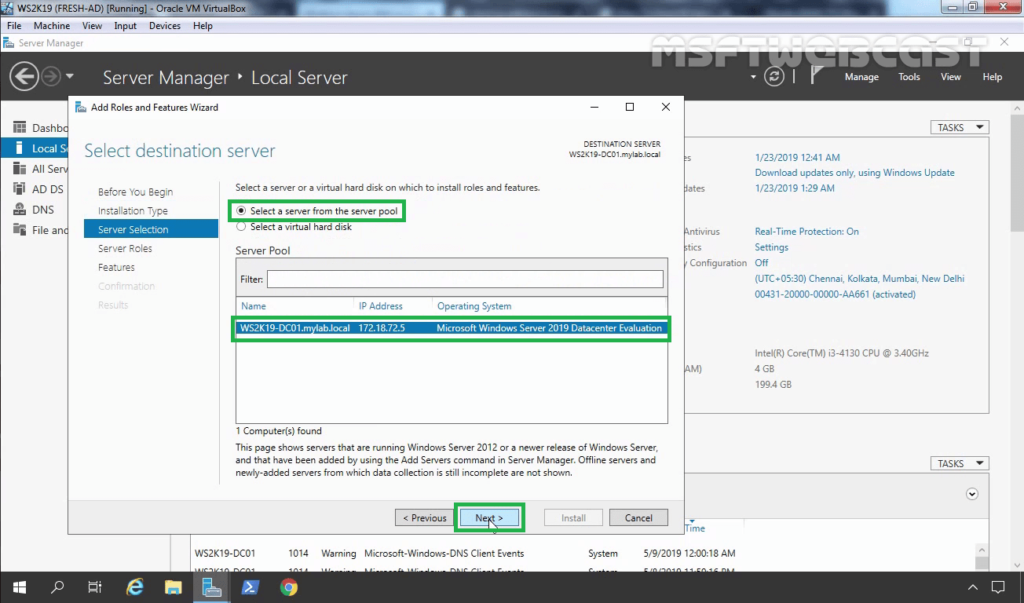
4. Select a server from the server pool on which you want to install the Network File System for Server role service, click Next.
5. On select server roles page, expand File and Storage Services, expand File and iSCSI Services. Select Server for NFS checkbox.
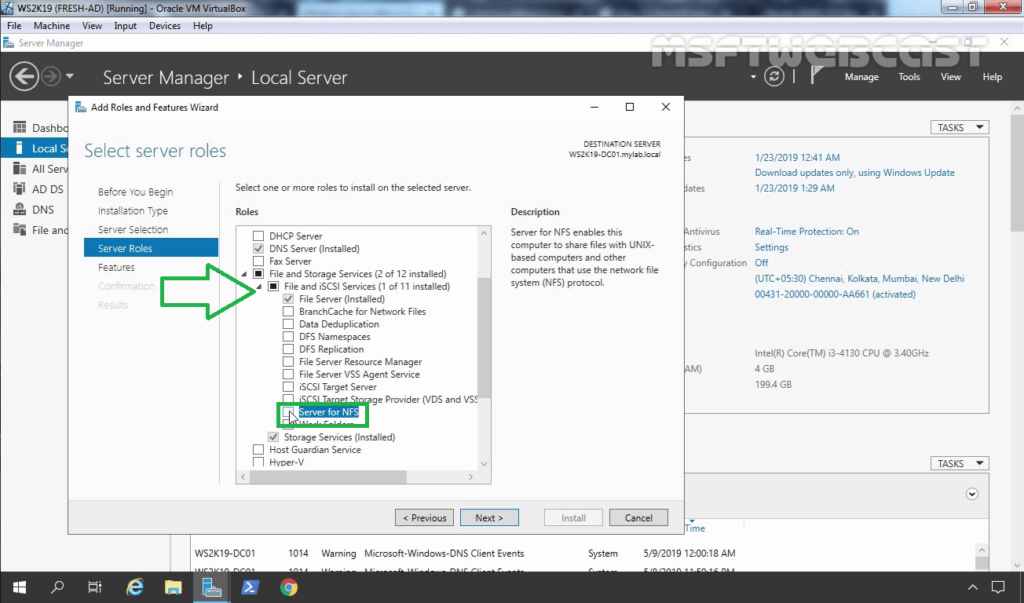
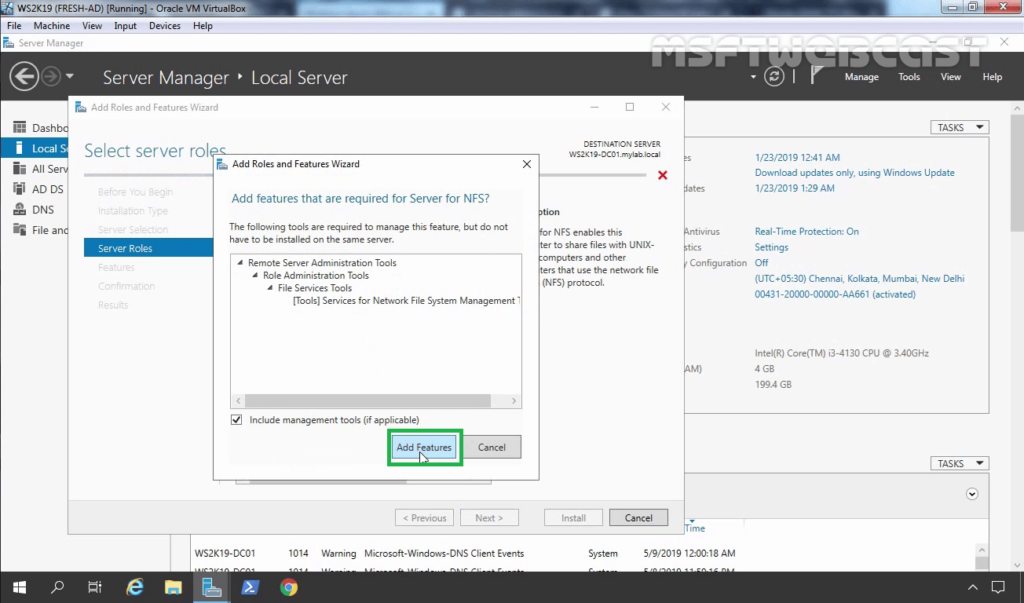
6. A new window will pop up, click on Add Features to include required features and management tools needed by the NFS server.
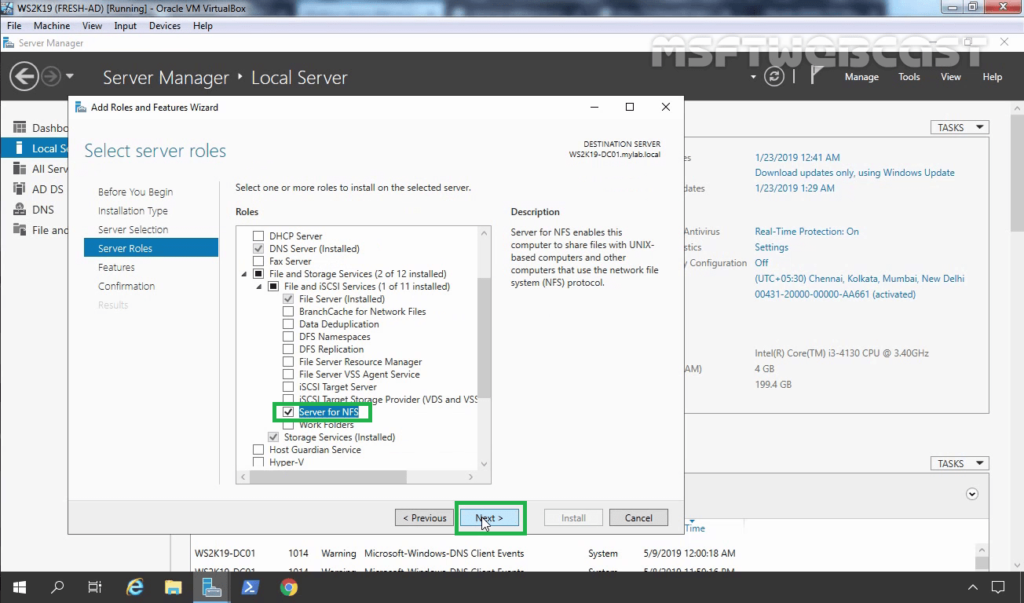
7. Make sure that the Server for NFS role service is selected. Click Next.
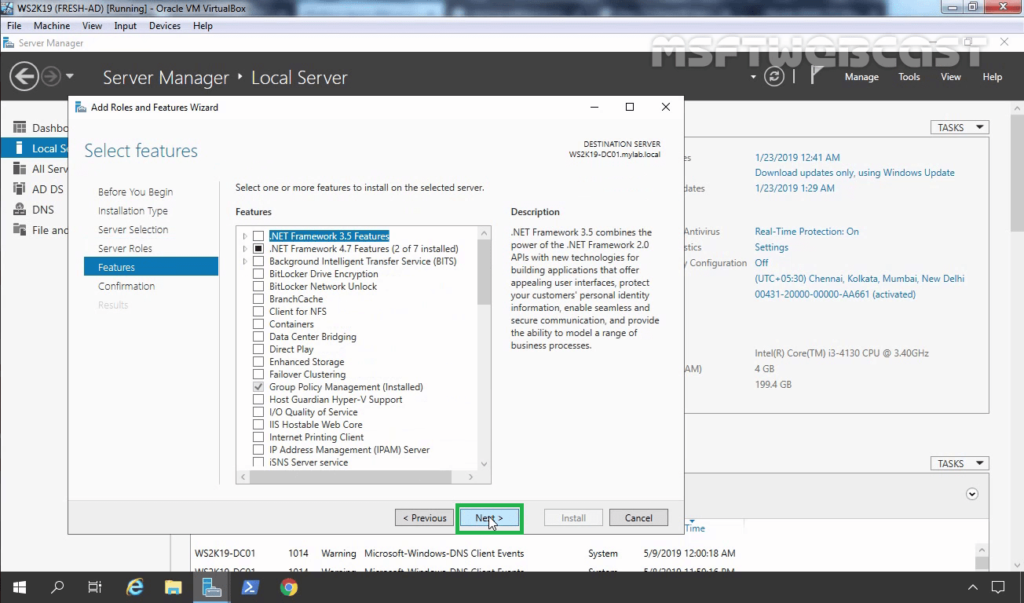
8. On select features, click Next.
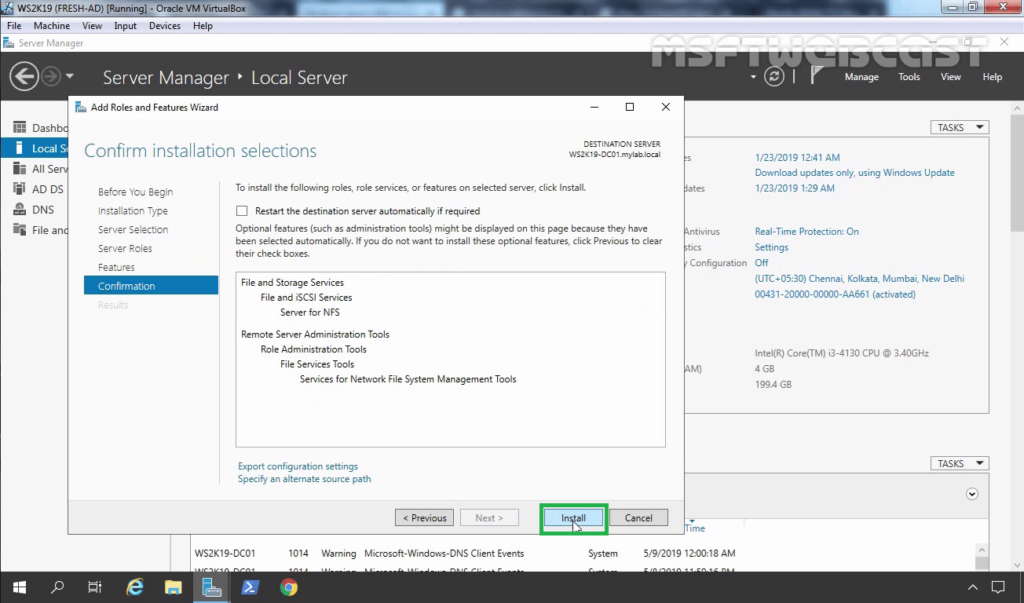
9. Click Install and complete the installation process.
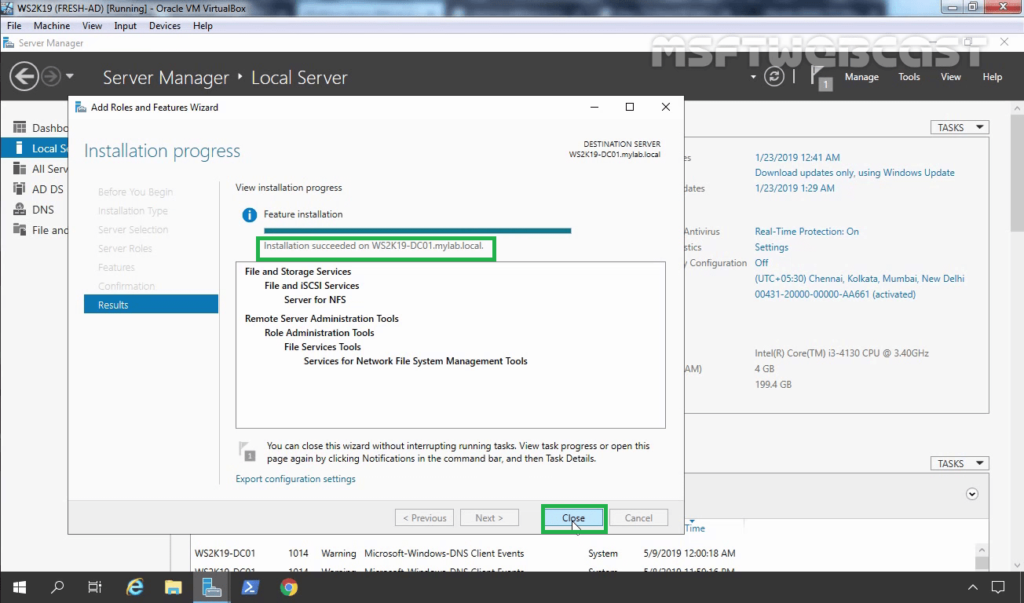
10. Click Close to finish the installation.
How to Create an NFS Shared Folder on Server 2019:
After installing the Server for NFS on Windows Server 2019, the next step is to create an NFS shared folder by using the File and Storage Services console.
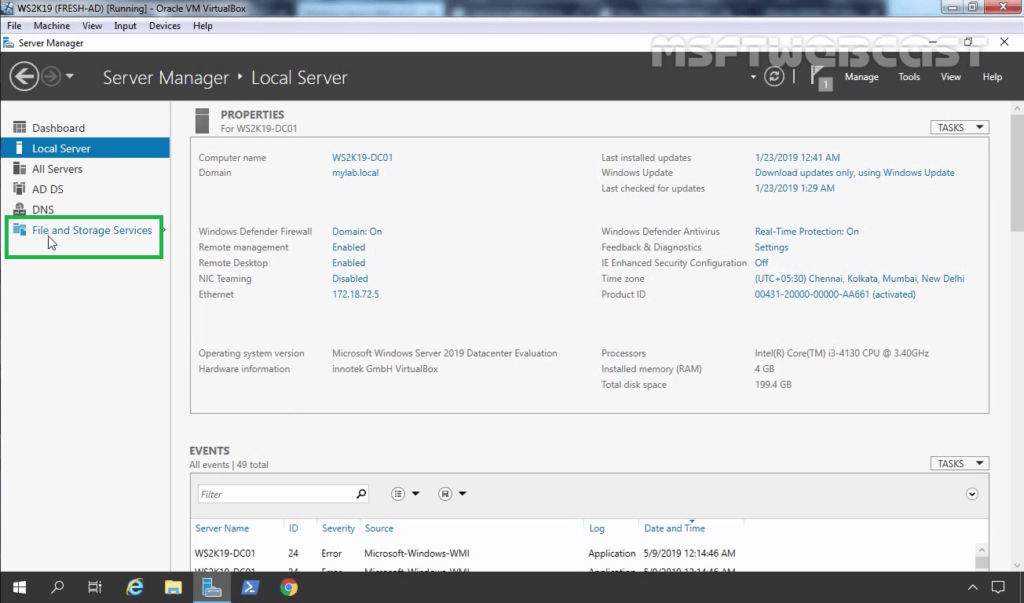
11. On the Server Manager Console, click on File and Storage Services.
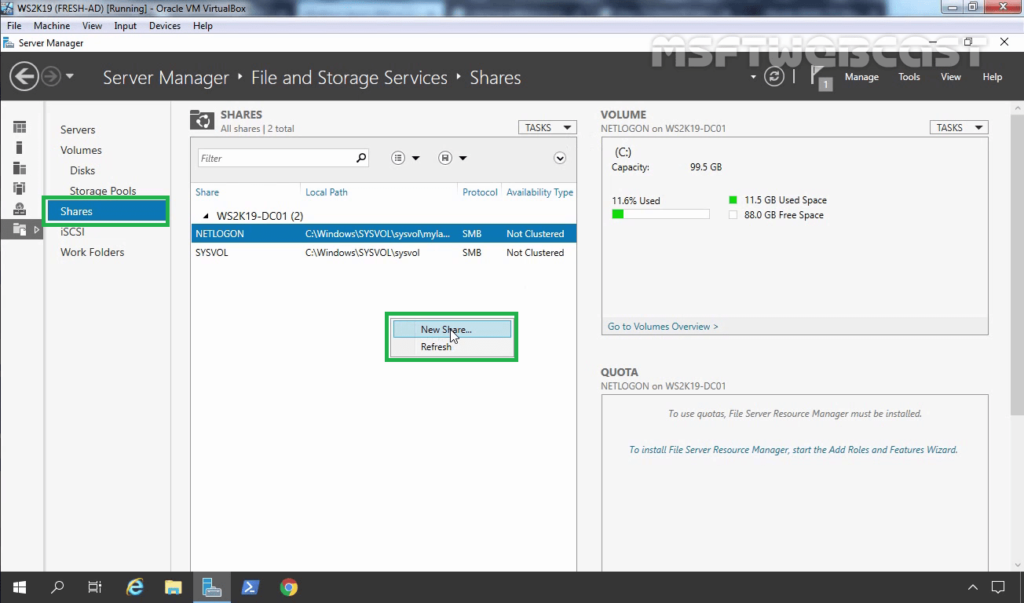
12. Click on Shares. Right-click in the empty area and select New Share.
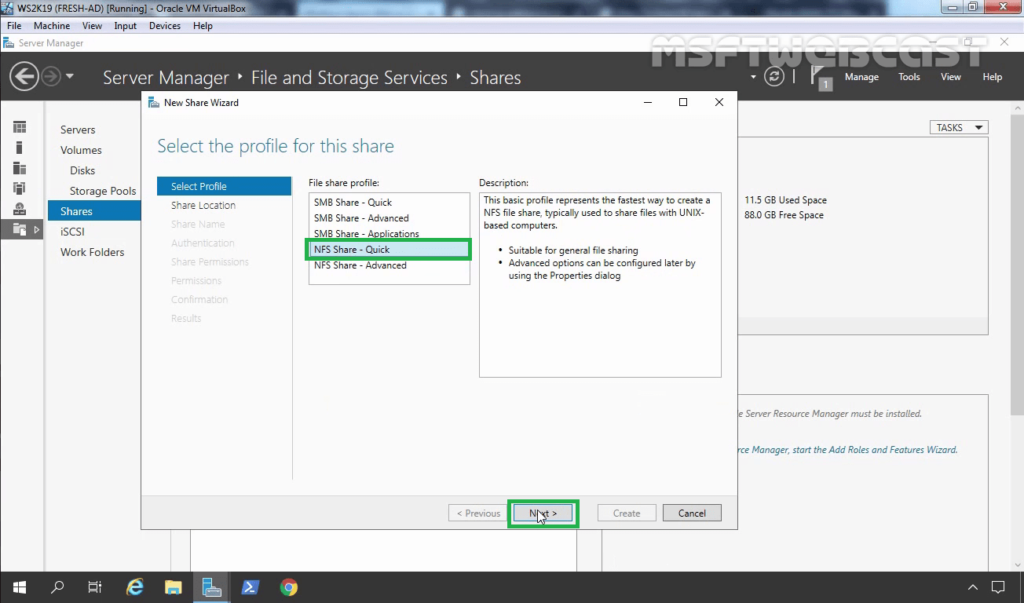
13. On Select the profile for this share, select NFS Share – Quick profile. Click Next.
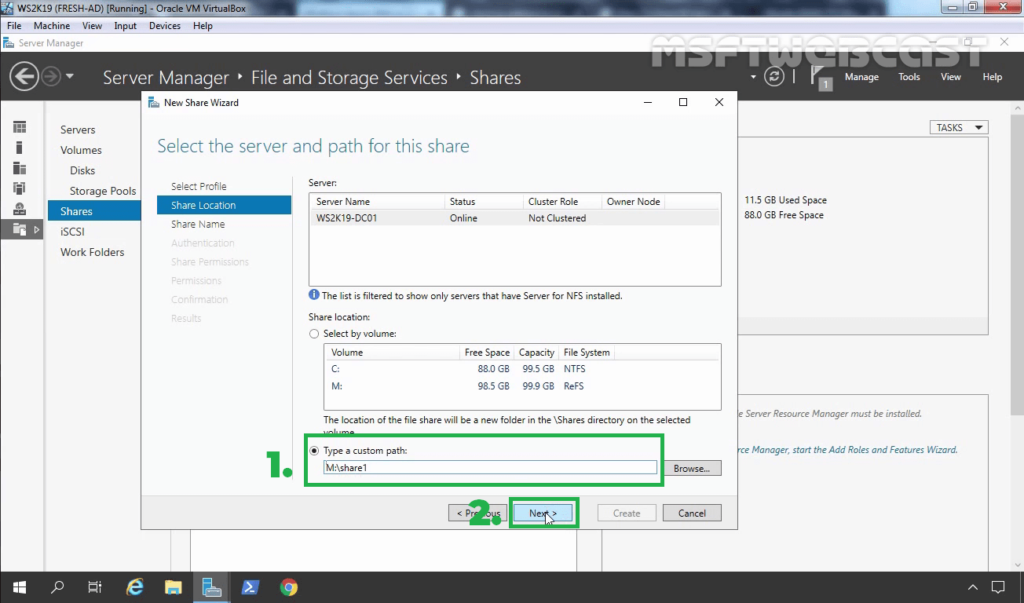
14. To configure a specific folder as NFS shared folder, select the checkbox Type a custom path and type the path for the specific folder you’d like to set as a shared folder. Click Next.
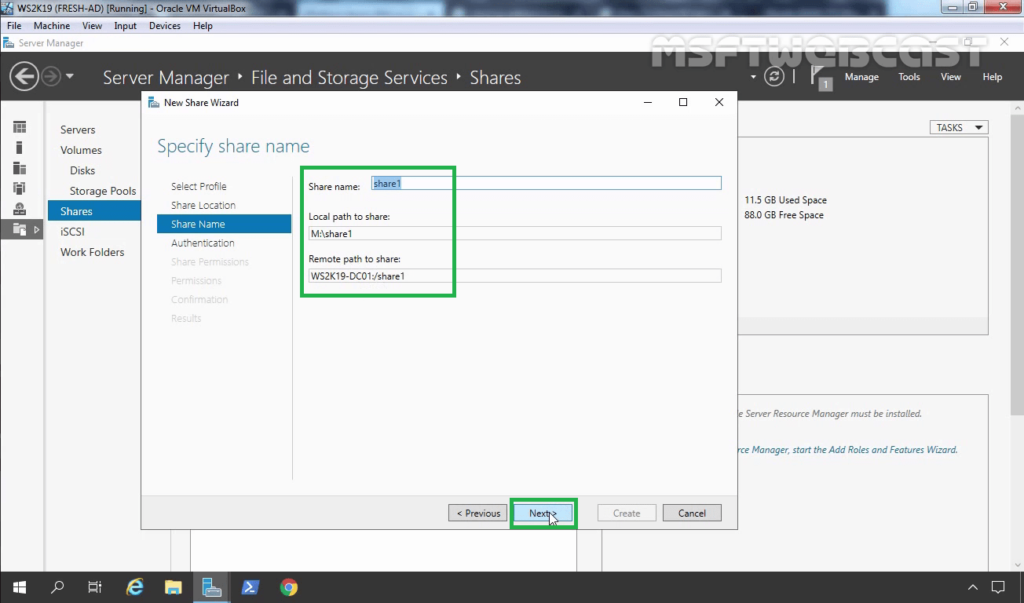
15. Verify share name, local path and remote path for NFS shared folder. Click Next.
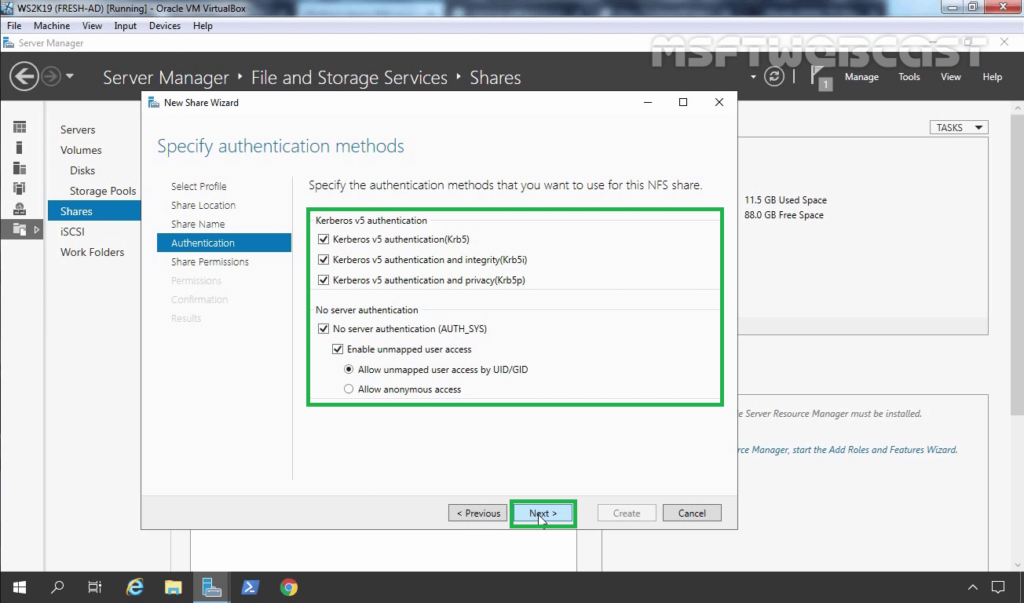
16. Specify the Authentication methods as per your requirement.
17. To set up the NFS share permissions, click Add button.
18. Specify the Hosts you’d like and assign the access permissions from the drop-down menu.
- Host: 172.18.72.103 (IP address of Ubuntu VM)
- Share Permissions: Read/Write
19. Click on Add.
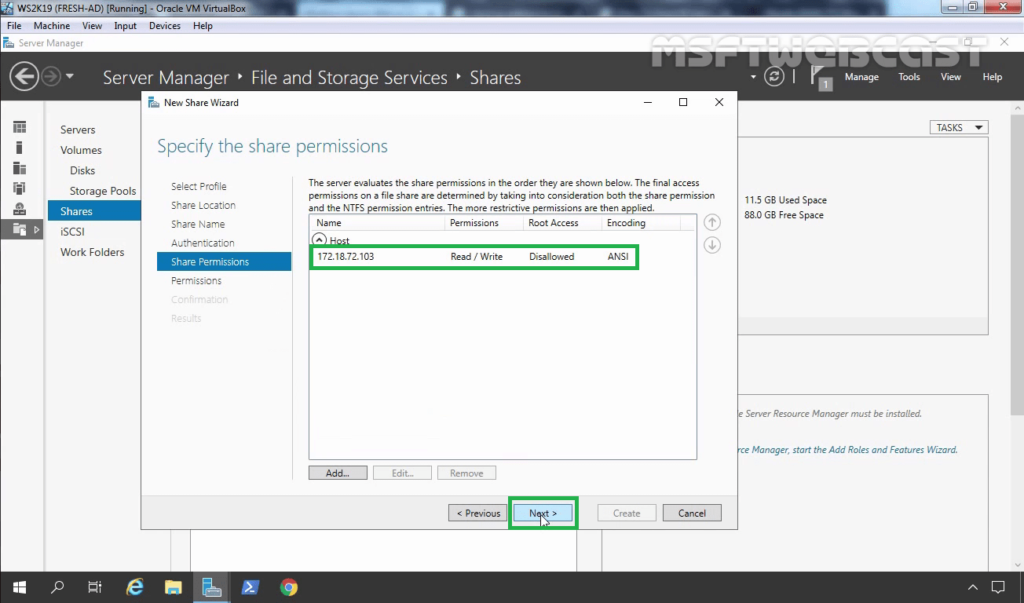
20. Using the same steps, you can add permission for other Hosts as well. Click Next.
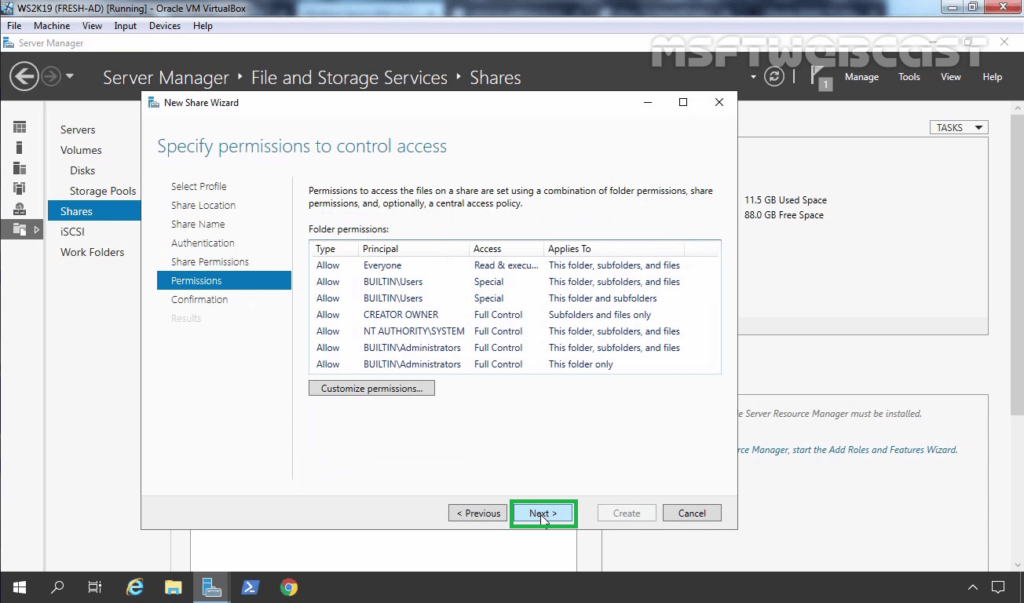
21. Specify NTFS permission. As we are just testing NFS sharing, we are going with default permission. Click Next.
22. Review the selections, click on the Create button.
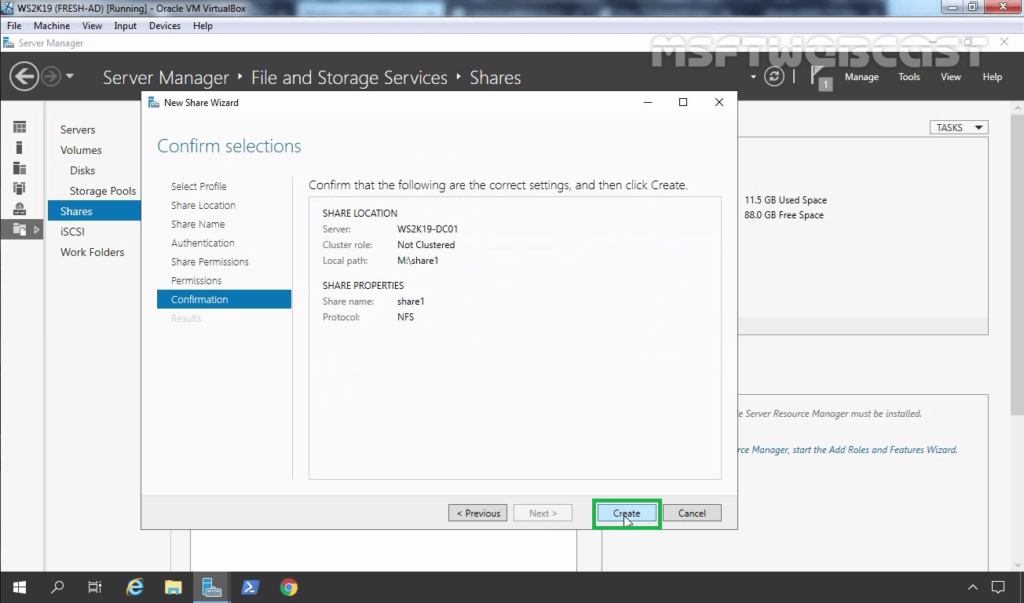
23. Click on the close button after verifying the successful creation of the NFS shared folder.
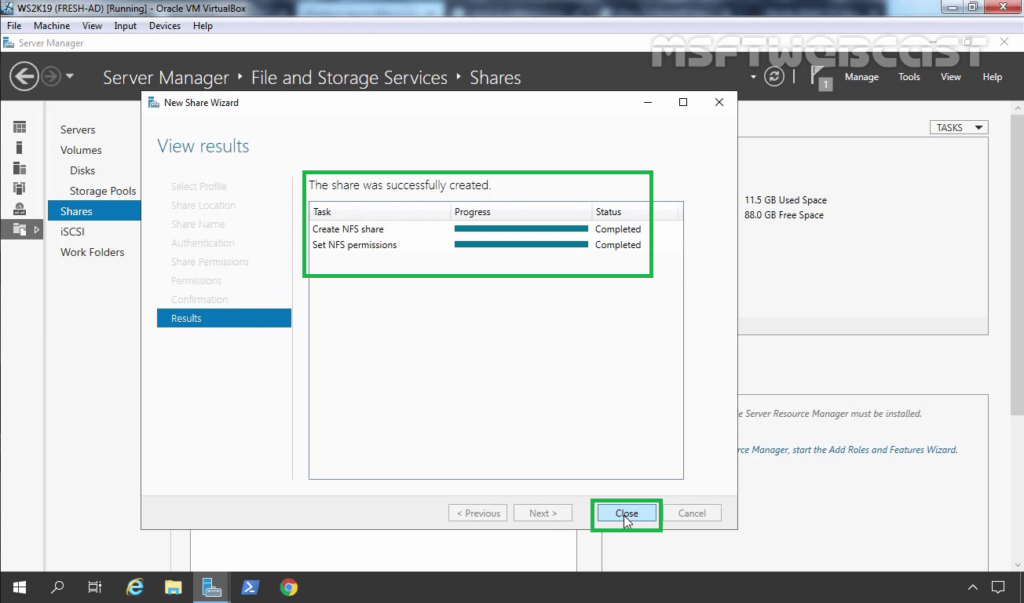
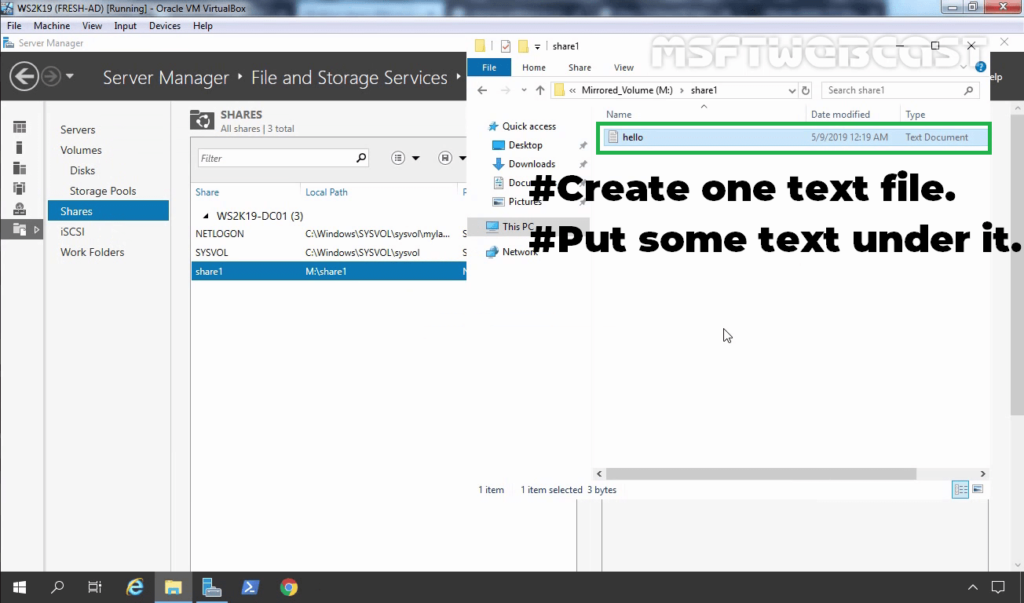
24. Verify the NFS shared folder under the shares list. Access the local path of the NFS shared folder. Create one text file and put some text under it.
Mount the NFS shared Folder on Linux Client (Ubuntu Machine):
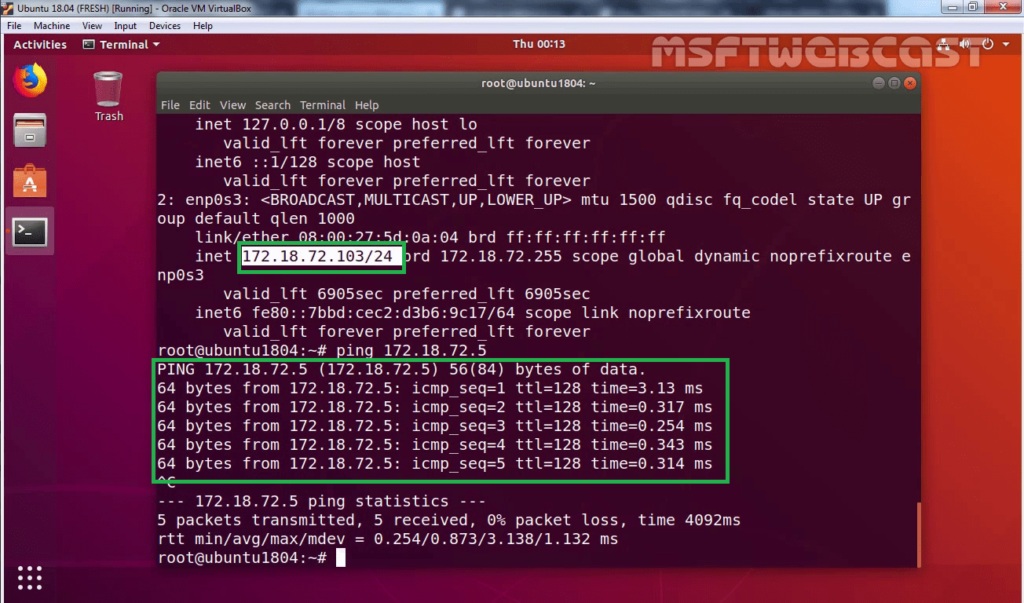
25. On the Ubuntu machine, verify the local IP address and network connectivity with the NFS server.
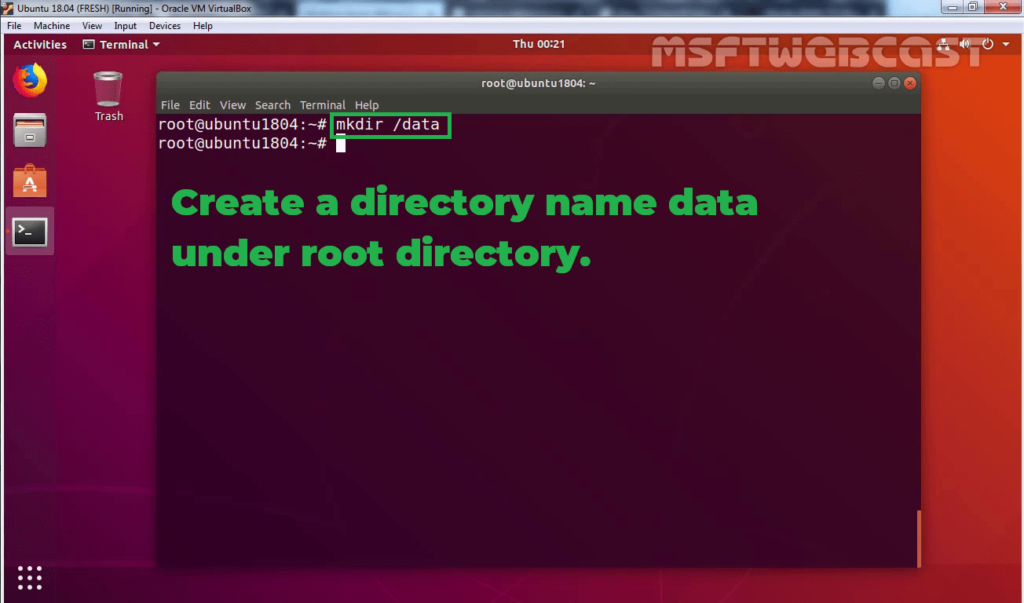
26. To mount an NFS shared folder on a Linux machine, open terminal. Type command: mkdir /data
This command will create one directory name data under the root directory.
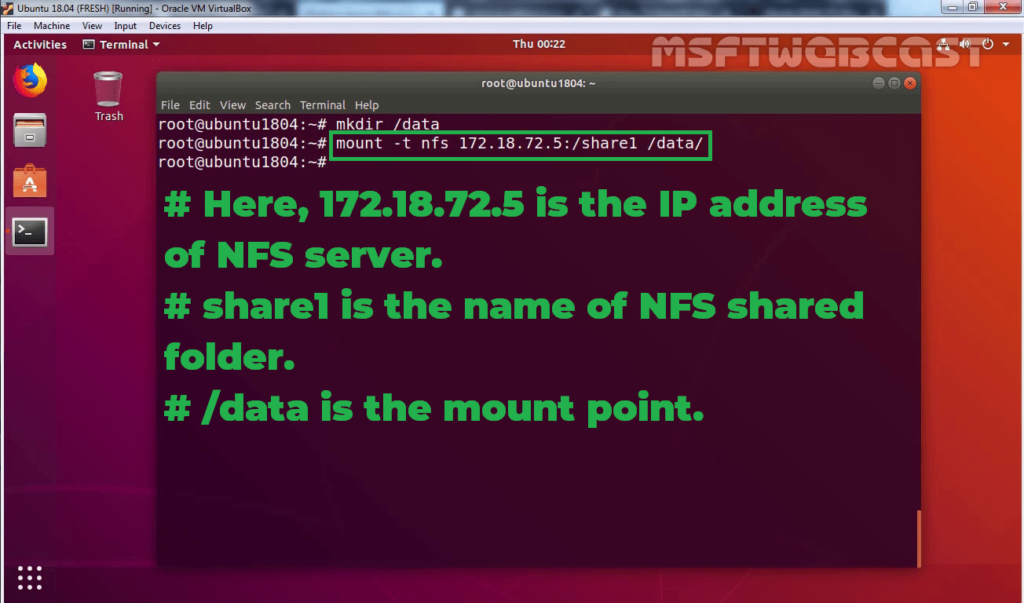
27. Type command:
Syntax: mount -t nfs <NFS-Server-IP>/<NFS-Shared-Folder-Name> /<Mount-Point>
For example, to mount an NFS shared folder named share1 of the NFS server that is configured with IP address 172.18.72.5, the folder should be mapped on the /data mount point.
In our case command will look like:
mount –t nfs 172.18.72.5:/share1 /data
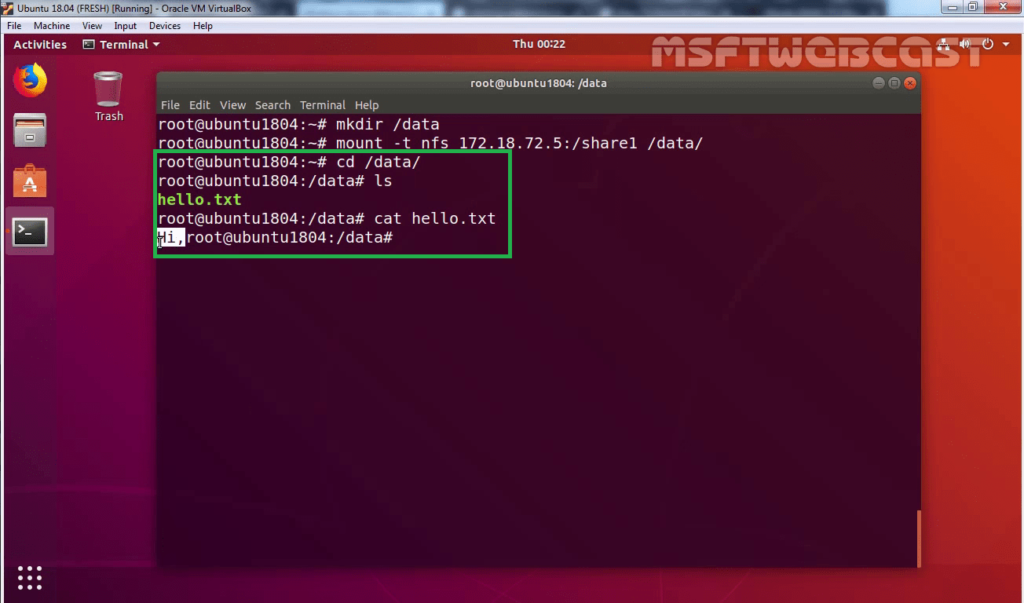
28. Verify the content of the text file which we have created earlier on the NFS server.
In this blog post, we have learned the steps on how to install and configure NFS in Windows Server 2019.
I hope, you enjoyed it. Thank you for reading.
Video Guide: Installing and Configuring NFS Server role in Windows Server 2019
Post Views: 5,142
Overview
Out of the box, a Windows Server 2012 and Windows 8 cannot connect to NFS-based shares from your Linux environment by default. Although, they both include a feature that when enable does allow them to.
Microsoft likes to trumpet that 90% of servers deployed in enterprise environments run Windows Server. But that still means there are a lot of Linux\Unix servers out there. When you include startups and mid-sized companies, the number of Linux servers grows substantially.
With the growth of Linux adoption, especially at the small-to-medium sized business, odds you may eventually need to connect a Windows server or a Windows desktop to an NFS share.
Install NFS Client Feature
The NFS client is now an installable feature in Windows 8 and Windows Server 2012 and higher.
- Launch Server Manager
- On the top-left side of the console, click Manage.
- Click Add Roles and Features.
- On the Before you begin screen, click Next.
- On the Select installation type screen, select Role-based or feature-based installation, and then click Next.
- On the Select destination server screen, if you are installing to the local server, click Next. Otherwise, select a server from the Server Pool list.
- On the Select server roles screen, click Next.
- On the Select features screen, scroll down the list of available features until you see Client for NFS. Click its checkbox to select it for installation, and then click Next.
- On the Confirm installation selections screen, review your selections and then click Install.
- After the installation completes, review the results and then click Close.
Mount NFS Share
To mount an NFS share into Windows we need to use the mount command. There is no GUI interface to perform this task. The command is very simple to use and relatively similar to the same command found in Linux.
The examples below will connect to a host named LNXSRV01. The local user account on LNXSRV01 that will be used to mount the share will be Sam.
- Open a command-prompt.
- Mount an NFS share called /exports/dept to the Z:.
mount -user:Sam -p:MyPassword \\LNXSRV01\exports\dept Z:
Instead of typing the password into the command-line, we can use ‘*’ to force a password prompt when mounting.
mount -user:Sam -p:* \\LNXSRV01\exports\dept Z:
To mount the share into any available drive letter on the Windows server we can replace Z: with ‘*’.
mount -user:Sam -p:* \\LNXSRV01\exports\dept *
Set whether the mount type is hard or soft using the mtype option.
mount -o mtype=hard -user:Same -p:* \\LNXSRV01\exports\dept *
Persistent Mounts
There is no method of creating a persistent mount of an NFS share on a Windows server. The only option to mount an NFS share at system boot or logon is to use a batch script. This, however, is not recommended.