В этой статье посмотрим, как с помощью встроенных средств на базе сервера с Windows Server 2012 R2 организовать простой межсетевой маршрутизатор. И хотя на практике маршрутизаторы на базе компьютеров используются довольно редко (аппаратные маршрутизаторы, как правило, имеют более высокую производительность, надежность и несколько дешевле выделенного компьютера), в тестовых или виртуальных средах, когда нужно срочно настроить маршрутизацию между несколькими подсетями, маршрутизатор на базе Windows Server вполне себе приемлемое решение.
Итак, в роли маршрутизатора будет выступать сервер с ОС Windows Server 2012 R2. Сервер имеет 2 сетевых интерфейса: физических или виртуальных, если сервер запущен на гипервизоре. Каждому интерфейсу сервера назначен выделенный IP адрес из различных подсетей. Для удобства, мы переименовали названия сетевых интерфейсов в Панели управления сетями и общим доступом:
Сетевая карта 1 (сетевая карта подключена во внутреннюю LAN сеть):
Имя: LAN
IP: 10.0.1.1
Сетевая карта 2 (сетевая карта во внешней сети ):
Имя: Internet
IP: 192.168.1.20
Наша задача – организовать маршрутизацию пакетов из локальной подсети 10.0.1.0 во внешнюю подсеть 192.168.1.0 (как правило, такая сеть имеет выход в интернет) через NAT. Такую схему можно реализовать в случае необходимости организации доступа клиентов из внутренней сети в интернет.

Маршрутизация в Windows Server 2012 R2 реализуется на базе роли Remote Access (RRAS). Данная служба появилась еще в Windows Server 2003 и до текущей в версии Windows Server ее интерфейс и процесс настройки практически не изменился.
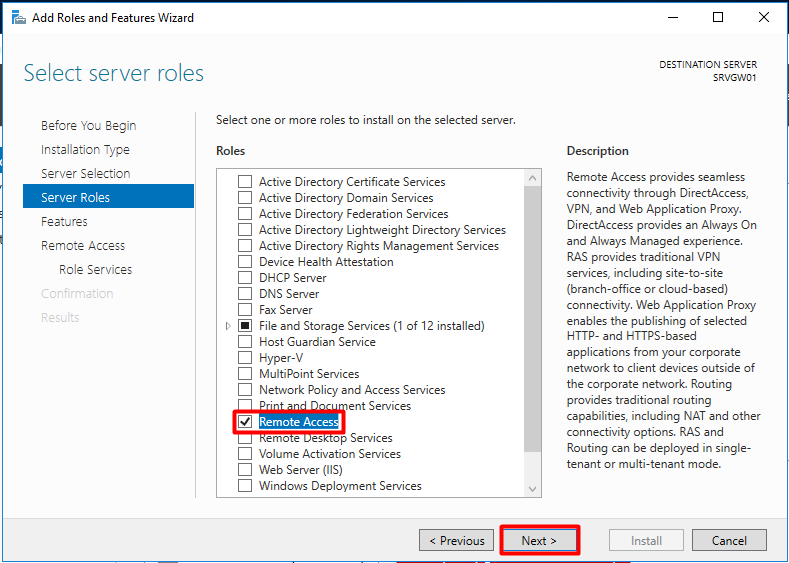
В первую очередь нужно установить роль Remote Access. Для этого откроем консоль Server Manager, выбираем Manage -> Add Roles and Features, находим и отмечаем роль Remote Access, в ее составе выбираем службу Routing, и, соглашаясь со всеми предложенными по умолчанию компонентами, запускаем ее установку (Install). 
После окончания установки открываем консоль Routing and Remote Access (rrasmgmt.msc), щелкаем по имени сервера (с красной стрелкой) и выбираем Configure and Enable Routing and Remote Access. 
В открывшемся окне выбираем пункт Network Address Translation (NAT).
")
На следующей шаге (NAT Internet Connection) нужно выбрать сетевой интерфейс, подключённый ко внешней сети / Интернету (в нашем примере это интерфейс Internet с ip 192.168.1.20). Этот интерфейс будет «публичным интерфейсом» нашего NAT роутера. 
Далее будет предложено указать должен ли NAT роутер обеспечить клиентов внутренней сети сервисами DHCP и DNS. Как правило, этот функционал во внутренней сети уже имеется, поэтому в нем мы не нуждаемся. 
На этом базовая настройка маршрутизации на Windows Server 2012 R2 завершена. Сервер уже должен выполнять маршрутизацию пакетов между двумя подключенными сетями и выполнять трансляцию сетевых адресов (NAT).
Чтобы в этом убедиться, в консоли RRAS откройте свойства сервера. На вкладке General показано, что IPv4 маршрутизация включена (т.е. пакеты IPv4 будут пересылаться с одной сетевой карты на другую).
Проверить работу маршрутизации можно, указав на клиентском компьютере во внутренней сети (к которой подключен интерфейс сервера LAN) в качестве шлюза IP-адрес сервера (10.0.1.1), и выполнить ping или трассировку маршрута к ресурсу, расположенному во внешней сети или интернете. Эти попытки должны быть успешными. 
Примечание. Windows Server 2012 R2 поддерживает статическую маршрутизацию, протокол динамической маршрутизации RIPv2 и BGPv4. Поддержка OSPF была прекращена еще в Windows Server 2008.
В нашем случае на сервере осуществялется статическая маршрутизация. Если нужно добавить новый маршрут, щелкните ПКМ по Static Routes, выберите пункт меню New static route и создайте новое статическое правило маршрутизации. 
Примечание. Статический маршрут также можно добавить из командной строки с помощью команд Route или netsh.
Overview:
In this post, we will be configuring Windows Server 2019 as a NAT (Network Address Translation) router to route traffic between local LAN and the internet.
The Windows Server 2019 must have two Network Adapters, one configured for the internal local network (LAN) and another one configured to access the internet (Internet).
Understanding Test Lab Setup:
For this guide, we will use the test lab created in VirtualBox.
- WS2K19-SRV02: Server 2019 with 2 NICs (LAN and INTERNET)
- WS10-1903: Windows 10 client machine.
Look at the below image for complete IP configuration details for all VMs.
Install Routing and Remote Access on Server 2019:
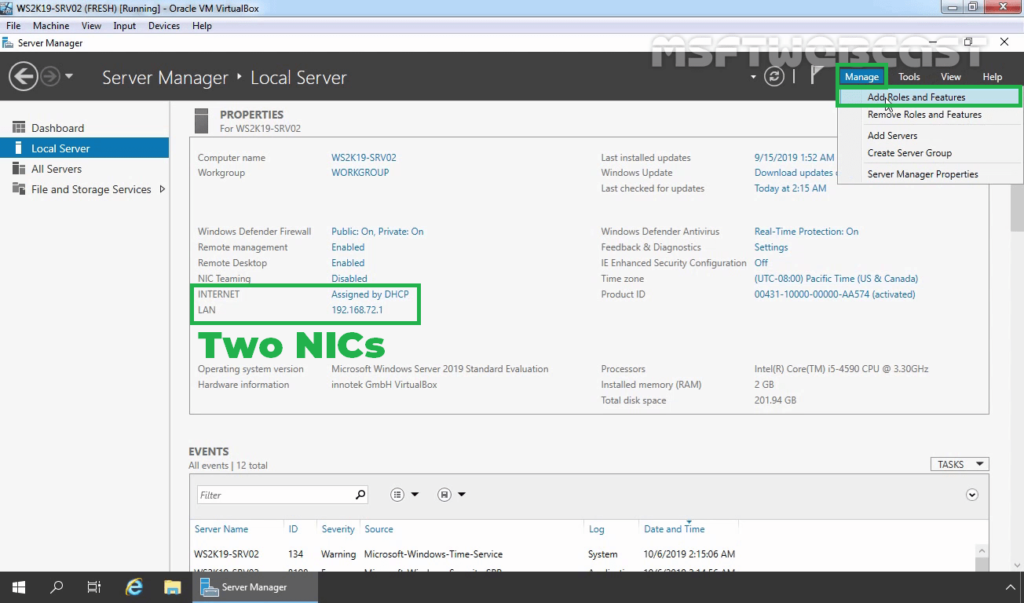
Let’s install the Remote Access server role on the WS2K19-SRV02 server. Open Server Manager Console.
1. Click on Manage and select Add Role and Features.
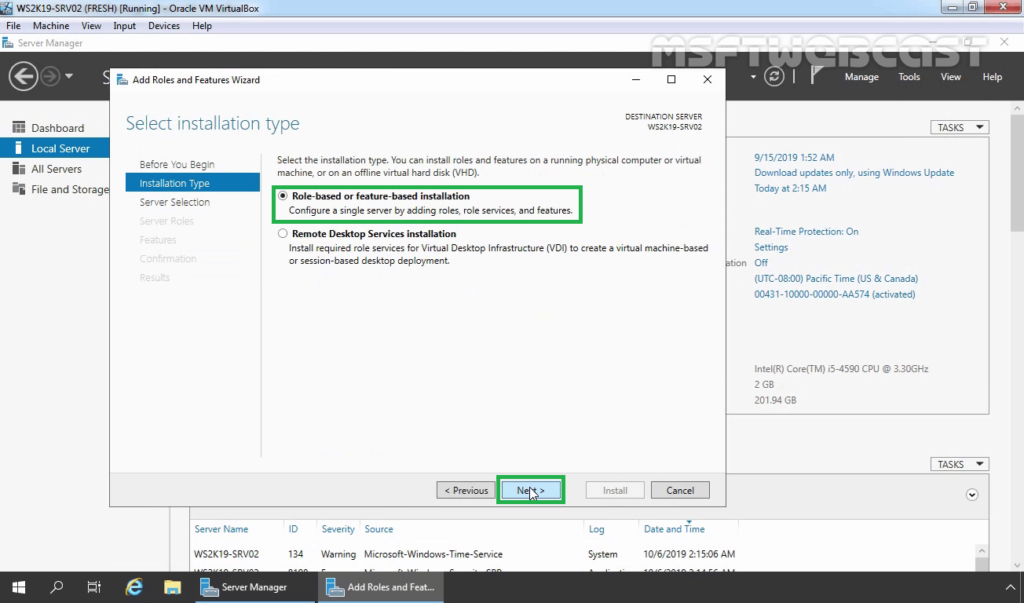
2. On the Before you begin page, click Next.

3. Select Role-based or feature-based installation and click Next.
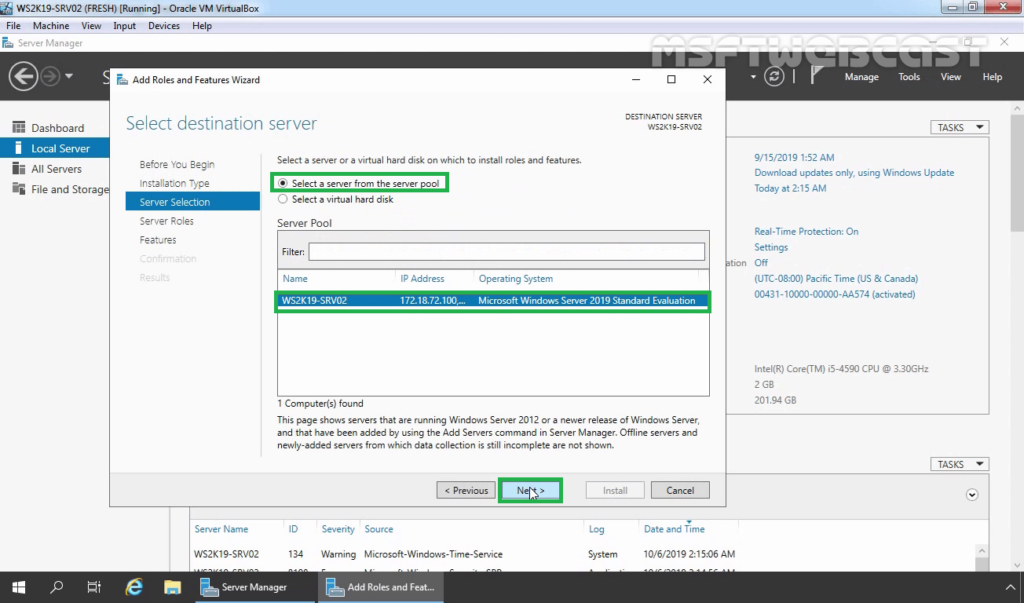
4. Select a server from the server pool on which you want to install the Remote Access Service role, click Next.
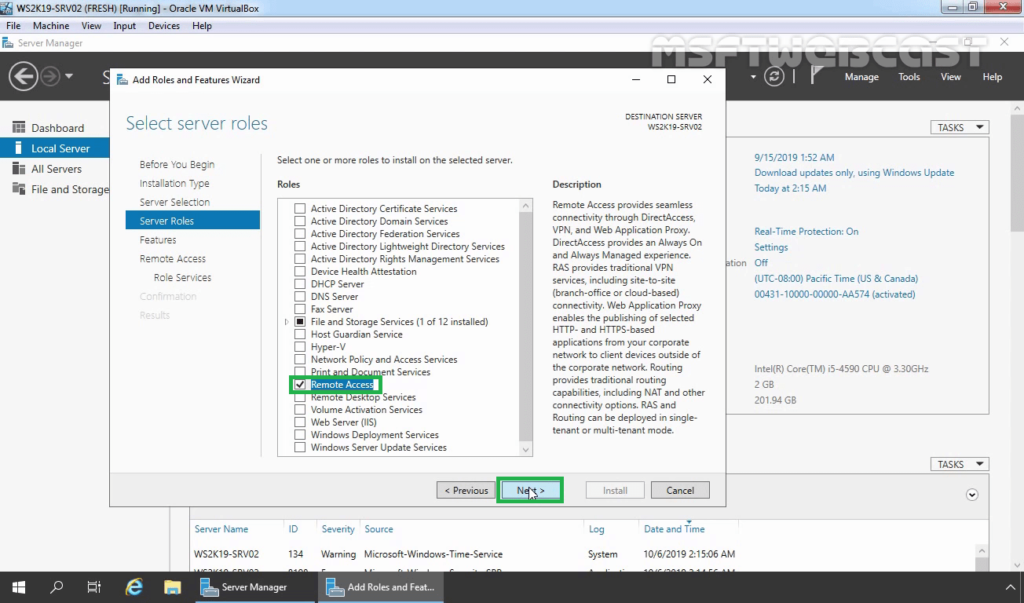
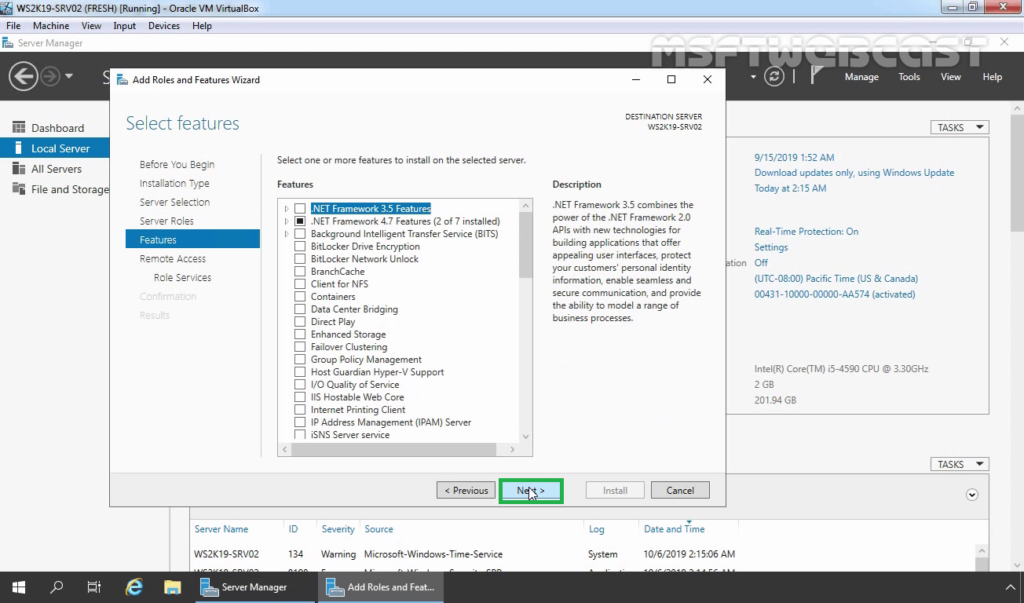
5. On select server roles page, select the Remote Access Services checkbox. Click Next.
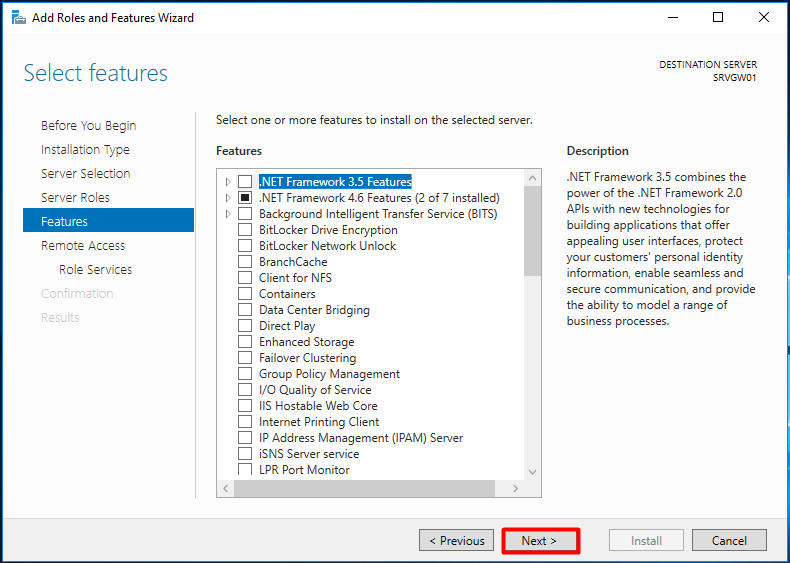
6. On select features, click Next.
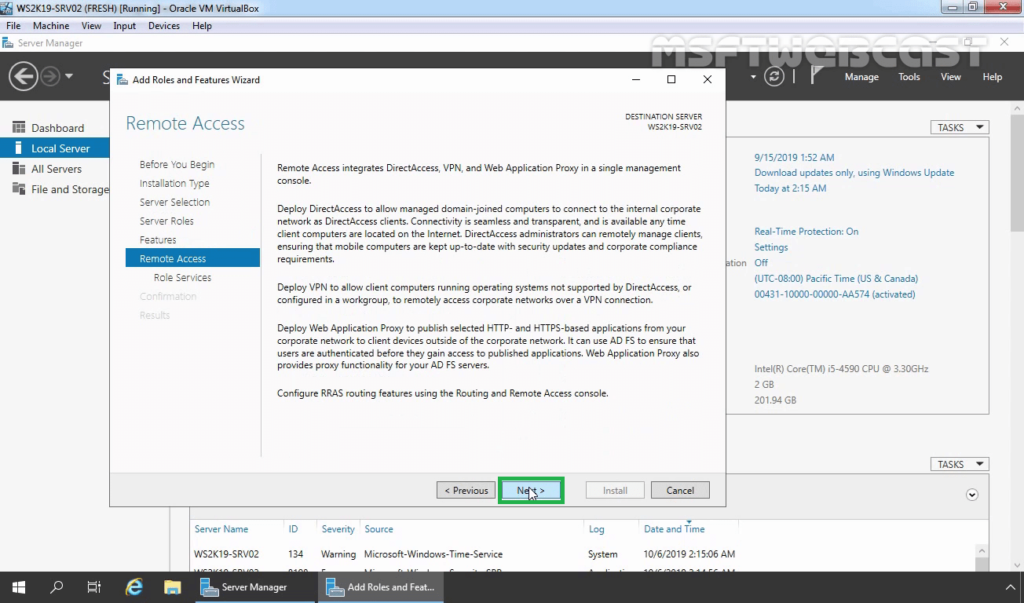
7. Read overview information about Remote Access Services and click Next.
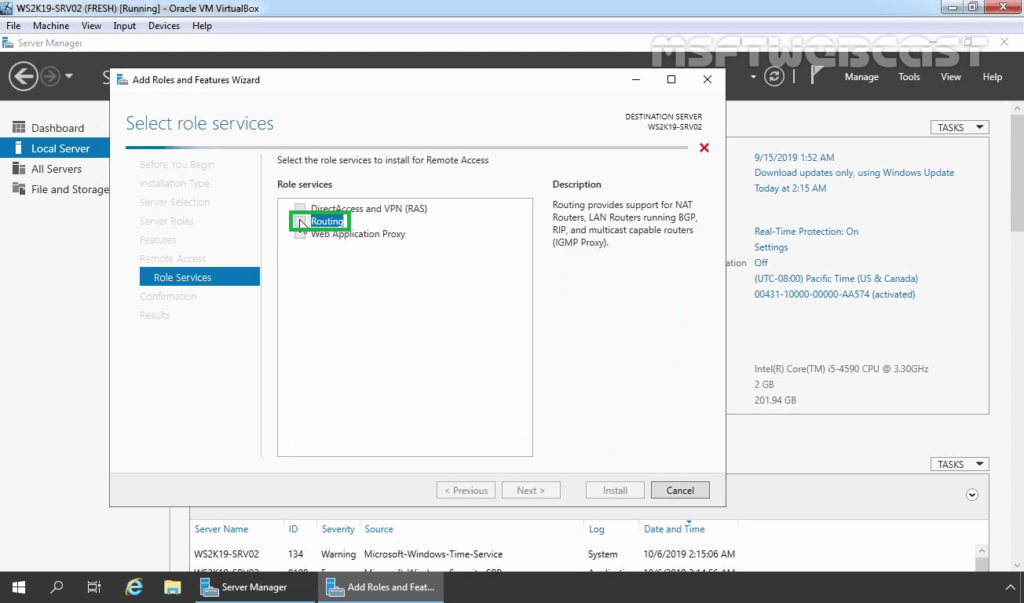
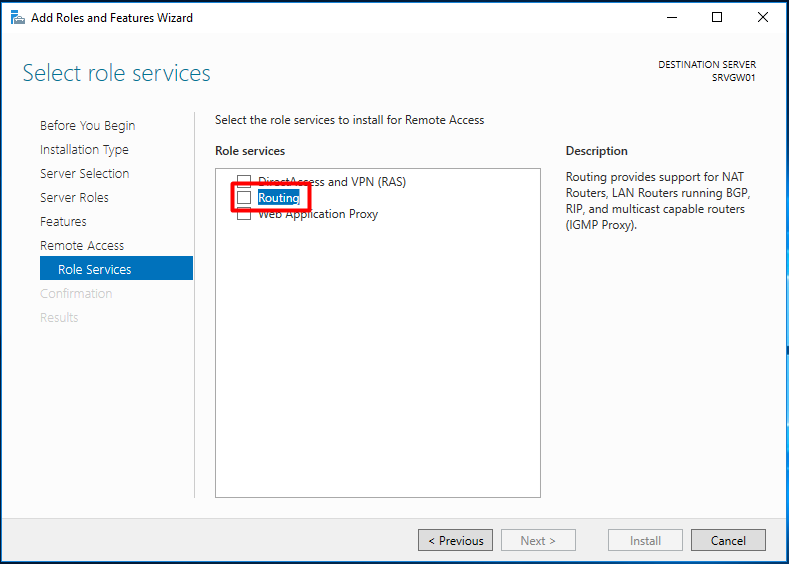
8. On Select Role Service console, select the Routing checkbox to install the LAN Routing role service.
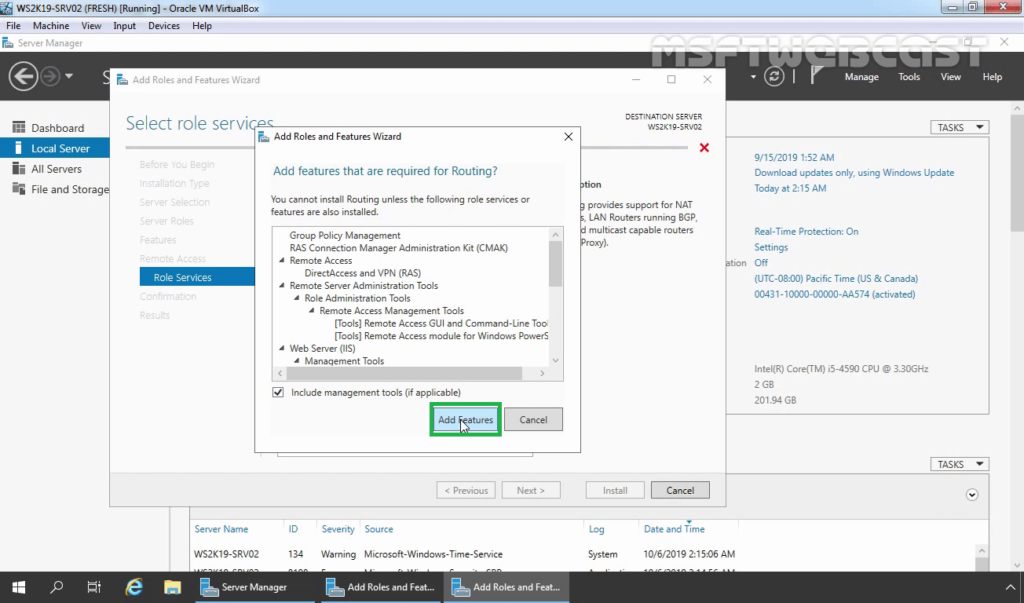
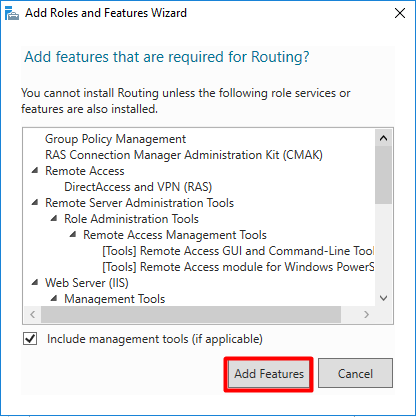
9. Click the Add Features button to add the required feature for LAN Routing. Click Next to continue.
10. Click Next on Web Server role services page.
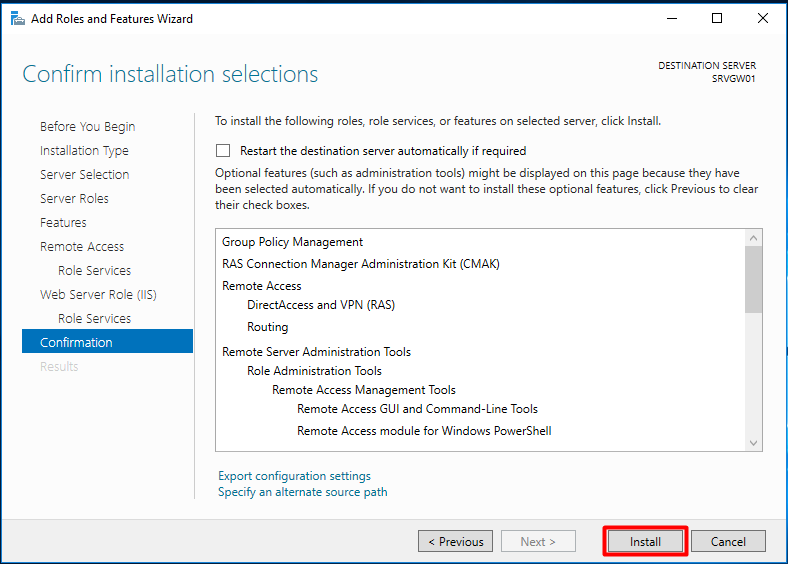
11. Click Install and complete the installation process.
12. Click Close to finish the installation.
Configure NAT and LAN Routing on Windows Server 2019:
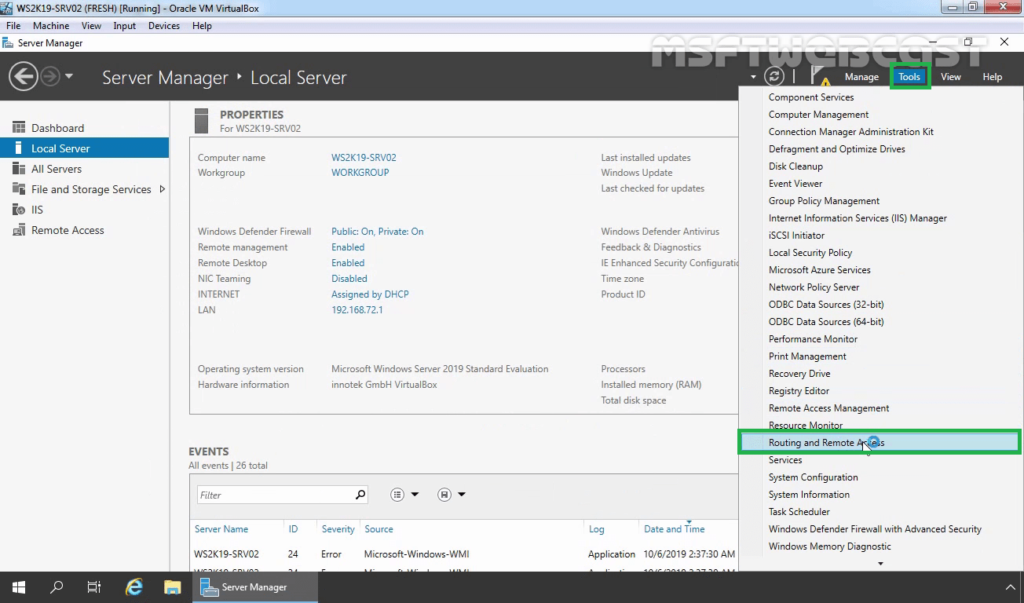
13. To configure NAT and LAN routing, open the Remote and Routing Access console using the Server Manager console.
14. Click on Tools and select Remote and Routing Access.
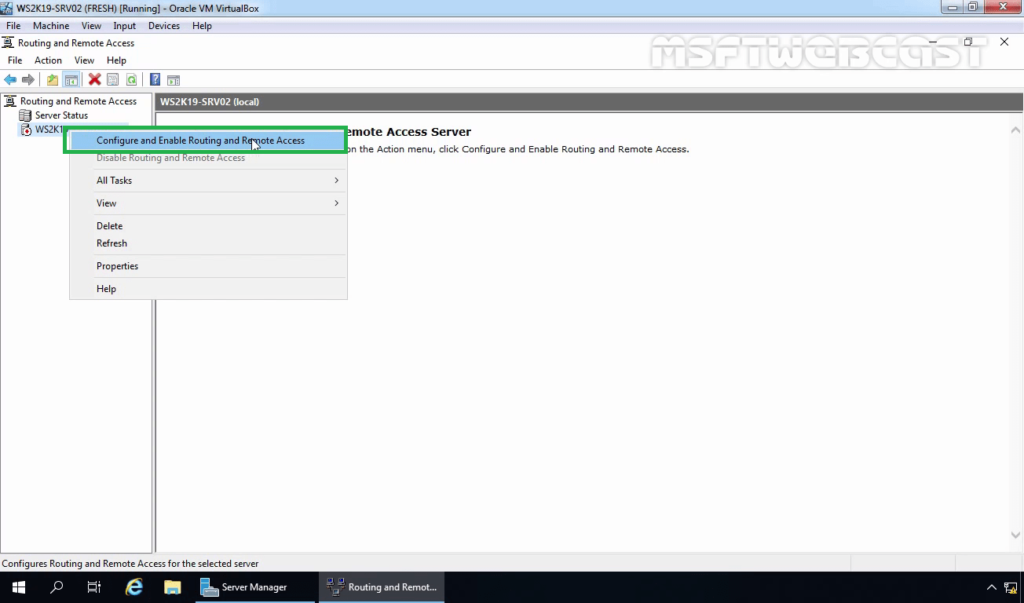
15. Select and right-click on the local server name and then select Configure and Enable Routing and Remote Access.
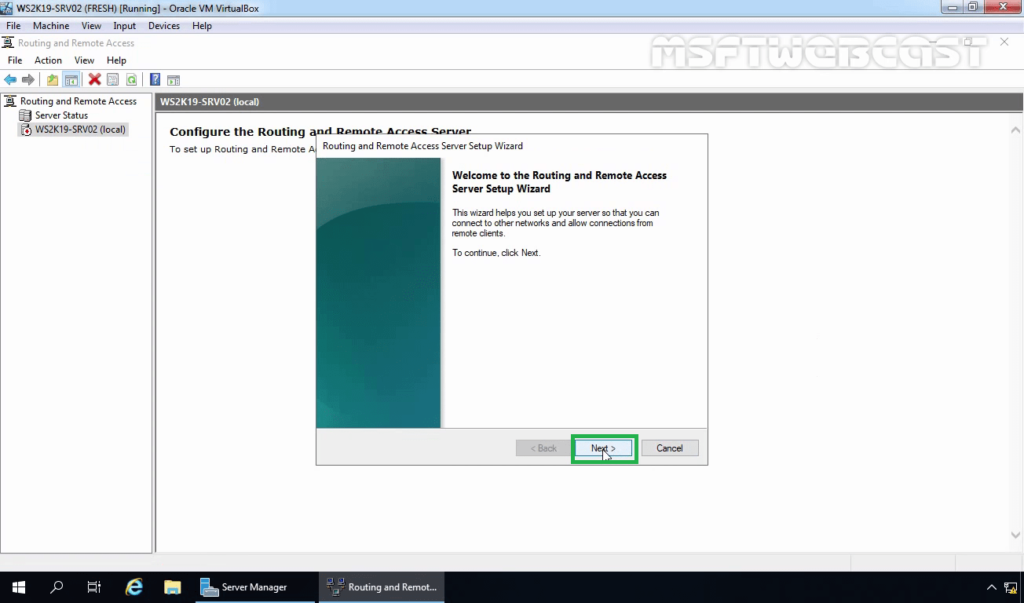
16. On the welcome page, read the description, and click Next.
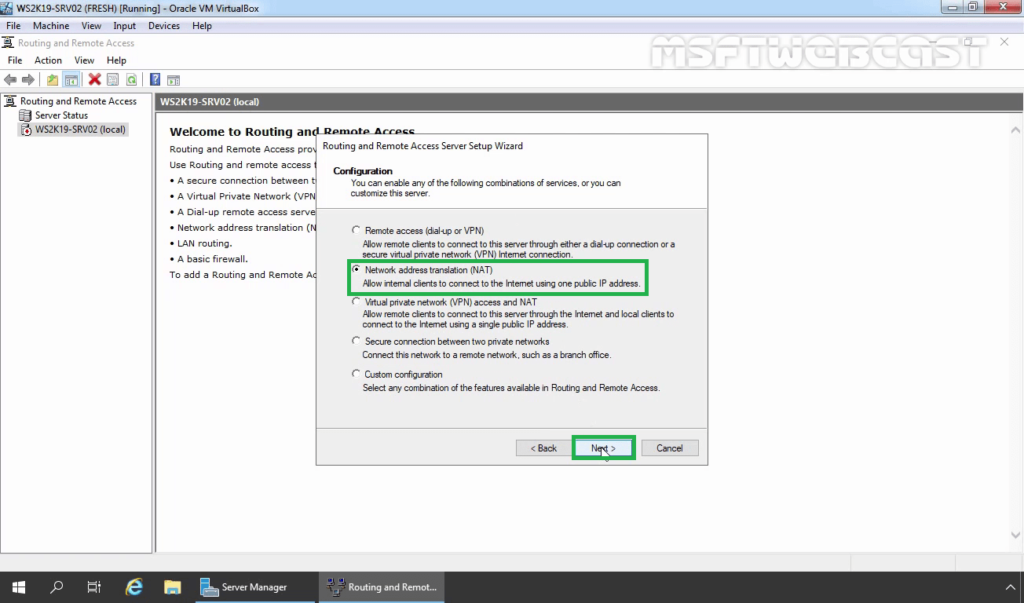
17. On the Configuration page, select the Network Address Translation (NAT). Click Next.
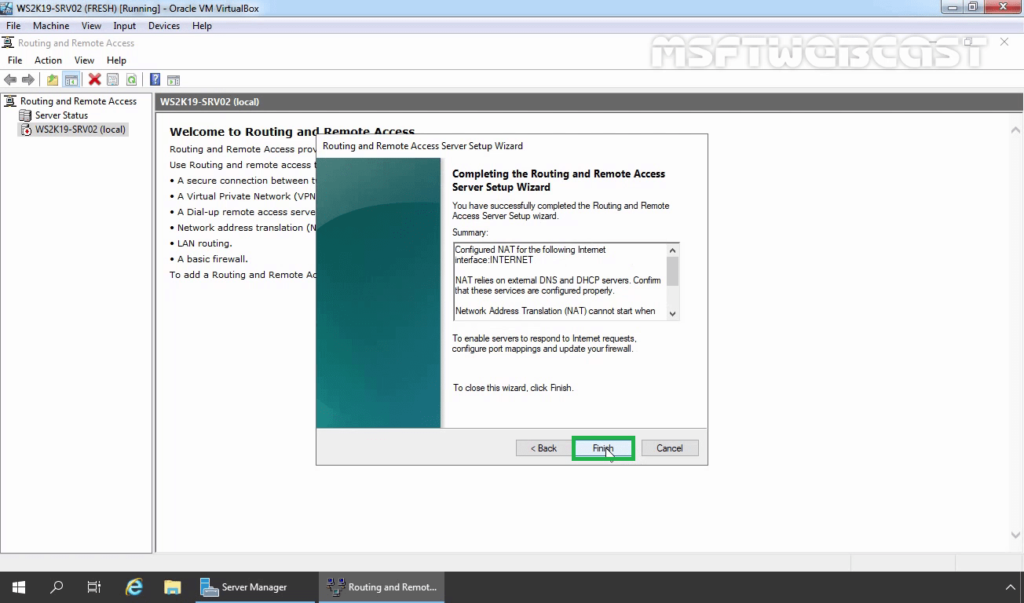
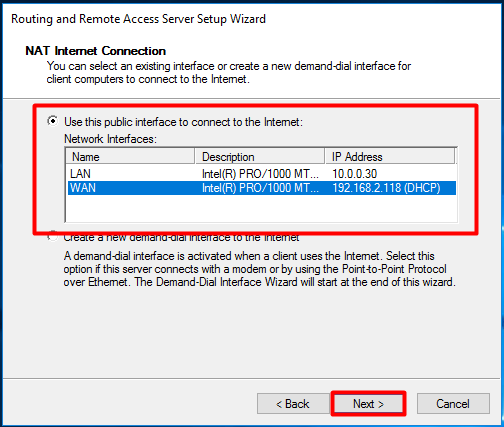
18. On the NAT Internet Connection page, select the network interface your users will use to connect to the internet. Click Next.

19. Click Finish.
Verify NAT Configuration Settings:
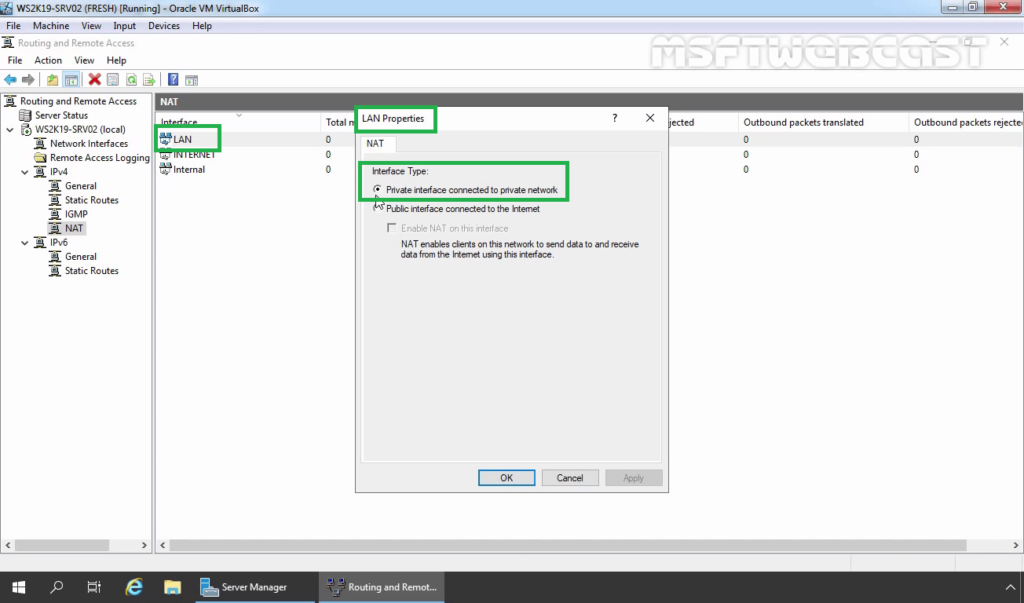
20. On Routing and Remote Access console, expand the local server name, expand IPv4. Click and Expand NAT.
21. Double-click on the LAN interface. Verify Interface type is a Private interface connected to the private network.
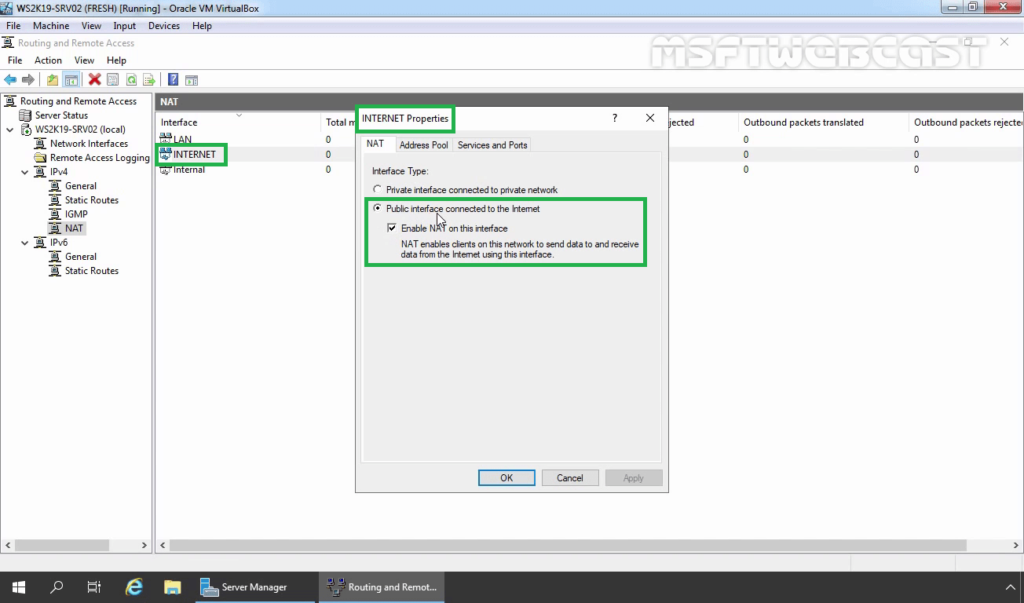
22. Double-click on the INTERNET interface. Verify Interface type is a Public interface connected to the Internet. Make sure that Enable NAT on this interface checkbox is selected.
Test NAT functionality from Windows 10:
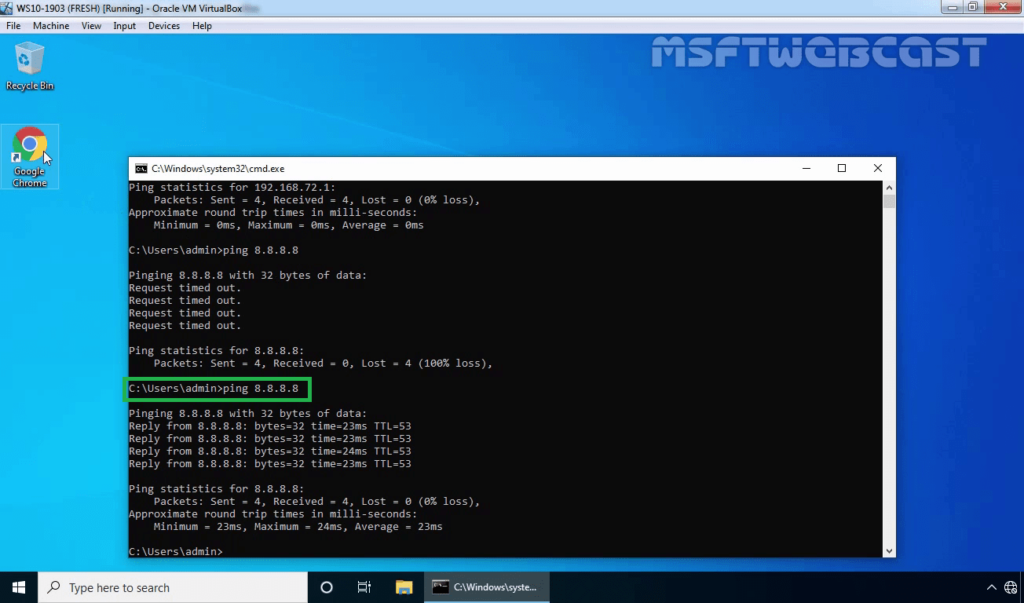
To test NAT functionality, move to Windows 10 PC.
23. Open command prompt and ping to googles public dns server. (ping 8.8.8.8)
24. Open the web browser and access www.google.com.
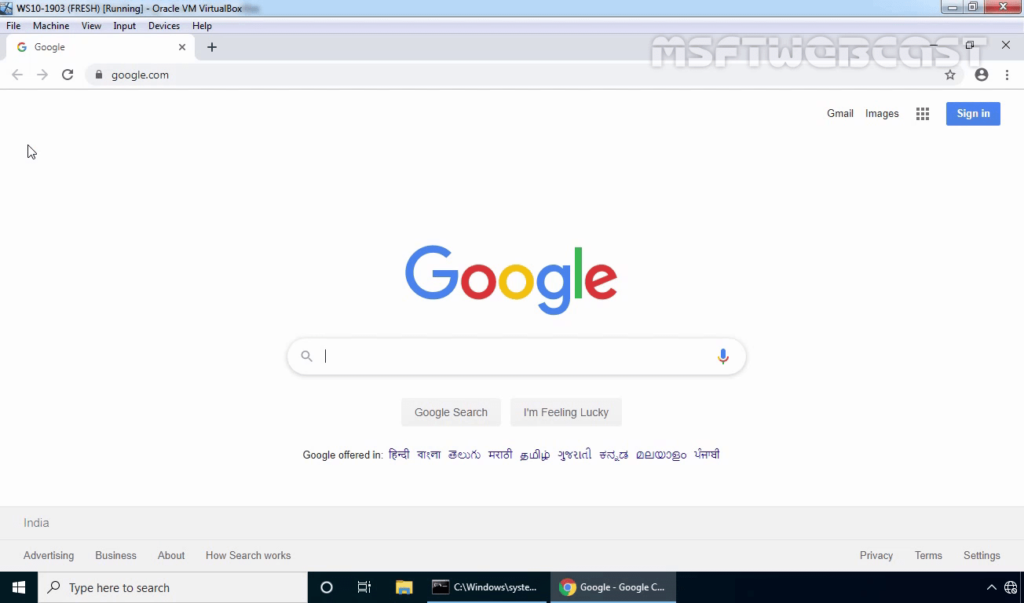
25. If the user can access the www.google.com website successfully, that means NAT is working properly.
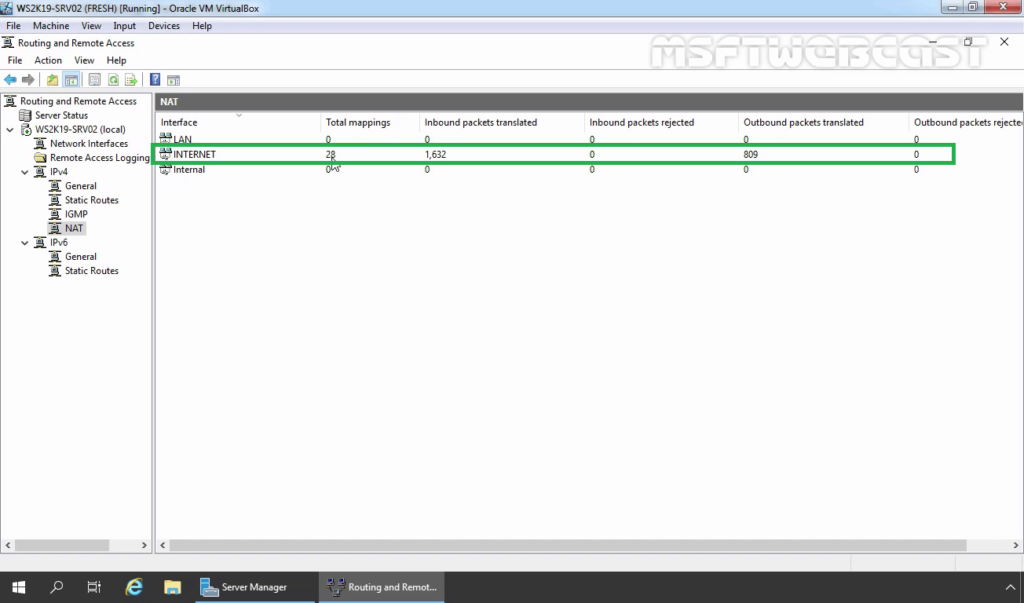
On Windows Server 2019 NAT Router,
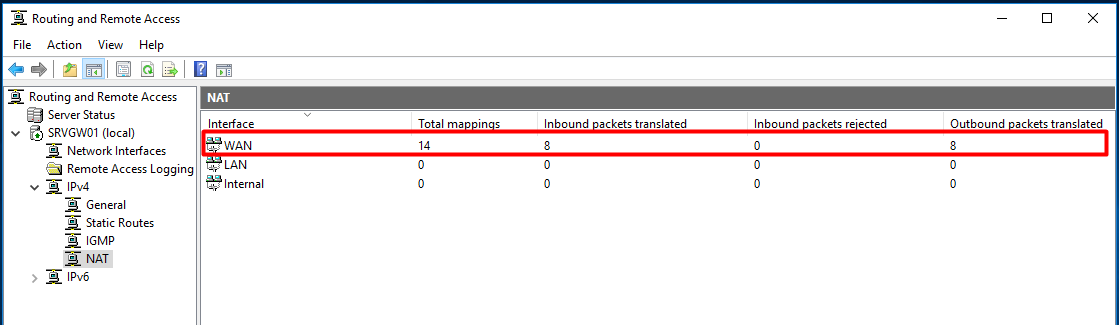
26. Click on NAT and you should see that packets have been translated.
In this guide, we have learned the steps to Configure Windows Server 2019 as a NAT Router.
Thank you for reading.
Related Article:
- Configure LAN Routing in Windows Server 2019
- How to Setup L2TP/IPsec VPN on Windows Server 2019
- Configure SSTP VPN with Self-Signed Certificate on Windows Server 2019
- How to Install and Configure VPN in Windows Server 2019
Post Views: 6,064
Windows Server 2012 R2 — это одна из самых популярных операционных систем для серверов. Она предлагает множество возможностей, включая функцию интернет-шлюза. Интернет-шлюз — это сервер, который обеспечивает подключение локальной сети к интернету, перенаправляя трафик между ними.
Настройка интернет-шлюза на Windows Server 2012 R2 относительно проста, но требует определенных знаний и навыков. В этой статье мы рассмотрим шаги по настройке интернет-шлюза на Windows Server 2012 R2 и ознакомимся с его основными преимуществами.
Одним из главных преимуществ интернет-шлюза на Windows Server 2012 R2 является его надежность и безопасность. Операционная система предлагает различные механизмы защиты, включая межсетевой экран и механизмы шифрования данных. Это позволяет максимально снизить риск возникновения угроз безопасности и обеспечить защиту локальной сети от несанкционированного доступа.
Важным преимуществом интернет-шлюза на Windows Server 2012 R2 является его масштабируемость и возможность управления трафиком. С помощью специальных инструментов администратор легко может мониторить и управлять трафиком, а также устанавливать правила и ограничения для конкретных пользователей или групп. Это позволяет эффективно использовать доступ к интернету и обеспечить его равномерное распределение между всеми пользователями.
Важно: перед началом настройки интернет-шлюза на Windows Server 2012 R2 необходимо обратиться к документации и следовать указаниям производителя, чтобы исключить возможные ошибки и обеспечить корректную работу системы.
Содержание
- Интернет шлюз на Windows Server 2012 R2:
- Настройка
- Преимущества
- Подключение к сети
Интернет шлюз на Windows Server 2012 R2:
Windows Server 2012 R2 предлагает мощный инструмент для создания интернет-шлюза, который позволяет организовать безопасное соединение с внешней сетью и предоставляет контроль над трафиком.
Захватывая сетевой трафик от клиентских устройств и направляя его через себя, интернет-шлюз на Windows Server 2012 R2 предоставляет удобные возможности контроля доступа, фильтрации содержимого, установки ограничений на использование ресурсов, а также обеспечивает высокую степень защиты от внешних угроз.
Настройка интернет-шлюза на Windows Server 2012 R2 достаточно проста и может быть выполнена с помощью диалоговых окон системы. Для этого необходимо настроить сетевые интерфейсы, определить правила маршрутизации и настройки безопасности, а также установить дополнительные компоненты, если это необходимо.
Основное преимущество использования интернет-шлюза на Windows Server 2012 R2 заключается в расширении возможностей сети предприятия. Он позволяет централизованно управлять доступом к интернет-ресурсам, настраивать маршрутизацию и обеспечивать безопасность сети.
Использование интернет-шлюза на Windows Server 2012 R2 упрощает администрирование сети, обеспечивает быструю и стабильную передачу данных, а также повышает безопасность и контроль соединений. Это делает его незаменимым инструментом для организации сетей любого масштаба.
Настройка
Настройка интернет шлюза на Windows Server 2012 R2 производится с помощью ряда шагов:
- Установка и активация роли Network Policy and Access Server (NPAS) на сервере.
- Настройка сетевых интерфейсов сервера: указание IP-адреса, маски подсети и шлюза по умолчанию.
- Настройка DHCP-сервера для автоматической выдачи IP-адресов клиентам.
- Настройка DNS-сервера для разрешения имен в сети.
- Настройка проброса портов для перенаправления входящего и исходящего трафика.
- Настройка брандмауэра и фильтрации трафика для обеспечения безопасности сети.
- Конфигурирование VPN-сервера для удаленного доступа к сети.
- Настройка маршрутизации для оптимального распределения трафика в сети.
После завершения всех этих шагов интернет шлюз будет полностью сконфигурирован и готов к работе. Он обеспечит стабильное соединение с сетью Интернет, а также возможность удаленного доступа к сети с помощью VPN.
Преимущества
Установка интернет-шлюза на Windows Server 2012 R2 имеет ряд преимуществ:
- Управление и контроль: Windows Server 2012 R2 обеспечивает гибкие инструменты управления, что позволяет полностью контролировать доступ в интернет, устанавливать правила и ограничения для пользователей и сетей.
- Безопасность: Реализация интернет-шлюза на базе Windows Server 2012 R2 позволяет использовать мощные инструменты безопасности, такие как межсетевой экран, антивирусное программное обеспечение, защита от DDoS-атак и другие, для обеспечения защиты сети и данных.
- Возможность настройки и мониторинга: Windows Server 2012 R2 предоставляет простой в использовании интерфейс для настройки интернет-шлюза и мониторинга сетевой активности, что упрощает администрирование и обслуживание системы.
- Экономическая эффективность: Использование имеющегося сервера и операционной системы для установки интернет-шлюза позволяет снизить затраты на оборудование и программное обеспечение, а также упростить обслуживание инфраструктуры.
- Улучшение производительности сети: Интернет-шлюз на базе Windows Server 2012 R2 может выполнять задачи маршрутизации и фильтрации трафика, что позволяет распределить нагрузку на сеть и повысить ее производительность.
Подключение к сети
Для настройки интернет-шлюза на Windows Server 2012 R2 необходимо произвести подключение к сети. Это позволит серверу получить доступ к интернету и стать точкой доступа для других устройств.
Для подключения к сети следует выполнить следующие шаги:
1. Подключите сетевой кабель от интернет-провайдера к сетевой карте сервера.
2. Зайдите в меню «Панель управления» и выберите раздел «Сеть и Интернет».
3. В разделе «Сеть и общий доступ» найдите ссылку «Центр управления сетями и общим доступом». Нажмите на нее.
4. В открывшемся окне выберите пункт «Настройка нового подключения или сети».
5. В мастере настройки сети выберите опцию «Подключение к интернету».
6. В следующем окне выберите «Широкополосное подключение, которое я уже использовал» и нажмите «Далее».
7. Введите данные, предоставленные вашим интернет-провайдером, в поля «Имя пользователя» и «Пароль».
8. Нажмите «Подключение», чтобы завершить настройку подключения к сети.
После успешного подключения к сети ваш интернет-шлюз на Windows Server 2012 R2 будет готов к использованию. Теперь вы можете настраивать дополнительные функции шлюза, такие как маршрутизация, фильтрация и прокси-сервер.
Introduction
In this article I’ll be setting up Windows Server 2016 as a NAT router to route traffic between my virtual lab LAN and the internet. Please note that this article was written in context with the configuration used in my virtual lab. You’ll have to adapt it to your network setup. Also, you will need to have a DHCP server to provide IP addresses to your client computers and a DNS server so that your client computers are able to resolve names. As a quick-ref, my LAB environment is as below:
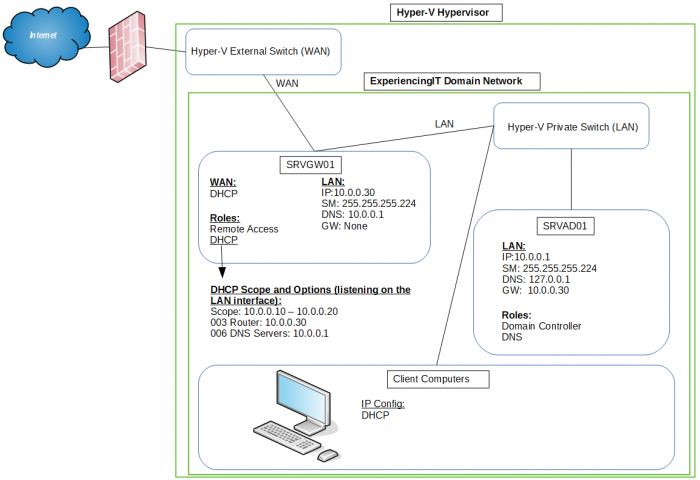
If you’d like to continue following this article, you can read on how to install Windows Server 2016 and, after installing, read how to rename the server so that you can identify its primary role by its name. I called mine SRVGW01 (GW=Gateway).
The server must have two NICs, one configured for the internal network (LAN) and another one configured to access the internet. I’ll call it WAN.
The first thing I’ll do is to rename the network interfaces to better identify them.
Configuring the NICs
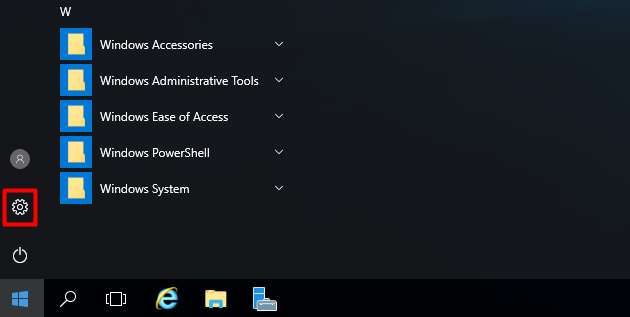
Open “Settings”
Choose “Network & Internet”
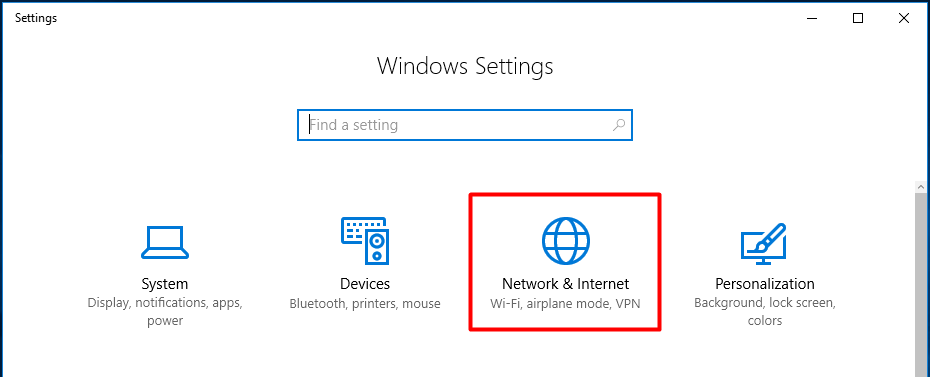
And choose “Change adapter options”
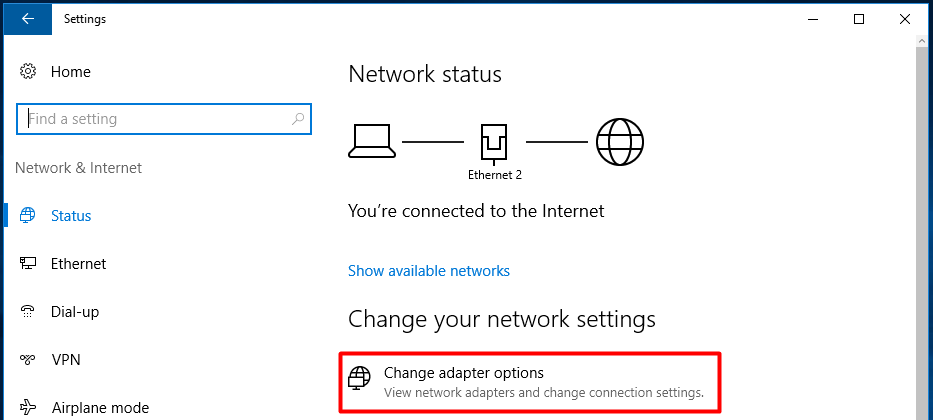
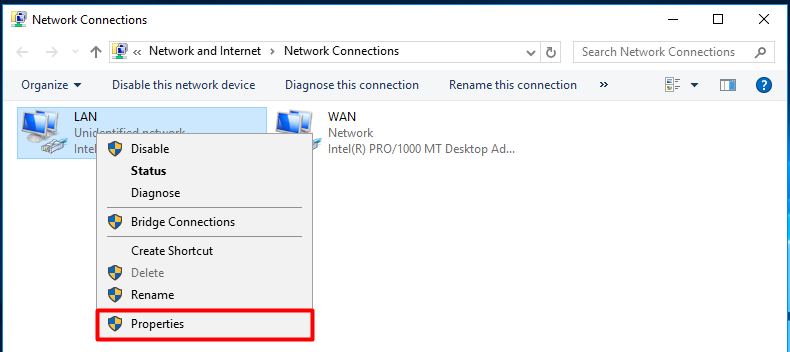
From the “Network Connections” window, it is pretty easy to spot what is the LAN connection (Unidentified network) and the WAN connection (bellow identified as Network). Let’s rename them. Select the connection to rename and press the “Rename this connection” button. Rename them accordingly.
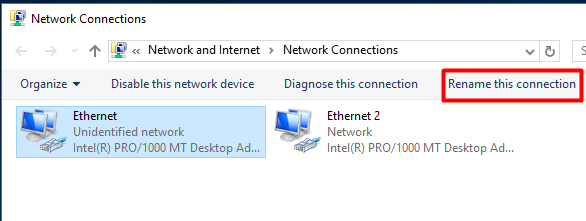
It should look like this:
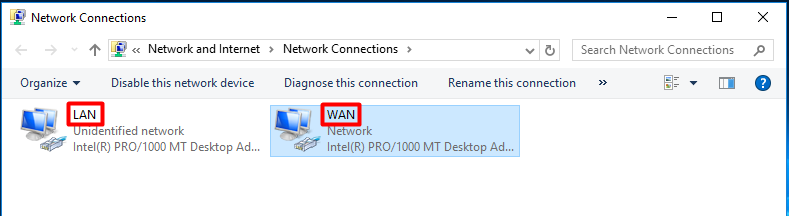
The LAN adapter needs to be configured with a static address, while the WAN adapter should be set to DHCP. The address configured on the LAN adapter is the address the client computers will use as their gateway. Right-click on the LAN adapter and select “Properties”.
Highlight “Internet Protocol Version 4 (TCP/IPv4)” and select “Properties”.
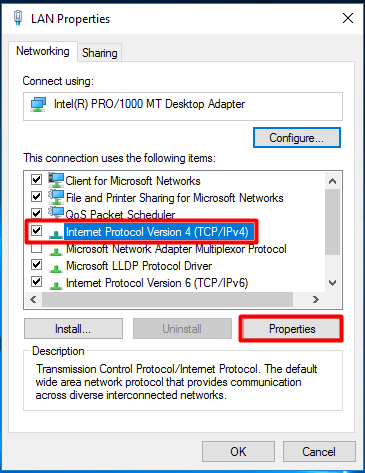
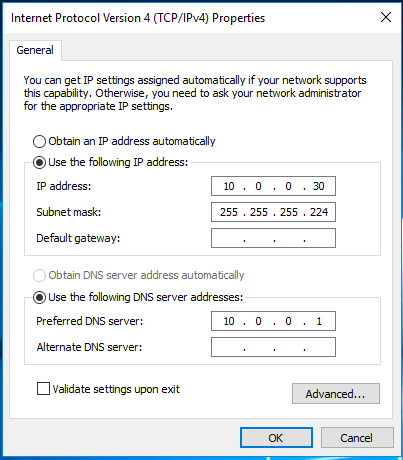
Setup the IP address settings to match your network configuration and press OK. Note that you need to have a DNS server setup on the network. It can the same server where this role is being installed.
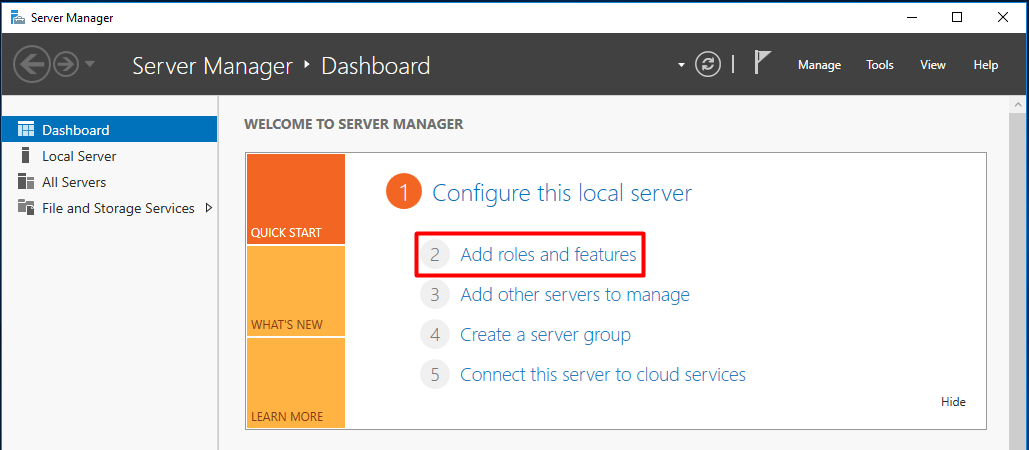
Adding the “Remote Access” server role
Now it’s time to install the “Remote Access” server role. Open Server Manager and select “Add roles and features”.
Press “Next” until you reach the screen below. Select the “Remote Access” role and press “Next”.
Press “Next” at the following screen.
Press “Next” and then select “Routing”, as shown below:
Click on “Add Features”.
Go till the end of the wizard by pressing “Next”. Press “Install” at the confirmation screen.
Configuring the “NAT router”
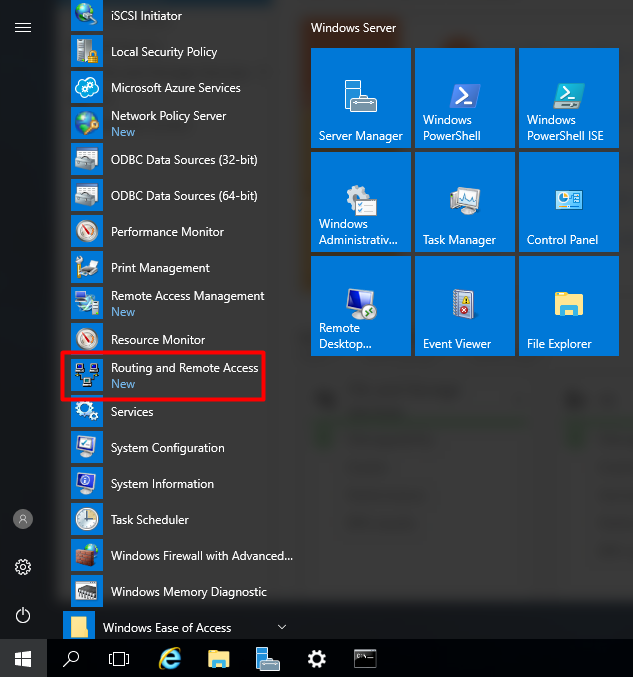
Wait for the installation to finish and open the “Routing and Remote Access” console. Press “Start” and under “Windows Administrative Tools” find “Routing and Remote Access”.
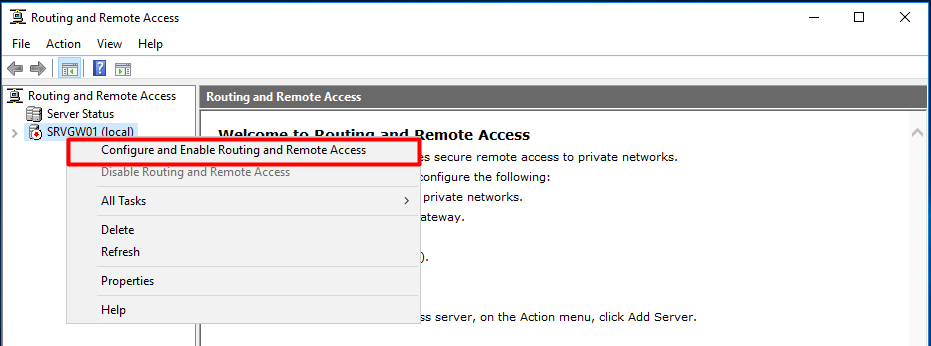
Right-click on the server name and select “Configure and Enable Routing and Remote Access”.
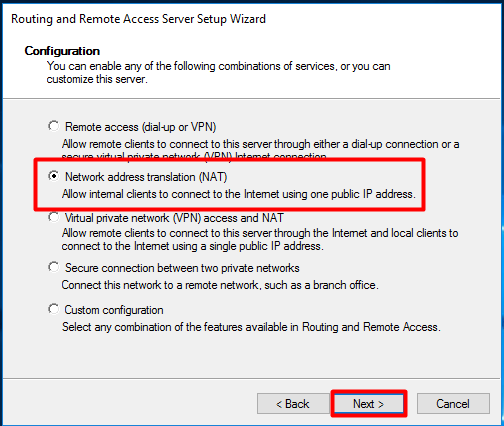
Press “Next” at the wizard welcome screen. Choose “Network address translation (NAT)” and press “Next”.
Select the WAN adapter and press “Next”.
Press “Finish”, wait for the configuration to finish and verify that the NAT router is working properly. Expand the IPv4 node, select “NAT” and you should see that packets have been translated.
As always, if you found this article useful, share it with your friends.
If you have any question or suggestion, leave your comment.
Thank you for reading!
This guide is for those who wants to simulate I virtual enterprise environment, and use a Windows Server as a virtual Gateway. In this example I´m going to use 2 separate VLAN and use the Gateway as a Router and also NAT all communications to the Internet. This way only one server faces the internet, and you could also have a firewall on the server.
SETUP:
1 Server 2016 Core, Name (GW) , Workgroup (but could be domain joined), used as gateway and router.
2 Server 2016 GUI, Name (MGM,MGM2), Workgroup (but could be domain joined), used for verification.
Setup Hyper-V:
On the GW server I need 3 network cards. One connected to an External switch and the other two connected to the same Private switch.
The two Private Switches I configure with VLAN ID.

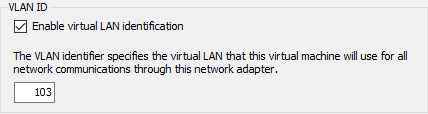
The MGM server has the VLAN 102 and the MGM2 has the VLAN 103 switch connected to them.
Setup GW Server:
Server is installed and fully patched.
On the server we now have three network cards. And I will rename them to External, VLAN 102 and VLAN 103.
First we check what Network cards we have, so logon to the server and start Powershell, and then we check what network adapters we have.
Get-NetAdapter

When looking at the LinkSpeed I see that one connection is at 1 Gbps, so that should be my External network, and the rest the internal. Bydefault the names of the cards is in order of installation, so if you first create the internal ones, they will have the lower number. So if you add them one by one, you will know which adapter is which.
Then we rename the cards, just so it will be easier to see.
Get-NetAdapter -Name "Ethernet" | Rename-NetAdapter -NewName "External"
Get-NetAdapter -Name "Ethernet 2" | Rename-NetAdapter -NewName "VLAN 102"
Get-NetAdapter -Name "Ethernet 3" | Rename-NetAdapter -NewName "VLAN 103"
![]()
And when we check again we see the new names.
Get-NetAdapter

Then we must set a IP-address of the network cards, in this case External gets from a DHCP, so we don´t need to change that one.
So for the VLAN 102
New-NetIPAddress -InterfaceAlias "VLAN 102" -IPAddress 192.168.102.1 -PrefixLength 24 -DefaultGateway 192.168.102.1

And for VLAN 103
New-NetIPAddress -InterfaceAlias "VLAN 103" -IPAddress 192.168.103.1 -PrefixLength 24 -DefaultGateway 192.168.103.1

This is not needed but I always want to enable IMCP, so lets enable that in the windows firewall.
Enable-NetFirewallRule -DisplayName "File and Printer Sharing (Echo Request - ICMPv4-In)"
![]()
Just a quick check that we have internet connectivity
Test-NetConnection

So now on with installing the RRAS. So install the Routing role and restart the server.
Install-WindowsFeature Routing -IncludeManagementTools -Restart
When the server has rebooted, log on to it again and start powershell.
Configuration RRAS:
The next part there is two solutions as I see it, the old way by using he GUI from another server, and another when you using NETSH. If you ever want to use the GUI and see what NAT that is in use and the stats for packages, then I recommend using the GUI. If anyone know a way to be able to use powershell or other ways to configure this and it will show up the same in the GUI let me know. I will now show both ways to configure this.
RRAS GUI:
From the MGM server, set it up on VLAN 102 with a IP and set the default GW to the IP of the GW server IP for VLAN 102. If using MGM2 set up with that IP and use that GW IP. Below I use MGM.If the server is in workgroup make sure that the same Admin account is on both servers with same password for easier management. If in domain, make sure your account has admin rights.
Now. On the MGM server. Install RSAT för RRAS via powershell. Restart not needed.
Install-WindowsFeature RSAT-RemoteAccess -IncludeAllSubFeature

Now start the “Routing and Remote Access” GUI.
In the GUI, right click on top of the tree and choose “Add Server”

Check The following computer and type in the IP-address of the gateway (in this case the MGM server is on VLAN 102 so we choose 192.168.0.1 to connect to the GW), and then click on connect.

Now right click on 192.168.102.1 and choose “Configure and Enable Routing and Remote Access”.

Click Next.

Select NAT and click on Next.

Select our External Network card and click on Next.

Select one of the cards (VLAN) that will be able to access internet, and click Next. In this you can´t add more then one card, but we will add it later.

The next screen will only show up if server is in a workgroup. You can choose if you want the GW to forward all DNS request towards the internet or if you will use a internal DNS and DHCP. In this case just to show how it works, so I will chose to let the GW forward all traffic. In a fully simulated environment, I would have the GW domain joined.

Click Next.

Click Finish and led RRAS be configured.

NB if you have enabled “Windows Firewall Remote Management” in the firewall you will get the following error message. This is not an Issue, because installing the Routing Role in the GW already has enabled the FW rules (at least on core).

Now expand 192.168.102.1 and the IPv4 and then NAT. If NAT does not show up, there is probably a GUI error, and a reboot of the RRAS console or the MGM server will fix that. We see that our VLAN 102 and the External Network is connected in NAT.

To add VLAN 103, right click on NAT and choose “New Interface.”

Select VLAN 103 and click on OK.

Select Private Interface and click on OK.

Now VLAN 103 should be visible under NAT.

Now, we can go on with verification.
RRAS Core:
NB, if you use this way you cant use the GUI from a 2016 server to view anything, it will throw a message that legacy is not supported and powershell must be used.
On the GW server install the install the RomoteAccess, and just because we want an output we add -PassThru
Install-RemoteAccess -VpnType RoutingOnly -PassThru
The next commands is using NETSH so start it by typing in NETSH and enter the NETSH interface. Then type “routing ip nat” to enter that.
![]()
And now add config in netsh. The first row will install the NAT functionality, this will throw a message that it does not find the file specified, but it will stil work. Row 2 will add the External Adapter with mode Full. Row 3 will add the VLAN 102 adapter. Row 4 will add the VLAN 103 adapter
install
add interface "External" mode=full
add interface "VLAN 102"
add interface "VLAN 103"
exit

And the its on to verification.
Verfification:
Now from the MGM server, make sure you have a functional DNS-server setting, or set google as one and the run Test-NetConnection.
Test-NetConnection

And from VLAN 103

So we see that internet access is working from both WLAN, and to test if the Routing works (starts working as soon NAT is in place). From VLAN 102 to VLAN 103, and we add -TraceRoute just to see the route.
Test-NetConnection 192.168.103.33 -TraceRoute

And from VLAN 103 to VLAN 102
Test-NetConnection 192.168.102.33 -TraceRoute

DONE