Прежде чем говорить о безопасном способе очистки папки WinSxS в Windows Server 2012, попробуем понять, что же это за папка такая, что в ней хранится и почему со временем она увеличивается в размерах.
Если вы помните, при установке дополнительных компонентов в Windows Server 2003 мастер установки требовал вставить в CD-Rom установочный диск , либо указать путь к каталогу с дистрибутивом Windows Server 2003. В Windows Server 2008 Microsoft решила изменить подход к установке дополнительных ролей и возможностей Windows. Теперь все бинарные файлы, необходимые для разворачивания любой роли, хранятся в каталоге C:\Windows\WinSxS (WinSxS — Windows Side By Side). Это означает, что при установке любой дополнительной роли теперь нет необходимости искать и подключать к серверу диск с дистрибутивом. Естественно, при таком подходе для ОС требует гораздо большего места на диске. Нужно понимать, что в каталоге WinSXS содержаться ключевые компоненты системы, поэтому удалять из нее что-то вручную ни в коем случае нельзя. Почему же размер папки WinSXS постоянно растет? Ответ прост – обновления. При установке обновлений различных компонентов в каталоге WinSXS остаются и старая и новая версия обновленного компонента. Благодаря такой архитектуре, мы в любой момент можем безопасно удалить любое установленное обновление и откатиться на старую версию компонента.
Содержание:
- Features on Demand в Windows Server 2012
- Установка удаленных ролей и функций в Windows Server 2012
- Автоматическая очистка WinSxS с помощью Cleanmgr
А что же делать, если система запущена и работает, разворачивать дополнительные роли не планируется, а места на диске не хватает? Ведь нелогично, что на системном диске несколько гигабайт занято дистрибутивами, которые никогда не потребуются! В Windows Server 2008, к сожалению, удалить данные файлы без вреда системе довольно сложно. Однако, в новой серверной ОС — Windows Server 2012, Microsft решила исправить этот недостаток и внедрила новую функцию под названием Features on Demand.
Features on Demand в Windows Server 2012
Функция Features on Demand (функции по запросу) позволяет уменьшить размер, занимаемый системой на диске, предоставляя возможность удалений бинарных файлов неиспользуемых ролей из папки WinSxS. В том случае, если в дальнейшем возникнет необходимость вернуть ранее удаленную роль, то все необходимые для работы ролей файлы можно извлечь из образа дистрибутива Windows Server 2012, службы Windows Update или сетевого ресурса с оригинальным содержимым WinSxS.
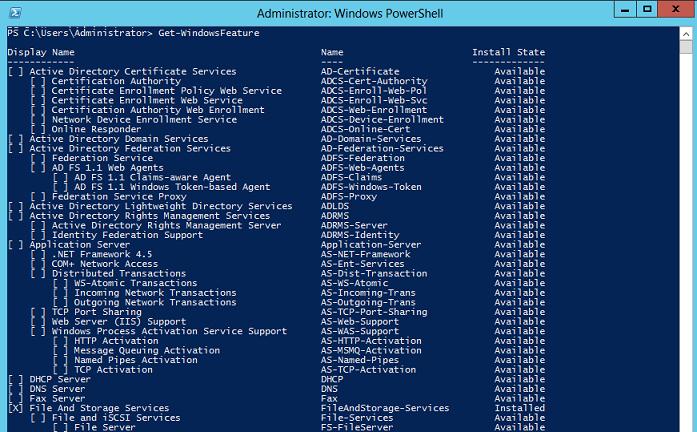
С помощью следующей команды Powershell можно получить информацию обо всех ролях системы:
Get-WindowsFeature
Как вы видите, в колонке Install State отображается состояние каждой роли. Возможные статусы:
- Installed: роль или функция установлена и в настоящий момент используется системой
- Available: роль на сервере не установлена, однако на диске присутствуют все необходимые файлы, позволяющие в любой момент установить/активировать эту роль.
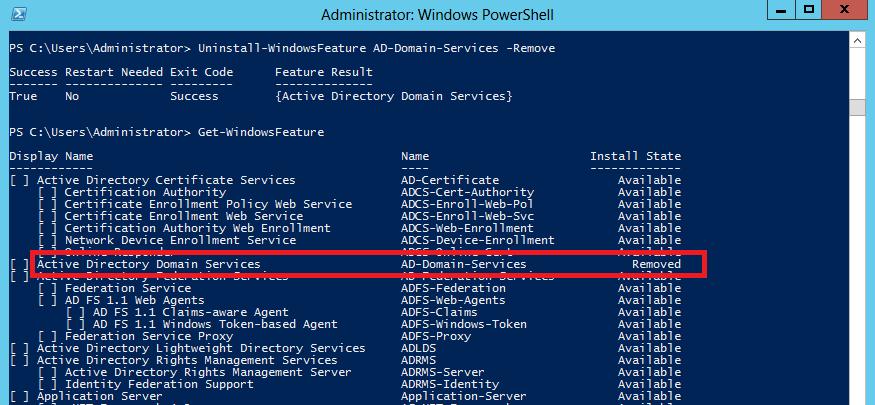
- Removed: — роль или функция на сервере не установлена, файлы, необходимые для ее установки удалены с диска
Соответственно, при установке любой роли через GUI или Powershell (команда Install-WindowsFeature) ее статус с Available меняется на Installed, а при удалении (команда Uninstall-WindowsFeature) наоборот.
Полностью удалить роль с диска (из папки WinSxS) можно только через Powershell. Для этого нужно использовать специальный аргумент команды Uninstall-WindowsFeatur — Remove.
Например, чтобы удалить бинарные файлы роли DHCP-сервера, выполните команду:
Uninstall-WindowsFeature –Name DHCP –Remove
А чтобы удалить файлы службы каталогов Active Directory Domain Services:
Uninstall-WindowsFeature AD-Domain-Services -Remove
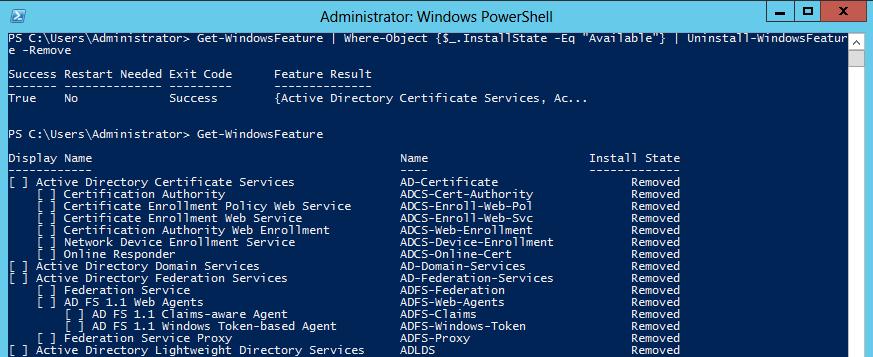
С помощью конвейеров Powershell можно написать более сложную команду, которая удалит с диска инсталляционные файлы всех неиспользуемых ролей и функций Windows Server:
Get-WindowsFeature | Where-Object {$_.InstallState -Eq “Available”} | Uninstall-WindowsFeature -Remove
В нашем примере, при условии, что была установлена только роль файл-сервера, размер папки WinSxS уменьшился с 8 до 5.2 Гб. Неплохо, правда? Тем более, что для очистки папки WinSxS нам потребовалась всего одна команда.
Установка удаленных ролей и функций в Windows Server 2012
Рассмотрим еще один сценарий, предполагающий, что вам потребуется установить некую роль Windows Server 2012, дистрибутив которой был удален из каталога WinSxS. Восстановить роль можно несколькими способами: с помощью GUI Server Manager или с помощью Powershell.
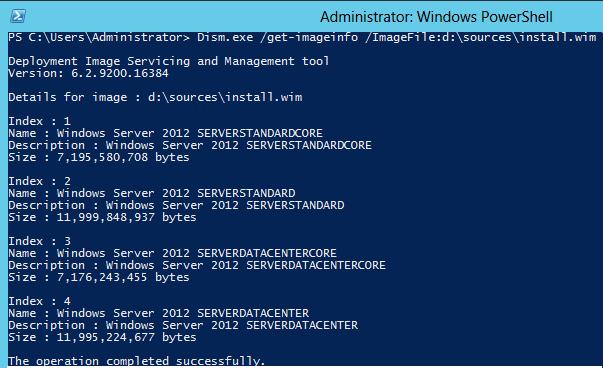
Прежде, чем приступить к восстановлению файлов ролей, необходимо определить индекс установленной редакции Windows Server 2012. Нам понадобятся диск с дистрибутивом Windows Server 2012 (а точнее файл образа install.wim, находящийся в каталоге sources). Выполните следующую Powershell команду:
Get-windowsimage –imagepath <путь к файлу wim>\sources\install.wim
Найдите версию установленного у вас Windows Server и запомните ее индекс (значение в строке Index). В нашем примере это Windows Server 2012 Datacenter с индексом 4. (Мы уже рассматривали особенности работы с различными редакциями Windows 2012 в одном дистрибутиве в статье «Интеграция драйверов в установочный диск Windows Server 2012»).
Ту же самую операцию можно выполнить с помощью утилиты Dism:
dism.exe /get-imageinfo /imagefile:d:\sources\install.wim
Устанавливаем удаленную роль с помощью Server Manager
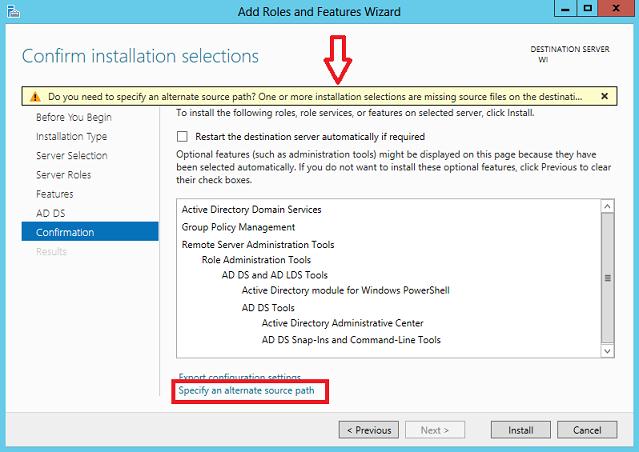
Откройте консоль Server Manager и запустите мастер установки ролей (Add Roles and Features. Выберите роль или функцию, которую необходимо установить. Мастер предупредит, что некоторые файлы, необходимые для установки данной роли отсутствуют и нужно указать альтернативный путь к местоположению дистрибутива. Нажмите кнопку Specify an alternate source path.
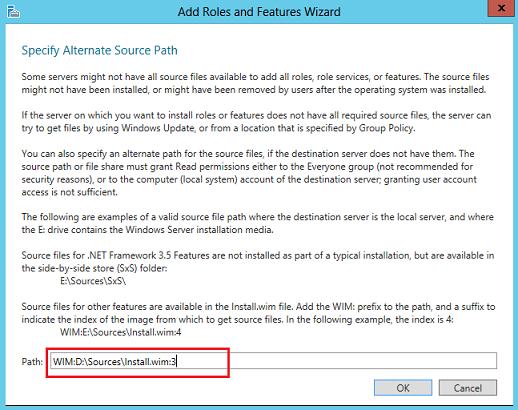
В поле Path укажите полный путь к файлу intall.wim и индекс установленной редакции ОС в таком формате:
WIM:D:\Sources\Install.wim:4
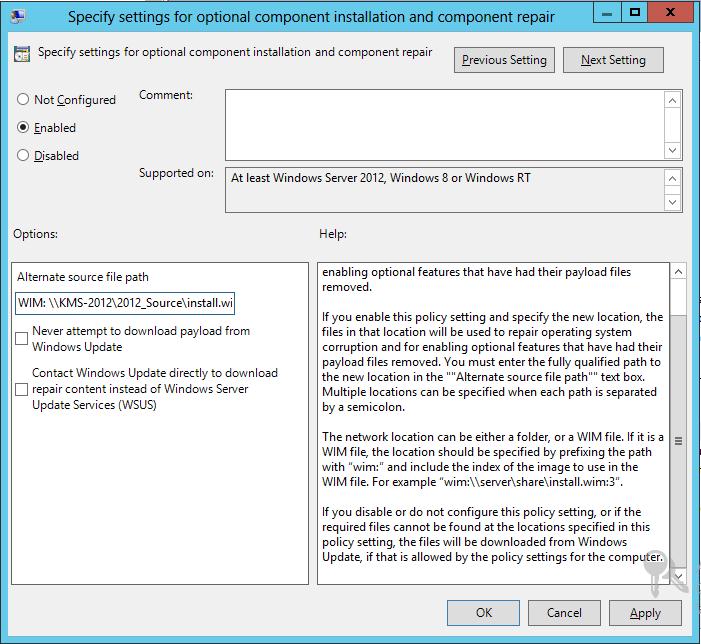
В случае необходимости, в данной строке можно указать сетевой путь к каталогу с файлом WIM или сетевой путь к каталогу WinSxS. Кроме того путь к данному каталогу можно указать сразу для группы серверов с помощью групповой политики ( Computer Configuration -> Administrative Templates ->System ->Specify settings for optional component installation and component repair). Последний вариант удобен в случае большого количества инсталляций серверов с Windows Server 2012, ведь суммарный эффект от очистки папки WinSxS может достигать сотен Гб.
После того, как будет нажата кнопка OK, все необходимые файлы для устанавливаемой роли будут скопированы в каталог WinSxS.
Восстановление удаленной роли Windows 2012 с помощью Powershell
Ту же самую операцию можно выполнить с помощью всего одной команды Powershell. Допустим, нам нужно восстановить удаленные файлы роли ADDS. Выполним следующую команду:
Install-WindowsFeature AD-Domain-Services -Source WIM: WIM:D:\Sources\Install.wim:4
Итак, в этой статье мы разобрались с новой функцией Windows Server 2012 под название Features on Demand, позволяющей удалить дистрибутивы бинарных файлов неиспользуемых серверных ролей из каталога WinSxS. В случае необходимости удаленную роль можно достаточно просто восстановить: все, что для этого понадобится – дистрибутив Windows Server 2012.
В Windows 8 функция Feautere on Demand работает немного по другому, дело в том, что используемый нами командлет Powershell просто напросто отсутствие. Его аналогом (не таким удобным) является команда DISM с параметром /Disable-Feature. Кроме того можно просто сжать содержимое каталога Winsxs. Подробности в статье Как уменьшить размер папки Winsxs в Windows 8
Автоматическая очистка WinSxS с помощью Cleanmgr
Для автоматической очистки файлов обновлений в WinSxs и временных файлов можно использовать стандартную утилиту Disk Cleanup (cleanmgr.exe). Используйте такой скрипт (thnks to Alex Kornev)
:: параметры очистки каталога winsxs
REG ADD "HKEY_LOCAL_MACHINE\SOFTWARE\
:: параметры очистки временных объектов
REG ADD "HKEY_LOCAL_MACHINE\SOFTWARE\
:: создание запланированной задачи "CleanupWinSxS"
schtasks /Create /TN CleanupWinSxS /RL Highest /SC monthly /TR "cleanmgr /sagerun:88"
Данный скрипт создаст в планировщике задание ежемесячной очистки папки WinSxS с помощью утилиты cleanmgr. Задача будет выполняться автоматически 1 раз в месяц 1-го числа без непосредственного участия. Время запуска задачи будет соответствовать времени создания задачи.
Чтобы задать свое время запуска, добавьте в последнюю строку ключ:
/ST HH:mm
где
HH - часы в формате 24h
mm - минуты
Contents
- 1 What is Windows Server 2019 features on demand?
- 2 What are Windows 10 features on demand?
- 3 How do I install on demand feature?
- 4 How do I open Windows features?
- 5 What is the difference between server role and feature?
- 6 How to install Windows Server features on demand?
- 7 What is features on Demand ( FOD ) in Server Core?
- 8 What are the features of Windows Server 2019?
What is Windows Server 2019 features on demand?
The Server Core App Compatibility Feature on Demand is an optional feature package that can be added to Windows Server 2019 Server Core installations, or Windows Server Semi-Annual Channel, at any time. For more information on Features on Demand (FOD), see Features On Demand.
What are Windows 10 features on demand?
Windows 10 Features On Demand are additional feature options available through Windows Update. This download allows organizations to pre-configure Windows 10 installation software with these features prior to deployment. This download can also be used to install features from local media.
What is Windows 10 feature on demand WSUS?
Features on Demand (FODs) are Windows feature packages that can be added at any time. When a Windows 10 PC needs a new feature, it can request the feature package from Windows Update.
How do I install on demand feature?
You can also install FODs with DISM /add-Capability . You have to use /add-capability to preinstall satellite FODs. If you’re preinstalling a FOD onto an offline image, use the /source option to tell Windows where to find the FOD installation files.
How do I open Windows features?
1- How to turn Windows features on or off?
- To open the Windows Features screen, go to Run –> optionalfeatures (This can also be accessed by opening Start Menu –> Control Panel –> Programs and Features –> Turn Windows features on or off)
- To enable a feature, check the checkbox beside the component.
What are the features of a server?
- The ability to update hardware and software without a restart or reboot.
- Advanced backup capability for frequent backup of critical data.
- Advanced networking performance.
- Automatic (invisible to the user) data transfer between devices.
- High security for resources, data and memory protection.
What is the difference between server role and feature?
Server roles refer to the roles that your server can play on your network — roles such as a file server, a web server, or a DHCP or DNS server. Features refer to additional capabilities of the Windows operating system itself, such as the . NET Framework or Windows Backup.
How to install Windows Server features on demand?
Windows Server 2019 Features On Demand is avaialble for Server Core option only! Abstractly speaking, FOD is a pack of tools or features which Microsoft offer, but not as an integrated part of Windows setup. Rather, Microsoft requires a manual installation (via DISM /image:<path_to_image> /get-capabilities), as explained here.
What are the different types of features on demand?
If you add an update prior to adding language packs, FODs, and apps you’ll have to reinstall the update. Starting with Windows 10, version 1809 and Windows Server 2019, Windows has two different types of Features on Demand: FODs without satellite packages: FODs with all language resources packaged into the same package.
What is features on Demand ( FOD ) in Server Core?
First, Windows Admin Center has been released and second, Features on Demand (FOD) is out which enables you to install a subset of graphical tools you are used to from the Desktop Experience installation method. For example, FOD enables you to administer Server Core with mmc.exe, Windows Explorer, Windows PowerShell ISE and much more.
What are the features of Windows Server 2019?
One of the things Microsoft wants to improve with Windows Server 2019, is the Windows Server Core experience. Bringing a great remote management experience with Windows Admin Center is one thing, the other feature which should improve the Server Core experience, is the Server Core App Compatibility feature-on-demand (FOD).

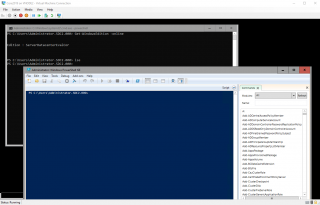
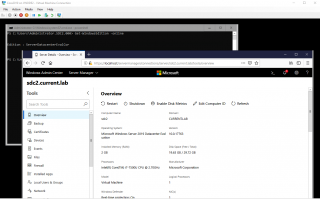
There are a couple of things that I think are game changers with the Windows Server Core version of Windows Server 2019 and the very soon to be GA Windows Server 2022. These are Windows Admin Center and Feature on Demand (FoD). I have written about the Windows Server Admin Center for Windows Server 2022 here. It changes the game of managing Windows Server Core releases. However, there is another provision for Windows Server 2022 Core that also allows IT admins to bridge the gap between the full Windows Server Desktop OS and the Windows Server Core OS – Features on Demand (FoD). What is Windows Server 2022 Core Feature on Demand (FoD)? Let’s look at how to download and install Windows Server 2022 Feature on Demand (FoD) and see how this changes your Windows Server 2022 Core experience.
The Windows Server 2022 Feature on Demand (FoD) package helps to change the game with Windows Server Core. It is also known as the “App Compatibility” package as it adds packages for compatibility purposes. The FoD package allows IT admins to add missing Windows features to the Windows Server Core operating system. Common features can be added such as language resources and .NET Framework. However, there are other extremely useful tools that are added when you install the Feature on Demand (FoD) package on a Windows Server 2022 Core installation. These include the following familiar management consoles:
- Microsoft Management Console (mmc.exe)
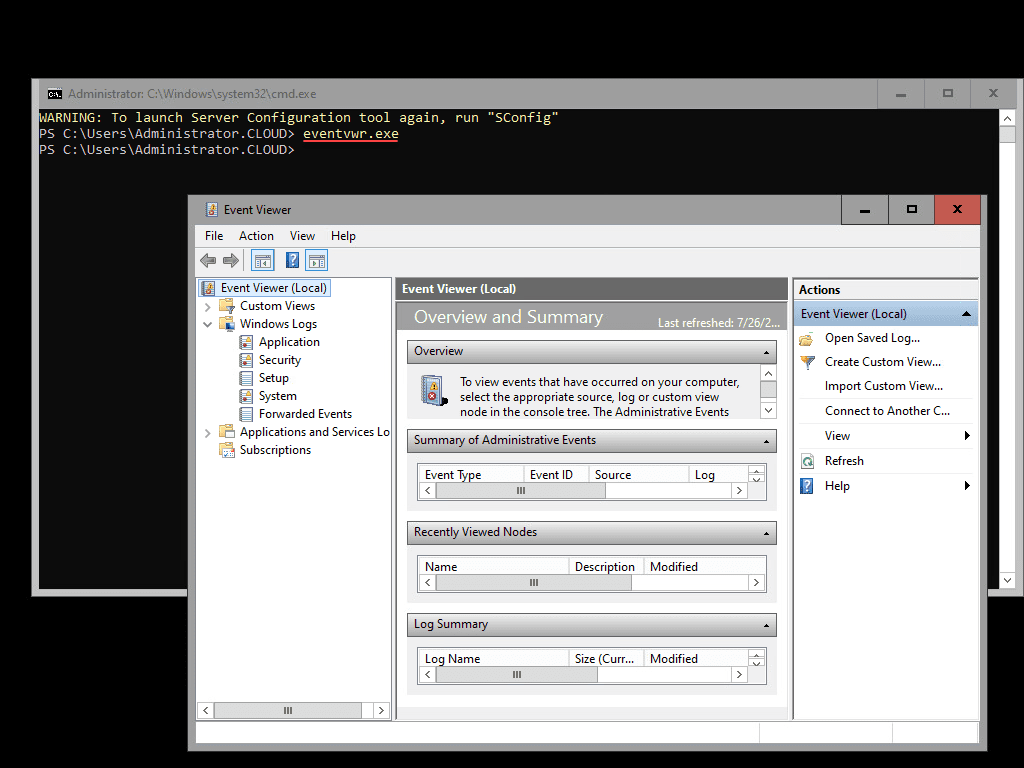
- Event Viewer (Eventvwr.msc)
- Performance Monitor (PerfMon.exe)
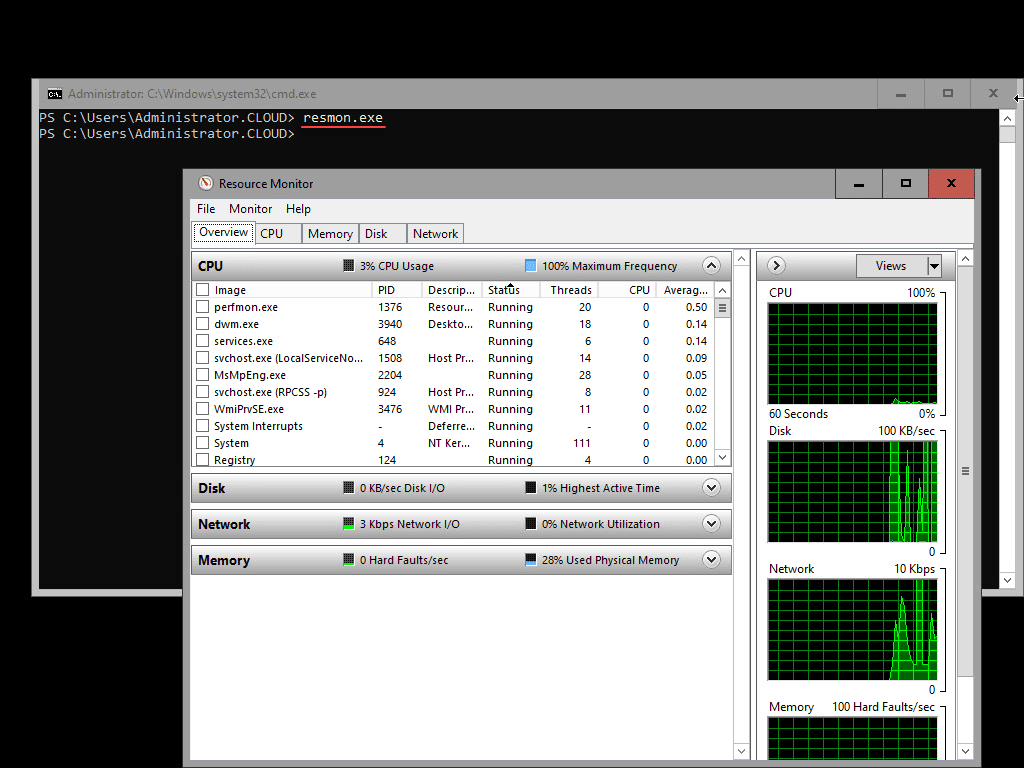
- Resource Monitor (Resmon.exe)
- Device Manager (Devmgmt.msc)
- File Explorer (Explorer.exe)
- Windows PowerShell (Powershell_ISE.exe)
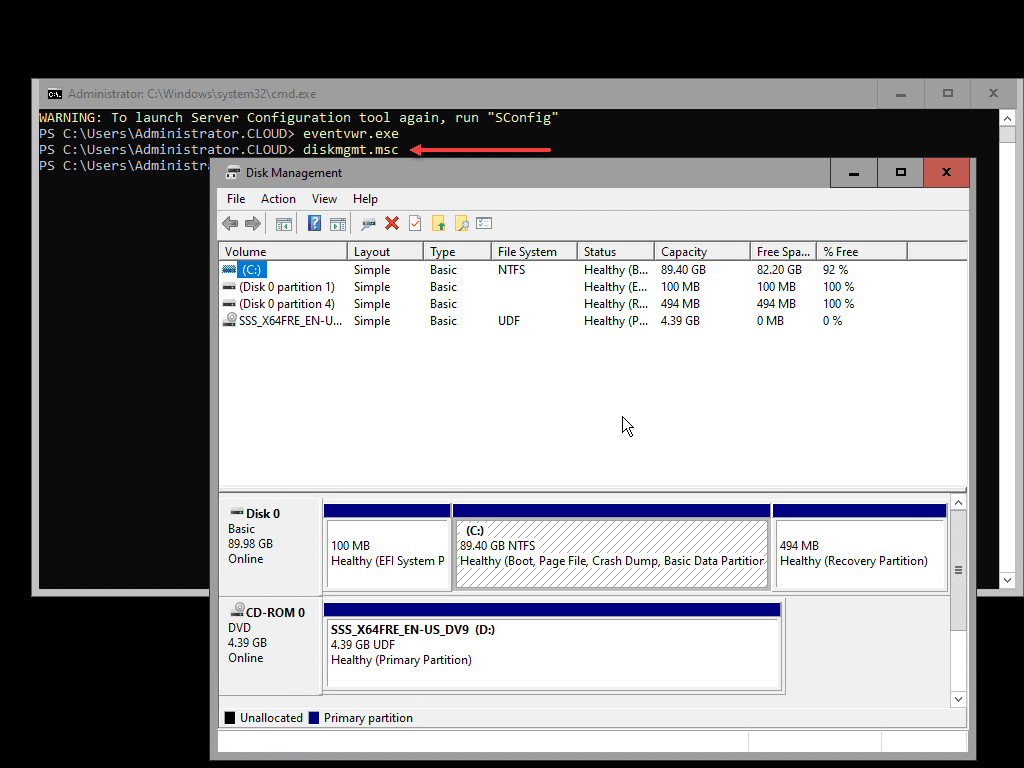
- Disk Management (Diskmgmt.msc)
- Failover Cluster Manager (CluAdmin.msc)
- Hyper-V Manager (virtmgmt.msc)
- Task Scheduler (taskschd.msc)
While Windows Admin Center provides a robust way to have centralized administration of your Windows Server 2022 Core operating systems, having the ability to have local management tools available can be extremely helpful in case the server is isolated or network connectivity is down. Having the ability to locally look at Event Viewer as an example, is extremely helpful if you are troubleshooting an issue.
Note, without adding the Features on Demand (FoD) package to Windows Server 2022 Core edition, attempting to launch Event Viewer fails as expected.
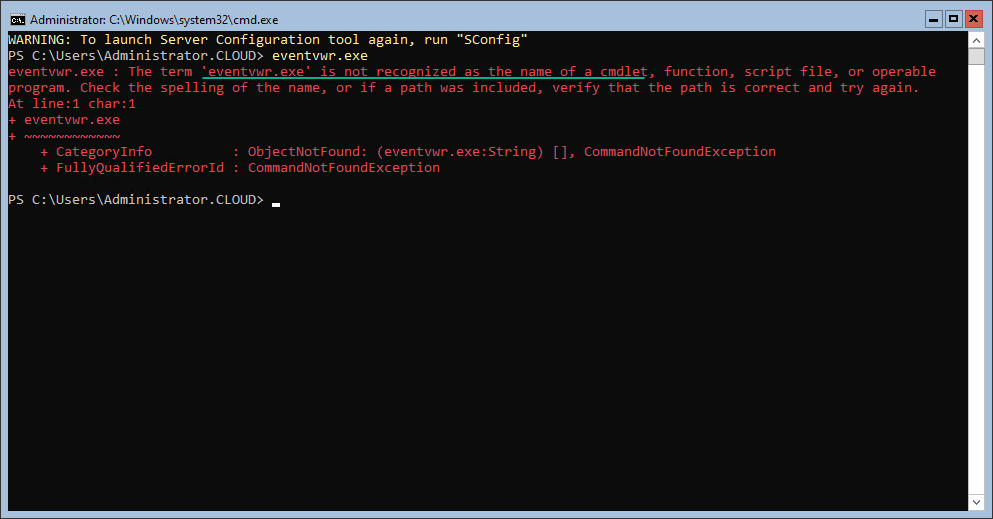
Download and Install Windows Server 2022 Core Features on Demand (FoD)
Microsoft has made the process fairly simple to download and install Windows Server 2022 Core Features on Demand (FoD). There are two ways you can do this with Windows Server 2022 Core.
- Online installation
- Download the FoD ISO image
The easiest and least amount of work for IT admins is to perform the online download and installation of the Features on Demand package. You can download and install Windows Server 2022 Core Features on Demand by using the command:
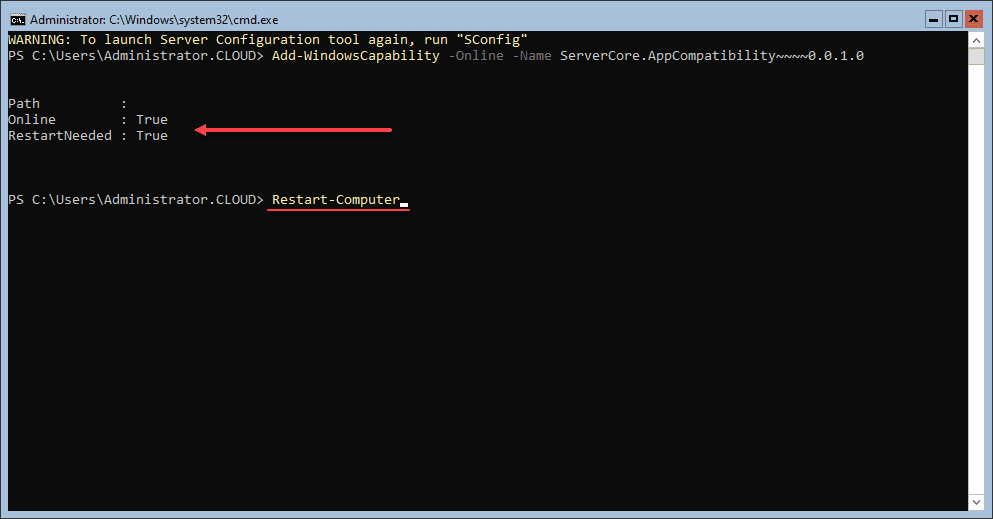
Add-WindowsCapability -Online -Name ServerCore.AppCompatibility~~~~0.0.1.0The process will download and install the ServerCore.AppCompatibility module on the server, aka, Features on Demand (FoD).
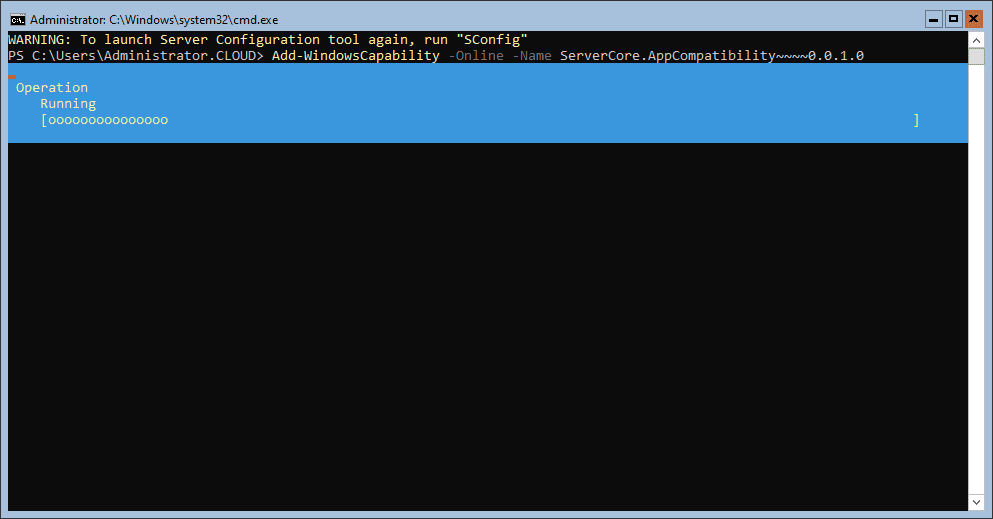
After the installation has completed, you will note the Online method as True and RestartNeeded as True. You can restart your Windows Server 2022 Core installation from the PowerShell prompt using the command:
Restart-Computer
Add the -force parameter if you have logged in sessionsOffline installation of Features on Demand (FoD) in Windows Server 2022 Core
If your server is not connected to the Internet to pull down the AppCompatibility module using the online method, you can use the offline approach with the ISO image of the FoD download.
- If you have a volume license, you can download the Server FOD ISO image file from the same portal where the operating system ISO image file is obtained: Volume Licensing Service Center.
- The Server FOD ISO image file is also available on the Microsoft Evaluation Center or on the Visual Studio portal for subscribers.
Troubleshooting with Windows Server 2022 Core Features on Demand (FoD)
After you have the Windows Server 2022 Core Features on Demand (FoD) installed, the tools installed can now easily be used to troubleshoot issues you may have on your Windows Server 2022 server. It includes looking at Event logs, troubleshooting disks, or pulling up Resource Monitor to get a more detailed look at processes, memory, disk, and network metrics.
Pulling up disk management can be done by typing the diskmgmt.msc command. This is handy to look at disk configuration, ensure drive letters, and format and provision disks if needed.
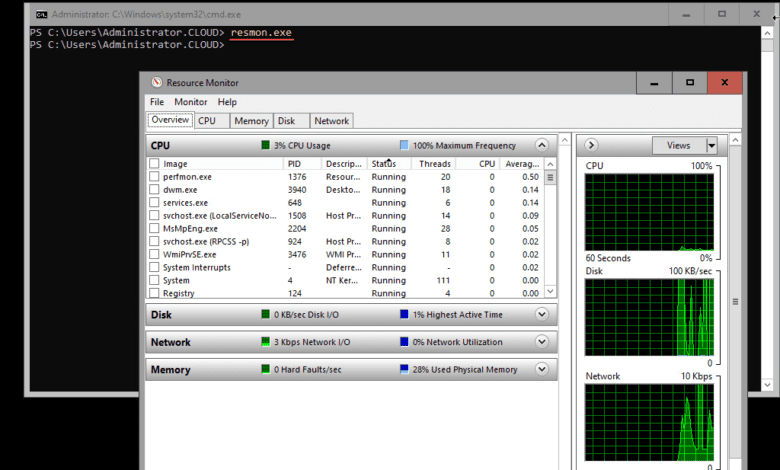
Resource Monitor is a great tool to troubleshoot performance and see where resources are utilized. It is great to have access to this tool on a Windows Server 2022 Core installation locally to view key performance indicators on your Core installation.
Wrapping Up
The process to Download and Install Windows Server 2022 Core Features on Demand (FoD) AppCompatibility module is extremely easy and adds excellent capabilities to your Windows Server 2022 Core installation. Combined with Windows Admin Center centralized management of Windows Server Core installations, the Features on Demand (FoD) package closes the gap on running business-critical workloads on Windows Server Core instead of the full Desktop version of the Windows Server operating system.
Содержание
- Windows 8/8.1/2012
-
- Изменить профиль сети с Public на Private в Windows 8.1/Server 2012 R2
-
- Windows Server 2019 core
-
- Core Edition. Установка Features on Demand (FOD) for App Compatibility
- Автозагрузка в Windows Server Core (Hyper-V Server)
- Удалённый интерактивный сеанс Powershell
- Управление производительностью процессора Windows Server Core
-
- Полезные ссылки
-
- Windows Admin Center
- Microsoft Software download portal
- Включение / выключение Hyper-V
- Управление локальным/удалённым сервером Hyper-V
-
Windows 8/8.1/2012
Изменить профиль сети с Public на Private в Windows 8.1/Server 2012 R2
PSH> Get-NetConnectionProfile PSH> Set-NetConnectionProfile -InterfaceIndex Num -NetworkCategory Private
Core Edition. Установка Features on Demand (FOD) for App Compatibility
The easiest method for installing the Feature on Demand (FoD) package is online via Windows Update. This can be done with the PowerShell command:
PSH> Add-WindowsCapability -Online -Name ServerCore.AppCompatibility~~~~0.0.1.0
Features On Demand
Available Features on Demand
Install Windows Server 2019 Core Feature on Demand for App Compatibility
Автозагрузка в Windows Server Core (Hyper-V Server)
Самое простое — через реестр. Например, запуск Far Manager при старте:
reg add HKEY_LOCAL_MACHINE\SOFTWARE\Microsoft\Windows\CurrentVersion\Run /v Far /d "C:\Program Files\Far Manager\Far.exe"
Windows Registry Editor Version 5.00
 [HKEY_LOCAL_MACHINE\SOFTWARE\Microsoft\Windows\CurrentVersion\Run]
 "far"="\"C:\Program Files\Far Manager\Far.exe\""
Удалённый интерактивный сеанс Powershell
Enter-PSSession -ComputerName SERVERNAME
Управление производительностью процессора Windows Server Core
For
example, to adjust the Boost Mode in the Power Saver plan and make that
Power Saver is the current plan, run the following commands:
Powercfg -setacvalueindex scheme_current sub_processor PERFBOOSTMODE 1
 Powercfg -setactive scheme_current
If
your server requires ultra-low latency, invariant CPU frequency (e.g.,
for repeatable testing), or the highest performance levels, you might
not want the processors switching to lower-performance states. For such a server, you can cap the minimum processor performance state at 100 percent by using the following commands:
Powercfg -setacvalueindex scheme_current sub_processor PROCTHROTTLEMIN 100
 Powercfg -setactive scheme_current
If
your server requires lower energy consumption, you might want to cap
the processor performance state at a percentage of maximum. For example, you can restrict the processor to 75 percent of its maximum frequency by using the following commands:
Powercfg -setacvalueindex scheme_current sub_processor PROCTHROTTLEMAX 75
 Powercfg -setactive scheme_current
For
example, if your server requires ultra-low latency while still wanting
to benefit from low power during idle periods, you could quicken the
performance state increase for any increase in load and slow the
decrease when load goes down. The following commands set the increase policy to «Rocket» for a faster state increase, and set the decrease policy to «Single». The increase and decrease thresholds are set to 10 and 8 respectively.
Powercfg.exe -setacvalueindex scheme_current sub_processor PERFINCPOL 2
 Powercfg.exe -setacvalueindex scheme_current sub_processor PERFDECPOL 1
 Powercfg.exe -setacvalueindex scheme_current sub_processor PERFINCTHRESHOLD 10
 Powercfg.exe -setacvalueindex scheme_current sub_processor PERFDECTHRESHOLD 8
 Powercfg.exe /setactive scheme_current
Статья на сайте Microsoft
Полезные ссылки
Windows Admin Center
https://docs.microsoft.com/ru-ru/windows-server/manage/windows-admin-center/use/manage-servers
Windows Admin Center runs in a web browser and manages Windows Server 2019, Windows Server 2016, Windows Server 2012 R2, Windows Server 2012, Windows Server 2008 R2, Windows 10, and more through the Windows Admin Center gateway installed on Windows Server or Windows 10. The gateway manages servers by using Remote PowerShell and WMI over WinRM. The gateway is included with Windows Admin Center in a single lightweight .msi package that you can download.
Microsoft Software download portal
https://www.microsoft.com/en-us/software-download/
Включение / выключение Hyper-V
Enable-WindowsOptionalFeature -Online -FeatureName Microsoft-Hyper-V –AllDisable-WindowsOptionalFeature -Online -FeatureName Microsoft-Hyper-V-All
Управление локальным/удалённым сервером Hyper-V
Probus ProHVM.
With ProHVM you can manage Hyper-V Servers and virtual machines both locally and remotely. ProHVM enables you to manage multiple versions of Hyper-V in one application, and from almost any version of windows. Use it on Servers, desktops and Core installations both 32 and 64-Bit. Using ProHVM you can connect to and manage Hyper-V servers in other domains and workgroups using different credentials.
It is very useful on installations of free Microsoft Hyper-V Server where you cannot run Microsoft Hyper-V manager locally. ProHVM Standard Is FREE for personal and commercial use!
Hello World,
In one of our previous post about Windows 2019, we have seen how easy it was to install and deploy a Windows 2019 core Edition. Microsoft seems to put a lot of effort in convincing customers to deploy core servers instead of having servers running a Graphical interface. Technically, it kind of make sense to minimize the footprint of an Operating system as this will minimize surface attack and simplify patching process… However, in practice, we have noticed that a lot of sysadmins are simply not comfortable with the command line and a lot of them still rely on GUI.
Overview
Server Core edition are great solution if you want to reduce footprint of the operating system and if you want to simplify patching process and improve security. However, lack of Graphical interface makes adoption difficult among “traditional” windows system admins. The sysadmin can indeed perform remote management of a core server using Server Manager or even the new Web based management interface called Windows Admin Center. As long as an admin does not need to locally login into the core server, there is not too much complains. The problem is when there is a need to connect locally on the box and that the known admin tools are simply not available. This is where the sysadmin feels really uncomfortable in managing the Server Core.
In Windows 2012 edition, there was the possibility to install a minimal GUI interface on top of a core Server edition in order to provide some basic admin tools that could be used by sysadmins when logged on locally on the server. This option (in feature and roles) does not exists anymore in Windows 2019. However, you can re-introduce this capability as a Feature on Demand which simply means that you have to download and install some additional software in order to get access to some GUI based tools and applications.
The App Compatbility software Feature on Demand basically will install some additional binaries onto your core server in order to be able to access some GUI-based programs without installing a full Desktop interface.
Obtain the Feature on Demand App Compatibility package
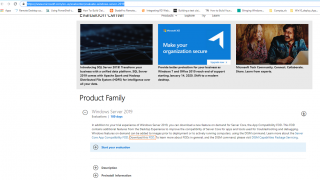
Microsoft has made available an iso file that can be downloaded from the evaluation center. The package can be downloaded freely from Microsoft Evaluation center web site. So, let’s try to grab this iso. We will need to go to the following location https://www.microsoft.com/en-us/evalcenter/evaluate-windows-server-2019
You will arrive on a page similar to this one. Expanding the Windows 2019 Product family, you will see that there is almost not visible link called FOD that can be used to download the iso file we need.
Click on Picture for Better Resolution
Mount the iso file into your operating system
When downloaded, based on your infrastructure, you can either attach the iso into your VM hosting the Server Core Edition or you can copy the iso file inside the operating system and use powershell to mount the iso into your session. In our setup, we are using VM so we can easily mount the iso file into the virtual machine and make it available within the operation system.
Note :

To mount the iso using powershell, you will need to execute the following command

Mount-DiskImage -ImagePath <%location of the iso file%>
Perform the installation
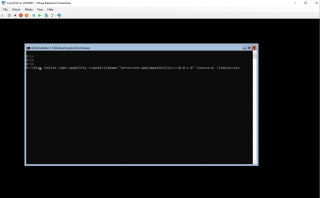
Open the command prompt on your core Server, and execute the following command
DISM /Online /Add-Capability /CapabilityName:"ServerCore.AppCompatibility~~~~0.0.1.0" /Source:drive_letter_of_mounted_ISO: /LimitAccess
In the screenshot, you can see that my DVD drive is set to D:
Click on Picture for Better Resolution
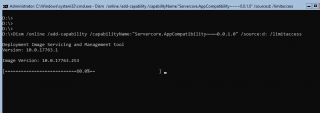
Wait for the installation to complete
Click on Picture for Better Resolution
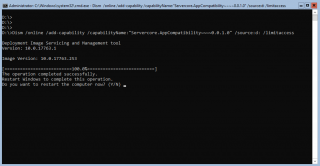
When the installation is completed, you will be asked to reboot your computer. Press Y in order to reboot and complete the installation
Click on Picture for Better Resolution
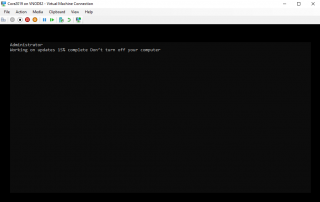
After the reboot, you should see that indeed some updates are being applied to your system
Click on Picture for Better Resolution
Testing the mini GUI capabilities
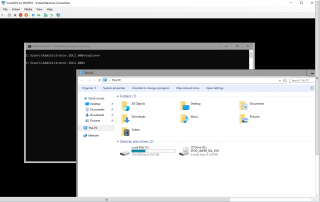
When completed, you can login locally on your system and you can try to launch the file explorer by simply typing the explorer.exe command in the command prompt. Now, you can browse your for files and folders on your Core Server edition.
Click on Picture for Better Resolution
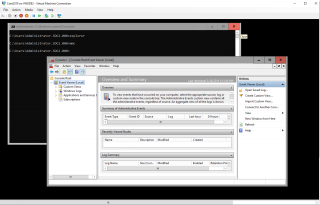
Adding FOD App Compability packages offers you the possibility to run mmc.exe console as well. As an example, we have opened the Eventviewer console
Click on Picture for Better Resolution
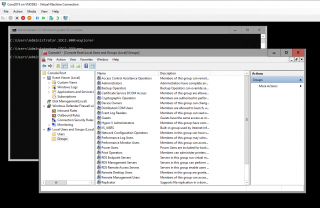
We have also tried to open the Local users and group console and as you can see this is working perfectly
Click on Picture for Better Resolution
You can also start the PowerShell ISE interface from a Powershell Console by issuing the following command
ise
The Powershell ISE should open and you can start scripting. As we test, we have run a powershell script displaying a gui interface and this wored on our Server Core Edition with FOD package installed. This means that if you have custom developed tools (GUI Based) written in Powershell, you might be able to run them on the Core Server (which is really cool)
Click on Picture for Better Resolution
Finally, in the Microsoft Documentation (see here) about FOD, it seems possible to add the Internet Explorer 11 packages by issuing the following command
Dism /online /add-package:drive_letter_of_mounted_iso:"Microsoft-Windows-InternetExplorer-Optional-Package~31bf3856ad364e35~amd64~~.cab"
Usually, Browser on Core editions are not needed. However, since the new web based management interface (Windows Admin Center) exists, it might be interesting to have a browser in order to manage locally the Core Edition through a web browser. Because Internet Explorer 11 is not supported for Windows Admin center, you should install another browser and give it a try. In our scenario, we have installed Firefox and we have installed the Windows admin center locally and we are able to perform basic management activities through a web based interface 🙂
Click on Picture for Better Resolution
Final Notes
Microsoft seems to be pushing customers to deploy Core Editions of their operating systems. First, more and more products seems to be capable of running on Core Server Edition. One of the recent example would be Exchange 2019 which is officially supported when installed on a Core edition. Microsoft wants to have more and more applications running on top of the Core Edition. However, some applications such as Sharepoint or even simply the remote desktop services features is not supported on a Core Edition. The Windows Admin Center new web management capability seems also a move to push traditional sysadmin to deploy Core Edition and perform remote administration through pleasing interfaces.
FOD Application Compability might seems a new thing but remember that Windows 2012 R2 had already something similar but was rarely used because a lot of people were deploying operating system with Full GUI capability. Windows 2019 might be the Operating system that will invert this trend and we might see more and more deployment of Windows Server Core Edition…. as all these small software additions (i.e. WAC and FOD) can help sysadmins to adopt with less resistance Core Server…..
Hope you enjoyed this post. There is more to come on Windows 2019 Topic..
Stay tuned
Till next time
See ya
Reference : https://docs.microsoft.com/en-us/windows-server/get-started-19/install-fod-19
