Install and Configure SharePoint 2019 Public Preview – For SharePoint Administrators
- Install & Configure.
- Pre requisites.
- Run Configuration Wizard.
- SharePoint Products Configuration.
- Connect to a server farm.
- Specify Configuration Database Settings.
- Specify Server Role.
How do I install SharePoint Server 2016?
SharePoint 2016 Installation
- Run the SharePoint Products Configuration Wizard.
- Select the Single Server farm for our testing purposes.
- Once the installation has finished you can open SharePoint 2016 Central Administration.
- Once you see the SharePoint 2016 Central Administration you’re done with the installation:
Do I need to install SharePoint?
either you install it for your own and colleagues or you need to install it for your customers. Anyway setting up a working environment is beneficial and here are some of the SharePoint installation best practices which worked for me.
What are the required server to deploy SharePoint server?
Each Windows Server where you want to install SharePoint also needs the SharePoint 2019 prerequisites:
- Microsoft .
- Microsoft SQL Server 2012 Service Pack 4 Native Client.
- Microsoft WCF Data Services 5.6.
- Microsoft Information Protection and Control Client.
- Microsoft Sync Framework Runtime v1.
- Microsoft Identity Extensions.
How do I setup and configure SharePoint 2019?
This article has 5 different sections that will guide you through the installation process step by step, in order to accomplish it you will need to:
- Install and Configure Hyper-V.
- Install Windows Server 2019.
- Install Active Directory Domain Services.
- Install SQL Server 2017.
- Install SharePoint 2019.
Is there an app for SharePoint?
With the SharePoint Mobile app for iOS and Android, you can stay connected to your team’s news, sites, and important links — even when you’re on the go.
Can SharePoint 2016 run on Windows Server 2019?
SharePoint Server 2016 will be supported any one of the following operating systems: Windows Server 2016 Standard or Datacenter. Windows Server 2019 Standard or Datacenter.
Can you download SharePoint?
Microsoft had earlier released its SharePoint App for Windows 10 Mobile. The App is a Content Management System Software Developed by Microsoft. The company had earlier released this app for all on Windows 10 Mobile.
Can you install SharePoint?
On the SharePoint Server 2019 Start page, click Install SharePoint Server to launch Microsoft SharePoint Server 2019 Setup. When prompted, provide a product key. You can use one of the following trial product keys.
Is SharePoint free to download?
Microsoft Download Manager is free and available for download now.
Is SharePoint compatible with SQL Server 2019?
SharePoint Server 2019 SQL Server Express is not supported with SharePoint Servers 2016 and 2019. SQL Server 2017 on Linux is not supported with SharePoint Servers 2016 and 2019.
What OS does SharePoint run on?
SharePoint
| Developer(s) | Microsoft Corporation |
|---|---|
| Initial release | March 28, 2001 |
| Stable release | 2019 / 2018-10-22[±] |
| Operating system | Windows Server 2016 and Windows Server 2019 |
| Platform | x64 |
How do I install SharePoint Server?
Verify that the user account that is performing this procedure is the farm administrator user account.
How to find SharePoint version?
there are a few distinctive features on each version.
What is SharePoint Server?
The Components of Microsoft SharePoint SharePoint Foundation: SharePoint Foundation is a foundational program that enables communication, collaboration, and content management; it comes free with the Windows Server operating system. SharePoint Server: SharePoint Server is a full-featured software product that provides industrial-grade communication, collaboration, and content management. InfoPath Form Services: This feature of SharePoint Server allows InfoPath forms to be embedded in SharePoint Web sites.
Back in March 2017 I did a blog post about installation of SharePoint 2016. With Microsoft launching their 2019 product wave, it is the perfect time to look at SharePoint 2019 installation to see what’s new and what’s changed since the previous release.
I decided to go the completely “new and shiny” route and perform the installation of SharePoint 2019 on top of Windows Server 2019. In this blog post, I will cover this process step by step.
1. Preparing Windows Server to install SharePoint 2019
SharePoint 2019 can be installed on top of Windows Server 2016 or 2019 and both Standard and Desktop editions are supported, with Desktop Experience listed as required. Many of you will find the Desktop Experience requirement quite strange with all the push towards Core and Nano Server things, but this is how things are for now. Another thing to keep in mind is that installing the Office 2019 client and SharePoint Server 2019 on the same computer is not supported (but who installs client components on servers? 😊)
Like I said, I wanted to go the “new and shiny” route as much as possible, so I opted for Windows Server 2019. Microsoft had some delays with making the Windows Server 2019 trial available in the form of a download, so I just spinnned off Azure B4ms VM to get my Windows Server 2019 platform. B4ms has 4 vCPUs and 16 GB of memory which is enough for basic installation and testing. Official hardware requirements for SharePoint 2019 state 12 GB of RAM as the absolute minimum (in 3-tier farm scenario) and looks as follows:
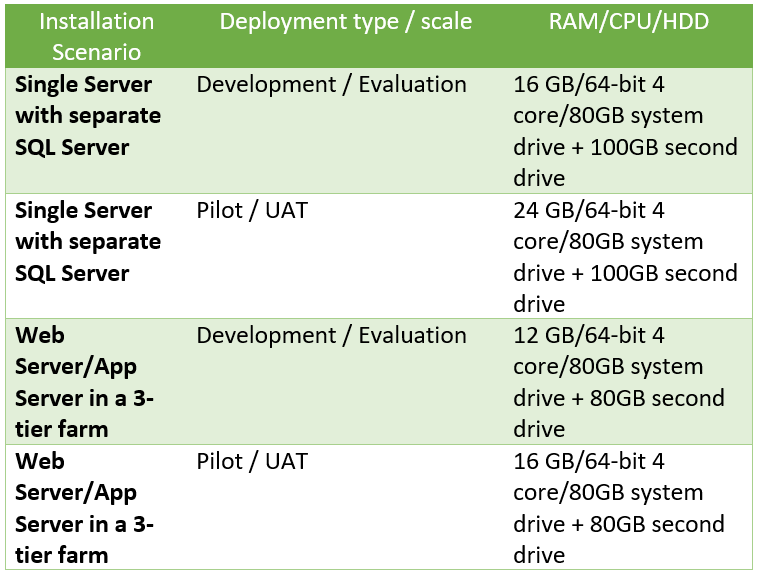
And, by the way, these requirements are exactly the same as those listed for SharePoint 2016 (you can check it here), so we have no reason to complain about any increased hardware demands.
2. Database server for installation
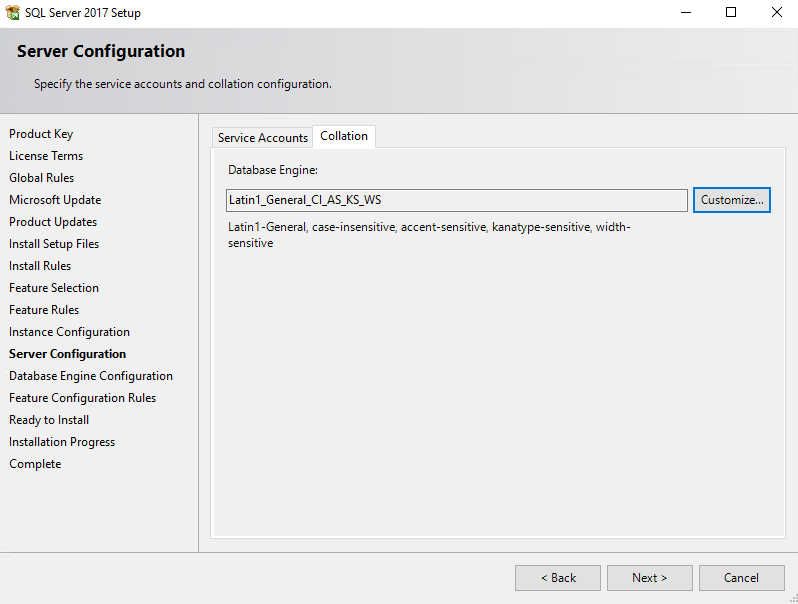
As a SQL Server for hosting SharePoint databases, we can use Server 2016/2017 Standard or Enterprise editions (any public updates are supported through the product life cycle). Obviously, SQL Server Express is not supported, and, strangely (at least to me), SQL Azure SaaS service is not supported also (for any SharePoint Databases). In my case, I’ve installed SQL Server 2017 on my Azure VM using trial version of on SQL Server 2017 on-prem. I’m not going to go into details about SQL Server installation in this article, and I will only mention that I set up SQL Server 2017 Trial default instance with Latin1_General_CI_AS_KS_WS collation, like so:
I’ve also created an SQL server alias “spdb” the same way I explained in my old blog post on SP2016 installation just for the sake of cultivating/encouraging good habit of following best practices. Remember that starting from SQL Server 2016 SQL, Server Management Studio goes as a separate download. And what is surprising (at least to me) is that SSMS 17.9.1 on top of Windows Server 2019 still reads alias settings from SysWOW64 registry hive. One might have thought that we are well in the x64 bit world with these products, yet not exactly…
3. Software prerequisites
Having Windows Server 2019 and SQL Server 2017 (along with alias and SSMS) in place, the next step is to install all the software prerequisites for SharePoint 2019.
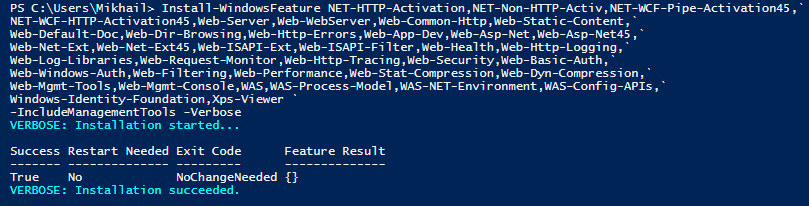
First, we need to install the required Windows Server roles and features. The easiest way to do this is with PS script. Copy the script and execute it from elevated PowerShell or PowerShell ISE window:
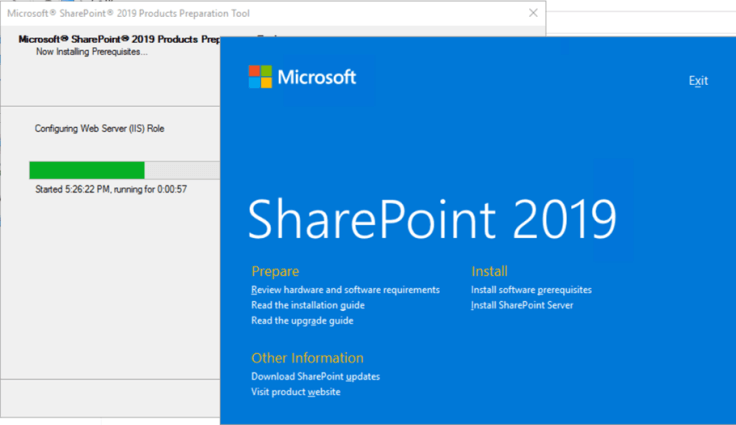
Next, we need to run SharePoint 2019 Products Preparation Tool launching PrerequisiteInstaller.exe from the root of product installation media:
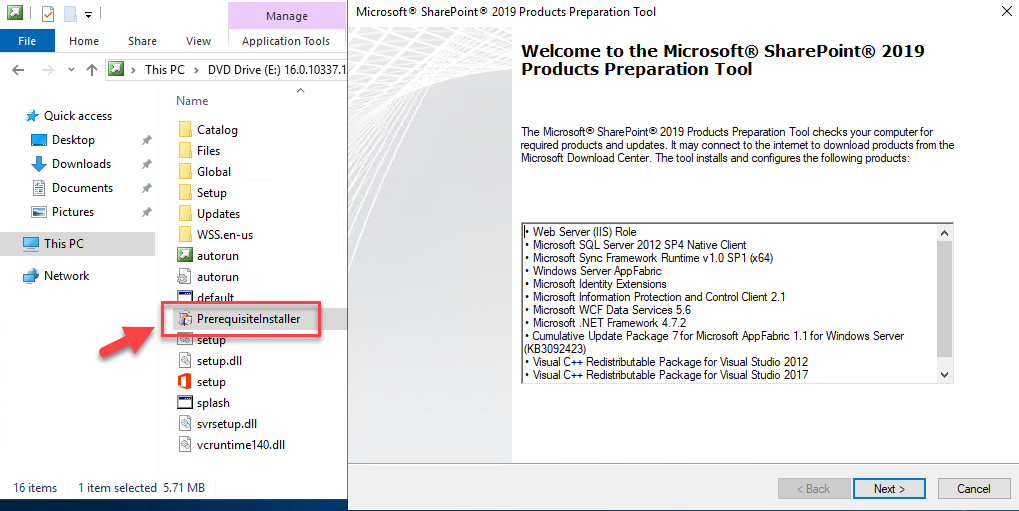
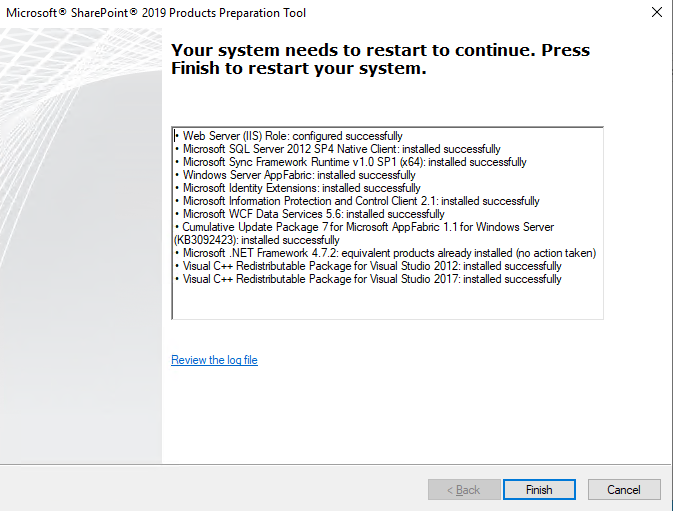
We just click Next on the initial wizard´s page, accepting License Terms and letting it do its job. In my case, it was completed in 2,5 minutes and asked for a restart:
Ensure that your SharePoint 2019 installation media is still mounted after reboot, otherwise you will see the following error:
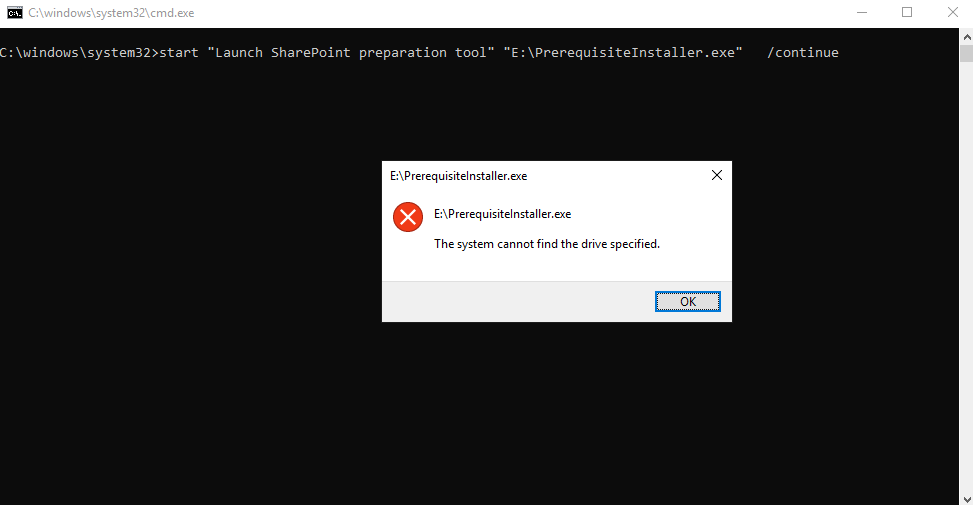
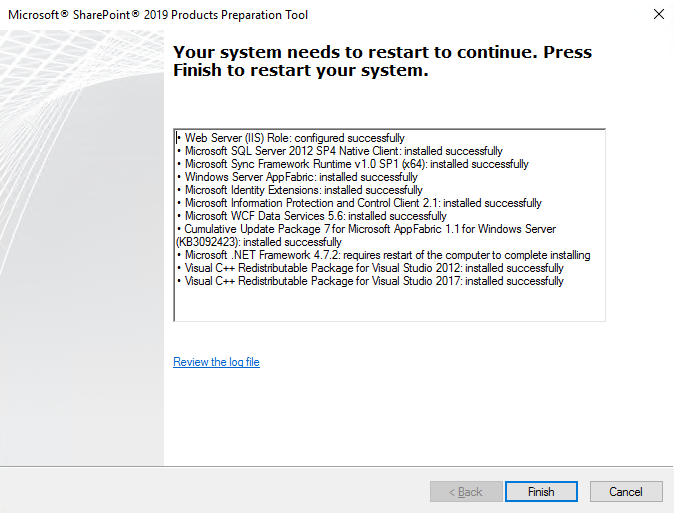
If you run into this, just re-run PrerequisiteInstaller.exe with /continue switch manually. Once it is completed, Preparation Tool will report the “Installation Complete” status:
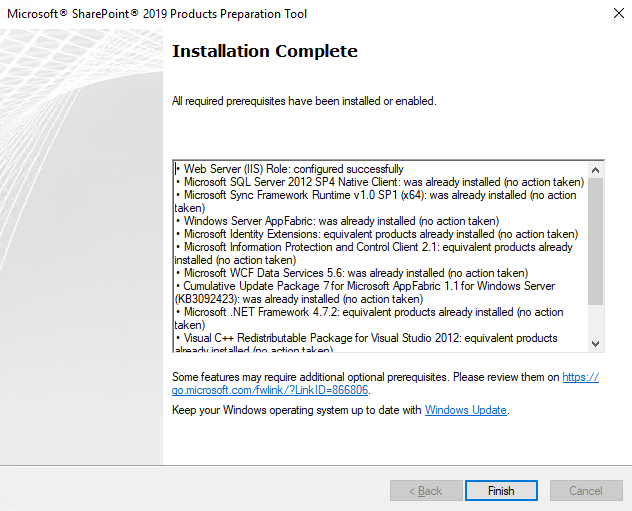
Just click Finish and move on to the next step.
4. Running SharePoint 2019 Setup
We are now ready to kick off SharePoint 2019 Setup executing setup.exe from the root of installation media:
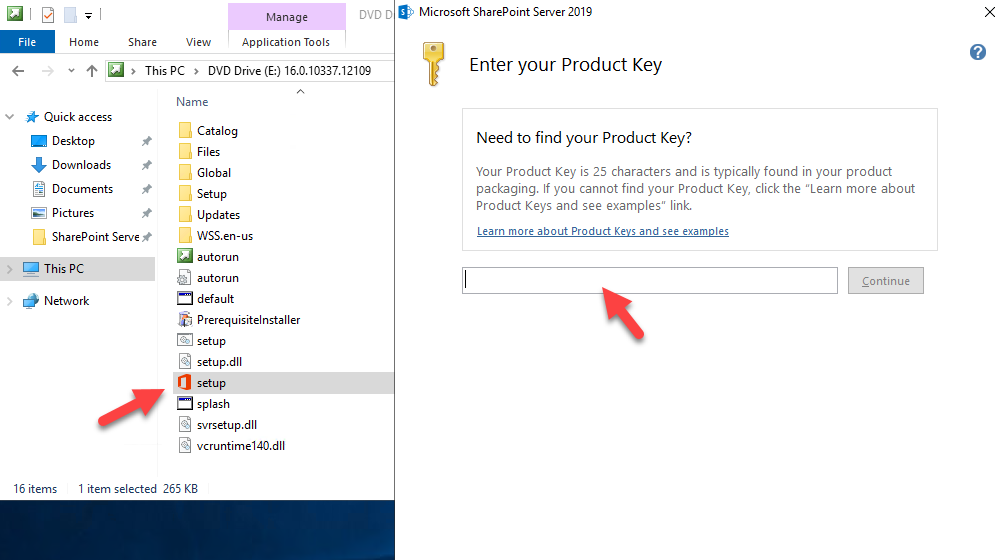
Remember that for the trial version installation, you can use the trial product key from SharePoint 2019 trial download page. Once you enter the product key, you will be prompted to agree with the license terms – no surprises here, first things first 😊:
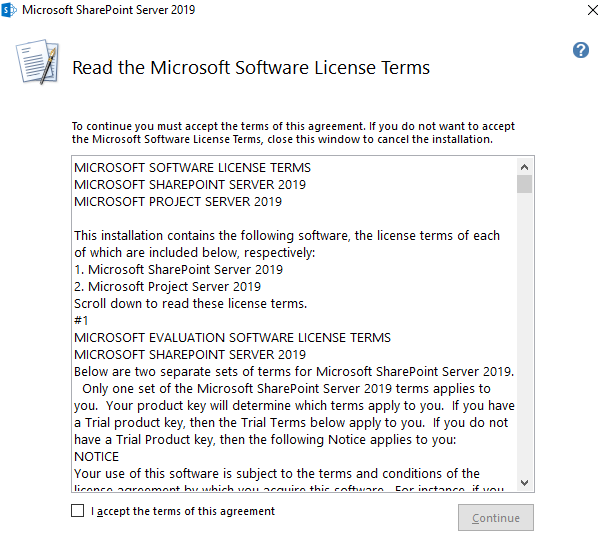
Tick “I accept…” check box and hit Continue to move on to file locations selection step:
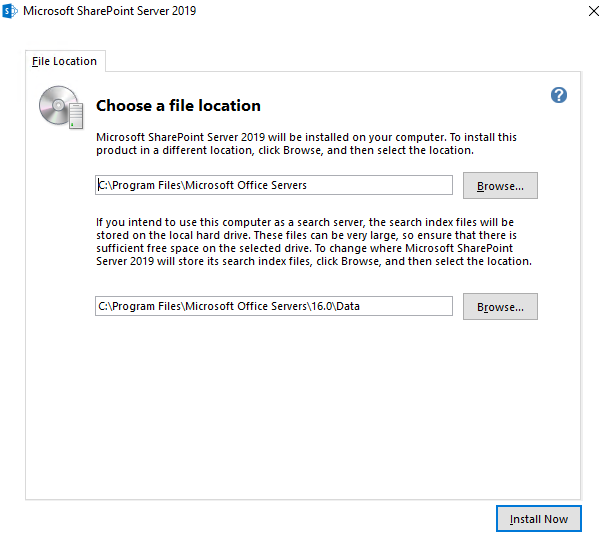
For our purpose here, it is OK to accept defaults and click on Install Now button.
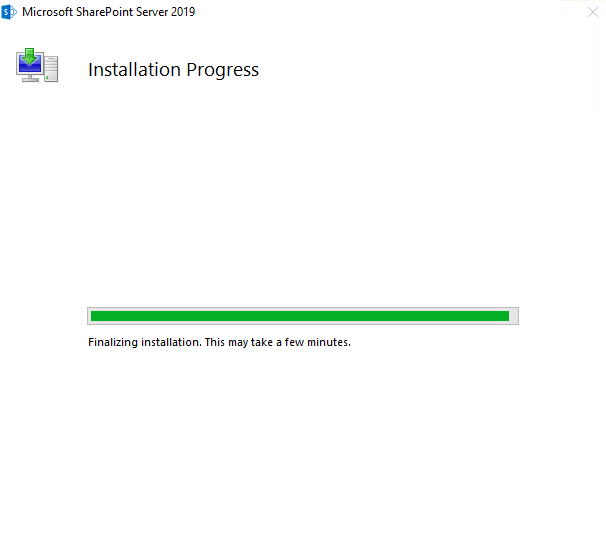
At this step, you can have some coffee and contemplate the green progress bar for some time (which generally should be your favorite part, unless you are repeating this process eight times in a row and expect it to fail yet again).
Once the installation completes, you can click Close and move on to SharePoint Products Configuration Wizard. You may be also prompted to reboot to complete your installation at this stage:
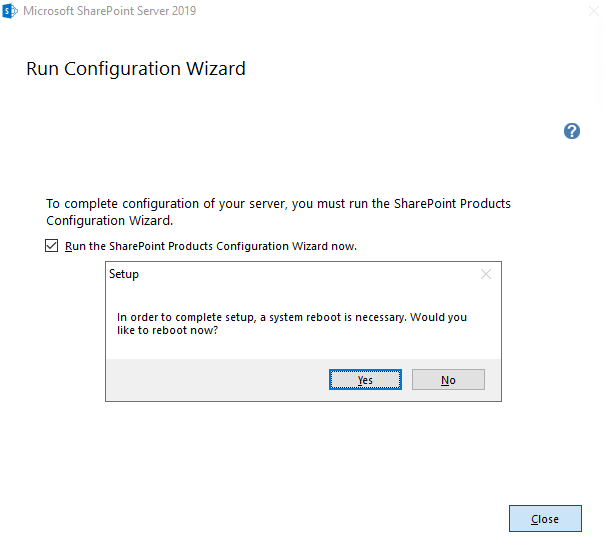
Click yes to perform the restart required to complete the installation process.
5. Running SharePoint Products Configuration Wizard
Unless you unchecked “Run the SharePoint Products Configuration Wizard now” check box or your installation media was removed, you will be presented with SharePoint Products Configuration Wizard after the reboot:
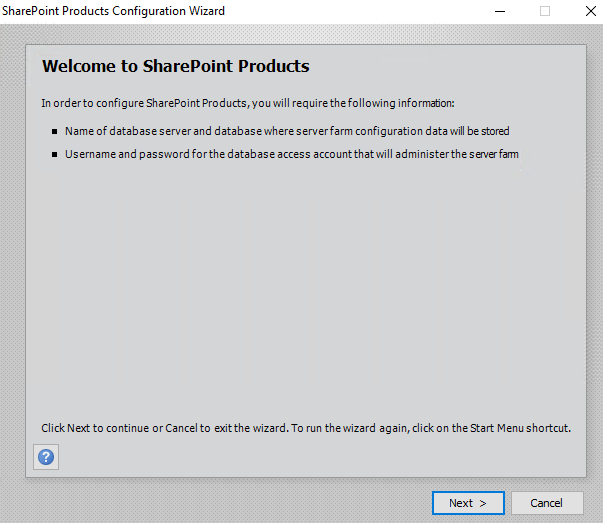
Let’s go through it together. After clicking Next on the initial screen, we need to explicitly confirm that we are OK with the restart of IIS, SharePoint Administration and SharePoint Timer services:
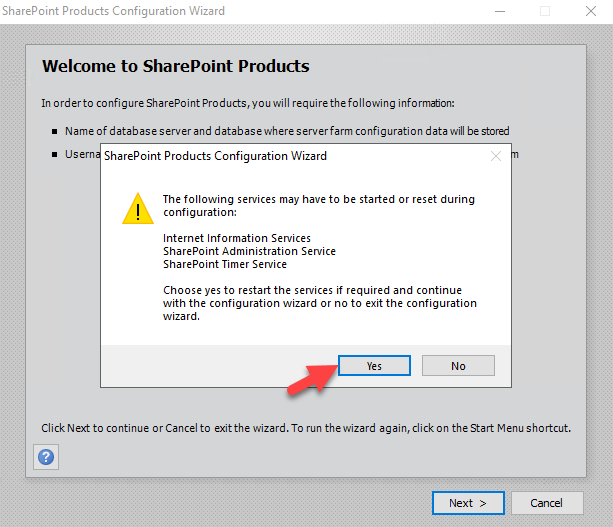
This is a way of taking care about those who don’t care about their agreed downtime windows, so that they are at least warned and have a chance to think twice.
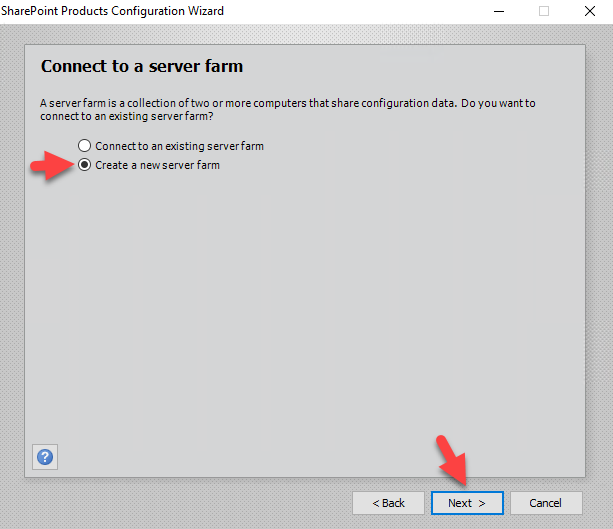
As we are performing a brand new installation, we select “Create a new server farm” on the next page of the wizard:
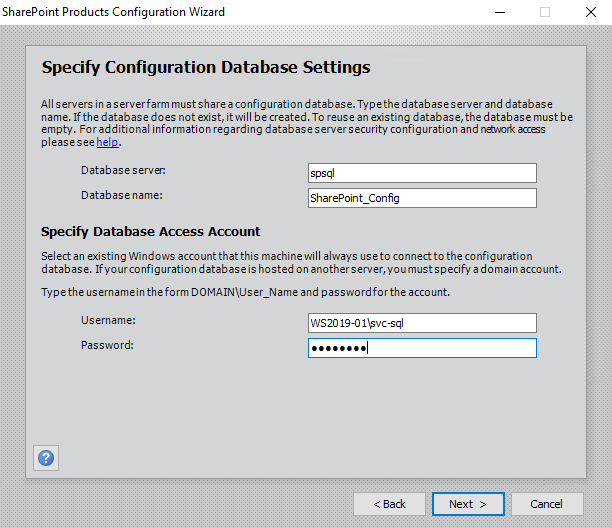
On the next page, we specify our SQL Server alias as database server, database name and database access account:
Your database access account is supposed to be the domain user, otherwise, you will get the following warning:
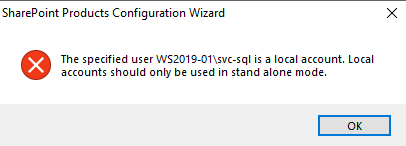
You can workaround this by creating your SharePoint configuration database using New-SPConfigurationDatabase cmdlet and specifying – the LocalServerRole SingleServerFarm parameter, like that:

Note: If you decide to go this route, you should understand all the implications of using this approach fully. In my case, I just spin up local domain controller and switch to domain accounts.
On a SQL Server side, the database access account needs to have dbcreator and securityadmin fixed server roles as well as db_owner fixed database roles on all existing SharePoint databases. To learn more about required accounts and permissions, read the “Initial deployment administrative and service accounts in SharePoint Server” section of the SharePoint 2019 product documentation.
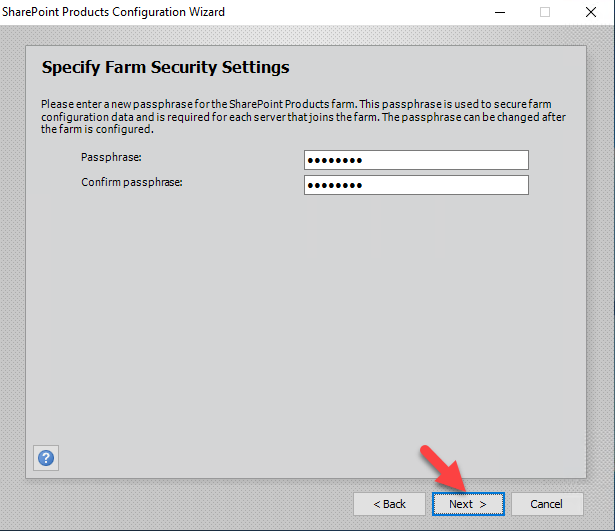
Following the wizard, our next step is to specify the farm pass phrase, which will be used to join new servers to the farm, and click Next:
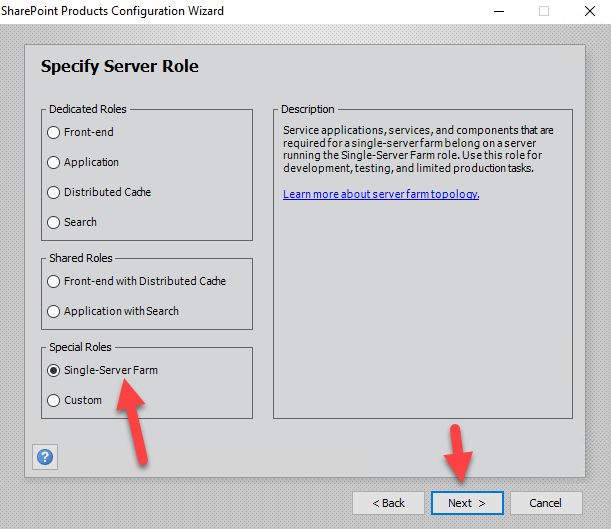
We then specify our server role as “Single-Server Farm”:
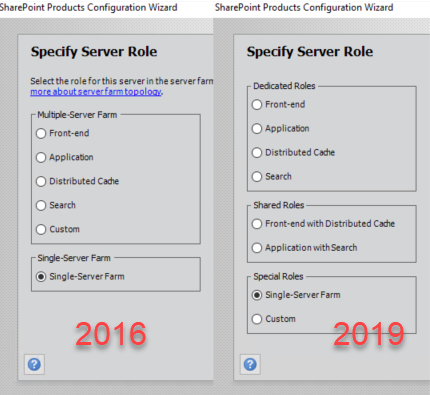
This is the part where we can see some differences in the server role options exposed to us by the wizard as you can easily see if we compare respective pages in SP2016 and SP2016 configuration wizards:
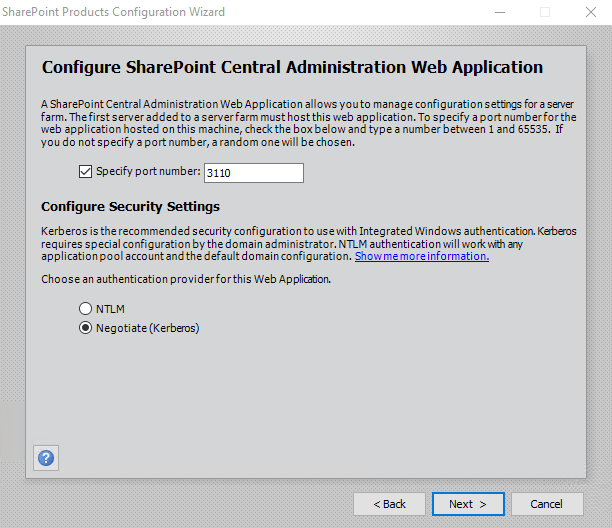
On the next step, we have options for configuring Central Administration (CA) web application port number (be sure to specify one, if you don’t want to end up with a random port), as well as the authentication provider for it:
If you select the Negotiate (Kerberos) option, you will receive a warning about additional manual configuration steps required:
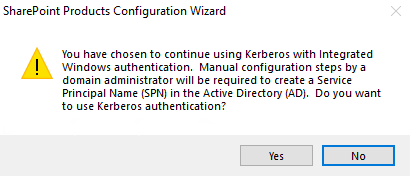
This lengthy blog post explains Kerberos related configuration settings in great details and contains references to additional resources if you want to learn more (there is always more when it comes to Kerberos 😊).
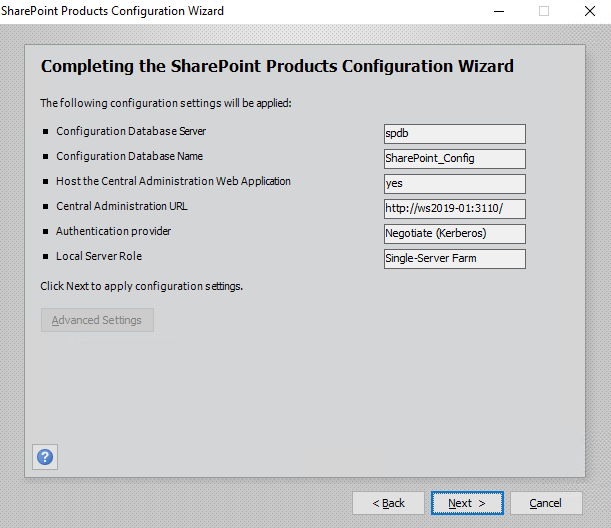
The next wizard step just shows you the summary of selected configuration settings to review before you start the configuration process:
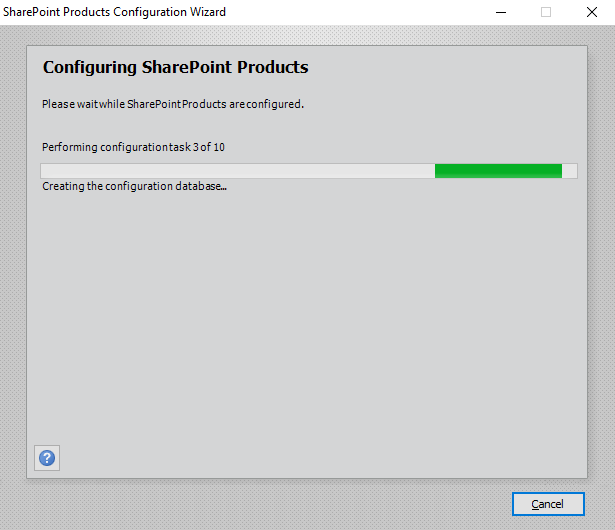
Once you click Next, the configuration process begins:
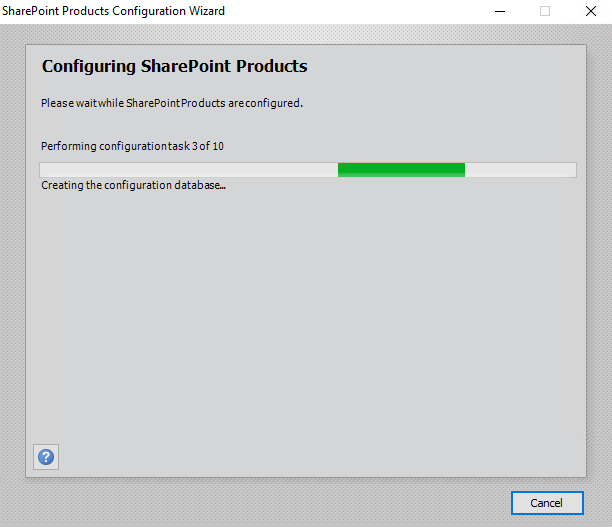
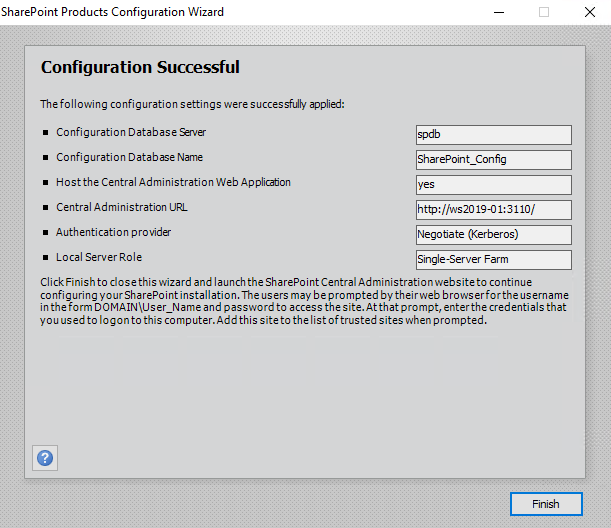
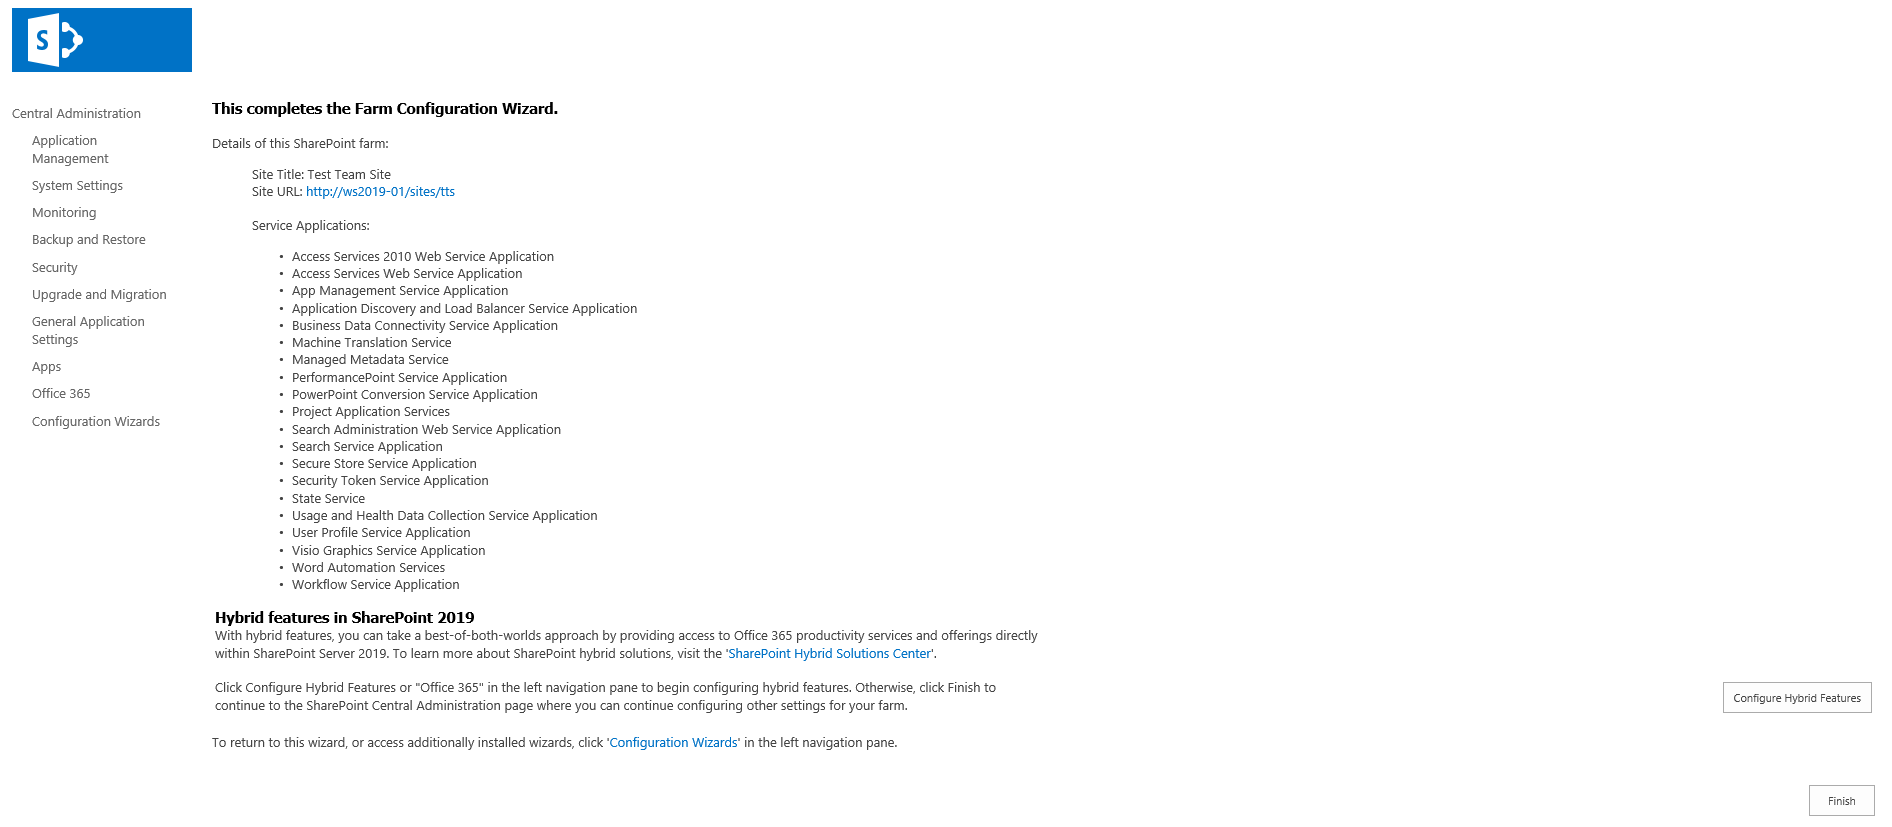
It involves ten configuration tasks, including such things as creation of configuration database, registration of SharePoint features, provisioning of SharePoint CA web application and so on. As soon as the process completes, we will see the Configuration Successful window and click Finish to complete the process:
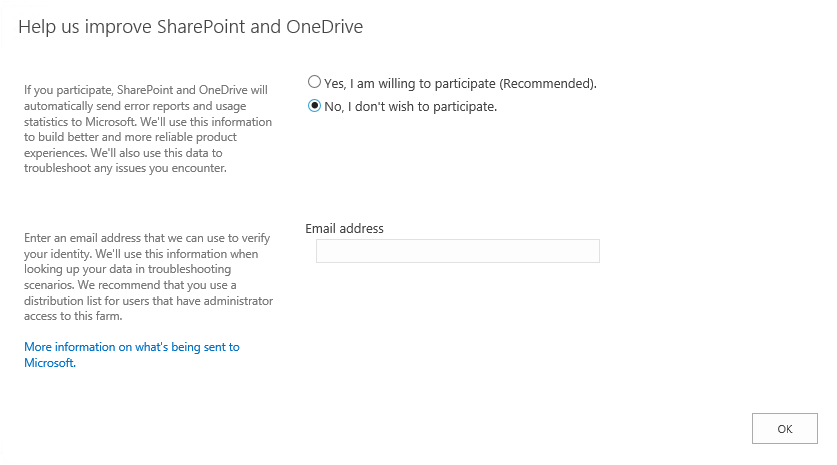
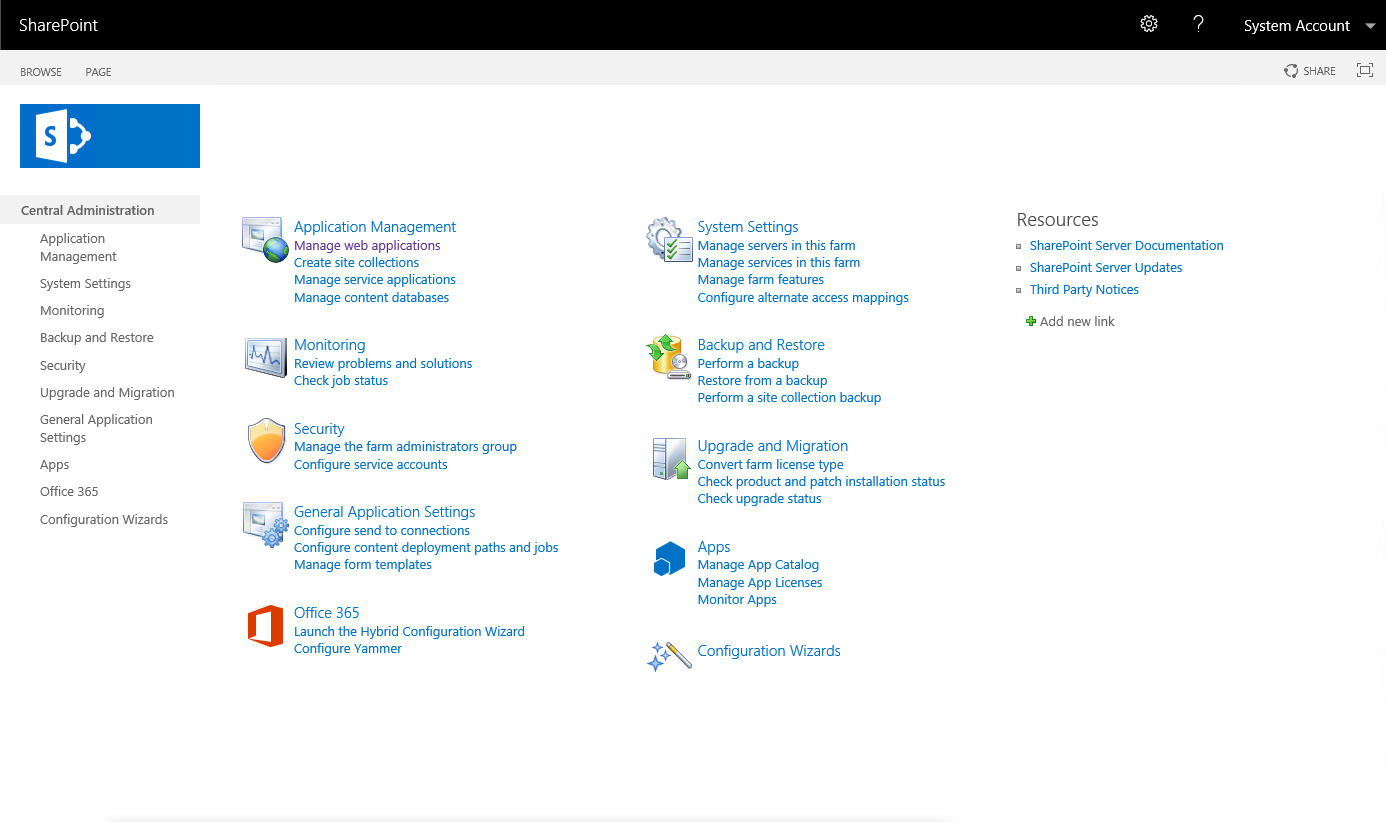
After you click Finish, Setup Manager opens the CA page for you, presenting you with the “Help us improve SharePoint and OneDrive” pop up prompt (something we used to know as Customer Experience Improvement Program or CEIP):
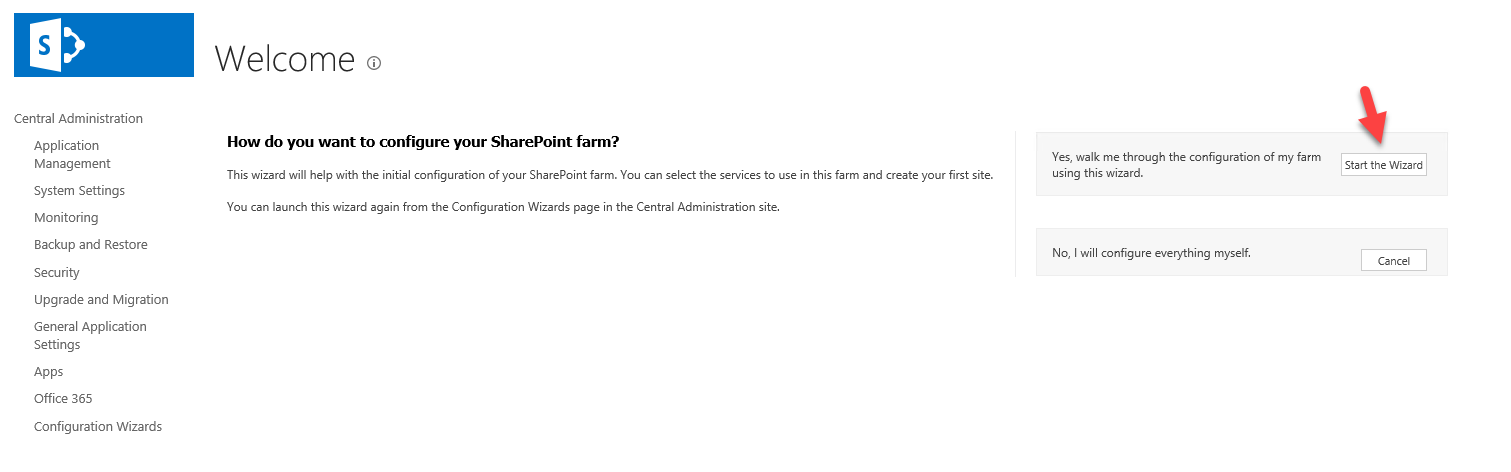
Once you get that pop up out of the way of selecting options of your preference, then you can select between manual and wizard configuration approaches to further configure your farm. For the sake of simplicity, we opt for the “Start the Wizard” option:
Wizard presents us with options to configure the service account, service applications and services:
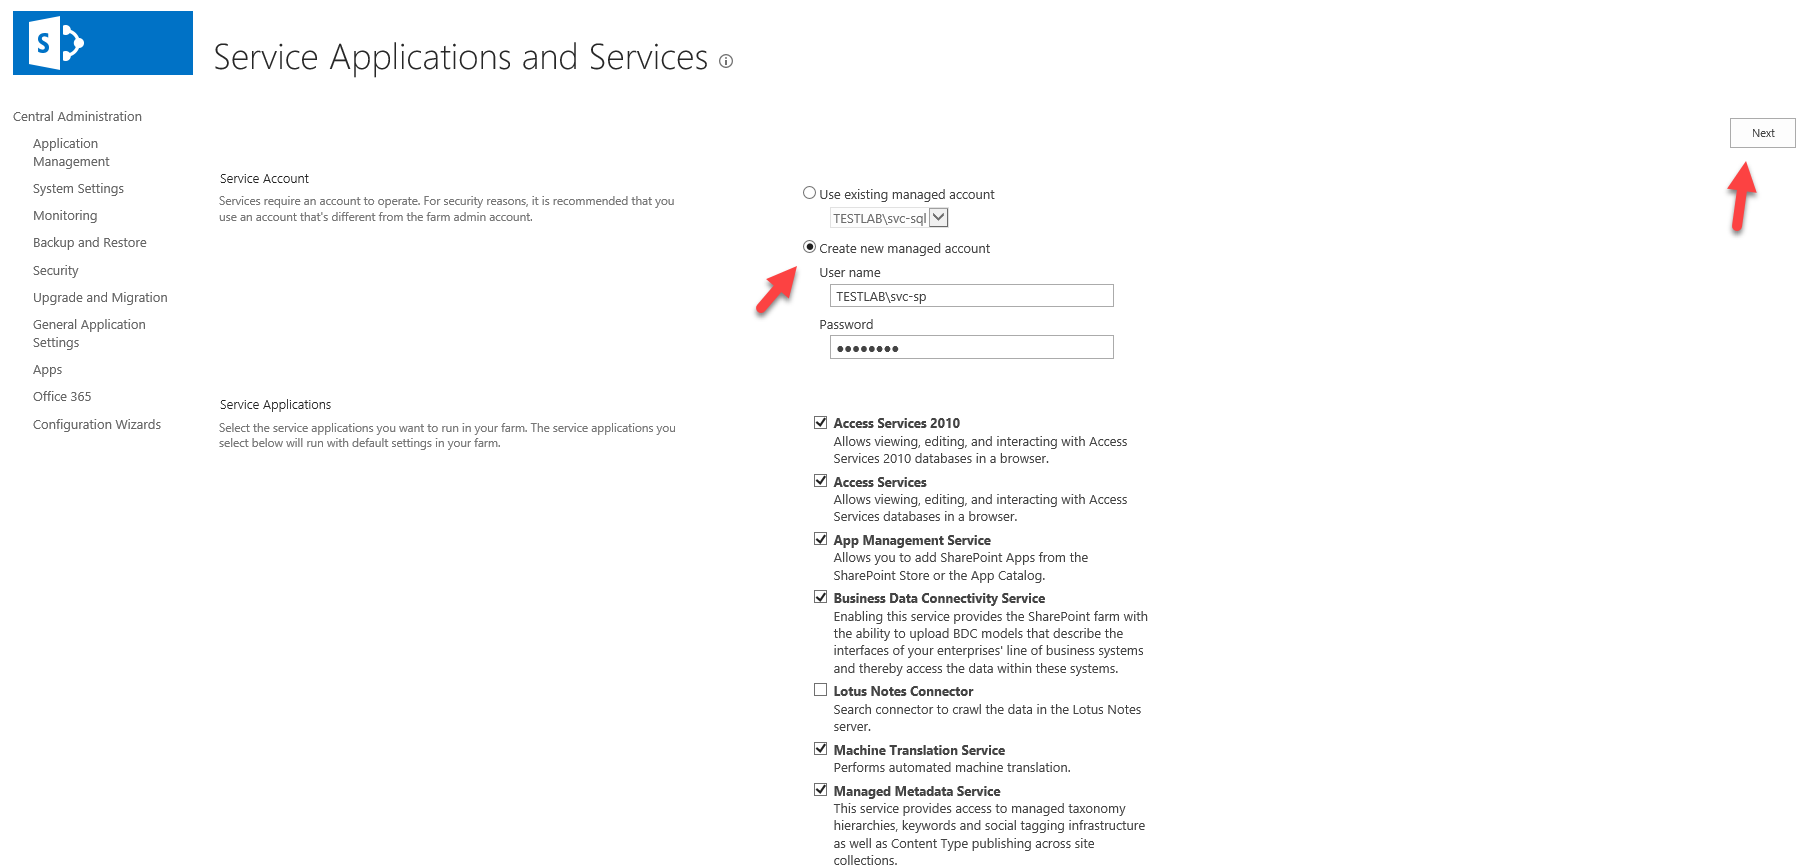
Create the new service account in AD DS and type in its name and password to register it as a new managed account, make your service applications and services selection and click Next. After contemplating a bit about that famous “This shouldn’t take long” message (which sometimes does take long), you will be redirected to Create Site Collection page:
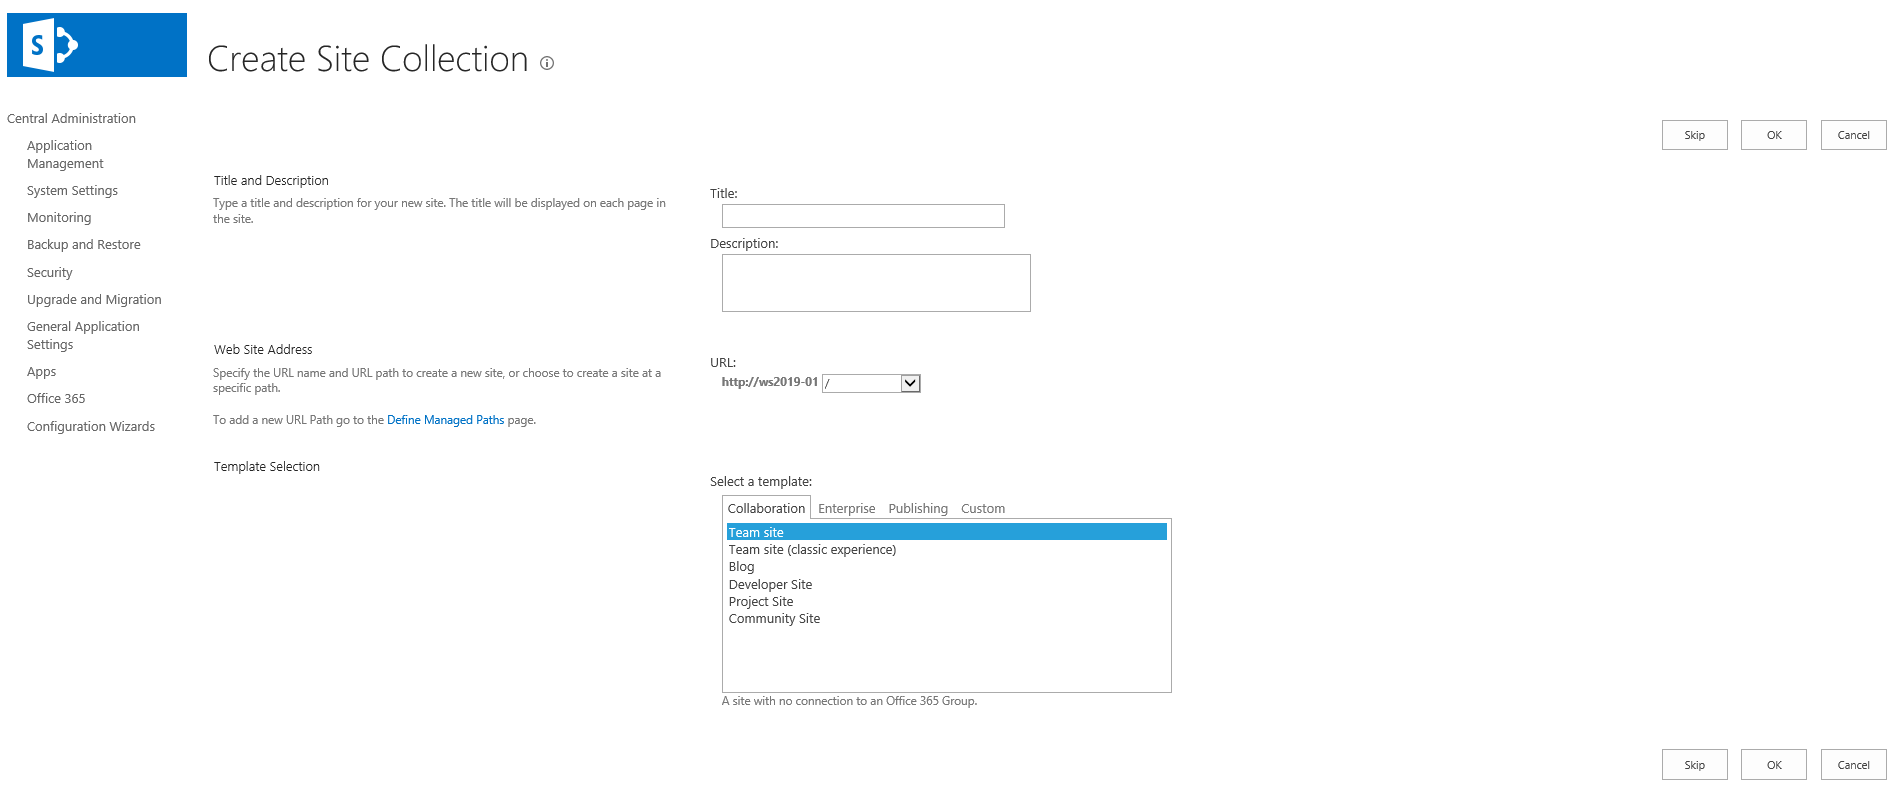 As you may notice, you now have Team Site and Team Site (classic experience) options amongst available templates. You can create site collection or skip this step, but in any case you will be next presented with the Farm Configuration Wizard completion page, which lists the details of your SharePoint farm configuration and offers you to configure SharePoint 2019 Hybrid Features:
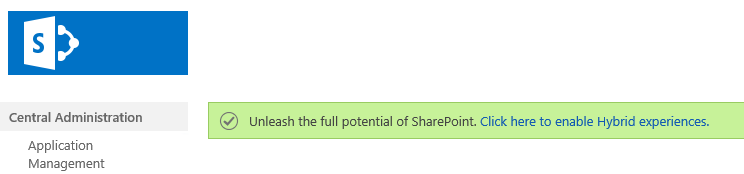
As you can see, the installation process has not changed too drastically compared with SharePoint 2016, but what is clear about this version is that this release really tries to get you ready to move to the cloud – no more loud declarations about “last on-premise release.” Instead, it is just very clear that all ground work is here in the product to prepare you to go the hybrid route, if not fully cloud, along with a clear message that you need to design and build your SharePoint based solutions and infrastructures with the cloud in mind, even if you still install the on-premise version. Just another example of this messaging:
And, yes, you can now create these sleek looking Team Sites which we saw before only in SharePoint Online:

I hope this quick installation tour was useful and informative, and in case you want to go into more details and be ready to do a production/real world installation, be sure to read through the official product documentation from Microsoft, starting from the Install SharePoint Server 2019 section. I think the overview of new features in SharePoint 2019 may be a topic for the next article, but you can also read up on those in the New and improved features in SharePoint Server 2019 section of the Microsoft product documentation.
- Installing SharePoint 2016
- Configuring SharePoint 2016 App Catalog
Back in March 2017 I did a blog post about installation of SharePoint 2016. With Microsoft launching their 2019 product wave, it is the perfect time to look at SharePoint 2019 installation to see what’s new and what’s changed since the previous release.
I decided to go the completely “new and shiny” route and perform the installation of SharePoint 2019 on top of Windows Server 2019. In this blog post, I will cover this process step by step.
1. Preparing Windows Server to install SharePoint 2019
SharePoint 2019 can be installed on top of Windows Server 2016 or 2019 and both Standard and Desktop editions are supported, with Desktop Experience listed as required. Many of you will find the Desktop Experience requirement quite strange with all the push towards Core and Nano Server things, but this is how things are for now. Another thing to keep in mind is that installing the Office 2019 client and SharePoint Server 2019 on the same computer is not supported (but who installs client components on servers? 😊)
Like I said, I wanted to go the “new and shiny” route as much as possible, so I opted for Windows Server 2019. Microsoft had some delays with making the Windows Server 2019 trial available in the form of a download, so I just spinnned off Azure B4ms VM to get my Windows Server 2019 platform. B4ms has 4 vCPUs and 16 GB of memory which is enough for basic installation and testing. Official hardware requirements for SharePoint 2019 state 12 GB of RAM as the absolute minimum (in 3-tier farm scenario) and looks as follows:
And, by the way, these requirements are exactly the same as those listed for SharePoint 2016 (you can check it here), so we have no reason to complain about any increased hardware demands.
2. Database server for installation
As a SQL Server for hosting SharePoint databases, we can use Server 2016/2017 Standard or Enterprise editions (any public updates are supported through the product life cycle). Obviously, SQL Server Express is not supported, and, strangely (at least to me), SQL Azure SaaS service is not supported also (for any SharePoint Databases). In my case, I’ve installed SQL Server 2017 on my Azure VM using trial version of on SQL Server 2017 on-prem. I’m not going to go into details about SQL Server installation in this article, and I will only mention that I set up SQL Server 2017 Trial default instance with Latin1_General_CI_AS_KS_WS collation, like so:
I’ve also created an SQL server alias “spdb” the same way I explained in my old blog post on SP2016 installation just for the sake of cultivating/encouraging good habit of following best practices. Remember that starting from SQL Server 2016 SQL, Server Management Studio goes as a separate download. And what is surprising (at least to me) is that SSMS 17.9.1 on top of Windows Server 2019 still reads alias settings from SysWOW64 registry hive. One might have thought that we are well in the x64 bit world with these products, yet not exactly…
3. Software prerequisites
Having Windows Server 2019 and SQL Server 2017 (along with alias and SSMS) in place, the next step is to install all the software prerequisites for SharePoint 2019.
First, we need to install the required Windows Server roles and features. The easiest way to do this is with PS script. Copy the script and execute it from elevated PowerShell or PowerShell ISE window:
Next, we need to run SharePoint 2019 Products Preparation Tool launching PrerequisiteInstaller.exe from the root of product installation media:
We just click Next on the initial wizard´s page, accepting License Terms and letting it do its job. In my case, it was completed in 2,5 minutes and asked for a restart:
Ensure that your SharePoint 2019 installation media is still mounted after reboot, otherwise you will see the following error:
If you run into this, just re-run PrerequisiteInstaller.exe with /continue switch manually. Once it is completed, Preparation Tool will report the “Installation Complete” status:
Just click Finish and move on to the next step.
4. Running SharePoint 2019 Setup
We are now ready to kick off SharePoint 2019 Setup executing setup.exe from the root of installation media:
Remember that for the trial version installation, you can use the trial product key from SharePoint 2019 trial download page. Once you enter the product key, you will be prompted to agree with the license terms – no surprises here, first things first 😊:
Tick “I accept…” check box and hit Continue to move on to file locations selection step:
For our purpose here, it is OK to accept defaults and click on Install Now button.
At this step, you can have some coffee and contemplate the green progress bar for some time (which generally should be your favorite part, unless you are repeating this process eight times in a row and expect it to fail yet again).
Once the installation completes, you can click Close and move on to SharePoint Products Configuration Wizard. You may be also prompted to reboot to complete your installation at this stage:
Click yes to perform the restart required to complete the installation process.
5. Running SharePoint Products Configuration Wizard
Unless you unchecked “Run the SharePoint Products Configuration Wizard now” check box or your installation media was removed, you will be presented with SharePoint Products Configuration Wizard after the reboot:
Let’s go through it together. After clicking Next on the initial screen, we need to explicitly confirm that we are OK with the restart of IIS, SharePoint Administration and SharePoint Timer services:
This is a way of taking care about those who don’t care about their agreed downtime windows, so that they are at least warned and have a chance to think twice.
As we are performing a brand new installation, we select “Create a new server farm” on the next page of the wizard:
On the next page, we specify our SQL Server alias as database server, database name and database access account:
Your database access account is supposed to be the domain user, otherwise, you will get the following warning:
You can workaround this by creating your SharePoint configuration database using New-SPConfigurationDatabase cmdlet and specifying – the LocalServerRole SingleServerFarm parameter, like that:
Note: If you decide to go this route, you should understand all the implications of using this approach fully. In my case, I just spin up local domain controller and switch to domain accounts.
On a SQL Server side, the database access account needs to have dbcreator and securityadmin fixed server roles as well as db_owner fixed database roles on all existing SharePoint databases. To learn more about required accounts and permissions, read the “Initial deployment administrative and service accounts in SharePoint Server” section of the SharePoint 2019 product documentation.
Following the wizard, our next step is to specify the farm pass phrase, which will be used to join new servers to the farm, and click Next:
We then specify our server role as “Single-Server Farm”:
This is the part where we can see some differences in the server role options exposed to us by the wizard as you can easily see if we compare respective pages in SP2016 and SP2016 configuration wizards:
On the next step, we have options for configuring Central Administration (CA) web application port number (be sure to specify one, if you don’t want to end up with a random port), as well as the authentication provider for it:
If you select the Negotiate (Kerberos) option, you will receive a warning about additional manual configuration steps required:
This lengthy blog post explains Kerberos related configuration settings in great details and contains references to additional resources if you want to learn more (there is always more when it comes to Kerberos 😊).
The next wizard step just shows you the summary of selected configuration settings to review before you start the configuration process:
Once you click Next, the configuration process begins:
It involves ten configuration tasks, including such things as creation of configuration database, registration of SharePoint features, provisioning of SharePoint CA web application and so on. As soon as the process completes, we will see the Configuration Successful window and click Finish to complete the process:
After you click Finish, Setup Manager opens the CA page for you, presenting you with the “Help us improve SharePoint and OneDrive” pop up prompt (something we used to know as Customer Experience Improvement Program or CEIP):
Once you get that pop up out of the way of selecting options of your preference, then you can select between manual and wizard configuration approaches to further configure your farm. For the sake of simplicity, we opt for the “Start the Wizard” option:
Wizard presents us with options to configure the service account, service applications and services:
Create the new service account in AD DS and type in its name and password to register it as a new managed account, make your service applications and services selection and click Next. After contemplating a bit about that famous “This shouldn’t take long” message (which sometimes does take long), you will be redirected to Create Site Collection page:
As you may notice, you now have Team Site and Team Site (classic experience) options amongst available templates. You can create site collection or skip this step, but in any case you will be next presented with the Farm Configuration Wizard completion page, which lists the details of your SharePoint farm configuration and offers you to configure SharePoint 2019 Hybrid Features:
As you can see, the installation process has not changed too drastically compared with SharePoint 2016, but what is clear about this version is that this release really tries to get you ready to move to the cloud – no more loud declarations about “last on-premise release.” Instead, it is just very clear that all ground work is here in the product to prepare you to go the hybrid route, if not fully cloud, along with a clear message that you need to design and build your SharePoint based solutions and infrastructures with the cloud in mind, even if you still install the on-premise version. Just another example of this messaging:
And, yes, you can now create these sleek looking Team Sites which we saw before only in SharePoint Online:
I hope this quick installation tour was useful and informative, and in case you want to go into more details and be ready to do a production/real world installation, be sure to read through the official product documentation from Microsoft, starting from the Install SharePoint Server 2019 section. I think the overview of new features in SharePoint 2019 may be a topic for the next article, but you can also read up on those in the New and improved features in SharePoint Server 2019 section of the Microsoft product documentation.
- Installing SharePoint 2016
- Configuring SharePoint 2016 App Catalog

Install & Configure
Introduction
This tutorial will show you how to install SharePoint 2019. It is for SharePoint administrators. Disclaimer : It is not following best practices to design a farm, it is just to test the preview version ! (Example : the mysite host should be in a separated web application)
It assumes :
- you have the windows virtual machine ready with 16GB ram and 4CPU
- you have installed SQL Server separately with a dedicated SQL Instance
What you will see :
- The configuration that is needed to be done to get the SharePoint Home page, communication sites, team sites and one drive. I found this missing from the Microsoft documentation.
It will not show you how to configure hybrid scenario such as search, power apps or flow.
It shall take you 2hours to set this up with this tutorial.
I still have issues with one drive configuration (the synchronization button do not open one drive), so I’ll update the article in future once it works.
Prequisite – Download the Installation binaries (iso)
- https://www.microsoft.com/en-us/download/details.aspx?id=57169
- officeserver_en-us.iso
- 4gb
Installation Documentation reference
Hardware & software pre requisites for SharePoint 2019 Preview and installation guide : https://docs.microsoft.com/en-us/sharepoint/install/install-for-sharepoint-server-2019
Installation guide for a evaluation mono-server environment : https://docs.microsoft.com/en-us/sharepoint/install/install-sharepoint-server-2016-on-one-server
What you need for SQL : Supported SQL versions
One of the following:
- Microsoft SQL Server 2016 RTM
- Microsoft SQL Server 2017 RTM for Windows
From <https://docs.microsoft.com/en-us/sharepoint/install/hardware-and-software-requirements-2019>
What you need for Windows : Supported Windows Version
One of the following operating systems:
- Windows Server 2016 Standard or Datacenter
- Windows Server 2019 Standard or Datacenter
From <https://docs.microsoft.com/en-us/sharepoint/install/hardware-and-software-requirements-2019>
Get help
https://social.technet.microsoft.com/Forums/office/en-US/home?forum=SP2019
Configuration done for SQL Server 2016
- Configure a domain account as local administrator
- Created an SQL Instance for this installation.
Configuration done for Windows Server 2016 : SharePoint 2019 Pre requisites
Run the prerequisite.exe from the .iso
To install the pre-requisite ensure you have internet Access or you’ll have to download manually each pre requisites files (IIS modules, sql modules, .NET framework etc)
Pre requisites
Reboot and restart the pre requisite.exe
Run install.exe

Run Configuration Wizard

SharePoint Products Configuration

Connect to a server farm
Database server :
Username : domain

Specify Configuration Database Settings

Specify Server Role

Configure SharePoint Central Administration Web Application

Configuring SharePoint Products
Run as admin the app from start menu

SharePoint 2019 Central Administration

Welcome

Service Applications and Services
I faced this error during the wizard

Microsoft.SharePoint.SPException: The value provided for instanceId is not a valid GUID.
at Microsoft.SharePoint.Administration.SPAdminConfigUtil.GetConfigData(Page page)
at Microsoft.SharePoint.ApplicationPages.AdminConfigServices.BtnOk_Click(Object sender, EventArgs args)
at System.Web.UI.WebControls.Button.OnClick(EventArgs e)
at System.Web.UI.WebControls.Button.RaisePostBackEvent(String eventArgument)
at System.Web.UI.Page.ProcessRequestMain(Boolean includeStagesBeforeAsyncPoint, Boolean includeStagesAfterAsyncPoint)
Decided to create the services one by one Go to service application
- Create managed metadata
- Create App Management Service Application
- Create secure store service
- Create search service, note there is a way to connect to O365 Search
- Create User Profile Service, note there is a way to integrate with yammer directly

Create New User Profile Service Application
Create a site collection

Create site collections
http://sp2019
Choose team site (modern UI team site)

Template Selection
Note that you can create classic site

Team site classic experience
Et voila modern UI on SharePoint 2019 on premise

SharePoint 2019
Access from your computer
Add to your host file
XXX.XXX.XXX.XX
Login with : domainusername
Create my site host, to have sharepoint home page
Create it on the :80 web application as root
Navigating to the http://xxxx url will show the mysite, if you allow self site creation, it enables one drive and redirect them to one drive.
Click on the APP LAUNCHER and click sharepoint to view sharepoint landing page.
The search must run a full crawl to show the web site on this page.

SharePoint admin

Apps

SharePoint Home

Sites
Allow end user to create sites (team site / comm site) from sharepoint landing page & use ONE DRIVE
Central Admin > select the web application > Self site service creation.
You can choose under which site collection path or web apps those site shall be created

Self-Service Site Creation Management
Your user will then see Create Site Under the SharePoint landing page

Featured Links

Create a site

Communication site
Navigating to one drive still shows this page

Securely store and share files
To fix it follow those Additional configs for One drive
- Central admin > click the web application 80 > Permission policy > create a new one with Create subsites permission
- Central admin > click the web application 80 > User policy > Add everyone Create subsites permissions
- Central admin > Web application > Click the web application 80 > Create the explicit managed path “personal”
- With a user, go to your profile, edit your profile
- Then go to one drive, it shall display the documents
I was not able to synch documents user One drive Client, an error showed
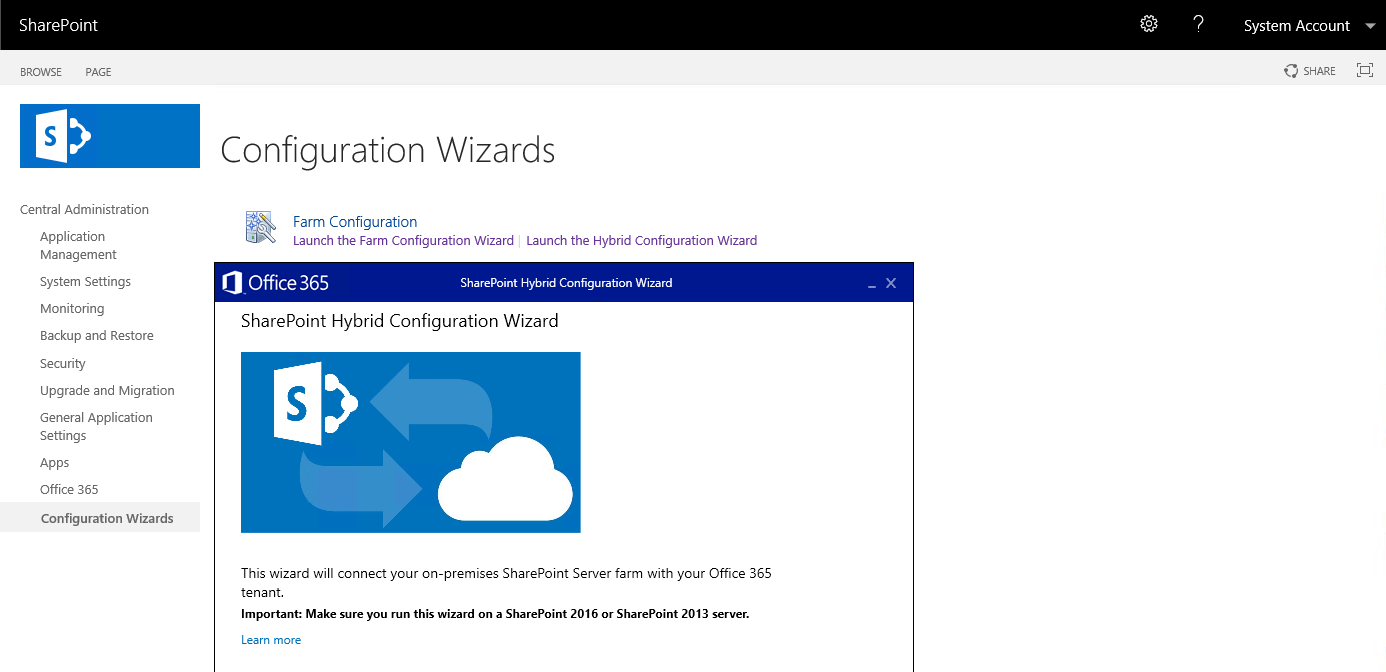
What i noticed, hybrid wizard from central admin
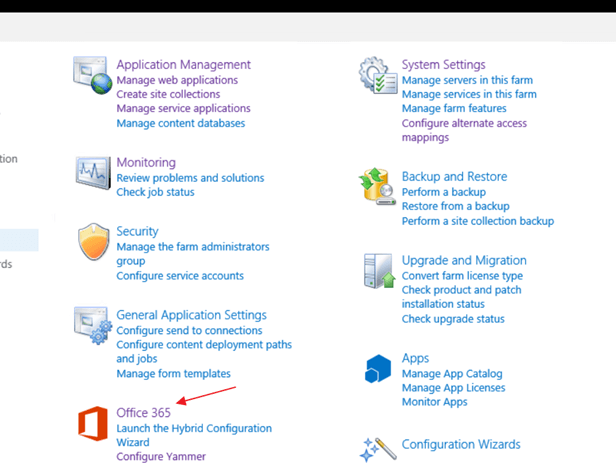
Hybrid wizard

SharePoint Hybrid Configuration Wizard

SharePoint Hybrid Configuration Wizard
Reference: Angama, J (2018). Install and Configure SharePoint 2019 Public Preview – For SharePoint Administrators. Available at: https://jeffangama.wordpress.com/2018/08/05/install-and-configure-sharepoint-2019-public-preview-for-sharepoint-administrators/ [Accessed 15 August 2018]
February 4, 2020 /
Andreas Glaser
See how to successfully install SharePoint 2019 step by step as an administrator or developer.
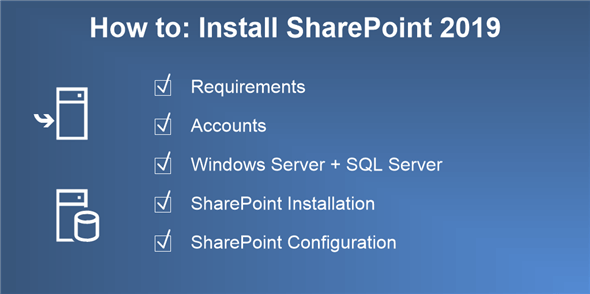
Install SharePoint 2019 — The Complete E-Book:
Scenario
I’m going to install SharePoint 2019 step by step using the following scenario:
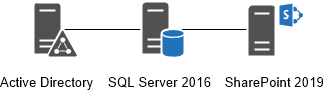
It’s a
- SharePoint 2019 single-server installation, including
- basic installation accounts, and
- SQL Server 2016 and Windows Server 2016 setup.
PowerShell automation is not shown.
Back to top
Helpful Tips
You may believe it or not but the following tips are the most useful I’ve seen during my years of installing SharePoint for my clients.
Meet all Hardware Requirements
Often I hear «SharePoint can’t have such high requirements…» or «We won’t need all features and there’s no need to scale…».
Don’t try to mess with hardware and software requirements and don’t try to run a SharePoint server at the most minimal requirements. Of course it costs money and it doesn’t matter if it’s their hardware or your time: It has to be paid. But believe me if you need to change things later it takes way more time and resources than you would have invested at the beginning.
Get enough Time
Installing SharePoint can’t be compared to installing a tool or application. It includes way more effort than a Windows Server or SQL Server since it’s based on different types of servers and a working infrastructure. Usually you will get challenges if you put a system on top combining different servers and services.
Take your time and schedule resources in time. Installing SharePoint can be done in some hours or days… it all depends on how well you and your team are prepared or not.
Prepare your Install Packages
This should be just a small thing but believe me it happens more often than you think and eats up your precious time really fast. Make sure that you prepare your own packages and that your customer has everything in place. It’s a waste of time if you need to wait when you are ready to install SharePoint. I met a lot of customers where time and resources were limited but the preparation wasn’t done.
Documentation
Documentation is everything and often it’s not done. It doesn’t matter if you give the project to someone else who needs to get into it. Usually there is more than one environment to install: staging, production or a recovery environment. There are hundreds of steps included and since nobody remembers all the steps which were done it’s important to write them down (and to take screenshots). This way the installation process can be done by different people or at different times.
Summary
You can ruin a really great SharePoint installation by missing the following things:
- Meet the requirements
- Try to get resources in time
- Take your time and do it properly
- Verify if you prepared everything for yourself and if your customer has done it too
- Document everything
Back to top
Administrative and Service Accounts
These are the official account requirements [1] in order to install SharePoint 2019.
Basic Installation Accounts
You need to create at least the following domain accounts in Active Directory to successfully install SharePoint 2019:
Basic Installation Accounts
| Required Account | Example |
|---|---|
| SQL Server Service Account | sqlSvcAcc |
| SharePoint Farm Administrator | spAdmin |
| SharePoint Farm Account | spFarmAcc |
Service Accounts
Service accounts aren’t needed for a successful SharePoint 2019 installation.
Assign Permission
The SharePoint 2019 Farm Administrator is the only account where you need to assign permission manually.
SQL Server Service Account
- Permission are assigned automatically during installation of SQL Server 2016.
- The SQL Server service account should be a domain account and is used to run SQL Server.
SharePoint Farm Administrator
SharePoint 2019 Farm Account
Permissions are automatically assigned by the SharePoint 2019 Farm Administrator so you don’t have to do it.
The farm account is used for the following things [1]:
- Configure and manage the server farm.
- Act as the application pool identity for the SharePoint Central Administration website.
- Run the Microsoft SharePoint Foundation Workflow Timer Service.
Back to top
SQL Server 2016 Configuration
I haven’t seen any official or unofficial documentation about required features yet so I’ll use the minimum set of features that worked with older versions of SharePoint.
SQL Server 2016 Installation
The following steps apply if you don’t have a SQL Server instance yet. If you have a SQL Server 2016 instance you can skip to the step below: «SQL Server 2016 configuration».
Select a new SQL Server stand-alone installation:

Install product updates, wait until setup files have been installed and run the install rules:


Please select at least the following minimum features:
- Database Engine Services

Keep the default instance.
Add the SQL Server service account (in my case: sqlSvcAcc) plus password and keep the collation settings.


If you create a development environment add the current administrator and SharePoint 2019 Farm Administrator as SQL Server administrators.

Start the SQL Server 2016 installation.
SQL Server 2016 Configuration
Download and install SQL Server Management Studio:

Open SQL Server Management Studio and give the following permissions.
Assign the dbcreator and securityadmin server role to the SharePoint 2019 Farm Administrator which is in my case spAdmin.

SQL Server 2016 Tips
Please also make sure you respect the following SQL Server best practices by Microsoft:
- Do not enable auto-create statistics on SharePoint content databases.
- Do not manually restrict database size in SQL Server.
- Keep max degree of parallelism (MAXDOP) to 1 for instances of SQL Server that host SharePoint databases.
Back to top
Windows Server 2016 Configuration
Usually I like to know which Windows Server 2016 role services and features are enabled: If you run the SharePoint 2019 prerequisites installer you won’t see the exact configuration steps. Anyway it’s sufficient for this scenario.
SharePoint 2019 Prerequisites Installer
The prerequisites installer installs and configures all SharePoint 2019 requirements but it doesn’t show you in detail what it does.


Make sure everything installed successfully and restart your server if required.
The prerequisites installer also downloads required patches and hotfixes for Windows Server 2016. In case you want to download them manually please read: SharePoint 2019 hardware and software requirements.
Back to top
SharePoint 2019 Installation
SharePoint 2019 also comes with the MinRole feature (SharePoint MinRole Explained) which configures a server for a specific role in a SharePoint topology like a Web Server or Application Server.
SharePoint 2019 Installation
Start the installation of SharePoint Server 2019 and use one of the following trial product keys:
- Enterprise: M692G-8N2JP-GG8B2-2W2P7-YY7J6
(Required to enable Project Server 2019) - Standard: F2DPD-HPNPV-WHKMK-G7C38-2G22J
The keys are valid for 180 days and you can change to a licensed version anytime during the trial or after the trial has expired using Central Administration.
Enter the product key and keep the file location.


Run the SharePoint Products Configuration Wizard.

SharePoint 2019 Configuration Wizard
Create a new server farm and enter your SQL Server [SERVERNAME] and specify the SharePoint 2019 Farm Account.
I installed SQL Server and SharePoint 2019 in the same machine so I used localhost as the SQL Server name.


Specify a new passphrase to secure farm settings:

Select the Single Server farm for our testing purposes. Specify a port number and start the configuration.


Once the installation has finished you can open SharePoint 2019 Central Administration.


Once you see the SharePoint 2019 Central Administration you’re done with the installation:

Back to top
Install SharePoint 2019 — The Complete E-Book:
All trademarks are property of their respective owners.
© 2017–2022
Contact
Resources
Company Information
SharePoint 2019 Preview доступен для скачивания: https://www.microsoft.com/en-us/download/details.aspx?id=57169
Требования
Начнем с минимальных требований к аппаратному обеспечению и ПО:
Железо
Требования к железу такие же как и для SharePoint 2016:
| Сценарий | RAM | Processor | HDD |
|---|---|---|---|
| Разработка | 12-16 GB | 64-bit, 4 cores | 180 GB (80 GB for system + 100 GB for data) |
| Пилот, Тестирование | 16-24 GB |
ПО
SharePoint Server 2019 может быть установлен на Windows Server 2016 или Windows Server 2019.
Для баз данных SharePoint Server 2019 требуется SQL Server 2016 или SQL Server 2017.
Само собой это должен быть SQL Server для Windows.
SQL Server для Linux не поддерживается.
Таблица сравнения требований для SharePoint 2016 и SharePoint 2019
| Требование | SharePoint 2016 | SharePoint 2019 |
|---|---|---|
| Windows Server 2012 R2 | ✔ | ✘ |
| Windows Server 2016 | ✔ | ✔ |
| Windows Server 2019 | ✘ | ✔ |
| SQL Server 2014 SP1 | ✔ | ✘ |
| SQL Server 2016 | ✔ | ✔ |
| SQL Server 2017 | ✔ | ✔ |
Апгрейд на новую версию SharePoint должен пройти легко, если Вы поддерживаете вашу среду в актуальном состоянии.
Установщик необходимых компонентов
Как и в предыдущих версиях SharePoint 2019 содержит утилиту prerequisiteinstaller.exe, которая устанавливает необходимое ПО в случае необходимости.
Ключ
Для установки SharePoint 2019 Preview можно использовать следующий ключ:
M692G-8N2JP-GG8B2-2W2P7-YY7J6
И вот этот для установки пробной версии Project Server:
R9946-QXNHR-62JPQ-3H3QC-TMWJT
Языковые пакеты
Если нужен языковой пакет для SharePoint 2019, он доступен здесь:
Language Packs for SharePoint Server 2019 Public Preview.
Установка
Скачиваем образ SharePoint Server 2019 Public Preview,
монтируем его и запускаем стартовый экран установщика SharePoint Server 2019:
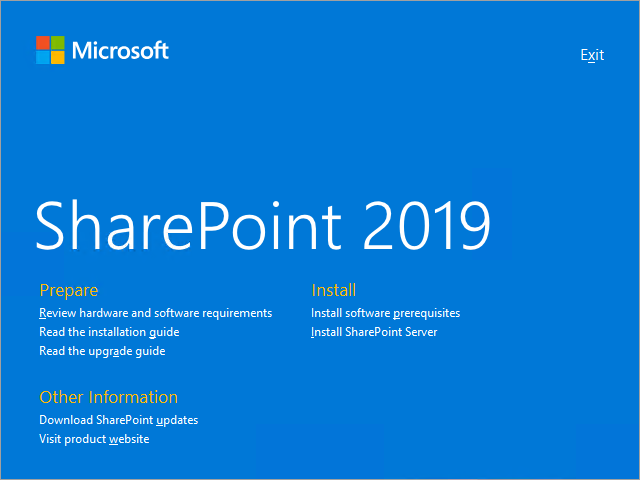
Запускаем программу подготовки продуктов Microsoft SharePoint 2019 для установки необходимого ПО и включения ролей сервера:
Последующие шаги: установка SharePoint 2019, запуск мастера настройки SharePoint. Эти шаги ровно такие же как и в случае с SharePoint 2016:
SharePoint 2013 имеет версию 15., SharePoint 2016 — версию 16.,… SharePoint 2019 — всё ещё 16. Нет никакой новой папки «17» в папке Web Server Extensions.
SharePoint 2016 и SharePoint 2019 имеют одинаковую мажорную версию своих сборок.
Центр Администрирования
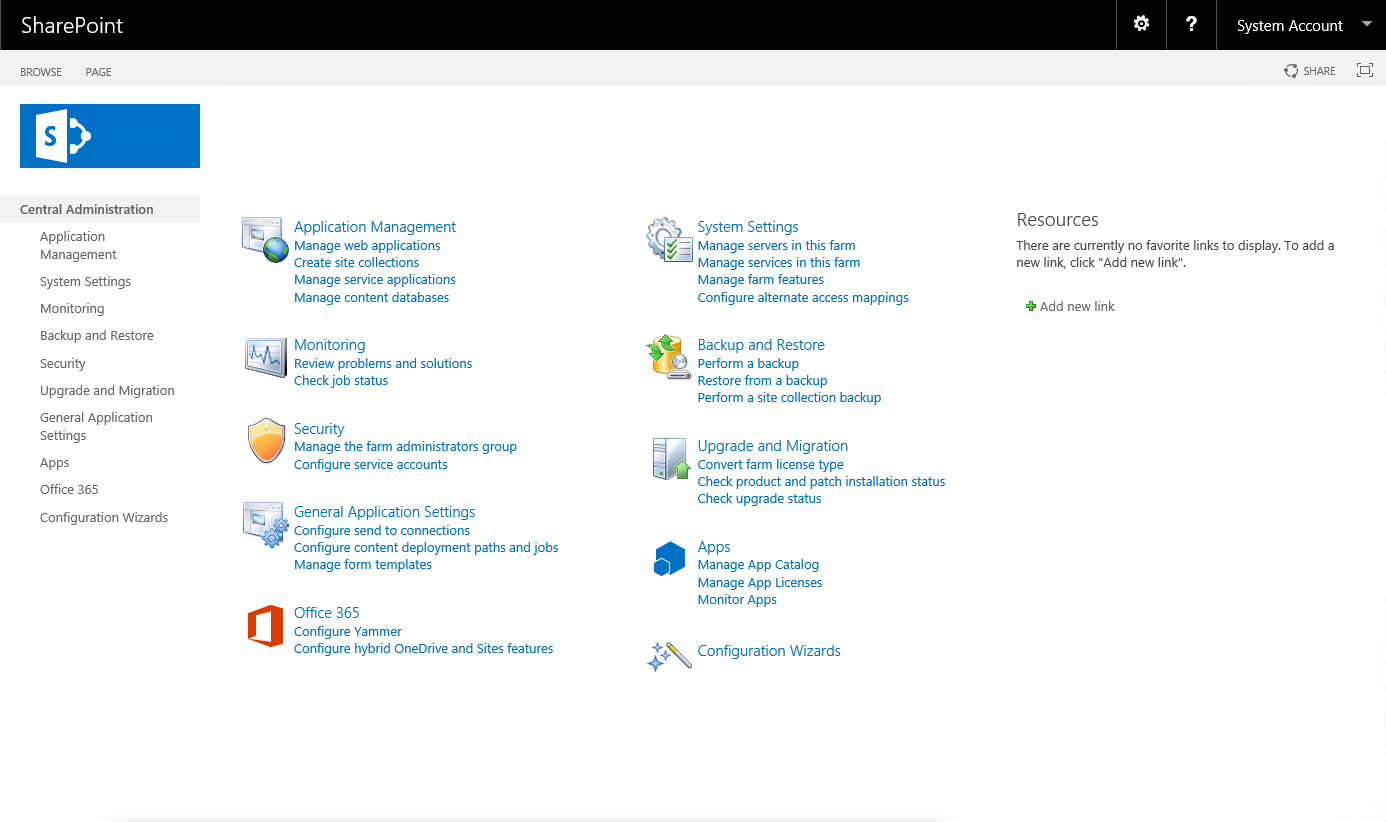
Новый Центр Администрирования SharePoint 2019:
Старый Центр Администрирования SharePoint 2016:
Hybrid Сonfiguration Цizard
Ссылка утилиту Hybrid configuration wizard доступна в центре администрирования SharePoint 2019:
Ссылки
SharePoint Server 2019 Public Preview
SharePoint Server 2019 Quick Start Guide
Install SharePoint Servers 2016 and 2019 Public Preview
Welcome to SharePoint Server 2019, a modern platform for choice and flexibility
Продолжение следует
В SharePoint 2019 очень много новых фич и компонентов. В следующих постах я об этом обязательно расскажу подробней.
Introduction
This tutorial will show you how to install SharePoint 2019. It is for SharePoint administrators. Disclaimer : It is not following best practices to design a farm, it is just to test the preview version ! (Example : the mysite host should be in a separated web application)
It assumes :
- you have the windows virtual machine ready with 16GB ram and 4CPU
- you have installed SQL Server separately with a dedicated SQL Instance
What you will see :
- The configuration that is needed to be done to get the SharePoint Home page, communication sites, team sites and one drive. I found this missing from the Microsoft documentation.
It will not show you how to configure hybrid scenario such as search, power apps or flow.
It shall take you 2hours to set this up with this tutorial.
Prequisite – Download the Installation binaries (iso)
- Download installer files
- officeserver_en-us.iso
- 4gb
Installation Documentation reference
Hardware & software pre requisites for SharePoint 2019 Preview and installation guide
Installation guide for a evaluation mono-server environment
What you need for SQL : Supported SQL versions
One of the following:
- Microsoft SQL Server 2016 RTM
- Microsoft SQL Server 2017 RTM for Windows
From <Microsoft hardware requirements for SharePoint 2019>
What you need for Windows : Supported Windows Version
One of the following operating systems:
- Windows Server 2016 Standard or Datacenter
- Windows Server 2019 Standard or Datacenter
From <Microsoft docs about SharePoint 2019 requirements>
Get help and ressources
SharePoint 2019 Forum
One drive configuration for SP2019
Configuration done for SQL Server 2016
- Configure a domain account as local administrator
- Created an SQL Instance for this installation.
Configuration done for Windows Server 2016 : SharePoint 2019 Pre requisites
Run the prerequisite.exe from the .iso
To install the pre-requisite ensure you have internet Access or you’ll have to download manually each pre requisites files (IIS modules, sql modules, .NET framework etc)

Reboot and restart the pre requisite.exe
Run install.exe


Database server :
Username : domain


Run as admin the app from start menu


I faced this error during the wizard
Microsoft.SharePoint.SPException: The value provided for instanceId is not a valid GUID.
at Microsoft.SharePoint.Administration.SPAdminConfigUtil.GetConfigData(Page page)
at Microsoft.SharePoint.ApplicationPages.AdminConfigServices.BtnOk_Click(Object sender, EventArgs args)
at System.Web.UI.WebControls.Button.OnClick(EventArgs e)
at System.Web.UI.WebControls.Button.RaisePostBackEvent(String eventArgument)
at System.Web.UI.Page.ProcessRequestMain(Boolean includeStagesBeforeAsyncPoint, Boolean includeStagesAfterAsyncPoint)
Decided to create the services one by one Go to service application
- Create managed metadata
- Create App Management Service Application
- Create secure store service
- Create search service, note there is a way to connect to O365 Search
- Create User Profile Service, note there is a way to integrate with yammer directly

Create a site collection

Access the site
http://sp2019
Choose team site (modern UI team site)

Note that you can create classic site

Et voila modern UI on SharePoint 2019 on premise

Access from your computer
Add to your host file
XXX.XXX.XXX.XX
Login with : domainusername
Create my site host, to have SharePoint home page and one drive
Create it on the :80 web application as root
Navigating to the http://xxxx url will show the mysite, if you allow self site creation, it enables one drive and redirect them to one drive.
Click on the APP LAUNCHER and click sharepoint to view sharepoint landing page.
The search must run a full crawl to show the web site on this page.


Allow end user to create sites (team site / comm site) from SharePoint landing page & use ONE DRIVE
Central Admin > select the web application > Self site service creation.
You can choose under which site collection path or web apps those site shall be created

Your user will then see Create Site Under the SharePoint landing page


Navigating to one drive still shows this page

Enable One drive site creation (mysites)
- Central admin > click the web application 80 > Permission policy > create a new one with Create subsites permission
- Central admin > click the web application 80 > User policy > Add everyone Create subsites permissions
- Central admin > Web application > Click the web application 80 > Create the explicit managed path “personal”
- With a user, go to your profile, edit your profile
- Then go to one drive, it shall display the documents
Open your one drive and synch
Click synch to have one drive synch to your computer. It will trigger an error, because you need to install those keys to registry. Create a .reg file on your desktop, add these values and run it :
Windows Registry Editor Version 5.00
[HKEY_LOCAL_MACHINESOFTWAREPoliciesMicrosoftOneDrive]
“SharePointOnPremPrioritization”=dword:00000001
“SharePointOnPremFrontDoorUrl”=”http://onedrive.monacoinformatiqueservice.mc”
What I noticed, hybrid wizard from central admin


Create modern sites for SharePoint 2019 using Powershell
Communication Site
New-SPSite http://sp2k19test/sites/commsite -OwnerAlias “SIILSP2K19_ADMIN” -Language 1033 -Template SITEPAGEPUBLISHING#0
Team site
New-SPSite http://sp2k19test/sites/teamsite -OwnerAlias “SIILSP2K19_ADMIN” -Language 1033 -Template STS#3
Create a subsite communication site under a modern team site
New-SPWeb http://sp2k19test/sites/teamsite/subsitecomm -Language 1033 -Template SITEPAGEPUBLISHING#0
— Advertisement —
Introduction
The purpose of this article is to guide you through the installation steps of SharePoint 2019.
Why SharePoint? (Intranet portal, DMS & Process Automation) It is important for an organization and how this will help an organization in a better position in terms of collaboration within employees. Usually, in a bigger size organization, employees will not know what’s happening in the other country/branches even other departments. Sometimes employees not even know some of the departments as exist. users come to the office to do their regular duty and leave the office. The main advantage of the Intranet Portal is a Single workspace for an entire organization in terms of Information sharing.
There are many tools available in the market for collaboration. However, one of the best suitable software is SharePoint. The reason why I suggest SharePoint is, this software is not only for collaboration, it includes content and collaboration, workflow automation.
Intranet portal in SharePoint it not rocket science. Yes, obviously for the Initial configuration you require IT help to setup. Once everything is fine, as a business user they can create their own Sites for their department and Share content between the employees. The movement they create sites and share the content, by default the collaboration has enabled in your organization, however in-order to represent better look and feel, you need a design expert to give an elegant look and feel to your portal.
When you want to promote portal inside your organization, you must do internal marketing and moreover try to build some important application using SharePoint like leave or expense approval, SharePoint has an inbuilt powerful workflow engine. Which run the workflow automation for all your approval process within your organization.
SharePoint 2019 Installation Steps
In this article, we will see how to install and configure a SharePoint 2019 environment.
- Microsoft SQL Server 2016 Installation and Configuration
- SharePoint 2019 Installation for application with Search.
- SharePoint 2019 installation for Web front end with a distributed cache server.
Prerequisites for Installing SharePoint 2019
- Windows Server 2016
- SharePoint 2019 with Product Key
- Microsoft SQL Server 2016 with Key
- Domain Account with local administrator privilege on all the servers.
- Internet Connection on all the servers during installation time.
Microsoft SQL Server 2016 Installation & Configuration
Step 1
Copy the installation Files into the Database server.
Step 2
Right-click the setup file and click run as administrator.

Step 3
Click the Installation link from the left bar.

Step 4
Click on the NEW SQL Server Stand-alone Installation or add features to an existing installation.

Step 5
Enter the Product Key and click next

Step 6
Accept the Microsoft software license and click next.

Step 7
On this screen, you need to decide on Microsoft update.
If you want SQL to be auto update then select this option otherwise click next without enabling this checkbox.

Step 8
The system will run a checklist wizard for smooth installation.

Step 9
In this step, enable what features need for installation. For this, we enabled only Database Engine Services.

Step 10
On this screen, select the default instance. In case if you have multiple instances on the same server, create a named instance selecting the appropriate option.

Step 11
Select SQL Server Agent and SQL Server Database Engine startup types as Automatic and click next.

Step 12
Select the collation type as Default (SQL_Latin_General_CP1_CI-AS)

Step 13
In this screen select the authentication types as windows authentication mode and add the domain login as the SQL Server administrator.
You have another tab. If you want to change the data directory location to a different drive, not in the system drive, it’s better to change in the Data Directory tab.

Step 14
Review wizard. In this screen you can verify the configuration which you have selected in the previous screens. If everything is OK, click the install button to start installing SQL 2016

Step 15
Installation Wizard

Step 16
After installation, the wizard will give you a report with the status.

Step 17
SQL Server 2016 has installed successfully. Click the close button to return to install management tools.
After SQL 2012 version Microsoft has split the SQL installation and Management tools installation separately.
Step 18
In the installation wizard, Click Install SQL server management tools link, this will open the Microsoft site for downloading the software with the latest release.

Step 19
On the website, click the download SQL Server Management Studio 18.2

Step 20
Save the setup file and Run the setup file as administrator.

Step 21
Follow the below snapshots for the management tools installation.


Introduction
The purpose of this article is to guide you through the installation steps of SharePoint 2019.
Why SharePoint?
Why SharePoint? (Intranet portal, DMS & Process Automation) It is important for an organization and how this will help an organization in a better position in terms of collaboration within employees. Usually, in a bigger size organization, employees will not know what’s happening in the other country/branches even other departments. Sometimes employees not even know some of the departments as exist. users come to the office to do their regular duty and leave the office. The main advantage of the Intranet Portal is a Single workspace for an entire organization in terms of Information sharing.
There are many tools available in the market for collaboration. However, one of the best suitable software is SharePoint. The reason why I suggest SharePoint is, this software is not only for collaboration, it includes content and collaboration, workflow automation.
Intranet portal in SharePoint it not rocket science. Yes, obviously for the Initial configuration you require IT help to setup. Once everything is fine, as a business user they can create their own Sites for their department and Share content between the employees. The movement they create sites and share the content, by default the collaboration has enabled in your organization, however in-order to represent better look and feel, you need a design expert to give an elegant look and feel to your portal.
When you want to promote portal inside your organization, you must do internal marketing and moreover try to build some important application using SharePoint like leave or expense approval, SharePoint has an inbuilt powerful workflow engine. Which run the workflow automation for all your approval process within your organization.
SharePoint 2019 Installation Steps
In this article, we will see how to install and configure a SharePoint 2019 environment.
- Microsoft SQL Server 2016 Installation and Configuration
- SharePoint 2019 Installation for application with Search.
- SharePoint 2019 installation for Web front end with a distributed cache server.
Prerequisites for Installing SharePoint 2019
- Windows Server 2016
- SharePoint 2019 with Product Key
- Microsoft SQL Server 2016 with Key
- Domain Account with local administrator privilege on all the servers.
- Internet Connection on all the servers during installation time.
Microsoft SQL Server 2016 Installation & Configuration
Step 1
Copy the installation Files into the Database server.
Step 2
Right-click the setup file and click run as administrator.
Step 3
Click the Installation link from the left bar.
Step 4
Click on the NEW SQL Server Stand-alone Installation or add features to an existing installation.
Step 5
Enter the Product Key and click next
Step 6
Accept the Microsoft software license and click next.
Step 7
On this screen, you need to decide on Microsoft update.
If you want SQL to be auto update then select this option otherwise click next without enabling this checkbox.
Step 8
The system will run a checklist wizard for smooth installation.
Step 9
In this step, enable what features need for installation. For this, we enabled only Database Engine Services.
Step 10
On this screen, select the default instance. In case if you have multiple instances on the same server, create a named instance selecting the appropriate option.
Step 11
Select SQL Server Agent and SQL Server Database Engine startup types as Automatic and click next.
Step 12
Select the collation type as Default (SQL_Latin_General_CP1_CI-AS)
Step 13
In this screen select the authentication types as windows authentication mode and add the domain login as the SQL Server administrator.
You have another tab. If you want to change the data directory location to a different drive, not in the system drive, it’s better to change in the Data Directory tab.
Step 14
Review wizard. In this screen you can verify the configuration which you have selected in the previous screens. If everything is OK, click the install button to start installing SQL 2016
Step 15
Installation Wizard
Step 16
After installation, the wizard will give you a report with the status.
Step 17
SQL Server 2016 has installed successfully. Click the close button to return to install management tools.
After SQL 2012 version Microsoft has split the SQL installation and Management tools installation separately.
Step 18
In the installation wizard, Click Install SQL server management tools link, this will open the Microsoft site for downloading the software with the latest release.
Step 19
On the website, click the download SQL Server Management Studio 18.2
Step 20
Save the setup file and Run the setup file as administrator.
Step 21
Follow the below snapshots for the management tools installation.
SharePoint 2019 Preview is available for download: https://www.microsoft.com/en-us/download/details.aspx?id=57169
Requirements
Lets start from minimal software and hardware requirements:
Hardware
Hardware requirements are the same as for SharePoint 2016:
| Scenario | RAM | Processor | HDD |
|---|---|---|---|
| Development | 12-16 GB | 64-bit, 4 cores | 180 GB (80 GB for system + 100 GB for data) |
| Pilot, UAT (User Acceptance Test) | 16-24 GB |
Software
SharePoint Server 2019 can be installed on Windows Server 2016 and Windows Server 2019.
SQL Server 2016 or SQL Server 2017 is required for SharePoint Server 2019. Needless to say it’s must SQL Server for Windows. SQL Server for linux not supported.
Сomparison of software requirements for SharePoint 2016 and SharePoint 2019
| Requirement | SharePoint 2016 | SharePoint 2019 |
|---|---|---|
| Windows Server 2012 R2 | ||
| Windows Server 2016 | ||
| Windows Server 2019 | ||
| SQL Server 2014 SP1 | ||
| SQL Server 2016 | ||
| SQL Server 2017 |
It’s easy to upgrade your SharePoint instance if you keep your environment up to date.
Prerequisite Installer
Same as in previous versions SharePoint 2019 contains prerequisiteinstaller.exe tool which installs required software if it has not been installed yet
Serial Key
For SharePoint 2019 Preview you can use the following serial key to install an instance:
M692G-8N2JP-GG8B2-2W2P7-YY7J6
The following key is for Project trial:
R9946-QXNHR-62JPQ-3H3QC-TMWJT
Language Pack
If you need a language pack for SharePoint 2019 Preview you can download it here: Language Packs for SharePoint Server 2019 Public Preview.
Installation
Download image of SharePoint Server 2019 Public Preview, mount it and launch the SharePoint Server 2019 Start page:

Start Microsoft SharePoint 2019 Products Preparation Tool to install required software:

The next steps are: installing SharePoint 2019, SharePoint Configuration Wizard. These steps are absolutly the same as SharePoint 2016:

SharePoint 2013 is version 15.*, SharePoint 2016 — version 16.*,… SharePoint 2019 — still 16.*. No new 17 folder under Web Server Extensions one.
SharePoint 2016 and SharePoint 2019 have the same major version of their assemblies.
Central Administration
New SharePoint 2019 Central Administration:

Old SharePoint 2016 Central Administration:

Hybrid Configuration Wizard
Link to Hybrid configuration wizard now available in Central Administration:

Links
SharePoint Server 2019 Public Preview
SharePoint Server 2019 Quick Start Guide
Install SharePoint Servers 2016 and 2019 Public Preview
Welcome to SharePoint Server 2019, a modern platform for choice and flexibility
To be continued
However there are a lot of new features in SharePoint 2019. In future posts I’ll show you many interesting features and how you can use them.

Vitaly Zhukov
SharePoint Architect, Developer, Technical Trainer, Microsoft MVP (Office Development). Above 15 years of total experience working with SharePoint, Dynamics CRM, Office 365, and Microsoft stack development.

- Remove From My Forums
-
Question
-
I have installed Sharepoint and SQL in separate machines. It is a single farm installation. However, when I created Search service application and its proxy and clicked on the service, the page shows «Page not found».
I have encountered this in two other computers. It seems that the webadminwebpart or something like this does not get installed and some other features as well. Why is this happening?
All replies
-
Hi Helm,
Make sure Search Host Controller Service and SharePoint Server Search is started via CA->Manage services on server.
And try to activate a hidden feature using command below:
Enable-SPFeature SearchAdminWebParts -url <central admin URL>
If the feature is already enabled, you need to disable the feature first and then enable it.
Disable-SPFeature SearchAdminWebParts -url <central admin URL>

Enable-SPFeature SearchAdminWebParts -url <central admin URL>
Run IISReset and check again.
Best regards,
Grace Wang
Please remember to mark the replies as answers if they helped. If you have feedback for TechNet Subscriber Support, contact
tnmff@microsoft.com.SharePoint Server 2019 has been released, you can click
here to download it.
Click
here to learn new features. Visit the dedicated
forum to
share, explore and talk to experts about SharePoint Server 2019. -
Hi Grace WR,
It seemed that the feature had not been installed at all. I run the Enable-SPFeature, but it did not find it. So, I checked the features folder and there it was. I ran install-spfeature -path «SearchAdminWebParts» and it installed it.
Now my question is why it did not install it in the first place? What else could have been left out?
-
Hi Helm,
To find the root cause which «SearchAdminWebParts» feature is not installed when configure SharePoint farm, I suggest you find the configuration log after you run the SharePoint Products Configuration Wizard.
Best regards,
Grace Wang
Please remember to mark the replies as answers if they helped. If you have feedback for TechNet Subscriber Support, contact
tnmff@microsoft.com.SharePoint Server 2019 has been released, you can click
here to download it.
Click
here to learn new features. Visit the dedicated
forum to
share, explore and talk to experts about SharePoint Server 2019.-
Proposed as answer by
Friday, November 15, 2019 9:41 AM
-
Proposed as answer by