Some people would feel frustrating about that after installing Windows server 2016 successfully, the user interface has changed. There is no a graphic user interface, so all the operation would be executed by typing some professional commands. That is not easy for some users who are not familiar with Windows server, especially for the people who is the freshman for Windows server. Then people may ask whether there is a way to enable the GUI in Windows server 2016. Here I would show you how to enable the GUI in Windows server 2016.
Here I would show the detailed steps from scratch.
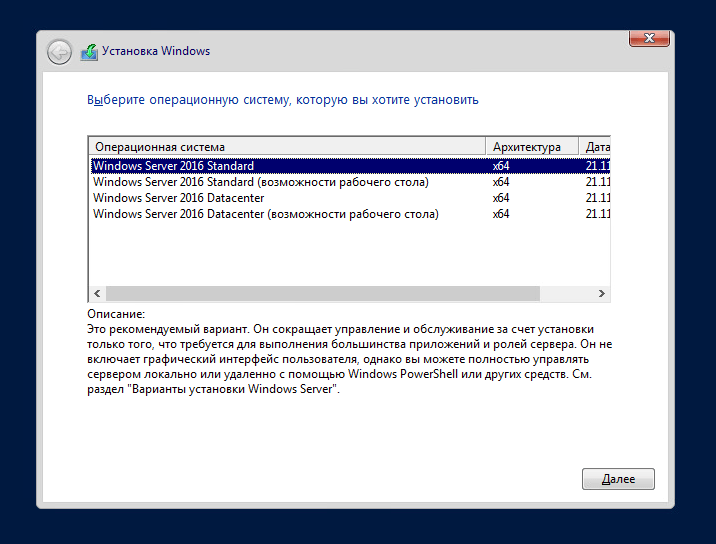
When we begin installing the new Windows server 2016, there are many options for us.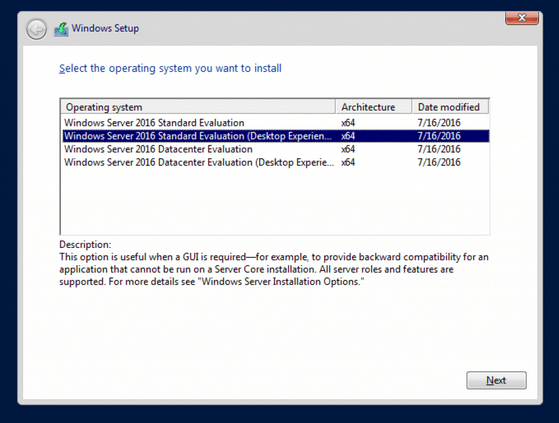
You can see many option are list on the above picture. The options without Desktop Experience are the core editions. They would not offer GUI after installation. And the ones with Desktop Experience would offer full GUI features. If you clear about which is your favor, you would find the problem and has no need to read the under passage. But if you just wrong installed the core edition of Windows server 2016 and you regretted it when finding that all the operations have to be implemented by typing commands. Then you should follow the under steps.
Step 1: Open PowerShell console and type Get-WindowsFeature -Name *GUI* into it.
You would find that all the install state of the GUI features listed are shown as removed. And now you should try to install the removed GUI features. Before that, you should make sure that your server has access to internet.
Step 2: Just type Install-WindowsFeature -Name Server-Gui-Shell, Server-Gui-Mgmt-Infra into PowerShell console and press Enter to execute it.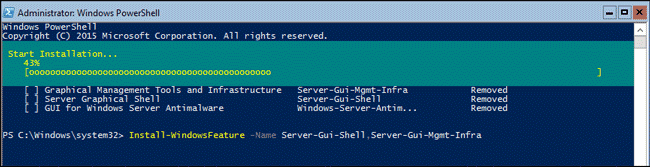
Typically, when the above operation is completed and you should just type Restart-Computer into the PowerShell console to restart your server. Then you would see windows server 2016 with the full graphic user interface(GUI).
Note: If your server has no access to the internet, you would probably see a large number of error message with red color. Then you have to use your installation media to successfully install server GUI features. Before you can do that, you need to identify appropriate index of Windows server 2016 edition from which you want to install features. The GUI features are only default built in the editions labelled with desktop experience, so you should skip indexes for core editions in the list.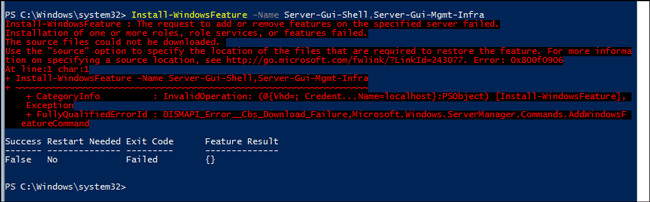
So here i would show you installing the GUI features from a installation media.
Here we go.
Step 1: If you have store the windows server installation media in this system before, just navigate to the path of it. Type the command Get-WindowsImage -ImagePath XXX\XX\X into the console.
Attention : The GUI features information are stored in install.win file located on D:\sources in my system drive, so you should just adapt it to your condition.
Here the GUI features related file’s path is D:\sources\install.wim. Then i just type Get-WindowsImage -ImagePath D:\sources\install.wim into the console to find the system imageindex.
From the first picture in this passage, we know that the imageindex of core edition without GUI is 1 and 3. Then you should just choose the right imageindex between 2 and 4. Here i would choose the imageindex as 2.
Step 2: Type Install-WindowsFeature -Name Server-Gui-Shell, Server-Gui-Mgmt-Infra -Source wim:D:\sources\install.wim:2 into PowerShell console. And press Enter to execute it.
Note: To install feature from non-default location, you should follow the appropriate syntax like below.
InstallationProvider:WIMFileLocation:ImageIndex
So if you want to install the GUI features from a installation media, you should follow the syntax.
Step 3: After the above operation is finished, you should be prompted with the information that you must restart this server to finish the installation process. Just type Restart-Computer into the PowerShell console and execute it.
Then you would find that the full GUI features has been enabled in your Windows server 2016.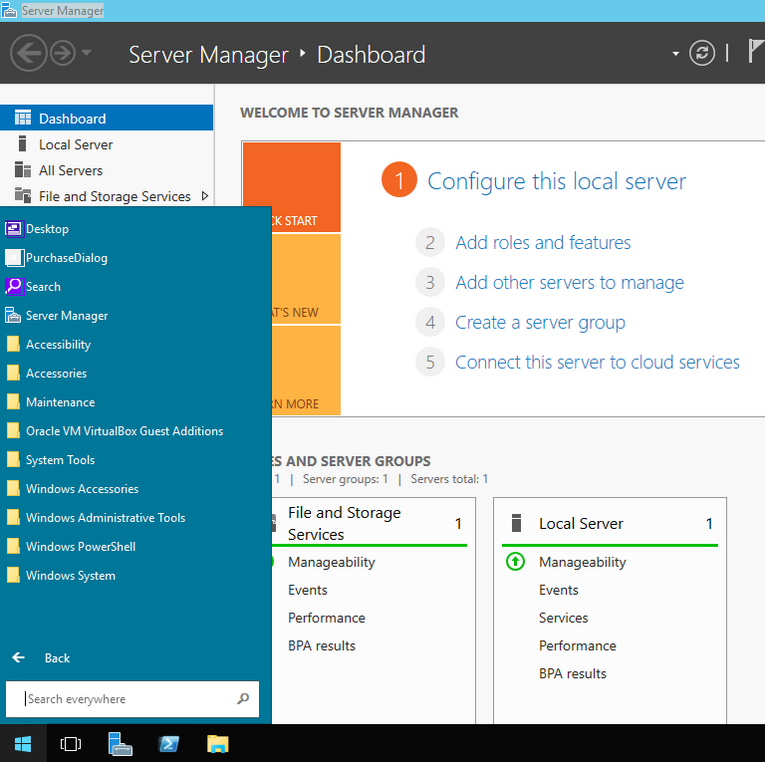
![]()
At Microsoft Ignite 2015 in Chicago, Microsoft unveiled the next preview of Windows Server. In the latest version, not only is the GUI not the default, but it also isn’t installed at all without additional post-install steps. In this tutorial, I’ll show you how you can enable the GUI for those applications that still require a graphical user interface in Windows Server 2016.
Contents
- Install the GUI on Server 2016 “MinShell”
- Install the GUI on Server Core
- To install the GUI or not?
- Author
- Recent Posts

Kyle Beckman works as a systems administrator in Atlanta, GA supporting Office 365 in higher education. He has 17+ years of systems administration experience.
If you’ve taken the time to install the latest build of Windows Server Technical Preview 2, you may have noticed that the graphical user interface (GUI) is no longer an option in a default install. When you’re prompted to select the operating system you want to install, you have two options.

Windows Server 2016 – Select the operating system you want to install
The first option, Windows Server Technical Preview 2 (the verbiage will most likely be replaced with Windows Server 2016 when the product is eventually released) is the traditional Server Core install that doesn’t include the GUI.

Windows Server 2016 Server Core
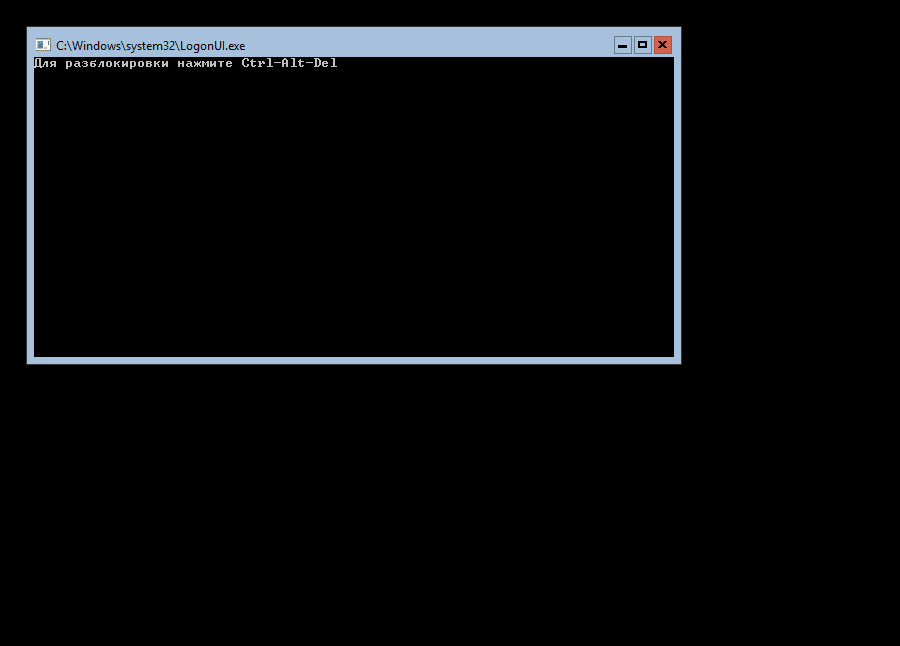
Just to show you how hardcore and serious Microsoft is, the Control+Alt+Delete logon prompt sits in a command prompt box. I wouldn’t be surprised to see this one day go the way of UNIX/Linux and drop the window completely in favor of just straight text.

Ctrl+Alt+Delete logon screen on Windows Server 2016 Server Core
The second option, Windows Server Technical Preview 2 (with local admin tools), is the “MinShell” install that contains a minimal GUI that includes Server Manager and the other GUI administration tools, but no traditional desktop.

Windows Server 2016 running MinShell
Install the GUI on Server 2016 “MinShell”
If you’re running the MinShell version of Windows Server 2016 that includes Server Manager and the other GUI administrative tools, installing the full GUI is rather easy. At the command prompt that you get when you log in, type powershell and press Enter to run PowerShell. Then, run the following command:
Install-WindowsFeature Server-Gui-Shell -Restart
The first part is the Install-WindowsFeature PowerShell cmdlet that tells Windows to install a feature of Windows Server. The second part tells the cmdlet that you want to install the GUI. The last part tells Windows to automatically reboot after installing the feature. The reboot is required to finish the install; just be aware that adding -Restart will force the reboot immediately following the completion of the install.

Install the GUI on Windows Server 2016 “MinShell” using PowerShell
Install the GUI on Server Core
If you decided to install Server Core, you have slightly more work to do to get the GUI installed. If you run the PowerShell command we used in the MinShell version of Windows Server 2016, it will fail and you’ll get a pretty big error message with lots of red error text: “Install-WindowsFeature : The request to add or remove features on the specified server failed. Installation of one or more roles, role services, or features failed. The source files could not be found.”

Error installing the GUI on Windows Server 2016 Server Core
We can dig a little bit by running this PowerShell command:
Get-WindowsFeature *gui*
This will show us the installable GUI options on the server. As you can see in the screenshot below, the Install State is “Removed.” Because this is a Server Core install, options such as the GUI aren’t cached on the disk for quick install. Instead, we’ll have to access the OS install WIM file to install the GUI.

Looking at GUI options on Windows Server 2016 Server Core
In my example, I’m using a Hyper-V VM that has the Windows Server Technical Preview 2 ISO image connected to the DVD drive so I can access the install.wim file. To install the GUI, I run this command:
Install-WindowsFeature Server-Gui-Shell –Restart -Source wim:D:\sources\install.wim:4

Install the GUI on Windows Server 2016 Server Core using PowerShell
After a reboot on Windows Server 2016 MinShell or Server Core, you’ll be greeted by the full graphical user interface.

Windows Server 2016 with GUI enabled
To install the GUI or not?
Most, if not all, organizations still have server-based applications that don’t play well with Server Core and need the full GUI. In many cases, the management tools and agents that we use to manage those servers are the apps that need the GUI. Until more vendors catch up to Microsoft’s philosophy, we’ll still see lots of sysadmins installing the GUI on their servers.
In a perfect world, I’d love to see Microsoft embrace some of the Linux philosophy with respect to GUIs. If the GUI was something that ran only when we needed it, then Windows systems administrators could run the GUI whenever they needed to perform certain administrative functions or use applications that don’t support a pure command-line interface.
Subscribe to 4sysops newsletter!
That would also allow the GUI to remain in an offline mode when it wasn’t needed, and it could be patched without the need to constantly reboot the system for updates. As it stands today, the non-GUI version of Windows Server just looks like a GUI that’s been stripped of the Start menu/screen, Task Bar, File Explorer, and other useful GUI tools other than a few utilities. As for what the future holds for Windows Server, I don’t think the GUI will ever completely go away, but now is the time to start using and learning PowerShell before you’re left in the dust.
Windows Server 2016 — мощная операционная система, предназначенная для управления и поддержки различных серверных приложений и служб. Однако, по умолчанию данная версия операционной системы поставляется без графического интерфейса. Но несмотря на это, пользователи могут легко включить графический интерфейс на своем сервере Windows Server 2016.
Включение графического интерфейса на Windows Server 2016 может быть полезным, особенно для администраторов, которые предпочитают работать в графической среде. Графический интерфейс позволяет удобно управлять и настраивать сервер, использовать графические инструменты для мониторинга и анализа производительности, а также легко настраивать и управлять службами и приложениями.
В данном руководстве мы рассмотрим несколько способов включения графического интерфейса на сервере Windows Server 2016. Мы рассмотрим стандартные методы, а также некоторые дополнительные инструменты, которые помогут вам выполнить эту задачу. Будьте уверены, что вы следуете инструкциям внимательно и берете все меры предосторожности, прежде чем вносить изменения в операционную систему сервера.
Примечание: Перед включением графического интерфейса на сервере Windows Server 2016 рекомендуется убедиться, что ваш сервер соответствует системным требованиям для работы с графическим интерфейсом. Убедитесь также, что вы имеете соответствующие права доступа и административные полномочия для внесения изменений.
Содержание
- Установка Windows Server 2016
- Проверка активации Windows Server 2016
- Отключение Server Core
- Загрузка необходимых компонентов для GUI
- Включение графического интерфейса
- Перезагрузка и проверка графического интерфейса
- Отключение графического интерфейса (GUI) при необходимости
Установка Windows Server 2016
1. Загрузите образ Windows Server 2016 с официального сайта Microsoft или используйте дистрибутив, предоставленный вашей организацией.
2. Создайте загрузочный USB-накопитель или DVD с помощью программы для записи образов, такой как Rufus или ImgBurn. Настройте BIOS вашего сервера на загрузку с этого накопителя.
3. Запустите установку Windows Server 2016 и следуйте инструкциям на экране. Выберите язык установки, формат времени и клавиатуры, а также допустимые лицензионные условия.
4. Выберите тип установки. Вам может понадобиться выполнить чистую установку или обновить существующую версию Windows. Выберите соответствующий вариант в зависимости от вашей ситуации.
5. Установите параметры сервера, такие как имя компьютера, пароль администратора и сетевые настройки. Они будут использоваться для доступа к серверу и его настройке.
6. Подождите, пока установка завершится. В этот момент система будет устанавливать и настраивать различные компоненты операционной системы. Это может занять некоторое время, поэтому будьте терпеливы.
7. После завершения установки войдите в систему с помощью указанного вами пароля администратора. Вы успешно установили Windows Server 2016 на ваш сервер.
Проверка активации Windows Server 2016
Проверить активацию Windows Server 2016 можно с помощью инструментов командной строки или графического интерфейса. Вот несколько способов проверки активации:
1. Использование командной строки
Откройте командную строку как администратор и выполните следующую команду:
slmgr.vbs /dli
Эта команда отобразит текущий статус активации Windows Server 2016, включая срок действия лицензии и оставшееся время.
2. Использование графического интерфейса через «Параметры системы»
Откройте «Параметры системы» через поиск «Параметры системы» в меню «Пуск» или щелкнув правой кнопкой мыши на значок «Компьютер» и выбрав «Свойства».
Найдите раздел «Активация Windows» и проверьте его статус. Если Windows Server 2016 активирована, вам будет показано сообщение «Windows активирована».
3. Использование графического интерфейса через «Система»
Откройте «Система» через поиск «Система» в меню «Пуск» или щелкнув правой кнопкой мыши на значок «Компьютер» и выбрав «Свойства».
В разделе «Windows активирована» вы увидите информацию о статусе активации, включая срок действия лицензии и оставшееся время.
Эти способы помогут вам легко и быстро проверить активацию Windows Server 2016 и убедиться, что ваша операционная система полностью функциональна.
Отключение Server Core
1. Зайдите в PowerShell в режиме администратора.
Чтобы вызвать PowerShell, нажмите клавиши Win+X и выберите «Windows PowerShell (Admin)».
2. Введите следующую команду:
Uninstall-WindowsFeature Server-Gui-Shell -Remove
Эта команда отключает графический интерфейс и удаляет его компоненты с сервера.
3. Перезагрузите сервер:
Restart-Computer
После перезагрузки сервера, вы работаете в режиме Server Core, без графического интерфейса.
Чтобы снова включить графический интерфейс, выполните следующую команду:
Install-WindowsFeature Server-Gui-Shell –Restart
После перезагрузки, сервер будет работать с графическим интерфейсом.
Теперь вы знаете, как отключить и включить графический интерфейс (GUI) на Windows Server 2016 в режиме Server Core.
Загрузка необходимых компонентов для GUI
Перед тем, как включить графический интерфейс на Windows Server 2016, необходимо установить несколько компонентов. В первую очередь вам понадобится подключение к Интернету, чтобы загрузить необходимые файлы.
1. Откройте PowerShell от имени администратора.
2. Следующей командой установите необходимые компоненты, выполнив поиск в репозитории:
Install-WindowsFeature Server-GUI-Shell, Server-GUI-Mgmt-Infra
После запуска команды процесс загрузки и установки компонентов может занять некоторое время в зависимости от скорости вашего интернет-соединения.
3. По завершении загрузки и установки, перезапустите сервер с помощью команды:
Restart-Computer
4. После перезагрузки сервера на экране появится графический интерфейс, и вы сможете войти в систему с помощью учетных данных администратора.
Теперь вы успешно загрузили все необходимые компоненты для включения графического интерфейса на Windows Server 2016.
Включение графического интерфейса
При установке Windows Server 2016 по умолчанию отключается графический интерфейс для повышения производительности системы и уменьшения потребления ресурсов. Однако, в некоторых случаях, может потребоваться включение графического интерфейса для удобства управления сервером.
Существует несколько способов включения графического интерфейса на Windows Server 2016:
| Способ | Описание |
|---|---|
| Установка графического интерфейса через командную строку | Один из самых простых способов. Для этого необходимо выполнить специальную команду в командной строке. |
| Установка графического интерфейса через Server Manager | Данный способ требует наличия графического интерфейса в виде графического установщика Server Manager. Необходимо открыть Server Manager и выполнить несколько шагов для установки графического интерфейса. |
| Установка графического интерфейса через PowerShell | Используя PowerShell, можно установить графический интерфейс с помощью определенных команд. Этот способ подходит для пользователей, предпочитающих работать с командной строкой. |
| Установка графического интерфейса с использованием ISO-образа | Этот способ требует наличия ISO-образа Windows Server 2016. Необходимо смонтировать образ и выполнить установку графического интерфейса с помощью специальной утилиты. |
Выбор конкретного способа зависит от ваших предпочтений и доступных возможностей. В любом случае, включение графического интерфейса может упростить управление сервером и облегчить выполнение задач.
Перезагрузка и проверка графического интерфейса
После установки графического интерфейса на Windows Server 2016, может потребоваться перезагрузка сервера для применения изменений. Чтобы перезагрузить сервер, выполните следующие шаги:
- Откройте меню «Пуск» и выберите «Выключение или перезагрузка».
- В открывшемся окне выберите «Перезагрузка» и нажмите «ОК».
После перезагрузки сервера вы можете проверить, по-прежнему ли работает графический интерфейс. Для этого выполните следующие действия:
- Войдите в систему с использованием учетной записи администратора.
- Откройте меню «Пуск» и проверьте наличие значка «Полный рабочий стол».
- Если значок «Полный рабочий стол» отсутствует, кликните правой кнопкой мыши на панели задач и выберите «Задачи». Найдите в списке процесс «Windows Explorer» и кликните на него, чтобы запустить графический интерфейс.
Теперь, после перезагрузки и проверки графического интерфейса, вы можете использовать полный потенциал графической оболочки Windows Server 2016.
Отключение графического интерфейса (GUI) при необходимости
Иногда возникает необходимость отключить графический интерфейс (GUI) на Windows Server 2016 для уменьшения потребления ресурсов системой или повышения безопасности. В данной статье мы рассмотрим, как выполнить эту операцию.
Шаг 1: Открыть PowerShell
Для начала необходимо открыть PowerShell в качестве администратора. Для этого щелкните правой кнопкой мыши на кнопке «Пуск» и выберите «Windows PowerShell (администратор)».
Шаг 2: Выполнить команду
После открытия PowerShell вам нужно выполнить следующую команду:
dism /online /disable-feature /featurename:Server-Gui-Mgmt /quiet
Эта команда отключит графический интерфейс сервера (GUI) на вашем компьютере. Дождитесь завершения операции.
Шаг 3: Перезагрузить сервер
Чтобы изменения вступили в силу, необходимо перезагрузить сервер. Вы можете сделать это путем выполнения следующей команды в PowerShell:
shutdown /r /t 0
После перезагрузки вы заметите, что сервер больше не имеет графического интерфейса.
Шаг 4: Включение графического интерфейса (по желанию)
Если вам понадобится включить графический интерфейс сервера (GUI) в будущем, вы можете выполнить следующую команду в PowerShell:
dism /online /enable-feature /featurename:Server-Gui-Mgmt /quiet
После этого перезагрузите сервер, чтобы изменения вступили в силу.
Примечание: Убедитесь, что вы выполняете все команды с правами администратора и следуете инструкциям внимательно, чтобы избежать ошибок и непредвиденных проблем.
К сожалению, переключиться с сервер Ядро для рабочего стола (Графический интерфейс пользователя) или наоборот в Windows сервер 2016. Если вы хотите, чтобы ваша Windows сервер 2016 с возможностями рабочего стола (Графический интерфейс пользователя) тогда вы будете иметь чтобы выбрать его при установке Windows.
Чтобы включить графический интерфейс графической оболочки сервера с помощью Windows PowerShell на компьютере с серверным ядром:
- В командной строке введите powershell.
- В командной строке Windows PowerShell введите install-windowsfeature -name server-gui-mgmt-infra, server-gui-shell. …
- Установка функции может занять несколько минут.
Как включить графический интерфейс?
Для этого просто выполните следующее:
- Перейдите в режим командной строки: CTRL + ALT + F1.
- Остановить службу графического интерфейса пользователя в Ubuntu: sudo service lightdm stop. или если вы используете версию Ubuntu до 11.10, запустите: sudo service gdm stop.
Как мне найти свой графический интерфейс Windows?
Чтобы включить графический интерфейс графической оболочки сервера с помощью Windows PowerShell на компьютере с серверным ядром:
- В командной строке введите powershell.
- В командной строке Windows PowerShell введите install-windowsfeature -name server-gui-mgmt-infra, server-gui-shell. …
- Установка функции может занять несколько минут.
Можете ли вы запустить Windows Server 2016 без графического интерфейса?
Варианты без возможности рабочего стола: основные редакции. Они не будут предлагать графический интерфейс после установки. … Но если вы просто неправильно установили базовую версию Windows server 2016 и пожалели об этом, обнаружив, что все операции должны выполняться путем ввода команд.
Могу ли я добавить графический интерфейс к серверу?
Чтобы включить графический интерфейс графической оболочки сервера с помощью Windows PowerShell на компьютере с серверным ядром: В командной строке введите powershell. В командной строке Windows PowerShell введите установить-windowsfeature -name server-gui-mgmt-infra, server-gui-shell.
Какие есть версии Windows Server 2019?
Windows Server 2019 имеет три редакции: Essentials, Standard и Datacenter. Как следует из их названий, они предназначены для организаций разного размера и с различными требованиями к виртуализации и центрам обработки данных.
В чем разница между Server Core и GUI?
Server with Desktop Experience устанавливает стандартный графический интерфейс пользователя, обычно называемый GUI, и полный пакет инструментов для Windows Server 2019.… Хотя Core включает в себя большинство стандартных ролей сервера, он не учитывает многие функции поддержки, которые не требуются для наиболее распространенные приложения.
Можно ли запустить Sconfig в версии Windows Server с графическим интерфейсом пользователя?
В Windows Server 2012 существует четыре уровня пользовательского интерфейса: Ядро сервера: Никакие функции графического интерфейса не включены. Локальные операции можно выполнять только с помощью командной строки, инструмента настройки сервера (Sconfig) и Windows PowerShell. … Графическая оболочка сервера: включены все обычные функции графического интерфейса Windows Server.
Как я могу запустить Windows без графического интерфейса?
Windows Server Core представляет собой версию Windows без графического интерфейса пользователя: начиная с Windows Server 2008 Microsoft предлагала возможность установки операционной системы без больших частей графического интерфейса пользователя (GUI). Это означает, что при входе на сервер все, что вы получаете, — это командная строка.
Следует ли включить загрузку без графического интерфейса?
Если вы не понимаете разницы, вы, вероятно, вообще не захотите их использовать. В отсутствие загрузки с графическим интерфейсом просто избавляется от графической движущейся полосы во время запуска. Это экономит несколько секунд, но без этого вы не сможете узнать, зависла ли ваша система во время запуска.
Как отключить графический интерфейс загрузки?
Как я отключу заставка загрузки Windows?
- Нажмите клавишу Windows, введите msconfig и нажмите клавишу ВВОД.
- Нажмите Boot таб. Если у вас нет Boot вкладку, перейдите к следующему разделу.
- На Boot на вкладке установите флажок Нет Загрузка с графическим интерфейсом.
- Щелкните Применить, а затем ОК.
Есть ли у wsl2 графический интерфейс?
WSL 2 позволяет приложениям с графическим интерфейсом пользователя Linux чтобы чувствовать себя естественным и естественным для использования в Windows. Теперь вы можете интегрировать приложения Windows и Linux в свой рабочий процесс для беспрепятственного использования рабочего стола.
Как мне получить доступ к своему графическому интерфейсу в Windows 10?
Чтобы открыть значок или получить к нему доступ, просто Двойной клик в теме. Шаг 1 — Щелкните правой кнопкой мыши фон рабочего стола. Шаг 2 — Выберите «Создать» и «Ярлык». Шаг 3 — Найдите приложение или файл, для которого вы хотите создать ярлык.
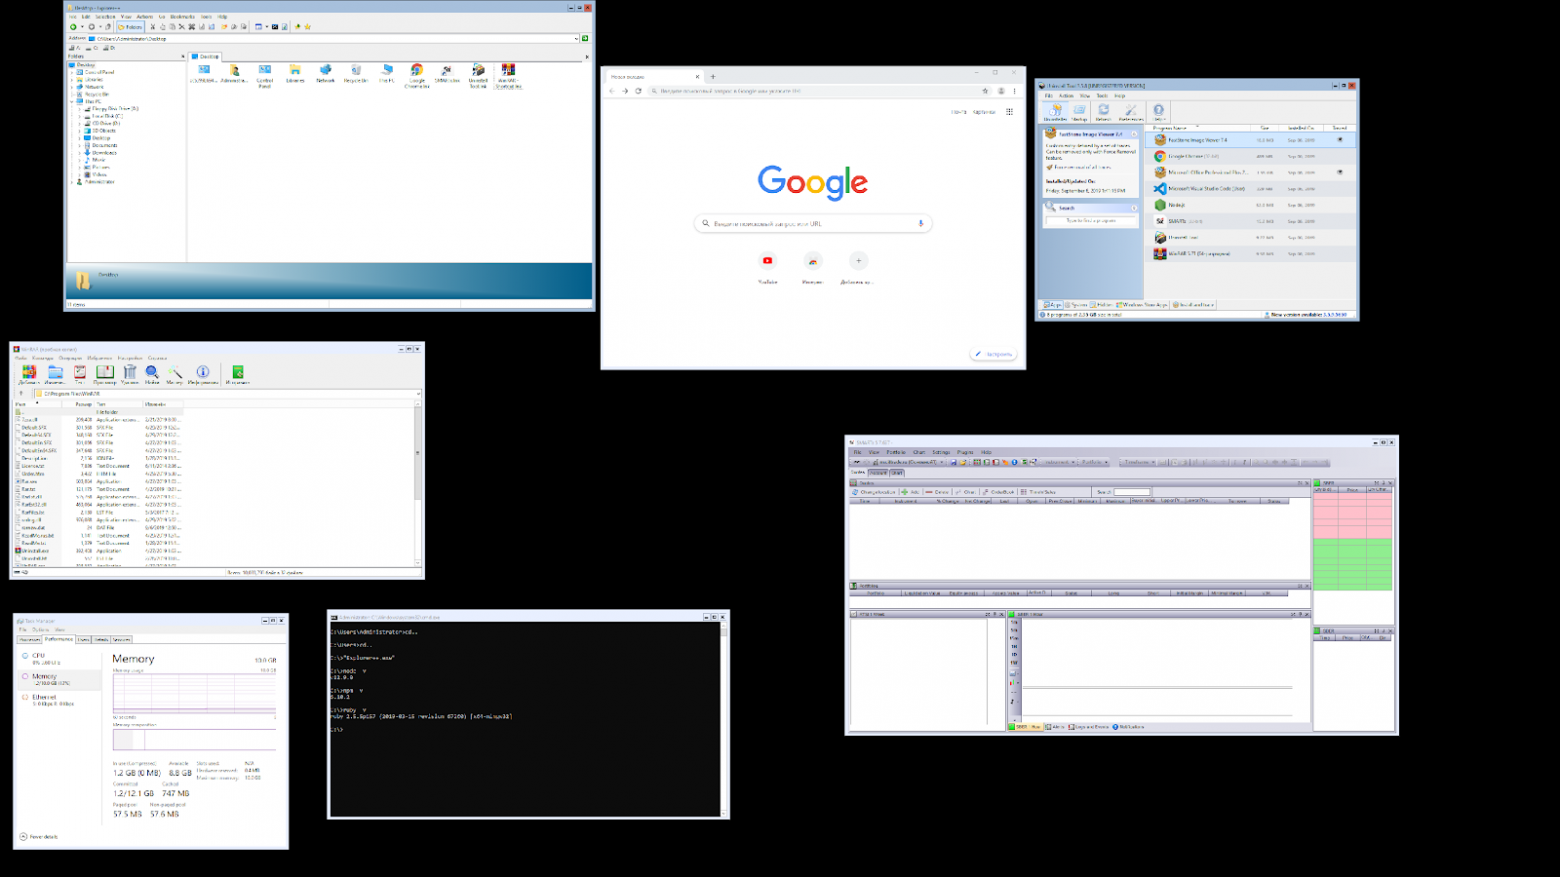
В прошлом нашем посте мы рассказали как готовим стандартные клиентские виртуальные машины и показали на примере нашего нового тарифа с Ultralight windows vds за 99 рублей, как мы создавали стандартный образ Windows Server 2019 Core.
В службу поддержки стали поступать заявки как работать с Server 2019 Core без привычной графической оболочки. Мы решили показать работу с Windows Server 2019 Core и как установить на него GUI.

Не повторяйте это на рабочих машинах, не используйте Server Core как рабочий стол, отключите RDP, обезопасьте свою информационную систему, именно безопасность — это главная фишка «Core» инсталляции.
В одной из следующих наших статей мы рассмотрим таблицу совместимости программ с Windows Server Core. В этой статье мы затронем то, как установить оболочку.
Оболочка сторонними средствами
1. Сложный, но наиболее экономичный способ
В Server Core из коробки нет привычного нам explorer.exe, чтобы облегчить нам жизнь, мы скачаем explorer++. Он заменяет все, что умеет оригинальный explorer. Рассматривался только explorer++, но подойдет почти любой файловый менеджер, в том числе Total Commander, FAR Manager и другие.
Скачиваем файлы.
Сначала нам нужно скачать файл на сервер. Это можно сделать через SMB (общую папку), Windows Admin Center и Invoke-WebRequest, он работает с параметром -UseBasicParsing.
Invoke-WebRequest -UseBasicParsing -Uri 'https://website.com/file.exe' -OutFile C:UsersAdministratorDownloadsfile.exeГде -uri это URL файла, а -OutFile полный путь куда его скачивать, указывая расширение файла и
C помощью Powershell:
На сервере создаём новую папку:
New-Item -Path 'C:OurCoolFiles' -ItemType DirectoryРасшариваем общую папку:
New-SmbShare -Path 'C:OurCoolFiles' -FullAccess Administrator
-Name OurCoolShare
На вашем ПК папка подключается как сетевой диск.

Через Windows Admin Center создаем новую папку выбрав пункт в меню.
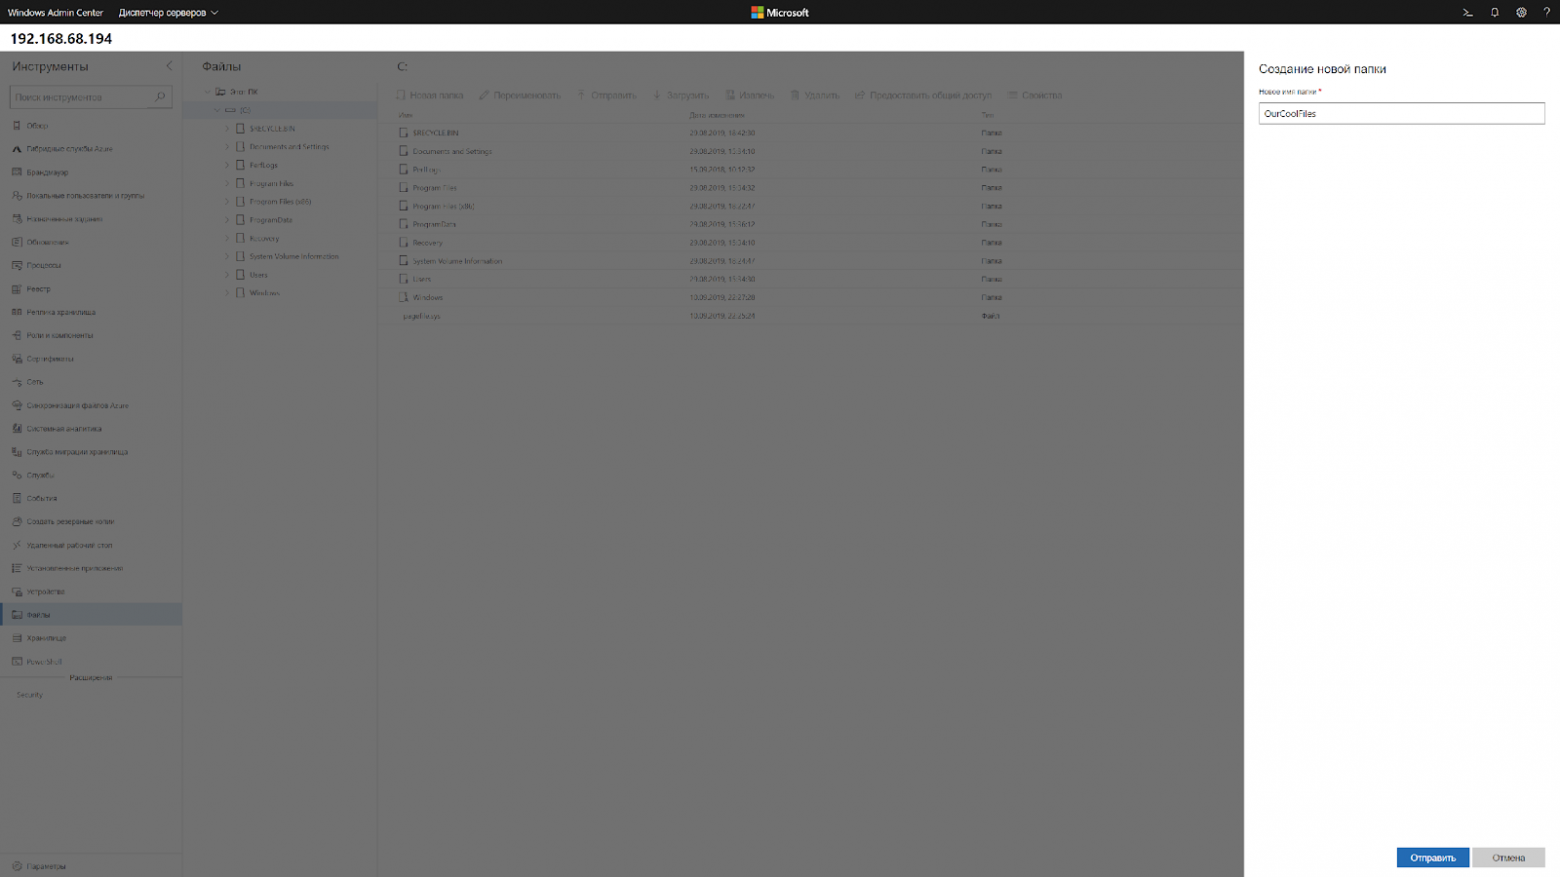
Переходим в общую папку и жмем кнопку отправить, выбираем файл.

Добавляем оболочку в планировщик.
Если вы не хотите запускать оболочку вручную при каждом входе в систему, то нужно добавить её в планировщик задач.
$A = New-ScheduledTaskAction -Execute "C:OurCoolFilesexplorer++.exe"
$T = New-ScheduledTaskTrigger -AtLogon
$P = New-ScheduledTaskPrincipal "localAdministrator"
$S = New-ScheduledTaskSettingsSet
$D = New-ScheduledTask -Action $A -Principal $P -Trigger $T -Settings $S
Register-ScheduledTask StartExplorer -InputObject $D
Без планировщика можно запустить через CMD:
CD C:OurCoolFilesExplorer++.exeСпособ 2. Запускаем родной Explorer
Remember, no GUI
Server Core App Compatibility Feature on Demand (FOD), вернет в систему: MMC, Eventvwr, PerfMon, Resmon, Explorer.exe и даже Powershell ISE. Подробнее можете ознакомиться на MSDN. Существующий набор ролей и компонентов он не расширяет.
Запустите Powershell и введите следующую команду:
Add-WindowsCapability -Online -Name ServerCore.AppCompatibility~~~~0.0.1.0Затем перезагрузите сервер:
Restart-Computer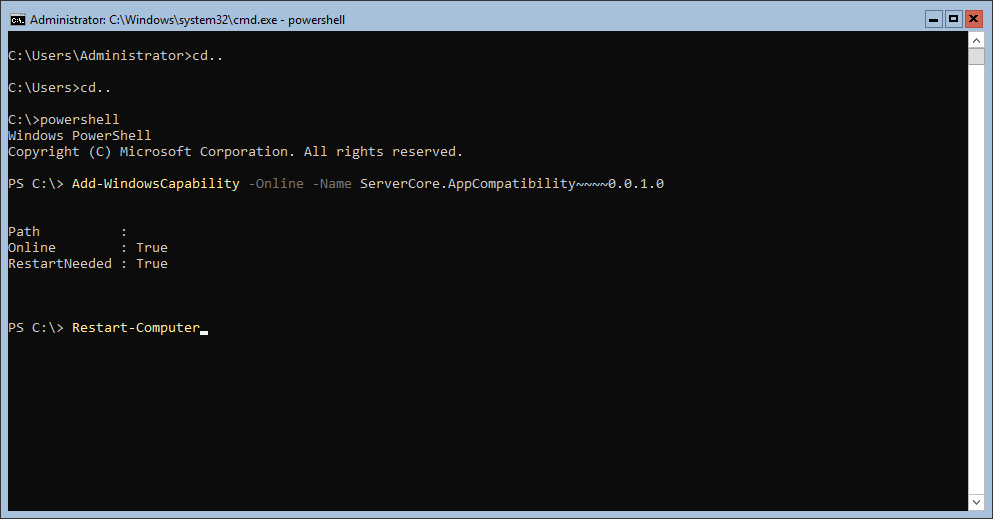
После этого вы сможете запускать даже Microsoft Office, но потеряете примерно 200 мегабайт ОЗУ навсегда, даже если в системе нет активных пользователей.

Windows Server 2019 c установленным Features on Demand
Windows Server 2019 CORE
На этом всё. В следующей статье мы рассмотрим таблицу совместимости программ с Windows Server Core.
Предлагаем обновлённый тариф UltraLite Windows VDS за 99 рублей с установленной Windows Server 2019 Core.

At Microsoft Ignite 2015 in Chicago, Microsoft unveiled the next preview of Windows Server. In the latest version, not only is the GUI not the default, but it also isn’t installed at all without additional post-install steps. In this tutorial, I’ll show you how you can enable the GUI for those applications that still require a graphical user interface in Windows Server 2016.
Contents
- Install the GUI on Server 2016 “MinShell”
- Install the GUI on Server Core
- To install the GUI or not?
- Author
- Recent Posts
Kyle Beckman works as a systems administrator in Atlanta, GA supporting Office 365 in higher education. He has 17+ years of systems administration experience.
If you’ve taken the time to install the latest build of Windows Server Technical Preview 2, you may have noticed that the graphical user interface (GUI) is no longer an option in a default install. When you’re prompted to select the operating system you want to install, you have two options.
Windows Server 2016 – Select the operating system you want to install
The first option, Windows Server Technical Preview 2 (the verbiage will most likely be replaced with Windows Server 2016 when the product is eventually released) is the traditional Server Core install that doesn’t include the GUI.
Windows Server 2016 Server Core
Just to show you how hardcore and serious Microsoft is, the Control+Alt+Delete logon prompt sits in a command prompt box. I wouldn’t be surprised to see this one day go the way of UNIX/Linux and drop the window completely in favor of just straight text.
Ctrl+Alt+Delete logon screen on Windows Server 2016 Server Core
The second option, Windows Server Technical Preview 2 (with local admin tools), is the “MinShell” install that contains a minimal GUI that includes Server Manager and the other GUI administration tools, but no traditional desktop.
Windows Server 2016 running MinShell
Install the GUI on Server 2016 “MinShell”
If you’re running the MinShell version of Windows Server 2016 that includes Server Manager and the other GUI administrative tools, installing the full GUI is rather easy. At the command prompt that you get when you log in, type powershell and press Enter to run PowerShell. Then, run the following command:
Install-WindowsFeature Server-Gui-Shell -Restart
The first part is the Install-WindowsFeature PowerShell cmdlet that tells Windows to install a feature of Windows Server. The second part tells the cmdlet that you want to install the GUI. The last part tells Windows to automatically reboot after installing the feature. The reboot is required to finish the install; just be aware that adding -Restart will force the reboot immediately following the completion of the install.
Install the GUI on Windows Server 2016 “MinShell” using PowerShell
Install the GUI on Server Core
If you decided to install Server Core, you have slightly more work to do to get the GUI installed. If you run the PowerShell command we used in the MinShell version of Windows Server 2016, it will fail and you’ll get a pretty big error message with lots of red error text: “Install-WindowsFeature : The request to add or remove features on the specified server failed. Installation of one or more roles, role services, or features failed. The source files could not be found.”
Error installing the GUI on Windows Server 2016 Server Core
We can dig a little bit by running this PowerShell command:
Get-WindowsFeature *gui*
This will show us the installable GUI options on the server. As you can see in the screenshot below, the Install State is “Removed.” Because this is a Server Core install, options such as the GUI aren’t cached on the disk for quick install. Instead, we’ll have to access the OS install WIM file to install the GUI.
Looking at GUI options on Windows Server 2016 Server Core
In my example, I’m using a Hyper-V VM that has the Windows Server Technical Preview 2 ISO image connected to the DVD drive so I can access the install.wim file. To install the GUI, I run this command:
Install-WindowsFeature Server-Gui-Shell –Restart -Source wim:D:sourcesinstall.wim:4
Install the GUI on Windows Server 2016 Server Core using PowerShell
After a reboot on Windows Server 2016 MinShell or Server Core, you’ll be greeted by the full graphical user interface.
Windows Server 2016 with GUI enabled
To install the GUI or not?
Most, if not all, organizations still have server-based applications that don’t play well with Server Core and need the full GUI. In many cases, the management tools and agents that we use to manage those servers are the apps that need the GUI. Until more vendors catch up to Microsoft’s philosophy, we’ll still see lots of sysadmins installing the GUI on their servers.
In a perfect world, I’d love to see Microsoft embrace some of the Linux philosophy with respect to GUIs. If the GUI was something that ran only when we needed it, then Windows systems administrators could run the GUI whenever they needed to perform certain administrative functions or use applications that don’t support a pure command-line interface.
Subscribe to 4sysops newsletter!
That would also allow the GUI to remain in an offline mode when it wasn’t needed, and it could be patched without the need to constantly reboot the system for updates. As it stands today, the non-GUI version of Windows Server just looks like a GUI that’s been stripped of the Start menu/screen, Task Bar, File Explorer, and other useful GUI tools other than a few utilities. As for what the future holds for Windows Server, I don’t think the GUI will ever completely go away, but now is the time to start using and learning PowerShell before you’re left in the dust.
- Remove From My Forums
-
Question
-
Hi,
I have purchased Windows Server 2016 Standard/Datacenter Server Core Edition ( Volume license) . After installation only the command line is visible and no GUI is available. I tried enabling GUI using PS commands mentioned in https://4sysops.com/archives/how-to-install-the-gui-on-windows-server-2016/
Its not working as the GUI packages aren’t available.There is no Desktop Experience option available while installing. Is there any way we can enable GUI ?
All replies
-
-
Proposed as answer by
Monday, January 14, 2019 2:49 AM
-
Proposed as answer by
-
-
Proposed as answer by
otto wang
Monday, January 14, 2019 2:49 AM
-
Proposed as answer by
-
You can manage your Windows Server from a remote client computer with Remote Server Administration Tools installed.
https://www.microsoft.com/en-us/download/details.aspx?id=45520
Microsoft Certified Professional
[If a post helps to resolve your issue, please click the
«Mark as Answer» of that post or click
«Vote as helpful» button of that post. By marking a post as Answered or Helpful, you help others find the answer faster. ]-
Proposed as answer by
otto wang
Monday, January 14, 2019 2:49 AM
-
Proposed as answer by
-
Hi,
Just checking in to see if the information provided was helpful. Please let us know if you would like further assistance.
Best Regards,
Otto Wang
Please remember to mark the replies as answers if they help.
If you have feedback for TechNet Subscriber Support, contact
tnmff@microsoft.com. -
Hi,
Was your issue resolved?
If you resolved it using our solution, please «mark it as answer» to help other community members find the helpful reply quickly.
If you resolve it using your own solution, please share your experience and solution here. It will be very beneficial for other community members who have similar questions.
If no, please reply and tell us the current situation in order to provide further help.
Best Regards,
Otto
Wang
Please remember to mark the replies as answers if they help.
If you have feedback for TechNet Subscriber Support, contact
tnmff@microsoft.com.
Server Core 2016, установка и настройка.
В сегодняшней статье рассмотрим установку Windows Server 2016 в режиме Server Core, то есть, без графического интерфейса. Отсутствие графики позволит сэкономить ресурсы на серверах и уменьшит количество уязвимостей, количество обновлений и перезагрузок, к тому же графика там не особо и нужна, ведь управлять сервером можно через оснастки или Диспетчер серверов.
Установка Server Core 2016
Установка Server Core 2016 мало чем отличается от стандартной, графической версии, единственное, при установке выбираем режим без графики.
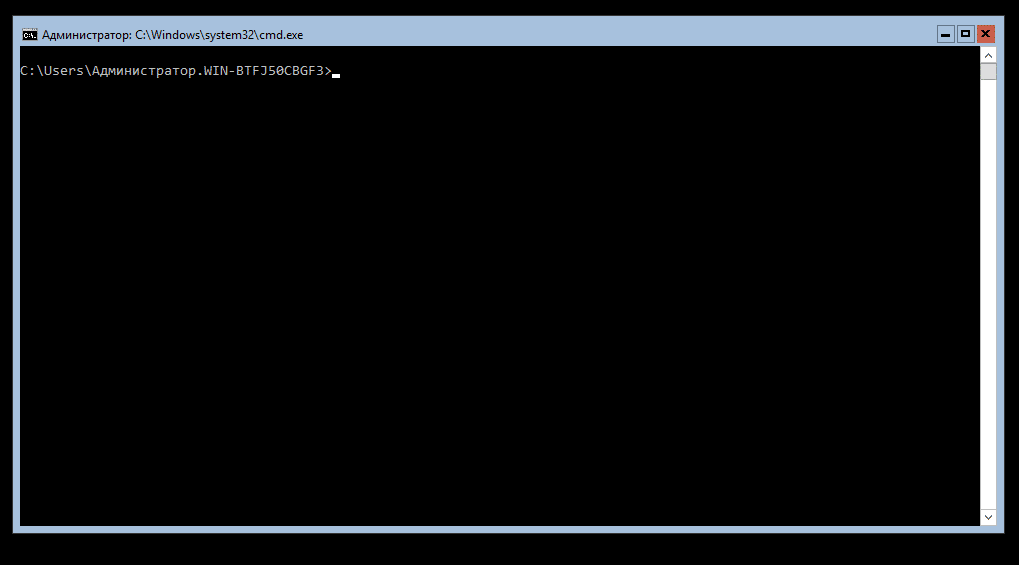
После установки системы вас встретит аскетичный интерфейс командной строки.
Первым делом установим пароль Администратора:
После ввода и подтверждения пароля
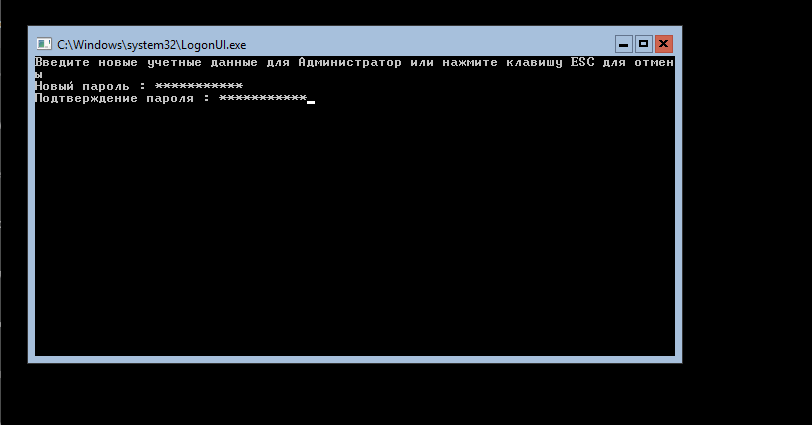
нам напишут об успешной смене пароля
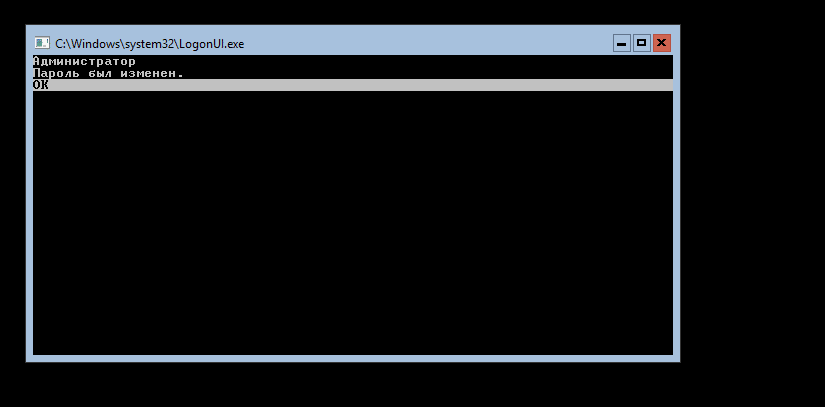
и мы войдем в систему.
Здесь я сделаю «лирическое отступление» и установлю Vmtools, поскольку устанавливаю Server Core на виртуальную машину VMware, и включу буфер обмена для виртуалки.
Установка Vmtools(при установке на vmware):
Подключить к виртуалке диск с Vmtools и выполнить команду <путь>setup64.exe
Дальше всё, как в графическом интерфейсе, стандартная установка Vmtools.
После того, как сервер перезагрузится, можно приступать к настройке.
Настройка Server Core 2016.
Заходим на сервер и вводим в командной строке sconfig.
Откроется окно настройки сервера.
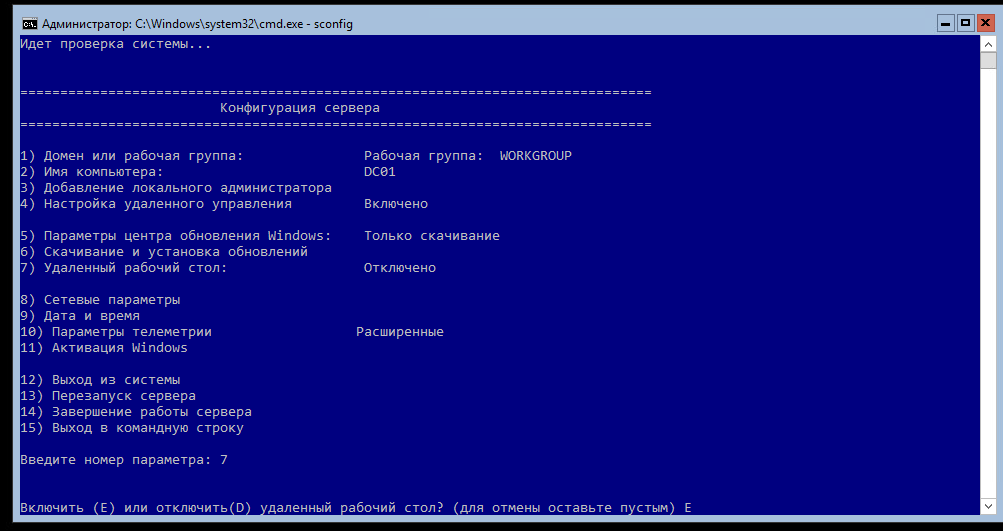
Здесь можно изменить имя сервера, сетевые настройки, включить доступ по РДП и т.д. Подробно описывать не буду — там все интуитивно понятно.
После изменения настроек, если требуется, перезагружаемся и продолжаем.
Замечу, что Powershell уже установлен в системе, и все действия можно выполнять через него, запустив его командой powershell.exe
Для того, чтобы разрешить удаленное управление нашим «ядерным» сервером, нужно выполнить на нем команду

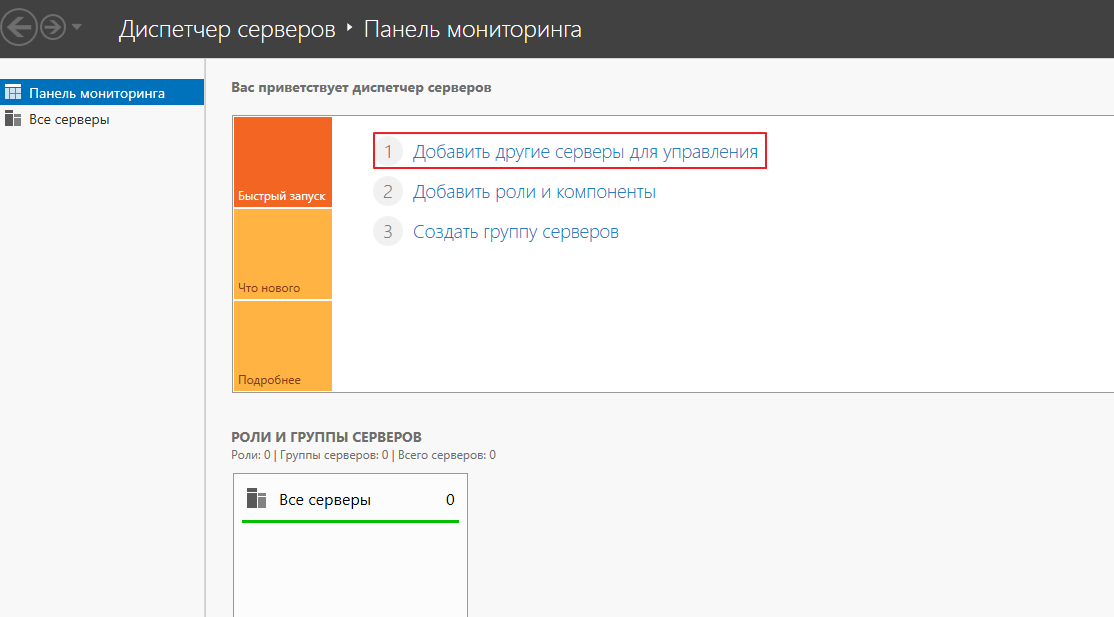
Теперь переходим на компьютер, с которого вы собираетесь управлять сервером Server Core, и на котором установлен Диспетчер серверов.
Откройте Диспетчер серверов и выберите «Добавить другие серверы для управления»:
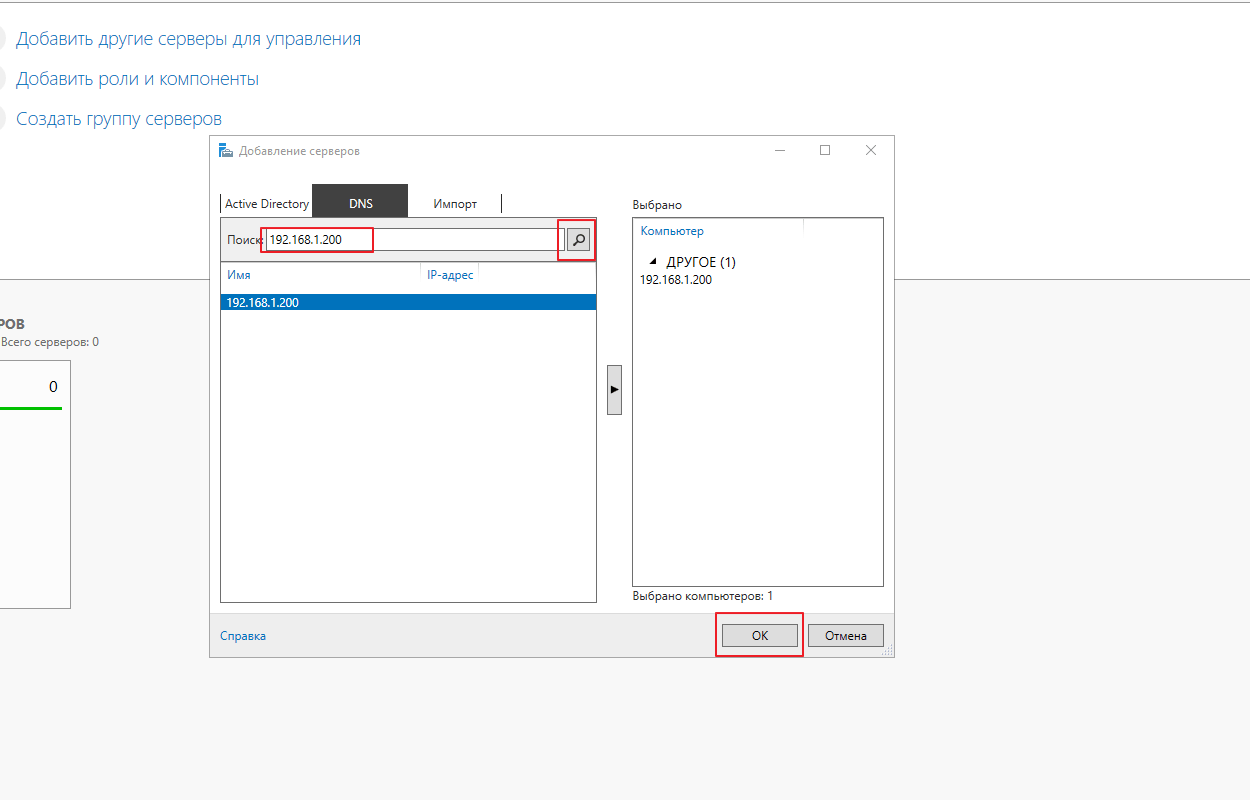
После этого, в открывшемся окне, выберите вкладку DNS и в поисковой строке вбейте имя или адрес вашего сервера Server Core
Если сервер у вас, как и у меня, не в домене, то, скорее всего, будут ошибки типа:
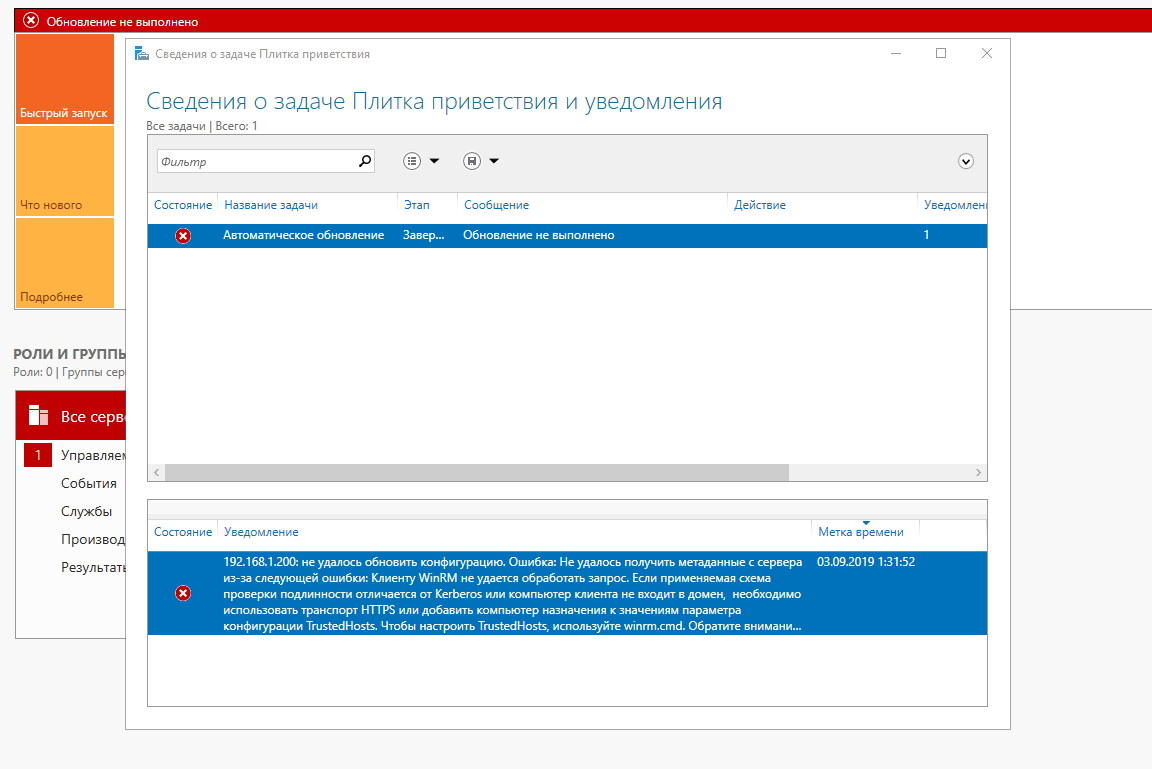
Для устранения ошибки, на компьютере, с которого подключаетесь, выполните команду:
|
winrm set winrm/config/client ‘@{TrustedHosts=»DC01″}’ |
— вместо DC01 введите имя или адрес вашего Server Core 2016
Другой вариант настройки Trusted Hosts — с помощью WSMan:
Посмотреть список доверенных хостов:
|
Get-Item WSMan:localhostClientTrustedHosts |
Указать доверенные хосты:
|
Set-Item WSMan:localhostClientTrustedHosts -Value ‘machineA,machineB’ |
Разрешить все хосты:
|
Set-Item WSMan:localhostClientTrustedHosts -Value ‘*’ |
Добавить хост к списку:
|
Set-Item WSMan:localhostClientTrustedHosts -Value ‘machineC’ -Concatenate |
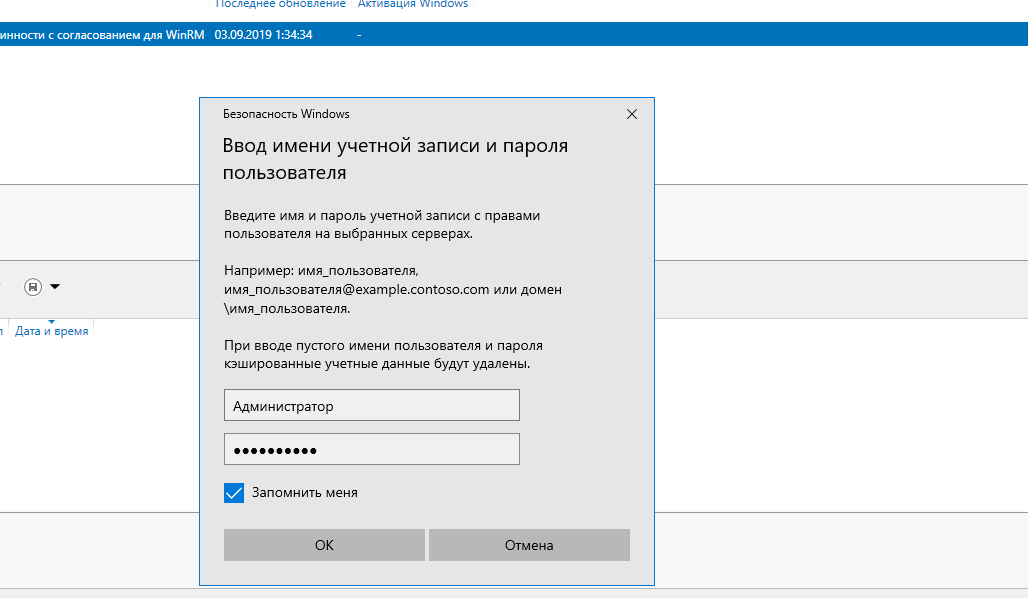
И для того, чтобы управлять сервером вне домена, нужно указать учетную запись с правами администратора на нем. Для этого щелкните правой кнопкой на вашем сервере в диспетчере серверов и выберите пункт «Управлять как…»
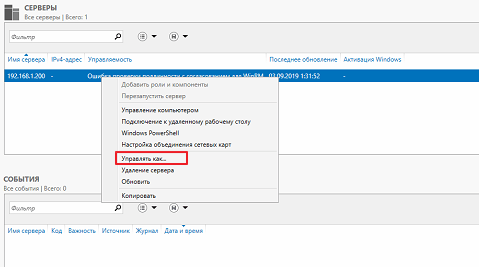
После этого введите учетные данные пользователя с правами администратора.
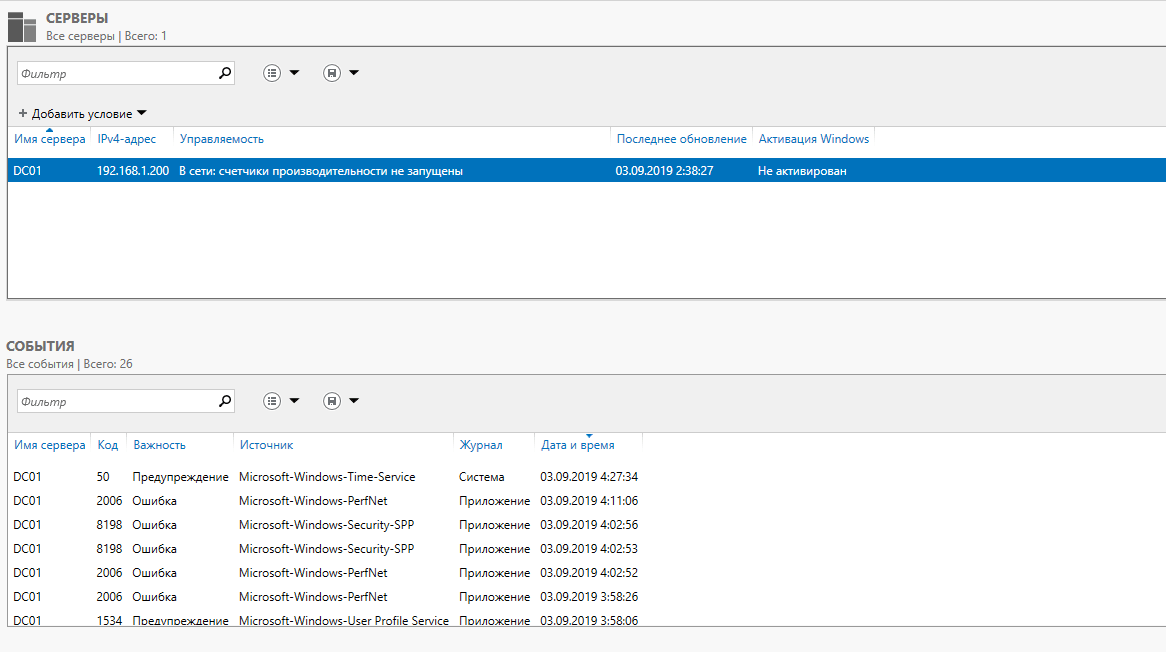
После всех проделанных манипуляций, ваш сервер в Диспетчере серверов должен выглядеть примерно так:
Подробнее о добавлении сервера в Диспетчер серверов: https://docs.microsoft.com/ru-ru/windows-server/administration/server-manager/add-servers-to-server-manager
На этом установку и первичную настройку Windows Server Core можно считать законченной. Теперь можно устанавливать на сервер нужные роли и администрировать его, практически, как обычный сервер.
P.S
С сожалением узнал, что в 2016 Server Core недоступны фишки, как в 2012, которые позволяли устанавливать и удалять графику:
Install-WindowsFeature Server-Gui-Mgmt-Infra,Server-Gui-Shell –Restart –Source c:mountdirwindowswinsxs
Install-WindowsFeature Server-Gui-Mgmt-Infra,Server-Gui-Shell –Restart
Uninstall-WindowsFeature Server-Gui-Mgmt-Infra -Restart
In today’s article, we will see a typical installation of Windows Server 2016 Desktop Experience, the ‘full’ version including the graphical user interface (GUI).
Before the installation
I mention the following for typical reasons as it is not self-evident for everyone.
- Check the system requirements and instructions given by Microsoft.
- Download the Windows Server 2016 installation ISO from the Evaluation Center, if you like.
- If you are going to install it on a physical machine then you have to burn it to a DVD or a USB flash drive. Personally, I prefer to do it with Rufus.
- You must select the DVD or USB as the boot device in the BIOS/UEFI settings.
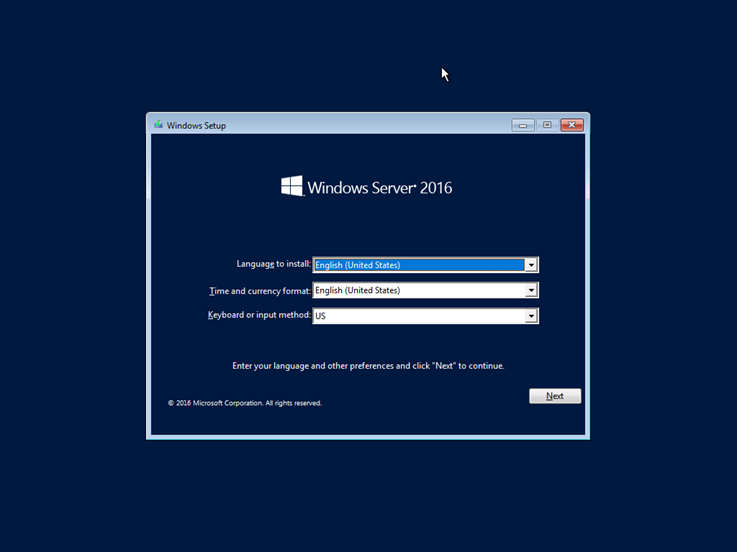
Select Language, Time, and keyboard language and click Next to continue.
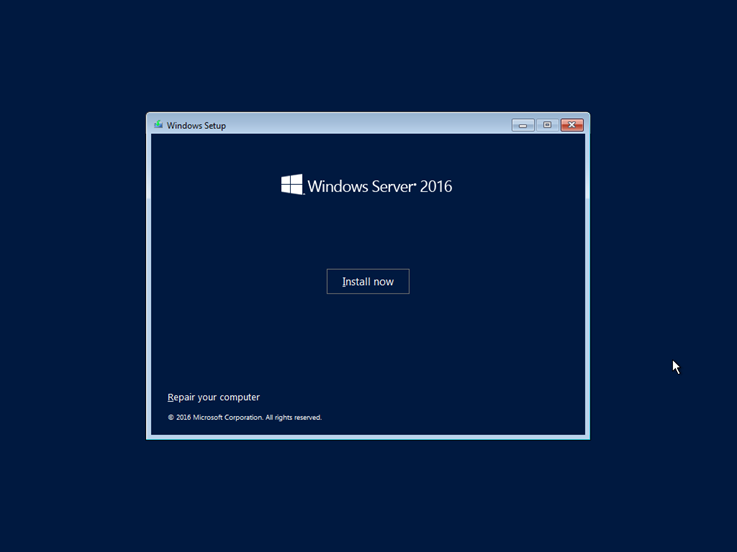
Click the Install now button to continue.
Here, select the version of Windows Server 2016 you are about to install. What you need to keep in mind is selecting the Desktop Experience version, which means the version with the graphical interface will be installed.

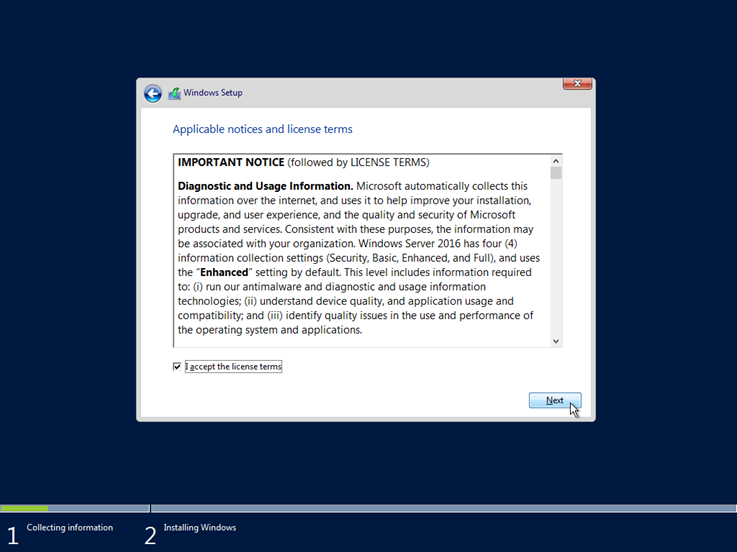
Accept the terms of use by selecting I accept license terms option and click Next to continue.
Since it is a clean installation rather than upgrading a previous version, click Custom: Install Windows only (advanced).

Select the disk to be installed in Windows Server 2016. At this point, you can create different partitions as well as load the respective drivers for the drives as long as required by the manufacturer. In a typical installation, you do not have to do anything more than simply selecting the disk.

The installation of Windows Server 2016 is in progress. You will have to wait a few minutes.

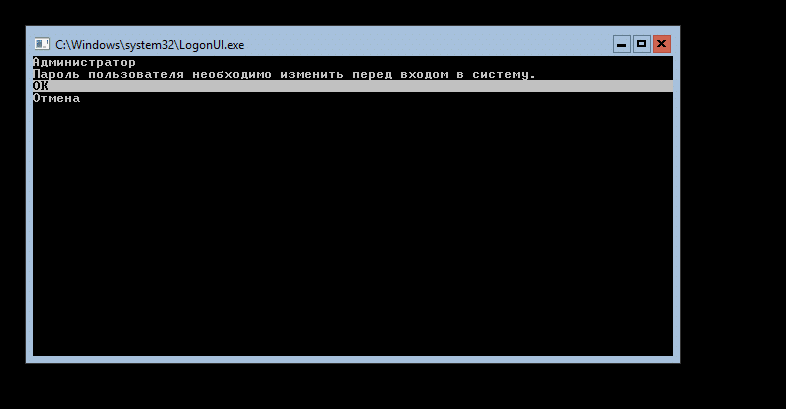
After restarting the server, you will be prompted to type the local administrator account password. Ensure that the password meets the basic complexity requirements.

Immediately after, the last actions will be performed and you will be ready to use Windows Server 2016. As you can see, by pressing the Ctrl + Alt + Delete key you can connect to the local administrator account you created in the previous step.

That’s it!
After you’ve finished installing Windows Server 2016, you can go ahead with some of the basic settings you’ll need to do first. Indicatively, the most common are:
- Set time, time zone, and date
- Change server name
- Change basic IPv4 network settings
- Join a local Active Directory domain

As you may noticed new server is coming out from Microsoft workshop – Windows Server 2016 – currently technical preview product. This server upon installation is little a bit different as it does not come with standard desktop or GUI and first thing what you will see is command prompt window. This server expect that you Admin will have a good hang of PowerShell and be able to manage all from command line.
Click inside the command prompt window and type in powershell – it will start PowerShell and now you can start play around.
C:UsersAdministrator>powershell
You should now notice the difference – PS in front of the prompt so you are now in PowerShell mode.
Lets list all gui available for the server:
PS C:UsersAdministrator>Get-WindowsFeature *gui*
You should see listed 3 items:
- Graphical Management Tools and Infrastructure
- Server Graphical Shell
- GUI for Windows Server Antimalware

Here is the one liner that will install for you the typical desktop environment on your Windows Server 2016:
PS C:UsersAdministrator>Install-WindowsFeature Server-Gui-shell -Restart
This command will install for you the Desktop experience on server and reboot server to make the changes. Once server is back you have same environment as you used to have in previous server versions.
In this post, we’gonna explain if it’s possible to Switch from Windows Server 2016 Core to GUI (Desktop Experience).

You may be also interested to check Windows Server 2016: Expand Virtual Machine Hard Disk & Extend the Operating System Drive.
Switch from Windows Server 2016 Core to Desktop Experience
-
1
Switch from Windows Server 2016 Core to Desktop Experience-
1.1
How to Convert from Windows Server 2016 Core to GUI? -
1.2
Is there any workaround to Switch from Windows Server 2016 Core to GUI Without Performing a Fresh Installation?
-
1.1
-
2
Install Windows Server 2016 Step by Step-
2.1
Windows Server 2016 Hardware Requirements -
2.2
Download Windows Server 2016 -
2.3
Windows Server 2016 Installation Steps
-
2.1
When I tried to install Windows Server 2016, I got the below dialog that ask me to select the operating system that I would like to install as shown below:
Actually, I have confused which option should I use
- Windows Server 2016 Standard or,
- Windows Server 2016 Standard (Desktop Experience).
Unfortunately, I selected the first option “Windows Server 2016 Standard“, after taking a long time to install the windows server 2016, it was the shock, I got the Windows Server 2016 console interface, not the normal Windows Server 2016 GUI Desktop Experience interface as shown below:

You might also like to read Convert from Windows Server 2019 Core to GUI
How to Convert from Windows Server 2016 Core to GUI?
Actually, In previous Windows Server releases like Windows Server 2012, 2008, we were able to add the Windows Server GUI functionality to the Windows Server core without performing a fresh installation.
But, In Windows Server 2016 and later, it’s no longer doable to convert from Windows Server 2016 core to Windows Server 2016 with Desktop experience and vice versa!
Is there any workaround to Switch from Windows Server 2016 Core to GUI Without Performing a Fresh Installation?
Unfortunately, there is no workaround to convert from Windows Server 2016 Core to GUI, the only available solution is performing a fresh installation from scratch again!
Install Windows Server 2016 Step by Step
In this section, we’ll explain how to install Windows Server 2016 Standard with GUI by doing the following:
- Exploring Windows Server 2016 Hardware Requirements.
- Download Windows Server 2016.
- Install Windows Server 2016.
Windows Server 2016 Hardware Requirements
The hardware requirements for Windows Server 2016 with desktop experience is differ from Windows Server 2016 Core.
Below is the minimum hardware requirements for Windows Server 2016 with desktop experience:
- CPU: 1.4 GHz 64-bit processor.
- RAM: 2 GB, (512 for core)
- Disk: 32 GB as absolute minimum value, (4 GB for core).
Download Windows Server 2016
Below are the official links to download Windows Server 2016 as well as Windows Server 2019.
- Download Windows Server 2016 Evaluation ISO.
- Download Windows Server 2019 Evaluation ISO.
The Windows Server 2016 Evaluation Period is 180 days that can be extended 6 times for additional 180 days.
To extend Windows Server 2016 Evaluation Period, please check Evaluation Period expired for Windows Server 2016, How to extend it?
Windows Server 2016 Installation Steps
- Mount your Windows Server 2016 ISO image.
- Run the Setup file.
- Select your language, time, currency format, and input method.

- Click on “Install now” button to start Windows Server 2016 installation.

- Select, “Windows Server 2016 Standard (Desktop Experience)“, then click “Next”.

Note: Windows Server 2016 Standard option refers to the core!
- Accept the license terms and click “Next”.

- Select “Install Windows Only“.

It’s strongly recommended to perform a clean installation for Windows Server 2016.
- The Windows Server 2016 installation will start!

- Finally, the Windows Server 2016 GUI has been installed with desktop experience as shown below!

Conclusion
Unlike previous Windows Server releases, you can’t convert from Windows Server 2016 core to GUI and vice versa, the only solution is performing a fresh installation!
So in this post, we have learned how to download and install Windows Server 2016 and Which option should we select during Windows Server installation to install Windows Server 2016 with Desktop Experience instead of Windows Server 2016 Core.
Applies To
- Windows Server 2019.
- Windows Server 2016.
You might also like to read
- Extend Volume option is disabled within Disk Management in Windows Server 2012.
- Error extending volume: Size Not Supported, During extending Operating System partition In Windows Server 2012.
- Windows failed to start: The Boot Configuration Data for your PC is missing or contains errors.
- Extend SQL Server Evaluation Period.
Have a Question?
If you have any related questions, please don’t hesitate to ask it at deBUG.to Community.