-
Question
-
I am trying to install windows 2012 R2 standard Server. I completed the installation windows is not booting properly . After entering the user name and password only c:\user\administrator display in the screen, if i type exit on it then only a
black screen and mouse pointer display. not sure what to do from here
All replies
-
1. it’s usual for server core
2. try to run server manager (just type servermanager in cmd)
3. try to view installed GUI feature using powershell
type powershell
get-windowsfeature *GUI*
verify that you have Server-Gui-Mgmt-Infra and Server-Gui-Shell installed
4. if 3 is false , install GUI features
Install-WindowsFeature Server-Gui-Mgmt-Infra,Server-Gui-Shell -Restart
Roman Levchenko, MCITP, MCTS http://www.rlevchenko.com
-
Edited by
Thursday, February 27, 2014 6:13 AM
-
Proposed as answer by
R.LevchenkoMVP
Thursday, February 27, 2014 6:37 AM
-
Edited by
-
-
Proposed as answer by
Agasthya.S.P
Wednesday, February 3, 2016 8:23 PM
-
Proposed as answer by
-
hi,
cmd > powershell
In powershell:
Install-WindowsFeature Server-Gui-Mgmt-Infra,Server-Gui-Shell -Restart
-
Neither worked, all unrecognized
-
it’s installing, I’m must have typed something wrong
-
It’s installing now, I must have typed something wrong
-
If you found a post to be the answer, please mark it appropriately. It helps to keep the forums tidy by highlighting which response is the answer to the question. It helps future readers. Thanks!
— Chris Ream —
**Remember, if you find a post that is helpful, or is the answer, please mark it appropriately.**
-
I’m back to the same place. I need to remove powershell, so I can install GUI version of Active Directory users and computers
-
No, you don’t need to remove PowerShell.
Do you want a core installation or a GUI installation? The default installation will be core, i.e. no GUI installed. But, it is possible to install the GUI using PowerShell or DISM afterwards. From the difficulties you are experiencing,
I would recommend that you either re-do your installation one more time, making sure you have selected the option to install with GUI instead of taking the default which is the core installation.The fact that you say that the command recommended by Roman returns unrecognized to you, I would ask if you are sure you are installing Windows Server and not Hyper-V Server. Windows Server would recognize the command Roman provided. What’s the
name of the ISO file you are using for installation?
.:|:.:|:. tim
-
Proposed as answer by
Susie Long
Wednesday, March 5, 2014 9:00 AM
-
Proposed as answer by
-
Hi,
Do you have any progresses on this issue by now?
Please feel free to let us know if this issue persists.
Best Regards,
Amy Wang
-
I want to run Windows Server 2012 normally, with GUI
It was installed and I was going through installing Active Directory Domain Services and upon finishing I did not see Active Directory Users and Computers, upon rebooting I get the cmd prompt and can’t go any farther
-
Look you should install the server fresh but do not chose core as they only installs the basic core of Hyper-V for a server farm
The above doesn’t make any sense at all.
-
Corret Paul in Hyper-V we can only install basic core.
Thanks
NM
Warm Regards, Niraj Mehta
-
thanks for this info. worked great!
-
hi
i am still seeing this problem which i have told you before plz resolve this issue which i am looking on my desktop. i want to say again that when i boot my server microsoft window server 2012 but it still shows me a window where it shows powershell dos
prompt message still. plz can you explain that which command i must apply that clear my desktop and i may use my serverRegards
iffi
-
iffi,
You have not provided any information about what you installed or your configuration. Have you tried the various commands that are shown in the responses to this post? Those commands are what will add the GUI to a Windows Server 2012 R2 core
installation. If you have installed Hyper-V Server, there is nothing you can do to create a GUI. But we don’t have any information about your installation.
. : | : . : | : . tim
-
I managed to have this happen to me after installing the full GUI version of the OS. Don’t ask how, its embarrassing! lol
Anyway, PowerShell would not function so Install-Feature was not an option. Server manager would not open so, enabling features with the UI was not an option. In fact, nothing would run from the command prompt except taskmgr.
The solution was to run the following command from the command prompt that had opened when I logged into the server:
Dism /online /enable-feature /featurename:Server-Gui-Mgmt /featurename:Server-Gui-Shell /featurename:ServerCore-FullServer /all
This installed the GUI features and all the requisites for those features.
Once the installation is complete, which will take quite awhile, reboot the server with the command
shutdown /r /t 0 This shuts the server down for reboot with a wait time of zero (immediate).
You should be back in business after the reboot.
-
Edited by
EVC
Tuesday, January 26, 2016 3:23 PM -
Proposed as answer by
Vimal Thiagaraj
Tuesday, February 9, 2016 7:10 AM
-
Edited by
-
Thanks for the post. This did work out for me perfectly.
-
Does anyone know the root cause of this? I have ran into the exact same situation that you described. Currently running the command you listed, and it is working.
-
It may be embarrassing, but I’m seeing this issue as well and perhaps I could benefit from the info.
-
I think it has something to do with the loss or corruption of the .Net 4 feature. Just my best guess.
-
I ran into the same problem and found it easier to download the non-core version and upgrade.
R, J
-
I ran into the same problem and found it easier to download the non-core version and upgrade.
R, J
Where did you find that? It might be a good idea to include that info.
Bill
-
thing is, it WAS a full install. I believe the removal of dot net 4.5 is the key. Engineer installing some software removed 4.5 and that’s when the issue happens. The above DISM command cleared it up.
-
If my solution worked please put a vote for it so others know to use it. Someone just mentioned .Net 4 as well. I’m really thinking this has something to do with .Net 4 being removed. When this happened to me, I was messing around with
.Net 4 due to a compatibility issue with a piece of software. -
i had the same problem here . i tried to remove the .net framework 4.5 on server manager than the server rebooted and came with the same issue. only started in command prompt. nothing is available. not powershell not server manager. if you do ctrl alt end
you can go to task manager and start firefox.exe for example you can download .netframework install it but after reboot stays the same. you can try install .netframework on prompt command but wont work. i used the command above listed
Dism /online /enable-feature /featurename:Server-Gui-Mgmt /featurename:Server-Gui-Shell /featurename:ServerCore-FullServer /all
after a few seconds asked if i wanted to rebbot. said yes and voila. everithing is back.thank you so much guys…
-
Proposed as answer by
Tryggr
Tuesday, June 28, 2016 3:22 PM -
Unproposed as answer by
Tryggr
Tuesday, June 28, 2016 3:23 PM
-
Proposed as answer by
-
Thanks a Lot EVC… It Worked for me ..Appreciate your Help …!!!!!
-
I work in a LAB with an MSDN license. I’m probably the wrong person to ask that question. On that note, if you have an MSDN subcription, just download one that isn’t a core and install over the top of the core to give it a GUI (the easy way). As shown
here, there are other ways. I did not find them particularly convenient other than it forced me to learn a bunch of basic Powershell commands (such as Restart-Computer, Stop-Computer, and so on).
R, J
-
Edited by
Crakdkorn
Sunday, June 5, 2016 6:57 PM
-
Edited by
-
Tried the reinstallation of GUI twice and still back at the black screen with cmd window. Restarted several times. The OS in question is Windows Server 2012. Please help.
Regards,
AR
-
Tried the reinstallation of GUI twice and still back at the black screen with cmd window. Restarted several times. The OS in question is Windows Server 2012. Please help.
Regards,
AR
-
Have you followed the suggestions in the old post? By replying to an old post, it is hard to tell what you have done.
From where did you obtain the distribution you are using? During the installation, are you sure you did NOT select the default installation option? There are four selections — Std Core, Std, Datacenter Core, and Datacenter. If you accept
the default, you will get core, which means no GUI.What steps did you follow?
. : | : . : | : . tim
-
I had to run the DISM command that EVC proposed, which took an extremely long time to run. It hangs on black screens for 5+ minutes, so it looks concerning. But with patience it finally completed. Once it came back up the Server Manager was very slow
to load, but did come up. I still didn’t have the full GUI though. Checked via powershell and the 2 gui features were «available» but not installed. Followed the steps from
R.Levchenko and now everything is back up and running. Thanks everyone. -
This was the one for me. Many thanks!
-
Dism /online /enable-feature /featurename:Server-Gui-Mgmt /featurename:Server-Gui-Shell /featurename:ServerCore-FullServer /all
This resolved my issue thanks Vimalanathan Sigamani T
dd
-
Edited by
Grandotto
Thursday, August 18, 2016 12:16 AM
-
Edited by
-
Dism /online /enable-feature /featurename:Server-Gui-Mgmt
/featurename:Server-Gui-Shell /featurename:ServerCore-FullServer /allThis worked for me as well. Thanks guys
-
Thanks Vimalanathan,
This really helped me and fixed the issue.
-
This worked perfectly for me. Seems the admin that I gave the server to might have removed dot net 4.5.
jimmypi
-
I managed to have this happen to me after installing the full GUI version of the OS. Don’t ask how, its embarrassing! lol
Anyway, PowerShell would not function so Install-Feature was not an option. Server manager would not open so, enabling features with the UI was not an option. In fact, nothing would run from the command prompt except taskmgr.
The solution was to run the following command from the command prompt that had opened when I logged into the server:
Dism /online /enable-feature /featurename:Server-Gui-Mgmt /featurename:Server-Gui-Shell /featurename:ServerCore-FullServer /all
This installed the GUI features and all the requisites for those features.
Once the installation is complete, which will take quite awhile, reboot the server with the command
shutdown /r /t 0 This shuts the server down for reboot with a wait time of zero (immediate).
You should be back in business after the reboot.
This seems to be working for me now. The previous commands did not work. But this is actually installing now.
I agree that it has something to do with the removal of .NET 4.0/4.5. I was trying to uninstall/reinstall IIS because a contractor royally screwed up the server by installing Apache. We use IIS on everything, so I’m trying to undo everything he did. Apparently
I unintentionally (not knowingly) removed a vital piece of the Server puzzle by uninstalling (removing) .NET 3.5 and .NET 4.5 when I uninstalled IIS. Everything was fine until the reboot.TL;DR
If you blew out .NET 4.5, EVC’s solution is the one you need. Forget everything else in this thread.
-
Edited by
Kim Dorris
Saturday, October 15, 2016 4:09 AM
correct typos
-
Edited by
-
You’re right, I did remove .NET 4 feature and suddenly all were gone except for Command Prompt. Your answer do the trick. Thanks.
-
Wow, it works. The latest release will prompt to restart the server. Someone ruined the .NET Framework 4.5 and after uninstalling the .NET Framework, I ruined the server LOL. Thanks EVC.
-
I agree. same thing happened here too.
-
if this does not work. try this:
https://www.linkedin.com/pulse/20140618170857-12975178-procedure-to-recover-gui-in-windows-2012-and-2012r2-net-framework-feature-dependency-in-windows-2012-2012-r2
-
if this does not work, try this:
https://www.linkedin.com/pulse/20140618170857-12975178-procedure-to-recover-gui-in-windows-2012-and-2012r2-net-framework-feature-dependency-in-windows-2012-2012-r2
-
Thank you for this post! A year later and it saved me.
-
Thanks guys… I was also facing same issue and tried this solution.. It perfectly worked for me.
Thanks again.
-
Thanks a ton for the solution, it saved my day.
-
I had this problem today I try the steps Don’t work for me
-
Yes, that was exactly what happened to me. Trying to install .NET 3.5 was not working, I thought had something to do with having a newer version and I went and removed .NET 4.0. BOOM no more GUI. Thanks for the solutions. It worked like a charm.
-
You can do it in 4 simple steps using powershell.
Just follow the below instructions and you are done.
1. c:\user\administrator\ipowershell
2. c:\user\administrator\Import-Module
Servermanager3.
c:\user\administrator\Install-WindowsFeature
Server-Gui-Mgmt-Infra,Server-Gui-Shell –Source wim:d:\sources\install.wim:4
4.c:\user\administrator\shutdown
/r /t 0 (Restart the server)Thank me Later

-
Edited by
RaviBhati
Thursday, May 31, 2018 7:33 AM
-
Edited by
-
The cmd mentioned before
cmd > powershell
In powershell:
Install-WindowsFeature Server-Gui-Mgmt-Infra,Server-Gui-Shell -Restart
It worked for me. Just be patient. It takes about 15 minutes after it gets stuck at 68% to process it. Thank you! Nivi
-
Edited by
TechSuperMario
Tuesday, October 22, 2019 12:46 AM
-
Edited by

-
Question
-
I am trying to install windows 2012 R2 standard Server. I completed the installation windows is not booting properly . After entering the user name and password only c:\user\administrator display in the screen, if i type exit on it then only a
black screen and mouse pointer display. not sure what to do from here
All replies
-
1. it’s usual for server core
2. try to run server manager (just type servermanager in cmd)
3. try to view installed GUI feature using powershell
type powershell
get-windowsfeature *GUI*
verify that you have Server-Gui-Mgmt-Infra and Server-Gui-Shell installed
4. if 3 is false , install GUI features
Install-WindowsFeature Server-Gui-Mgmt-Infra,Server-Gui-Shell -Restart
Roman Levchenko, MCITP, MCTS http://www.rlevchenko.com
-
Edited by
Thursday, February 27, 2014 6:13 AM
-
Proposed as answer by
R.LevchenkoMVP
Thursday, February 27, 2014 6:37 AM
-
Edited by
-
-
Proposed as answer by
Agasthya.S.P
Wednesday, February 3, 2016 8:23 PM
-
Proposed as answer by
-
hi,
cmd > powershell
In powershell:
Install-WindowsFeature Server-Gui-Mgmt-Infra,Server-Gui-Shell -Restart
-
Neither worked, all unrecognized
-
it’s installing, I’m must have typed something wrong
-
It’s installing now, I must have typed something wrong
-
If you found a post to be the answer, please mark it appropriately. It helps to keep the forums tidy by highlighting which response is the answer to the question. It helps future readers. Thanks!
— Chris Ream —
**Remember, if you find a post that is helpful, or is the answer, please mark it appropriately.**
-
I’m back to the same place. I need to remove powershell, so I can install GUI version of Active Directory users and computers
-
No, you don’t need to remove PowerShell.
Do you want a core installation or a GUI installation? The default installation will be core, i.e. no GUI installed. But, it is possible to install the GUI using PowerShell or DISM afterwards. From the difficulties you are experiencing,
I would recommend that you either re-do your installation one more time, making sure you have selected the option to install with GUI instead of taking the default which is the core installation.The fact that you say that the command recommended by Roman returns unrecognized to you, I would ask if you are sure you are installing Windows Server and not Hyper-V Server. Windows Server would recognize the command Roman provided. What’s the
name of the ISO file you are using for installation?
.:|:.:|:. tim
-
Proposed as answer by
Susie Long
Wednesday, March 5, 2014 9:00 AM
-
Proposed as answer by
-
Hi,
Do you have any progresses on this issue by now?
Please feel free to let us know if this issue persists.
Best Regards,
Amy Wang
-
I want to run Windows Server 2012 normally, with GUI
It was installed and I was going through installing Active Directory Domain Services and upon finishing I did not see Active Directory Users and Computers, upon rebooting I get the cmd prompt and can’t go any farther
-
Look you should install the server fresh but do not chose core as they only installs the basic core of Hyper-V for a server farm
The above doesn’t make any sense at all.
-
Corret Paul in Hyper-V we can only install basic core.
Thanks
NM
Warm Regards, Niraj Mehta
-
thanks for this info. worked great!
-
hi
i am still seeing this problem which i have told you before plz resolve this issue which i am looking on my desktop. i want to say again that when i boot my server microsoft window server 2012 but it still shows me a window where it shows powershell dos
prompt message still. plz can you explain that which command i must apply that clear my desktop and i may use my serverRegards
iffi
-
hi
i am still seeing this problem which i have told you before plz resolve this issue which i am looking on my desktop. i want to say again that when i boot my server microsoft window server 2012 but it still shows me a window where it shows powershell dos
prompt message still. plz can you explain that which command i must apply that clear my desktop and i may use my serverRegards
iffi
-
iffi,
You have not provided any information about what you installed or your configuration. Have you tried the various commands that are shown in the responses to this post? Those commands are what will add the GUI to a Windows Server 2012 R2 core
installation. If you have installed Hyper-V Server, there is nothing you can do to create a GUI. But we don’t have any information about your installation.
. : | : . : | : . tim
-
I managed to have this happen to me after installing the full GUI version of the OS. Don’t ask how, its embarrassing! lol
Anyway, PowerShell would not function so Install-Feature was not an option. Server manager would not open so, enabling features with the UI was not an option. In fact, nothing would run from the command prompt except taskmgr.
The solution was to run the following command from the command prompt that had opened when I logged into the server:
Dism /online /enable-feature /featurename:Server-Gui-Mgmt /featurename:Server-Gui-Shell /featurename:ServerCore-FullServer /all
This installed the GUI features and all the requisites for those features.
Once the installation is complete, which will take quite awhile, reboot the server with the command
shutdown /r /t 0 This shuts the server down for reboot with a wait time of zero (immediate).
You should be back in business after the reboot.
-
Edited by
EVC
Tuesday, January 26, 2016 3:23 PM -
Proposed as answer by
Vimal Thiagaraj
Tuesday, February 9, 2016 7:10 AM
-
Edited by
-
Thanks for the post. This did work out for me perfectly.
-
Does anyone know the root cause of this? I have ran into the exact same situation that you described. Currently running the command you listed, and it is working.
-
It may be embarrassing, but I’m seeing this issue as well and perhaps I could benefit from the info.
-
I think it has something to do with the loss or corruption of the .Net 4 feature. Just my best guess.
-
I ran into the same problem and found it easier to download the non-core version and upgrade.
R, J
-
I ran into the same problem and found it easier to download the non-core version and upgrade.
R, J
Where did you find that? It might be a good idea to include that info.
Bill
-
thing is, it WAS a full install. I believe the removal of dot net 4.5 is the key. Engineer installing some software removed 4.5 and that’s when the issue happens. The above DISM command cleared it up.
-
If my solution worked please put a vote for it so others know to use it. Someone just mentioned .Net 4 as well. I’m really thinking this has something to do with .Net 4 being removed. When this happened to me, I was messing around with
.Net 4 due to a compatibility issue with a piece of software. -
i had the same problem here . i tried to remove the .net framework 4.5 on server manager than the server rebooted and came with the same issue. only started in command prompt. nothing is available. not powershell not server manager. if you do ctrl alt end
you can go to task manager and start firefox.exe for example you can download .netframework install it but after reboot stays the same. you can try install .netframework on prompt command but wont work. i used the command above listed
Dism /online /enable-feature /featurename:Server-Gui-Mgmt /featurename:Server-Gui-Shell /featurename:ServerCore-FullServer /all
after a few seconds asked if i wanted to rebbot. said yes and voila. everithing is back.thank you so much guys…
-
Proposed as answer by
Tryggr
Tuesday, June 28, 2016 3:22 PM -
Unproposed as answer by
Tryggr
Tuesday, June 28, 2016 3:23 PM
-
Proposed as answer by
-
Thanks a Lot EVC… It Worked for me ..Appreciate your Help …!!!!!
-
I work in a LAB with an MSDN license. I’m probably the wrong person to ask that question. On that note, if you have an MSDN subcription, just download one that isn’t a core and install over the top of the core to give it a GUI (the easy way). As shown
here, there are other ways. I did not find them particularly convenient other than it forced me to learn a bunch of basic Powershell commands (such as Restart-Computer, Stop-Computer, and so on).
R, J
-
Edited by
Crakdkorn
Sunday, June 5, 2016 6:57 PM
-
Edited by
-
Tried the reinstallation of GUI twice and still back at the black screen with cmd window. Restarted several times. The OS in question is Windows Server 2012. Please help.
Regards,
AR
-
Tried the reinstallation of GUI twice and still back at the black screen with cmd window. Restarted several times. The OS in question is Windows Server 2012. Please help.
Regards,
AR
-
Have you followed the suggestions in the old post? By replying to an old post, it is hard to tell what you have done.
From where did you obtain the distribution you are using? During the installation, are you sure you did NOT select the default installation option? There are four selections — Std Core, Std, Datacenter Core, and Datacenter. If you accept
the default, you will get core, which means no GUI.What steps did you follow?
. : | : . : | : . tim
-
I had to run the DISM command that EVC proposed, which took an extremely long time to run. It hangs on black screens for 5+ minutes, so it looks concerning. But with patience it finally completed. Once it came back up the Server Manager was very slow
to load, but did come up. I still didn’t have the full GUI though. Checked via powershell and the 2 gui features were «available» but not installed. Followed the steps from
R.Levchenko and now everything is back up and running. Thanks everyone. -
This was the one for me. Many thanks!
-
Dism /online /enable-feature /featurename:Server-Gui-Mgmt /featurename:Server-Gui-Shell /featurename:ServerCore-FullServer /all
This resolved my issue thanks Vimalanathan Sigamani T
dd
-
Edited by
Grandotto
Thursday, August 18, 2016 12:16 AM
-
Edited by
-
Dism /online /enable-feature /featurename:Server-Gui-Mgmt
/featurename:Server-Gui-Shell /featurename:ServerCore-FullServer /allThis worked for me as well. Thanks guys
-
Thanks Vimalanathan,
This really helped me and fixed the issue.
-
This worked perfectly for me. Seems the admin that I gave the server to might have removed dot net 4.5.
jimmypi
-
I managed to have this happen to me after installing the full GUI version of the OS. Don’t ask how, its embarrassing! lol
Anyway, PowerShell would not function so Install-Feature was not an option. Server manager would not open so, enabling features with the UI was not an option. In fact, nothing would run from the command prompt except taskmgr.
The solution was to run the following command from the command prompt that had opened when I logged into the server:
Dism /online /enable-feature /featurename:Server-Gui-Mgmt /featurename:Server-Gui-Shell /featurename:ServerCore-FullServer /all
This installed the GUI features and all the requisites for those features.
Once the installation is complete, which will take quite awhile, reboot the server with the command
shutdown /r /t 0 This shuts the server down for reboot with a wait time of zero (immediate).
You should be back in business after the reboot.
This seems to be working for me now. The previous commands did not work. But this is actually installing now.
I agree that it has something to do with the removal of .NET 4.0/4.5. I was trying to uninstall/reinstall IIS because a contractor royally screwed up the server by installing Apache. We use IIS on everything, so I’m trying to undo everything he did. Apparently
I unintentionally (not knowingly) removed a vital piece of the Server puzzle by uninstalling (removing) .NET 3.5 and .NET 4.5 when I uninstalled IIS. Everything was fine until the reboot.TL;DR
If you blew out .NET 4.5, EVC’s solution is the one you need. Forget everything else in this thread.
-
Edited by
Kim Dorris
Saturday, October 15, 2016 4:09 AM
correct typos
-
Edited by
-
You’re right, I did remove .NET 4 feature and suddenly all were gone except for Command Prompt. Your answer do the trick. Thanks.
-
Wow, it works. The latest release will prompt to restart the server. Someone ruined the .NET Framework 4.5 and after uninstalling the .NET Framework, I ruined the server LOL. Thanks EVC.
-
I agree. same thing happened here too.
-
if this does not work. try this:
https://www.linkedin.com/pulse/20140618170857-12975178-procedure-to-recover-gui-in-windows-2012-and-2012r2-net-framework-feature-dependency-in-windows-2012-2012-r2
-
if this does not work, try this:
https://www.linkedin.com/pulse/20140618170857-12975178-procedure-to-recover-gui-in-windows-2012-and-2012r2-net-framework-feature-dependency-in-windows-2012-2012-r2
-
Thank you for this post! A year later and it saved me.
-
Thanks guys… I was also facing same issue and tried this solution.. It perfectly worked for me.
Thanks again.
-
Thanks a ton for the solution, it saved my day.
-
I had this problem today I try the steps Don’t work for me
-
Yes, that was exactly what happened to me. Trying to install .NET 3.5 was not working, I thought had something to do with having a newer version and I went and removed .NET 4.0. BOOM no more GUI. Thanks for the solutions. It worked like a charm.
-
You can do it in 4 simple steps using powershell.
Just follow the below instructions and you are done.
1. c:\user\administrator\ipowershell
2. c:\user\administrator\Import-Module
Servermanager3.
c:\user\administrator\Install-WindowsFeature
Server-Gui-Mgmt-Infra,Server-Gui-Shell –Source wim:d:\sources\install.wim:4
4.c:\user\administrator\shutdown
/r /t 0 (Restart the server)Thank me Later
-
Edited by
RaviBhati
Thursday, May 31, 2018 7:33 AM
-
Edited by
-
The cmd mentioned before
cmd > powershell
In powershell:
Install-WindowsFeature Server-Gui-Mgmt-Infra,Server-Gui-Shell -Restart
It worked for me. Just be patient. It takes about 15 minutes after it gets stuck at 68% to process it. Thank you! Nivi
-
Edited by
TechSuperMario
Tuesday, October 22, 2019 12:46 AM
-
Edited by
-
Question
-
I am trying to install windows 2012 R2 standard Server. I completed the installation windows is not booting properly . After entering the user name and password only c:useradministrator display in the screen, if i type exit on it then only a
black screen and mouse pointer display. not sure what to do from here
All replies
-
1. it’s usual for server core
2. try to run server manager (just type servermanager in cmd)
3. try to view installed GUI feature using powershell
type powershell
get-windowsfeature *GUI*
verify that you have Server-Gui-Mgmt-Infra and Server-Gui-Shell installed
4. if 3 is false , install GUI features
Install-WindowsFeature Server-Gui-Mgmt-Infra,Server-Gui-Shell -Restart
Roman Levchenko, MCITP, MCTS http://www.rlevchenko.com
-
Edited by
Thursday, February 27, 2014 6:13 AM
-
Proposed as answer by
R.LevchenkoMVP
Thursday, February 27, 2014 6:37 AM
-
Edited by
-
-
Proposed as answer by
Agasthya.S.P
Wednesday, February 3, 2016 8:23 PM
-
Proposed as answer by
-
hi,
cmd > powershell
In powershell:
Install-WindowsFeature Server-Gui-Mgmt-Infra,Server-Gui-Shell -Restart
-
Neither worked, all unrecognized
-
it’s installing, I’m must have typed something wrong
-
It’s installing now, I must have typed something wrong
-
If you found a post to be the answer, please mark it appropriately. It helps to keep the forums tidy by highlighting which response is the answer to the question. It helps future readers. Thanks!
— Chris Ream —
**Remember, if you find a post that is helpful, or is the answer, please mark it appropriately.**
-
I’m back to the same place. I need to remove powershell, so I can install GUI version of Active Directory users and computers
-
No, you don’t need to remove PowerShell.
Do you want a core installation or a GUI installation? The default installation will be core, i.e. no GUI installed. But, it is possible to install the GUI using PowerShell or DISM afterwards. From the difficulties you are experiencing,
I would recommend that you either re-do your installation one more time, making sure you have selected the option to install with GUI instead of taking the default which is the core installation.The fact that you say that the command recommended by Roman returns unrecognized to you, I would ask if you are sure you are installing Windows Server and not Hyper-V Server. Windows Server would recognize the command Roman provided. What’s the
name of the ISO file you are using for installation?
.:|:.:|:. tim
-
Proposed as answer by
Susie Long
Wednesday, March 5, 2014 9:00 AM
-
Proposed as answer by
-
Hi,
Do you have any progresses on this issue by now?
Please feel free to let us know if this issue persists.
Best Regards,
Amy Wang
-
I want to run Windows Server 2012 normally, with GUI
It was installed and I was going through installing Active Directory Domain Services and upon finishing I did not see Active Directory Users and Computers, upon rebooting I get the cmd prompt and can’t go any farther
-
Look you should install the server fresh but do not chose core as they only installs the basic core of Hyper-V for a server farm
The above doesn’t make any sense at all.
-
Corret Paul in Hyper-V we can only install basic core.
Thanks
NM
Warm Regards, Niraj Mehta
-
thanks for this info. worked great!
-
hi
i am still seeing this problem which i have told you before plz resolve this issue which i am looking on my desktop. i want to say again that when i boot my server microsoft window server 2012 but it still shows me a window where it shows powershell dos
prompt message still. plz can you explain that which command i must apply that clear my desktop and i may use my serverRegards
iffi
-
hi
i am still seeing this problem which i have told you before plz resolve this issue which i am looking on my desktop. i want to say again that when i boot my server microsoft window server 2012 but it still shows me a window where it shows powershell dos
prompt message still. plz can you explain that which command i must apply that clear my desktop and i may use my serverRegards
iffi
-
iffi,
You have not provided any information about what you installed or your configuration. Have you tried the various commands that are shown in the responses to this post? Those commands are what will add the GUI to a Windows Server 2012 R2 core
installation. If you have installed Hyper-V Server, there is nothing you can do to create a GUI. But we don’t have any information about your installation.
. : | : . : | : . tim
-
I managed to have this happen to me after installing the full GUI version of the OS. Don’t ask how, its embarrassing! lol
Anyway, PowerShell would not function so Install-Feature was not an option. Server manager would not open so, enabling features with the UI was not an option. In fact, nothing would run from the command prompt except taskmgr.
The solution was to run the following command from the command prompt that had opened when I logged into the server:
Dism /online /enable-feature /featurename:Server-Gui-Mgmt /featurename:Server-Gui-Shell /featurename:ServerCore-FullServer /all
This installed the GUI features and all the requisites for those features.
Once the installation is complete, which will take quite awhile, reboot the server with the command
shutdown /r /t 0 This shuts the server down for reboot with a wait time of zero (immediate).
You should be back in business after the reboot.
-
Edited by
EVC
Tuesday, January 26, 2016 3:23 PM -
Proposed as answer by
Vimal Thiagaraj
Tuesday, February 9, 2016 7:10 AM
-
Edited by
-
Thanks for the post. This did work out for me perfectly.
-
Does anyone know the root cause of this? I have ran into the exact same situation that you described. Currently running the command you listed, and it is working.
-
It may be embarrassing, but I’m seeing this issue as well and perhaps I could benefit from the info.
-
I think it has something to do with the loss or corruption of the .Net 4 feature. Just my best guess.
-
I ran into the same problem and found it easier to download the non-core version and upgrade.
R, J
-
I ran into the same problem and found it easier to download the non-core version and upgrade.
R, J
Where did you find that? It might be a good idea to include that info.
Bill
-
thing is, it WAS a full install. I believe the removal of dot net 4.5 is the key. Engineer installing some software removed 4.5 and that’s when the issue happens. The above DISM command cleared it up.
-
If my solution worked please put a vote for it so others know to use it. Someone just mentioned .Net 4 as well. I’m really thinking this has something to do with .Net 4 being removed. When this happened to me, I was messing around with
.Net 4 due to a compatibility issue with a piece of software. -
i had the same problem here . i tried to remove the .net framework 4.5 on server manager than the server rebooted and came with the same issue. only started in command prompt. nothing is available. not powershell not server manager. if you do ctrl alt end
you can go to task manager and start firefox.exe for example you can download .netframework install it but after reboot stays the same. you can try install .netframework on prompt command but wont work. i used the command above listed
Dism /online /enable-feature /featurename:Server-Gui-Mgmt /featurename:Server-Gui-Shell /featurename:ServerCore-FullServer /all
after a few seconds asked if i wanted to rebbot. said yes and voila. everithing is back.thank you so much guys…
-
Proposed as answer by
Tryggr
Tuesday, June 28, 2016 3:22 PM -
Unproposed as answer by
Tryggr
Tuesday, June 28, 2016 3:23 PM
-
Proposed as answer by
-
Thanks a Lot EVC… It Worked for me ..Appreciate your Help …!!!!!
-
I work in a LAB with an MSDN license. I’m probably the wrong person to ask that question. On that note, if you have an MSDN subcription, just download one that isn’t a core and install over the top of the core to give it a GUI (the easy way). As shown
here, there are other ways. I did not find them particularly convenient other than it forced me to learn a bunch of basic Powershell commands (such as Restart-Computer, Stop-Computer, and so on).
R, J
-
Edited by
Crakdkorn
Sunday, June 5, 2016 6:57 PM
-
Edited by
-
Tried the reinstallation of GUI twice and still back at the black screen with cmd window. Restarted several times. The OS in question is Windows Server 2012. Please help.
Regards,
AR
-
Tried the reinstallation of GUI twice and still back at the black screen with cmd window. Restarted several times. The OS in question is Windows Server 2012. Please help.
Regards,
AR
-
Have you followed the suggestions in the old post? By replying to an old post, it is hard to tell what you have done.
From where did you obtain the distribution you are using? During the installation, are you sure you did NOT select the default installation option? There are four selections — Std Core, Std, Datacenter Core, and Datacenter. If you accept
the default, you will get core, which means no GUI.What steps did you follow?
. : | : . : | : . tim
-
I had to run the DISM command that EVC proposed, which took an extremely long time to run. It hangs on black screens for 5+ minutes, so it looks concerning. But with patience it finally completed. Once it came back up the Server Manager was very slow
to load, but did come up. I still didn’t have the full GUI though. Checked via powershell and the 2 gui features were «available» but not installed. Followed the steps from
R.Levchenko and now everything is back up and running. Thanks everyone. -
This was the one for me. Many thanks!
-
Dism /online /enable-feature /featurename:Server-Gui-Mgmt /featurename:Server-Gui-Shell /featurename:ServerCore-FullServer /all
This resolved my issue thanks Vimalanathan Sigamani T
dd
-
Edited by
Grandotto
Thursday, August 18, 2016 12:16 AM
-
Edited by
-
Dism /online /enable-feature /featurename:Server-Gui-Mgmt
/featurename:Server-Gui-Shell /featurename:ServerCore-FullServer /allThis worked for me as well. Thanks guys
-
Thanks Vimalanathan,
This really helped me and fixed the issue.
-
This worked perfectly for me. Seems the admin that I gave the server to might have removed dot net 4.5.
jimmypi
-
I managed to have this happen to me after installing the full GUI version of the OS. Don’t ask how, its embarrassing! lol
Anyway, PowerShell would not function so Install-Feature was not an option. Server manager would not open so, enabling features with the UI was not an option. In fact, nothing would run from the command prompt except taskmgr.
The solution was to run the following command from the command prompt that had opened when I logged into the server:
Dism /online /enable-feature /featurename:Server-Gui-Mgmt /featurename:Server-Gui-Shell /featurename:ServerCore-FullServer /all
This installed the GUI features and all the requisites for those features.
Once the installation is complete, which will take quite awhile, reboot the server with the command
shutdown /r /t 0 This shuts the server down for reboot with a wait time of zero (immediate).
You should be back in business after the reboot.
This seems to be working for me now. The previous commands did not work. But this is actually installing now.
I agree that it has something to do with the removal of .NET 4.0/4.5. I was trying to uninstall/reinstall IIS because a contractor royally screwed up the server by installing Apache. We use IIS on everything, so I’m trying to undo everything he did. Apparently
I unintentionally (not knowingly) removed a vital piece of the Server puzzle by uninstalling (removing) .NET 3.5 and .NET 4.5 when I uninstalled IIS. Everything was fine until the reboot.TL;DR
If you blew out .NET 4.5, EVC’s solution is the one you need. Forget everything else in this thread.
-
Edited by
Kim Dorris
Saturday, October 15, 2016 4:09 AM
correct typos
-
Edited by
-
You’re right, I did remove .NET 4 feature and suddenly all were gone except for Command Prompt. Your answer do the trick. Thanks.
-
Wow, it works. The latest release will prompt to restart the server. Someone ruined the .NET Framework 4.5 and after uninstalling the .NET Framework, I ruined the server LOL. Thanks EVC.
-
I agree. same thing happened here too.
-
if this does not work. try this:
https://www.linkedin.com/pulse/20140618170857-12975178-procedure-to-recover-gui-in-windows-2012-and-2012r2-net-framework-feature-dependency-in-windows-2012-2012-r2
-
if this does not work, try this:
https://www.linkedin.com/pulse/20140618170857-12975178-procedure-to-recover-gui-in-windows-2012-and-2012r2-net-framework-feature-dependency-in-windows-2012-2012-r2
-
Thank you for this post! A year later and it saved me.
-
Thanks guys… I was also facing same issue and tried this solution.. It perfectly worked for me.
Thanks again.
-
Thanks a ton for the solution, it saved my day.
-
I had this problem today I try the steps Don’t work for me
-
Yes, that was exactly what happened to me. Trying to install .NET 3.5 was not working, I thought had something to do with having a newer version and I went and removed .NET 4.0. BOOM no more GUI. Thanks for the solutions. It worked like a charm.
-
You can do it in 4 simple steps using powershell.
Just follow the below instructions and you are done.
1. c:useradministratoripowershell
2. c:useradministratorImport-Module
Servermanager3.
c:useradministratorInstall-WindowsFeature
Server-Gui-Mgmt-Infra,Server-Gui-Shell –Source wim:d:sourcesinstall.wim:4
4.c:useradministratorshutdown
/r /t 0 (Restart the server)Thank me Later
-
Edited by
RaviBhati
Thursday, May 31, 2018 7:33 AM
-
Edited by
-
The cmd mentioned before
cmd > powershell
In powershell:
Install-WindowsFeature Server-Gui-Mgmt-Infra,Server-Gui-Shell -Restart
It worked for me. Just be patient. It takes about 15 minutes after it gets stuck at 68% to process it. Thank you! Nivi
-
Edited by
TechSuperMario
Tuesday, October 22, 2019 12:46 AM
-
Edited by
Обновлено 29.08.2018
Windows Server 2012 R2 core
Всем привет! Сегодня хочу рассказать, как установить Windows Server 2012 R2 core. Core версия, это такая версия, которая не имеет GUI интерфейса и уже по априори имеет меньший фронт атаки и большее быстродействие. Так же есть ряд нюансов при настройки данной версии, которые мы рассмотрим в цикле статей. Сама Microsoft во многих сценариях советует системным администраторам, останавливать свой выбор именно на ней, в Windows Server 2016, уже появилась еще более сжатая версия, под названием Nano.
Из своей практики советую ставить всегда английскую версию, в ней нет кучи глюков с sconfig, в данном примере устанавливается русская версия для ознакомления механизма установки и показа дальнейших глюков
Загружаемся с установочного носителя (Загрузочной флешки) первое, что нужно сделать это выбрать язык установки и раскладки клавиатуры
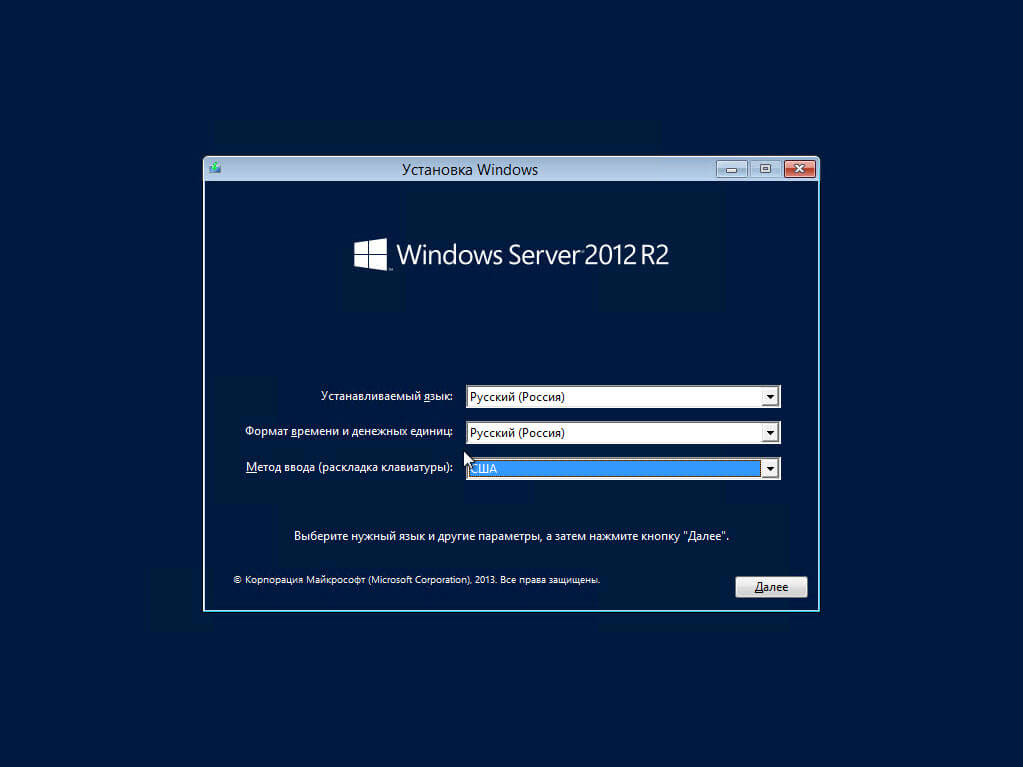
Как установить Windows Server 2012 R2 core-01
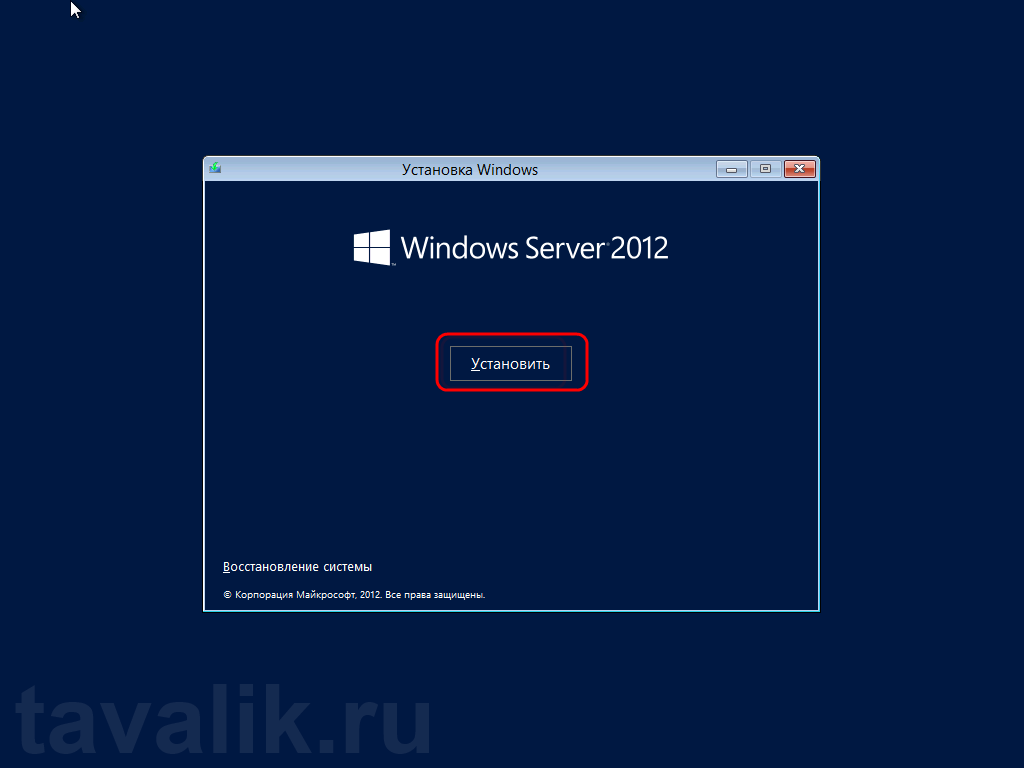
Жмем Установить
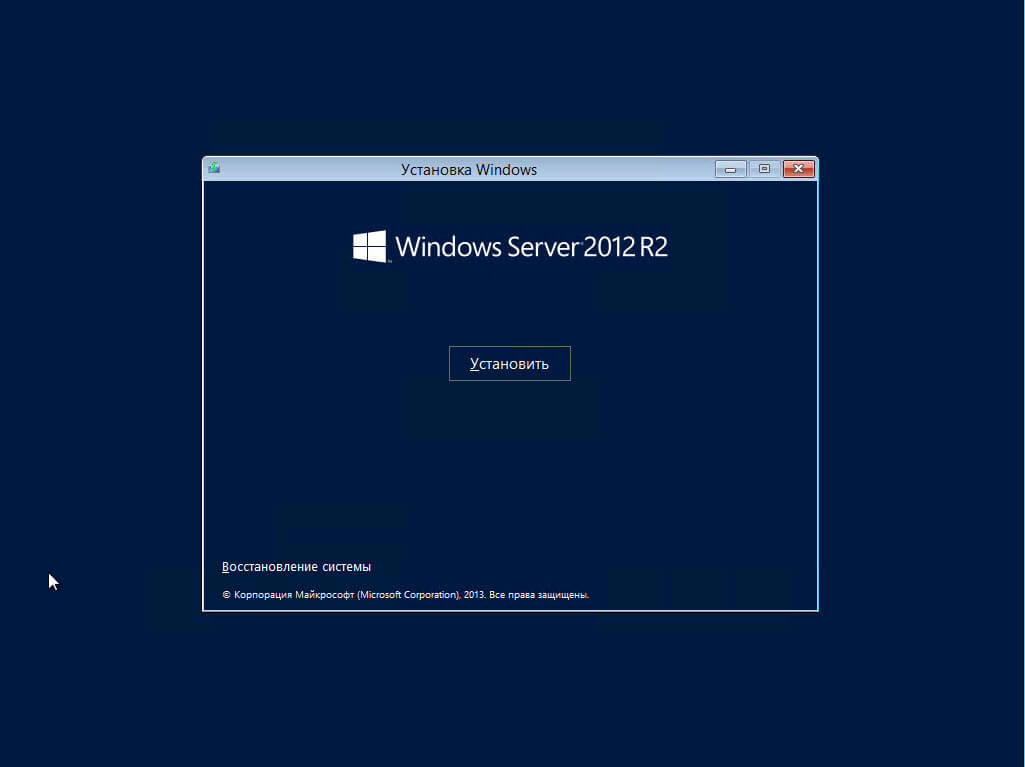
Как установить Windows Server 2012 R2 core-02
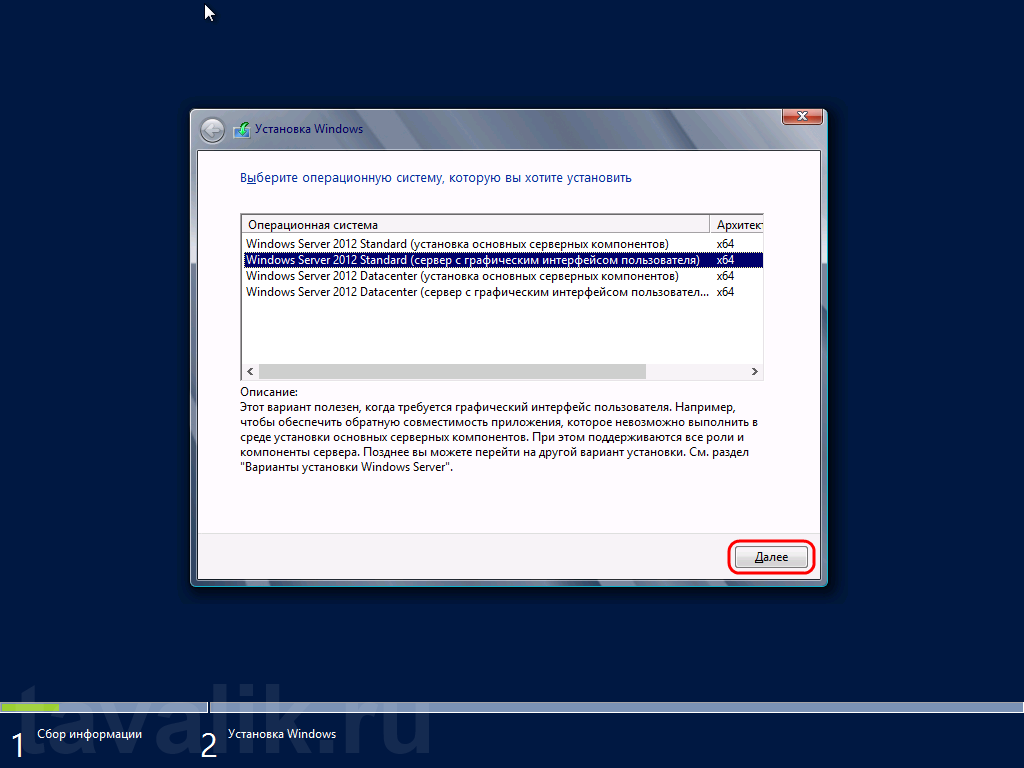
Выбираем Windows Server 2012 R2 Standart (Установка основных серверных компонентов)
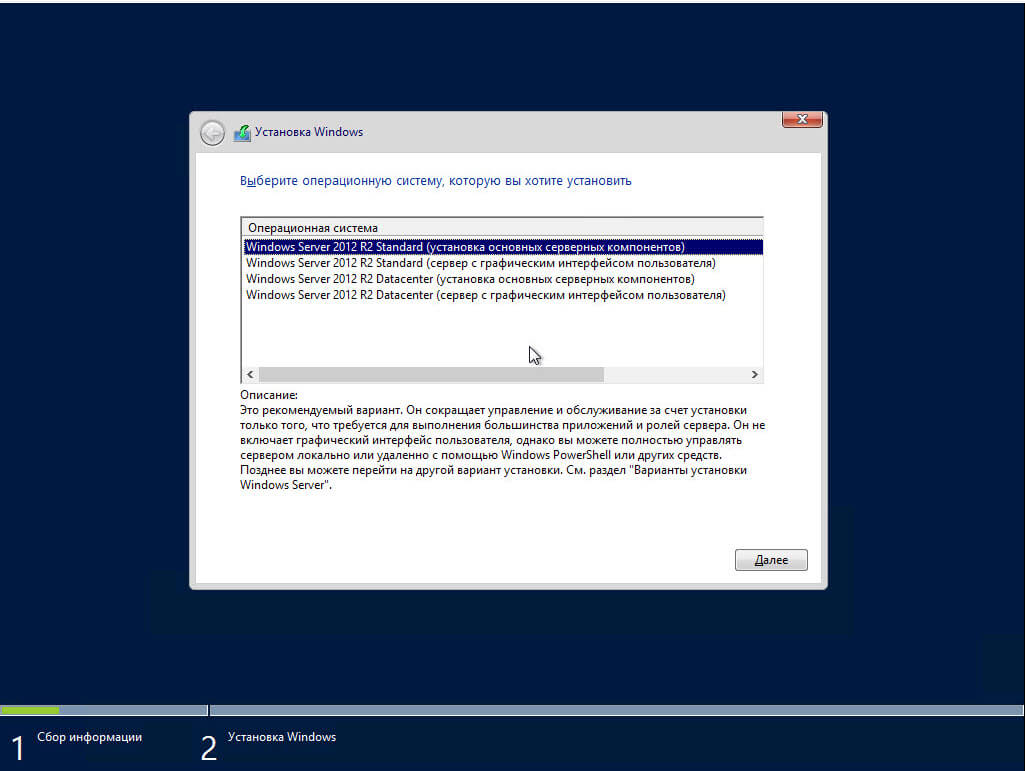
Как установить Windows Server 2012 R2 core-03
принимаем лицензионное соглашение

Как установить Windows Server 2012 R2 core-04
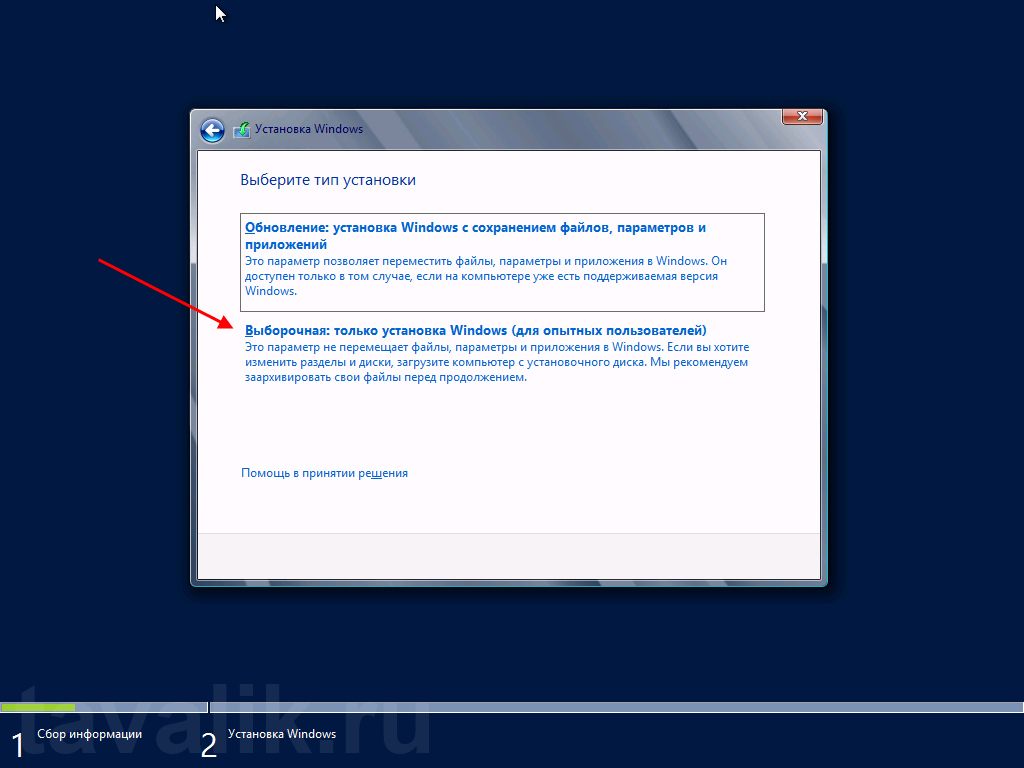
Выбираем выборочную установку Windows

Как установить Windows Server 2012 R2 core-05
Выбираем ваше дисковое пространство куда будет производиться установка, жмем далее.
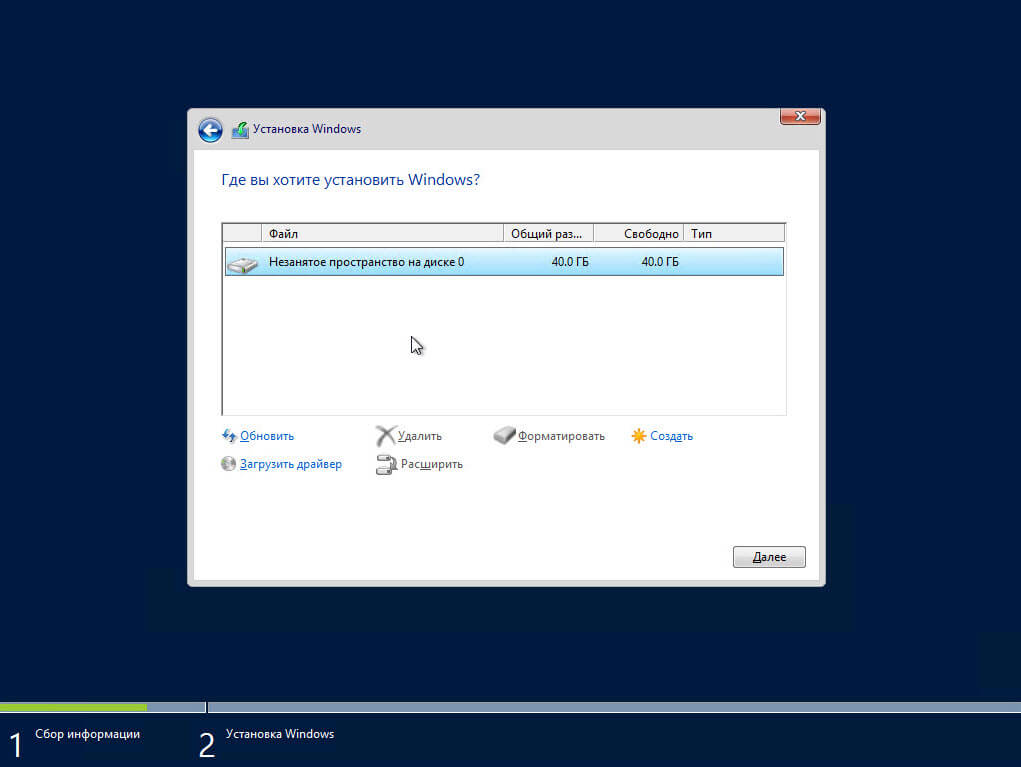
Как установить Windows Server 2012 R2 core-06
начнется процесс установки
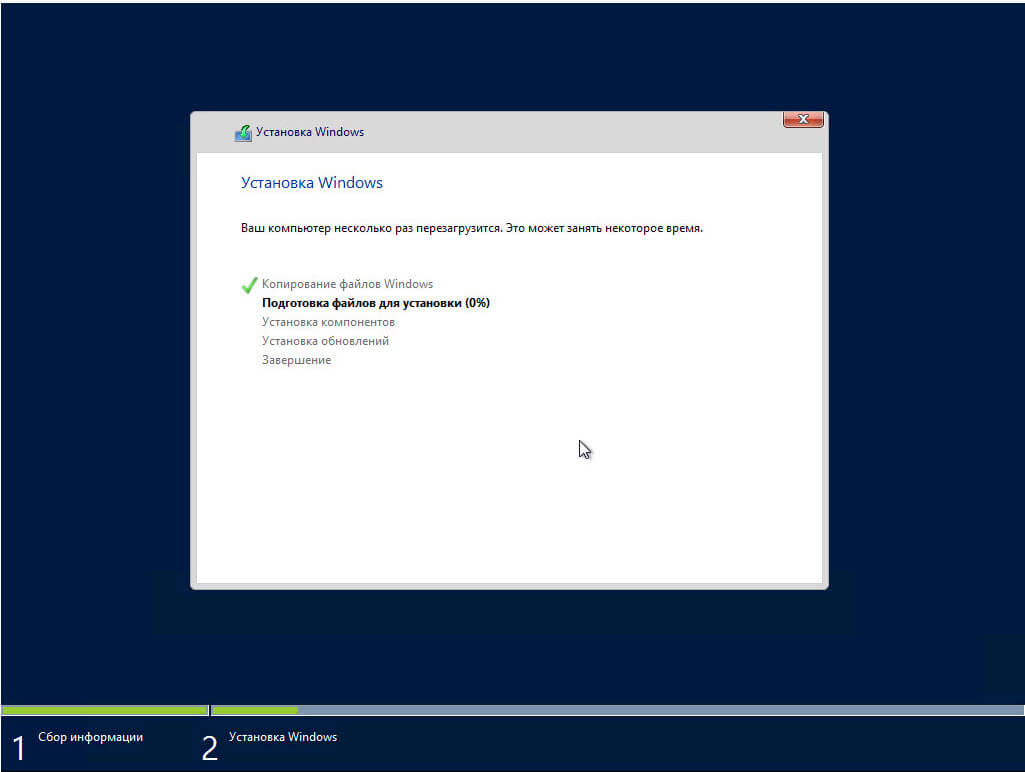
Как установить Windows Server 2012 R2 core-07
После установки у вас произойдет две перезагрузки, после чего вас попросят ввести CTRL+ALT+DEL.
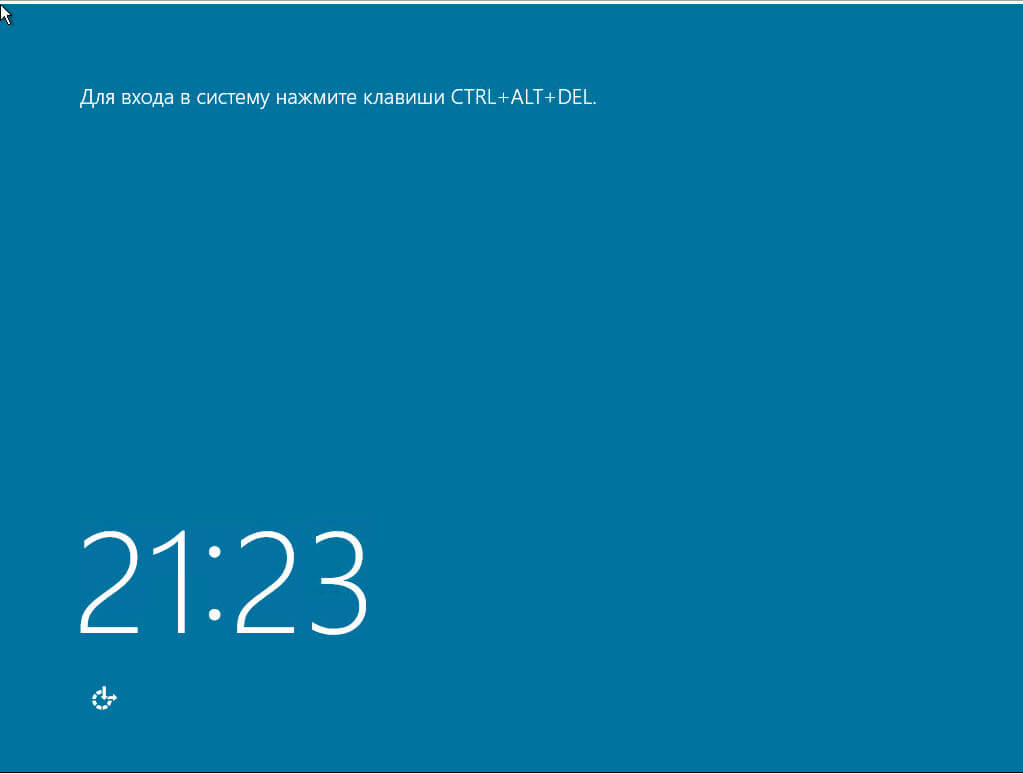
Как установить Windows Server 2012 R2 core-08
Далее вам нужно будет установить пароль Администратора.

Как установить Windows Server 2012 R2 core-09
Вводим два раза ваш пароль
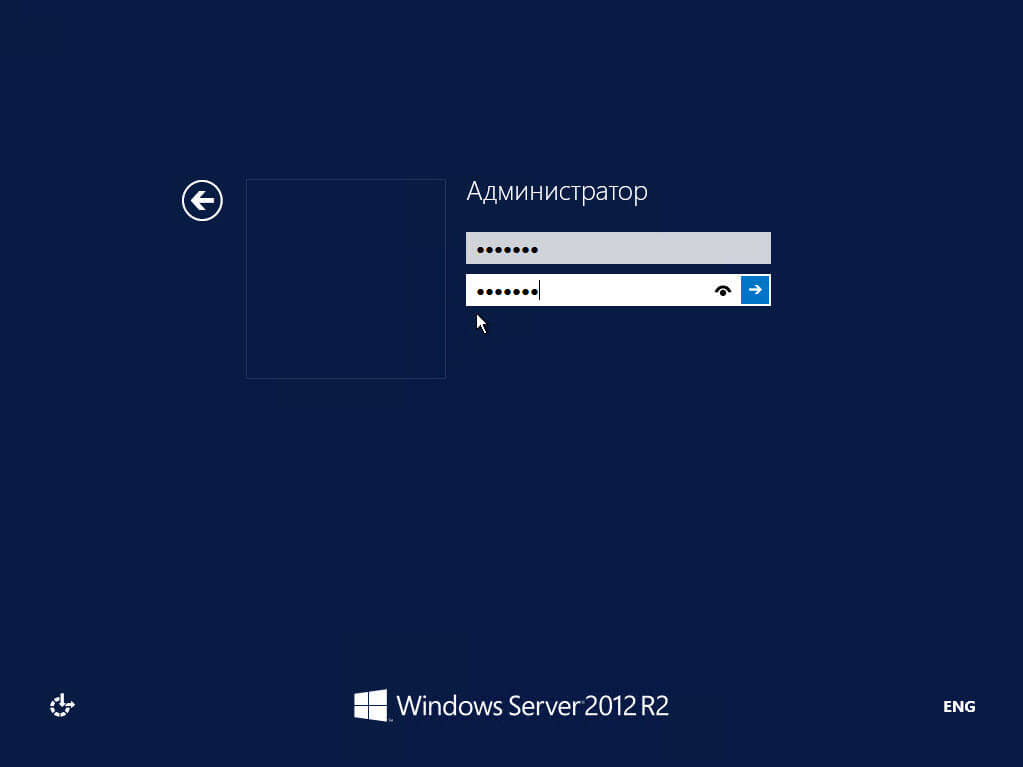
Как установить Windows Server 2012 R2 core-10
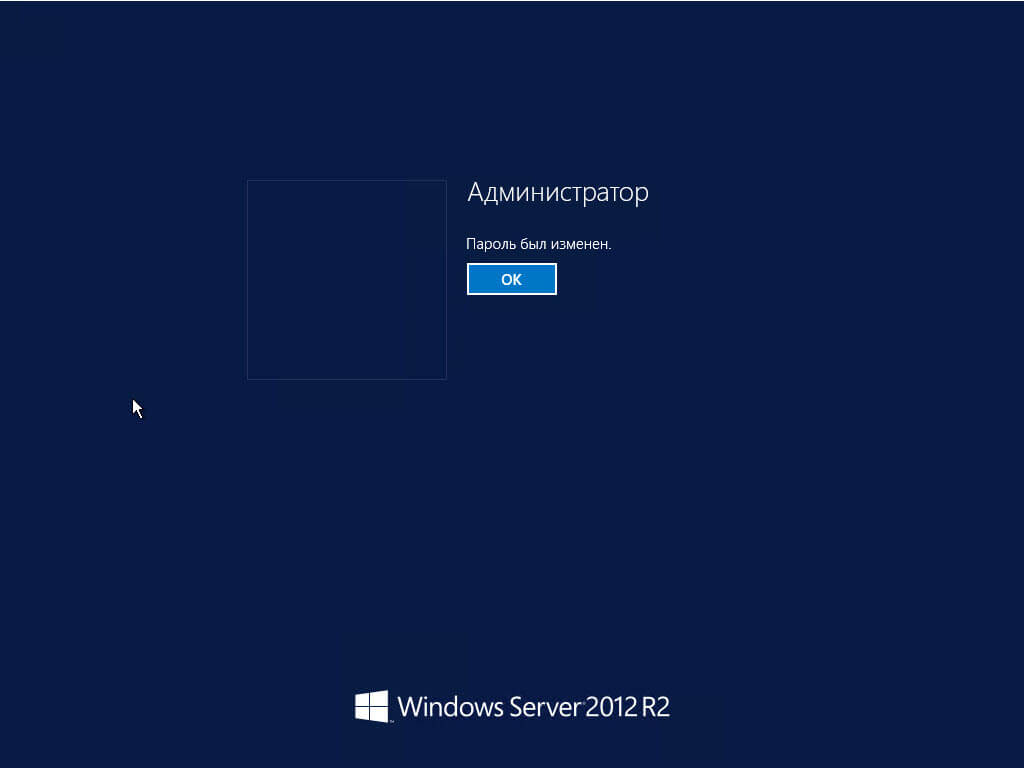
Как установить Windows Server 2012 R2 core-11
после ввода пароля у вас появится окно командной строки, смотрите далее как производится базовая настройка Windows Server 2012 R2 core.
Вот так вот просто установить Windows Server 2012 R2 core.
Материал сайта pyatilistnik.org
![]() В данной статье будет приведена пошаговая инструкция по установке и первоначальной настройке Microsoft Windows Server 2012. Установка данной версии Windows Server не сильно отличается от установки Microsoft Windows Server 2008 R2 или даже установки Windows 8, однако из-за ряда особенностей я покажу процесс установки полностью, от начала и до конца.
В данной статье будет приведена пошаговая инструкция по установке и первоначальной настройке Microsoft Windows Server 2012. Установка данной версии Windows Server не сильно отличается от установки Microsoft Windows Server 2008 R2 или даже установки Windows 8, однако из-за ряда особенностей я покажу процесс установки полностью, от начала и до конца.
0. Оглавление
- Что понадобится
- Установка Microsoft Windows Server 2012
- Первоначальная настройка Microsoft Windows Server 2012
1. Что понадобится
- Установочный диск Microsoft Windows Server 2012 (скачать можно здесь)
- Рабочий ключ для активации Windows Server 2012
2. Установка Microsoft Windows Server 2012
Вставляем установочный диск Microsoft Windows Server 2012 в DVD-привод компьютера и загружаемся с него (для этого в BIOS компьютера необходимо поставить первичную загрузку с CD-ROM). После непродолжительной загрузки попадаем на окно выбора языка. Выбираем нужные параметры (по умолчанию язык, формат времени и денежных единиц и раскладку клавиатуры оставляем русскую) и нажимаем «Далее» (Next) .

В следующем окне, для первичной установки Windows Server нажимаем «Установить» (Install now) .
Теперь необходимо выбрать выпуск операционной системы, который будем устанавливать (об отличии различных выпусков Windows Server 2012 можно прочитать, например, здесь). Выбрав нужный выпуск, жмем «Далее» (Next) .
Соглашаемся с условиями лицензионного соглашения, установив флаг «Я принимаю условия лицензии» (I accept the license terms) и жмем «Далее» (Next) .

На следующем шаге необходим выбрать тип установки. Для чистой установки Windows Server 2012 выбираем «Выборочная: только установка Windows…» (Custom: Install Windows only) .
Теперь разметим жесткий диск для установки, если это не было сделано раннее. Для этого выберем незанятое пространство на каком-либо физическом жестком диске в списке и нажмем «Создать» (New).

Введем размер создаваемого логического диска (по умолчанию полный объем) и нажмем «Применить» (Apply).
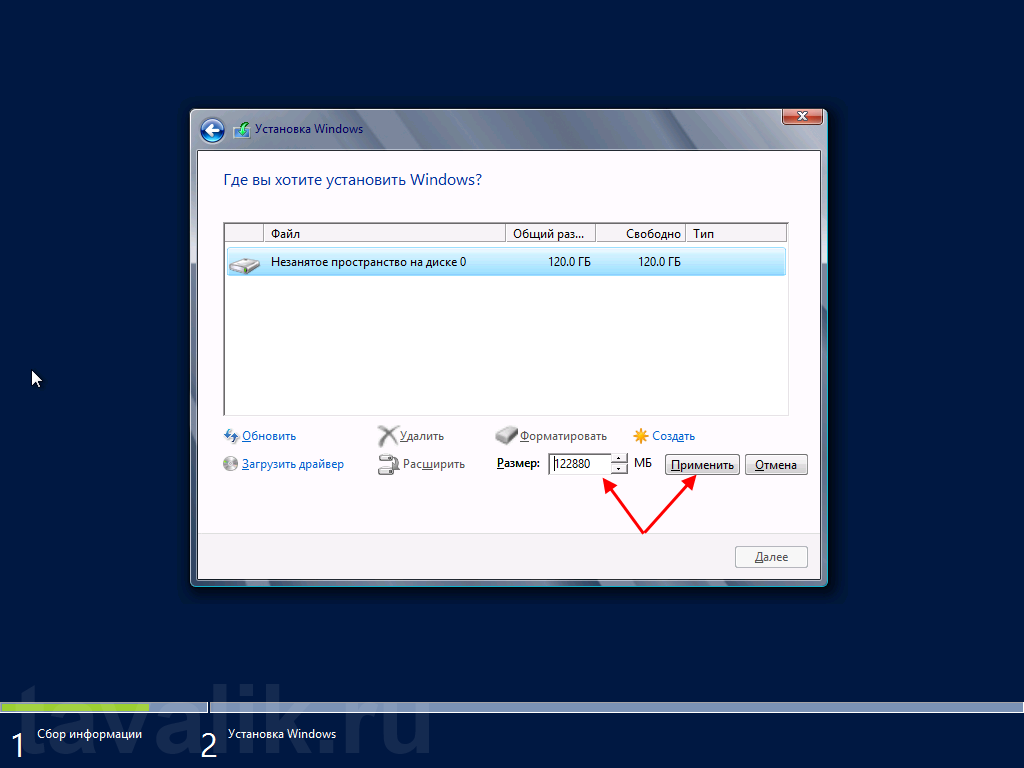
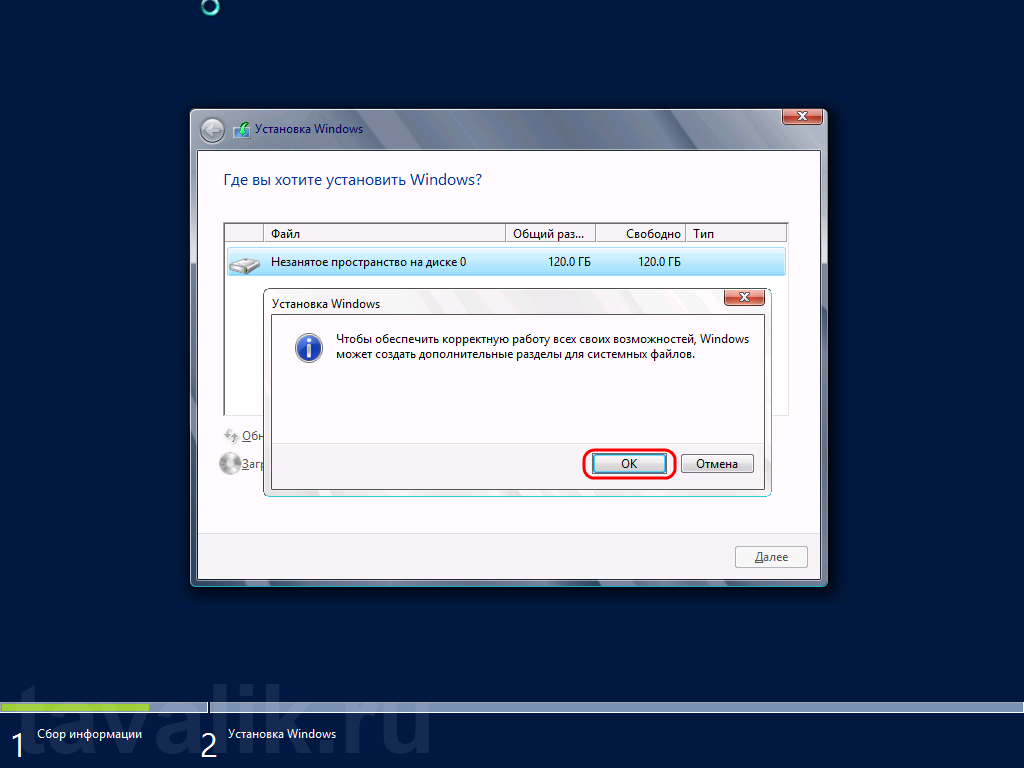
Также согласимся на создание дополнительных разделов для системных файлов, нажав «ОК» в появившемся окне.
После вышеописанных действий, вместо неразмеченной области должны появиться 2 раздела: Системный (System) и Основной (Primary). Выбираем основной раздел для установки Windows и жмем «Далее» (Next).

Дожидаемся завершения установки компонент Windows Server 2012.
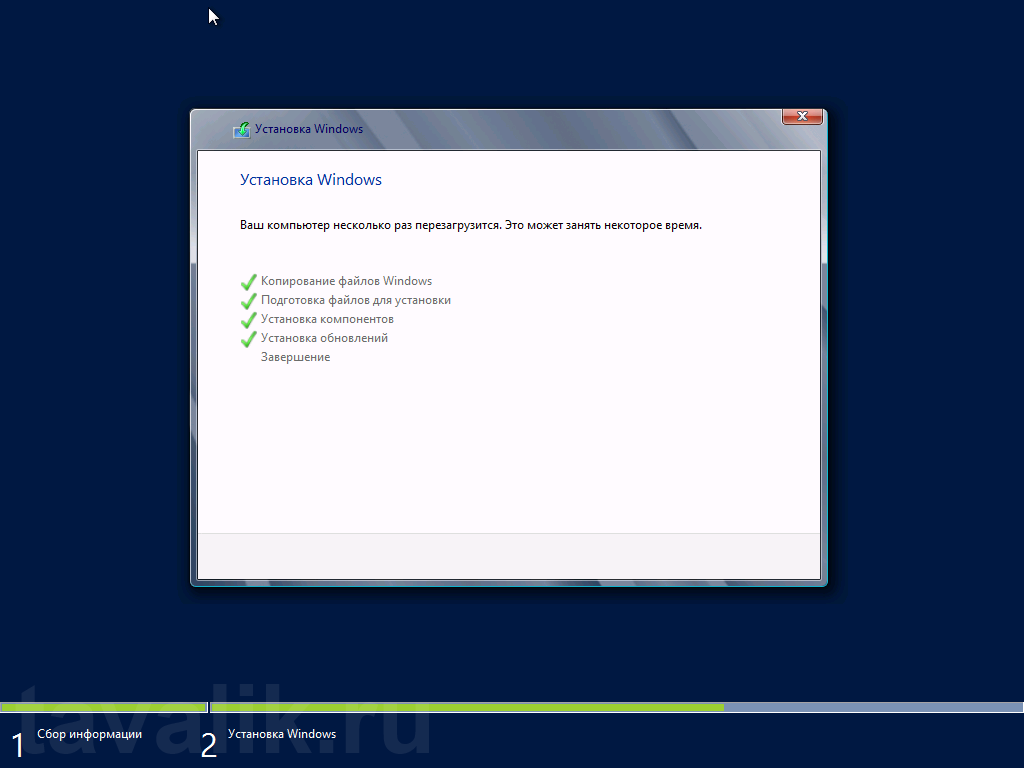
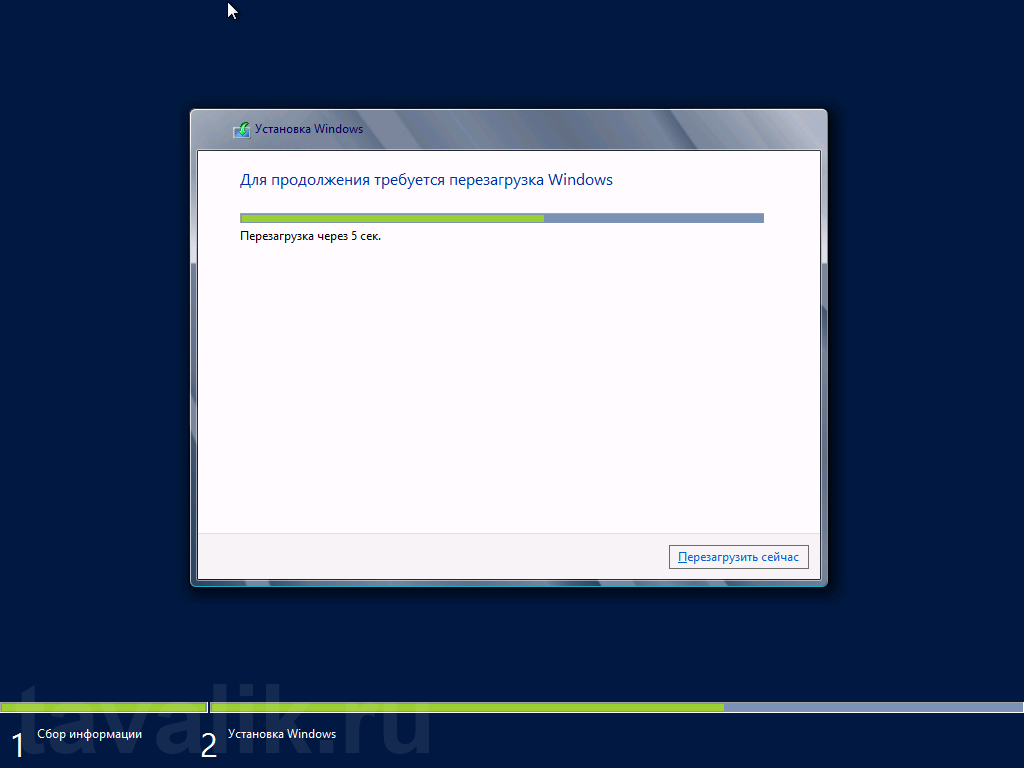
По завершении установки компьютер будет перезагружен.
После перезагрузки система предложит ввести пароль для учетной записи «Администратор» (Administrator) . По умолчанию пароль должен отвечать требованиям безопасности паролей, а именно:
- Не содержать имени учетной записи пользователя или частей полного имени пользователя длиной более двух рядом стоящих знаков
- Иметь длину не менее 6 знаков
- Содержать знаки трех из четырех перечисленных ниже категорий:
- Латинские заглавные буквы (от A до Z)
- Латинские строчные буквы (от a до z)
- Цифры (от 0 до 9)
- Отличающиеся от букв и цифр знаки (например, !, $, #, %)
(О том, как потом изменить политику паролей, можно прочитать в статье Изменение политики паролей в Windows Server 2012 R2)
Рекомендую сразу записать пароль в отведенное для хранения паролей место. Для этого удобно использовать различные менеджеры паролей, например бесплатную программу KeePass.
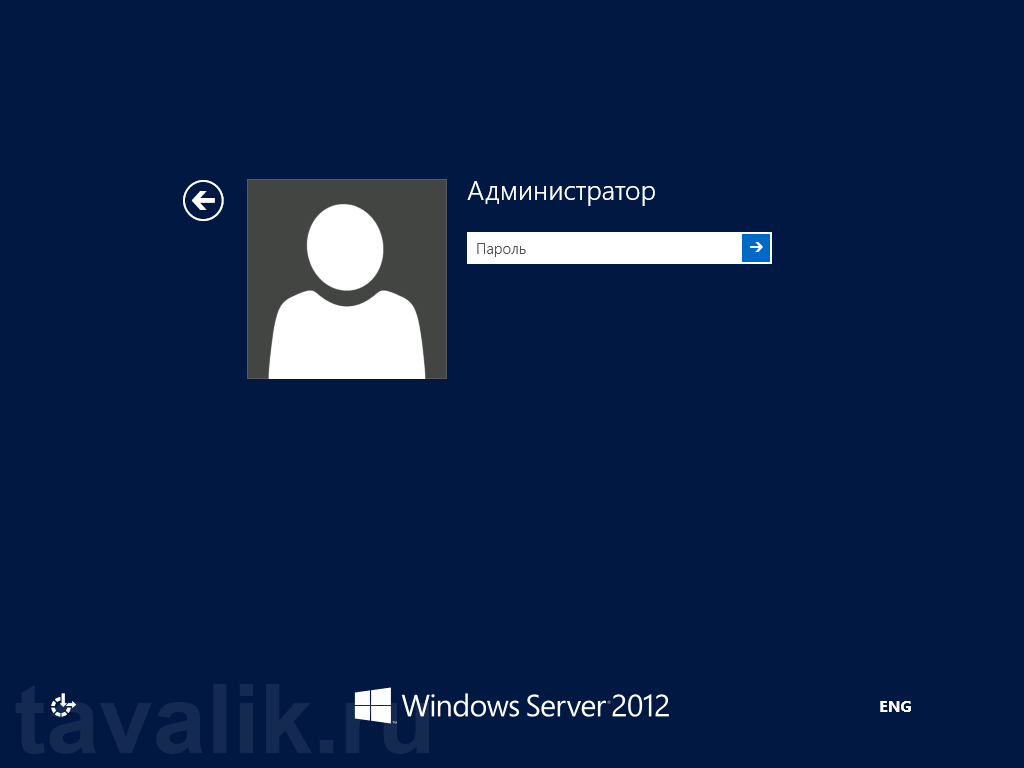
Вводим пароль администратора и жмем «Готово» (Finish) .

Далее попадем на стартовое окно Windows Server 2012. Нажимаем одновременно CTRL, ALT и DEL

и входим в Windows под учетной записью Администратора, введя установленный на предыдущем шаге пароль.
3. Первоначальная настройка Microsoft Windows Server 2012
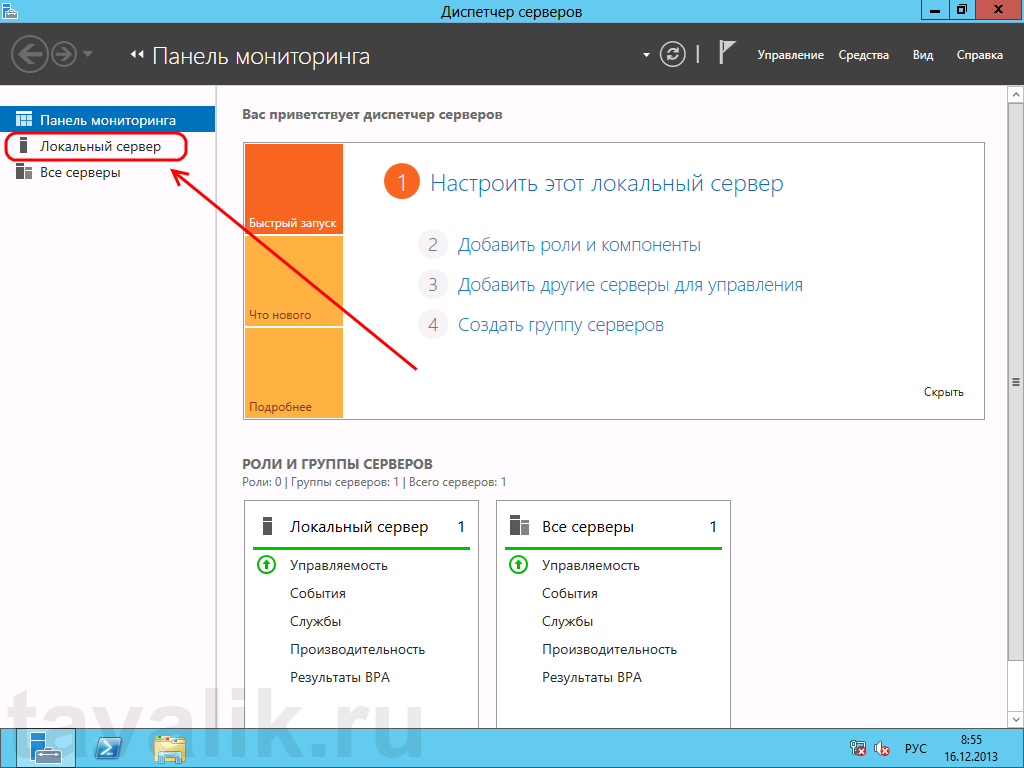
Первое, что мы увидим после входа в систему будет заметно модифицированный со времен Windows Server 2008 R2 диспетчер серверов (Server Manager). Для настройки текущего локального сервера выберем вкладку «Локальный сервер» (Local Server) в панели вкладок слева.
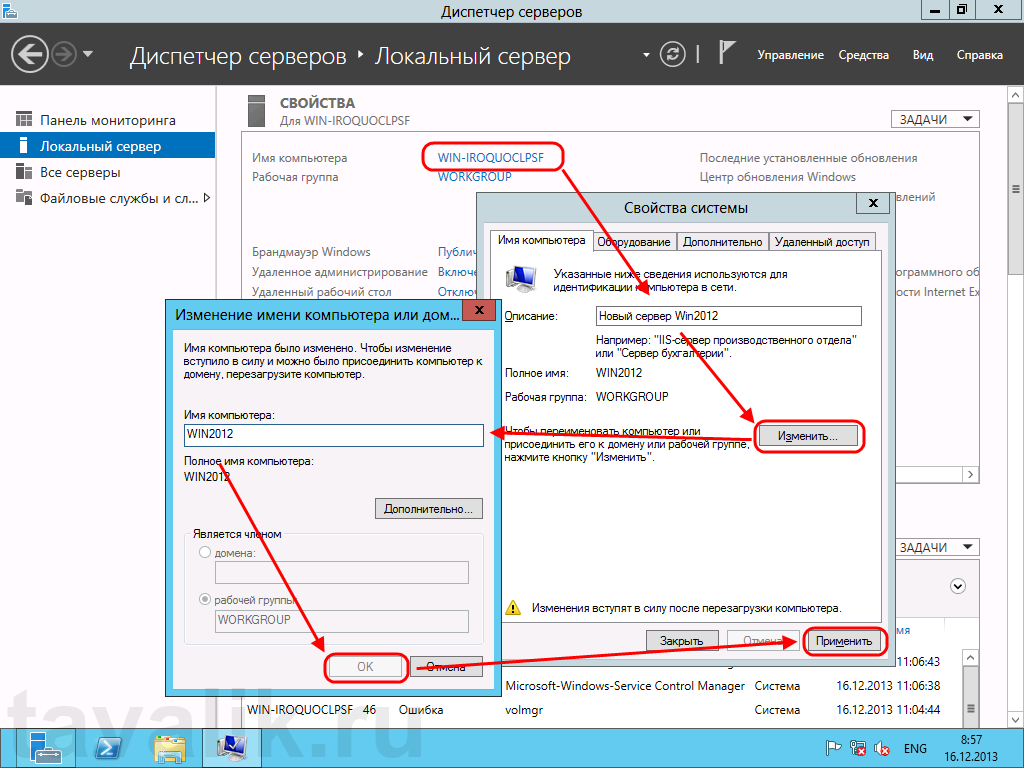
Начнем изменение параметров локального сервера с изменения имени компьютера. Для этого кликнем по текущему имени компьютера в окне «Свойства» (Properties) . Откроется окно «Свойства системы» (System Properties) на закладке «Имя компьютера» (Computer Name) . Нажмем кнопку «Изменить…» (Change…) и введем новое имя сервера в появившемся окне. После чего закроем все окна нажав последовательно «ОК» и «Применить» (Apply) .
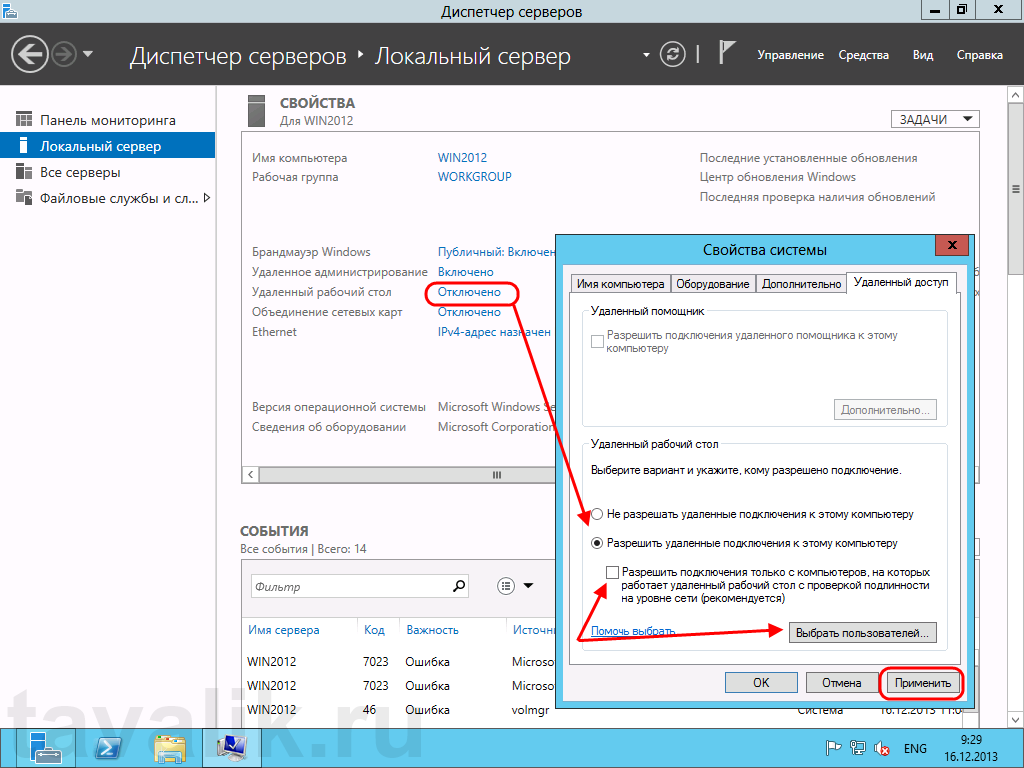
Далее, разрешим удаленный доступ к текущему серверу. Для этого кликнем по ссылке напротив «Удаленный рабочий стол» (Remote Desktop) в окне свойств. Откроется уже знакомое окно «Свойства системы» (System Properties) на вкладке «Удаленный доступ» (Remote) . Установим переключатель в «Разрешить удаленное подключение к этому компьютеру» (Allow remote connections to this computer) . По умолчанию только пользователи группы «Администраторы» (Administrators) имеет доступ к удаленному рабочему столу (для добавления пользователей необходимо нажать на «Выбрать пользователей…» (Select Users) и добавить пользователей системы из списка), после чего нажимаем «Применить» (Apply) . Подключение к серверу осуществляется с помощью встроенного в Windows RDP-клиента.
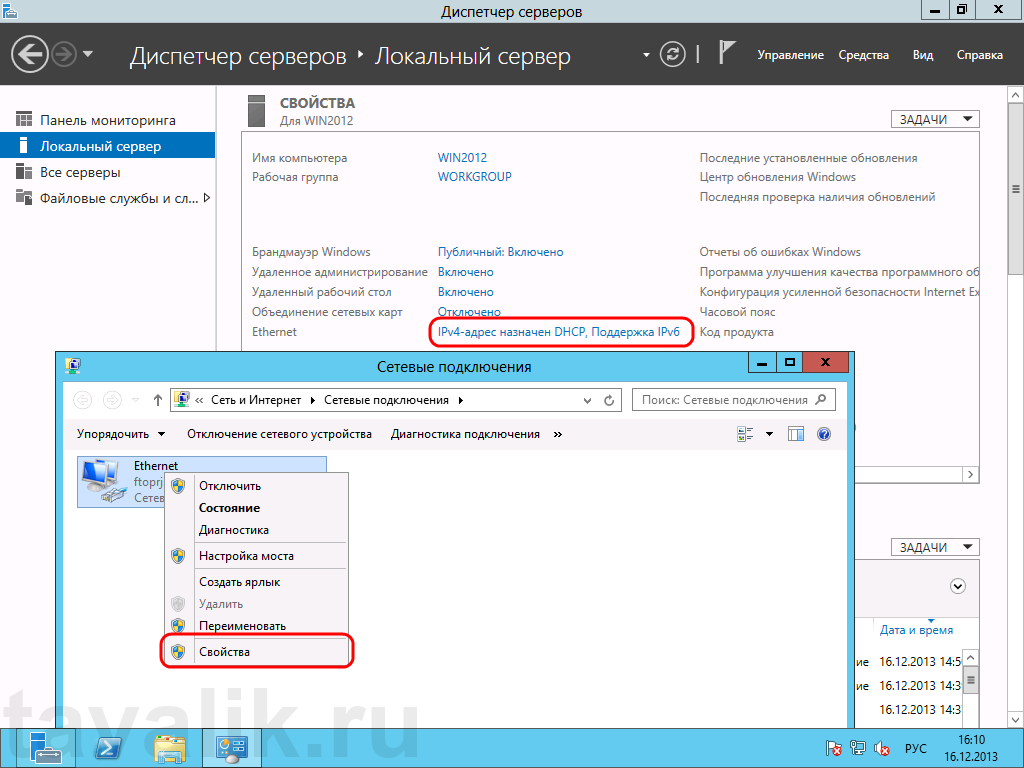
Настроим параметры сети. Для этого кликнем по ссылке напротив пункта «Ethernet» . Откроются сетевые подключения текущего компьютера. Кликаем правой кнопкой мыши по текущему активному сетевому адаптеру и в контекстном меню выбираем «Свойства» (Properties) .
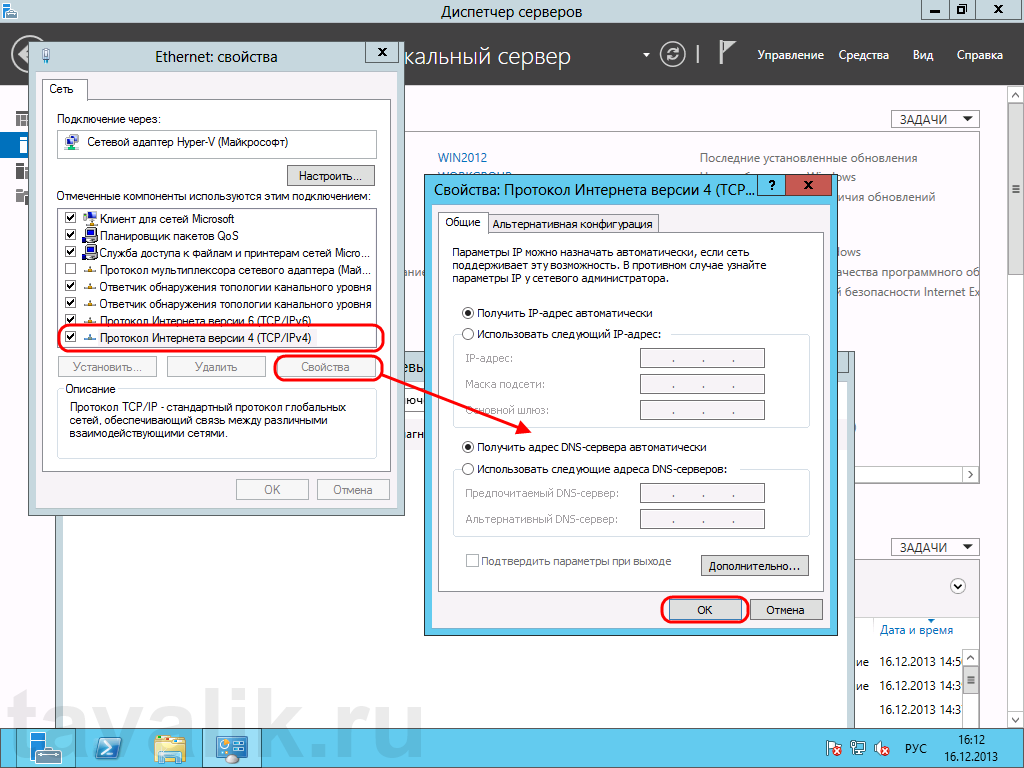
Откроются свойства сетевого соединения. Выберем в списке компонент «Протокол интернета версии 4 (TCP/IPv4)» (Internet Protocol Version 4 (TCP/IPv4)) (и снова нажмем «Свойства» (Properties) . В открывшемся окне можно задать нужные параметры IP. Это может быть динамический IP, если в сети есть DHCP-сервер, либо статический IP, который можно задать самостоятельно. Когда параметры IP установлены, жмем «ОК» для сохранения настроек.
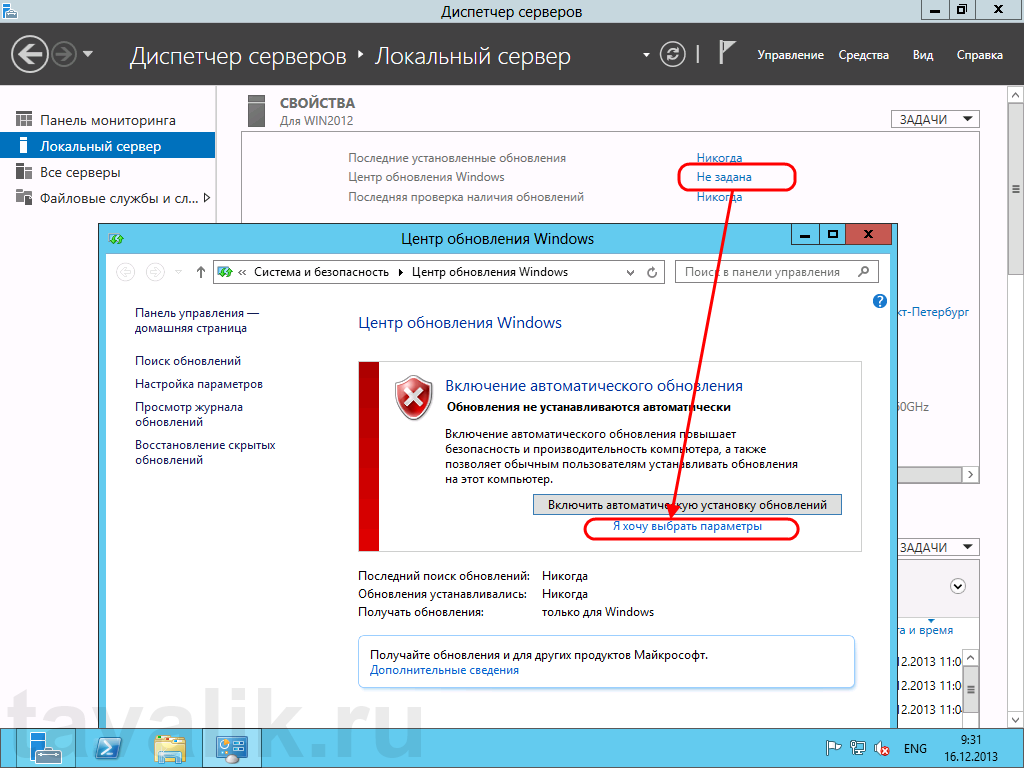
На следующем шаге выберем параметры обновления Windows Server 2012. Для этого пройдем по ссылке напротив пункта «Центр обновления Windows» (Windows Update), чтобы открыть соответствующую оснастку. Здесь кликнем на «Я хочу выбрать параметры» (Let me choose my settings) .
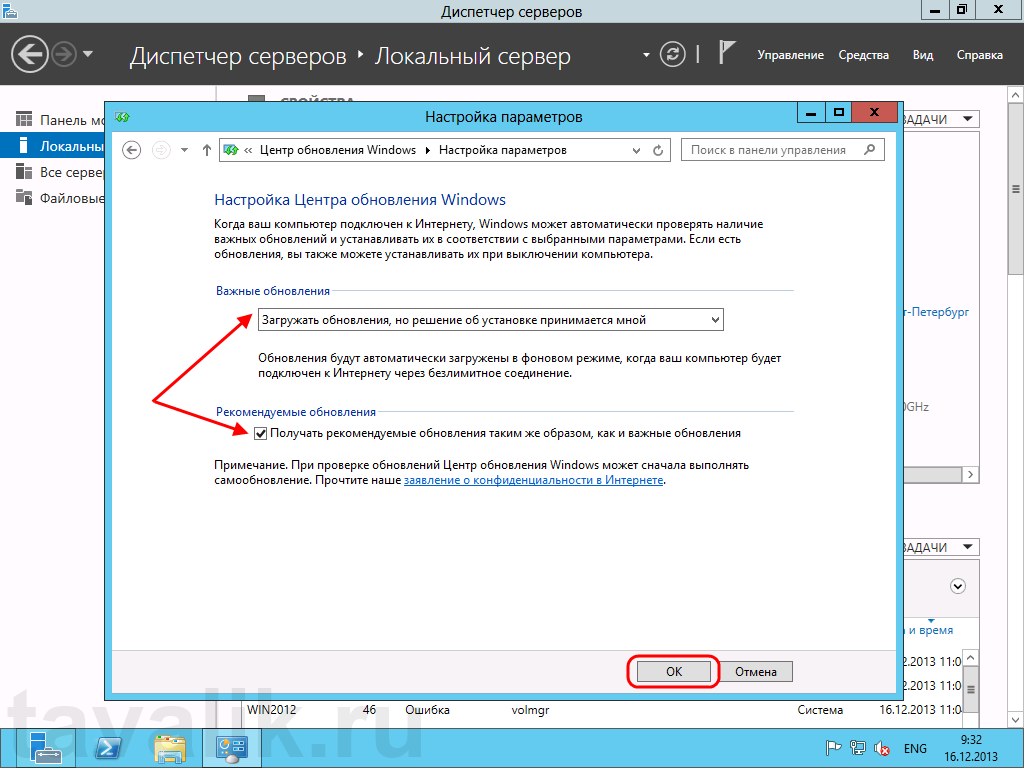
В открывшемся окне выберем необходимые параметры центра обновлений Windows. Я обычно устанавливаю:
- Важные обновления: «Загружать обновления, но решение об установке принимается мной» (Check for updates but let me choose whether to download and install them).
- Рекомендованные обновления: «Получать рекомендованные обновления таким же образом, как и важные обновления» (Give me recommended updates the same way I recieve important updates) .
После того, как параметры установлены, жмем «ОК» для сохранения настроек.
После чего Windows выполнит поиск доступных обновлений. Отметим все обновления в списке и нажмем «Установить» (Install) для запуска процесса установки.

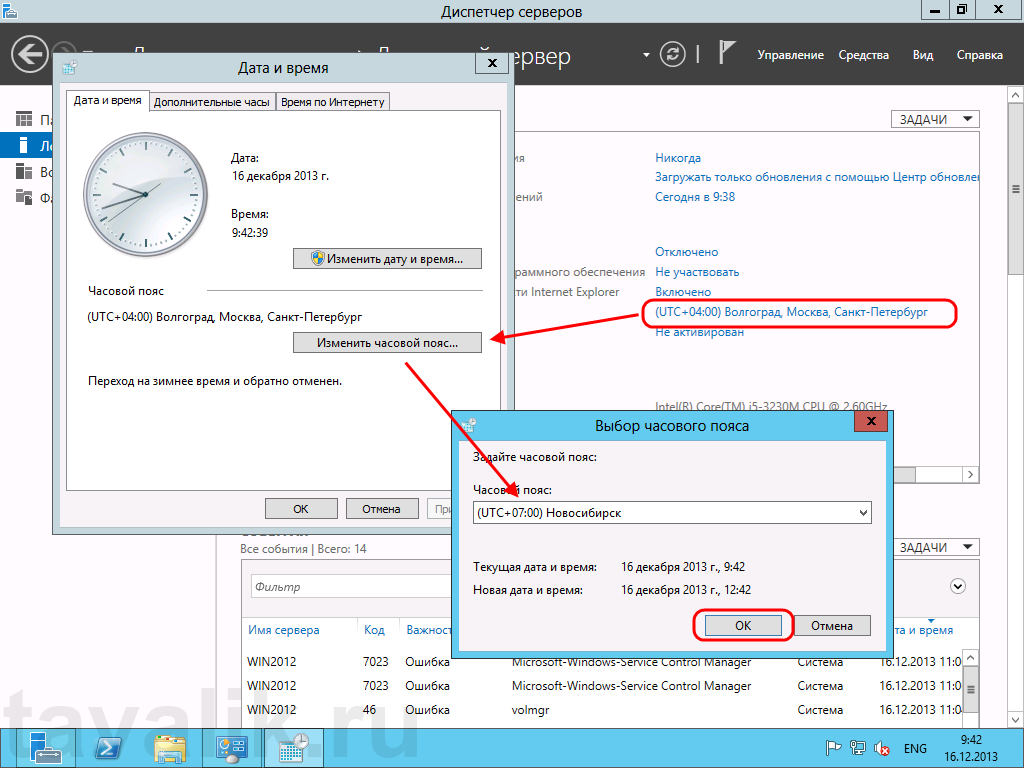
Пока происходит загрузка и установка обновлений продолжим настройку сервера. Пройдем по ссылке напротив пункта «Дата и время» (Time zone) для установки этих параметров. Для изменения даты и времени нажмем «Изменить дату и время…» (Change date and time…) в открывшемся окне, и «Изменить часовой пояс…» (Change time zone…) для изменения часового пояса соответственно. Определившись с настройками закрываем все окна кнопкой «ОК» .
Ну и напоследок нам осталось только активировать Windows Server 2012. Для этого жмем на ссылку в пункте «Код продукта» (Product ID). Откроется окно «Активация Windows» (Windows Activation) (в котором необходимо ввести текущий ключ продукта и нажать кнопку «Активировать» (Activate).
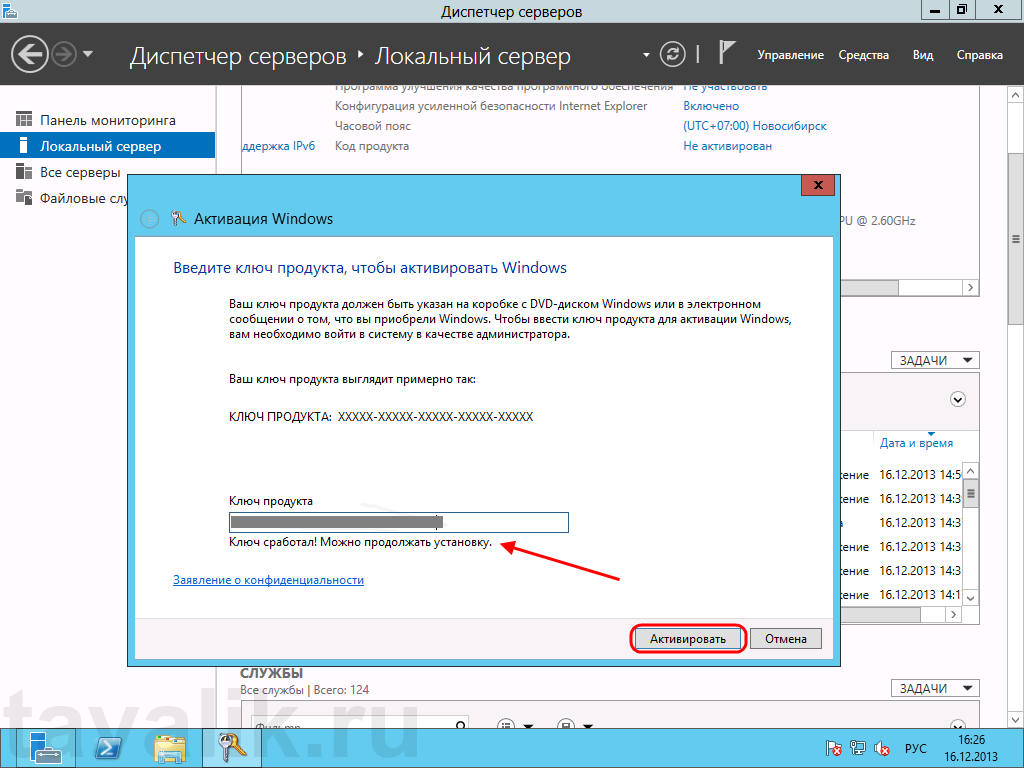
Если код соответствует выбранной версии Windows Server 2012, через некоторое время появится сообщение об успешной активации Windows, а напротив пункта «Код продукта» (Product ID) мы должны увидеть текущий код и статус «(активировано)» (activated) .

Вот и все. На этом установка и первоначальная настройка Microsoft Windows Server 2012 закончена. Осталось только дождаться установки текущих обновлений, перезагрузить сервер, затем повторить процедуру снова, до тех пор, пока все необходимые обновления не будут установлены.
![]()
Download Article
![]()
Download Article
Windows Server 2012 R2 operating system has features that support domain enterprise networks of varying sizes, but to realize the benefits of these features, you must first install, configure, and test it.
-
1
Create the operating system media.
- Create the operating system media, if you do not already have a DVD with Windows Server 2012 R2; however, if you download it, be sure to copy the product key, because you will need it for the installation.
- Download Windows Server 2012 R2 from Microsoft and save it onto your hard drive.
- Make a backup copy of the .iso file by copying it onto a DVD from the hard disk.
-
2
Start operating system installation.
- Place the Windows Server 2012 R2 DVD in the CD/DVD drive.
- Power on the machine to boot the operating system from the DVD.
- Watch the screen as the system boots from the Windows Server 2012 R2 DVD. After booting begins, you will see the display Loading files… followed by the Windows Server 2012 R2 Setup screen.
- Expand the drop down and review optional preferences; they include the language you can select for the installation.
- Click Next to display the options, Install now or Repair your computer.
Advertisement
-
3
Install or Upgrade.
- Observe that with these Windows Setup options, you choose either first time install or repair an existing operating system.
- Click Install now to display the product key request.
-
4
Type OS installation key.
- Take note that if you are using a DVD from a textbook, you may not need a key.
- Type the installation key.
- Click Next so you can choose the operating system version to install.
-
5
Select the OS version to install.
- Notice that depending on the DVD you are using, you may see a slightly different set of options. However, regardless of which DVD, Windows Server 2012 R2 Server Cores is the default.
- Select Windows Server 2012 R2 Standard (GUI installation), with the arrow key or mouse.
- Click Next to display the license agreement.
-
6
Select license terms.
- Review the Microsoft license agreement.
- Click the checkbox next to I accept the license terms.
- Click Next to display options, upgrade or custom install.
-
7
Configure upgrade or custom install.
- Review the notes for these options because they are very different; upgrade lets you upgrade a qualified Windows OS. Whereas with custom, you can install the OS on a newly created space.
- Click Custom to manage disk space and display the disk configuration.
- Highlight where you would like to install the operating system; you can use the arrow key, or mouse.
- Click Next to display Installing Windows screen followed by password Settings.
-
8
Create password.
- Create Administrator password at Windows Setup Settings prompt..
- Type the password, such as Passworda10.
- Click Finish to display the Sign in screen.
-
9
Log on to the server.
- Note that this action, display the password prompt, will depend on the installed environment, real or virtual.
- Click Ctrl+Alt+Delete to display the password prompt.
- Observe that this is the password you created earlier.
- Type the password for Administrator.
- Click the arrow to display Networks so you can tell setup how to configure network parameters.
-
10
Configure Network Settings.
- Configure network visibility is needed even if you plan to isolate the server; your intentions must be know to network settings.
- Click Yes so your computer is visible to other network devices.
-
11
Verify Installation complete.
- Verify the display of Server Manager indicating the installation is complete.
- Continue to learn more.


Advertisement
- These steps demonstrate how to configure TCP/IP settings, which are needed to verify network connectivity with another machine, such as Windows 7.
-
1
Minimize Server Manager.
- Click Minimize to minimize Server Manager, which is displayed when the OS completes booting.
-
2
Display menu items.
- Notice that when Server Manager is minimized, you will see the Recycle Bin and Taskbar; there are also menu items, such as Start, that are visible when the mouse is located at the bottom right.
- Move your mouse along the taskbar to the right and hover it to the right of the time and date; this action displays a number of icons, and to see their names, such as Search, Start, and Settings move the mouse straight up. If the icons are not shown, slightly move the mouse in any direction to display them.
- Click Start to display its contents.
-
3
Display Control Panel contents.
- Notice that Start shows a number of icons, such as Control Panel.
- Click Control Panel to display its contents.
-
4
Display Network and Internet links.
- Notice that items are shown in categories, but you can change how they are displayed.
- Click Network and Internet to display the screen containing their links.
-
5
Display Network and Sharing links.
- Notice there are two options, but only the first lets you configure the network adapter.
- Click Network and Sharing Center to display its options.
-
6
Display Network Connections (Ethernet) Properties.
- Notice there are several options in the left pane, but your main interest is on the adapter settings.
- Click Change adapter settings to display Network Connections.
- Notice that this computer has one NIC.
- Right click Ethernet and click Properties to display its properties.
-
7
Display TCP/IP Properties.
- Notice there are a number of protocol options for configuring network settings.
- Highlight Internet Protocol Version 4 (TCP/IPv4).
- Click Properties to display TCP/IP Properties.
- Notice that the default TCP/IPv4 configuration for network interface is DHCP client.
- Click Use the following IP address.
- Notice that the boxes are no longer grayed.
-
8
Configure TCP/IP settings.
- Notice there are a number of textboxes, but to test connectivity, only the IP address and subnet mask are needed.
- Type 172.16.150.10 in IP address field.
- Change the entry in Subnet mask to 255.255.255.0.
- Click OK.
- Click Close.
- Click close (X) to close both Network Connections and Network and Sharing Center.


Advertisement
- After the OS is installed and network parameters configured, it is time to test both activities; an important test is to verify the server can communicate with another machine, such as a Windows 7 client, and the client can communicate with the server; you can do this using the Command Prompt, and after testing is complete, you can shutdown the server.
-
1
Verify Connectivity.
- Display Start.
- Click the down arrow to display several Apps.
- Scroll right.
- Click the Command Prompt.
- Ping the second machine.
- From the second machine, ping the server.
-
2
Shutdown server.
- Display Start.
- Click Settings to display its contents.
- Click Power.
- Click Shutdown.
- Follow the displayed instructions to complete the shutdown.


Advertisement
Ask a Question
200 characters left
Include your email address to get a message when this question is answered.
Submit
Advertisement
-
Installation: Since it is unlikely you are dual booting a virtual machine, the following bullets apply only if you are installing the server on a physical machine.
- If an OS is already installed on the machine, you may see Press any key to boot from CD/DVD; this is your opportunity to boot from the CD/DVD drive.
- If an OS is already installed on the machine, and you do not see Press any key to boot from CD/DVD, you will have to reconfigure the boot process to boot form the CD/DVD drive.
- If an OS it not on the machine, the boot process goes directly to the CD/DVD drive and begins booting.
- If you are installing from a DVD that came with a textbook, you may not need a product key.
- Depending on the DVD you are using, such as one that came with a textbook, or one from Microsoft, you may see a slightly different selection menu; be sure not to select Server Core but GUI instead.
-
If you have an existing operating system that you want to upgrade, when prompted, you would select Upgrade, but in this case select Custom so you can customize the disk for installation.
-
The configuration shown will depend on the partition and unallocated space on your disk(s). Notice that you are given a number of disk options, but they are not always enabled; it depends on whether a partition or unallocated space is highlighted; if a partition is highlighted all except New are enabled, and if an unallocated space is highlighted, all are grayed, except New.
Show More Tips
Thanks for submitting a tip for review!
Advertisement
-
When partitioning the disks, Next does not depend on a selection; this means whichever space is highlighted, partition or unallocated, and you click Next, setup formats the space, copy the necessary operating system files, and install the operating system. Everything on that partition will be lost.
-
When partitioning the disks, if you select Delete, setup will delete the highlighted partition and label it unallocated; you will then have to use New to create a partition for the install, or click Next to install. Also, note that if you click Next, setup uses the entire highlighted space for the install, but if you do not want to use the entire space, to install the operating system, use New to create the partition size from the unallocated space.
Advertisement
Things You’ll Need
- DVD you created with the .iso for Windows Server 2012 R2.
- DVD with a Windows client, such as Windows 7.
- One physical machine on which you can install and configure two virtual machines: one server and one client.
- Virtual machine software, such as VirtualBox.
References
- Microsoft. (2013, June 24). System Requirements and Installation Information for Windows Server 2012 R2. Retrieved from TechNet: http://technet.microsoft.com/en-us/library/dn303418.aspx
- Microsoft. (2013, June 24). Windows Server Installation Options. Retrieved from TechNet: http://technet.microsoft.com/en-us/library/hh831786.aspx
About This Article
Thanks to all authors for creating a page that has been read 56,127 times.
Is this article up to date?
![]()
Download Article
![]()
Download Article
Windows Server 2012 R2 operating system has features that support domain enterprise networks of varying sizes, but to realize the benefits of these features, you must first install, configure, and test it.
-
1
Create the operating system media.
- Create the operating system media, if you do not already have a DVD with Windows Server 2012 R2; however, if you download it, be sure to copy the product key, because you will need it for the installation.
- Download Windows Server 2012 R2 from Microsoft and save it onto your hard drive.
- Make a backup copy of the .iso file by copying it onto a DVD from the hard disk.
-
2
Start operating system installation.
- Place the Windows Server 2012 R2 DVD in the CD/DVD drive.
- Power on the machine to boot the operating system from the DVD.
- Watch the screen as the system boots from the Windows Server 2012 R2 DVD. After booting begins, you will see the display Loading files… followed by the Windows Server 2012 R2 Setup screen.
- Expand the drop down and review optional preferences; they include the language you can select for the installation.
- Click Next to display the options, Install now or Repair your computer.
Advertisement
-
3
Install or Upgrade.
- Observe that with these Windows Setup options, you choose either first time install or repair an existing operating system.
- Click Install now to display the product key request.
-
4
Type OS installation key.
- Take note that if you are using a DVD from a textbook, you may not need a key.
- Type the installation key.
- Click Next so you can choose the operating system version to install.
-
5
Select the OS version to install.
- Notice that depending on the DVD you are using, you may see a slightly different set of options. However, regardless of which DVD, Windows Server 2012 R2 Server Cores is the default.
- Select Windows Server 2012 R2 Standard (GUI installation), with the arrow key or mouse.
- Click Next to display the license agreement.
-
6
Select license terms.
- Review the Microsoft license agreement.
- Click the checkbox next to I accept the license terms.
- Click Next to display options, upgrade or custom install.
-
7
Configure upgrade or custom install.
- Review the notes for these options because they are very different; upgrade lets you upgrade a qualified Windows OS. Whereas with custom, you can install the OS on a newly created space.
- Click Custom to manage disk space and display the disk configuration.
- Highlight where you would like to install the operating system; you can use the arrow key, or mouse.
- Click Next to display Installing Windows screen followed by password Settings.
-
8
Create password.
- Create Administrator password at Windows Setup Settings prompt..
- Type the password, such as Passworda10.
- Click Finish to display the Sign in screen.
-
9
Log on to the server.
- Note that this action, display the password prompt, will depend on the installed environment, real or virtual.
- Click Ctrl+Alt+Delete to display the password prompt.
- Observe that this is the password you created earlier.
- Type the password for Administrator.
- Click the arrow to display Networks so you can tell setup how to configure network parameters.
-
10
Configure Network Settings.
- Configure network visibility is needed even if you plan to isolate the server; your intentions must be know to network settings.
- Click Yes so your computer is visible to other network devices.
-
11
Verify Installation complete.
- Verify the display of Server Manager indicating the installation is complete.
- Continue to learn more.
Advertisement
- These steps demonstrate how to configure TCP/IP settings, which are needed to verify network connectivity with another machine, such as Windows 7.
-
1
Minimize Server Manager.
- Click Minimize to minimize Server Manager, which is displayed when the OS completes booting.
-
2
Display menu items.
- Notice that when Server Manager is minimized, you will see the Recycle Bin and Taskbar; there are also menu items, such as Start, that are visible when the mouse is located at the bottom right.
- Move your mouse along the taskbar to the right and hover it to the right of the time and date; this action displays a number of icons, and to see their names, such as Search, Start, and Settings move the mouse straight up. If the icons are not shown, slightly move the mouse in any direction to display them.
- Click Start to display its contents.
-
3
Display Control Panel contents.
- Notice that Start shows a number of icons, such as Control Panel.
- Click Control Panel to display its contents.
-
4
Display Network and Internet links.
- Notice that items are shown in categories, but you can change how they are displayed.
- Click Network and Internet to display the screen containing their links.
-
5
Display Network and Sharing links.
- Notice there are two options, but only the first lets you configure the network adapter.
- Click Network and Sharing Center to display its options.
-
6
Display Network Connections (Ethernet) Properties.
- Notice there are several options in the left pane, but your main interest is on the adapter settings.
- Click Change adapter settings to display Network Connections.
- Notice that this computer has one NIC.
- Right click Ethernet and click Properties to display its properties.
-
7
Display TCP/IP Properties.
- Notice there are a number of protocol options for configuring network settings.
- Highlight Internet Protocol Version 4 (TCP/IPv4).
- Click Properties to display TCP/IP Properties.
- Notice that the default TCP/IPv4 configuration for network interface is DHCP client.
- Click Use the following IP address.
- Notice that the boxes are no longer grayed.
-
8
Configure TCP/IP settings.
- Notice there are a number of textboxes, but to test connectivity, only the IP address and subnet mask are needed.
- Type 172.16.150.10 in IP address field.
- Change the entry in Subnet mask to 255.255.255.0.
- Click OK.
- Click Close.
- Click close (X) to close both Network Connections and Network and Sharing Center.
Advertisement
- After the OS is installed and network parameters configured, it is time to test both activities; an important test is to verify the server can communicate with another machine, such as a Windows 7 client, and the client can communicate with the server; you can do this using the Command Prompt, and after testing is complete, you can shutdown the server.
-
1
Verify Connectivity.
- Display Start.
- Click the down arrow to display several Apps.
- Scroll right.
- Click the Command Prompt.
- Ping the second machine.
- From the second machine, ping the server.
-
2
Shutdown server.
- Display Start.
- Click Settings to display its contents.
- Click Power.
- Click Shutdown.
- Follow the displayed instructions to complete the shutdown.
Advertisement
Ask a Question
200 characters left
Include your email address to get a message when this question is answered.
Submit
Advertisement
-
Installation: Since it is unlikely you are dual booting a virtual machine, the following bullets apply only if you are installing the server on a physical machine.
- If an OS is already installed on the machine, you may see Press any key to boot from CD/DVD; this is your opportunity to boot from the CD/DVD drive.
- If an OS is already installed on the machine, and you do not see Press any key to boot from CD/DVD, you will have to reconfigure the boot process to boot form the CD/DVD drive.
- If an OS it not on the machine, the boot process goes directly to the CD/DVD drive and begins booting.
- If you are installing from a DVD that came with a textbook, you may not need a product key.
- Depending on the DVD you are using, such as one that came with a textbook, or one from Microsoft, you may see a slightly different selection menu; be sure not to select Server Core but GUI instead.
-
If you have an existing operating system that you want to upgrade, when prompted, you would select Upgrade, but in this case select Custom so you can customize the disk for installation.
-
The configuration shown will depend on the partition and unallocated space on your disk(s). Notice that you are given a number of disk options, but they are not always enabled; it depends on whether a partition or unallocated space is highlighted; if a partition is highlighted all except New are enabled, and if an unallocated space is highlighted, all are grayed, except New.
Show More Tips
Thanks for submitting a tip for review!
Advertisement
-
When partitioning the disks, Next does not depend on a selection; this means whichever space is highlighted, partition or unallocated, and you click Next, setup formats the space, copy the necessary operating system files, and install the operating system. Everything on that partition will be lost.
-
When partitioning the disks, if you select Delete, setup will delete the highlighted partition and label it unallocated; you will then have to use New to create a partition for the install, or click Next to install. Also, note that if you click Next, setup uses the entire highlighted space for the install, but if you do not want to use the entire space, to install the operating system, use New to create the partition size from the unallocated space.
Advertisement
Things You’ll Need
- DVD you created with the .iso for Windows Server 2012 R2.
- DVD with a Windows client, such as Windows 7.
- One physical machine on which you can install and configure two virtual machines: one server and one client.
- Virtual machine software, such as VirtualBox.
References
- Microsoft. (2013, June 24). System Requirements and Installation Information for Windows Server 2012 R2. Retrieved from TechNet: http://technet.microsoft.com/en-us/library/dn303418.aspx
- Microsoft. (2013, June 24). Windows Server Installation Options. Retrieved from TechNet: http://technet.microsoft.com/en-us/library/hh831786.aspx
About This Article
Thanks to all authors for creating a page that has been read 56,127 times.
Is this article up to date?
-
13.05.2016, 11:56
#1
Гость форума
- Регистрация
- 30.03.2016
- Сообщений
- 7
- Сказал(а) спасибо
- 1
- Поблагодарили 0 раз(а) в 0 сообщениях
После сбоя по питанию server загружается и выходит в командную строку, может войти в диспетчер задач.Подскажите что можно сделать?
-
12.10.2017, 17:03
#2
Пришел за помощью
- Регистрация
- 28.11.2014
- Сообщений
- 10
- Сказал(а) спасибо
- 0
- Поблагодарили 1 раз в 1 сообщении
Re: server 2012 грузится и выходит в командную строку
Попробуй ввести taskmgr.exe
Затем файл-выполнить explorer.exe

Всем добрый день. Хотелось бы рассказать о установке и конфигурировании Windows Server 2012 R2 Essentials. Эта статья не является призывом к повсеместной установке Windows или пропагандой продуктов Microsoft. Хотелось бы просто рассказать об интересном продукте и возможно кого-то данный продукт заинтересует и пригодится в работе. Статью я старался писать для неподготовленного читателя, поэтому минимум терминологии и максимум обобщения некоторых понятий.
Немножко о редакции Essentials
Windows Server 2012 R2 Essentials – это одна из редакция серверной операционной системы от компании Microsoft. Однако имеет множество отличий от редакций Standard и Datacenter. Что же умеет Essentials:
- Авторизация и аутентификация пользователей вашей сети (домен контроллер службы каталогов Active Directory)
- Файловое хранилище (роль файлового сервера)
- Удаленный доступ к корпоративной сети (VPN и DirectAccess сервер)
- Удаленный доступ к файловому хранилищу через Web-интерфейс (настроенный для этого IIS)
- Удаленный доступ к рабочем столам клиентских машин (шлюз удаленных рабочих столов)
- Резервное копирование клиентских машин (windows backup)
- Резервное копирование самого сервера (windows backup)
- Интеграция с облачными технологиями Microsoft (Office 365, Azure backup и т.д.)
- Консоль единой настройки Essentials, которая позволит настроить возможности описанные выше даже не подготовленному системному администратору.
Если обобщить, то редакция Essentials имеет большинство ролей Windows Server. Некоторые из этих ролей настроены, некоторые доступны в полном объеме, некоторые как например Hyper-V с серьезными ограничениями. Компенсацией за эти все ограничения является более низкая цена, включенных 25 клиентских лицензий, централизованная и простая настройка. Хочу так же отметить, что процесс лицензирования серьезно отличается. Вы можете использовать эту редакцию только для организаций, где число пользователей не превышает 25. Но повторюсь вам не нужно приобретать какие-либо клиентские лицензии.
Таким образом Essentials очень хорошо подходит для малых организаций, которые бы хотели пользоваться большинством современных решений для обеспечения безопасности корпоративной сети, хранения документов, удаленного доступа, возможно, почтовые системы. Для тех организаций, которые не хотели бы тратить много денег как на саму ИТ инфраструктуру, так и на работу высококвалифицированных системных администраторов.
Установка и первоначальная настройка
Установка данной ОС вполне стандартная процедура. Если вы хоть раз устанавливали Windows Vista /7/8/8.1, то вы без проблем установите и Essentials. Однако, если вы не устанавливали ни вышеперечисленных ОС ни любую из последних версий серверных ОС, то я рекомендую или довериться профессионалу или как минимум студенту второкурснику.
Единственное, что я бы рекомендовал в момент установки, если у вас один жёсткий диск, разбить его на два раздела. Т.е. сделать так чтобы после установки в системе был второй уже отформатированный жесткий диск. Безусловно это только рекомендация, вы сможете подготовить второй диск в последующем, однако придется переносить некоторые папки.
После первого входа в свежеустановленную ОС запустится мастер «Настройка Windows Server Essentials», который поможет произвести первоначальную настройку.
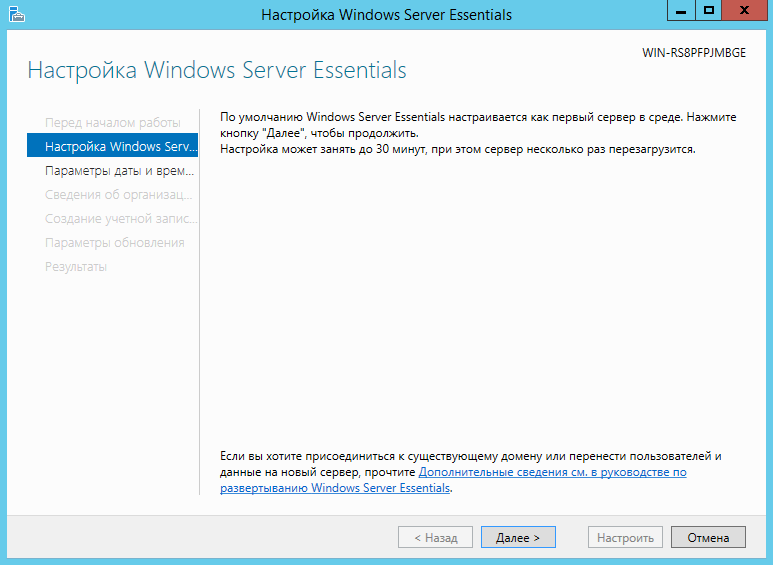
На первом шаге вам необходимо задать настройки даты и времени.
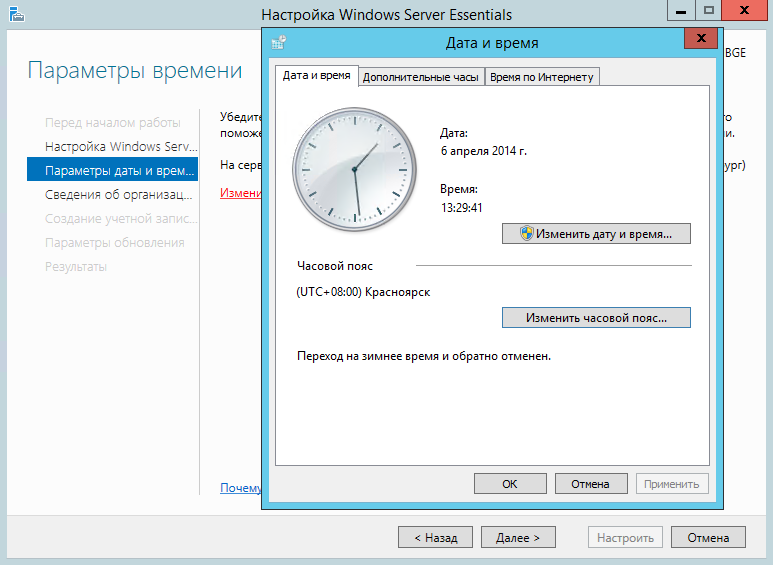
На втором шаге вам необходимо заполнить на английском языке название компании. Имя домена и имя сервера будут в таком случая сгенерированы автоматически, хотя конечно вы можете поменять их.
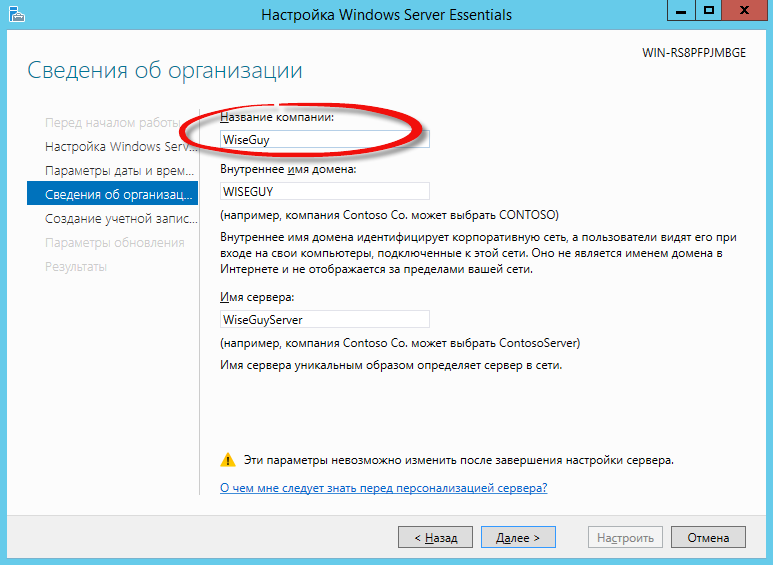
На следующем шаге вам необходимо заполнить имя администратора и задать его пароль.

На последнем шаге необходимо указать способ обновления операционной системы и нажать настроить
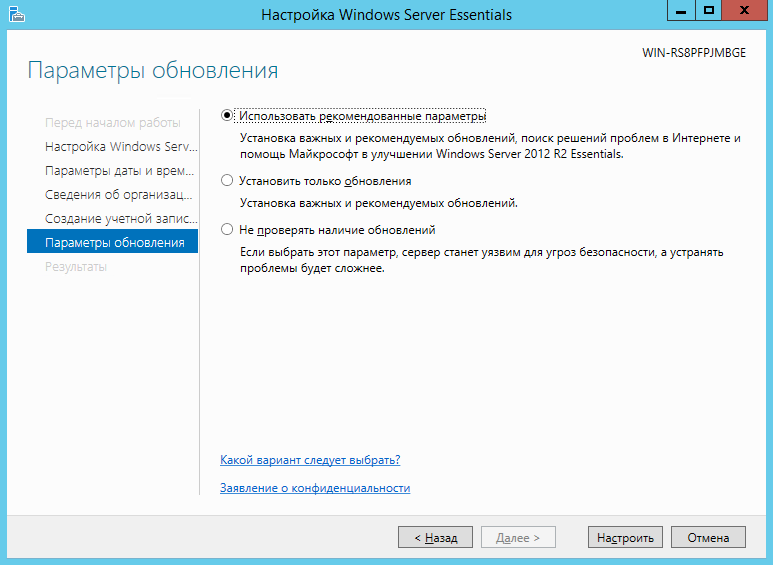
После этого запустится процесс, который произведет все необходимые первоначальные настройки. Это займет около 30 минут и потребует несколько перезагрузок. За это время ОС успеет в частности установить необходимые роли и настроить сервер в качестве домен контроллера для нового домена.
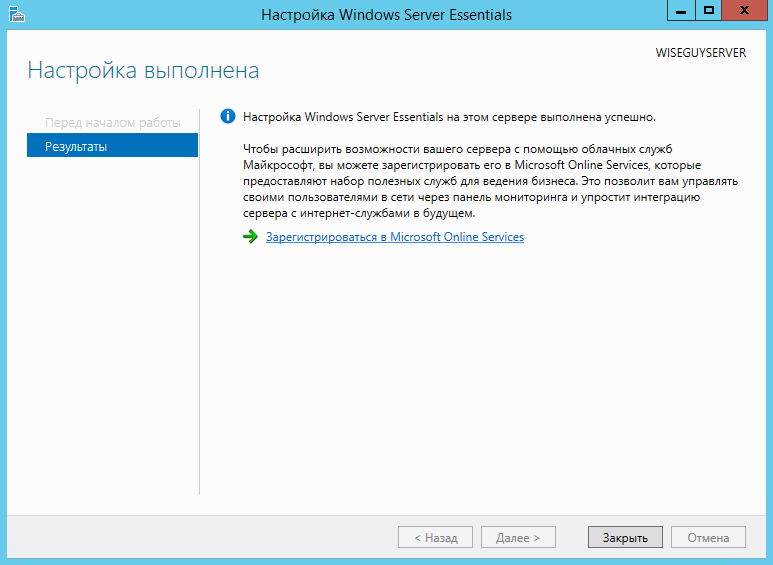
Настройка
Продукт весьма большой и обширный, я хотел бы рассказать о самых базовых возможностях настройки, такие как создание пользователей, настройка удаленного доступа, создание папок, подключение клиентов.
Вся настройка происходит в панели мониторинга, доступ к ней есть с рабочего стола, панели быстрого запуска и стартового экрана.
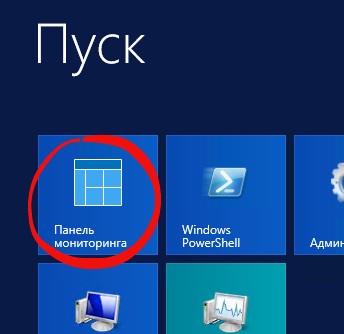
Создание пользователей
При первом запуске данной панели вам откроется вкладка установка, на которой можно выполнить ряд задач по настройке сервера.
Я начну с добавления пользователей. Щелкаем ссылку для добавления учетных записей.
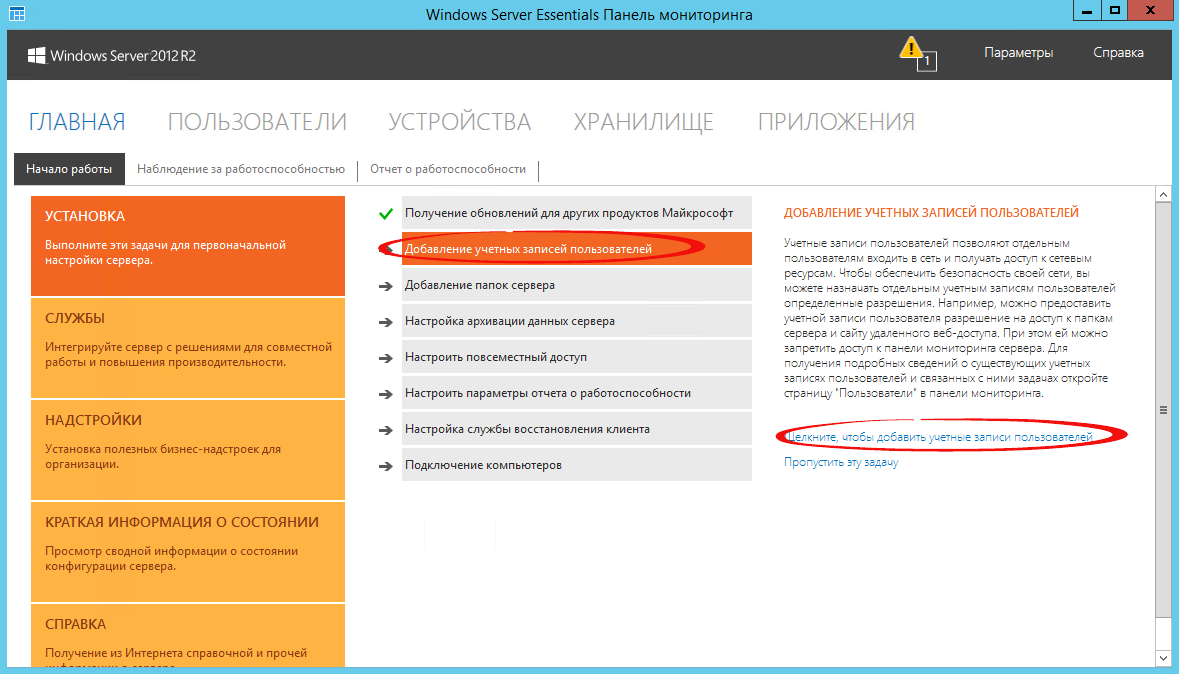
Заполняем поля формы и нажимаем далее
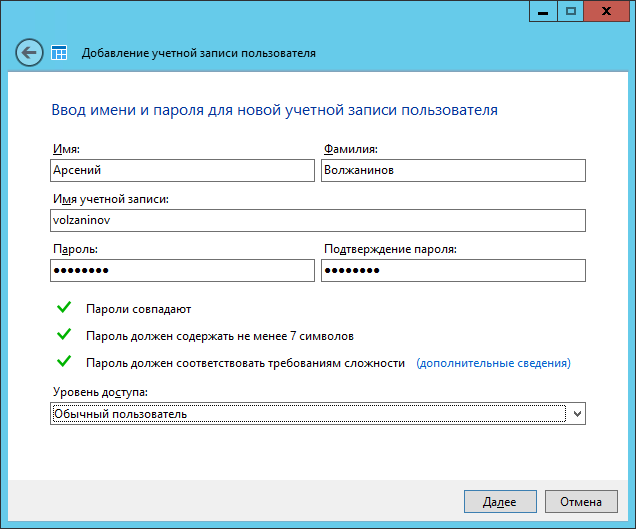
Выбираем уровень доступа к общим папкам, которые были созданы. На начальном этапе существует лишь одна – Организация. В дальнейшем вы можете менять разрешения на доступ как из свойств пользователя, так и из свойств папки.
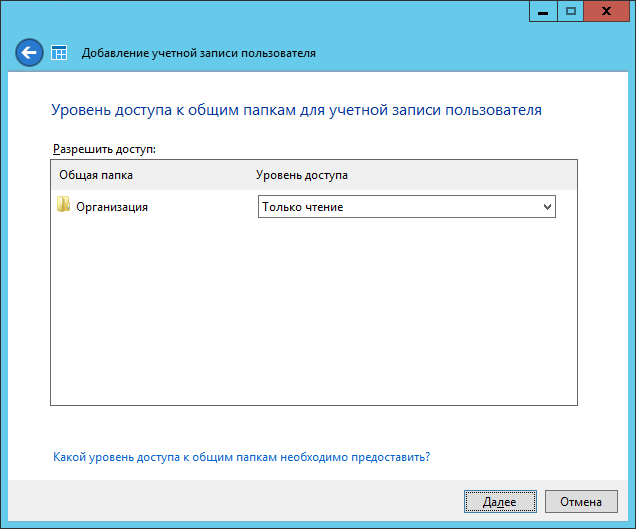
Далее устанавливаем, что будет доступно для пользователя удаленно. Про удаленный доступ расскажу чуть позже.
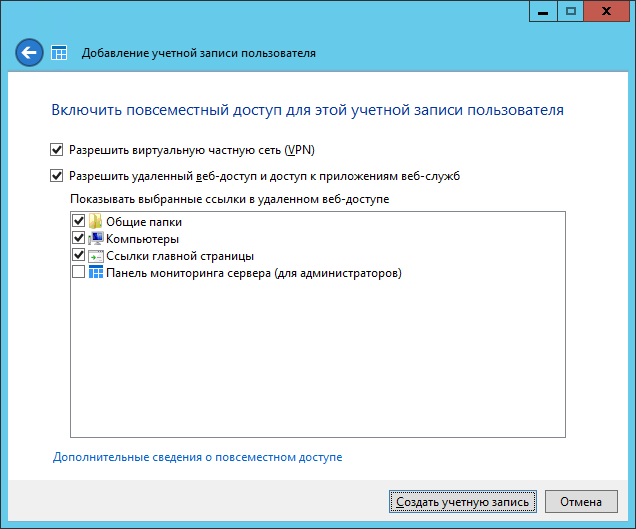
Учетная запись создана. Жмем закрыть.
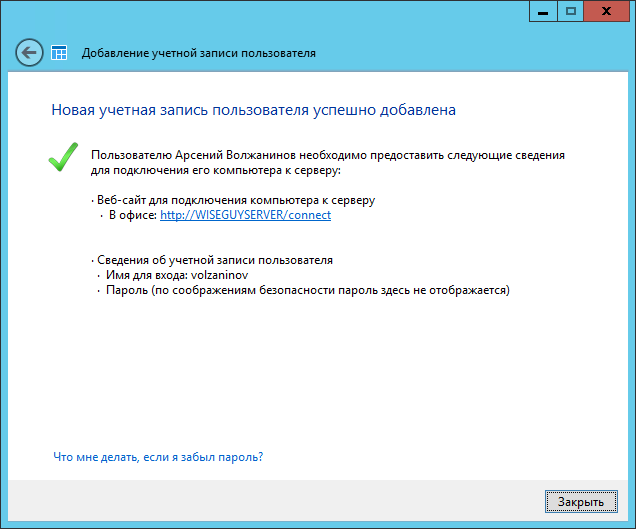
Подобным образом можно создать множество учетных записей. Безусловно, Вы можете пользоваться и привычным и знакомым для вас интерфейсом Active Directory Users and Computers, но в таком случае выдавать разрешения на доступ вам придется ручками.
Добавление папок сервера
Для добавление папок существует другой мастер, который поможет и создать папку на диске, и общий доступ для нее настроить, и разрешения выдать. Для его запуска необходимо щелкнуть соответствующую ссылку в панели мониторинга.
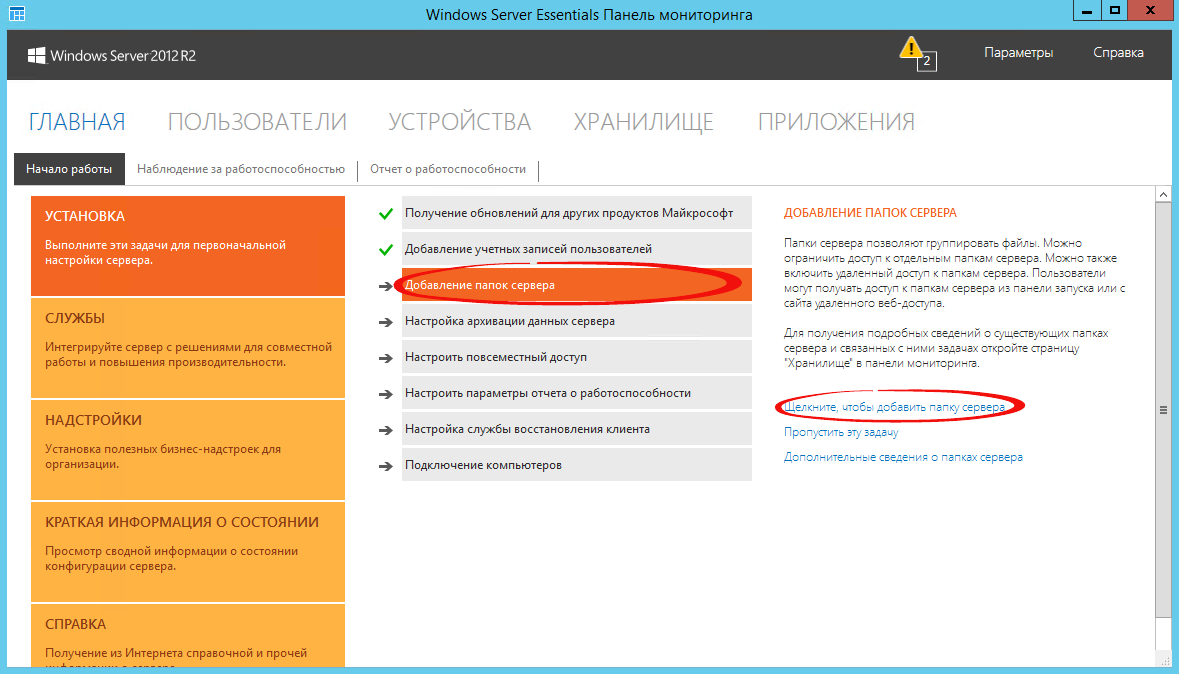
В открывшемся окне мастера вводим название. Можно изменить расположение и добавить описание. Нажимаем далее.
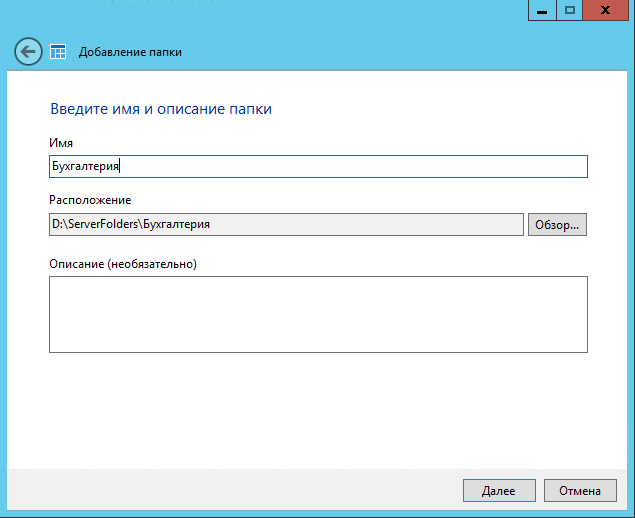
На следующей странице указываем необходимые разрешения. При необходимости делаем ее недоступной при удаленном доступе.
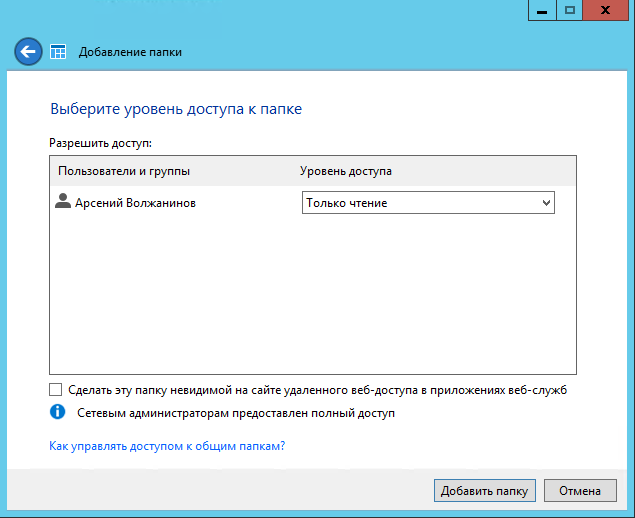
С последнего шага данного мастера можно запустить мастер настройки архивации. Нажимаем закрыть.
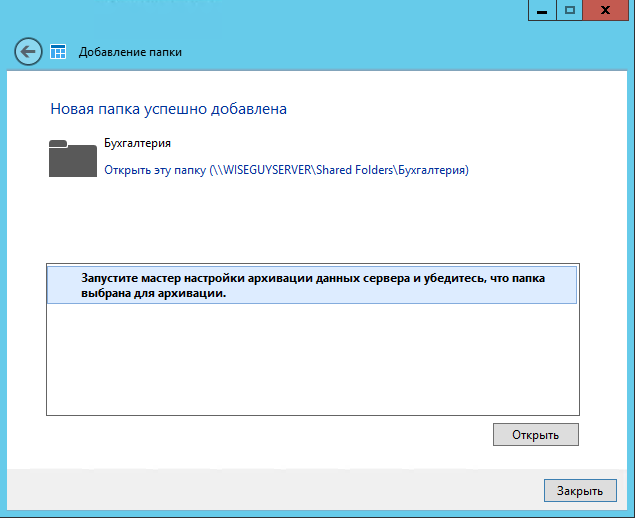
Настройка удаленного доступа
Один, наверное, из самых сложных этапов настройки Windows Server 2012R2 Essentials. Настройка так же происходит с помощью мастера. Мастер традиционно запускается из панели мониторинга.
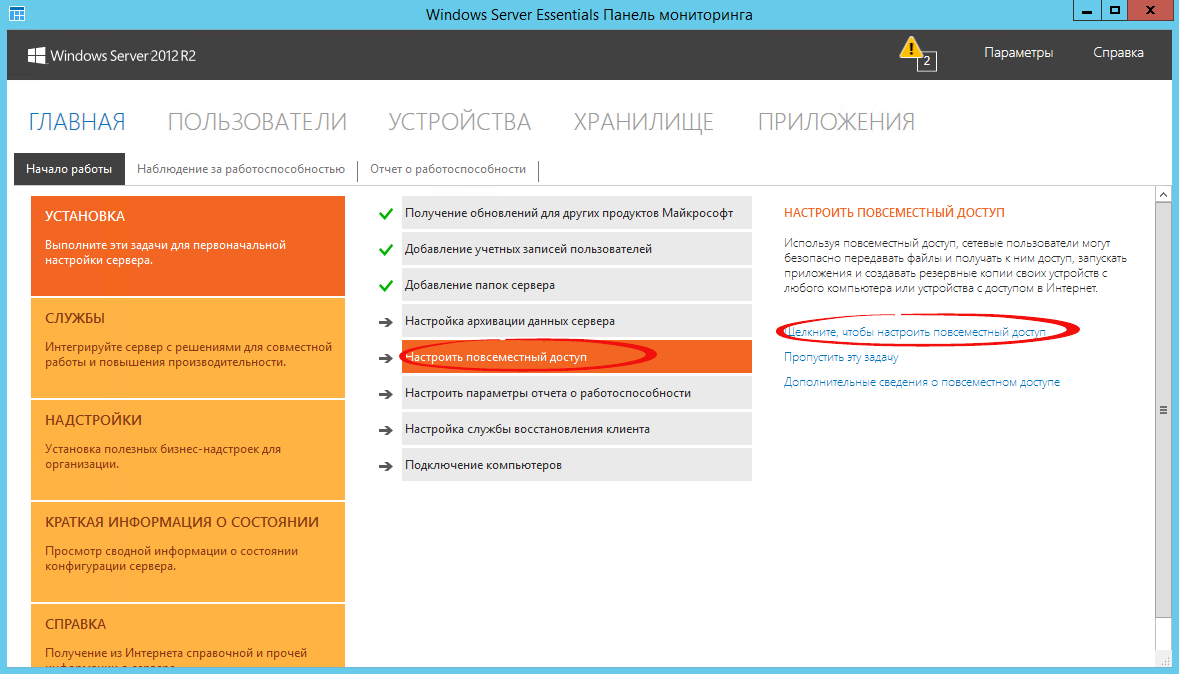
Первое что Вам необходимо настроить это ваш маршрутизатор – об этом Вам сообщает мастер. На самом деле Вам необходимо настроить перенаправление портов на маршрутизаторе. Для этого у маршрутизатора должен быть «белый» IP адрес. А на самом сервере лучше настроить статический IP адрес. Перенаправить нужно следующие порты 80, 443, 1723, 987 на IP адрес вашего сервера. В общем то процедуру настройки может выполнить и сам мастер, если ваш маршрутизатор поддерживает UPnP. Я делал настройку ручками, поэтому пропустил данный шаг.
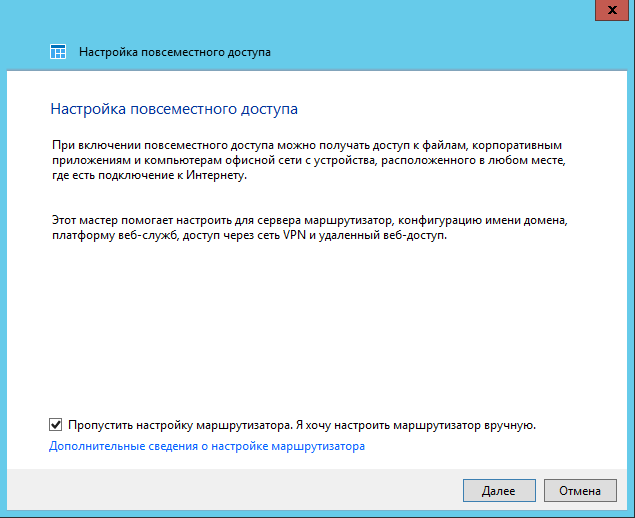
После этого открывается новый мастер настройки доменного имени. Нажимаем далее.
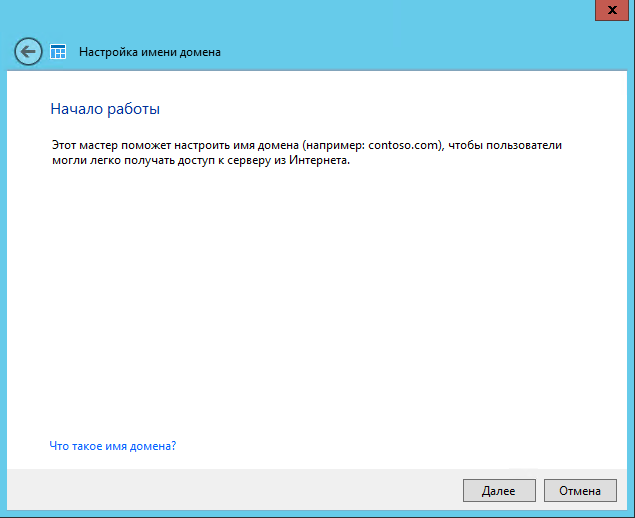
Мастер предложит ввести имя внешнего домена или создать новый. Для собственного домена Вам понадобится сертификат, поэтому рассмотрим тут вариант настройки с использованием домена Microsoft. Выбираем другое имя домена и щелкаем далее.
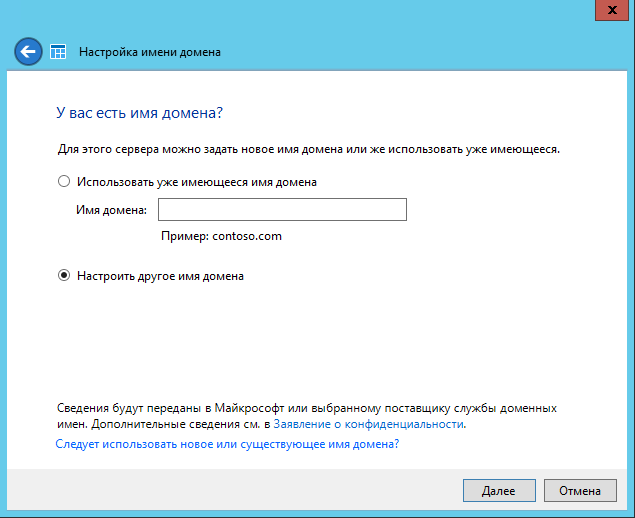
Рассмотрим вариант с доменом компании Microsoft.
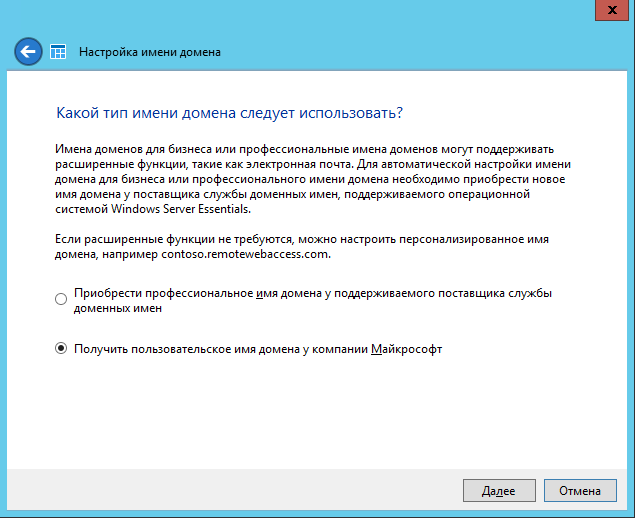
Тут попросит авторизоваться в Microsoft Account.
После авторизации принимаем заявление о конфиденциальности.

Вводим имя домена и проверяем доступность, жмем настроить.

Ну что с именем домена разобрались. Продолжаем — далее.
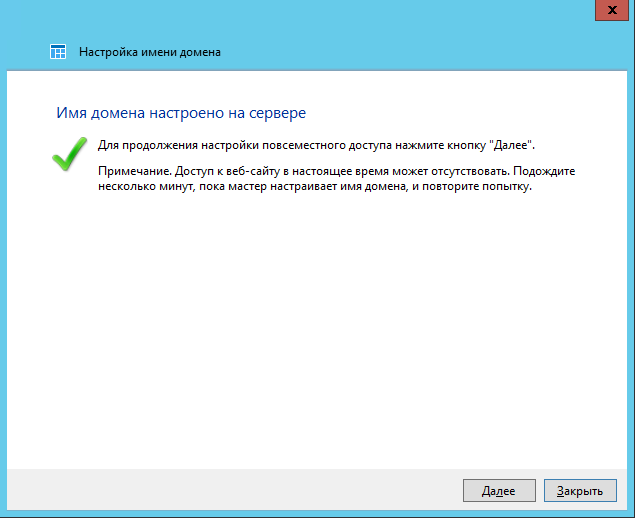
Выбираем какие именно возможности будут доступны.

Выбираем будет ли доступен удаленный доступ для текущих пользователей.
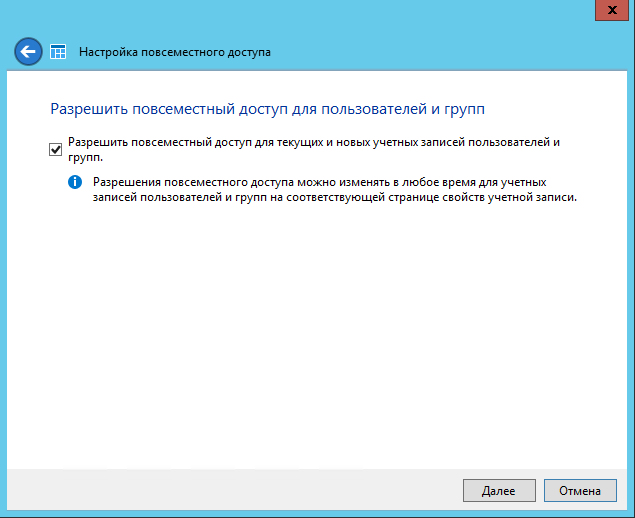
Ну вот и все можете попробовать зайти на сайт wiseguy.remoteweaccess.com.

C данного веб сайта есть возможность доступа к общим папкам и доступ к рабочим столам пользователей.
Подключение рабочих станций
Если мы и на этот раз откроем панель мониторинга и перейдем на страницу подключение компьютеров, то увидим там лишь инструкцию к действию

Следуя инструкции на клиенте в браузере открываем страничку http://<Имя сервера>/connect. Нажимаем ссылку для скачивания.
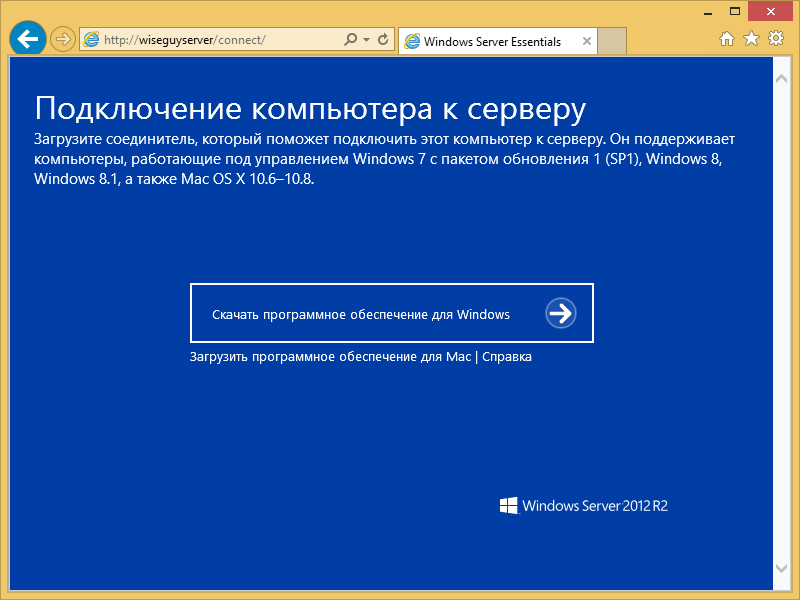
Выбираем выполнить.

Принимаем лицензию и ждем.
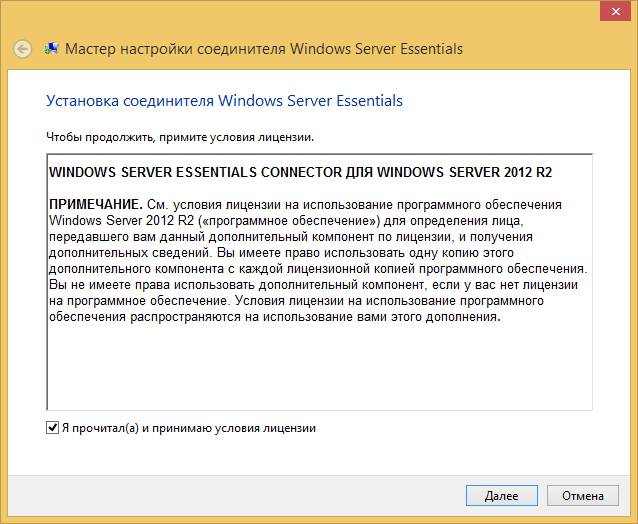
Вводим имя пользователя и пароль пользователя данного компьютера или администратора. Я вводил учетку пользователя.
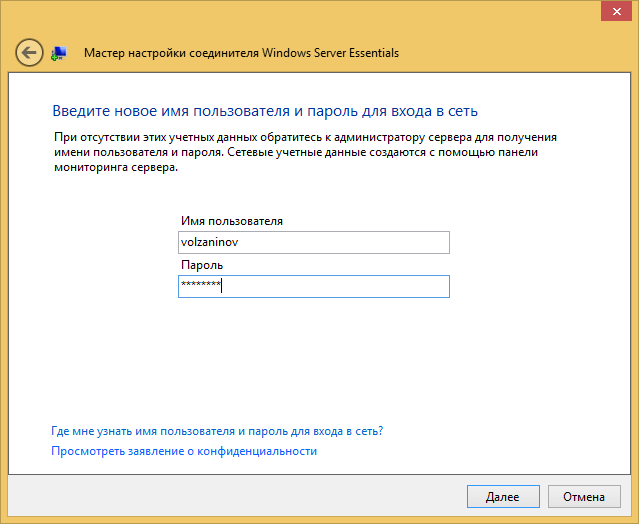
Перезагружаем сервер.

Выбираем, кто будет пользоваться компьютером.
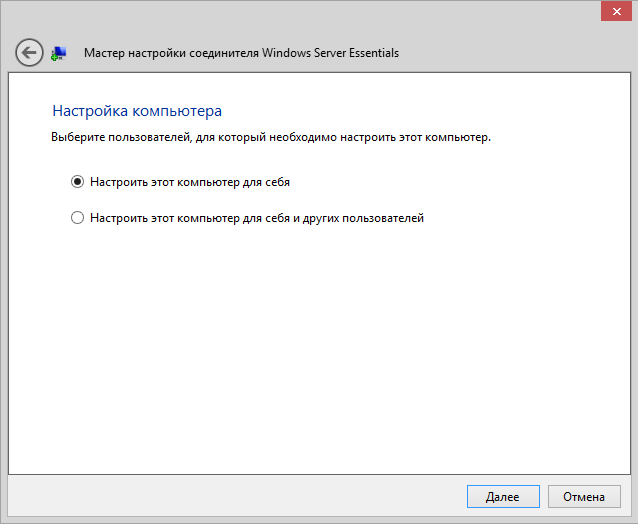
Вводим описание компьютера.
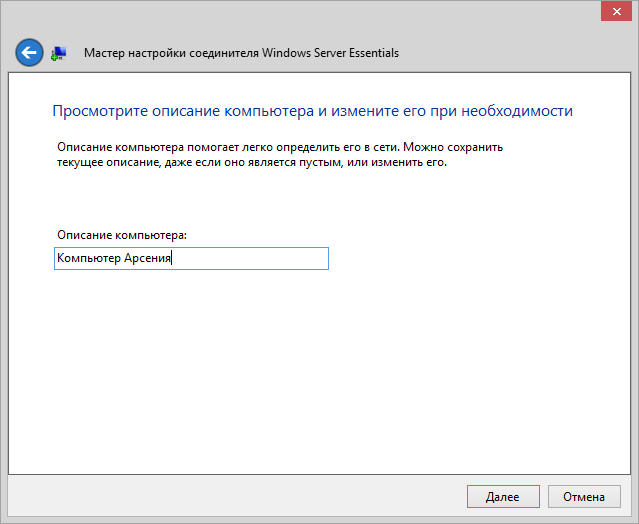
Параметры архивации.
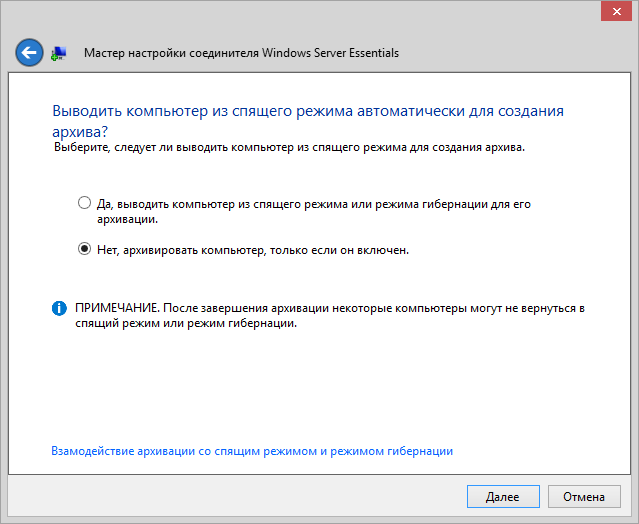
Ура! Готово.
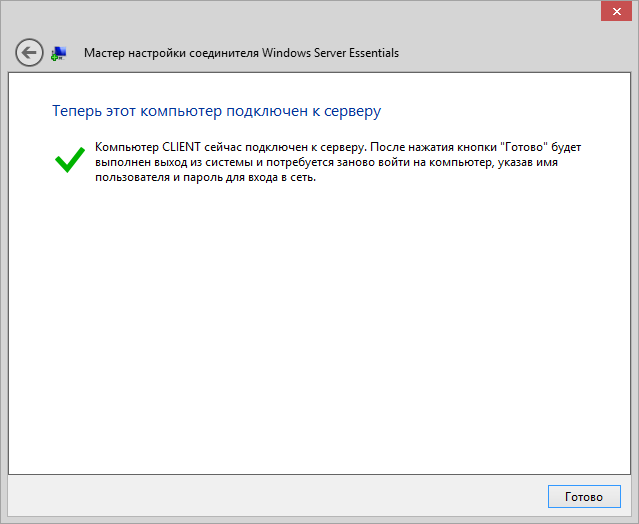
Заходим на компьютер под учетной записью пользователя.

Можно работать. На рабочем столе уже есть все необходимые ярлыки.

Post scriptum
Безусловно Windows Server 2012R2 Essentials – это не панацея. Автоматизировано в ней многое, но не все. Тем не менее для малых организаций, это весьма интересное решение и его необходимо рассмотреть. В этой статье я рассказал лишь о самых базовых настройках Essentials. Если вы желаете чуть ближе познакомиться с продуктом, вы можете посмотреть мои видеодоклады на сайте Techdays.ru .
Windows Server 2012 R2 Essentials первый взгляд: www.techdays.ru/videos/7351.html — тут можно внимательно изучить процесс инсталляции Essentials.
Windows Server 2012 R2 Essentials настройка: www.techdays.ru/videos/7370.html — рассмотрены настройка всех возможностей, показана настройка удаленного доступа для своего домена.
Windows Server 2012 R2 Essentials интеграция Office 365: www.techdays.ru/videos/7380.html — интеграция с облачным офисом от Microsoft.
Комментарии и вопросы приветствуются.
В статье подробно описан и продемонстрирован процесс создания загрузочной USB флешки с Windows Server 2012 R2, а также процесс активации Windows Server 2012 R2.
Процесс создания загрузочной USB флешки, установки операционной системы и активации показан на примере Windows Server 2012 R2 Datacenter, однако данное руководство также полностью подходит для установки версий Windows Server 2012 R2 Foundation/Essentials/Standard.
ВАЖНО! Прежде чем переустанавливать Windows Server 2012 R2, скопируйте всю ценную для Вас информацию на сторонние носители. Если имеется такая возможность, желательно скачать драйверы сетевой карты для компьютера на который Вы будете устанавливать Windows Server 2012 R2.
Для установки Windows Server 2012 R2 понадобятся:
1. USB флешка объемом 8Гб или больше. Имейте ввиду, что в процессе создания загрузочной USB флешки с Windows Server 2012 R2 вся информация находящаяся на флешке будет удалена;
2. Оригинальный образ (ISO-образ) Windows Server 2012 R2;
Скачать Windows Server 2012 R2
.
3. Утилита Rufus для создания загрузочной USB флешки из ISO-образа Windows Server 2012 R2;
Скачать Rufus
.
4. Утилита Activator KMSAuto для активации Windows Server 2012 R2;
Скачать Activator KMSAuto
.
I. Создание загрузочной флешки с Windows Server 2008 R2
1. Вставьте USB флешку в USB разъем.
2. Запустите скачанную утилиту Rufus.
Перед Вами откроется окно:

Рис.1
.
3. На Рис.1 видно USB флешку, которую Вы вставили в USB разъем.
4. Нажмите на иконку, после чего откроется окно выбора ISO-образа. Выберите скачанный Вами ранее ISO-образ с Windows Server 2012 R2 (прим. вспомните куда Вы его сохраняли).
5. Нажимаем Открыть.
6. Нажимаем Старт.

Рис.2
.
7. Появится окно предупреждения, информирующее о том, что все данные на USB флешке будут удалены. Нажимаем ОК, после чего начнётся установка ISO-образа. После окончания установки ISO-образа (Рис.2) нажмите Закрыть.
.
II. Добавление активатора Windows на USB флешку
1. Откройте созданную загрузочную USB флешку с Windows Server 2012 R2.
2. Распакуйте (прим. с помощью WinRAR или просто открыть через Проводник) скачанную Вами ранее утилиту Activator KMSAuto. Полученную папку Activator KMSAuto переместите на загрузочную USB флешку с Windows Server 2012 R2 (Рис.3).

Рис.3
.
III. Установка Windows Server 2012 R2
1. Вставьте загрузочную USB флешку с Windows Server 2012 R2 в разъём USB.
2. Сразу после запуска компьютера необходимо вызвать Boot menu. Т.к. на разных материнских платах и ноутбуках клавиши вызова Boot menu отличаются, ниже приведена таблица (Рис.4) в соответствии с которой Вам необходимо нажать соответствующую клавишу (прим. если у Вас стационарный компьютер, и Вы не знаете какая материнская на нём стоит, обесточьте компьютер, откройте боковую крышку системного блока и посмотрите модель материнской платы).

Рис.4
.
3. Boot menu незначительно отличается на разных моделях и приблизительно выглядит следующим образом (Рис.5, Рис.6, Рис.7).

Рис.5
.

Рис.6
.

Рис.7
.
4. Выберите загрузку с USB флешки и нажмите Enter.
5. Далее на дисплее появится надпись «Press any key to boot from CD or DVD…», нажмите любую клавишу на клавиатуре (Рис.8).

Рис.8
.
6. В появившемся окне установки Windows Server 2012 R2 выберите нужный язык и нажмите Далее (Рис.9).

Рис.9
.
7. Для начала установки нажмите Установить (Рис.10).

Рис.10
.
8. Выбираем необходимую нам операционную систему (прим. в данном руководстве установка показана на примере Windows Server 2012 R2 Datacenter (сервер с графическим интерфейсом)).
Примечание! Windows Server 2012 R2 включает вариант облегченной установки Windows Server 2012 R2 в которую не включена графическая оболочка. Вся настройка и обслуживание выполняется при помощи интерфейса командной строки Windows, или подключением к серверу удалённо посредством Консоли управления. При этом доступны Блокнот и некоторые элементы панели управления, к примеру, Региональные Настройки.
После того как вы выбрали нужную Вам операционную систему нажмите Далее (Рис.11).

Рис.11
.
9. В появившемся окне поставьте галочку напротив Я принимаю условия лицензии, затем нажмите Далее (Рис.12).

Рис.12
.
10. В разделе тип установки выберите Выборочная: только установка Windows (для опытных пользователей) (Рис.13).

Рис.13
.
11. Выберите опцию Создать (Рис.14).

Рис.14
.
12. Появится строка, в которой нужно указать размер создаваемого логического диска, затем нажмите Применить (прим. если Вам необходимо создать два и более разделов — сначала задайте размер первого логического диска, затем, из оставшегося незанятого пространства, аналогичным образом, создайте другие разделы) (Рис.15).

Рис.15
.
13. Откроется окно, в котором сообщается, что Windows необходимо создать дополнительные разделы для системных файлов. Нажмите ОК (Рис.16).

Рис.16
.
14. Выберите раздел для установки Windows Server 2012 R2 (прим. в данном руководстве это Диск 0 Раздел 2), затем нажмите Далее (Рис.17).

Рис.17
.
15. Начнется установка Windows Server 2012 R2, в процессе которой компьютер перезагрузится (Рис.18).

Рис.18
.
16. Придумайте и введите новый пароль для учётной записи администратора (прим. пароль, как минимум, должен содержать буквы разного регистра и цифры), затем нажмите Готово (Рис.19).

Рис.19
.
17. После окончания установки, для входа в систему, нажмите Ctrl + Alt + Delete (Рис.20).

Рис.20
.
18. Введите пароль администратора, затем нажмите Enter (или синюю иконку со стрелочкой) (Рис.21).

Рис.21
.
19. После запуска системы появится рабочий стол Windows Server 2012 R2 (Рис.22).

Рис.22
.
IV. Активация Windows Server 2012 R2
1. На установленной Windows Server 2012 R2 откройте загрузочную USB флешку с Windows Server 2012 R2, в ней откройте папку Activator KMSAuto и запустите файл KMSAuto (Рис.23).

Рис.23
.
2. В открывшемся окне нажмите Активация Windows, после окончания активации внизу появится надпись Completed (Рис.24).

Рис.24
.
3. После активации откройте Пуск > Компьютер (пр. кнопкой мыши) > Свойства (Рис.25).

Рис.25
.
4. Откроется окно, внизу которого будет написано, что активация Windows выполнена (Рис.26).

Рис.26
.
Установка и активация Windows Server 2012 R2 завершена! Надеемся, что данное руководство помогло Вам!
.
Содержание
- Windows Server 2012: Переключение между режимами GUI и Core
- Переключение из режима Server Core в GUI
- Переключение из GUI режима в Core
- Переключение из Windows Server 2012 GUI в Minimal Server interface
- Переключение из Core в Minimal Server Interface в Windows 2012
- Windows server 2012 после установки только командная строка
- Как сменить имя компьютера в Windows Server 2012 R2 core
- Как включить удаленный рабочий стол в Windows Server 2012 R2 core
- Как настроить обновления в Windows Server 2012 R2 core.
- Как задать время в Windows Server 2012 R2 core.
- Как настроить статический ip адрес в Windows Server 2012 R2 core русской версии
- Как присоединить к домену Windows Server 2012 R2 core русской версии
Windows Server 2012: Переключение между режимами GUI и Core
Server Core – особый режим установки Windows Server, это среда, в которой отсутствует графический интерфейс и средства управления, а также некоторые серверные роли и компоненты. Управление Windows Server Core предполагается из командной строки, с помощью PowerShell, или же с других серверов/рабочих станций с установленным RSAT (RSAT для Windows 7, RSAT для Windows 10). Впервые Core-режим работы серверной ОС Microsoft появился еще в Windows Server 2008. Основные преимущества Server Core перед полными инсталляциями Windows Server: экономия системных ресурсов, повышенная стабильность и безопасность за счет меньшего количества компонентов, упрощение обслуживания, меньший даунтайм при установке обновлений, сокращение поверхности атаки злоумышленниками.
Одним из главных недостатков в Windows Server 2008 Core являлась невозможность переключение в режим с графической оболочкой (GUI) или в обратную сторону (из GUI в Core режим). В случае возникновения такой необходимости приходилось целиком переустанавливать ОС.
В Windows Server 2012 Microsoft решила убрать это ограничение, кроме того появился еще один вариант работы сервера — минимальный интерфейс сервера (Minimal Server Interface). В этом режиме отсутствуют проводник, Internet Explorer, рабочий стол и начальный экран).
В Windows Server 2012 теперь можно установить и настроить сервер в знакомом администраторам GUI, после чего перевести сервер в Core режим. Этот подход упрощает процедуру настройки сервера, не вынуждая администраторов разбираться в подчас достаточно сложных консольных командах и командлетах PoSh.
Итак, в Windows Server 2012 возможна работа в нескольких режимах, между которыми в процессе эксплуатирования и настройки сервера может переключаться администратор.
- Full Server with GUI – полноценный сервер с GUI
- Server Core with GUI Management (Minimal Server Interface) – минимальная интерфейс сервера с Windows Server 2012, включающий графические утилитаты управления сервером
- Server Core – режим командной строки
Далее мы разберем способы переключения между данными режимами работа новой серверной платформы от Microsoft
Переключение из режима Server Core в GUI
В том случае, если сервер был установлен в режиме Windows Server 2012 Core, в установленных компонентах отсутствуют необходимые файлы для установки GUI (концепция минимизации занимаемого места на диске в Core режиме). По умолчанию, если нужные компоненты отсутствуют на диске, система пытается скачать их с сайта Windows Update. Если доступ в интернет у сервера отсутствует, нам придется указать альтернативные источник установки (с помощью команды powershell Install-WindowsFeature с параметром -Source).
Для установки графического интерфейса нам понадобится дистрибутив Windows Server 2012. Допустим, мы вставили (смонтировали iso образа) дистрибутив Windows Server 2012 в устройство, которому назначена буква D:.
Далее нужно определить индекс установленной версии Windows Server 2012 в установочном wim образе. Для этого наберите команду, отображающую информацию о содержимом установочного образа:
Т.к. на сервере установлен Windows Server 2012 Datacenter, нас интересует дистрибутив SERVERDATACENTER, индекс которого 4.
Далее нужно установить недостающие компоненты (Server GUI) из wim файла командой:
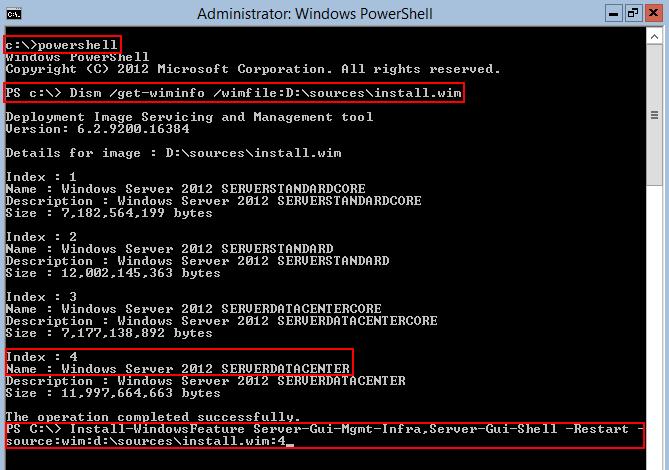 Процедура установки займет порядка 5-10 минут. В том случае если при установке будут наблюдаться проблемы, попробуйте отключить сетевые карты, чтобы Windows не пыталась скачать файлы с сайта Windows Update.
После выполнения команды сервер автоматически перезагрузится и загрузится уже в графическом режиме.
Графические компоненты Windows Server 2012 можно также установить и с помощью DISM, ту же самую операцию выполним с помощью двух команд:
В том случае, если сервер изначально был установлен в GUI режиме, который затем отключили, его можно вернуть командой:
Переключение из GUI режима в Core
Удалить GUI режим в Win Server 2012 в Core можно несколькими способами:
- С помощью Powershell
- Из графического интерфейса консоли Server Manager
Запустите строку PoSh и выполните команду
 После выполнения команды сервер автоматически перезагрузится и загрузили уже в Core-режиме.
Аналогом командлета remove-WindowsFeature является Uninstall-WindowsFeature команда, и чтобы перейти из режима Server with GUI в режим Server Core воспользуйтесь командами:
Если вам удобнее пользоваться графическими утилитами, откройте консоль Server Manager:
- Выберите пункт Remove Roles or Features
- Снимите флажки с Graphical Management Tools and Infrastructure и Server Graphical Shell
- После окончания работы мастера перезагрузите сервер

Переключение из Windows Server 2012 GUI в Minimal Server interface
В режиме работы Minimal Server Interface в системе присутствуют все базовые графические инструменты управления сервером (оснастки MMC, консоль Server Manager, элементы панели управления), однако такие компоненты как Windows Explorer, Internet Explorer 10, рабочий стол, начальный экран Start screen отсутствуют.
С помощью Powershell переключиться в режим Minimal Server Interface можно с помощью команды:
 Тоже самое в графической консоли Server Manager:
- Откройте консоль Server Manager
- Выберите Remove Roles or Features
- Снимите флажок с элемента Server Graphical Shell
- По окончании работы мастера перезагрузите сервер
Переключение из Core в Minimal Server Interface в Windows 2012
Откройте консоль Powershell и выполните команду:
Всем привет! Ранее я рассказывал, Как установить Windows Server 2012 R2 core русскую версию, и говорил в ней, что лучше ставить английскую версию, сегодня я расскажу почему, а так же мы рассмотрим базовую настройку Windows Server 2012 R2 core русской версии с помощью sconfig. Этот метод разработчики вшили в свой дистрибутив, дабы он стал более дружелюбным в плане настройки, на мой взгляд, это очень правильное решение.
Как я и говорил сегодня мы будем использовать самый быстрый способ настройки с помощью утилиты sconfig. Пишем в командной строке sconfig.

Базовая настройка Windows Server 2012 R2 core русской версии с помощью sconfig-01
У нас открывается синее окно с Конфигурацией сервера. Видим, что каждый пункт выполняется вводим определенной цифры меню.
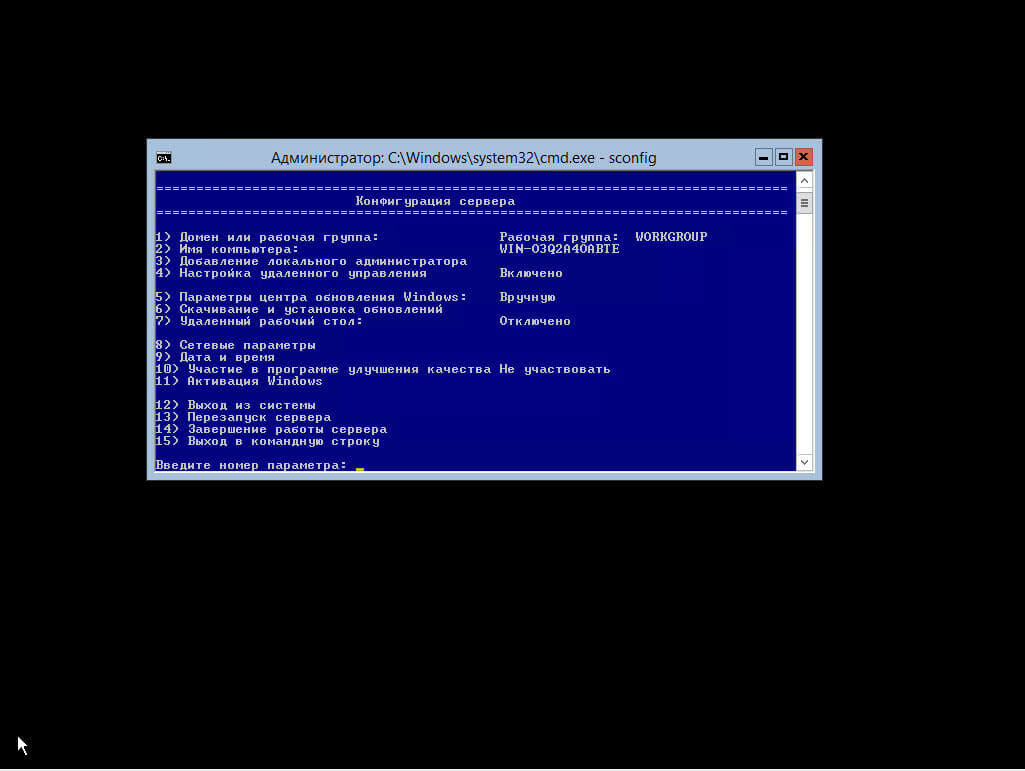
Базовая настройка Windows Server 2012 R2 core русской версии с помощью sconfig-02
Как сменить имя компьютера в Windows Server 2012 R2 core
Текущее имя компьютера отображается на экране по умолчанию средства настройки сервера. Чтобы изменить имя компьютера, перейдите на страницу «Computer Name» (Имя компьютера) из главного меню и следуйте инструкциям. Для этого вводим 2 и жмем Enter. Вводим нужное вам имя и снова жмем Enter.
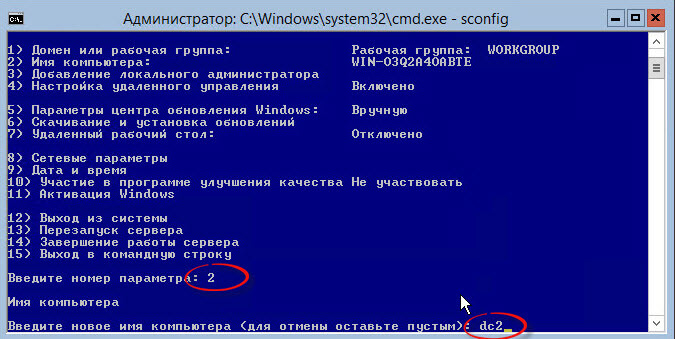
Базовая настройка Windows Server 2012 R2 core русской версии с помощью sconfig-03
Для того чтобы имя приминилось вас попросят перезагрузиться

Базовая настройка Windows Server 2012 R2 core русской версии с помощью sconfig-04
Как включить удаленный рабочий стол в Windows Server 2012 R2 core
Текущее состояние удаленного рабочего стола отображается на экране по умолчанию средства настройки сервера. Чтобы настроить следующие параметры удаленного рабочего стола, используйте параметр главного меню Remote Desktop (Удаленный рабочий стол) и следуйте инструкциям на экране.
- разрешить использование удаленного рабочего стола для клиентов с удаленным рабочим столом с сетевой проверкой подлинности
- разрешить использование удаленного рабочего стола для клиентов с любой версией удаленного рабочего стола
- запретить использование удаленного рабочего стола
Нажимаем 7 и выбираем нужный вам вариант работы удаленного рабочего стола.
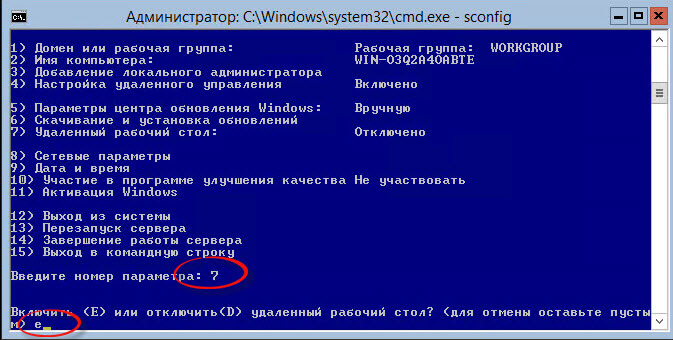
Базовая настройка Windows Server 2012 R2 core русской версии с помощью sconfig-05
Видим, что все включилось

Базовая настройка Windows Server 2012 R2 core русской версии с помощью sconfig-06
Как настроить обновления в Windows Server 2012 R2 core.
Текущие параметры Центра обновления Windows отображаются на экране по умолчанию средства настройки сервера. Можно настроить сервер для выполнения обновления в автоматическом или ручном режиме с помощью параметра главного меню Windows Update Settings (Параметры Центра обновления Windows).
Если выбрано значение Automatic Updates (Автоматическое обновление), система автоматически выполняет проверку наличия обновлений и установку обновлений ежедневно в 3:00. Параметры применяются немедленно. Если выбрано значение Manual (Обновление вручную), система не выполняет автоматических проверок наличия обновлений.
Вы можете загрузить и установить обновления с помощью параметра Download and Install Updates (Загрузить и установить обновления) в главном меню в любое время.
Нажимаем 5 и выбираем с помощью A автоматическое получение

Базовая настройка Windows Server 2012 R2 core русской версии с помощью sconfig-07
Вам высветится окно о том что в 3 ночи будут проверяться обновления
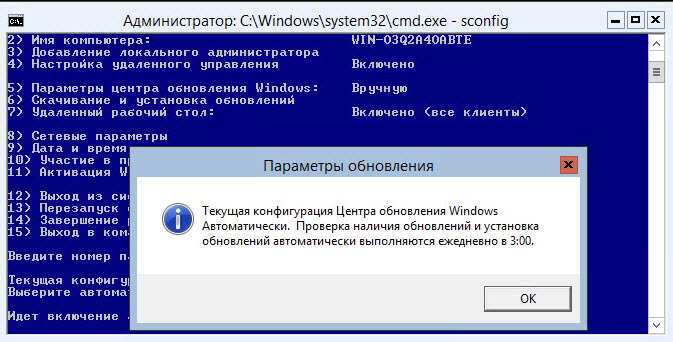
Базовая настройка Windows Server 2012 R2 core русской версии с помощью sconfig-08
Мы с вами люди которые ждать не особо хотят до 3 ночи, хотим накатить обновления прямо сейчас и вот тут начинаются глюки которые тянутся аж с 2008 года. Выбираем 6 для установки обновлений.
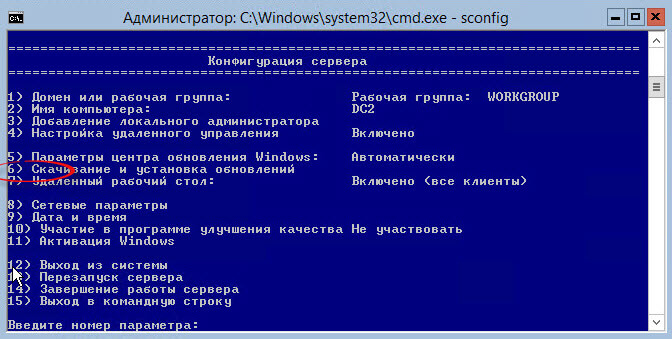
Базовая настройка Windows Server 2012 R2 core русской версии с помощью sconfig-09
У вас откроется новое черное окно в котором будет написано «Найти все обновления (В) или только рекомендуемые обновления (Р)?». Вроде все хорошо жмем B, и должны начаться скачиваться обновления, но херас два и два в уме. Сколько бы рас не нажимали что либо на латинице у вас ничего не выйдет (Прочитать из за чего это происходит можно тут),
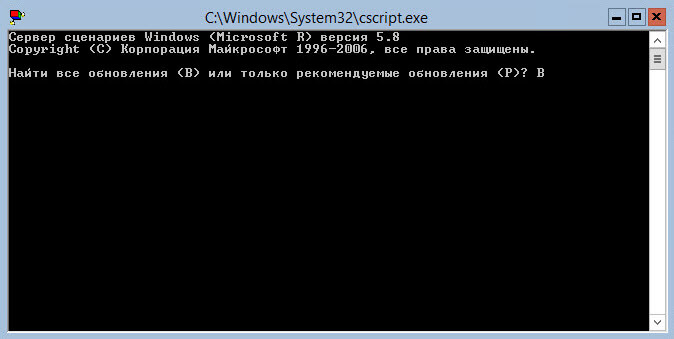
Базовая настройка Windows Server 2012 R2 core русской версии с помощью sconfig-10
в данном случае можно нажать на кириллице клавишу т и о чудо началось скачивание

Базовая настройка Windows Server 2012 R2 core русской версии с помощью sconfig-11
После поиска обновлений, чтобы их установить снова жмем т а не то что просят на экране.
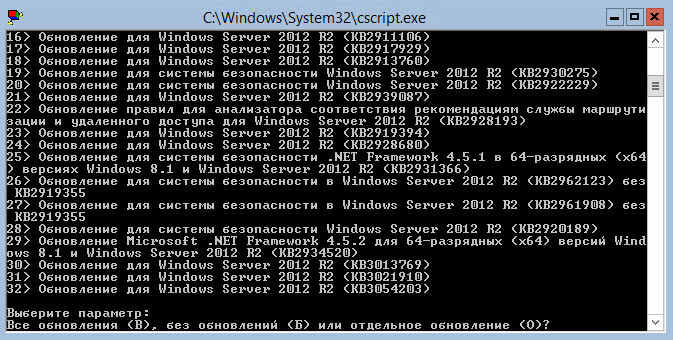
Базовая настройка Windows Server 2012 R2 core русской версии с помощью sconfig-12
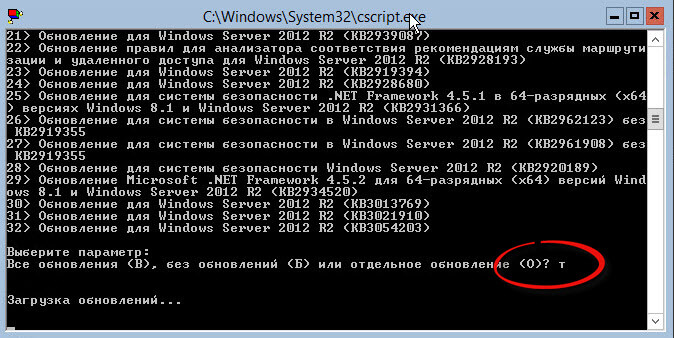
Базовая настройка Windows Server 2012 R2 core русской версии с помощью sconfig-13
После установки вас попросят перезагрузиться
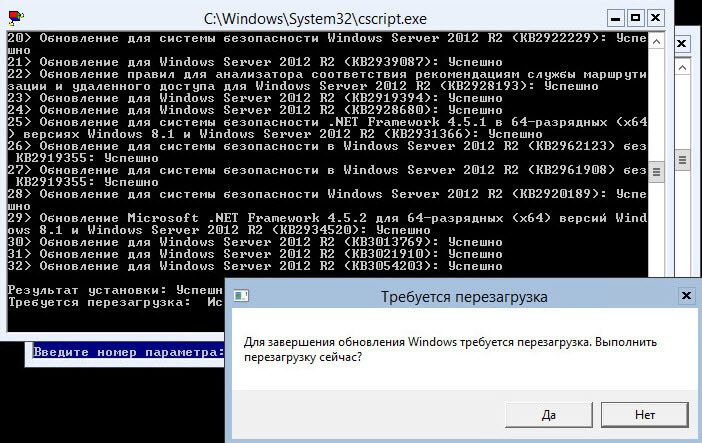
Базовая настройка Windows Server 2012 R2 core русской версии с помощью sconfig-14
Повторять поиск обновлений придется до тех пор пока больше ничего находится не будет, и число перезагрузок у всех будет индивидуально.
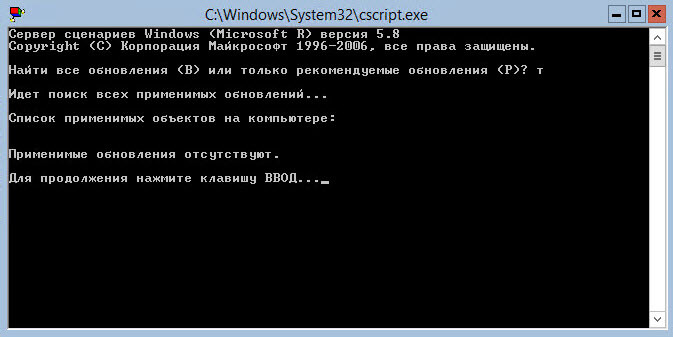
Базовая настройка Windows Server 2012 R2 core русской версии с помощью sconfig-15
Как задать время в Windows Server 2012 R2 core.
Чтобы изменить параметры даты и времени, используйте параметр главного меню Date and Time (Дата и время) и нажимайте 9
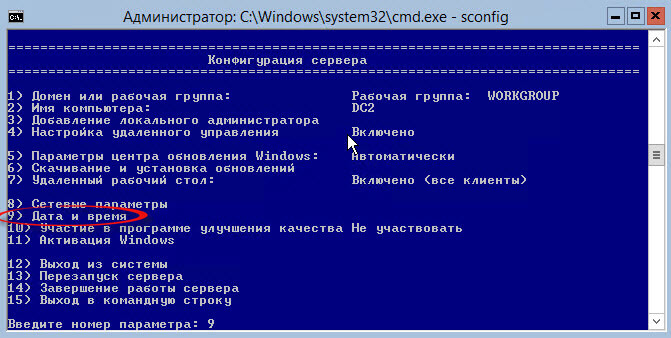
Базовая настройка Windows Server 2012 R2 core русской версии с помощью sconfig-16
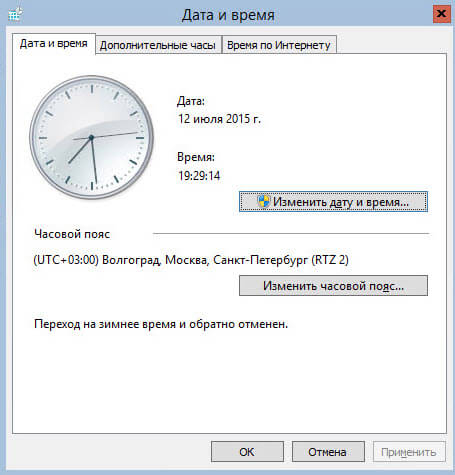
Базовая настройка Windows Server 2012 R2 core русской версии с помощью sconfig-17
Как настроить статический ip адрес в Windows Server 2012 R2 core русской версии
Далее серверу нужно назначить статический ip адрес. Выбираем 8. У вас появится список сетевых интерфейсов. Слева у каждого интерфейса есть номер в моем случае это 10. Его и нужно вводить для редактирования.

Базовая настройка Windows Server 2012 R2 core русской версии с помощью sconfig-18
В новом меню выбираем Установка адреса сетевого адаптера. Указываем что будет статический ip с помощью буквы D. Устанавливаем нужный IP, маску и основной шлюз.
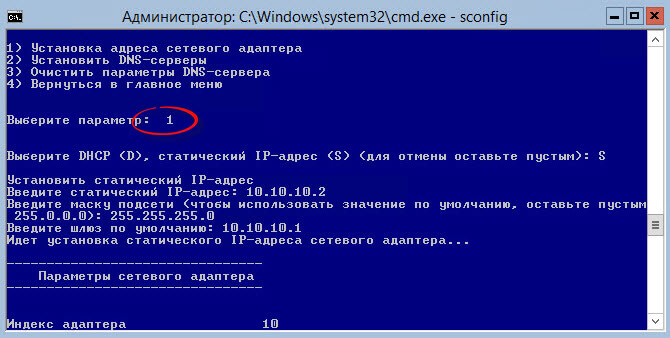
Базовая настройка Windows Server 2012 R2 core русской версии с помощью sconfig-19
Устанавливаем DNS, нажимаем 2.

Базовая настройка Windows Server 2012 R2 core русской версии с помощью sconfig-20
Задаем основной и дополнительные DNS

Базовая настройка Windows Server 2012 R2 core русской версии с помощью sconfig-21
Следующим шагом нужно присоединить к домену. Для этого выбираем 1, и нажимаем D.

Базовая настройка Windows Server 2012 R2 core русской версии с помощью sconfig-22
Задаем имя домена и учетную запись от имени которой будет ввод в домен.
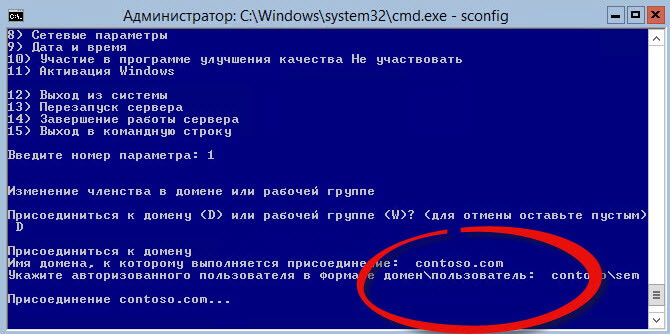
Базовая настройка Windows Server 2012 R2 core русской версии с помощью sconfig-23
Откроется окно для ввода пароля
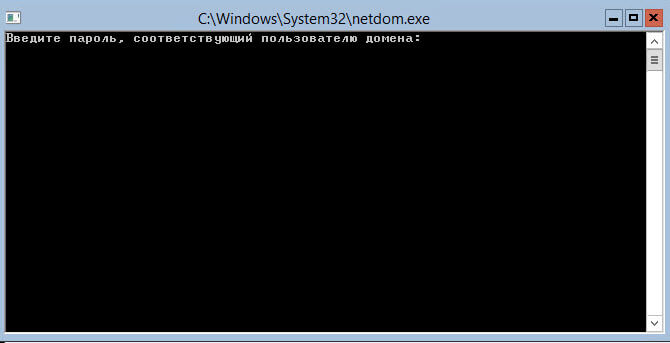
Базовая настройка Windows Server 2012 R2 core русской версии с помощью sconfig-24
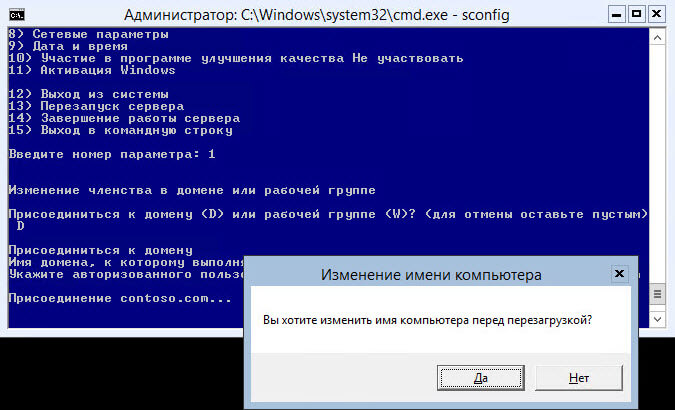
Базовая настройка Windows Server 2012 R2 core русской версии с помощью sconfig-25
Смотрим в Active Directory Пользователи и компьютеры и видим наш компьютер.
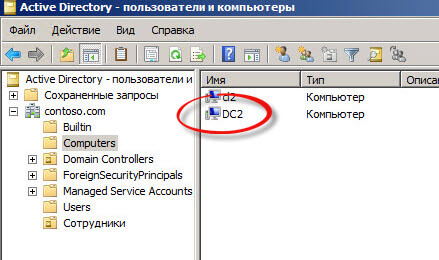
Базовая настройка Windows Server 2012 R2 core русской версии с помощью sconfig-26
В этой статье я постарался собрать в одном месте основные команды cmd и PowerShell, которые полезны при настройке и управлении Windows Server Core. Думаю, этот гайд будет полезен как новичкам, так и опытным системным администраторам, как справочник по базовым командам Server Core.
Содержание:
- Настройка Windows Server Core с помощью SCONFIG
- Основные команды PowerShell для настройки Server Core
- Установка обновлений в Server Core
- Часто используемые команды в Server Core
Напомним, что Server Core это особый режим установки Windows Server без большинства графических инструментов и оболочек. Управление таким сервером выполняется из командной строки или удаленно.
Преимущества Windows Serve Core:
- Меньшие требования к ресурсам;
- Повышенная стабильность, безопасность, требует установки меньшего количества обновлений (за счет меньшего количества кода и используемых компонентов);
- Идеально подходит для использования в качестве сервера для инфраструктурных ролей (контроллер домена Active Directory, DHCP сервер, Hyper-V сервер, файловый сервер и т.д.).
Server Core лицензируется как обычный физический или виртуальный экземпляр Windows Server (в отличии от Hyper-V Server, который полностью бесплатен).
Для установки Windows Server 2016/2019 в режиме Core нужно выбрать обычную установку. Если вы выберите Windows Server (Desktop Experience), будет установлен GUI версия операционной системы (в предыдущих версиях Windows Server она называлась Server with a GUI).
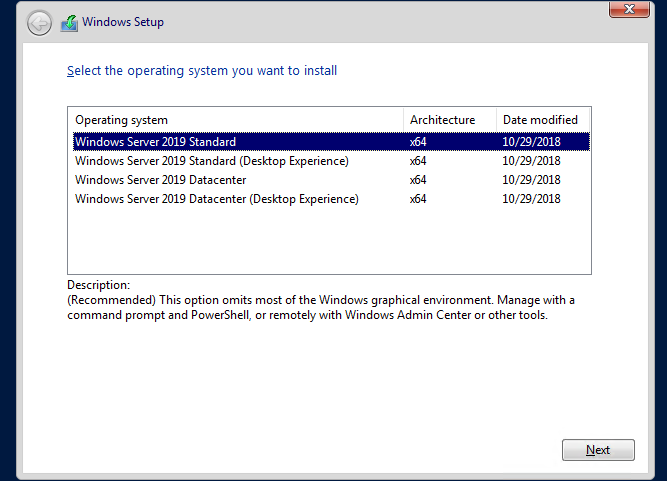
После установки Windows Server Core перед вами появляется командная строка, где нужно задать пароль локального администратора.
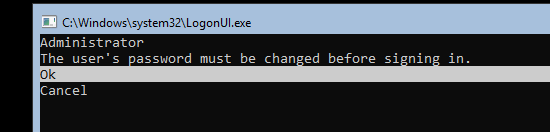
При входе на Server Core открывается командная строка (cmd.exe). Чтобы вместо командной строки у вас всегда открывалась консоль PowerShell.exe, нужно внести изменения в реестр. Выполните команды:
Powershell.exe
Set-ItemProperty -Path 'HKLM:SoftwareMicrosoftWindows NTCurrentVersionWinLogon' -Name Shell -Value 'PowerShell.exe'
И перезагрузите сервер:
Restart-Computer -Force

Если вы случайно закрыли окно командной строки, нажмите сочетание клавиш Ctrl+Alt+Delete, запустите Task Manager -> File -> Run -> выполните
cmd.exe
(или
PowerShell.exe
).
Настройка Windows Server Core с помощью SCONFIG
Для базовой настройки Server Core можно использовать встроенный скрипт sconfig. Просто выполните команду sconfig в консоли. Перед вами появиться меню с несколькими пунктами:
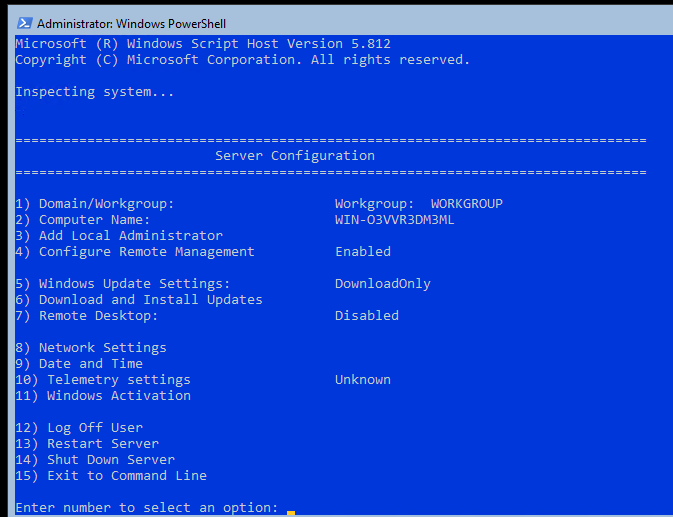
С помощью меню Server Configuration можно настроить:
- Добавить компьютер в домен или рабочую группу;
- Изменить имя компьютера (hostname);
- Добавить локального администратора;
- Разрешить/запретить удаленное управления и ответы на icmp;
- Настроить параметры обновления через Windows Update;
- Установить обновления Windows;
- Включить/отключить RDP;
- Настроить параметры сетевых адаптеров (IP адрес, шлюз, DNS сервера);
- Настроить дату и время;
- Изменить параметры телеметрии;
- Выполнить logoff, перезагрузить или выключить сервер.
Все пункт в меню
sconfig
пронумерованы. Чтобы перейти в определенное меню наберите его номер и Enter.
В некоторых пунктах меню настройки sconfig есть вложенные пункты. Там также, чтобы перейти к определенной настройке, нужно сделать выбор цифры пункта меню.
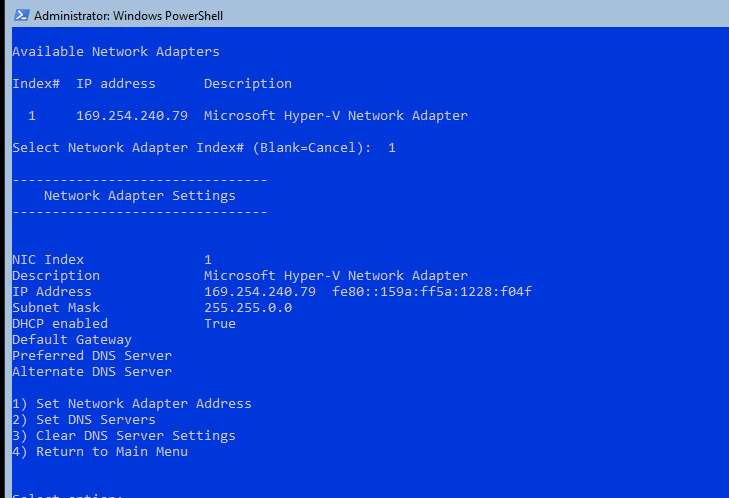
Не будем подробно рассматривать все пункты настройки sconfig, т.к. там все достаточно просто и очевидно. Однако в большинстве случаев администраторы предпочитают использовать для настройки новых хостов с Server Core различные PowerShell скрипты. Это намного проще и быстрее, особенно при массовых развёртываниях.
Основные команды PowerShell для настройки Server Core
Рассмотрим основные команды PowerShell, которые можно использовать для настройки Server Core.
Узнать информацию о версии Windows Server и версии PowerShell:
Get-ComputerInfo | select WindowsProductName, WindowsVersion, OsHardwareAbstractionLayer
$PSVersionTable

Для перезагрузки Server Core нужно выполнить команду PowerShell :
Restart-Computer
Чтобы выполнить выход из консоли Server Core, наберите:
logoff
Настройка параметров сети
Теперь нужно из PowerShell нужно настроить параметры сети (по умолчанию Windows настроена на получение адреса от DHCP). Выведите список сетевых подключений:
Get-NetIPConfiguration
Теперь укажите индекс интерфейса сетевого адаптера (InterfaceIndex), который нужно изменить и задайте новый IP адрес:
New-NetIPaddress -InterfaceIndex 4 -IPAddress 192.168.13.100 -PrefixLength 24 -DefaultGateway 192.168.13.1
Set-DNSClientServerAddress –InterfaceIndex 4 -ServerAddresses 192.168.13.11,192.168.13.
111
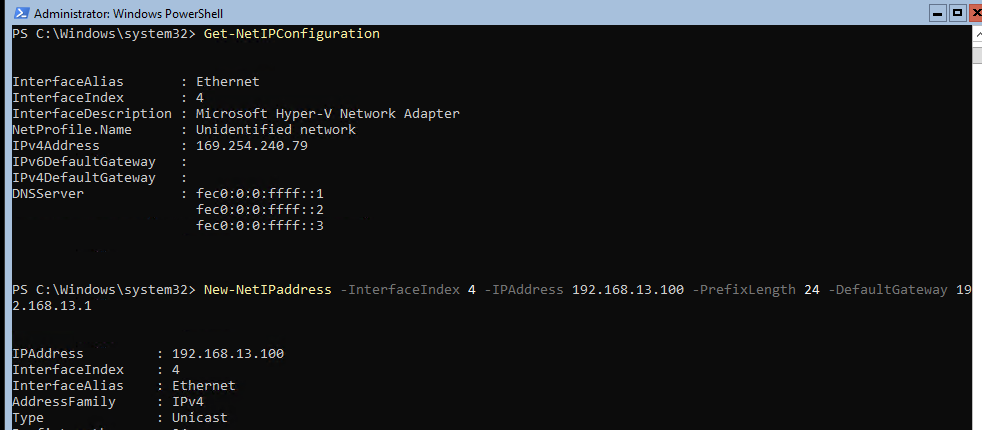
Проверьте текущие настройки:
Get-NetIPConfiguration
Если нужно сбросить IP адрес и вернуться к получению адреса от DHCP, выполните:
Set-DnsClientServerAddress –InterfaceIndex 4 –ResetServerAddresses
Set-NetIPInterface –InterfaceIndex 4 -Dhcp Enabled
Включить/отключить сетевой адаптер:
Disable-NetAdapter -Name “Ethernet0”
Enable-NetAdapter -Name “Ethernet 0”
Включить, отключить, проверить статус поддержки IPv6 для сетевого адаптера:
Disable-NetAdapterBinding -Name "Ethernet0" -ComponentID ms_tcpip6
Enable-NetAdapterBinding -Name "Ethernet0" -ComponentID ms_tcpip6
Get-NetAdapterBinding -ComponentID ms_tcpip6
Настроить winhttp прокси сервер для PowerShell и системных подключений:
netsh Winhttp set proxy <servername>:<port number>
Настройка времени/даты
Вы можете настроить дату, время, часовой пояс с помощью графической утилиты
intl.cpl
или с помощью PowerShell:
Set-Date -Date "09/03/2022 09:00"
Set-TimeZone "Russia Time Zone 3
Задать имя компьютера, добавить в домен, активация
Чтобы изменить имя компьютера:
Rename-Computer -NewName win-srv01 -PassThru

Добавить сервер в домен Active Directory:
Add-Computer -DomainName "corp.winitpro.ru " -Restart
Если нужно добавить дополнительных пользователей в администраторы, можно настроить групповую политику или добавить вручную:
Add-LocalGroupMember -Group "Administrators" -Member "corpanovikov"
Для активации Windows Server нужно указать ваш ключ:
slmgr.vbs –ipk <productkey>
slmgr.vbs –ato
Или можно активировать хост на KMS сервере (например, для Windows Server 2019):
slmgr /ipk N69G4-B89J2-4G8F4-WWYCC-J464C
slmgr /skms kms-server.winitpro.ru:1688
slmgr /ato
Разрешить удаленный доступ
Разрешить удаленный доступ к Server Core через RDP:
cscript C:WindowsSystem32Scregedit.wsf /ar 0
Разрешить удаленное управление:
Configure-SMRemoting.exe –Enable
Enable-NetFirewallRule -DisplayGroup “Windows Remote Management”
Текущие настройки:
Configure-SMRemoting.exe -Get
Разрешить Win-Rm PowerShell Remoting:
Enable-PSRemoting –force
Сервером с Windows Server можно управлять удаленно c другого сервера (с помощью ServerManager.exe), через браузер с помощью Windows Admin Center (WAC), с любой рабочей станции с помощью инструментов администрирования RSAT, подключаться к нему по RDP, PowerShell Remoting или SSH (в современных версиях Windows есть встроенный SSH сервер).
Настройка Windows Firewall
Информация о настройке Windows Firewall есть в статье по ссылке. Здесь оставлю несколько базовых команд.
Включить Windows Defender Firewall для всех профилей:
Set-NetFirewallProfile -Profile Domain,Public,Private -Enabled True
Изменить тип сети с Public на Private:
Get-NetConnectionProfile | Set-NetConnectionProfile -NetworkCategory Private
Полностью отключить Windows Firewall (не рекомендуется):
Get-NetFirewallProfile | Set-NetFirewallProfile -enabled false
Разрешить подключение через инструменты удаленного управления:
Enable-NetFireWallRule -DisplayName “Windows Management Instrumentation (DCOM-In)”
Enable-NetFireWallRule -DisplayGroup “Remote Event Log Management”
Enable-NetFireWallRule -DisplayGroup “Remote Service Management”
Enable-NetFireWallRule -DisplayGroup “Remote Volume Management”
Enable-NetFireWallRule -DisplayGroup “Remote Scheduled Tasks Management”
Enable-NetFireWallRule -DisplayGroup “Windows Firewall Remote Management”
Enable-NetFirewallRule -DisplayGroup "Remote Administration"
Установка обновлений в Server Core
Для управления параметрами обновлений предпочтительно использовать групповые политики Windows Update, но можно задать параметры и вручную.
Отключить автоматическое обновление:
Set-ItemProperty -Path HKLM:SoftwarePoliciesMicrosoftWindowsWindowsUpdateAU -Name AUOptions -Value 1
Автоматически скачивать доступные обновления:
Set-ItemProperty -Path HKLM:SoftwarePoliciesMicrosoftWindowsWindowsUpdateAU -Name AUOptions -Value 3
Получить список установленных обновлений:
Get-Hotfix
Или
wmic qfe list
Для ручной установки обновлений Windows можно использовать утилиту wusa:
Wusa update_name.msu /quiet
Также для установки и управления обновлениями из командной строки удобно использовать PowerShell модуль PSWindowsUpdate.
Управление ролями, службами и процессами Windows
Для получения списка всех доступных ролей в Windows Server Core выполните команду PowerShell:
Get-WindowsFeature
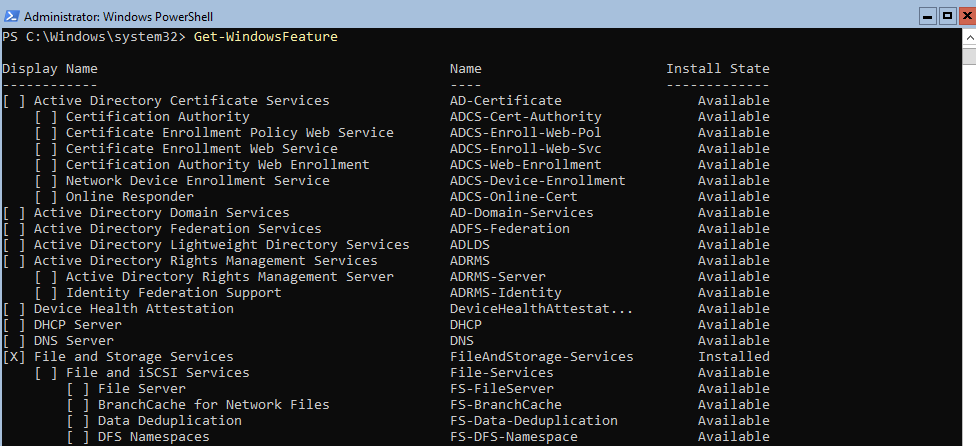
Получить список всех установленных ролей и компонентов в Windows Server(можно быстро понять, для чего используется сервер):
Get-WindowsFeature | Where-Object {$_. installstate -eq "installed"} | ft Name,Installstate
Например, для установки службы DNS воспользуйтесь такой командой:
Install-WindowsFeature DNS -IncludeManagementTools
Список всех служб в Windows:
Get-Service
Список остановленных служб:
Get-Service | Where-Object {$_.status -eq “stopped”}
Перезапустить службу:
Restart-Service -Name spooler
Для управление процессами можно использовать стандартный диспетчер задач (taskmgr.exe) или PowerShell модуль Processes:
Get-Process cmd, proc1* | Select-Object ProcessName, StartTime, MainWindowTitle, Path, Company|ft
Часто используемые команды в Server Core
Ну и наконец, приведу список различных полезных мне команд, которые я периодически использую в Server Core.
Информация о статусе и здоровье физических дисков (используется стандартный модуль управления дисками Storage):
Get-PhysicalDisk | Sort Size | FT FriendlyName, Size, MediaType, SpindleSpeed, HealthStatus, OperationalStatus -AutoSize
Информация о свободном месте на диске:
Get-WmiObject -Class Win32_LogicalDisk |
Select-Object -Property DeviceID, VolumeName, @{Label='FreeSpace (Gb)'; expression={($_.FreeSpace/1GB).ToString('F2')}},
@{Label='Total (Gb)'; expression={($_.Size/1GB).ToString('F2')}},
@{label='FreePercent'; expression={[Math]::Round(($_.freespace / $_.size) * 100, 2)}}|ft
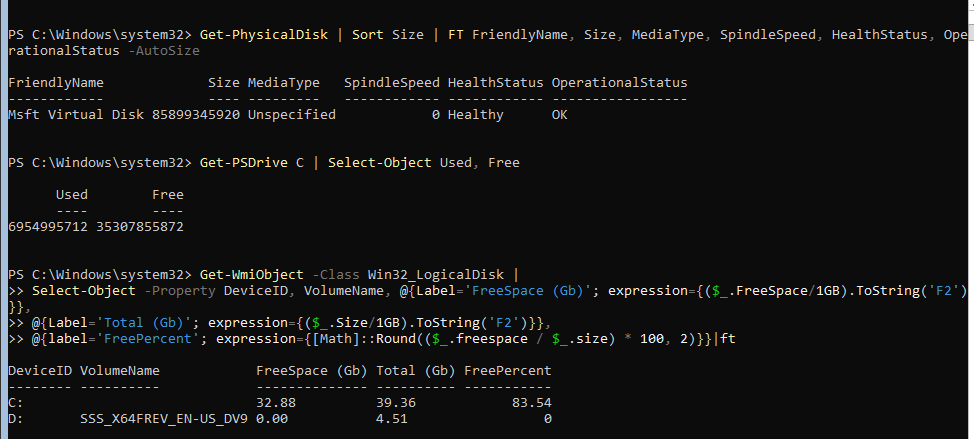
Информация о времени последних 10 перезагрузок сервера:
Get-EventLog system | where-object {$_.eventid -eq 6006} | select -last 10
Список установленных программ:
Get-ItemProperty HKLM:SoftwareWow6432NodeMicrosoftWindowsCurrentVersionUninstall* | Select-Object DisplayName, DisplayVersion, Publisher, InstallDate | Format-Table –AutoSize
Скачать и распаковать zip файл с внешнего сайта:
Invoke-WebRequest https://contoso/test.zip -outfile test.zip
Expand-Archive -path '.test.zip' -DestinationPath C:UsersAdministratorDocuments
Чтобы скопировать все файлы из каталога на удаленный компьютер по сети можно использовать Copy-Item:
$session = New-PSSession -ComputerName remotsnode1
Copy-Item -Path "C:Logs*" -ToSession $session -Destination "C:Logs" -Recurse -Force
Для установки драйвера можно использовать стандартную утилиту:
Pnputil –i –a c:distrhpdp.inf
Также Microsoft предлагает специальный пакет Server Core App Compatibility Feature on Demand (FOD), который позволяет установить в Windows Server 2019 некоторые графические инструменты и консоли (MMC, Eventvwr, Hyper-V Manager, PerfMon, Resmon, Explorer.exe, Device Manager, Powershell ISE). Этот FOD доступен для загрузки в виде ISO при наличии активной подписки. Установка выполняется командой:
Add-WindowsCapability -Online -Name ServerCore.AppCompatibility~~~~0.0.1.0
Установка Server Core App Compatibility Feature on Demand будет использовать дополнительно около 200 Мб оперативной памяти в Server Core.
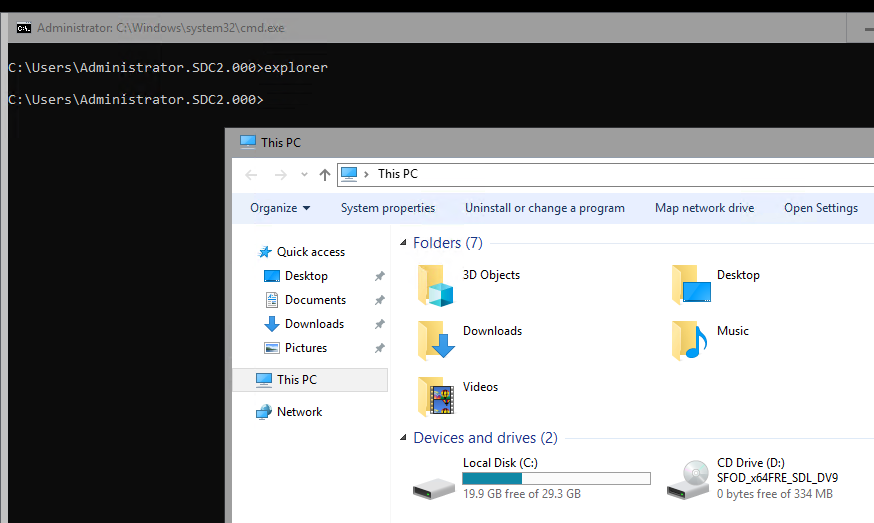
В этой статье я постарался собрать самые нужные команды, которые нужно постоянно держать под рукой при работе с Windows Server Core. Время от времени я буду обновлять статью и добавлять новые команды, которые покажутся мне нужными для повседневной работы.
Время на прочтение
3 мин
Количество просмотров 143K

Когда появилась самая первая версия Server Core многие администраторы избегали его по той причине, что они могли использовать исклюительно возможности командной строки, а это не всегда удобно. Однако, в Windows Server 2012 ситуация поменялась, теперь стало возможным использовать гибридный режим, т.е. возможно как отключение, так и включение графического интерфейса.
Отключение GUI
В Windows Server 2012 GUI последовал примеру общей архитектуры интерфейса управления и работы операционной системы и стал «фичей». Это в свою делает процесс удаления графического интерфейса простым до невозможности. Для начала необходимо запустить «Server Manager».

Нажмите «Manage», а затем выберите пункт «Remove Roles or Features» из меню.
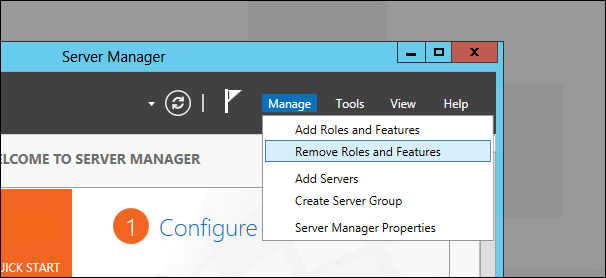
Далее нажмите «Next» для того, чтобы проскочить предварительные пункты мастера настройки, далее выберите необходимый вам сервер из доступного пула (в нашем случае это сервер DC1) и нажмите «Next».
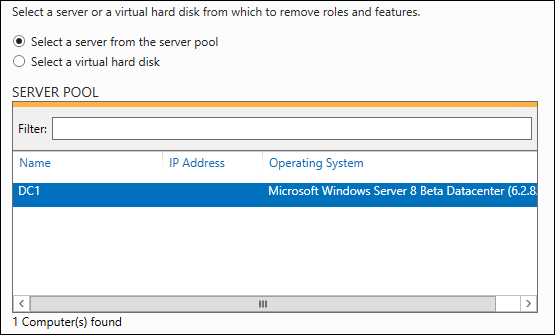
Так как GUI не является ролью, нажмите «Next», чтобы пропустить мастер ролей и перейти к следующей секции.
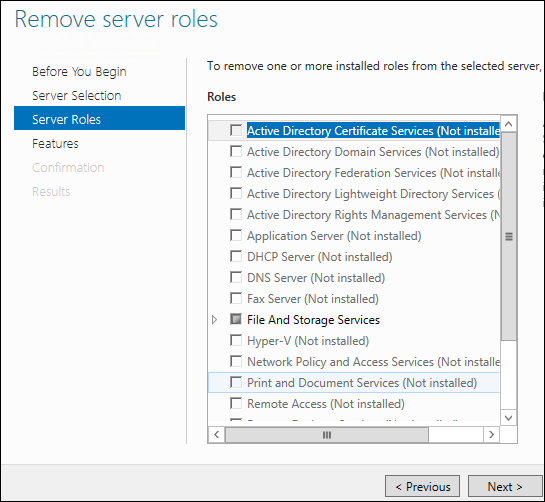
Когда вы дойдете до мастера фич, вам будет необходимо снять галочку с чек-бокса «User Interfaces and Infrastructure», а затем нажать «Next».
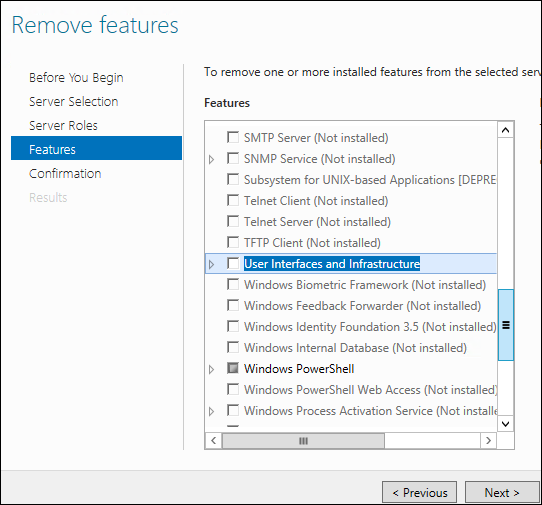
Поставьте отметку на «Restart Destination Server» и нажмите «Remove».
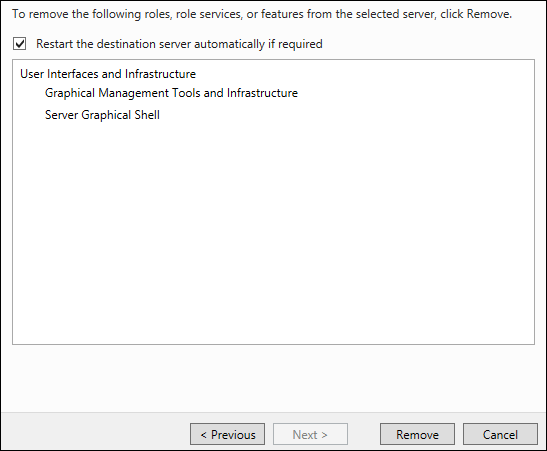
После этого действия GUI будет удален.
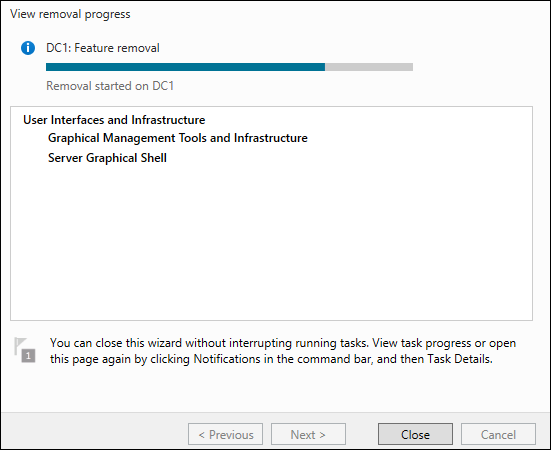
После удаления всех необходимых данных сервер будет автоматически перезагружен.
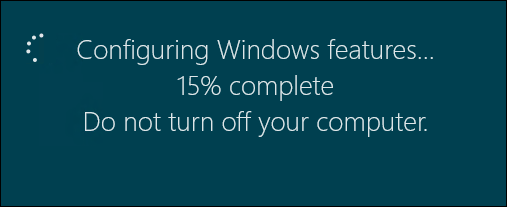
После того как сервер вновь загрузиться, а вы залогинитесь – с этого момента вы сможете использовать только командную строку для взаимодействия с сервером.
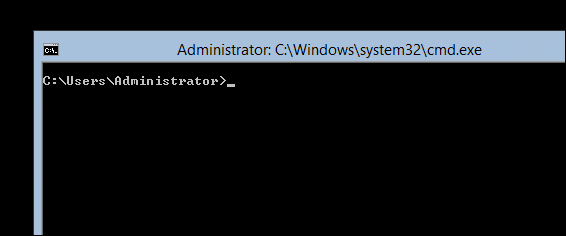
Включение GUI
После того как мы успешно удалили GUI, было бы очень неплохо знать как же все-таки его вернуть обратно. Для этого мы используем утилиту «SConfig» — так что просто наберите в командной строке «sconfig» и нажмите Enter.

В самом низу экрана можно увидеть пункт меню 12, который как раз отвечает за восстановление графического интерфейса – все что нам остается сделать, это набрать 12 и нажать «Enter».
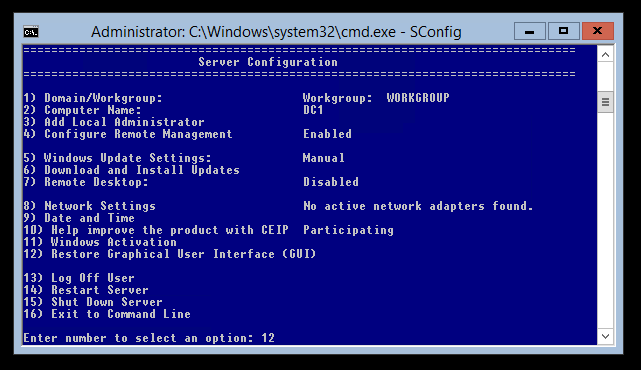
На экране появится уведомление о том, что в случае включения GUI потребуется перезагрузка сервера – смело нажимаем «Yes» для завершения операции восстановления графического интерфейса.
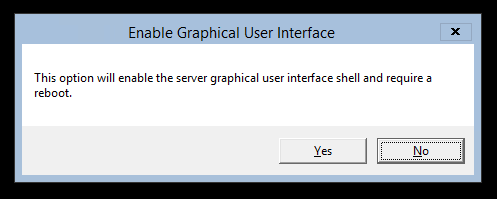
После этого запуститься DISM, который произведет добавление необходимых файлов для активации графической оболочки.
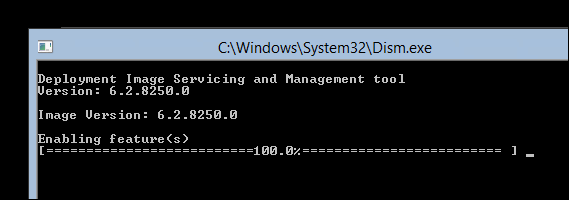
После окончания вышеуказанного процесса вам будет предложено перезагрузить сервер, наберите «y» и нажмите для перезагрузки.
Отключение GUI с помощью PowerShell
Также мы можем осуществить все вышеперечисленный операции как по удалению, так и по возвращению GUI гораздо быстрее, если воспользуемся командами PowerShell. Для этого необходимо открыть «Server Manager», нажать на «Tools» и запустить PowerShell.
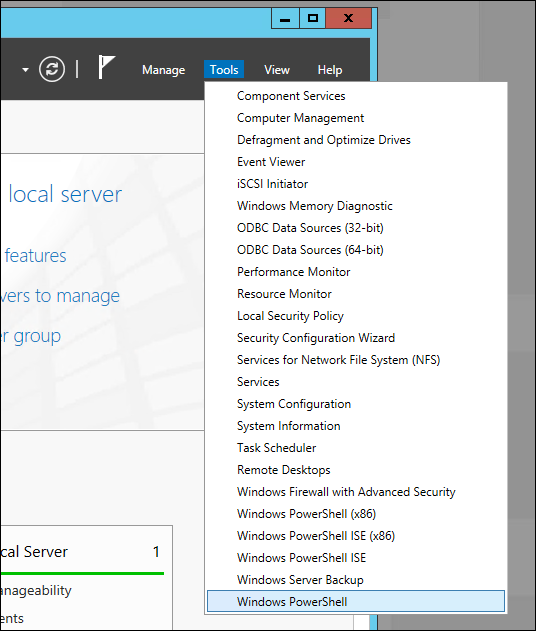
Для того чтобы удалить GUI мы используем командлет Remove-WindowsFeature:
Remove-WindowsFeature Server-Gui-Shell, Server-Gui-Mgmt-Infra
В свою очередь Remove-WindowsFeature является просто алиасом команды, а значит мы вполне можем также использовать следующие команды:
Uninstall-WindowsFeature Server-Gui-Shell, Server-Gui-Mgmt-Infra

После ввода команды и нажатия клавиши «Enter» начнется процедура удаления графического интерфейса.
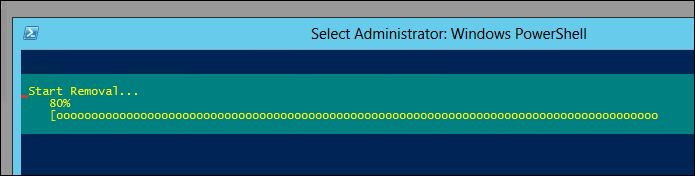
После завершения операции удаления бинарников необходимо будет перезагрузиться, для того чтобы изменения вступили в силу. Набираем следующую команду и нажимаем «Enter»:
Shutdown –r -t 0
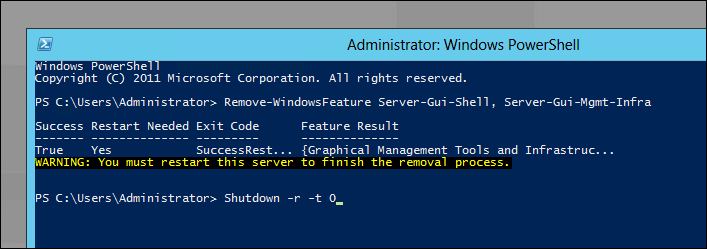
После перезагрузки для работы будет доступна только командная строка.
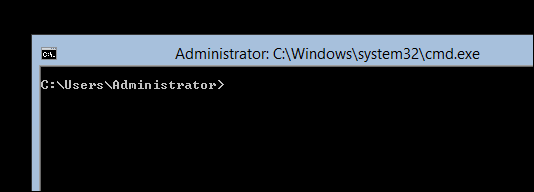
Включение GUI с помощью PowerShell
Первое что нам нужно сделать, это попасть в PowerShell, набираем из командной строки PowerShell и нажимаем «Enter».
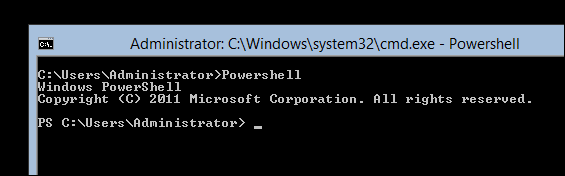
Теперь нам понадобится командлет Add-WindowsFeature для того чтобы вернуть GUI обратно:
Add-WindowsFeature Server-Gui-Shell, Server-Gui-Mgmt-Infra
Это также является алиасом для следующих команд:
Install-WindowsFeature Server-Gui-Shell, Server-Gui-Mgmt-Infra
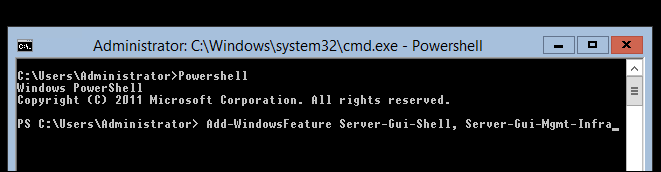
После завршения процедуры добавления компонентов необходимо перезагрузить сервер с помощью команды shutdown:
Shutdown –r -t 0
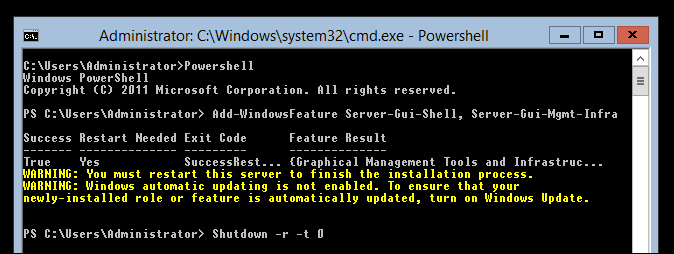
После перезагрузки сервера графический интерфейс будет снова доступен.
P.S> Загрузить Windows Server 2012 RC можно здесь.
С уважением,
Георгий А. Гаджиев
Эксперт по информационной инфраструктуре,
Microsoft
- Форум
- Компьютерные технологии
- В помощь системному администратору
- server 2012 грузится и выходит в командную строку

X
Привет дорогой друг
Наш сайт существует и развиваетется за счет рекламы. Пожалуйста, отключите блокировку рекламы AdBlock или подобное, для нашего сайта. Спасибо!
-
13.05.2016, 11:56
#1
Гость форума
server 2012 грузится и выходит в командную строку
После сбоя по питанию server загружается и выходит в командную строку, может войти в диспетчер задач.Подскажите что можно сделать?
-
12.10.2017, 17:03
#2
Пришел за помощью
Re: server 2012 грузится и выходит в командную строку
Попробуй ввести taskmgr.exe
Затем файл-выполнить explorer.exe
Социальные закладки
Социальные закладки
Ваши права

- Вы не можете создавать новые темы
- Вы не можете отвечать в темах
- Вы не можете прикреплять вложения
- Вы не можете редактировать свои сообщения
- BB коды Вкл.
- Смайлы Вкл.
- [IMG] код Вкл.
- [VIDEO] код Вкл.
- HTML код Выкл.
Правила форума