Last Updated on June 6, 2014 by
This tutorial will explain how to install AD on server 2008. This will valid for windows 2008 R2 as well.
Requirement:
Minimum: Single processor with 1.4 GHz (x64 processor) or 1.3GHz (Dual Core)
Minimum: 512 MB RAM
Minimum: 32 GB or greater
- The first step is to assign a ip to the server that you going to deploy the AD. Its nessary to install it as DNS server too. So its better to have fixed ip it doesn’t mean you cannot install AD without fixed ip address but it will solve lot of issues if you used fixed ip.
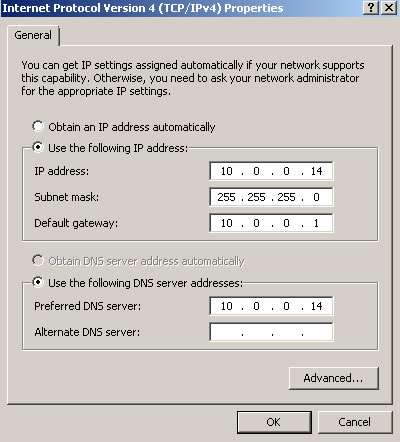
In here the server ip is 10.0.0.14. Since we going to make it as DNS server too you should use the same ip as the preferred DNS server.
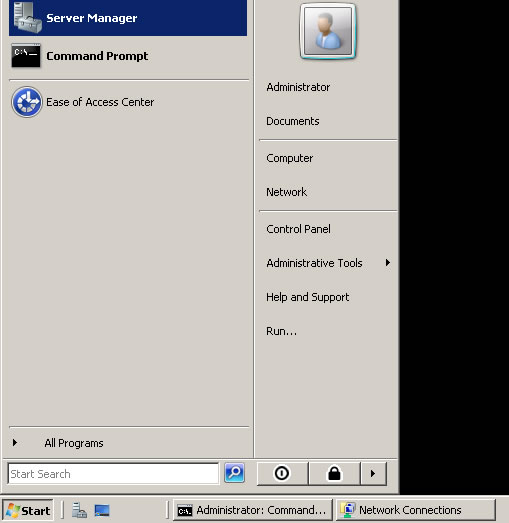
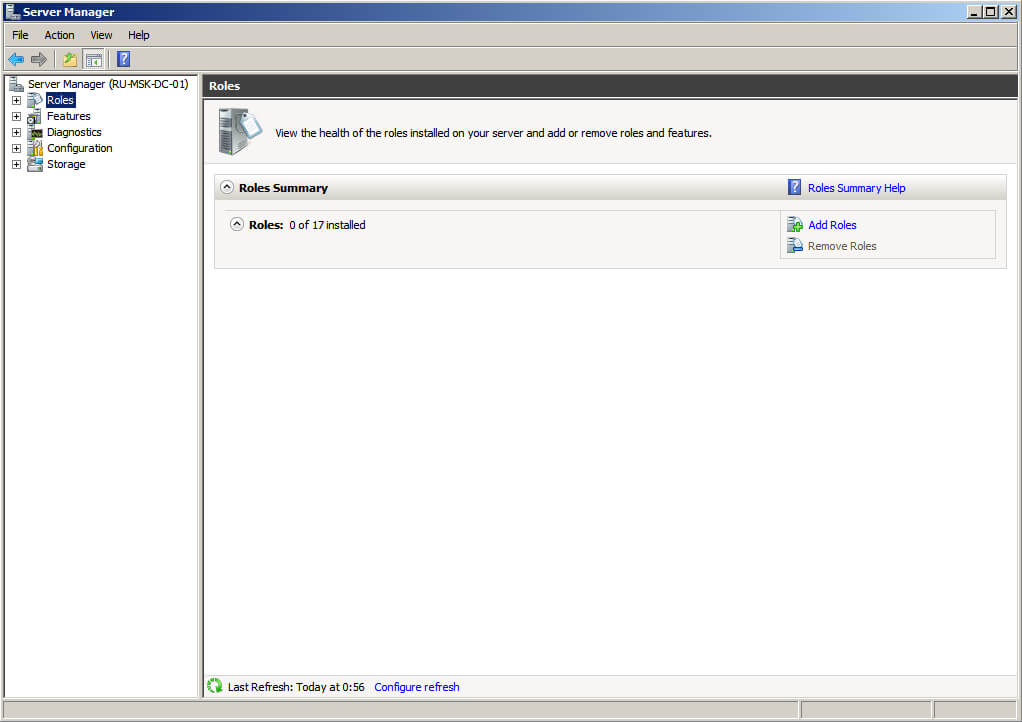
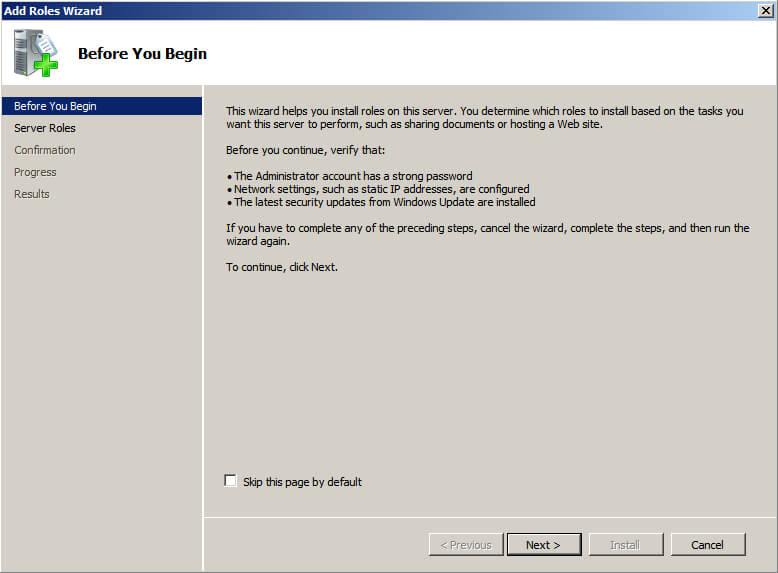
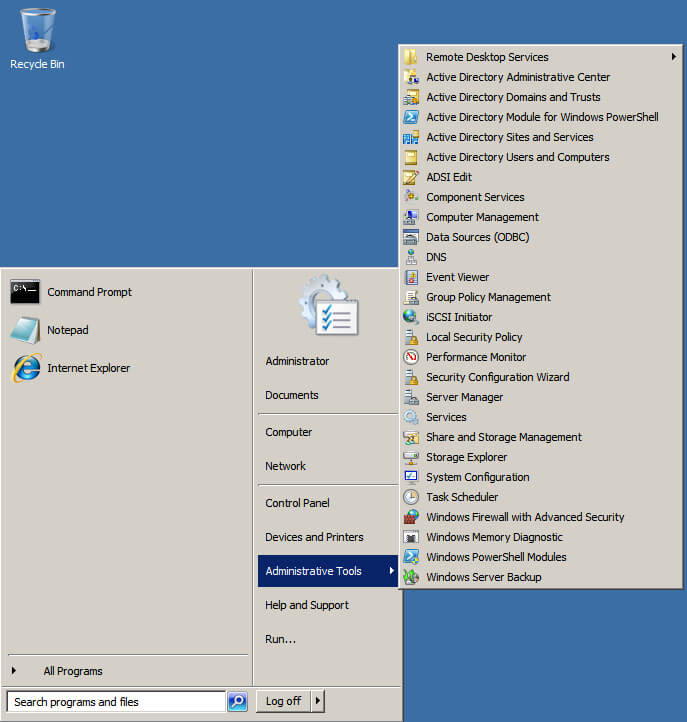
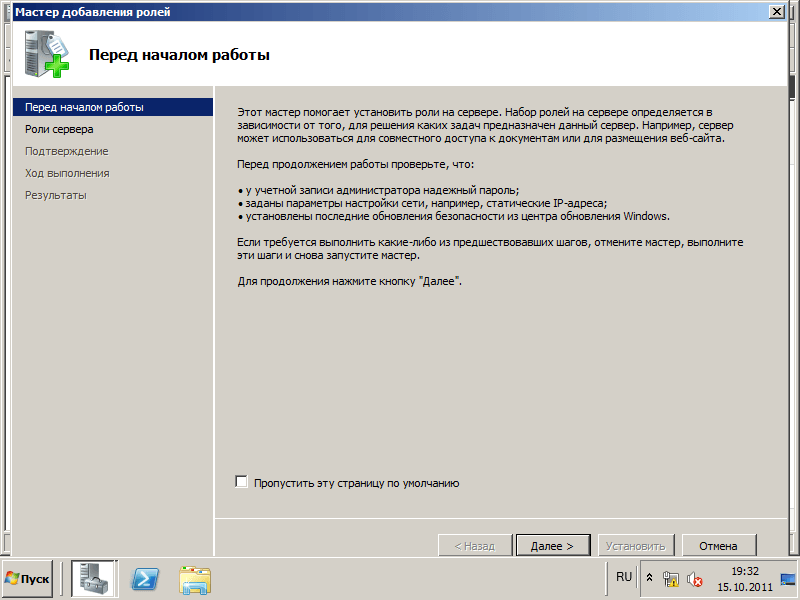
- Next step is to install the Active directory roles. Unlikely the older version of windows servers Microsoft highly recommend to use server manager option to install roles before you run dcpromo.
- Click on start menu and select the Server Manager
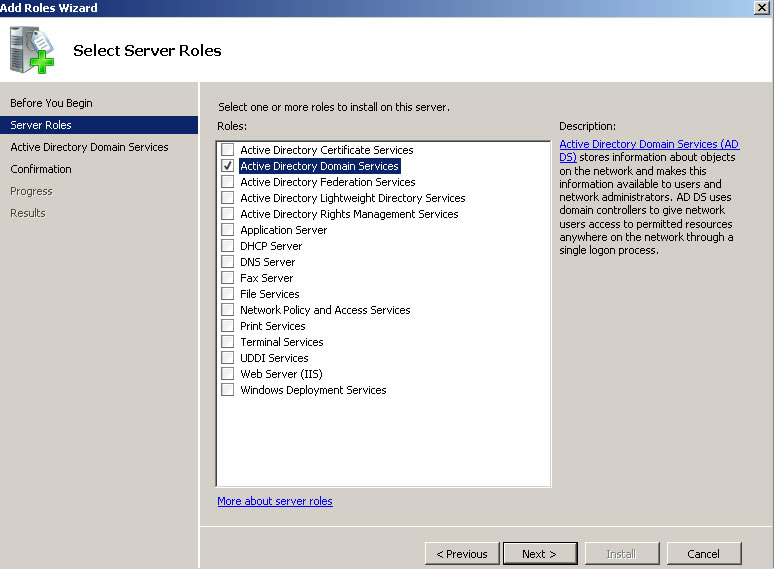
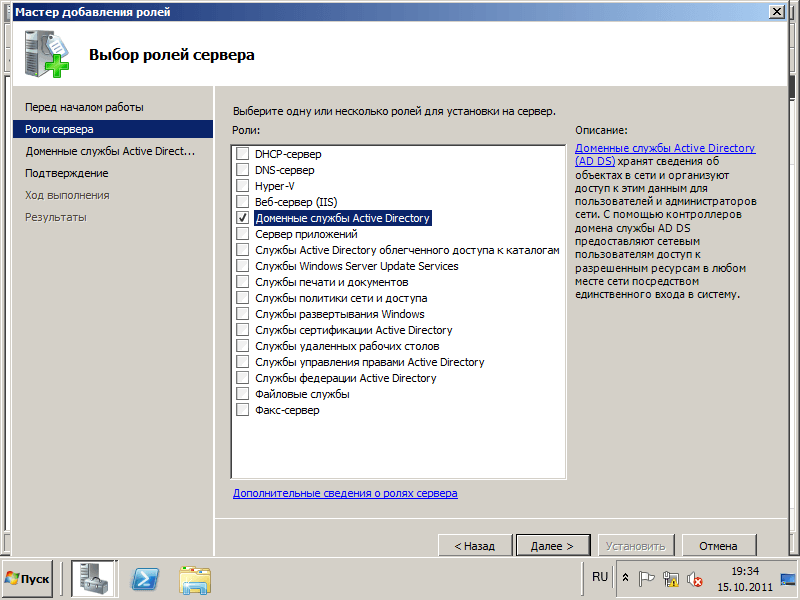
- Select the roles from the right hand panel and click on add roles option.

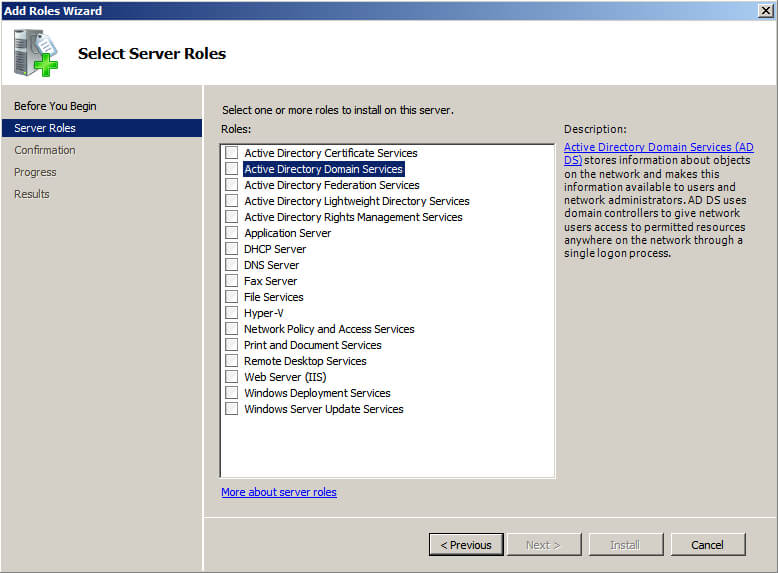
- From the roles list select the «Active Directory Domain Services» role and Click «Next»
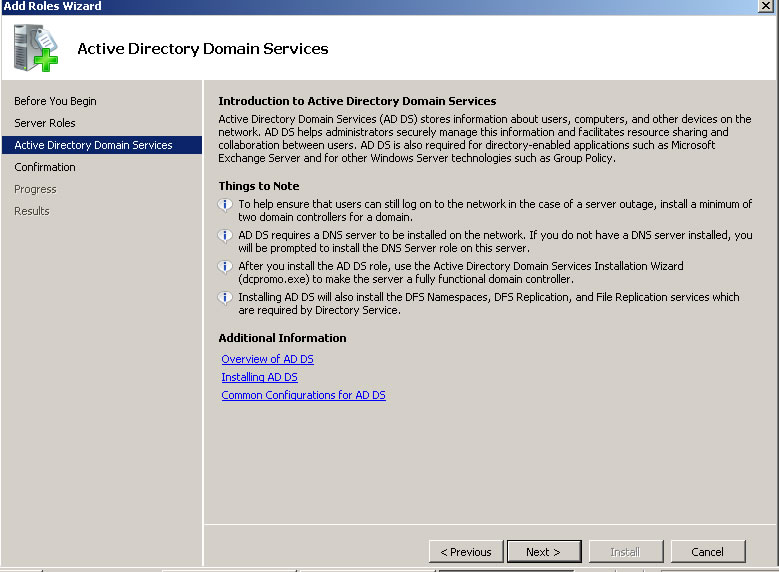
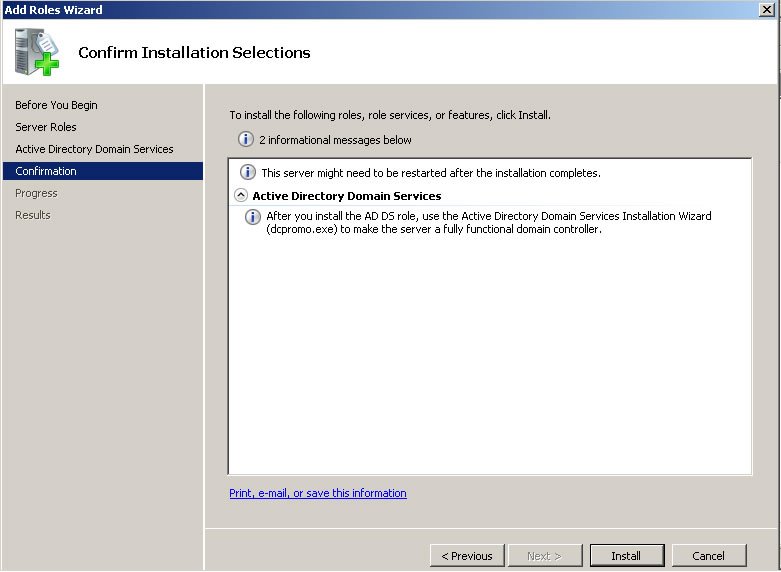
- Review the confirmation and click on «Next»
- Review the installation confirmation and click on «Next»
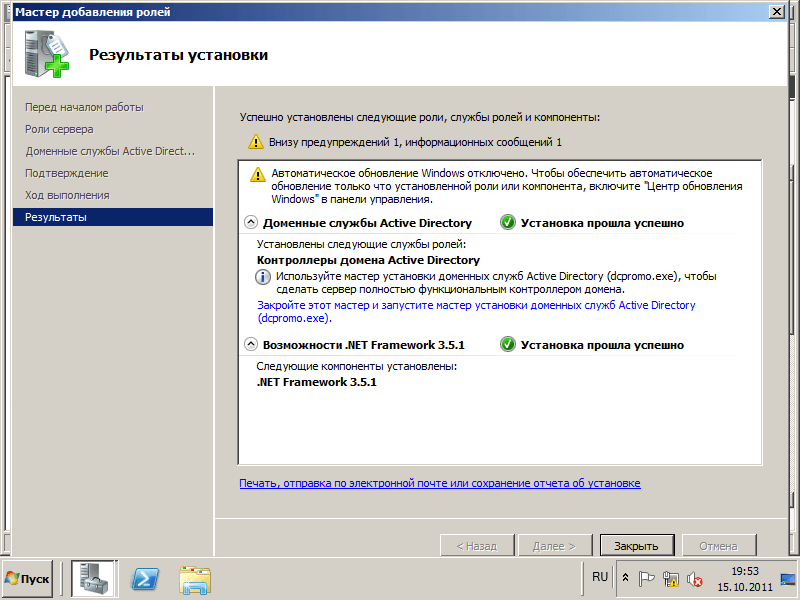
- It will take few minutes to complete and when its done you will get this confirmation. And then click on «Close»
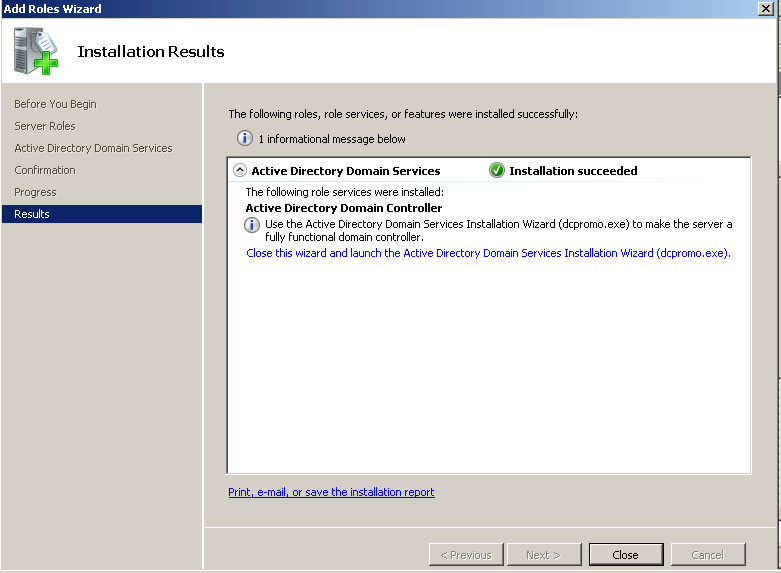
After that you will need to do a reboot.
-
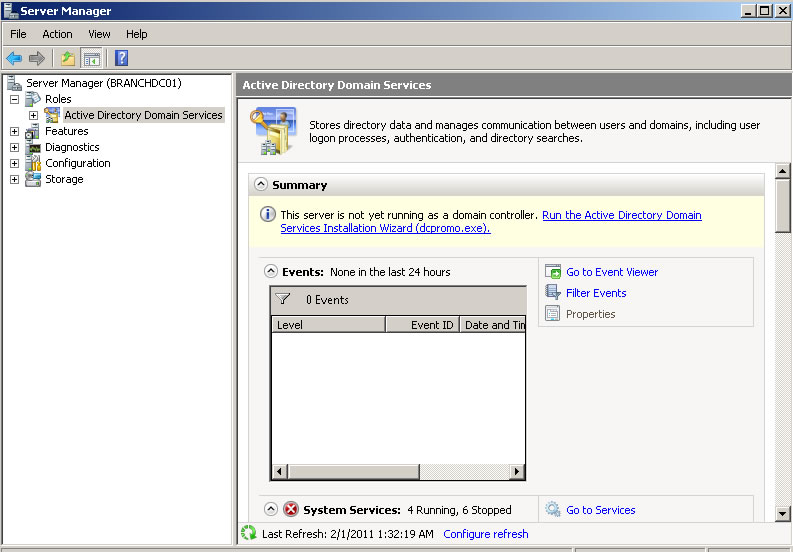
After reboot please open up the «server Manager» again. And then click on «Roles» there you will see the «Active Directory Domain Services» is successfully installed in there. click on it then you will get a window like below.

In their please pay attention to the message

So please click on that link and it will start the DCPROMO wizard.
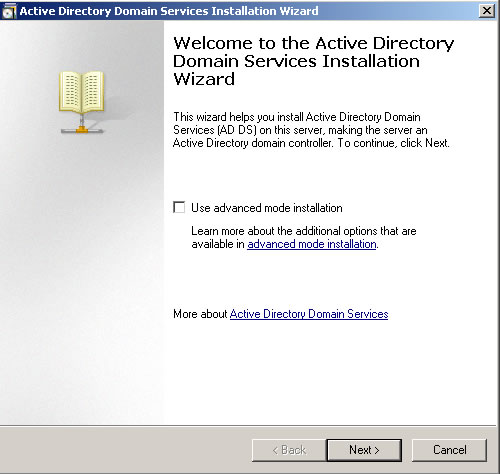
- So next step to go through the DC promo wizard.
- To start the installation click on «Next»

- Click on «Next»
- Since we going to install New domain Controller in new forest please select the option «Create a new domain in new forest» option and click on «Next»
- Now we have to provide the name for our domain controller. It must be FQDN. In our case I used rebeladmin.com as the domain. Please click «Next» after it.
- In this window it will ask to select forest function level. If you going to add server 2003 domain controller to your forest later don’t select the function level as server 2008. If you going to use full features of 2008 Ad you must select forest function level as server 2008. In my case I used server 2008. Click on «Next» after the select.

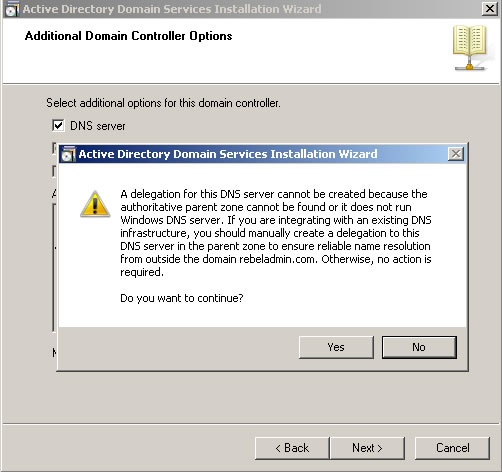
- In next window since it’s the first DC we should make it as DNS server too. Leave the default selection and click on «Next»
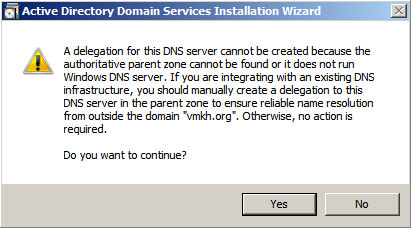
- If the wizard cannot create a delegation for the DNS server, it displays a message to indicate that you can create the delegation manually. To continue, click «Yes»
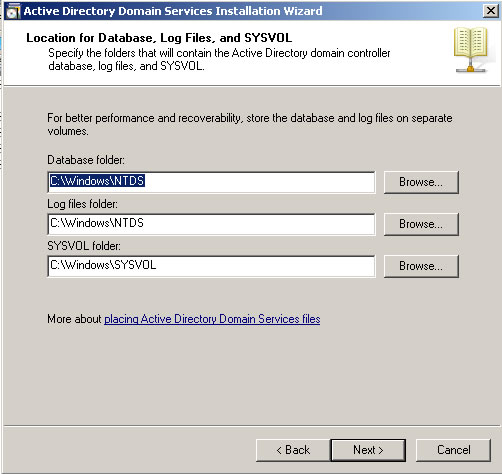
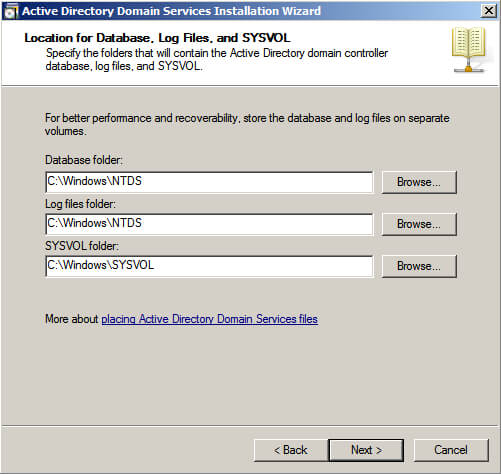
- In next window it will show up the database location. It its going to be bigger AD its good if you can keep NTDS database in different partition. Click on «Next» after changes.
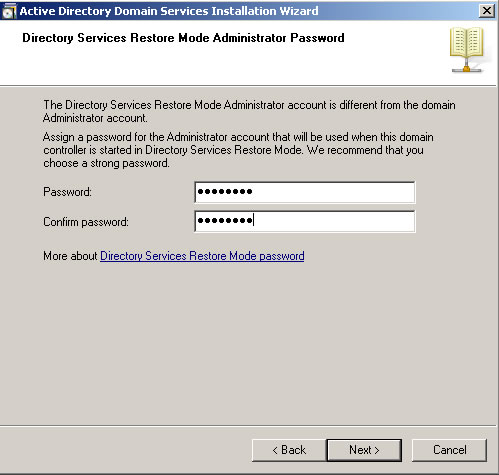
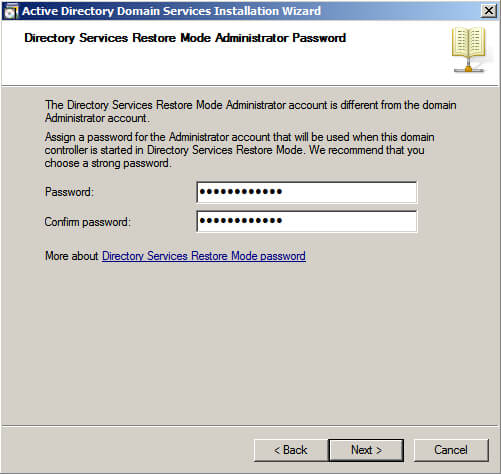
- In next window its asking to define a restore mode password. Its more important if you had to do a restore from backup in a server crash. Click on «Next» after filling it.
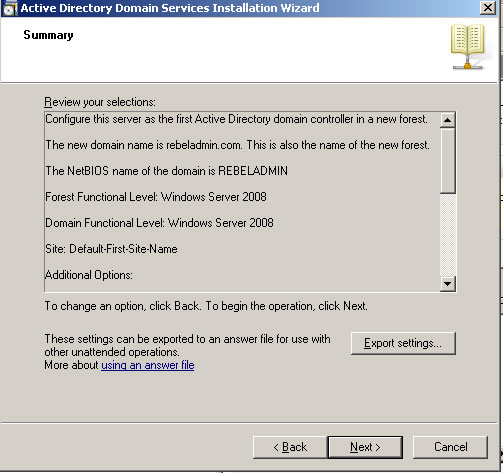
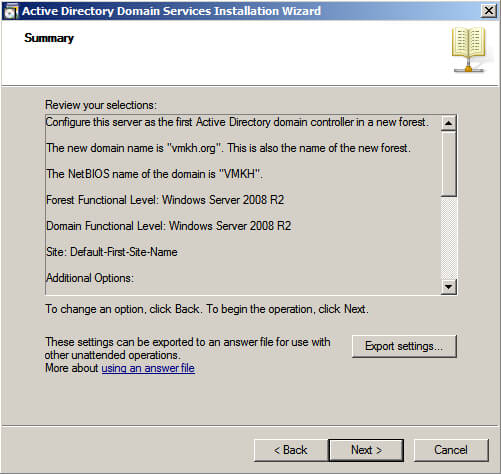
- Next window is giving you a brief of the installation. Click on «Next»
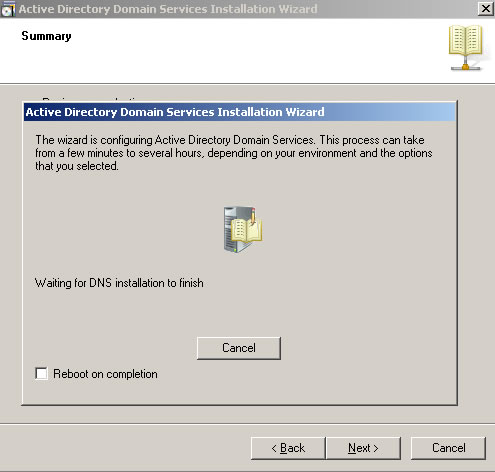
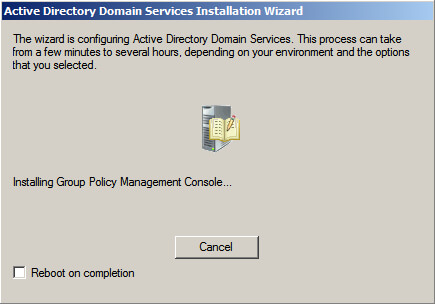
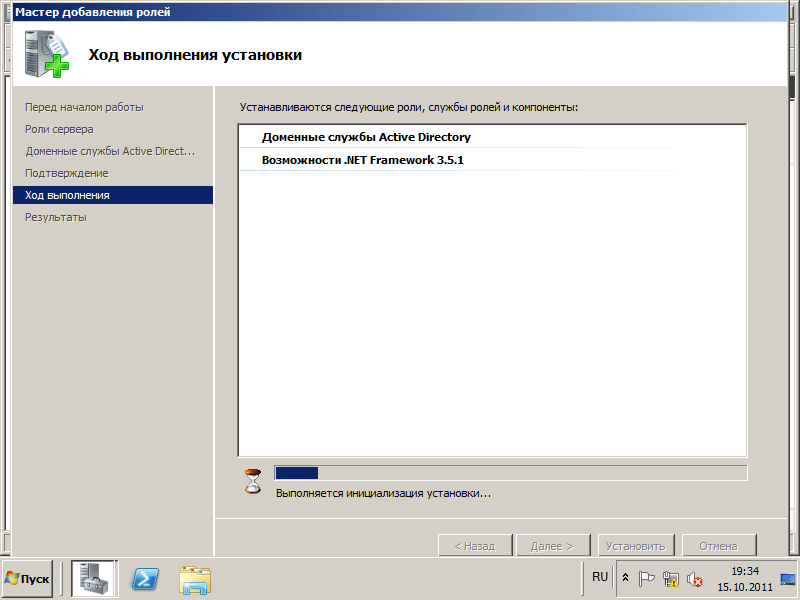
- Then it will start the installation of the AD. It will take some time to complete. After complete of the installation perform a server reboot.
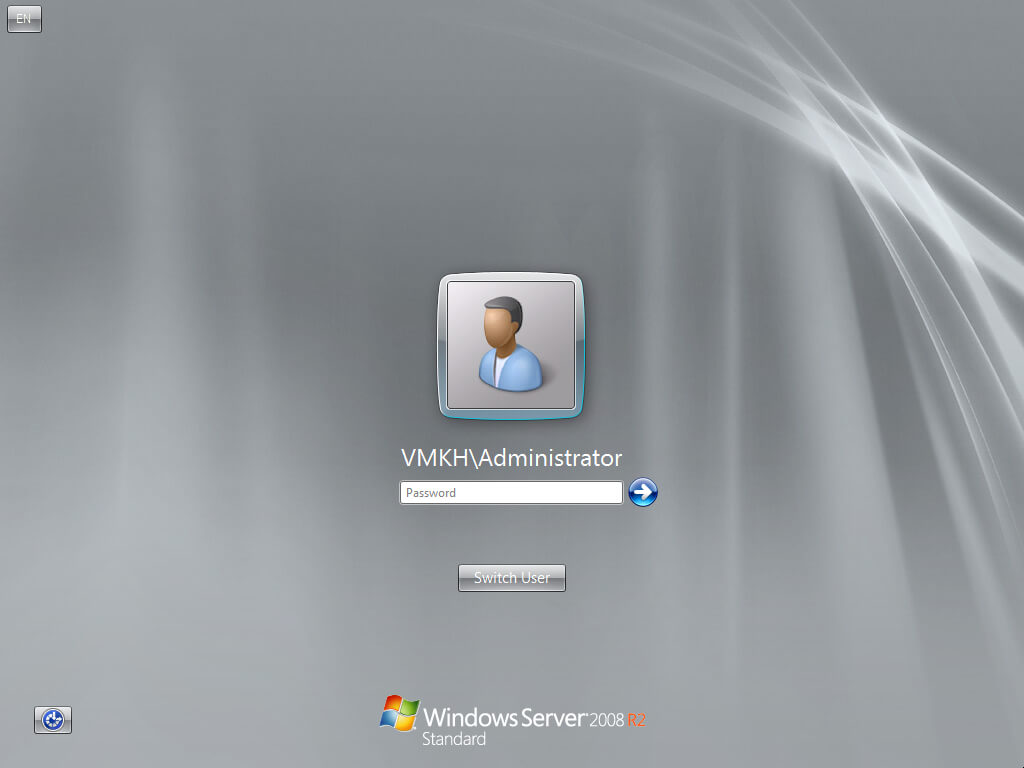
- After the reboot now you can login to the domain. Please use the login as following example
User name : your domain\administrator
Password : XXXXXXXX
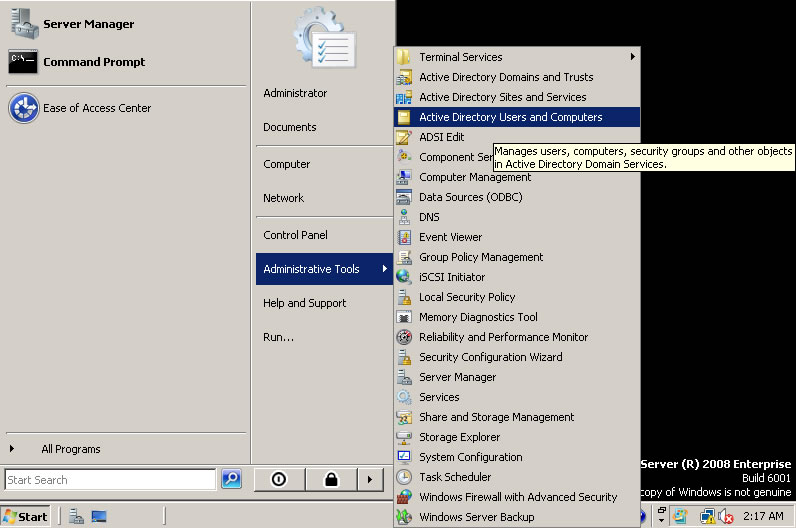
- Now its done and you can view the active directory options on administrative tools menu
Hope this tutorial is clear for you guys. If any question please ask me on rebeladm@live.com
Данная статья предназначена для тех, кто искал подробное и понятное руководство о том, как установить Active Directory Domain Services на Windows Server 2008 R2.
В этом руководстве мы будем рассматривать тот случай, когда у вас уже есть сервер с установленной на нем операционной системой Windows Server 2008 R2.
Подробно о том, как установить Windows Server 2008 R2, вы можете прочитать в моем руководстве “Установка Windows Server 2008 R2”. Узнать о том, как установить Active Directory Domain Services на Windows Server 2019, вы можете, прочитав “Установка Active Directory Domain Services на Windows Server 2019”.
Рекомендую всегда использовать англоязычные издания Windows Server. Как показывает практика, оригинальные (английские) версии Windows работают стабильнее, к тому же вам будет проще общаться на одном языке с профессионалами в случае возникновения проблем или при желании обменяться опытом.
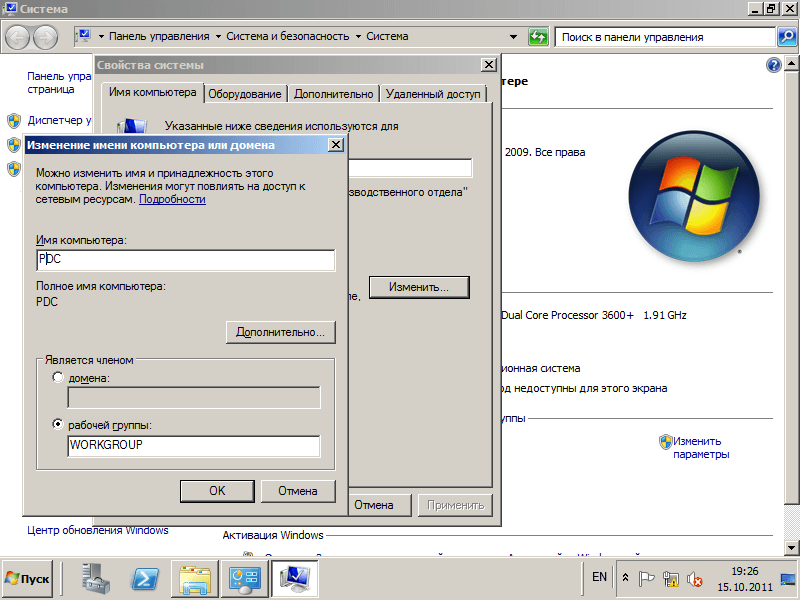
Перед началом установки роли Active Directory Domain Services необходимо присвоить серверу корректное имя в соответствии со стандартами вашей организации, а затем указать статический IP-адрес, маску подсети, шлюз и адрес сервера DNS.
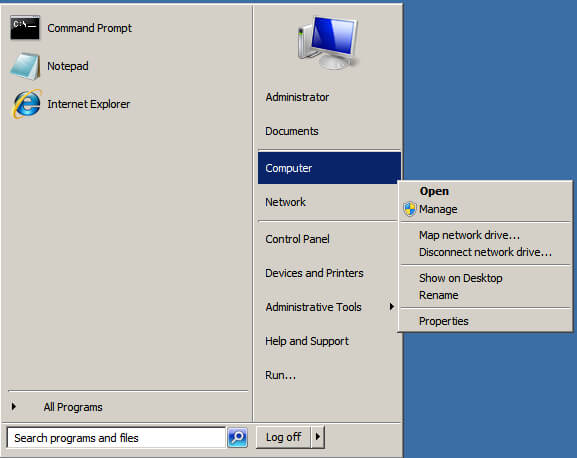
Заходим в систему под учетной записью с правами администратора и переходим в меню “Start”, нажимаем правой кнопкой мыши на “Computer” и выбираем “Properties”.
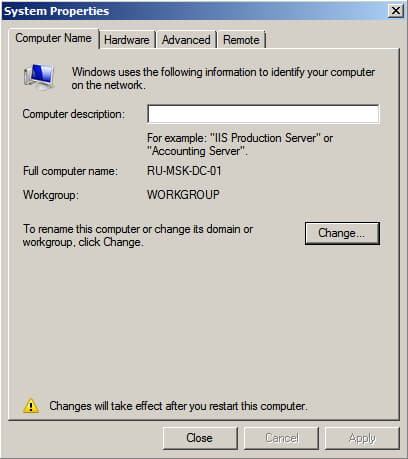
Далее в окне “System” в разделе “Computer name, domain, and workgroup settings” нажимаем на кнопку “Change settings”.

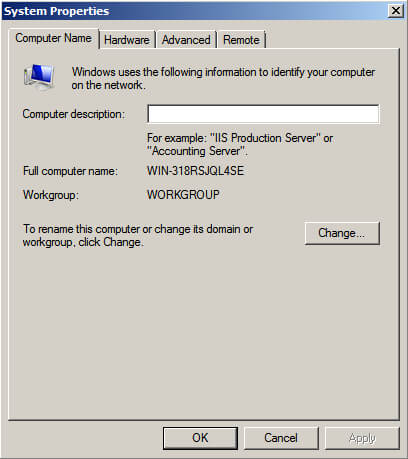
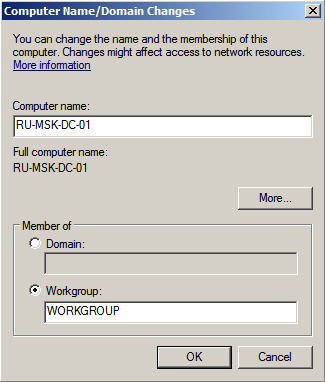
В окне “System Properties” на вкладке “Computer Name” нажимаем на кнопку “Change”.
Настоятельно рекомендую заранее продумать, как будут называться сервера в вашей организации.
Далее указываем новое имя сервера в поле “Computer Name” и нажимаем на кнопку “OK”.
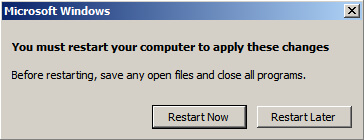
Система предупредит о том, что для применения новых настроек необходимо перезагрузить сервер.
Нажимаем кнопку “OK”.

В окне “System Properties” нажимаем на кнопку “Close”.
Теперь система предложит перезагрузить сервер для того чтобы новые настройки вступили в силу.
Нажимаем на кнопку “Restart Now”.
Далее сервер начнет перезагружаться.

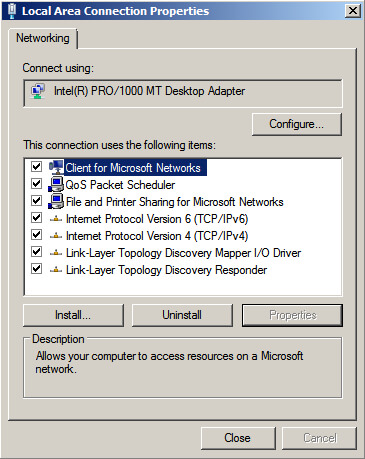
Теперь необходимо прописать статический IP-адрес в настройках сетевого подключения.
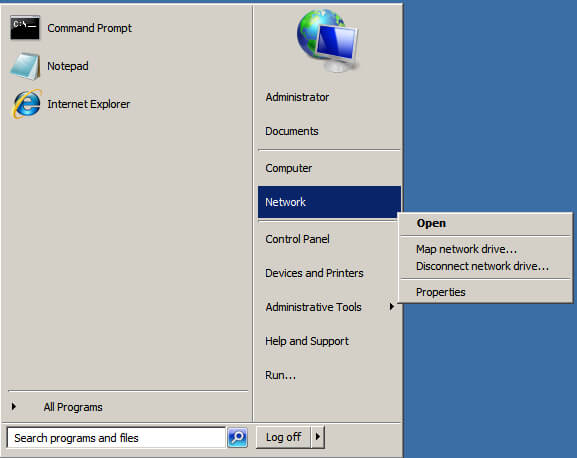
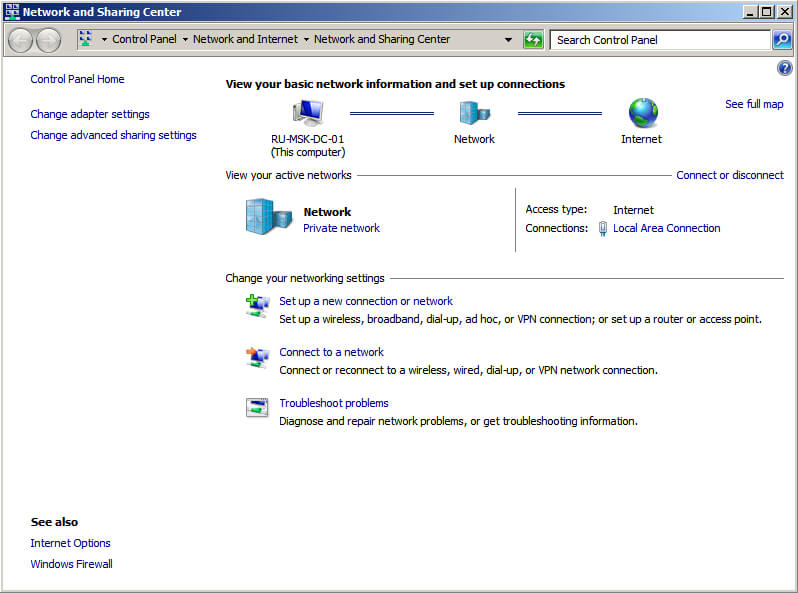
Заходим в систему под учетной записью с правами администратора и переходим в меню “Start”, нажимаем правой кнопкой мыши на “Network” и выбираем “Properties”.
Далее в окне “Network and Sharing Center” нажимаем на кнопку “Change adapter settings”.
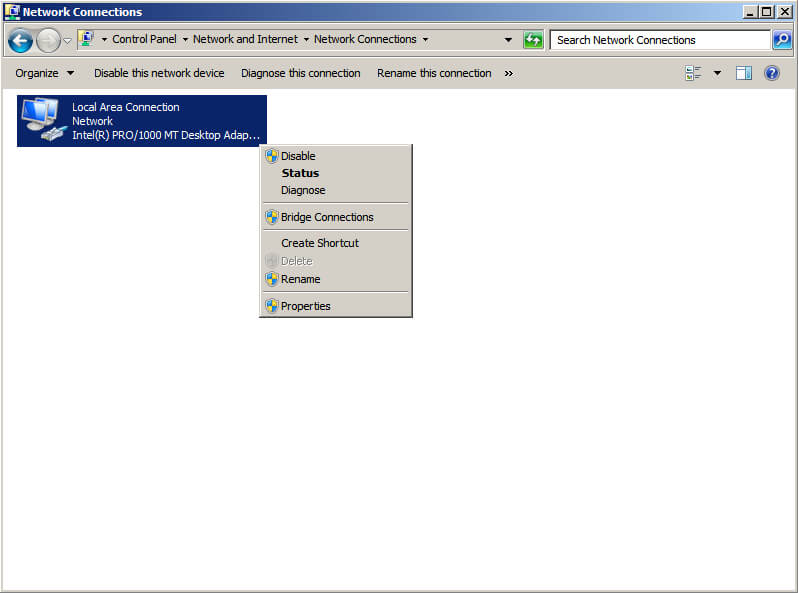
Теперь нажимаем правой кнопкой мыши на сетевом подключении “Ethernet” и выбираем пункт “Properties”.
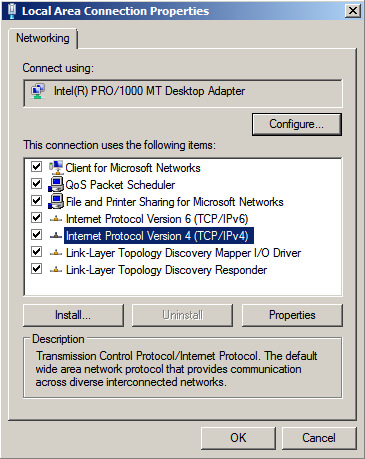
Выбираем “Internet Protocol Version 4 (TCP/IPv4)” и нажимаем на кнопку “Properties”.
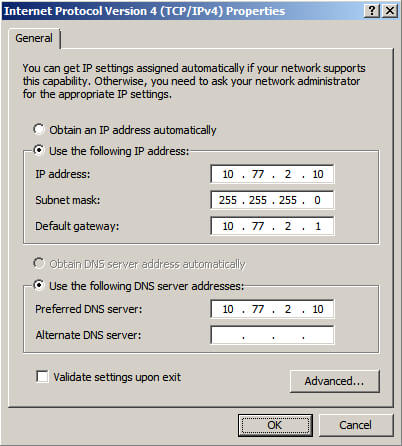
Далее выбираем пункт “Use the following IP address” и указываем свободный IP-адрес, маску подсети и шлюз. Обратите внимание, вы должны заранее понимать, как устроена ваша сеть и знать какие IP-адреса свободны.
В поле “Preferred DNS server” указываем IP-адрес этого сервера, так как на вашем сервере будет присутствовать роль “DNS Server”, которая устанавливается вместе с ролью “Active Directory Domain Services”.
Нажимаем на кнопку “OK”.
В окне “Local Area Connection Properties” нажимаем кнопку “Close”.
Теперь можно приступить к установке роли “Active Directory Domain Services”.
Открываем “Server Manager” и в пункте “Roles” выбираем “Add Roles”.
Нажимаем на кнопку “Next”.
Выбираем роль “Active Directory Domain Services”.
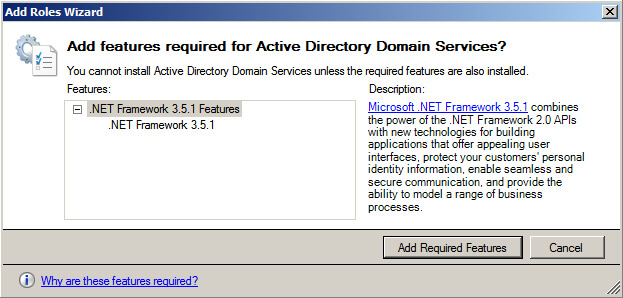
На следующем этапе “Мастер установки ролей” предупредит, что для установки роли “Active Directory Domain Services” нужно установить несколько компонентов.
Нажимаем на кнопку “Add Required Features”.
На этом этапе выбирать роль DNS Server не обязательно. Она будет установлена позже.
Нажимаем на кнопку “Next”.

Далее “Мастер установки ролей” предлагает ознакомиться с дополнительной информацией касательно роли “Active Directory Domain Services”.
Нажимаем на кнопку “Next”.

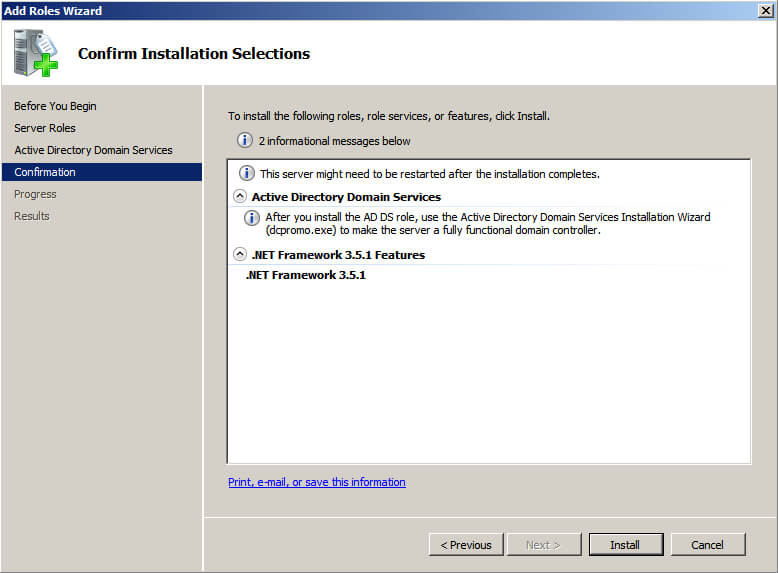
Для того чтобы начать установку выбранной роли, нажимаем на кнопку “Install”.
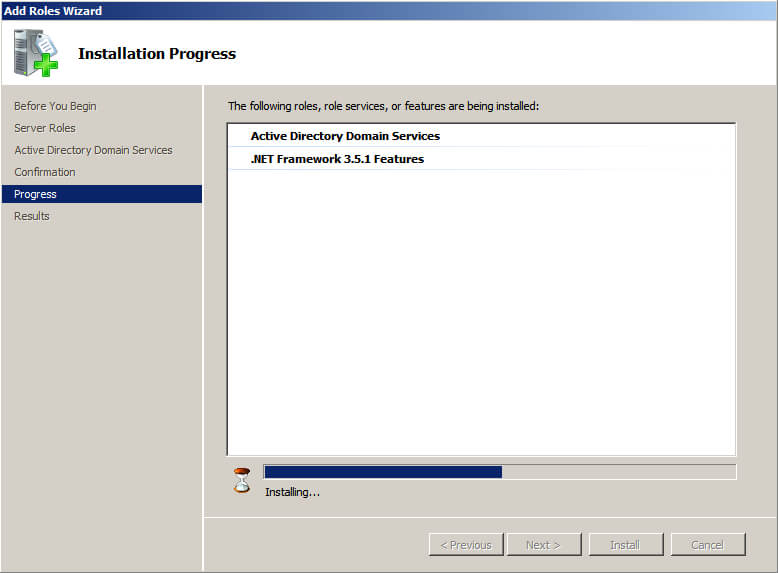
Началась установка выбранной роли и необходимых для нее компонентов.
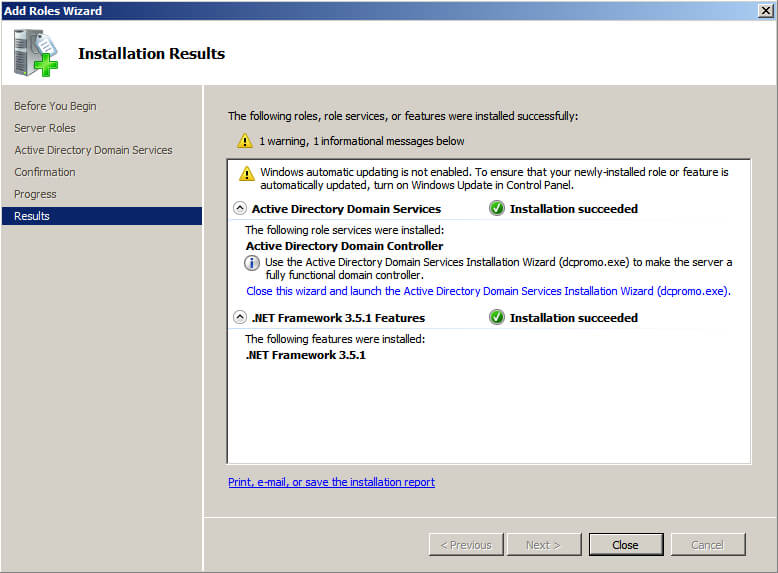
Установка роли “Active Directory Domain Services” завершена.
Теперь нажимаем на кнопку “Close this wizard and launch the Active Directory Domain Services Installation Wizard (dcpromo.exe)”, для того чтобы повысить роль вашего сервера до уровня контроллера домена.
Настоятельно рекомендую заранее продумать какое доменное имя вы будете использовать при добавлении нового леса.
Нажимаем на кнопку “Next”.

Далее предлагается ознакомиться с дополнительной информацией касательно функционала Windows Server 2008 R2.
Нажимаем на кнопку “Next”.
В данном руководстве рассматривается добавление нового леса, поэтому в окне “Active Directory Domain Services Installation Wizard” выбираем пункт “Create a new domain in a new forest”.
Нажимаем на кнопку “Next”.
В поле “FQDN of the new forest root domain” указываем желаемое имя для корневого домена.
Нажимаем на кнопку “Next”.

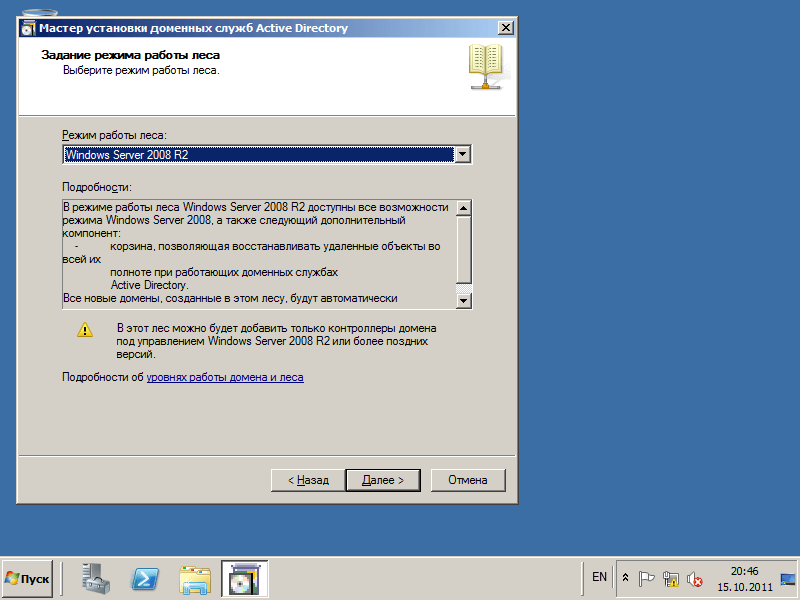
На следующем шаге предлагается выбрать функциональный уровень нового леса и корневого домена.
Если вы добавляете новый лес и планируете в дальнейшем использовать сервера на базе операционной системы Windows Server 2008 R2, то необходимо выбрать “Windows Server 2008 R2”.
Нажимаем на кнопку “Next”.
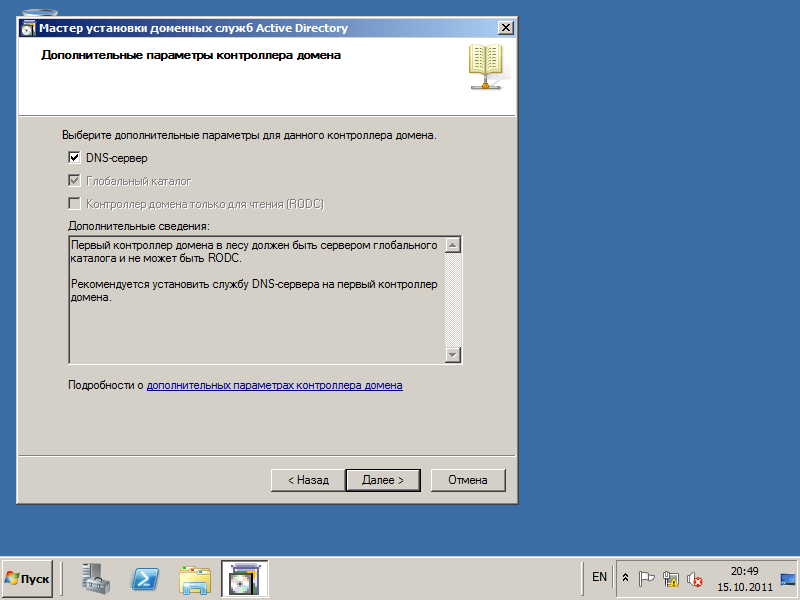
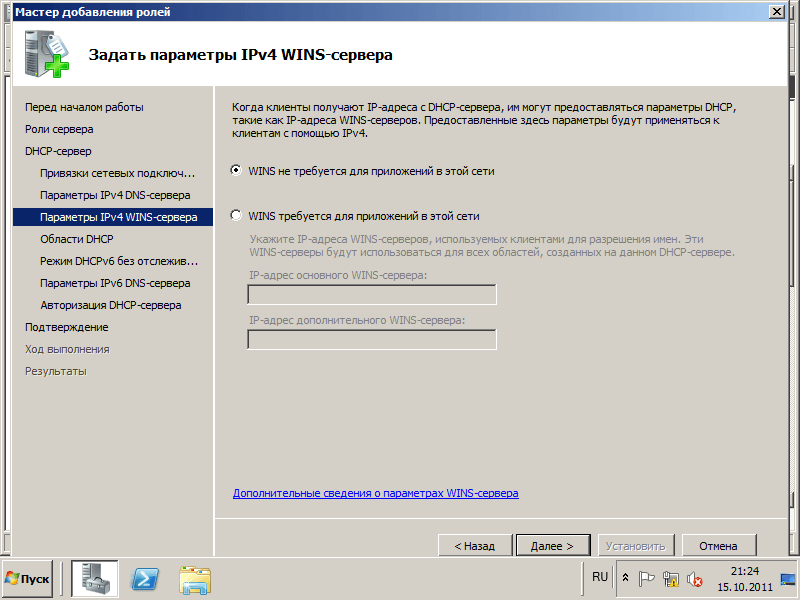
Для корректной работы контроллера домена необходимо установить роль “DNS server”.
Выбираем “DNS server” и нажимаем на кнопку “Next”.
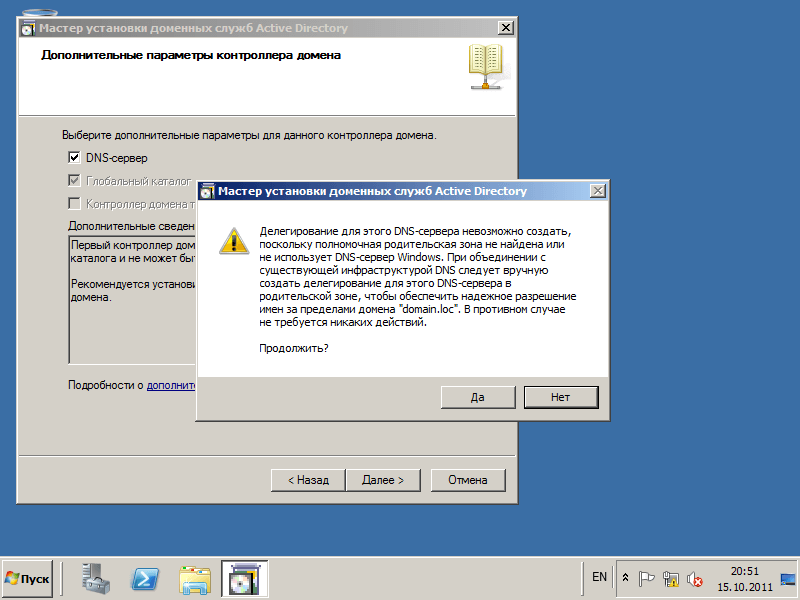
На данном этапе “Мастер настройки AD DS” предупредит, что делегирование для этого DNS-сервера не может быть создано.
Нажимаем на кнопку “Yes”.
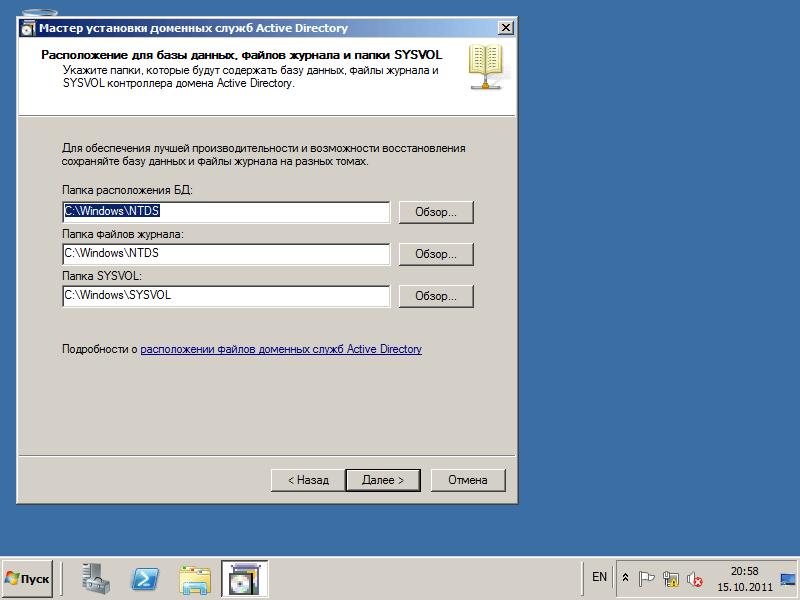
Теперь можно изменить пути к каталогам базы данных AD DS, файлам журнала и папке SYSVOL. Рекомендую оставить эти значения по умолчанию.
Нажимаем на кнопку “Next”.
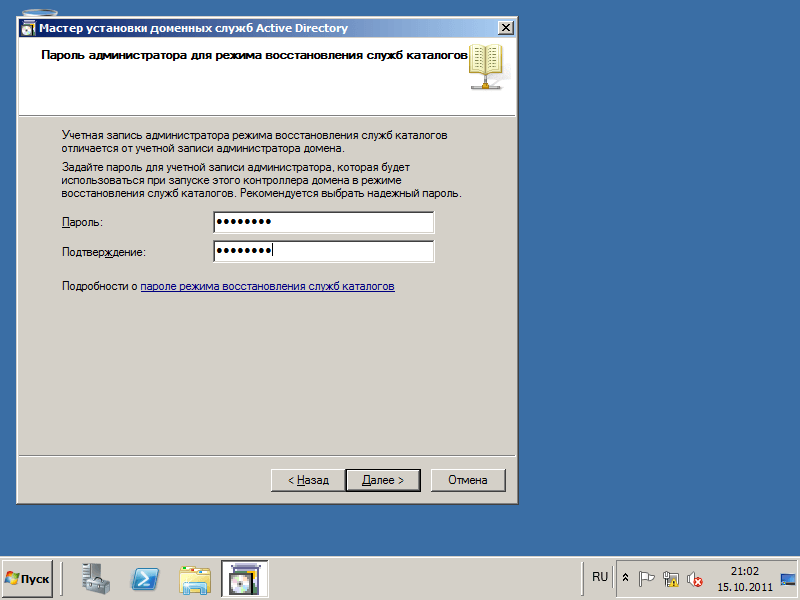
Указываем пароль для DSRM (Directory Service Restore Mode — режим восстановления службы каталога) и нажимаем на кнопку “Next”.
На следующем шаге отображается сводная информация по настройке сервера.
Нажимаем на кнопку “Next”.
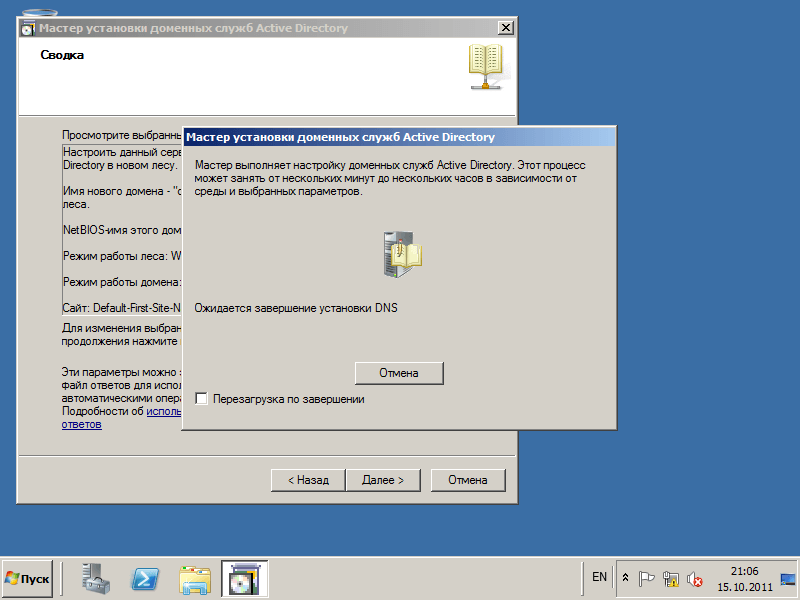
Начался процесс повышения роли сервера до уровня контроллера домена.
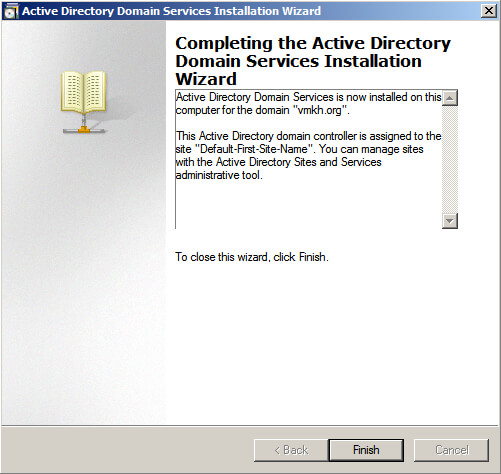
Процесс повышения роли сервера до уровня контроллера домена завершен.
Нажимаем на кнопку “Finish”.
Теперь система предложит перезагрузить сервер для того чтобы новые настройки вступили в силу.
Нажимаем на кнопку “Restart Now”.
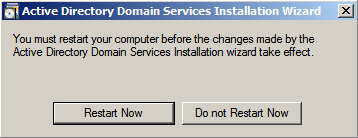
Далее сервер начнет перезагружаться.

Повышение роли сервера до уровня контроллера домена завершено.
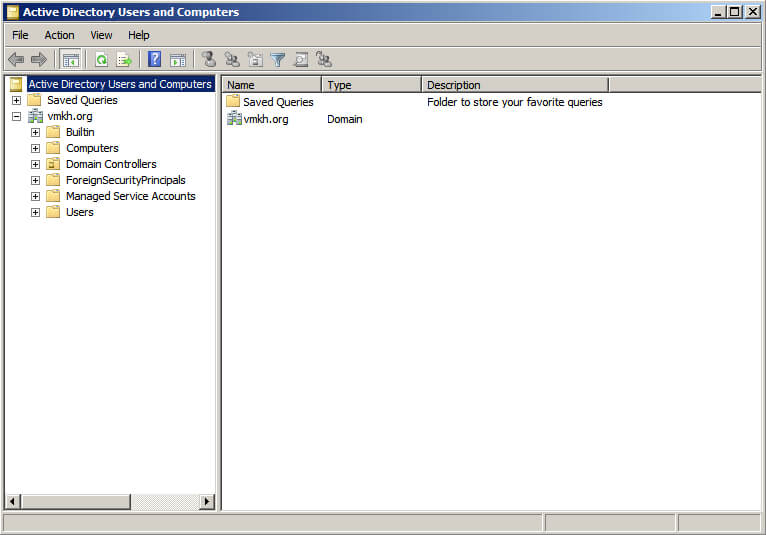
Для управления пользователями, группами и другими объектами каталога Active Directory можно использовать привычную многим оснастку Active Directory Users and Computers.
Заходим в систему под учетной записью с правами администратора домена.
Переходим в меню “Start” и выбираем пункт “Administrative Tools”, далее выбираем “Active Directory Users and Computers”.
Откроется оснастка Active Directory Users and Computers.
В данной статье мы рассмотрим установку контроллера Active Directory под Windows 2008 R2 с подготовкой и будем считать, что до нас служба доменных имен не была развернута. А наш контроллер домена будет первым. Все ниже перечисленные действия мы выполняем из-под Администратора.
Для начала необходимо установить IP адрес сетевому адаптеру. Для нашего случая мы задали адрес 192.168.1.5, маску подсети 255.255.255.0 и в качестве предпочитаемого DNS свой IP или 127.0.0.1. Эти настройки мы прописываем для сети со статическим IP адресом.

Переменнуем компьютер так, чтобы было понятно, что за зверь. Для этого: жмем правой кнопкой мыши по Мой компьютер –> Свойства –> Справа снизу жмем Изменить параметры –> на вкладке Имя компьютера кликаем на Изменить.
Перегружаем сервер.
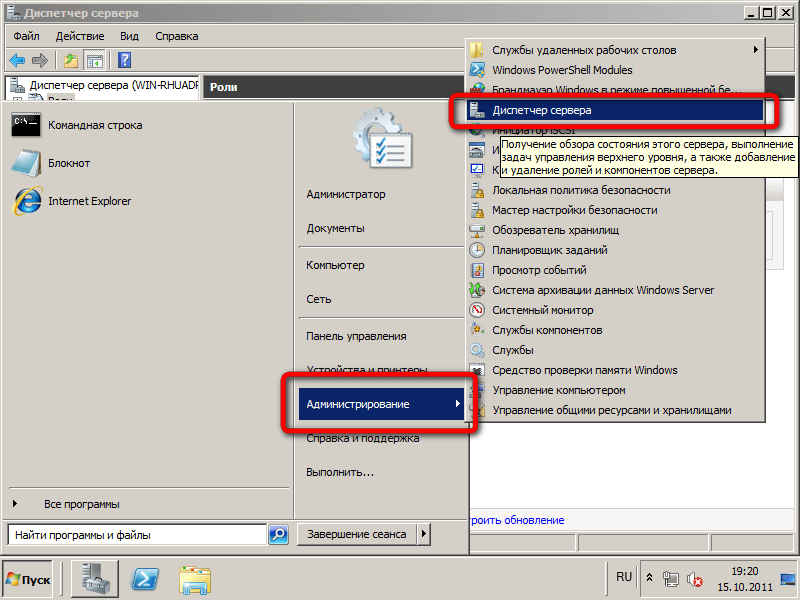
Нажимаем ПУСК –> Администрирование –> Диспетчер сервера. Возле пункта Роли ищем кнопку Добавить роли, нажимаем. В появившемся окне нажимаем Далее, ставим галочку на Доменные службы Active Directory. Ждем окончания установки.
Далее
Далее
Ждем установки
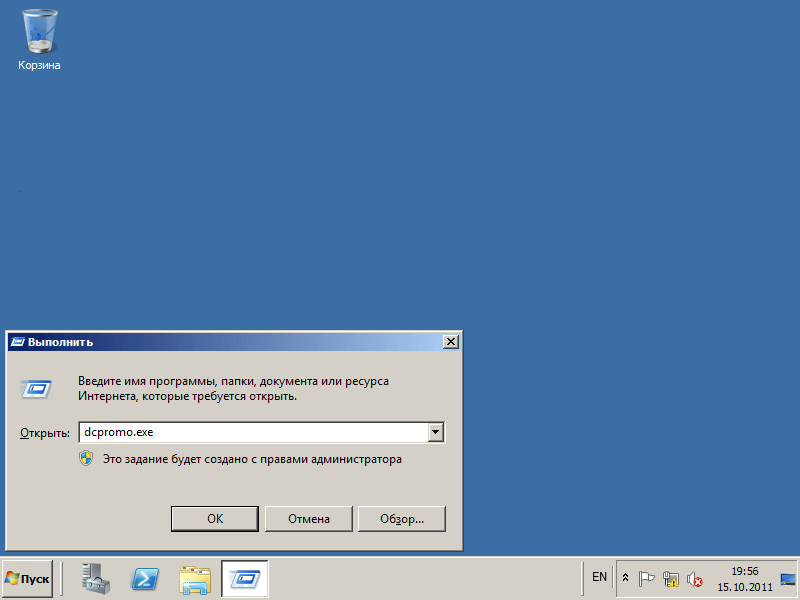
Заходим ПУСК –> Выполнить. В появившемся окне пишем dcpromo.exe.
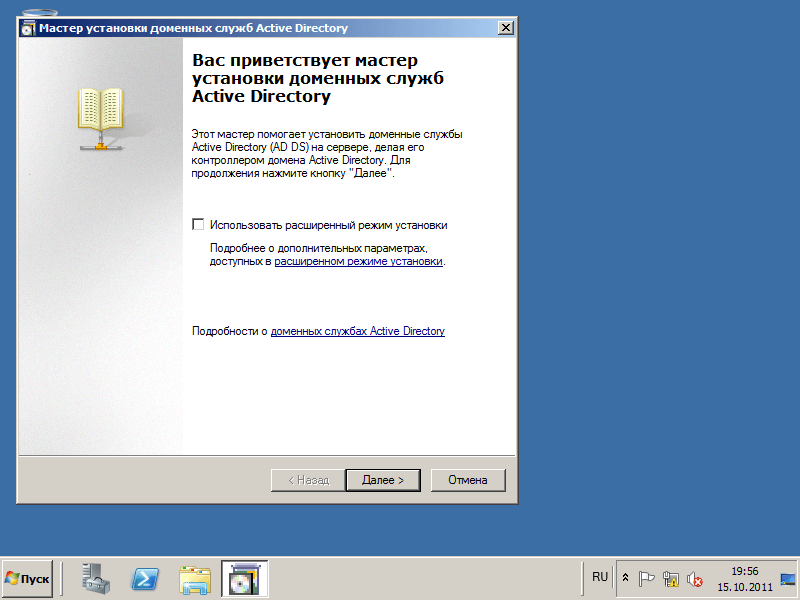
Откроется установщик Active Directory.
Далее
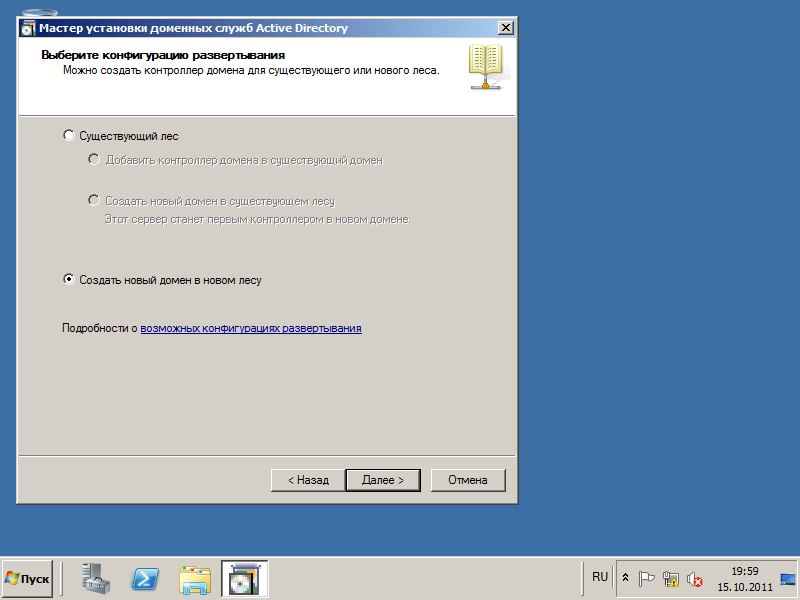
Так как у нас производится установка AD с нуля, то необходимо создать новый лес.
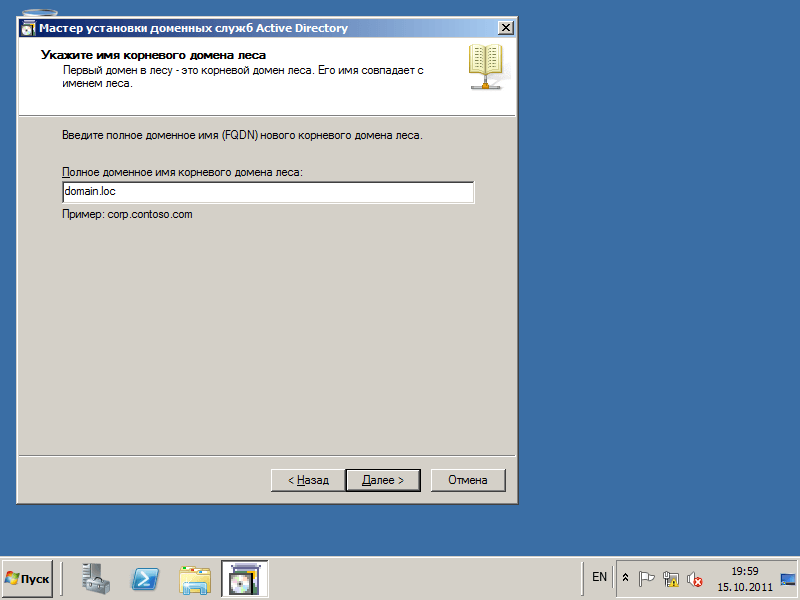
Далее впишем имя нашего домена.
На следующем этапе необходимо выбрать режим совместимости. Если в Вашем домене не будет других сервером кроме как Windows 2008 R2 – можно выбрать соответствующий режим.
На следующем шаге оставляем все по умолчанию.
Далее будет происходить настройка службы DNS.
Так как на нашем сервере DNS ранее не использовался, то и делегирование создано не было.
Следующим этапом необходимо выбрать папку для хранения системных файлов.
Далее.
Устанавливаем пароль администрирования.
ВНИМАНИЕ! Пароль должен отвечать требованиям политики безопасности. По умолчанию, он должен содержать:
— Цифры;
— Спецсимволы;
— Буквы латинского алфавита (заглавные и прописные);
Следующий этап Далее.
Active Directory устанавливает и настраивает компоненты. Иногда это может занять некоторое время.
После чего, ОБЯЗАТЕЛЬНО перегружаем сервер.
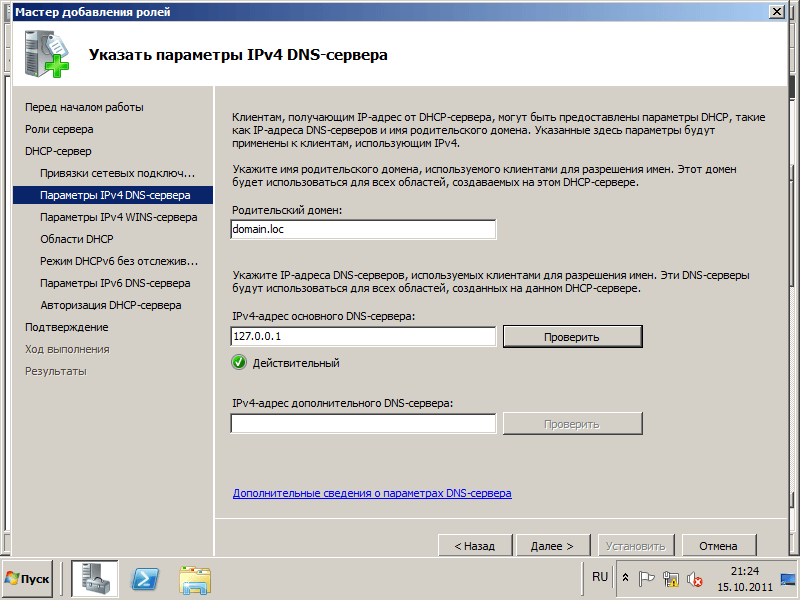
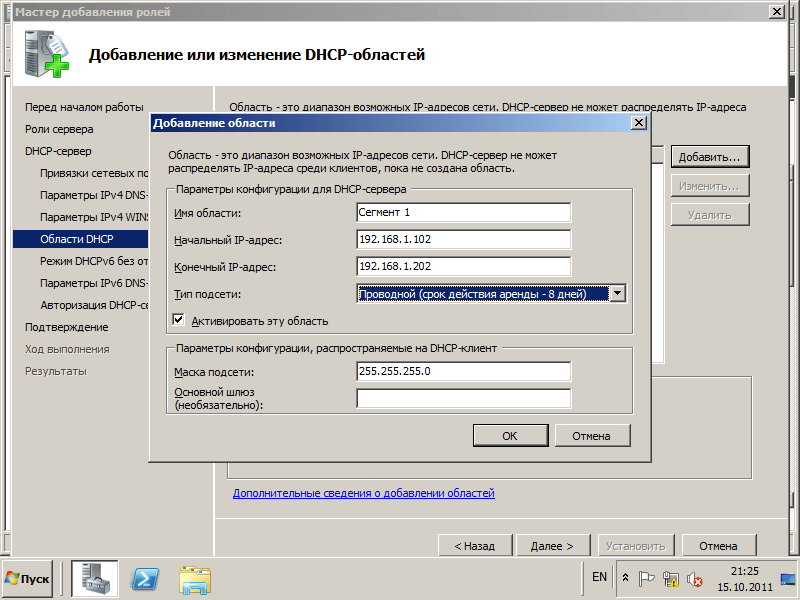
На следующем этапе необходимо установить и настроить DHCP-сервер.
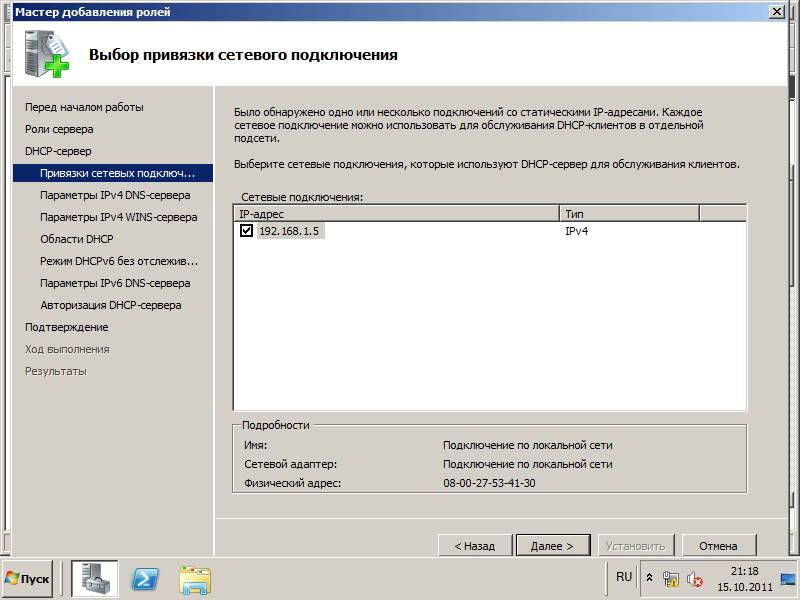
Заходим в Диспетчер сервера, снова жмем Добавить роль. Ставим галку на DHCP-сервер. Ниже будут показаны только основные шаги.

Был произведен автоматический поиск активных сетевых адаптеров. IP добавлены автоматически. Если у вас динамические IP адреса ситуация будет совсем иная, начнут возникать проблемы).
Прописываем статический IP адрес.
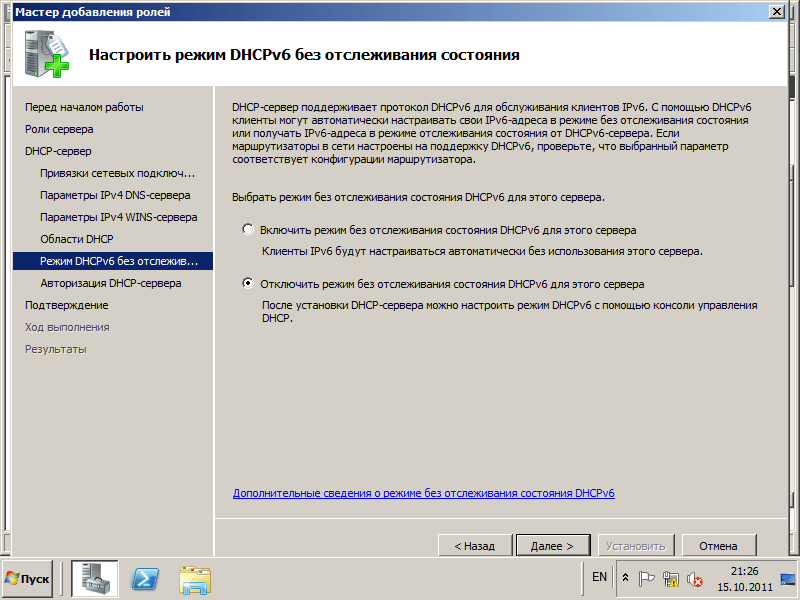
IPv6 в нашей сети не используется, поэтому данная опция была отключена.

На этом этапе выбираем ту учетную запись, под которой выполнялась установка Active Directory. В будущем это позволит избежать непонятных ситуаций и путаниц.
Жмем кнопку Далее -> Установить. Дожидаемся окончания установки. На этом установку Active Directory можно считать законченной.
Вы всегда можете рассчитывать на квалифицированную поддержку и консультацию по телефону +7 (812) 951-35-68, ICQ 313636765 или электронной почте admin@kuzevanov.ru. Будем рады видеть Вас в числе наших клиентов, с уважением Компьютерный сервис.
As you probably know Active Directory stores information about objects on the network and makes this information available to users and network administrators. AD uses domain controllers to give network users access to permitted resources anywhere on the network through a single logon process. In this article I will go through the installation of active directory on Windows server 2008.
Prerequisites
- Have Windows server 2008 already installed.
- Have administrative privilege on the system
- be able to reboot the system any time.
- Have an NTFS partition with enough free space
Things you should keep in mind
- If you are installing active directory on windows server 2008 for the first time, it must be a global catalog server, it cannot be RODC.
- NT 4.0 domain controllers are not supported on windows server 2008 anymore. if you still have NT domain controllers on your network, you need to have 2000/2003 DCs to support them.
- If you are making windows 2008 a domain controller on 2003 forest, you must prepare the forest for windows 2008 by running ADPREP.
Final preparations
the last thing I will do to start the installation of active directory is to change the name of the computer to reflect the new status. to do that, login to the server and click on the Start button and right-click on Computer and go to Properties. at the bottom under computer name, domain, and workgroup settings, click on the Change settings:

the System Property window will come up.
click on the change tab, and change the computer name to whatever you want.

Click on the OK button. Windows Server 2008 will now reboot.
Installing Active Directory Domain Services
Now that we have renamed the computer to something that reflects the new role on windows server 2008, we will proceed with the installation of active directory. I always recommend using the server manager interface when installing active directory and other network services. to install active directory domain services, go to Start and click on Server Manager.
the server manager window will come up:

The Select Server Role window will come up:

Make sure the Active Directory Domain Services option is checked.
click on Next after checking the option.
Active directory domain services (AD DS) is something new on Windows Server 2008. on the following window you can read a small introduction about it. click next when you finish reading.

click Next on the above window.
on the following window, you will be asked to confirm the installation of domain services:

click on Install to start the installation.

You should receive the Installation Results window after the installation completes.

Note: this only installs Active Directory domain services, it does not make Windows server 2008 a domain controller. for that we will need to run the DCPROMO wizard.
Installing Active Directory Domain Controller
after Active Directory Domain Services have been installed, you should return to the Server Role Interface. click on Active Directory Domain Services:

on the window that pops up, you will see a summary message that reads, “This server is not yet running as a domain controller: Run Active Directory Domain Services Installation Wizard ( dcpromo.exe)
Click on the blue link.

by clicking on the blue link, the dcpromo.exe wizard should come up:

make sure “Use advanced mode installation” option is checked and click Next.
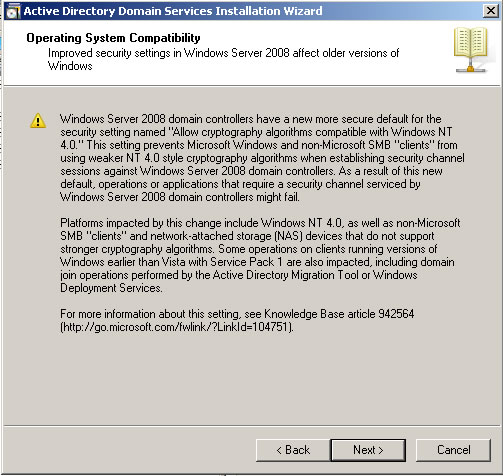
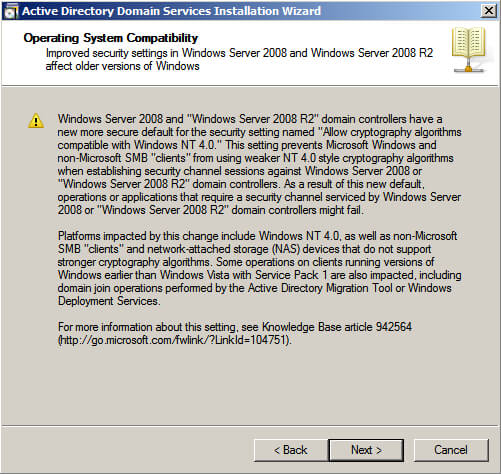
read the provided information on the next screen. that explains some new features on windows server 2008 domain services that might affect older Windows operating systems and non Microsoft SMB clients on an existing domain.

Click Next after you read the above warning.
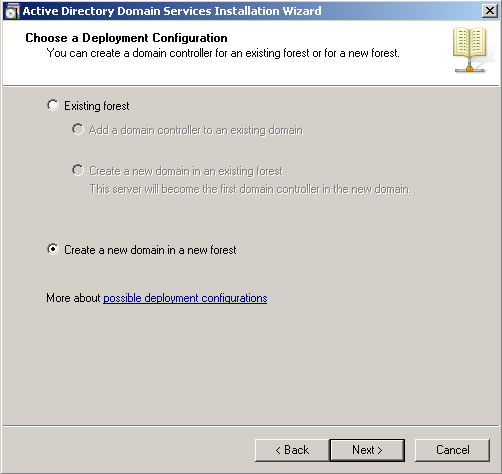
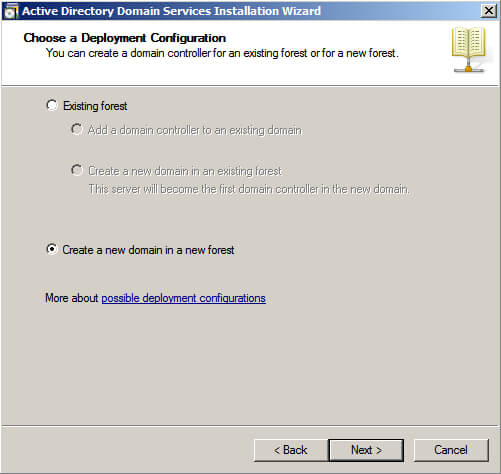
on the following screen, choose your deployment configuration.

because this is my first domain controller, I will choose the “Create a new domain in a new forest” option.

click on Next.
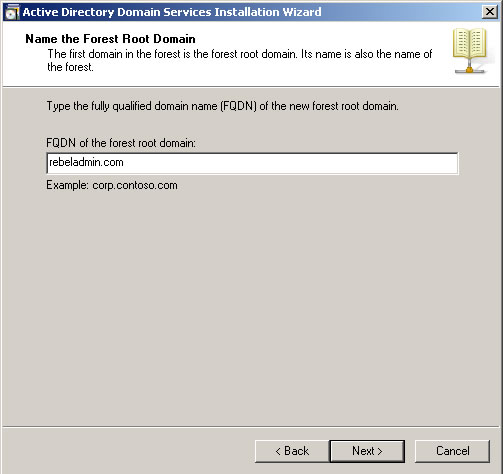
Choose the name for your forest root domain on the following window.

click Next after choosing your fully qualified domain name.
the wizard will check if that forest name is already in used:

after a few seconds, the wizard will ask you to enter the NetBIOS name:

the default NetBIOS name should be fine. click on the Next tab.
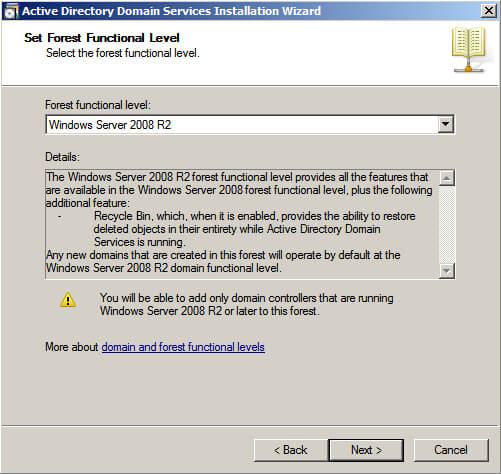
on the following screen, choose the forest functional level:

I will choose Windows Server 2003 as my functional level. Choosing windows server 2008 functional level does not provide any new features over the Windows 2003 forest functional level. However, it ensures that any new domains created in this forest will automatically operate at the Windows Server 2008 domain functional level, which does provide unique features. click on Next.

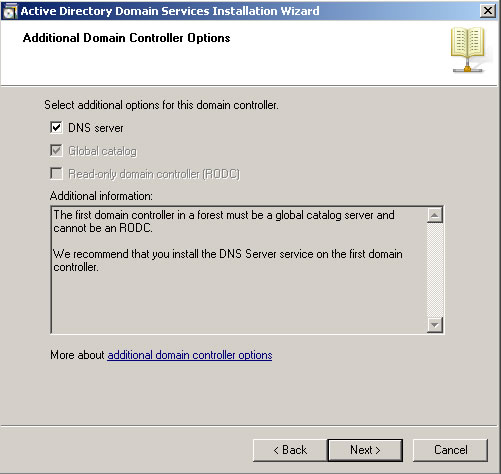
Clicking next, the dcpromo wizard will check for DNS configurations.
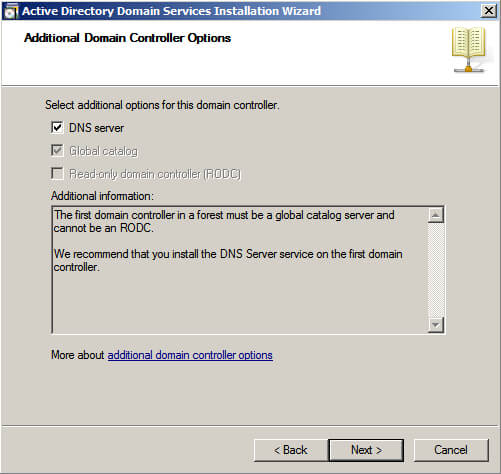
If DNS is not installed on your system, choose the DNS Server option on the following screen.

here you get the info that tells you:
The first domain controller in a forest must be a global catalog server and cannot be an RODC.
Click on Next.
if your server does have static IP address assigned on the server, you might get the following warning:

as you can see, having dynamic assigned IP address is not recommended. use static IP addresses for servers whenever is possible.
choose your option, and click Next.
another warning:

if you get this warning, click on OK.
choose the location of the AD database on the following screen:

Leave the default settings, and click on Next.
Enter your the password for your Restore Mode Administrator on the following screen.

click Next after entering the password.
on the following screen you should get the Summary page.

click on Next.
damn it!! I got an error saying I need to install DNS manually.

“An error occurred while the wizard was installing DNS, you will have to configure DNS for this domain manually.
this is the first time I let the dcpromo.exe to configure DNS for me, and I kind of was expecting for this error. that will be the subject of the next article.
click OK on the error for now.
active directory installation should start installing. but it won’t work perfect until DNS is install.

after awhile, you should get the completion window.

click on Finish.
you will need to reboot the computer.

go ahead and restart the computer, and if you need to install DNS do so after the reboot.