
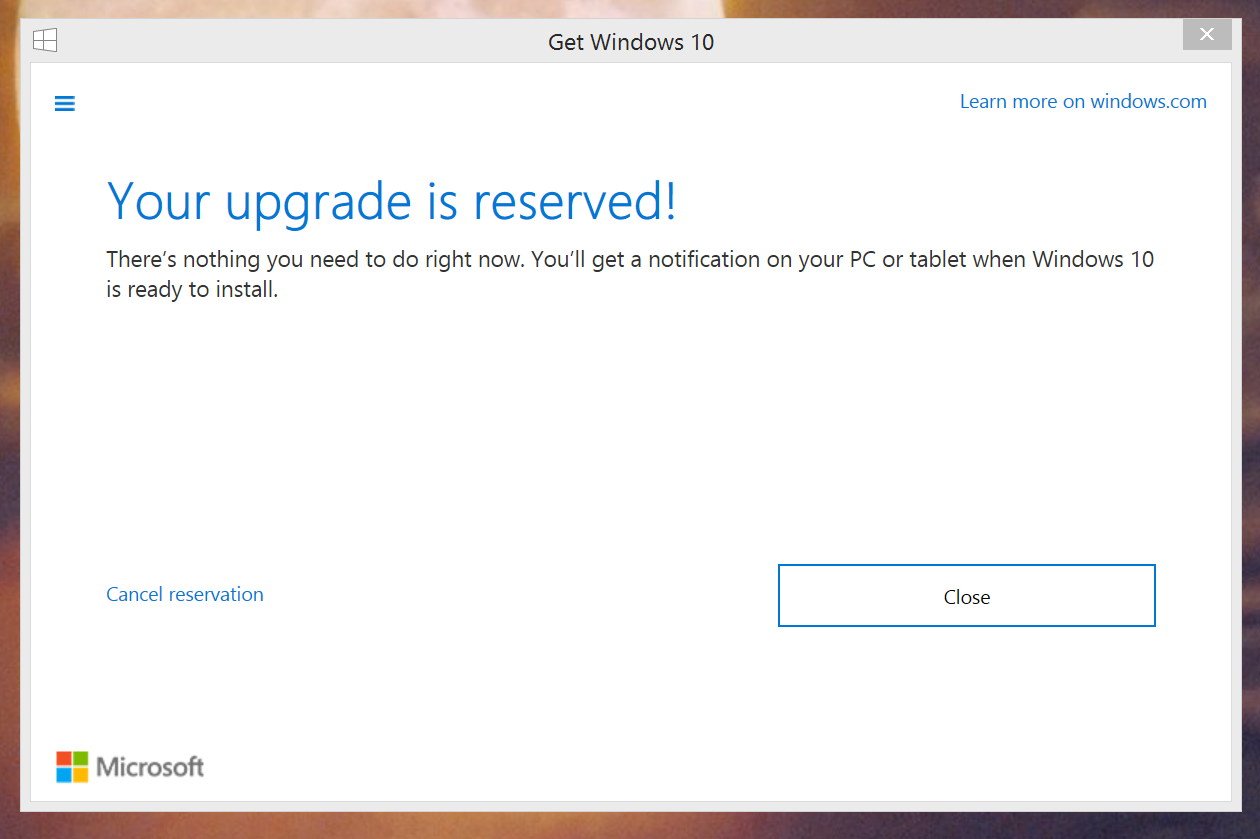
Starting on June 1st, 2015, millions of PCs and tablets around the world will begin to see the Windows 10 upgrade notification icon in the system tray, on all qualifying devices. That’s because Microsoft has announced that the next version of its operating system will be arriving on July 29.
Now there is a slight chance that some Windows users won’t want to move quickly to the new version of the operating system. Some users might feel they want to stay a little longer with Windows 7 or Windows 8.1, or they feel that Windows 10 isn’t quite ready. For those people, I will show you how you can remove the icon from the system tray and how to cancel your reservation.
The Windows logo icon in the system tray didn’t magically appear on your PC. It was the update KB3035583 that handled the notification preparing your computer for Windows 10.

KB3035583 was originally an update released back in April, Microsoft offered it as an optional update for Windows 7 and Windows 8.1 machines. Today, the software maker is changing the priority of the update to «Recommended», which will force the update to download and install automatically via Windows Update.
Cancel reservation
If you reserved your copy of Windows 10, but you just realized that you don’t want to upgrade, you can easily:
1- Right-click the system tray icon and select Check your upgrade status.
2- Click the Cancel reservation link. If you don’t see the link, click the hamburger button in the top-left, click View information, and then click the Cancel reservation.
That’s it.
Removing the «Get Windows 10» app
If you’re prompted to reserve your free copy of Windows 10, it means that your device is ready to receive the new version of the operating system. You’ll be asked to enter your email address to confirm your reservation, but if you don’t want to upgrade or get reminded, you can easily:
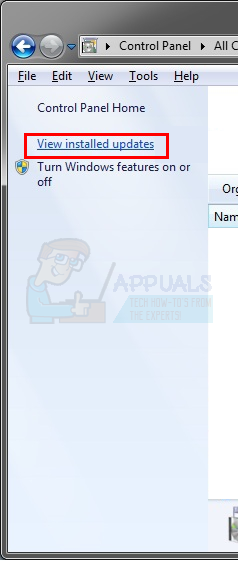
1- Go to Control Panel > Programs and Features > Installed Updates.
2- Do a search for KB3035583, double-click it, and then click Yes, to uninstall the update.
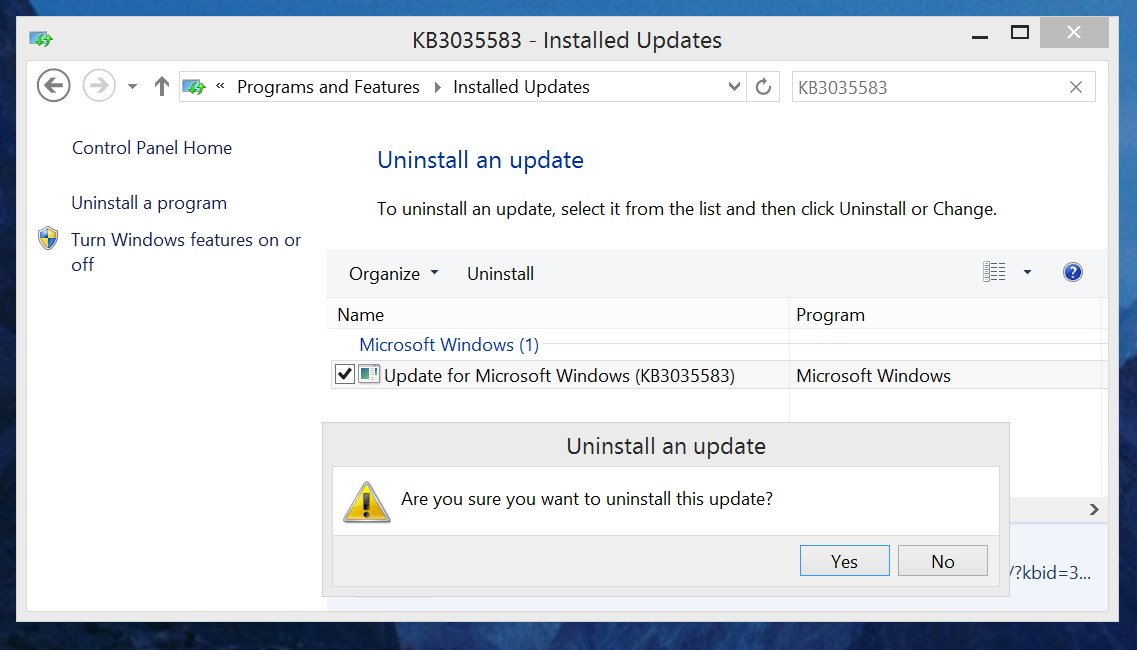
3- Reboot your computer, and you’ll be good to go.
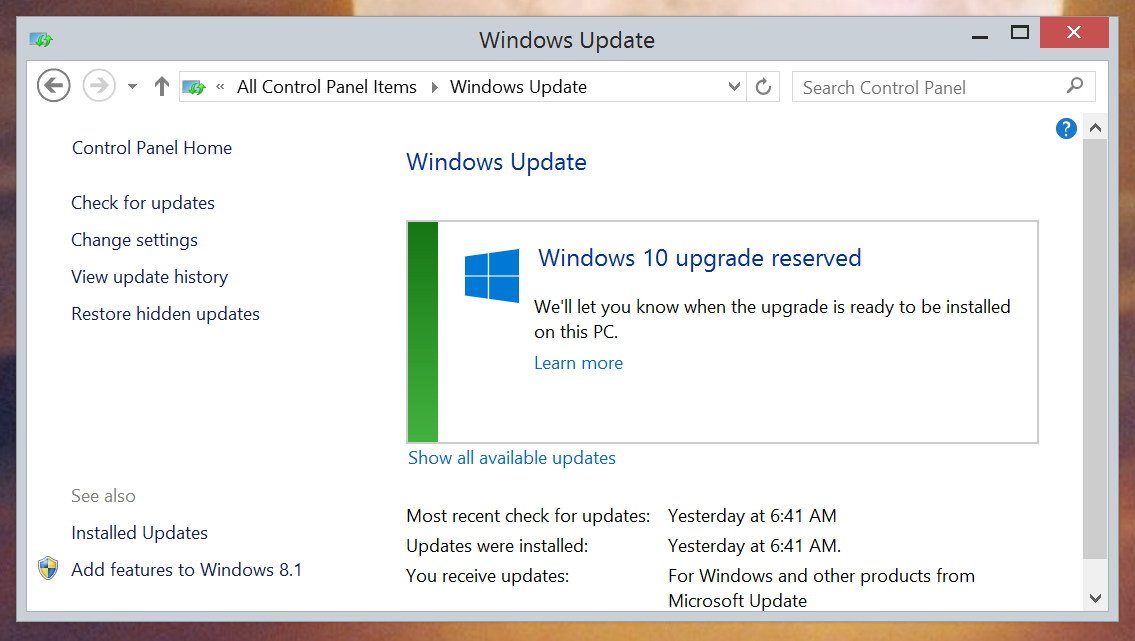
If you can’t remember whether you reserved your copy, you can check your upgrade status. To do so go to the Control Panel > Windows Update, and you’ll notice the «Windows 10 Upgrade reserved» message.
It’s worth noting that Windows 10 is a major update to the operating system, and this is the first time in history that Microsoft will be offering users a chance to upgrade free of charge. However, Windows 10 will not be free forever, there is a limited time to get the update. While the company is opening the doors to reserve a copy of the operating system on June 1st (some users even received the notification on May 31st), the company will only offer the free upgrade until July 29, 2016 (one year to be exact).
After this time, those who didn’t take advantage of the upgrade will have to pay full price.
Reserving your upgrade again
Now, if you change your mind, you can always download and install the update KB3035583, and reserve your copy of Windows 10.
In conclusion
I encourage you to reserve your upgrade of Windows 10. This next version is looking to be an awesome operating system, just like Windows XP and Windows 7. But we also have to understand that there will be a lot of users that might feel annoyed by being prompted to upgrade, and there will be users feeling that Windows 10 isn’t for them.
Will you be reserving your Windows 10 upgrade? Let us know in the comments below!
All the latest news, reviews, and guides for Windows and Xbox diehards.
Mauro Huculak is technical writer for WindowsCentral.com. His primary focus is to write comprehensive how-tos to help users get the most out of Windows 10 and its many related technologies. He has an IT background with professional certifications from Microsoft, Cisco, and CompTIA, and he’s a recognized member of the Microsoft MVP community.
We all know that Windows 10 is the latest operating system from Microsoft and Microsoft sure is pushing its users to get the Windows 10. That is why, if you are a user of Windows 7, you will see the notifications/pop-ups of Get Windows 10 in the taskbar. This isn’t a huge problem but it might be annoying for a lot of people especially if they aren’t planning on moving to Windows 10. Also, this pop-up will keep appearing until you install the Windows 10. So, it can make your Windows 7 experience really annoying.
Basically, this PUP (Potentially Unwanted Program) gets installed with the KB3035583 update. So, every Windows user who installed the latest updates, or at least the KB3035583 update, is going to get this Windows program that will show up these pop-ups continuously. The GWX.exe executable is related to this program and you will be able to see it in the task manager as well. As long as this GWX.exe is running, this program will continue to run and show the pop-ups.
So, there are a few ways that can help you stop this program or disable it or completely delete it from the Windows. There are also some methods to just uninstall the update that brings this program. Go through each method listed below and check which one works for you.
If you don’t want to get into too many details then you can follow the steps given below to turn off the Get Windows 10 notification. However, this is a temporary solution and the notifications will be back after the restart. So, you will need to do this on every restart of your computer.
- Press CTRL, ALT and DELETE key simultaneously (CTRL + ALT + DELETE)
- Select Start Task Manager
- Click the Processes tab
- Locate the process called exe
- Right click GWX.exe and click Stop
Method 1: Uninstall the Updates
The first thing you should do is to uninstall the update from your machine. The update that brings this pop-up program is the KB3035583. So, all you have to do is locate this from the installed updates and uninstall it.
Steps for uninstalling KB3035583 are given below
- Hold Windows key and press R
- Type appwiz.cpl and press Enter
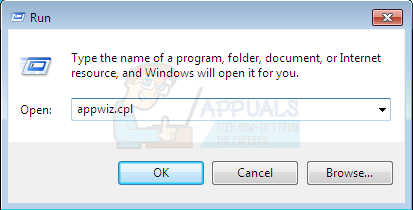
- Click View installed updates from the left top
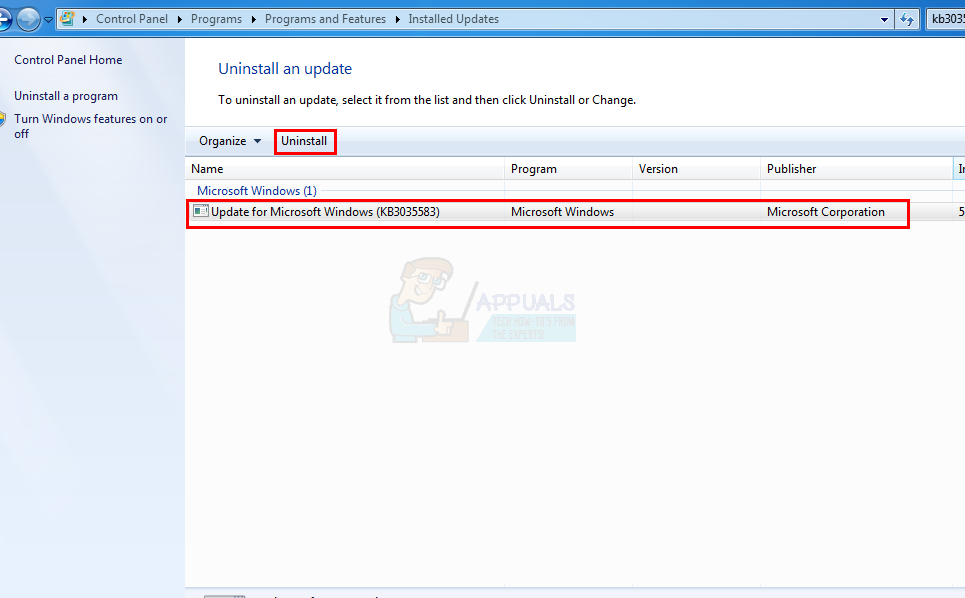
- Now go through these updates and locate the KB3035583 update
- Select KB3035583 update and click Uninstall
- Follow any additional on-screen instructions
That’s it. You should restart your PC for the changes to take place. So, reboot your system and the update should be gone once your computer reboots. However, the update might get installed again if your Windows Updates are on automatic settings. There also are cases where this specific update is packaged with other updates (This isn’t confirmed but there are chances) so installing other update isn’t safe as well.
So, once you are done with following the above steps, follow the steps given below to make sure the update doesn’t get installed again.
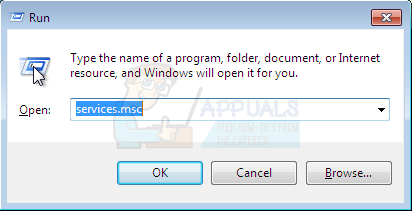
- Hold Windows key and press R
- Type services.msc and press Enter
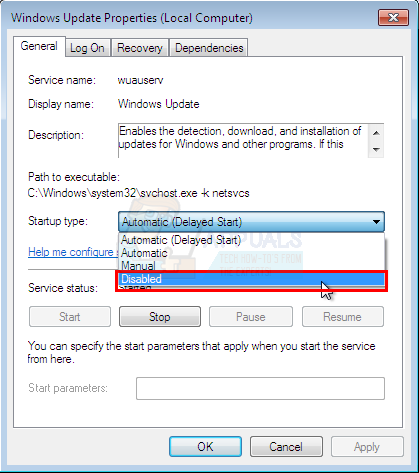
- Locate Windows Update service and double click it
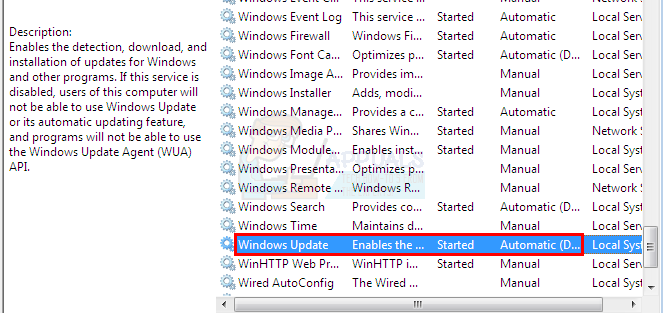
- Select either Manual or Disabled from the drop down menu in Startup Type section
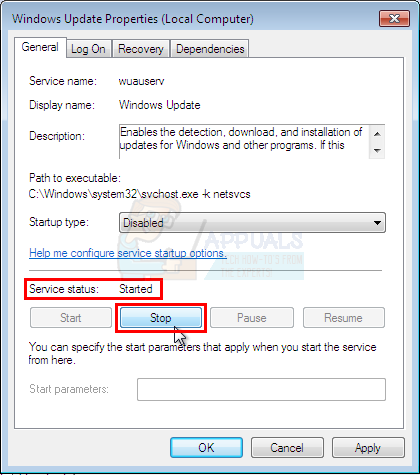
- Click Stop if the Service Status is Running
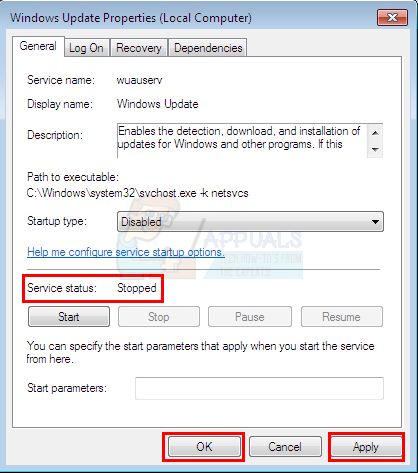
- Click Apply then Ok
This should prevent any further Windows Updates from getting installed on your system. If you want to install updates then just follow the above given steps and select Automatic from the drop down menu in step 4. But, keep in mind that the update KB3035583 might get installed again which will bring back the pop-ups.
Method 2: Delete GWX Folder
You also have the option to delete the GWX folder (which contains the GWX.exe that gives this pop up). However, this method requires you to take the ownership because Windows won’t let you delete the folder without proper permissions.
Before deleting the GWX folder, we need to stop the GWX.exe from the task manager as well. This is because Windows doesn’t delete any program that is in the running state.
So, here are the steps to locate and delete the GWX folder
- Press CTRL, ALT and DELETE key simultaneously (CTRL + ALT + DELETE)
- Select Start Task Manager
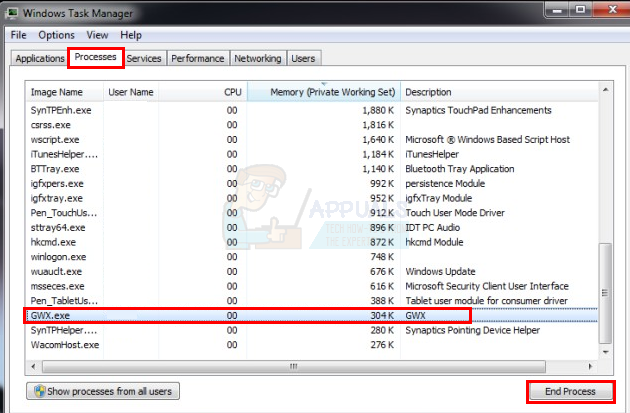
- Click the Processes tab
- Locate the process called exe
- Right click GWX.exe and click End Process
- Now, close the Task Manager
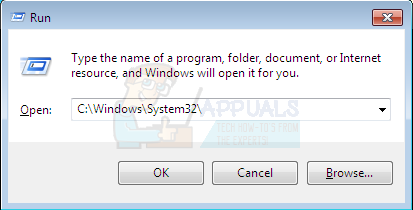
- Hold Windows key and press R
- Type C:\Windows\System32\ and press Enter
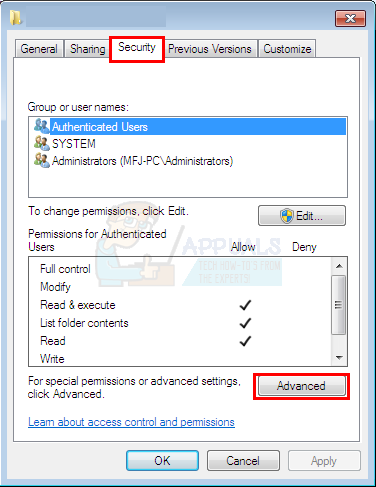
- Locate, right click the folder GWX and select Properties
- Select Security tab
- Select Advanced
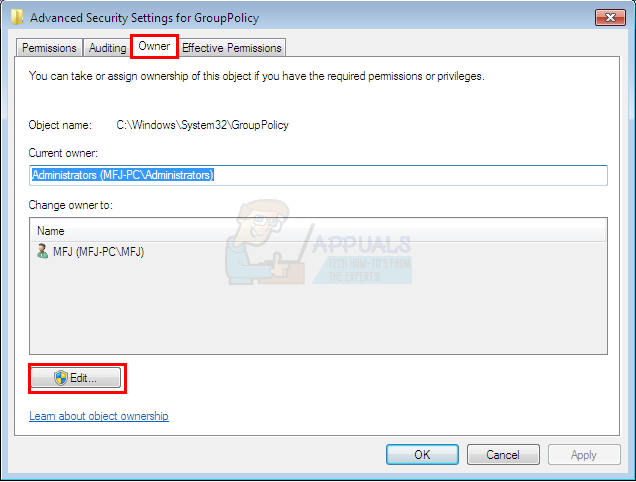
- Select the Owner tab
- Click Edit
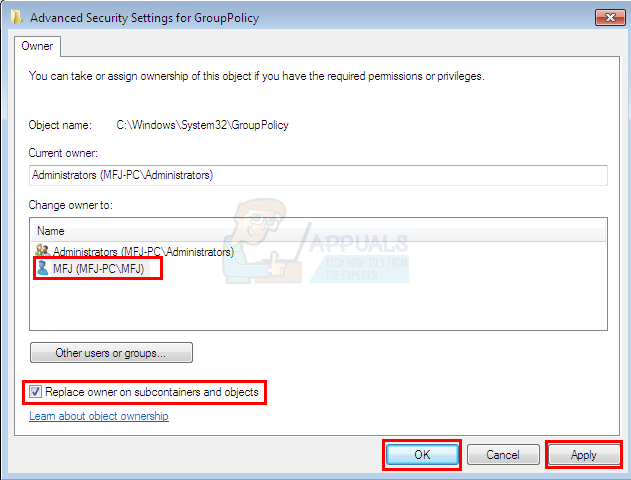
- Select your user account
- Check the box that says Replace owner on subcontainers and objects
- Click Apply then Ok
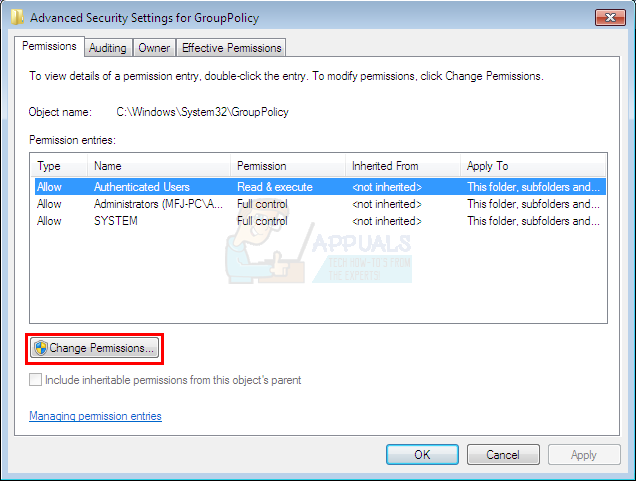
- Now, you should be back at the Advanced security settings window. Select the Permissions tab
- Click Change permissions
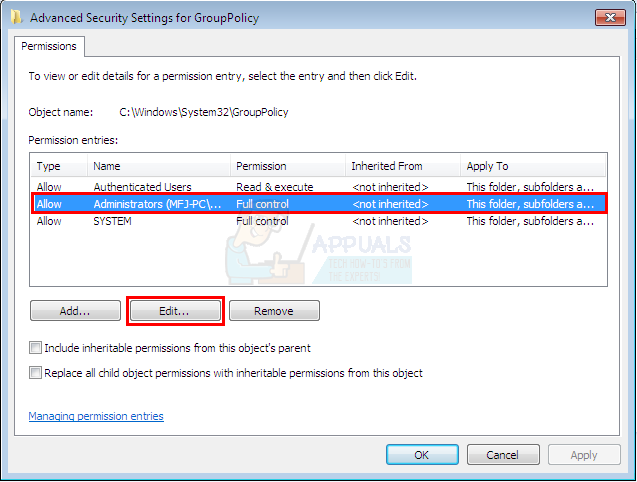
- Select your user account from the list
- Select Edit
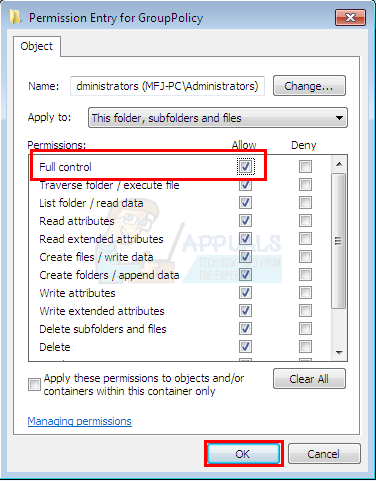
- Check the box that says Full Control
- Click Ok. Click Ok again if a confirmation dialog appears
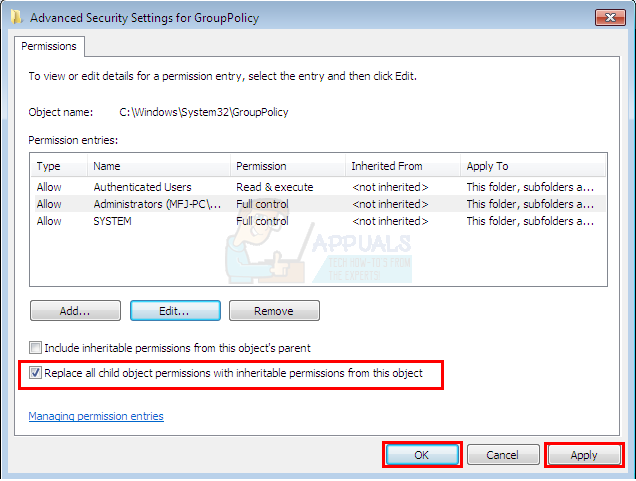
- Check the option Replace all child object permissions with inheritable permissions from this object
- Click Apply then Ok
- Now, you should be able to delete the GWX
- Close the Properties window
- Right click GWX from the System32 folder and select Delete. Confirm the action and it should easily delete now.
Note: If you still can’t delete the GWX folder then follow the steps from 1-6 (given above) to stop the GWX.exe and perform steps 7-27 again.
Method 3: DisableGWX
If you can’t or simply don’t want to delete the GWX folder then you also have the option to disable the GWX. Disabling GWX will prevent it from running on your windows which, therefore, will stop the pop-ups.
You can disable the GWX from the Windows Registry. So, here are the steps for disabling GWX
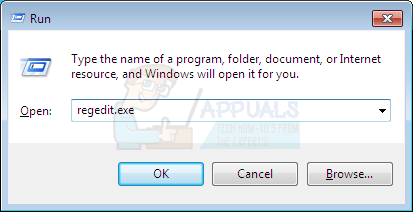
- Hold Windows key and press R
- Type regedit.exe and press Enter
- Now, go to the HKEY_LOCAL_MACHINE\SOFTWARE\Policies\Microsoft\Windows If you don’t know how to navigate to this position then follow the steps given below
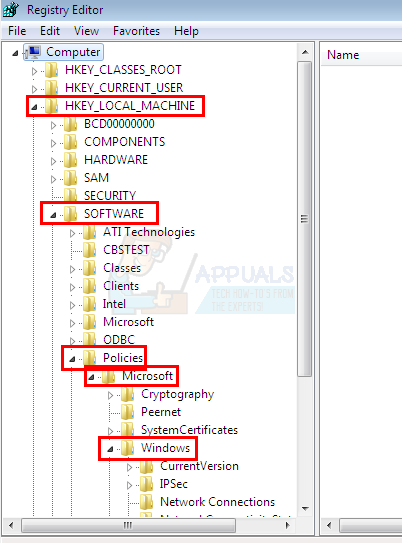
- Double click HKEY_LOCAL_MACHINE from the left pane
- Double click SOFTWARE from the left pane
- Double click Policies from the left pane
- Double click Microsoft from the left pane
- Double click Windows from the left pane
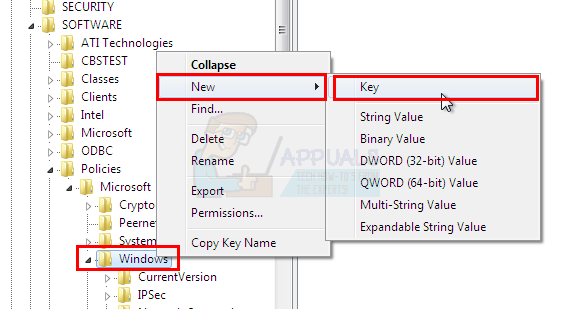
- Right click Windows from the left pane and select New then select Key
- Name the newly create key “GWX” (without quotes) and press Enter
- Now, click GWX
- Right click on an empty space (in the right pane) and select New then select DWORD (32 bit) Value
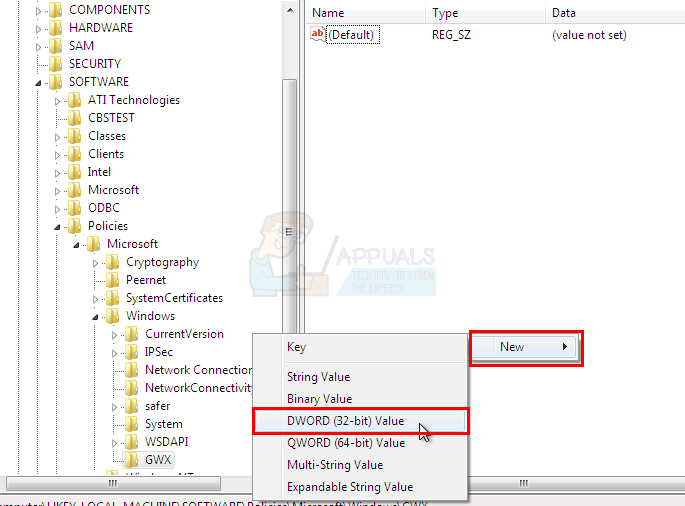
- Name the newly created DWORD value “DiableGWX” (without quotes) and press Enter
- Now, Right click the newly create DisableGWX entry and select Modify
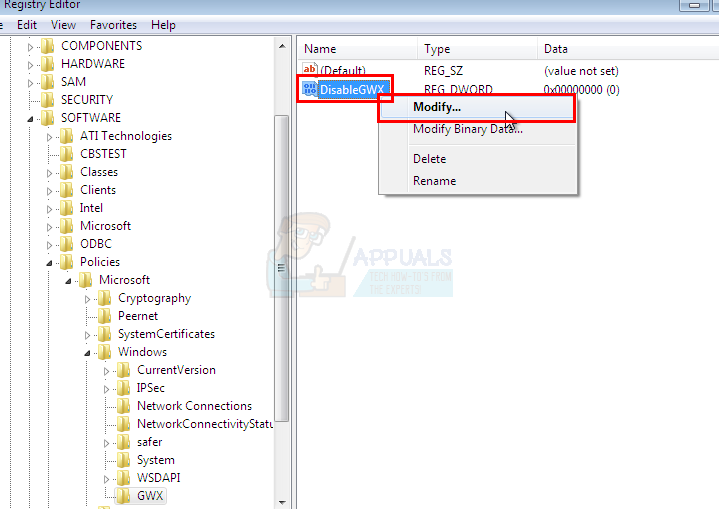
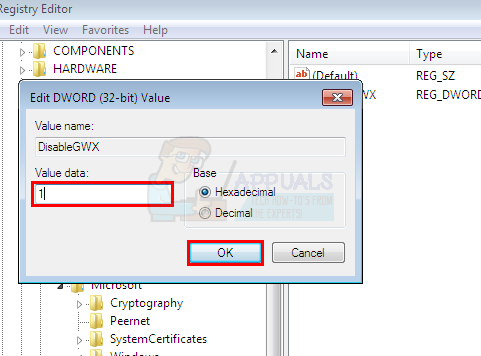
- Type 1 in its Value Data section and press Ok
That’s it, you can now close the Windows Registry and the GWX won’t work anymore.
Method 4: Using GWX Control Panel
If you don’t want to do any technical stuff to prevent Windows 10 notifications then you have another option as well. If you don’t mind using a third party tool to control the Windows 10 and its pop-ups then GWX Control Panel is for you. Basically, this is a software that you can use to block Windows 10 related pop-ups and updates. It’s simpler than other methods because you don’t have to anything except for clicking a few buttons. However, it is a third party tool so use it on your own risk.
- Go here, scroll down and click the Download GWX Control Panel button.
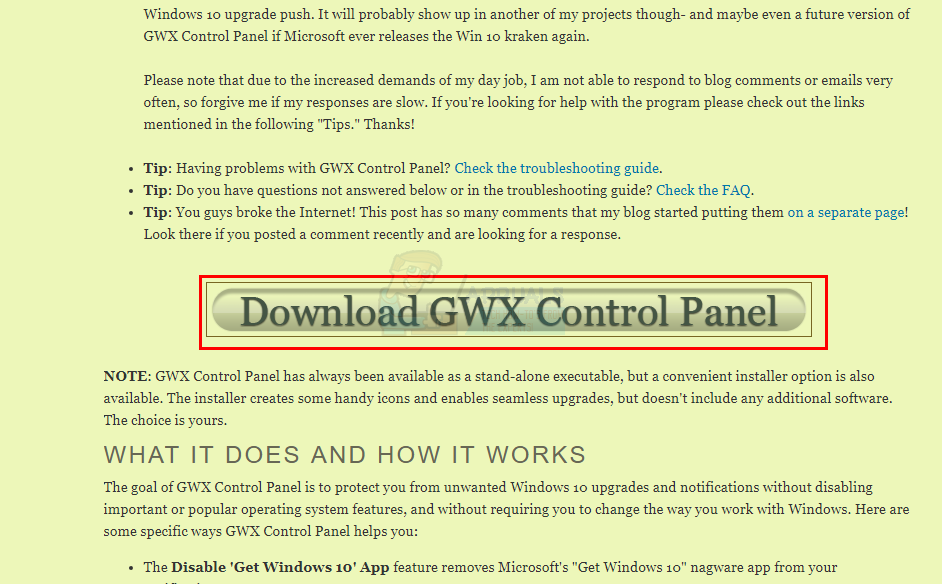
- Once downloaded, simply run the GWX Control Panel exe and you are good to go
- You can check the status of the Windows 10 updates from the GWX Control Panel.
- Check the Is ‘Get Windows 10’ Icon app running, Is ‘Get Windows 10’ Icon app enabled and Are Windows 10 upgrades allowed These sections can be found on the top left corner of the GWX Control Panel screen. None of these should be yes, if any one of these is yes then click any of the relevant button on the GWX Control Panel. For example, if your Is ‘Get Windows 10’ Icon app running status is yes then click Click to Disable ‘Get Windows 10’ App (icon remove)
You can also read about the GWX Control Panel from their page as well.

Kevin Arrows
Kevin Arrows is a highly experienced and knowledgeable technology specialist with over a decade of industry experience. He holds a Microsoft Certified Technology Specialist (MCTS) certification and has a deep passion for staying up-to-date on the latest tech developments. Kevin has written extensively on a wide range of tech-related topics, showcasing his expertise and knowledge in areas such as software development, cybersecurity, and cloud computing. His contributions to the tech field have been widely recognized and respected by his peers, and he is highly regarded for his ability to explain complex technical concepts in a clear and concise manner.
Get Windows 10 — это программное обеспечение, предназначенное для установки операционной системы Windows 10 на компьютеры, работающие под управлением Windows 7 или Windows 8.1. Однако некоторым пользователям может не понравиться это предложение, по разным причинам, и они решают удалить Get Windows 10 с своего компьютера.
Чтобы удалить Get Windows 10, есть несколько способов. Некоторые из них могут потребовать некоторых технических навыков, поэтому, прежде чем приступить к удалению, рекомендуется создать резервные копии важных данных и ознакомиться с инструкциями, чтобы избежать потери данных.
Один из простых способов удаления Get Windows 10 — это использование программного обеспечения для управления программами, установленными на компьютере. В Windows 7 и Windows 8.1 можно воспользоваться встроенным инструментом «Установка и удаление программ», который позволяет легко найти и удалить Get Windows 10. В Windows 10 этот инструмент называется «Панель управления» и также позволяет удалить программы из системы.
Обратите внимание, что удаление Get Windows 10 не отменяет возможность обновления до Windows 10 в будущем. Если вы хотите приостановить предложение об обновлении до Windows 10 для вашего компьютера, вам может потребоваться выполнить дополнительные действия, которые не описаны в этой статье. Рекомендуется ознакомиться с официальной документацией Microsoft или обратиться в службу поддержки Microsoft для получения дополнительной информации.
Содержание
- Удаление Get Windows 10 из Windows
- Понимание проблемы
- Опции управления обновлениями
- Изменение настроек системы
- Использование командной строки
- Удаление программы Get Windows 10
- Удаление связанных файлов и папок
- Проверка наличия обновлений
Удаление Get Windows 10 из Windows
Вот несколько способов удалить Get Windows 10 из Windows:
- Откройте «Панель управления» и выберите «Установка и удаление программ».
- Найдите «Get Windows 10» в списке установленных программ.
- Нажмите правой кнопкой мыши на «Get Windows 10» и выберите «Удалить».
- Подтвердите свое намерение удалить программу, следуя предлагаемым инструкциям.
После завершения процесса удаления, программа Get Windows 10 будет полностью удалена и больше не будет появляться на вашем компьютере.
Если вы все еще получаете напоминания о Get Windows 10 после удаления программы, рекомендуется проверить наличие обновлений операционной системы и отключить уведомления о Windows 10 в настройках системы.
Понимание проблемы
Проблема заключается в том, что эта программа иногда мешает работе пользователя, отвлекая его от текущих задач или вызывая неудобство. Кроме того, программа может появляться неоднократно после ее удаления, что может быть раздражающим для пользователей.
Поэтому, если вы не хотите получать предложений об обновлении до Windows 10 и хотите удалить программу Get Windows 10 с вашего компьютера, вам потребуется следовать определенным шагам.
| Проблема | Влияние |
| Появление уведомлений и значков Get Windows 10 | Отвлекает пользователя от работы или вызывает неудобство |
| Повторное появление программы после ее удаления | Может вызывать раздражение и нежелание обновлять систему |
Опции управления обновлениями
Если вам необходимо управлять обновлениями на вашей операционной системе Windows, вы можете воспользоваться несколькими опциями:
- Отключение автоматических обновлений
- Настройка расписания обновлений
- Скрытие конкретных обновлений
- Удаление Get Windows 10 и связанных обновлений
Чтобы отключить автоматические обновления, откройте «Настройки» в меню «Пуск» и выберите «Обновление и безопасность». Затем перейдите в раздел «Windows Update» и нажмите «Расширенные параметры». В этом разделе вы можете выбрать «Нет» в поле «Выборочные обновления» и сохранить изменения.
Если вы хотите настроить расписание обновлений, возвращайтесь к разделу «Обновление и безопасность» в меню «Настройки». Затем выберите «Windows Update» и нажмите на ссылку «Изменить активные часы». В этом окне вы можете указать период времени, когда не хотите получать обновления.
Для скрытия конкретных обновлений откройте панель управления Windows и найдите раздел «Windows Update». В разделе «Обновление Windows» нажмите на ссылку «Скрыть обновления» и выберите необходимые обновления для скрытия.
Если вы хотите удалить Get Windows 10 и связанные обновления, откройте «Установленные обновления» в разделе «Windows Update» панели управления. Затем найдите обновления, связанные с Get Windows 10, щелкните правой кнопкой мыши на них и выберите «Удалить».
Изменение настроек системы
Чтобы удалить Get Windows 10 из Windows, можно изменить настройки системы, чтобы остановить автоматическую загрузку и установку этого приложения.
1. Откройте «Панель управления» и выберите пункт «Обновление и безопасность».
2. В разделе «Windows Update» найдите и щелкните на ссылке «Дополнительные параметры».
3. В открывшемся окне выберите вкладку «Выбор обновлений».
4. Снимите флажок напротив «Обновление Windows 10» и закройте окно.
5. Теперь Get Windows 10 больше не будет автоматически загружаться и устанавливаться на вашем компьютере.
Обратите внимание, что отключение автоматических обновлений может повлиять на безопасность и стабильность вашей системы. Рекомендуется регулярно проверять и устанавливать доступные обновления вручную.
Использование командной строки
Если вы предпочитаете использовать командную строку для удаления Get Windows 10, вам понадобится некоторая базовая знание команд.
1. Откройте командную строку, щелкнув правой кнопкой мыши по кнопке «Пуск» и выбрав «Командная строка», или нажав клавиши Win + X и выбрав «Командная строка» из контекстного меню.
2. Выполните команду «wmic» для открытия интерфейса компоненты WMI.
3. Введите команду «product get name» для отображения списка установленных программ.
4. Найдите запись «Microsoft Windows 10 Upgrade» или «Get Windows 10», и запишите идентификатор продукта для этой записи.
5. Выполните команду «product where name=»идентификатор продукта» call uninstall» для удаления Get Windows 10.
6. Подтвердите удаление, следуя инструкциям.
Использование командной строки может быть немного сложным для новичков, поэтому убедитесь, что вы понимаете, что делаете, и следуйте инструкциям внимательно. Сделайте точную резервную копию системы перед удалением Get Windows 10, чтобы в случае проблем можно было восстановить систему.
Удаление программы Get Windows 10
Программа Get Windows 10, также известная как GWX, может иногда вызывать раздражение у пользователей операционной системы Windows. Если вы не хотите получать уведомления о необходимости обновиться до Windows 10, вы можете удалить эту программу.
Вот несколько способов удалить программу Get Windows 10:
- Способ 1: С помощью «Установки и удаления программ»
- Откройте «Панель управления» и выберите «Установка и удаление программ».
- В списке программ найдите «Get Windows 10» и щелкните правой кнопкой мыши.
- Выберите «Удалить» и следуйте инструкциям на экране, чтобы удалить программу.
- Способ 2: С помощью редактора политики группы
- Нажмите клавишу Windows + R, чтобы открыть окно «Выполнить».
- Введите «gpedit.msc» и нажмите Enter, чтобы открыть редактор политики группы.
- Перейдите к «Компьютерной конфигурации» > «Административным шаблонам» > «Компонентам Windows» > «Windows Update».
- Найдите опцию «Не показывать предложение обновления до новой версии Windows» и дважды щелкните по ней.
- Выберите «Включено» и нажмите «ОК».
- Способ 3: С помощью реестра Windows
- Нажмите клавишу Windows + R, чтобы открыть окно «Выполнить».
- Введите «regedit» и нажмите Enter, чтобы открыть редактор реестра.
- Перейдите к следующему пути: «HKEY_LOCAL_MACHINE\SOFTWARE\Policies\Microsoft\Windows».
- Щелкните правой кнопкой мыши на папке «Windows» и выберите «New» > «Key». Назовите новую папку «GWX».
- Щелкните правой кнопкой мыши в любом месте в правой части окна редактора реестра и выберите «New» > «DWORD (32-bit) Value». Назовите новый значение «DisableGWX» и установите его значение в «1».
После выполнения одного из этих способов программа Get Windows 10 будет удалена или перестанет отображаться на вашем компьютере.
Удаление связанных файлов и папок
При удалении программы Get Windows 10 потребуется также удалить связанные файлы и папки. Вот список файлов и папок, которые следует удалить:
| Путь | Описание |
|---|---|
| C:\Program Files\Get Windows 10 | Папка, содержащая файлы программы Get Windows 10. |
| C:\ProgramData\Microsoft\Windows\Start Menu\Programs\Get Windows 10 | Папка, содержащая ярлыки программы Get Windows 10 в меню «Пуск». |
| C:\Users\Имя пользователя\AppData\Local\Get Windows 10 | Папка, содержащая временные файлы и данные программы Get Windows 10, используемые для обновления. |
| C:\Windows\System32\GWX | Папка, содержащая файлы и компоненты программы Get Windows 10, связанные с системой. |
Чтобы удалить эти файлы и папки, откройте Проводник Windows и перейдите по указанным путям. Удалите каждую папку вручную, нажмите правой кнопкой мыши и выберите «Удалить». Возможно, при удалении некоторых файлов и папок потребуется подтверждение администратора.
После удаления всех связанных файлов и папок программа Get Windows 10 будет полностью удалена с вашего компьютера.
Проверка наличия обновлений
Прежде чем удалить программу Get Windows 10 из операционной системы Windows, необходимо убедиться, что у вас установлены все доступные обновления операционной системы. Обновления зачастую содержат исправления ошибок, улучшения производительности и обеспечивают безопасность компьютера.
Для проверки наличия обновлений в операционной системе Windows можно выполнить следующие шаги:
- Откройте меню «Пуск» и выберите «Настройки».
- В открывшейся панели «Настройки» выберите раздел «Обновление и безопасность».
- В разделе «Обновление и безопасность» выберите «Windows Update» в левой части окна.
- Нажмите на кнопку «Проверить наличие обновлений».
- Ожидайте завершения процесса проверки обновлений.
Если обновления доступны, система автоматически загрузит и установит их. После установки обновлений рекомендуется перезапустить компьютер для применения изменений.
After 1st June of 2015 and until 29th July 2016, Microsoft offers a free upgrade to Windows 10, to legitimate Windows 7 or Windows 8.1 computers. Many of you have seen that offer in a taskbar notification icon, that prompts you to reserve a free Windows 10 copy once available.
The «Get Windows 10» update notification offer, comes on official Windows 7 or 8.1 PC’s, after the installation of Windows update KB3035583, that is installed via Windows Update.
This guide contains detailed steps on how to disable completely the automatic upgrade to Windows 10 and to remove the «Get Windows 10» update notification icon from the taskbar.

How to prevent the Windows 10 Upgrade and remove the «Get Windows 10» update notification.
Note: Keep in mind that Microsoft will stop to offer the free upgrade to Windows 10 OS after 29 July 2016 and it will then cost you $119 to upgrade your system to Windows 10.
Step 1. Disable Windows OS Upgrade through Registry.
Step 2. Remove the «Get Windows 10” update notification icon.
Step 3. Uninstall the Windows update KB3035583.
Step 1. Step 1. Disable Windows 10 Upgrade through Registry.
In order to prevent Windows 10 from installed on your computer, you have to disable the automatic update to Windows 10 OS through registry. To do that:
1. Simultaneously press the Windows key + R keys to open the ‘Run‘ command box.
2. In run command box, type: regedit and press Enter.

3. IMPORTANT: Before you continue, first take a backup of your registry. To do that:
1. From the main menu, go to File & select Export.

2. Specify a destination location (e.g. your Desktop), give a filename to the exported registry file (e.g. “RegistryUntouched”), select at Export range: All and press Save.

4. After you have backed up your registry, navigate to the following location at the left pane:
- HKEY_LOCAL_MACHINE\SOFTWARE\Policies\Microsoft\Windows
5. Right-click at Windows key and select New > Key.

6. Give the name «WindowsUpdate» (without quotes) to the new key and press Enter.
7. Right click at an empty space on the right pane and select New > DWORD (32-bit) Value.

8. Give the name «DisableOSUpgrade» (without quotes) to the new value and press Enter.
9. Double click at the newly created DisableOSUpgrade value and at the Value data box type 1.

10. Close Registry Editor and restart your computer. *
* Note: If you want to allow the Windows 10 Upgrade in the future then set the DisableOSUpgrade value to 0.
Step 2. Hide the «Get Windows 10 update» icon notification.
You can either remove the “Get Windows 10” update notification to the current user only or to all users on the computer.
Remove the “Get Windows 10” update notification to the current user.
Remove the “Get Windows 10” update notification to All users.
A. Hide the «Get Windows 10 update» icon notification for the current user only.
By using this option you can hide the «get Windows 10 fro free» icon notification from the taskbar from the current user account. This means that you have to repeat the below procedure for all users on the computer.
1. Right-click on an empty space on the taskbar and choose Properties.

2. Choose Customize under the Notification area section.

3. Then set the the GWX Get Windows 10 icon behavior, to Hide icon and notifications.

4. Make sure that the Always show all icons and notifications on the taskbar checkbox is unchecked and then press OK to exit.

B. Hide the «Get Windows 10 update» icon notification for all users.
By using this option you can hide the «get Windows 10 fro free» icon notification from the taskbar on all user accounts that working on the computer. To perform the actions below, make sure that you have logged in as Administrator.
1. Go to Start > All Programs > Accessories > System Tools > Task Scheduler.

2. At the left panel, navigate to (expand): Task Scheduler Library > Microsoft > Windows > Setup >gwx.

3a. At the right-pane right-click at launchtrayprocess task and choose Disable.

3b. Then right-click at refreshgwxconfig task and choose Disable.

4. Close Task Scheduler options and reboot the computer.
Step 3 (Optional): Uninstall the Windows update KB3035583 (Get Windows 10).
Uninstall the responsible update for the «Get Windows 10» notification icon.
1. Press Windows + R keys to load the Run dialog box.
2. Type the following command to open Windows Update and press Enter.
- wuapp.exe

3. Click at Installed Updates link on the left pane.

4. Select the Update for Microsoft Windows (KB3035583) and click Uninstall.

5. Then go back and Check for Updates.

6. Choose the Optional Updates link.

7. Right-click at Update for Microsoft Windows (KB3035583) and select Hide update. Then press OK.

You ‘re done.
- Скажите пожалуйста, как убрать значок приложения Get Windows 10 (Получить Windows 10), с панели задач, то есть не удалять программу обновления совсем, а просто скрыть её значок, ведь я уже зарезервировал себе обновление, зачем ненужные элементы на панели задач? В предыдущей вашей статье вы предлагаете просто завершать его через диспетчер задач, но делать это при каждом включении ноутбука просто надоест.
Как убрать значок Получить Windows 10
Привет всем! Совсем недавно Майкрософт выпустило приложение Get Windows 10 (Получить Windows 10), которое вместе с обновлениями автоматически установилось на все компьютеры с Windows 7, 8.1.
Это небольшое приложение сходу по-хозяйски разместилось на панели задач операционной системы

и конечно все пользователи щёлкнули на нём левой мышью, в ответ открылось окно с предложением зарезервировать бесплатное обновление до Windows 10 уже сейчас.

Естественно все нажали на кнопку и зарезервировали бесплатное обновление до Windows 10 (а вдруг её не хватит на всех, а вдруг обновление станет платным), но что странно, значок после этого не пропал, и не пропал он даже после того, как мы щёлкнули на нём ещё 10 раз.
Друзья, шутки шутками, но не забывайте, что Get Windows 10, это простая программа и убрать её с панели задач очень просто!
Самый простой способ
Щёлкаем левой мышью на маленькой стрелочке Отображать скрытые значки

и перетаскиваем мышью значок Get Windows 10 на панель скрытых значков.

Вот и всё.

Отныне, приложения Get Windows 10 не будет видно на панели задач, но оно будет работать в нашей операционной системе и в нужный момент предупредит нас о выходе бесплатного обновления до Windows 10.

Один из самых сложных способов

Щёлкаем на панели задач правой мышью и выбираем Свойства.

Настроить.

Находим значок GWX (Получить Windows 10) и в Поведении выставляем Показать только уведомления.
Снимаем галочку с пункта Всегда отображать все значки и уведомления на панели задач.
Жмём ОК.

Как удалить приложение Get Windows 10 (Получить Windows 10)
Если вы не планируете обновлять свою операционную систему до Windows 10 и хотите удалить Get Windows 10, то для этого нужно просто деинсталлировать обновление KB3035583.
Жмём на кнопку Удалить или изменить программу.

Просмотр установленных обновлений.

Находим упомянутое обновление и щёлкаем на нём левой мышью, жмём Удалить.

Данное обновление может установиться вновь, чтобы этого не произошло читаем эту статью.