 Одна из распространённых ошибок в Windows 11 и Windows 10 — сообщение «Интерфейс не поддерживается» при открытии файлов фото (JPG, PNG и других), видео, документов и любых других файлов, которые должны открываться в какой-либо программе, назначенной для этого типа файла по умолчанию. Эта же ошибка иногда может возникнуть при использовании пунктов контекстных меню Windows, добавленных стандартными программами.
В этой инструкции подробно о том, как можно исправить ошибку и чем она может быть вызвана. Отдельная инструкция на схожую тему: Исправление ошибки «Интерфейс не поддерживается» при открытии EXE файлов.
Способы исправить ошибку «Интерфейс не поддерживается» при открытии файлов
Обычно рассматриваемая ошибка бывает вызвана повреждениями разделов реестра, имеющим отношение к открываемому типу файлов или программе, с помощью которой они открываются. Причины таких повреждений могут быть разными:
- Ручное редактирование реестра
- Использование программ «очистки, оптимизации и исправления ошибок» реестра Windows
- Установка и удаление программ для открытия определенного типа файлов, вследствие которых записи для этих типов файлов были повреждены
- Иногда — сбои обновлений Windows
Попытки исправить ошибку «Интерфейс не поддерживается» стоит начать со следующих простых способов:
- Если у вас есть точки восстановления системы на дату, когда проблема ещё не проявила себя, попробуйте использовать их. Для открытия интерфейса восстановления из точек восстановления вы можете нажать клавиши Win+R и ввести rstrui.exe, либо зайти в Панель управления и открыть пункт «Восстановление системы». Затем достаточно выбрать нужную точку восстановления и запустить восстановление системы. Подробнее: Точки восстановления Windows 11 и Точки восстановления Windows 10.

- Если ошибка возникает при открытии какого-либо файла в стандартном приложении Windows, например, «Фотографии», «Медиаплеер», «Блокнот» или другом, попробуйте следующее. В Windows 11 зайдите в Параметры — Приложения — Установленные приложения, нажмите по трем точкам справа от имени приложения и выберите пункт «Дополнительные параметры». В Windows 10 зайдите в Параметры — Приложения, затем в разделе «Приложения и возможности» нажмите по нужному приложению и выберите пункт «Дополнительные параметры». В дополнительных параметрах используйте кнопки «Исправить» и «Сброс». Проверьте, решило ли это проблему.

- Для не системных приложений, и для тех, которые были установлены не из Microsoft Store, может помочь простое удаление программы через Панель управления или Параметры с последующей повторной установкой. При необходимости повторно сделайте установленное приложение используемым по умолчанию, подробнее: Настройка приложений по умолчанию в Windows 11, Приложения по умолчанию в Windows 10.
- В крайнем случае вы можете установить другую программу, которая способна открывать нужный тип файла и назначить её используемой по умолчанию.


В большинстве случаев один из трёх простых методов, предложенных выше, помогает решить проблему и файлы начинают открываться без ошибок.
Дополнительные методы решения проблемы
Если предыдущие способы не смогли исправить ошибку, попробуйте следующие варианты решения:
- Проверьте целостность и восстановите повреждения системных файлов: запустите командную строку от имени администратора и используйте команду
sfc /scannow
- Если команда из предыдущего шага нашла повреждения файлов, но не смогла их восстановить, попробуйте восстановить хранилище системных компонентов с помощью команды
DISM /Online /Cleanup-Image /RestoreHealth
а после её успешного выполнения вновь повторите команду из первого пункта.
- Также существует возможность восстановить системные файлы с использованием WinPE.
- Учитывайте, что повреждения программ, с помощью которых должен открываться файл, или отдельных их компонентов также может приводить к такой ошибки. В свою очередь, такие повреждения могут быть вызваны использование нелицензионного ПО и тем фактом, что Windows может сама удалять некоторые файлы таких программ. Подробнее на тему и как это исправить.
- Вы можете попробовать экспортировать раздел реестра
HKEY_CLASSES_ROOT\.расширение
а также раздел с именем равным значению параметра «По умолчанию» в этом разделе с другого компьютера, где проблема не наблюдается и импортировать их на своем компьютере, однако возможны нюансы: при использовании одинаковых ОС и системных приложений для открытия файлов проблем обычно не наблюдается (но ошибка может быть не исправлена при наличии других поврежденных разделов реестра, связанных с этим типом файла и приложением по умолчанию), в то время как при разных конфигурациях системы и версиях ОС такой подход может добавить ошибочных записей в реестр.
И последняя возможность на случай, если разобраться с ошибкой «Интерфейс не поддерживается» не удается:
- Подключите флешку с Windows той же версии, которая установлена на компьютере, либо смонтируйте ISO образ с ней в системе.
- Запустите файл setup.exe с подключенного накопителя.
- Пройдите первые этапы установки, затем выберите опцию «Храните файлы, настройки и приложения» и нажмите «Далее».

- Это перезапишет файлы системы и исправит большинство ошибок, оставив при этом все ваши данные и программы.

Надеюсь, один из предложенных способов сработает в вашем случае. Буду благодарен, если вы сможете поделиться в комментариях информацией о том, какой именно из методов оказался результативным.
Warning: The retired, out-of-support Internet Explorer 11 desktop application has been permanently disabled through a Microsoft Edge update on certain versions of Windows 10. For more information, see Internet Explorer 11 desktop app retirement FAQ.
Symptoms
Assume that you use Internet Explorer 11 on a computer that is running Windows 8.1 or Windows Server 2012 R2, or you use Internet Explorer 10 on a computer that is running Windows 8 or Windows Server 2012. When you try to open a file in a folder from a folder location for an FTP site, a blank page or download dialog appears. Or, you receive the following error message:
No such interface supported.
Resolution
Update information
To resolve this issue, install the most recent cumulative security update for Internet Explorer. To do this, go to Microsoft Update.
For technical information about the most recent cumulative security update for Internet Explorer, go to the following Microsoft website:
2969262 MS14-035: Cumulative Security Update for Internet Explorer: June 10, 2014
Status
Microsoft has confirmed that this is a problem in the Microsoft products that are listed in the «Applies to» section.
References
See the terminology that Microsoft uses to describe software updates.
Need more help?
Want more options?
Explore subscription benefits, browse training courses, learn how to secure your device, and more.
Communities help you ask and answer questions, give feedback, and hear from experts with rich knowledge.

The “No such interface supported” error is a message that appears when there is a problem with the interface between two software programs or between a software program and the operating system on a computer. The interface is a set of protocols and standards that allow different programs to communicate with each other and exchange data.
The error message indicates that one program is trying to access an interface that is not supported or recognized by the other program or the operating system. This can be caused by a variety of factors, such as a damaged or corrupted system file, a conflict between software programs, or a problem with the hardware on the computer.
Attention Windows Users!!
Facing issues on your Windows PC every now and then? We would recommend you use the Restoro PC Repair tool.
It is a one-stop solution to repair common computer errors, protect your Windows PC from data loss, malware, hardware failure, Registry issues, BSOD errors, etc. and optimize your PC for maximum performance in just three simple steps:
- Download Restoro Tool that comes with Patented Technologies (see patents here).
- Install and click on Start Scan to find the issues on your Windows PC.
- Finally, click on Repair All to fix the issues.
Before moving on to the actual solutions, there are a few quick steps you can try to resolve the “No Such Interface Supported” error message:
- Restart your computer: Sometimes, simply restarting your computer can help resolve the issue.
- Check for updates: Make sure you have the latest updates installed for your operating system and any software programs you are using.
Fix 1: Reset/Repair The Affected App
If you are encountering the “No Such Interface Supported” error message while using a specific app, you can try resetting or repairing the app as a potential solution. To reset an app on Windows 10,11:
- Open the Start menu and click on “Settings“.
- In the Settings menu, click on “Apps“.
- In the Apps & features section, find the app that is causing the error and click on it.
- Click on the “Advanced options” button.
- Scroll down to the Reset section and click on the “Reset” button.
- Confirm that you want to reset the app by clicking on the “Reset” button in the pop-up window.
To repair an app on older Windows:
- Open the Start menu and click on “Control Panel“.
- In the Control Panel, click on “Programs and Features“.
- Find the app that is causing the error and click on it.
- Click on the “Change” button.
- In the setup window, click on the “Repair” button.
- Follow the prompts to complete the repair process.
Note: Keep in mind that resetting or repairing an app will erase any changes you have made to the app’s settings and may remove any data you have saved within the app. You may want to consider backing up your data before resetting or repairing the app.
Fix 2: Update The Application
If are still encountering the “No such interface supported” error message after trying the above steps, you may be able to resolve the issue by updating the app to the latest version.
Here’s how to do this on your computer:
- Open the app that is causing the error.
- Check the app’s settings or menu to see if there is an option to check for updates.
- If there is no option to check for updates within the app, visit the developer’s website to see if a newer version of the app is available for download.
- If a newer version is available, download and install it.
You can also update the application through the Microsoft Store if it is available in the store. Here’s how you can do it:
- Open the Microsoft Store app.
- Now, click on the “Library” icon at the bottom left corner.
- Under Library, Click on the “Get updates” button.
- Now, update the affected application.
Fix 3: Uninstall/Reinstall The Application
If updating the application doesn’t solve your issue, you may be able to resolve the issue by uninstalling and then reinstalling the app. Here’s how to do this on a Windows 10 computer:
- Open the Start menu and click on “Control Panel“.
- In the Control Panel, click on “Programs and Features“.
- Find the app that is causing the error and click on it.
- Click on the “Uninstall” button.
- Follow the prompts to uninstall the app.
- Restart your computer.
- Now, Download and install the latest version of the app from the developer’s website or a trusted source.
Note: Uninstalling and reinstalling the app will also erase any changes you have made to the app’s settings and may remove any data you have saved within the app. You may want to consider backing up your data before uninstalling and reinstalling the app.
Fix 4: Use CMD
- Press the Windows + R keys to open the Run dialog box.
- Type “cmd” in the Run dialog box and press Ctrl + Shift + Enter to open the Command Prompt with administrative privileges.
- In the User Account Control (UAC) prompt that appears, click on “Yes” to allow the Command Prompt to make changes to your system.
- In the Command Prompt, paste the following command and press Enter:
regsvr32 c:\windows\system32\actxprxy.dll
This command will register the actxprxy.dll file, which is a system file that is sometimes associated with the “No such interface supported” error.
- If the above command does not resolve the issue, you can try the following command to register all .dll files on your system:
FOR /R C:\ %G IN (*.dll) DO "%systemroot%\system32\regsvr32.exe" /s "%G"
This command will search for all .dll files on your C: drive and register them.
- Restart your computer and try using the software or app that was previously causing the “No such interface supported” error.
Fix 5: Delete Registry Keys
To delete certain registry keys and files that may be related to the “No Such Interface Supported” error, you can try the following steps:
- Press the Windows + S keys to open the Search feature.
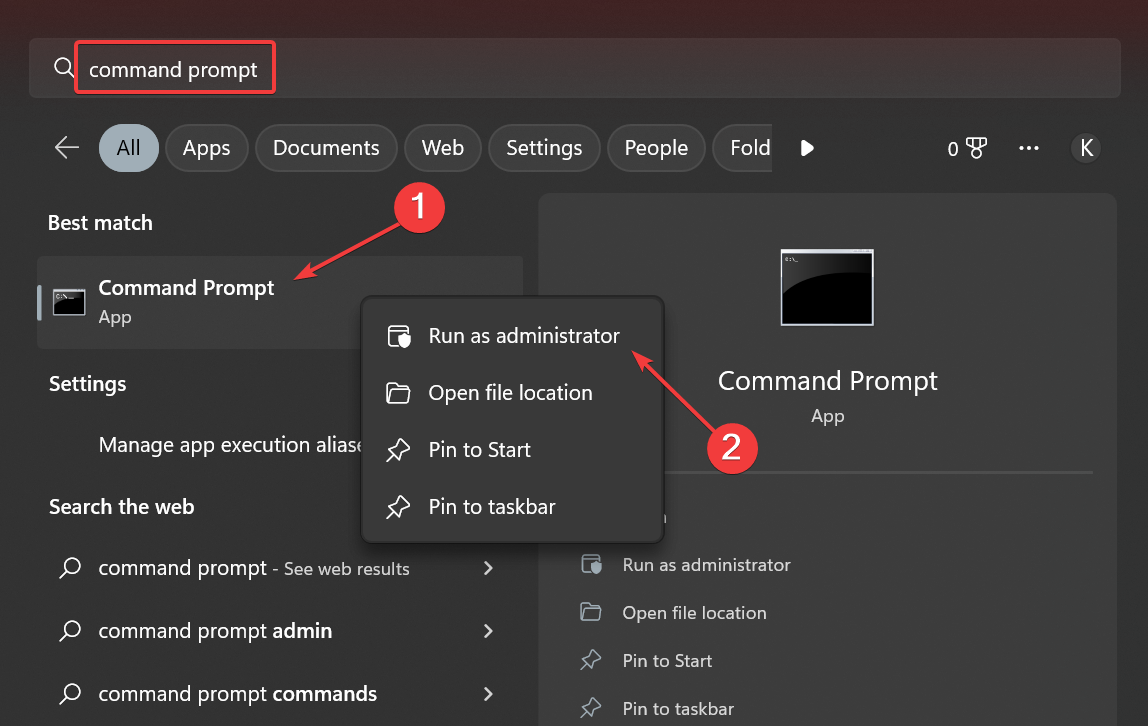
- Type “Command Prompt” in the Search box and right-click on the relevant search result.
- Select “Run as administrator” from the context menu.
- In the User Account Control (UAC) prompt that appears, click on “Yes” to allow the Command Prompt to make changes to your system.
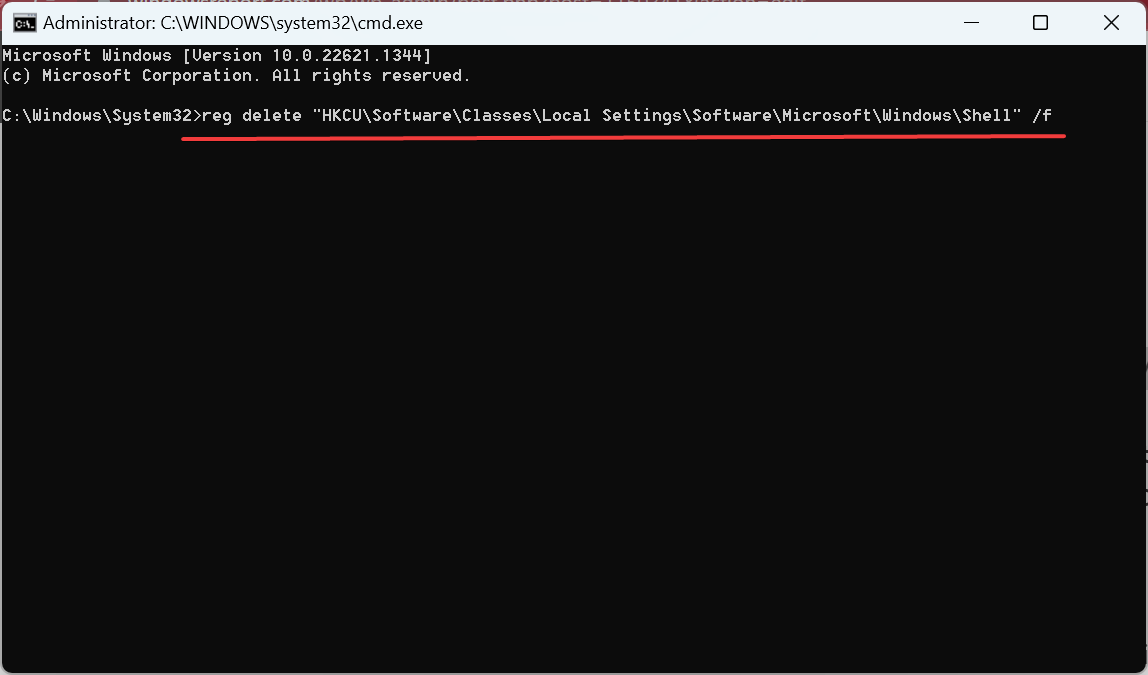
- In the Command Prompt, paste the following commands one at a time and press Enter after each:
reg delete "HKCUSoftwareClassesLocal SettingsSoftwareMicrosoftWindowsShell" /f
reg delete "HKCUSoftwareMicrosoftWindowsCurrentVersionExplorerStreams" /f reg delete
"HKCUSoftwareMicrosoftWindowsCurrentVersionExplorerStuckRects2" /f reg delete
"HKCUSoftwareMicrosoftWindowsCurrentVersionExplorerMenuOrder" /f attrib -r -s -h
"%userprofile%AppDataLocal*.db" del "%userprofile%AppDataLocal*.db"
Note: Deleting these registry keys and files can potentially cause problems with Windows Shell or Windows Explorer and may affect the functionality of certain software programs. You should only use these commands if you are experiencing specific issues and if you are comfortable using the Command Prompt. If you are unsure about what these commands do or how to use them,
Bottom Line
That concludes this fixing guide. I hope that the information provided here has been helpful in resolving your “No such interface supported” issue. The “No such interface supported” error can be caused by a variety of factors, including damaged or corrupted system files, conflicts between software programs, or hardware problems.
To fix this error, you can try quick fixes such as restarting your computer, checking for updates, running a system file check, or uninstalling and reinstalling the problematic software. If these steps do not resolve the issue, you may need to try more advanced troubleshooting methods such as resetting or repairing the app, updating the app, or using the Command Prompt to register system files or delete registry keys and files.
Also Read:
- Fix: God Mode is Not Working in Windows
- Fix Shift+F10 Not Working while installing Windows
- Fix: Magic Mouse or its Scroll Not Working on Windows
Find out what worked for other users
by Madalina Dinita
Madalina has been a Windows fan ever since she got her hands on her first Windows XP computer. She is interested in all things technology, especially emerging technologies… read more
Updated on
- The No such interface supported is one of the tricky errors in Windows that prevents users from opening files or applications.
- The issue may arise due to corrupt system files or problems with the app itself.
- To fix things, update the OS, repair and reset the app, or re-register the DLL files, amongst other solutions.
XINSTALL BY CLICKING THE DOWNLOAD
FILE
Windows is prone to errors, and many of these can be ignored. But a few affect the core operations and, in turn, the whole experience. One of these is the No such interface supported error encountered while opening a file or application.
The error can affect almost every program, lead to the app not launching, and is seen on every iteration of Windows, though troubleshooting is usually quick. So, let’s find out how you can fix things in this case.
What is the No such interface reported error?
The error indicates Windows’ inability to launch a file/app. It could be a built-in program or one you downloaded from the Microsoft Store.
Here are a few reasons you might receive the No such interface supported error:
How we test, review and rate?
We have worked for the past 6 months on building a new review system on how we produce content. Using it, we have subsequently redone most of our articles to provide actual hands-on expertise on the guides we made.
For more details you can read how we test, review, and rate at WindowsReport.
- Issues with the application – In most cases, the problem lay with the application itself, and users had to repair, reset, or reinstall it. This was especially true in the case of No such interface supported with MP4.
- Corrupt system files – When the system files are corrupt or missing, you will encounter several issues and error codes in Windows.
- Bug in the OS – If the error message appears after updating the current iteration or upgrading to Windows 11, it could a bug that’s triggering the error.
- Missing or corrupt DLL file(s) – If the DLL files are missing, chances are you will come across the Error 0x80004002: No such interface supported in Windows 11.
How to fix No such interface supported error?
Before we head to the slightly complex solutions, here are a few quick ones you can try:
- Restart the computer and check whether the No such interface supported error is fixed.
- If you are having trouble opening a particular file, move it to the desktop and try again.
- Check for Windows updates and make sure you are running the latest version of the OS. Updating the OS fixed things when users faced No such interface supported in Windows 11 Photos.
- Try opening the file by right-clicking on it, choosing Open with from the context menu, and selecting the desired app. In case you receive an error, double-click on the file instead.
If these don’t work, try the solutions listed next.
1. Update the affected application

NOTE
The steps here are for the Microsoft Store. If you downloaded the app from the official website, navigate to it, and install the available updates.
- Press Windows + S to open Search, type Microsoft Store in the text field, and click on the relevant search result.

- Now, click on the Library icon.

- Click on the Get updates button.
- Now, wait for the updates to get installed.

If the affected application gets updated, restart the computer, and check whether the No such interface supported error is fixed. In case it persists, head to the next method.
2. Reset/repair the app
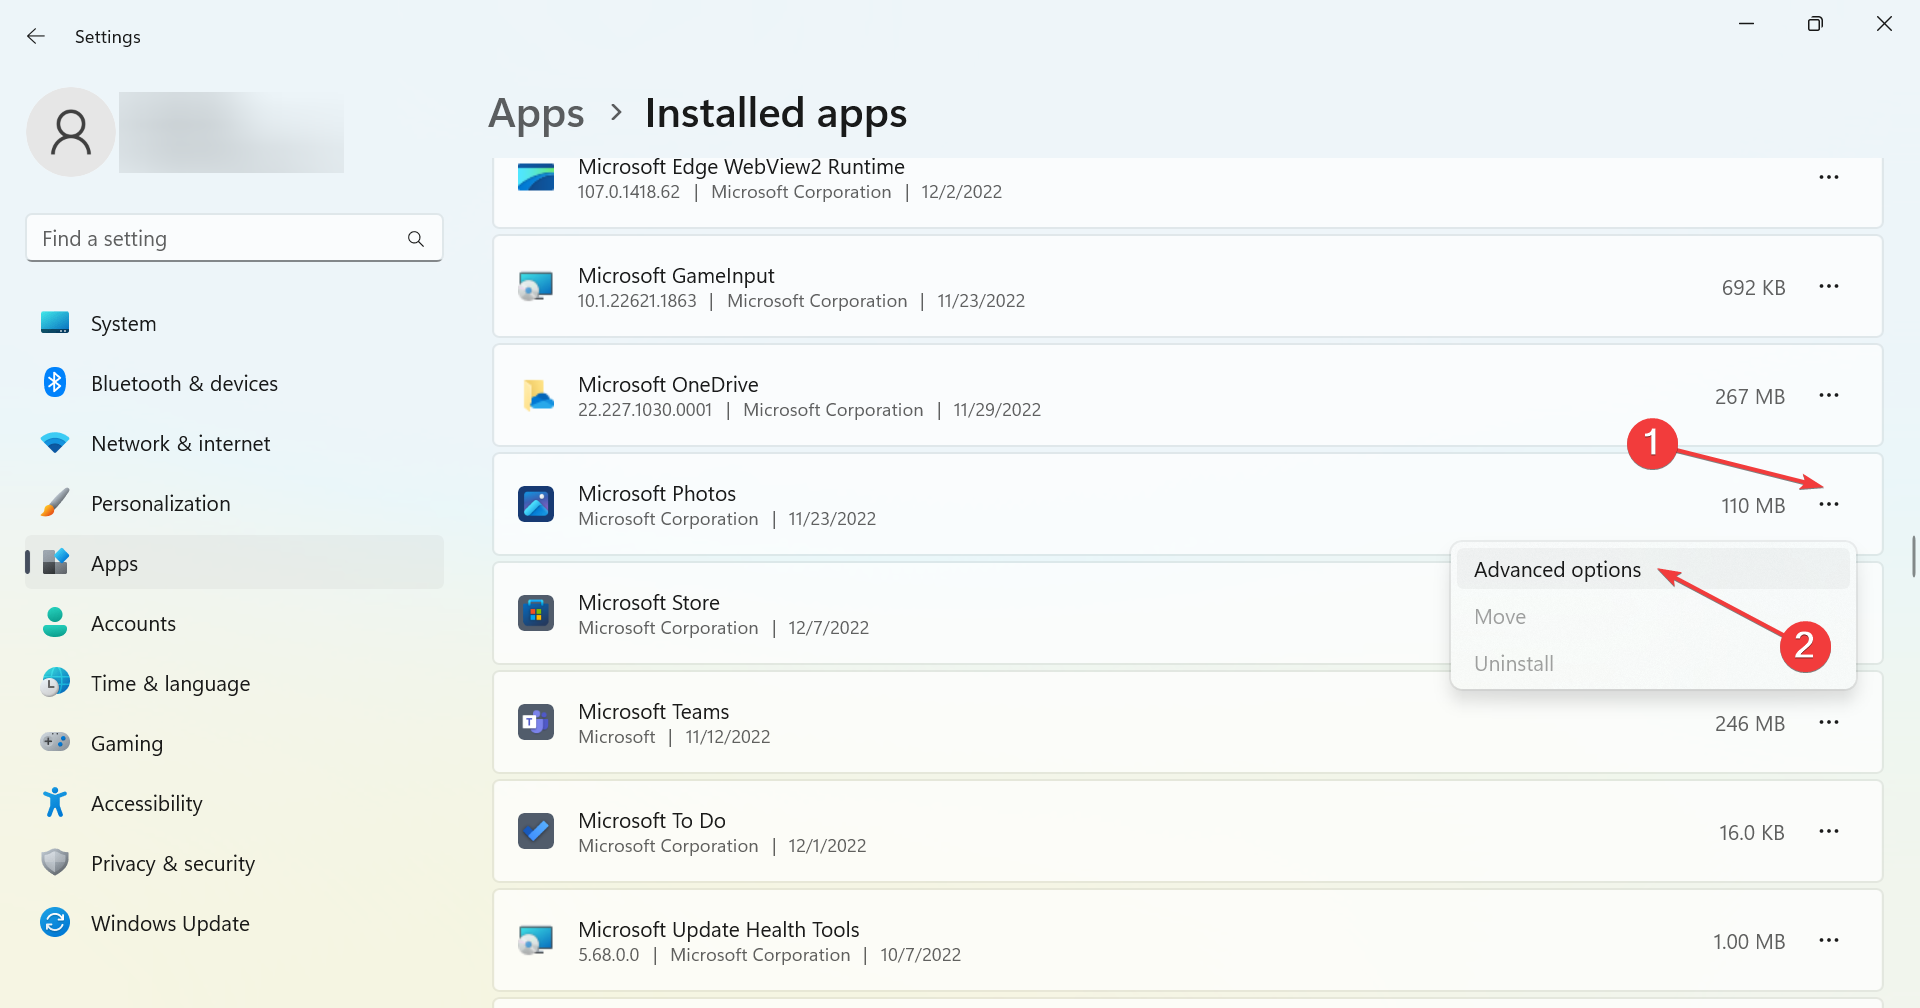
- Press Windows + I to open Settings, choose Apps from the left, and click on Installed apps.
- Locate the affected app, click on the ellipsis next to it, and choose Advanced options.
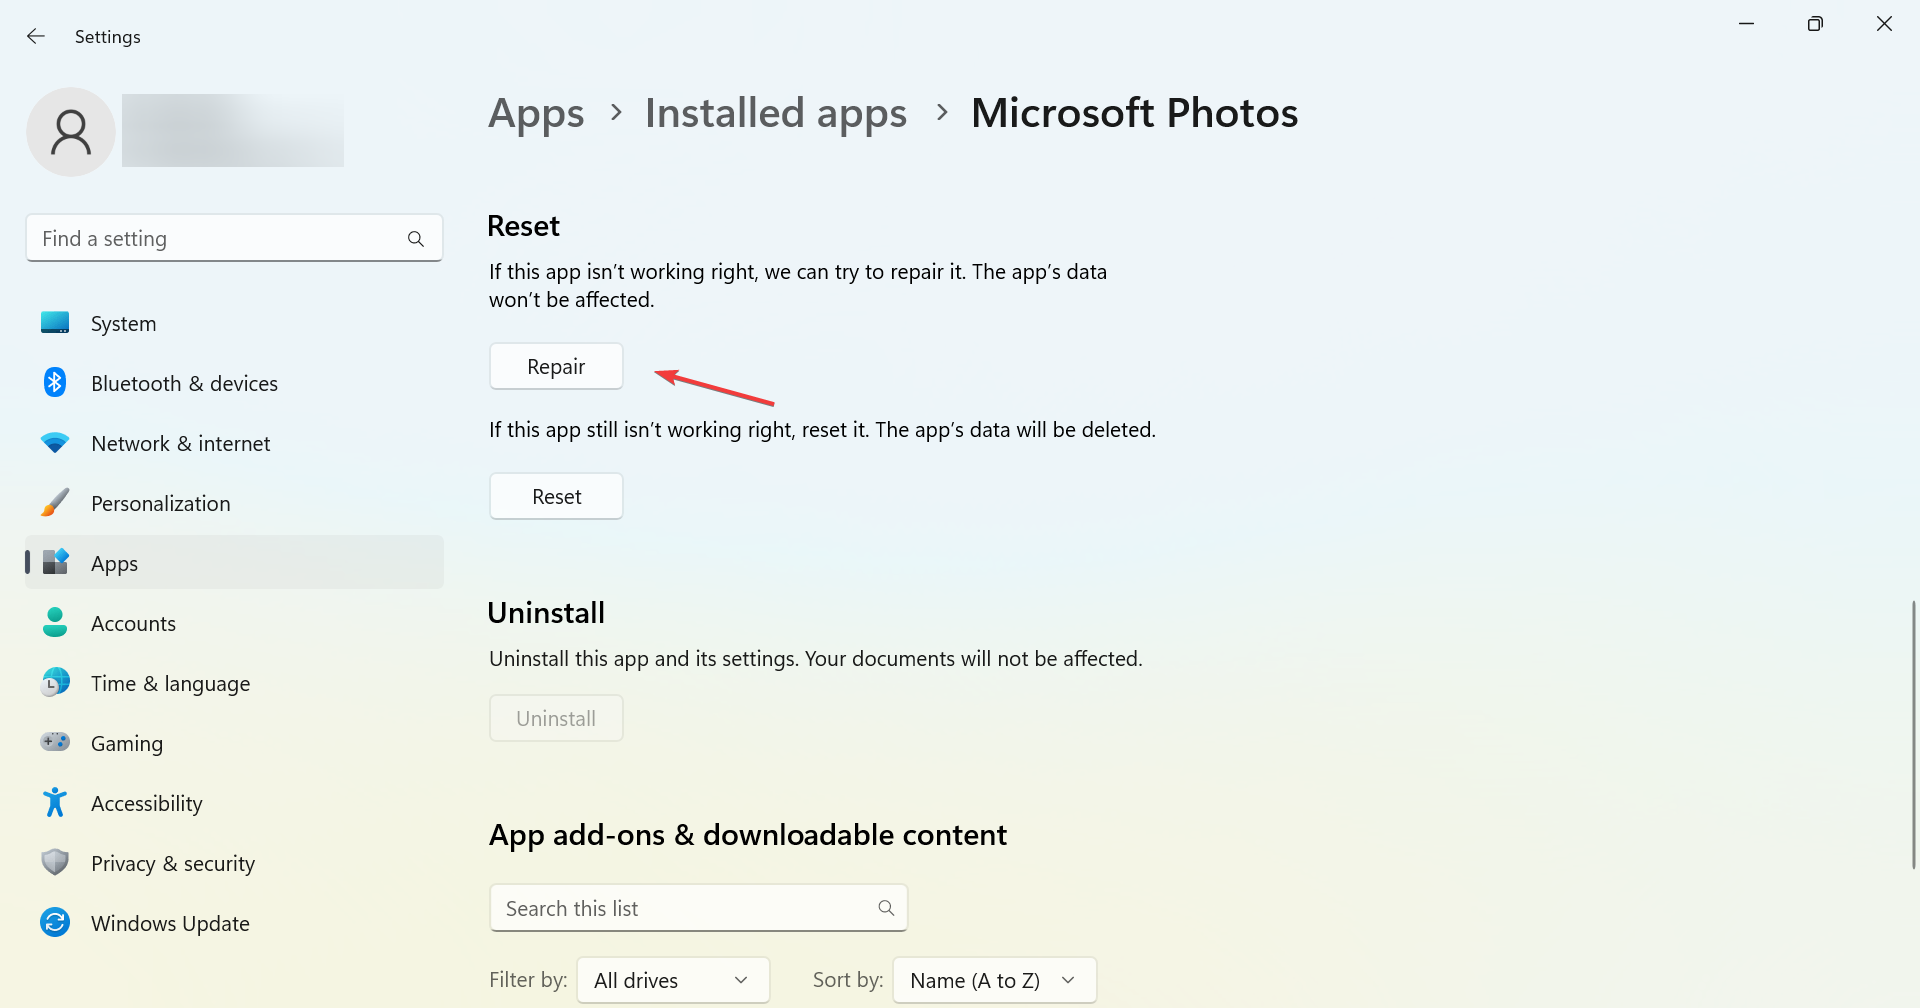
- Now, click on Repair, wait for the process to complete, and check whether the error is fixed.
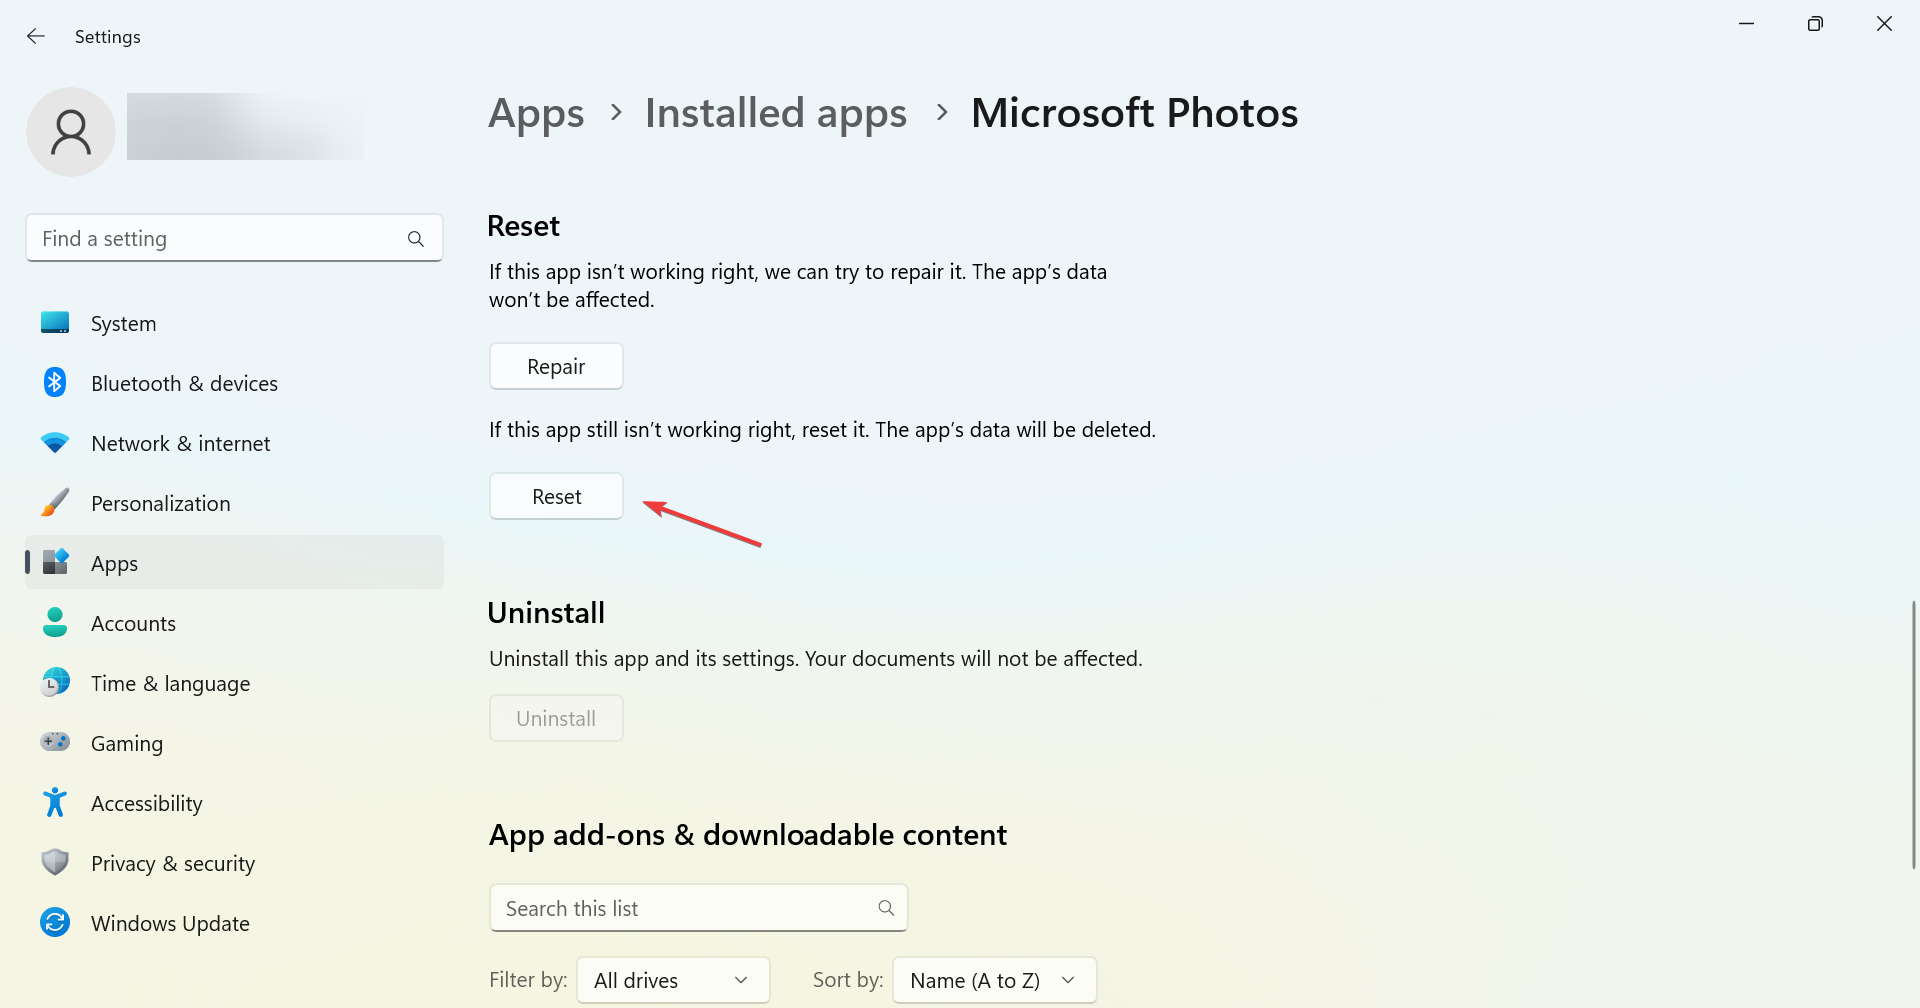
- If not, click on Reset.
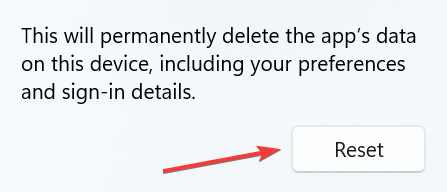
- Again, click Reset in the confirmation prompt to start the process.


Repair and restart are two effective built-in options that fix a range of issues with the Windows apps, including the No such interface supported error with Photos.
3. Reinstall the application
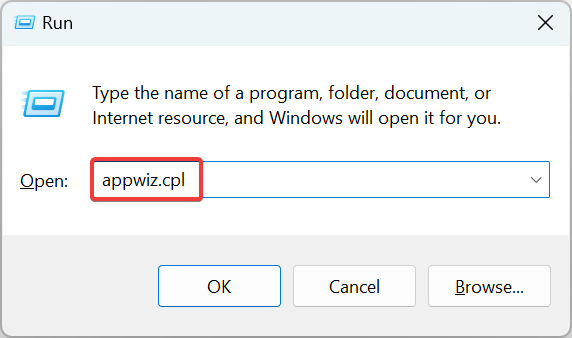
- Press Windows + R to open Run, type appwiz.cpl in the text field, and hit Enter.

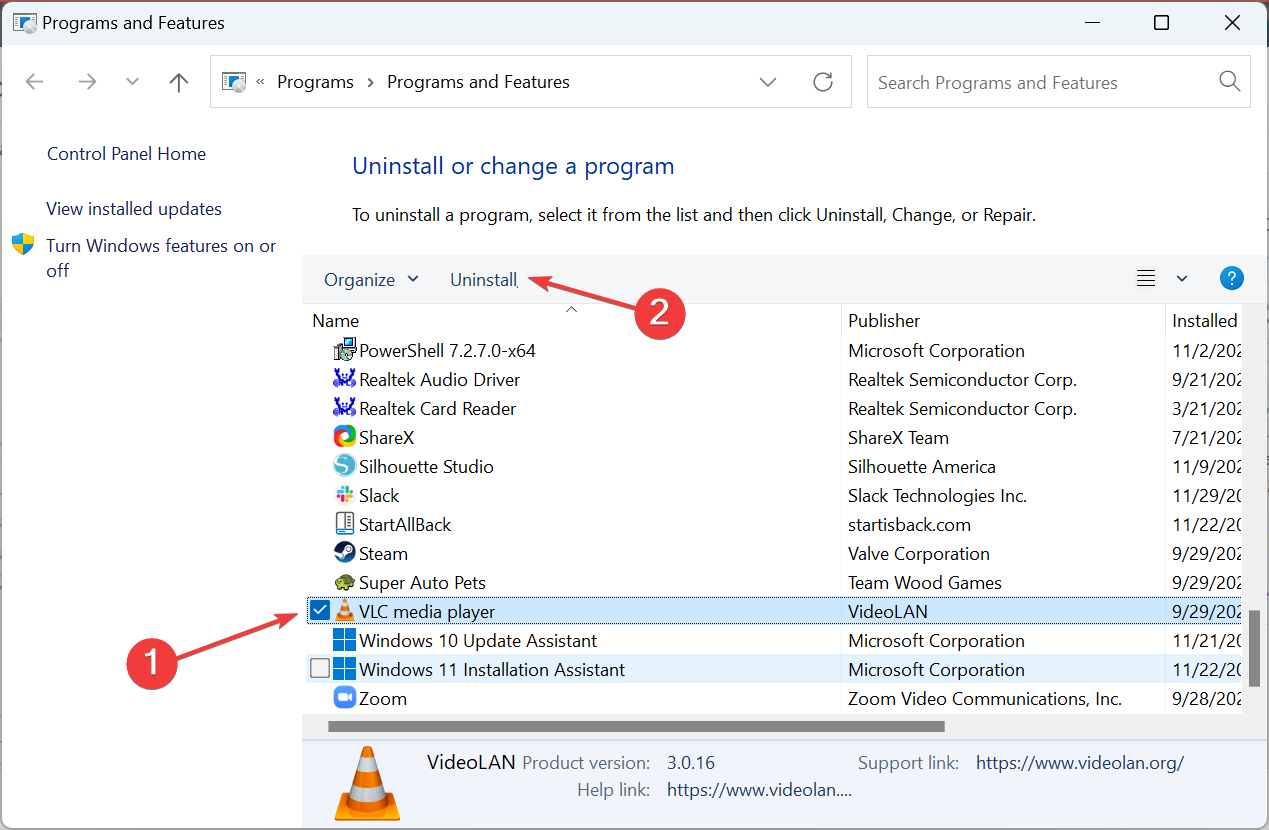
- Choose the app that’s throwing the error, and click on Uninstall.

- Follow the on-screen instructions to complete the process.
- Once done, restart the computer for the changes to come into effect.
- Now, reinstall the application from an official source, say, the manufacturer’s official website or the Microsoft Store.
When facing the No such interface supported error with VLC or another app you got manually, reinstalling it should do the trick.
Just make sure to remove all associated files and registry entries before reinstalling the program. A good software removal tool should come to your aid in this case.
- How to Properly Fix a PC That’s Not Turning on [12 ways]
- Security Settings Blocked Self-signed Application [Fix]
- 10 Common Computer Problems & How to Properly Fix Them
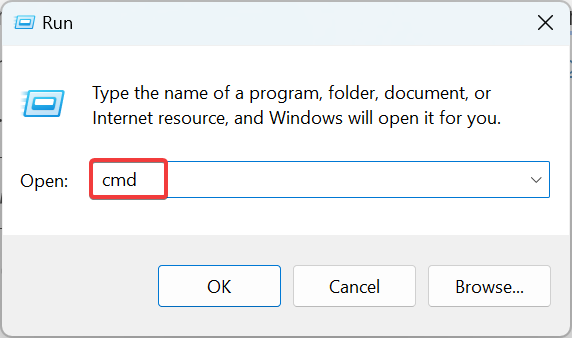
- Press Windows + R to open Run, type cmd, and hit Ctrl + Shift + Enter.
- Click Yes in the UAC prompt.
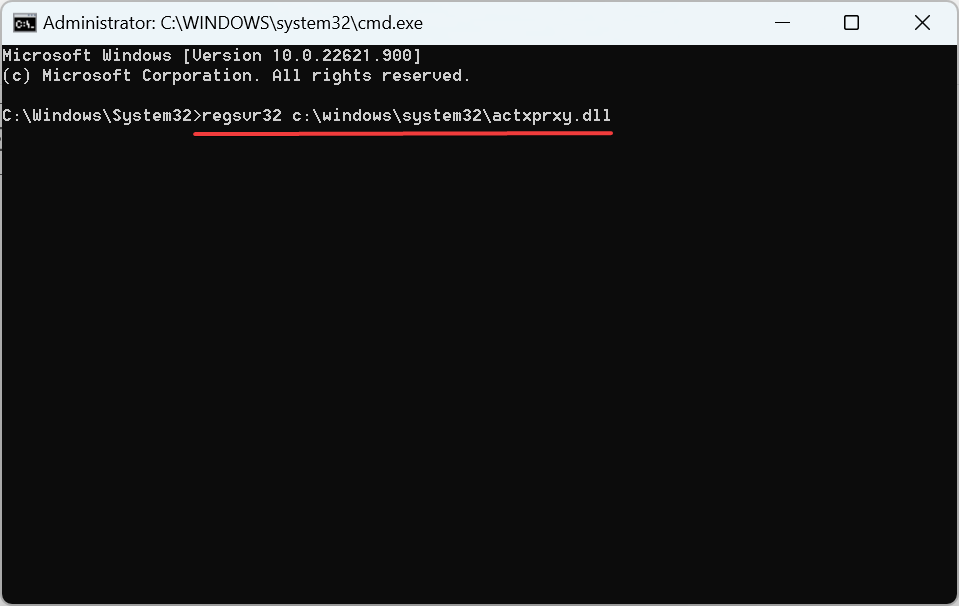
- Now, paste the following command and hit Enter:
regsvr32 c:\windows\system32\actxprxy.dll
- If you still face issues, execute the following command:
FOR /R C:\ %G IN (*.dll) DO "%systemroot%\system32\regsvr32.exe" /s "%G"
Reregistering the DLLs should help fix No such interface supported in Windows 7 as well.
5. Run a few commands
- Press Windows + S to open Search, type Command Prompt, right-click on the relevant search result, and then select Run as administrator.

- Click Yes in the UAC prompt that pops up.
- Paste the following commands individually, and hit Enter after each:
reg delete "HKCU\Software\Classes\Local Settings\Software\Microsoft\Windows\Shell" /freg delete "HKCU\Software\Microsoft\Windows\CurrentVersion\Explorer\Streams" /freg delete "HKCU\Software\Microsoft\Windows\CurrentVersion\Explorer\StuckRects2" /freg delete "HKCU\Software\Microsoft\Windows\CurrentVersion\Explorer\MenuOrder" /fattrib -r -s -h "%userprofile%\AppData\Local*.db"del "%userprofile%\AppData\Local*.db"
That’s it! You shouldn’t see No such interface supported in Windows 10 or the other iterations of the OS anymore, be it while opening files or programs. In case you do, the last option is to reinstall Windows, which can be done via a bootable USB drive or the setup.
Before you leave, check the best apps for Windows 11 and get a few of these today for a better experience.
Tell us which fix worked for you in the comments section below.
![]()
Many of the errors that Windows users frequently encounter can be disregarded. However, some errors impact the overall working of your PC. The “No such interface supported” error is one of them, preventing users from launching any app or program. Also, you can encounter this error in any Windows version.
Key Takeaways
- In Windows 11, “No such interface supported” prevents users from accessing any app or software, and it can appear on any version of Windows.
- Corrupt system files or DLL files, incompatible or outdated app drivers, conflicts due to other active applications, or bugs in the OS are some of the reasons.
- Repairing and resetting the application, re-registering the DLL and system files, running SFC and DISM, or updating Windows are potential ways to fix the error.
What Is The “No Such Interface Supported” Error?
The interface error means Windows could not run the applications or any specific one. You might have downloaded it from the Microsoft Store or any third-party software website, or it might be a built-in program.

You’ll see the following message if you face the error:
Error Message: No such interface supported.
Causes
You may get this error for the following reasons:
- Issues with the application.
- Corrupt system files.
- Bug in the OS.
- A problematic user account.
- Damaged or misconfigured DLL files.
- Outdated or incompatible drivers.
- Conflicting third-party services.
- Problems with Internet Explorer settings.
Also Read: How To Fix Cursor Moving On Its Own In Windows 11
How To Fix The “No Such Interface Supported” Error In Windows 11
Following is the list of some potential methods that can fix the error:
- Update Application
- Update Or Rollback Drivers
- Create A New User Account
- Reset/Repair Or Reinstall The Application
- Disable Startup Programs
- Re-register DLLs
- Perform System Restore
- Fix Registry Errors
- Scan For Viruses
- Run DISM And SFC Scans
- Run Important Commands
- Reset System
Here are some basic fixes you should workaround before we go on to the technical ones:
- First and foremost, restart your system, power cycle it, and launch the app to see if the error is not showing up now. Restarting a PC fixes temporary glitches.
- Ensure you have installed the latest Windows version, and check for any pending updates.
- If you get this error while launching Internet Explorer, try resetting the settings.
Retry opening the application, and if you are still getting errors, then let’s move on to the technical methods:
Update Application
If you downloaded the app from the Microsoft Store and it displays an error when launching it, go to the store and see if any pending updates prevent the application from working.
Here are the steps to update an application:
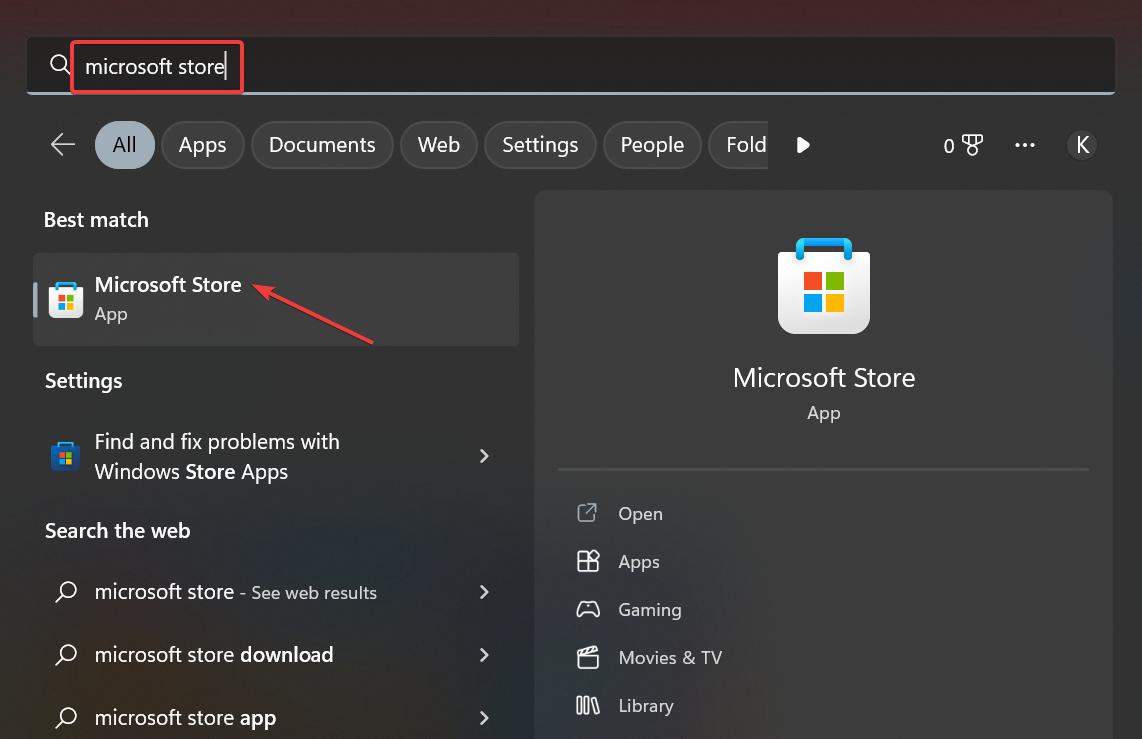
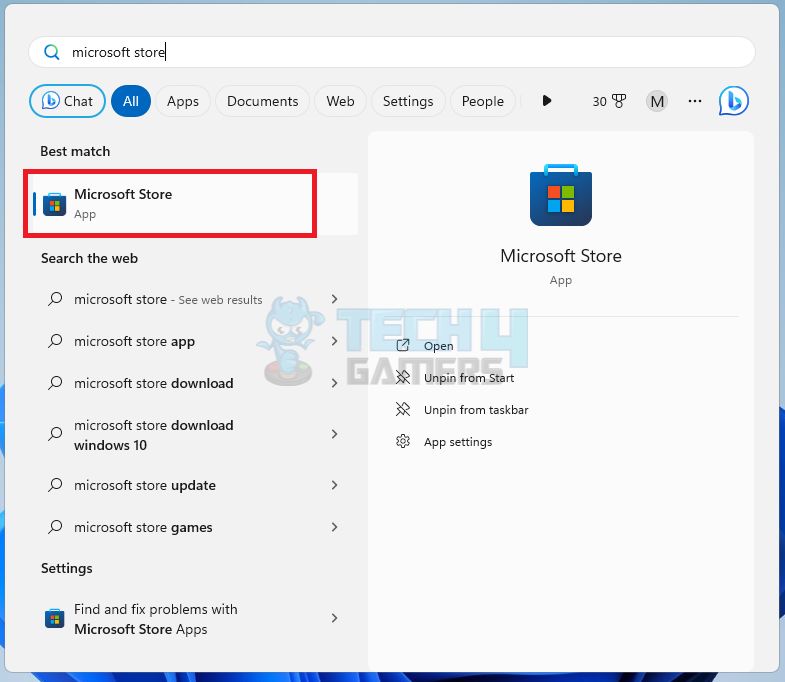
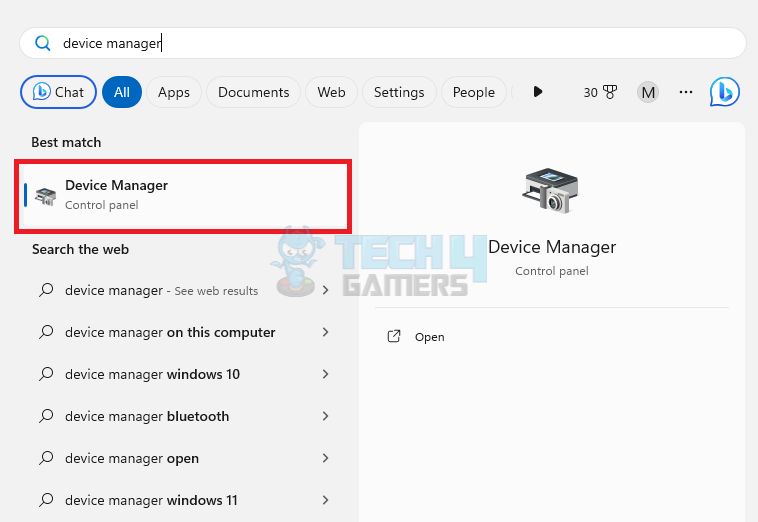
- Go to Windows search and type Microsoft Store. The store will appear. Just click on it.

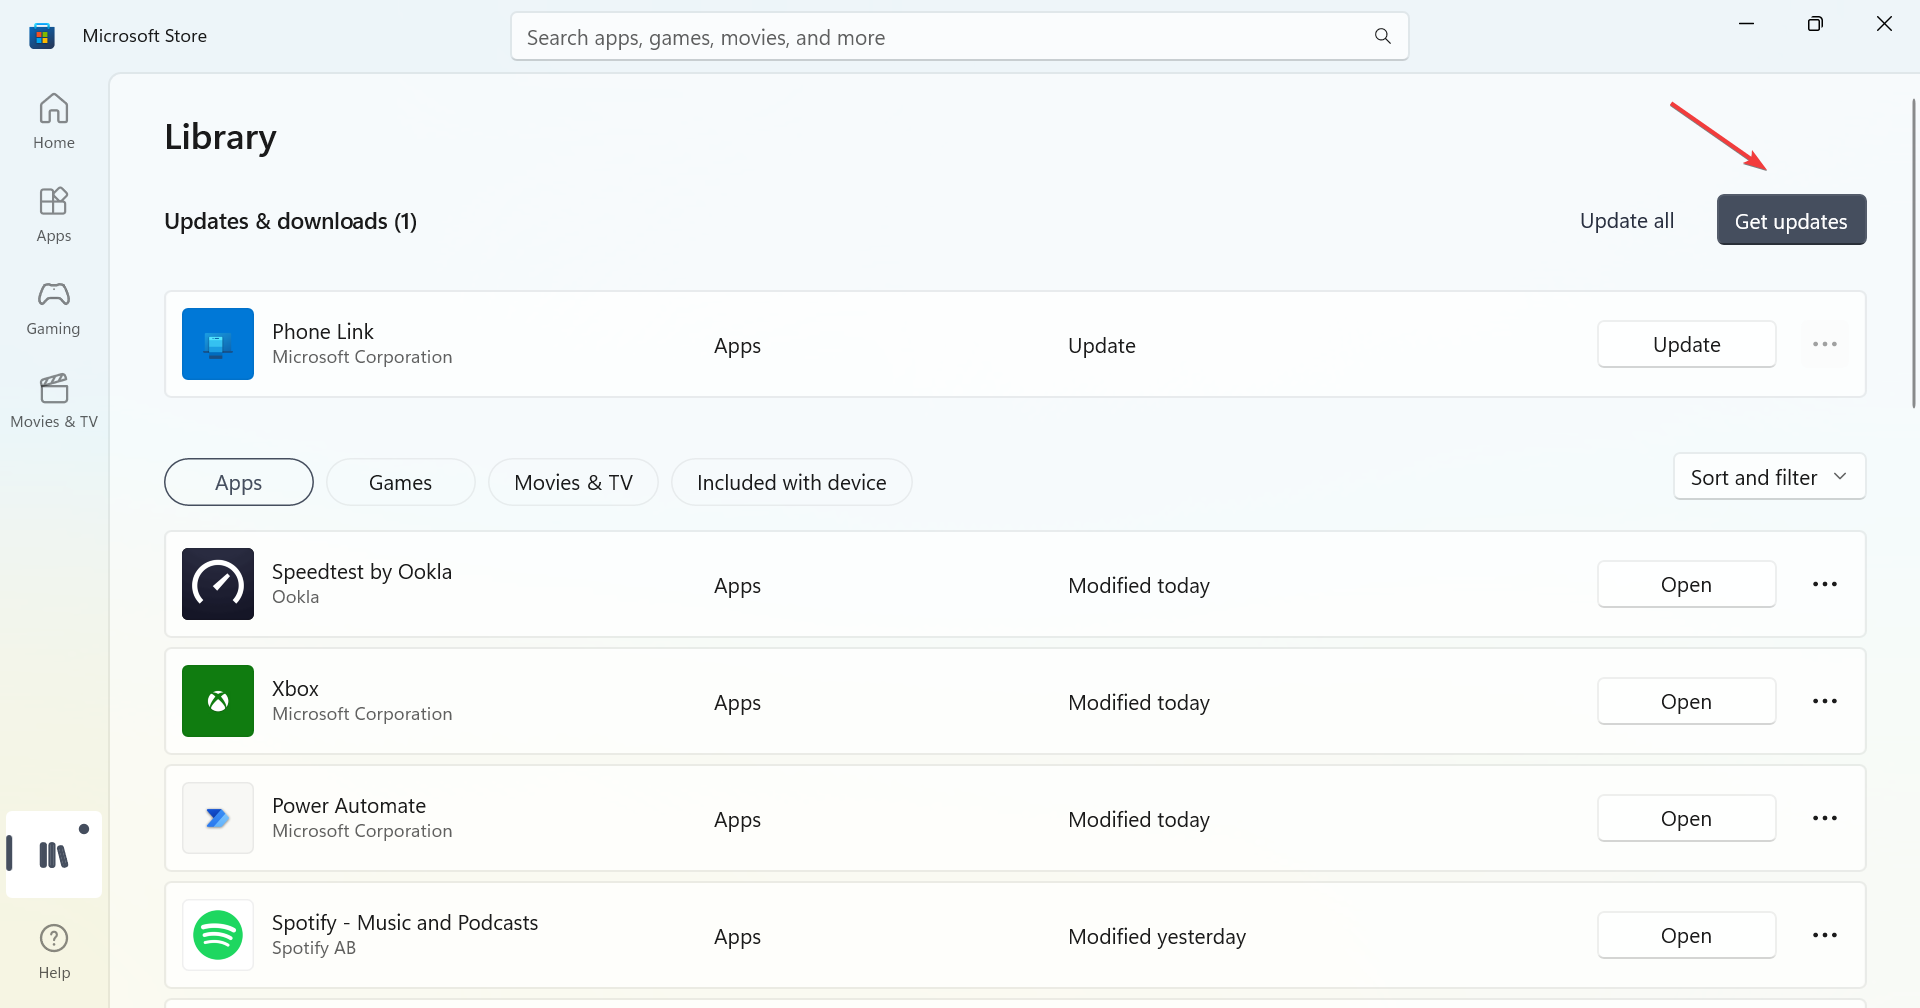
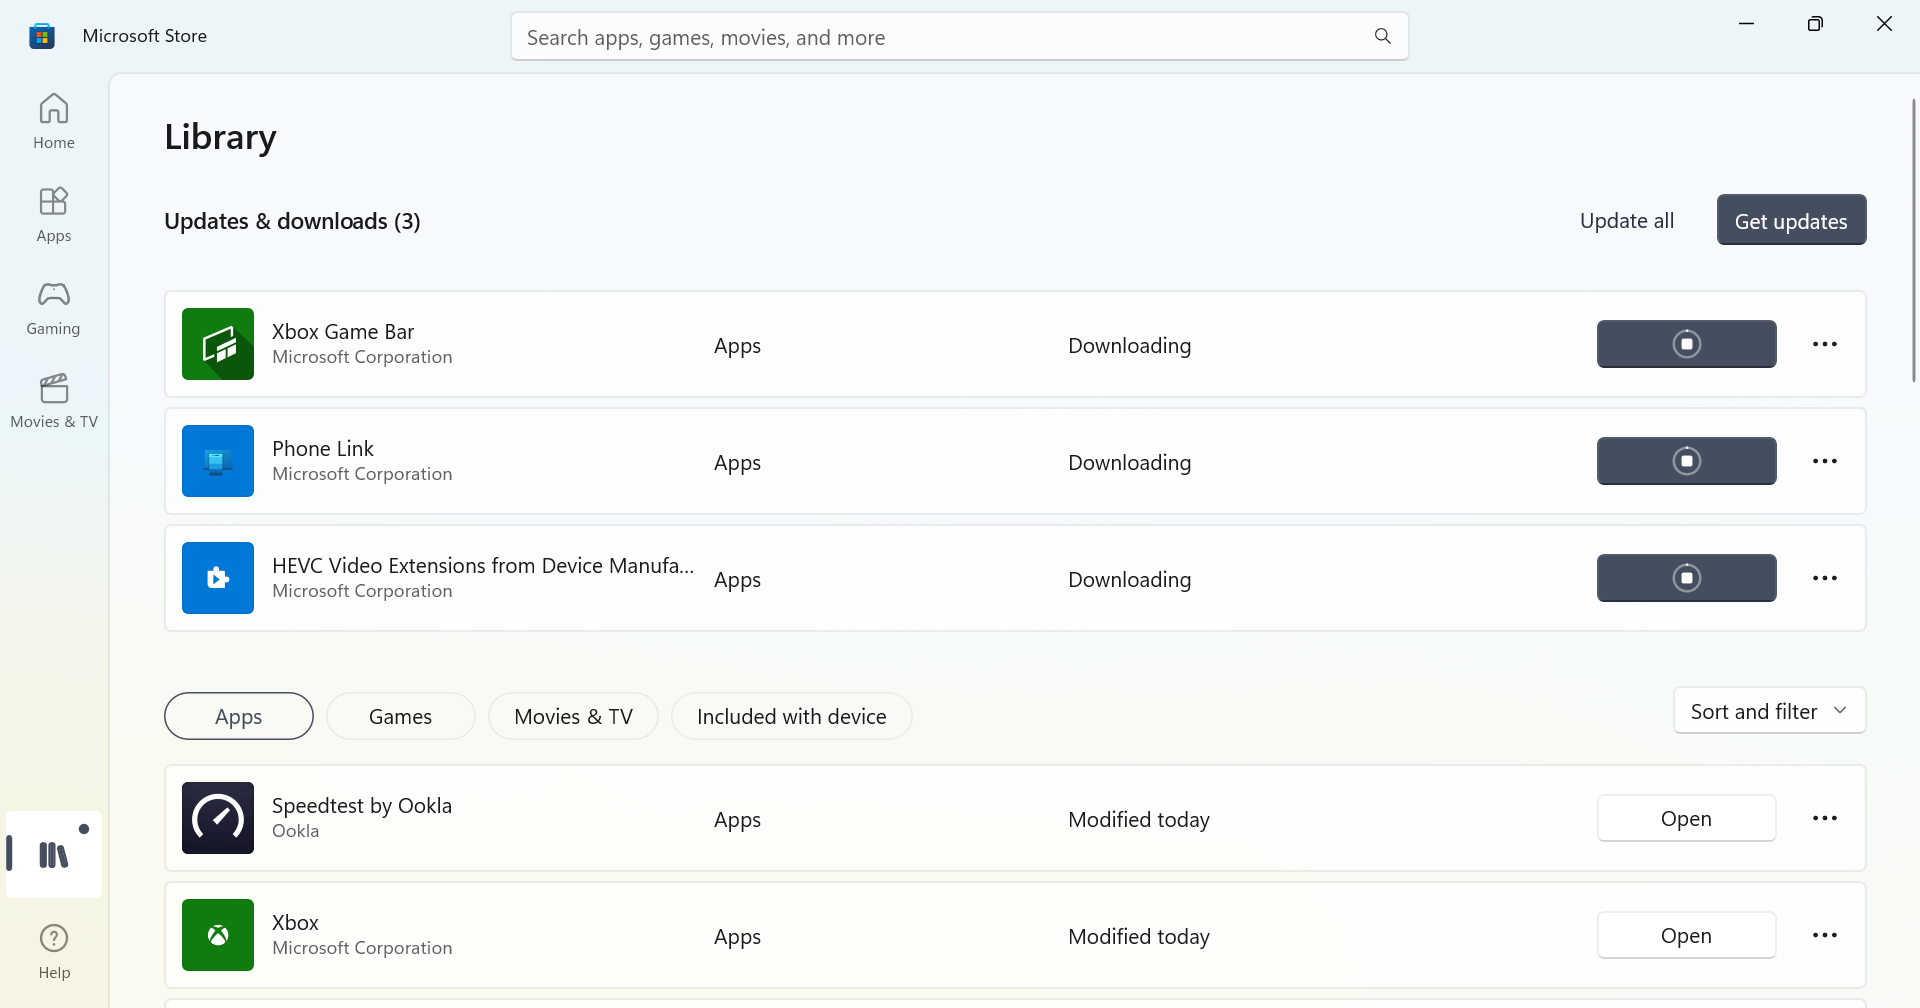
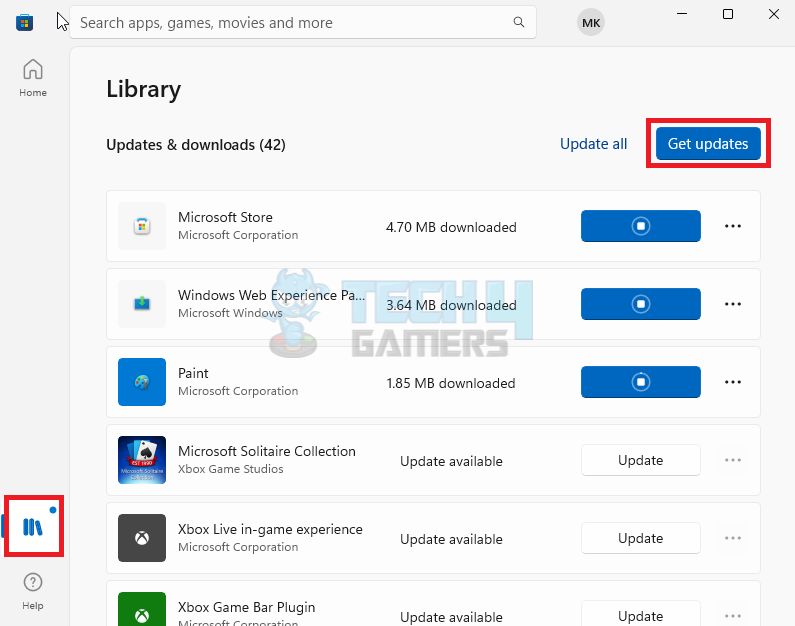
Microsoft Store – Image Credits (Tech4Gamers) - Click Library and then go to Get Updates.

Get Updated – Image Credits (Tech4Gamers) - Let your system install updates, and then restart it.
- Now, relaunch the app showing the error to see if it’s working currently.
Note: If you downloaded the app from any other third-party website, look for the updates there.
Update Or Roll Back Drivers
The interface error can be triggered if your system has incompatible or outdated drivers.
To get rid of the interface error, you should rollback or update drivers:
- Go to Device Manager or search it through Windows search.

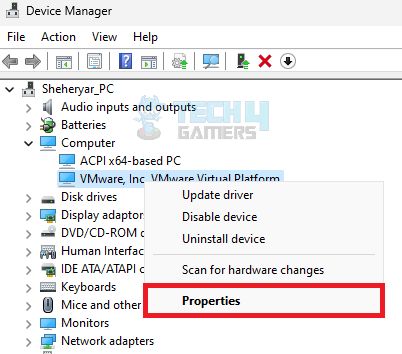
Device Manager – Image Credits (Tech4Gamers) - Open Categories and find the drivers you think the problematic application is using.
- Update that driver by right-clicking on it and complying with the instructions.
- Now, launch the application and see if there’s no error anymore; otherwise, rollback driver to the older version through the following steps:
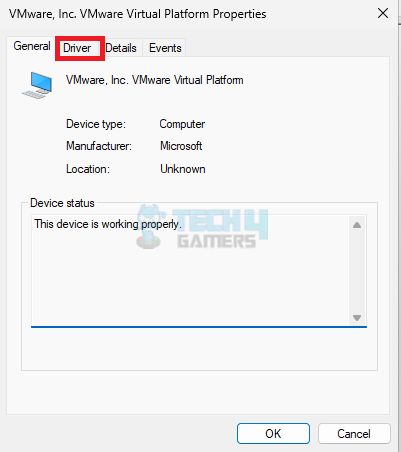
- Again, right-click on that specific driver and jump to Properties.

Display Properties – Image Credits (Tech4Gamers) - Open the Driver tab.

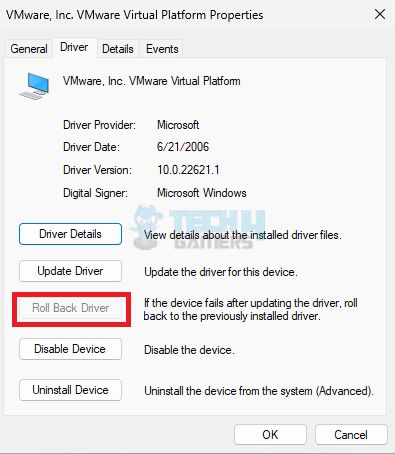
Driver Tab – Image Credits (Tech4Gamers)
Now, to return to an older version, select Rollback Driver.
Also Read: How To Fix Windows 11 Screen Saver Not Working
Create A New User Account
If your user account lacks permissions or configurations are not up to the mark or get corrupted, you won’t be able to run an application. Every user account has different formats and permissions, so a quick approach to see whether this is the case is to run the app with a new login and see if the issue persists.
Here’s how to create a new user account:
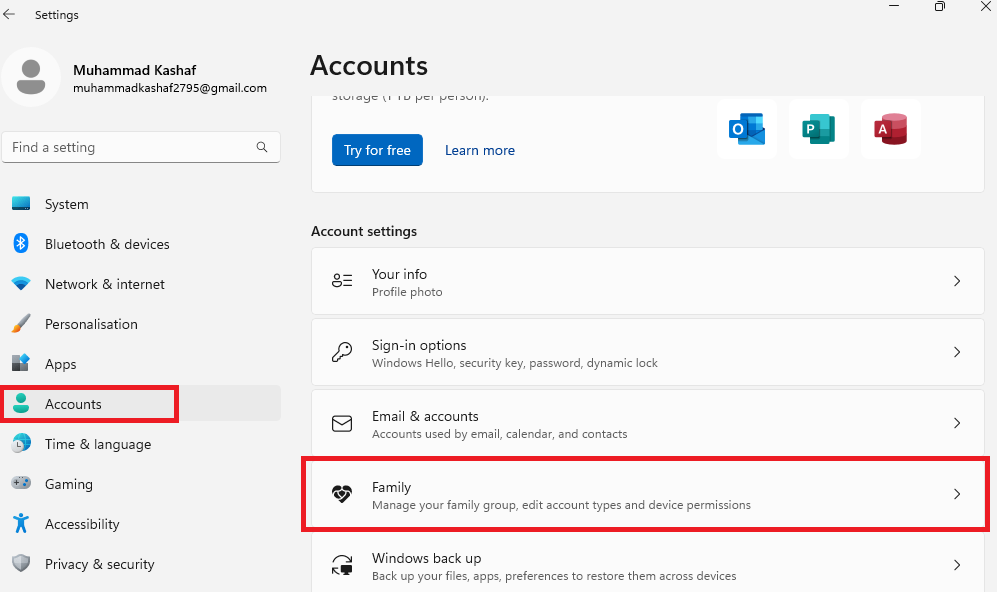
- Go to Windows settings.
- Jump to Accounts and opt for Family.

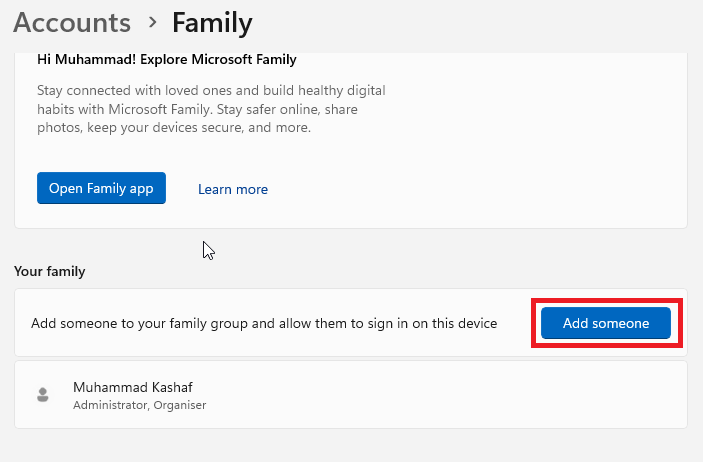
Accounts – Image Credits (Tech4Gamers) - Now, click on Add someone.

Accounts Family – Image Credits (Tech4Gamers) - Opt for the option I need this person’s sign-in information.

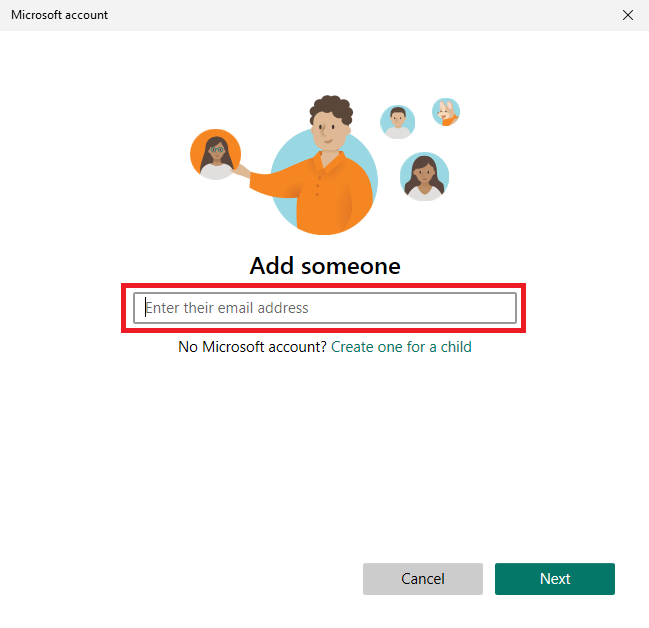
Enter Email Address – Image Credits (Tech4Gamers) - You will be directed to a new window; here, choose Add a user without a Microsoft account.
- Type username and password.
- Choose a password hint or security question to avoid forgetting the password later.
Click Next. - Now, log in with this new user account to Windows and try launching the app.
Reset/Repair Or Reinstall The Application
If you cannot launch an app, you can repair or reset it at first through a Windows built-in feature instead of uninstalling it. Our team managed to fix the “No such interface supported” error in Windows 11 through this method.
Here’s how you can correct or reset an application or program:
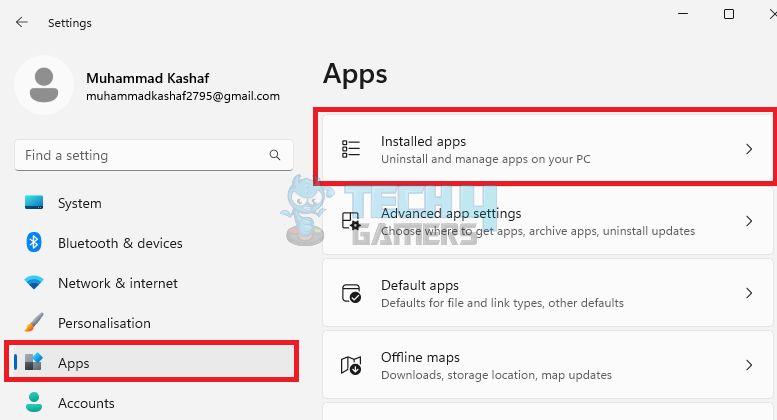
- Go to Windows settings and open Apps.
- Now, jump to Installed Apps.

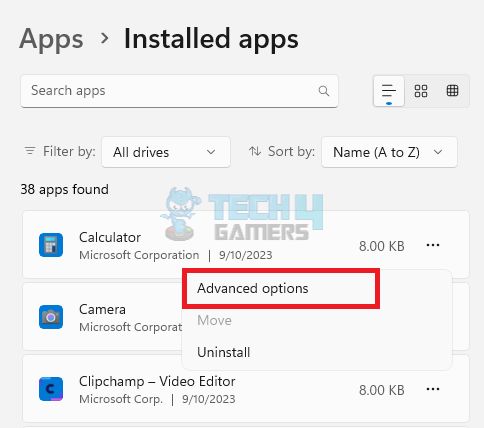
Installed Apps – Image Credits (Tech4Gamers) - Find the app that is displaying an error and click on the ellipsis.
- Select Advanced options from the menu.

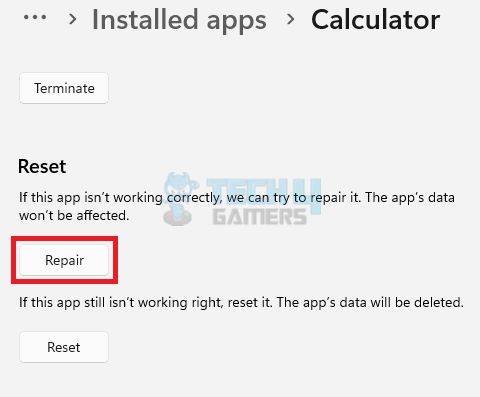
Advanced Options – Image Credits (Tech4Gamers) - Choose the option Repair now and wait for a while. Try launching the app, and if you are still getting the error, move on to resetting.

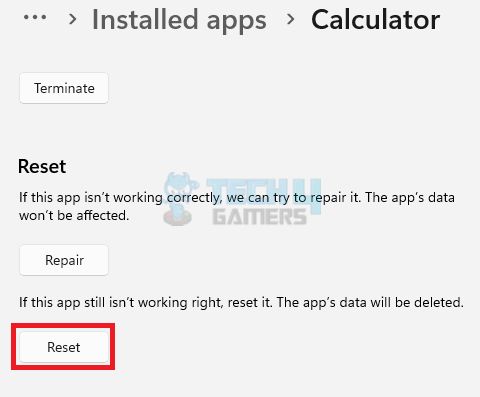
Repair Now – Image Credits (Tech4Gamers) - Find the Reset button and choose it.
Reset Button – Image Credits (Tech4Gamers) - Confirm on the resetting window.
If the above methods are unsuccessful, then it might be the issue of improper installation. To fix this, you need to reinstall the application, and here are the steps to do so:
- Hit the Windows+R keys together to launch the Run dialogue box.
- Now copy and paste appwiz.cpl and Enter.
- Look for the app showing an error, click Uninstall, and comply with the instructions.
- Restart your system once you finish the process to save the modifications.
- Now, go to the website from where you have downloaded the app or open the Microsoft Store and reinstall the app.
Important: Please delete all the registry entries and files of the app’s setup before reinstalling it. You can opt for reliable third-party software if you need assistance figuring out where the files are.
Also Read: How To Fix Google Drive Not Syncing On Windows 11
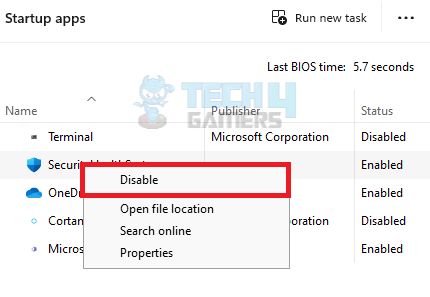
Disable Startup Programs
It is possible for specific third-party applications or services to conflict with the usual operation of system interfaces, which causes the error to show up. If you have different software installed on your system and they auto-launch when your system starts, consider turning off those software that aren’t essential for system startup.
It can also free up system resources, enabling the necessary interfaces to run without interruption.
Here’s how to go about it:
- Press Win+R on the keyboard to access the Run dialogue box.
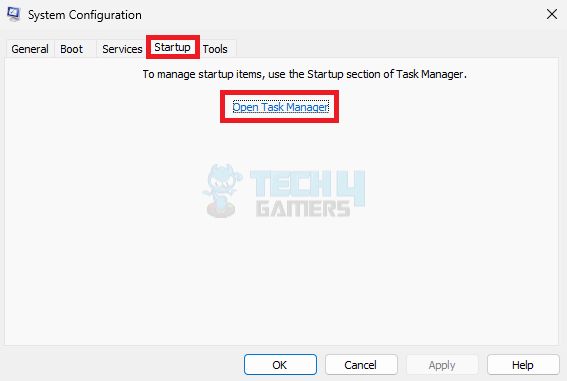
- Type msconfig in the box and Enter to launch the System Configuration.
- Choose the option Open Task Manager under the Startup window.

Open Task Manager – Image Credits (Tech4Gamers) - Now, a list of applications that start up automatically with the system will appear. Look for the optional ones. Disable them by doing a right-click on them. Do this for all the programs that don’t need to start while the system is booting.

App Disable – Image Credits (Tech4Gamers) - Exit the Task Manager after you’re finished and restart the PC.
It should have eliminated the error if it occurred due to software conflict.
Re-Register DLLs
One of the solutions to the application error is to re-register the DLL files of the application.
Following are the steps to register DLL:
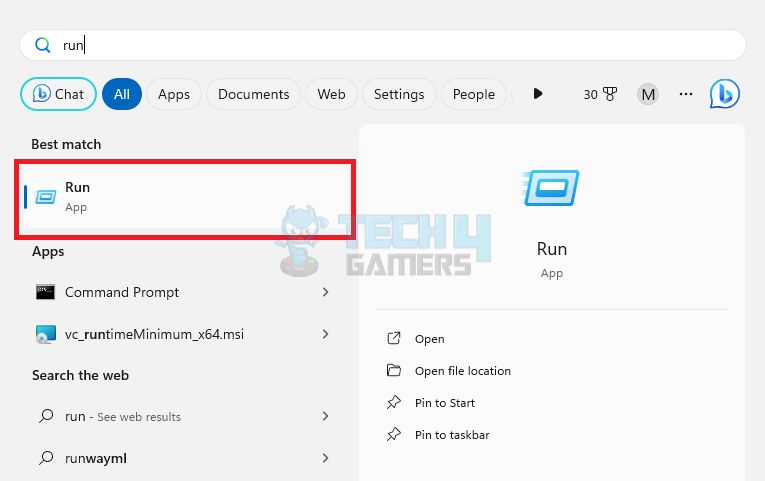
- Use Windows search to open the Run dialogue box.

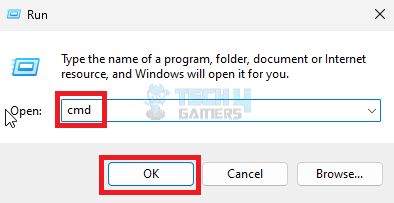
Search Run – Image Credits (Tech4Gamers) - Type cmd and press the keyboard’s Ctrl+Shift+Enter keys together.

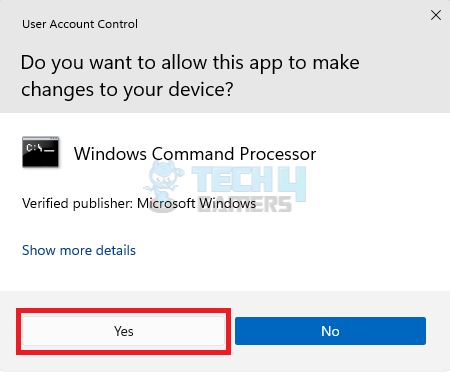
Run Cmd – Image Credits (Tech4Gamers) - When you are asked for confirmation through the UAC window, hit Yes.

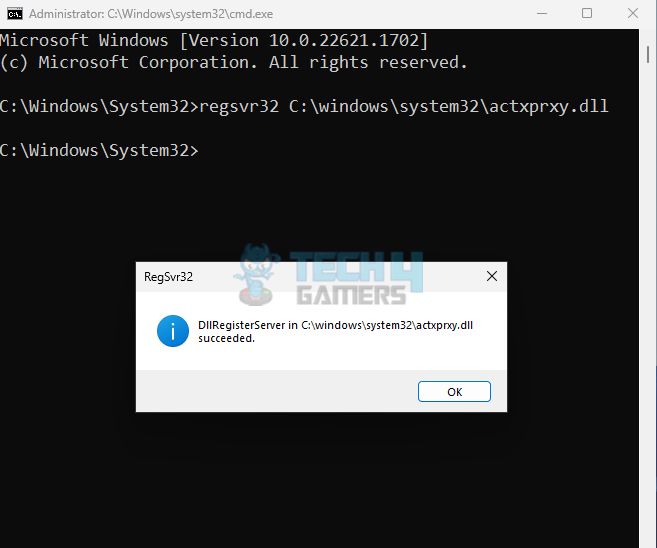
Windows Command Processor UAC – Image Credits (Tech4Gamers) - Copy this command: regsvr32 c:\windows\system32\actxprxy.dll and paste it into the box, then Enter.

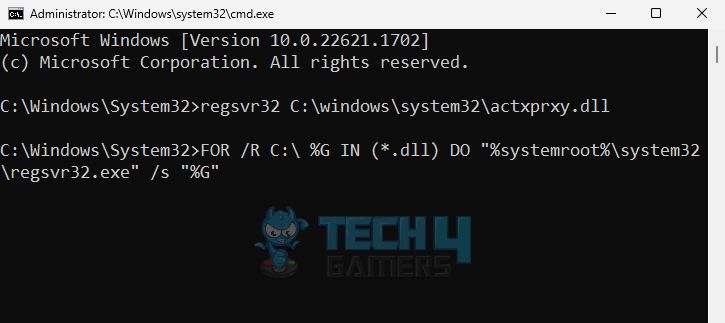
regsvr32 – Image Credits (Tech4Gamers) - Go to the app, launch it, and see if it works. Otherwise, copy the command:
FOR /R C:\ %G IN (*.dll) DO “%systemroot%\system32\regsvr32.exe” /s “%G”

systemroot – Image Credits (Tech4Gamers) - Launch the app to see if the issue is fixed.
Perform System Restore
Windows System Restore tool will let you undo changes you have done earlier and are now causing errors while launching any application.
Follow the steps below to restore your system:
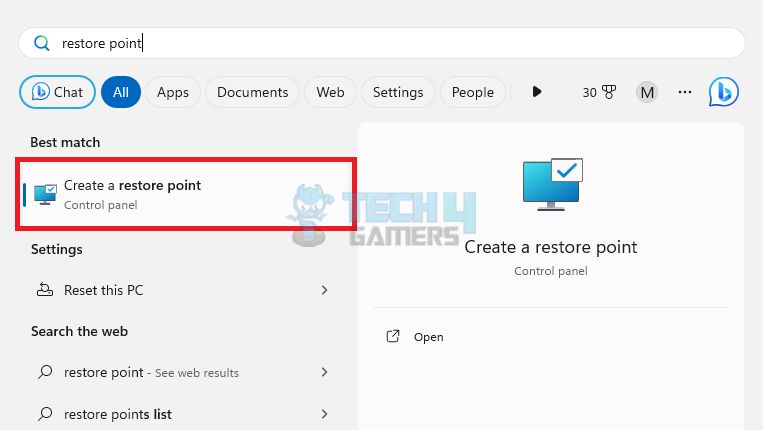
- Type the restore point in the search bar.

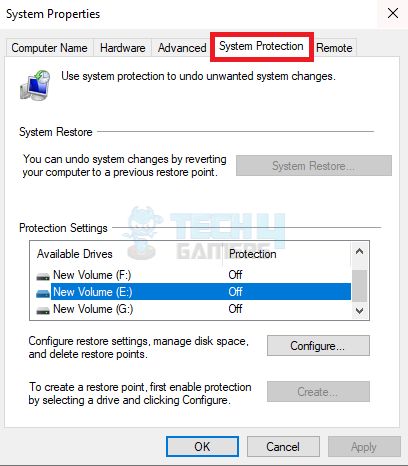
Restore Point – Image Credits (Tech4Gamers) - From the System Protection menu, choose the System Restore option and Next.

System Restore – Image Credits (Tech4Gamers) - Pick a restore point created before the error appeared and click Next.
- Hit Finish and let Windows return to the restore point you chose.
When Windows rolls back to the selected restore point, you won’t see the error again.
Fix Registry Errors
When we install any software, its configuration settings are saved in the Windows Registry; however, if the registry gets corrupted and affects an application setting for any reason, you won’t be able to launch that application.
Here is a list of things you can try to fix the registry error:
- Run built-in Windows Error Checking software.
- Use a program to clear the registry, such as CCleaner.
- End all the processes you are working on before turning off your system.
- Update BIOS.
- Reverse CPU overclocking.
- Restore old settings.
Also Read: FIXED: Windows 11 Time Zone Greyed Out
Scan For Viruses
Viruses or malware are the usual culprits in triggering application errors. Running anti-malware or antivirus scans can clear your system.
You can use a Windows tool called Malicious Software Removal Tool for this purpose, or you can use reliable third-party software such as Malwarebytes and Avast Free Antivirus for advanced options and proper scanning of your system.
Important: Running multiple scans using different tools will help you identify exact issues because every software has additional findings per their programming.
Run SFC And DISM Scans
Corrupted system files prevent applications from starting and can cause the Windows 11 “No such interface supported” error. The best methods for finding damaged system files on Windows and fixing them are Deployment Image Servicing and Management and System File Check.
Here are the steps to run SFC and DISM:
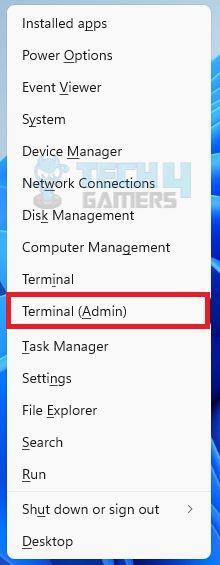
- Use the keyboard’s Windows+X combination to open the Power User menu.
- Click on Terminal (Admin).

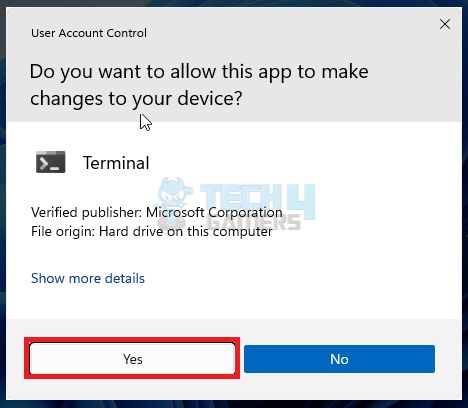
Terminal Admin – Image Credits (Tech4Gamers) - When User Account Control (UAC) requests confirmation, choose Yes.

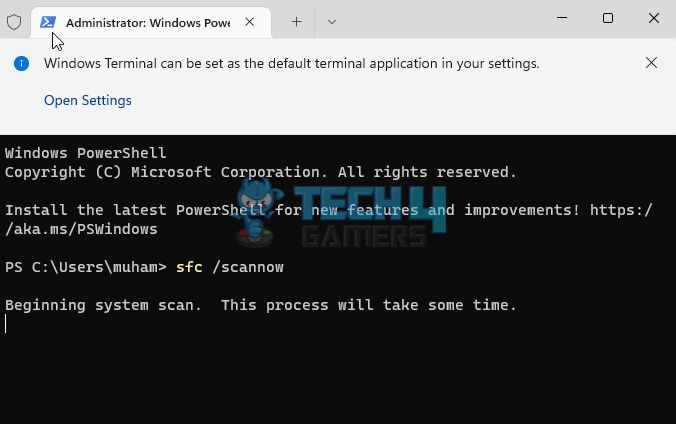
UAC Request – Image Credits (Tech4Gamers) - Copy sfc /scannow, paste in the box and Enter.

SFC Scan – Image Credits (Tech4Gamers) - Next, run the DISM scan by copying and pasting the following commands one by one using the Enter button:
DISM /Online /Cleanup-Image /CheckHealth
DISM /Online /Cleanup-Image /ScanHealth
DISM /Online /Cleanup-Image /Restore Health
When the system is done with the scanning, restart it and go to the app showing an error. Relaunch it to check if these scans have eliminated the error.
Run Important Commands
Running some commands in the Command Prompt usually fixes some users’ errors.
Let’s try to solve the error with this method:
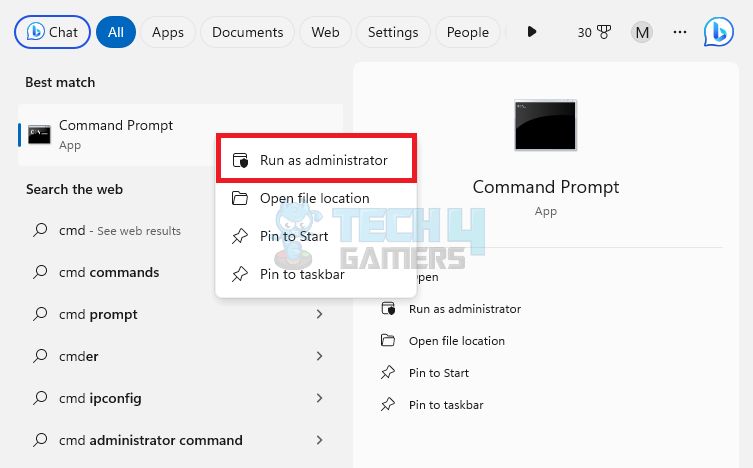
- Click on Windows search, type cmd, and click on the option Run as administrator showing below the Command Prompt.

Run As Administrator – Image Credits (Tech4Gamers) - UAC prompt will ask you to confirm, so click Yes.
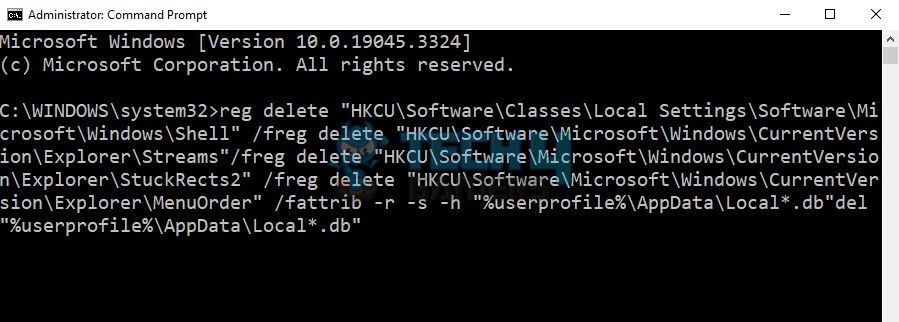
- Copy the following commands one at a time and paste them into the dialogue, followed by pressing Enter after each one:
reg delete “HKCU\Software\Classes\Local Settings\Software\Microsoft\Windows\Shell” /f
reg delete “HKCU\Software\Microsoft\Windows\CurrentVersion\Explorer\Streams”/f
reg delete “HKCU\Software\Microsoft\Windows\CurrentVersion\Explorer\StuckRects2” /f
reg delete “HKCU\Software\Microsoft\Windows\CurrentVersion\Explorer\MenuOrder” /f
attrib -r -s -h “%userprofile%\AppData\Local*.db”
del “%userprofile%\AppData\Local*.db”

HKCU – Image Credits (Tech4Gamers) - Go to the app showing the error and launch it to check if this method has resolved it.
Reset System
There might be an issue in your drives, and after trying out every possible method, if you cannot solve the error, try resetting your PC. It will clear all the Windows data, so remember to create a backup.
Performing a system reset is as follows:
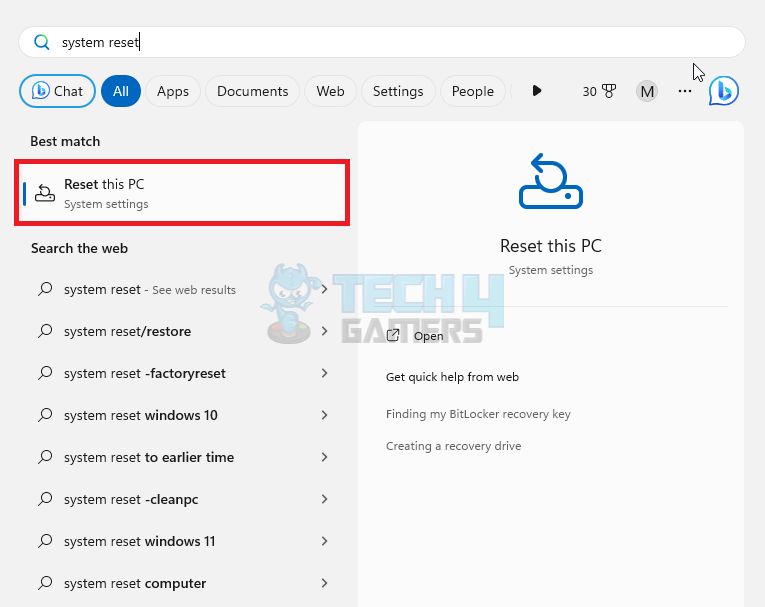
- Go to Windows search and type system reset in the search field.

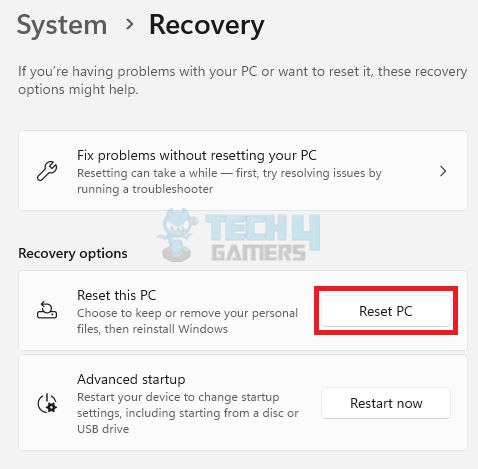
System Reset – Image Credits (Tech4Gamers) - Now, select Reset PC.

Reset PC – Image Credits (Tech4Gamers) - Jump to the option Get Started.
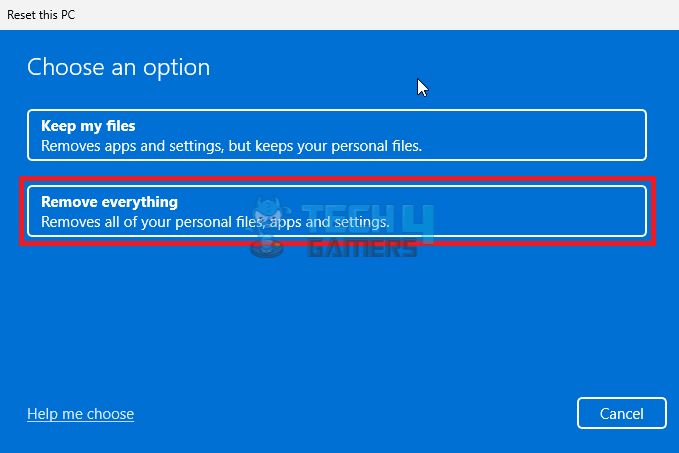
- Two options will appear for you to choose. Selecting Remove everything from that menu is the option that will give your system a fresh start.

Remove Everything – Image Credits (Tech4Gamers)
As the system reset, wait until the process is finished and then check if this has eliminated the error.
Common Questions Answered
What is the meaning of the error “No Such Interface Supported”?
This Windows error prevents applications and software from launching and can occur in any OS version. Sometimes, this impacts the overall working of a system.
What are the reasons behind the error?
Outdated drivers, bugs in OS, third-party apps conflict during boot, corrupted DLL or system files, and issues with the application.
How do we fix the interface support error?
Some potential methods include updating or reinstalling applications, re-registering DLL files, running SFC and DISM scans, or restoring systems.
Related Articles
- Windows 11: Computer Won’t Wake Up From Sleep
- Windows 11 Stuck On Restarting Screen
Was our article helpful? 👨💻
Thank you! Please share your positive feedback. 🔋
How could we improve this post? Please Help us. 😔