-
Home
-
News
- How to Move Window with Keyboard? (3 Common Ways)
By Vera | Follow |
Last Updated
If you like to use a keyboard, you may want to know how to move a window with keyboard rather than your mouse in the Windows operating system. In this post, you can know three common methods for moving a window.
Move Window with Keyboard
When using your computer, you may want to move the window. Usually, you choose to use a mouse to drag the window easily. But some prefer to use a keyboard to move the window.
Since Windows 7, the operating systems offer the keyboard support for moving and arranging application windows. Well then, how to move a window with keyboard?
In the following part, MiniTool Solution will tell you how to do this work in small increments to an exact place that you want, how to move a window to the right or left, and how to move a window to another monitor.
Tip: Sometimes, the window is off the computer screen. So, how to move the window back? This post – How to Move a Windows That Is Off-Screen to Desktop in Windows 10 gives you some effective methods. Just try one of them to fix this issue.
Ways to Move Windows with Keyboard
Incremental Move
This way is only available for windows that are not fully maximized. If the window is maximized, you cannot move the window. Just follow these steps below to start the window moving:
Step 1: Click the window or you can use the keyboard shortcut – Alt + Tab and let the window that you want to move active.
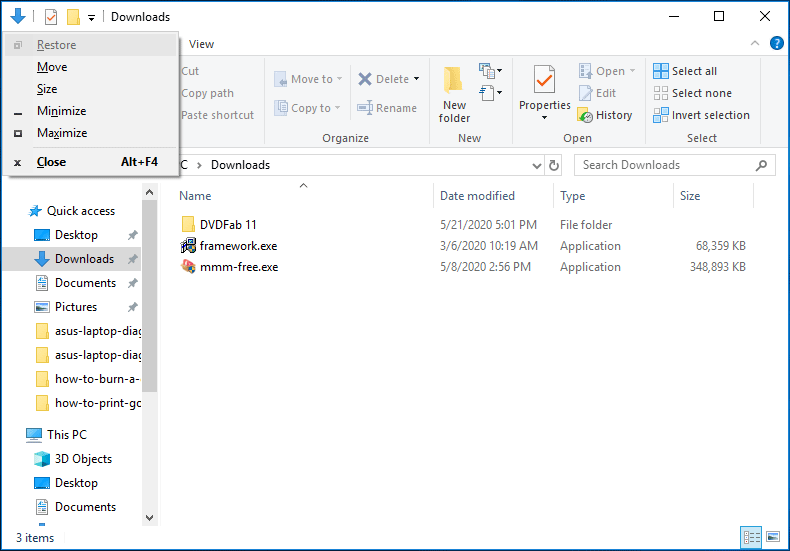
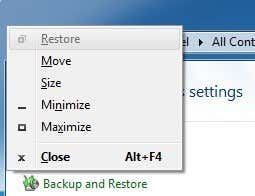
Step 2: Then, press Alt + Spacebar and you can see a small menu
Step 3: Press M (equal to selecting the Move option) and the mouse cursor will turn into a cross with arrows and move to the title bar of the window. Now, you can use the left, right, up, and down arrow keys on your keyboard to move the window to another position.
Step 4: Press Enter to exit the move mode.
Snap an App Window
In Windows, there is a feature that allows you to snap the window to the right or left side of the computer screen. When dragging the window to the left or right, it will automatically snap to the side and resize.
Here are two keyboard shortcuts to move window:
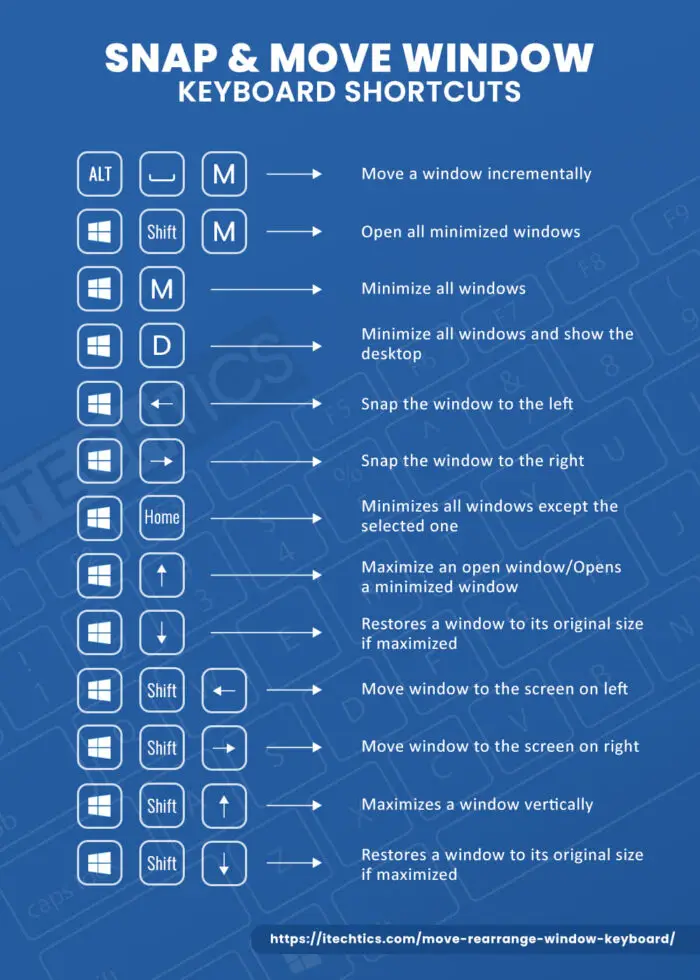
- Win + Left Arrow: snap the window to the left
- Win + Right Arrow: snap the window to the right
Besides, there are some other keyboard shortcuts to manipulate the active window:
- Win + Home: minimize all windows except the foreground window
- Win + Up Arrow: maxmize a window
- Win + Down Arrow: minimize the window if the window is not maximized, or else, it restores the window to its original size
- Win + Shift + Up: maximize a window vertically
Move Window to Another Monitor
If you want to move your window between multiple monitors, use these keyboard shortcuts:
- Win + Shift + Left Arrow: move a window to the monitor on the left
- Win + Shift+Right Arrow: move a window to the monitor on the right
Tip: This post – The Complete Guide to Move Window to Other Monitor also shows you some information on the window moving between multiple monitors.
Bottom Line
How to move window with keyboard? After reading this article, you know some effective ways and just follow one of them based on your situation to start the moving operation.
About The Author
Position: Columnist
Vera is an editor of the MiniTool Team since 2016 who has more than 7 years’ writing experiences in the field of technical articles. Her articles mainly focus on disk & partition management, PC data recovery, video conversion, as well as PC backup & restore, helping users to solve some errors and issues when using their computers. In her spare times, she likes shopping, playing games and reading some articles.
It is not often that you need to move a window using the keyboard only in the Windows operating system. Windows is designed to be used with a mouse besides the keyboard, and now touch. Every Windows user at least has a touchpad or mouse these days. However, if the keyboard is what you prefer to use, then here is how you can move a window using the keyboard! Moving a window using the keyboard can be useful if your window is partially or fully out of the screen or if some buttons that you need to click are under the Taskbar which usually appears always on top covering them.
To move a window using keyboard only in Windows 10 and all earlier Windows versions, do the following:
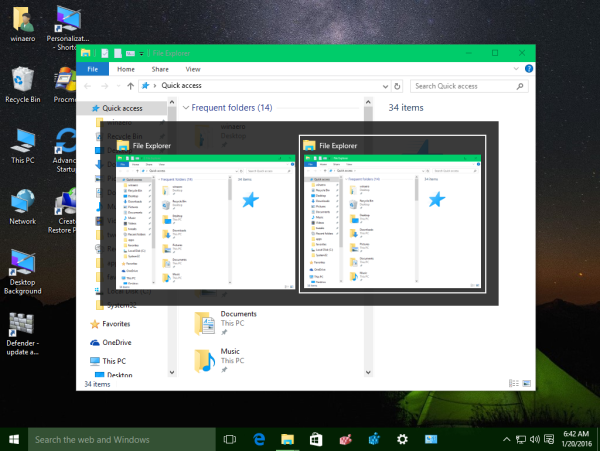
- Switch to the desired window using Alt + Tab.
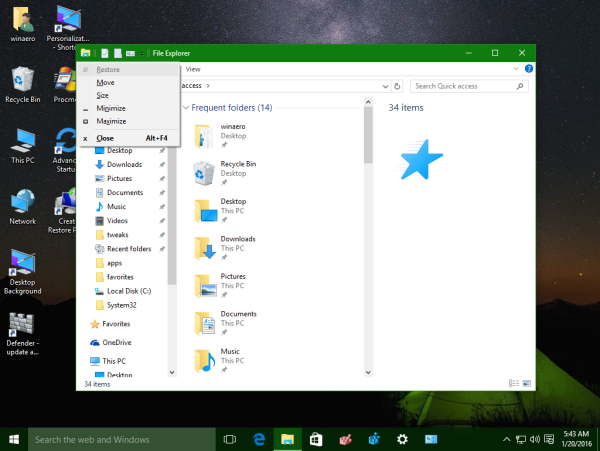
Tip: See how to tweak Alt+Tab to enlarge thumbnails and disable live aero peek preview. Also see two secrets of Alt + Tab dialog in Windows 10 you might not be aware of. - Press Alt + Space shortcut keys together on the keyboard to open the window menu.
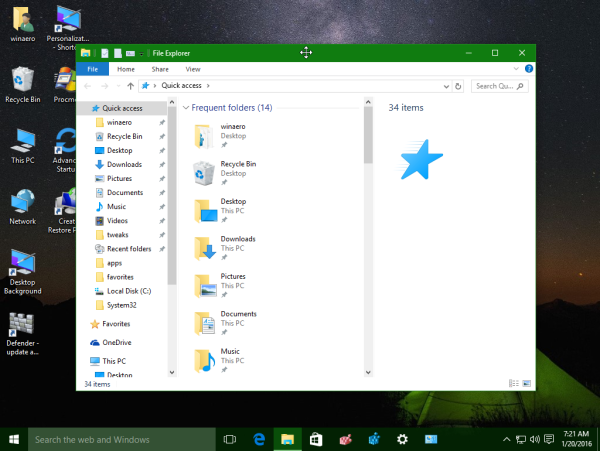
- Now, press M. The mouse cursor will move to the title bar of the window and turn into a cross with arrows:
- Use the left, right, up and down arrow keys to move your window. When you have moved the window to the desired position, press Enter.
You are done.
Modern operating systems like Windows 10, Windows 8 or Windows 7 allow you to perform few extra actions with windows. They allow you to control the size and positioning of open windows better by dragging them to the edge of the screen. If you drag a window using its title bar to the top edge of the screen, it will be maximized. With the mouse pointer touching the left or right edges of the screen when dragging a window, it will be snapped to the left or right side of the screen respectively. This feature is called Snap.
If you grab the title bar of a window with the mouse and drag and shake it, all other background windows will be minimized. This is called Aero Shake. Both actions have their own hotkeys:
Win + Home: Same as Aero Shake (minimizes all windows except the foreground window)
Win + Left arrow key: Snaps an app window to the left.
Win + Right arrow key: Snaps an app window to the right.
Win + Up arrow key: Maximizes a window.
Win + Shift + Up arrow key: Maximizes/resizes a window vertically.
Win + Down arrow key: Minimizes a window if it’s not maximized, otherwise it restores the window to its original non-maximized sized.
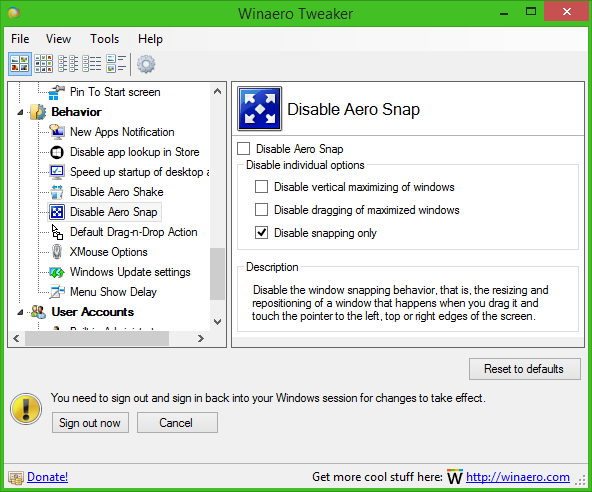
Aero Snap in Windows 10, Windows 8 and Windows 7 can also be customized. While the operating system does not allow you to control individual options, you can use my freeware Winaero Tweaker to enable or disable snapping, drag to maximize and vertical resizing options:
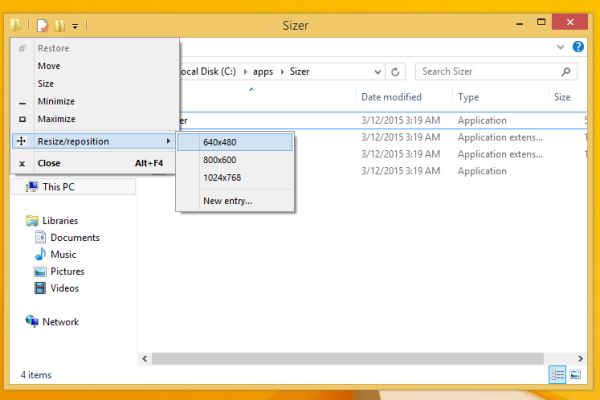
Bonus tip: You can also resize a window to a specific size or move it to specific position using the free app, Sizer.
Also, using the free AquaSnap, you can get Windows 10 Snap features in Windows 7 and XP.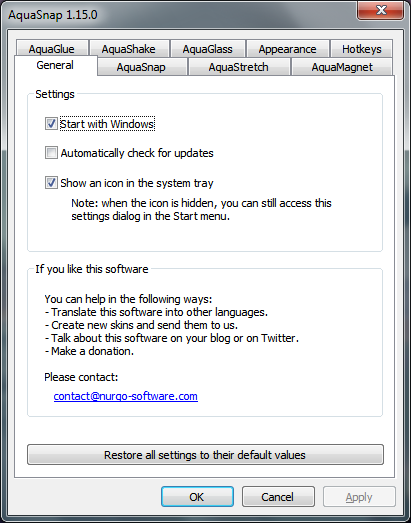
Support us
Winaero greatly relies on your support. You can help the site keep bringing you interesting and useful content and software by using these options:
If you like this article, please share it using the buttons below. It won’t take a lot from you, but it will help us grow. Thanks for your support!
So for those of you who do not like to use a mouse, it would be pretty cool if you could move a window using just the keyboard in Windows 7 right? Well, there are a couple of ways to do this and even though you may not need to do it very often, it does come in handy on the rare occasion!
In this article, I’ll tell you how to move a window in small increments to the exact position you want, how to snap a window to the left or right and how to move a window between monitors on a multi-monitor setup, all by just using the keyboard!
Method 1 – Incremental Move
For exact positioning, you first need to click on the window. Now this is obviously going to only work for windows that are not fully maximized. If it’s fully maximized, there is really nowhere to move the window.
Step 1: Either click on the window or if you want to use the keyboard, press ALT+TAB and make the window you want to move active.
Step 2: Now go ahead and press ALT+SPACEBAR and you’ll see a small menu appear in the window.
Step 3: Now press M, which will basically choose the Move option in the menu.
Step 4: Now use the arrow keys on your keyboard to move the window to the new position that you desire.
Step 5: Press the Enter key to get out of the move mode. Also, if you want to have the window go back to the original position before you started the move, press the Esc key instead.
Method 2 – Windows Snap
Windows has a nifty feature that lets you snap windows to the left-hand or right-hand side of the screen. If you drag a window to the right or left, it will automatically resize and snap to the side.
To do this using the keyboard, press the Windows Key + the right or left arrow. Make sure to hold down the Windows key while pressing the left and right arrow keys. It’s actually pretty neat and much faster than dragging the window around the screen.
Method 3 – Multi-Monitor Setups
Lastly, for moving between multiple monitors, all you have to do is add SHIFT to the above key combo, so it would simply be Windows Key + Shift + right or left arrow.
For the power users who really want to control their windows, moving may not be enough. So here’s a few other shortcuts that could come in handy if you are left with nothing but a keyboard and Windows:
End – Will display the bottom of the active window (in case you need to scroll using the keyboard)
Home – Will display the top of the active window
F11 – Will either maximize or minimize the active window
Ctrl + Tab – If you have a window with tabs, then this will move you forward through the tabs
Ctrl + Shift + Tab – Will move you back through the tabs
Windows Key + Shift + Up Arrow – This will stretch a window to the top and bottom of the screen.
When you have a lot of different windows open on your PC, it can be infuriating to manage them. Switching back and forth can be a hassle when they are on top of each other.
Thankfully, the Windows operating systems come with keyboard shortcuts that you can use to move, select, and rearrange the windows across your screen(s). Many users still use their mouse to drag a window, but sometimes it is much more convenient to use the keyboard which automatically snaps windows according to your directions.
You may occasionally find yourself in a situation where a window on the secondary screen did not appear on your primary screen after disconnecting it. Or your mouse may not be functioning and you need to select and move windows using just your keyboard.
In this article, we show you all the different methods to move your windows using just the keyboard.
Table of contents
- How to Snap a Window using Keyboard
- How to Move a Window using Keyboard
- How to Move a Window to Different Screen using Keyboard
- How to Minimize/Maximize a Window using Keyboard
- How to Select a Window using Keyboard
- Select an Open Window using Alt + Tab Keys
- Select an Open Window using Ctrl + Alt + Tab
- Select an Open Windows using Task View
- Closing Thoughts
There are different ways to move or rearrange windows on a Windows PC. While some methods can be used to automatically align windows, others can be used to move them bit by bit until they are at your desired location.
How to Snap a Window using Keyboard
The Windows OS has a feature that automatically moves and snaps an app window according to the keyboard input. For example, if a window is open in the middle of the screen, you can move it to the right half of the screen, or the left half. Similarly, you can also arrange a window in each corner of the screen.
There are many other window layouts that you can set using just your keyboard. For these shortcuts to work, the window you want to snap must be selected. We have given the methods to select a window further down this article.
You will find the details for each keyboard shortcut to snap a window in this table:
| Keyboard Shortcut Keys | Action |
| Windows Key + Left Arrow | Snap the window to the left |
| Windows Key + Right Arrow | Snap the window to the right |
| Windows Key + Home | Minimizes all windows except the selected one. Press again to restore all windows again |
| Windows Key + Up Arrow | Maximize an open window/Opens a minimized window |
| Windows Key + Down Arrow | Restores a window to its original size if maximized/ Minimizes a window if in its original size |
| Windows Key + Shift + Up Arrow | Maximizes a window vertically |
| Windows Key + Shift + Down Arrow | Restores a window to its original size if maximized/ Minimizes a window if in its original size and unselects it |
We have also shared a few examples here:
-
To snap a window to the right side of the screen, press Windows Key + Right Arrow.
Snap window to the right -
To bring a snapped window to the left side of the screen from the right side, press and hold the Windows Key and then press the Left Arrow twice.
Snap window to the left -
To snap a window to the bottom-right corner of the screen, press Windows Key + Right Arrow, and then Windows Key + Down Arrow.
Snap window to the bottom-right of the screen -
To maximize a window vertically, press Windows Key + Shift + Up Arrow.
Maximize window vertically
How to Move a Window using Keyboard
When we use the word “move,” we mean an incremental move of a window. This means moving a selected window little by little. This can also be done using just the keyboard. However, this will only work on windows that are not maximized.
This method can also be used if a window is off-screen and you want to bring it to an active screen.
-
Press Alt + Spacebar shortcut keys to open the window’s menu.
Open menu -
Press “M” to select Move.
The mouse cursor will now turn into a cross with arrows and move to the title bar of the window.
-
Use the arrow keys to move the window in your desired direction.
-
When the window is in position, press Enter to exit the Move mode.
How to Move a Window to Different Screen using Keyboard
You can move a window to a different screen using the incremental move shortcut keys discussed above. But that would take a lot of time.
You can instantly shift a window to a different screen if you have multiple monitors using keyboard shortcuts.
| Keyboard Shortcut Keys | Action |
| Windows key + Shift + Left Arrow | Move the window to the screen on the left |
| Windows key + Shift + Right Arrow | Move the window to the screen on the right |
How to Minimize/Maximize a Window using Keyboard
There are also different methods to minimize and maximize windows in Windows OS. You can perform an action on a specific window or all of them. The table below lists the details and their respective key combinations:
| Keyboard Shortcut Keys | Action |
| Windows Key + Up Arrow | Maximize an open window/Opens a minimized window |
| Windows Key + Down Arrow | Restores a window to its original size if maximized/ Minimizes a window if in its original size |
| Windows Key + M | Minimize all windows |
| Windows Key + D | Minimize all windows and show the desktop |
| Windows Key + Home | Minimizes all windows except the selected one. Press again to restore all windows again |
| Windows Key + Shift + M | Open all minimized windows |
How to Select a Window using Keyboard
The keyboard shortcuts given above will only work if and when a window is selected.
There are multiple ways to select an open window in Windows OS.
Select an Open Window using Alt + Tab Keys
The most-used method to switch and select different windows is using the Alt + Tab shortcut keys from the keyboard. This is what most people use to switch between windows and cycle through them.
Using the Alt + Tab shortcut keys, the selected window is brought forward while all others remain in the background.
To select a window, hold down the Alt button and then press Tab. While holding the Alt button, repeatedly press the Tab button to cycle through the open windows.
Select an Open Window using Ctrl + Alt + Tab
Similar to using the Alt + Tab shortcut keys, you can also use the Ctrl + Alt + Tab shortcut key combination to cycle through the open windows. However, you only need to press it once.
Once you press the Ctrl + Alt + Tab shortcut keys, you will see a panel displaying the open windows. Let go of the keys. Then, use the arrow keys to cycle through the windows and press Enter on the window you want to select.
Select an Open Windows using Task View
This method does not apply to Windows 7.
Both Windows 11 and Windows 10 have a Task View feature, as well as a button built into the taskbar through which you can cycle through the open windows as well as the virtual desktops.
This a more sophisticated method that displays relatively larger previews of the open windows.
You can open the Task View panel by clicking on the button in the taskbar, or pressing the Windows Key + Tab shortcut keys.
When open, use the arrow keys to cycle through the app windows and hit Enter. You can also select a window using your mouse.
These are the methods to select a window, after which you can snap or move it using any of the methods shared above.
Closing Thoughts
We find it quite nifty to be able to perform many different window-related tasks using just our keyboard. To attain maximum productivity, the keyboard shortcuts can be used to go directly to the desktop or cycle between windows, as opposed to using the mouse cursor.
Introduction
When working on a computer, we often find ourselves needing to move a window to a different location on the screen. While many people rely on the mouse for this task, there are actually several shortcut keys available that can make the process quicker and more efficient. Whether you’re looking to rearrange your workspace or maximize your productivity, mastering these keyboard shortcuts can save you time and effort.
In this article, we will explore different shortcut keys that allow you to move a window using only your keyboard. We will cover various techniques that utilize different key combinations to achieve the desired results. By the end of this article, you will be equipped with the knowledge to effortlessly reposition windows on your screen, improving your workflow and overall user experience.
So, if you’re ready to take your computer skills to the next level and become a master of window movement, let’s dive in and discover the keyboard shortcuts that will revolutionize the way you interface with your computer.
Shortcut Keys to Move a Window
When it comes to moving a window on your computer screen, using keyboard shortcuts can be a game-changer. These shortcuts allow you to quickly and efficiently reposition windows without the need for a mouse. Let’s explore some of the most commonly used shortcut keys for moving windows:
- Using the Arrow Keys: By combining the Alt key with the arrow keys, you can move the active window in small increments. Pressing Alt + Up Arrow moves the window up, Alt + Down Arrow moves it down, Alt + Left Arrow moves it to the left, and Alt + Right Arrow moves it to the right. This method is perfect for fine-tuning the position of a window.
- Using the Alt Key: Pressing Alt + Spacebar opens the window’s system menu, where you can choose the “Move” option. Once the “Move” option is selected, you can use the arrow keys to move the window. This method is helpful when the window is partially off-screen or inaccessible using the mouse.
- Using the Windows Key: Pressing the Windows key + Shift + Left Arrow or Windows key + Shift + Right Arrow moves a window to the previous or next monitor in a multi-monitor setup. This shortcut comes in handy when you want to quickly rearrange windows across different screens.
- Using the Shift Key: Pressing the Shift key while dragging a window with the mouse locks its movement to a horizontal or vertical axis. This allows for precise alignment with other windows or screen elements. Additionally, combining Shift + Windows key + Left Arrow or Shift + Windows key + Right Arrow moves the window to the left or right half of the screen, making it easy to organize windows side by side.
- Using the Ctrl Key: Pressing Ctrl + Windows key + Left Arrow or Ctrl + Windows key + Right Arrow moves the window between virtual desktops, if supported by your operating system. This is useful for users who utilize virtual desktops to keep their workspace organized.
By mastering these shortcut keys, you can swiftly and effortlessly move windows on your computer screen. Whether you’re aiming for efficient multitasking or simply want to declutter your workspace, incorporating these shortcuts into your workflow will significantly boost your productivity.
Using the Arrow Keys
One of the simplest and most versatile ways to move a window with your keyboard is by utilizing the arrow keys. By combining the Alt key with the arrow keys, you can precisely adjust the position of the active window.
Here’s how you can use the arrow keys to move a window:
- Press and hold the Alt key on your keyboard.
- While keeping the Alt key pressed, use the arrow keys to move the window in small increments.
- Press the up arrow to move the window up, the down arrow to move it down, the left arrow to move it to the left, and the right arrow to move it to the right.
- Release the Alt key when the window is in the desired position.
This method is particularly useful when you need to make fine adjustments to the window’s placement. By incrementally moving the window with the arrow keys, you can achieve precise positioning to fit your workflow or screen layout.
Additionally, the Alt + Spacebar shortcut allows you to access the window’s system menu. From there, you can select the “Move” option, which activates the same arrow key movement functionality. This alternative method is helpful when the window is partially off-screen or difficult to reach using the mouse.
By mastering the arrow key shortcuts, you’ll be able to effortlessly and accurately move windows on your screen, improving your productivity and streamlining your workflow.
Using the Alt Key
The Alt key is a powerful tool when it comes to moving windows without the use of a mouse. By combining the Alt key with a few other keyboard shortcuts, you can easily reposition windows on your screen.
Here are some ways to use the Alt key to move a window:
- Press and hold the Alt key on your keyboard.
- While keeping the Alt key pressed, press the Spacebar. This opens up the window’s system menu.
- From the system menu, use the arrow keys to select the “Move” option and press Enter.
- Now you can use the arrow keys to move the window in small increments.
- Press the up arrow to move the window up, the down arrow to move it down, the left arrow to move it to the left, and the right arrow to move it to the right.
- Once the window is in the desired position, press Enter to set it.
The Alt key method is particularly useful when you need to move a window that is partially off-screen or inaccessible using the mouse. It provides a quick and efficient way to bring the window into view or reposition it to your liking.
By using the Alt key in combination with the system menu and arrow keys, you have fine-grained control over the window’s movement. This allows you to easily adjust the position of the window without the need for external devices or interruptions to your workflow.
Mastering the Alt key method will make you more proficient in moving windows and enhance your overall productivity when working on your computer.
Using the Windows Key
The Windows key is a powerful tool that can be used to quickly move windows on your computer screen, especially in a multi-monitor setup. By combining the Windows key with other shortcut keys, you can effortlessly reposition windows and organize your workspace.
Here are some ways to use the Windows key to move a window:
- Press and hold the Windows key on your keyboard.
- While keeping the Windows key pressed, press the Shift key and the Left Arrow key simultaneously to move the window to the previous monitor, or press the Shift key and the Right Arrow key simultaneously to move the window to the next monitor.
- Alternatively, you can use the Windows key + Shift + Left Arrow key or Windows key + Shift + Right Arrow key to achieve the same effect.
Using the Windows key method is particularly beneficial when you have multiple monitors connected to your computer. It allows you to easily shuffle windows between different screens, making it convenient to organize your workspace and utilize the available screen real estate effectively.
This shortcut is not only helpful for rearranging windows but also for improving workflow and multitasking. By quickly moving windows to different monitors, you can seamlessly transition between applications and tasks, enhancing your productivity and efficiency.
By mastering the Windows key shortcuts for moving windows, you’ll have greater control over your workspace, especially in multi-monitor setups. It’s a handy technique to streamline your workflow and make the most out of your computer’s capabilities.
Using the Shift Key
The Shift key can be a valuable tool for precisely aligning and rearranging windows on your computer screen. By combining the Shift key with other keyboard shortcuts, you can easily move and organize windows with accuracy.
Here are some ways to use the Shift key to move a window:
- Press and hold the Shift key on your keyboard.
- While keeping the Shift key pressed, click and drag the window with your mouse. This locks the window’s movement to a horizontal or vertical axis, allowing for precise alignment with other windows or screen elements.
- To move a window to the left or right half of the screen, press and hold the Shift key, then press the Windows key and the Left Arrow key simultaneously to move the window to the left half, or press the Windows key and the Right Arrow key simultaneously to move the window to the right half.
The Shift key method is particularly useful when you want to align windows side by side or organize them in a specific layout. By holding the Shift key while dragging a window, you can ensure that it moves in a straight line, maintaining its relative position with other windows.
Additionally, the Shift key in combination with the Windows key allows you to quickly snap windows to either the left or right half of the screen. This feature is handy for multitasking and working with multiple windows simultaneously, as it maximizes your screen real estate and improves your productivity.
By mastering the Shift key shortcuts for moving windows, you’ll have more control over the positioning and alignment of your windows. The ability to easily align windows and arrange them in a desired layout enhances your workflow and improves your overall user experience.
Using the Ctrl Key
The Ctrl key is a versatile tool that can be used in combination with other shortcut keys to move windows between virtual desktops. If your operating system supports virtual desktop functionality, this method can help you keep your workspace organized and improve productivity.
Here’s how to use the Ctrl key to move a window between virtual desktops:
- Press and hold the Ctrl key on your keyboard.
- While keeping the Ctrl key pressed, press the Windows key and the Left Arrow key simultaneously to move the window to the previous virtual desktop, or press the Windows key and the Right Arrow key simultaneously to move the window to the next virtual desktop.
Using the Ctrl key method is particularly beneficial for users who utilize virtual desktops to manage their workload. It allows you to quickly shift a window from one virtual desktop to another, providing a seamless and organized transition between different tasks or projects.
With virtual desktops, you can create separate workspaces for different purposes, such as work-related tasks, personal use, or specific projects. Being able to move a window to the desired virtual desktop with a simple key combination enables efficient task management and reduces clutter.
By mastering the Ctrl key shortcuts for moving windows between virtual desktops, you can optimize your workflow and easily switch between various tasks or projects without losing focus or disrupting your workspace.
Conclusion
Moving windows with keyboard shortcuts is a valuable skill that can greatly enhance your productivity and efficiency when working on a computer. By mastering the various shortcut keys available, you can easily rearrange windows, organize your workspace, and streamline your workflow.
In this article, we explored several keyboard shortcuts for moving windows, including utilizing the arrow keys, the Alt key, the Windows key, the Shift key, and the Ctrl key. Each method offers unique advantages and can be used in different scenarios, depending on your specific needs and preferences.
Using the arrow keys, in combination with the Alt key or the system menu, allows for precise adjustments and fine-tuning of window positioning. The Windows key shortcuts are particularly useful for users with multiple monitors, making it easy to move windows between screens and optimize screen real estate.
The Shift key method is ideal for aligning windows and maintaining their relative position, while the Ctrl key shortcuts come in handy for users who utilize virtual desktops to stay organized and manage their tasks efficiently.
By incorporating these keyboard shortcuts into your daily computer use, you can save time, reduce reliance on the mouse, and create a more seamless and efficient workflow. Experiment with these shortcuts and discover the ones that best suit your needs, allowing you to take full control of your window management experience.
So, let your fingers dance across the keys and master the art of moving windows with keyboard shortcuts. Elevate your productivity and experience a smoother, more efficient workflow as you effortlessly navigate and arrange windows on your computer screen.
