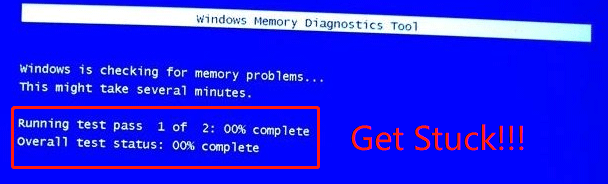
Microsoft provides Windows 10 and older systems users with a tool to verify and test the RAM. However, lots of users said that the tool stuck for ten hours or even an entire day. This is a bothering question, but the solution guide could do help. If you are beset with the issue, follow the solution guide to fix Windows Memory Diagnostic tool stuck.
In Windows 10 or older systems, users can run Windows Memory Diagnostic to verify and test RAM. Normally, the RAM verification in extended mode can finish in 15 minutes to over 20 hours, depending on the RAM size.
Tip: MiniTool Partition Wizard is a free tool for verifying and testing hard drives. For example, it can test the hard drive speed, and check if the hard drive has file system errors or bad sectors.
MiniTool Partition Wizard FreeClick to Download100%Clean & Safe
However, according to lots of users’ reports, this tool did not work as expected and get stuck at 1% or 21% for an entire day without any progression. In this case, some actions need to be taken, and they are displayed below.
Note: If the RAM verification is frozen at a point for less than 20 hours, it should not be a problem, and you should wait patiently until it finishes.
Fix 1: Switch to Cache On
Try to switch to the On mode in the Cache section. The steps are below:
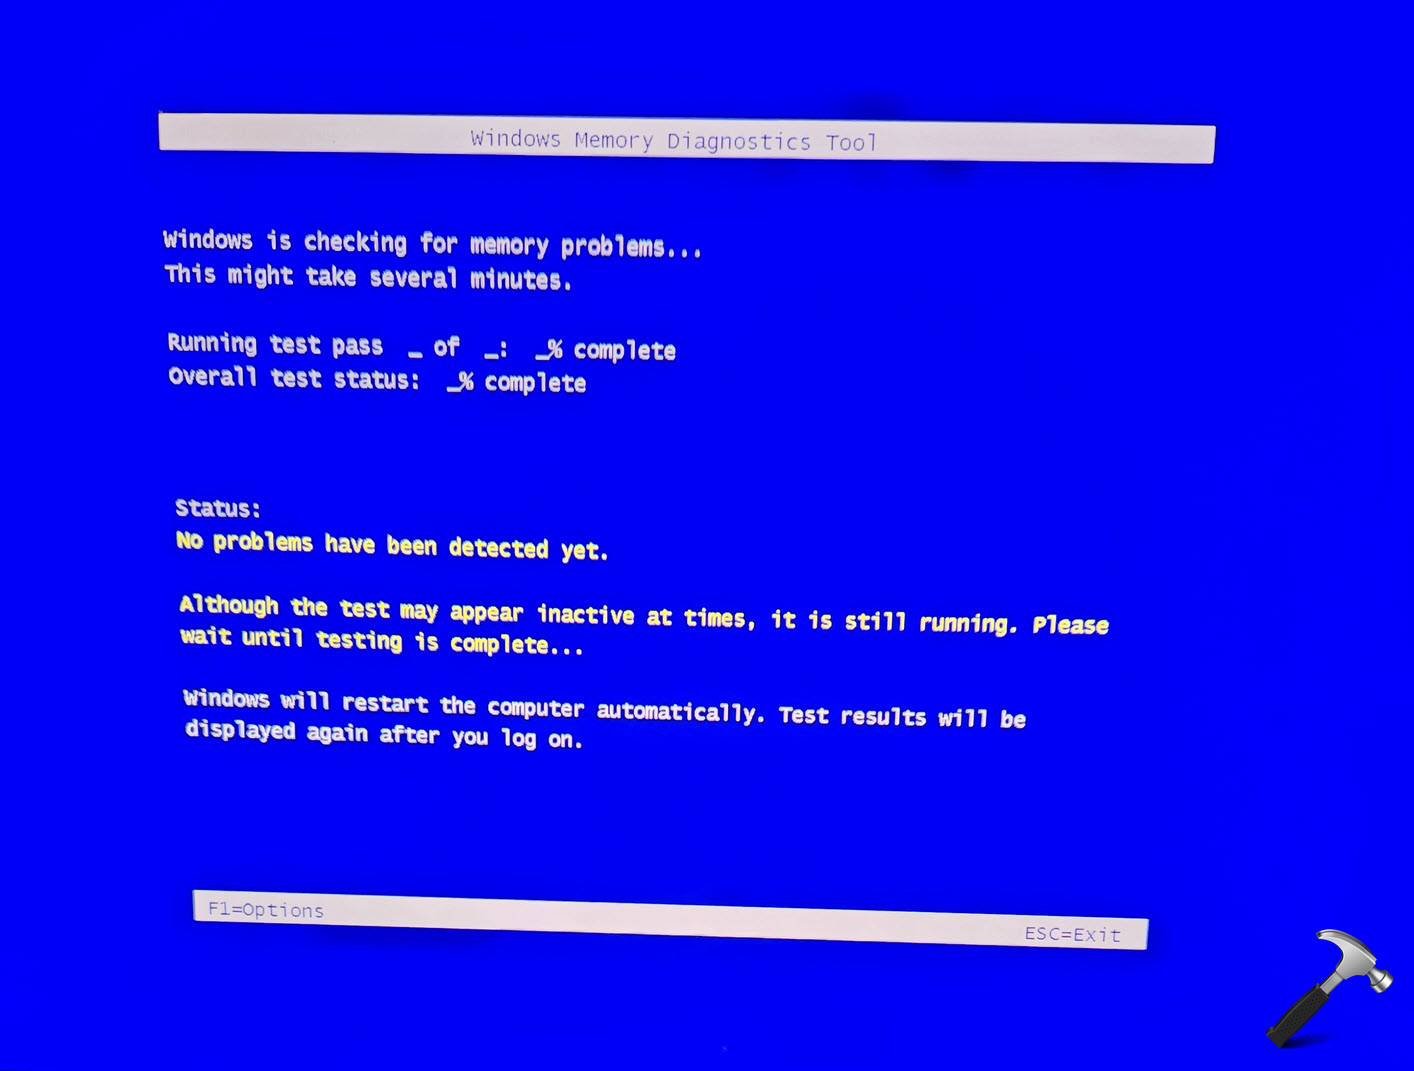
- On the blue screen of the memory test, press the F1 key for options.
- Use the Tab key to reach the Cache
- Press the Down Arrow key to select the On
- Press the F10 key to save the change and let the test go on.

Now check the issue like “Windows Memory Diagnostic tool stuck at 21”.
If the above solution is not helpful, there might be interference by third-party software, so please try running the tool after performing a clean boot.
Here is the tutorial:
Step 1: Press Windows + R to open the Run window.
Step 2: Input msconfig in the Run window and press the Enter key to open the System Configuration window.
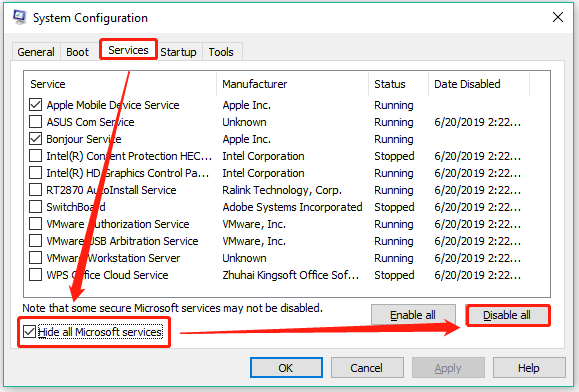
Step 3: On the pop-up window, switch to the Services tab. Then, tick the checkbox for Hide all Microsoft services and click the Disable all button.
Step 4: Click the Apply button to save the changes.
Step 5: Open Task Manager by right-clicking the Windows taskbar and choosing Task Manager.
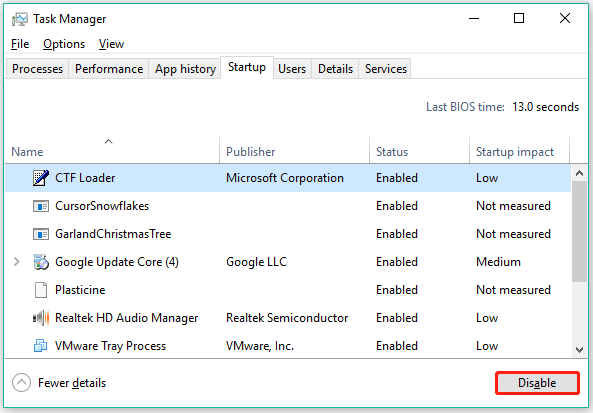
Step 6: On the Task Manager window, choose the Startup tab and disable all the services under the Startup tab.
Step 7: Close Task Manager and go back to the System Configuration window and click the OK button.
Step 8: Restart your computer.
Your computer will start in clean boot mode. Once it boots, run Windows Memory Diagnostic tool again and see if the tool works perfectly.
If the tool works fine after the reboot, it means that the “Windows Memory Diagnostic tool stuck at 21” resulted from the interference by the third-party software, and you can consider uninstalling recently installed programs that could have contributed to the issue.
Bottom Line
That’s all about how to fix “Windows Memory Diagnostic tool stuck”. Do you solve the issue by applying the above two fixing methods? If you have any other useful solutions, please share them with us. Thanks in advance.
Microsoft Windows comes with a handy tool to diagnose RAM issues on your system. Memory problems can cause your computer to lose information, or it may stop working in certain situations. Using the default Windows Memory Diagnostic tool, you can easily check your computer for memory problems. But at times, the Windows Memory Diagnostic tool gets stuck at 21%. If you frequently face the same, here are the top ways to fix the problem.
Depending on the RAM size, it takes around 15 minutes to 10+ hours to run the Memory Diagnostic tool on Windows. The tool getting stuck on 1%, 21%, or any percentage can confuse end users. While it’s normal for the app to get stuck on 21%, if the estimated time is more than 12+ hours, there might be a system glitch. Let’s troubleshoot the problem.
1. Wait for Some Time
As we mentioned earlier, it may take around up to 10 hours to run the Windows Memory Diagnostic tool on your computer. Sometimes, it gets stuck on 21% for more than five hours. It’s completely normal. You should only start sweating when the tool is stuck for more than 10 hours. If you don’t see any movement within 10 hours, it’s time to go through the steps below to troubleshoot the problem.
2. Disable All Services and Try Again
You should disable apps and services running in the background and try your luck with Windows Memory Diagnostic tool again. You shouldn’t disable required Microsoft services at startup, though. You may encounter glitches during the reboot process.
Step 1: Press Windows + R keys to open the Run menu.
Step 2: Type msconfig and hit the Enter key to open the System Configuration menu.

Step 3: Enable the Hide all Microsoft services option.
Step 4: Click Disable all and move to the Startup tab.

Step 5: Open Task Manager from the following menu.

Step 6: Disable all startup apps and services from the following menu.

Reboot your computer and start the system in Clean Boot mode. You can run the Windows Memory Diagnostic tool again and check RAM problems without any issues.

3. Enable Cache
You can enable cache while running the Windows Memory Diagnostic Tool.
Step 1: When you are on the blue screen of the Memory Diagnostic tool, press the F1 key.
Step 2: Use the Tab key to move down to the Cache option.
Step 3: Select On and hit F10 to apply the change.
4. Use MemTest86
The MemTest86 trick will help you determine if the Windows Memory Diagnostic tool getting stuck at 21% is due to the physical RAM or any issue with the software itself.
First, make sure you have a bootable USB stick with you and follow the instructions below to run Windows Memory Diagnostic tool without any issues.
Step 1: Head to the official website to download MemTest86 on your computer.

Step 2: Open File Explorer (use Windows + E keys) and find your downloaded file.
Step 3: Right-click on the folder and select Extract All from the context menu.

Step 4: Connect your USB drive to the computer.
Step 5: Run the imageUSB.exe file from the extracted folder.

Step 6: Make sure to detect the connected drive in the ImageUSB window.
Now turn off your computer, plug in a USB pen drive, and turn on the system. The tool will automatically run after you restart the computer.
5. Run Windows Security Tool
Do you frequently download apps and media files from unknown sources on the web? You might have infected the PC with bogus files. Instead of trying any random third-party anti-virus app, use the built-in Windows Security tool to remove malicious files and run the Windows Memory Diagnostic tool without any issues.
Step 1: Press the Windows key and search for Windows Security.
Step 2: Hit Enter to open the app.

Step 3: Select Virus & threat protection from the left sidebar.
Step 4: Run a quick scan on your computer and remove harmful files.

Try running the Windows Memory Diagnostic tool again, and it won’t get stuck to 21%.
Identify RAM Issues on Windows
Windows Memory Diagnostic tool getting stuck at 21% can confuse you. Instead of waiting for hours, use the tricks above and fix such glaring issues in no time.
Иногда диагностические инструменты Windows сами нуждаются в диагностике. Вот как освободить инструмент диагностики памяти Windows
 Image Credit: borevina/Shutterstock.
Средство диагностики памяти Windows – это полезная программа, которая проверяет оперативную память на наличие потенциальных проблем. Обычно она находит и устраняет проблемы, которые могут привести к снижению производительности системы, частым зависаниям и зависаниям, а также к появлению синих экранов
Система обычно автоматически предлагает запустить Memory Diagnostic Tool, когда вы начинаете испытывать любую из вышеперечисленных проблем, но вы можете запустить ее и вручную. Хотя инструмент обычно выполняет свою работу без проблем, бывают случаи, когда с ним могут возникнуть проблемы, например, когда он застревает в процессе сканирования
Ниже мы рассмотрим методы устранения неполадок, которые можно попробовать, если вы столкнулись с проблемами при использовании инструмента диагностики памяти на компьютере под управлением Windows
Каковы некоторые потенциальные причины проблемы?
В большинстве случаев инструмент диагностики памяти застревает либо в середине выполнения сканирования, либо когда пользователи анализируют результаты диагностики памяти. Инструмент диагностики памяти является отличным способом решения проблем с памятью Windows, поэтому его неработоспособность может стать большой проблемой
- Приложение или фоновый процесс могут помешать работе средства диагностики памяти, что приведет к его зависанию и сбою.
- Сам инструмент может страдать от неприятной ошибки или повреждения данных, что мешает ему работать должным образом.
- Или же повреждение данных может повлиять на другой компонент системы, что приводит к сбою в работе Memory Diagnostic Tool.
Теперь, когда мы знаем о возможных причинах, давайте рассмотрим различные методы устранения неполадок, которые можно попробовать, чтобы снова заставить Memory Diagnostic Tool работать
1. Подождите
2. Запустите программу в состоянии чистой загрузки
- Введите msconfig в поиске Windows и нажмите кнопку Открыть для Конфигурации системы.
- В следующем диалоговом окне перейдите на вкладку Службы и установите флажок Скрыть все службы Microsoft.
- Нажмите Отключить все.
- После этого запустите диспетчер задач и перейдите на вкладку Startup tab.
- Щелкните правой кнопкой мыши на приложениях здесь по одному и выберите Отключить.
- Теперь вернитесь в диалог Конфигурация системы и нажмите кнопку OK.
Теперь вы можете перезагрузить компьютер (или позже), и после перезагрузки ваша система автоматически запустится в состоянии Clean Boot. Попробуйте снова запустить Memory Diagnostic Tool и проверьте, есть ли проблемы на этот раз. Если инструмент работает нормально в этом состоянии, то лучше всего определить виновника в системе и устранить его, чтобы избежать подобных проблем в будущем. Для этого сначала можно попробовать удалить недавно установленные программы. Если вы не уверены в том, что это именно те программы, снова откройте диалог конфигурации системы и перейдите на вкладку Службы. Теперь вы должны увидеть список всех доступных приложений на вашем компьютере. Начните с разделения доступных служб на две части. Затем включите все службы в первой части и посмотрите, возникнет ли проблема. Если да, значит, виновником является одно из приложений из первой части. Продолжайте искать проблемное приложение, пока не найдете его. Этот процесс занимает много времени, поэтому мы рекомендуем приступать к нему только в том случае, если другие методы, упомянутые в данном руководстве, не помогли вам
3. Включите кэш инструмента диагностики памяти
- На экране проверки памяти нажмите клавишу F1.
- Перейдите в раздел Cache, нажав клавишу Tab, а затем с помощью клавиши со стрелкой выберите опцию On.
- Нажмите клавишу F10 , чтобы ввести изменения и проверить, есть ли разница.
4. Если ничего не получается, проверьте память с помощью другого инструмента
Проверьте оперативную память компьютера без проблем
Вы уже должны были решить проблему с помощью вышеупомянутых методов устранения неполадок. Если же ни один из предложенных способов не помог, попробуйте сообщить о проблеме в официальную службу поддержки Microsoft. Пока они не выпустят официальное исправление проблемы, вы можете попробовать использовать аналогичное решение сторонних производителей для устранения проблемы.
Windows comes with a Memory Diagnostic tool that helps verify and test the RAM of your device. Users launch it to check the RAM for any issues present. However, some users face that this tool is stuck or working improperly in their system. In this article, we have suggested three ways you can fix Windows memory diagnostic tool stuck or not working in your Windows OS.
Page Contents
Depending on the RAM size, the Memory Diagnostic Tool can take anywhere from 15 minutes to more than 20 hours in the extended mode to finish its testing process. The app is generally known to get stuck at 1% and 21% progression for hours. It could be due to some system glitch. When this happens, you can try the following fixes.
Fix 1: Perform a Clean boot before running the tool
This could be your solution if a third-party software is preventing this tool from completing the test. The Windows starts with a minimal set of drivers and startup apps in the clean boot mode. It allows you to determine if the background program/app is interfering with other programs. To perform a clean boot, follow the steps below.
- Open the Start Menu and search for System Configuration.
- In the Windows that opens, go to Services tab.
- Check the Hide all Microsoft services box. Then, click on Disable all.
- Click Apply to save the changes.

- Now, right click on the Windows icon and go to Task Manager in the menu that pops.
- Open Startup apps tab.
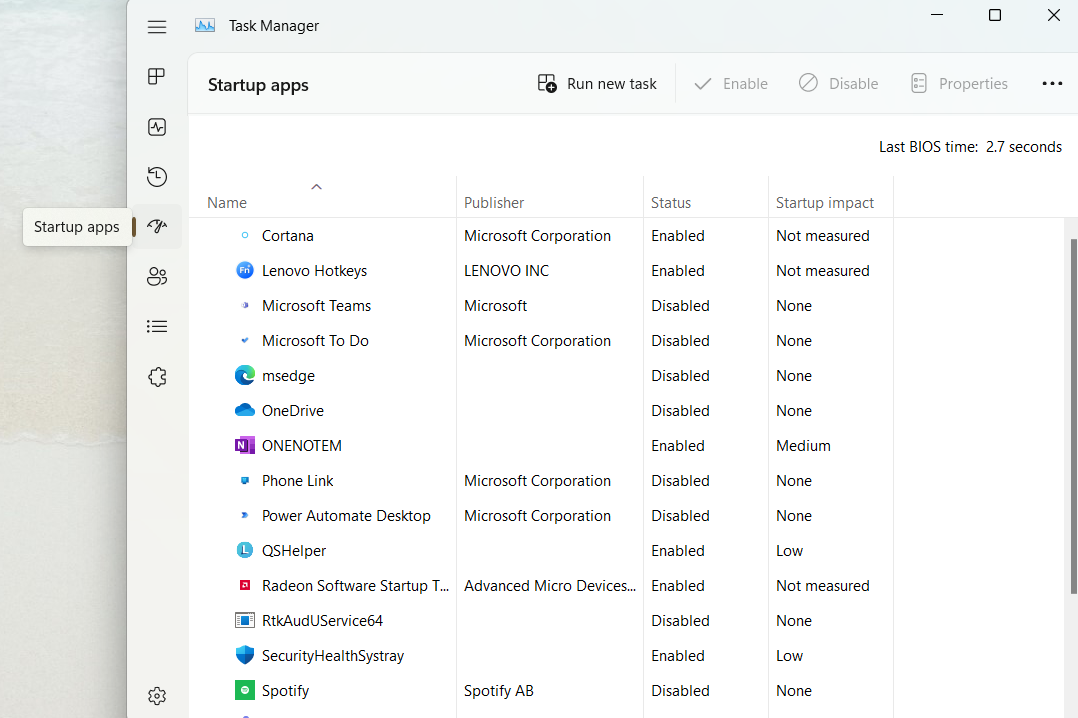
- One by one, click on all the items that have their status as enabled, and click on the disable button.
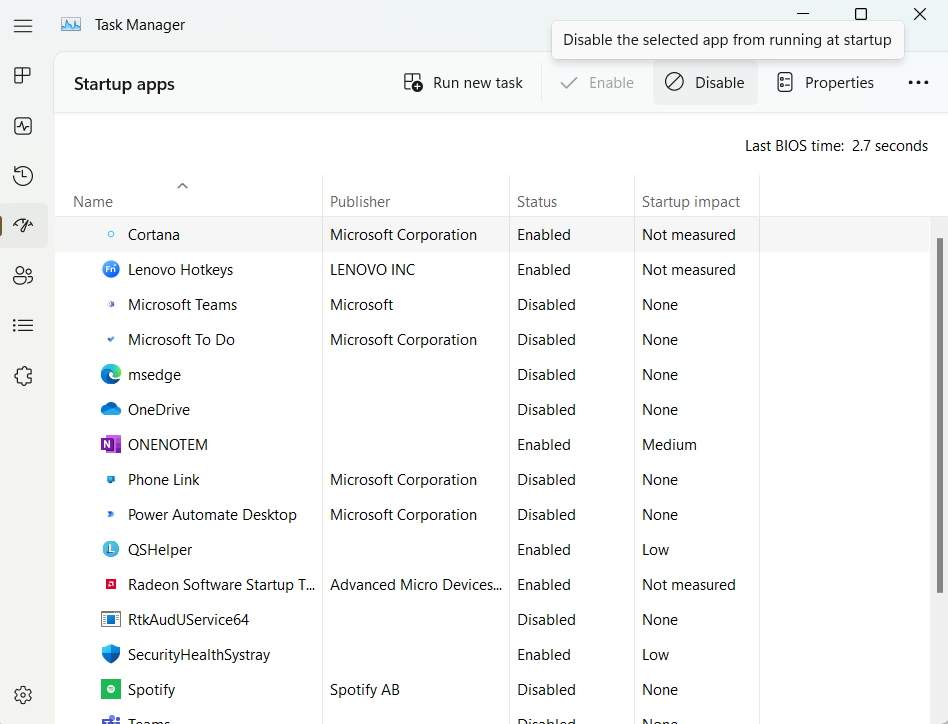
Do ensure that all the services in the Startup apps tab have their status as Disabled.
- Close the Task Manger and go to the System Configuration Window. Click OK.
Now Restart your PC. Your system will start in a Clean Boot mode. Try running the tool again and see if the issue is resolved.
Fix 2: Use MemTest86
Using Memtest86 will help you determine whether the issue is with the RAM or the tool. If this test completes without any error, you will need to run the memory diagnostic tool once again to check if the issue at hand is solved. To run the test, you first need to make sure that you have a working USB drive and that it is empty, as it is to be used as a bootable drive. Follow the steps below to go ahead.
- Download MemTest86 from its website (https://memtest86.com).
- When it is done, right click on the downloaded folder and select Extract All. And then click on Extract.
- Next, connect the USB drive with your device.
- From the recently extracted folder, run imageUSB.exe file in your system.
- When the connected and detected drive is ensured, click on the Write button.
- The process will take some time. Once it is done, close the ImageUSB tool by clicking on Exit.
All you need to do now is to shut down your PC, Insert the USB flash, and restart the system. The tool will automatically run after your PC Restarts.
Fix 3: Wait till the tool completes the process
At times, tool being stuck for a few hours is not a glitch. When run in extended mode, it may get stuck at 21%, 88%. 89%, and 90% progress for more than 4 hours. Unless the progress is stuck at 21% for an entire day, you can let it run and finish the process without any interruption.
Of course, you have a couple fixes suggested here to try if it is stuck for an entire day without any progress.
Hence, we have covered all the fixes you can try on your own. If the problem still persists, the issue could be deeper, and you would probably need PC repair tool to fix it. You need to simply download and install it from the web, Start the Scan and select the option of Repair All. This ultimate solution will fix the problem for sure.
READ THESE ARTICLES NEXT
- Fix: Troubleshooters not working on Windows 11
- Run troubleshooter from command-line in Windows 11
- Fix: Insufficient system resources exist to complete the requested service
- Fix: High Hardware Reserved Memory in Windows 11
- Fix: Windows Online Troubleshooting Service is disabled
- For your security, some settings are managed by your system administrator
- Fix: The device is being used by another application in Windows 11/10
- Fix: Your system requires SMB2 or higher in Windows 11/10
- Fix: NET::ERR_CERT_INVALID in Google Chrome
- Fix: Audio enhancements tab missing in Windows 11/10/8.1