Главная » Windows » Проверка памяти с помощью Windows Memory Diagnostic
В прошлой статье я говорил о том, что может служить причиной появления различных ошибок в системе и экранов смерти. Так, мы разобрали, что для выявления этих ошибок можно воспользоваться программами Memtest86, Memtest86+ и программа от Microsoft – Windows Memory Diagnostic. Сегодня я опишу, как пользоваться Memory Diagnostic.
Итак, одним из уязвимых мест в ПК является оперативная память. Но, как показывается практика, иногда планки памяти выходят из строя или же повреждаются, из-за этого могут возникать ошибки. Чтобы убедится в том, что виновата все-таки оперативная память, воспользуемся специальной утилитой.
Утилита Memory Diagnostic Tool – это программа, которая выполняет тесты оперативной памяти под высокой нагрузкой. Она является компонентов версий Windows и способна выявить различные ошибки чипа памяти.
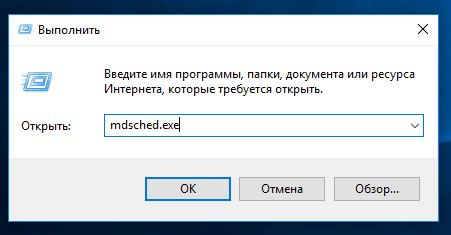
Теперь перейдем к делу. Эта утилита находится на системном диске, поэтому, мы сможем ее запустить из диалогового окна «Выполнить». Для этого нажимаем Win+R и вводим фразу mdsched.exe.
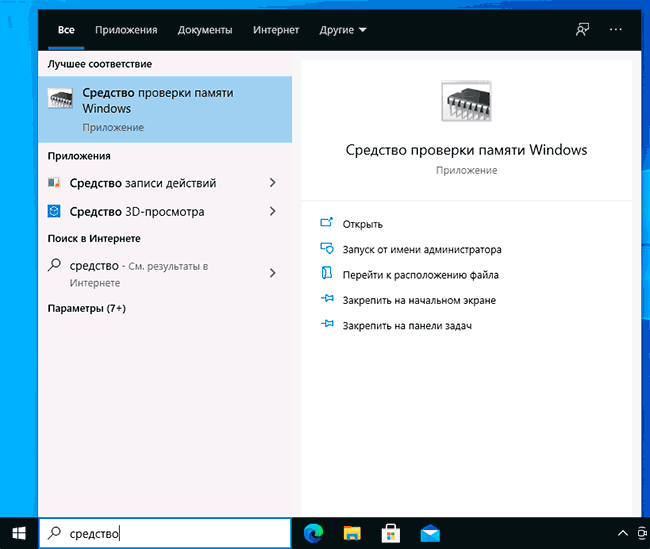
Если вы пользуетесь Windows 8.1, то вы можете в поиске ввести «w m d» и тогда, в результатах поиска вы увидите утилиту.

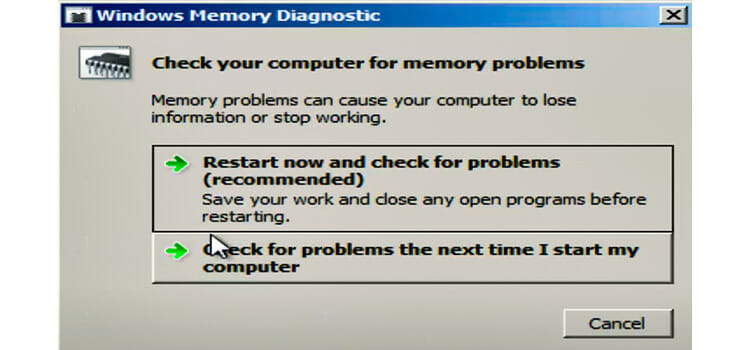
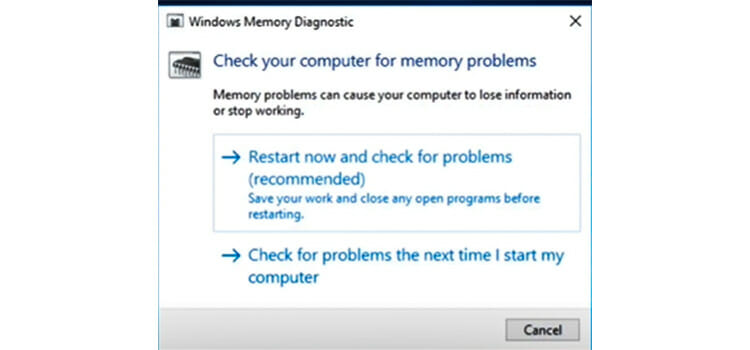
Нажали? Перед вами должно появится окно «Средство проверки памяти Windows», где видно два варианта проверки. Первый позволяет сразу же перезагрузить компьютер и начнет диагностику. Второй вариант будет работать при следующем включении компьютера.
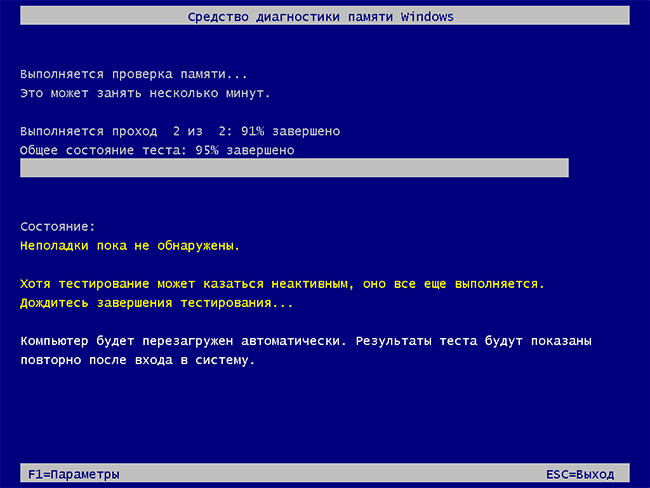
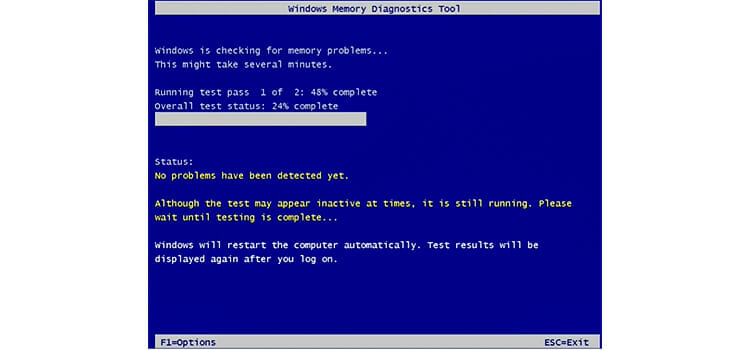
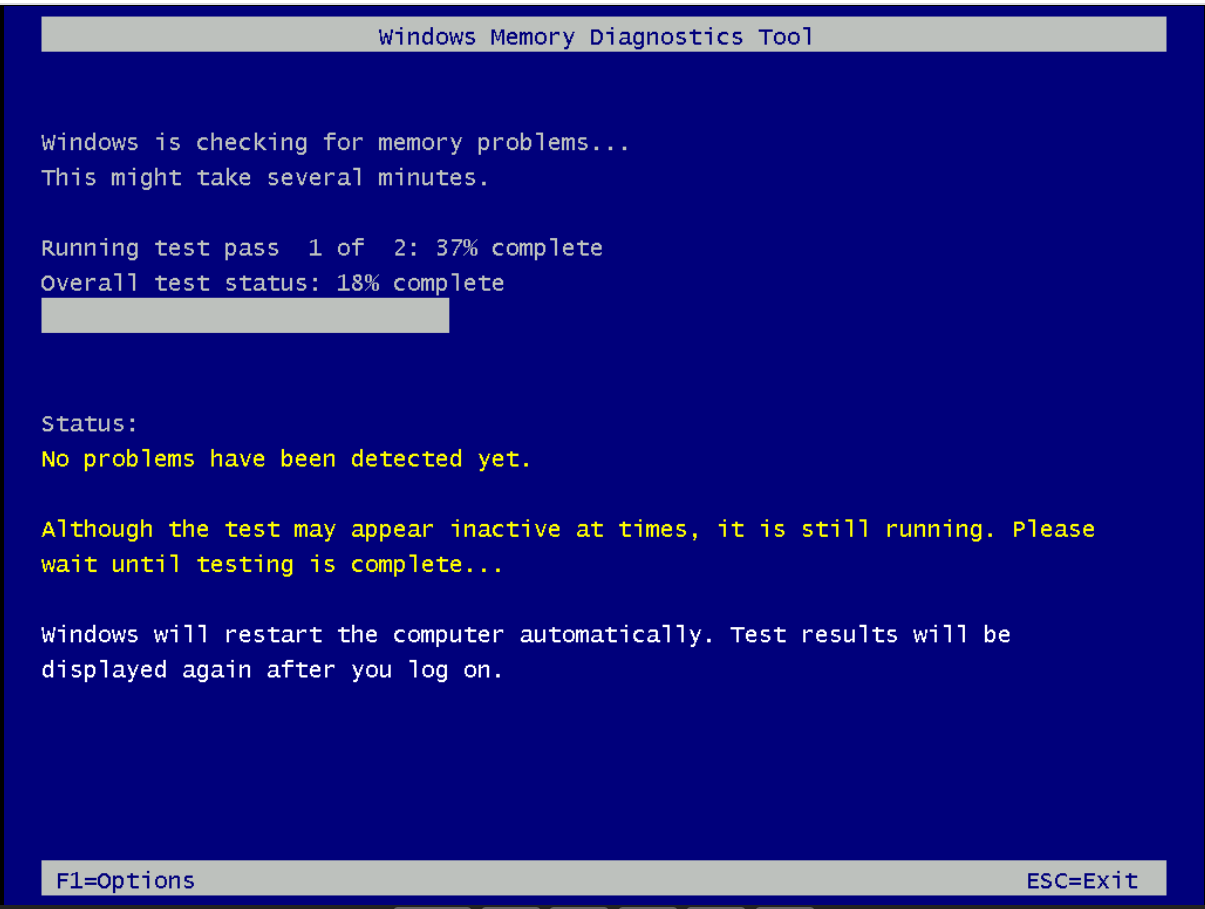
Как только выбрали первый вариант, то на экране вы увидите, как идет процесс диагностики памяти.
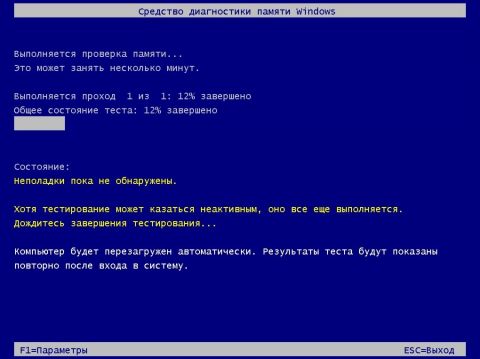
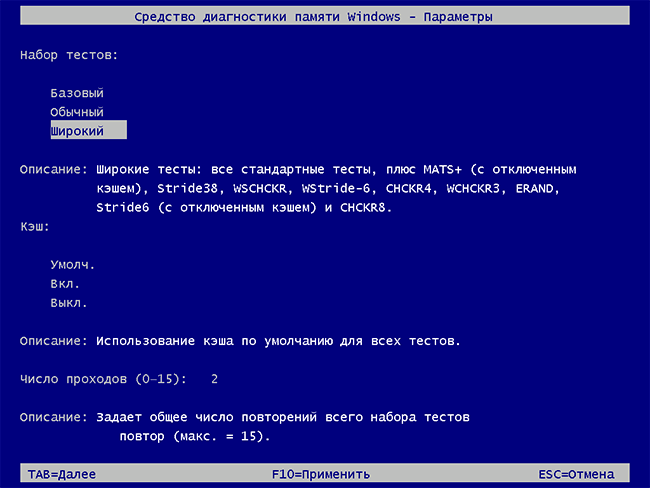
Во время проверки нажмите на клавишу F1, таким образом, откроется выбор типов диагностики: Basic, Standard, Extended (Простой, стандартный, расширенный). Любой из этих пунктов влияет на то, сколько вы будете ждать, пока проверка будет завершена. Метод Extended, конечно, будет эффективнее, но и ждать придется не мало.
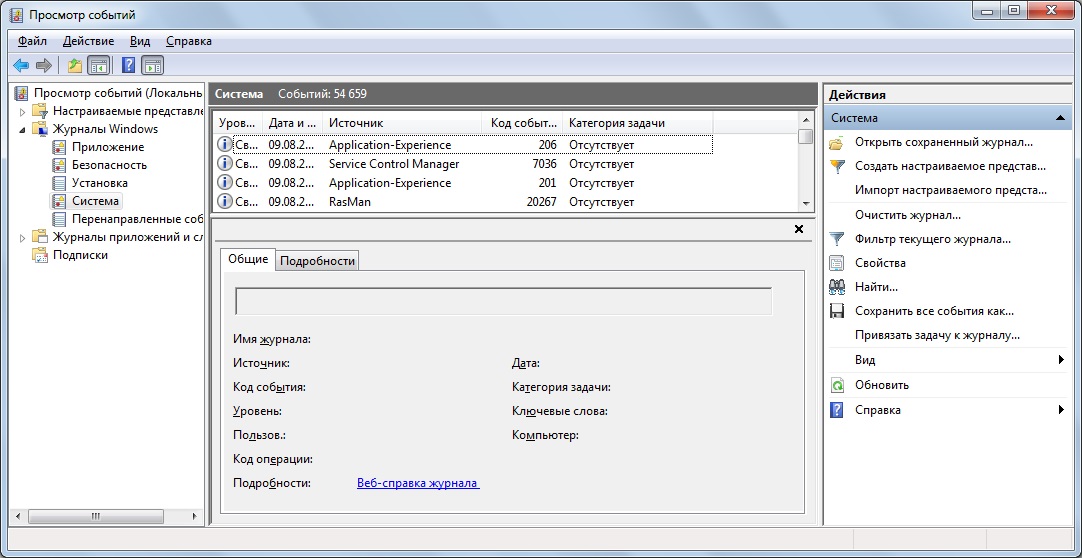
Как только диагностика памяти завершится, компьютер перезагрузится. Результаты вы можете посмотреть в «Просмотр событий». Чтобы туда попасть можно в строке поиске ввести эту фразу. Переходим в «Журналы Windows», потом «Система», в правой части окна ищем «Диагностика памяти» или «Memory Diagnostic».
Данный анализ должен показать присутствие ошибок в оперативной памяти, если же их не обнаружилось, то стоит искать причину неисправности системы в другом, возможно, что виноват какой-то другой компонент компьютера.
Новые материалы: Как проверить оперативную память на ошибки и неисправность?
( 4 оценки, среднее 3 из 5 )
 Если сбои системы, синие экраны BSoD или иные проблемы при работе Windows 10, 8.1 или Windows 7 наводят вас на мысли о том, что имеются какие-либо проблемы с оперативной памятью компьютера, может иметь смысл выполнить её проверку, а начать можно со встроенного средства диагностики проверки памяти Windows.
В этой инструкции подробно о способах запустить средство проверки памяти средствами Windows, причём даже в тех случаях, когда вход в систему невозможен, а также о возможных вариантах действий в случае, если в результате теста средство диагностики памяти сообщает о том, что были обнаружены проблемы оборудования. На схожую тему: Устранение неполадок Windows 10.
- Способы запуска средства проверки памяти
- Использование средства и просмотр результатов
- Обнаружены проблемы оборудования в средстве диагностики памяти
- Видео инструкция
Как запустить средство проверки памяти в Windows 10 и предыдущих версиях системы
В случае, если операционная система запускается, вход в неё и работа возможны, вы можете использовать один из следующих вариантов запуска средства проверки памяти:
- Найти нужный пункт в разделе «Средства администрирования Windows» меню «Пуск».
- Нажать клавиши Win+R на клавиатуре, ввести mdsched.exe и нажать Enter.

- Открыть панель управления, выбрать пункт «Администрирование» и запустить «Средство проверки памяти Windows».
- Использовать поиск в панели задач Windows 10, начав вводить «Средство проверки памяти». Или встроенные средства поиска в предыдущих версиях ОС.

- Вручную запустить файл C:\Windows\System32\MdSched.exe

Если же ситуация осложняется тем, что Windows не запускается, вход в неё невозможен, либо сразу после него происходят сбои, можно использовать следующие способы запуска средства диагностики оперативной памяти:
- Загрузить компьютер или ноутбук с загрузочной флешки с Windows 10 или другой версией Windows, можно и с загрузочного диска. На экране программы установки нажать клавиши Shift+F10 (Shift+Fn+F10 на некоторых ноутбуках), ввести mdsexe в открывшейся командной строке и нажать Enter. После выбора в утилите проверки пункта «Выполнить перезагрузку и проверку», загружайте компьютер не с флешки, а с обычного загрузочного HDD или SSD.

- Средство проверки памяти можно запустить из среды восстановления Windows 10 — нажав кнопку «Дополнительные параметры» на синем экране с ошибкой или, находясь на экране блокировки Windows 10 (с выбором имени пользователя) нажать по изображенной справа внизу кнопке «Питания», а затем, удерживая Shift, нажать «Перезагрузка». В среде восстановления выбираем «Поиск и устранение неисправностей» — «Дополнительные параметры» — «Командная строка». А в ней, как и в предыдущем случае используем команду mdsched.exe.

- Если у вас есть подготовленный диск восстановления Windows, запуск можно осуществить, загрузившись с него.


Использование средства проверки памяти Windows и просмотр результатов

После запуска средства проверки памяти вам будет предложено перезагрузить компьютер, после согласия, процесс будет выглядеть следующим образом:
- Начнётся проверка оперативной памяти, которая может занять продолжительное время. Может показаться, что средство диагностики зависло: на всякий случай подождите в такой ситуации 5-10 минут. Если же действительно произошло зависание, не исключено что есть проблемы с оборудованием, вероятно — с оперативной памятью, но не обязательно.

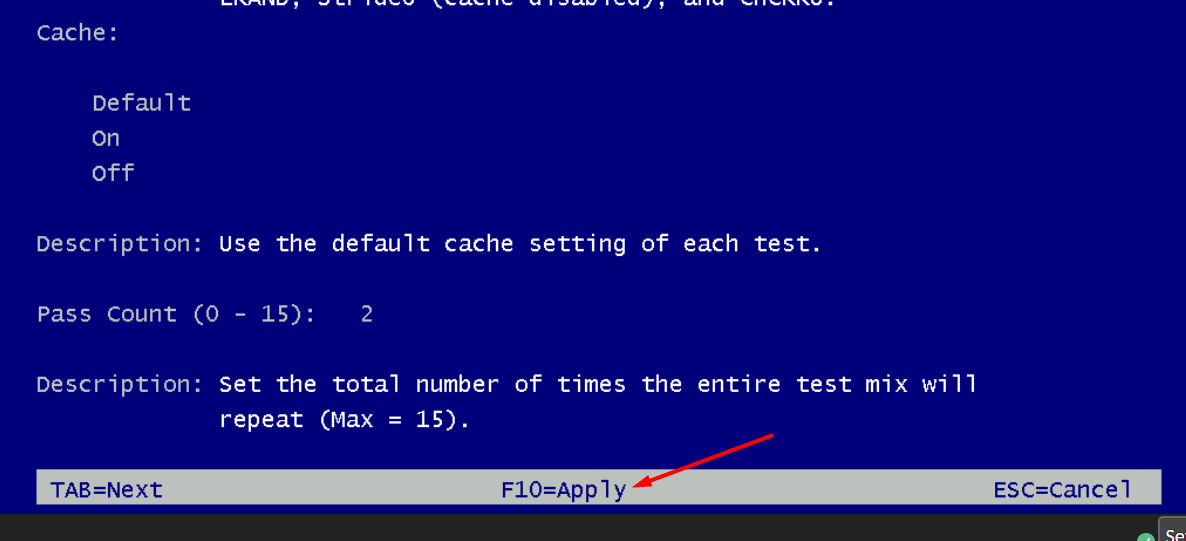
- Если в ходе проверки нажать клавишу F1 (или Fn+F1, если F1 не срабатывает), вы попадёте в настройки средства диагностики памяти Windows. Здесь можно выбрать набор тестов (по умолчанию — обычный), использование кэша, и число проходов. Переключение между разделами настроек выполняется клавишей Tab, изменение параметров — стрелками и вводом цифр (для числа проходов), применение параметров — клавишей F10. После изменения настроек тест перезапускается.
- В ходе проверки вы будете видеть информацию вида «Неполадки пока не обнаружены» или «Были обнаружены проблемы оборудования».
После завершения проверки компьютер будет автоматически перезагружен. Дальнейшие шаги — просмотр результатов.
- После перезагрузки в случае Windows 10 вы можете увидеть уведомление в области уведомлений, сообщающее о результате проверки памяти. Но оно отображается не всегда.
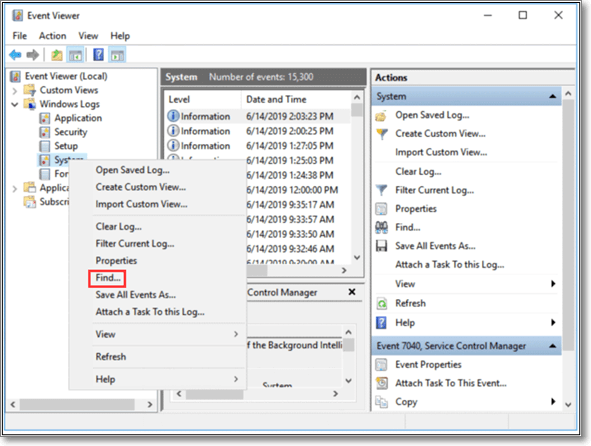
- Можно зайти в просмотр событий, для этого нажимаем Win+R, вводим eventvwr.msc и нажимаем Enter. Там открываем раздел «Журналы Windows» — «Система», находим пункты, где в столбце «Источник» указано MemoryDiagnostics-Results и просматриваем результаты.


Учитывайте, что ошибки, «вылеты», синие экраны и зависания не всегда связаны с проблемами оперативной памяти: если средство диагностики показывает, что всё в порядке, есть и иные возможные причины: отключенный файл подкачки, проблемы с HDD или SSD (или с их подключением, например — неисправный кабель), сторонние антивирусы или, наоборот, вредоносные программы, неправильная работа драйверов оборудования.
Что делать, если были обнаружены проблемы оборудования в средстве диагностики памяти
К сожалению, средство диагностики не сообщает о том, какие именно проблемы были обнаружены в ходе проверки, а лишь рекомендует обратиться к производителю оборудования. Что можно сделать:
- Отключить любые опции ускорения памяти (изменение частоты, таймингов и другие) при наличии соответствующих опций в БИОС или ПО производителя материнской платы или ноутбука.
- Попробовать проверить планки памяти по одной, в других слотах на материнской плате для того, чтобы выяснить, появляются ли проблемы только с одним конкретным модулем памяти или в одном конкретном разъеме.
- Использовать другие утилиты для проверки оперативной памяти при необходимости.
- Прочитать документацию к материнской плате ПК — возможно, это какая-то несовместимость с памятью с конкретными характеристиками (если вы недавно добавили новые модули памяти или только что самостоятельно собрали компьютер).
- Иногда может помочь обновление БИОС.
Видео инструкция
Если вы разобрались, чем была вызвана именно ваша проблема, буду благодарен комментарию к статье: возможно, для кого-то он окажется полезным.
With keen eyes glued on the monitor, you are typing an important mail, or handling serious office work. Suddenly, your screen turns blue. Your RAM just crashed and your unsaved works are gone. Has it ever happened to you? You are not alone. Memory problems can be quite annoying and it can be a side effect of old Windows or frequent use of corrupt files. Here the Windows Memory Diagnostic tool comes handy. It comes pre-installed with some versions of Windows and takes at best 5 minutes to run and find out the actual problem with your memory.
Table of Contents
- Common RAM Problems
- What is the Windows Memory Diagnostic Tool?
- How to Use the Windows Memory Diagnostic Tool
- For Automatic Memory Diagnosis
- For Manual Memory Diagnosis
- Find Memory Diagnostic Result
- Advanced Options
- Disable Windows Memory Diagnostic Tool
- Conclusion
Common RAM Problems
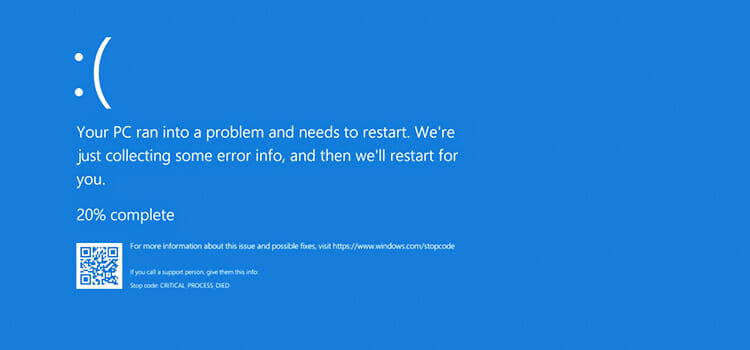
The computer memory that temporarily saves your data while you typing, browsing, or playing games is called RAM (random access memory). It is very important as it provides a memory space for your short time activity, multitasking, and switching between your tasks. With any problem with your RAM, you may face BSOD (blue screen of death), slower speed, freezing in switching between tasks, a random crash of memory, sudden reboot, repeated booting, graphics problem, screen blacking, etc.
All these are quite annoying as the user experiences frequent disrupt in working with the computer. How can you solve it? Well, before solving any problem, you have to find out exactly what is causing the problem? Once you find it, the solution becomes much easy.
What is the Windows Memory Diagnostic Tool?
Every time you power on your computer, it performs pretty basic diagnostic tests to find any issues with hardware. But any problem causing by bad RAM requires elaborate testing. Windows Memory Diagnostic is an excellent tool for this purpose. It comes pre-installed and is supported for the older versions of Windows (Windows Vista, Windows 7) to the newest ones like Windows 10. It is free software and basically, anyone can run the test.
How to Use the Windows Memory Diagnostic Tool
For Automatic Memory Diagnosis
- Save your works. As the Windows Memory Diagnostic tool scans the memory and requires rebooting your computer, any unsaved work will be lost. So, save your work in permanent memory before you run the test.
- If you get a notification that your memory might have some problem, click on the notification for setting up the time of the rebooting of your computer.
- After restarting, the diagnostic tool will test your memory automatically. This might take a couple of minutes. The issues will be pointed out at Event Viewer.
For Manual Memory Diagnosis
- Make sure to save your works.
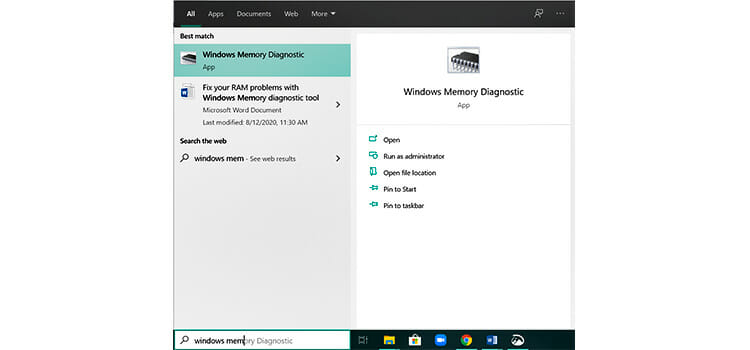
- Go to search option of Windows and type and select ‘Windows Memory diagnostic’.
3. Choose ‘Restart now’ to restart your computer. After the first restart, the diagnostic tool diagnoses the memory. Wait patiently for a few minutes. After the second restart, you a good to use your computer.
Find Memory Diagnostic Result
- After the diagnosis, you can find the result either from clicking on the notification or from the Event Viewer.
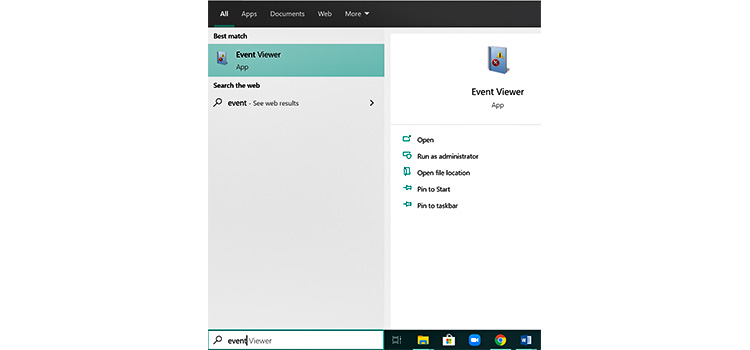
- From the search bar type and select ‘Event Viewer’.
3. From there go to Windows logs > Systems.
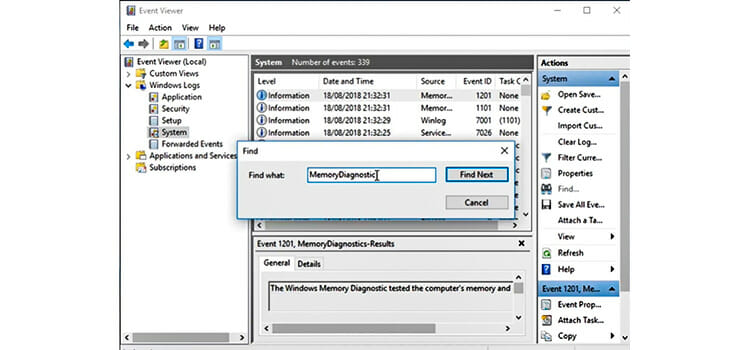
3. From the right of the window select ‘find’.
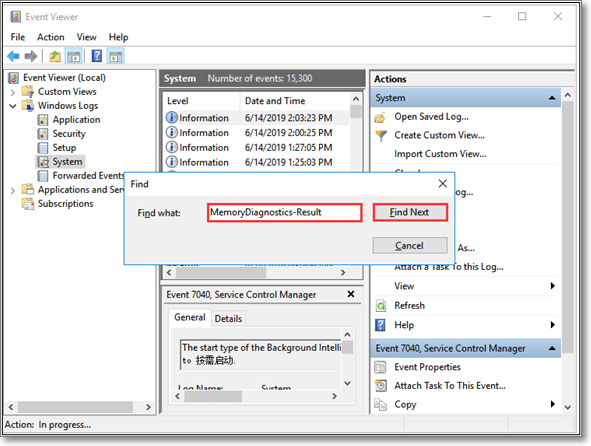
4. A pop-up window will appear with a search box. Type ‘MemoryDiagnostic’ and click on ‘find next’.
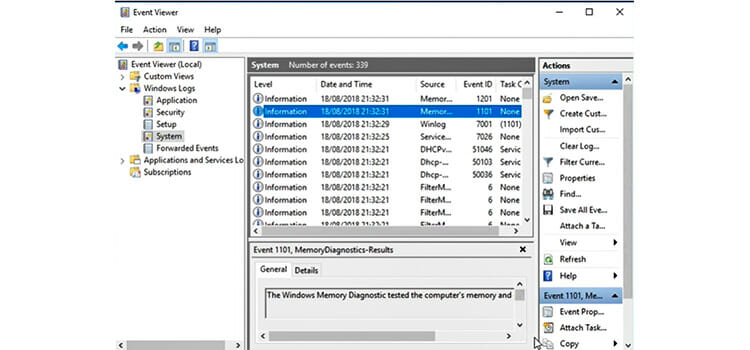
5. The upper box will show the memory scan and the lower box show individual detail. You can also double-tap an item for details.
6. If you find any issue with the memory, check and remove all the RAM sticks, and perform the diagnosis with each stick. It is an easy way to find out a bad stick and replace it.
Advanced Options
With this option, you change the setting in the Windows Memory Diagnostic tool. Follow the process,
- Run the Windows diagnostic tools following the details stated above.
- After starting the process, press F1.
- You can change the settings to run a Basic, Standard, or Extended test. You can also select the number of times the test should perform as well as the cache setting.
- After setting according to your liking, press F10 to start the process of diagnosis.
The common problem users face after running the Windows Memory Diagnostic tool is that it keeps running on the background every time they boot the PC. You can kill it from the task manager, but this method is not permanent. To fix the problem follow the steps,
- Go to Control Panel > Administrative tools > Task Scheduler > Windows Memory Diagnostic and kill the task.
- Delete any reference to the program.
- After rebooting the PC check the Task Manager. It should not run.
- Follow these steps every time you go through the memory diagnostic process.
Conclusion
The key to fix any problem is detecting the problem in the first place. If you are facing issues with the display and performance of your computer, there is a high chance it is due to bad RAM. Windows Memory Diagnostic tool comes in great use when it comes to pinpoint the exact problem. It is free and easy to use. In a couple of minutes, you get the result and its details. Now that you know the process, check your RAM status, and fix the issues using it.
RAM (Random Access Memory) is the working memory of a computer that operates almost every function. Whenever you load a program or input data related to a query, it will be transferred to RAM and then read by it to process the instructions. But faults in this memory can cause problems like application crashes, system not responding, or BSOD.
To get an idea about the health of your system’s RAM, you can use Windows memory diagnostic tool. It is a built-in tool that can help you in this regard. This article will describe this particular tool, its working, benefits, and how to use it. Let us show you all of these steps by step.
Overview of Windows Memory Diagnostic
It is a built-in tool for Windows operating system to check the RAM’s health and issues. Windows memory diagnostic tool is available in every Window version after Windows 7. Does not matter what is the version you are using in your device, you can access this tool and perform this test.
This tool is completely free for everyone without any registration requirements. You can use this tool with a little knowledge of the system and proficiency in working with it. With the help of this diagnostic tool, you can get results regarding memory problems. All in all, it will be a good choice for you to pick and look for problems in RAM to get them resolved.
How to Check RAM with Windows Memory Diagnostic?
Before checking RAM with this specific tool, you should need to take some precautions. Be mindful that this process needs a quick restart after following some steps. So, you should have to save your files (if working) before starting the process. If you have not done this, you will face problems because the lost data is not recoverable.
Now, let us show you the process to use Windows Memory Diagnostic tool for RAM analysis.
Step 1. Open the Control Panel of your system by clicking on «Windows Icon»
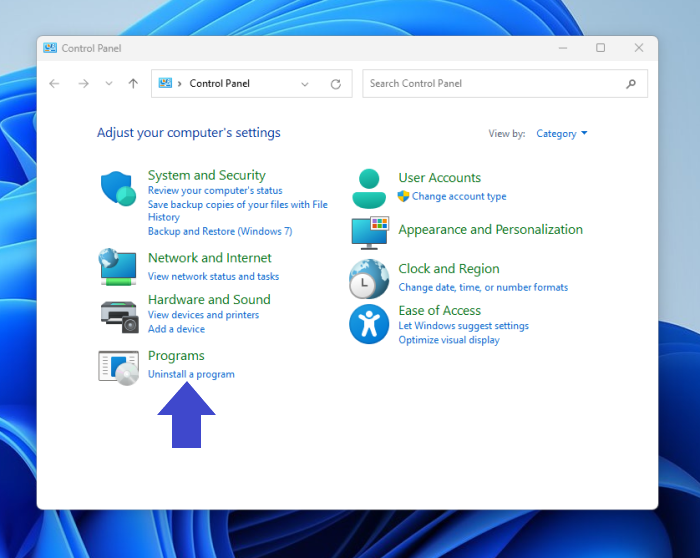
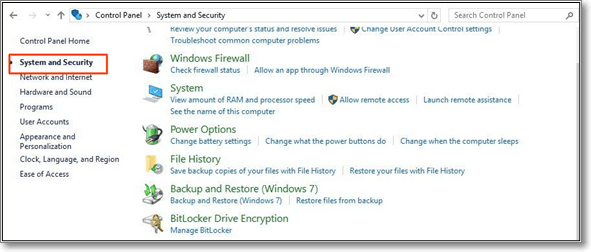
Step 2. Look for System and Security and tap to open it
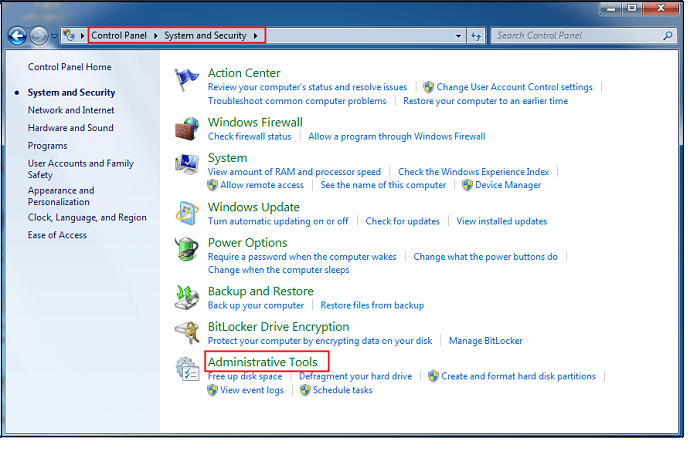
Step 3. Search for the Administrative tool in the list shown on your device’s window
Step 4. Click on «Diagnose your computer’s memory problems» just below that option
Step 5. A small window will pop up with the option «Restart now and check problems»
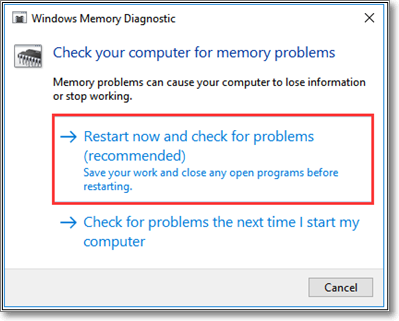
Step 6. Click on that option to restart the device
This is all that you have to do to run this test. When the device reboots, it will be opened in the Windows memory diagnostic environment. The tool will run multiple tests including LRAND, CHCKR3, and others simultaneously to analyze the RAM of your device.
There are other ways also available for accessing this tool. Those methods need little knowledge of the technical specifications of your system. You should have to use different keys to open this tool quickly and run this test. Let us show you those methods too to access this tool.
- Using Run Keys
- Using CMD Keys
Using Run Keys
Step 1. Press the Windows button and R simultaneously
Step 2. It will open a dialogue box
Step 3. Search for «mdsched» and tap on the «OK» button
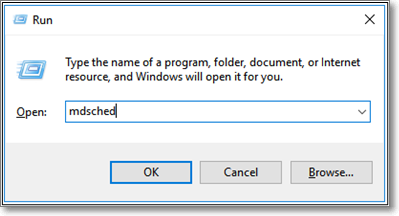
Step 4. Wait until you get the short window with «Restart now and check for problems»
Step 5. Click on that option to run this test
Using CMD Keys
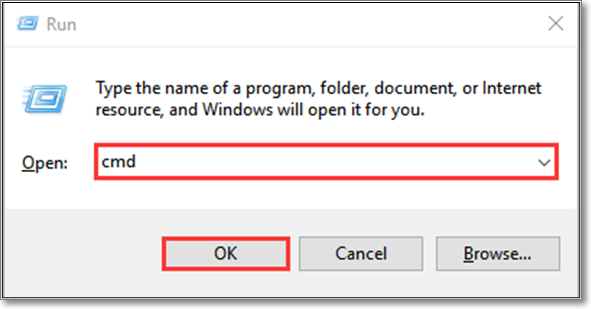
Step 1. Press Windows and R simultaneously
Step 2. Search for «cmd» in the box and click on the «OK» button
Step 3. Type mdsched in the opened black window
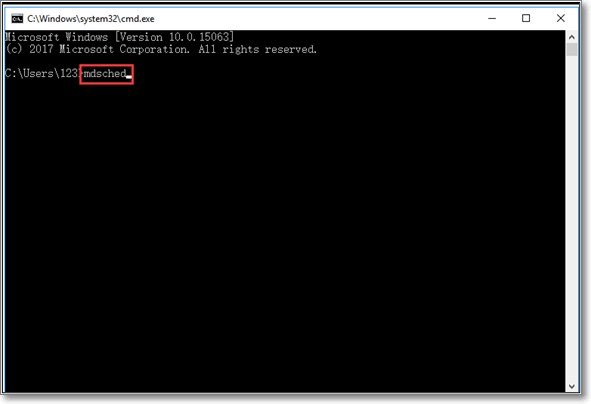
Step 4. Tap the «Enter» button available on your keyboard
Step 5. It will begin the Windows memory diagnostic test and complete it in a few minutes
How to Find Windows Memory Diagnostic Results?
Whether you have used the first method to run this test or any of the others, the process to check the results will be the same. It does not have even a single difference depending on the ways to run this test. So, you can choose any of the above methods to run this tool and wait until your device will be restarted a few minutes after its completion.
When you have signed in to your device, it is time to check the results of the Windows memory diagnostic tool test. Here are the steps that you should have to follow in this regard.
Step 1. Go to the Windows search bar
Step 2. Type eventvwr.exe in the search bar
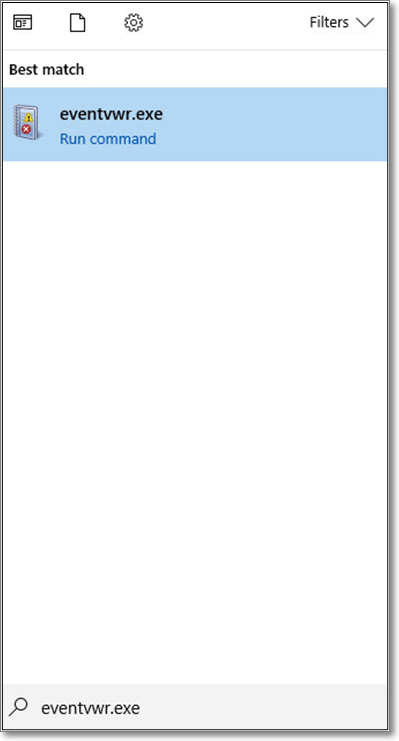
Step 3. Click on the first option shown on the screen
Step 4. It will open a window with some options in the left vertical bar
Step 5. Expand the «Windows Logs» folder by clicking on it
Step 6. Right-click on the System option shown in the dropdown options
Step 7. Now, click on the «Find» option given there
Step 8. Type MemoryDiagnostics-Results and tap on «Find Next»
Step 9. Double click on the file with this name to view the results in the form of a message
Bottom Line
This blog has properly discussed how to use Windows memory diagnostic tool and check its results. You can use any of the above methods to run this test and analyze your device’s memory.
But it is recommended to follow the steps with the care mentioned above. The reason is a minor mistake in the inserted keys will run another test with which you may be unfamiliar.
If your server keeps crashing, freezing or the application doesn’t respond as expected, you might have a problem with the computer memory (RAM).
One of the easiest and the most straightforward solution to troubleshoot the issue is to use the a pre-installed Windows tool called “Windows Memory Diagnostic” to perform test and check out potential errors related to memory.
In this tutorial, we will demonstrate the process on a Hyonix virtual private server.
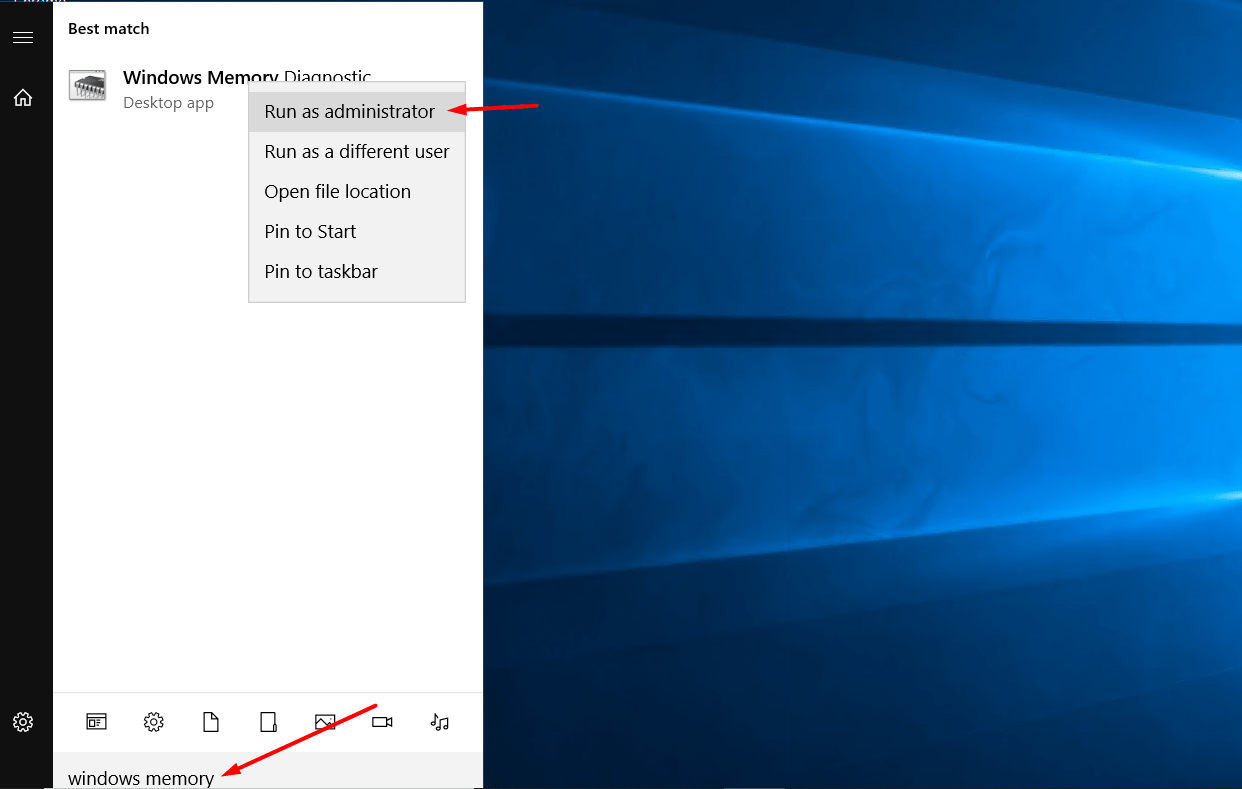
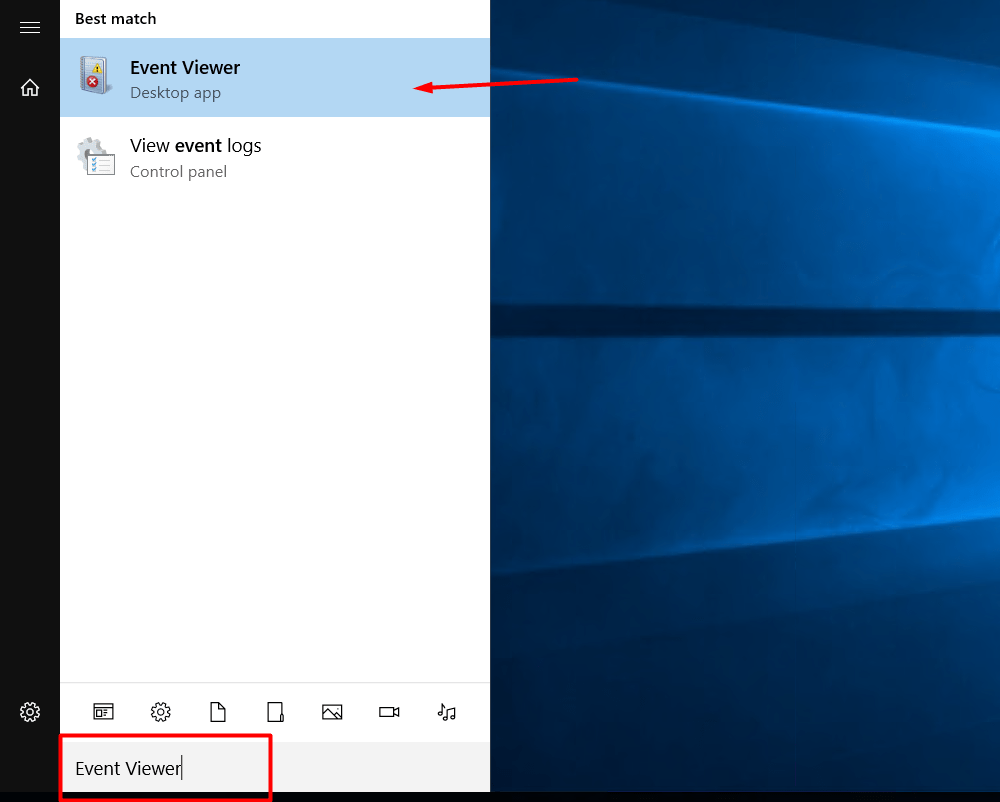
To get started, log in to Windows Virtual Machine/Server using RDP, and search for the Windows Memory Diagnostic Tool. (Also, you can use the “mdsched” term in the search bar). Right-click on the “Windows Memory Diagnostic Tool” and click on “Run as administrator”.
Get Started With The Tool.
Next, you can find two options,
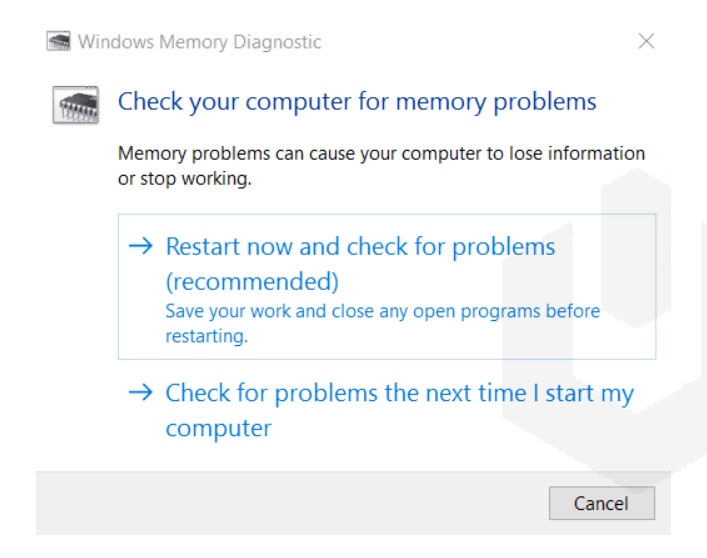
1) Restart now and check for problems.
This option will immediately restart the server and prompt to Windows Memory Diagnostic Tool interface after the system boots.
2) Check for problems the next time I start my computer.
If you are working on something but can wait until restart to troubleshoot the problem, then you can go ahead with this option.
Now, if you are using a Virtual Private Server, you will need to access the Console/VNC.
If you are a customer of Hyonix.com, then follow this article – How to access the Server Console?
Diagnosing The Problem.
If you select the “Restart now and check for problems” option, then your server will be restarted automatically.
After booting the server, you will prompt to Windows Memory Diagnostic Tool interface. By default, the Windows Memory Diagnostic Tool will run through the Standard Mode, which is most effective for most problems.
Also, you can customize the operation of the tool by pressing F1.
Configurable Options (Advanced).
Testing duration might takes up to several hours depending on the amount of Memory that your server has.
A) Test Mix.
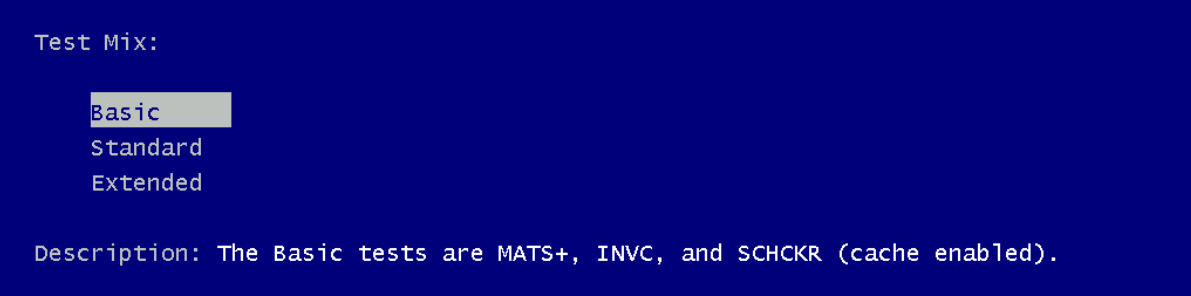
– Basic Mode.
This mode runs MATS+, INVC, and SCHCKR (cache enabled) tests.
– Standard Mode (default).
This mode runs MATS+, INVC, SCHCKR (cache enabled), LRAND, Stride6 (cache enabled), CHCKR3, WMATS+, and WINVC tests.
– Extended Mode.
This mode runs MATS+, INVC, and SCHCKR (cache enabled), LRAND, Stride6 (cache enabled), CHCKR3, WMATS+, WINVC, MATS+ (cache disabled), Stride38, WSCHCKR, WStride-6, CHCKR4, WCHCKR3, ERAND, Stride6 (cache disabled), and CHCKR8.
B) Cache.
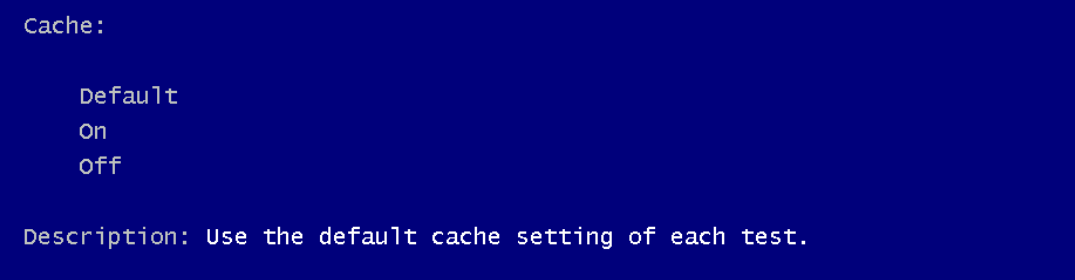
If this option is set to turn on, it will allow Windows Memory Diagnostic Tool to access the data in cache. If this option is turned off, Windows Memory Diagnostic Tool will access the data in RAM directly to ensure completion of the test. Default this option is enabled.
C) Pass Count.

This option is to set a number of times the scan will be repeated to test the server’s memory/memory module.
Once you are done with the configuration, press the F10 to go back to the main page. Again, the scan will restart automatically and runs according to the selected configuration option.
This process will take several minutes, and after that, your server will be booted normally.

Checking The Results.
Now, to view the diagnosis results, you can take the help of “Event Viewer“.
1. Log in to Windows Virtual Machine (RDP), and search for the “Event Viewer” or “eventvwr.exe”.
2. Expand the “Windows Logs” directory.
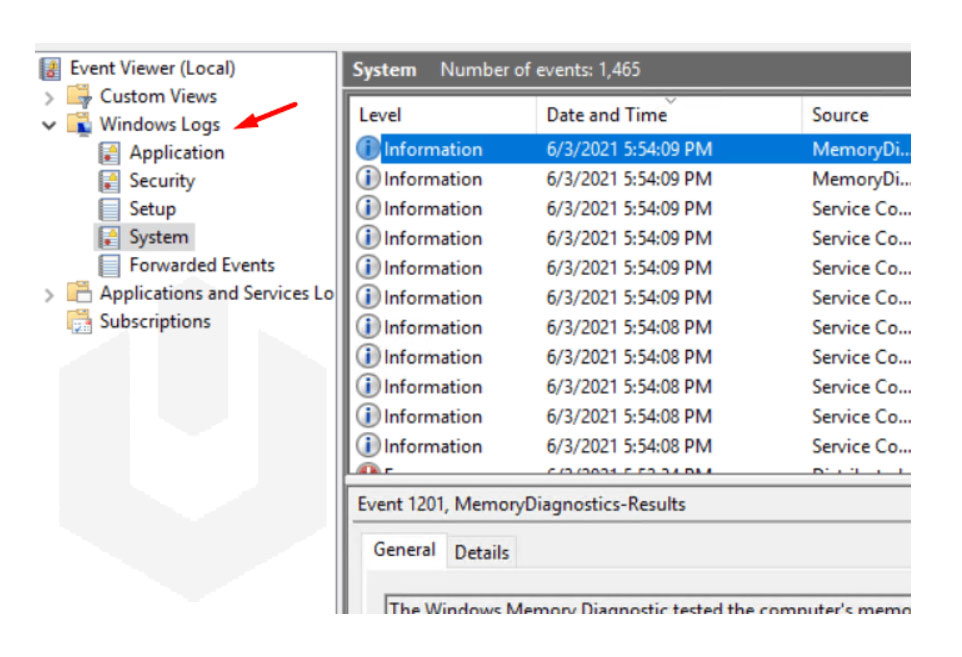
3. Right-click on System and click on Find.
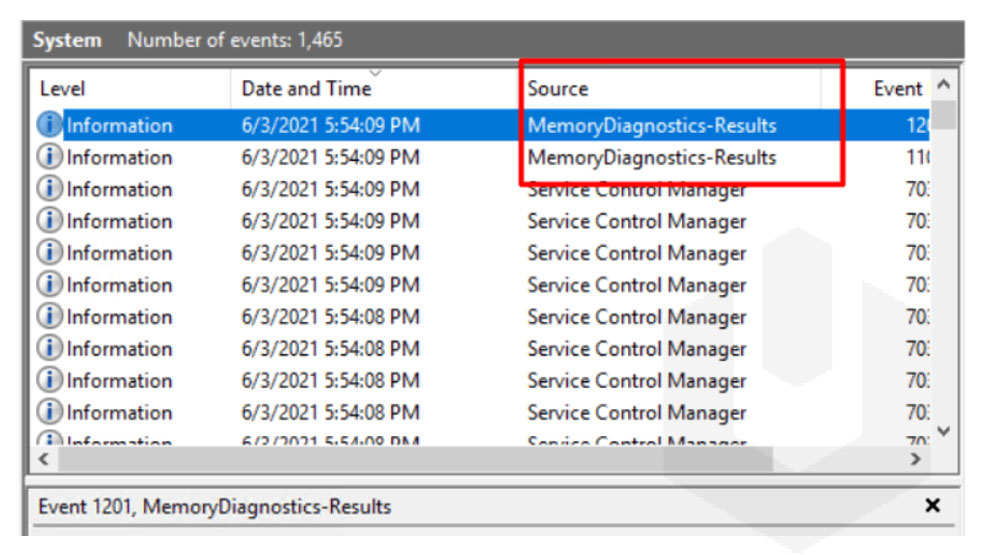
4. Search for “MemoryDiagnostics-Results” and click on “Find Next”.

5. You can find the latest results on top, now double-click on the “MemoryDiagnostics-Results”.
6. If you find “The Windows Memory Diagnostic tested the computer’s memory and detected no errors” in the “General Dialogue Box,” then you are not having any problem with the memory.

Errors & Conclusions.
- If the test detected no errors and you are still facing errors, your RAM is likely not the cause of the issue you are facing. However, you can perform a more advanced test (using Extended, Cache On, and higher Pass Count) for a more accurate result.
- If the test resulted in errors, The message will mention which RAM module has the actual problem. However, if it’s unable to grab that information during the test, you will need to use Memtest86 to re-check again, or manually removing RAM module one by one until the result came clear.
If you are having Windows Virtual Private Server with Hyonix, you can Save Selected Events of the error and submit a ticket to the technical department, Our technician will handle the rest for you!