Why start this series in the 2020, when everything is about cloud, and Microsoft is pulling the plug on its “on-premise” certificates including MCSA, MCSE on Windows Server on 31.01.2021. Why even bother?
For a start… This series is obviously aimed at those of you who are just starting in IT, and want to pursue a career in IT infrastructure/services.
Although everything today is about cloud, Windows Server is still everywhere and will be for some time, since not every workload is suited for cloud, be it practical, security or regulatory reasons. That may change in future, but for now it is like that…
Also, I think that mastering Windows Server 2019 will help you understand basic concepts of services and IT infrastructure.
And in the end, Microsoft Azure is built on Windows Server 2019 at the moment, so if you have a chance to work on ASDK (Azure Stack) you will benefit from this knowledge, because you will understand how it is all connected and working.
This “Server Basics” series will not go into details too deep, the goal is to make you act and try technology by doing something practical and simple that works. That way you will quickly get the result which will make you excited about technology and push you to explore more.
Before you start…
Where to get the Windows Server 2019 installation?
No need for piracy, Microsoft offers trial version of software that will work for 180 days (and more) and is fully functioning.
You can get the software here – https://www.microsoft.com/en-us/evalcenter/evaluate-windows-server-2019
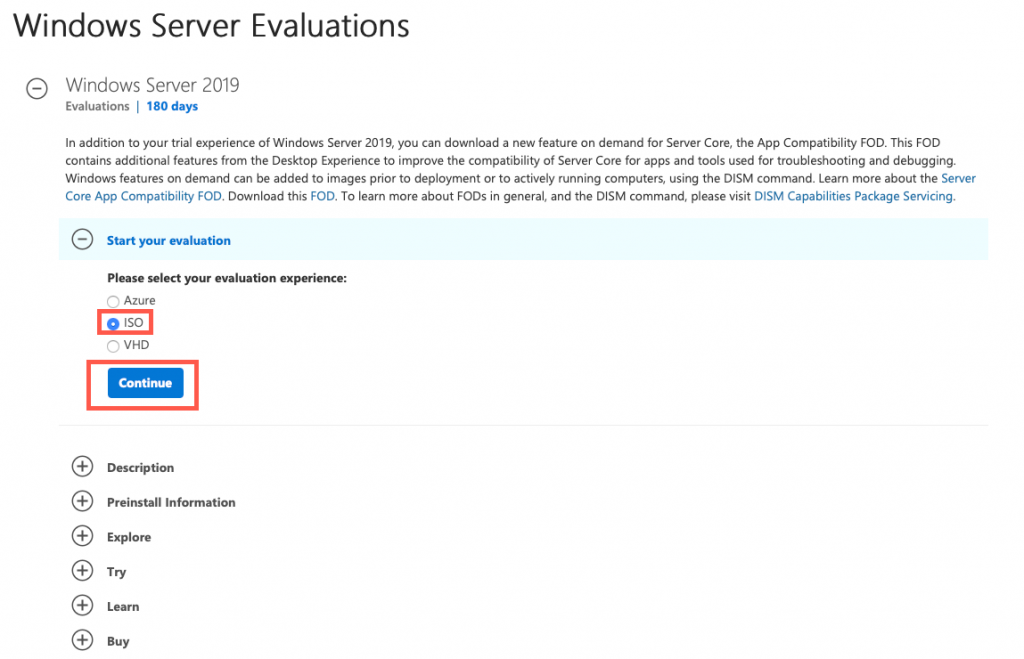
Select ISO image and click on Continue
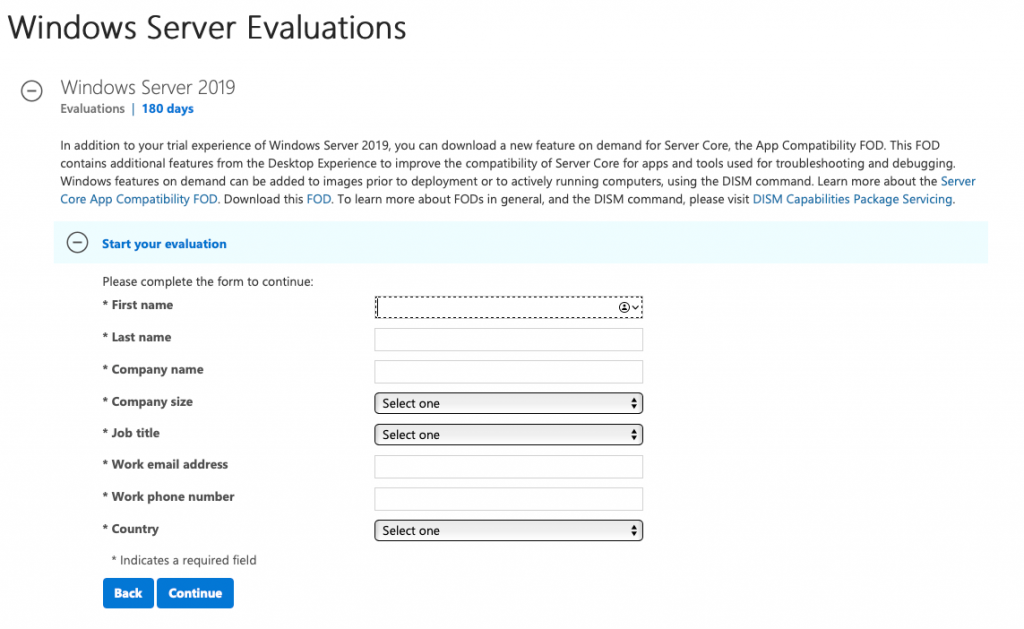
You will be asked for your details, and after you enter everything select Continue
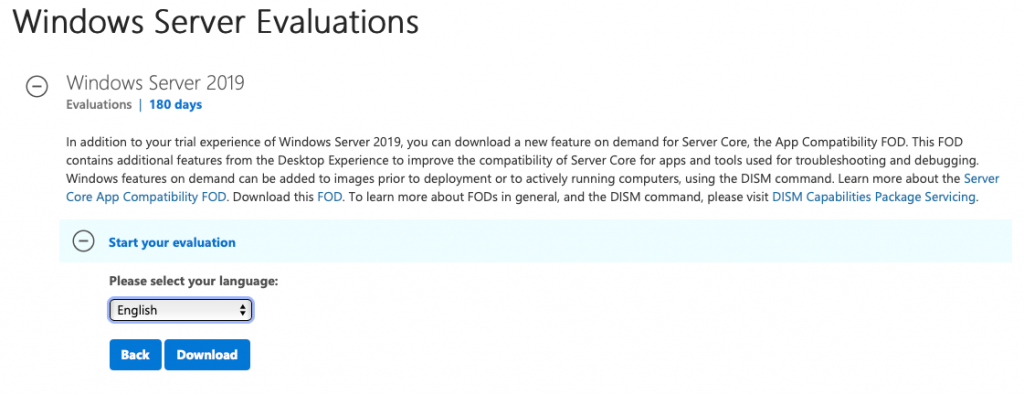
You will then select the language and click on Download…
If you are planing to do Windows Server 2019 installation on physical machine you will have to “burn” ISO image you downloaded to CD or USB stick (USB preferably) – you can do that with a tool called Rufus, you can find it here – https://rufus.ie/
Installation on Hardware or Virtual Machine?
Hardware
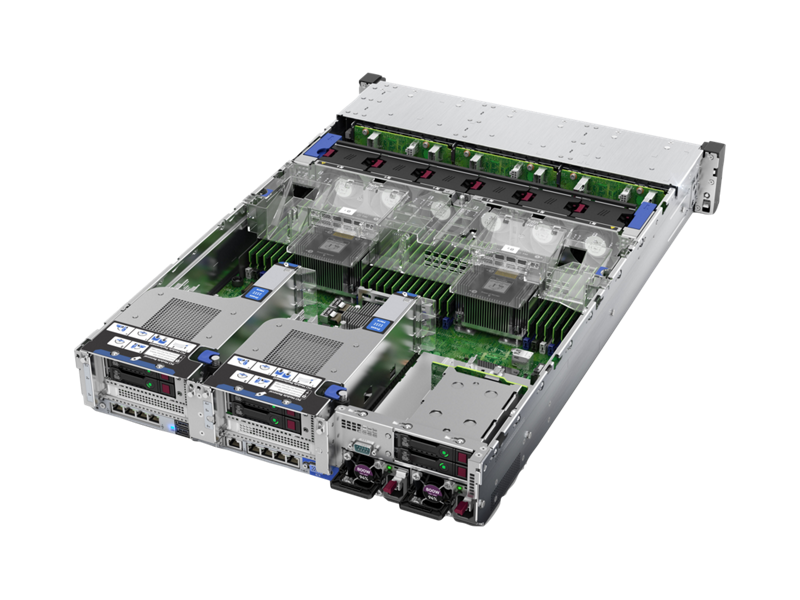
If you are installing on a physical machine (bare metal) there are a couple of thing to be aware of:
Minimal requirements are (same goes for virtual machines (VMs)) – 1.4Ghz 64bit CPU (it is very important you have 64bit capable CPU, otherwise this won’t work), 512MB of RAM – 2GB of RAM is minimal for graphic environment (which we will do) and 4GB is optimal in my experience. 32GB of disk space, 1Gbit ethernet, 1024×768 screen resolution, keyboard/mouse.
My advice would be to have CPU with multiple cores (2 or more if you can afford), at least 16GB of RAM (the more the better) 1TB disk drive at minimum for testing, if you plan to do LAB and test Windows Server 2019 and its services.
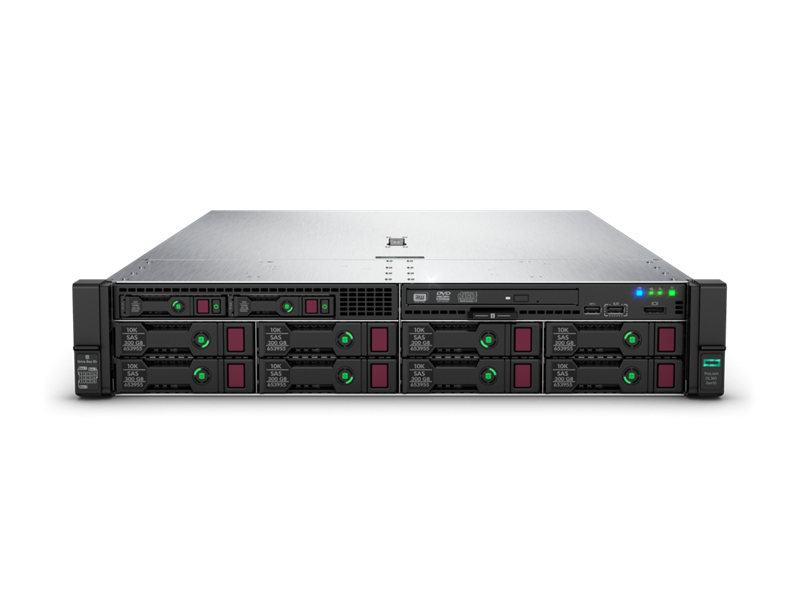
If you are installing on a server, be sure that you first upgraded all the firmwares on your machine. Also, create RAID field on the server on which you will place your Windows Server 2019 installation.
Make sure you set boot device in BIOS to USB stick (or whatever you burned your Windows Server 2019 installation to)
In the end have storage drivers (raid controller) or motherboard storage drivers at hand – Windows Server recognises a huge variety of storage controllers but you never know… Better to be prepared then to waste time. If you are practicing on Dell, HP, Lenovo server equipment, you are covered out of the box.
If you don’t have a server at hand and you are practicing in home lab on “desktop” grade hardware, no worries, installation should work, just make sure you have minimal requirements covered in your PC or laptop. There may be an odd driver issue to resolve if you have “exotic” configuration, so be aware of that.
Virtualization:
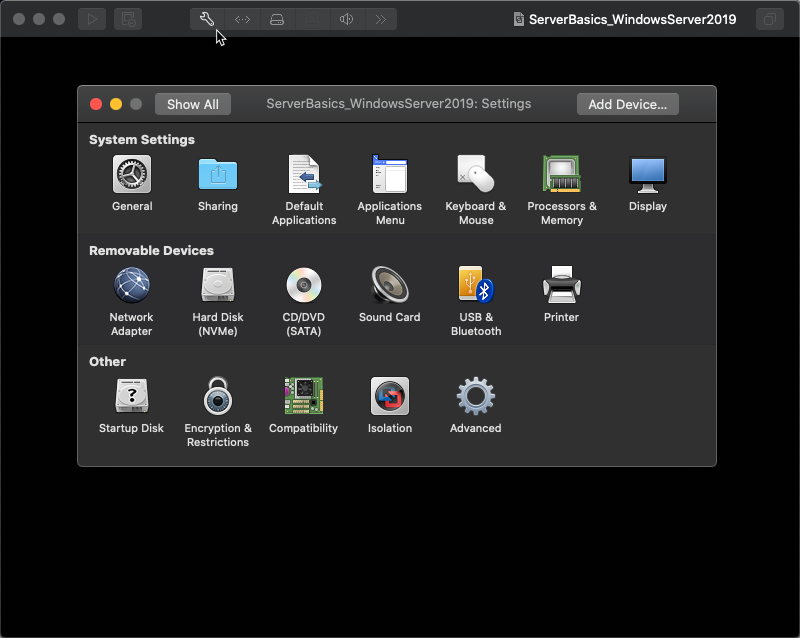
With virtual machines you just need to mount Windows Server 2019 ISO image we downloaded earlier after you created empty VM for your Windows Server 2019 ISO install. Procedure depends on the virtualisation software you are using, I can show you VMware vSphere, but more or less all the virtualisation softwares are same with these options, it just depends how you navigate to the option you need.
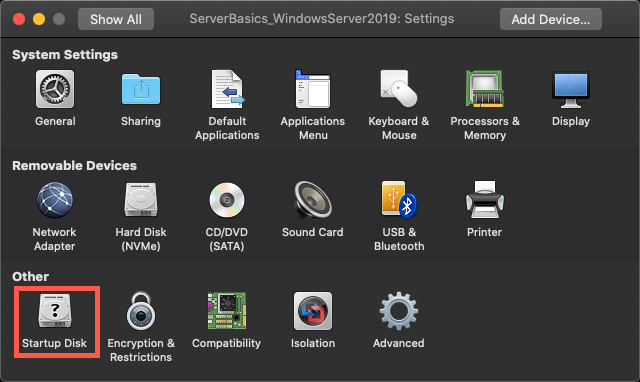
In vSphere you click on settings on virtual machine you created, it is a little wrench on the top of the screen. Under Removable Devices section you will select CD/DVD (SATA)
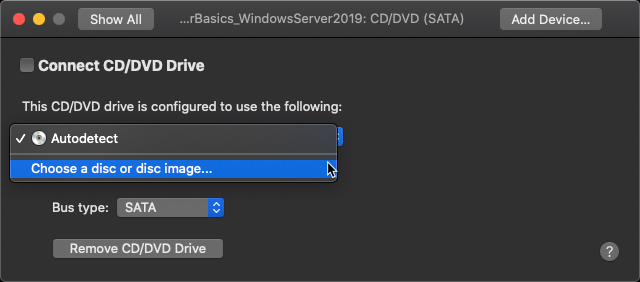
Click on the selection box and select “Choose a disc or disc image…”
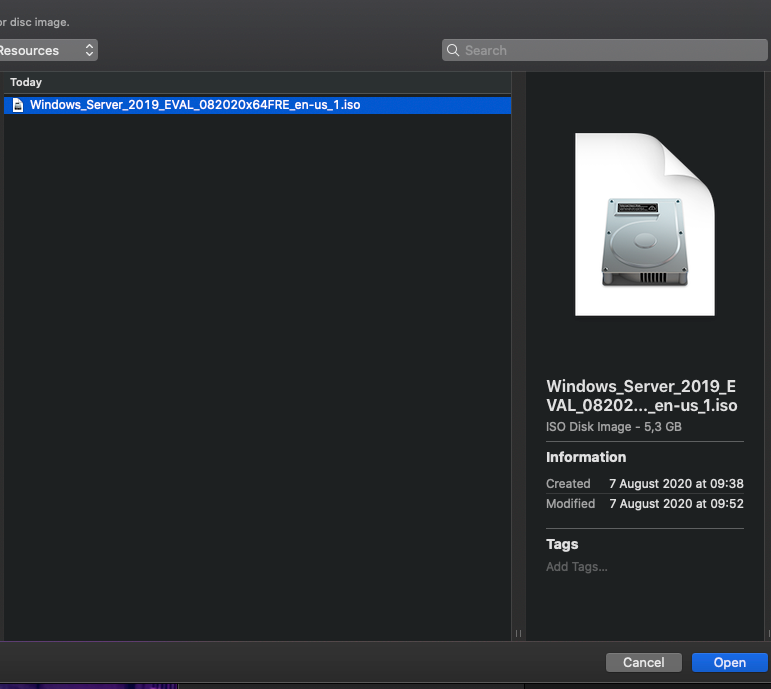
Navigate to the location you downloaded your Windows Server 2019 ISO image and select it.
Now that we selected our ISO image, make sure you selected “Connect CD/DVD Drive” checkbox and then back to the main settings screen.
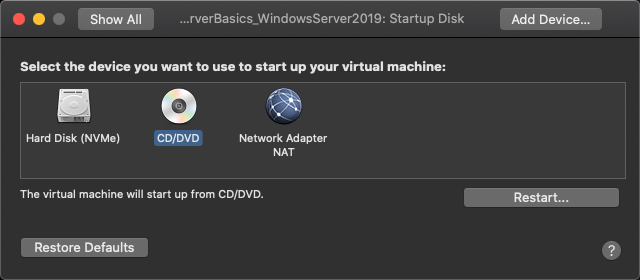
We need to set one more thing so we are sure that we will boot from our ISO image
Under Other Section select “Startup Disk”
Select CD/DVD as your startup device.
Again, settings in your virtualisation software may differ from this, so explore or Google for the steps you need.
Goal is clear whatever method – hardware or software you are using – mount Windows Server 2019 image we downloaded earlier and select it as bootable device. Also change hardware settings (CPU, RAM, disk) to the settings I mentioned above.
Installation
Now, to the final step, installation of our first Windows Server 2019 machine.
If you are doing it on physical machine be sure you set the USB stick (or CD/DVD if you burned downloaded ISO image to it) as main bootable device in BIOS (probably under boot menu) and in your virtualisation software follow steps I mentioned earlier.
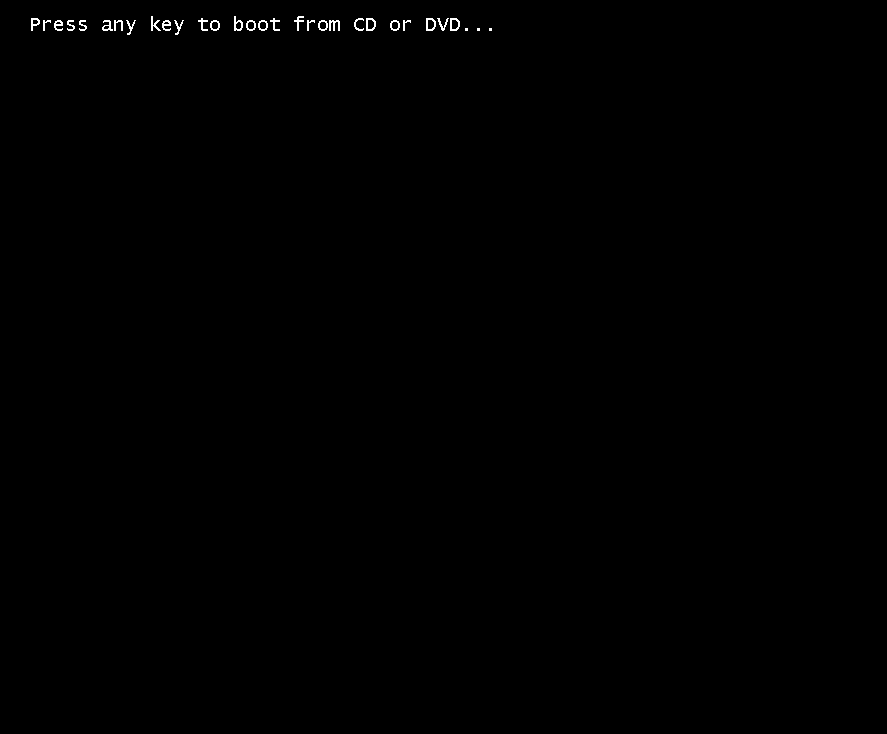
If you did everything correctly, you will be greeted with this screen…
“Press any key to boot from CD or DVD” – press a key on your keyboard to boot from it…
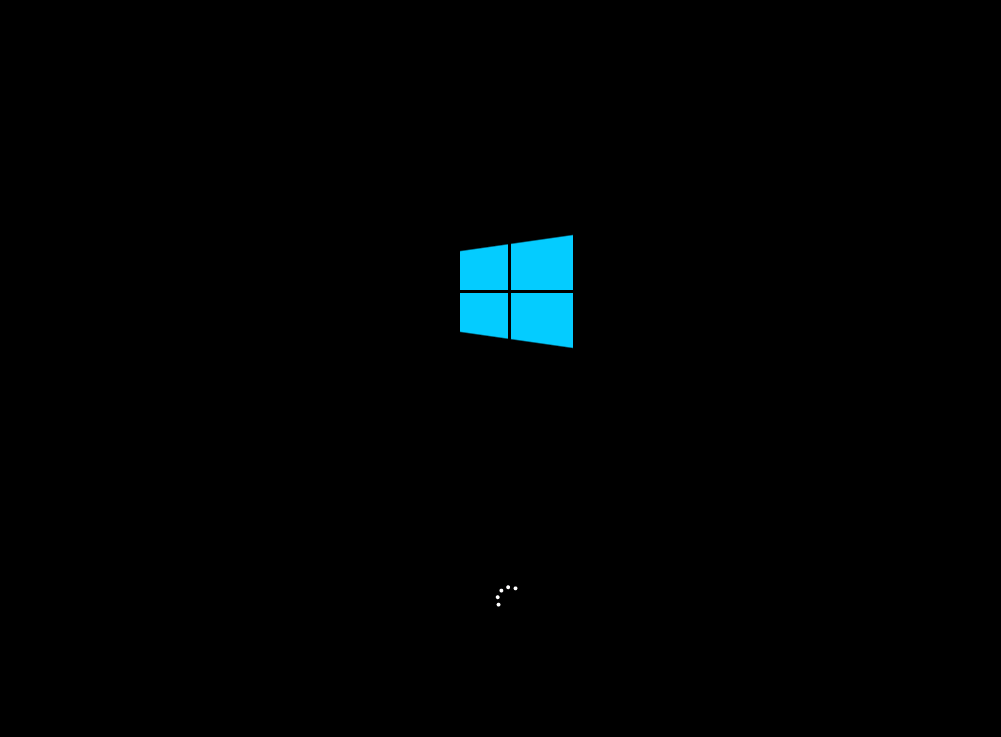
Wait…
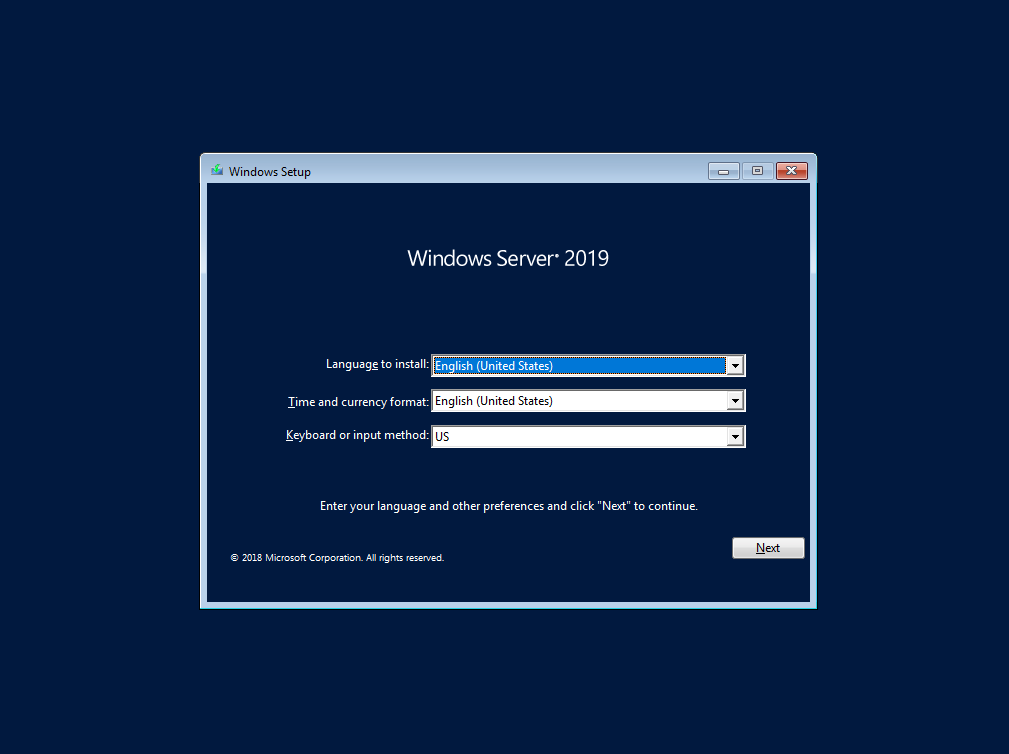
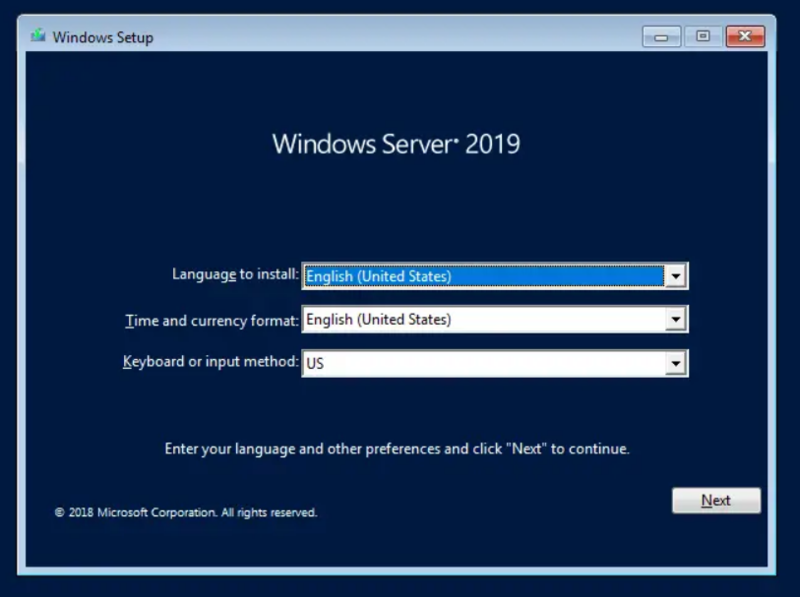
Language to install: Select language you wish your Windows Server installation to be – I will select English
Time and currency format – again, select your local settings
Keyboard or input method – select a keyboard layout, I will select English keyboard layout.
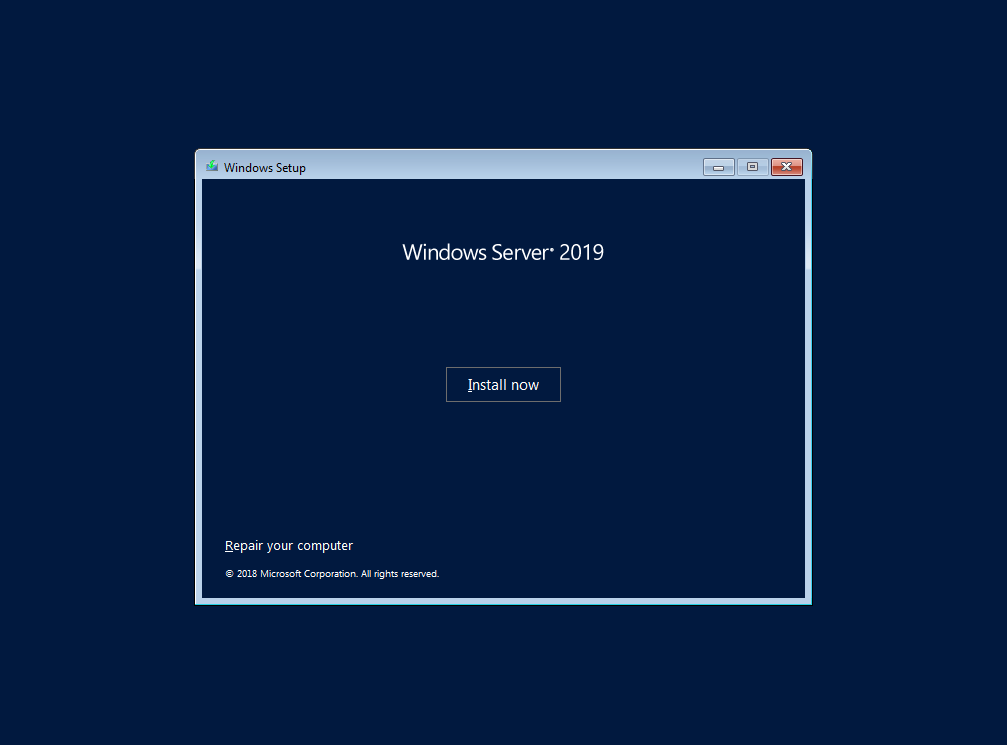
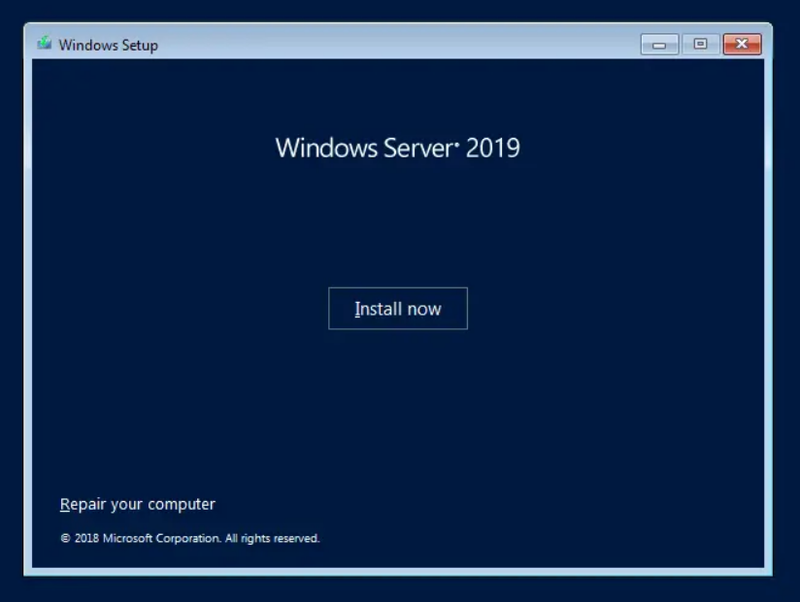
Install now…
…
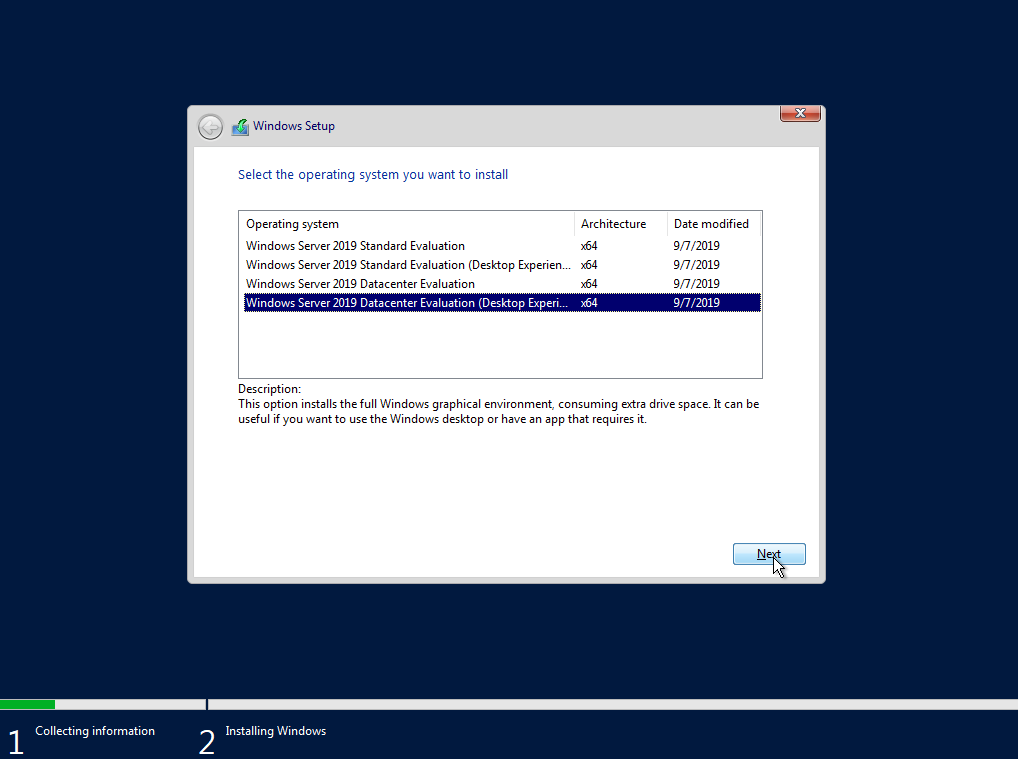
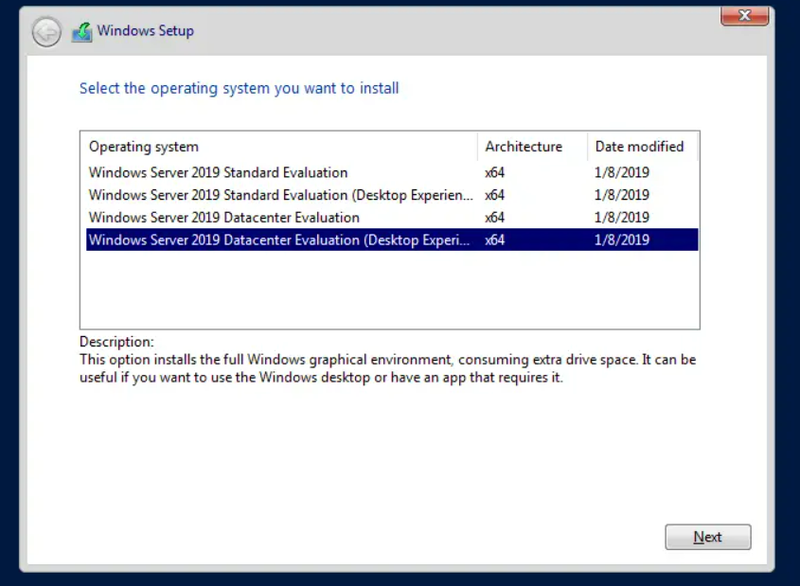
We will select Windows Server 2019 Datacenter Evaluation (Desktop Experience)
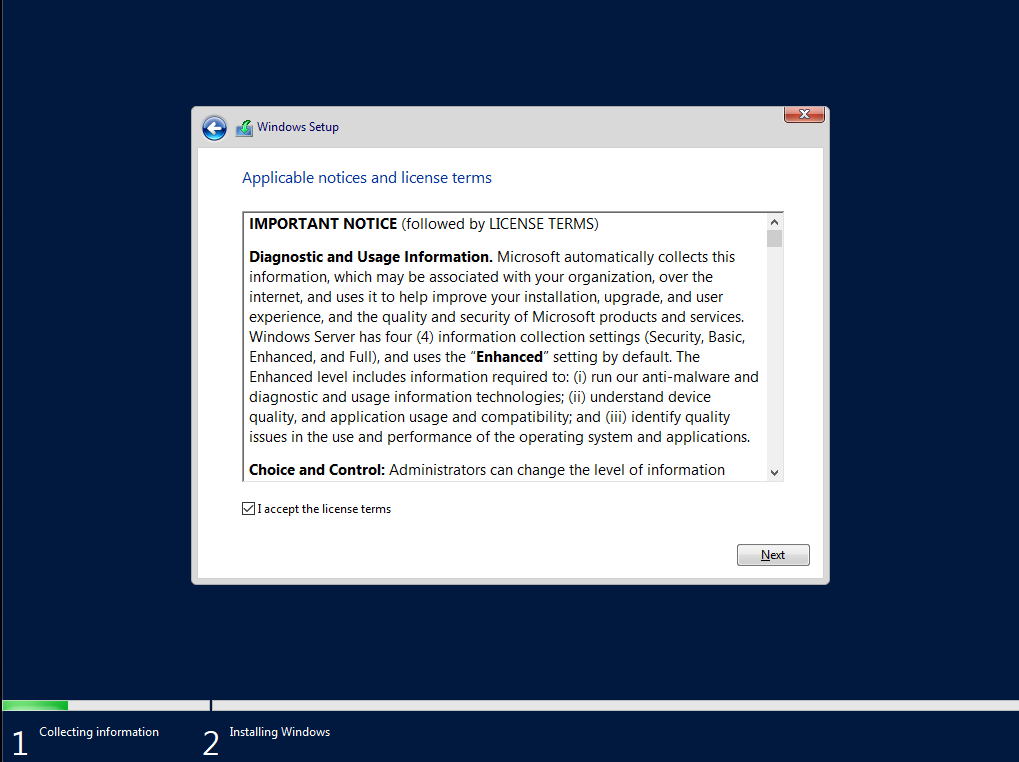
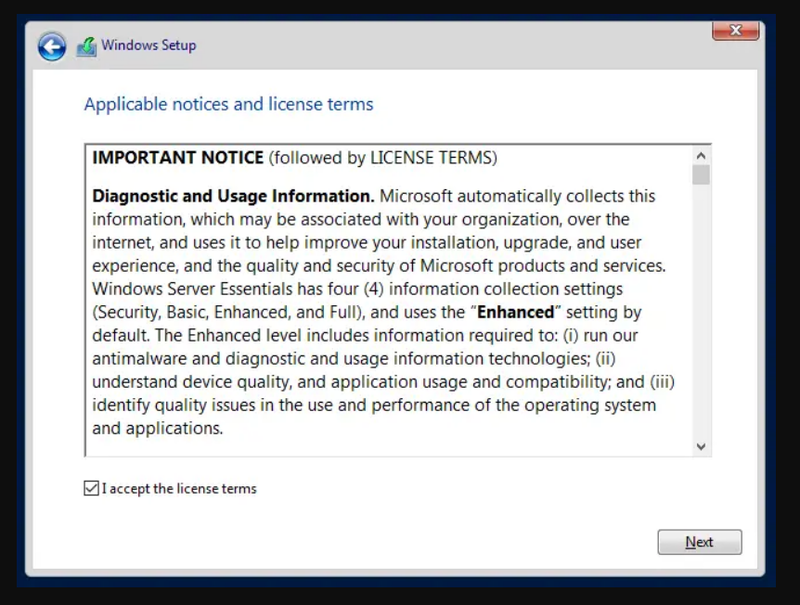
Read agreement, select “I accept…” and click on Next
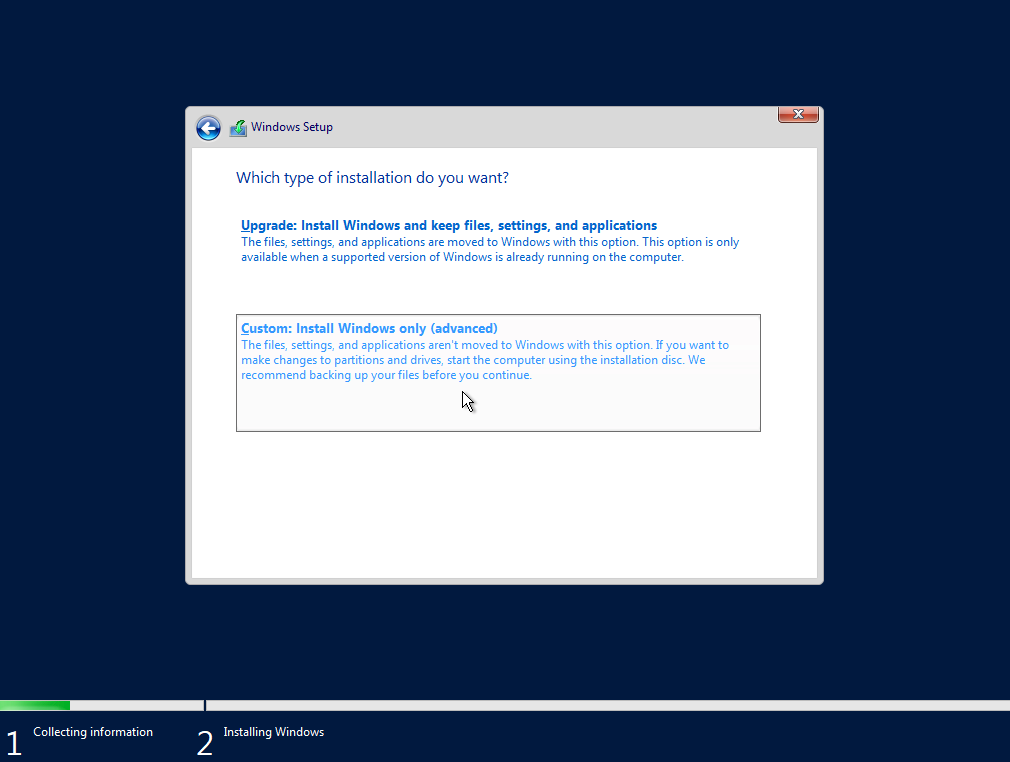
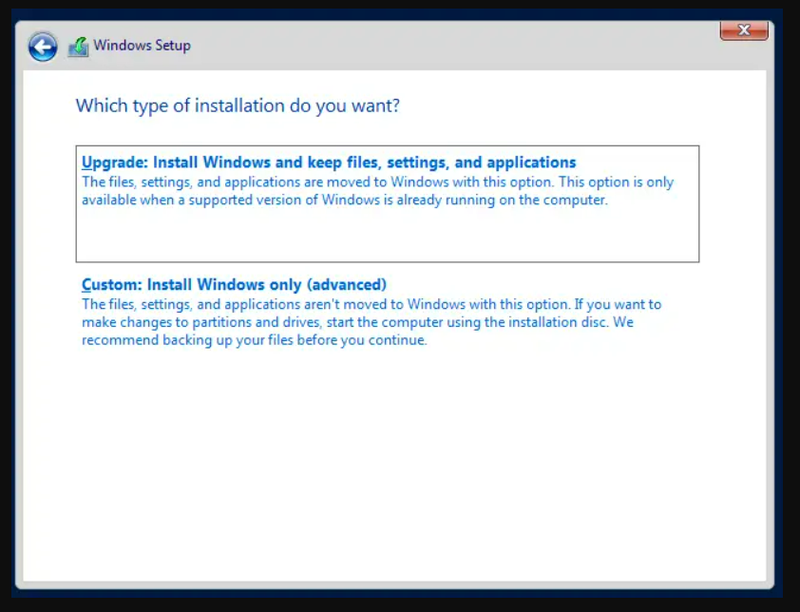
Select “Custom: Install Windows only (advanced) option
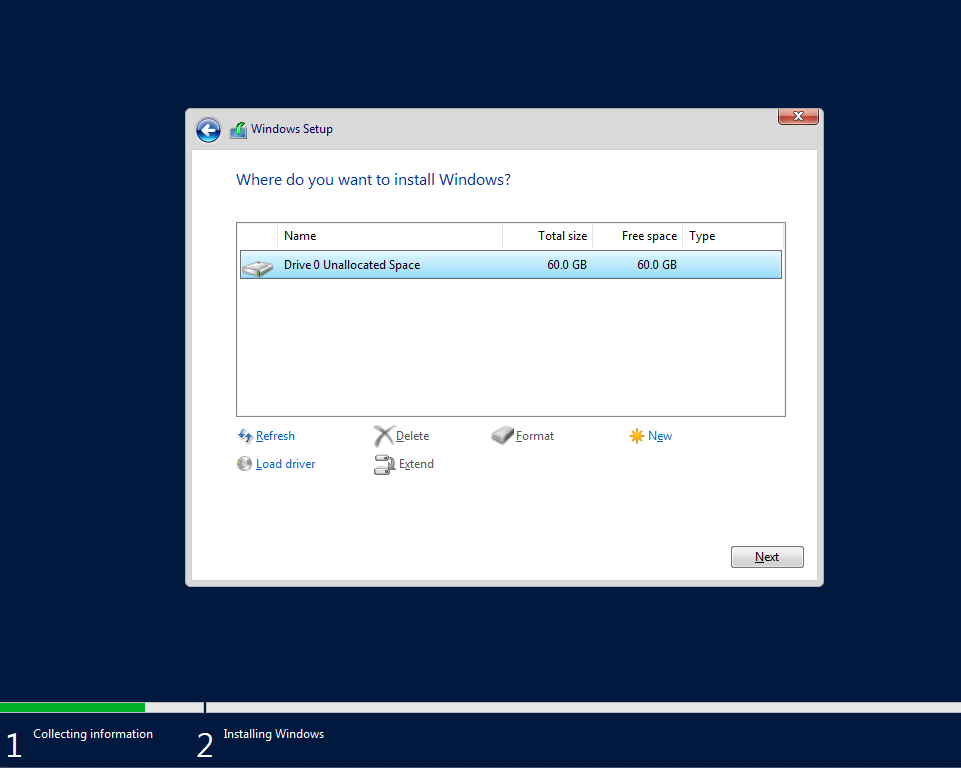
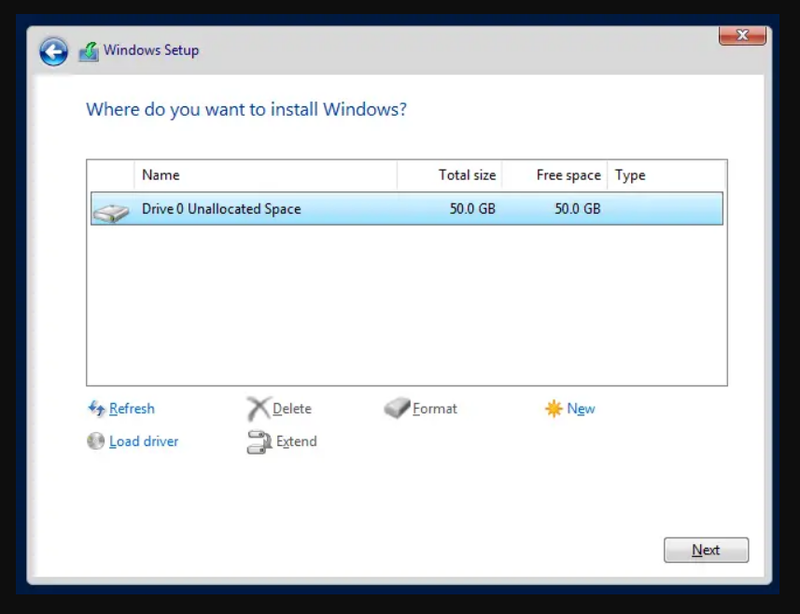
Now, select the disk you prepared for this installation. If this is a blank screen for you, you will need to prepare and load drivers for your storage controller (or RAID controller) I mentioned before. Copy drivers (drivers need to be for the Windows Server 2016/19 or some Windows 10 will even work) to USB, plug it in your machine and click on the Load driver on bottom of the screen. Then browse to your driver, select it and hope for the best.
Also, make sure disk you are installing on is empty with no important data on it, this operation will delete everything on it.
If you can see your disk on the screen below, then select Next and the installation will start…
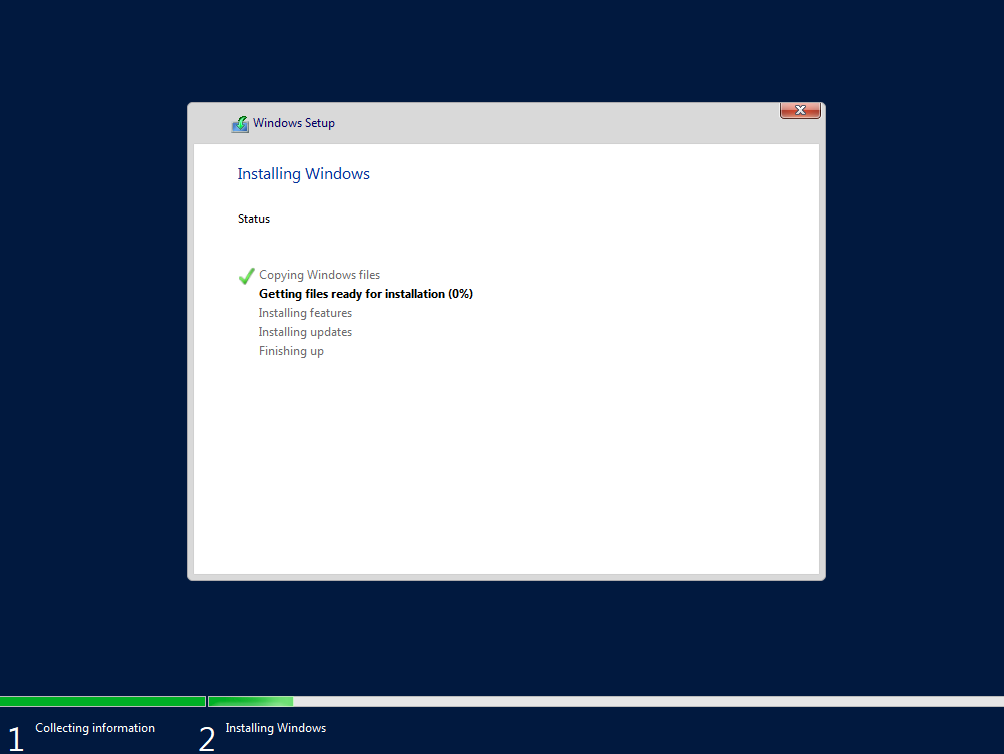
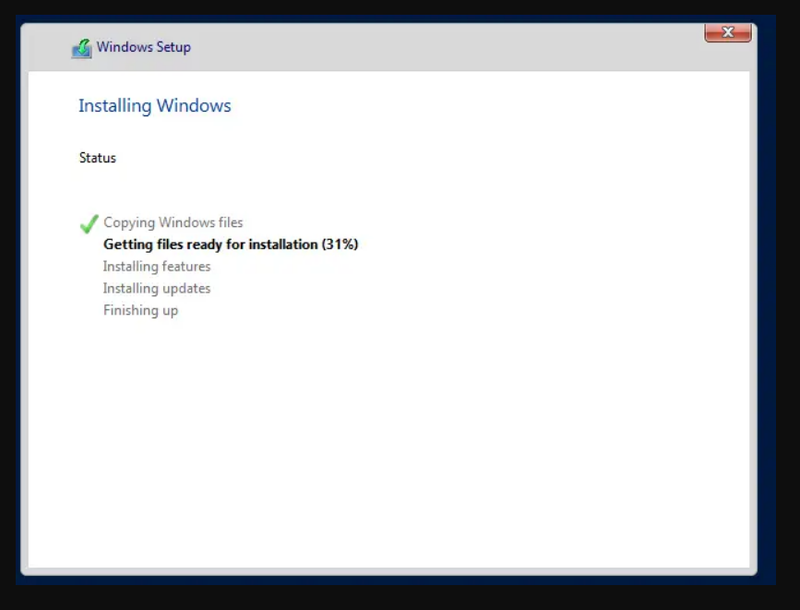
We will now wait a bit… Waiting depends primarily on the speed of your PC, it may take longer on be very quick to install…
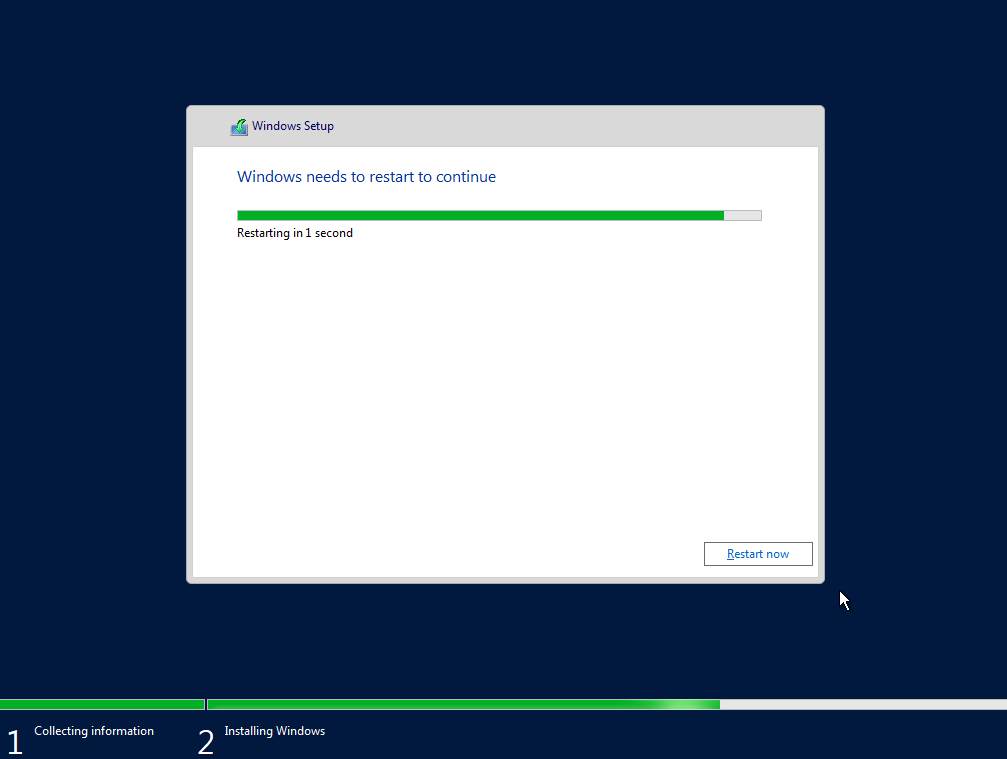
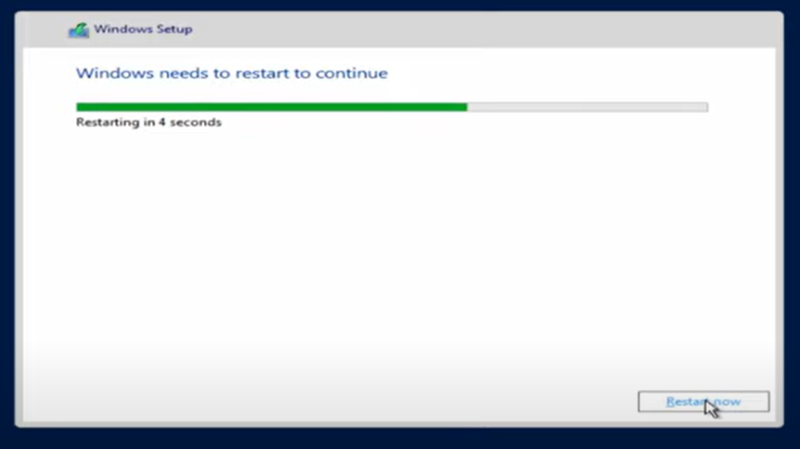
After you reached last step you will get restart screen…
Let the computer/VM restart and this time let it pass “Press any key to boot from CD or DVD” – do not press any key on that screen.
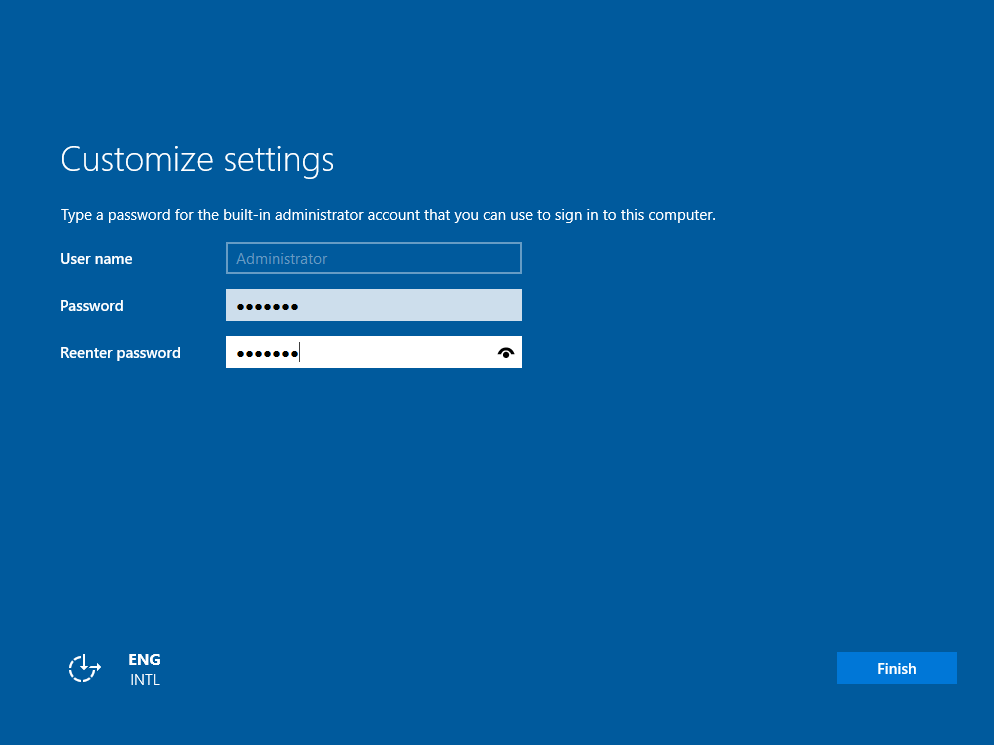
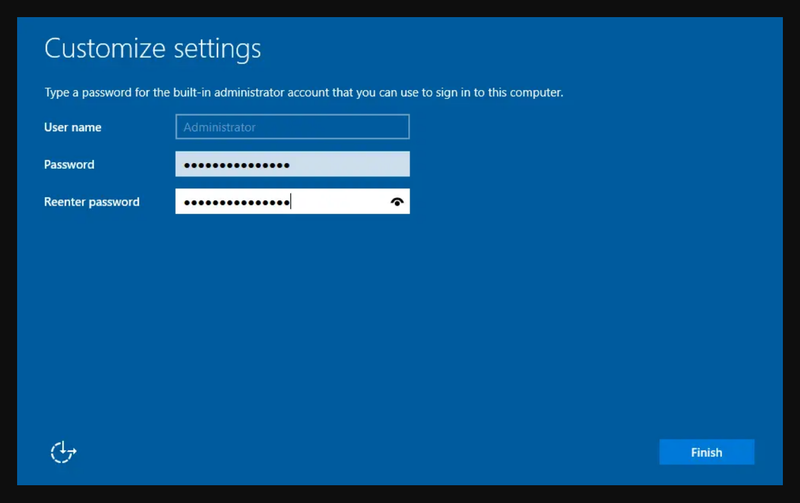
You will be greeted with this screen… Enter password of your selection for your installation. Always make sure you use strong passwords (Minimum 12 signs – combination of letters, numbers, special chars…)
Click on Finish
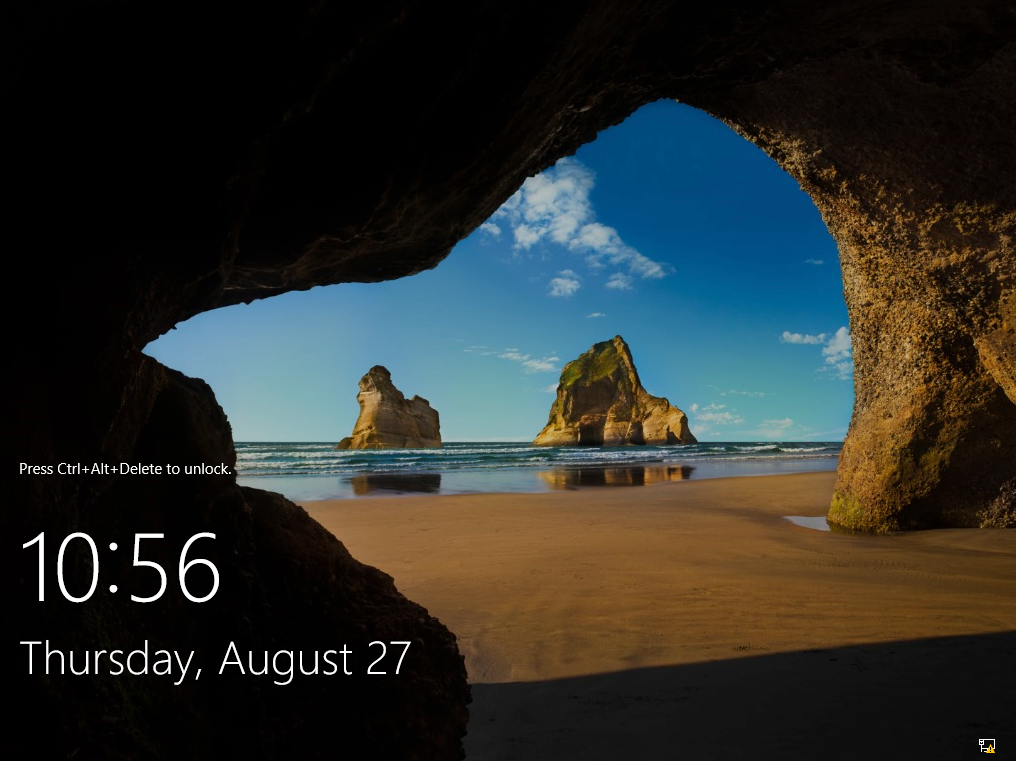
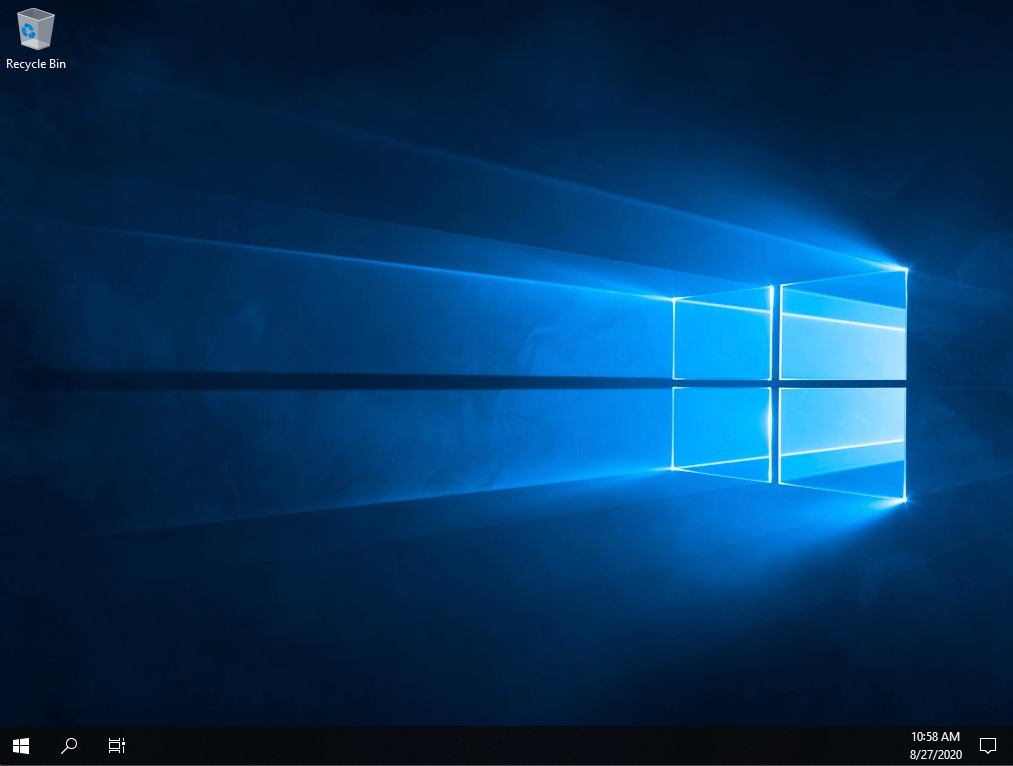
That is it, you are greeted with lock screen
Press CTRL+ALT+DEL if you did install on physical machine, if you done install on a VM, look for a CTRL+ALT+DEL shortcut in a menu.
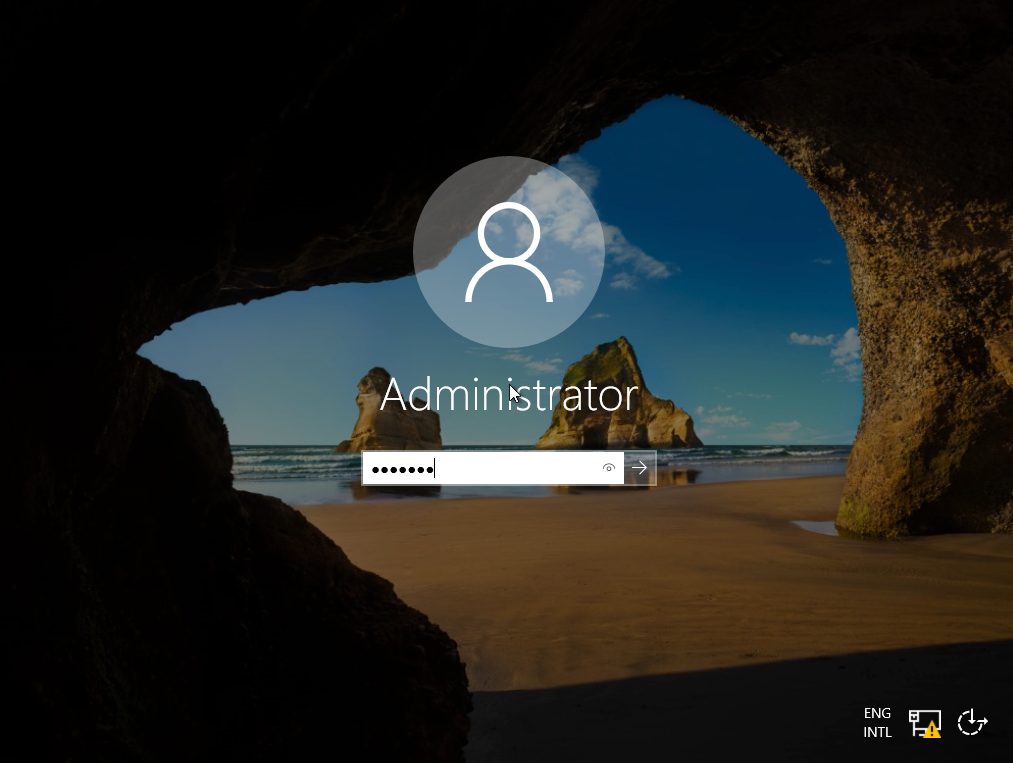
Enter your password and press enter on a keyboard.
Congratulations, you did your first Windows Server 2019 installation.
In the future I will try to expand this “Server Basics” series with more tutorials on how to configure your Windows Server 2019 installation and set various services on it (DHCP, DNS, file share, failover…)
I have a very busy schedule, so I can’t promise much, but I will try to write as much as time allows.
If you are interested in a video version of this tutorial – here is the video:
Disclaimer
Other tutorials in this series:
Server basics 02: First steps adter Windows Server 2019 install
Server Basics 03: How to install Hyper-V
Server Basics 04: How to create VM on Hyper-V
Server Basics 05: How to create virtual machine template
Server Basics 06: How to create windows domain
Server Basics 07: How to create user in domain, join computer to domain
Server Basics 08: How to create DHCP server
Server Basics 09: How to configure Groupe Policy Part1
Server Basics 10: How to configure Groupe Policy Part2
Server Basics 11: How to create iSCSI Target in Windows Server
Server Basics 12: How to create file server (DFS) in Windows Server
Server Basics 13: How to create Print Server
Windows Server
Muhammad FaizanSeptember 9, 2020 — Last Updated: December 14, 2020
0 2,339 2 minutes read

Muhammad Faizan
Hi, My name is Muhammad Faizan and i have spent last 15 years working as System Administrator mainly with Microsoft Technologies. I am MCSE, MCTP, MCITP, certified professional. I love scripting and Powershell is the scripting language i am in love with.
-
Website
-
Facebook
Related Articles
Join us to say hello to the 9th version of the Windows Server operating system, which Microsoft announced on March 2018. This article will review a visual installation process of Microsoft Windows Server 2019. From the workgroup to the data center, an infrastructure of interconnected applications, networks, and web services may be built with Windows Server. It connects on-premises systems with Azure, giving extra security levels and assisting you in modernizing your infrastructure and applications.
The next version of Microsoft’s server operating system, Windows Server 2019, adds a number of new features along with upgrades and performance enhancements. Built on the solid basis of Windows Server 2016, Windows Server 2019 introduces several advancements in security, application platform, hybrid cloud, and hyper-converged infrastructure (HCI).
The Desktop Experience is a part of Windows Server 2019, a Long-Term Servicing Channel (LTSC) release. Like Windows Server 2016, you can install Server Core or Server with Desktop Experience while configuring the operating system. To reduce the operational expenses associated with reactively managing issues in your Windows Server deployments, you can use the new feature of Windows Server 2019 which is System Insights.
Following this guide, you can install Windows Server 2019 on a physical server, Virtual Environment, or the Cloud. If you prefer installing Windows Server 2019 on a physical server, you must first pull the Windows Server ISO image and burn it to a USB device. Users of VirtualBox, KVM, and VMware need only attach the ISO file during VM creation and carry out the specified installation procedures.
Prerequisites to Install Microsoft Windows Server 2019
To let this tutorial works correctly, provide the options below and move on.
- Server: Buy Dedicated Server to install Windows Server on it, and then follow the below instructions and screenshots to install Windows Server 2019 on the computer you prefer to be your server machine.
- Processor: 1.4 GHz 64-bit processor
- RAM: 512 MB
- Disk Space – At least 32 GB
- Network: Gigabit (10/100/1000baseT) Ethernet adapter
- Optical Storage: DVD drive (if installing the OS from DVD media)
Let’s go through the steps of this guide and learn How to Install Windows Server 2019 smoothly. Just prepare a clean USB to create a bootable USB or DVD medium. Connect the USB to your system and start it.
Step 1. Select Language, Keyboard type, and Time Zone
When loading files is finished, you will see the first blue screen. Select your preferred language, Keyboard layout, and Time zone. Then, click ‘’Next’’.
Step 2. Install Windows Server 2019
On the below screen, click on ”Install Now” to let the installation process get started.
When you see the ”Setup is starting” screen, wait till it ends.
Step 3. Choose the Windows Operating System
At this point in the installation process, select the Windows Server operating system you wish to install and click ‘’Next’’.
Step 4. License Agreement
By selecting the “I accept the license terms” checkbox after reading the license terms, you can begin the installation.
Step 5. Determine Installation Type
When you are asked to choose the type of installation, you must select (Custom: Install Windows only) if this is the first installation of Windows Server 2019 on your Server.
Step 6. Specify where to Install Windows Server 2019
In this part of Installing Windows Server 2019, you need to choose a partition to install Windows Server. Create a new partition for it and specify the size. Also, you can use the entire disk space available by clicking ‘’Next’’.
To consider a separate partition, If the service is going to be used as a full server, it is a good idea to keep the operating system separate from using data. To do this click ‘’New’’ and specify your considered size and click on ‘’Apply’’ and then click ‘’Ok’’.
Step 7. Complete the Installation
Wait for the installation to complete itself.
Windows will restart a couple of times and after that, the installation is finished.
Step 8. Specify a Password for the built-in Administrator Account
On the screen below, choose a complex password for the administrator when you are prompted and click ”Finish”.
Step 9. Enter Your Administrator Password
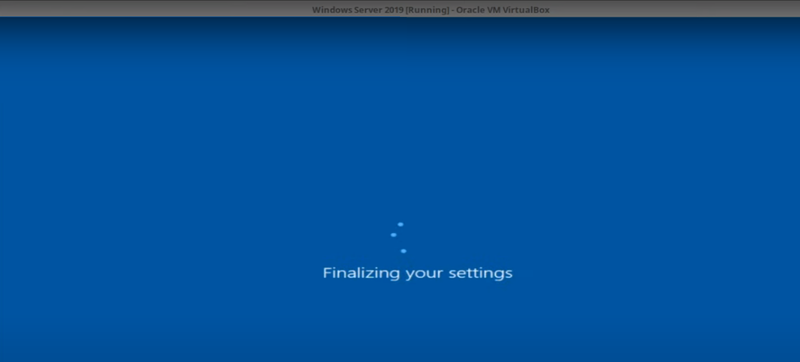
To enter the user profile service, enter your password and wait for applying user settings and the local session manager. Use the Ctrl + Alt + Del key combination to log in as the Administrator user.
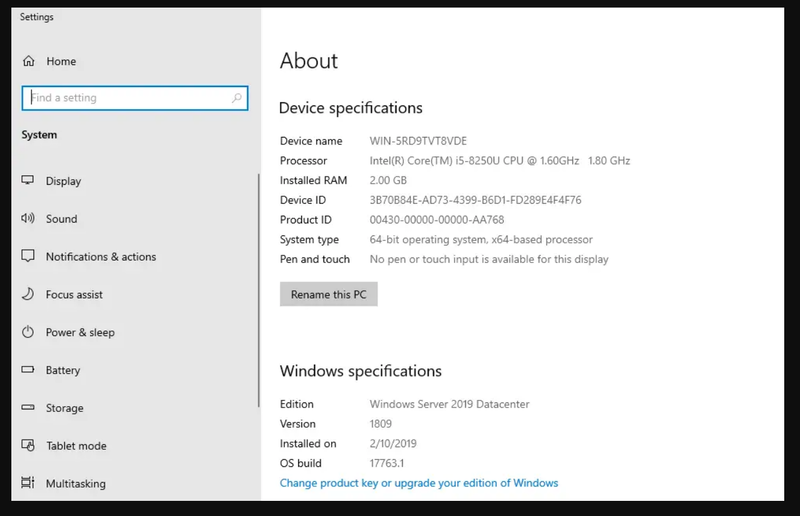
Step 10. Windows Server 2019 Settings
To review Windows Server details, refer to the settings section and customize different fields if you wish.
You should also be able to find information about Windows Server 2019 installation in the Server Manager Local Server area.
That’s all. Congratulation. This is the end of installing Windows Server 2019 on your Physical server or Virtual Environment. In the end, you are recommended to get back up in Windows Server 2019.
A Quick Method to Install Microsoft Windows Server 2019
As you know, a Dedicated server is a requirement for installing Windows Server. Since the support team of your provider does not install Windows Server 2019, you need to use virtual machines such as esxi or kvm. if you use any virtualization software, take a snapshot of the final point, as you haven’t yet set any roles or functions (Directory or Certificate Services) for the server.
Installing Windows Server on a PC also requires a virtual machine which seems difficult for many users. So, what is the OperaVPS team’s suggestion? You can easily buy Windows VPS with a pre-installed Windows Server 2019 to not have to do all the required steps of installation and manage the long process of installation.
FAQ
There are four editions available:
Windows Server 2019 Datacenter
Windows Server 2019 Standard
Windows Server 2019 Essentials
Microsoft Hyper-V Server 2019
Microsoft has solved this issue.
Microsoft has released an emergency out-of-band update to address this issue.
Conclusion
In this article, you learned How to Install Microsoft Windows Server 2019. From now on, you will be able to create cloud-native and modernize traditional apps using containers and micro-services using Windows Server 2019.
If you follow the above steps properly then you can smoothly install Windows Server 2019 without any errors but do not hesitate to contact us if you encounter any problems. Our technical support team will try their best to solve your problems.
Item Preview
There Is No Preview Available For This Item
This item does not appear to have any files that can be experienced on Archive.org.
Please download files in this item to interact with them on your computer.
Show all files
1,630
Views
4
Favorites
DOWNLOAD OPTIONS
Uploaded by
gordanfarmer3
on
SIMILAR ITEMS (based on metadata)
Windows Server 2019 LTSC Version 1809 (Updated November 2022) x64 Russian English
Состав редакций в образах:
Standard
Standard (возможности рабочего стола)
Datacenter
Datacenter (возможности рабочего стола)
Hyper-V
Essentials
Storage
Скачать Торрент
Скачать с Яндекс Диска
Контрольные суммы
Файл: ru-ru_windows_server_2019_x64_dvd_e02b76ba.iso
Размер: 5.244 GB (5631150080 байт)
MD5: 13c5ee7a58ded09f2c2a22a104c3ea1b
SHA-1: 3757ef88a62d769729a7f7664dac0ed8e8ced829
SHA-256: 0f539fcfbcdf6445cde00a3f2d84386317d27b8220c77f845cf93ac0866e052c
Файл: en-us_windows_server_2019_x64_dvd_f9475476.iso
Размер: 5.264 GB (5651695616 байт)
MD5: 676540503b041245836437227e44d4e0
SHA-1: 34412e74f01861ee1c230a189a9b92205d34ef2c
SHA-256: ea247e5cf4df3e5829bfaaf45d899933a2a67b1c700a02ee8141287a8520261c
[свернуть]
Windows Server 2019 RTM Version 1809 x64 Russian English
Состав редакций в образах:
Standard
Standard (возможности рабочего стола)
Datacenter
Datacenter (возможности рабочего стола)
Hyper-V
Essentials
Скачать Торрент
Скачать с Яндекс Диска
Контрольные суммы
Windows Server 2019 (x64) — DVD (Russian)
File: ru_windows_server_2019_x64_dvd_f37d6021.iso
SHA-1: 9e869bdbdcb4978c7aee0527f88ed1973816e5c8
Microsoft Hyper-V Server 2019 (x64) — DVD (Russian)
File: ru_microsoft_hyper-v_server_2019_x64_dvd_2ea02425.iso
SHA-1: 453d8a7c81ca6f81d02466b64c039689e10ec887
Windows Server 2019 Essentials (x64) — DVD (Russian)
File: ru_windows_server_2019_essentials_x64_dvd_f341fabd.iso
SHA-1: b311f46dfe363e6e4bcb1e9bdd799876ff47f280
Windows Server, version 1809 (x64) — DVD (Russian)
File: ru_windows_server_version_1809_x64_dvd_b3d78a44.iso
SHA-1: f70cb8c8852256ff6d1fda1d09b29d1a51c8b5b2
Windows Server 2019 (x64) — DVD (English)
File: en_windows_server_2019_x64_dvd_3c2cf1202.iso
SHA-1: 24f7c459f3612df82205a45fdb68ca9f96bc5d80
Microsoft Hyper-V Server 2019 (x64) — DVD (English)
File: en_microsoft_hyper-v_server_2019_x64_dvd_1804cc67.iso
SHA-1: 04b40e7e2fd14c964086c214d6409795908f6887
Windows Server 2019 Essentials (x64) — DVD (English)
File: en_windows_server_2019_essentials_x64_dvd_70296902.iso
SHA-1: 66706c2fc927066c90df294e8b67d4a70e564986
Windows Server 2019 Features on Demand (x64) — DVD (English)
File: en_windows_server_2019_features_on_demand_x64_dvd_c6194375.iso
SHA-1: 113a9d70ec2a676dc95c5f088855b177ea630583
Windows Server, version 1809 (x64) — DVD (English)
File: en_windows_server_version_1809_x64_dvd_ab2a40d6.iso
SHA-1: 961616165939d008f15029a70bafe5b734eba65d
[свернуть]
