- Dependency management
- System Requirements
-
Installation — Linux / Unix / macOS
-
Downloading the Composer Executable
- Locally
- Globally
-
Downloading the Composer Executable
-
Installation — Windows
- Using the Installer
- Manual Installation
- Docker Image
- Using Composer
Composer is a tool for dependency management in PHP. It allows you to declare
the libraries your project depends on and it will manage (install/update) them
for you.
Dependency management#
Composer is not a package manager in the same sense as Yum or Apt are. Yes,
it deals with «packages» or libraries, but it manages them on a per-project
basis, installing them in a directory (e.g. vendor) inside your project. By
default, it does not install anything globally. Thus, it is a dependency
manager. It does however support a «global» project for convenience via the
global command.
This idea is not new and Composer is strongly inspired by node’s
npm and ruby’s bundler.
Suppose:
- You have a project that depends on a number of libraries.
- Some of those libraries depend on other libraries.
Composer:
- Enables you to declare the libraries you depend on.
- Finds out which versions of which packages can and need to be installed, and
installs them (meaning it downloads them into your project). - You can update all your dependencies in one command.
See the Basic usage chapter for more details on declaring
dependencies.
System Requirements#
Composer in its latest version requires PHP 7.2.5 to run. A long-term-support
version (2.2.x) still offers support for PHP 5.3.2+ in case you are stuck with
a legacy PHP version. A few sensitive php settings and compile flags are also
required, but when using the installer you will be warned about any
incompatibilities.
Composer needs several supporting applications to work effectively, making the
process of handling package dependencies more efficient. For decompressing
files, Composer relies on tools like 7z (or 7zz), gzip, tar, unrar,
unzip and xz. As for version control systems, Composer integrates seamlessly
with Fossil, Git, Mercurial, Perforce and Subversion, thereby ensuring the
application’s smooth operation and management of library repositories. Before
using Composer, ensure that these dependencies are correctly installed on your
system.
Composer is multi-platform and we strive to make it run equally well on Windows,
Linux and macOS.
Installation — Linux / Unix / macOS#
Downloading the Composer Executable#
Composer offers a convenient installer that you can execute directly from the
command line. Feel free to download this file
or review it on GitHub
if you wish to know more about the inner workings of the installer. The source
is plain PHP.
There are, in short, two ways to install Composer. Locally as part of your
project, or globally as a system wide executable.
Locally#
To install Composer locally, run the installer in your project directory. See
the Download page for instructions.
The installer will check a few PHP settings and then download composer.phar
to your working directory. This file is the Composer binary. It is a PHAR
(PHP archive), which is an archive format for PHP which can be run on
the command line, amongst other things.
Now run php composer.phar in order to run Composer.
You can install Composer to a specific directory by using the --install-dir
option and additionally (re)name it as well using the --filename option. When
running the installer when following
the Download page instructions add the
following parameters:
php composer-setup.php --install-dir=bin --filename=composerNow run php bin/composer in order to run Composer.
Globally#
You can place the Composer PHAR anywhere you wish. If you put it in a directory
that is part of your PATH, you can access it globally. On Unix systems you
can even make it executable and invoke it without directly using the php
interpreter.
After running the installer following the Download page instructions
you can run this to move composer.phar to a directory that is in your path:
mv composer.phar /usr/local/bin/composerIf you like to install it only for your user and avoid requiring root permissions,
you can use ~/.local/bin instead which is available by default on some
Linux distributions.
Note: If the above fails due to permissions, you may need to run it again
withsudo.Note: On some versions of macOS the
/usrdirectory does not exist by
default. If you receive the error «/usr/local/bin/composer: No such file or
directory» then you must create the directory manually before proceeding:
mkdir -p /usr/local/bin.Note: For information on changing your PATH, please read the
Wikipedia article and/or use
your search engine of choice.
Now run composer in order to run Composer instead of php composer.phar.
Installation — Windows#
Using the Installer#
This is the easiest way to get Composer set up on your machine.
Download and run
Composer-Setup.exe. It will
install the latest Composer version and set up your PATH so that you can
call composer from any directory in your command line.
Note: Close your current terminal. Test usage with a new terminal: This is
important since the PATH only gets loaded when the terminal starts.
Manual Installation#
Change to a directory on your PATH and run the installer following
the Download page instructions
to download composer.phar.
Create a new composer.bat file alongside composer.phar:
Using cmd.exe:
C:\bin> echo @php "%~dp0composer.phar" %*>composer.batUsing PowerShell:
PS C:\bin> Set-Content composer.bat '@php "%~dp0composer.phar" %*'Add the directory to your PATH environment variable if it isn’t already.
For information on changing your PATH variable, please see
this article and/or
use your search engine of choice.
Close your current terminal. Test usage with a new terminal:
C:\Users\username>composer -VComposer version 2.4.0 2022-08-16 16:10:48Docker Image#
Composer is published as Docker container in a few places, see the list in the composer/docker README.
Example usage:
docker pull composer/composer
docker run --rm -it -v "$(pwd):/app" composer/composer install
To add Composer to an existing Dockerfile you can simply copy binary file from pre-built, low-size images:
# Latest release
COPY --from=composer/composer:latest-bin /composer /usr/bin/composer

# Specific release
COPY --from=composer/composer:2-bin /composer /usr/bin/composer
Read the image description for further usage information.
Note: Docker specific issues should be filed on the composer/docker repository.
Note: You may also use composer instead of composer/composer as image name above. It is shorter and is a Docker official image but is not published directly by us and thus usually receives new releases with a delay of a few days. Important: short-aliased images don’t have binary-only equivalents, so for COPY --from approach it’s better to use composer/composer ones.
Using Composer#
Now that you’ve installed Composer, you are ready to use it! Head on over to the
next chapter for a short demonstration.
Basic usage →
Found a typo? Something is wrong in this documentation?
Fork and edit it!
Last updated on | 83 replies
In this guide we will install Composer and PHP on Windows 10 so that we can install dependencies for our web apps directly from Windows command line.
1. Download and Install Visual C++
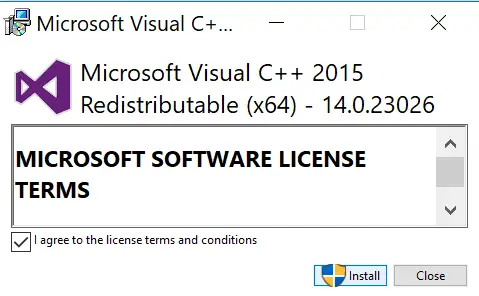
In order to run PHP on Windows 10, you will need to install Visual C++ Redistributable for Visual Studio. You can download it from the Windows Download page or click the direct link below.
- Download: VC_redist.x64.exe (64 bit) or VC_redist.x86.exe (32 bit)
Once downloaded, run the installer and click Install.
2. Download and Extract PHP
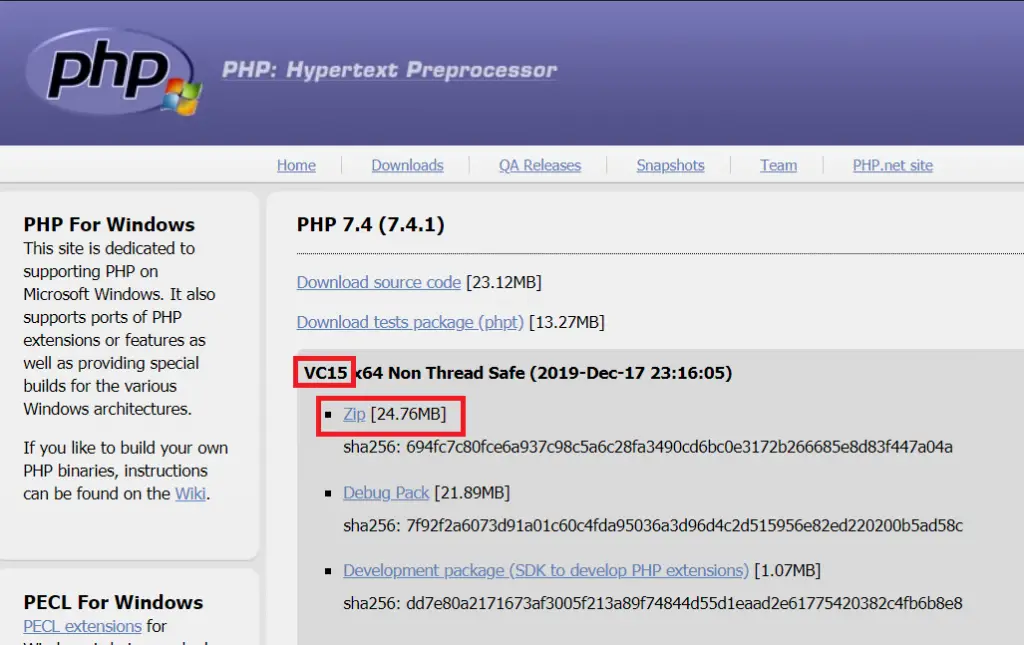
Go to the Windows PHP download page and download the .zip of the version of PHP you require. In this guide, we are installing PHP 7.4 VC15 x64 Non Thread Safe, which is the latest version as of writing (Jan 2020).
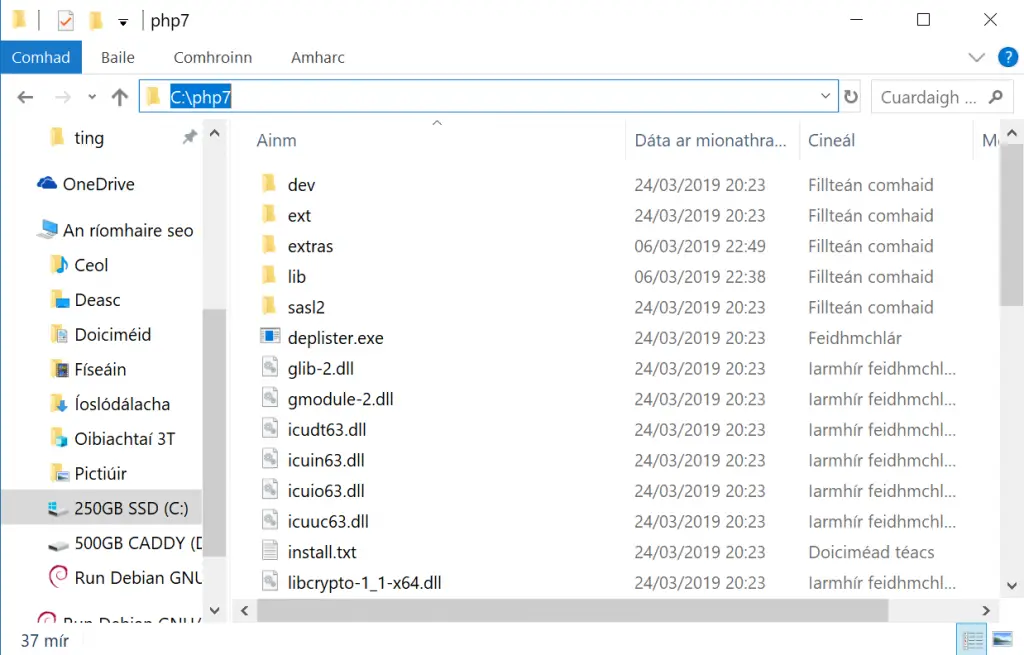
Once downloaded, create a new folder in c:\php7 (or wherever you prefer) and extract your PHP zip to it.
3. Download and Install Composer
- Download Composer-Setup.exe from the Composer Download page.
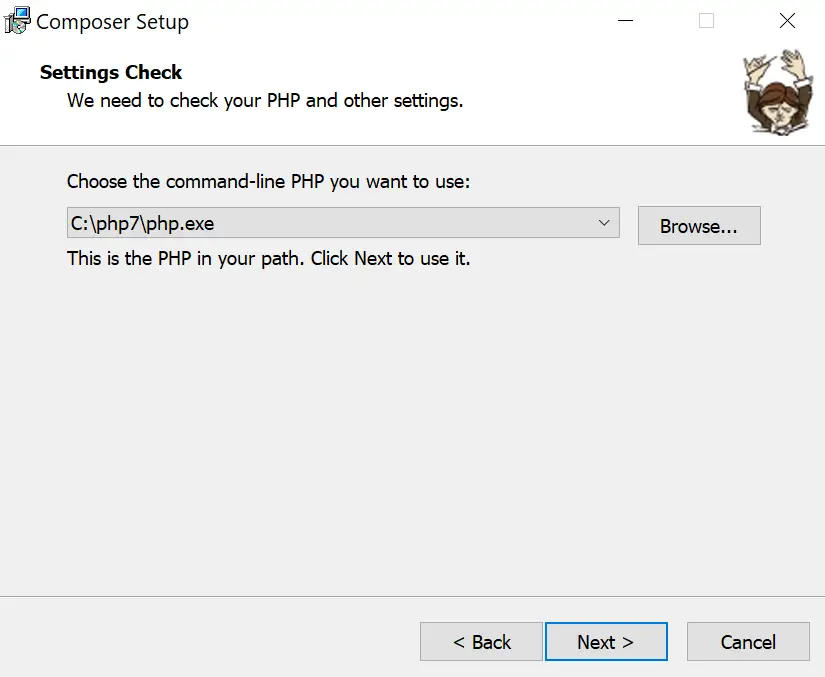
In the second step of Composer Setup, make sure the correct path to php.exe is set and click Next.
If Setup prompts to create php.ini, allow it and click Next.
Skip the Proxy URL settings, just click Next then click Install.
Click Finish once install is complete.
4. Test PHP
If you have any Command Prompt windows currently open, close them now.
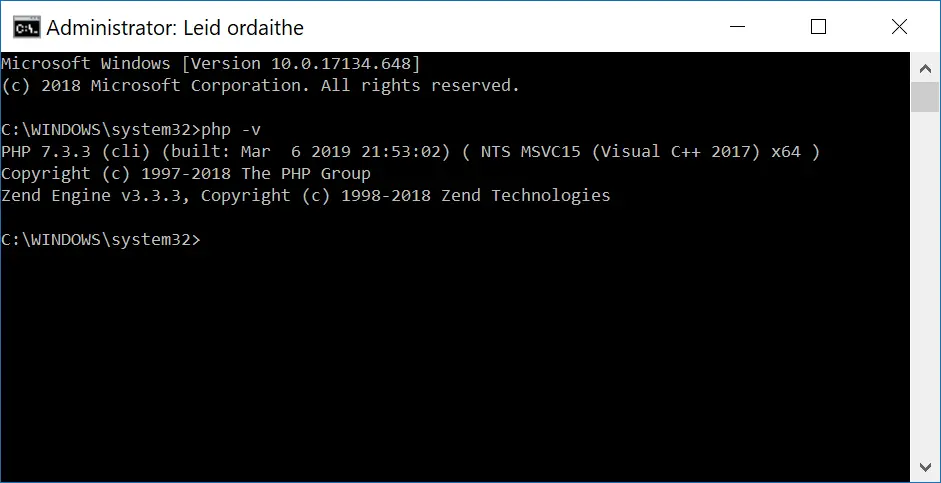
Open Command Prompt, type php -v and press Enter. You should now see the PHP version.
If it returns a PHP version, you can skip to Step 6 to test Composer.
If you get an error “‘php’ is not recognized as an internal or external command,
operable program or batch file.”, you may need to Add a Path Environment Variable.
5. Add Path Environment Variable
Composer setup usually does this for you, but if for whatever reason it didn’t, you can set one up manually.
So that you don’t have to type the whole path to php.exe every time you run a PHP command, you should add c:\php7 as a path environment variable.
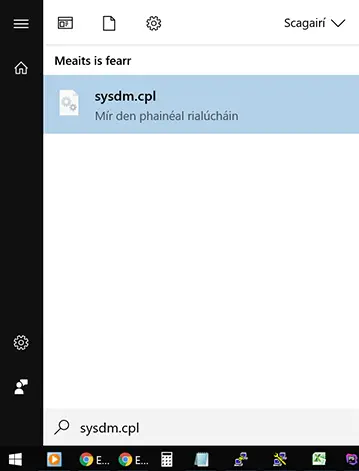
Open System Properties by clicking the start menu and typing sysdm.cpl and press Enter.
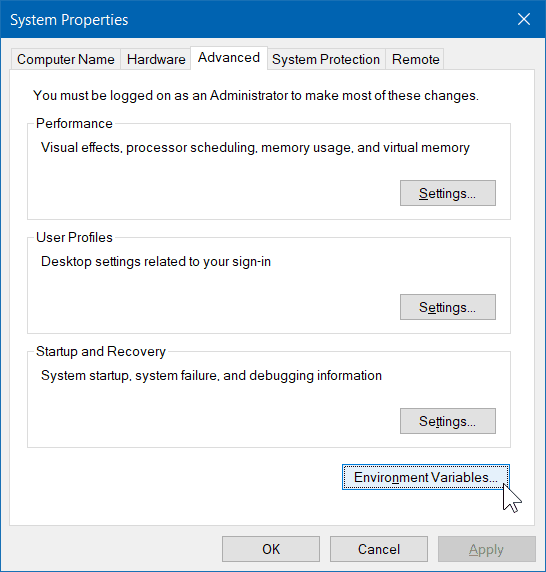
In System Properties, click Environment Variables.
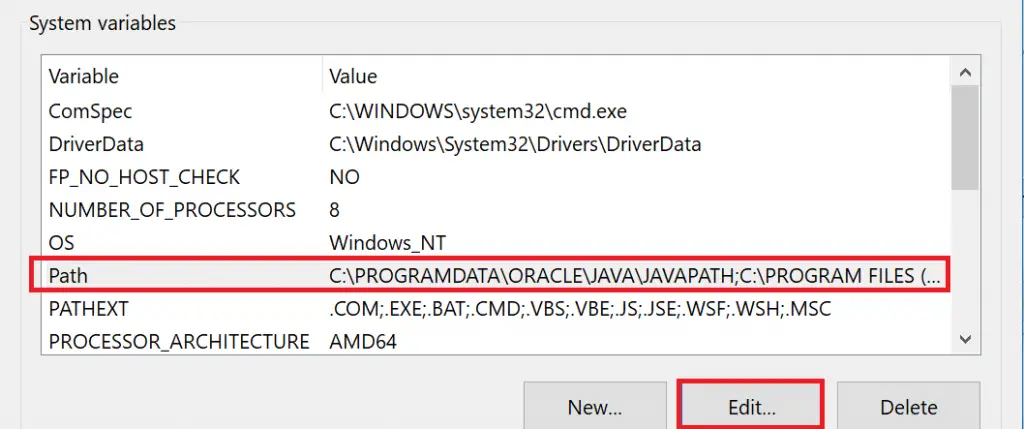
In System Variables, click Path and then click Edit.
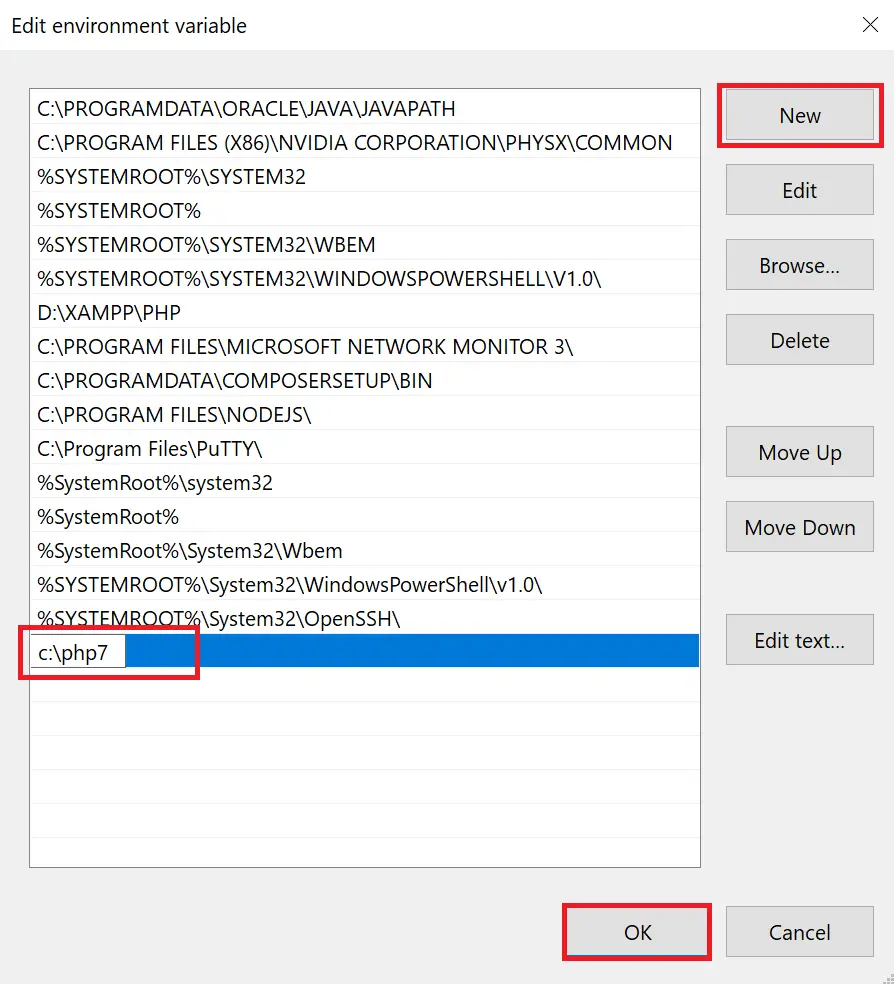
Click New, type the path to your PHP folder (c:\php7) and click OK.
Close the System Properties dialogue by clicking OK.
6. Test Composer
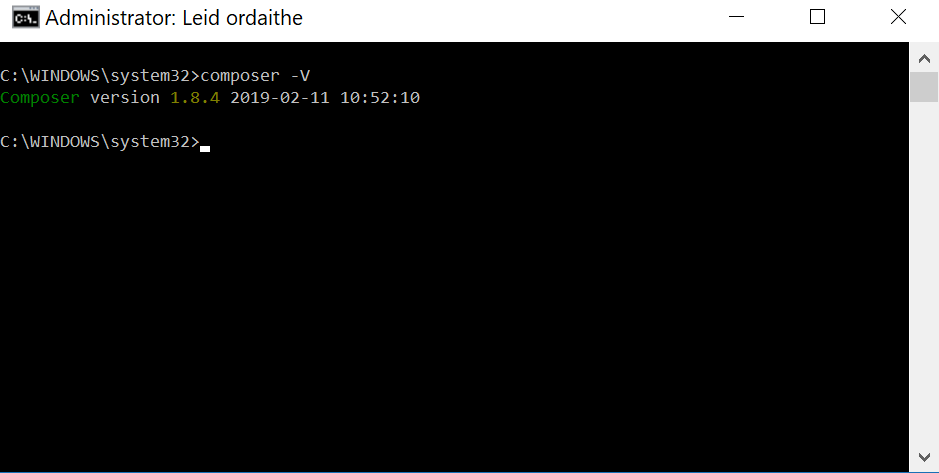
Open up Command Prompt and type composer -V (that’s uppercase V).
If all was installed correctly, you should see a version number.
Hurrah! You can now run Composer and PHP on Windows 10.
Let me know if this helped. Follow me on Twitter, Facebook and YouTube, or 🍊 buy me a smoothie.
Composer is essentially a package manager for PHP. A package manager is, it allows anyone to import codebases into the project & keep them up to date. It just helps you to manage those dependencies.
In this article, we will look into the process of installing a composer on a windows system.
Installation PHP composer on Windows:
Follow the below steps to install PHP composer on a windows system:
Step 1: Navigate to the official composer website.
Step 2: Then click on the Download button.
Step 3: Then click on the Composer-Setup.exe & download the file.
Step 4: Then click on “Install for all users”.
Step 5: Do not make any changes & click Next
Step 6: First, you have to install PHP in your computer. You can see the installation location here. Click Next.
Step 7: Do not make any changes & click Next.
Step 8: Do not make any changes & click Install.
Step 9: Wait for the installation.
Step 10: Do not make any changes, just leave it & click Next.
Step 11: Click Finish, Composer is installed successfully.
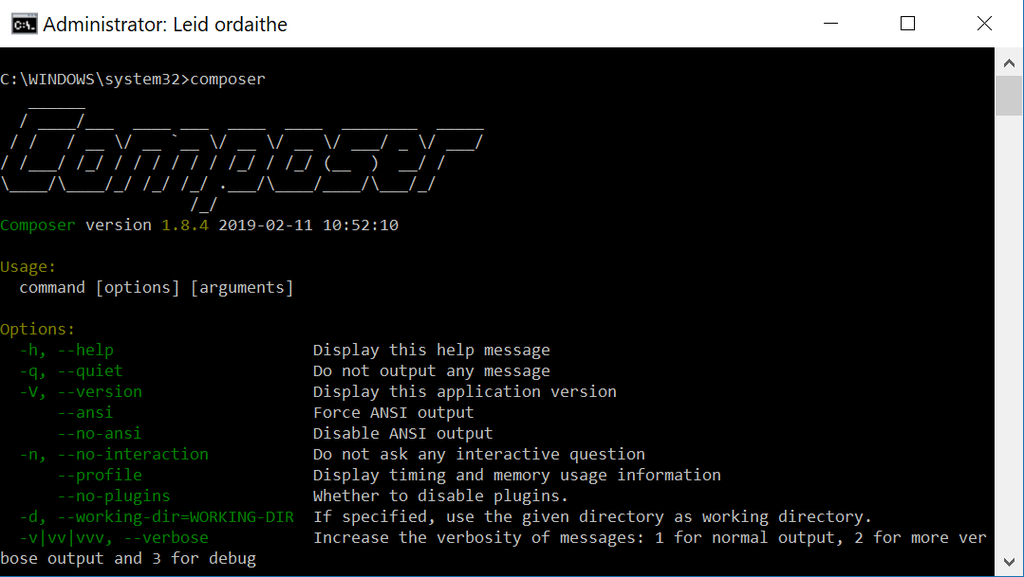
Step 12: Open command prompt & execute the below command :
composer
Hence you can see all details & your installation is successful.
Last Updated :
26 Nov, 2021
Like Article
Save Article
Composer-Setup
The Windows installer for the Composer PHP Dependency Manager. Download
the latest release.
Contents
- About
- Details
- Php Ini File
- Troubleshooting
- Uninstalling
- Install Locations
- Environment Variables
- Command Line Parameters
- Unattended Installation
- License
About
Composer-Setup downloads and installs Composer so you can use it easily from the command line.
- it looks for PHP on your computer.
- it creates or modifies
php.iniif required. - it adds PHP to the path.
- it installs Composer globally — just type
composerfrom any location to use it. - it lets you use the Command Prompt, Git Bash, Msys, Msys2 and Cygwin.
- it can be deployed unattended for silent installs/uninstalls.
Download and run the latest release and in the majority of cases this is all you need to
do. The install process is described in more detail below.
Composer-Setup is written with Inno Setup, which is a powerful free installer for Windows
programs.
Details
First you must choose the installation type. By default Composer will be installed to a
fixed location with a Control Panel uninstaller. You can choose Developer Mode if
you want more control, which will install Composer anywhere you want without an uninstaller.
The next step is to find the location of your php.exe, which is the PHP command line interpreter.
The installer searches common locations on your computer and presents you with its findings. If PHP
is already in your path then it will display this value. If not, or you want to choose a different
PHP, you must select from the list or hunt around manually.
The installer will then check that PHP and your path are set up correctly. If it finds any errors it
will give you the chance to fix them. It will also offer to either create or modify the php.ini
file if required settings do not exist. See Php Ini File for more information.
Next, the installer will ask if you need a proxy server to connect to the internet. If it finds any
values in your Internet Settings or your environment, then the proxy url will be displayed.
After you have reviewed and accepted your settings, the installer will download Composer and set
everything up. If your environment has been changed, it is important to close your current terminal
and open a new one so that the changes get loaded. The installer will remind you if this is the case.
Php Ini File
Composer-Setup will either create a new php.ini or modify an existing file if any settings needed
by Composer are missing:
allow_url_fopenset toOncurl,mbstringandopen_sslextensions enabled
When creating a new file, the php.ini-production file is used with extension_dir and
date.timezone values appropriately set. When modifying an existing file, a backup is created in
the same directory, named php.ini~orig.
Troubleshooting
Composer-Setup creates a log file, which may be useful to review if you experience any installation
issues. This is stored in your temp directory AppData\Local\Temp with a formatted filename:
Setup Log YYYY-MM-DD #nnn.txt.
Uninstalling
The uninstall program is available from the Control Panel (or Apps and Features) and is named
Composer - PHP Dependency Manager. It offers the option to remove user cache and configuration
data (for all users, if run as an Adminstrator) from:
<user>\AppData\Local\Composer<user>\AppData\Roaming\Composer
The uninstall program will not be available if you installed in Developer Mode. To manually
uninstall you must delete the composer files from the location you installed to and update the
environment.
Install Locations
In a default installation, the install directories are pre-determined and depend on whether you have
chosen to install for All Users or the Current User.
All Users install:
C:\<Program Files>\ComposerSetup— uninstaller.C:\ProgramData\ComposerSetup\bin— composer files.
Current User install:
C:\Users\<user>\AppData\Local\ComposerSetup— uninstaller.C:\Users\<user>\AppData\Local\ComposerSetup\bin— composer files.
In a Developer Mode installation you can install the composer files to a location of your choice.
Environment Variables
The installer will modify the System path for All Users installs, or the User path for
Current User installs:
- the path to PHP will be added if missing, or replaced if a different PHP is selected. For default
All Users installs you must confirm that you accept responsibility for the access control of this
location. This is important if other people use the computer because it could enable escalation of
priveleges exploits. - the path to the composer files directory will be added/replaced.
In addition the installer will add the following to the environment of the current user:
- the
C:\Users\<user>\AppData\Roaming\Composer\vendor\bindirectory to your path. - an
http_proxyvalue, if a proxy is specified in the installer.
The uninstaller will remove the path to the composer files directory and, if the user data was
removed, the Composer\vendor\bin path. The PHP path and any http_proxy value will be left intact.
Command Line Parameters
The installer supports Inno Setup’s Setup Command Line Parameters, although not all
of them are relevant. Of interest are the /VERYSILENT or /SILENT options for
Unattended Installs and the /SAVEINF= and /LOADINF= directives for
creating and using a settings file. The following additional parameters are available:
/PHP="folder-or-exe"uses PHP from the specified location, adding it to the path if necessary./DEV="path"selects Developer Mode and installs Composer to the specified path without an
uninstaller./PROXY=proxy-urlis the proxy url to use and save, but only if no
proxy environment variables exist. The log file automatically reports the
command line parameters so any sensitive data in the proxy url will be visible. This is not the case
when the proxy url is specified in a settings file.
The uninstall program supports Inno Setup’s Uninstaller Command Line Parameters,
plus the following parameters:
/DELETE=localremoves<user>\AppData\Local\Composerdata./DELETE=alladditionally removes<user>\AppData\Roaming\Composerdata.
Unattended Installs
Unattended installs and uninstalls require the /VERYSILENT /SUPPRESSMSGBOXES command line options.
- The confirmation needed to add/replace a PHP folder on the System path
is bypassed on unattended installs. - User cache and configuration data is not removed on unattended uninstalls unless specified with
the/DELETE=parameter (as above), which will apply to all users if being run as an Administrator.
License
Composer-Setup is licensed under the MIT License — see the LICENSE file for details
Для работы Composer на ПК с ОС Windows в обязательном порядке нужен php. Потому установка Компосера начинается с установки пхп. Для начала давайте проверим, возможно php уже установлен. Открываем консоль и вводим команду:
php -vЕсли результатом выполнения станет сообщение:
«php» не является внутренней или внешней командой исполняемой программой или пакетным файлом
пхп в системе нет.

Установка php в Windows
Переходим к непосредственной установке. Для этого переходим на сайт php.net и в разделе «Downloads» кликаем по ссылке «Windows downloads».

Теперь нам необходимо скачать zip-архив версии php, которую хотим установить.

После того как архив скачается распакуем его для постоянного хранения на компе в любую удобную вам папку. (Я рекомендую распаковывать на диск C в папку php7).
На этом установка php закончена. Остаётся только произвести настройку. Открываем проводник, кликаем правой кнопкой мыши по «Этот компьютер», далее «Свойства». В появившемся окне выбираем пункт «Дополнительные параметры системы» в колонке слева.

Открывается окно «Свойства системы». Переходим во вкладку «Дополнительно» и нажимаем на кнопку «Параметры среды».

В окне «Системные переменные» левой кнопкой мыши нажимаем на «path» и жмём кнопку «Изменить».

Открывается список всех системных переменных. Нажимаем кнопку «создать» и прописываем путь до папки с php, которые мы создали на втором шаге. В моём случае это C:\php7

Подтверждаем действие нажатием «ок».
Установка curl в php
Настоятельно рекомендую настроить поддержку curl (по умолчанию она отключена). Для этого открываем папку с нашим php, находим файл php.ini и в самый конец добавляем
extension=php_curl.dllСохраняем файл.
Закрываем все окна. Перезагружаем компьютер. Открываем консоль. Набираем php -v
Если всё сделали верно, то вы увидите версию php установленную в вашей системе.
Установка Composer
После того как php успешно установлен в системе установка Composer будет весьма простой. Скачиваем установщик с официального сайта. Запускаем. На шаге «Choose the command-line PHP…» скорее всего уже будет указан правильный путь до файла php.exe

Если этого не произошло — просто нажмите «Browse…» и вручную укажите расположение файла.
Как устанавливать библиотеки с git-hub через Composer
Сам в своё время потратил кучу времени, чтобы понять, что означают инструкции типа:
Добавьте библиотеку в файл composer.json вашего проекта
На самом деле всё очень просто. Создаем на компьютере папку в которую хотим установить нужную библиотеку с гитхаба. Создаем файл с названием composer.json. В это файл засовываем тот код, который указан на гитхабе у данной библиотеки. Сохраняем.
Теперь открываем командную строку. Используя команды cd и путь к папке — переходим в нужную папку. Выполняем простую команду:
composer installЕсли у вас установлен Composer, пхп среда и активен curl, то с высокой долей вероятности запустится установка, а через какое-то время в папке появятся желаемые файл, с которыми уже можно будет спокойно работать!
