Table of Contents
- Enabling The Telnet Client
- Verifying The Install
- Summary
- See Also
The Telnet Client is a great tool for developers and administrators to help manage and test network connectivity. However, the Telnet Client application is disabled by default in Microsoft Windows 10. Attempts to use it before activation returns the error
message ’not recognized as an internal or external command, operable program or batch file’.

The following step-by-step shows you how to enable
Telnet.
Enabling The Telnet Client
To enable Telnet Client on Windows 10, follow these steps:
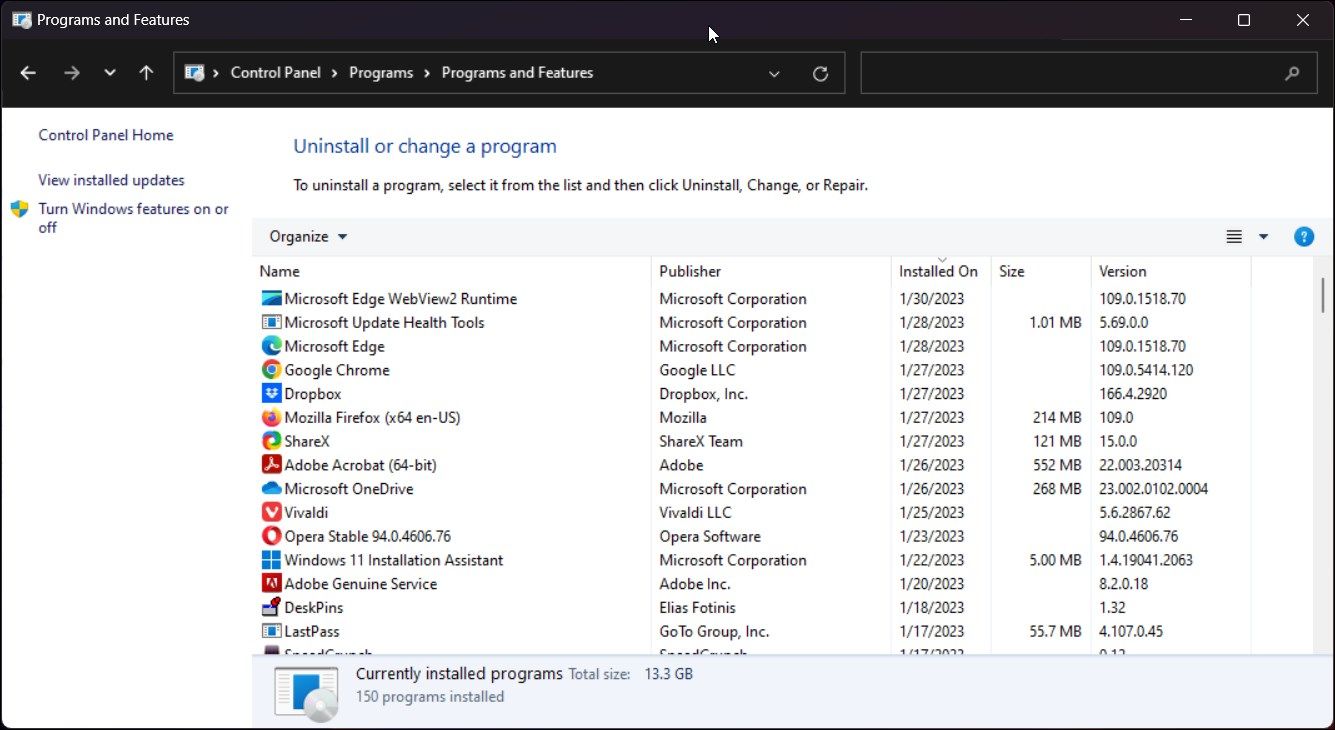
- Right-click the Start button and select Programs and Features.

- Click Turn Windows features on or off from the left-hand menu.
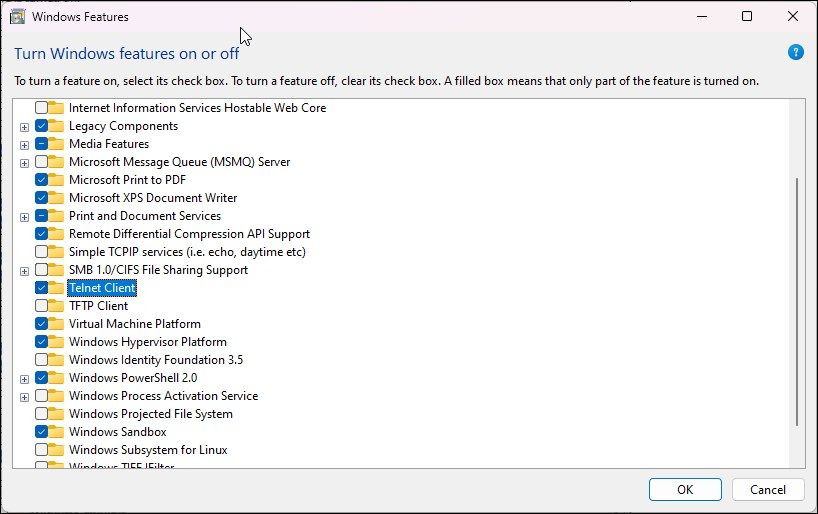
- The Windows Features dialog box appears. Scroll down and select Telnet Client. Click
OK.
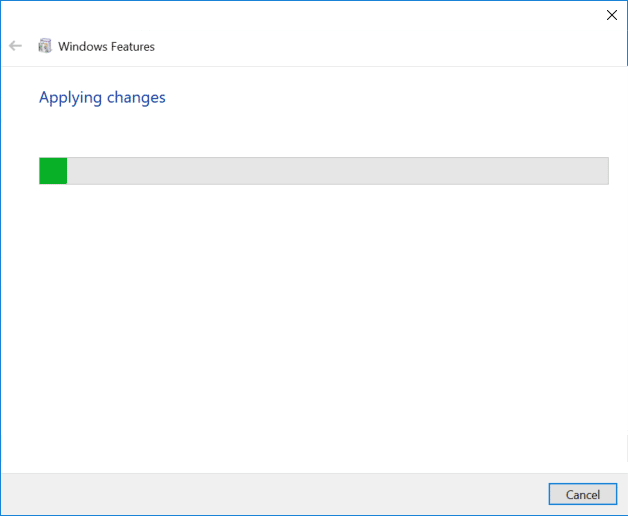
- The Telnet Client installations begins.
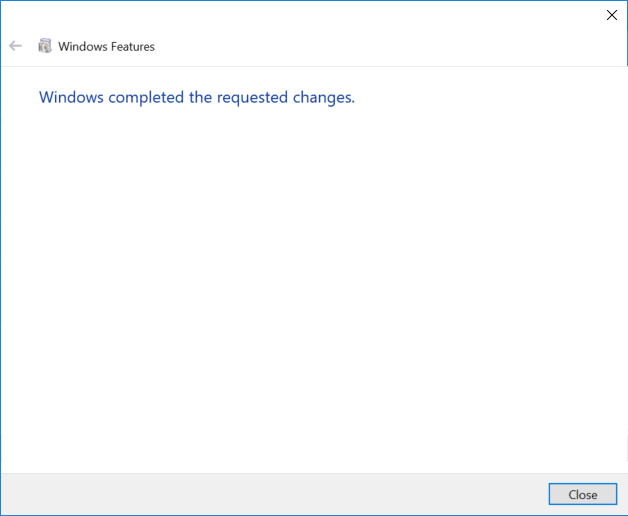
- Once complete, a success message appears.
- Click Close. There’s no need to restart your computer.


Verifying The Install
Once the installation completes, we can use the Telnet Client.
- Launch the Command Prompt by typing Command Prompt into the search box on the menu bar and clicking the app returned.
- Alternatively, you can also type Windows Key + R to open the
Run command dialog. Type cmd and hit the
Enter key. - Type telnet and hit Enter to access the Telnet Client.
- Type help to see the supported Telnet commands.
- Type q or quit to exit Telnet.
- Type telnet google.com 80 to Telnet into Google on port 80.


Summary
In this article, we have seen how to enable and use the Telnet Client in Windows 10.
See Also
- How To Enable Telnet in Windows Server 2012
- Windows 7: Enabling Telnet Client
 Несмотря на то, что Telnet протокол уже редко используется, что связано с отсутствием шифрования и проверки подлинности данных, у некоторых пользователей могут возникать задачи, требующие подключения с использованием клиента Telnet.
В Windows 11 и Windows 10 клиент для Telnet протокола присутствует, но отключен по умолчанию. При необходимости его можно включить одним из способов, описанных далее.
Компоненты Windows
Клиент Telnet — один из дополнительных компонентов Windows, который может быть включен, как и другие такие компоненты:
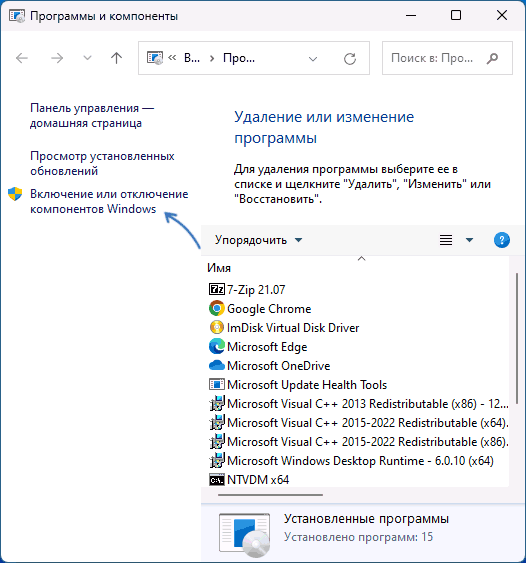
- Нажмите клавиши Win+R на клавиатуре (либо нажмите правой кнопкой мыши по кнопке «Пуск» и выберите пункт «Выполнить»), введите appwiz.cpl и нажмите Enter.
- В открывшемся окне в панели слева нажмите по пункту «Включение или отключение компонентов Windows».

- Отметьте «Клиент Telnet» в списке доступных компонентов и нажмите «Ок».

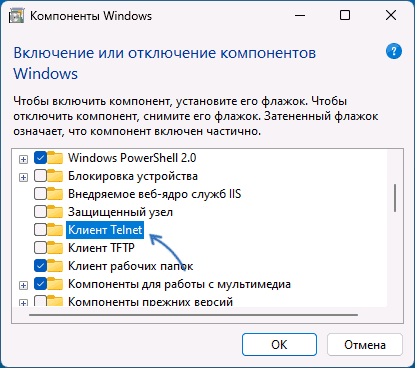
Останется дождаться, когда клиент Telnet будет установлен.
Для начала использования достаточно будет запустить командную строку, ввести команду telnet и нажать Enter.
Командная строка
Вы можете включить Telnet в командной строке, установив компонент с помощью DISM:
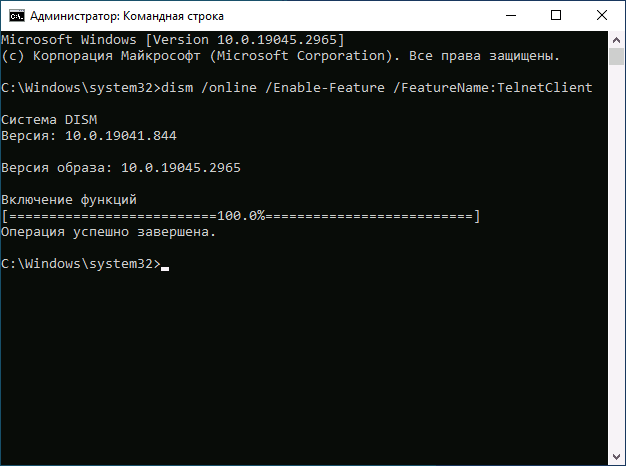
- Запустите командную строку от имени администратора.
- Введите команду
dism /online /Enable-Feature /FeatureName:TelnetClient
и нажмите Enter.

- Дождитесь завершения установки компонента.
Windows PowerShell
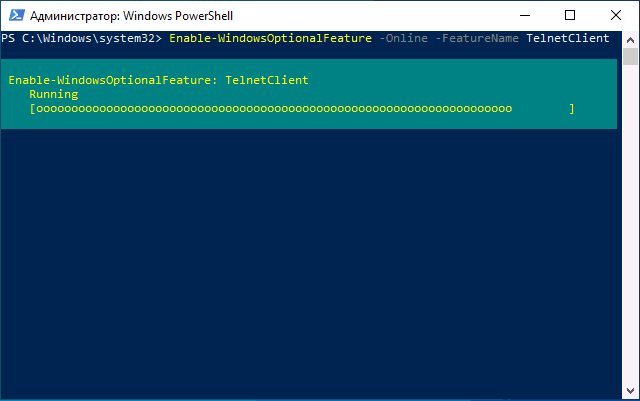
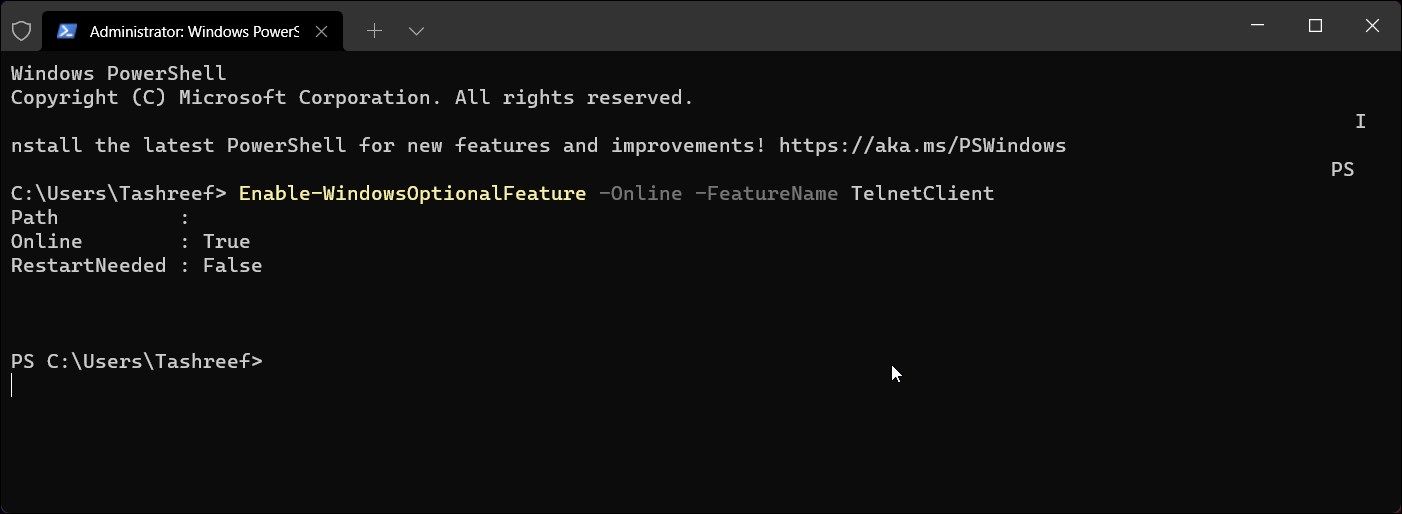
Включить компонент можно и в PowerShell: запустите Windows PowerShell или Терминал Windows от имени администратора, сделать это можно в контекстном меню кнопки «Пуск», после чего введите команду:
Enable-WindowsOptionalFeature -Online -FeatureName TelnetClient
и нажмите Enter. Через короткое время клиент Telnet будет установлен на вашем компьютере.
Завершая статью, поинтересуюсь: для какой цели вам потребовался именно Telnet клиент в наше время SSH, шифрования и защищенных протоколов? Будет отлично, если вы сможете поделиться этим в комментариях.
By default the telnet client in Microsoft’s Windows operating systems is disabled, this is unfortunate as it is an extremely useful tool which can be used for testing TCP connectivity to external hosts on a specified port.
This is great when you’re trying to troubleshoot network connectivity problems, for example, say we have a web server which should be listening on port 80 to serve HTTP traffic but we are not able to load a web page, by using telnet to connect to the web server on port 80 we can verify the connectivity.
It may be that the connectivity is fine but there is a problem with the web server, or that the web server is stopped and the port is not listening at all, for instance. With telnet we can get a better understanding of what’s going on.
Update October 21st 2015: I have also created a video showing the process:
Enabling the Telnet Client
Firstly you need to enable the telnet client, if you don’t enable it you’ll get a result similar to the below message when trying to use it.
C:\>telnet google.com 80
'telnet' is not recognized as an internal or external command, operable program or batch file.
C:\>
You can enable the client either by command line or through the graphical interface.
Enabling the telnet client through command line
Run the below command in command prompt with administrator permissions.
dism /online /Enable-Feature /FeatureName:TelnetClient
That’s it, after a few seconds telnet should be ready to use.
Enabling the telnet client through the graphical user interface
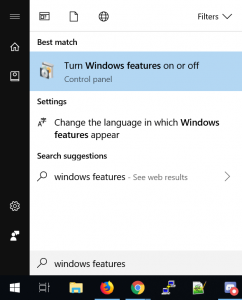
- Click the start button, then start typing “Turn Windows features on or off”, and select this option, as shown below.

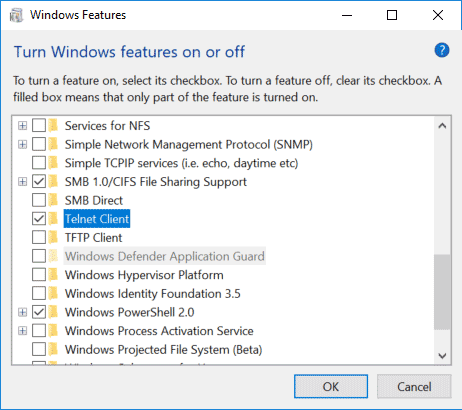
- The “Turn Windows Features on or off” window should open, scroll down and select “Telnet Client”.

- Click the OK button to proceed, this will display a screen while the changes apply.

- When complete it will display as below, you can now close the window.
Verifying that the telnet client is enabled
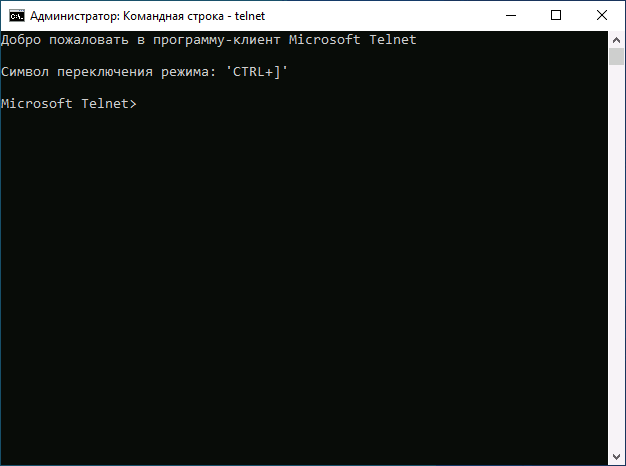
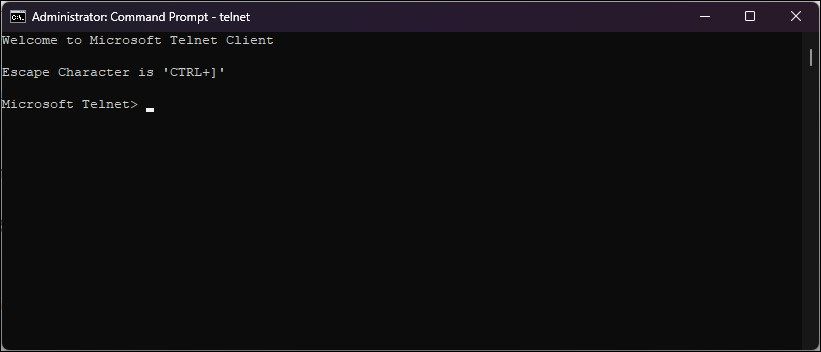
Simply open command prompt or powershell, type ‘telnet’ and press enter. If this was successful you should have a prompt similar to the below:
Welcome to Microsoft Telnet Client

Escape Character is 'CTRL+]'

Microsoft Telnet>
Already have telnet installed but still failing?
In some cases you must run command prompt or powershell as administrator in order to issue the telnet command, otherwise it will give the same error as if it was not enabled at all.
Summary
Now that you have enabled telnet you should be able to start issuing commands with it and using it to troubleshoot TCP connectivity problems.
Here’s how to get Telnet up and running on Windows 10 and 11.

Despite the vulnerability issues, Telnet is still used as a client-server protocol by Windows users. It is primarily used for initial network hardware configuration, remote access, port testing and forwarding, and other tasks that don’t involve sensitive information transfer.
You can enable Telnet on Windows 10 and 11 computers via Command Prompt or the Graphics User Interface (GUI) tool. Here we show you the many ways to enable Telnet on your Windows computer.
1. Enable Telnet on Windows Using Control Panel
You can enable Telnet Client using the Classic Control Panel. Since it is an optional feature, you can enable it using the Windows Optional Feature dialog. You can use it add or remove other users’ optional features on Windows.
To enable Telnet Client using Control Panel:
- Press Win + R to open Run.
- Type control and click OK to open Control Panel.
- In Control Panel, Click on Uninstall a Program under Programs and Features.

- In the left pane, click on the Turn Windows feature on or off.

- In the Windows Features dialog, scroll down and select Telnet Client.
- Click OK and wait for the feature to install. Once installed, restart your PC to apply the changes and enable the feature.
If you need to disable Telnet:
- Open the Windows Features dialog and unselect Telnet Client.
- Click OK and wait for the feature to uninstall.
- Click on Restart now to reboot your PC and apply the changes.
2. Enable Telnet Client Using Windows PowerShell
You can use the Enable-WindowsOptionalFeature cmdlet to enable Telnet Client using Windows PowerShell. Useful if you are unable to turn on the feature using the Windows Features dialog and it is also faster than the GUI method.
To enable Telnet using Windows PowerShell:
- Press Win + X to open the WinX menu.
- Click on Windows Terminal(Admin) and click Yes to open the terminal app as administrator. If you are using Windows 10, type PowerShell in Windows Search and open Windows PowerShell administrator.
- In the PowerShell window, type the following command and press Enter to enable Telnet:
Enable-WindowsOptionalFeature -Online -FeatureName TelnetClient - This process may take several minutes, so wait for it to complete and return a status report. If successful, you’ll see the result as Online:True.
- If you want to disable Telnet Client, use the following command instead:
Disable-WindowsOptionalFeature -Online -FeatureName TelnetClient - Close PowerShell and restart your PC.
3. Install Telnet Client Using Command Prompt
If you prefer Command Prompt over PowerShell, you can use the DISM /Online command to enable the optional features on your Windows 11 computer.
Follow these steps to install Telnet using Command Prompt:
- Press the Win key and type cmd.
- Right-click on Command Prompt and select Run as administrator.
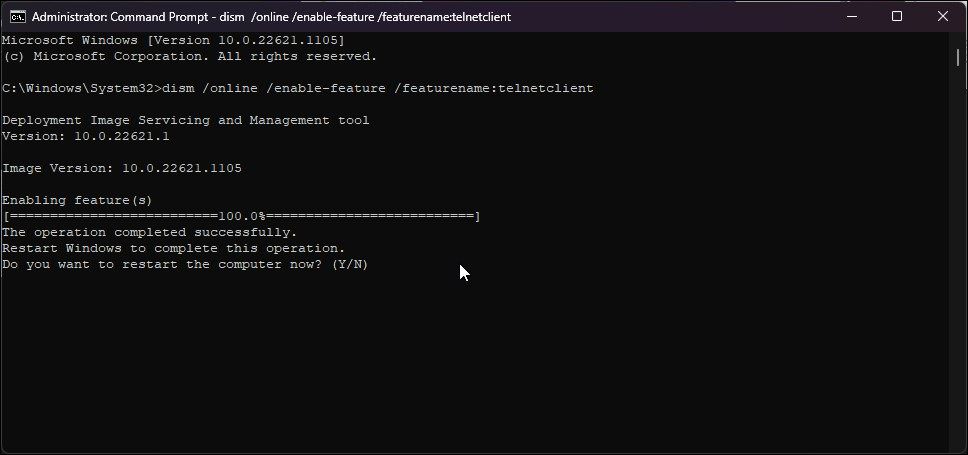
- In the Command Prompt window, type the following command and press Enter:
dism /online /Enable-Feature /FeatureName:TelnetClient - Command Prompt will start enabling the feature and display the operation completed successfully message.
- If you need to disable Telnet, type the following command and press Enter:
dism /Online /Disable-Feature /FeatureName:TelnetClient - Wait for the success message.
- Type exit and press Enter to close Command Prompt.
How to Check the Telnet Client Status on Your PC
You can check if the Telnet client is enabled on your PC using a Command Prompt command. When enabled, the Telnet command will open a new CMD to connect to remote servers and perform other tasks.
- Launch Command Prompt as administrator (see how to run the Command Prompt as an administrator for in-depth steps).
- In the Command Prompt window, type Telnet and press Enter.
- A new CMD with Microsoft Telnet will open.
All the Ways to Enable Telnet On Your Windows 11 Computer
Telnet is a built-in remote access utility that you can use to troubleshoot firewall and network issues. While it is still part of Windows, system administrators now prefer the more secure SSH protocol to access computers over an unsecured network.
The major disadvantage of Telnet is that it is not secure and prone to a man-in-the-middle attack. If not for particular situations, switch to a more secure network protocol such as SSH and Mosh with better password and public key authentication.
The Terminal Over A Network (telnet) connection allows you to connect to a remote computer using the command line. You can then run scripts and programs on the remote PC. The system administrators may already be familiar with this feature.
If you are new to this, then this article is for you. Before you can remotely access another computer, the telnet feature needs to be enabled on all Windows versions. In this article, we discuss in detail what telnet is, and how to enable it.
Note: The methods discussed in this post explain how to enable Telnet Client, which is enabled on the source computer. Telnet Server will need to be enabled on the remote (target) computer to which you want to connect.
On This Page
What is Telnet
Telnet is a network protocol that is used to log into a remote computer on the same network using the command line interface.
To establish remote sessions, telnet adheres to a user command Transmission Control Protocol/Internet Protocol (TCP/IP) networking protocol. Using this, users can sign in with regular user accounts with the permissions they have been allowed to the particular programs and data on the target computer.
Telnet uses a client-server relationship to establish a connection. It is a text-based communication mechanism between a client machine and a server where an individual can run commands on a remote computer while being logged in as a local user.
Telnet can be used to perform any number of functions, like editing files, running applications, etc., on remote computers.
Telnet Client vs. Telnet Server
As mentioned earlier, Telnet uses the client-server configuration method to establish a connection to a remote computer. Telnet Client is a piece of software that you enable on client computers from which you access the remote computer. Whereas, the Telnet Server is the target computer that you connect with over the network.
In other words, on the Telnet Server, the Telnet port needs to be opened and allowed to let other computers connect to it.
That said, one common issue that many users face on the Windows command line is experiencing the error “telnet is not recognized as an internal or external command.”
Fix “Telnet is Not Recognized”
If telnet is not enabled on a computer and you try to connect to a remote computer using this protocol, you will see the following error message:
'telnet' is not recognized as an internal or extenral command, operable program or batch file.

This means that telnet needs to be enabled before you can use it to establish remote connections over the network. Of course, if the feature is not enabled, how can the Windows computer recognize it?
If you are seeing such an error, then you can also benefit from all the methods shared below to enable Telnet on your Windows PC.
How to Enable Telnet on Windows
Enable Telnet from Optional Features
The files for the optional features on a Windows PC are always there, but the feature is not installed. Since telnet is an optional feature, here is how you can enable it:
-
Open the Optional Features applet by typing in “optionalfeatures” in the Run Command box.

Open Optional Features -
Check the box with “Telnet Client” and click Ok.

Enable telnet from Optional Features The feature will now begin to install.
-
Once installed, close the wizard.

Close wizard


Telnet will now be enabled and you may continue to use the command line to connect to a remote computer.
To disable Telnet, simply uncheck the box next to “Telnet Client” in the Optional Features applet.
Enable Telnet from Command Prompt
You can also enable the telnet client directly from the Command Prompt. This method can come in handy if you are already inside the Command Prompt and trying to connect remotely using telnet.
-
Ensure you are running Command Prompt with elevated privileges.
-
Run this cmdlet:
pkgmgr /iu:"TelnetClient"
Enable telnet from Command Prompt The command will run silently and install telnet in the background. Alternatively, you can also use this command to enable Telnet:
Note: Elevated privileges are required to run the DISM command.
dism /online /Enable-Feature /FeatureName:TelnetClient -
If prompted with a UAC, click Yes.
You can now begin connecting to a remote computer once the telnet is installed

To disable telnet from the Command Prompt, run the following cmdlet using Deployment Image Servicing and Management (DISM):
dism /online /Disable-Feature /FeatureName:TelnetClient
Enable Telnet from Windows PowerShell
If you are using PowerShell, run the following command in an elevated PowerShell instance to enable the Telnet Client:
Enable-WindowsOptionalFeature -Online -FeatureName TelnetClient
Telnet will now be enabled. You may now continue to access a remote PC using telnet directly from PowerShell.
In case you wish to disable the feature in the future, run this cmdlet in Windows PowerShell:
Disable-WindowsOptionalFeature -Online -FeatureName TelnetClient
Enable Telnet Remotely
The methods above show how you can enable the Telnet Client on the local computer. However, you can also enable it on a remote PC on your network. This is especially useful if Telnet has not been allowed through the target computer’s firewall.
To enable telnet on a remote Pc, we must use PsTools by SysInternals – which is a suite of command-line tools for the Windows operating system. Using the PsExec utility inside this suite, you can remote access the Command Prompt of the target PC and then run any command.
Use the following steps to enable Telnet on a remote PC:
-
Start by downloading and extracting PsTools.

Extract PsTools -
Launch an elevated Command Prompt and use the
CDcmdlet to change the directory to the extracted folder:CD [PathToExtractedPsTools]Change directory to PsTools -
Now use the following command syntax to connect to the remote computer:
Note: If you see an “Access is denied” error at this point, a solution for it is provided at the end of these steps.
PsExec -i \\[RemoteComputerName] -u [Username] -p [Password] cmdReplace [RemoteComputerName] with the name of the PC you want to connect to, [Username] with the account name, and [Password] with the account password. Make sure that the account you are logging in with has administrative rights.
Connect to remote computer using PsTools PsExec You will now be connected to the remote PC.
-
Now, use the following command to enable telnet on the remote PC:
dism /online /Enable-Feature /FeatureName:TelnetClientEnable Telnet remotely


That’s it! Telnet has been successfully enabled on the remote computer, and you can now close the Command Prompt window.
If you faced the “Access is denied” error while attempting to access the remote computer with PsExec, it is probably because UAC is running on the remote machine. You must perform the following steps on the remote computer physically to disable UAC:
Note: This process involves making changes to the Windows Registry manually. Misconfiguration of critical values in the system’s registry could be fatal for your operating system. Therefore, we insist that you create a system restore point or a complete system image backup before proceeding forward with the process.
You can also use our top selection of disk imaging and backup software so you never lose your data or operating system again.
-
Open the Registry Editor by typing in “regedit” in the Run Command box.
Open the Registry Editor -
Paste the following in the address bar for quick navigation:
Computer\HKEY_LOCAL_MACHINE\SOFTWARE\Microsoft\Windows\CurrentVersion\Policies\System
Navigate to the System key -
Right-click the “System” key, expand New, and then click “DWORD (32-bit) Value.” Name this DWORD “LocalAccountTokenFilterPolicy“.
Create the DWORD LocalAccountTokenFilterPolicy -
Double-click the DWORD “LocalAccountTokenFilterPolicy” and change its Value Data to 1.
Change Value Data to 1 -
Now restart the computer for the changes to take effect.


Once these steps are performed, you should be able to access the remote computer using PsExec.
How to Check if Telnet is Disabled
Once Telnet is enabled, you can verify it by typing in “Telnet” in the Command Prompt. This will change and open another command line with “Microsoft Telnet” written, as in the image below.

Closing Words
In comparison, the Remote Desktop Connection can also be used to access a PC on the same network remotely. It offers a GUI interface, and you can log into a local account, and run apps and cmdlets, just like telnet.
However, if you prefer using the Command Line Interface instead, then telnet is the right tool for you. It is quick to connect and gives you more control over the remote PC.