Последнее обновление: 31.10.2015
Окна открытия и сохранения файла представлены классами OpenFileDialog и SaveFileDialog.
Они имеют во многом схожую функциональность, поэтому рассмотрим их вместе.
OpenFileDialog и SaveFileDialog имеют ряд общих свойств, среди которых можно выделить следующие:
-
DefaultExt: устанавливает расширение файла, которое добавляется по умолчанию, если пользователь ввел имя файла без расширения -
AddExtension: при значенииtrueдобавляет к имени файла расширение при его отсуствии. Расширение берется из
свойстваDefaultExtилиFilter -
CheckFileExists: если имеет значениеtrue, то проверяет существование файла с указанным именем -
CheckPathExists: если имеет значениеtrue, то проверяет существование пути к файлу с указанным именем -
FileName: возвращает полное имя файла, выбранного в диалоговом окне -
Filter: задает фильтр файлов, благодаря чему в диалоговом окне можно отфильтровать файлы по расширению. Фильтр задается в следующем формате
Название_файлов|*.расширение. Например,Текстовые файлы(*.txt)|*.txt. Можно задать сразу несколько фильтров, для этого они разделяются
вертикальной линией |. Например,Bitmap files (*.bmp)|*.bmp|Image files (*.jpg)|*.jpg -
InitialDirectory: устанавливает каталог, который отображается при первом вызове окна -
Title: заголовок диалогового окна
Отдельно у класса SaveFileDialog можно еще выделить пару свойств:
-
CreatePrompt: при значенииtrueв случае, если указан не существующий файл, то будет отображаться сообщение о его создании -
OverwritePrompt: при значенииtrueв случае, если указан существующий файл, то будет отображаться сообщение о том, что файл будет перезаписан
Чтобы отобразить диалоговое окно, надо вызвать метод ShowDialog().
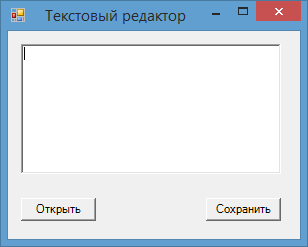
Рассмотрим оба диалоговых окна на примере. Добавим на форму текстовое поле textBox1 и две кнопки button1 и button2. Также перетащим с панели инструментов
компоненты OpenFileDialog и SaveFileDialog. После добавления они отобразятся внизу дизайнера формы. В итоге форма будет выглядеть примерно так:
Теперь изменим код формы:
public partial class Form1 : Form
{
    public Form1()
    {
        InitializeComponent();

        button1.Click += button1_Click;
        button2.Click += button2_Click;
        openFileDialog1.Filter = "Text files(*.txt)|*.txt|All files(*.*)|*.*";
        saveFileDialog1.Filter = "Text files(*.txt)|*.txt|All files(*.*)|*.*";
    }
    // сохранение файла
    void button2_Click(object sender, EventArgs e)
    {
        if (saveFileDialog1.ShowDialog() == DialogResult.Cancel)
            return;
        // получаем выбранный файл
        string filename = saveFileDialog1.FileName;
        // сохраняем текст в файл
        System.IO.File.WriteAllText(filename, textBox1.Text);
        MessageBox.Show("Файл сохранен");
    }
    // открытие файла
    void button1_Click(object sender, EventArgs e)
    {
        if (openFileDialog1.ShowDialog() == DialogResult.Cancel)
            return;
        // получаем выбранный файл
        string filename = openFileDialog1.FileName;
        // читаем файл в строку
        string fileText = System.IO.File.ReadAllText(filename);
        textBox1.Text = fileText;
        MessageBox.Show("Файл открыт");
    }
}
По нажатию на первую кнопку будет открываться окно открытия файла. После выбора файла он будет считываться, а его текст будет отображаться в
текстовом поле. Клик на вторую кнопку отобразит окно для сохранения файла, в котором надо установить его название. И после этого произойдет сохранение
текста из текстового поля в файл.
I am new to the OpenFileDialog function, but have the basics figured out. What I need to do is open a text file, read the data from the file (text only) and correctly place the data into separate text boxes in my application. Here’s what I have in my «open file» event handler:
private void openToolStripMenuItem_Click(object sender, EventArgs e)
{
    OpenFileDialog theDialog = new OpenFileDialog();
    theDialog.Title = "Open Text File";
    theDialog.Filter = "TXT files|*.txt";
    theDialog.InitialDirectory = @"C:\";
    if (theDialog.ShowDialog() == DialogResult.OK)
    {
        MessageBox.Show(theDialog.FileName.ToString());
    }
}
The text file I need to read is this (for homework, I need to read this exact file), It has an employee number, name, address, wage, and hours worked:
1
John Merryweather
123 West Main Street
5.00 30
In the text file I was given, there are 4 more employees with info immediately after this in the same format. You can see that the employee wage and hours are on the same line, not a typo.
I have an employee class here:
public class Employee
{
    //get and set properties for each
    public int EmployeeNum { get; set; }
    public string Name { get; set; }
    public string Address { get; set; }
    public double Wage { get; set; }
    public double Hours { get; set; }

    public void employeeConst() //constructor method
    {
        EmployeeNum = 0;
        Name = "";
        Address = "";
        Wage = 0.0;
        Hours = 0.0;
    }

    //Method prologue
    //calculates employee earnings
    //parameters: 2 doubles, hours and wages
    //returns: a double, the calculated salary
    public static double calcSalary(double h, double w)
    {
        int OT = 40;
        double timeandahalf = 1.5;
        double FED = .20;
        double STATE = .075;
        double OThours = 0;
        double OTwage = 0;
        double OTpay = 0;
        double gross = 0; ;
        double net = 0;
        double net1 = 0;
        double net2 = 0;
        if (h > OT)
        {
            OThours = h - OT;
            OTwage = w * timeandahalf;
            OTpay = OThours * OTwage;
            gross = w * h;
            net = gross + OTpay;
        }
        else
        {
            net = w * h;
        }

        net1 = net * FED; //the net after federal taxes
        net2 = net * STATE; // the net after state taxes

        net = net - (net1 + net2);
        return net; //total net
    }
}
So I need to pull the text from that file into my Employee class, then output the data to the correct textbox in the windows forms application. I am having trouble understanding how to do this right. Do I need to use a streamreader? Or is there another, better way in this instance? Thank you.
C# OpenFileDialog
C# OpenFileDialog control allows us to browse and select files on a computer in an application. A typical Open File Dialog looks like Figure 1 where you can see Windows Explorer like features to navigate through folders and select a file.

Figure 1
Creating a OpenFileDialog
We can create an OpenFileDialog control using a Forms designer at design-time or using the OpenFileDialog class in code at run-time (also known as dynamically). Unlike other Windows Forms controls, an OpenFileDialog does not have and not need visual properties like others. The only purpose of OpenFileDialog to display available colors, create custom colors and select a color from these colors. Once a color is selected, we need that color in our code so we can apply it on other controls.
Again, you can create an OpenFileDialog at design-time but it is easier to create an OpenFileDialog at run-time.
Design-time
To create an OpenFileDialog control at design-time, you simply drag and drop an OpenFileDialog control from Toolbox to a Form in Visual Studio. After you drag and drop an OpenFileDialog on a Form, the OpenFileDialog looks like Figure 2.

Figure 2
Adding an OpenFileDialog to a Form adds following two lines of code.
private System.Windows.Forms.OpenFileDialog openFileDialog1;
this.openFileDialog1 = new System.Windows.Forms.OpenFileDialog();
Run-time
Creating a OpenFileDialog control at run-time is merely a work of creating an instance of OpenFileDialog class, set its properties and add OpenFileDialog class to the Form controls.
First step to create a dynamic OpenFileDialog is to create an instance of OpenFileDialog class. The following code snippet creates an OpenFileDialog control object.
OpenFileDialog openFileDialog1 = new OpenFileDialog(); ShowDialog method displays the OpenFileDialog.
openFileDialog1.ShowDialog(); Once the ShowDialog method is called, you can browse and select a file.
Setting OpenFileDialog Properties
After you place an OpenFileDialog control on a Form, the next step is to set properties.
The easiest way to set properties is from the Properties Window. You can open Properties window by pressing F4 or right click on a control and select Properties menu item. The Properties window looks like Figure 3.

Figure 3
Initial and Restore Directories
InitialDirectory property represents the directory to be displayed when the open file dialog appears first time.
openFileDialog1.InitialDirectory = @"C:\"; If RestoreDirectory property set to true that means the open file dialogg box restores the current directory before closing.
openFileDialog1.RestoreDirectory = true; Title
Title property is used to set or get the title of the open file dialog.
openFileDialog1.Title = "Browse Text Files";Default Extension
DefaultExtn property represents the default file name extension.
openFileDialog1.DefaultExt = "txt"; Filter and Filter Index
Filter property represents the filter on an open file dialog that is used to filter the type of files to be loaded during the browse option in an open file dialog. For example, if you need users to restrict to image files only, we can set Filter property to load image files only.
openFileDialog1.Filter = "txt files (*.txt)|*.txt|All files (*.*)|*.*"; FilterIndex property represents the index of the filter currently selected in the file dialog box.
openFileDialog1.FilterIndex = 2;Check File Exists and Check Path Exists
CheckFileExists property indicates whether the dialog box displays a warning if the user specifies a file name that does not exist. CheckPathExists property indicates whether the dialog box displays a warning if the user specifies a path that does not exist.
openFileDialog1.CheckFileExists = true;
openFileDialog1.CheckPathExists = true;
File Name and File Names
FileName property represents the file name selected in the open file dialog.
textBox1.Text = openFileDialog1.FileName; If MultiSelect property is set to true that means the open file dialog box allows multiple file selection. The FileNames property represents all the files selected in the selection.
this.openFileDialog1.Multiselect = true;
foreach (String file in openFileDialog1.FileNames)
{
  MessageBox.Show(file);
}
Read Only Checked and Show Read Only Files
ReadOnlyChecked property represents whether the read-only checkbox is selected and ShowReadOnly property represents whether the read-only checkbox is available or not.
openFileDialog1.ReadOnlyChecked = true;
openFileDialog1.ShowReadOnly = true;
Implementing OpenFileDialog in a C# and WinForms Applications
Now let’s create a WinForms application that will use an OpenFileDialog that has two Button controls, a TextBox, and a container control. The Form looks like Figure 4.

Figure 4
The Browse button click event handler will show an open file dialog and users will be able to select text files. The open file dialog looks like Figure 5.

Figure 5
The following code snippet is the code for Browse button click event handler. Once a text file is selected, the name of the text file is displayed in the TextBox.
private void BrowseButton_Click(object sender, EventArgs e)
{
    OpenFileDialog openFileDialog1 = new OpenFileDialog
    {
        InitialDirectory = @"D:\",
        Title = "Browse Text Files",

        CheckFileExists = true,
        CheckPathExists = true,

        DefaultExt = "txt",
        Filter = "txt files (*.txt)|*.txt",
        FilterIndex = 2,
        RestoreDirectory = true,

        ReadOnlyChecked = true,
        ShowReadOnly = true
    };

    if (openFileDialog1.ShowDialog() == DialogResult.OK)
    {
        textBox1.Text = openFileDialog1.FileName;
    }
}
The code for Browse Multiple Files button click event handler looks like following.
private void BrowseMultipleButton_Click(object sender, EventArgs e)
{
    this.openFileDialog1.Filter =
"Images (*.BMP;*.JPG;*.GIF,*.PNG,*.TIFF)|*.BMP;*.JPG;*.GIF;*.PNG;*.TIFF|" +
"All files (*.*)|*.*";

    this.openFileDialog1.Multiselect = true;
    this.openFileDialog1.Title = "Select Photos";

    DialogResult dr = this.openFileDialog1.ShowDialog();
    if (dr == System.Windows.Forms.DialogResult.OK)
    {
        foreach (String file in openFileDialog1.FileNames)
        {
            try
            {
                PictureBox imageControl = new PictureBox();
                imageControl.Height = 400;
                imageControl.Width = 400;

                Image.GetThumbnailImageAbort myCallback =
                        new Image.GetThumbnailImageAbort(ThumbnailCallback);
                Bitmap myBitmap = new Bitmap(file);
                Image myThumbnail = myBitmap.GetThumbnailImage(300, 300,
                    myCallback, IntPtr.Zero);
                imageControl.Image = myThumbnail;

                PhotoGallary.Controls.Add(imageControl);
            }
            catch (Exception ex)
            {
                MessageBox.Show("Error: " + ex.Message);
            }
        }
    }
}
public bool ThumbnailCallback()
{
    return false;
}
The output looks like Figure 6.

Summary
An OpenFileDialog control allows users to launch Windows Open File Dialog and let them select files. In this article, we discussed how to use a Windows Open File Dialog and set its properties in a Windows Forms application.
The Open File Dialog control (System.Windows.Forms.OpenFileDialog) allows you to open and read file contents such as texts from text files. The dialog allows you to browse your file system and pick a directory. You can type the name of the file that exist in the current directory or you can type the whole path of a file or directory in the File Name text box located at the bottom of the dialog.

The following table shows some useful properties of the OpenFileDialog control.
| Property | Description |
|---|---|
| AddExtention | Specifies whether to automatically add an extension when the user omits the extension of the file he or she chooses. |
| CheckFileExists | Specifies whether to initiate a warning if the user types a file that does not exist. |
| CheckPathExists | Specifies whether to initiate a warning if the user types a path that does not exist. |
| DefaultExt | The default extension to add when the user does not indicate a file extension. |
| FileName | The file selected by the user. This can also be the default selected the file when the dialog shows up. |
| FileNames | A collection of files that the user picked. |
| Filter | Allows you to add a filter which are a special string indicating which types or files are only allowed to be opened by the user. |
| FilterIndex | If multiple filters are present, this indicates which filter shows as the default starting with index 1. |
| InitialDirectory | The initial directory that the OpenFileDialog will show. |
| Multiselect | Tells whether the user can select multiple files. |
| Title | The title of the dialog. |
The AddExtention property automatically adds an extension when the user does not indicate the file extension of the file name. The extension to add is specified by the DefaultExt property. The CheckFileExists and CheckPathExists methods are recommended to be set to true so the dialog will issue a warning message if it cannot find the specified file or directory. The InitialDirectory property specifies the initial directory that the dialog will show when you open it up. The Title property is the title of the dialog located at the title bar. The FileName property is the selected file selected or specified by the user. You can allow a user to select multiple files by setting the Multiselect property to true. You can then use the FileNames property to get the collection of selected file names.
Filtering Files
We can filter the files to be shown by their file types. We use the Filter property which accepts a string containing a special pattern. For example, we can set the dialog to only show text files by filtering the results to only files with .txt file extensions. The Filter property requires a special pattern.
Description1|FilterPattern1|Description2|FilterPattern2|...DescriptionN|FilterPatternNWe first start with a description telling about the type of file. We then follow it with a vertical bar (|) followed by the filter pattern. For example, the following pattern only shows the text files.
Text Files|*.txtThe description here is Text Files and the pattern is *.txt. The * character is a wildcard character which means any names. The .txtportion specifies the specific file extension. The filter pattern says any file with a file extension of .txt. You can also use the wildcard characters for many another purpose. For example, m*.txt is the pattern for all the text files that start with letter m. *r.txt is the pattern for all the text files that ends with letter r, *.* is the pattern for all kinds of files, *.t* is the pattern for all files that have a file extension that starts with letter t.
You can specify multiple filters. For example, the following pattern adds multiple filters.
Text Files|*.txt|Bitmap Files|*.bmp|All Files|*.*You can select a filter using a combo box next to the file name text box of the dialog.

You can group a set of file extensions for a single description. For example, image files consist of different file extensions such as bmp, jpeg, or png. You simply separate the file extensions using semicolons.
Image Files|*.bmp;*.jpeg;*.png;*.gifWhen you select this filter, then all of the files that matches one of the filter patterns will be shown.
OpenFileDialog Control Example
We will now create an example application that uses the basic capabilities of the OpenFileDialog control. The application will allow a user to browse for a text file and view its contents using a multiline text box. Please note that we need to import the System.IOnamespace in our code.
using System.IO;Create a form similar to the one below. Use a multiline text box by setting the Multiline property to true. Set the Scrollbars property of the text box to both and the WordWrap property to false (optional). Drag an OpenFileDialog control from the toolbox to the form.

Double-click the button to create an event handler for its Click event. Again, import the System.IO namespace first at the top of the code. Use the following code for the event handler.
private void button1_Click(object sender, EventArgs e)
{
    //Filter to only text files
    openFileDialog1.Filter = "Text Files|*.txt";
    //No initial file selected
    openFileDialog1.FileName = String.Empty;

    //Open file dialog and store the returned value
    DialogResult result = openFileDialog1.ShowDialog();

    //If Open Button was pressed
    if (result == DialogResult.OK)
    {
        //Create a stream which points to the file
        Stream fs = openFileDialog1.OpenFile();
        //Create a reader using the stream
        StreamReader reader = new StreamReader(fs);
        //Read Contents
        textBox1.Text = reader.ReadToEnd();
        //Close the reader and the stream
        reader.Close();
    }
}
The first line adds a filter using the Filter property. We specified in the pattern to only allow the user to open text files. The second one assigns an empty string to the FileName so there is no file selected by default. We then open the OpenFileDialog using its ShowMethodproperty which returns a DialogResult value. The user can now choose a text file by browsing the system. When the user presses the Open button while a valid file is selected, then the method ShowDialog will return DialogResult.OK. We tested this using an ifstatement. We used the OpenFile method of the OpenFileDialog control and store it in a Stream object. The Stream object points to the selected file and we use this object to create a StreamReader object which is used to read the stream(the file). We used the ReadToEnd method of the StreamReader object to read all the contents of the file and return the result as trying. We then place the result inside the text box.
Execute the application and click the button. Browse for a text file and click Open. If the file the user types cannot be found, then an error will show up if the CheckFileExists and CheckPathExists properties are set to true. If the file is valid and you press Open, then the contents of the file will be shown in the text box.
В данной заметке я решил кратко, а главное наглядно продемонстрировать пример создания окна для выбора файла.
Сразу оговорюсь, что если Вас интересует окно для выбора директории, то Вам нужно смотреть данную заметку.
По сравнению с окном для выбора папок, форма для выбора файлов более богата настройками. Однако в целом принцип работы класса OpenFileDialog не отличается от класса FolderBrowserDialog. Создадим новую форму и перейдем к ее коду. Там уже будет создан конструктор нашей формы, именно там мы и будем вызывать наше окно, для выбора файла.
public Form1()
        {
            InitializeComponent();
            OpenFileDialog OPF = new OpenFileDialog();
            if (OPF.ShowDialog() == DialogResult.OK)
            {
                MessageBox.Show(OPF.FileName);
            }
        }
Пример уже вполне рабочий, однако использовать данный класс так не стоит. Главная причина этому — форма показывает нам абсолютно все файлы. В жизни такое бывает редко, поэтому давайте ограничим отображение только файлами txt и cs. Для этого нам понадобиться свойство Filter.
OPF.Filter = "Файлы txt|*.txt|Файлы cs|*.cs";
Фильтр задается через разделитель по следующему принципу: «ОписаниеТипаФайла|МаскаПоискаФайла[|…]». Таким образом в нашем примере в качестве описания выступают фразы «Файлы txt» и «Файлы cs», а в качества масок «*.txt» и «*.cs» — что соответствует любым файлам с расширением txt и cs. Так же мы можем явно задать имя файла, который нам нужно выбрать.
OPF.Filter = "Файлы txt|*.txt|Файлы cs|Form1.cs";
Так же мы можем разрешить пользователю выбор нескольких файлов сразу, для этого необходимо поставить свойство Multiselect = true. Однако тогда, для полечения всех имен выбранных файлов необходимо будет использовать массив FileNames вместо свойства FileName.
public Form1()
        {
            InitializeComponent();
            OpenFileDialog OPF = new OpenFileDialog();
            OPF.Multiselect = true;
            if (OPF.ShowDialog() == DialogResult.OK)
            {
                foreach (string file in OPF.FileNames)
                {
                    MessageBox.Show(file);
                }
            }
        }
В целом если покопаться в свойствах класса OpenFileDialog можно найти еще несколько забавных свойств, однако основные из них, я описал выше.