На Reddit и форумах Microsoft появляются жалобы от пользователей касаемо свежего обновления Microsoft Defender. Сообщается, что Защитник Windows захламляет системный диск тысячами бесполезных файлов.
Microsoft Defender — это инструмент безопасности, который предустановлен во всех версиях Windows 10 и регулярно обновляется через Центр обновления. После одного из таких патчей в конце апреля 2021 пользователи заметили, что в папке C: \ ProgramData \ Microsoft \ Windows Defender \ Scans \ History \ Store генерируются большое количество неопознанных файлов.
Сами файлы весят 1-2 КБ и являются безвредными, но в некоторых случаях могут занимать суммарно огромный объём дискового пространства. Проблема также затрагивает серверные операционные системы Windows.
У нас есть три сервера 2016 года, которые подверглись проблеме. Вчера вечером стали появляться предупреждения о нехватке свободного места на жёстких дисках. На одном сервере 18 миллионов файлов в папке Store. На другом — 13 миллионов. На то, чтобы обнаружить и удалить их, уходят часы. В сумме они занимают 50-60 ГБ. Это серьезная ошибка Microsoft.
Пользователь Reddit
Простой способ узнать, подвергся ли ваш компьютер подобной ошибке — это проверить вышеуказанную папку. Файлы можно безопасно удалить.
Microsoft заявила, что знает о проблеме и уже готовит решение под номером 1.1.18100.6. Обновление загрузится и установится автоматически в течение ближайших дней.
Ранее Microsoft также выпустила исправление для обновлений Windows 10, которые снижали производительность в играх.
Windows 10 and 11 include Windows Security, which provides the latest antivirus protection. Your device will be actively protected from the moment you start Windows. Windows Security continually scans for malware (malicious software), viruses, and security threats. In addition to this real-time protection, updates are downloaded automatically to help keep your device safe and protect it from threats.
Tip: If you’re a Microsoft 365 Family or Personal subscriber you get Microsoft Defender, our advanced security software for Windows, Mac, iOS, and Android, as part of your subscription. Learn more at Getting started with Microsoft Defender.
Windows 10 or 11 in S mode
Some features will be a little different if you’re running Windows 10 or 11 in S mode. Because this mode is streamlined for tighter security, the Virus & threat protection area has fewer options. But don’t worry—the built-in security of this mode automatically prevents viruses and other threats from running on your device, and you’ll receive security updates automatically. For more info, see Windows 10 or 11 in S mode FAQ.
Important security info
-
Windows Security is built-in to Windows and includes an antivirus program called Microsoft Defender Antivirus. (In early versions of Windows 10, Windows Security is called Windows Defender Security Center).
-
If you have another antivirus app installed and turned on, Microsoft Defender Antivirus will turn off automatically. If you uninstall the other app, Microsoft Defender Antivirus will turn back on automatically.
-
If you’re having problems receiving Windows Security updates, see Fix Windows Update errors and the Windows Update FAQ.
-
For info on how to uninstall an app, see Repair or remove an app in Windows.
-
To change your user account to an admin account, see Create a local user or administrator account in Windows.
Understand and customize Windows Security features
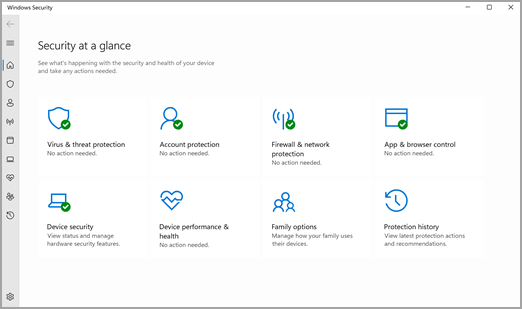
Windows Security is your home to manage the tools that protect your device and your data:
-
Virus & threat protection — Monitor threats to your device, run scans, and get updates to help detect the latest threats. (Some of these options are unavailable if you’re running Windows 10 in S mode.)
-
Account protection — Access sign-in options and account settings, including Windows Hello and dynamic lock.
-
Firewall & network protection — Manage firewall settings and monitor what’s happening with your networks and internet connections.
-
App & browser control — Update settings for Microsoft Defender SmartScreen to help protect your device against potentially dangerous apps, files, sites, and downloads. You’ll have exploit protection and you can customize protection settings for your devices.
-
Device security — Review built-in security options to help protect your device from attacks by malicious software.
-
Device performance & health — View status info about your device’s performance health, and keep your device clean and up to date with the latest version of Windows.
-
Family options — Keep track of your kids’ online activity and the devices in your household.
To customize how your device is protected with these Windows Security features select Start > Settings > Update & Security > Windows Security or select the button below.
Open Windows Security settings
Status icons indicate your level of safety:
-
Green means there aren’t any recommended actions right now.
-
Yellow means there is a safety recommendation for you.
-
Red is a warning that something needs your immediate attention.
Run a malware scan manually
If you’re worried about a specific file or folder on your local device, you can right-click the file or folder in File Explorer, then select Scan with Microsoft Defender.
Tip: On Windows 11 you may have to select Show more options after you right-click to see the option to scan the file or folder.
If you suspect there’s malware or a virus on your device, you should immediately run a quick scan.
Run a quick scan in Windows Security
Note: Because of streamlined security, this isn’t available if you’re running Windows 10 or 11 in S mode.
-
Select Start > Settings > Update & Security > Windows Security and then Virus & threat protection.
Open Windows Security settings -
Under Current threats, select Quick scan (or in early versions of Windows 10, under Threat history, select Scan now).
If the scan doesn’t find any issues, but you’re still concerned, you may want to check your device more thoroughly.
Run an advanced scan in Windows Security
-
Select Start > Settings > Update & Security > Windows Security and then Virus & threat protection.
-
Under Current threats, select Scan options (or in early versions of Windows 10, under Threat history, select Run a new advanced scan).
-
Select one of the scan options:
-
Full scan (check all files and programs currently on your device)
-
Custom scan (scan specific files or folders)
-
Microsoft Defender Offline scan (restarts your computer and runs a deep scan before Windows loads to catch especially sneaky malware). Learn more about Microsoft Defender Offline
-
-
Select Scan now.
Learn more about running an advanced scan
Schedule your own scan
Even though Windows Security is regularly scanning your device to keep it safe, you can also set when and how often the scans occur.
Note: Because of streamlined security, this isn’t available if you’re running Windows 10 or 11 in S mode.
Schedule a scan
-
Select the Start button, type schedule tasks in the Search box, and in the list of results, select Task Scheduler.
-
In the left pane, select the arrow (>) next to Task Scheduler Library to expand it, do the same with Microsoft > Windows, and then scroll down and select the Windows Defender folder.
-
In the top-center pane, select Windows Defender Scheduled Scan. (Point to the choices to see the full names.)
-
In the Actions pane on the right, scroll down and then select Properties.
-
In the window that opens, select the Triggers tab, and then select New.
-
Set your preferred time and frequency, and then select OK.
-
Review the schedule and select OK.
Turn Microsoft Defender Antivirus real-time protection on or off
Sometimes you may need to briefly stop running real-time protection. While real-time protection is off, files you open or download won’t be scanned for threats. However, real-time protection will soon turn on automatically again to protect your device.
Turn real-time protection off temporarily
Note: Because of streamlined security, this isn’t available if you’re running Windows 10 or 11 in S mode.
-
Select Start > Settings > Update & Security > Windows Security and then Virus & threat protection > Manage settings. (In early versions of Windows 10, select Virus & threat protection > Virus & threat protection settings.)
Open Windows Security settings -
Switch the Real-time protection setting to Off and choose Yes to verify.
See also
How malware can infect your PC
Microsoft security help and learning
Подобно другим антивирусам, встроенный Защитник Windows ведет историю обнаруженных угроз, просмотреть которую можно в журнале защиты. Эти записи будут отображаться в журнале, даже если опасный файл обезврежен и помещен в карантин, что может вызвать своеобразный побочный эффект, проявляющийся наличием красного или желтого значка на иконке Защитника в системном лотке. в Windows 10 2004 разработчики вроде бы должны были решить эту проблему.
Но, судя по отзывам пользователей, сталкиваться с ней приходится и в последней стабильной версии системы.
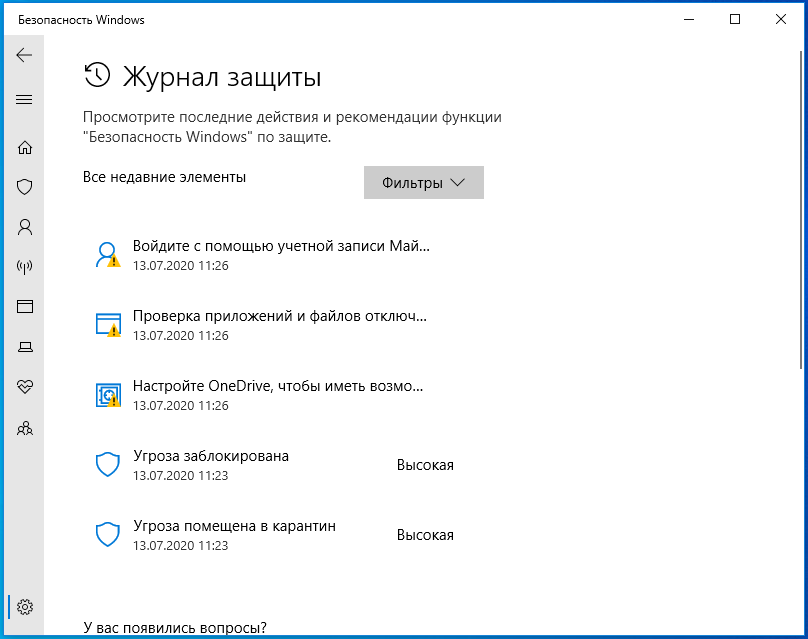
Чтобы избавиться от этих предупреждающих о несуществующей уже угрозе значков, нужно очистить журнал Windows Defender. В сборках до релиза 1903 сделать это можно было через интерфейс управления безопасностью Windows, в более поздних сборках системы кнопка очистки журнала отсутствует. Данные журнала удаляются автоматически по истечении 30-и дней, но вы можете сократить этот период или просто удалить их принудительно.
Изменение срока хранения Журнала Защитника
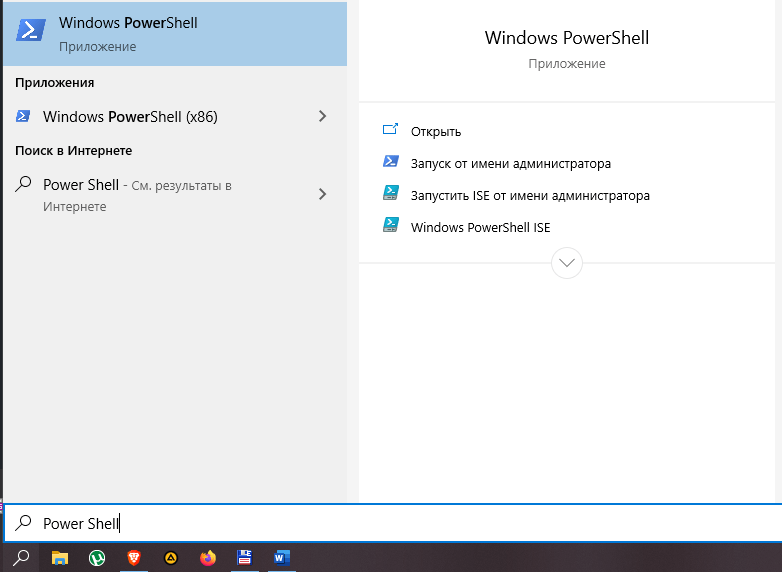
Для изменения срока хранения записей в журнале Защитника Windows 10 мы предлагаем использовать консоль PowerShell.
Запустив ее от имени администратора, выполните в ней команду Get-MpPreference и найдите в полученном списке параметр ScanPurgeItemsAfterDelay.
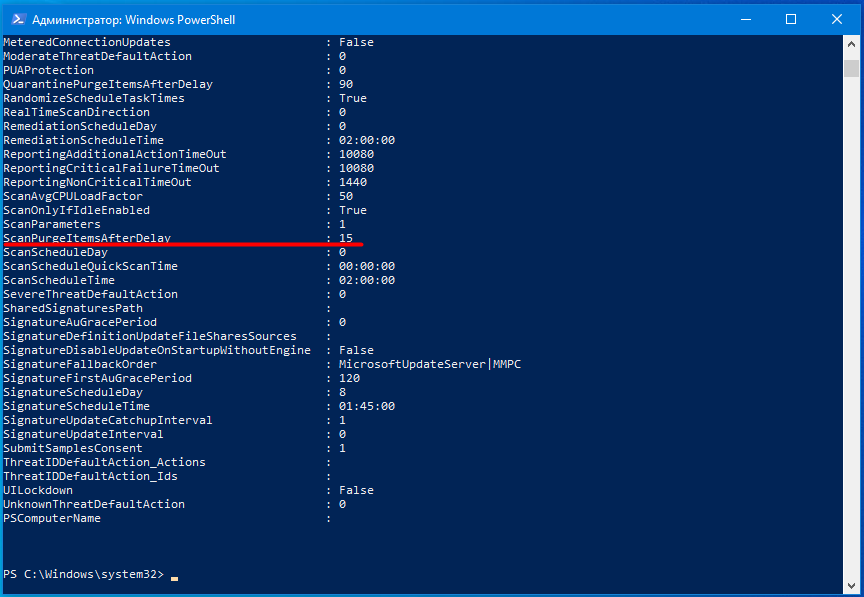
В Windows 10 2004 его значение равняется 15, то есть данные журнала хранятся 15 дней. Чтобы сократить этот срок, скажем, до двух дней, выполните в PowerShell такую команду:
Set-MpPreference -ScanPurgeItemsAfterDelay 2

Принудительная очистка Журнала Защитника
Если вы хотите очистить журнал прямо сейчас, выполните следующие действия.
Перейдите в Проводнике в папку C:\ProgramData\Microsoft\Windows Defender\Scans, а затем зайдите в расположенную в ней папку History, подтвердив вход с правами администратора.
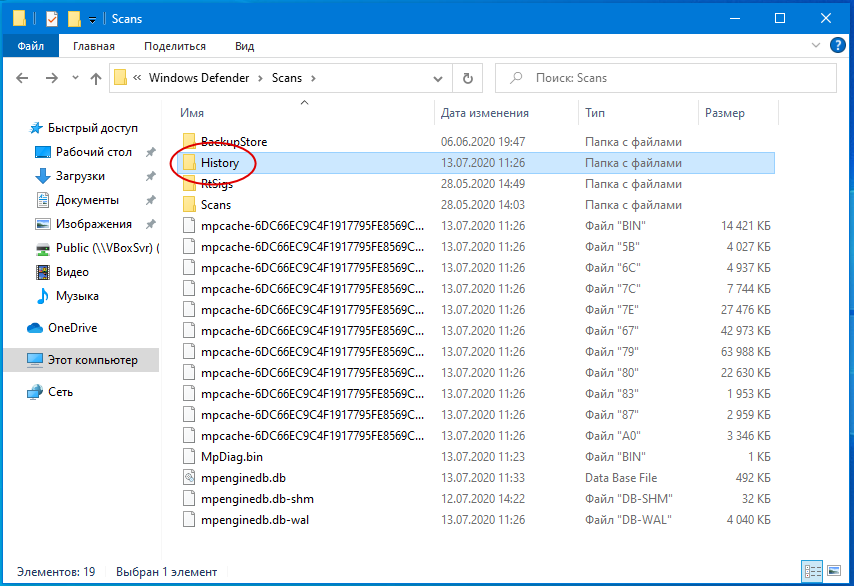
В свою очередь, в ней найдите папку Service и удалите ее.
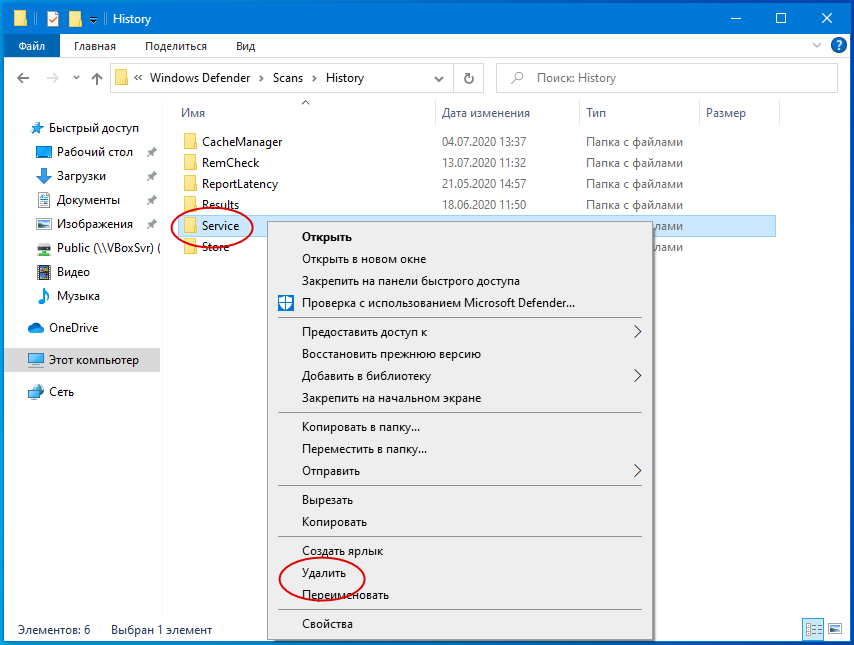
Вместе с ней будет удалена и история действий Windows Defender.
Должен исчезнуть и значок предупреждения на иконке Защитника. Однако, если у вас не настроены базовые функции безопасности, желтый значок предупреждения будет отображаться независимо от того, имеются в журнале записи или нет.
![]() Загрузка…
Загрузка…
How to Find Windows Defender Scan Result Log History in Windows 10. As we know, Windows defender is an in-built solution of Windows 10 to secure your system from Viruses, Malware, Ransomware, Trojans etc. Various types of scanning features such as scheduled scan, quick scan, full scan, Custom scan etc are available in Windows defender security. Windows Defender Offline scan is also an important feature of Windows 10. After performing full scan of your system through Windows defender, you want to view Scan Result Log History so that you could identify the name and type of viruses. It also notified in your system through notification.
You should see Windows Defender scan results to analyze the type and gravity of viruses and also remove it from log. Here in this article, we will discuss How to Find Windows Defender Scan Result Log History in Windows 10. You can see result log by three methods. The first one is through Setting app, the second one is through Windows Defender Support and the third one is through Event viewer.
Ways-1: Through Windows Setting
- Press Win logo + I shortcut key to open Windows Settings app in windows 10.
- Choose the option Update & Security from the available menu.
- Now from the left menu of setting window, select the option Windows Security.
- Thereafter go to the right side of same page.
- Make a click on Virus & threat protection.

- A new window page is open now.
- Here you will find the option Protection History.
- Click on it to view the scan result log.
Ways-2: Find Windows Defender Scan Result Log History through Windows Defender Support
- Go to the file explorer of your Windows 10 system.
- Navigate the following path in File explorer: –
- C:\ProgramData\Microsoft\Windows Defender\Support
- Make a click on ok button.
- Scan result is now visible on your screen.
Ways-3: By using Event Viewer
- Apply a right click on start button.
- Make a click on Event Viewer option from the context menu.
- Now navigate the under mentioned path from the Event viewer window: –
- Applications and Services Logs > Microsoft > Windows > Windows Defender

- Apply a double click on the option Windows Defender.
- Thereafter double click on the Operational.

- Now you can see the result on the screen.
That’s all.

Пользователи ОС Виндовс 10 знают, что на рабочем столе неподалеку от значка Моего компьютера есть новый системный ярлычок — сине-голубой символ щита. Так обозначен встроенный Защитник. Он работает по принципу антивируса и фильтра, который ведет учет атак и регулирует установку и активность сомнительных программ. Но периодически на ярлычке появляется восклицательный знак. Чтоб его убрать, необходимо знать, как очистить журнал защиты в системе Виндовс 10.
Для чего это нужно?
Защитник Windows хранит информацию в виде записей с временными отметками о каждой шпионской программе или потенциальной угрозе для системы. Учет ведется, даже если нежелательное ПО отправить на карантин или удалить полностью. Информация в журнале хранится в течение месяца, а потом обычно самоудаляется.

Если Защитник показывает историю угроз, которым больше 30 суток, это чревато зависанием, торможением, некорректной работой ОС. Да и сам Windows Defender будет вылетать, потому что места для дальнейшего ведения базы безопасности у него не будет. Чтобы такого не происходило, необходимо регулярно очищать журнал безопасности или хотя бы увеличить срок хранения учетных данных.
Как очистить журнал защиты в Windows 10
Сегодня доступны два способа очистки журнала Windows Defender. Оба вполне просты и понятны даже тому, кто ни разу не залезал в программную начинку своего компьютера.
Изменение истории защиты
Понадобится активировать программу Power Shell с аккаунта Администратора и прописать там код:
- Set-MpPreference -ScanPurgeItemsAfterDelay 7. Цифра на конце — это количество суток, которое будет храниться история выявленных угроз, можно вписать любую, от 1 до 30. Большее число крайне нежелательно.
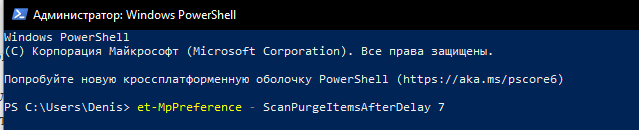
- Нажать «ВВОД» и перезагрузить устройство. С этого момента журнал Защитника в Виндовса будет обновляться в указанном промежутке.
Удаление сразу всей истории
Когда ненужной информации в журнале защиты Windows накопилось столько, что его требуется очистить полностью, то следует действовать так:
- Заходим в диск С. Как правило, на нем хранятся все файлы «родных» программ.
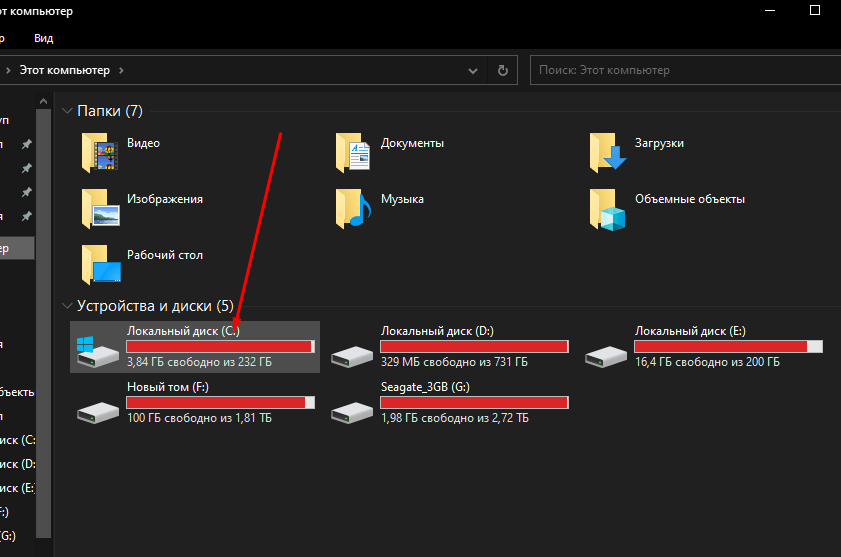
- Совершаем переход: ProgramData\Microsoft\Windows Defender\Scans\History.

- Находим папку «Сервис» («Service») и удаляем.
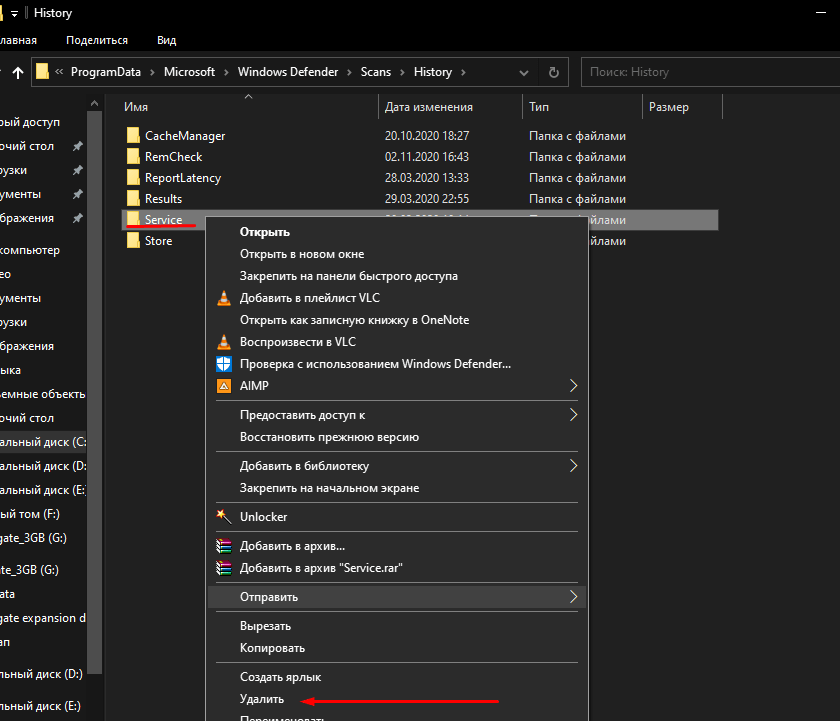
- Когда Защитник выявит новые угрозы, он автоматически создаст идентичную папку заново.
Перед процессом лучше выключить защиту в реальном времени и защиту из Облака. В противном случае они будут «ругаться». По завершению обязательно вновь активировать их.
Очистка через просмотр событий
При помощи утилиты через окно «Выполнить» также можно решить возникшую проблему:
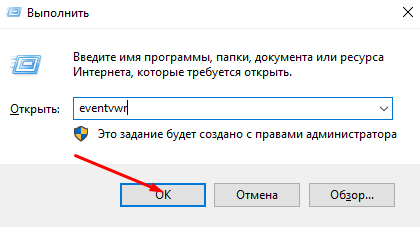
- Вызываем нужную функцию клавишами «Win+R».
- Вписываем в строку ввода «eventvwr» и жмем «Enter».
- Появится окно с тремя колонками. Уходим в левую, и там проходим путь: «Журналы приложений и служб» => «Microsoft» => «Windows» => «Windows Defender» = > «Operational».
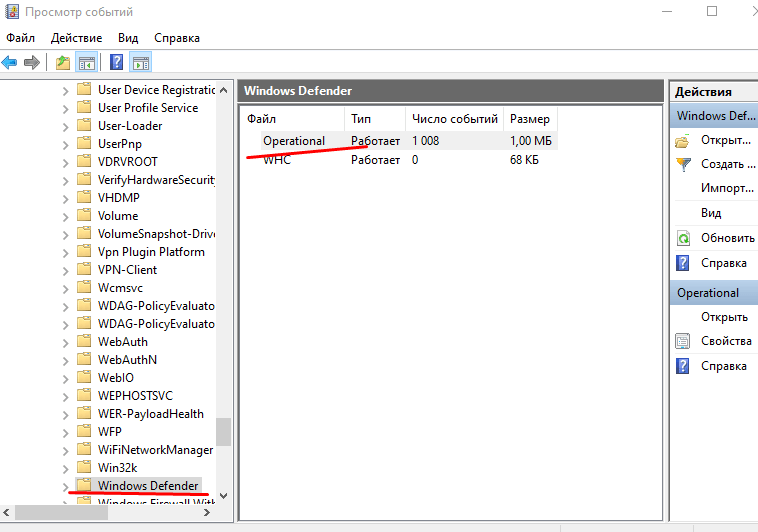
- Далее уже в правой части выбираем опцию «Очистить журнал».
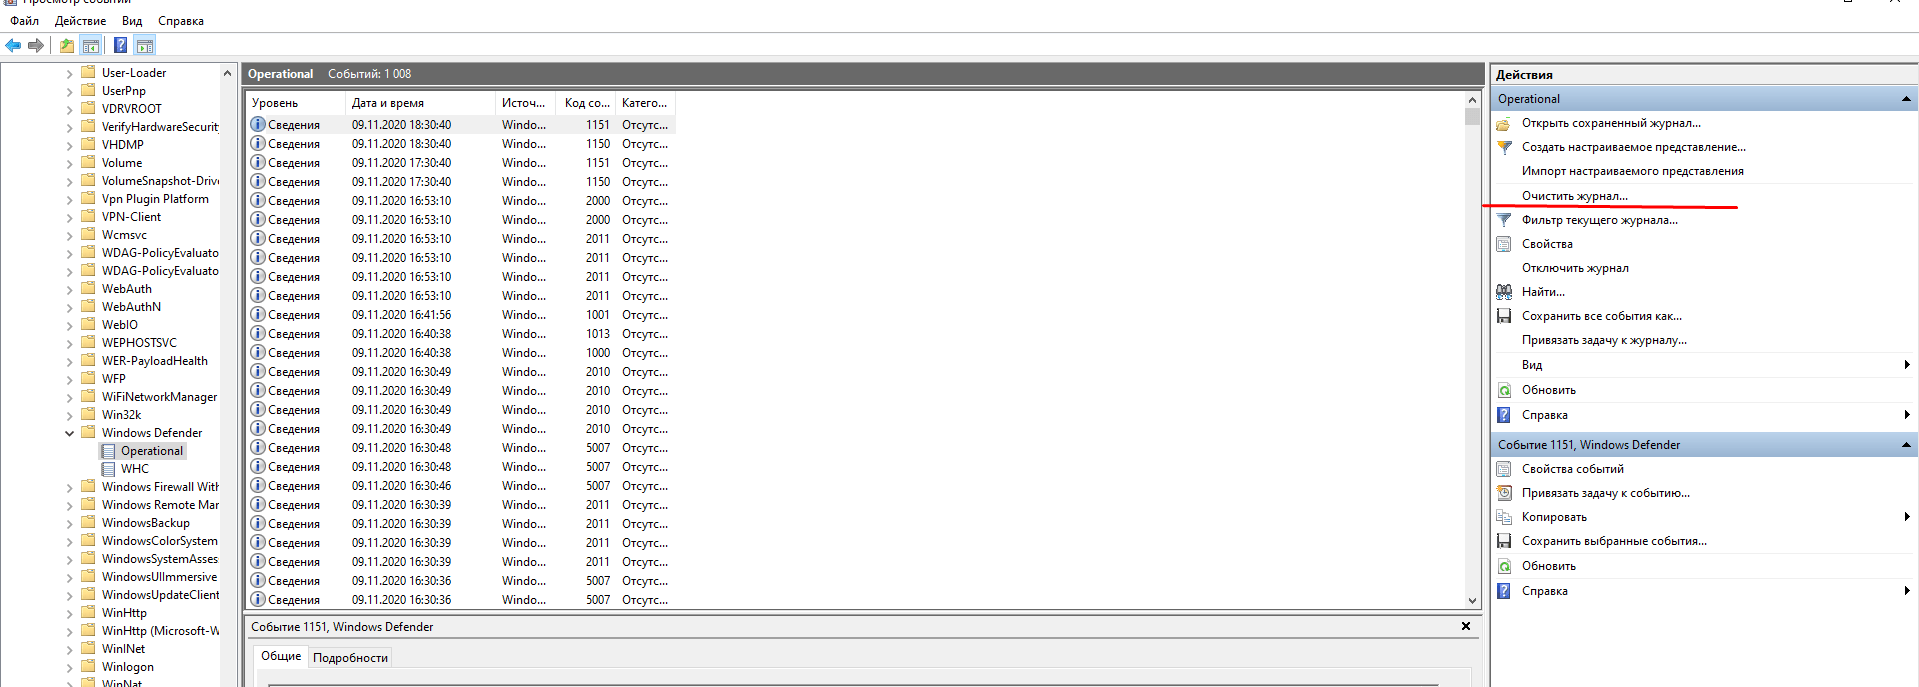
- Жмем аналогичную кнопку в нижней части маленького окна. Готово.
- Стоит также знать, что в Windows 10, версии 1903 данный метод не работает.
Windows Defender защищает не только программы, которые есть на компьютере. Он бережет личные конфиденциальные данные пользователя. В первую очередь, логин и пароль для доступа к аккаунту, банковские данные, телефон и все остальное, что было указано при регистрации.
Историю журнала безопасности рекомендуют периодически очищать, независимо от того, появился ли восклицательный знак на ярлычке рабочего стола или нет. Так у Защитника будет свободное место для создания данных о текущих угрозах и своевременная возможность обновиться.

Вам помогло? Поделитесь с друзьями — помогите и нам!