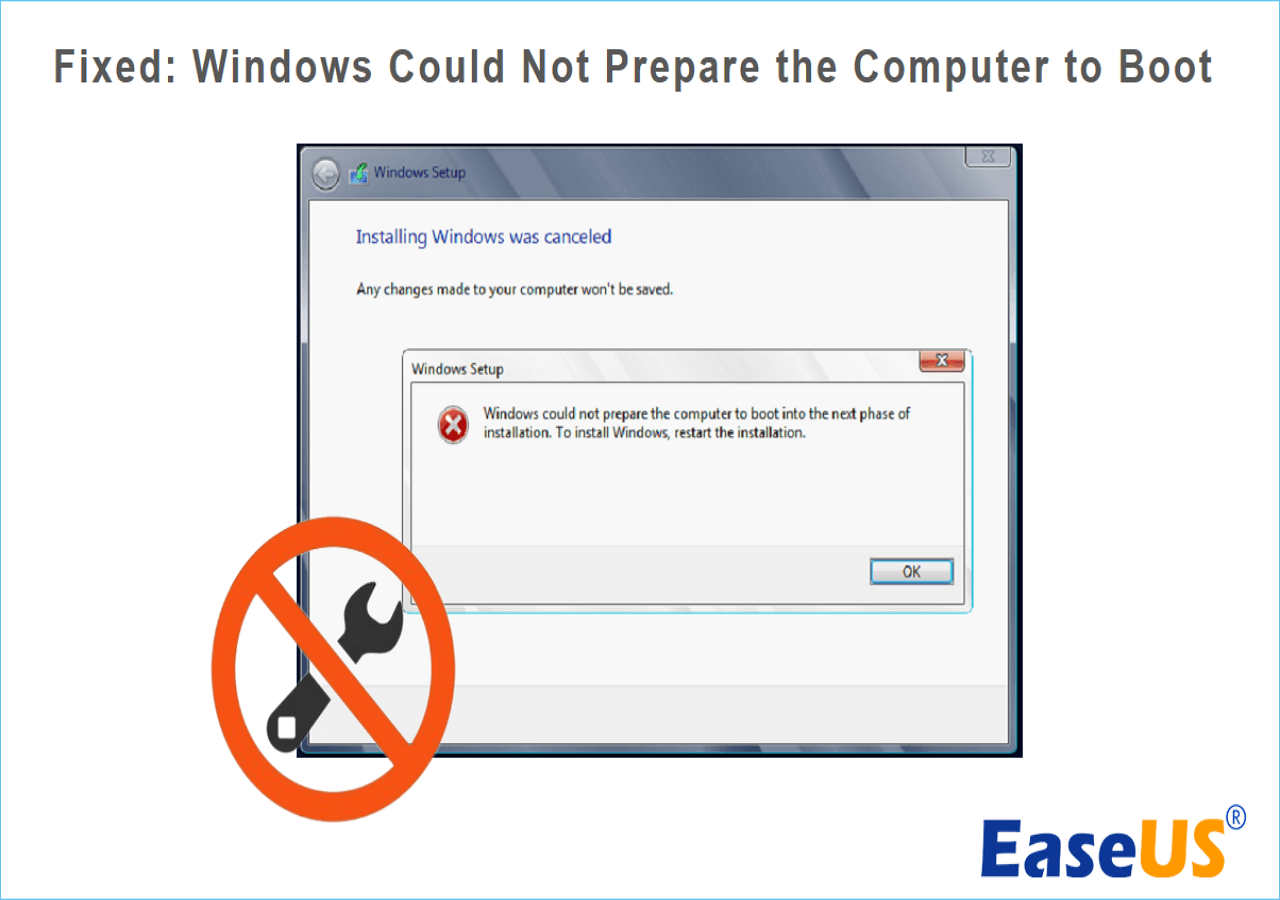
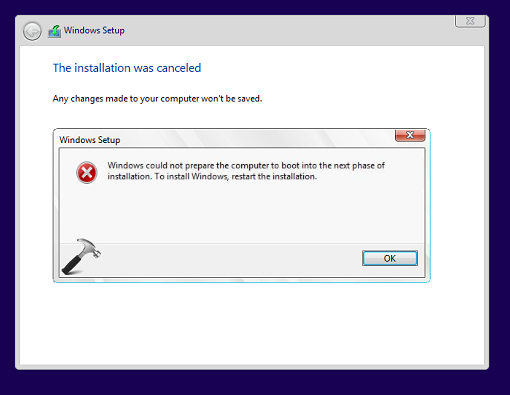
Windows users have reportedly encountered the following error message when trying to install or upgrade a new OS. Windows could not prepare the computer to boot into the next stage of installation. To install Windows, restart the installation.
The following are real cases of users asking for help from the forum:
[HELP] Windows could not prepare the computer to boot into the next phase of installation. Hello! I decided to reinstall Windows and encountered this issue while installing it on my SSD. My bootable Windows 10 USB was created and set to GPT; my SSD is also converted to GPT. How can I fix this? I’ve been trying for hours and still haven’t found a fix. — From Reddit
To continue and complete the installation, you must fix this error. Fortunately, this post of EaseUS has collected all possible causes and effective and efficient solutions on how to fix Windows can’t prepare your computer to start in Windows 11, Windows 10, or Windows 7. First, let’s figure out why you get this error message.
Why Windows Could Not Prepare the Computer to Boot
Why is your Windows unable to prepare your computer to boot into the next installation stage? Based on user reports and our explorations, here are some possible reasons that can trigger Windows installation failures.
🚩Too many extra devices connected during Windows installation:
This has been verified to cause some BIOS versions to malfunction. By removing the unnecessary hardware, the BIOS firmware can perform the boot process as usual.
🚩The installation media is not set correctly:
Many users use an external bootable USB drive to install a new operating system, and this is a good option. However, it turns out that incorrectly created installation media will cause Windows not to prepare the computer to boot issue.
🚩BIOS-related issues:
BIOS is the firmware that checks the system devices and loads the Windows OS. It plays an important role in the Windows boot process. Three things can cause Windows was not ready to start the computer issue:
- Outdated BIOS version. An outdated BIOS can cause compatibility and security issues between the operating system and hardware.
- The BIOS version is incompatible and will not work with some installers. This problem mainly occurs on computers with small motherboards, such as mini PCs. The BIOS versions of these smaller motherboards do not support Windows 7 and earlier.
- BIOS settings misconfigured. An incorrectly configured BIOS cannot start your computer due to a failed BIOS update, virus infection, or other file corruption.
🚩System files or installation files are damaged:
If the system files in the operating system are corrupted, your computer will not be able to install a complete and secure operating system and will display Windows cannot prepare the computer to start an error.
These are the possible reasons why Windows could not prepare the computer to boot. It’s so kind of you to share this article and help other users to solve this issue.
Fixes for Windows Could Not Prepare the Computer to Boot
In this section, you will find various methods to fix Windows that cannot prepare your computer to start up. Try one by one to remove installation errors in Windows 11/10/7.
Fix 1. Unplug Unnecessary Hardware Devices
Windows Could Not Prepare the Computer to Boot error can appear when many external devices are connected to the computer. Highly loaded hardware may trigger a BIOS error, causing the OS installation to fail. In this case, removing all extra peripherals is the quickest and most useful method.
Remove all unnecessary devices, including external USB drives, USB adapters, SD cards, additional HDD or SSD, CDs, and any other peripherals you don’t need to install, and make sure your computer can run with minimal hardware. Afterward, restart your computer and go through the installation process again.
Fix 2. Verify BIOS
You need to fix Windows Could Not Prepare the Computer to Boot error by fixing outdated, incompatible, and incorrectly configured BIOS.
Depending on the state of your BIOS, we offer several methods to fix this firmware-related error and help you out of a failed Windows installation.
Guide 1. Check BIOS Compatibility
Due to the small size of the motherboard, many recent mini PCs can only run Windows 8.1 or later. To verify that your BIOS supports the operating system you are trying to install, you can call the manufacturer or search for online help on their official website.
If the BIOS is not compatible with your operating system or the BIOS settings are incorrect, you can update the BIOS as follows.
Guide 2. Upgrading an Outdated BIOS Version
Remember, you should find the correct BIOS version compatible with your PC and specific system. Here, we take Windows PC as an example to show you how to update the BIOS to the latest version.
Step 1. Verify the current BIOS version.
- Press the Windows + R shortcut keys simultaneously. In the prompt window, type msinfo32 and hit Enter.
- In the System Information section, scroll down to locate the BIOS Version/Date section.
- Copy the information and save it in another location.
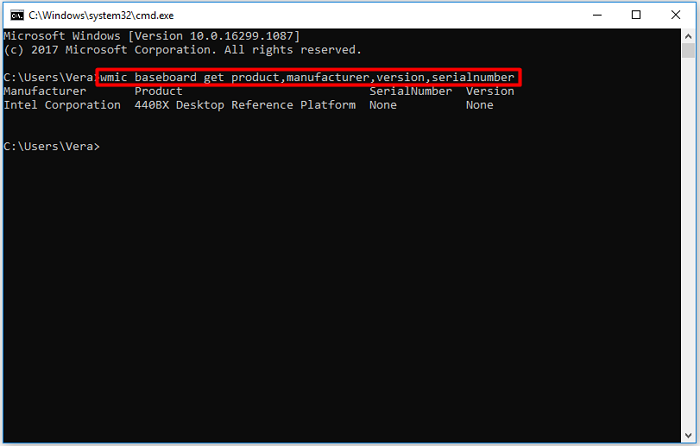
Step 2. Find your computer’s serial number.
- In Search, type cmd to open a command prompt. Please select the first option, «Open.»
- Enter the following command prompt and press Enter:
wmic board, get product, manufacturer, version, serial number;
Again, note the serial number and save it to another location.
Step 3. Then, you need to update to the corresponding BIOS version.
As mentioned earlier, BIOS versions vary from PC to PC. Therefore, you should first find your motherboard model and select your current operating system. Then find the latest BIOS version for your computer and download it to use.
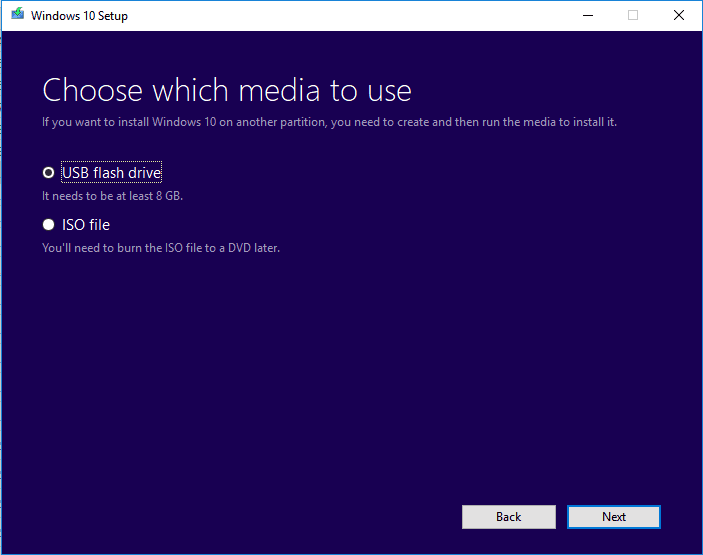
Fix 3. Properly Configure the Installation Media
Some users are experiencing Windows 10 preparations not booting to the next stage of the installation when installing Windows using the installation media. Misconfigured installation media (such as a bootable USB) can cause this error during installation. Fortunately, you can follow this link below to learn how to properly configure the installation media and install Windows from USB.
![]()
Fix 4. Set the Correct Partition Style for the BIOS Mode
BIOS has two modes, Legacy BIOS and UEFI BIOS; UEFI BIOS is suitable for GPT; Legacy BIOS is suitable for MBR. It is therefore recommended to set the correct partition style on the installation media before starting the installation process. We recommend you use EaseUS Partition Master to convert partitions into pairs. This tool lets you convert partitions to MBR or GPT without losing data. Here, we will take converting MBR to GPT as an example. Download the tool and follow the tutorial to set the correct partition style.
After setting the correct partition style, try again to see if you have removed this error. This tool can also convert GPT to MBR and set the partition to the right style.
Fix 5. Delete All Partitions in the Installation Media
If you still get the error after trying all the solutions, deleting all partitions may be the last resort, although it will delete all data. It is recommended that you back up your important data in advance and then proceed with the following steps.
Step 1. Force start the computer using the installation media.
Step 2. In the Windows Setup screen, select each current partition on the installation device and click the Delete button below.
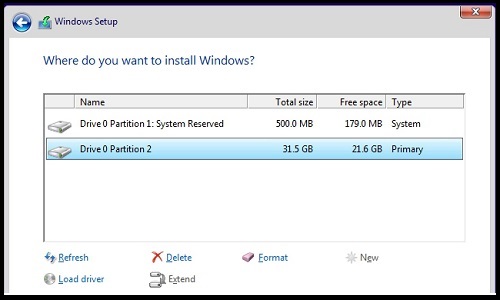
Step 3. Create a new partition from the unallocated space.
Step 4. Then, restart the Windows installation process.
You should now have successfully fixed Windows, not preparing your computer to start up.
Editor’s Thought
In this post, we have detailed five solutions on how to fix Windows won’t prepare your computer to start up. In most cases, removing all extra hardware peripherals proves to be the most useful and efficient one. If this doesn’t solve your problem, you can try other solutions in the post. The last solution will delete all data in the installation media; if you want to delete all partitions, please back up your important data in advance. You may also like the following topics.
Windows Could Not Prepare the Computer to Boot FAQs
Have you removed the «Windows could not prepare the computer to boot» error? If you have other doubts, read the following content to try.
1. How can I solve Windows that could’t prepare the computer to boot into the next phase of installation?
The most efficient solution to solve the Windows could not prepare the computer to boot error is to disconnect all the unnecessary hardware connections. Keep the essential hardware and try to reinstall Windows.
2. How to fix a Windows 10 installation that won’t boot?
If your Windows 10 fails to boot, perhaps there’re problems with the hard drive, BIOS and its settings, or Windows installation files. To remove the problem, you can run a startup repair, fix hard drive errors, reset BIOS mode, or update BIOS versions.
3. Why is Windows installation stuck on the getting ready screen?
You may need to check if the system files are corrupted since corrupted Windows installation files (in most cases) are the culprit that leads your Windows to get stuck on the getting ready screen.
Nota Bene: Not a duplicate! I’ve checked the following questions and didn’t find the working solution.
Nota Bene 2: I’ve got a lot more details. Check them in the bottom of the question!
Questions:
And to the problem:
I use MediaCreationTool2004.exe to create a bootable USB drive, straight from Microsoft site. My EFI sees the USB (By the way, my EFI doesn’t have a GUI); I select it and boot. Everything goes fine before the literal finish of the installation. It just says Windows could not prepare the computer to boot into the next phase of the installation. Restart and try again.
My laptop OS hierarchy:
- Windows 10 x64
- Windows 10 x64 once again after me formatting C: for no reason
- Ubuntu
- Multiboot (Ubuntu, Windows 10 x64)
- Kali Linux
- Zorin OS
- Ubuntu
- Linux Mint
- Tried to install Windows 8 x64 but didn’t succeed (same error)
- Tried to install Windows 8.1 x64 but same error
- Tried to install Windows 10 x64 but didn’t succeed (same error) (current)
Very current: No OS
What’ve I tried:
- Removing each partition when installing but the installation failed instantly (after copying the files)
- Removing each partition through diskpart before even installing, which of course failed as well
- Not removing the partitions, just formatting the main partition to install but it failed on the last step.
- Going to «Repair the system» —> Delete updates —> Delete the last update. Outputs «An error occurred…»
- Removing literally everything from the laptop I could remove (except for the USB) (mouse, patch cable, charger). Nothing changed, the same error as in the 3rd.
- Going to «Repair the system» —> cmd —> Using the diskpart and formatting directly from here. Nothing changed.
- Cleaning volumes — didn’t help, nothing changed.
Also after some time, diskpart started saying Drive not selected. when trying to format C:<br/>
I have no idea what to do.
More data:
Laptop — Digma
CPU — Intel(R) Atom(TM) x5-Z8350 CPU @ 1.44GHz
RAM — 2048 MB DDR3
Windows 10: was licensed when it was on my laptop
The details you came for:
Unsucceed:
Using MediaCreationTool2004.exe with
Windows 10, Russian, x64settings
Using MediaCreationTool2004.exe withWindows 10, Russian, x86settings
Using Rufus 3.11.1678 withGPT, UEFI (non-CSM), FAT32, 4096, x64settings
Using Rufus 3.11.1678 withGPT, UEFI (non-CSM), FAT32, 4096, x86settings
Additional:
My EFI doesn’t see the NTFS-formatted USB for some reason
My USB is 8 GB
There are various complex tasks that take place under the hood while you upgrade or clean install the Windows operating system on a computer. Because of its complexity, there are times when you might encounter some errors when you upgrade or clean install Windows 10. One of the errors you could encounter is the error that states, “Windows could not prepare the computer to boot into the next phase of installation. To install Windows, restart the installation”.
This error does not only occur in Windows 10 as it could also occur on the other versions of Windows. There are a lot of possible causes for this error. It could be due to incompatible BIOS, corrupted system files, improper installation media or it could also be due to excessive hardware plugged into your computer and so on. Whatever the cause is, here are some potential fixes you need to check out to fix the problem.
Option 1 – Try to disconnect or disable newly installed hardware
In this option, you will have to disable or remove the hardware you’ve just installed recently since external devices could be the one that’s causing the Blue Screen of Death error to appear. To do that, just disconnect any external device that’s connected to your computer physically and then check if it fixes the error.
Option 2 – Try to update the BIOS
As you know, the BIOS is a sensitive part of a computer. Even though it is a software component, the functioning of the hardware depends on it largely. Thus, you must be careful when modifying something in the BIOS. So if you don’t know much about it, it’s best if you skip on this option and try the other ones instead. However, if you are well-versed in navigating the BIOS, then follow the steps below.
- Tap the Win + R keys to open the Run dialog box.
- Next, type “msinfo32” in the field and press Enter to open System Information.
- From there, you should find a search field on the bottom where you have to search for the BIOS version and then press Enter.
- After that, you should see the developer and version of the BIOS installed on your PC.
- Go to your manufacturer’s website and then download the latest version of BIOS on your computer.
- If you are using a laptop, make sure that you keep it plugged in until you have updated the BIOS.
- Now double click on the downloaded file and install the new BIOS version in your computer.
- Now restart your computer to apply the changes made.
Option 3 – Try to reconfigure all the created partitions
You could also try to reconfigure the partitions by deleting and recreating all the available partitions on your computer and then see if it fixes the problem.
Option 4 – Make a proper bootable USB Drive/Stick
To make a proper bootable USB drive, you need to use the Windows Media Creation tool. The Media Creation tool in Windows allows you to use the ISO installation file to make a bootable device that you can use to install Windows on your PC. Note that this is kind of different from the usual installation process as it could erase your computer’s current settings and data on the primary drive. Thus, before you proceed, you need to backup all your data into some removable drive and then use the Media Creation Tool to make a bootable drive.
- After making the bootable drive, you need to plug it into your computer and then reboot.
- Next, tap the F10 or Esc key to open the boot options.
- Now set the boot priority of the removable drive the highest. Once the setup comes forth, follow the next onscreen instructions and install Windows without any problems.
Do You Need Help with Your Device?
Our Team of Experts May Help

Troubleshoot.Tech Experts are There for You!
GET HELP
Troubleshoot.Tech experts work with all versions of Microsoft Windows including Windows 11, with Android, Mac, and more.
Share this article:
You might also like
This toolbar/web browser extension is ad/search-supported that is typically installed as an optional offer, users generally have this bundled with 3rd party software. During setup, this toolbar will modify the home page and new tab pages to the affiliate search portal MyWay.com using a primary search engine to collect shared search revenue. It will also modify the default search provider as well.
While this extension is installed users will experience a display of additional ads and sponsored content throughout their browsing sessions, as well as the possibility of pop-up ads.
Several anti-virus scanners have marked this extension as a Browser Hijacker and it is recommended to remove it from your computer.
About Browser Hijackers
Browser hijacking means that a malicious code has taken control over and altered the settings of your internet browser, without your consent. They are designed to interfere with browser programs for a variety of purposes. Usually, it’ll drive users to predetermined websites that are looking to increase their advertising campaign income. Though it may seem naive, all browser hijackers are damaging and thus always regarded as security risks. In a worst-case scenario, your internet browser can be hijacked to download malicious software that can do a great deal of damage to your laptop or computer.
How to know if your internet browser has been hijacked
The common symptoms that indicate having this malicious software on your PC are:
1. home page is modified
2. bookmark and the new tab are likewise modified
3. default online search engine is changed
4. you’re getting new toolbars you have never found before
5. your internet browser displays endless pop-up ads
6. your web browser has become unstable or starts running slowly
7. you can’t visit certain websites like homepages of anti-malware software.
Exactly how browser hijacker finds its way onto your computer system
Browser hijackers can enter a computer by some means or other, including via downloads, file sharing, and e-mail also. They may also come from any BHO, extension, add-on, toolbar, or plug-in with malicious intent. Browser hijackers sneak into your pc in addition to free software application downloads that you unintentionally install alongside the original. Some of the most popular hijackers are MyImageConverter, Conduit Search, Babylon Toolbar, Sweet Page, OneWebSearch, and CoolWebSearch.
Learn how to get rid of browser hijackers
Certain hijackers could be removed by just uninstalling the related freeware or add-ons through the Add or Remove Programs in the Windows control panel. In some cases, it could be a difficult job to find and remove the malicious piece because the associated file could be running as part of the operating system process. Besides, browser hijackers can modify the Windows registry so it can be quite tough to restore all the values manually, especially when you are not a very tech-savvy person.
You can choose automatic browser hijacker removal by just installing and running an efficient anti-malware program. SafeBytes Anti-Malware detects all types of hijackers – including MyImageConverter – and eliminates every trace quickly and efficiently. In addition to anti-virus software, a PC optimizer program, like Total System Care, can help you fix Windows registry errors, remove unwanted toolbars, secure your internet privacy, and boost overall computer performance.
What to Do if Virus Stops You From Downloading Or Installing Antivirus?
Practically all malware is bad, but certain types of malware do much more damage to your PC than others. Some malware variants alter web browser settings by adding a proxy server or change the PC’s DNS configuration settings. In such cases, you’ll be unable to visit some or all of the websites, and therefore not able to download or install the required security software to clear out the computer virus. If you are reading this now, you might have perhaps realized that virus infection is a reason behind your blocked net connectivity. So how to proceed if you need to install an anti-virus software like Safebytes? Follow the instructions below to remove malware by alternate methods.
Download the software in Safe Mode with Networking
The Windows operating system comes with a special mode referred to as “Safe Mode” in which only the minimum required programs and services are loaded. In the event the malware is blocking internet connection and affecting your computer, running it in Safe Mode enables you to download anti-virus and run a diagnostic scan whilst limiting potential damage. To get into Safe Mode or Safe Mode with Networking, press F8 while the system is booting up or run MSCONFIG and locate the “Safe Boot” options in the “Boot” tab. Once you are in safe mode, you can try to install your anti-malware application without the hindrance of the malware. Now, you can run the antivirus scan to get rid of viruses and malware without hindrance from another malicious application.
Download the security software using an alternate internet browser
Some malware only targets particular web browsers. If this sounds like your situation, utilize another web browser as it might circumvent the virus. If you seem to have a trojan attached to Internet Explorer, then switch to an alternate web browser with built-in safety features, such as Firefox or Chrome, to download your preferred anti-malware program – Safebytes.
Install anti-malware on a USB drive
Another option would be to make a portable antivirus program on your USB flash drive. To run anti-malware from a USB pen drive, follow these simple measures:
1) On a virus-free computer, download and install Safebytes Anti-Malware.
2) Plug the USB drive into the clean computer.
3) Double-click on the downloaded file to open the installation wizard.
4) Select the drive letter of the flash drive as the location when the wizard asks you exactly where you want to install the antivirus. Follow the on-screen instructions to finish the installation process.
5) Transfer the flash drive from the uninfected computer to the infected computer.
6) Double-click the Safebytes Anti-malware icon on the USB drive to run the software.
7) Hit the “Scan” button to run a full computer scan and remove viruses automatically.
Protect Your PC and Privacy With SafeBytes Anti-Malware
Are you looking to install the best anti-malware software program for your PC? You can find many applications on the market which come in free and paid versions for Windows systems. A few of them do a great job in eradicating malware threats while some will affect your PC themselves. You should look for a product that has obtained a good reputation and detects not only viruses but other types of malware as well. While considering the highly regarded applications, Safebytes AntiMalware is certainly the highly recommended one.
SafeBytes anti-malware is trustworthy software that not only secures your PC completely but is also quite user-friendly for people of all ability levels. Through its cutting-edge technology, this software will help you protect your computer against infections caused by various kinds of malware and similar internet threats, including adware, spyware, viruses, worms, trojans, keyloggers, ransomware, and potentially unwanted program (PUPs).
SafeBytes anti-malware offers an array of advanced features which sets it aside from all others. Let’s take a look at a few of them below:
Real-time Threat Response: SafeBytes provides real-time active supervision and protection from all known computer viruses and malware. It’ll inspect your personal computer for suspicious activity regularly and its unrivaled firewall protects your computer from illegal access by the outside world.
World-class AntiMalware Protection: Using a critically acclaimed anti-malware engine, SafeBytes offers multilayered protection which is designed to catch and get rid of viruses and malware that are hidden deep inside your computer’s operating system.
Web protection: SafeBytes inspects the hyperlinks present on a webpage for possible threats and notifies you if the site is safe to visit or not, through its unique safety ranking system.
Light-weight: This application is not “heavy” on the computer’s resources, so you’ll not see any performance troubles when SafeBytes is working in the background.
24/7 Customer Support: Support service is readily available 24 x 7 x 365 days through email and chats to answer your concerns.
SafeBytes has developed a great anti-malware solution to help you conquer the latest malware threats and virus attacks. You can be sure that your computer will be protected in real-time once you put this tool to use. So if you’re looking for the absolute best malware removal application out there, and if you don’t mind paying out a few bucks for it, opt for SafeBytes Anti-Malware.
Technical Details and Manual Removal (Advanced Users)
To get rid of MyImageConverter manually, navigate to the Add or Remove programs list in the Control Panel and choose the program you want to get rid of. For web browser extensions, go to your browser’s Addon/Extension manager and choose the plug-in you intend to disable or remove. You may also want to reset your home page and search engine providers, and also delete temporary files, browsing history, and cookies.
If you opt to manually delete the system files and Windows registry entries, utilize the following checklist to make sure you know precisely what files to remove before performing any actions. But bear in mind, editing the Windows registry is usually a difficult task that only advanced users and professionals should attempt to fix the problem. In addition, some malware is capable of replicating or preventing removal. It is highly recommended that you carry out the removal procedure in Windows Safe Mode.
Files:
%PROGRAMFILES(x86)%4zUninstall MyImageConverter.dll
%SystemDrive%\Users\wsierra\AppData\Roaming\Mozilla\Firefox\Profiles\pe3eufs0.default\extensionszffxtbr-bs@MyImageConverter_4z.com\content\MyImageConverter.exe
%LOCALAPPDATA%\MyImageConverter_4z
%PROGRAMFILES%\MyImageConverter_4z
%UserProfile%\Local Settings\Application Data\amailnkkmeeoijlkjdgloiclaiifpojf
%LOCALAPPDATA%\amailnkkmeeoijlkjdgloiclaiifpojf
%ProgramFiles%\MyImageConverter
%UserProfile%\Local Settings\Application Data\Google\Chrome\User Data\Default\Sync Extension Settings\oeabadoffdnkmmecmhpknaklgmabippp
%ProgramFiles(x86)%\MyImageConverter
%UserProfile%\Local Settings\Application Data\Google\Chrome\User Data\Default\Extensions\ikgjglmlehllifdekcggaapkaplbdpje
%LOCALAPPDATA%\Google\Chrome\User Data\Default\Extensions\ikgjglmlehllifdekcggaapkaplbdpje
%LOCALAPPDATA%\Google\Chrome\User Data\Default\Sync Extension Settings\ikgjglmlehllifdekcggaapkaplbdpje
%UserProfile%\Local Settings\Application Data\Google\Chrome\User Data\Default\Sync Extension Settings\ikgjglmlehllifdekcggaapkaplbdpje
%UserProfile%\Local Settings\Application Data\MyImageConverterTooltab
%LOCALAPPDATA%\MyImageConverterTooltab
Registry:
HKEY_CURRENT_USER\HKEY_CURRENT_USER\Software\
HKEY_CURRENT_USER\Software\AppDataLow\Software\MyImageConverter_4z
HKEY_CURRENT_USER\Software\MyImageConverter_4z
HKEY_LOCAL_MACHINE\SOFTWARE\Classes\MyImageConverter_4z.DynamicBarButton
HKEY_LOCAL_MACHINE\SOFTWARE\Classes\MyImageConverter_4z.DynamicBarButton.1
HKEY_LOCAL_MACHINE\SOFTWARE\Classes\MyImageConverter_4z.FeedManager
HKEY_LOCAL_MACHINE\SOFTWARE\Classes\MyImageConverter_4z.HTMLPanel
HKEY_LOCAL_MACHINE\SOFTWARE\Classes\MyImageConverter_4z.HTMLPanel.1
HKEY_LOCAL_MACHINE\SOFTWARE\Classes\MyImageConverter_4z.MultipleButton
HKEY_LOCAL_MACHINE\SOFTWARE\Classes\MyImageConverter_4z.MultipleButton.1
HKEY_LOCAL_MACHINE\SOFTWARE\Classes\MyImageConverter_4z.PseudoTransparentPlugin
HKEY_LOCAL_MACHINE\SOFTWARE\Classes\MyImageConverter_4z.PseudoTransparentPlugin.1
HKEY_LOCAL_MACHINE\SOFTWARE\Classes\MyImageConverter_4z.Radio
HKEY_LOCAL_MACHINE\SOFTWARE\Classes\MyImageConverter_4z.ScriptButton
HKEY_LOCAL_MACHINE\SOFTWARE\Classes\MyImageConverter_4z.ScriptButton.1
HKEY_LOCAL_MACHINE\SOFTWARE\Classes\MyImageConverter_4z.SettingsPlugin
HKEY_LOCAL_MACHINE\SOFTWARE\Classes\MyImageConverter_4z.SettingsPlugin.1
HKEY_LOCAL_MACHINE\SOFTWARE\Classes\MyImageConverter_4z.SkinLauncher
HKEY_LOCAL_MACHINE\SOFTWARE\Classes\MyImageConverter_4z.SkinLauncher.1
HKEY_LOCAL_MACHINE\SOFTWARE\Classes\MyImageConverter_4z.SkinLauncherSettings
HKEY_LOCAL_MACHINE\SOFTWARE\Classes\MyImageConverter_4z.SkinLauncherSettings.1
HKEY_LOCAL_MACHINE\SOFTWARE\Classes\MyImageConverter_4z.ToolbarProtector
HKEY_LOCAL_MACHINE\SOFTWARE\Classes\MyImageConverter_4z.ToolbarProtector.1
HKEY_LOCAL_MACHINE\SOFTWARE\Classes\MyImageConverter_4z.UrlAlertButton
HKEY_LOCAL_MACHINE\SOFTWARE\Classes\MyImageConverter_4z.UrlAlertButton.1
HKEY_LOCAL_MACHINE\SOFTWARE\Classes\MyImageConverter_4z.XMLSessionPlugin
HKEY_LOCAL_MACHINE\SOFTWARE\Classes\MyImageConverter_4z.XMLSessionPlugin.1
HKEY_CURRENT_USER\Software\Microsoft\Internet Explorer\Approved Extensions, value: 312F84FB-8970-4FD3-BDDB-7012EAC4AFC9
HKEY_CURRENT_USER\Software\Microsoft\Internet Explorer\Approved Extensions, value: 48586425-6BB7-4F51-8DC6-38C88E3EBB58
HKEY_LOCAL_MACHINE\SOFTWARE\Wow6432Node\Google\Chrome\Extensions\adldappccjhelkmbkpiibilgnnjakieg
HKEY_LOCAL_MACHINE\SOFTWARE\Wow6432Node\Microsoft\Internet Explorer\Low Rights\ElevationPolicy\3d429207-4689-492d-a0e5-cdc5dfbb5005
HKEY_LOCAL_MACHINE\SOFTWARE\Wow6432Node\Microsoft\Internet Explorer\Low Rights\ElevationPolicy\66d59105-fe06-43a4-b292-eb0097e9eb74
HKEY_LOCAL_MACHINE\SOFTWARE\Wow6432Node\Microsoft\Internet Explorer\Low Rights\ElevationPolicy\9103c314-c4e2-4463-8934-b19bcb46236d
HKEY_LOCAL_MACHINE\SOFTWARE\Wow6432Node\Microsoft\Internet Explorer\Low Rights\ElevationPolicy\97cef41c-5055-474a-855a-892d4fe3e596
HKEY_LOCAL_MACHINE\SOFTWARE\Wow6432Node\Microsoft\Internet Explorer\Low Rights\ElevationPolicy\d375ee64-f893-498a-a0e9-0e9829c88c3d
HKEY_LOCAL_MACHINE\SOFTWARE\Wow6432Node\Microsoft\Tracing\MyImageConverterCrxSetup_RASAPI32
HKEY_LOCAL_MACHINE\SOFTWARE\Wow6432Node\Microsoft\Tracing\MyImageConverterCrxSetup_RASMANCS
HKEY_LOCAL_MACHINE\SOFTWARE\Wow6432Node\Microsoft\Windows\CurrentVersion\Ext\PreApproved\1f6f39c1-00a8-4752-a94c-d0ea92d978b6
HKEY_LOCAL_MACHINE\SOFTWARE\Wow6432Node\Microsoft\Windows\CurrentVersion\Ext\PreApproved\38122a36-83b2-46b8-b39a-ec72a4614a07
HKEY_LOCAL_MACHINE\SOFTWARE\Wow6432Node\Microsoft\Windows\CurrentVersion\Ext\PreApproved\5354d921-3f52-47c5-938d-77a2fb6defe7
HKEY_LOCAL_MACHINE\SOFTWARE\Wow6432Node\Microsoft\Windows\CurrentVersion\Ext\PreApproved\71144427-1368-4D18-8DC9-2AE3CC4C4F83
HKEY_LOCAL_MACHINE\SOFTWARE\Wow6432Node\Microsoft\Windows\CurrentVersion\Ext\PreApproved\99e1f6fd-2e94-4cf6-8344-1ba63cd3bd9b
HKEY_LOCAL_MACHINE\SOFTWARE\Wow6432Node\Microsoft\Windows\CurrentVersion\Ext\PreApproved\a86782d8-7b41-452f-a217-1854f72dba54
HKEY_LOCAL_MACHINE\SOFTWARE\Wow6432Node\Microsoft\Windows\CurrentVersion\Ext\PreApproved\ed345812-2722-4dca-9976-d01832db44ee
HKEY_LOCAL_MACHINE\SOFTWARE\Wow6432Node\MozillaPlugins\@MyImageConverter_4z.com/Plugin
HKEY_LOCAL_MACHINE\SOFTWARE\Microsoft\Internet Explorer\Low Rights\ElevationPolicy\9103c314-c4e2-4463-8934-b19bcb46236d
HKEY_LOCAL_MACHINE\SOFTWARE\Microsoft\Internet Explorer\Low Rights\ElevationPolicy\97cef41c-5055-474a-855a-892d4fe3e596
HKEY_LOCAL_MACHINE\SOFTWARE\Microsoft\Internet Explorer\Low Rights\ElevationPolicy\d375ee64-f893-498a-a0e9-0e9829c88c3d
HKEY_LOCAL_MACHINE\SOFTWARE\Microsoft\Tracing\MyImageConverterCrxSetup_RASAPI32
HKEY_LOCAL_MACHINE\SOFTWARE\Microsoft\Tracing\MyImageConverterCrxSetup_RASMANCS
HKEY_LOCAL_MACHINE\SOFTWARE\Microsoft\Windows\CurrentVersion\explorer\Browser Helper Objects\312f84fb-8970-4fd3-bddb-7012eac4afc9
HKEY_LOCAL_MACHINE\SOFTWARE\Microsoft\Windows\CurrentVersion\explorer\Browser Helper Objects\c547c6c2-561b-4169-a2a5-20ba771ca93b
HKEY_LOCAL_MACHINE\SOFTWARE\Microsoft\Windows\CurrentVersion\Ext\PreApproved\1f6f39c1-00a8-4752-a94c-d0ea92d978b6
HKEY_LOCAL_MACHINE\SOFTWARE\Microsoft\Windows\CurrentVersion\Ext\PreApproved\71144427-1368-4D18-8DC9-2AE3CC4C4F83
HKEY_LOCAL_MACHINE\SOFTWARE\Microsoft\Windows\CurrentVersion\Ext\PreApproved\99e1f6fd-2e94-4cf6-8344-1ba63cd3bd9b
HKEY_LOCAL_MACHINE\SOFTWARE\Microsoft\Windows\CurrentVersion\Ext\PreApproved\a86782d8-7b41-452f-a217-1854f72dba54
HKEY_LOCAL_MACHINE\SOFTWARE\Microsoft\Windows\CurrentVersion\Ext\PreApproved\ed345812-2722-4dca-9976-d01832db44ee
HKEY_LOCAL_MACHINE\SOFTWARE\MozillaPlugins\@MyImageConverter_4z.com/Plugin
HKEY_LOCAL_MACHINE\SOFTWARE\Microsoft\Windows\CurrentVersion\Run, value: MyImageConverter Search Scope Monitor
HKEY_LOCAL_MACHINE\SOFTWARE\Wow6432Node\Microsoft\Windows\CurrentVersion\Uninstall\VDC_is1
HKEY_LOCAL_MACHINE\SOFTWARE\Google\Chrome\Extensions\adldappccjhelkmbkpiibilgnnjakieg
HKEY_LOCAL_MACHINE\SOFTWARE\MyImageConverter
HKEY_LOCAL_MACHINE\SOFTWARE\Wow6432Node\MyImageConverter_4z
HKEY_LOCAL_MACHINE\SOFTWARE\Classes\MyImageConverter.ScriptHelper
HKEY_LOCAL_MACHINE\SOFTWARE\Classes\MyImageConverter.ScriptHelper.1
HKEY_LOCAL_MACHINE\SOFTWARE\Wow6432Node\Microsoft\Internet Explorer\SearchScopes\cf6e4b1c-dbde-457e-9cef-ab8ecac8a5e8
HKEY_LOCAL_MACHINE\SOFTWARE\Wow6432Node\Microsoft\Windows\CurrentVersion\Uninstall\MyImageConverter
HKEY_LOCAL_MACHINE\SOFTWARE\MozillaPlugins\@MyImageConverter_ScriptHelper.com/Plugin
HKEY_LOCAL_MACHINE\SOFTWARE\Microsoft\Windows\CurrentVersion\Run, value: MyImageConverter_4z Browser Plugin Loader
HKEY_LOCAL_MACHINE\SOFTWARE\Wow6432Node\Microsoft\Windows\CurrentVersion\Run, value: MyImageConverter_4z Browser Plugin Loader
HKEY_LOCAL_MACHINE\SOFTWARE\Microsoft\Internet Explorer\LowRegistry\DOMStorage\MyImageConverter.dl.tb.ask.com
HKEY_CURRENT_USER\Software\Microsoft\Internet Explorer\DOMStorage\MyImageConverter.dl.myway.com
HKEY_LOCAL_MACHINE\SOFTWARE\Microsoft\Internet Explorer\DOMStorage\MyImageConverter.com
HKEY_LOCAL_MACHINE\SOFTWARE\Microsoft\Internet Explorer\LowRegistry\DOMStorage\www.MyImageConverter.com
HKEY_CURRENT_USER\Software\Microsoft\Internet Explorer\DOMStorage\free.MyImageConverter.com
HKEY_LOCAL_MACHINE\HKEY_CURRENT_USER\Software\[APPLICATION]\Microsoft\Windows\CurrentVersion\Uninstall..Uninstaller
Read More
In today’s digital life, when we access the internet daily, browsers are essential almost as our operating system, after all, we do access all of the internet data via them, and having a good, reliable, and personal browser tailored for our needs can make all the difference in the world.
In today’s article, we will introduce you to the five greatest browsers of today, we will point their advantages and disadvantages and why should you pick one or another. As with each piece of software, there is not an ultimate browser, better than anything else and we will not favor anyone on this list, the decision which you should use is solely up to you, we are here to provide you with an objective opinion on each one.
All of this being said, let’s begin with the countdown in no particular order.
-
Mozilla firefox.

If you consider yourself a power user or you value your privacy then firefox is the browser for you. It is open source and is packed with great features like reporting when your email has been used for a known data breach, it stops annoying pop-up notifications, stops browser fingerprinting, and many more. Firefox is also a cross-platform browser making it a great choice if you want to transfer and use your data across multiple devices with one account. The downside of firefox however is its speed, this browser is the slowest on this list, I guess features and advantages took their tool in the speed department, but if that is not a concern for you and you feel like the positives outweigh some slower speed, grab it here. -
Google Chrome

Chrome browser has been a game-changer when it was released and even today some of its features are still great and needed. It is packed with some great features like tab freezing, for example, it is cross-platform meaning that also as firefox you can change data between browsers on different devices. it is a very expandable browser with tons of extensions and its speed performance is very very good. The downside of Chrome are two things sadly, one of them is its hunger for RAM, the browser takes a big chunk of RAM once it is active and on some older computer with limited RAM it performs slowly, another is telemetry which its sending, in other words, other browsers don’t come with the lingering fear that Google’s just a little bit too involved in all of our lives. But if downsides do not trouble you and you have a decent amount of RAM in your system chrome might be the best solution for you, grab it here and check it out. -
Microsoft Edge

Or should I say Microsoft edge 2.0 since this new Edge is completely recoded and rethought, a completely new browser based on chromium. The first version of the edge was an inhouse attempt from Microsoft and it was a disaster, I guess the lesson was learned, and this new edge we have today is a great Browser, it is lightning fast and packed with some great features with one among them standing out I just love, that is the ability to save web pages as applications and truth to be told you have to try this in order to see al great advantages it offers. A very interesting feature is that edge itself wins the speed race from all of the 5 contestants here which is a great surprise. Of course, the downside of annoying Microsoft pushing it to be your default is, well it’s Microsoft, as chrome is tied to Google so is edge tied to Microsoft, and the same dreaded feeling that big MS is watching you. If however, you do not concern yourself with these kinds of things, since it is already part of Windows 10, give it a spin and try it, I am sure you will at least love its blazing speed. -
Vivaldi

A new kid on the block, relatively unknown Browser Vivaldi offers some great customizable features no other one on this list offers, a very unique and down to each detail customization option, you can literally tweak each and every aspect of this browser making it best customizable and personal browser ever. How it is also based o chromium, every chrome extension works in it naturally. It is very good in speed and constantly updated and developed. The downside, well if you are anything like me, you could spend ages trying to customize it, ages, it has tons of features, and making it really feel and tick as you want can consume a really lot of time. If this thing does not bother you at all, grab Vivaldi here. -
Opera

Last but not least, we have another relic of the old browser age, the Opera browser. Packed with great security and great in-house features like a built-in VPN, built-in ad blocker, built-in crypto wallet, etc this browser seems like a swiss army knife. Opera is full of features and it shows once you start using it. The downside of opera is that its look and feel are specifically tailored to a certain type of user and not everyone will find that appealing or attractive, add some great but hidden and hard to come by features and it may go unnoticed. However, I think you should really give it a go since it definitely deserves more attention than it gets. Grab it here and check it out.


That’s it, 5 great browsers to look up, I hope that you have enjoyed the read and I hope to see you again here for more articles.
If you would like to read more helpful articles and tips about various software and hardware visit errortools.com daily.
Read More
If you encounter a Recovery Error code 0xc000000e, “Your PC needs to be repaired” error on your Windows 10 computer, then it means that there is some hardware failure or an incorrect drive configuration. Apart from the error, it may be accompanied by different error message such as:
- A required device is inaccessible
- The selected entry could not be loaded
- A required device isn’t connected or cannot be accessed
- The selected entry could not be loaded because the application is missing or corrupt
- The boot selection failed because a required device is inaccessible.
As mentioned, the error code 0xc000000e or STATUS_NO_SUCH_DEVICE error indicates that there is a hardware failure or an incorrect drive configuration and to fix it, you have to check your cables as well as check the drive with the diagnostic utility available from the manufacturer of the drive. And if you are using older PATA (IDE) drives, then this kind of error also indicates an incorrect master/subordinate drive configuration.
There could be different causes for this error. It could be that the winload.exe file is not accessible or is corrupted or that the boot location for the operating system cannot be found. Thus, for you to boot into and access the operating system, you can try the suggestions given below.
Option 1 – Try rebuilding the Boot Configuration Data (BCD) file
- Once you get to the Welcome Screen part, click on Next.
- Afterward, click on the Repair your computer option located on the bottom-left part of the window.
- Then click on Troubleshoot.
- Next, select the Advanced Options and then Command Prompt.
- Once Command Prompt has been pulled up, the following command to rebuild BCD files.
bootrec /rebuildbcd
- Once the command line is successful in finding out a Windows installation, hit Y to let it boot from the list which will successfully rebuild BCD.
- Now type “exit” to close Command Prompt and then restart your computer to successfully apply the changes made.
Option 2 – Try to run the Automatic Repair Utility
You might also want to use Automatic Repair in fixing the error code 0xC000000E. To do so, follow the steps below.
- You can start by creating and booting from a bootable Windows 10 USB Stick.
- After that, click on Repair your computer located in the bottom left corner when you are on the initial Windows Startup screen.
- Next, click on Troubleshoot, and then on the other screen, click the Startup Repair option.
- Now select the operating system you want to repair. Once you do that, it will start to repair your operating system. Wait until the process is completed and then check if the problem’s now fixed.
Option 3 – Try checking the physical device connections
You might also want to try checking if there are other devices that are connected to your PC. This is because of the configuration of the BIOS or UEFI might be configured in a way that any external device connected to the computer has a higher boot priority compared to the hard disk. And if it’s really the case, the externally attached disk might be the drive your computer is trying to boot into and not the hard disk. In such cases, Pen Drives, USB storage devices, CDs, DVDs, and so on, are included in this category of physical device connections.
Option 4 – Try updating the BIOS
As you know, the BIOS is a sensitive part of a computer. Even though it is a software component, the functioning of the hardware depends on it largely. Thus, you must be careful when modifying something in the BIOS. So if you don’t know much about it, it’s best if you skip on this option and try the other ones instead. However, if you are well-versed in navigating the BIOS, then follow the steps below.
- Tap the Win + R keys to open the Run dialog box.
- Next, type “msinfo32” in the field and press Enter to open System Information.
- From there, you should find a search field on the bottom where you have to search for the BIOS version and then press Enter.
- After that, you should see the developer and version of the BIOS installed on your PC.
- Go to your manufacturer’s website and then download the latest version of BIOS on your computer.
- If you are using a laptop, make sure that you keep it plugged in until you have updated the BIOS.
- Now double click on the downloaded file and install the new BIOS version on your computer.
- Now restart your computer to apply the changes made.
Option 5 – Try resetting the BIOS/UEFI configuration
You might also want to reset the BIOS configuration which will lead to arranging the boot configuration since it is intended by the manufacturer. Note that this will get rid of any blockage in the boot process.
Option 6 – Try marking your Disk as Online
Marking your Disk as Online can also help in resolving the error code 0xC000000E. To do so, follow the steps below.
- You need to first create a bootable Windows 10 Media and then boot from it.
- After that, click on Repair your computer on the first window of the Windows 10 installation setup.
- Now, choose the operating system partition from the options and click on Next.
- Then select Command Prompt from the System Recovery Options box.
- Next, type in “diskpart” and hit Enter to initiate the Diskpart utility inside the Command Prompt.
- Now type in either “list disk” or “list volume” and hit Enter. Either of these commands will help you in listing all the Disk connects or all the partitions on those disks formed. So you have to select one command depending on the list command you entered.
- Afterward, type in “select disk #” or “select volume #” and hit Enter to select the Disk or Partition you want to select.
- Now type in “online disk #” or “online volume #” and press Enter to mark the disk you selected as Online.
Read More
In recent times, some Windows 10 users have seen an error code BCM20702A0, when using Bluetooth and they are concerned as to what it is all about. We can say for certain that it has something to do with your Bluetooth driver. The error message in question is:
The drivers for this device are not installed. There are no compatible drivers for this device.
The problem here tends to no longer allow specific Bluetooth components to properly communicate with your Windows 10 operating system. It also affects laptops that do not have native Bluetooth support; therefore, the manufacturer installed a dongle on the inside to deliver the service. This is not the best way to do things because native support is always better. On the other hand, maybe you’re using a Broadcom USB Bluetooth dongle that is acting up, and as such, the error is showing.
Below are solutions provided for this particular error and how to eliminate it.
-
Run the Bluetooth Troubleshooter
Press ⊞ WINDOWS to open the menu and select settings
In settings choose Update & Security
Go to troubleshoot and on the right panel click on additional troubleshooters
Click on Bluetooth
Select Run the troubleshooter, then sit back and allow the tool to do its thing. Once you’ve completed the task, click on Apply this fix if any repairs are needed
Reboot your computer -
Install Broadcom driver from official website
Windows drivers for Broadcom Bluetooth devices are no longer posted on their website. They should be available through Microsoft’s Windows Update service. If drivers were not downloaded automatically by Windows Update, use Device Manager to refresh the driver from Windows Update.
However, the Broadcom Bluetooth drivers seem to be available here on the Lenovo website. To fix the BCM20702A0 driver error, you may download and install them.
After downloading it, right-click on the downloaded item, and select Run as administrator. After installation, restart your computer, then check again if it works. -
Remove all Bluetooth drivers and USB controllers
If previous solutions did not work, go to device manager and remove all Bluetooth devices along with all USB controllers.
Reboot your computer and Windows will automatically reinstall and set all devices.
Read More
GoodShopLanding is a browser extension for Google Chrome, Mozilla Firefox, and Safari. This extension offers the latest coupons from a range of variety stores. While this may seem useful, this extension only offers coupons from sponsored stores, not all coupons available, so the only coupons that you will get are from the Extensions Ad network. You may see additional new tabs opening randomly while browsing the internet, these tabs are opened by GoodShopLanding and usually contain last-minute store deals.
As it is often distributed via potentially unwanted advertising, and impacts browser performance in a way that many users do not want, it is classified as a Browser Hijacker and thus flagged for optional removal.
From the Author:
Shop online? Here’s your free automatic coupon finder, Gumdrop.
Never miss a coupon again
Gumdrop automatically applies the best coupons for you at checkout.
Get the best deals anywhere
With over 500,000 coupons, Gumdrop finds deals for thousands of stores, including Amazon, Expedia, and Papa John’s.
About Browser Hijackers
Browser hijackers (sometimes called hijackware) are a kind of malicious software that alters internet browser configurations without the computer owner’s knowledge or consent. These hijacks appear to be increasing at an astonishing rate around the globe, and it could be truly nefarious and sometimes harmful too. There are numerous reasons why you may have a browser hijack; but commercial, marketing, and advertising are definitely the primary purposes for their creation. Often, hijackers will force hits to sites of their choice either to increase traffic generating higher advertisement revenue, or to gain a commission for every user visiting there. However, it isn’t that harmless. Your web safety is jeopardized and it is extremely irritating. They not only mess up your web browsers, but browser hijackers can also modify the system registry, leaving your computer vulnerable to various other attacks.
Indications of browser hijack
There are many symptoms that indicate the browser is highjacked: your homepage is reset to some mysterious site; bookmark and the new tab are likewise changed; The default search page of web browser is changed; unwanted new toolbars are added to your web browser; you may see never-ending pop-up ads on your computer screen; web pages load very slowly and sometimes incomplete; you’re disallowed access to certain webpages, such as the site of an antimalware software developer like SafeBytes.
How they get into the computer
A browser hijacker can be installed on your computer if you go to an infected website, click an e-mail attachment, or download something from a file-sharing website. They can also be deployed via the installation of an internet browser toolbar, add-on, or extension. Browser hijackers sneak into your pc along with free software application downloads that you unknowingly install along with the original. A good example of some well-known browser hijackers includes Babylon, Anyprotect, Conduit, DefaultTab, SweetPage, RocketTab, and Delta Search, but the names are often changing.
Browser hijackers may record user keystrokes to collect potentially invaluable information that leads to privacy issues, cause instability on computers, significantly disrupt user’s browsing experience, and finally slow down the computer to a stage where it will become unusable.
How you can get rid of browser hijackers
Certain browser hijacking can be simply corrected by identifying and removing the corresponding malware program from your control panel. Unfortunately, most of the software programs utilized to hijack a web browser are intentionally designed to be hard to remove or detect. Moreover, manual removal requires you to carry out many time-consuming and intricate steps which are tough to conduct for new computer users.
Installing and running anti-malware software on the affected computer can automatically delete browser hijackers as well as other malicious applications. If you want to remove persistent browser hijackers quickly and effectively, install the top-rated Anti-Malware program Safebytes Anti-Malware. Along with anti-virus software, a system optimizer program can help you fix registry errors, get rid of unwanted toolbars, secure internet privacy, and enhance overall computer performance.
What you can do if Malware Stops You From Downloading Anti-virus?
Malware could cause all kinds of damage when they invade your system, from stealing your private information to deleting data files on your computer. Some malware sits in between the computer and the internet connection and blocks some or all sites that you really want to visit. It could also block you from adding anything to your machine, especially antivirus applications. If you are reading this, you may have got infected by malware that stops you from installing a computer security application like Safebytes Anti-Malware. Do as instructed below to get rid of the malware in alternate ways.
Download the application in Safe Mode with Networking
If the malware is set to load immediately when Microsoft Windows starts, entering Safe Mode could very well block the attempt. Since only the bare minimum applications and services start-up in safe mode, there are seldom any reasons for issues to take place. Here are the steps you should follow to boot into the Safe Mode of your Windows XP, Vista, or 7 computers (go to Microsoft site for instructions on Windows 8 and 10 computers).
1) At power-on/startup, press the F8 key in 1-second intervals. This will conjure up the “Advanced Boot Options” menu.
2) Use the arrow keys to select Safe Mode with Networking and hit ENTER.
3) When this mode loads, you should have internet access. Now, use your internet browser normally and navigate to https://safebytes.com/products/anti-malware/ to download Safebytes Anti-Malware.
4) Immediately after installation, do a full scan and allow the program to delete the threats it discovers.
Switch over to an alternate browser
Malicious program code could exploit vulnerabilities in a particular internet browser and block access to all anti-virus software sites. If you seem to have a virus attached to Internet Explorer, then switch over to an alternate web browser with built-in safety features, such as Firefox or Chrome, to download your favorite antivirus program – Safebytes.
Create a portable antivirus for removing malware
Another solution is to make a portable antivirus program on your USB stick. Adopt these measures to use a USB flash drive to fix your corrupted computer system.
1) Download Safebytes Anti-Malware or MS Windows Defender Offline onto a virus-free computer system.
2) Plug the USB drive into the clean PC.
3) Double-click the Setup icon of the antivirus software package to run the Installation Wizard.
4) Pick a USB flash drive as the location when the wizard asks you where you intend to install the software. Follow the directions to complete the installation process.
5) Remove the USB drive. You may now utilize this portable antivirus on the infected computer system.
6) Double click the Safebytes Anti-malware icon on the thumb drive to run the program.
7) Click the “Scan Now” button to begin the virus scan.
Let’s Talk About SafeBytes Anti-Malware!
If you’re looking to download anti-malware software for your PC, there are numerous tools in the market to consider nonetheless, you cannot trust blindly anyone, regardless of whether it is paid or free program. Some of them are good but there are several scamware applications that pretend as legit anti-malware programs waiting to wreak havoc on your personal computer. When looking for antimalware software, pick one that provides solid, efficient, and total protection against all known computer viruses and malware. When thinking about reliable software programs, Safebytes AntiMalware is undoubtedly the highly recommended one.
SafeBytes anti-malware is a powerful, highly effective protection tool made to help users of all levels of IT literacy in identifying and eliminating harmful threats from their personal computers. Once you’ve got installed this tool, SafeBytes superior protection system will ensure that no viruses or malicious software can seep through your PC.
SafeBytes carries a variety of amazing features which can help you protect your PC from malware attack and damage. Listed below are some of the good ones:
Real-time Threat Response: SafeBytes delivers complete and real-time security for your PC. It’ll monitor your personal computer for suspicious activity at all times and safeguards your PC from unauthorized access.
Robust, Anti-malware Protection: With a critically acclaimed malware engine, SafeBytes gives multilayered protection which is made to catch and eliminate viruses and malware that are hidden deep inside your computer’s operating system.
Fast Scan: Safebytes Anti-Malware, using its enhanced scanning engine, offers extremely fast scanning which can promptly target any active online threat.
Safe Browsing: SafeBytes inspects the links present on a webpage for possible threats and alerts you if the site is safe to visit or not, through its unique safety rating system.
Light-weight Tool: This software program is not “heavy” on the computer’s resources, so you’ll not see any performance troubles when SafeBytes is working in the background.
24/7 Online Technical Support: For any technical issues or product guidance, you could get 24/7 professional assistance through chat and email.
To sum it up, SafeBytes Anti-Malware provides excellent protection combined with very low system resource usage with both great malware detection and prevention. You can be sure that your computer system will be protected in real-time once you put this software program to use. So if you’re searching for the absolute best malware removal application out there, and when you don’t mind shelling out some money for it, go for SafeBytes Anti-Malware.
Technical Details and Manual Removal (Advanced Users)
If you wish to do the removal of GoodShop Landing manually instead of employing an automated tool, you can follow these measures: Navigate to the Windows Control Panel, click the “Add or Remove Programs” and there, select the offending program to remove. In cases of suspicious versions of browser extensions, you can actually get rid of it through your browser’s extension manager. You will likely also want to reset your browser.
To be certain of complete removal, find the following registry entries on your computer and remove them or reset the values appropriately. Please note that this is for professional users only and might be difficult, with wrong file removal leading to additional system errors. Additionally, certain malicious programs are capable to defend against its deletion. Doing this malware-removal process in Safe Mode is suggested.
Read More
What’s program restore no longer working error?
The element of system restore is vital in the Windows operating system, and on occasions, it might be a genuine lifesaver. If for some reason you discover that the System Restore is not correctly functioning in Win7 or Windows 8 operating system:
- The points of system restore are not be being produced by hand or mechanically,
- You are unable to create by hand the restore points
- The system restore fails, and you’re incapable of restoring your personal computer,
The subsequent are a few tricks that could allow you to solve this issue.
Solution
 Error Causes
 Error Causes
There are lots of variables that will trigger this malfunction in your Personal Computer. The remedy to the issue will depend on its cause. You ought to attempt the next actions in no sequence.
Further Information and Manual Repair
- Physically, strive to make Program Restore points. Subsequently, pay attention to the Error Messages(s) you receive. If none, check to see whether a restore point has been created.
- Eliminate the protection applications or anti-virus and then try creating a restore point.
- Startup the Computer in Safe-Mode. Oftentimes, non-Ms drivers or providers may restrict the smooth working for System Restore. The other viable choice, try a clean boot and see whether system restore is back to normal.
- Run file checker. Quite simply, operate the sfc /scannow from the superuser command line. When the program record test is complete, restart your computer and assess whether system restore is operational.
- Run disk check as the administrator. Type chkdsk /f /r and subsequently push Enter. Allow this procedure to finish before attempting a system restore.
- Ensure the System Restore function is allowed in the drivers where you need this function allowed. For System Restore point to be saved, you must have free space of around 300 MB on each one of the devices which have the Program Safety perform turned-on.
- Ensure that there’s adequate space on the drivers where System Restore performs is allowed.
- In the search box inside the Start Button, type «Services.msc» (with no quotes) and then push Enter. Ensure that at this time around Process Scheduler Service and the » Volume Shadow Copy » are correctly working, and are set on Automated mode. Make certain you start the System Restore service if it’s not set place to automatic mode. Remember that you’ll have to restart the computer in this process. Do this and subsequently try again, in case the system needs a reboot.
- In the search box, type eventvwr.msc /s subsequently push enter to open the Event Viewer. Double-click on the applications and Services Logs, then assess if you can determine the cause of the error.
- Could your network administrator have turned off the System Restore? Contact them. Ask them to re-activate system restore for your computer if they have switched it off.
Read More
As you probably know, Windows 10 does not offer lots of choices for its Regional settings depending on where you are and what locale you work with or belong to. The standard region settings for Windows 10 allow users to select one set of formats for the calendar and more. However, this has somewhat changed in the Windows 10 v1809. If you don’t want such a change, you can just override the default regional format settings in the Windows 10 Improved local experience. So in this post, you will be guided on how you can do such a thing.
Follow the given instructions below to override the default Regional Format settings in Windows 10.
Step 1: Go to Settings > Time and Language > Region.
Step 2: From there, the default region is what Windows and apps might use to provide you with local content. However, this won’t be much of use if you work for a different locale and need to have different format settings like Calendar, Dates, Times, Currency, and First day of the week, all of which you can modify under the Regional format.
Step 3: You need not reboot your Windows 10 computer after changing. On the other hand, some of the apps will have to close and launch again in order to apply the new format. Thus, if you need to use apps that are of different locales, you will only see the changes after you re-launch the app.
Note: You can also select a different language that makes more sense to you. In other words, if you prefer more common words to standard words for your Windows 10 computer, then this is definitely the way to do it. This local format will be used for messages, menus, navigation, settings, and other topics.
Step 4: Look for a link that says “Add a Windows display language with local experience packs” under Languages.
In case you don’t know, Local Experience Packs are Microsoft Store apps that deliver Windows display language quality improvements. So once you click the link, it will download the packs from the Microsoft Store. In addition, Windows has already begun using AI or Artificial Intelligence as well as neural network-based Machine Learning for Windows localization. And as the number increase, the Machine language improvements and feedback from users will help in making the translations a lot better and make them available to even more languages. All in all, it’s pretty much an interesting and a good move for Microsoft as the demands for topics and machines to be available in local languages have been increasing for the past couple of years.
Read More
What Is Error 126?
Error 126 is a very commonly occurring error that is often the result of damaged system files of Windows. They usually occur during the installation of some Windows program or application. When Error 126 is generated, it terminates the installation process almost instantly.
It is important to take corrective measures immediately to ensure that no such problems are encountered again in the future.
Solution
Error Causes
There are a variety of conditions that may trigger Error 126. These conditions are listed below as follows.
- Corruption of the service-related DLL file
- Missing or damage service-related DLL file
- Corrupt, damaged, or Misconfigured system files
- Improper hardware or application installations or uninstallations
- Existence of viruses, malware, adware, or spyware in the system
- Corrupt or incorrect registry entries in the system files
When any of the above-listed conditions occur, the corrupt system files will go to the improper links or missing information.
Eventually, the problems with the files will keep the applications or programs from responding in the usual manner. Whatever are the reasons for error generation, it is of utmost importance that the error is removed to ensure smooth functioning of the system.
Further Information and Manual Repair
There are many different ways this error can be rectified. However, the two most effective solutions are listed below as follows.
- This solution is for the advanced user. Turn on the system and log on to it as the Administrator. Now click on the Start button. Now click on All programs -> Accessories -> System Tools. Here you will come across the option for System Restore. Click on it. A new window will appear. Select ‘restore my computer to an earlier time’ point. Now clock on Next. A list of restore points will now appear in front of you. Choose the latest restore point you come across from this list and click on ‘Next’. In the next window that opens, click on ‘Next’ again. This is the confirmation window. Once the restoration finishes, restart your computer.
- This solution is for novice users. Download an Error 126 repair utility program. Install it on your system. Now use it to scan your system for errors. Find out if there is an option to fix/repair error. When you come across it, click on it as soon as the scan is complete. Restart your computer. Your system is now free of Error 126.
Read More
There is a built-in tool in Windows 10 the Disk Cleanup Utility which can help you restore hard disk space by removing temporary files, Thumbnails, old Windows files, Windows Upgrade logs, Delivery optimization files, and many more. However, from time to time, this built-in tool also experiences some issues. One of these issues is when it gets stuck on Windows Update Cleanup. Read on to find out what you can do in such a case.
When the Disk Cleanup Utility is stuck on the Windows Update Cleanup, the process could be slow and take a long time to complete when purging the files. If this happens, click on Cancel to close the dialog box. After that, try running the Disk Cleanup Tool again as administrator and check if the files that you want to clean is still there or not. If it isn’t there, then this means that the cleanup has been done, otherwise, you need to refer to the options given below.
Option 1 – Try to manually delete the contents in the SoftwareDistribution folder
- Open the WinX Menu.
- From there, open Command Prompt as admin.
- Then type in the following command – don’t forget to hit Enter right after typing each one of them.
net stop wuauserv
net start cryptSvc
net start bits
net start msiserver
- After entering these commands, it will stop the Windows Update Service, Background Intelligent Transfer Service (BITS), Cryptographic, and the MSI Installer
- Next, go to the C:/Windows/SoftwareDistribution folder and get rid of all the folders and files thereby tapping the Ctrl + A keys to select them all and then click on Delete. Note that if the files are in use, you won’t be able to delete them.
After resetting the SoftwareDistribution folder, you need to reset the Catroot2 folder to restart the services you just stopped. To do that, follow these steps:
- Type each one of the following commands.
net start wuauserv
net start cryptSvc
net start bits
net start msiserver
- After that, exit Command Prompt and restart your computer and then try to run Windows Update once more.
Option 2 – Try to manually delete the contents of the Windows.old folder
The Windows.old folder is the one that holds the older version of Windows when you upgrade. It comes really useful when you want to revert to the previous version of Windows 10. Thus, you can delete the Windows.old files in case the cleanup tool is stuck.
Option 3 – Try running Disk Cleanup in a Clean Boot State or Safe Mode
Another thing you can try is to restart your computer in a Clean Boot State or Safe Mode. Chances are, there are some programs that are preventing the Disk Cleanup Utility tool to run properly. After you restart your computer in a Clean Boot State or Safe Mode, try to run the Disk Cleanup tool again and then see if it now works or not.
Option 4 – Run the Windows Update Troubleshooter
You might also want to run the Windows Update Troubleshooter as it could also help in fixing this issue. To run it, go to Settings and then select Troubleshoot from the options. From there, click on Windows Update and then click the “Run the troubleshooter” button. After that, follow the next on-screen instructions and you should be good to go.
Option 5 – Run the DISM tool to fix the corruption in the Component Store
You can try running the Deployment Imaging and Servicing Management or DISM tool to fix the Wdf01000.sys Blue Screen error. Using this built-in tool, you have various options such as the “/ScanHealth”, “/CheckHealth”, and “/RestoreHealth”.
- Open the Command Prompt with admin privileges.
- Then type in the following commands and make sure to hit Enter right after you type each one of them:
- Dism /Online /Cleanup-Image /CheckHealth
- Dism /Online /Cleanup-Image /ScanHealth
- exe /Online /Cleanup-image /Restorehealth
- Do not close the window if the process takes a while as it will probably take a few minutes to finish.
Read More
The Windows 10 system allows users to change the default location of the User folders to another drive. This is probably to make sure that the files stay safe in case the system suddenly crashes. However, in some cases, while changing the path to another drive, for instance, the D drive or any folder, the Windows system recognized it as a hard drive as well so even though the files will be saved on that folder, it will appear as a hard drive in the Windows Explorer or look merged with another folder. It could also be that you had dragged and dropped a user folder to another user folder by accident. So if you’re wondering how you can unmerge the User folders, read on as this post will guide you on how exactly you can do that.
Take note that even if you try to use the File History to restore the User folders, it still won’t work and you won’t be able to move them back to their previous locations nor restore the folders back to their previous versions and it would only state that they are not available. In the instructions given below, we are using the Downloads folder as an example.
- Step 1: Tap the Win + R keys to open the Run dialog box.
- Step 2: Next, type “Regedit” in the field and hit Enter to open the Registry Editor.
- Step 3: After opening the Registry Editor, navigate to the following registry key:
ComputerHKEY_CURRENT_USERSoftwareMicrosoftWindowsCurrentVersionExplorerUser Shell Folders
- Step 4: Then double-click on the multi-string value {374DE290-123F-4565-9164-39C4925E467B} located in the right hand pane. And in the Value Data, copy and paste the following value:
%USERPROFILE%Downloads
- Step 5: Now click OK and close the Registry Editor.
Note: Look close enough and you’ll see that the multi-string values belong to each one of the folders. From there, you have a Desktop, Favorites, Skydrive, Music, Pictures, and many more.
- Step 6: Restart your computer. After that, the operating system will pick up the new folder location during the startup. Here are the values for the other folders:
Music – {1CF1260C-4DD0-4ebb-811F-33C572699FDE}
Pictures – {3ADD1653-EB32-4cb0-BBD7-DFA0ABB5ACCA}
Videos – {A0953C92-50DC-43bf-BE83-3742FED03C9C}
Documents – {A8CDFF1C-4878-43be-B5FD-F8091C1C60D0}
Desktop – {B4BFCC3A-DB2C-424C-B029-7FE99A87C641}
- Step 7: Now all you have to do is to change the location correctly. Start by tapping the Win + E keys to open the Windows File Explorer.
- Step 8: After that, right-click on the Downloads folder located in the right-hand pane.
- Step 9: Then click on Properties and go to the Location tab then type “D:\Downloads” in the location box.
- Step 10: Click the Apply button and then the OK button to save the changes made. Doing so would ensure that not only the Downloads folder is restored but also that it does not stay merged to another folder or appear as a drive.
Read More
![]()
Copyright © 2023, ErrorTools. All Rights Reserved
Trademark: Microsoft Windows logos are registered trademarks of Microsoft. Disclaimer: ErrorTools.com is not affiliated with Microsoft, nor claims direct affiliation.
The information on this page is provided for information purposes only.
![]()
If you’re going to make clean install of Windows and you’re unable to proceed to due to some error, you may want help. Today, in this article, we’re going to talk about a well known issue that might occur while installing Windows.
During the clean installation, we got following error which prevented the installation:
Page Contents
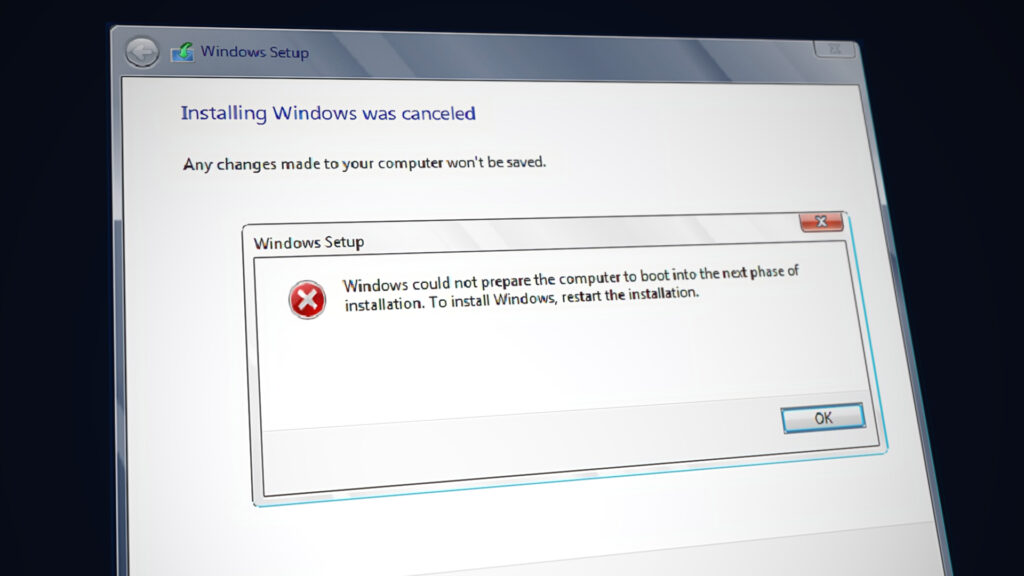
Windows could not prepare the computer to boot into the next phase of installation. To install Windows, restart the installation.
After getting this message, our next move was to restart the installation. However, even after 3 attempts, we found no change in the situation. The error keeps appearing in a loop, ultimately leading to failure of clean install. If you’re also facing this issue while installing Windows 10/8/7, try out suggestions mentioned below, see if they helps.
FIX: Windows Could Not Prepare The Computer To Boot Into The Next Phase Of Installation While Installing Windows 10/8.1/8/7
FIX 1 – General Suggestions
1. Make sure your system is not connected to any other external devices while installation.
2. Check your hard disk for errors (refer FIX 1 here), just in case.
3. If you’re getting this error while upgrading, repair the boot records first and then retry with the upgrade.
4. For upgrade users, you must temporarily disable your security software and see if this helps.
FIX 2 – Using Advanced Recovery Command Prompt
1. Boot from the installation media, let the setup wizard start, click Repair your computer link.
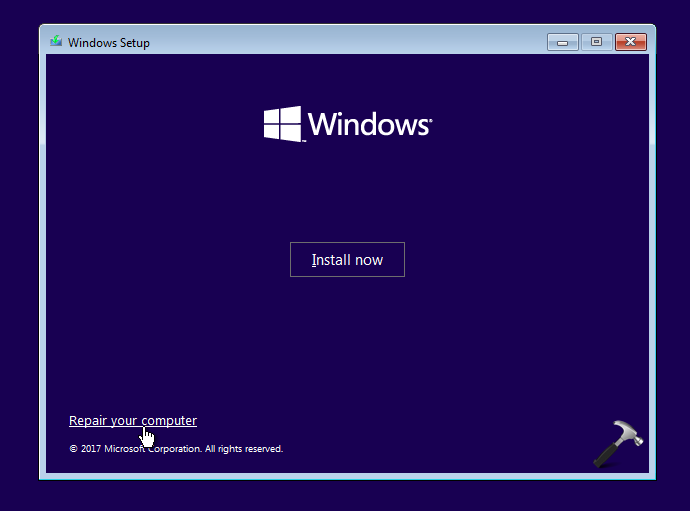
Then select Troubleshoot > and choose Command Prompt on Advanced options screen.
2. In the Command Prompt window, type these commands (mentioned in bold) one by one and press Enter key after each:
diskpart Opens Disk Management in command interface
list disk Lists all available disks on system
select disk # Select the system disk you're using
list partition List partitions on selected disk
select partition # Replace # with partition to which you want to install
active Marks selected partition as active
format fs=ntfs Formats selected partition. Use format fs=fat32 for UEFI systems
assign Assigns a drive letter to partition
exit Exists DiskPart
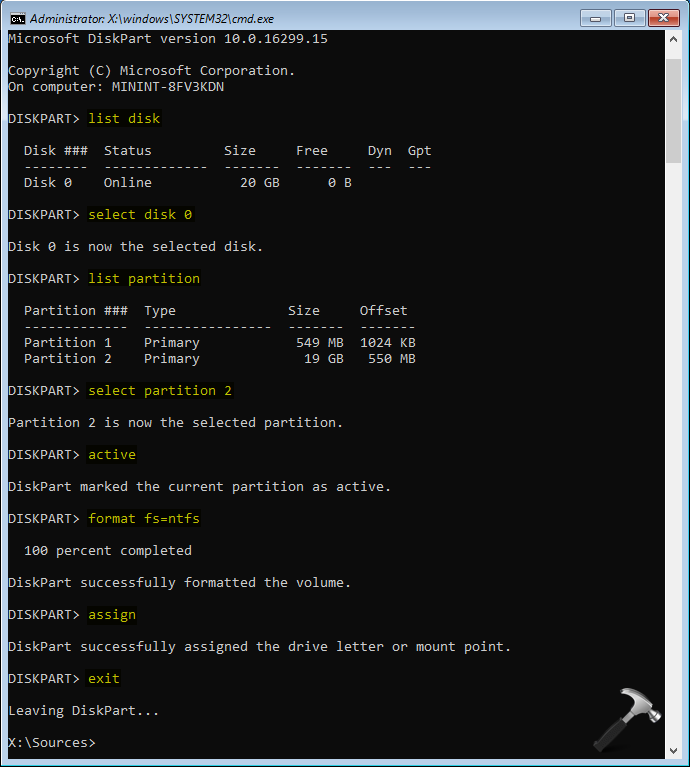
3. Close Command Prompt and restart the installation, this time you should be able to install Windows without any error.
Hope this helps!
READ THESE ARTICLES NEXT
- Fix: You do not have sufficient privileges to install the program
- Fix: The installer has insufficient privileges to modify or access
- Fix: We couldn’t update system reserved partition in Windows 11
- How to upgrade Windows 11 using ISO file
- Fix Error Code 0x80070070 while upgrading to Windows 11
- Fix: Windows 11 installation has failed
- Fix: Something went wrong OOBESETTINGS
- FIX: Windows Cannot Install Required Files (0x8007025D)
- FIX: Windows 10 Upgrade Error 0xC1900101 – 0x30018
- Understanding Windows Upgrade Error Codes
Some users are encountering the “Windows could not prepare the computer to boot into the next phase of installation” error when trying to install Windows or trying to upgrade an existing version. The issue is not exclusive to a particular Windows version and it’s reported to occur with Windows 7, Windows 8.1 and Windows 10 installations.
What is causing the “Windows could not prepare the computer to boot into the next phase of installation” error?
We investigated this particular issue by looking at various user reports and the repair strategies that they used to get the issue resolved. Based on what we gathered, there are several common scenarios that will end up triggering this particular error message:
- Too many non-essential devices are plugged in – Certain BIOS versions are known to act up when too many unnecessary hardware is plugged in during the installation/upgrade process. A lot of affected users have managed to get the issue resolved by removing or disabling every unnecessary hardware.
- Installation media improperly prepared – A few affected users have confirmed that this particular error was occurring due to a badly created installation media. Upon recreating it properly, most users have reported that the issue was resolved.
- BIOS does not support the Windows version – This particular issue is mostly encountered with Mini-PC and similar computers. Most of the smaller motherboards models that are recently released feature a BIOS version that doesn’t support Windows 7 or under.
- System file corruption is causing the error – It’s also possible that system file corruption is what’s causing this particular error. Users in a similar situation have reported that the issue was resolved after they deleted all partitions and did a clean install.
If you’re currently looking for fixes that will allow you to get past the “Windows could not prepare the computer to boot into the next phase of installation” error, this article will provide you with several potential repair strategies.
Down below, you’ll discover several different fixes that other users in a similar situation have used to get the issue resolved. Since the methods below are ordered by efficiency and severity, we advise you to follow them in the order that they are presented in.
Method 1: Disabling all unnecessary hardware
The most effective fix when encountering the “Windows could not prepare the computer to boot into the next phase of installation” error is to remove/disable any unnecessary hardware. This is especially effective in those situations where the user tries to upgrade an existing Windows installation.
Some users are speculating that the issue is triggered by a bugged BIOS version on older computers. This is only reported to occur when there are a lot of peripherals and external devices connected to the computer.
With this in mind, remove any non-critical hardware such as Universal Serial Bus (USB) devices, network adapters, sound cards, serial cards etc. If you have multiple HDD or SDDs, disconnect those that are not needed during the installation. Also, remove any optical drives that are currently active in your computer.
Once your computer is running with the bare minimum hardware, restart your computer and start the installation again. Chances are you will be able to complete the process without seeing the error again.
Method 2: Prepare the installation media properly
Another possible culprit that might end up triggering this particular issue is a badly written installation media. Since it’s confirmed that the “Windows could not prepare the computer to boot into the next phase of installation” error might occur if the media wasn’t prepared properly, you might be able to resolve the issue by starting the process again from a different installation media.
Here are two different methods that you can follow in order to create Windows installation media. Follow whichever ones seem more convenable to your current situation:
- Creating a Windows 7 Bootable DVD or USB
- Creating a Bootable USB drive with Rufus or MediaCreation Tool
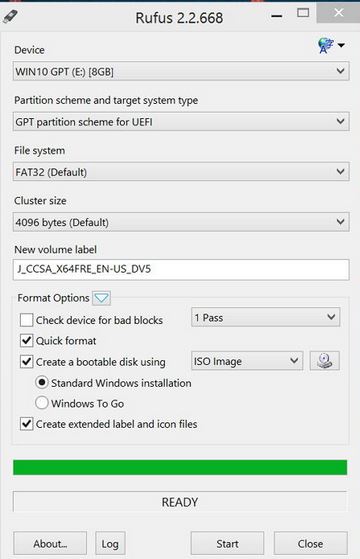
Repeat the process with the newly created media and see if you’re still encountering the “Windows could not prepare the computer to boot into the next phase of installation” error.
If the error is still persisting even with the new installation media, move down to the next method below.
Method 3: Verify whether BIOS supports the Windows version
If you’re trying to install an older Windows version on a newer laptop or desktop, there is a chance that your BIOS model does not support the Windows version that you’re trying to install. There are a lot of reported cases with this occurring on Mini-PC models. Almost all newer models will not support Windows versions older than 8.1.
If you think this scenario might be applicable to your current situation, call your warranty service or search online to see if the BIOS model present on your PC supports the Windows version that you’re trying to install.
Alternatively, try to install a newer Windows version and see if the “Windows could not prepare the computer to boot into the next phase of installation” error persists.
Method 4: Deleting all partitions
Some affected users have reported that they were finally able to go through with the installation and complete the process without the “Windows could not prepare the computer to boot into the next phase of installation” error only after they deleted all partitions and started the OS installation process from scratch.
Of course, this can be a major inconvenient if you were simply trying to upgrade an existing Windows installation, but if you’ve come this far without a result you don’t really have any other choice.
But just in case things go wrong, we advise you to create a Windows System Image backup before you proceed with the deletion of all available partitions.
Once the backup is in place, restart your computer and force your computer to boot from the installation media. When you reach the screen where you get to select where to install the OS, delete every available partition and create new ones from the Unallocated space.
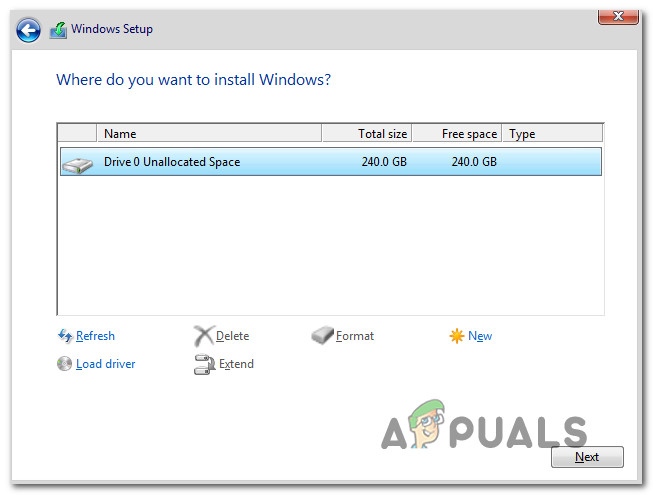
Next, proceed with the Windows installation normally and you should no longer be encountering the “Windows could not prepare the computer to boot into the next phase of installation” error.

Kevin Arrows
Kevin Arrows is a highly experienced and knowledgeable technology specialist with over a decade of industry experience. He holds a Microsoft Certified Technology Specialist (MCTS) certification and has a deep passion for staying up-to-date on the latest tech developments. Kevin has written extensively on a wide range of tech-related topics, showcasing his expertise and knowledge in areas such as software development, cybersecurity, and cloud computing. His contributions to the tech field have been widely recognized and respected by his peers, and he is highly regarded for his ability to explain complex technical concepts in a clear and concise manner.