Уровень сложности
Средний
Время на прочтение
2 мин
Количество просмотров 19K
Кому и для чего это нужно?
С момента появления Apple MacBook с процессорами M1 и M2 задача виртуализации становится очень актуальной. Я для разработки всегда использую несколько виртуалок. Ubuntu, CentOS, Windows, работающие под Oracle Virtual Box, например, в качестве тестовых полигонов значительно облегчают жизнь и экономят время. Но Virtual Box на MacBook с процессором M2 чувствует себя очень плохо (но это отдельная история). Основная задача в том, что на новых маках в качестве гостевых операционных систем лучше всего использовать собранные под ARM. Это особенность архитектуры и челендж на ближайшее время. Итак, где взять Windows 11 под ARM?
Microsoft Windows Insider Program
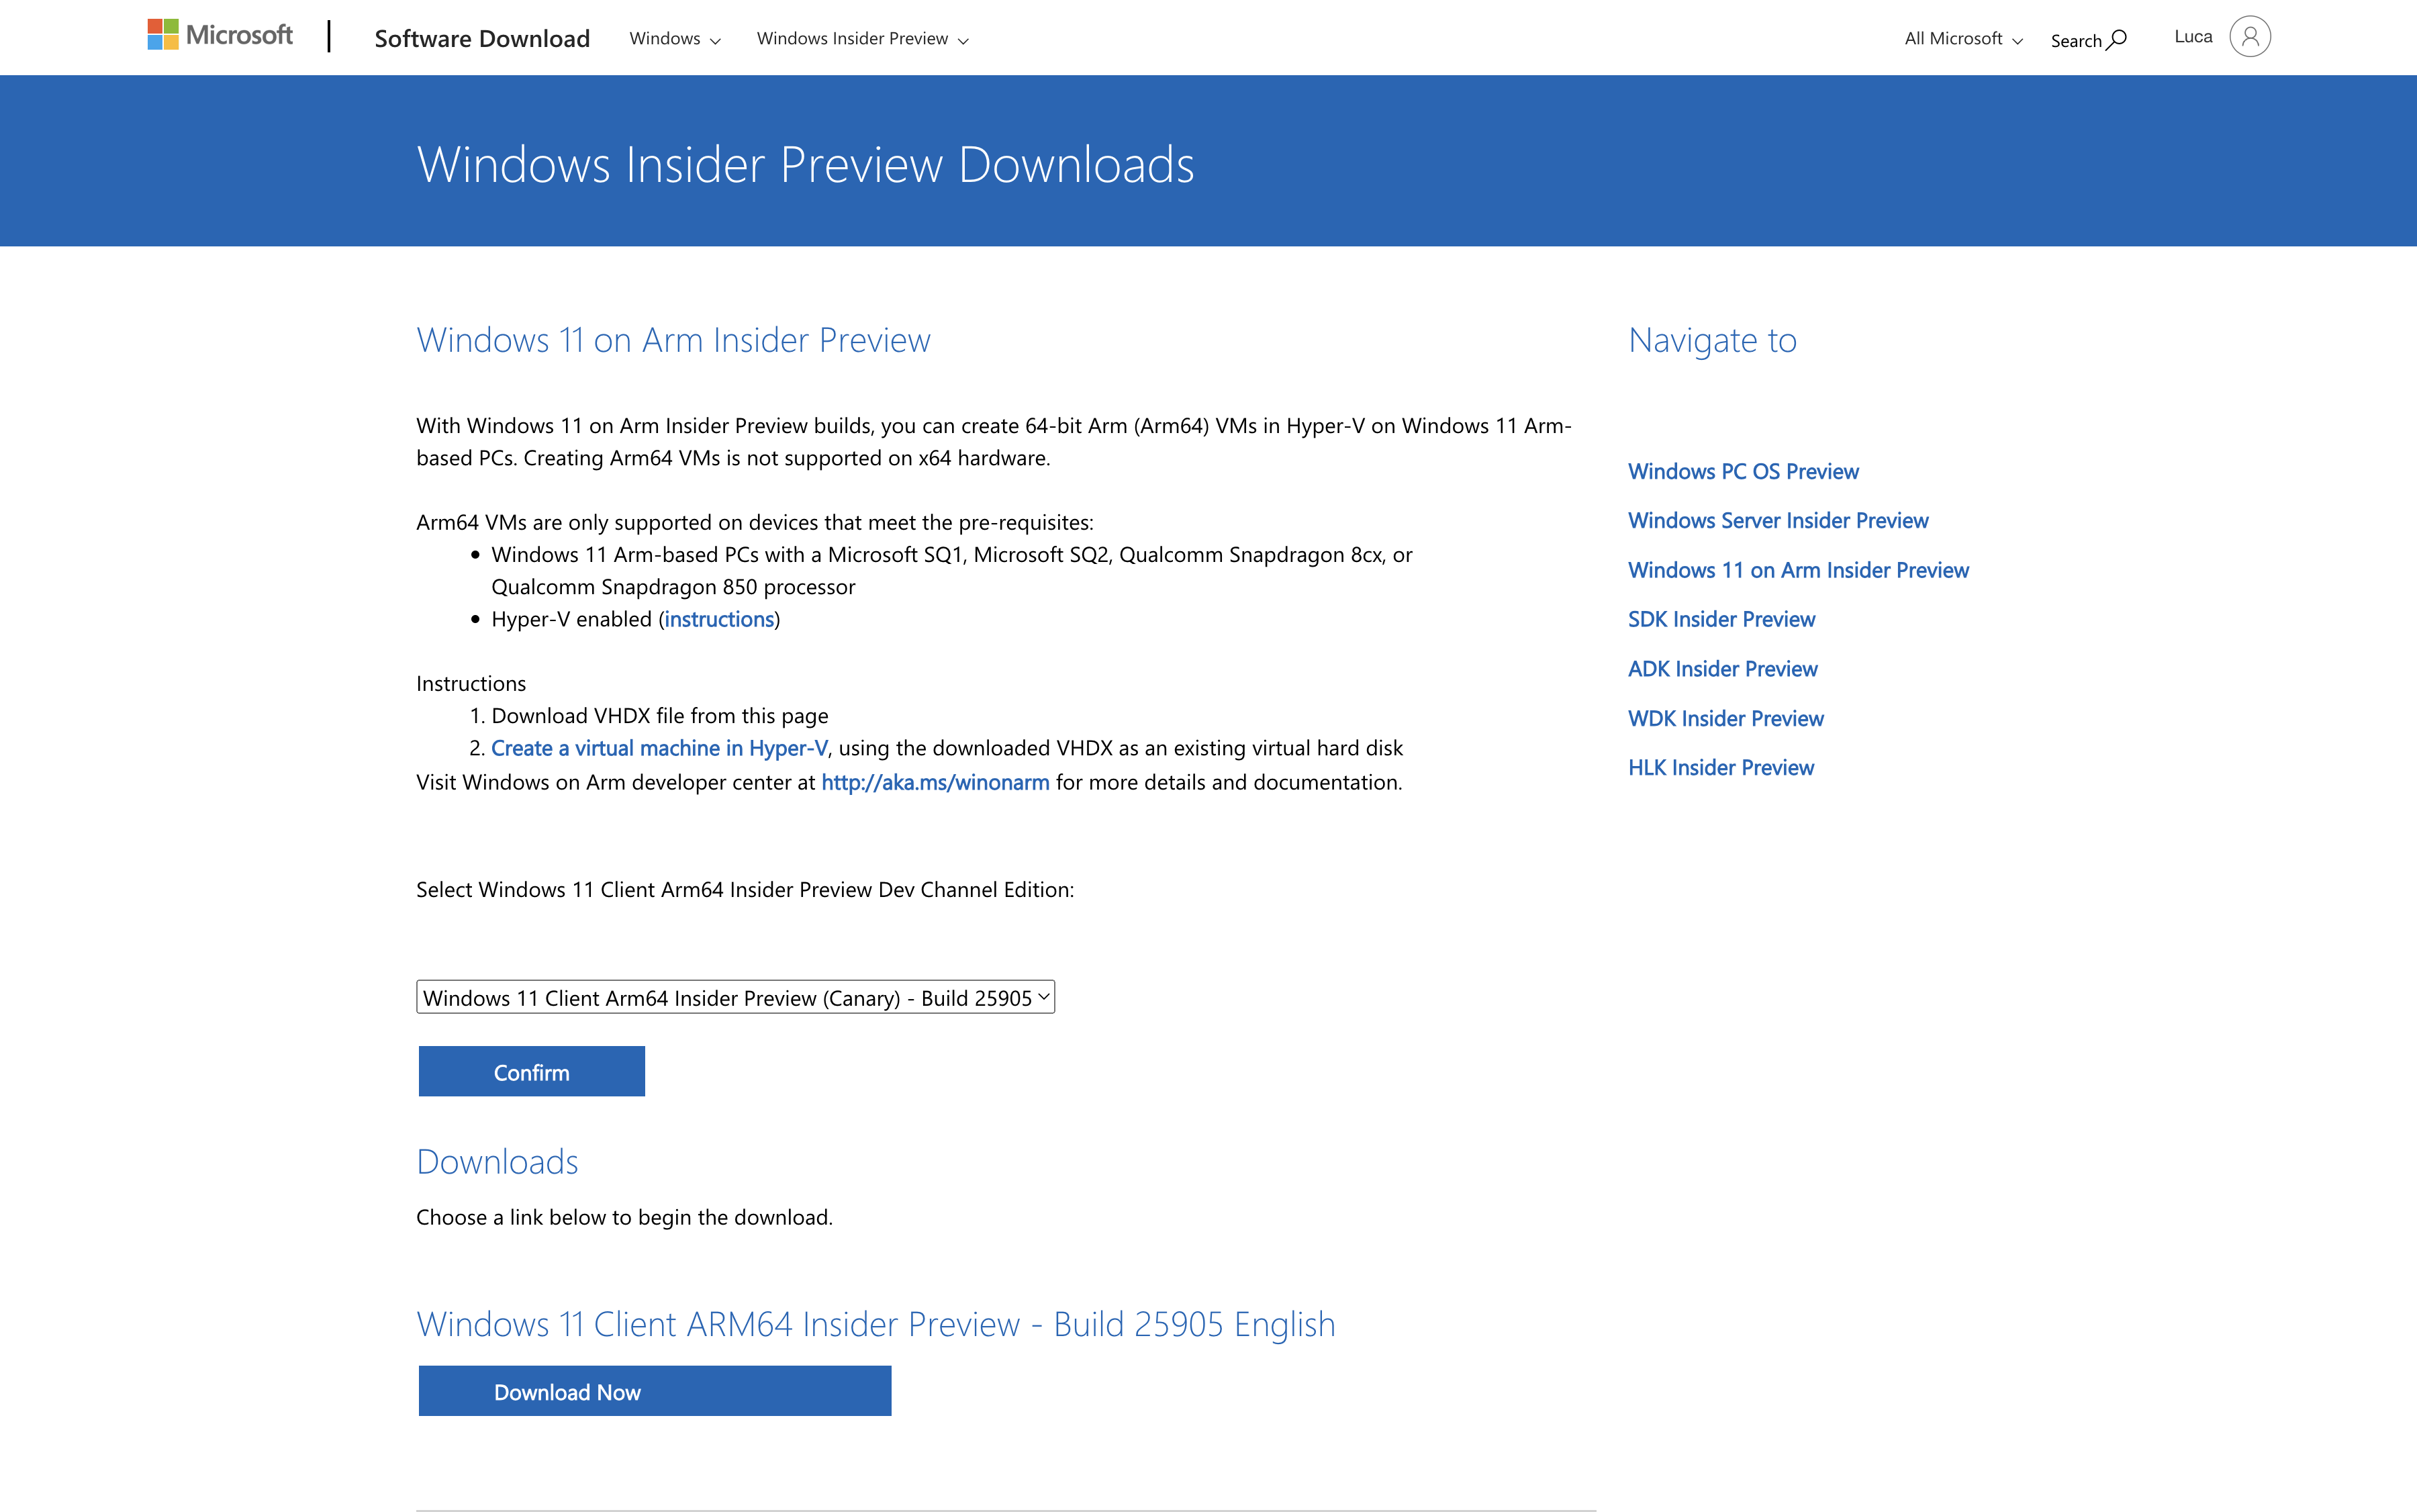
Для того, чтобы получить нужный ISO образ от Microsoft, нужно присоединиться к Windows Insider Program. Затем на странице Windows Insider Preview Downloads нужно выбирать сборку и нажать на кнопку Confirm. Затем нужно выбрать язык сборки и снова нажать на кнопку Confirm.
После этих телодвижений в случае, если компьютер находится не на территории России, начнётся загрузка нужного ISO образа. В противном случае появится следующее сообщение.
We are unable to complete your request at this time. Some users, entities and locations are banned from using this service. For this reason, leveraging anonymous or location hiding technologies when connecting to this service is not generally allowed. If you believe that you encountered this problem in error, please try again. И т.д.
К счастью, есть альтернативный способ.
Альтернативный способ получить Windows 11 под ARM
Можно воспользоваться услугами сервиса UUP Dump. Делается это в несколько шагов, но может потребовать большое количество времени (напрямую зависит от качества и скорости интернет подключения) и, возможно, админских скилов ( как минимум нужно понимать, как запускать скрипты для командной строки).
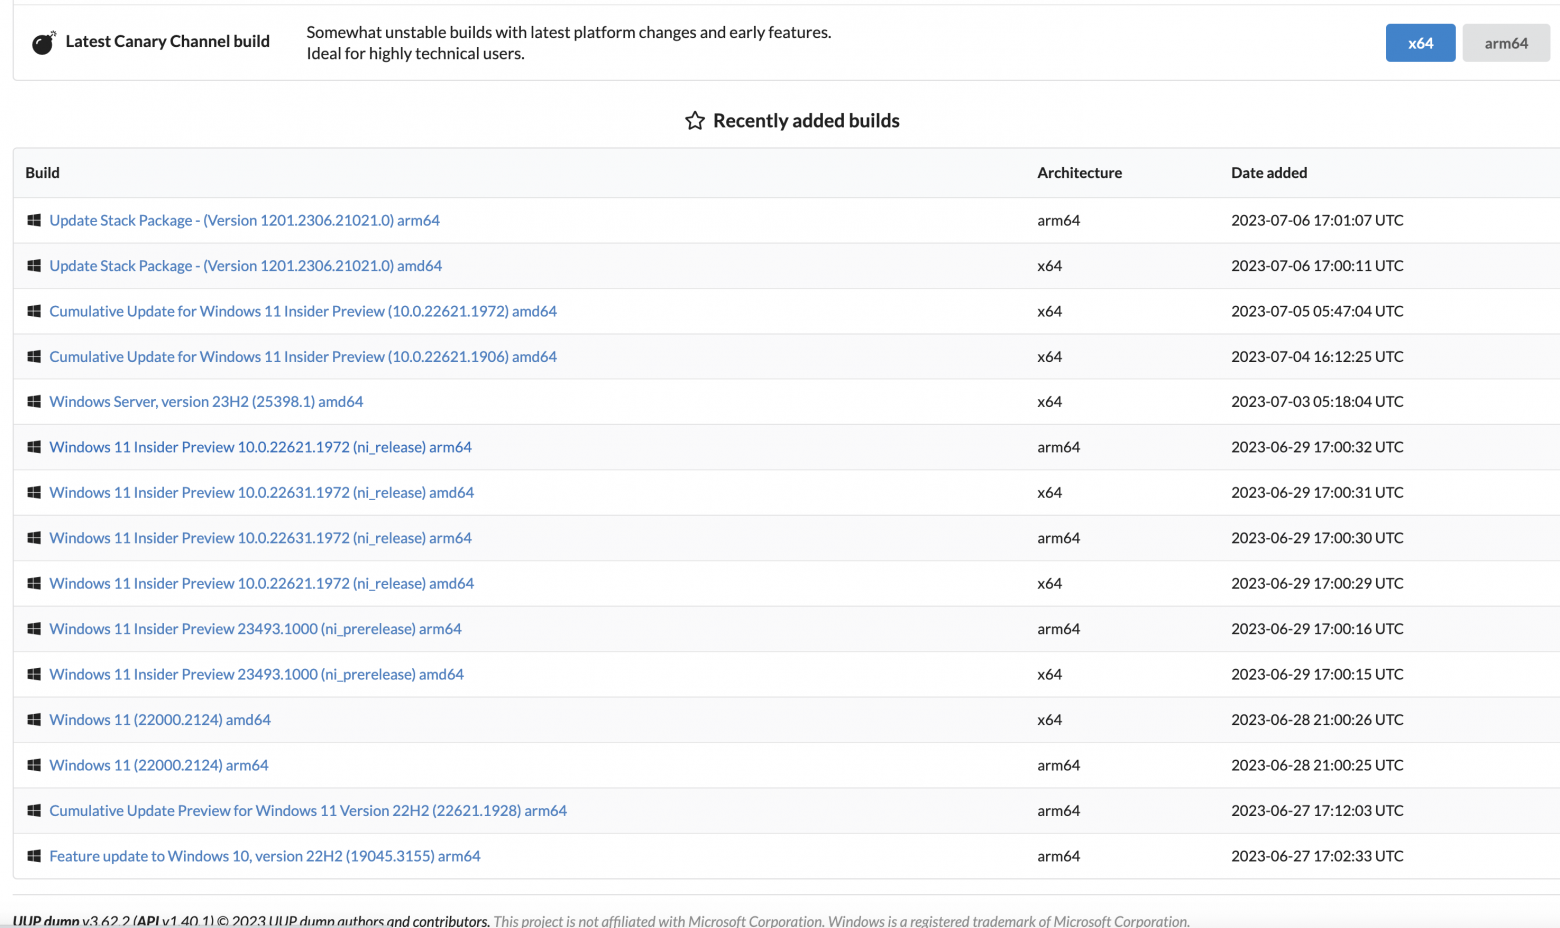
На открывшейся странице выбираем нужный релиз
Затем выбираем язык сборки и жмём на кнопку Next
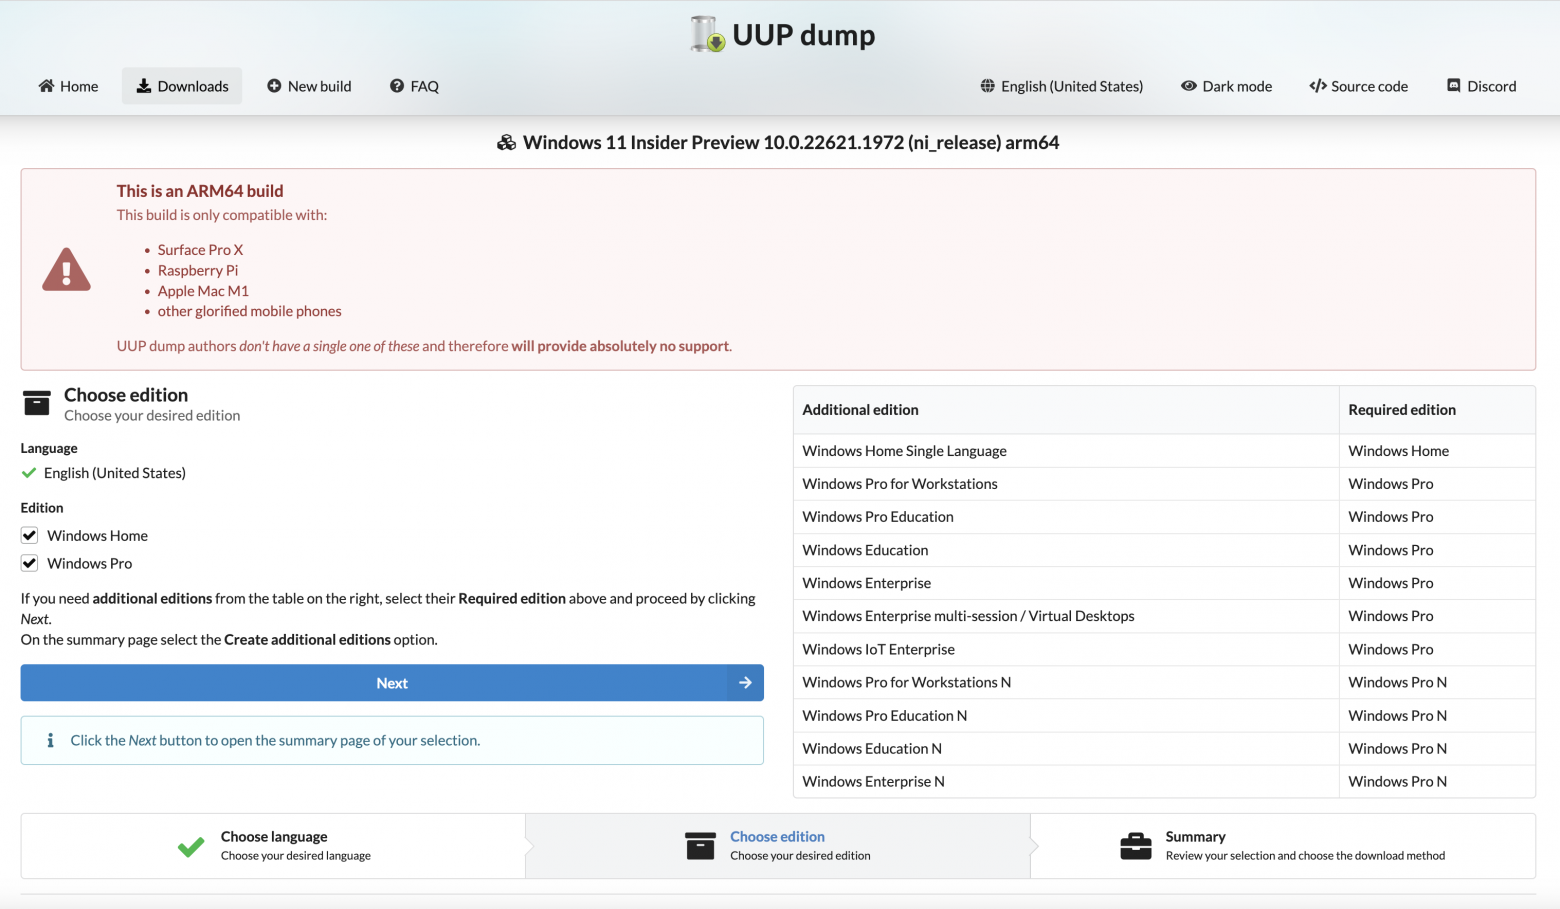
Затем выбираем редакцию WIndows (по умолчанию Home и Pro) и жмём на кнопку Next
Затем, если нажать на кнопку Create Download Package, скачивается небольшой архив с файлами для командной строки Linux, macOS и Windows.
И тут начинается самое интересное. Каждая из версий скрипта скачивает исходники Windows 11 для ARM архитектуры и собирает их в загрузочный ISO образ, пригодный для установки. Вначале попробовал собрать образ на macOS с использованием uup_download_macos.sh, но сразу у меня не получилось добиться результата. Нужно разбираться вот с этим мануалом.
Вариант с Windows uup_download_windows.cmd отработал нормально. Я оставил процесс работать на ночь и на утро получил нужный результат. Собранный мной образ можно скачать c Яндекс Диска.
Полученный ISO образ я перенёс на macOS и установил с использованием UTM.
Всем желаю удачи, и… надеюсь, что мой опыт будет полезным кому-то ещё.
Emulating Windows 11 Client ARM64 Insider Preview on Apple Silicon (M1, M2, M3) through VMware Fusion.
August 8, 2023
Introduction
ARM-based processors have transformed the computing landscape, introducing greater efficiency and performance to various devices. Apple has been at the forefront of this revolution with its Apple Silicon lineup, including the M1, M2, and potentially M3 chips. Windows enthusiasts who own these devices might be excited to explore the possibility of running Windows 11 on Apple Silicon using the ARM64 Insider Preview. This article will delve into the steps to achieve this intriguing cross-platform setup.
The Apple Silicon Advantage
Apple Silicon processors, powered by ARM architecture, have gained immense popularity for their impressive power efficiency and performance. These chips have redefined the performance standards for laptops and desktops and demonstrated potential for supporting other operating systems, such as Windows.
Windows 11 ARM64 Insider Preview
Microsoft’s Windows 11 ARM64 Insider Preview offers an exciting opportunity for users to experience Windows 11 on ARM-based devices. This includes support for ARM64 architecture, allowing it to run seamlessly on ARM-based processors, such as Apple’s M1, M2, and potentially M3 chips.
Links
- https://www.microsoft.com/en-us/software-download/windowsinsiderpreviewarm64
The Best Resources For Ansible
Video Course
- Udemy: Learn Ansible Automation in 250+examples & practical lessons: Learn Ansible with some real-life examples of how to use the most common modules and Ansible Playbook
Printed Book
eBooks
- Ansible by Examples: 200+ Automation Examples For Linux and Windows System Administrator and DevOps
- Ansible For Windows By Examples: 50+ Automation Examples For Windows System Administrator And DevOps
- Ansible For Linux by Examples: 100+ Automation Examples For Linux System Administrator and DevOps
- Ansible Linux Filesystem By Examples: 40+ Automation Examples on Linux File and Directory Operation for Modern IT Infrastructure
- Ansible For Containers and Kubernetes By Examples: 20+ Automation Examples To Automate Containers, Kubernetes and OpenShift
- Ansible For Security by Examples: 100+ Automation Examples to Automate Security and Verify Compliance for IT Modern Infrastructure
- Ansible Tips and Tricks: 10+ Ansible Examples to Save Time and Automate More Tasks
- Ansible Linux Users & Groups By Examples: 20+ Automation Examples on Linux Users and Groups Operation for Modern IT Infrastructure
- Ansible For PostgreSQL by Examples: 10+ Examples To Automate Your PostgreSQL database
- Ansible For Amazon Web Services AWS By Examples: 10+ Examples To Automate Your AWS Modern Infrastructure
- Ansible Automation Platform By Example: A step-by-step guide for the most common user scenarios
Step-by-Step Guide
While running Windows 11 on Apple Silicon might sound complex, it can be achieved with the right set of tools and instructions. Here’s a step-by-step guide to help you get started.
Virtual Machine
- Preparation:
— Ensure you have a supported Apple Silicon device (M1, M2, or M3) with sufficient storage space and memory.
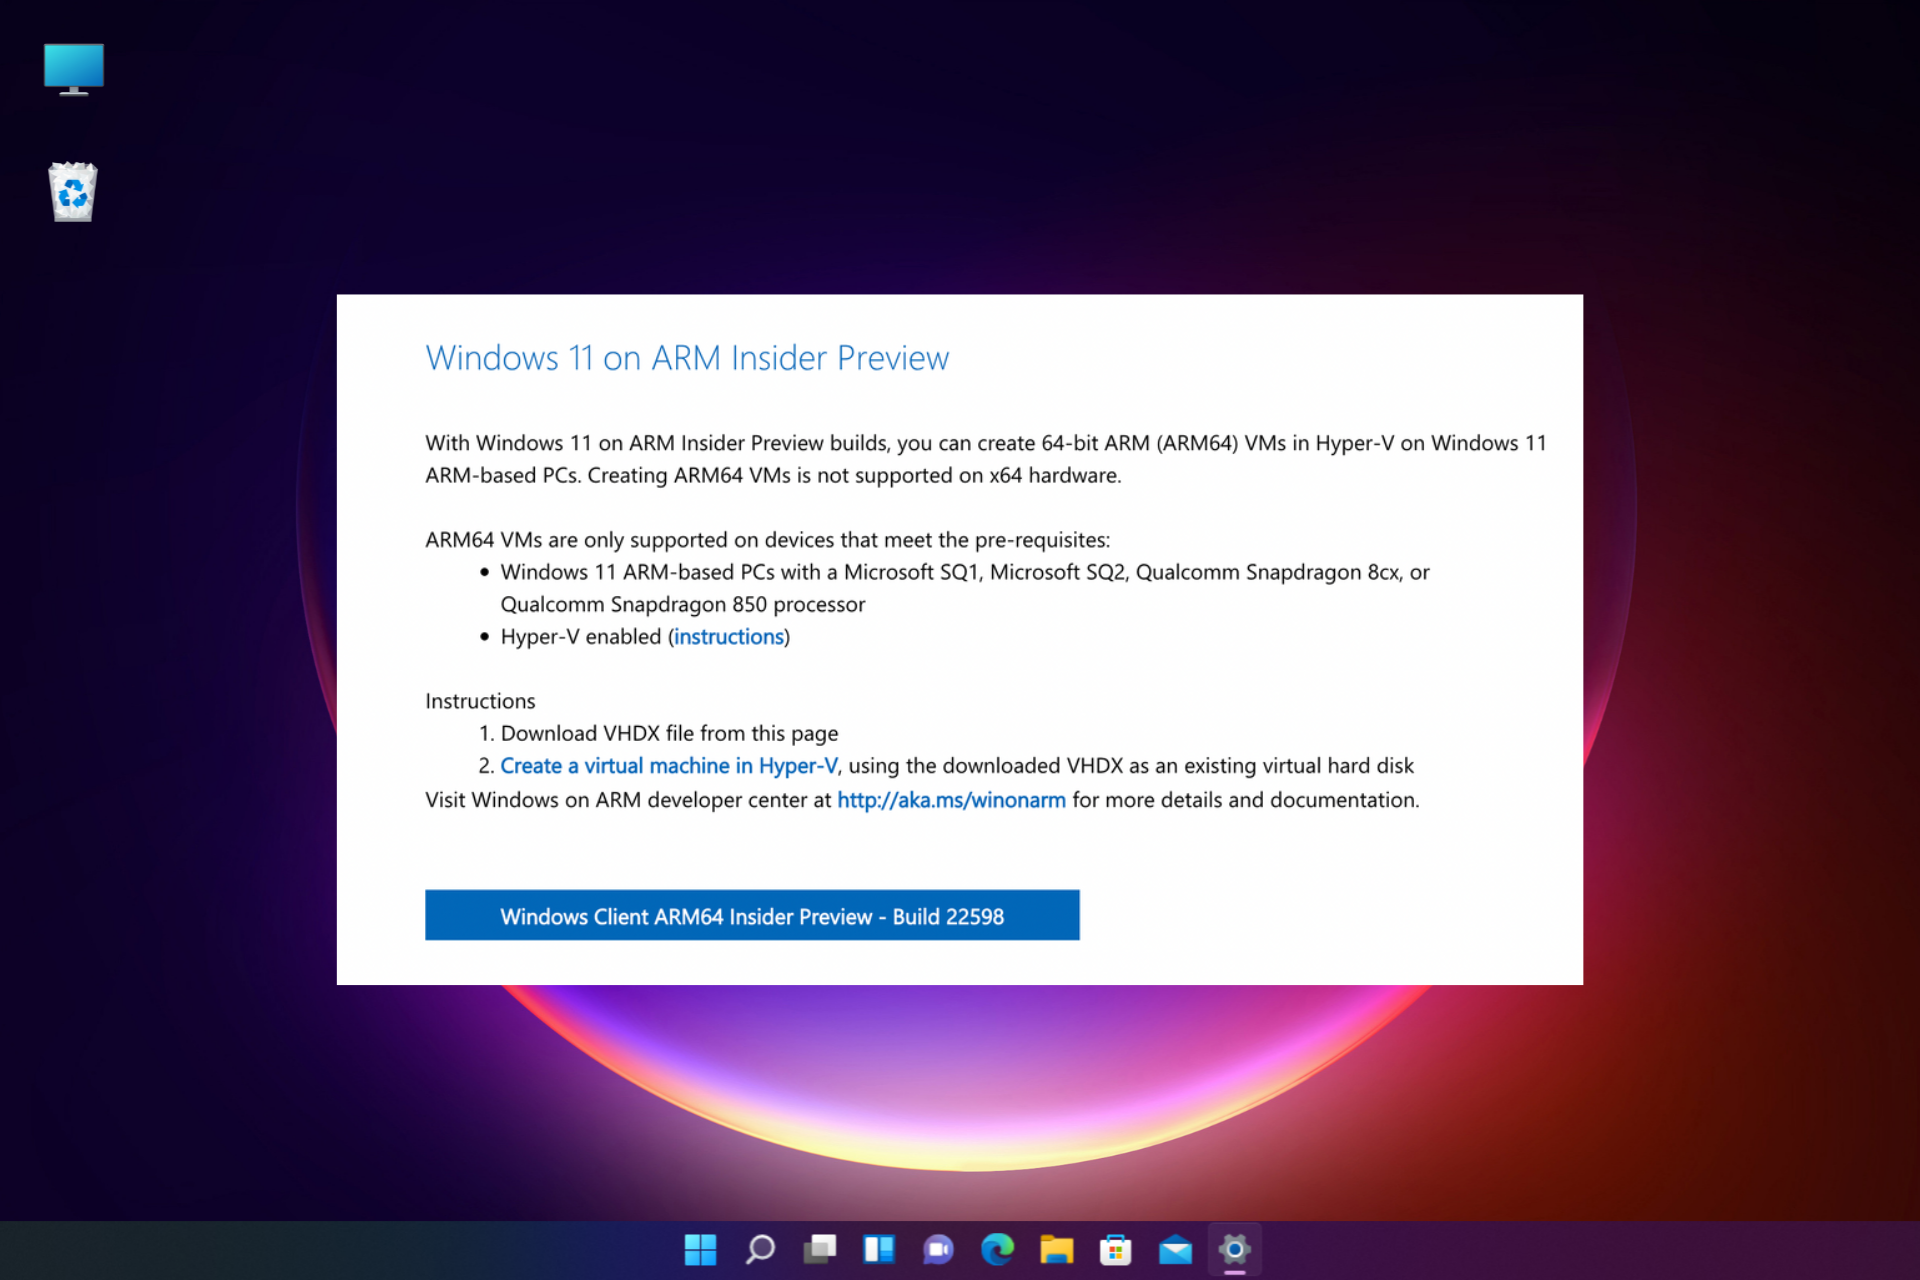
— Download the Windows 11 ARM64 Insider Preview ISO file in VHDX format (Hyper-V) from the official Microsoft website. https://www.microsoft.com/en-us/software-download/windowsinsiderpreviewarm64
-
Install VMware Fusion, Oracle VM VirtualBox, or Parallels Desktop:
— VMware Fusion, Oracle VM VirtualBox, or Parallels Desktop are virtualization software that allows you to run multiple operating systems on your Mac. Ensure you have the latest version compatible with Apple Silicon. -
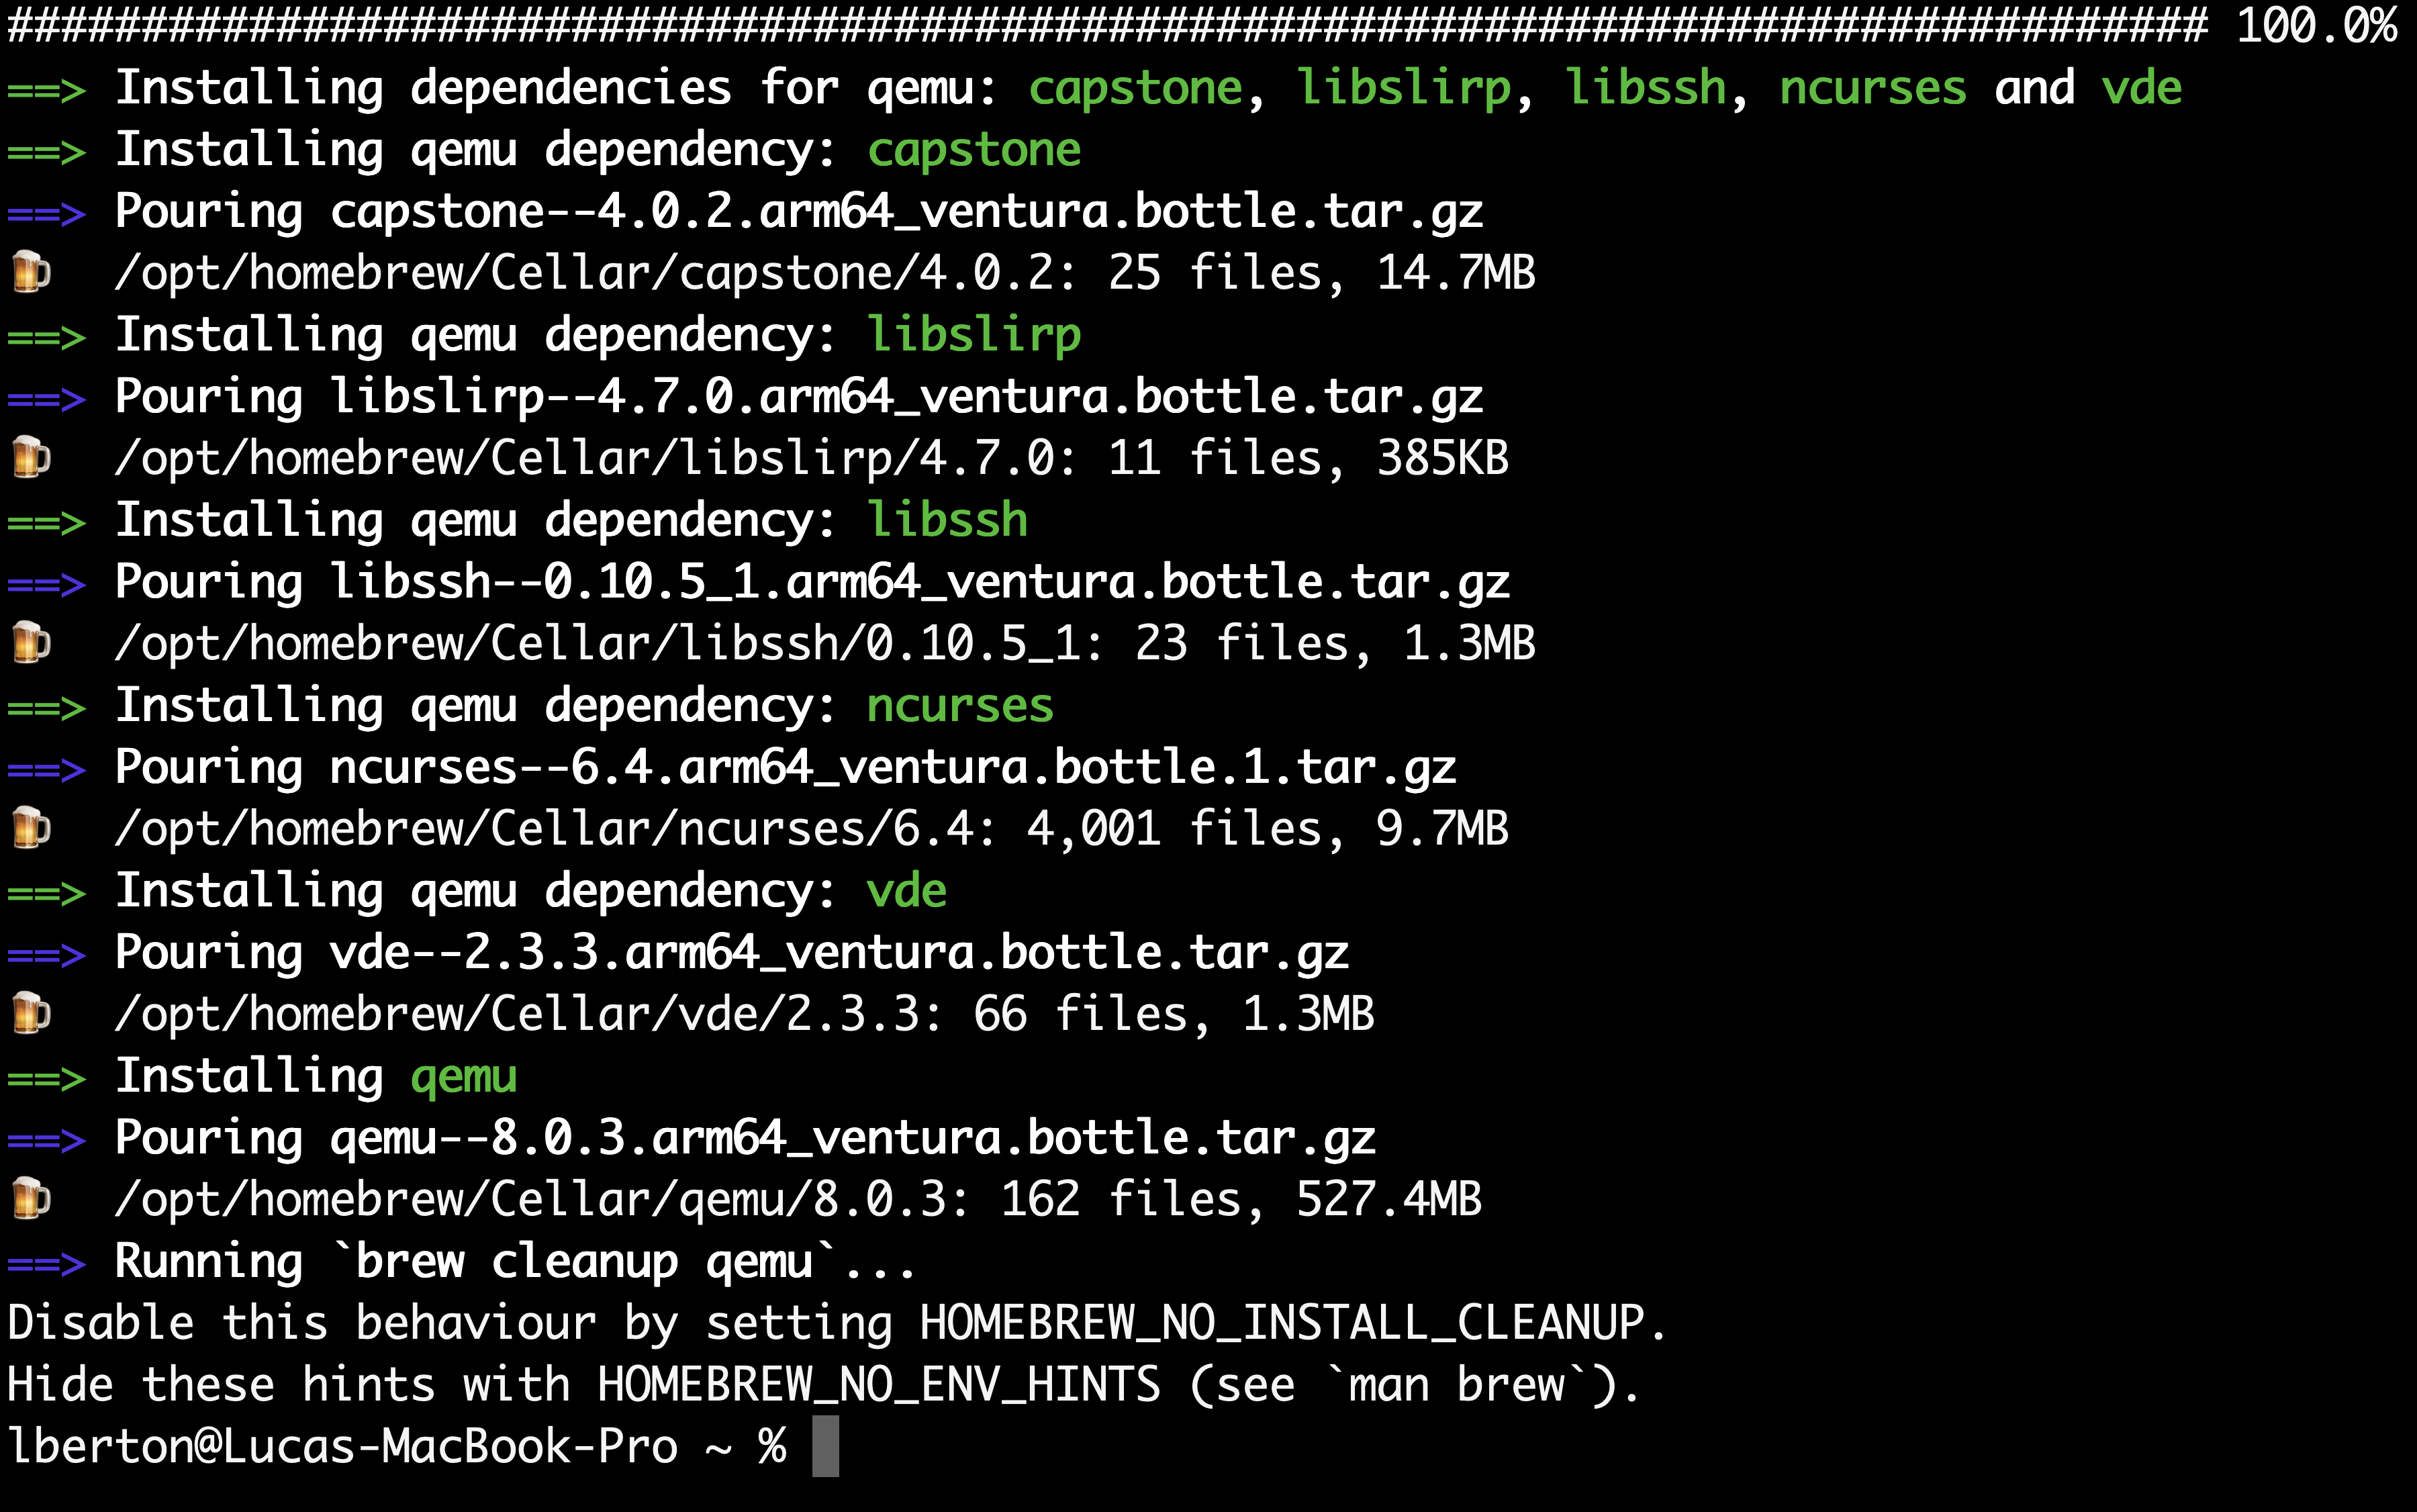
Installing QEMU (Quick Emulator) on your Mac using Homebrew is a straightforward process that allows you to create virtual machines and emulate various architectures. Install Homebrew (if not already installed): If you don’t have Homebrew installed on your Mac, you can install it by opening Terminal and executing the following command:
/bin/bash -c "$(curl -fsSL https://raw.githubusercontent.com/Homebrew/install/HEAD/install.sh)"
- Update Homebrew: It’s a good practice to update Homebrew before installing any packages. Run the following command in the Terminal:
- Install QEMU: Once Homebrew is up-to-date, you can install QEMU by executing the following command:
- Verify the Installation: After the installation is complete, you can verify that QEMU has been installed successfully by checking its version. Enter the following command in Terminal:
$ qemu-img --version
qemu-img version 8.0.3
Copyright (c) 2003-2022 Fabrice Bellard and the QEMU Project developers
This command should display the version of QEMU that was installed.
- Convert the image from VHDX format (Hyper-V) to VMDK format (VMware):
$ qemu-img convert -O vmdk Windows11_InsiderPreview_Client_ARM64_en-us_25905.VHDX Windows11_InsiderPreview_Client_ARM64_en-us_25905.vmdk
The output look like the following:
$ qemu-img convert -O vmdk Windows11_InsiderPreview_Client_ARM64_en-us_25905.VHDX Windows11_InsiderPreview_Client_ARM64_en-us_25905.vmdk
$ du -hs Windows11_InsiderPreview_Client_ARM64_en-us_25905.*
9.7G Windows11_InsiderPreview_Client_ARM64_en-us_25905.VHDX
9.7G Windows11_InsiderPreview_Client_ARM64_en-us_25905.vmdk
- Create a Virtual Machine (VM):
— Open VMware Fusion, Oracle VM VirtualBox, or Parallels Desktop and create a new VM.
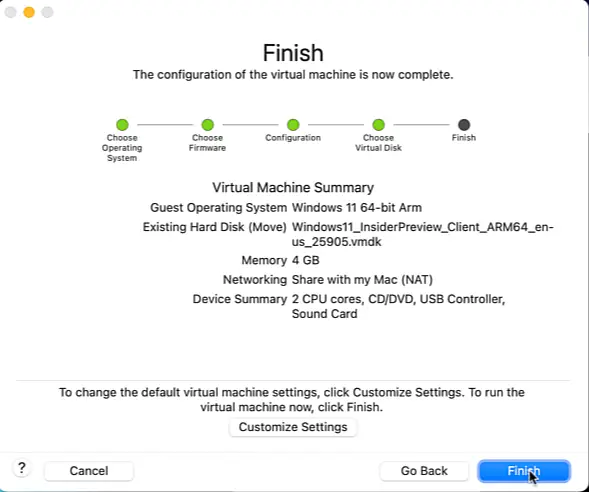
— Select “Install Windows or another OS from a DVD or image file,” and then select the converted Windows 11 VMDK format for the hard drive.
We can adjust VM Settings as our hardware permit:
— Allocate sufficient resources to the VM, including memory and processor cores.
— Enable 3D acceleration for better graphics performance.
Setting Up Windows
Since the VMXNet3 virtual network driver required for Windows on ARM isn’t included in Windows Home or Pro editions, you’ll need to follow these steps to bypass network enrollment during the Windows setup process.
-
Accessing Command Prompt:
Use your Mac’s keyboard to press Shift+F10. If you’re using a MacBook or Magic Keyboard with the default setup, press Fn+Shift+F10 instead. This action will open the Windows Command Prompt. -
Entering the Command: In the Command Prompt, type the following:
OOBE\BYPASSNRO
Press the Return key on your keyboard. This command enables you to skip network enrollment but will first restart the Windows Setup process.
-
Selecting Country/Region: US/United States of America
Choose your country or region from the list and click “Yes.” -
Choosing Input Method: US
Select your preferred input method and click “Yes.” -
Skipping Keyboard Layout: On the second keyboard layout page, click the “Skip” option.
-
Configuring Network: When you reach the network page, choose “I don’t have Internet” and proceed by clicking “Continue with limited setup.”
-
Accepting License Agreement: Click “Accept” on the License Agreement page.
-
Entering User Details: username Enter your name and click “Next.”
-
Setting Password (Optional): If you wish, you can set a password and then click “Next.”
-
Privacy Settings: Disable all privacy settings and click “Accept.”
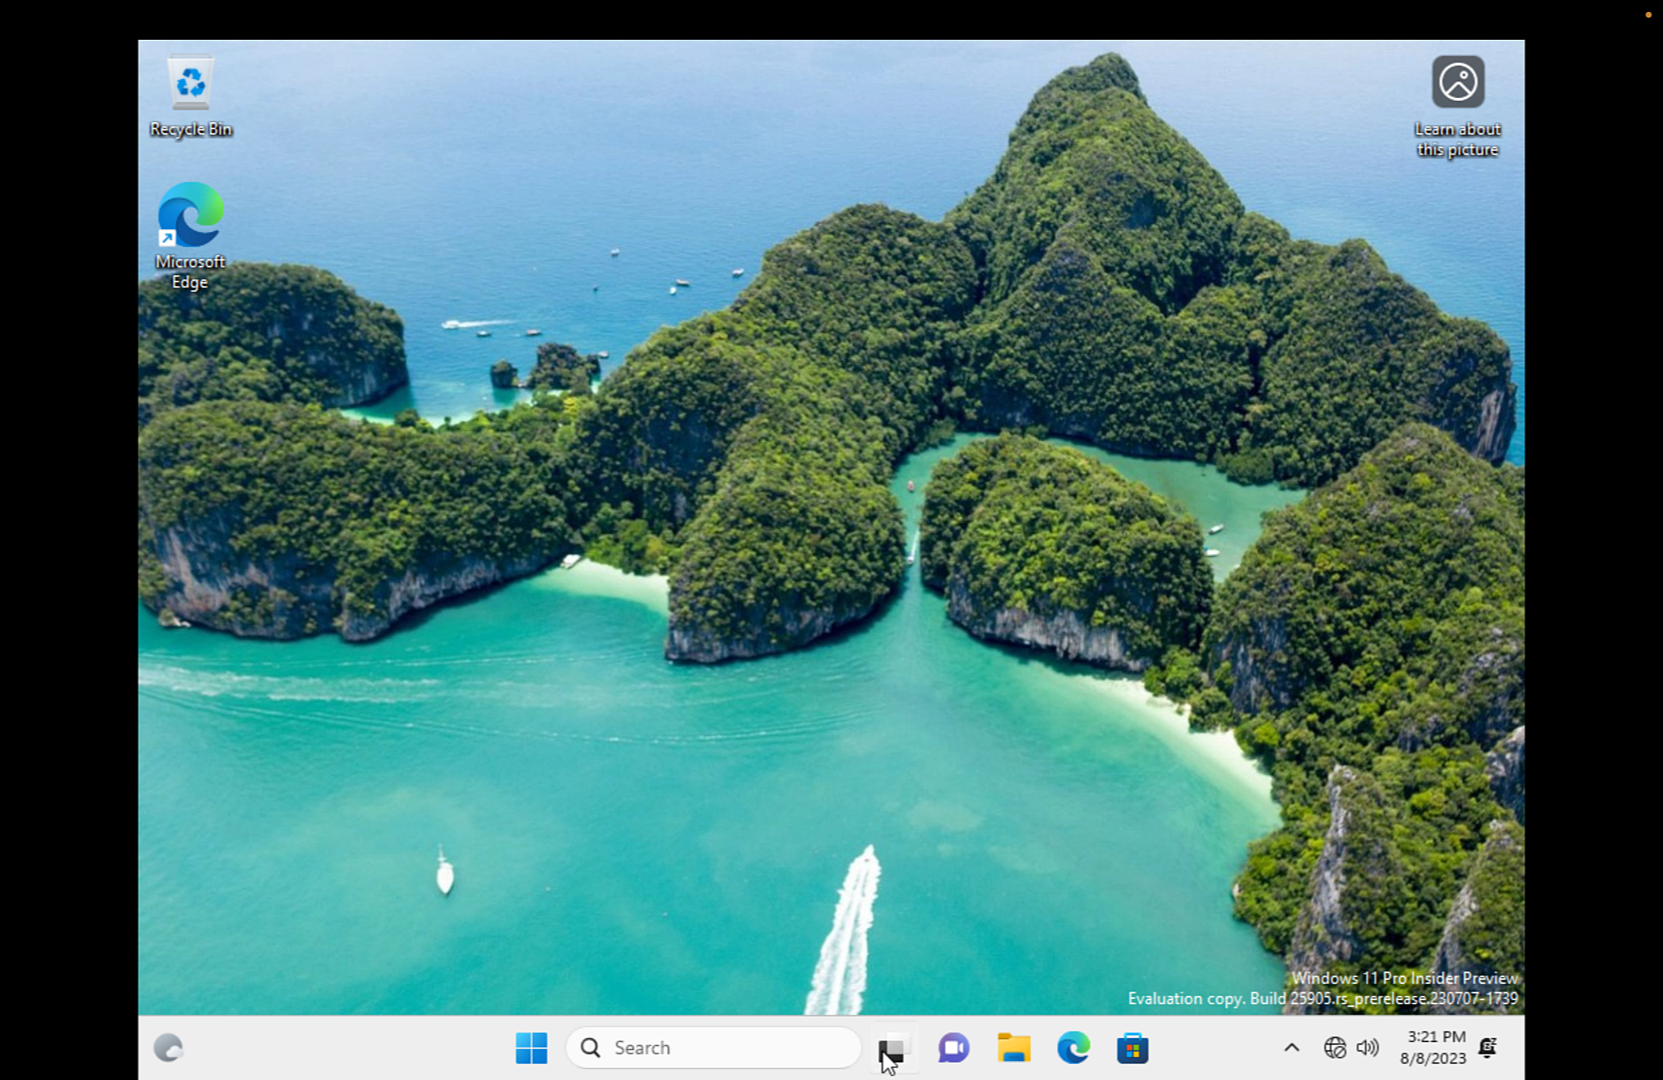
Windows will proceed with the final configuration steps, and eventually, you’ll see the Windows desktop.
VMware Tools
Before configuring your network connection and adjusting display resolution settings, installing VMware Tools is crucial. This step is essential for seamless functionality.
Open PowerShell as Administrator
- Click the Windows Start menu and type “PowerShell” in the search box.
- Right-click on PowerShell and choose “Run as Administrator.” If this option isn’t visible, select “Run as Administrator” after clicking on PowerShell.
Execute PowerShell Commands
- Inside the PowerShell prompt, type the following:
Set-ExecutionPolicy RemoteSigned
- Press Enter to execute the command. When prompted, type ‘Y’ and press Enter to confirm the change in execution policy.
- Type “Exit” and press Enter to close the PowerShell window.
- Reinstall VMware Tools
- In the VMware Fusion menu bar, click “Virtual Machine.”
- Select “Reinstall VMware Tools” and click “Install” on the prompt that appears.
- Run VMware Tools Setup
- Open Windows Explorer and navigate to the DVD drive.
- Ensure that the VMware Tools setup is mounted. Look for a Setup.ps1 PowerShell script at the root of the DVD drive.
- Install VMware Tools
- Right-click the Setup PowerShell Script and choose “Run with PowerShell.”
- Click “Yes” on the User Account Control pop-up.
VMware Tools will now install, including the necessary VMXNet3 network drivers and SVGA display drivers. After a brief countdown, the PowerShell window will close automatically. With VMware Tools successfully installed, network functionality will be operational, and you can configure display settings through Start → Settings → Display. A restart should not be necessary to activate this newly enabled functionality.
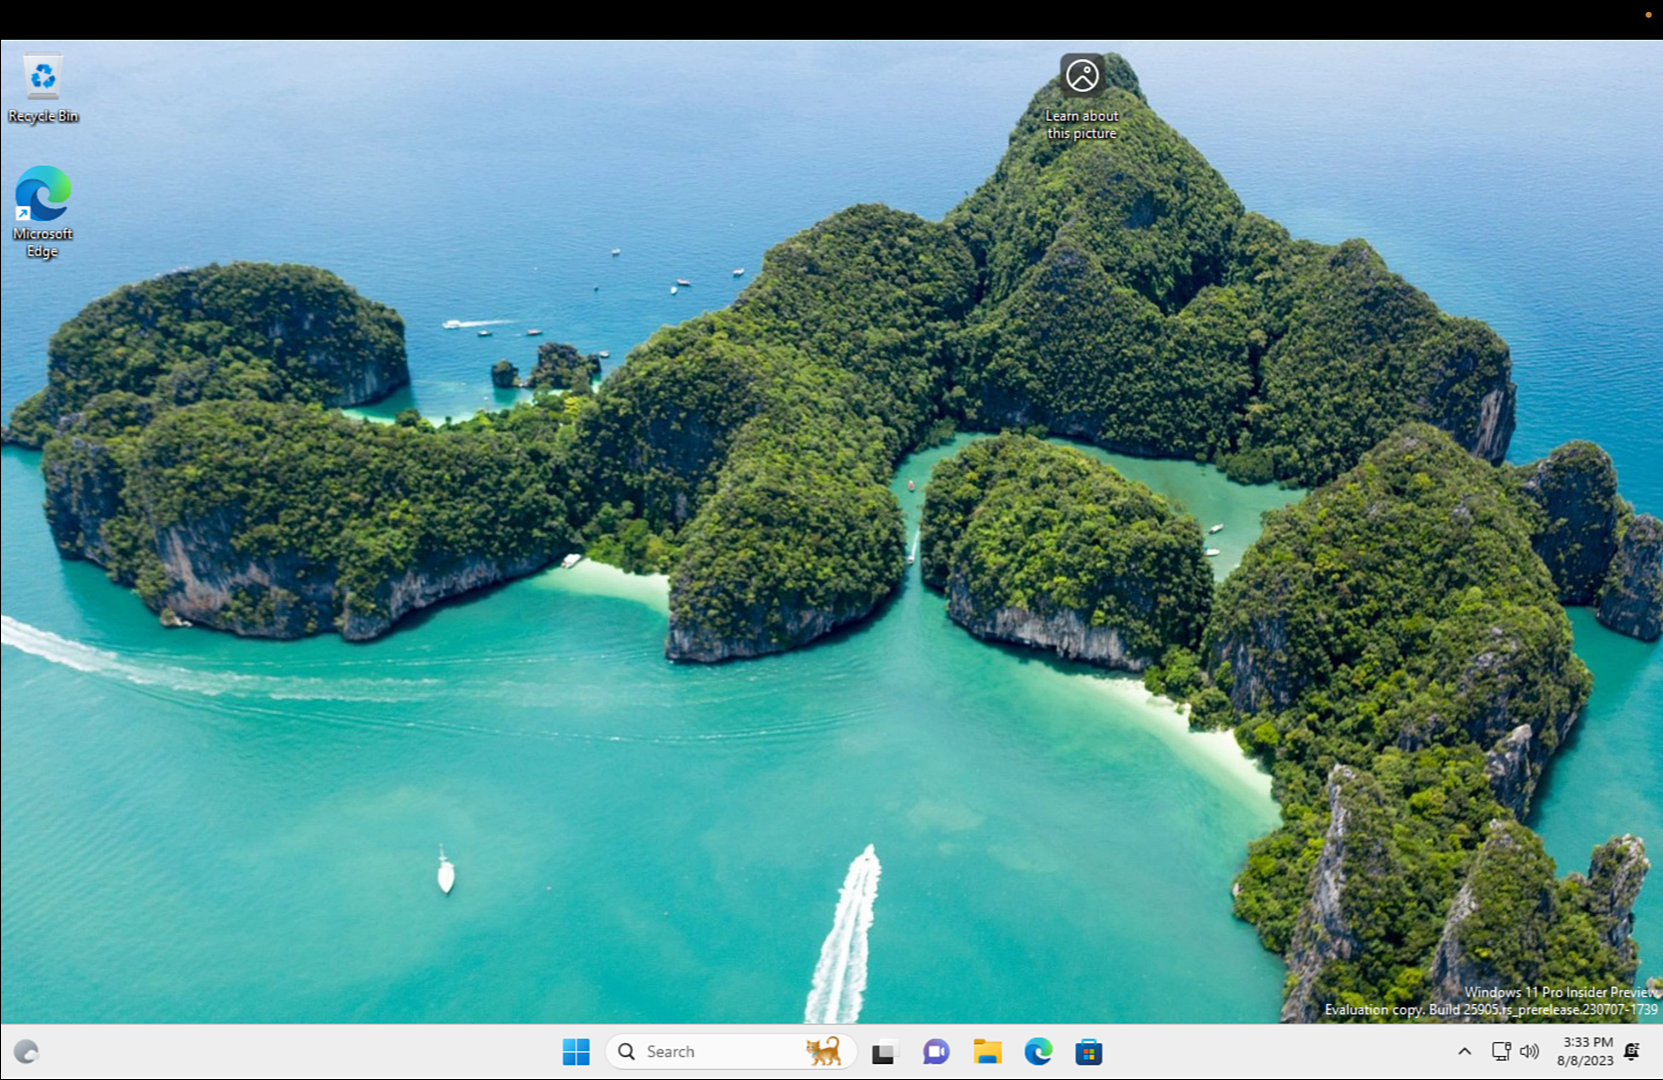
Enjoy Windows 11 on Apple Silicon: Once the setup is complete, you can enjoy using Windows 11 on your Apple Silicon device.
Conclusion
Running the Windows 11 ARM64 Insider Preview on Apple Silicon devices like the M1, M2, and potentially M3 chips is an exciting endeavor that allows users to experience the synergy of two cutting-edge technologies. With the right tools and guidance, you can seamlessly set up a virtual machine to enjoy Windows 11 on your Apple device. Keep in mind that this process involves some technical intricacies, and there might be limitations and compatibility issues, but it undoubtedly showcases the ever-expanding capabilities of modern computing. As Microsoft and Apple continue to innovate, the potential for even more refined cross-platform experiences remains a tantalizing prospect for tech enthusiasts and professionals alike.
Subscribe to the YouTube channel, Medium, Website, Twitter, and Substack to not miss the next episode of the Ansible Pilot.
Academy
Learn the Ansible automation technology with some real-life examples in my
My book Ansible By Examples: 200+ Automation Examples For Linux and Windows System Administrator and DevOps
Donate
Want to keep this project going? Please donate
Windows 11 ARM64 ISO is mainly used for emulating Windows 11 on MAC using Parallels Desktop or creating its virtual machine using Hyper V. Windows 11 on ARM will enable its support for ARM64 processors. This version is specially built by Microsoft to allow users to run the desktop version of Windows 11 on other non-supported devices.
An ARM-based CPU architecture will give an all-day battery life to the devices with the integrated mobile network support. Parallels Desktop on Intel MAC or MAC M1 requires Windows 11 ARM ISO file to create its virtual machine environment.
This guide is on How to download Windows 11 ARM ISO file from Microsoft to install it on MacBook Air and Pro? First, you have to join Windows Insider Program from the web to begin the download. We have also covered all the features of Windows on ARM in the latter topic.
Read Also: Install Windows on Virtual Box
Contents
- 1 Register for Windows Insider Program
- 2 Download Windows 11 ARM ISO File
- 3 Windows 11 on ARM Features
Register for Windows Insider Program
Microsoft has released Windows 11 on ARM Insider Preview exclusive to the Insiders. Windows Insider Program is like a beta tester program for users to download and try out the latest builds before they go live to the public. You need to register for the Windows Insider Program from the web to download Windows 11 ARM64 ISO.
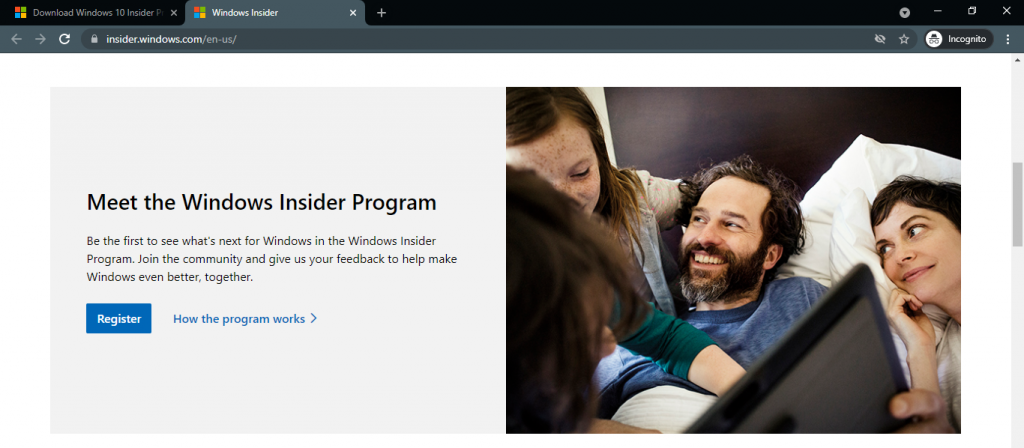
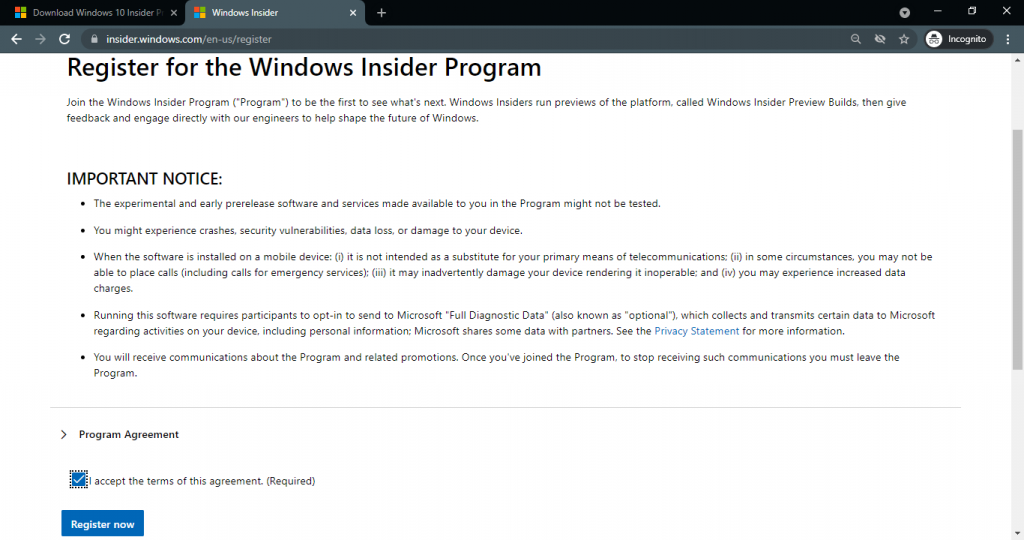
Go to the insider.windows.com website and Register for the program.
Sign in with your Microsoft Account to Accept the terms and conditions.
That’s it, you are now a Windows Insider member and you can directly download ISO files.
Download Windows 11 ARM ISO File
You will get many options such as to try out Windows 11 from your PC or download Windows 11 ARM ISO files once you have successfully registered for the Windows Insider Program.
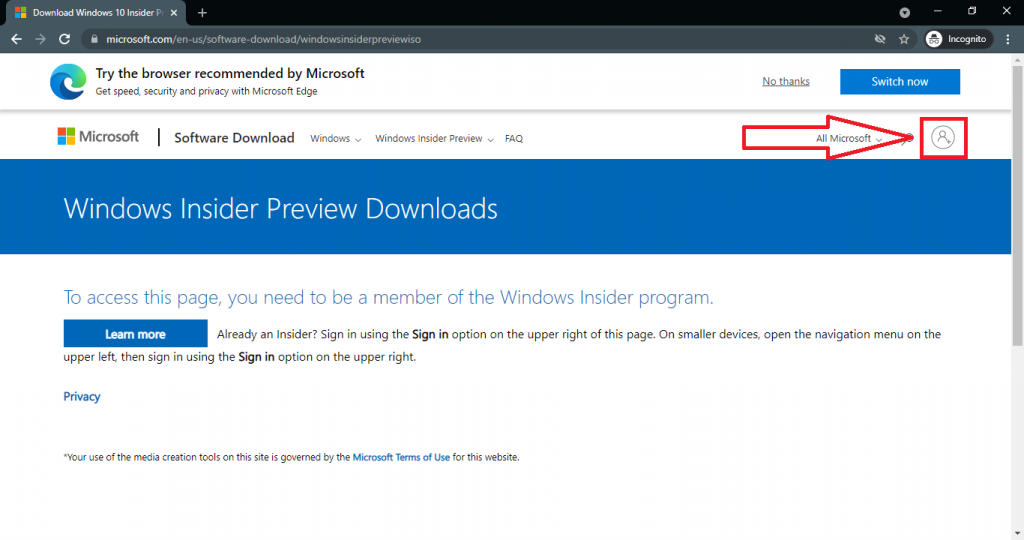
Visit the Microsoft website and login with the same account.
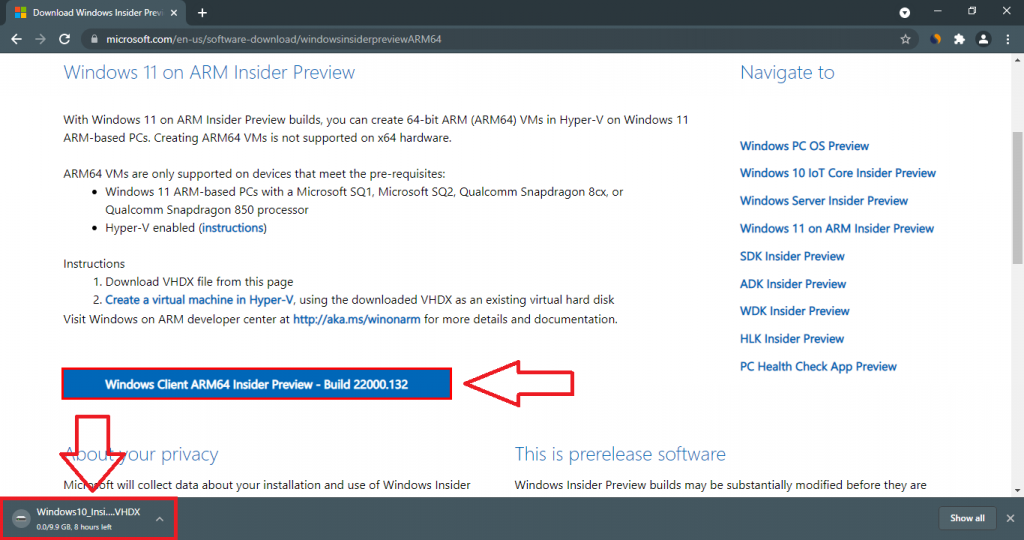
Scroll down and tap on the Windows Client ARM64 Insider Preview – Build 22000.xxx button.
It will download the VHDX file supported by all ARM64 devices and Parallels Desktop on MAC M1 or Intel.
Once the download is complete, run the downloaded VHDX file in a Parallels Desktop and follow on-screen instructions to install Windows 11 on your MAC. Wait until Windows 11 is installed on your MAC.
Intel MAC and MAC M1 might not support the TPM 2.0 chips and give an error message as this PC can’t run Windows 11. MAC M1 users first need to download Windows 10 ARM ISO then upgrade to the Windows 11 Insider Preview bypassing the TPM 2.0 requirements.
Windows 11 on ARM Features
Windows 11 on ARM-based PCs will be packed with several devices orient features. ARM-based PCs are well known for their integrated cellular networks, longer battery, and instant power. Windows 11 will also deploy all these features to provide the best advantages of machine capabilities to their users.
Cellular Connectivity: ARM-based machines such as Tablets have got a cellular or e-sim feature. Windows 11 ARM ISO or VHDX file will also have cellular services to keep you connected with the network. You will keep receiving calls, messages, and videos on your device.
Longer Battery Life: Users are mostly dependent on their devices for all-day work. They will be able to continue their study or work throughout the day on a Windows 11 without charging again in between. The same goes for entertainment such as watching movies or playing games.
Instant Power: Windows 11 for ARM-based machines will instantly turn on and shut down on the tap of a power button, just like our phones. Users don’t have to wait for their devices to start or shut down to join classes, meetings, or other activities.
If you really liked its features then try out Windows 11 on your MAC. Download Windows 11 ARM64 ISO file and get started with Parallels desktop.
Here’s how to download Windows 11 ARM for Parallels + install ISO on M1
by Madhuparna Roy
A diploma holder in computers and with a keen interest in technology, Madhuparna is passionate about writing How-to guides and helping people solve the most intricate Windows issues…. read more
Updated on
- With Apple’s custom ARM SoC, it’s not possible to install the Windows x86 version or x86 Windows apps using Boot Camp anymore.
- But if you are using an unsupported ARM-based PC or want to install Windows 11 on your Mac, we have a quick guide for you.
- You can download & install the Windows 11 ARM64 ISO file on M1 and M2 Mac using virtualization software.
Being able to run Windows on an Apple silicon device is something that users have long wished for. They have been waiting since to know how to download & install Windows 11 ARM ISO on M1 Mac.
However, previously, Windows 10 ARM-based PCs had many limitations. But as the Windows 11 ARM version was released, Microsoft worked on some of its limitations.
For example, among other improvements, it now offers support for 64-bit apps, but for M1 Mac, there’s still no official support.
For now, you can run the Windows apps on Apple laptops using any of these 5 best PC emulation software for Mac.
In this post, we will tell you how to download and install Windows 11 ARM with ISO on M1 and M2 Mac.
Can I install Windows 11 on Mac M1?
- Can I install Windows 11 on Mac M1?
- How can I download and install Windows 11 on my M1 Mac?
- 1. Download Windows 11 on M1 Mac
- 2. Activate Windows 11 on Mac with Apple M1 chip
- 2.1. Activate with the current license
- 2.2. Activate with a new license
Yes, you can install Windows 11 on Mac M1. However, you would need a 3rd-party solution like the Parallels Virtualization Software.
How we test, review and rate?
We have worked for the past 6 months on building a new review system on how we produce content. Using it, we have subsequently redone most of our articles to provide actual hands-on expertise on the guides we made.
For more details you can read how we test, review, and rate at WindowsReport.
This will help you to run Windows 10 and Windows 11 Insider builds, specially designed for the ARM hardware on Apple silicon-based devices.
So, how do I get the Windows 11 ISO on my M1 Mac ARM?
Below is a detailed guide for you that explains how to download & install Windows 11 ARM64 ISO on M1 Mac.
However, before you proceed, check if it’s a supported operating system. While we’re at it, let’s also understand if there’s a Windows 11 ARM version available. So, is there a Windows 11 ARM version?
📌 How do I get Windows 11 ARM64?
- Samsung Galaxy Book2, Huawei Matebook E (2019), Microsoft HoloLens2 powered by Snapdragon 850
- Samsung Galaxy Book S, Lenovo Flex 5G, Lenovo IdeaPad 5G powered by Snapdragon 8cx
- Acer Spin 7, HP Elite Folio powered by Snapdragon 8cx second generation
- Lenovo’s ThinkPad X13s, or Lenovo IdeaPad 4G LTE powered by Snapdragon 8c
- Acer Chromebook Spin 513, Positivo Wise N1212S powered by Snapdragon 7c
- Microsoft Surface Pro X powered by Microsoft SQ1 or Microsoft SQ2
These are some of the devices that may support Windows 11 ARM versions. Moreover, if your device runs on Snapdragon 850, 7c, 7c Gen 2, 8c, 8cx, and 8cx Gen 2, upgrading to Windows 11 is possible.
While not all ARM laptops may come with Windows 11, you can install Windows 11 on some ARM-based devices.
One such device is Apple’s ARM-powered M1 silicon device, but for now, Microsoft denies any possibility of running Windows 11 on M1 Macs.
So, can Mac M1 run Windows 11? We have answered the perennial question below.
How can I download and install Windows 11 on my M1 Mac?
1. Download Windows 11 on M1 Mac
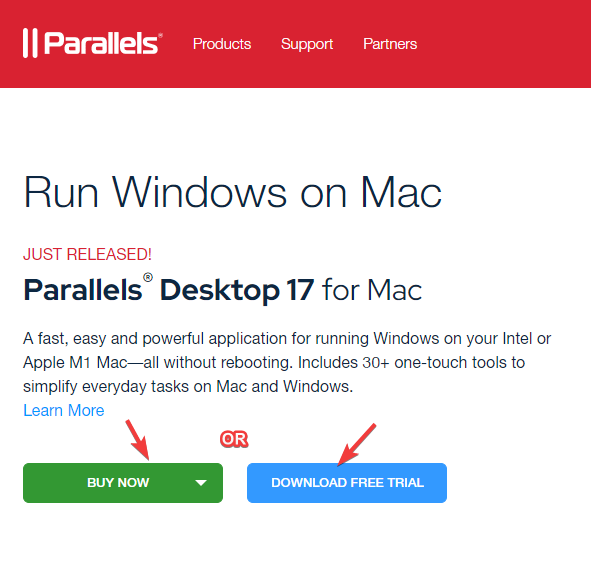
- Visit the Parallels Desktop 17 for Mac web page.
- Click on Download Free Trial or click on Buy Now to purchase a new license.
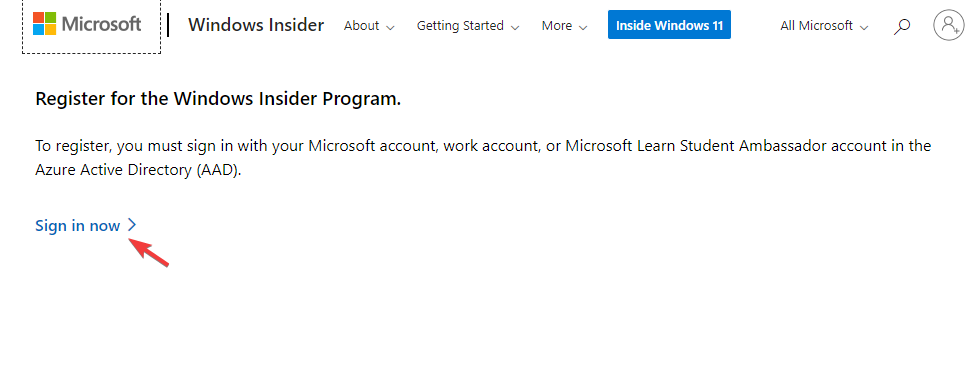
- Now, register for the Windows Insider Program on its official web page.
- Here, click on Sign in now. Log in with your Windows credentials.
- Follow the on-screen instructions to complete the registration.
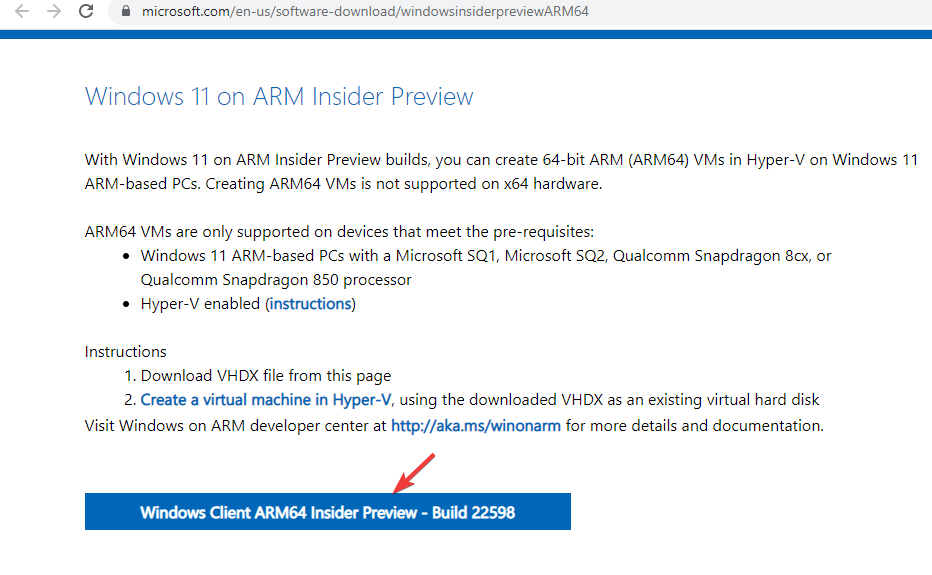
- Now, visit the Windows Insider Preview ARM64 web page.
- Here, click on the blue button to download the Windows Client ARM64 Insider Preview VHDX image.
- After the VHDX image is successfully downloaded, double-click on the file to open on Parallel’s desktop.
- Next, follow the instructions on the screen and wait till the installation is complete.
Parallels Desktop is one of the fastest in testing compared to its competitors and is also known for seamless graphics performance for gaming.
Moreover, it also helps you install macOS from the recovery partition on Intel-powered Macs, thus, making it an expert’s choice for virtualization software.
- Windows 11 and Qualcomm CPUs: Here’s what you should know
- How to install Windows on Mac
- How to turn your PC into a Mac
- How to dual boot Windows 11 and macOS
2. Activate Windows 11 on Mac with Apple M1 chip
2.1. Activate with the current license
- Press the Win + I keys simultaneously to open Windows Settings.
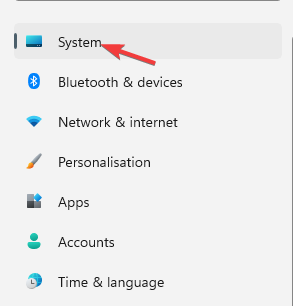
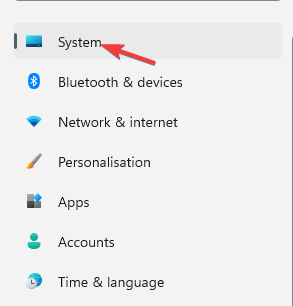
- Click on System on the left side of the pane.
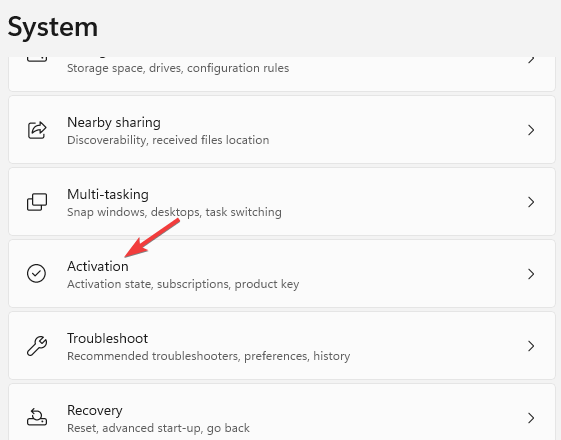
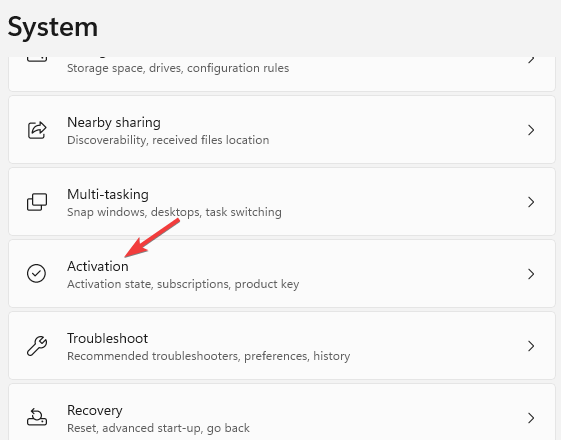
- Next, on the right side, scroll down a bit and click on Activation.
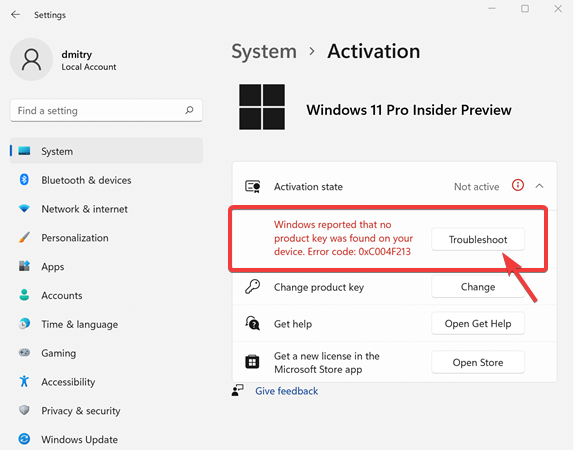
- Now, on the right side, under the Activation state, click on Troubleshoot.
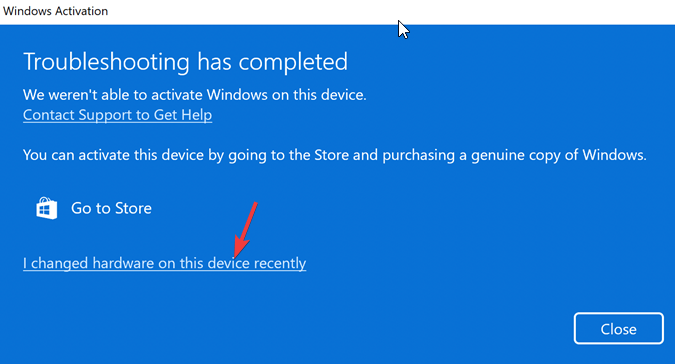
- In the Windows activation dialog box, click on the I changed hardware on this device recently link.
- On the next screen enter your login details to sign in to your Microsoft account.
- Hit Enter when asked for the current Windows password.
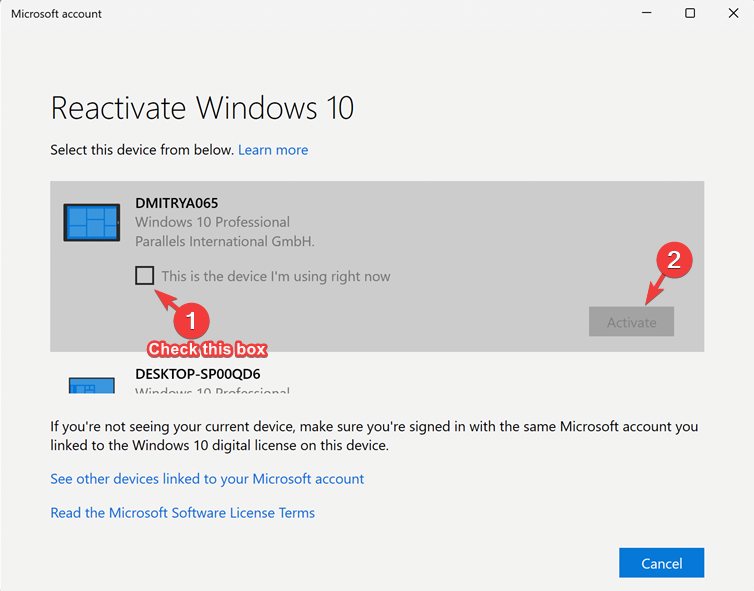
- Select the This is the device I’m using right now option and click on Activate.
Windows is now successfully activated on your M1 Mac.
2.2. Activate with a new license
- Press the Win + I keys together to launch Windows Settings.
- Click on System on the left of the Settings app.
- Now, on the right, click on Activation.
- Click on Get a new license in the Microsoft Store app on the right.
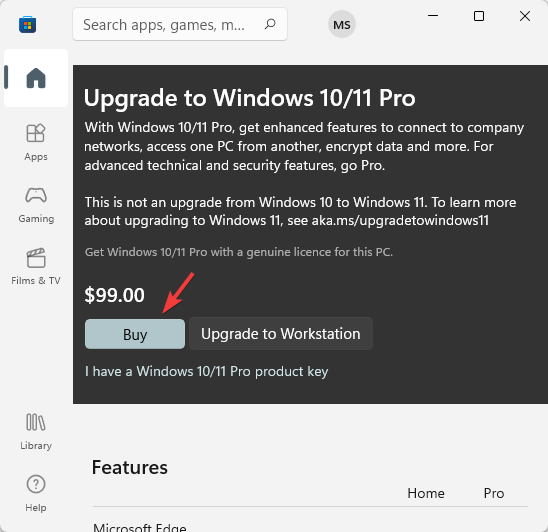
- You will now see the Upgrade to Windows 10/11 Pro dialog box. Click on Buy to proceed with the purchase process.
Windows will be automatically activated once the purchase is successful.
If you were wondering how to install a Windows 11 virtual machine on an M1 Mac for free, there is no need to wonder anymore. There you have it!
While you can download Windows 11 ISO from the UUP dump for non-supported ARM devices, to download & install Windows 11 ARM64 on M1 Mac, you need the Parallels Desktop.
If you are still facing any challenges to install Windows 11 on an ARM64 M1 Mac device, you can let us know in the comments box below.
I’m trying to install Windows 10 for use with Parallels Desktop 17 on my M1 MacBook Air. The link on Windows Insider for Windows 10 on ARM now redirects to Windows 11 on ARM, and the software I’m trying to run on my MacBook is not compatible with Windows 11.
Can I literally just not download Windows 10 on ARM for use with Parallels anymore, or is there a download page I’m missing?
EDIT: Updating this incase anyone has the same issue in the future. I’ve been trying to find a download for this thing since 4:30 AM and as far as I can tell there is no official way to download Windows 10 for ARM anymore. I give up. I found a .iso online from a decently trustworthy source (uupdump) and I’m going to use that instead to get Parallels working.
