 Одна из самых частых проблем при подключении к Wi-Fi в Windows 10 — сообщение «Не удается подключиться к этой сети». Информации о причинах проблемы это уведомление не даёт, а потому пользователю подчас сложно разобраться, в чём дело и как решить проблему.
В этой инструкции подробно о том, почему Windows 10 пишет, что не удается подключиться к этой сети и различные способы исправить ситуацию. На схожую тему: Что делать, если не работает Wi-Fi на ноутбуке.
- Простая и частая причина ошибки подключения
- Способы исправить проблему
- MAC-адрес адаптера
- Забыть сеть Wi-Fi и снова подключиться к ней
- Режим полета и отключение беспроводного соединения
- Драйверы Wi-Fi адаптера
- Отключение IPv6
- FIPS
- Другие варианты решения
- Видео инструкция
Одна из самых простых и распространенных причин ошибки при подключении к сети Wi-Fi

Самый простой способ получить ошибку «Не удается подключиться к этой сети» при подключении — ввести неправильный пароль (ключ безопасности сети) от Wi-Fi (иногда при этом сообщается, что введен недопустимый ключ безопасности, а иногда — выводится сообщение, рассматриваемое в статье).
Даже если вы уверены, что всё введено правильно, учитывайте следующие моменты:
- Перепроверьте раскладку клавиатуры при вводе пароля, учитывайте, что заглавные и строчные буквы нужно вводить именно так, как они были заданы в пароле.
- Если вы установили пароль Wi-Fi, содержащий кириллицу или какие-либо спец-символы, это может являться причиной проблемы: попробуйте изменить пароль Wi-Fi на роутере таким образом, чтобы он состоял только из латиницы и цифр.
- Если кто-то из членов семьи мог поменять пароль на Wi-Fi без вашего ведома, уточните этот вопрос у него.
И, наконец, бывает и такое, что очень начинающий пользователь, нажимая по значку Wi-Fi, видит, что там доступно множество сетей, и предполагает, что он ими может пользоваться для доступа в Интернет, хотя это не так: это не ваши сети и вы не можете к ним просто так (не зная пароля) подключиться.
Способы исправить проблему «Не удается подключиться к этой сети»
Если с паролем Wi-Fi гарантированно нет никаких проблем (или он сохранен в системе), попробуйте использовать следующие варианты решения проблемы.
Внимание: прежде чем приступать, проверьте, а сохранится ли проблема, если перезагрузить ноутбук и роутер (выключить роутер из розетки и включить через 10-15 секунд). Если проблема появляется после завершения работы (а также после режима сна или гибернации) и включения ноутбука, но всё работает исправно после перезагрузки, попробуйте отключить быстрый запуск Windows 10 (и выполнить перезагрузку после этого).
Отключите «Случайные аппаратные адреса» в параметрах Wi-Fi, помните о блокировке по MAC-адресу
Если в настройках роутера включена блокировка подключения устройств по их MAC-адресу в настройках Wi-Fi роутера, вы можете получить рассматриваемую ошибку подключения. Также на её появление может повлиять включение опции «Случайные аппаратные адреса» в Windows 10.
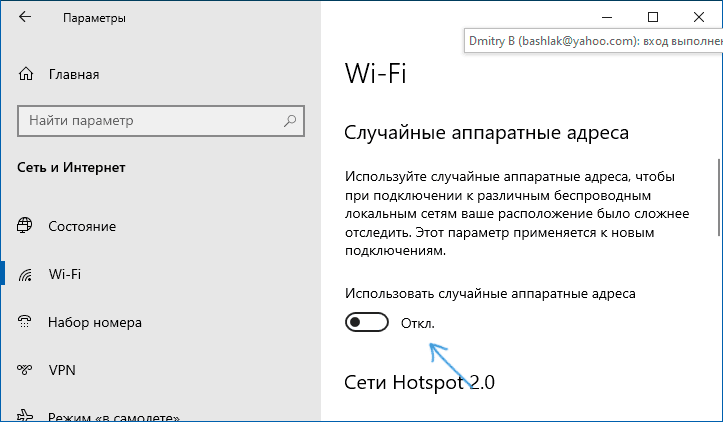
Чтобы проверить, не включена ли эта функция, зайдите в Параметры — Сеть и Интернет — Wi-Fi и, при наличии раздела «Случайные аппаратные адреса» (есть не во всех версиях ОС), отключите эту опцию.
Попробуйте «забыть» сеть Wi-Fi и снова подключиться к ней
Если пароль сети сохранен (не запрашивается при подключении), попробуйте «забыть» сеть, а затем снова подключиться к ней. При использовании этого метода необходимо, чтобы вы помнили пароль вашей сети Wi-Fi. Также его можно посмотреть на другом устройстве: Как посмотреть пароль Wi-Fi в Windows 10, Как посмотреть пароль Wi-Fi на Android.
Чтобы забыть сеть в последних версиях Windows 10, достаточно нажать по её имени в списке подключений и выбрать пункт «Забыть». После этого попробуйте заново подключиться к сети.
Включение и повторное отключение режима полёта, отключение беспроводного соединения
Если на вашем ноутбуке есть клавиша включения режима полёта попробуйте включить режим полета с помощью неё, а затем снова отключить его, а затем проверить подключение. Если такая клавиша отсутствует, включите «Режим в самолете» в области уведомлений Windows 10.

А после включения режима снова выключите его и вновь попробуйте подключиться к сети Wi-Fi. Если это не помогло, попробуйте следующий вариант:
- Нажмите клавиши Win+R на клавиатуре, введите ncpa.cpl и нажмите Enter.
- В списке найдите ваше беспроводное соединение, нажмите по нему правой кнопкой мыши и выберите пункт «Отключить».
- После того, как оно будет отключено, снова нажмите по нему правой кнопкой мыши и выберите пункт «Подключить».
Далее можно попробовать вновь подключиться к беспроводной сети.
Драйверы Wi-Fi адаптера
Если до недавнего времени проблем с подключением не было, попробуйте такой вариант:
- Зайдите в диспетчер устройств (можно через меню по правому клику на кнопку «Пуск»).
- Перейдите в свойства вашего Wi-Fi адаптера (находится в разделе «Сетевые адаптеры», для перехода в свойства можно дважды нажать по имени адаптера или использовать контекстное меню).
- Посмотрите, активна ли кнопка «Откатить». Если да, используйте её для отката драйвера.
Также можно попробовать использовать точки восстановления Windows 10.
Если же проблема появилась после установки Windows 10 или крупного обновления системы, попробуйте скачать драйвер вашего Wi-Fi адаптера с официального сайта производителя ноутбука (внимание: я понимаю, что у вас не работает Интернет, но вы можете скачать его и на телефон, а потом скопировать на проблемный компьютер) и установить его. Если на сайте производителя драйверы только для предыдущих версий ОС, помните: они обычно прекрасно работают и под Windows 10.
Отключение IPv6 в свойствах подключения
По некоторым отзывам этот метод также иногда оказывается работоспособным:
- Откройте список подключений (Win+R — ncpa.cpl), нажмите правой кнопкой мыши по беспроводному подключению (обычно «Беспроводная сеть») и выберите пункт «Свойства».
- Снимите отметку с IP версии 6 (TCP/IPv6) и примените настройки.


Включение или отключение FIPS
Попробуйте включить или отключить FIPS-совместимые алгоритмы шифрования, для этого в Windows 10 Pro или Enterprise:
- Нажмите клавиши Win+R, введите gpedit.msc и нажмите Enter.
- Перейдите к разделу Конфигурация компьютера — Конфигурация Windows — Параметры безопасности — Локальные политики — Параметры безопасности.
- Найдите пункт «Системная криптография: использовать FIPS-совместимые алгоритмы для шифрования, хэширования и подписывания» и дважды нажмите по нему.
- Установите значение «Включен», если он отключен или наоборот.
После этого сохраните настройки, закройте редактор локальной групповой политики и перезагрузите ваш ноутбук или ПК.
В случае Windows 10 Домашняя запустите редактор реестра (Win+R — regedit) и перейдите к разделу
HKEY_LOCAL_MACHINE\System\CurrentControlSet\Control\Lsa\FipsAlgorithmPolicy\
В правой части окна реестра обратите внимание на значение параметра Enabled.

Если оно равно 0, измените на 1 (после двойного клика по параметру) и наоборот. Затем закройте редактор реестра и перезагрузите систему.
Другие варианты решения проблемы
Среди прочих причин и методов решения проблемы «Не удается подключиться к этой сети» в Windows 10 можно выделить следующие:
- Помните, что плохой прием сети Wi-Fi может также вызывать эту ошибку. Проверьте, сохраняется ли она, когда подключаемый ноутбук находится в непосредственной близости к роутеру. Иногда может помочь выбор свободного канала Wi-Fi.
- Если проблема актуальна для всех устройств, подключающихся к этой Wi-Fi сети, возможно, что-то было изменено в параметрах роутера, возможно, даже кем-то посторонним (изменен пароль Wi-Fi, включена блокировка по MAC-адресу). Решение — попробовать заново выполнить настройку роутера, предпочтительно — с предварительным сбросом на заводские настройки (если для вас это не сложно).
- Если вы устанавливали сторонние антивирусы или файрволлы, попробуйте отключить их, а лучше попробовать полностью удалить с компьютера и выполнить его перезагрузку.
- Если вы отключали какие-либо службы Windows 10 в целях оптимизации, это может оказаться причиной проблемы: попробуйте вновь включить их.
- Попробуйте использовать встроенное средство устранения неполадок сети Windows 10. Даже если оно не исправит ошибку, оно может сообщить о каких-то проблемах, решение для которых удастся найти в Интернете.
- Попробуйте выполнить сброс параметров сети средствами Windows 10.
- Теоретически, причиной проблемы могут быть вирусы на вашем ноутбуке или компьютере. Если есть подозрения на это, попробуйте выполнить соответствующую проверку. Также рекомендую воспользоваться AdwCleaner.
Среди прочих советов часто можно встретить рекомендацию запустить командную строку от имени администратора, затем по порядку использовать следующие команды
netsh winsock reset
netsh int ip reset
ipconfig /release
ipconfig /renew
ipconfig /flushdns
С последующей перезагрузкой. Это может помочь, но, на мой взгляд, излишне: встроенный сброс сети Windows 10 выполняет все указанные действия.
Видео инструкция
Если вы сможете поделиться в комментариях информацией о том, какой именно способ вам помог, это может оказаться полезным для получения статистики по проблеме.
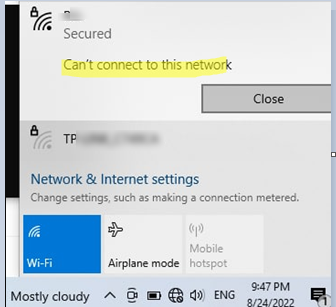
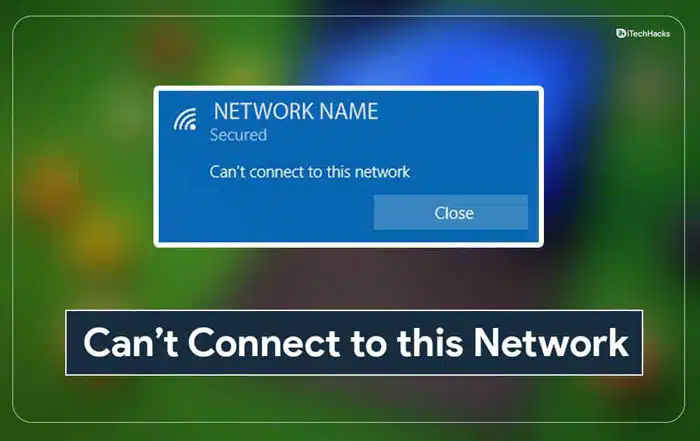
При попытке подключиться к одной из доступных Wi-Fi сетей в Windows 10 может появляться ошибка:
Не удается подключиться к этой сети
Can’t connect to this network
Причиной ошибки может быть неправильный пароль, некорректные настройки сетевого профиля WLAN для сохраненной сети (тип шифрования или аутентификации), драйвер Wi-Fi адаптера, измененные настройки точки доступны и т.д. В этой статье мы рассмотрим, как исправить эту ошибку и восстановить Wi-Fi подключение в Windows.
Убедитесь, что вы ввели правильный ключ безопасности (пароль для подключения). Нежелательно использовать в пароле Wi-Fi кириллицу или спец символы.
Самый первый и простой вариант решения проблемы – начните с перезагрузки вашего компьютера и Wi-Fi роутера.
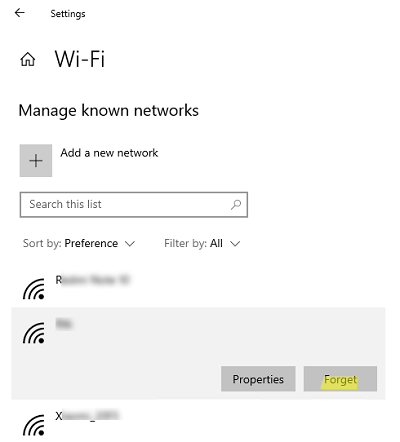
Если предыдущий способ не помог, возможно проблема связана с тем, что изменились настройки Wi-Fi роутера (пароль сети, настройки шифрования) и Windows не может подключиться к вашему роутеру с предыдущими сохраненными настройками в Wi-Fi профиле этой сети. Попробуйте удалить сохраненные настройки беспроводной сети в Windows и переподключиться к точке доступа :
- Перейдите в панель Settings -> Network and Internet -> Wi-Fi -> Manage known networks (или выполните команду быстрого доступа
ms-settings:network-wifi
); - Найдите в списке вашу Wi-Fi сеть и удалите ее (Forget/Забыть);
Можно удалить профиль сети из командной строки:
netsh wlan delete profile name="имя_сети"
- Заново подключитесь к вашей Wi-Fi точке доступа, укажите ключ безопасности сети (пароль для подключения).
Проверьте, что драйвер вашего сетевого адаптера поддерживает типы шифрования и аутентификации, которые разрешены на вашей точке доступа Wi-Fi. Список стандартов и типов шифрования, которые поддерживает ваш Wi-FI драйвер Windows можно вывести с помощью команды:
netsh wlan show all
Например, в моем случае:
Radio types supported : 802.11n 802.11g 802.11b
FIPS 140-2 mode supported : Yes
Authentication and cipher supported in infrastructure mode:
Open None
WPA2-Personal CCMP
Open WEP-40bit
Open WEP-104bit
Open WEP
WPA-Enterprise TKIP
WPA-Personal TKIP
WPA2-Enterprise TKIP
WPA2-Personal TKIP
WPA-Enterprise CCMP
WPA-Personal CCMP
WPA2-Enterprise CCMP
WPA3-Personal CCMP
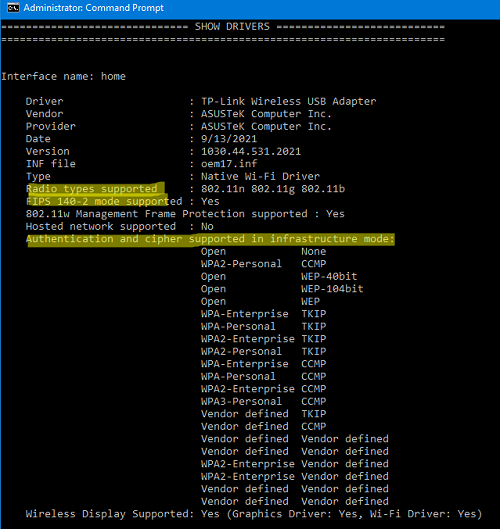
Убедитесь, что эти режимы поддерживаются вашей точкой доступа Wi-Fi (нужно зайти на интерфейс управления вашей точки доступа и проверить настройки безопасности). В некоторых случаях нужно обновить драйвер вашего сетевого адаптера.
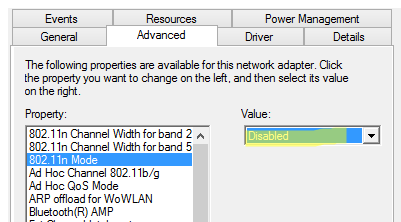
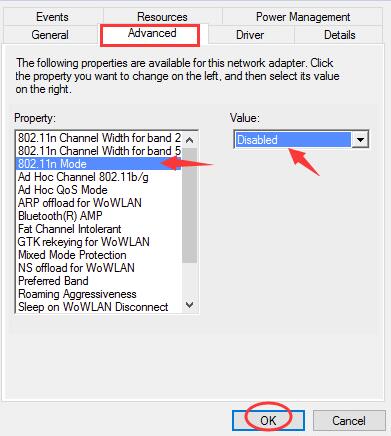
Откройте свойства сетевого драйвера адаптера в Device Manager, перейдите на вкладку Advanced и проверьте, какие режимы разрешены в его настройках. В этом примере режиме 802.11n отключен. Если ваша точка доступа и драйвер адаптера поддерживают его, включите эту опцию.
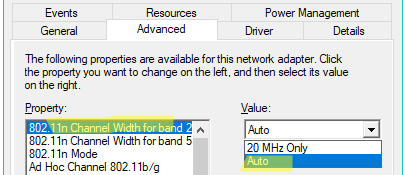
Также попробуйте изменить ширину канала в параметре 802.11n Channel Width for band 2 с
20 MHz
Only на
Auto
.
Удалите/переустановите сетевой драйвер вашего Wi-Fi адаптера (консоль
devmgmt.msc
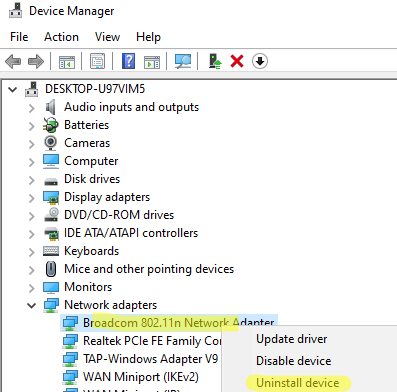
). Разверните секцию сетевых адаптера, щелкните по вашему Wi-Fi адаптеру и выберите (Удалить устройства/Uninstall device).
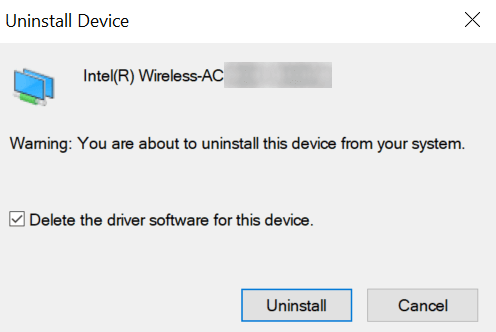
При удалении устройства вам будет предложено также удалить драйвер из хранилища драйверов. Включите опцию Delete the driver software for this device и нажмите Uninstall.
После этого выполните обнаружение новых устройств Actions -> Scan for hardware changes и дождитесь, пока Windows обнаружит ваш Wi-Fi адаптер и установит подходящие драйвера.
Это также сбросит текущие настройки вашего Wi-Fi адаптера (полезно, если вы изменяли их вручную).
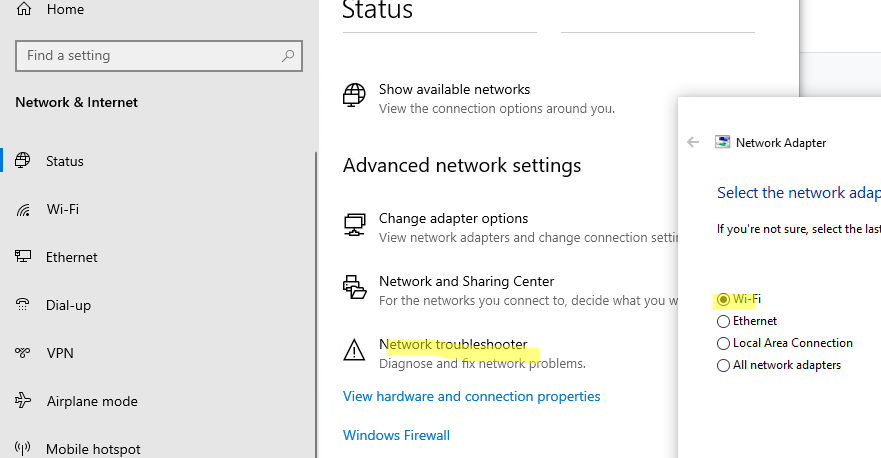
Запустите средство диагностики и устранения неполадок сети Settings -> Network and Internet > Status и нажмите на кнопку Network troubleshooter в секции Advanced network properties (или выполните команду
msdt.exe /id networkdiagnosticsnetworkadapter
). Выберите тип сетевого адаптера Wi-Fi и дождитесь пока мастер найдет и исправит возможные сетевые проблемы.
При появлении ошибки подключения к Wi-Fi сети вы можете найти более подробную информацию о причине ошибки в журнале Event Viewer.
- Откройте консоль Event Viewer (
eventvwr.msc
) и перейдите в раздел Applications and Services Logs -> Microsoft -> Windows -> WLAN-AutoConfig -> Operational; - Проверьте наличие ошибок и предупреждений в этом журнале;
- В моем примере тут нашлось событие EventID 8001 (AcmConnection), со следующим описанием:
Network Adapter: Broadcom 802.11n Network Adapter
Interface GUID: {c8342b50-2894-4d8f-84d7-907fce8e1784}
Connection Mode: Manual connection with a profile
Profile Name: HMNWRK
SSID: HMNWRK
BSS Type: Infrastructure
 Failure Reason:The specific network is not available.
RSSI: 255
Судя по ошибке данная точка доступа Wi-Fi оказалось недоступна (выключена) в момент подключения к ней.
Или еще одна похожая ошибка:
EventID 11006 (MsmSecurity)
WLAN-AutoConfig
Wireless security failed.
Reason: Dynamic key exchange did not succeed within configured time
Здесь похоже, что ваш компьютер не успел обменяться ключами с роутером за определенное время (точка доступа не загрузилась, тормозит, или вне зоны доступа).

Если ничего не помогает, и проблема появляется при подключении к любой Wi-Fi сети (будь то аппаратная точка доступа, или программная Wi-Fi точка доступа на Windows, Linux или Android), очистите таблицу маршрутизации и кэш DNS, выполните полный сброс сетевых настроек в Windows :
route -f
ipconfig /flushdns
netsh int ip reset
netsh int ipv4 reset
netsh int tcp reset
netsh winsock reset
Перезагрузите компьютер и подключитесь к своей сети. Ошибка
“Windows не удалось подключиться к Wi-Fi
” должна исчезнуть.
Несколько дополнительных советов по решению проблемы:
- Слабый и нестабильный сигнал Wi-Fi сети может вызывать эту ошибку. Проверьте уровень сигнала Wi-Fi и наименее загруженные каналы с помощью PowerShell. Попробует переключить вашу точку доступа на один из свободных номеров каналов;
- Измените имя (SSID) Wi-Fi сети на точке доступа;
- Если в настройках роутера жестко задан режима работы беспроводной сети (802.11 b/g/n). попробуйте выбрать тот, режим, который поддерживается драйвером Wi-FI в Windows или переключиться в режим Auto. Например, некоторые старые модели Wi-Fi адаптеров не поддерживают более современный режим 802.11n (работают только в 802.11g);
- Проверьте, не включена ли в настройках Wi-Fi роутера блокировка клиентов по MAC адресу
“Windows 10 can’t connect to this network” is one of the issues you could face while trying to connect your Windows machine to a network. As you can see, except for telling you you can’t connect to the network, the error doesn’t say much about why the issue has occurred and what you can do about it.
If you’ve found yourself in the situation for the first time, you’re probably clueless and have no idea what to do. Luckily, there are a few ways to get around the issue and successfully connect to your chosen network on your PC.
Also, be sure to check out our short video on our YouTube channel where we cover some of the fixes mentioned in this article.
Forget The Network & Reconnect To It
When there’s an issue on your computer, you’re usually asked to reboot your machine and that’ll hopefully fix it for you. The same can be done for your network connection as well. You can try forgetting the network and then re-connecting to it to see if it then connects without any issues.
Although it’s one of the most basic things to do, it may just work out for you, and there’s no harm in doing it.
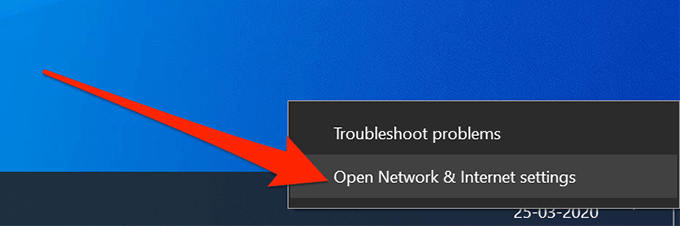
- Find the network icon in your system tray, right-click on it, and select Open Network & Internet settings.

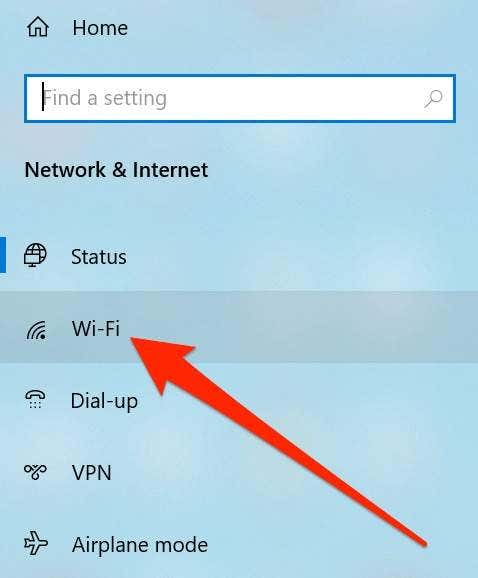
- Click on the option that says Wi-Fi in the left sidebar to view your wireless adapters.
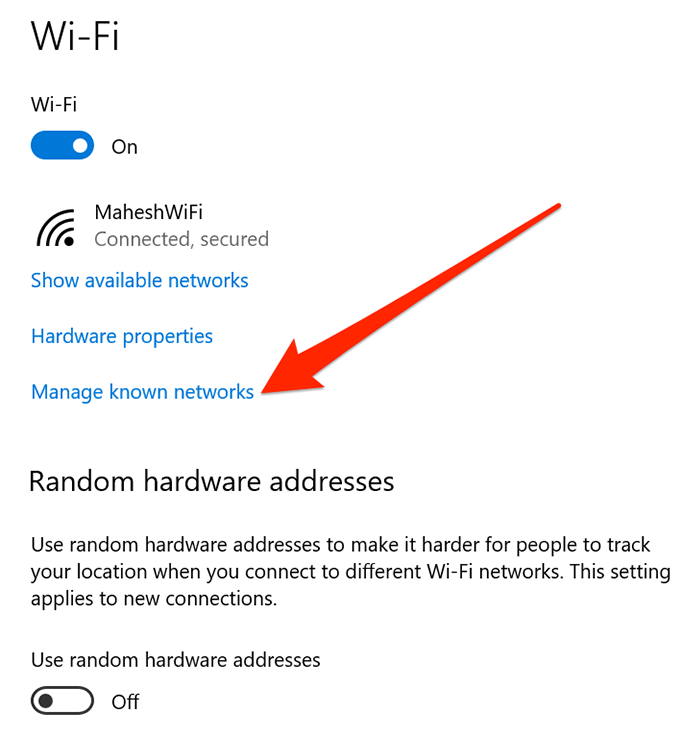
- On the following screen, click on Manage known networks on the right-hand side pane to view your networks.
- You’ll see a list of all the networks you’ve ever connected to from your PC. Click on the one you’re having trouble connecting to and select the Forget button for it.
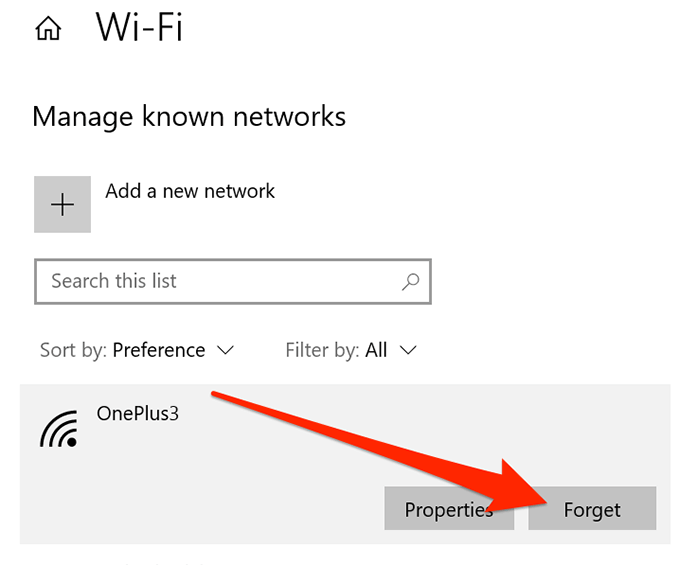
- The network will be removed from the list.
- To reconnect to it, scan for it as you would normally and click on it.
Toggle The Airplane Mode On & Off
On smartphones like iPhone and Android, when you face the “windows 10 can’t connect to this network” issue, one of the things you’re asked to do is toggle the airplane mode and see if that fixes the problem for you. It works in many cases as it helps your device fully disconnect from any networks, and you can then turn it off and manually connect to your chosen network.
You can use the same method on your Windows PC as well.
- Click on the notification-like icon at the bottom-right corner to open the Windows Action center.
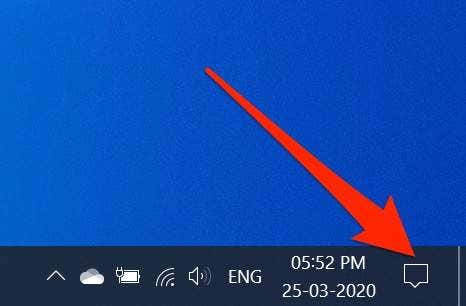
- You’ll see several tiles you can enable and disable for your machine. Click on the one that says Airplane mode to turn it on.
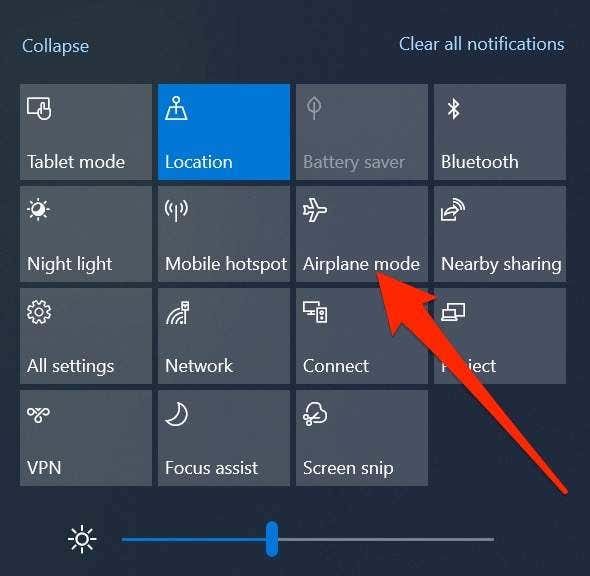
- The tile will turn full blue meaning the airplane mode has been enabled on your PC.
- Wait for about a minute and then click on the same tile again. This time, it’ll disable the airplane mode.
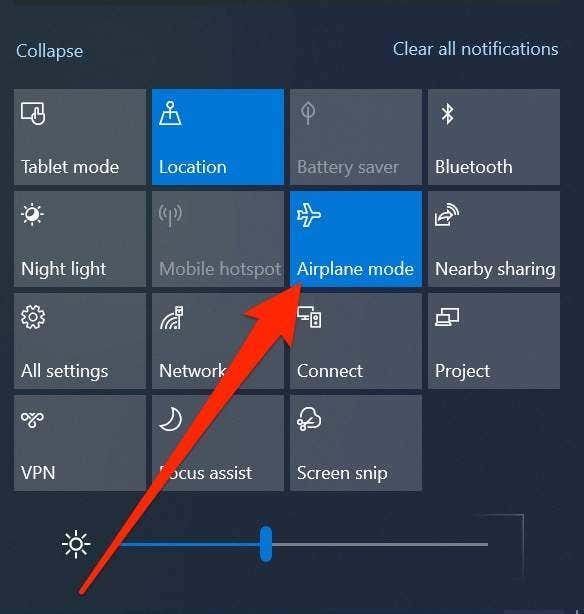
- Reconnect to your network and you should be able to do it without an issue.
Uninstall The Drivers For Your Network Adapter
Your Windows computer recognizes your network adapter because you have its drivers installed on your machine. If there’s an issue with the drivers, it can cause issues like “Windows can’t connect to this network”.
One of the ways to resolve the driver-related issues is to uninstall the device and the drivers. Your machine will then automatically install the proper and required drivers for your device.
- Search for Device Manager using Cortana search and launch it.
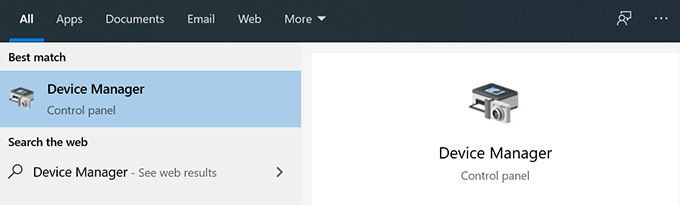
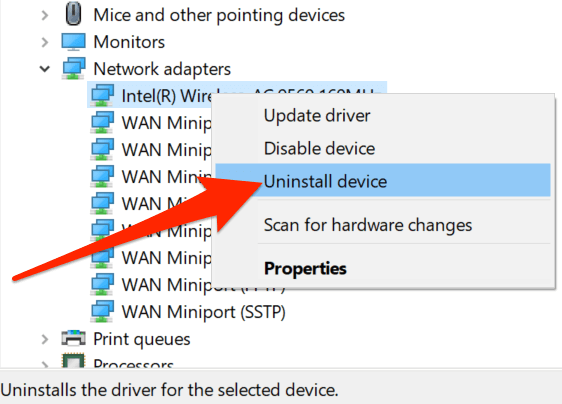
- Expand the Network adapters menu by clicking on it. Then, select your wireless adapter from the list, right-click on it, and select Uninstall device.
- Tick-mark the box that says Delete the driver software for this device and click on Uninstall. It’ll remove the device as well as the drivers for it from your computer.
- Reboot your computer.
- Your computer will automatically find and install the required drivers for your adapter.
Run Commands In CMD To Fix The Issue
The “Can’t connect to network” issue you’re facing on your Windows 10 could be due to an IP related issue as well. In that case, Microsoft recommends you use a command to release your IP and flush the DNS cache.
These commands can be run from the Command Prompt utility on your computer. You don’t need to configure them or anything like that; all you need to do is copy and paste them into your CMD window.
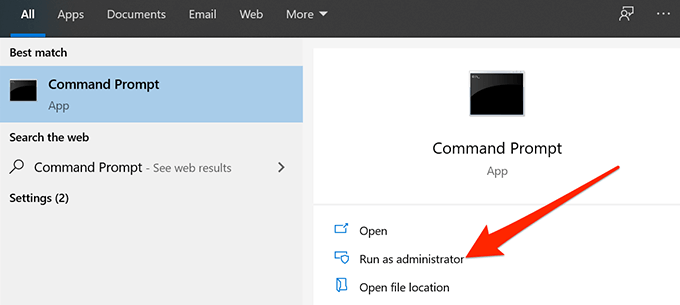
- Search for Command Prompt using the Cortana search and click on the Run as administrator option.
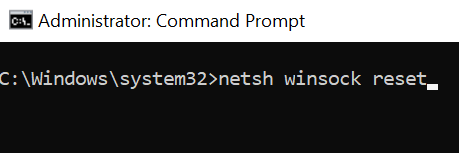
- Type the following commands into the Command Prompt window one by one hitting Enter after each line.
netsh winsock reset
netsh int ip reset
ipconfig /release
ipconfig /renew
ipconfig /flushdns
- Reboot your computer and your issue should likely be fixed.
Reset Your Network Settings
Sometimes an improper configuration in your network settings can lead to errors like “Windows 10 can’t connect to this network”. The best way to resolve the issue, without getting into much details, is to reset your network settings.
It brings your settings back to the factory defaults, and you can always reconfigure them when needed.
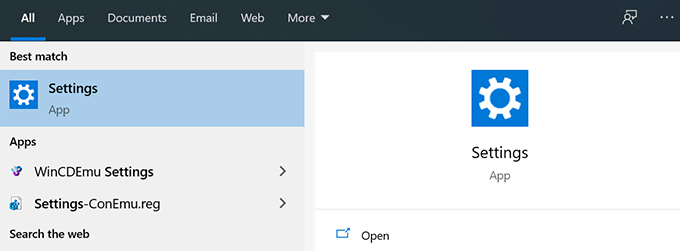
- Launch the Settings app using Cortana search on your PC.
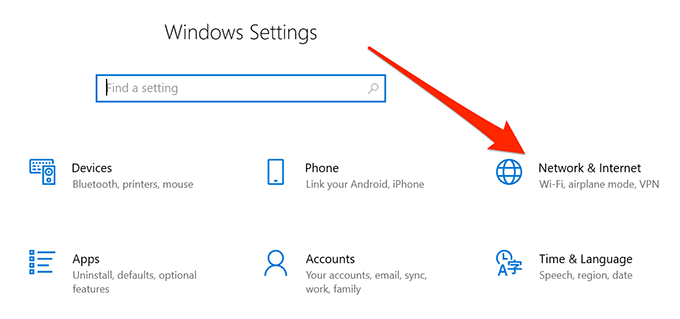
- Click on the option that says Network & Internet.
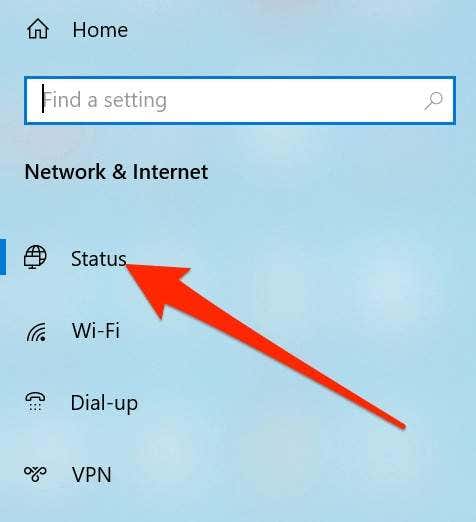
- Select Status from the left sidebar on your screen.
- Scroll down in the right-hand side pane and click on the option that says Network reset. It should be at the very bottom of your screen.
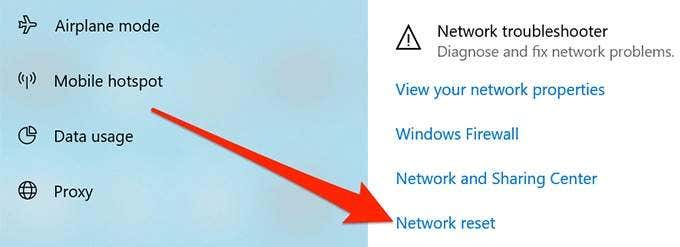
- Click on the Reset now button to reset your settings.

Disable IPv6 On Your PC
You can try disabling IP version 6 on your computer and see if it helps fix the connection issue on your machine. Most computers can work just fine with IPv4 and you shouldn’t have any issues at all, unless you work on something that specifically requires IPv6.
- Right-click on the network icon in your system tray and select Open Network & Internet settings.
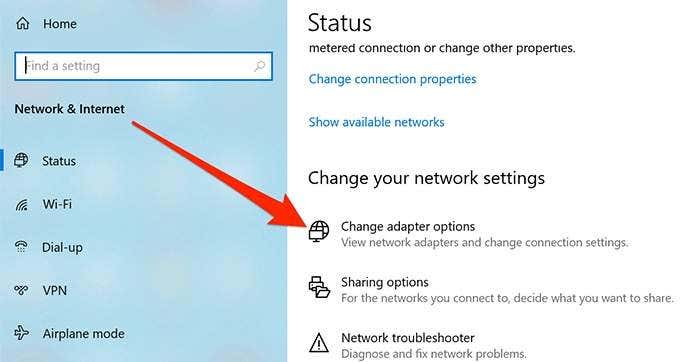
- Click on Change adapter options on the following screen.
- Find your wireless adapter, right-click on it, and select Properties.
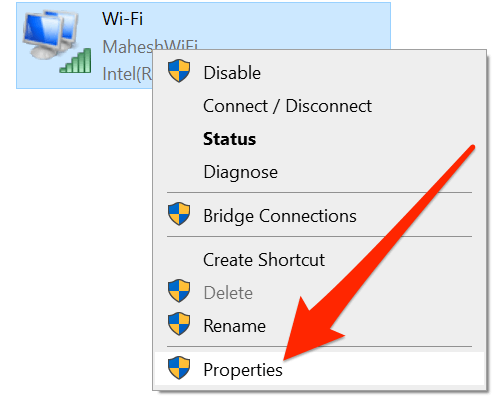
- You’ll see several options you can enable and disable for your adapter. Untick the box that says Internet Protocol Version 6 (TCP/IPv6) to disable IPv6. Then click on OK at the bottom.

Use The Network Troubleshooter
If you have still not been able to figure out the issue yet, you might want to take help of the built-in network troubleshooter to find and fix the underlying problem on your computer.
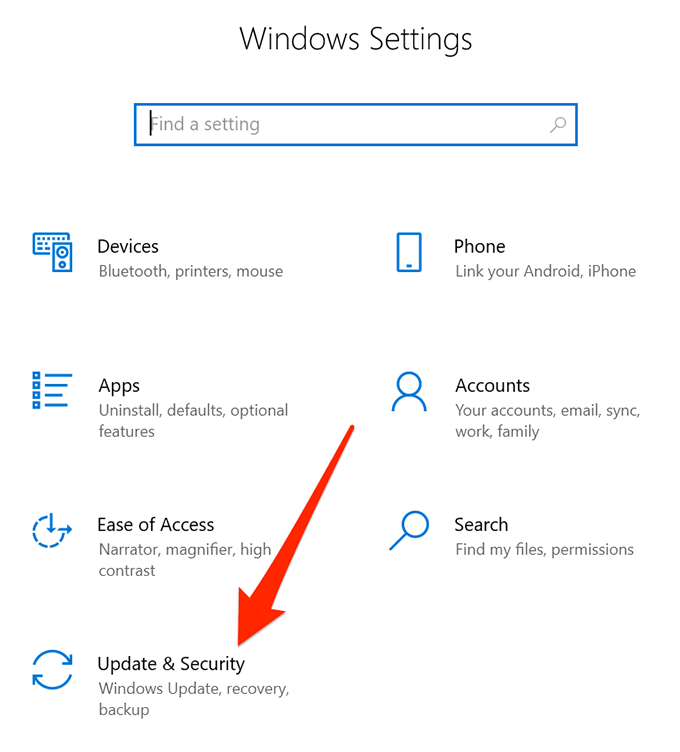
- Launch the Settings app on your PC.

- Click on Update & Security.
- Select Troubleshoot from the left sidebar.

- Find Network Adapter in the list, click on it, and choose Run the troubleshooter.
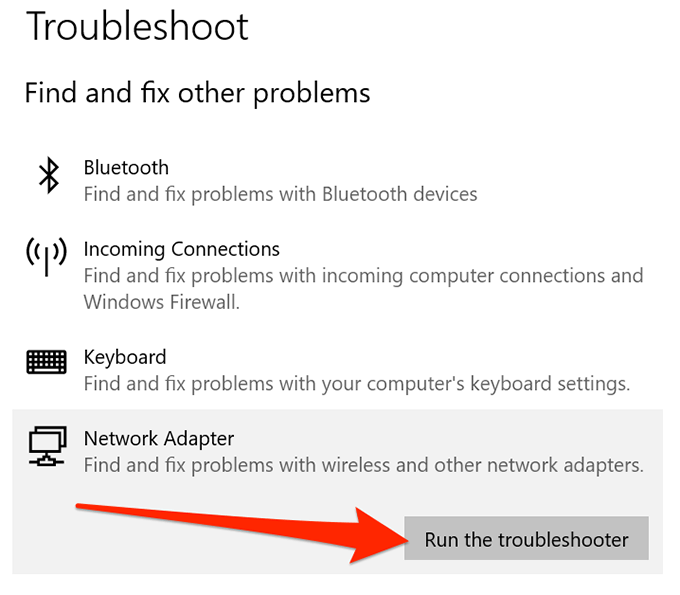
- The troubleshooter will find and help fix the issue on your machine.
The “Windows can’t connect to this network” issue basically paralyzes you as it won’t let you connect to the Internet, and that means you can’t access your sites, emails, and anything else that requires an active Internet connection.
If you were able to fix the issue using any of the above methods, please let us know your experience in the comments below.
Table of Contents
Can’t Connect To This Network Windows 11? There are several reasons for this error, including misconfigured settings and physical distance from the network source. It can also be caused by outdated or broken network drivers. Windows 11 comes with built-in troubleshooters to address these issues.
One option is to reset the network settings. This will restore the default network configuration and should fix the problem.
1. Check the Network Settings:
One of the most common causes of the Can’t Connect To This Network Windows 11 error is an incorrect network configuration. To check if this is the case, open the Settings app and head to Network & Internet. Select Advanced networking options and click the Network reset option. This will restore all the network settings to their default state and should fix the problem.
Another potential cause of the error is outdated or corrupted network drivers. To check if this is the case, press the Windows key + X and choose Device Manager from the menu. Expand the Network adapters section and right-click on your network driver. Select the Update Driver option and follow the on-screen instructions to install the latest version of the network driver.
Finally, you can try disabling IPv6 to see if this resolves the problem. Unlike IPv4 which is integral, IPv6 is an optional protocol that you can choose not to use. To disable it, run the Cpl command in Command Prompt and enter the following commands:
If none of these fixes work, you may need to reinstall the network adapter. To do this, launch the Device Manager and expand the Network Adapters section. Right-click on your network adapter and select Uninstall device. Then, reboot your PC and Windows should automatically reinstall the correct driver for your network adapter.
2. Reset the Network:
The most common way to connect to the internet is through a router. It acts as a gateway for your home or office network, forwarding outbound local traffic to your internet connection and inbound internet traffic into your local network. It can also act as a switch, controlling the flow of data between your router and other devices.
Sometimes, the router can get overworked and may not function properly. This can lead to problems like the “Can’t connect to this network” error. It is important to check the router and modem for any issues and disconnect them if necessary.
Another option is to reset the network settings. This can be done by opening the settings and selecting “Network reset”. It will restore the default network settings, and it will remove all existing configurations, and reinstall the adapter drivers. You can also try disabling IPv6 to troubleshoot the problem. Unlike IPv4, which is integral to most connections, IPv6 is optional.
If you’re having trouble connecting to the internet, make sure your router is not set to Airplane Mode. It is possible that your laptop accidentally turned it on, and this can cause the error to appear. You can also try forgetting the network if this doesn’t work. If the problem persists, you should contact your service provider to see if they can help.
3. Reinstall the Network Adapter:
In order to use the Internet, you need a stable connection. This is why it’s important to know how to troubleshoot and fix problems that can occur with your network. Fortunately, there are several different ways to solve these issues. Some of these methods are simple, while others require a little more effort. Regardless, the tips in this article can help you resolve the issue quickly and easily.
If you’re unable to connect to the internet on your Windows 11 PC, it may be an issue with your network adapter. This can happen for many reasons, including outdated drivers, a router or modem problem, and a VPN. To fix this, try rebooting your computer and resetting the network settings. If this doesn’t work, you can try reinstalling the network driver.
You can do this by pressing the Windows key and X at the same time, then selecting Device Manager. Once you’re in Device Manager, expand the Network Adapters section and right-click on your network driver. Select Uninstall device and follow the on-screen instructions. Once the device driver is removed, restart your computer and run the network adapter troubleshooter to see if it fixes the problem.
You can also try downloading the latest network driver from your PC manufacturer’s website and saving it to a USB flash drive. Then, plug the USB into your computer and follow the steps above to reinstall it.
4. Disable IPv6:
In some cases, disabling IPv6 in Windows 11 can help resolve network connection issues. This is because IPv6 was developed to overcome some of the limitations of IPv4. To disable IPv6, you can use the Control Panel utility or the PowerShell command line.
To disable IPv6 in Windows 11, first open the Control Panel and select Network and Internet from the options. Then, select Change adapter settings. On the Network Properties dialog that pops up, right-click your network connection and select Properties. Then, under Internet Protocol Version 6 (TCP/IPv6), uncheck the box.
You can also disable IPv6 by running the following commands in the PowerShell command line. Make sure that you run these commands as an administrator. This will prevent any errors from occurring.
Stella has been working as an English editor in MiniTool Software for more than 7 years. She has written various articles on different topics including storage media data recovery, phone data recovery, YouTube video download, partition management, and more.
Windows is constantly releasing updates designed to fix bugs and improve the overall performance of the operating system. However, sometimes these updates can cause problems with your computer, including the inability to connect to a wireless network. If you are having trouble connecting to your network, try these tips to resolve the issue. If you are still having trouble, you can always contact Microsoft support for assistance.
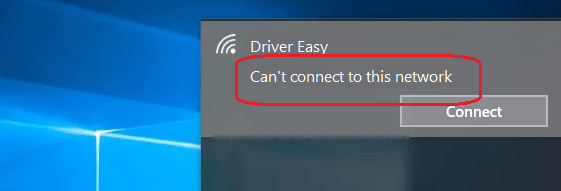
Lose your network connection? Don’t worry. If you’re on Windows 10, and you’re seeing this error saying Can’t connect to this network, you’re not alone. Many Windows users are reporting it. The good news is you can fix it. Read on to find how…
Fixes for ‘Can’t connect to this network’:
- Uninstall your network adapter driver
- Update your network adapter driver
- Disable 802.1 1n mode of your network adapter
- Reset your router
Solution 1: Uninstall your network adapter driver
When “Can’t connect to this network” error occurs on your Windows 10, it’s probably there’s something wrong with your network adapter. So as the top 1 solution, we advise you uninstall your network adapter and then let your Windows 10 reinstall the driver automatically.
1) On your keyboard, press the Windows logo key and X key together to open quick-access menu.
2) Click Device Manager.
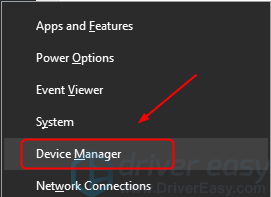
3) Click Network adapters, then right-click on your network adapter and select Uninstall device.
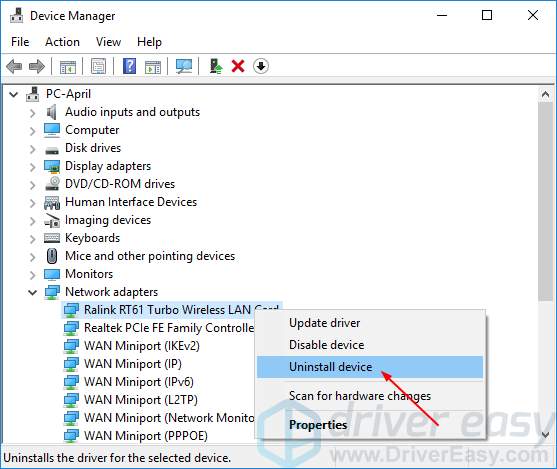
4) Tick on Delete the driver software for this device. Then click Uninstall.

5) Reboot your Window 10 and try to establish your network connection to see if it works.
Solution 2: Update your network adapter driver
This problem could be also caused by the old or incorrect network driver. If you’re not confident playing around with drivers manually, you can do it automatically with Driver Easy.
Driver Easy will automatically recognize your system and find the correct drivers for it. You don’t need to know exactly what system your computer is running, you don’t need to risk downloading and installing the wrong driver, and you don’t need to worry about making a mistake when installing.
You can update your drivers automatically with either the FREE or the Pro version of Driver Easy. But with the Pro version it takes just 2 clicks (and you get full support and a 30-day money back guarantee):
1) Download and install Driver Easy.
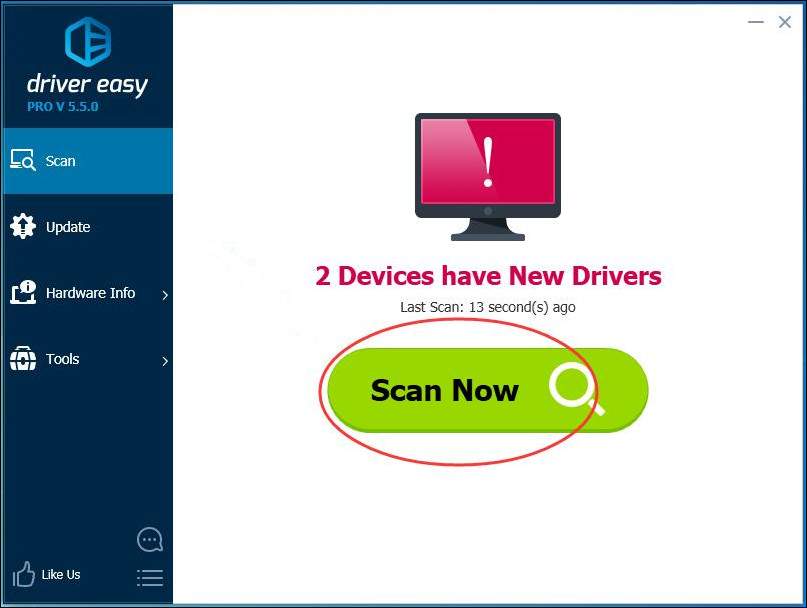
2) Run Driver Easy and click Scan Now button. Driver Easy will then scan your computer and detect any problem drivers.
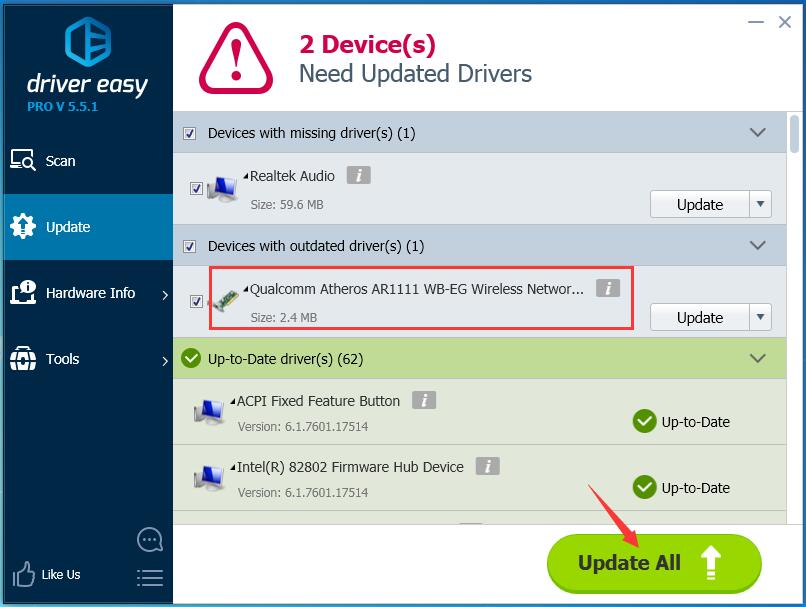
3) Click the Update button next to a flagged network adapter driver to automatically download and install the correct version of this driver (you can do this with the FREE version).
Or click Update All to automatically download and install the correct version of all the drivers that are missing or out of date on your system (this requires the Pro version – you’ll be prompted to upgrade when you click Update All).
NOTICE: It needs network connection for Driver Easy help you update all the driver with one-click. But without Internet, you still can use its Offline Scan feature to update your network adapter drivers.
4) Reboot your Window 10 and try to establish your network connection to see if it works.
Solution 3: Disable 802.1 1n mode of your network adapter
1) On your keyboard, press the Windows logo key and X key together to open quick-access menu.
2) Click Device Manager.
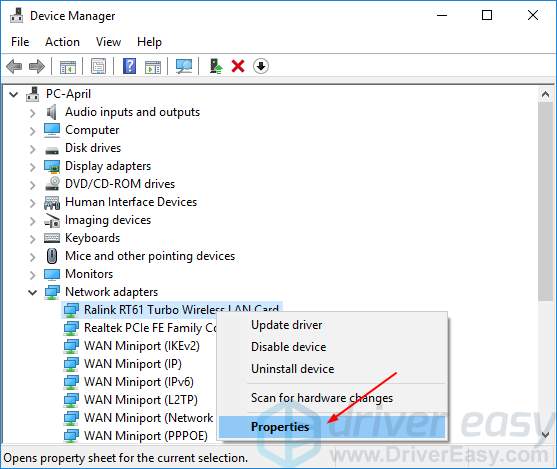
3) Click Network adapters, then right-click on your network adapter and select Properties.
2) Click the Advanced section, then click 802.1 1n Mode and set the Value to Disabled.
Click OK.
3) Try to establish your network connection to see if it works.
Solution 4: Reset your router
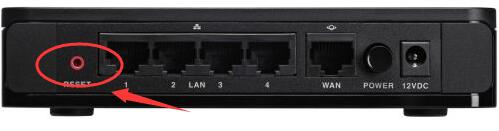
According to many users reported, reset their routers help them fix the error. Thus make sure to reset your router to try to fix the error.
You can use the reset button on your router or unplug and reconnect your router to reset it.
When it’s done, try to establish your network connection to see if it works.
39
39 people found this helpful
Available in other languages
In diesem Beitrag erfahren Sie 5 Lösungen, um das Verbindungsproblem Keine Verbindung mit diesem Netzwerk möglich zu beheben.