Faulty system files can trigger this problem
by Vladimir Popescu
Being an artist his entire life while also playing handball at a professional level, Vladimir has also developed a passion for all things computer-related. With an innate fascination… read more
Updated on
- Several users have reported that their Windows Update got stuck underway for no reason they know of.
- Windows 11 updates can sometimes get stuck due to reasons such as faulty system files, poor internet connection, lack of storage, etcetera.
- You can easily determine the cause and also fix this issue by running the SFC scan.
XINSTALL BY CLICKING THE DOWNLOAD
FILE
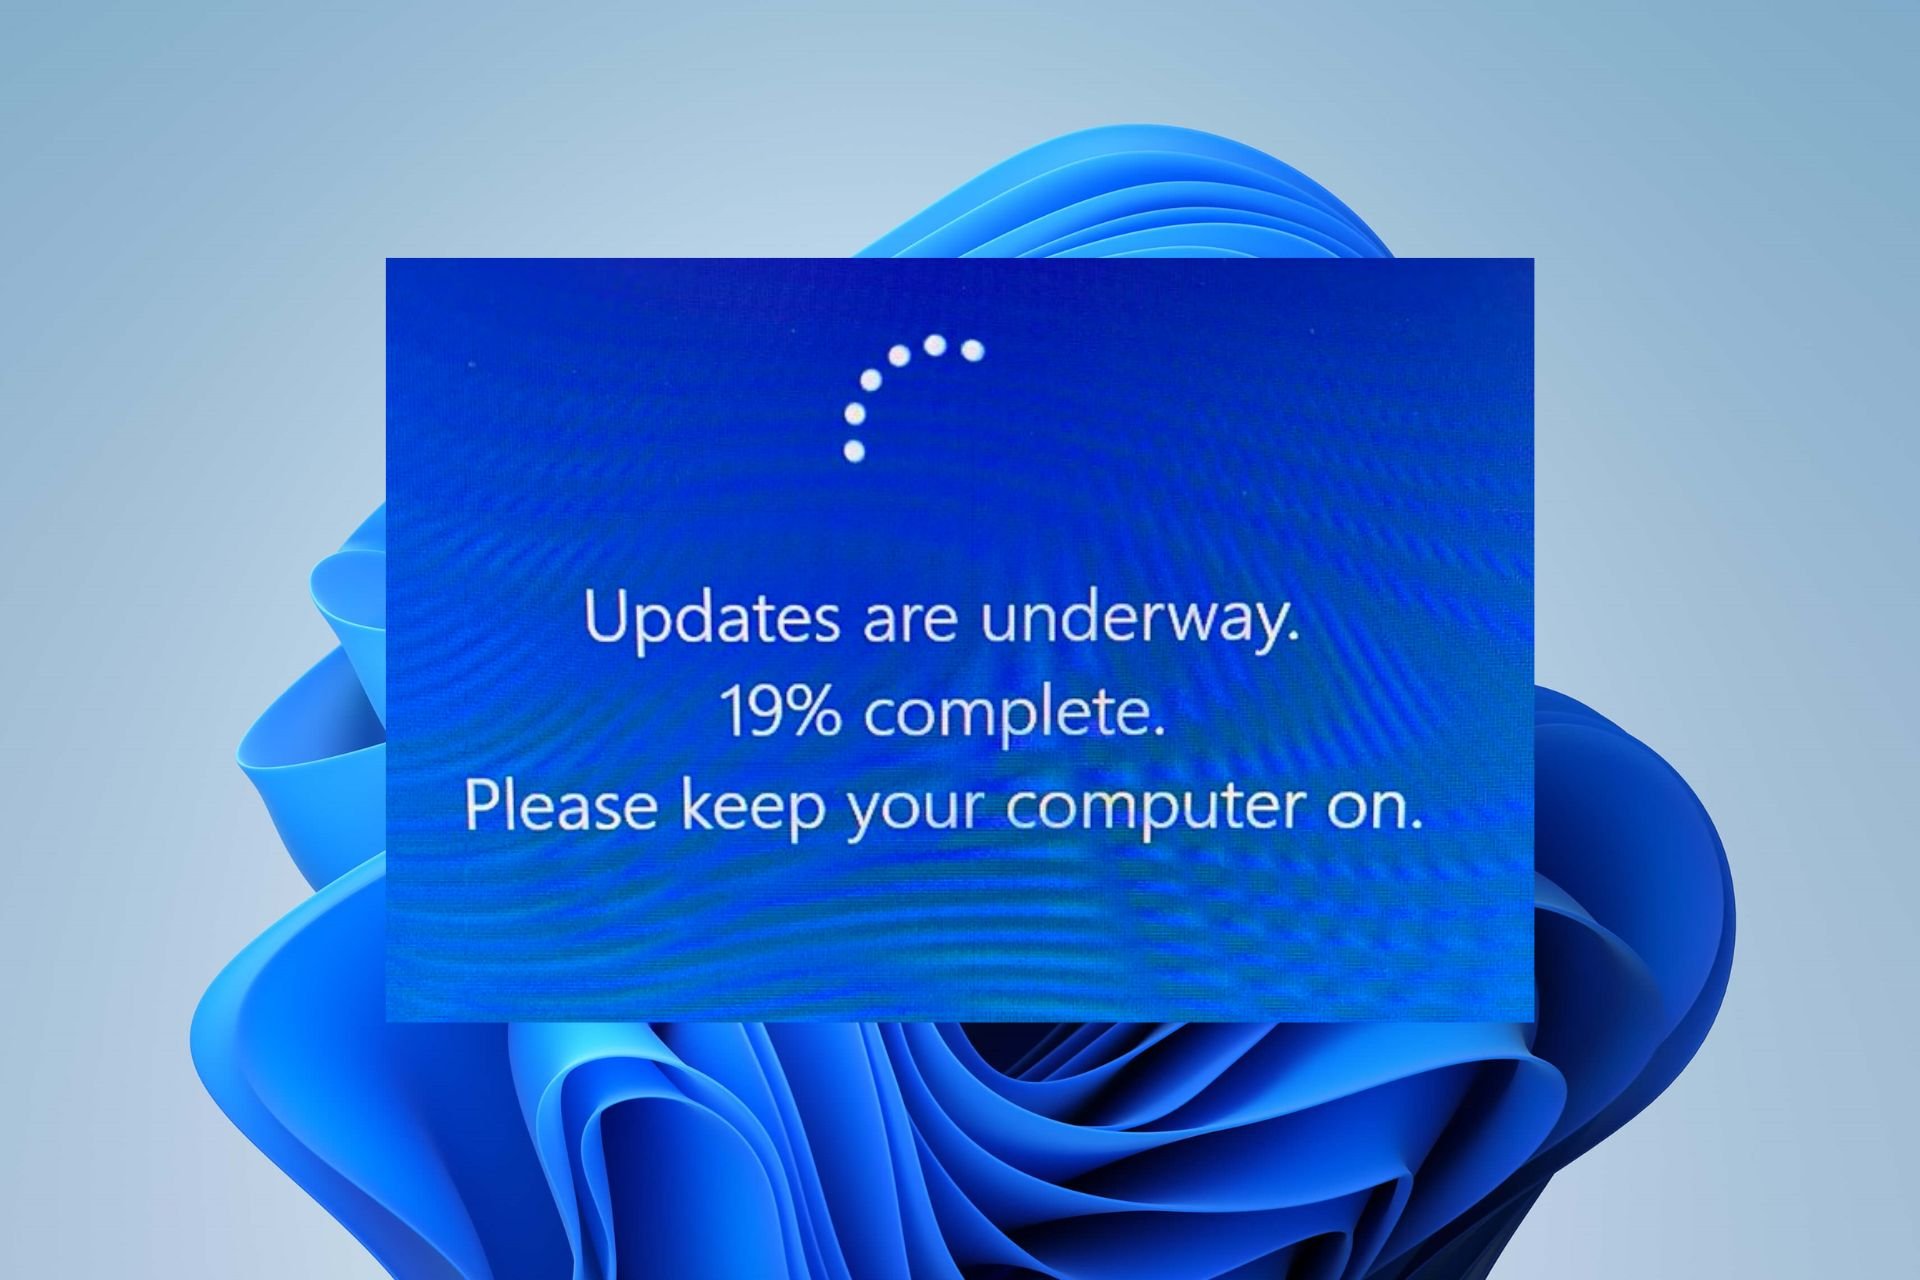
Some of our readers have reported that their Windows 11 updates get stuck. For some users, updates may get stuck at 100% 70%, or at a different value with the updates are underway Windows 11 error message.
If you have been experiencing this similar issue during Windows 11 update, you don’t have to worry as we have gathered some possible tweaks on how to bypass the persistent error in this article.
- What causes updates are underway on Windows 11?
- How can I bypass the error updates are underway?
- 1. Press Ctrl + Alt + Del
- 2. Restart Windows 11 in Safe Mode
- 3. Run the SFC Scan to Repair System Files
What causes updates are underway on Windows 11?
Before proceeding to explore the possible solutions for this error, it would interest you to take note of the reasons why you are experiencing this issue. What’s more, this may help you to prevent such from repeating itself next time:
- Poor internet connection – One of the major reasons behind this error is due to poor internet connection. When your device is not properly connected to a stable internet connection, it can get stuck while downloading and installing updates.
- Faulty system files – In some cases, this error can be triggered by broken system files. However, you can use Windows built-in tools to repair these corrupt files or a corrupted system file fixer.
- Interrupted power supply – An interrupted power supply can also cause the updates are underway error with Windows 11. When this happens, it can interfere with the build cycle and cause Windows 11 updates to stop at a certain level.
- Conflicting third-party programs – It may be due to incompatible or problematic applications if the Windows 11 upgrade is taking too long on your PC. Utilizing an uninstaller software should fix the problem.
- Insufficient storage space – The ISO for Windows 11 is almost 4.5GB in size, and Windows updates are generally pretty huge. Check to see if your system disk has adequate space to install Windows 11.
- Disabled services – For your PC to function properly, some system services are necessary. To make the process successful, you must enable these services.
Now that you know some of the potential reasons for the updates are underway on Windows 11 errors, you can explore the solutions provided below to help you fix the issue.
How we test, review and rate?
We have worked for the past 6 months on building a new review system on how we produce content. Using it, we have subsequently redone most of our articles to provide actual hands-on expertise on the guides we made.
For more details you can read how we test, review, and rate at WindowsReport.
How can I bypass the error updates are underway?
Before engaging in advanced troubleshooting steps, you should consider performing the following preliminary checks which can help you prevent the error next time:
- Make sure you are properly connected to the Internet.
- Ensure that you are connected to an uninterrupted power supply.
- Disconnect all unnecessary peripheral devices.
- Make sure there is enough storage space on your PC.
- Download the latest BIOS for Windows 11 from the manufacturer’s website.
- Ensure that you enable the system services that are necessary for downloading and installing updates.
Having confirmed the above checks and you still require further assistance, you can explore the dedicated fixes on how to bypass the updates are underway Windows 11 error.
1. Press Ctrl + Alt + Del
If the update appears to be stuck during the installation process in some cases, you can try pressing Ctrl + Alt + Del to see if the Windows login screen appears.
In such a case, log into Windows, as usual, to see if the update procedure can proceed without problems. However, if nothing happens after the operation, move to other troubleshooting tips.
2. Restart Windows 11 in Safe Mode
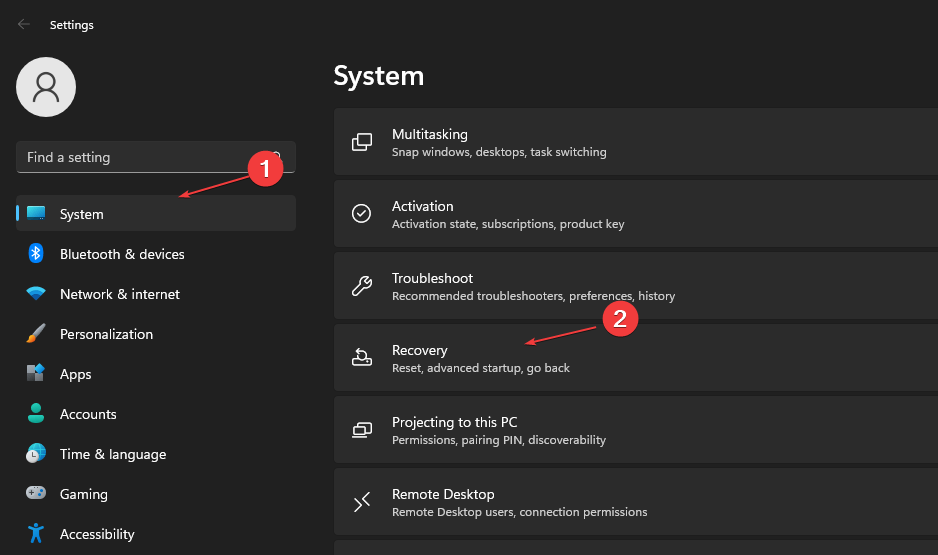
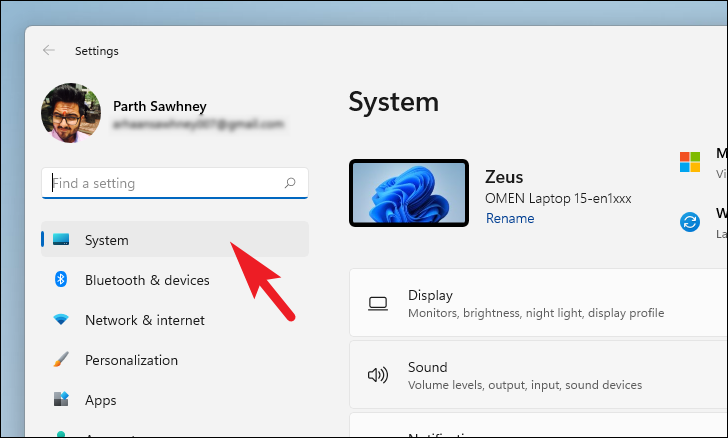
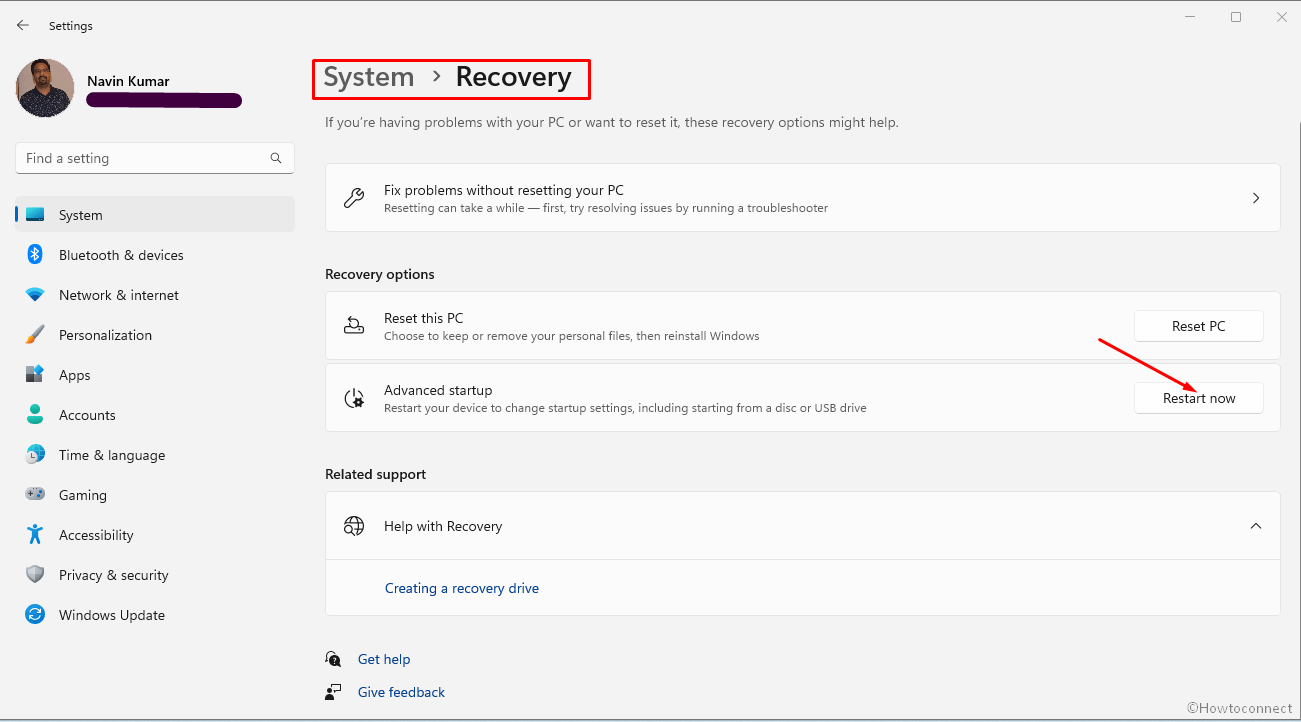
- Press the Windows + I keys and select Recovery.

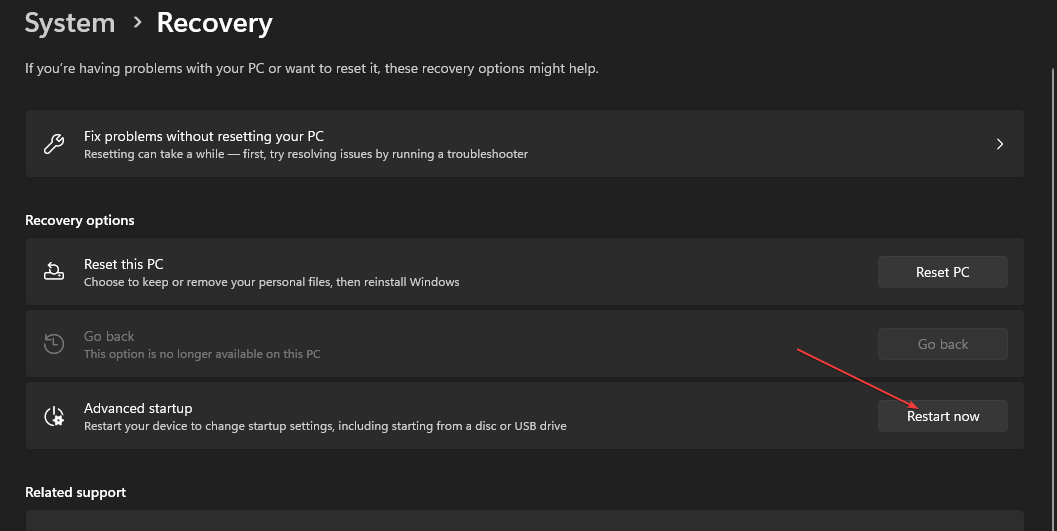
- Then, click the Restart now button before Advanced Startup.

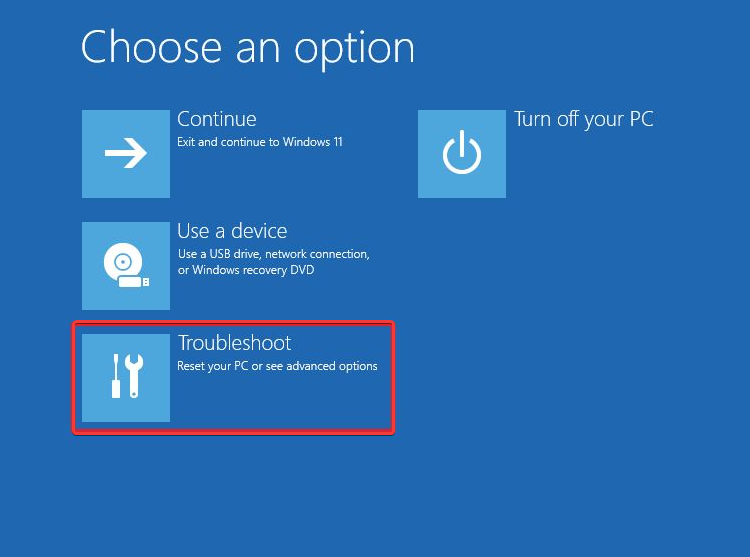
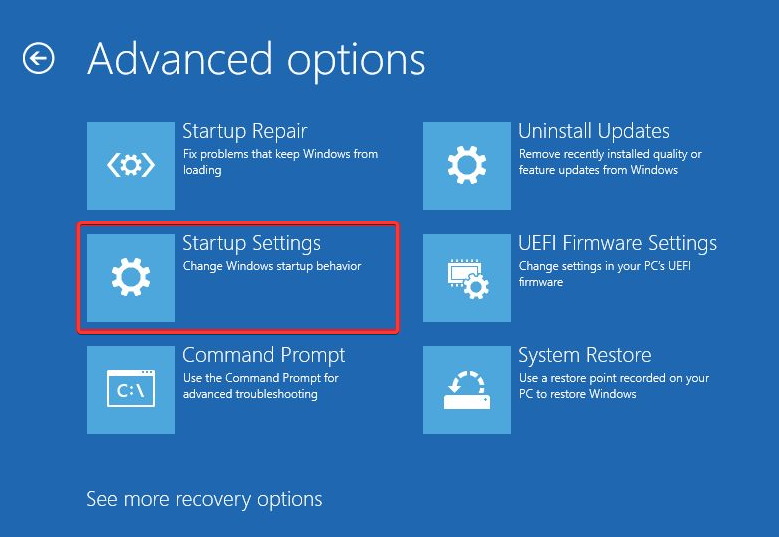
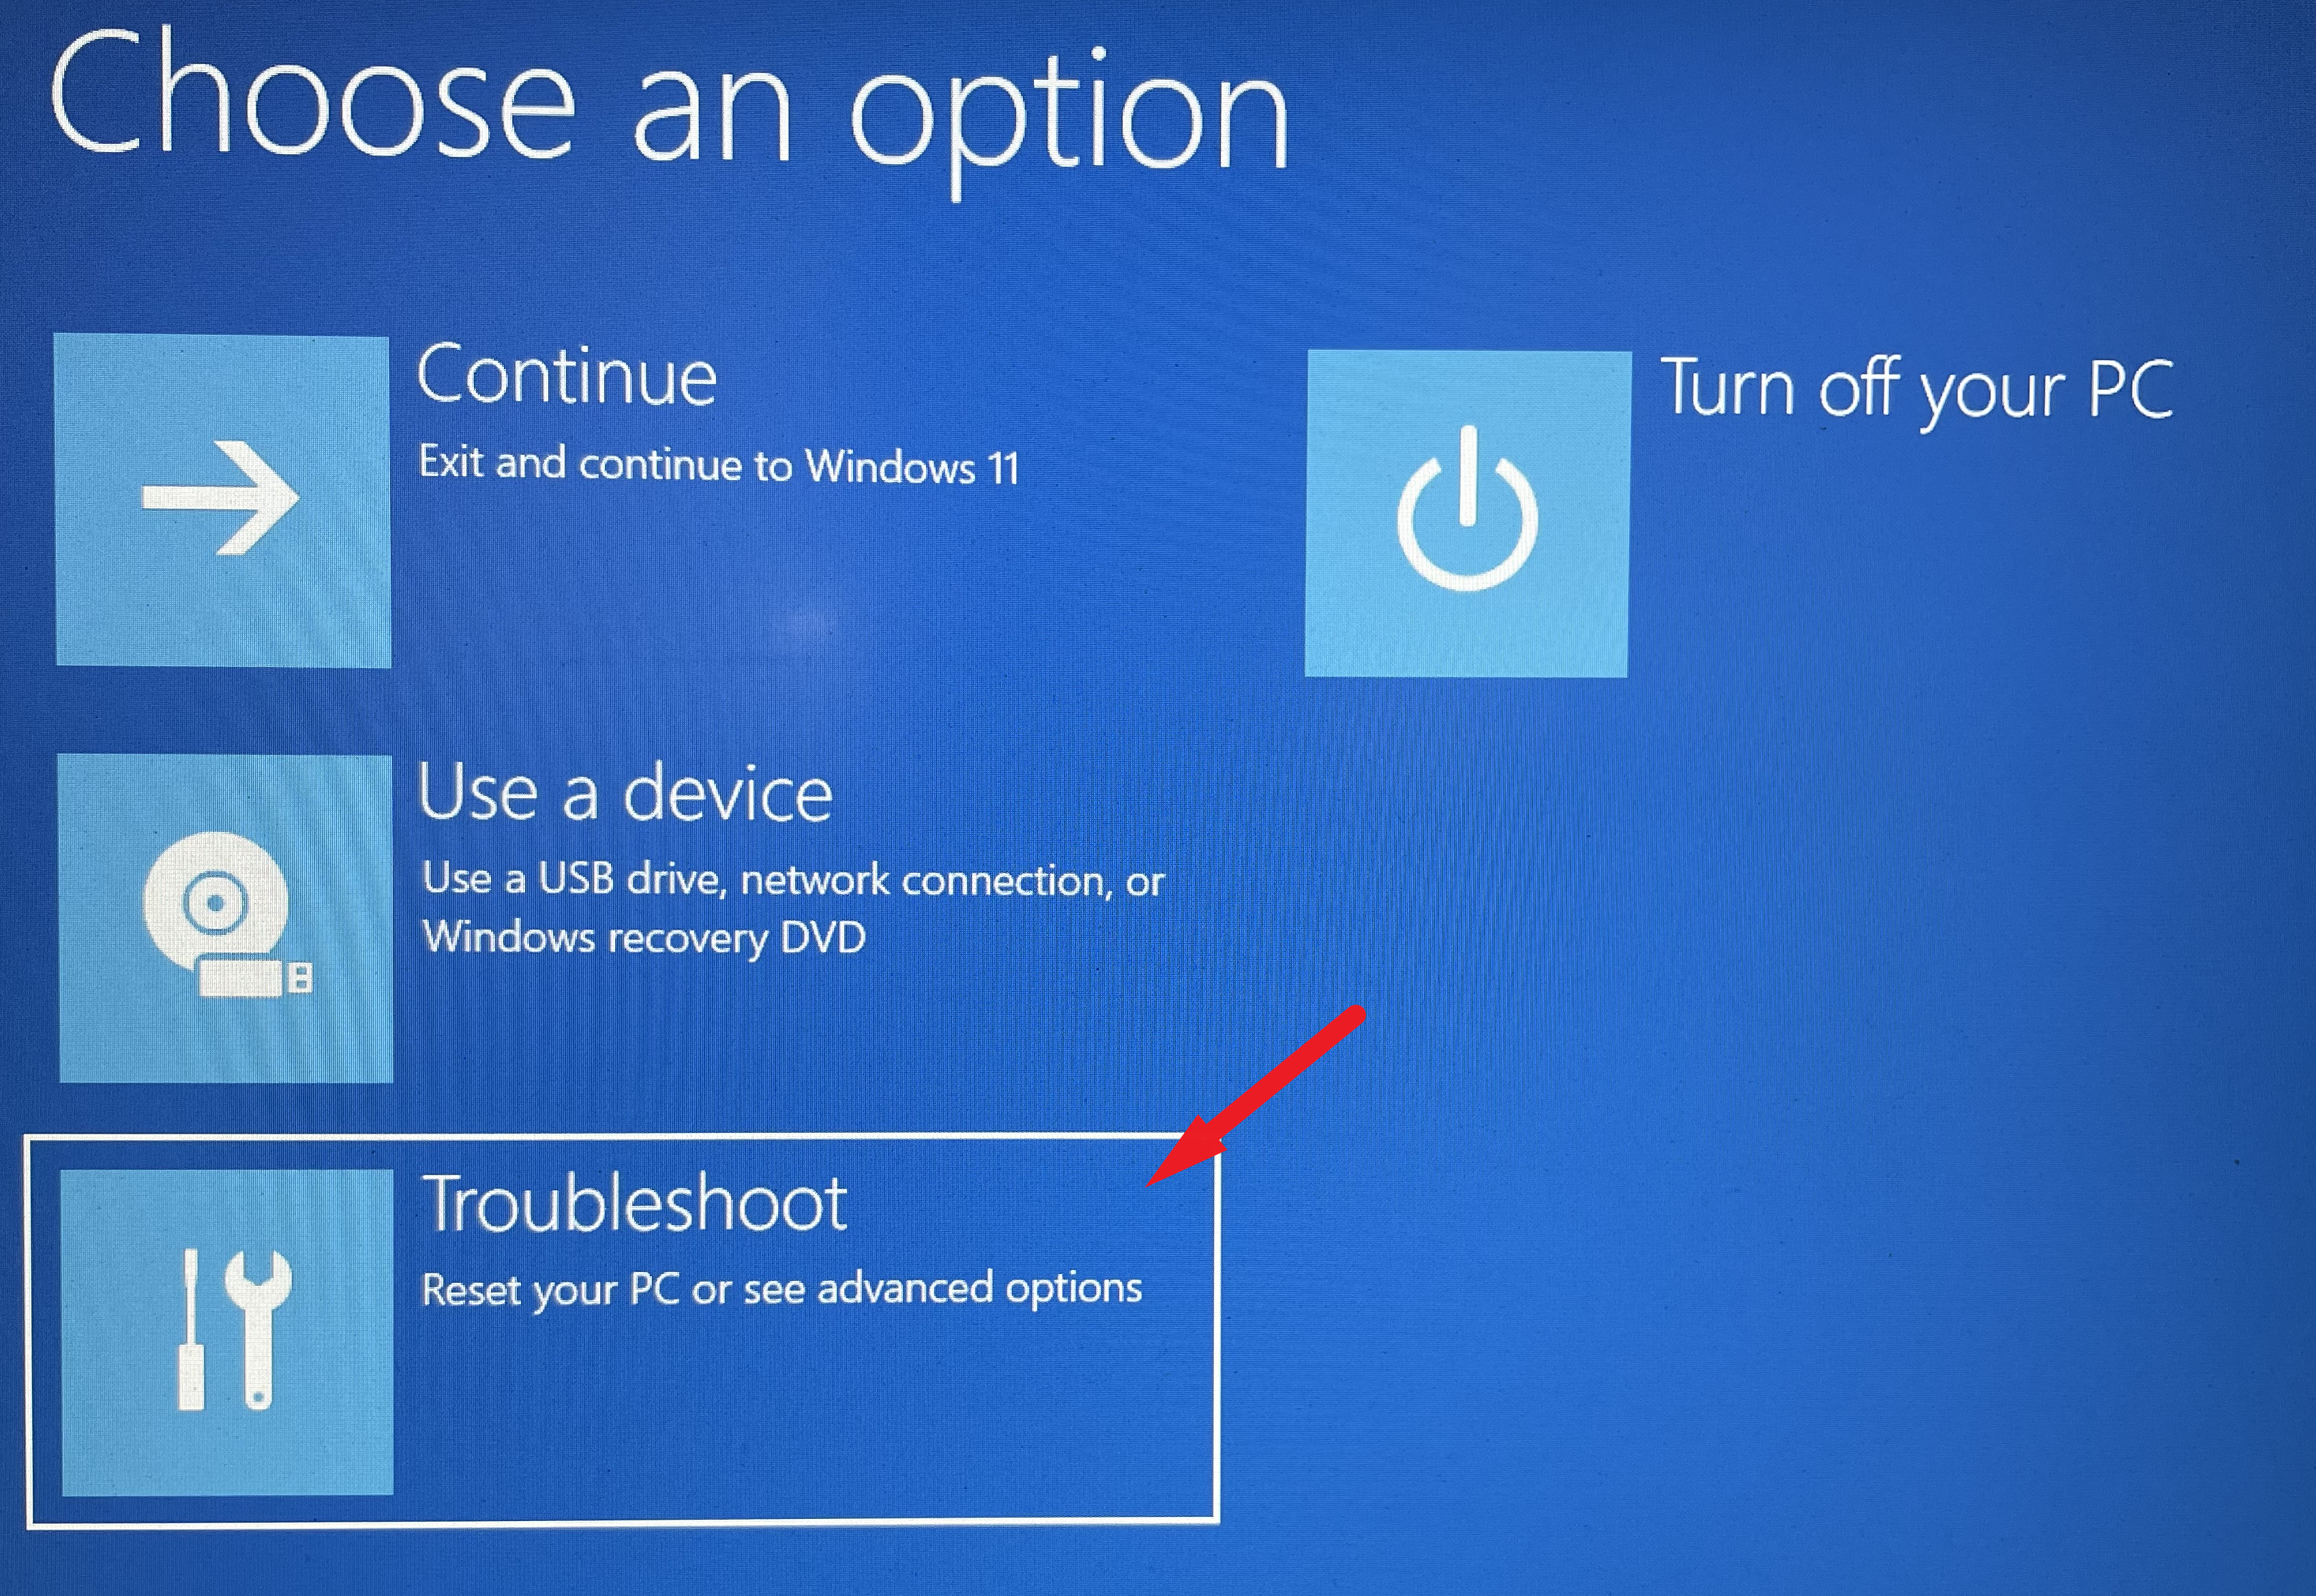
- Once the computer restarts, click on Troubleshoot and select Advanced Options.

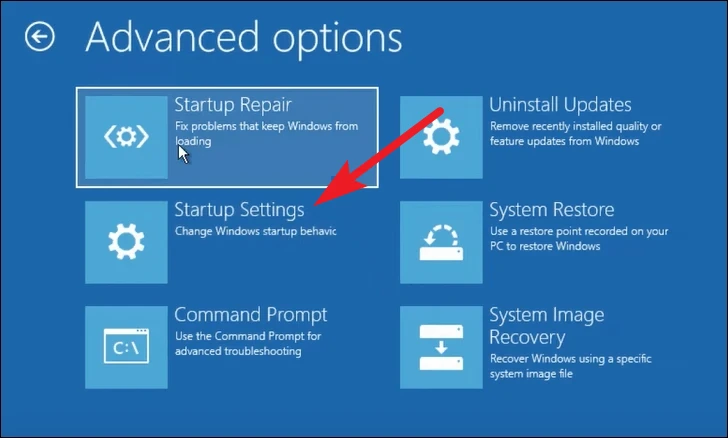
- Next, select Startup Settings.

- From there, click the Restart button.
- Finally, press F5 to Enable Safe Mode with Networking.
At other times, if you’re stuck on the Update screen, you can enter Windows Recovery Environment by using a bootable drive or force restarting the computer a few times. But if restarting Windows in Safe mode does not fix the issue, try the next fix.
- Microsoft Paint Cocreator: A complete guide on the new AI tool
- Windows 11 adds more apps to the share links feature
3. Run the SFC Scan to Repair System Files
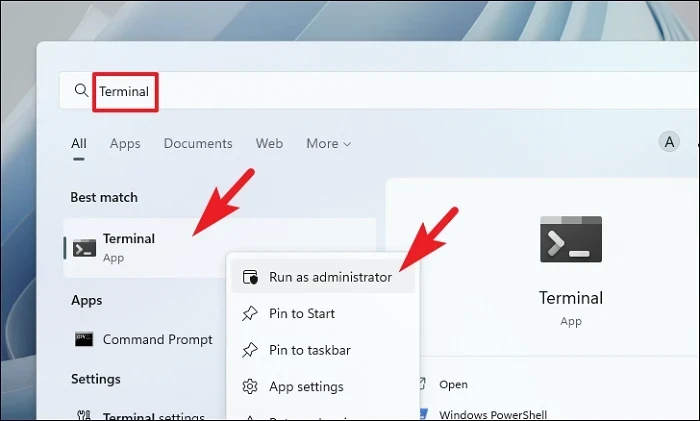
- Press the Windows key, type cmd in the Search box, and click Run as administrator.
- In the CMD window, type the following command in the text field and press Enter:
sfc /scannow
- The scanning process may take up to 15 minutes, so wait till the verification reaches 100%.
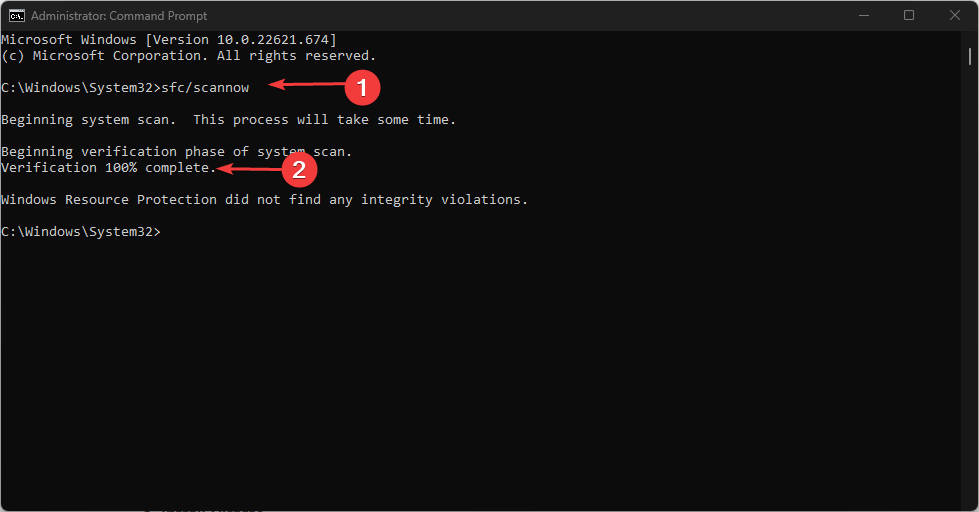
If some system files necessary for the update to Windows 11 are missing, the procedure may occasionally become stuck. However, an SFC scan ought to assist you in swiftly resolving this problem.
Alternatively, you can try a dedicated tool because it scans your PC for corrupt or missing files and automatically finds healthy replacements from its repository.
In the case where CMD is not working in Windows 11, here is an easy fix to apply.
And that’s it on how to bypass updates are underway Windows 11 error message.
If you have any questions or suggestions, do not hesitate to use the comments section below.
![]()
Making a Windows 11 update helps to keep your system safe by ensuring it has the latest security features. When updating your operating system, it’s possible to get stuck along the way. This is common and shouldn’t worry you much. This tutorial from EaseUS outlines how to fix the «Windows 11 updates are underway stuck» issue.
We will start by looking at the common issues leading to the problem. From there, you’ll learn about eight fixes you can apply to address the Windows update stuck issue. It doesn’t matter if your Windows 11 update got stuck at 0%, 66%, 87%, or 100% since we’ve got you covered. Read on.
The «Updates are underway» issue may appear due to several reasons. Some of the common causes of this problem include the following:
- Corrupted Windows update files: Your Windows 11 update process may get stuck if some of the system files you’re downloading get corrupted. File corruption mostly happens due to a poor internet connection.
- Software conflicts: Some applications running in the background may prevent Windows 11 from updating successfully.
- Unstable Internet connection: Performing a Windows update always needs stable internet since the files to download are large. A poor internet may slow down things.
- Driver faults: If your computer has outdated drivers, it will likely affect the Windows 11 update process.
- Interrupted power supply: If your computer’s power connection is interrupted during the update process, it may highly slow down things and even lead to the process getting stuck.
Ensure you address these issues to prevent the «Windows 11 updates are underway stuck». The next section will discuss ways you can fix this issue.
If you find the Windows update stuck on restarting, you can refer to the following article for help.

(Solved!) Windows Update Stuck on Restarting
Sometimes, your Windows update will get stuck on restarting. Do you know how to fix this error? This article will describe how to cope with it. Read more >>
How to Fix ‘Windows 11 Stuck on Updates Are Underway’
The fixes to the Windows 11 update stuck issue range from simple to more complex. It’s important to try out all the fixes to establish the one that fixes your problem. The fixes discussed in this section are well-described and easy to follow. Now, let’s talk about each fix in detail.
- Fix 1. Press Ctrl+Alt+Del
- Fix 2. Hard Reset PC
- Fix 3. Run SFC Scan
- Fix 4. Run Windows Update Troubleshooter
- Fix 5. Rename SoftwareDistribution Folder
- Fix 6. Run Automatic Startup Repair
- Fix 7. Perform a System Restore
- Fix 8. Reset This PC
Fix 1. Press Ctrl+Alt+Del
The Windows update process usually occurs in phases. Sometimes, the system may get stuck since the next phase requires you to log in to Windows again to complete the installation process. To confirm if that was the issue, press «Ctrl+Alt+Del» on your keyboard, then log in to your computer as normal. This will likely fix the problem; otherwise, you can proceed to the next fix.
Fix 2. Hard Reset PC
If the update process has stuck for a long time, the second fix is to hard reboot your device. This will always help to fix the frozen process. Follow the steps below to hard reset your Windows 11 PC if it got stuck on updates:
Step 1. Press and hold the power button until your Windows PC powers off (you’ll confirm this if the lights on this button go off).
Step 2. Give it about 30 seconds, then power it on again. From there, the update process will likely continue to completion.
Fix 3. Run SFC Scan
Running the SFC scan command helps to detect possible file errors and fix them. The command scans your entire OS to identify those files preventing your system from updating successfully. You’ll need to access Command Prompt to run an SFC scan.
Step 1. Go to the search bar and type cmd to open Command Prompt and run it as an administrator.
Step 2. When the Command Prompt window opens, type sfc /scannow and hit «Enter».
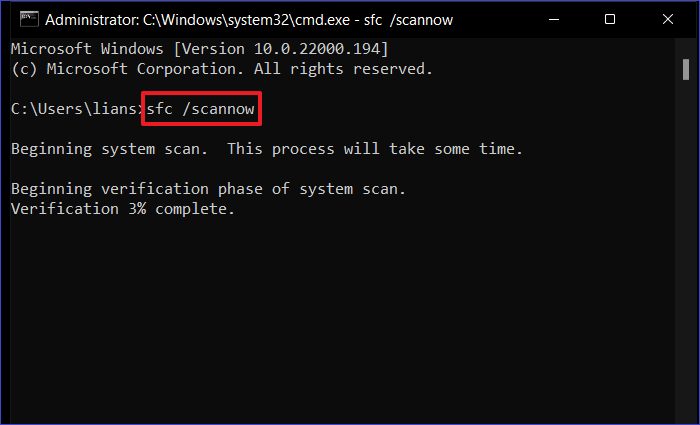
Step 3. The above command will initiate a system scan on your computer. Stay patient until the process finishes. If successful, you’ll have the Windows 11 update issue fixed.
Fix 4. Run Windows Update Troubleshooter
Running an update troubleshooter helps the system to identify possible errors preventing your Windows OS from updating. The troubleshooter will check the status of your update, repair update components, and check for pending install updates. You can run a Windows update troubleshooter using the following steps:
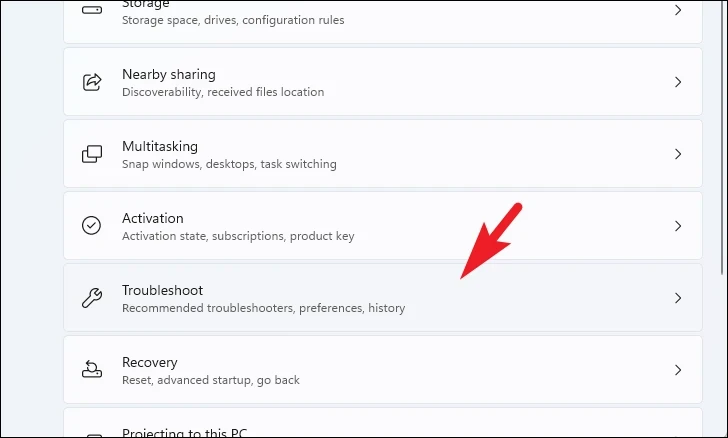
Step 1. Open «Settings» on your Windows 11 PC and click on «System».
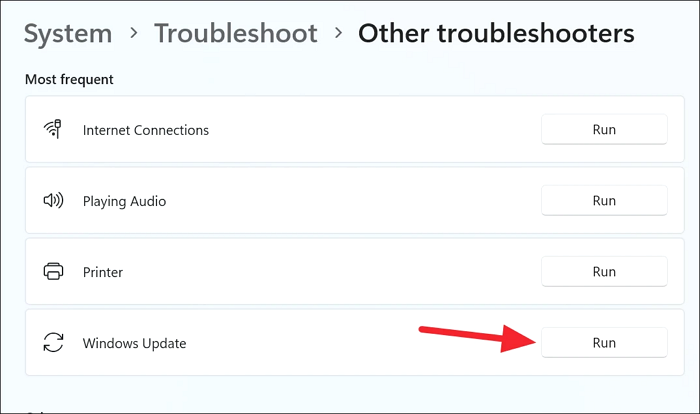
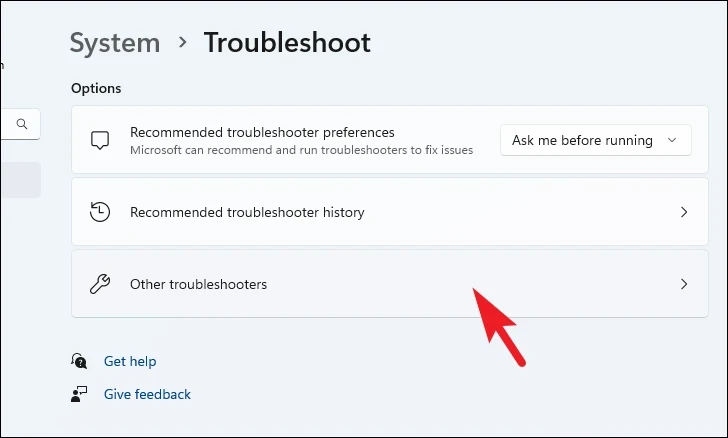
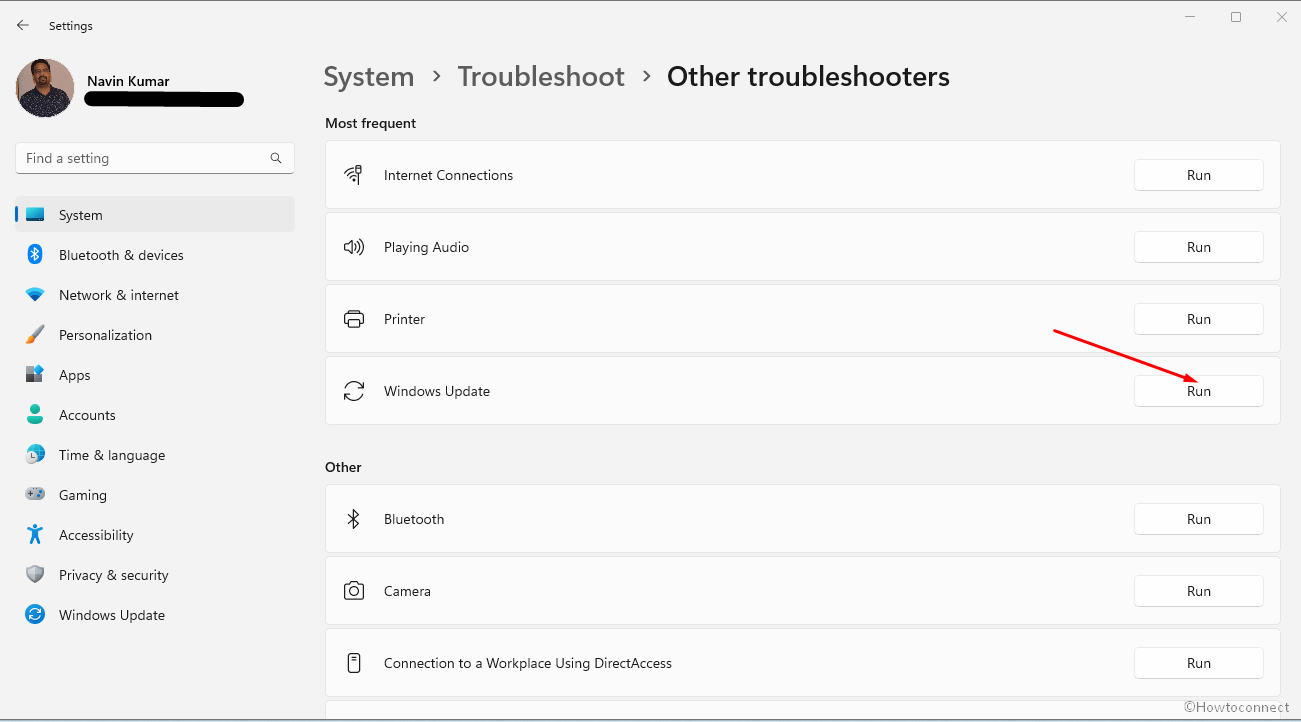
Step 2. Next, click on «Troubleshoot» and then «Other Troubleshooters».
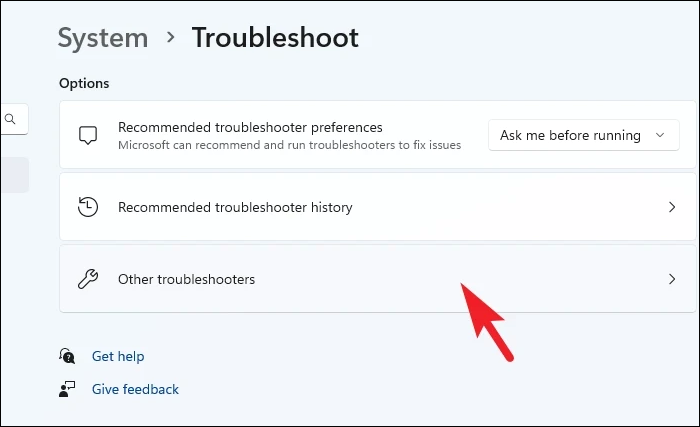
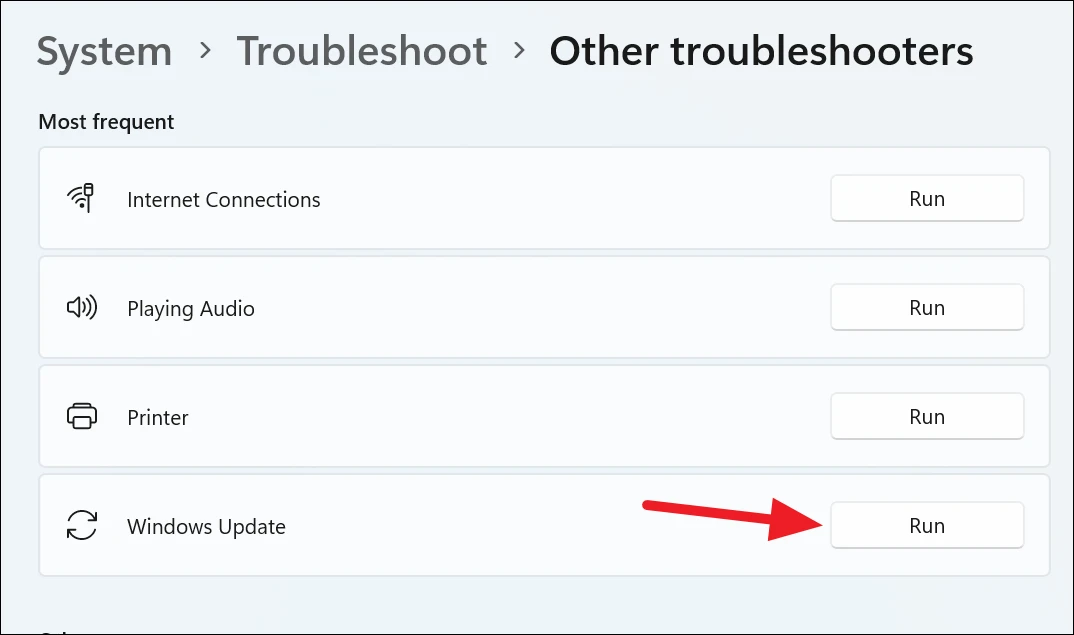
Step 3. Navigate to the «Windows Update» section and click the «Run» button. This allows the update troubleshooter to run on your computer and identify any possible issues affecting the update process. Once the troubleshooter finds the errors, it will guide you on how to fix them.
If the post did help you with the issue, don’t forget to share it with your friends and family!
Fix 5. Rename SoftwareDistribution Folder
The SoftwareDistribution folder temporarily stores your Windows update files. If this folder is broken or has encountered some issues, it may affect the update process. The best fix is to rename it. Follow the steps below to do that:
Step 1. Open Command Prompt as an administrator, then type the following string of commands. Ensure you press the «Enter» key after typing each command:
- net stop wuauserv
- net stop cryptSvc
- net stop bits
- net stop msiserver
Step 2. Next, type the following command and hit «Enter» to rename the SoftwareDistribution folder:
Ren C:\Windows\SoftwareDistribution SoftwareDistribution.old
Step 3. You can restart your Windows updates once the above command has run successfully. You can achieve that by typing the following string of commands and hitting «Enter» after each:
- net start wuauserv
- net start cryptSvc
- net start bits
- net start msiserver
You can now confirm if the update process has resumed.
Fix 6. Run Automatic Startup Repair
If your PC has failed to boot normally after an unsuccessful update, you can run a startup repair to fix things. Below are the steps to run a startup repair to fix the «Windows 11 updates are underway stuck» issue.
Step 1. Boot your computer to WinRE using a bootable media.
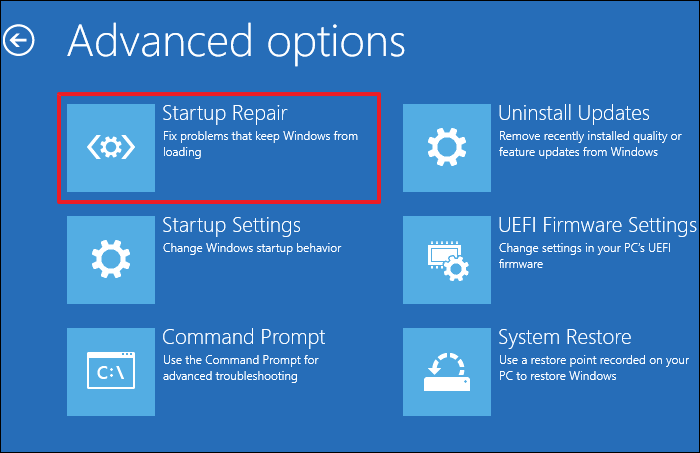
Step 2. Next, click on «Troubleshoot» and go to «Advanced options».
Step 3. Next, click on the «Startup Repair» option. The system will run this troubleshooter and fix the issues preventing Windows from loading.
Fix 7. Perform a System Restore
Performing a system restore helps to revert your computer to its working state before the Windows update stuck issue. You can perform a system restore if you had created a system restore point before you started Windows 11 updates. Below is how you can perform a system restore:
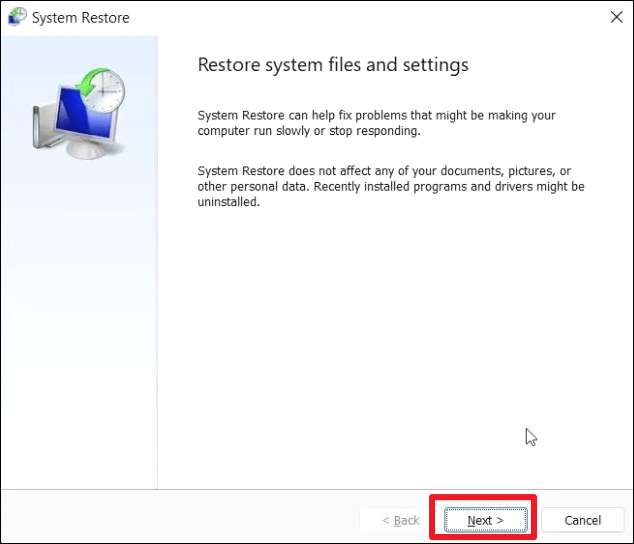
Step 1. Launch Command Prompt as an admin. Type rstrui.exe in the command line and hit «Enter». This allows you to go to the System Restore window.
Step 2. Click on the «Next» button and select a restore point. Next, follow the onscreen instructions to start restoring your PC.
Step 3. Once your computer restarts, try to install the pending Windows 11 updates. This will possibly fix the Windows update stuck issue.
Fix 8. Reset This PC
If the solutions mentioned above have not fixed the «stuck on the updates» issue, another viable option is to reset the device. Resetting will clear all the settings, and then reinstall Windows on your computer. This fix is the surest way to fix any issues preventing your operating system from working normally.
You’ll have the option to keep or delete all personal files. Follow the steps below to reset your PC and fix the «Windows 11 updates are underway stuck» issue:
Step 1. Go to the Windows Recovery Environment (WinRE) and click «Troubleshoot».
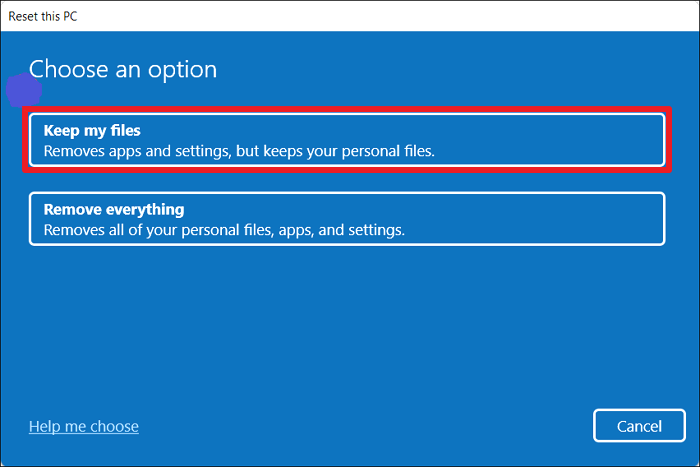
Step 2. Next, click on the «Reset this PC» option. In the «Choose an option screen», you’ll have the option to «Keep my files» or «Remove everything». Select your preferred option to move to the next step.
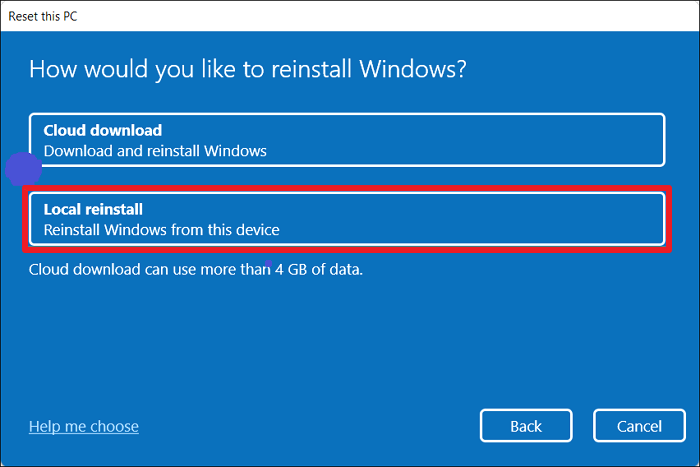
Step 3. Depending on where your Windows ISO file gets located, you can select to either perform a «Cloud download» or «Local reinstall». Next, follow the onscreen instructions to complete resetting your PC. Since this process could take some time, you must stay patient.
Step 4. Once your PC has finished resetting, you can log in afresh. Your device will now work normally. You can try updating Windows 11 again to check if the errors have disappeared.
Bonus Tip: Backup Your Computer Before Updating Windows 11
When updating Windows 11, it’s possible to encounter errors that may affect the safety of your data. As a precaution, we advise that you back up your data first. One of the best software you can use to securely back up your Windows PC data is EaseUS Todo Backup, a name that has to be mentioned in the backup and recovery field.
With this tool, you can access your data even when Windows fails since it has an efficient backup and restore feature. In just a few clicks, EaseUS Todo Backup allows you to back up your files to the cloud, the network, NAS, an external hard drive, local drives, etc.
The main features of EaseUS Todo Backup:
- Bootable backup and recovery.
- Creating system image on USB.
- Multi-path backup storage.
- Simple backup management.
- Enhanced backup efficiency.
- Creating schedule backup.
After you download and install EaseUS Todo Backup on your computer, follow the guide below to back up your PC.
Step 1. Launch EaseUS Todo Backup on your computer, and click Create Backup on the home screen and then hit the big question mark to select backup contents.

Step 2. To back up your Windows operating system, click «OS» to begin the backup task.

Step 3. Your Windows operating system information and all system related files and partitions will be automatically selected so you don’t need to do any manual selection at this step. Next, you’ll need to choose a location to save the system image backup by clicking the illustrated area.

Step 4. The backup location can be another local drive on your computer, an external hard drive, network, cloud or NAS. Generally, we recommend you use an external physical drive or cloud to preserve the system backup files.

Step 5. Customiztion settings like enabling an automatic backup schedule in daily, weekly, monthly, or upon an event, and making a differential and incremental backup are available in the Options button if you’re interested. Click «Backup Now«, and the Windows system backup process will begin. The completed backup task will display on the left side in a card style.

Final Thoughts
You may encounter the «Windows 11 updates are underway stuck» issue because of issues like unstable internet, faulty drivers, software conflicts, power interruption, or corrupted update files. To address these issues and fix the update error, ensure you apply the fixes discussed in this article.
Also, remember to save your data using EaseUS Todo Backup before updating Windows 11. This data backup and restore software guarantees the safety and availability of your data. To start using EaseUS Todo Backup today, ensure you download and install the software to your PC.
FAQs on Windows 11 Updates Are Underway Stuck
Below are common questions about the «Windows 11 updates are underway stuck» problem.
1. Why Is Windows Installation Taking So Long?
Although a Windows installation takes time, it shouldn’t last too long. When that happens, it could result from underlying issues like slow internet, conflicting programs, driver errors, or corrupted update files. Ensure you check on these issues before resuming the Windows installation process.
2. What to Do If Windows Update Is Stuck?
If your Windows update gets stuck, you can try out the following fixes:
- Hard reset PC.
- Run Windows update troubleshooter.
- Run automatic startup repair.
- Run SFC scan.
- Reset PC.
Go to the previous sections of this article to get detailed steps of how these methods work. Ensure you back up your data using EaseUS Todo Backup before you try resetting your PC.
3. Why Is the Windows 11 Update Stuck on 100 Downloading?
Windows 11 may get stuck on 100% downloading if your internet connection is unstable. This may also happen because of power interruption. Ensure you check on these issues for the update process to complete.
Windows 11 is leaps ahead in terms of providing usability and productivity through the continuous addition of features. That being said, it is still not completely immune to errors and issues.
A Windows 11 PC stuck on the ‘Updates are underway’ screen is one such issue. Many users have been reporting that their PC shows the updating screen before booting up and is stuck there in a fault loop.
An issue like this can be really frustrating and annoying as you cannot log in to troubleshoot the issue. Thankfully, you can still Safe Boot your PC and try to troubleshoot the problem.
Probable Causes of PC Getting Stuck on the ‘Updates are Underway’ Screen
Since the issue can cause a major inconvenience, it is worth knowing the culprit behind the error so you can probably reduce the chances of facing it again.
- Faulty System Files
- Poor Internet Connectivity
- Interrupted Power Supply
- Third-party software/service interference
- Driver faults
To resolve the issue, we will be showcasing all the methods that will eliminate one aforementioned root cause at a time.
Boot into Safe Mode on your PC
Safe Mode only loads essential services and software on your PC. Once you are successfully logged in to Safe Mode, you can perform the troubleshooting steps.
First, power on your system, and at the first signal of boot up, press and hold the power button again for 10 seconds to force shut down the system. You can also pull the plug if you are working on a Desktop PC. Repeat the aforementioned process three times.
On the fourth time, let your PC boot up without any interruption. This shall load the Windows Recovery Environment.
Once the Windows Recovery Environment has been loaded, you will be able to see a ‘Choose an option’ screen. Click on ‘Troubleshoot’ to proceed.
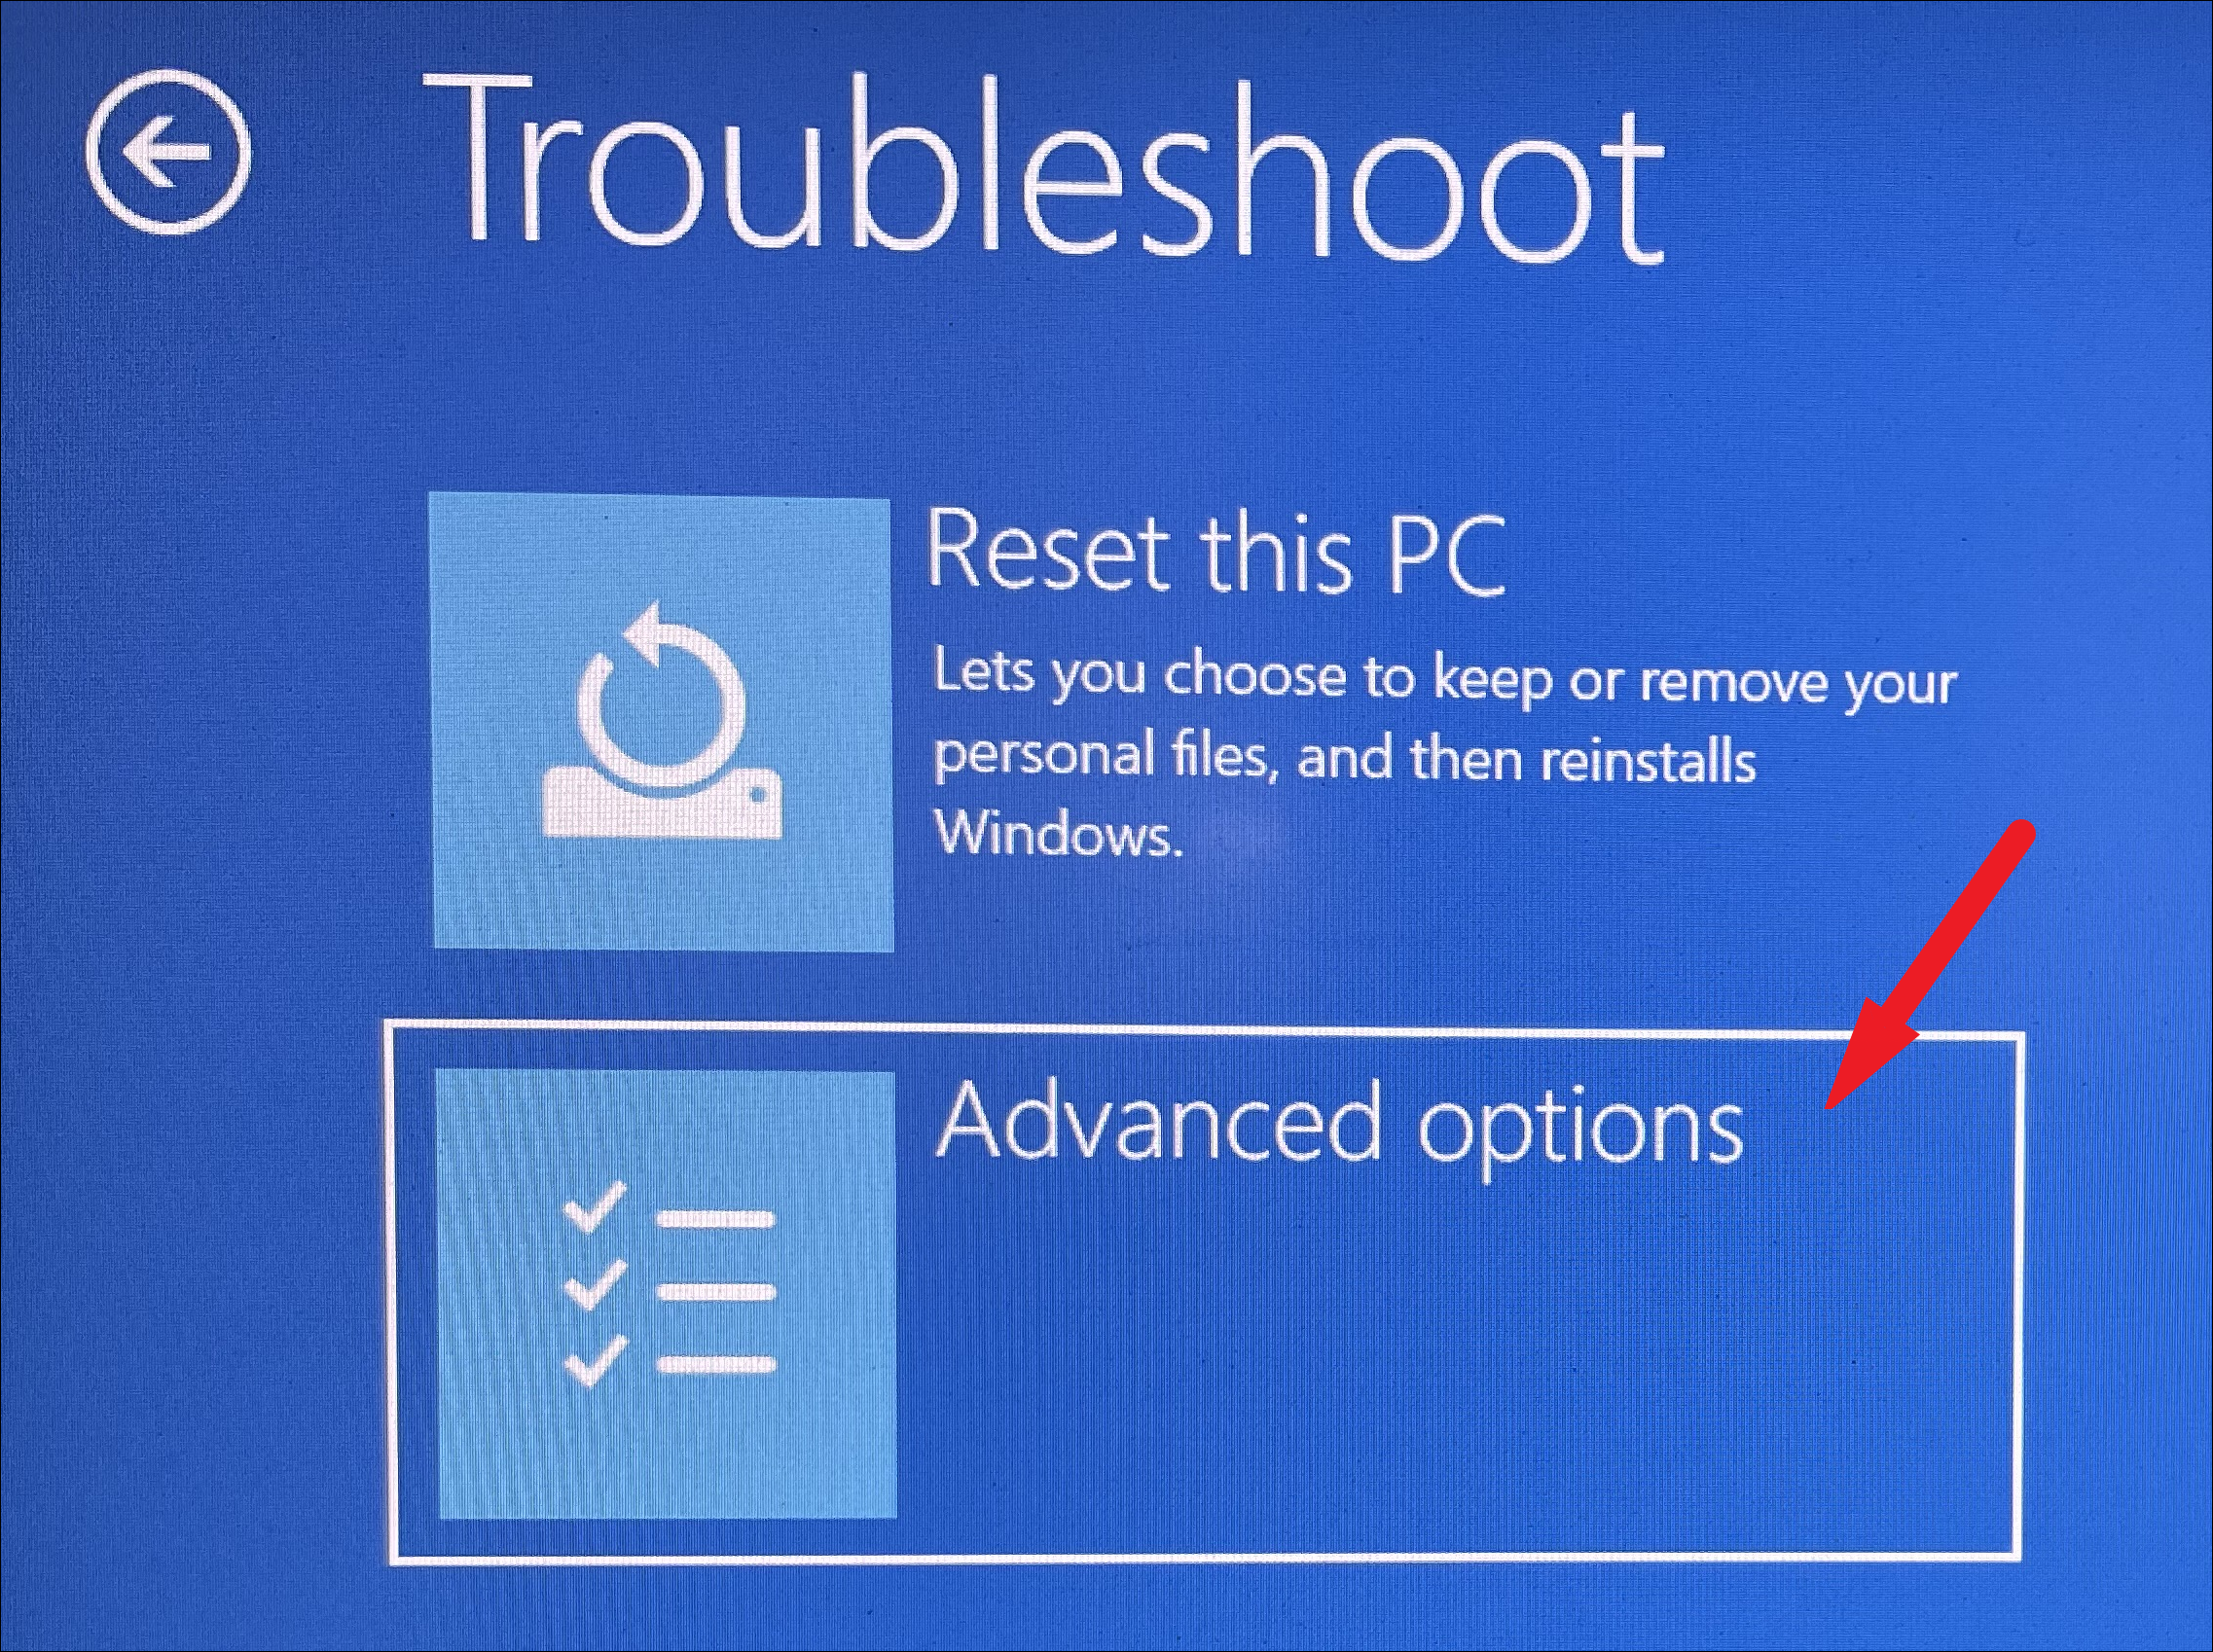
On the next screen, click the ‘Advanced options’ tile to proceed.
Now, locate and click on the ‘Startup settings’ tile to continue.
Afterward, click the ‘Restart’ button in the bottom right corner to continue. This will restart your PC immediately.
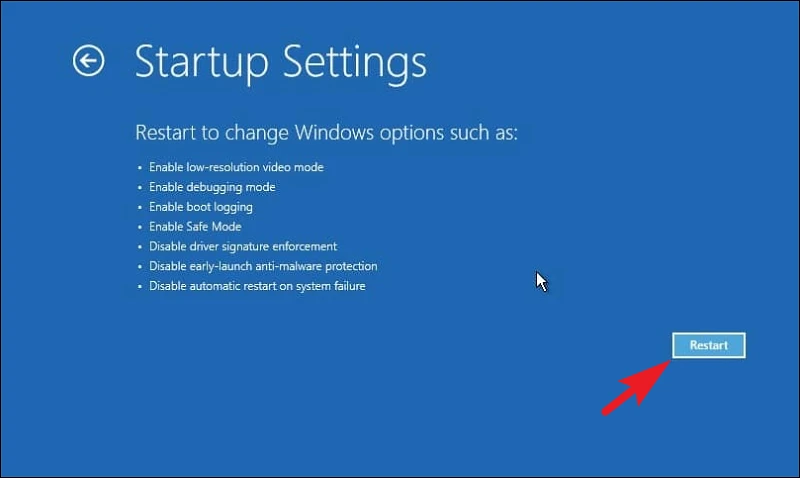
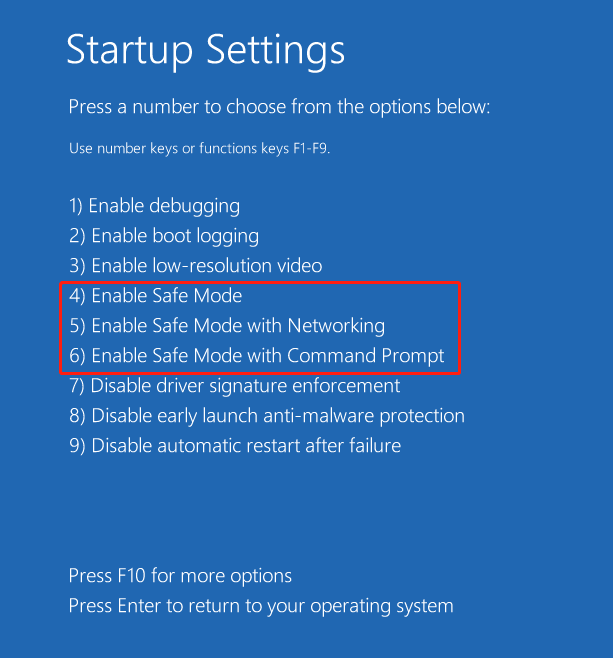
Once restarted, you will see a numbered list of the modes available. Make sure you press the number for the ‘Safe Mode’/’Safe Mode with Networking’ option. The ‘Safe Mode with Networking’ option allows you to connect to the Internet. Once your PC starts up in Safe Mode, you can try the fixes to get things back on track again.
Note: To access the Internet in ‘Safe Mode with Networking’ mode, you might need to connect your PC using a LAN cable, as the system might disable Wi-Fi.
1. Restart Your PC
Many times a simple service deadlock or third-party interference could cause the issue. And though a restart may seem like a very elementary fix, it can work wonders and resolve issues in a swish.
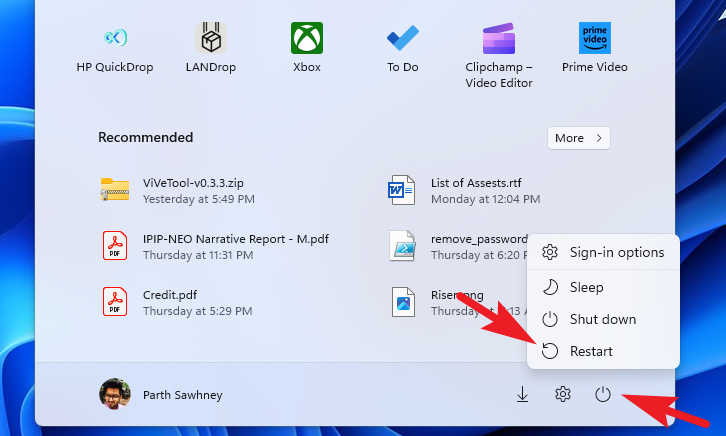
To do so, head to the Start Menu and click the ‘Power’ icon. Then, select the ‘Restart’ option.
2. Uninstall Recently Installed Apps
If you have started experiencing the issue after installing an application on your PC, there is a high probability the app is the culprit behind the problem on your system.
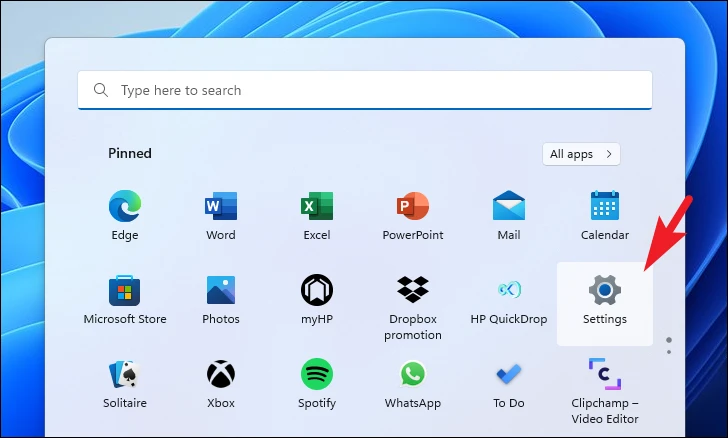
To uninstall the app, head to the Settings app from the Start Menu.

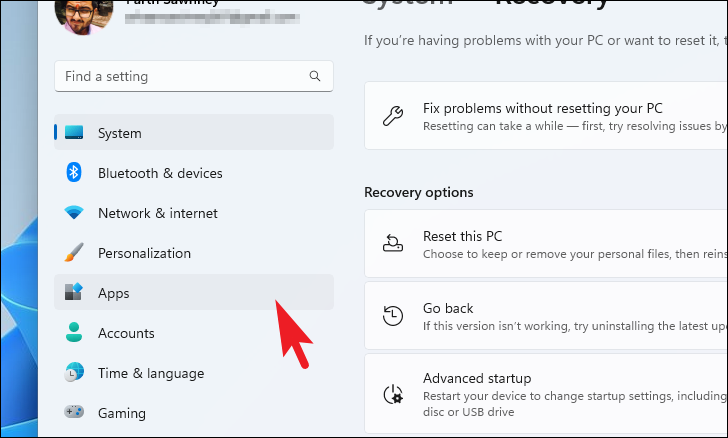
After that, locate and click on the ‘Apps’ tab present on the left sidebar of the Settings window to proceed.
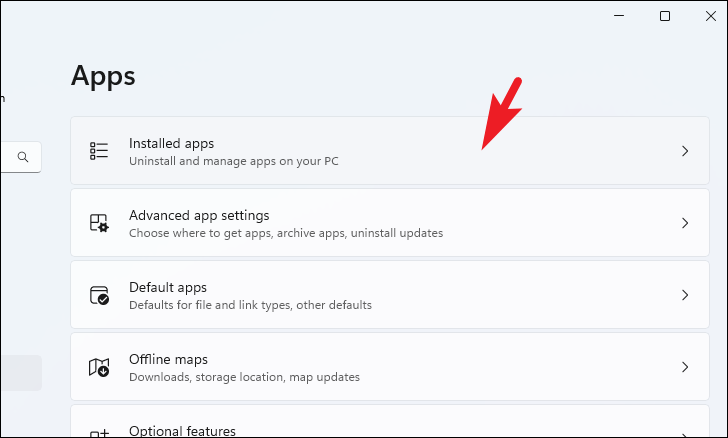
Next, from the right section of the window, locate and click on the ‘Installed apps’ tile to continue.
Now you can either search or scroll down manually to search for the app.
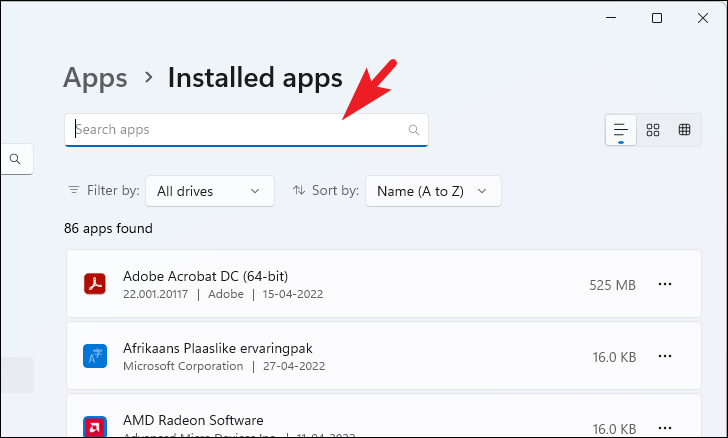
Once you have located the app, click the ‘ellipsis’ icon on its tile and select the ‘Uninstall’ button.
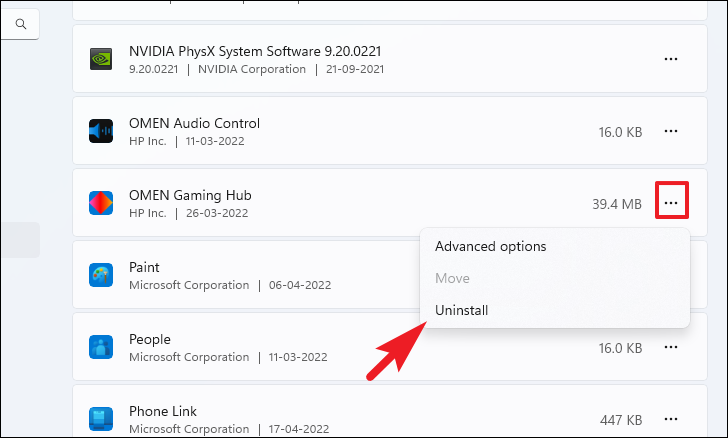
Now, again click the ‘Uninstall’ button to remove the app from your PC. Once done, restart your PC to check if the issue has been resolved.
3. Run the Update Troubleshooter
If you are sure your PC can connect to the Internet but still cannot install an update, running the troubleshooter is the most elementary and basic step towards resolving the issue.
First, head to the Start Menu and click on the ‘Settings’ tile to proceed.
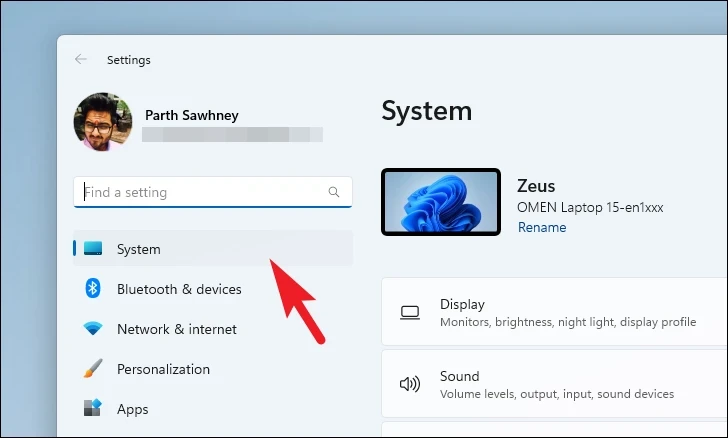
After that, make sure you are on the ‘System’ tab from the sidebar on the left.
Then, click on the ‘Troubleshoot’ tile from the right section of the window.
Now, click on the ‘Other Troubleshooters’ tile to continue.
Finally, click the option for ‘Run’ on the right of the ‘Windows Update’ tile.
Let the troubleshooter run, and if it finds an issue, it will guide you through the steps to fix it. After performing those steps, try updating your system again. If the troubleshooter couldn’t find anything, move on to the other fixes in this list.
4. Empty the Software Distribution Folder
Many times, a damaged or corrupted Windows update copy can stall your device from getting updated. Thus, wiping clean the update folder might do the trick for you.
First, double-click on the ‘This PC’ icon from the Desktop. Alternatively, you can also press Windows+E keyboard shortcut to open it.

Then, type or copy+paste the below-mentioned address in the address bar of the window and press Enter to navigate to the directory.
C:\Windows\SoftwareDistribution\Download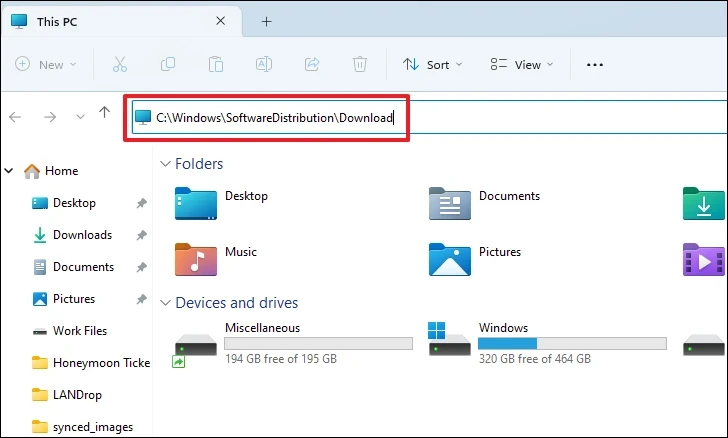
After that press Ctrl+A to select all files and press the Shift+Delete keys to permanently delete all files from the directory. You will need admin privileges to delete the contents of this folder.
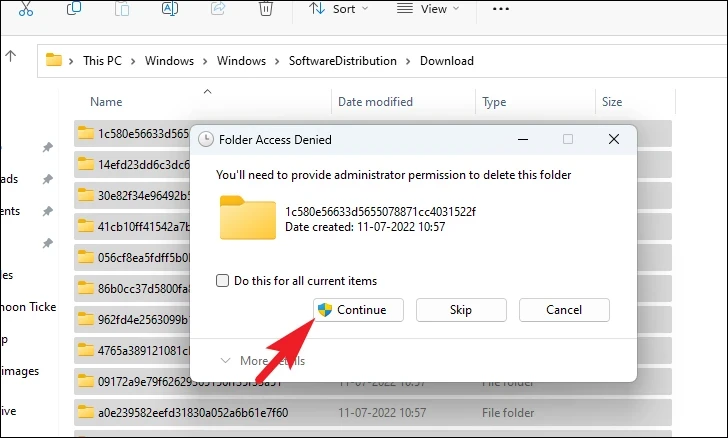
Once deleted, restart your PC and try to update your PC once more to see if it rectified the issue.
5 Restart Windows Update Services
In case just clearing the Windows update folder does not resolve the issue for you, try restarting Windows services along with clearing out the logs.
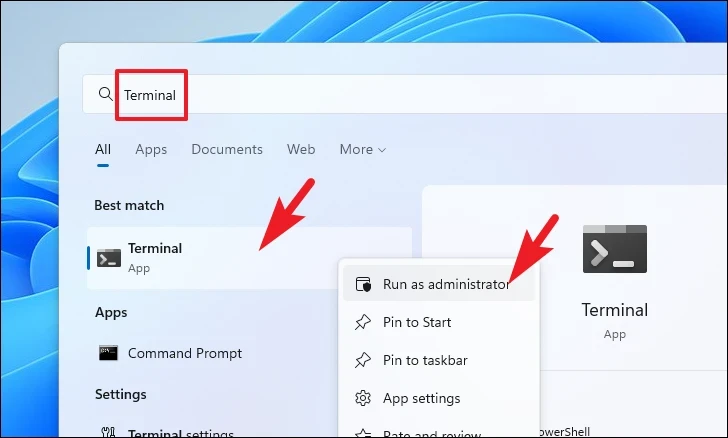
First, head to the Start Menu and type Terminal in the menu to perform a search for it. Then, from the search results, right-click on the ‘Terminal’ tile and click the ‘Run as administrator’ option to proceed.
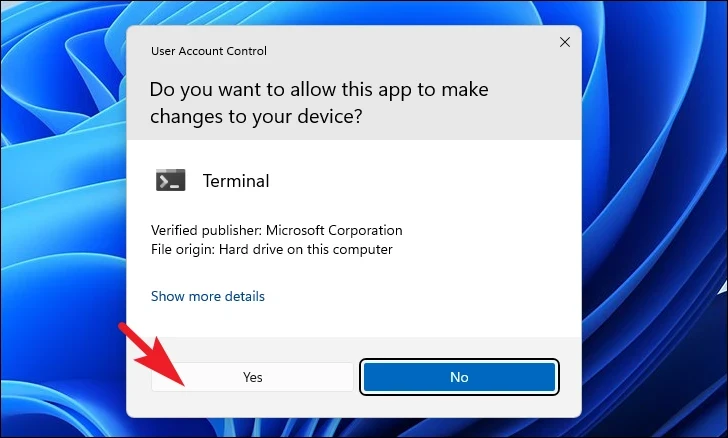
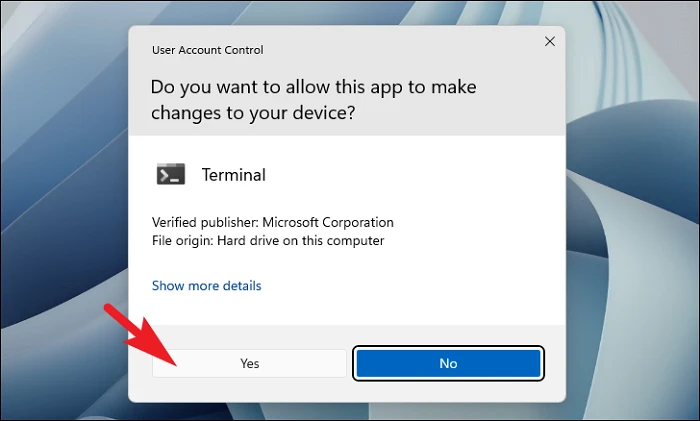
A UAC (User Account Control) window will appear on your screen; if you are not logged in with an admin account, enter the credentials for one. Otherwise, click on the ‘Yes’ button to proceed.
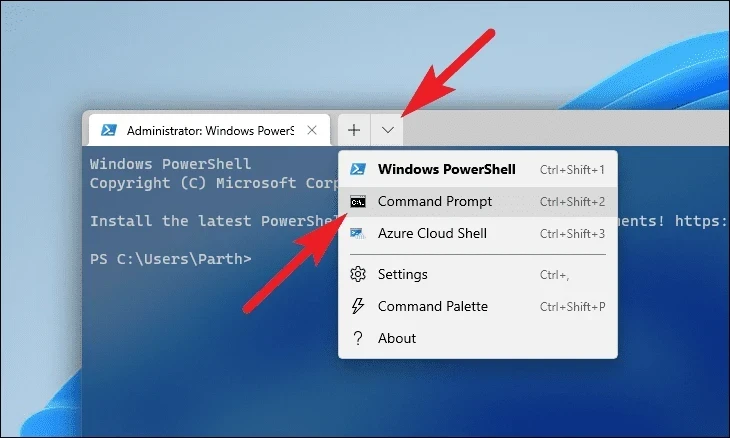
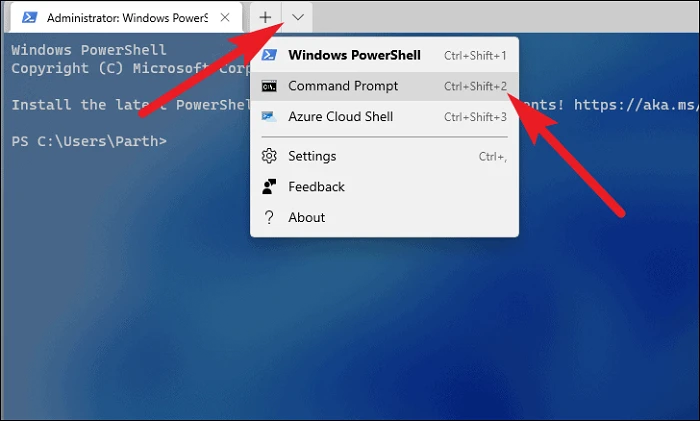
Next, click the ‘Chevron’ icon (downward arrow) and then select the ‘Command Prompt’ icon to proceed. This will open the Command Prompt in a separate tab.
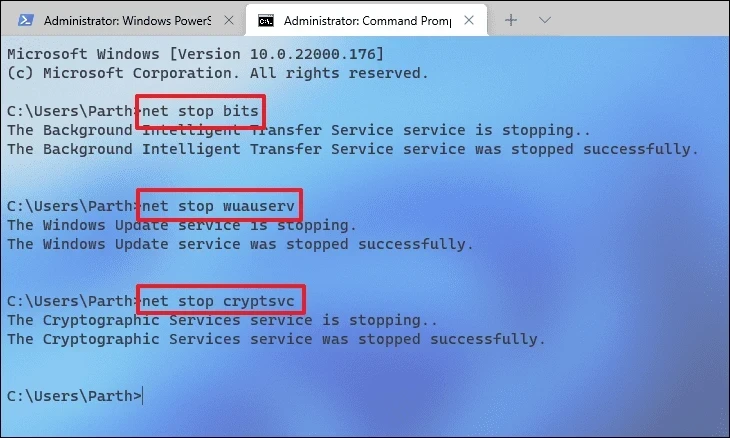
Now, type or copy+paste the below-mentioned commands to stop the ongoing update services. Make sure you press Enter after each command to execute them individually.
net stop bits
net stop wuaserv
net stop cryptsvc
After that, press Windows+R keys together on your keyboard to open the Run command utility. Then, type or copy+paste the below-mentioned address path.
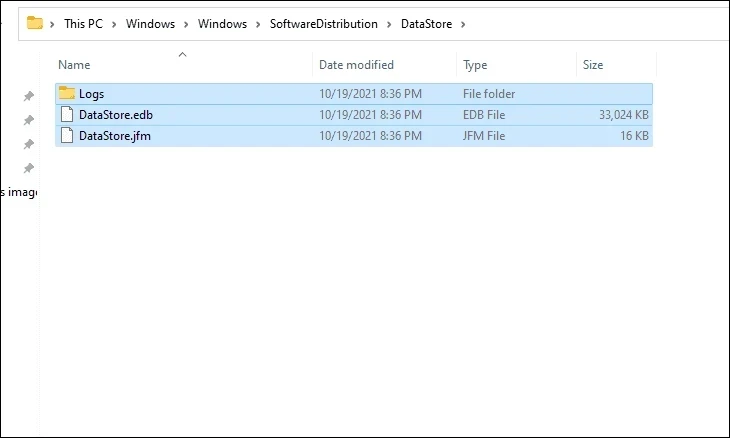
C:\Windows\SoftwareDistribution\DataStore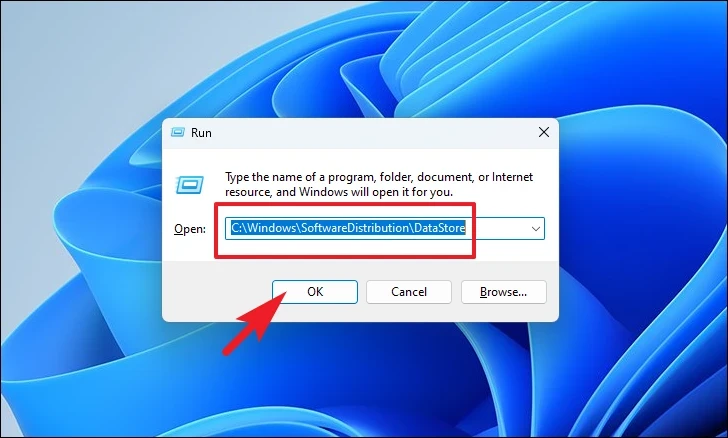
Then, press Ctrl+A keys to select all files and folders. Next, press Shift+Delete keys to delete all files permanently.
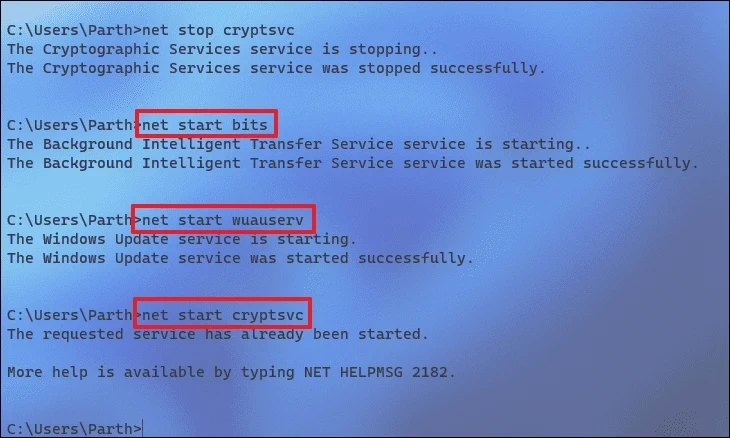
Finally, head back to the elevated Command Prompt window, type or copy+paste the following commands one by one, and hit Enter after each to start the services you disabled earlier.
net start bits
net start wuaserv
net start cryptsvc
Once the process is completed, restart your Windows PC and check if the issue still persists.
6. Run SFC and DISM
Deployment Image Servicing and Management scans will check and repair the existing operating system files installed on your device, along with other system files currently on your PC.
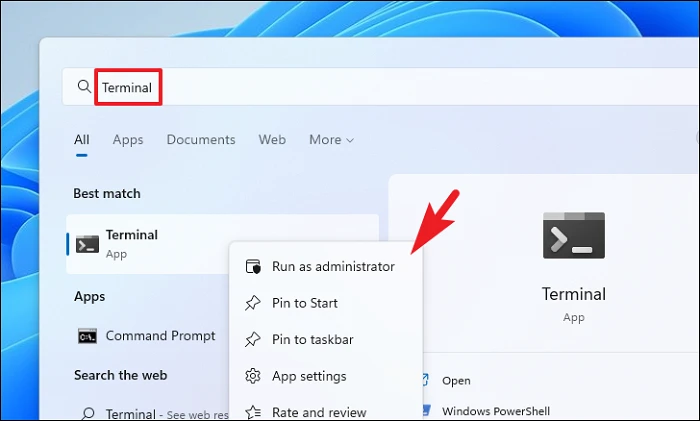
Head to the Start Menu and type Terminal. Then, right-click on the ‘Terminal’ tile and select the ‘Run as administrator’ option to proceed.
Next, if you are not logged in with an admin account, enter the credentials for one. Otherwise, click on the ‘Yes’ button to proceed.

After that, click on the ‘Chevron’ (downwards arrow) icon and select the ‘Command Prompt’ option.

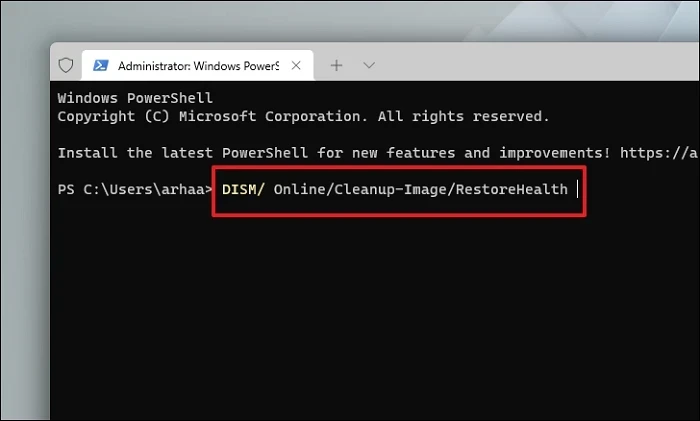
Then, type or copy+paste the below-mentioned command and hit Enter on your keyboard. This will restore the currently installed OS image on your device.
DISM/Online/Cleanup-Image/RestoreHeatlh
Once completed, type or copy+paste the following command to check and repair the system files on your PC. SFC is a free tool from Microsoft that can help you find and recover corrupted files on your PC.
SFC/ scannow
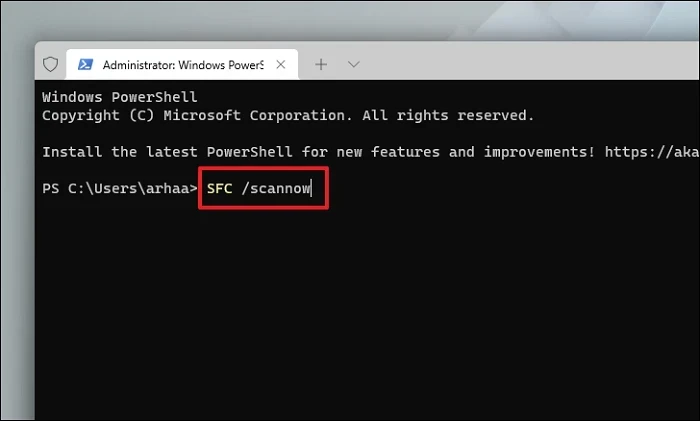
Once the scan is successful, restart your PC and check if the method resolved the issue.
5. Run CHKDSK
CHKDSK scan will check your hard disk for the physical bad sector and logical errors as well. This will help you to pinpoint problems with your secondary storage device.
First, head to the Start Menu and type Terminal to perform a search for it. After that, right-click on the ‘Terminal’ tile and choose the ‘Run as administrator’ option to proceed.
Then, enter credentials for admin on the UAC screen if you are not logged in with an admin account. Otherwise, click on the ‘Yes’ button to proceed.
After that, click on the chevron (downward arrow) and choose the ‘Command Prompt’ option to continue. This will open the Command Prompt in a separate tab.
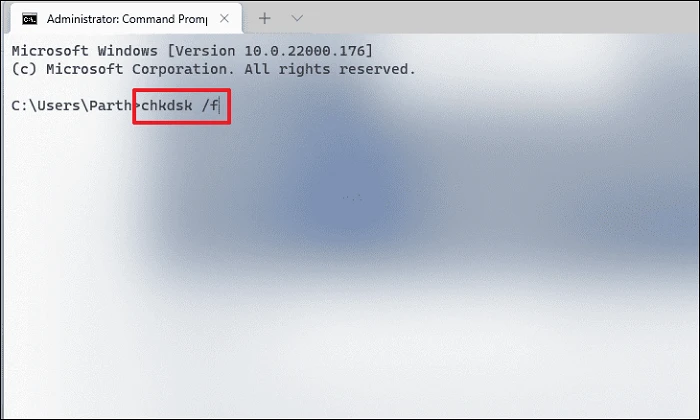
Next, type or copy+paste the below-mentioned command and hit Enter on your keyboard to execute the command.
chkdsk /f
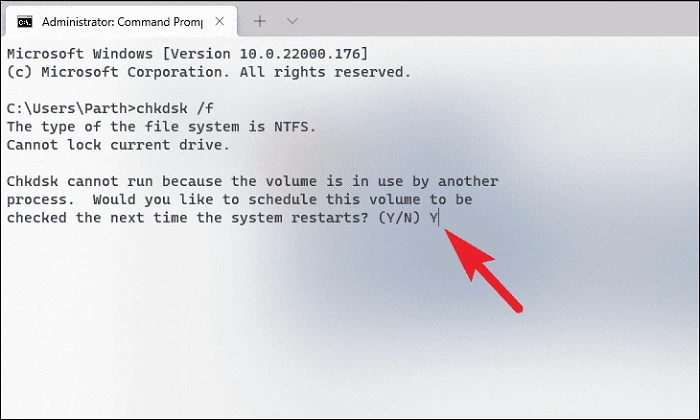
After that, press the Y key to schedule the scan to be initiated when you boot up your PC next time.
6. Roll Back to a System Restore
If you have created a system restore point previously, you can easily roll back to it and have an error-free PC.
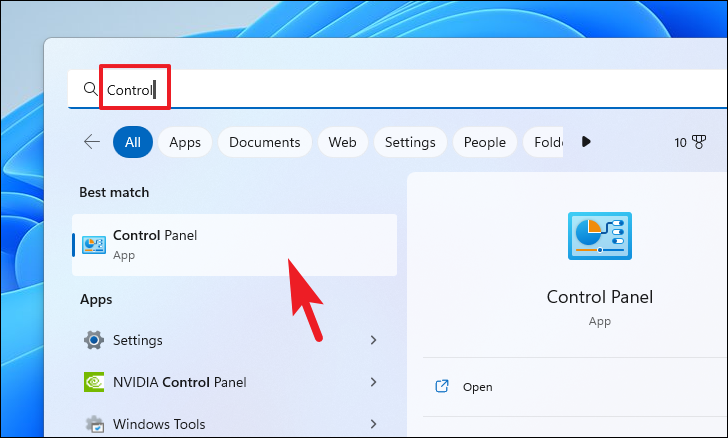
Head to the Start Menu and type Control. Then, click on the ‘Control Panel’ tile from the search results.
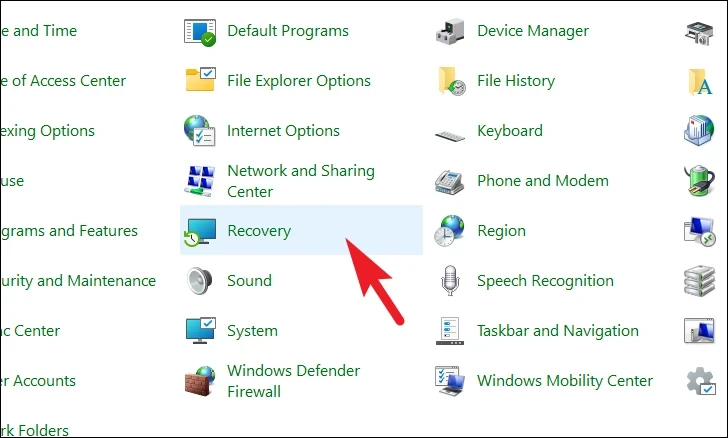
After that, locate and click on the ‘Recovery’ tile from the grid.
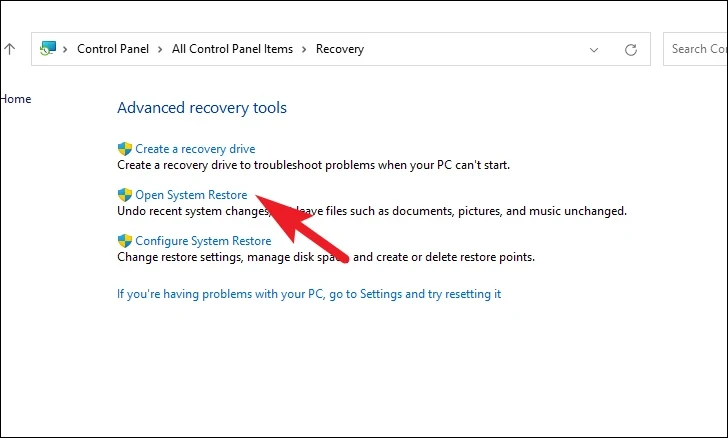
Next, click on the ‘Open System Restore’ option from the list. This will open a separate window on your screen,
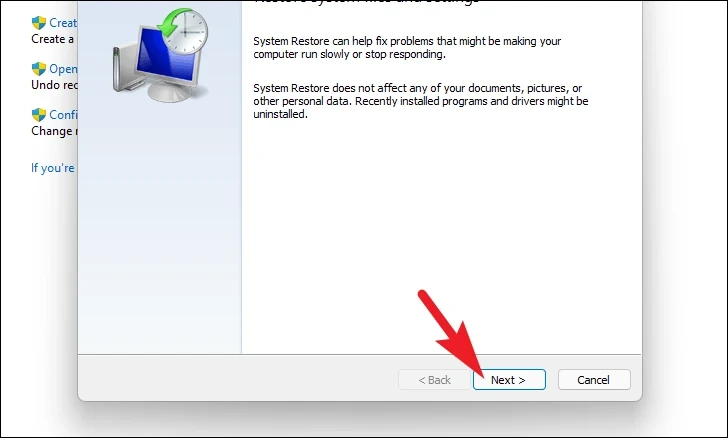
From the separately opened window, click on the ‘Next’ button.
All created system restore points will be listed on the screen. Click to select the desired one and then click on the ‘Next’ button to initiate the rolling back process.
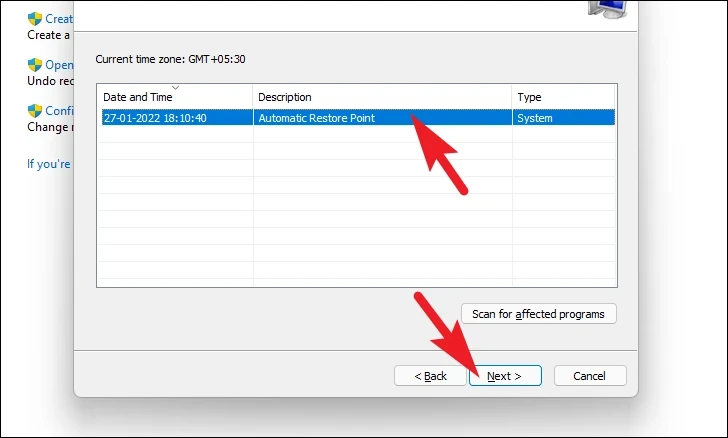
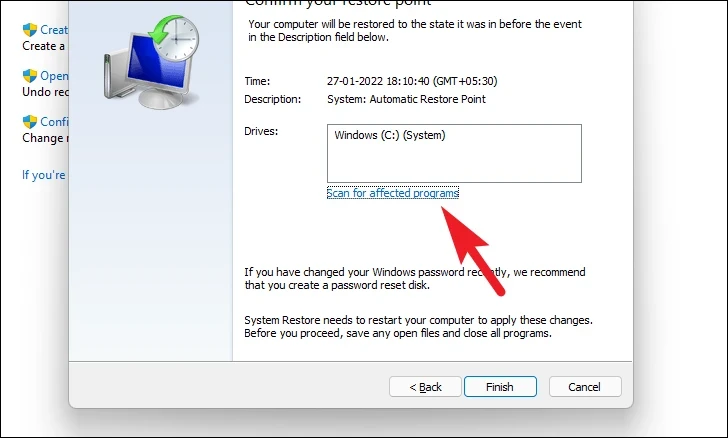
Next, a list of drives the rollback will impact will be displayed, along with the timestamp of the restore point created. You can also check the programs that will be affected; click on the ‘Scan for affected programs’ button. A new window will appear on the screen.
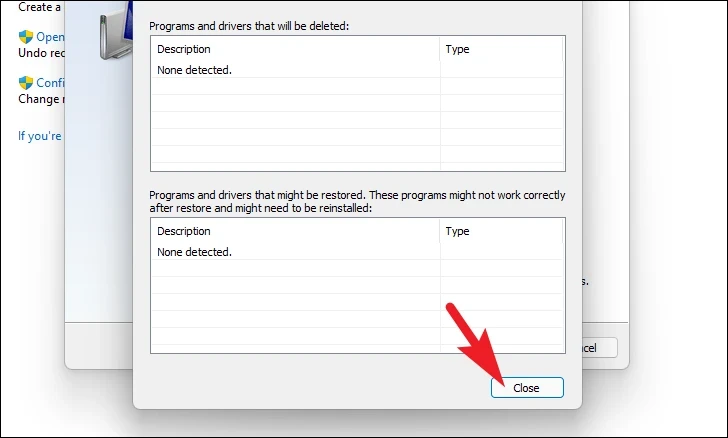
On the new window, you can view the programs that will be deleted and the ones that will be restored (since no programs will be affected on the test PC, the list in the screenshot is empty). Click on the ‘Close’ button to navigate to the previous window.
Finally, click the ‘Finish’ button to initiate the rollback process.
7. Reset Your PC
If none of the things worked for you, it is time to bring out the big guns. Resetting your PC reinstalls the complete Windows whilst keeping your personal files and folders intact.
To reset your PC, head to the Settings app from the Start Menu.
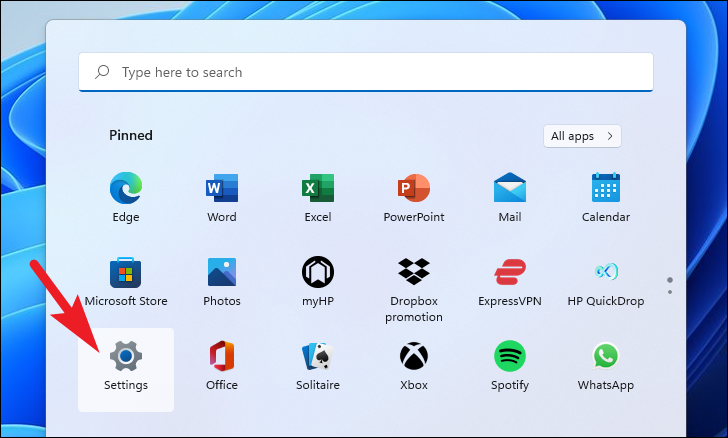
After that, make sure you have selected the ‘System’ tab from the left sidebar present on the Settings window.
Next, from the right section of the window, scroll down to locate and click on the ‘Recovery’ tile to continue.
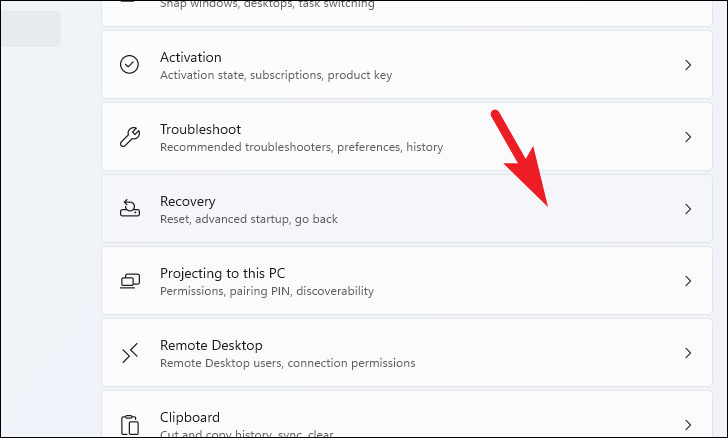
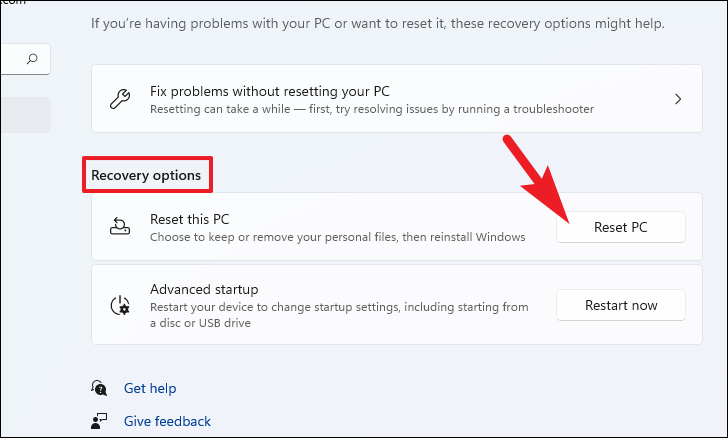
Now, locate the ‘Reset this PC’ tile present under the ‘Recovery options’ section and click on the ‘Reset PC’ button situated on the far right edge of the tile. This will open a separate window.
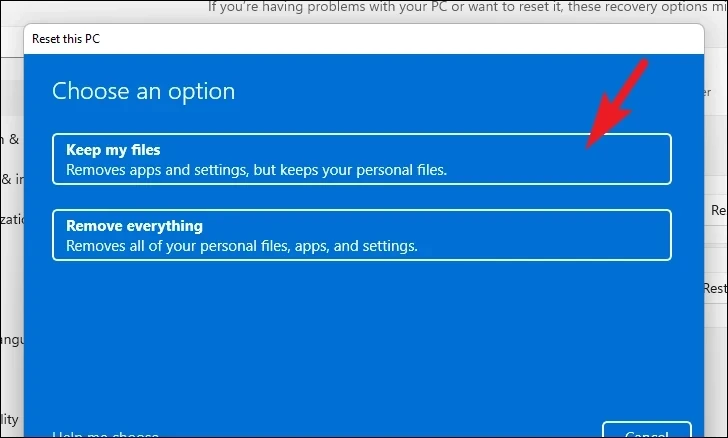
On the separate ‘Reset this PC’ window that appears, you will have two options. Choose the ‘Keep my files’ by clicking on it to roll the system settings and apps to a fresh start whilst keeping your personal files and folders intact.
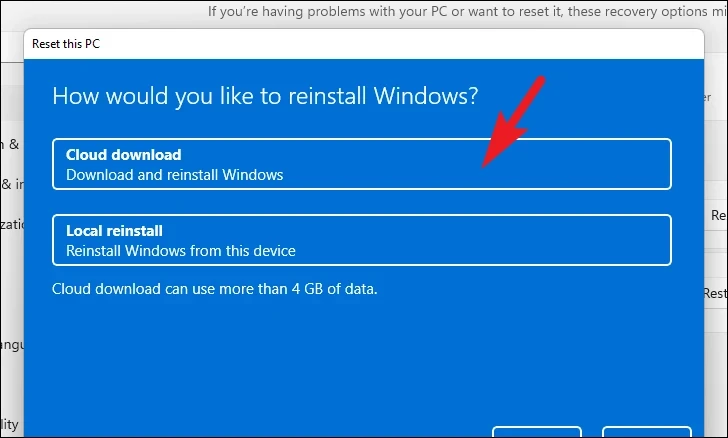
On the next screen, you will need to choose a method for reinstalling the operating system on your machine. Since there could be an issue with the copy already present on your system, it is recommended that you click on the ‘Cloud download’ option.
Note: ‘Cloud download’ will require an active internet connection and will consume upwards of 4 GB of data.
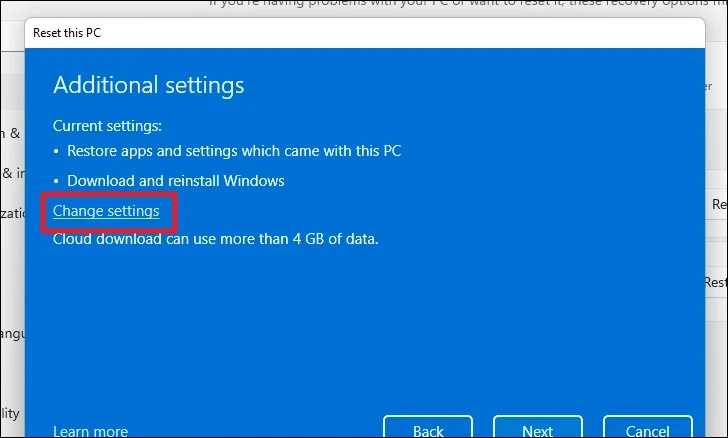
After that, Windows will list the settings that you have chosen. If you wish to change any of it, click the ‘Change settings’ option to continue.
If you change the settings, you can configure the following settings on the next screen. You can choose not to restore the apps and settings by clicking on the toggle switch under the ‘Restore preinstalled apps?’ option and bringing it to the ‘No’ position. You can even switch from the Cloud download to the local installation by clicking on the toggle switch under the ‘Download Windows?’ option to change the installation method. Once adjusted according to your preference, click the ‘Confirm’ button to proceed.
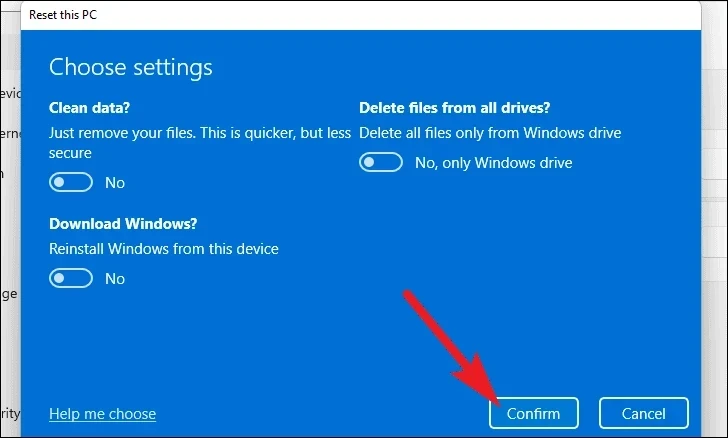
Then, click the ‘Next’ button at the bottom of the window to continue.

It might take a while for Windows to load the next screen. On the next screen, Windows will list the impact of resetting your PC. Read them carefully and click on the ‘Reset’ button to start the resetting process.
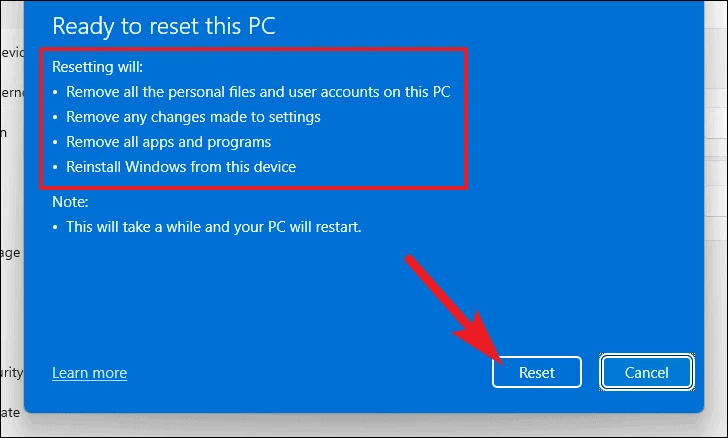
Your machine may restart several times, which is completely normal. It may take several minutes, depending on your computer and the settings for resetting the PC.
Getting stuck on the ‘Updates are underway’ screen can be frustrating. Fortunately, one of the fixes mentioned in this guide will be able to resolve the issue on your computer.
“Windows 11 updates are underway stuck at 0, 66, 82, 87, 100” is a common issue when updating Windows 11. If your PC is also stuck on the page, what should you do? Take it easy and it is easy to get rid of the trouble after trying solutions given by MiniTool here.
Updates are Underway Windows 11 Stuck
Keeping Windows up to date is an important thing since the updates can bring security updates, feature improvements, and patches bugs to make sure the PC function perfectly. For Windows 11, it is necessary to install the latest updates.
However, during the update, you may run into the situation of Windows 11 update stuck. To be specific, your PC is always on the screen – “Updates are underway. Please keep your computer on” even though the process is 100% complete. Sometimes it is stuck at 0, 66, 82, 87, or other percentages.

Tip: Sometimes Windows gets stuck on preparing to configure Windows screen. If your Windows 11 is performing certain necessary updates but is stuck, what should you do? Refer to the related post to find solutions – Stuck on Preparing to Configure Windows? Here’re 7 Solutions.
Then you may ask “updates are underway Windows 11 how long does it take” in Google. You should know the update process can take some time to complete but it won’t take hours. Usually, you are taken to the next stage once the process reaches 100%. If it hangs for a long time, you need to take action to get rid of the loop.
Let’s get to the point. How to fix “Windows 11 stuck on updates are underway”? Try multiple ways here.
Fixes for Windows 11 Updates Are Underway Stuck
Press Ctrl + Alt + Del
In some situations, the update may be stuck at a particular part of the installation process. You can try to press Ctrl + Alt + Del to see if the Windows login screen is presented. If so, log in to Windows as normal, which may let the update process continue successfully. If nothing happens after the operation, continue other troubleshooting tips.
Hard Reset Your PC
If the Windows 11 update installation is completely frozen, you can do nothing but hard-reboot. Thus, try to hard restart your computer if the issue “updates are underway Windows 11 stuck at 0, 100, etc. for a long time” happens.
Step 1: Press and hold the power button for about 5 seconds. This can turn the PC off. No lights can be seen near the power button.
Tip: For a tablet or laptop, you may need to remove the battery.
Step 2: Wait 30 seconds and then press the power button to turn it on again.
Run Windows 11 to Safe Mode
In Safe Mode, Windows only loads the minimum services and drivers that the system authentically needs. “Windows 11 updates are underway stuck at 0, 66, 82 or 100” can happen due to a conflict between another program or service and Windows updates. So, you can try to boot Windows 11 to Safe Mode.
If that’s the case, you can restart the PC from there and start the Windows update installation again. The process will finish and the PC can boot to the normal state.
Well then, how to boot your Windows 11 computer to Safe Mode on the stuck interface of “Windows 11 updates are underway 100 complete”?
Use a bootable drive or force restart the PC several times to enter WinRE (Windows Recovery Environment). Then, go to Troubleshoot > Advanced options > Startup Settings > Restart. Press F4 to enter Safe Mode.
Tip: In Windows 11, there are many ways to access Safe Mode. You can find them in our previous post – How to Start/Boot Windows 11 in Safe Mode? (7 Ways).
Run SFC
In Safe Mode, you can run an SFC scan with System File Checker. This can help to scan the entire operating system for the corrupt Windows files and repair the corruption to fix your issue.
Step 1: Type in cmd to the search box, click Command Prompt, and choose Run as administrator.
Step 2: Type sfc /scannow to the CMD window and press Enter to execute the operation.
Step 3: Wait some time until the verification finishes 100%.

Tip: Or you can boot the PC to WinRE, click Command Prompt, and then execute the SFC scan.
Rename SoftwareDistribution Folder
To fix “updates are underway Windows 11 stuck at 0, 66, 100”, you can try this way in these steps:
Step 1: In Command Prompt, type these commands one by one and press Enter after each command:
net stop wuauserv
net stop cryptSvc
net stop bits
net stop msiserver
Step 2: Rename the update folder by executing the command – Ren C:\Windows\SoftwareDistribution SoftwareDistribution.old.
Step 3: Restart Windows update services by running these commands in turn:
net start wuauserv
net start cryptSvc
net start bits
net start msiserver
After that, go to check if the update installation process gets stuck or not.
Run Startup Repair
To fix “Windows 11 stuck on updates are underway”, you can try to run Startup Repair. This feature can help to fix issues that prevent Windows from loading. Here, you can also have a try.
Step 1: Boot your Windows 11 to WinRE using a bootable drive or force restart. (Related article: How to Access Advanced Startup Options (WinRE) on Windows 11)
Step 2: Go to Troubleshoot > Advanced options > Startup Repair.

Run a System Restore
If you have created a system restore point before a Windows 11 update, you can get rid of the trouble – “updates are underway stuck Windows 11 at 0, 100, etc.”. Also, you need to run the PC to Windows Recovery Environment, and navigate to Troubleshoot > Advanced options > System Restore. Next, choose a restore point, confirm the restoration operation and click Finish.
Reset This PC
If none of the above ways to fix “Windows 11 updates are underway stuck”, the last way you can try is to reset this PC to its factory settings.
Step 1: Go to WinRE and click Troubleshoot > Reset this PC.
Step 2: There are two options for you to do this operation – Keep my files and Remove everything. It is highly recommended to select the first option to keep data safe. If you choose the second one, you had better go to back up your important files by following the post – How to Back up Data without Booting Windows? Easy Ways Are Here!

Step 3: Select Cloud download and Local reinstall. To know which one to choose, refer to this related post to find details – Cloud Download vs Local Reinstall: Differences on Win 10/11 Reset.
Step 4: Finish the PC resetting by following the on-screen prompts.
After the resetting, try to update the Windows and you won’t meet issues.
“Windows 11 updates are underway stuck at 100, 87, 82, 66, 0? After trying these solutions, you can easily get rid of the trouble. Just share them with more persons if they need.”Click to Tweet
Back up PC before Windows 11 Update
After trying these solutions, you should successfully fix the issue – “updates are underway Windows 11 stuck at 0, 66, 82, 100”. After that, we recommend that you create a system image. This is mainly because fixing Windows update issues is troublesome and time-consuming. Even sometimes, you fail to fix problems although you try many fixes.
If you back up your PC, you can quickly use the backup to restore the PC to a normal state when Windows update problems happen.
Tip: It is also recommended to back up your PC before any Windows updates to avoid update issues. In addition to system backup, you can choose to back up important data to avoid data loss after an update.
Referring to creating a PC system image, you can use MiniTool ShadowMaker – a professional and free Windows 11 backup software. It enables you to easily back up and restore Windows in case of system crashes. Besides, you can use it to back up files, folders, disks, and partitions, sync folders & files, and clone a hard drive for disk backup or upgrade.
To run this software for Windows 11 backup, click the following button to get its trial edition (free trial in 30 days) and then double-click on the exe file to finish the installation by following the on-screen prompts.
MiniTool ShadowMaker TrialClick to Download100%Clean & Safe
Step 1: Double-click on the icon of this backup software for Windows 11 to open it.
Step 2: Click Keep Trial to continue using this edition.
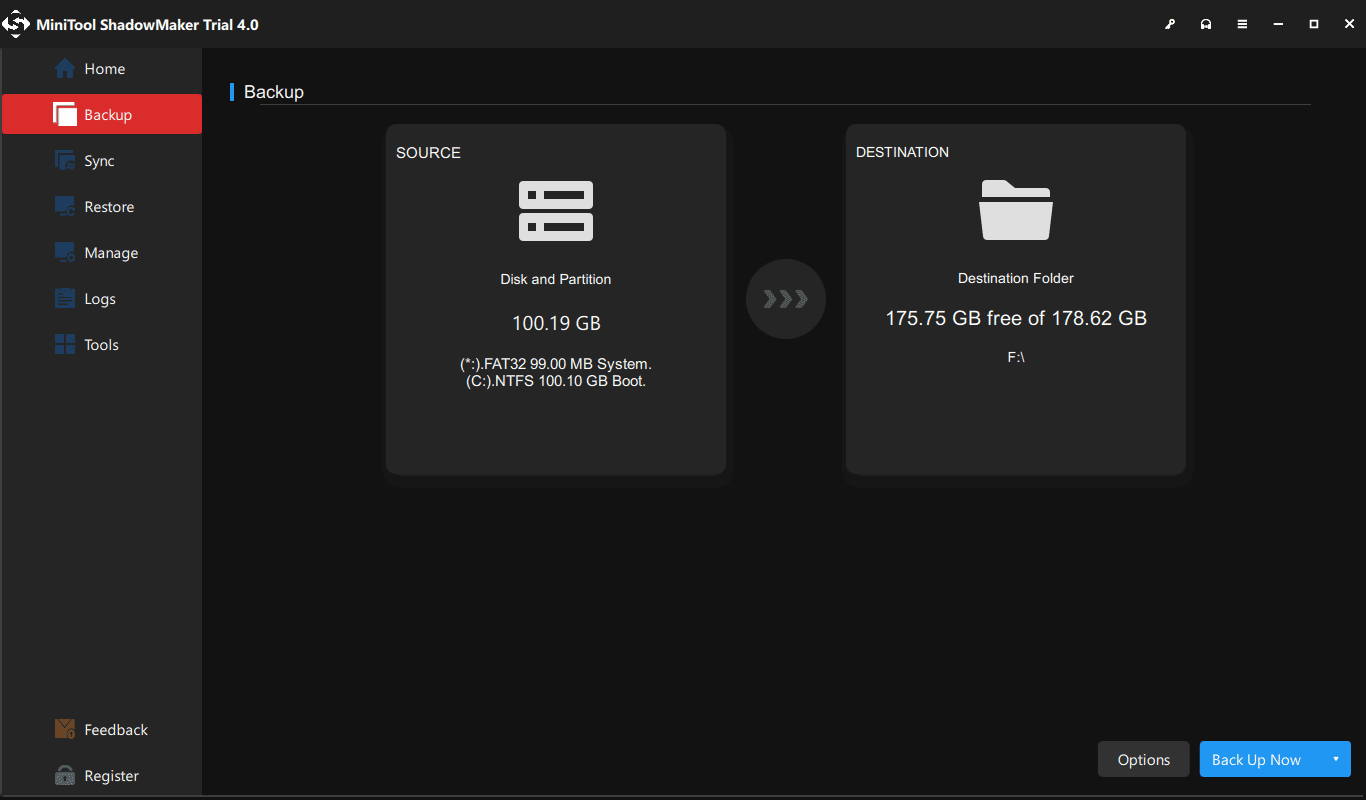
Step 3: Go to the Backup page, you can see MiniTool ShadowMaker has selected system partitions as the backup source. To create a system image, skip this step. To back up files, click Source > Folders and Files, select the items you want to back up, and click OK.
Step 4: Click Destination and choose an external hard drive, SSD, HDD, USB drive, etc. as the path to save the image file of the backup.
Step 5: Click Back Up Now to start the backup immediately.
After finishing backing up your PC, it is recommended to go to Tools and click Media Builder to create a bootable USB hard disk, USB flash drive, or CD/DVD so that you can use it to perform a recovery in case of an unbootable PC like the situation of “Windows 11 updates are underway stuck”.
Tip: Sometimes Windows updates cause data loss. If you find your important files get lost after installing the updates, restore them from the backed-up file. Or you can perform file recovery with MiniTool Power Data Recovery. To know more information, refer to our previous post – How to Recover Your Lost Files after Upgrading to Windows 11.
FAQ – Windows 11 Download & Install Issues
In addition to the situation of Windows 11 update stuck, you may run into some issues when downloading Windows 11 updates or installing Windows 11. The following are the related situations and click the corresponding link to get the solutions:
- Windows 11 Update Downloading Stuck at 100%
- Windows 11 Installation Stuck at 35%/85%…
- How to Fix Windows 11 Installation Has Failed
- 7 Ways to Fix Windows Updates Stuck at 0% Downloading Easily
Highly recommend: Before you install a new update, create a backup for your PC with MiniTool ShadowMaker. Once the PC goes wrong, you can perform a quick disaster recovery from an image backup.
MiniTool ShadowMaker TrialClick to Download100%Clean & Safe
Final Words
Windows 11 updates are underway 100 complete stuck or Windows 11 update stuck at 0, 66, 82, 87…? The stuck problem is very common when installing Windows 11 updates on your PC. If you are bothered by this annoying thing, don’t panic and multiple ways in this post can help you out easily. Just try them one by one until you find useful ways.
If you have other troubleshooting tips in addition to the above fixes, let us know in the comment below. Thanks in advance.
Do you face “Updates are underway” in Windows 11 taking too long and stuck with spinning dots on the screen of your Computer? This problem may occur with a certain percentage of installation urging you to wait until the process is complete. First of all, let’s be clear that updates are underway meaning is they fall into conflict with corrupted system files, incorrect configurations, or third-party programs when the stage is taking more time than normal.
Usually, this process can stay for some minutes (approx. 5-10) depending on the volume of the update files. But when installing an update stuck in the stage because of some glitches you will need to think about fixing the issue manually. This includes getting help from troubleshooter, safe mode, reset, SFC, Startup Repair, system restore, and so on. See – Fix Windows 10 update stuck at 61% (Percent) – Easy ways.
Here is how to fix Updates are underway, please keep your computer on error in Windows –
Way-1: Wait for some more time
On Windows 11 22H2, several users are annoyed with the time taken by “Updates are underway” screen and some of them report that the process is completed in almost 2-3 hours.
While waiting to install, this would be a better idea to give Windows more time. In the meantime, if it is taking too long to wait you can try force restart in spite of the suggestion your screen is showing.
May be helpful – Fix Undoing changes made to your computer Error in Windows 11 22H2
Way-2: Boot Windows into Safe Mode
While spotting the issue, initiating safe mode can be a working solution because this is a diagnostic state known to quickly resolve errors about driver conflicts, glitches, or malicious software, which may hinder your PC’s normal functioning. To boot into this mode follow the steps mentioned below:
- Press – Winkey+R.
- Scroll down on the right side of the Settings app and select – Recovery.
- Go to “Advanced startup” section then click on Restart.
- On the Choose an option screen, select Troubleshoot.
- Then choose Advanced options.
- Click on Startup settings.
- Select – Restart.
- When the next screen loads after reboot, press F4.
- After this procedure has been completed, the computer should be able to return to its usual condition and boot normally without showing updates are underway.
Alternatively, you can follow – 7 ways to boot Windows 11 into Safe mode with easy steps.
Way-3: Run the Windows Update Troubleshooter
Use of the Windows update troubleshooter staying in Safe mode may fix updates are underway restarting loop, so proceed with the steps –
- Open Settings app (Windows+I).
- Select – Troubleshoot from the right pane.
- Go with the Other troubleshooters option.
- Click on Run from the Windows update section.
- Once the updates are installed successfully, you can return to normal mode by following – How to Come Out of Safe Mode in Windows 10.
This can also assist – Use Common Windows Update Troubleshooter on Windows 11, 10, 8.1, 7.
Way-4: Perform a PC Reset
Resetting the PC is one of the easiest ways to fix, the “Updates are underway” error. As this solution is quite handy when it comes to combating malware, corrupted or damaged files, issues with the Windows update, and so on. Enter the Windows Recovery Environment (Windows RE) using the following guidelines –
- Go to the Sign-In screen, and hold down the Shift key while clicking the power icon.
- Then, select – Restart.
Now, follow these steps for a PC reset –
- On the WinRE screen, click the – Troubleshoot.
- Move forward with – Reset this PC.
- This process has two available options: Keep my files and Remove everything. To keep data secure, it is strongly suggested to pick the first option. If you select the second option, you should immediately back up your crucial files.
- Select Local reinstallation.
- Follow the on-screen instructions to complete reset.
- Go to Settings > Windows update.
- Click on – Check for updates.
The chances of resolving the Windows update issue after this step are quite high, however, if the problem persists follow the next way.
Way-5: Try Using Startup Repair
Using startup repair can also be a viable option when it comes to solving the Updates are underway, please keep your computer on problem. This tool when launched does an instant, comprehensive check of your system’s configuration and files for anything that could be causing the update troubles.
The utility will replace any damaged or missing system files, correct the boot configuration data, or conduct any other necessary fixes after the issue has been detected.
- Start Windows in WinRE mode using the previous method.
- Then, navigate to Troubleshoot => Advanced Options, => Startup Repair.
Way-6: Go with System Restore
System restore might be one of the best tools to solve the message “Updates are underway” if you have recently installed any driver, third-party software or made any registry change. Follow the instructions and bring the Windows to an earlier state –
- Right-click on – Start.
- Select – Run.
- Type – rstrui.exe and press Enter.
- On the wizard that appears, check the option – Choose a different restore point.
- Click on – Next.
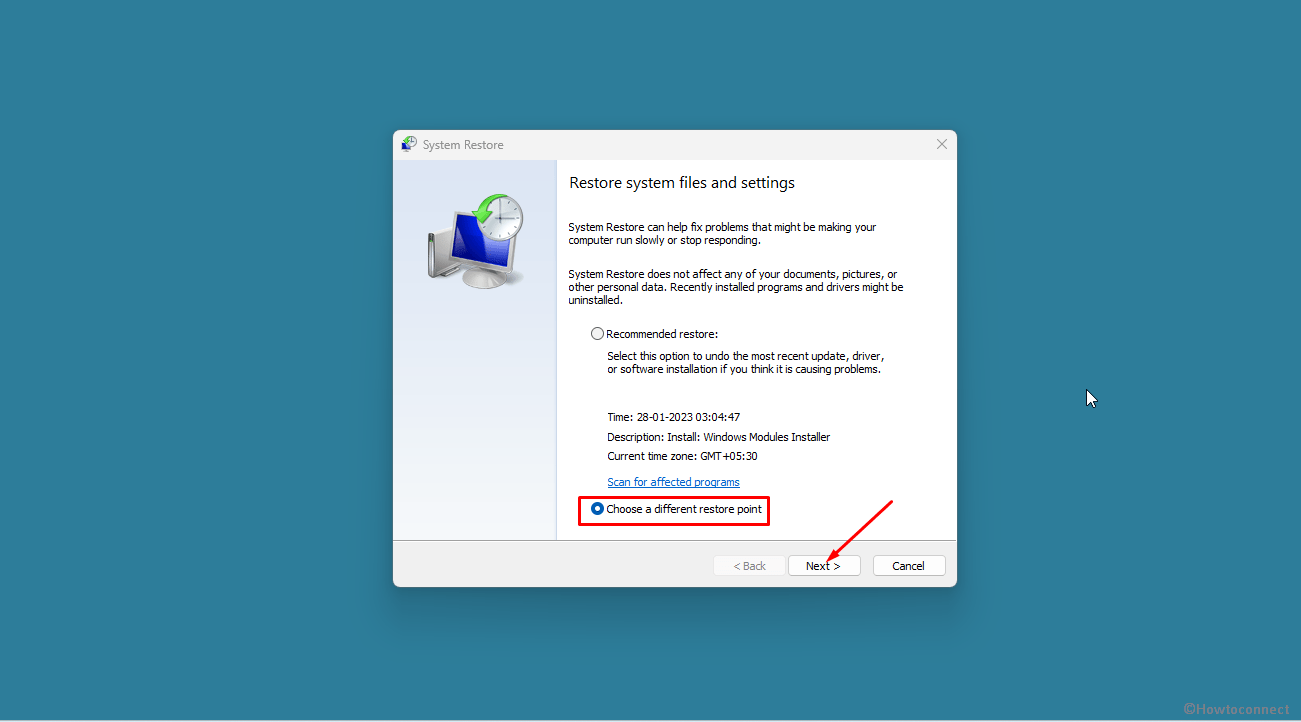
- Tick the box saying – Show more restore points.
- Then select a point when you have made the change and click Next.
- Make sure the selections are correct then click on – Finish.
- Choose Yes on Confirmation dialog box.
- The process will take abundant time so stay for the period then check for updates again.
Way-7: Run SFC aka System File Checker
If installing updates is a trouble that is an implication of a corrupt system file, using SFC may be an effective way to resolve it. This utility through its scan is capable of checking damaged Windows files and then repairing any found ones, thus addressing the issue.
- Press – Windows+Q.
- Type – cmd,
- Select the option – Run as administrator.
- Click on Yes when the User account control opens up.
- In the command prompt window, type
sfc /scannow.

- Then hit – Enter.
- Please be patient while it completes the verification. After that, you should exit the Command Prompt. and reboot your PC.
Way-8: Delete the update files from SoftwareDistribution/Download Folder
Various online communities have suggested this way for solving when you get stuck on updates are underway screen. So step forward to evacuate the softwaredistribution –
- Launch the Command prompt as mentioned in previous method.
- Type each of the following commands in turn, and then hit “Enter” every time
net stop wuauserv
net stop cryptSvc
net stop bits
net stop msiserver- Press Win+E to open the File Explorer and paste “C:\Windows\SoftwareDistribution\Download” in the address bar.
- Hit Enter’ then delete all the content in the open folder.
- Start Windows update related services by running the following command in sequence:
net start wuauserv
net start cryptSvc
net start bits
net start msiserver- Then, check to see whether the update installation process is resolved or not.
We hope, all these 6 ways must have aided you to fix the Updates are underway, please keep your computer on problem in your Windows 11 or 10.
Methods:
Way-1: Wait for some more time
Way-2: Boot Windows into Safe Mode
Way-3: Run the Windows Update Troubleshooter
Way-4: Perform a PC Reset
Way-5: Try Using Startup Repair
Way-6: Go with System Restore
Way-7: Run SFC aka System File Checker
Way-8: Delete the update files from SoftwareDistribution/Download Folder
That’s all!!
Repair any Windows problems such as Blue/Black Screen, DLL, Exe, application, Regisrty error and quickly recover system from issues using Reimage.