by Alexandru Poloboc
With an overpowering desire to always get to the bottom of things and uncover the truth, Alex spent most of his time working as a news reporter, anchor,… read more
Updated on
- Even if Wmic was removed for both Windows 10 and Windows 11, you can still add it.
- Users have been reporting dealing with quite a number of Wmic issues on Windows 11.
- If your Wmic access is denied, follow these troubleshooting steps and fix the problem.
- Carefully go through our step-by-step guide and you will be done in absolutely no time.
Everyone that is familiar with Wmic knows it as a command-line and scripting interface that simplifies the use of Windows Management Instrumentation (WMI) and systems managed through WMI.
Wmic actually operates in two modes. The first one is interactive, which allows commands to be entered one line at a time, and non-interactive, which allows commands to be scripted for use in batch files.
That being said, Microsoft removed WMIC from Windows 10 and Windows 11, but you can add the functionality back to your PC if that’s what you choose.
Users that did add Wmic back to their Windows 11 machines are reporting dealing with the Wmic is not recognized as an internal or external command error.
Don’t worry, we can show you how to fix that in just a few minutes by going through our simple but effective troubleshooting process.
What can I do if Wmic access is denied?
The first and most important step is not panicking and treating the situation with the utmost calm. Second, we are about to give you the solutions, so you don’t have to worry about that either.
A lot of people are dealing with this issue right now and it’s important to know that it is totally fixable, just in case you had any doubts.
1. Set DCOM permissions
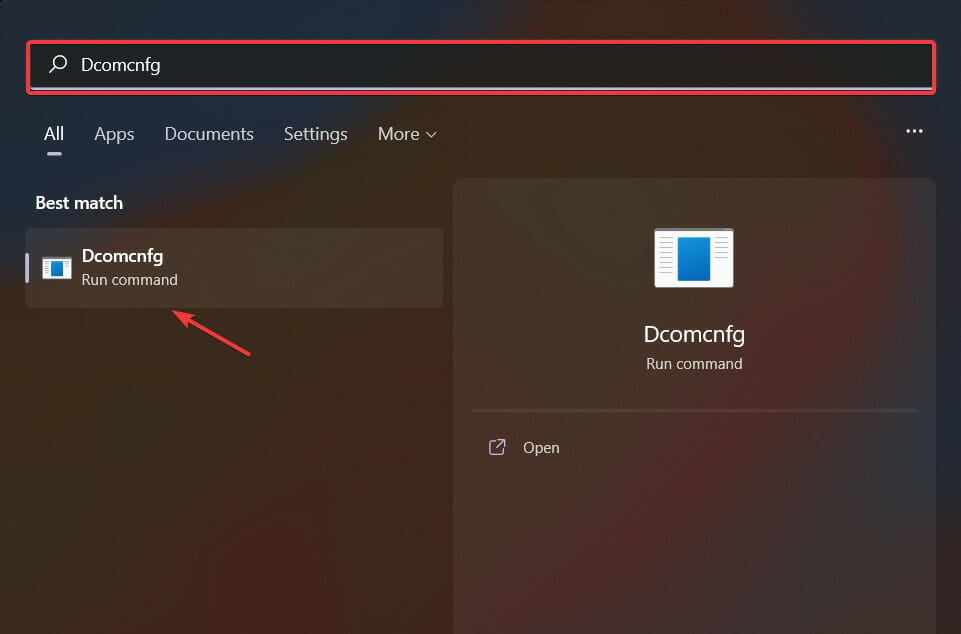
- Open the start menu, search for Dcomcnfg and open the app.

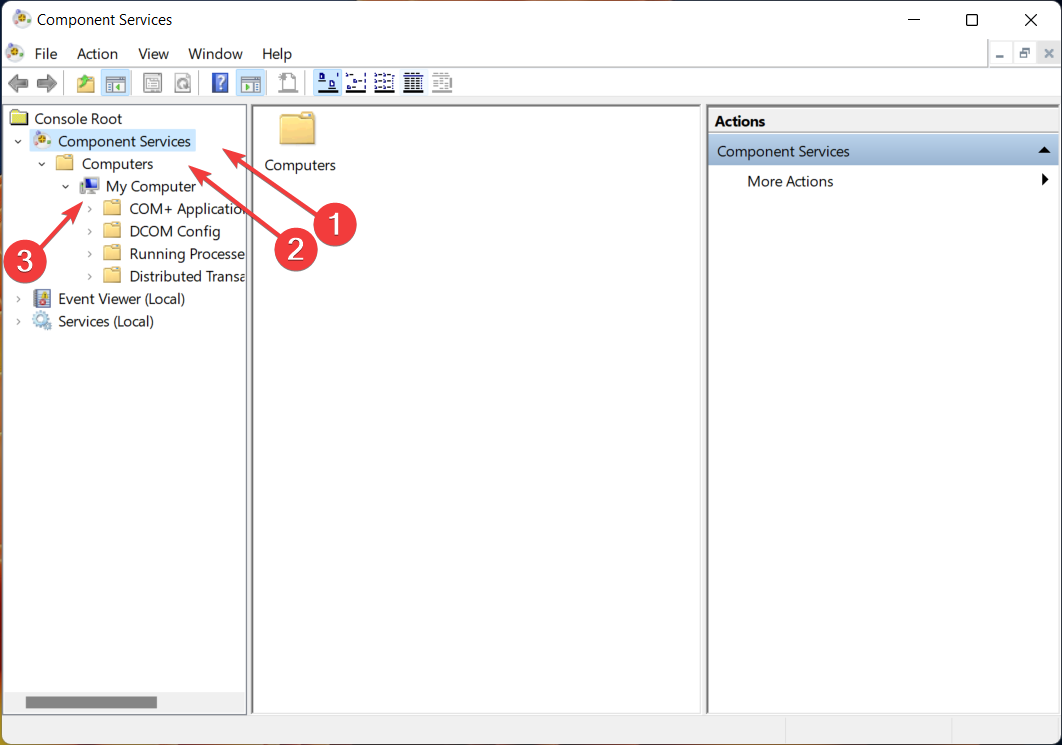
- Expand Component Service, select Computers, then My computer.

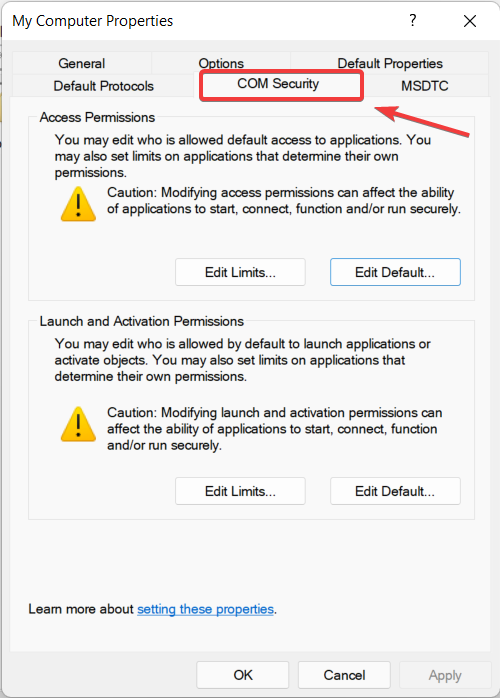
- Right My Computer and select Properties.

- Select the COM Security Tab.

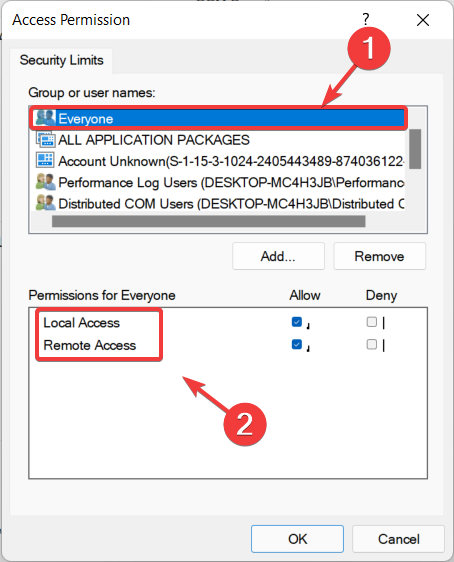
- Click on Edit Limits under Access Permissions, and ensure the Everyone user group has Local Access and Remote Access permission.

- Click on the Edit Limit for the Launch and Activation Permissions, and ensure Everyone user group has Local Activation and Local Launch permission.

2. Set Permission for the user to the WMI namespace
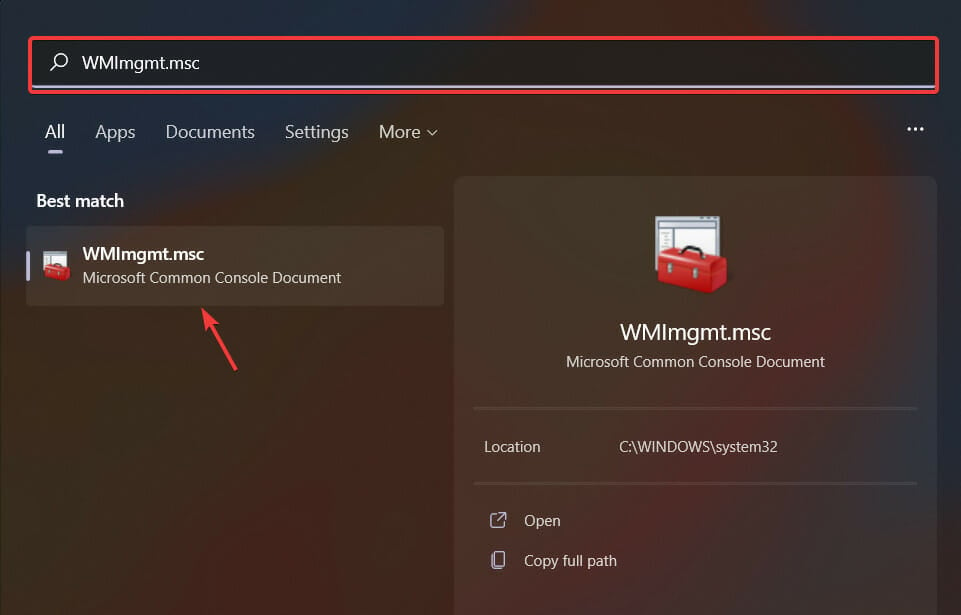
- Open the Start menu, search for WMImgmt.msc, and open the app.

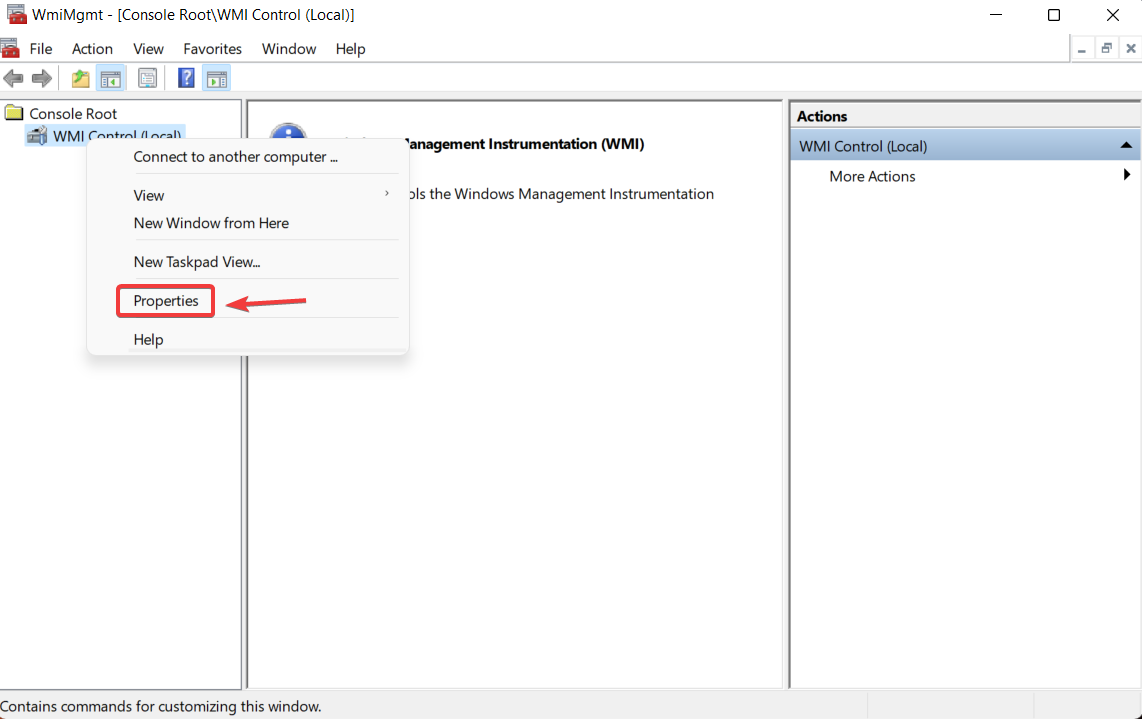
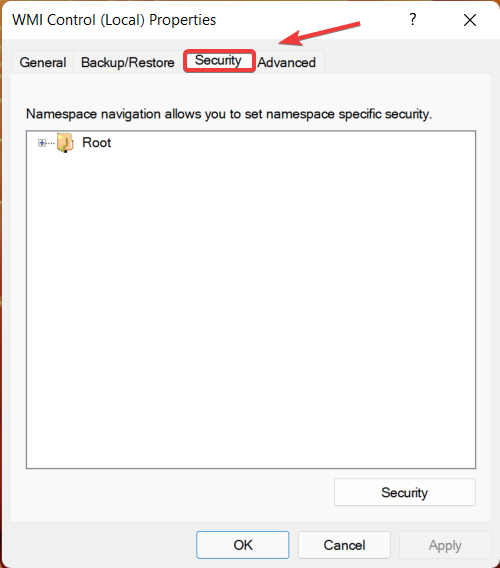
- Right click on WMI Control and select Properties.

- Go to the Security tab.

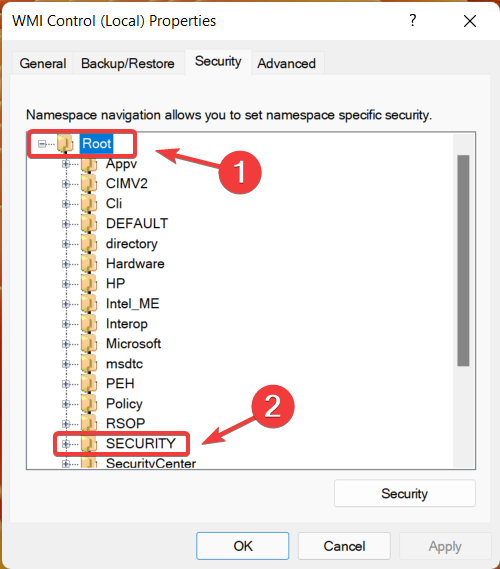
- Select Root and open Security.

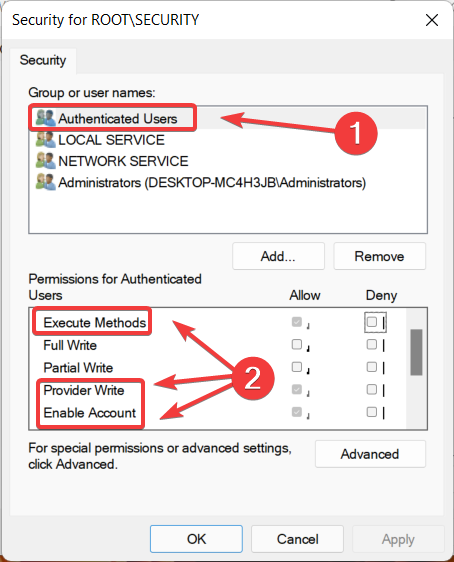
- Ensure Authenticated Users has Execute Methods, Provider Right and Enable Account right.
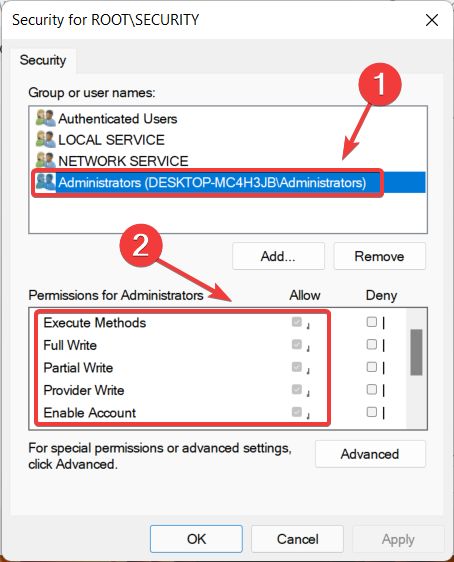
- Ensure Administrators have all permission.
3. Verify WMI Impersonation Rights
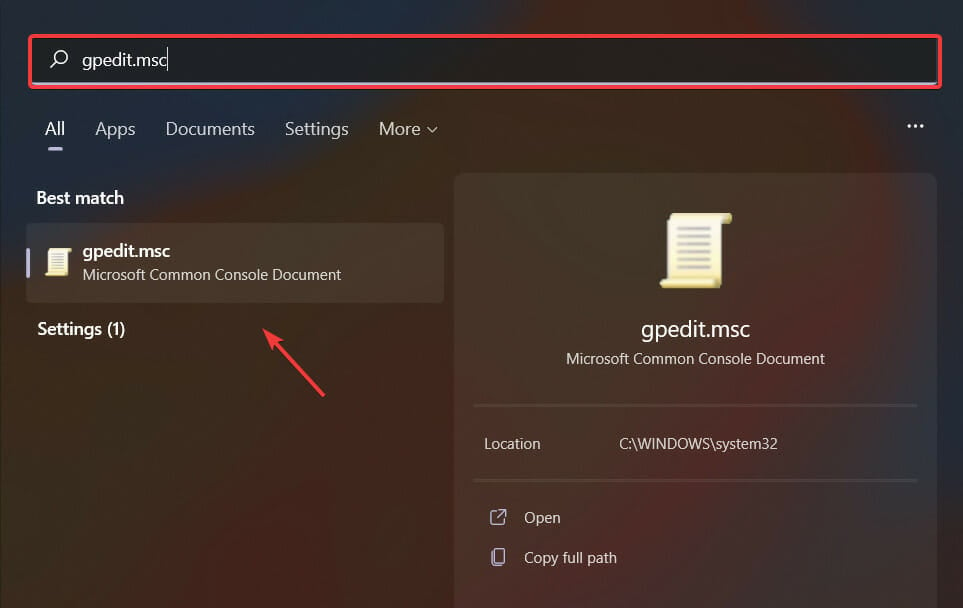
- Open the Start menu, search for gpedit.msc, and open the app.

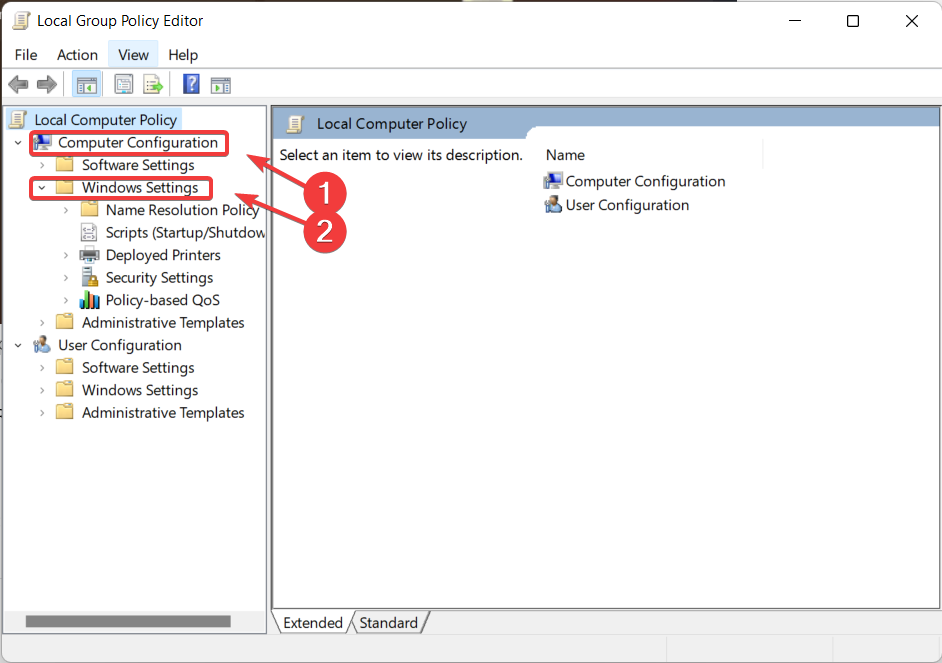
- Under Local Computer Policy, expand Computer Configuration, and then expand Windows Settings.

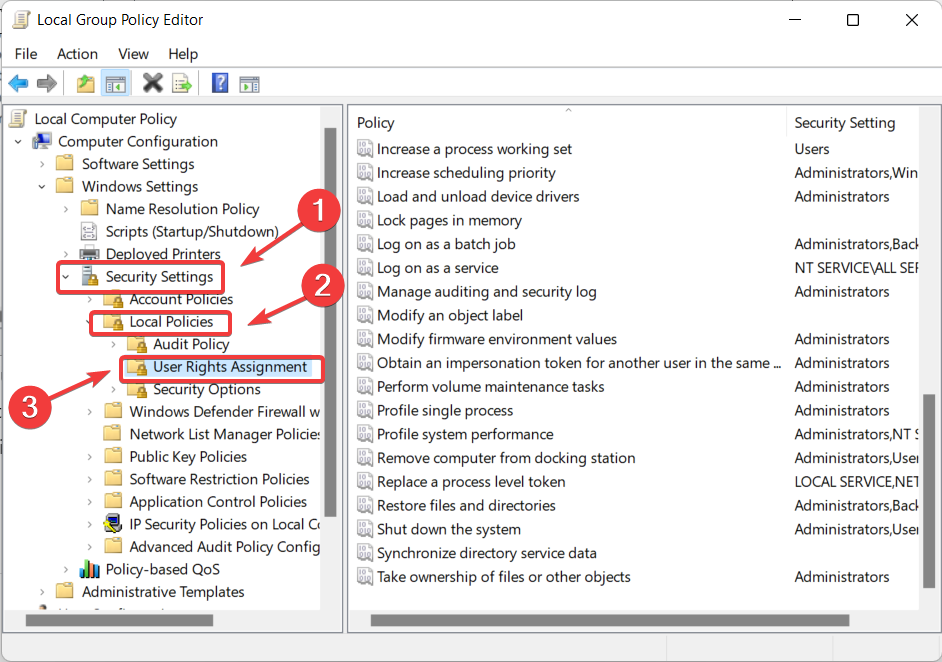
- Expand Security Settings, expand Local Policies, and then click User Rights Assignment.

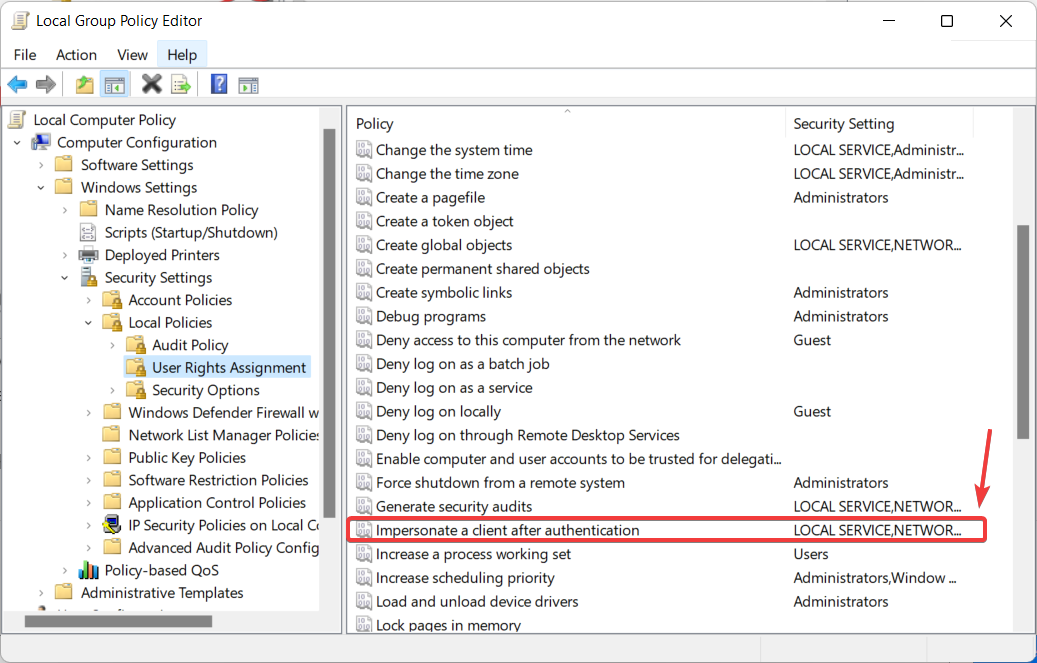
- Verify that the LOCAL SERVICE account is specifically granted Impersonate a client after authentication rights.

Going through this troubleshooting process will fix your problem and you can go on about your day as if nothing ever happened.
Was this guide helpful to you? Let us know in the comments section below.
![]()
While using any WMIC command, if you get Access is denied error on Windows 11/10, this guide will help you get rid of the problem. No matter which WMIC parameter you use, you might come across the Access is denied message at times. In such situations, these solutions will help you troubleshoot the issue.
Although WMIC or Windows Management Instrumentation Command-line is deprecated from Windows 10 and is no longer in active development for Windows 11, you can use it on your computer. In case you don’t know, you can do various things with the help of WMIC commands. For example, you can check the battery level, find the hard disk health status, etc.
Here’s what you should do if the WMIC command gives Access is denied error when trying to connect remotely to a Windows 11/10 computer:
- Add LOCAL SERVICE in Group policy
- Enable Local Activation for Everyone user group
- Verify WMI permission
Before getting started with these steps, you log into an administrator account. Otherwise, you can make the necessary changes as described below.
1] Add LOCAL SERVICE in Group policy
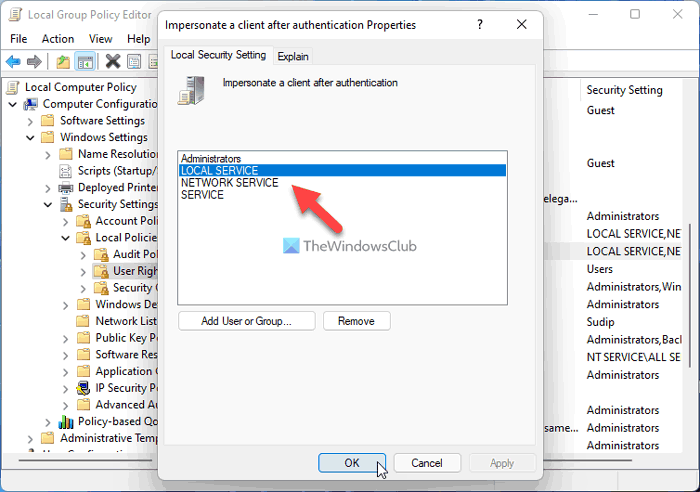
In simple words, you need to check or verify the WMI impersonation rights. For that, you can take the help of the Local Group Policy Editor. To do that, follow these steps:
- Press Win+R > type gpedit.msc > hit the Enter button.
- Navigate to Computer Configuration > Windows Settings > Security Settings > Local Policies > User Rights Assignment.
- Double-click on the Impersonate a client after authentication setting.
- Check if LOCAL SERVICE is included in the list.
However, if it is not included, you need to add it to the same group. For that, follow these steps:
- Click the Add User or Group button.
- Search for local service and click the Check Names button.
- Click the OK button.
Once done, you can close all the windows, restart your computer and check if you can run the WMIC commands or not.
2] Enable Local Activation for Everyone user group
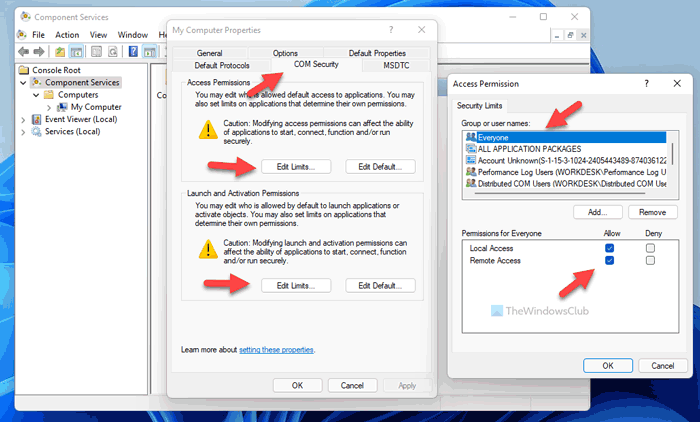
You need to set the correct DCOM permission on your computer. Otherwise, you will continue getting the Access is denied error while running a WMIC command. Follow the following steps to set the DCOM permission on Windows 11/10 PC:
- Press Win+R > type dcomcnfg > hit the Enter button.
- Navigate to Component Services > Computers > My Computer.
- Right-click on My Computer > Properties.
- Go to the COM Security tab.
- Click on the Edit Limits button.
- Select Everyone and tick both checkboxes under Allow.
- Click the OK button.
- Click on the other Edit Limits button.
- Select Everyone and tick the Local Launch and Local Activation checkboxes.
- Click the OK button.
However, if you cannot find the Everyone user group, you need to add it manually. For that, click the Add button, write everyone and click on the Check Names button. Then, click on the OK button.
3] Verify WMI permission
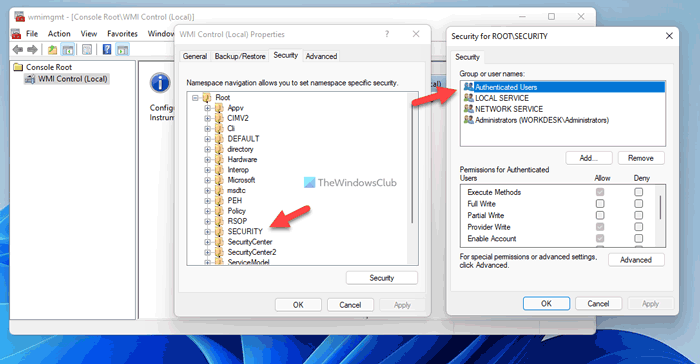
It is yet another important step you need to follow if those two solutions don’t work for you. You need to make sure that a specific user has three permissions – Execute Methods, Provider Write, and Enable Account. If the Authenticated Users doesn’t have these three permissions, you may not be able to access WMIC on Windows 11 or Windows 10 computers.
Therefore, follow the following steps to verify the WMI permission:
- Press Win+R > type wmimgmt.msc > press the Enter button.
- Right-click on WMI Control and select Properties.
- Switch to the Security tab.
- Expand Root and go to SECURITY.
- Click on the Security button.
- Select Authenticated Users.
- Tick Execute Methods, Provider Write, and Enable Account checkboxes.
- Click the OK button to save the change.
However, if you cannot find the Authenticated Users in the Group or user names list, you need to add it manually. To do that, click the Add button, write authenticated users in the empty box, and click the Check Named button.
Then, you can change the permission as mentioned above. Once done, it is recommended to restart your computer. Following that, you will be able to use WMIC commands without any error.
How do I fix WMI Access is denied?
To fix WMI Access is denied or WMIC Access is denied, you need to follow the same set of solutions as mentioned above. You need to check the permission in various locations, including the Local Group Policy Editor, Component Services, and WmiMgmt. All the steps are mentioned above, and you can follow them one after one.
Read: How to locate or find Model Name or Serial Number of Windows computer using WMIC
How do I use WMIC on a remote computer?
To use WMIC commands on a remote computer, you need to enter this command: /node:target-computer-name, where the target-computer-name is the original name of the remote computer. However, your computer must be connected to the same local network to which your host computer is connected. Otherwise, it won’t work.
How do I fix WMI Access is denied 0x80070005 error?
Error 0x80070005 means that the Domain Controller/local Windows system could not verify the credentials for the target computer. So apart from trying the suggestions in this post, ensure that you are using the correct credentials.
First my workingsetup:
DesktopPC: Windows 10 Pro, Version: 10.0.10586 Build: 10586, 64-Bit
Laptop: Windows 10 Pro, Version: 10.0.10586 Build: 10586, 64-Bit
User: Both computers have the same username {zuka} & password {blah}.
I tried to connect remotely, with WMIC to my DesktopPC, with my Laptop and to execute a query.
I typed these following shell commands into Powershell:
    PS C:\Windows\system32> wmic
    wmic:root\cli> /user: zuka
    Please enter the password:blah
    wmic:root\cli> /node: {IP-Address of my DesktopPC}
    wmic:root\cli> csproduct get /value
    Node - {IP-Address of my DesktopPC}
    Error:
    Description = Access is denied.
Or with:
get-wmiobject CIM_Memory -computername desktopPC { or IP } -credential zuka
I get a errormessage like:
Access is denied. (Exception from HRESULT: 0x80070005 (E_ACCESSDENIED))
I tried to resolve the problem with these following steps:
( But none of them worked :[ )
- Went into secpol.msc & changed Network access: Sharing and security model for local accounts to Classic — local users authenticate as themselfes.
- I also changed in secpol.msc Network security LAN Manager authentication level to Send LM & NTLM responses, use NTLMv2 session security if negotiated.
- In compmgmt.msc > Service & application > WMI-control > register «security» > expand root & selected CIMV2 saw that local administrators have fully access to this namespace. Zuka is in a membership of the local administrator group.
Is there a specific issue with Windows 10 or did I miss a certain configuration?
Issue:
We have a custom service using system.managementscope.connect to connect to a remote wmi to gather it’s system/hardware/software data.
This service runs on a windows 1803 as Local System and adds the correct impersonation & authentication level and also sets the connection
options with the local username & password on the remote target.
This worked on target machines running windows 10 pro <= 1703 but started returning “access denied” on targets windows 10 pro >=
1803.
Remark: This problem only occurs when a windows 1803 (or later) machine is trying to
remotely connect wmi to another 1803 (or later) machine.
We can simulate this malfunction using wbemtest.exe:
We have a problem getting a windows 10 pro
machine (both in domain and workgroup)
to connect to remote WMI to a windows 10 >= 1803 target in a domain or a workgroup.
Every time we try to access it, we get “access denied”. This is related to the user executing the remote WMI connection.
If this user does not exist on the target machine, the remote WMI connection will always fail with “access denied”, even when this user
has been passed with the connection options. This has worked on targets with windows 10 <= 1703.
We did our tests using wbemtest.exe with the same impersonation & authentication level as the target (configured using dcomcnfg.exe).
Until 1703:
Test wbemtest.exe with local user of remote destination filled in in the credentials section:
Able to connect and retrieve data
Starting from 1803:
Test wbemtest.exe with local user of remote destination filled in in the credentials section):
0x80070005 access denied
Request:
We need
to specifically find which
LocalSecurityPolicy/Registry
settings have been modified in 1803 which is blocking the remote WMI connects.
We already tried disabling windows defender, modifying remote uac, LocalAccountTokenFilterPolicy (and rebooting) but none of these changes
worked so far.
-
Edited by
Tuesday, November 13, 2018 8:16 AM
Table of Contents
- WMI Service: Access Denied
- Symptoms:
- Troubleshooting:
- Security Descriptors by Operating System Version
WMI Service: Access Denied
There are times when the WMI Service within Microsoft Windows becomes corrupt, or the permissions are incorrect. This leads to access
denied errors when performing updates or other maintenance. This guide will show you how to check and repair the WMI Permissions on directories, as well as the WMI Service to ensure that it is configurable and workable.
Symptoms:
1. When installing software such as Microsoft Exchange Service Pack Upgrades, you may be greeted with an Access Denied
message
2. When attempting to stop, start or restart the Winmgmt service, the options are greyed out (GUI)
or you receive Access Denied (Command line)
Troubleshooting:
You will be making changes to permissions and registry entries, as well as some system permissions. Please make sure you have a good backup of the server or computer before continuing. If you are not comfortable making the
changes, there is a good chance you can corrupt your Windows Installation.
1. Log into Windows as an Administrative User
2. Check permissions on C:\:
Administrators: Full Control
System: Full Control
Users: Read
Authenticated Users: Read
Everyone: Read
3. Check permissions on C:\Windows\System32
Administrators: Full Control
System: Full Control
Users: Read
Authenticated Users: Read
Everyone: Read
4. Check permissions on C:\Windows\Registration
Administrators: Full Control
System: Full Control
Users: Read
Authenticated Users: Read
Everyone: Read
5. Check permissions on C:\Windows\Registration\*.clb (any file with the file extension .clb)
Administrators: Full Control
System: Full Control
Users: Read
Authenticated Users: Read
Everyone: Read
6. Open the Registry Editor, regedit
7. Navigate to HKEY_Classes_Root\CLSID
8. Check permissions on CLSID
Administrators: Full Control
System: Full Control
Users: Read
Authenticated Users: Read
Everyone: Read
Computer: Read
9. Open an elevated command prompt
10. Check the security descriptors for WinMGMT by using the command sc
sdshow winmgmt
The security descriptors are different based on Operating System version and service pack. Below are some suggested descriptors. They should match what you see in the command above, if not the command to change them is below.
Security Descriptors by Operating System Version
Windows Server 2012: D:(A;;CCLCSWRPWPDTLOCRRC;;;SY)(A;;CCDCLCSWRPWPDTLOCRSDRCWDWO;;;BA)(A;;CCLCSWLOCRRC;;;IU)(A;;CCLCSWLOCRRC;;;SU)(A;;CCDCLCSWRPWPDTLOCRSDRCWDWO;;;SO)S:(AU;FA;CCDCLCSWRPWPDTLOCRSDRCWDWO;;;WD)

Windows Server 2008 R2 SP1: D:(A;;CCLCSWRPWPDTLOCRRC;;;SY)(A;;CCDCLCSWRPWPDTLOCRSDRCWDWO;;;BA)(A;;CCLCSWLOCRRC;;;IU)(A;;CCLCSWLOCRRC;;;SU)(A;;CCDCLCSWRPWPDTLOCRSDRCWDWO;;;SO)S:(AU;FA;CCDCLCSWRPWPDTLOCRSDRCWDWO;;;WD)

Windows Server 2008 SP2 x64: D:(A;;CCLCSWRPWPDTLOCRRC;;;SY)(A;;CCDCLCSWRPWPDTLOCRSDRCWDWO;;;BA)(A;;CCLCSWLOCRRC;;;IU)(A;;CCLCSWLOCRRC;;;SU)

Windows 8.1 x64: D:(A;;CCLCSWRPWPDTLOCRRC;;;SY)(A;;CCDCLCSWRPWPDTLOCRSDRCWDWO;;;BA)(A;;CCLCSWLOCRRC;;;IU)(A;;CCLCSWLOCRRC;;;SU)

Windows 7 SP1 x86: D:(A;;CCLCSWRPWPDTLOCRRC;;;SY)(A;;CCDCLCSWRPWPDTLOCRSDRCWDWO;;;BA)(A;;CCLCSWLOCRRC;;;IU)(A;;CCLCSWLOCRRC;;;SU)

Windows 7 SP1 x64: D:(A;;CCLCSWRPWPDTLOCRRC;;;SY)(A;;CCDCLCSWRPWPDTLOCRSDRCWDWO;;;BA)(A;;CCLCSWLOCRRC;;;IU)(A;;CCLCSWLOCRRC;;;SU)S:(AU;FA;CCDCLCSWRPWPDTLOCRSDRCWDWO;;;WD)

Windows XP SP3 x86: D:(A;;CCLCSWRPWPDTLOCRRC;;;SY)(A;;CCDCLCSWRPWPDTLOCRSDRCWDWO;;;BA)(A;;CCLCSWLOCRRC;;;AU)(A;;CCLCSWRPWPDTLOCRRC;;;PU)
11. If the security descriptors are not correct for you operating system version, then run the command sc sdset winmgmt *DESCRIPTORS* where
*DESCRIPTORS* is the appropriate set for your Operating System Version. (See above)
12. Restart the Server/Computer and check the WMI Service to see if the issue is resolved.