
В операционную систему Виндовс 10 входит множество предустановленных компонентов. Определенный браузер включен в состав операционной системы Windows разработчиком, поэтому устанавливается в автоматическом режиме после распаковки и активации Винды. Используют данный инструмент нечасто, поэтому важно знать, как отключить работу сервиса Интернет Эксплорер в Виндовс 10.

Отключение через «Компоненты Windows»
Существует несколько способов деактивировать ненужный процесс. Для выполнения необходимых действий требуется пройти следующие этапы:
- нажать одновременно сочетание горячих клавиш «Win» и «R»;
- откроется дополнительное рабочее окно «Выполнить»;
- в пустую строку ввести «OptionalFeatures», подтвердить операцию кнопкой «Enter»;

- запустится следующий блок, где напротив наименования интернет-браузера требуется снять флажок автозапуска;
- перезагрузить ПК в принудительном порядке.

Внимание! Операционка выведет окно, где потребуется подтвердить запрос на отключение элемента. На работу других компонентов персонального компьютера (стационарного или портативного) это не повлияет.
PowerShell
Это встроенный инструмент, с помощью которого можно изменить характеристики блоков операционной системы и установленных приложений. Инструкция:
- запустить консоль (важно выполнять операцию от имени и с правами администратора, иначе внесенные изменения не будут сохранены);
- ввести запрос Disable-WindowsOptionalFeature –FeatureName «Internet-Explorer-Optional-amd64»-Online;
- при появлении следующего окна нажать клавишу «Y» (независимо от языка текущей раскладки), подтвердить «Enter».

Работу интернет-ресурса можно запустить заново, используя команду Enable-WindowsOptionalFeature –FeatureName «Internet-Explorer-Optional-amd64» -All -Online.
Панель управления
Третий вариант взаимодействия с Эксплорером – использование встроенного инструмента. Этапы действий:
- открыть «Пуск», перейти к разделу «Параметры»;
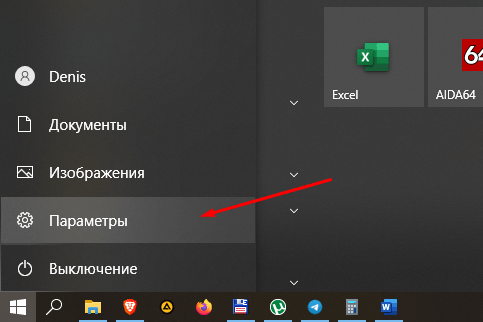
- выбрать блок «Приложения», затем пункт «Не обязательные функции»;

- найти нужный элемент, кликнуть по строке «Вход»;
- активировать пункт «Удалить».

После этого требуется перезагрузить персональный компьютер принудительно в стандартном режиме.
Если пользователю нужно отключить работу программы Internet Explorer, используют три способа. Каждый из вариантов действует по определенному алгоритму. Инструкции несложные, подойдут начинающим пользователям.

Вам помогло? Поделитесь с друзьями — помогите и нам!
Missing System files can prompt this problem
by Henderson Jayden Harper
Passionate about technology, Crypto, software, Windows, and everything computer-related, he spends most of his time developing new skills and learning more about the tech world. He also enjoys… read more
Updated on
Reviewed by
Alex Serban

After moving away from the corporate work-style, Alex has found rewards in a lifestyle of constant analysis, team coordination and pestering his colleagues. Holding an MCSA Windows Server… read more
- Windows 10 File Explorer constantly opening by itself may cause problems with the proper operations on the PC.
- The issue often occurs due to problems with File Explorer processes and corrupt system files on the computer.
- Ending tasks and restarting the File Explorer process on your computer can resolve background apps causing it to open at will.
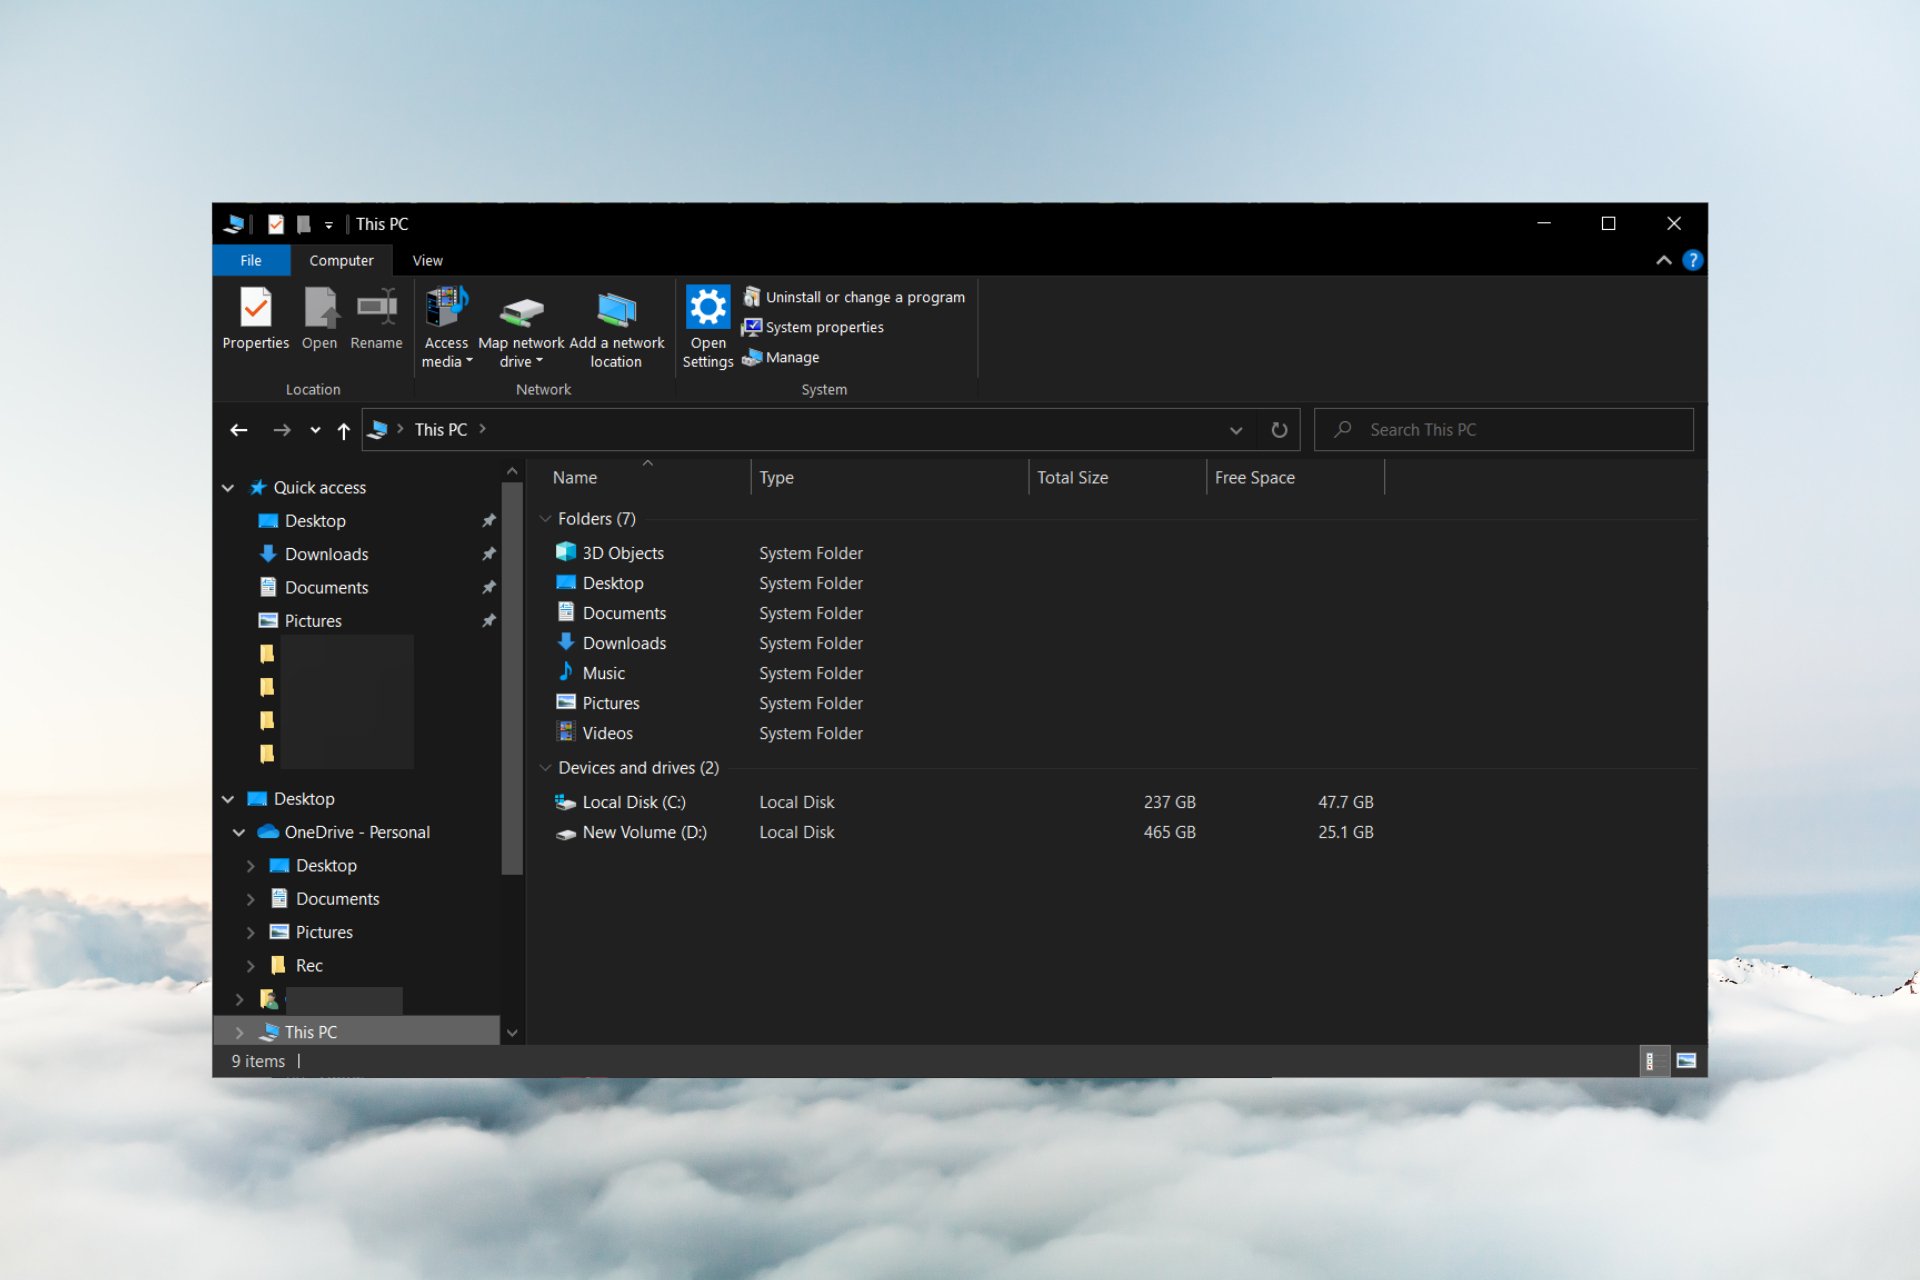
File Explorer is the default file manager software for Windows. However, our readers reported that Windows 10 File Explorer keeps opening itself. Hence, it causes interruption while using the PC.
Also, we have a detailed guide for fixing File Explorer preview pane not working on Windows PCs.
Why does the Windows 10 File Explorer keep opening?
There isn’t a specific reason why File Explorer keeps opening on Windows 10. However, some probable causes are:
- File Explorer bug – If this happens right after an update or a severe crash, the app may simply be bugged, and it also may result in File Explorer crashing repeatedly or malfunctioning.
- The AutoPlay feature is enabled – If enabled on your PC, it can cause File Explorer to keep opening by itself.
- Corrupt or missing system files – If the system files are corrupt on Windows 10 or not accessible, it can cause the program to malfunction or affect other programs running on the system.
- Viruses and malware infection – Apps opening by themselves might be a sign of infection. Also, viruses and malware can cause File Explorer to work slowly on the computer.
Fortunately, there are some troubleshooting steps you can follow to fix the problem and get File Explorer working correctly.
What can I do if Windows 10 File Explorer keeps opening?
Before trying any advanced troubleshooting steps, go through the following:
How we test, review and rate?
We have worked for the past 6 months on building a new review system on how we produce content. Using it, we have subsequently redone most of our articles to provide actual hands-on expertise on the guides we made.
For more details you can read how we test, review, and rate at WindowsReport.
- Turn off background apps running on your computer.
- Restart Windows in Safe Mode and check if you can fix File Explorer opening without the user’s consent.
- Make sure you installed all the latest updates to your OS. A patch fixing the File Explorer may already be issued.
Should the problem persist, go ahead and proceed with the solutions below.
1. Perform a Clean boot on your PC
- Press Windows + R key to open the Run dialog box, type msconfig, and click OK.
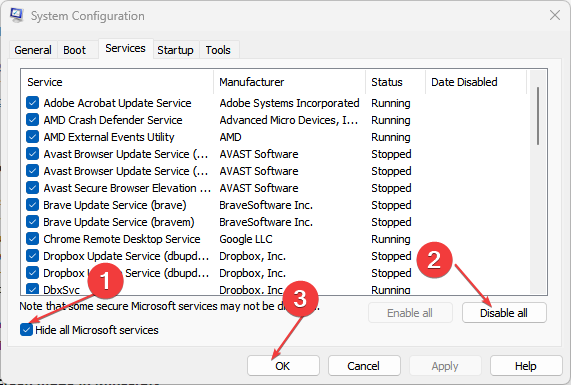
- Click the Services tab, check the box for the Hide all Microsoft services option, then click the Disable all button.

- Go to the Startup tab and click Open Task Manager.
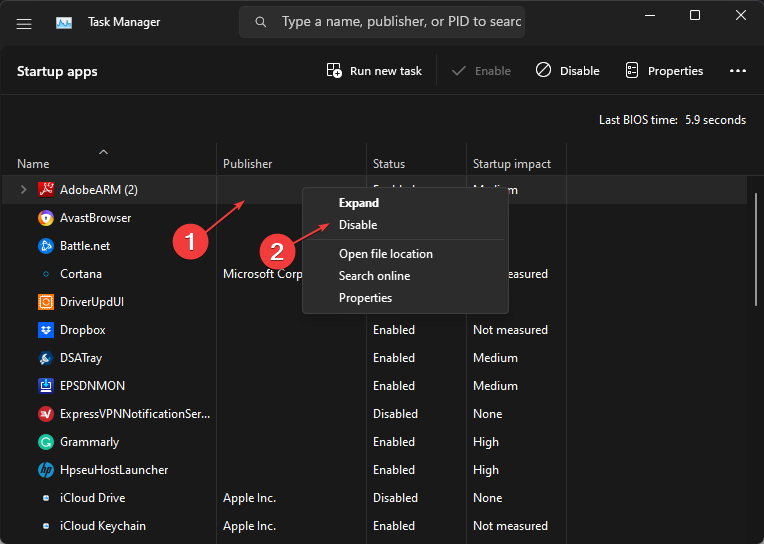
- Select the startup programs and click the Disable button.

- Restart your PC and check if the issue persists.

Performing a Clean boot stops services interfering with File Explorer from running when you boot the system. It disables startup apps from running on your computer when not prompted.
2. End tasks for File Explorer processes on your PC
- Press Windows + R key to open the Run dialog box, type taskmgr.exe, and click OK to open Task Manager.
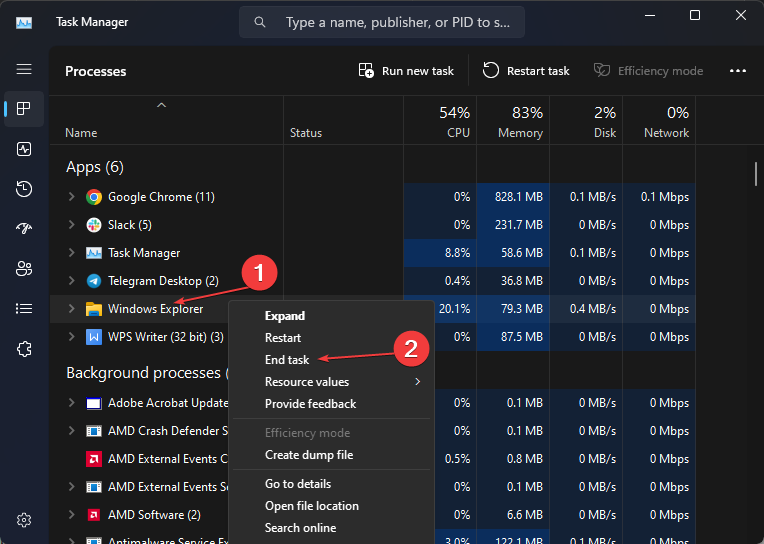
- Find the File Explorer app, right-click it, then select End Task from the drop-down menu.
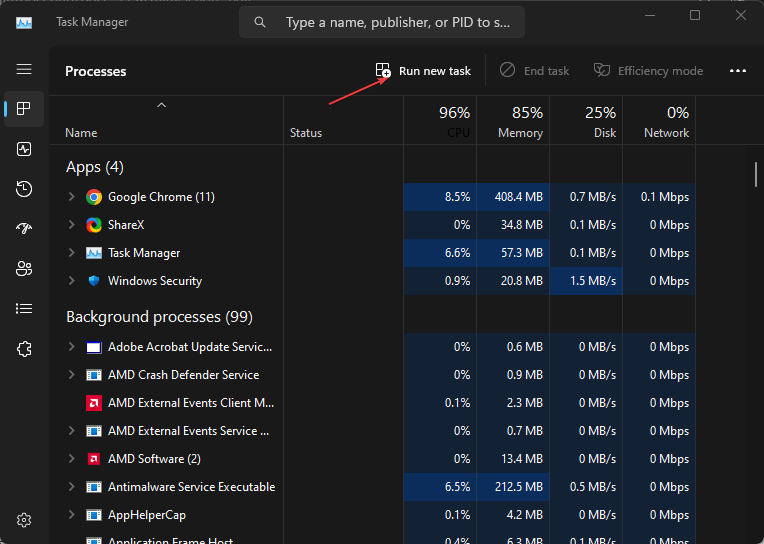
- Click on File from the taskbar and select Run new task from the menu.
- Type explorer.exe in the box and click OK to restart the File Explorer process on your computer.
- Restart your PC and check if the issue continues.
Ending tasks and restarting the File Explorer processes on your computer will stop background activities prompting it to open randomly. Also, it fixes ongoing actions liable to impede its performance.
3. Disable the Use AutoPlay for all media and devices option
- Left-click the Start button, type control panel, then choose the best match to open the Control Panel.
- Click the View by icon and change it to Large or Small icons.
- Under All Control Panel items, click the AutoPlay option.

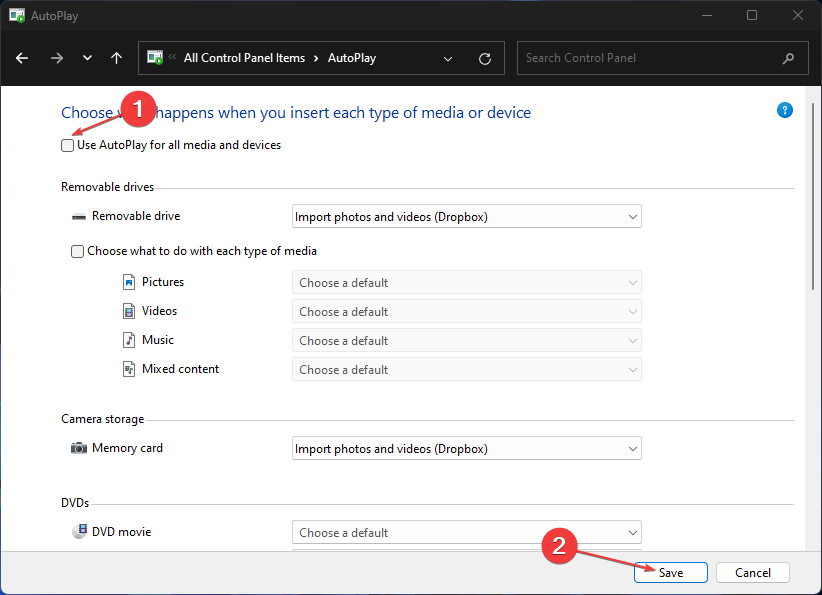
- Uncheck the box for the Use AutoPlay for all media and devices option, then change the Removable drive option to Take no action.
- Click on the Save button to confirm the changes.
- Restart your PC and check if File Explorer keeps opening.

Disabling the AutoPlay feature stops apps from opening automatically to perform tasks on the PC.
- How to Quickly Create a New Library on Windows 11
- Fix: File Explorer Randomly Stealing Focus on Windows 11
- Windows 11 is Not Asking to Replace or Skip Files When Copying
- No Details Tab in Properties? How to Enable it on Windows 11
4. Run a System File Checker (SFC) scan
- Left-click the Start button, type Command Prompt, and click the Run as administrator option.
- Click Yes on the User Account Control prompt.
- Type the following and press Enter:
sfc /scannow
- Restart your PC and check if the issue persists.

Running an SFC scan on your PC will find and repair missing or corrupt system file issues that may cause File Explorer to malfunction.
Read our guide on fixing the run as administrator option if it’s not working on your PC.
5. Run Windows Defender scan
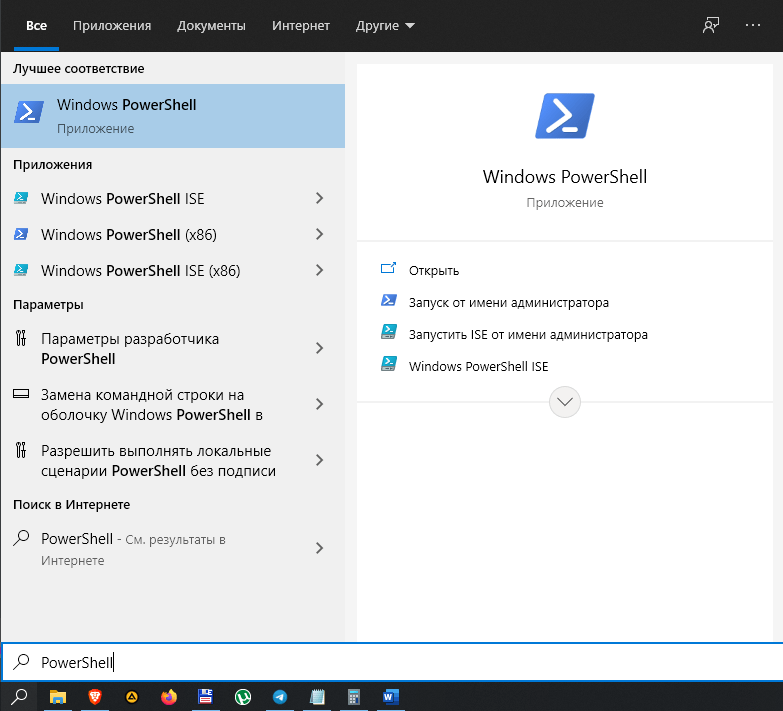
- Left-click the Start button, type Windows Security, then choose the best match to open the app.
- Click on Virus & Threat Protection from the menu and select Scan options.

- Then click the Full scan button to initiate an extensive scan and click the Scan now button.

- Lastly, wait while the scan completes.

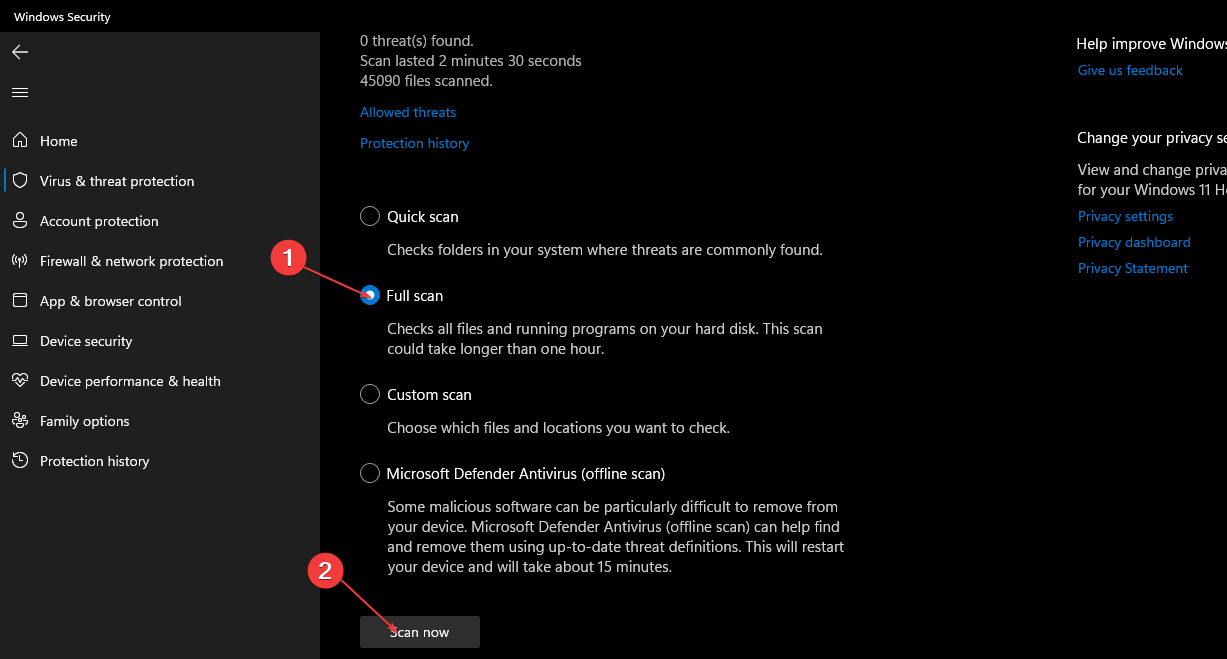
Running a Windows Defender scan will find and remove any malware and viruses affecting the File Explorer on your computer.
Read how to fix the Windows Virus and threat protection not working on Windows 11.
In conclusion, you may be interested in our guide on how to fix File Explorer freezing or not responding & more issues on Windows computers. Also, check how to extract files from multiple folders in File Explorer.
If you have further questions or suggestions, kindly use the comments section.
![]()
 Проводник в Windows является практически полным интерфейсом системы, он включает в себя запущенные окна, открытые папки, рабочий стол и так далее. Проводник представляет собой процесс explorer.exe, который может зависнуть или начать неправильно работать, вследствие чего потребуется его перезагрузить. Чаще всего пользователи это делают путем полной перезагрузки компьютера, но можно выполнить только перезагрузку проводника, что гораздо быстрее и не менее просто. При этом также перезагрузка проводника может быть необходима, например, для активации внесенных изменений в реестр системы и в ряде других случаев.
Как перезагрузить проводник в Windows
Существует несколько способов перезагрузить проводник в операционной системе Windows. Самый простой из них, который доступен на любой версии операционной системы, это деактивация процесса explorer.exe через «Диспетчер задач». Делается это следующим образом:
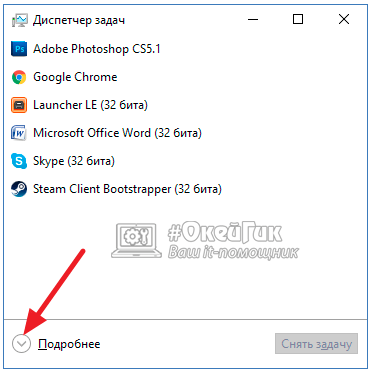
- Запустите «Диспетчер задач», нажав на клавиатуре сочетание клавиш Ctrl+Alt+Del;
- Далее перейдите в расширенный режим просмотра «Диспетчера задач», кликнув по варианту «Подробнее» в открывшемся окне;

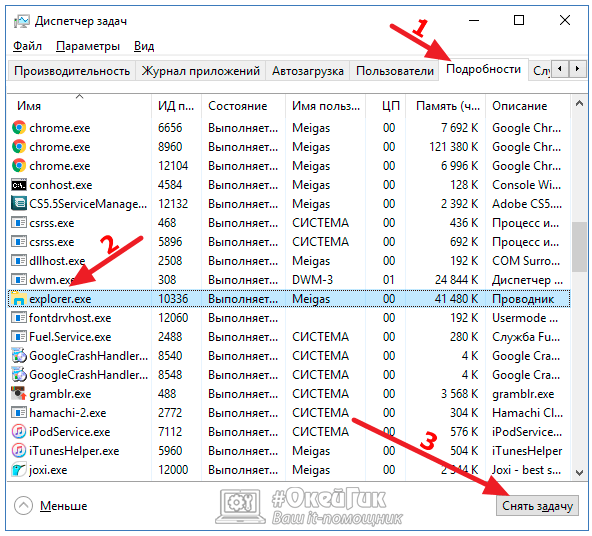
- После этого переключитесь на вкладку «Подробности» и для удобства отсортируйте отраженные процессы по имени;
- Далее выделите explorer.exe и нажмите «Снять задачу». Появится всплывающее окно, в котором нужно подтвердить намерения.

Также имеются другие способы перезагрузить проводник в Windows:
Стоит отметить, что в некоторых случаях после завершения работы проводника он запускается автоматически, и не требуется его принудительная активация через диспетчер задач. Но если после выполнения описанных выше действий проводник будет отключен и самостоятельно не включится, ниже идет речь о том как его запустить.
Как запустить проводник в Windows
При завершении процесса проводника пропадают все элементы системы, при этом у пользователя остается возможность пользоваться различными утилитами Windows, в том числе и «Диспетчером задач». Через него можно запустить проводник следующим образом:
- Запустите «Диспетчер задач» стандартным образом, нажав на клавиатуре Ctrl+Alt+Del;
- Далее потребуется создать новую задачу. Для этого перейдите в расширенный режим «Диспетчера задач», нажав на кнопку «Подробнее»;
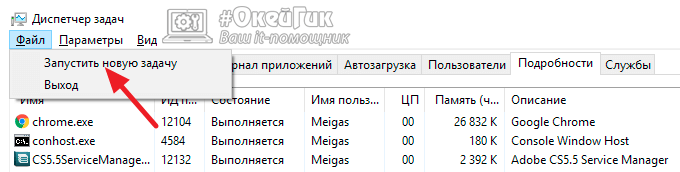
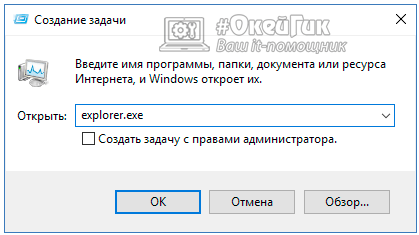
- После этого в верхней части открытого окна кликните «Файл» и выберите в выпадающем меню пункт «Запустить новую задачу»;

- Введите в открывшемся окне создания задачи команду explorer.exe, после чего нажмите «ОК», и проводник должен будет прогрузиться.

Если проводник в системе не запускается после загрузки компьютера, а попытки запустить его описанным выше способом через создание новой задачи приводят к ошибкам, можно попробовать сделать следующее:
- Через «Диспетчер задач» запустите новую задачу — rstrui.exe;
- Также попробуйте запустить командную строку через «Диспетчер задач», путем активации задачи cmd.exe. Когда командная строка будет запущена, проверьте целостность системных файлов операционной системы Windows, для этого нужно ввести в командной строке sfc /scannow.
Если приведенные выше советы не помогли запустить проводник Windows, можно попробовать восстановление компьютера до последней контрольной точки или выполнить сброс операционной системы, но для этого потребуется загрузочная флешка или диск.
![]()
![]()
![]()
![]()
![]() (411 голос., средний: 4,59 из 5)
(411 голос., средний: 4,59 из 5)
![]() Загрузка…
Загрузка…

Устранение неполадки при которой после загрузки операционной системы Windows, автоматически открывается окно Проводника.
Для устранения данной проблемы:
- Откройте Пуск → Панель управления → Параметры папок → и уберите галочку с параметра «Восстанавливать прежние окна папок при входе в систему».
Или
- Запустите командную строку от имени администратора.
- Введите команду и нажмите Enter ↵: sfc /scannow
- Дождитесь завершения проверки файлов.
или
Создайте и примените reg-файл:
Windows Registry Editor Version 5.00

[HKEY_LOCAL_MACHINE\SOFTWARE\Microsoft\Windows NT\CurrentVersion\Winlogon]
"Shell"="explorer.exe"
"Userinit"="C:\\Windows\\system32\\userinit.exe,"
ну или
- Запустите редактор реестра и перейдите в раздел реестра HKEY_LOCAL_MACHINE\SOFTWARE\Microsoft\Windows\CurrentVersion\Run — если в нем найдете какой-либо параметр со значением, указывающим на explorer.exe или C:\WINDOWS\Explorer.exe — удалите его
Также не будет лишним проверить автозагрузку, возможно Проводник открывается при загрузки Windows, именно потому что прописан в автозагрузке.