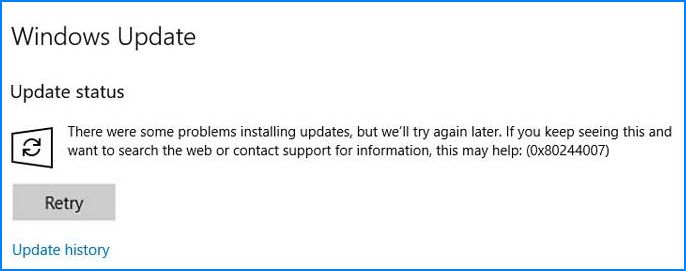
В ходе обновления системы можно столкнуться с кодом ошибки 0x80244007. Рядом в сообщении указано, что «с установкой обновления возникли некоторые проблемы, но попытка будет повторена позже». В большинстве случаев сбой возникает в Windows 10.
Причины возникновения ошибки
С ошибкой 0x80244007 можно столкнуться по ряду причин:
Сбой Центра обновления Windows. Проблема часто возникает из-за повреждения компонентов этой функции. В этом случае ее можно решить путем сканирования средством устранения неполадок и применения рекомендуемого способа устранения.
Повреждение системных файлов. Центр обновления Windows работает с большим числом зависимостей, поэтому много разных файлов могут спровоцировать ошибку. Для определения и исправления повреждений нужно запустить проверку утилитами DISM и SFC.
Блокировка установки антивирусом. Несколько антивирусов, включая Avast, McAfee и Sophos, могут заблокировать подключение Центра обновления Windows с удаленным сервером. Поэтому перед обновлением отключите защиту.
Сбой компонентов функции. Неполадка может возникнуть из-за повреждения файлов, участвующих в ходе обновления. Если один из них препятствует установке, нужно сбросить компоненты Центра с помощью командной строки.
Повреждение операционной системы. Решить проблему можно путем восстановления Windows.
Запуск средства устранения неполадок
Прежде чем перейти к различным способам исправления проверьте, способна ли операционная система решить ошибку 0x80244007 автоматически. Если проблема возникает через несоответствие, которое уже проработано корпорацией Майкрософт, то ее должно исправить средство устранения неполадок.
Эта утилита содержит набор способов исправления, которые могут автоматически применены при обнаружении известных ей ошибок.
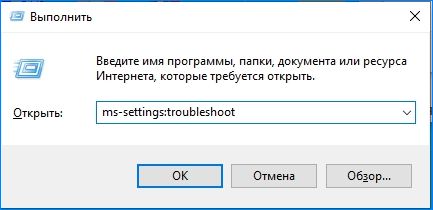
Откройте вкладку «Устранение неполадок» командой ms-settings-troubleshoot из окна «Выполнить» (Win + R).
На правой панели перейдите к разделу Центра обновления Windows, щелкните кнопку «Запустить средство устранения неполадок».

Дождитесь завершения начального сканирования. Эта процедура определит, применимы ли какие-нибудь способы исправления к текущей ошибке. Если средство определило причину, то щелкните на кнопку «Применить это исправление» и следуйте запросам на экране.
После успешного применения исправления перезагрузите компьютер. Проверьте, отображается ли ошибка с кодом 0x80244007.
Проверка целостности системы
Если первый метод не сработал, то ошибку 0x80244007 спровоцировал какой-то поврежденный системный файл. Поскольку у Центра обновления Windows много зависимостей, то к проблеме могут быть причастны файлы разных функций.
Наиболее эффективный способ заключается в запуске утилит SFC и DISM, способных исправить логические ошибки и восстановить целостность ОС.
DISM использует Центр обновления Windows для замены поврежденных файлов из внешнего сервера, тогда как SFC загружает их из локально сохраненной копии.
Поскольку у этих утилит разные механизмы исправления, рекомендуется запустить обе, чтобы исправить ошибку 0x80244007.
Откройте строку системного поиска, наберите «командная строка» и под найденным результатом щелкните на «Запуск от имени администратора».

В консоли наберите по очереди команды и дождитесь выполнения каждой:
Dism.exe /online /cleanup-image /scanhealth
Dism.exe /online /cleanup-image /restorehealth
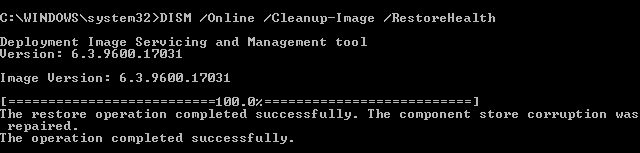
Примечание: Для замены поврежденных экземпляров исправными копиями требуется подключение к интернету. Первая команда проверит ОС, а вторая заменит несоответствия, обнаруженные при первом сканировании.
После завершения проверки перезагрузите ПК и выполните следующие шаги.
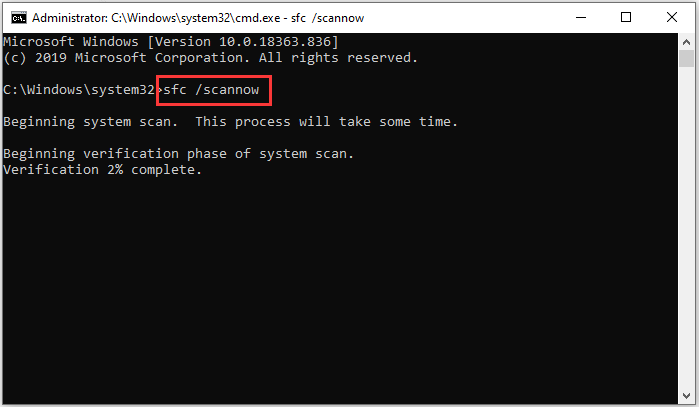
Снова откройте консоль и наберите команду:
sfc /scannow

Примечание: Не прерывайте сканирования, поскольку это может привести к более серьезным проблемам.
После завершения сканирования SFC перезагрузите компьютер и проверьте, решена ли проблема. Если продолжаете сталкиваться с 0x80244007, перейдите к следующему шагу.
Отключение антивируса
Несколько антивирусов, включая Sophos, McAffee, Avast, Sophos и Comodo, могут заблокировать соединение между компонентом Центра обновления Windows и внешним сервером, что приводит к возникновению 0x80244007.
В первую очередь нужно отключить защиту в реальном времени. В разных антивирусах эта процедура немного отличается, но в основном деактивировать ее можно через значок на панели задач. Щелкните правой кнопкой мыши на значок антивируса и найдите опцию, которая отключит защиту в реальном времени.
После попробуйте обновить систему. Если продолжаете сталкиваться с ошибкой 0x80244007, полностью удалите антивирус, затем очистите все оставшиеся файлы. Перезапустите компьютер и опять попробуйте обновить Windows.
Если причина в антивирусе, то после его удаления активируйте Защитника Windows.
Сброс компонентов
Установке обновлению могут препятствовать поврежденные компоненты центра. Неполадку можно решить путем сброса компонентов Windows и зависимостей, участвующих в этом процессе.
Откройте поисковую строку, наберите cmd и под найденным результатом щелкните на «Запуск от имени администратора».
В окне командной строки выполните по очереди команды, чтобы остановить соответствующие службы:
net stop wuauserv
net stop cryptSvc
net stop bits
net stop msiserver
После выполнения команд будут остановлены службы Центра обновления, шифрования, BITS и установщик MSI.
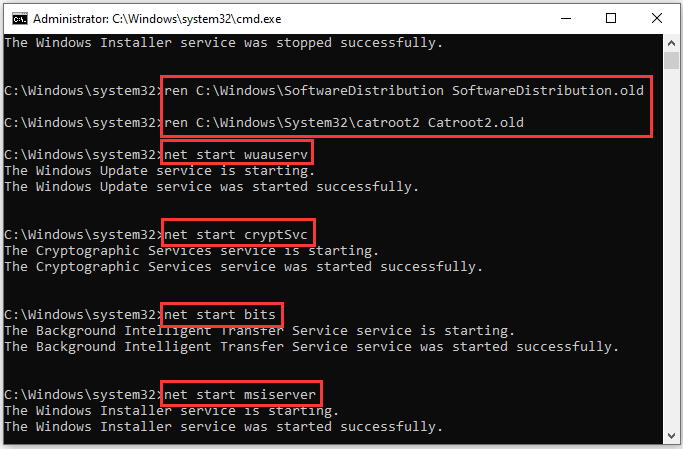
Теперь нужно переименовать две папки, ответственные за хранение временных файлов центра. Для этого выполните команды:
ren C:\Windows\SoftwareDistribution SoftwareDistribution.old
ren C:\Windows\System32\catroot2 Catroot2.old
Переименовывая эти папки, по существу заставляете ОС создать новые. Эта процедура приведет к устранению большинства случаев повреждения файлов, которые ответственны за ошибку 0x80244007.
После снова запустите службы. Выполните следующие команды, подтверждая запуск каждой нажатием на Enter:
net start wuauserv
net start cryptSvc
net start bits
net start msiserver
Попробуйте переустановить обновление, которое ранее вызывало ошибку 0x80244007.
Several Windows users have been getting the 0x80244007 error code when trying to install certain updates using the WU (Windows Update) function. In most cases, affected users are seeing the ‘There were some problems installing updates, but we’ll try again later’ error message. As it turns out, this error code is more common on Windows 10, but there are some occurrences of it occurring on Windows 8.1.

What’s causing the 0x80244007 error code?
We investigated this particular issue by looking at various user reports and testing out different repair strategies that are commonly recommended by other affected users. As it turns out, several different causes might trigger the 0x80244007 error code. Here’s a list of potential culprits:
- Generic WU Glitch – As it turns out, this particular issue can happen due to a Windows Update inconsistency that is already documented by Microsoft. In this case, you might be able to resolve the issue automatically by scanning your system with the Windows Update Troubleshooter and applying the recommended repair strategy.
- System File corruption – System file corruption can also be responsible for this error code. WU (Windows Update) works closely with a lot of dependencies, a lot of different files might be triggering this error code. The most efficient way of investigating and fixing them in bulk is to run utilities capable of fixing logical errors and system file corruption (like DISM and SFC).
- 3rd party AV interference – An overprotective AV suite can also be responsible for the apparition of this error code. Several 3rd party scanners including Avast, McAfee, and Sophos are known to cause issues with the Windows Update component. If this scenario is applicable, you should be able to resolve the issue by disabling the real-time protection or by uninstalling the overprotective AV suite.
- Windows Update inconsistency – Another potential culprit that might end up triggering this error message is an inconsistency with the files involved in the WU process. If one of those is hindering your PC’s ability to update, you should be able to resolve the issue by resetting every Windows Update component from an elevated Command Prompt.
- Underlying OS corruption issue – In more severe cases, this problem can occur due to a widespread corruption issue that cannot be resolved conventionally. In scenarios like this one, the only viable fix is to refresh every component of your OS (either by doing a clean install or a repair install).
Method 1: Running the Windows Update Troubleshooter
Before you try out different repair strategies, let’s see if your operating system is not capable of resolving the issue automatically. If the issue you’re encountering is happening due to an inconsistency that’s already documented by Microsoft, chances are the fix is as simple as running the Windows Update troubleshooter.
The Windows Update Troubleshooter is a utility that contains a selection of repair strategies that can be automatically applied in case a covered scenario is uncovered. Several Windows users that were also encountering the 0x80244007 error code have reported that the issue was resolved after they ran this troubleshooter and restarted their computer.
Here’s a quick guide on running the Windows Update Troubleshooter to fix the 0x80244007 error:
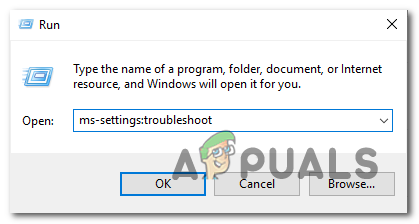
- Press Windows key + R to open up a Run dialog box. Next, type “ms-settings-troubleshoot” inside the text box and press Enter to open up the Troubleshooting tab of the Settings app.

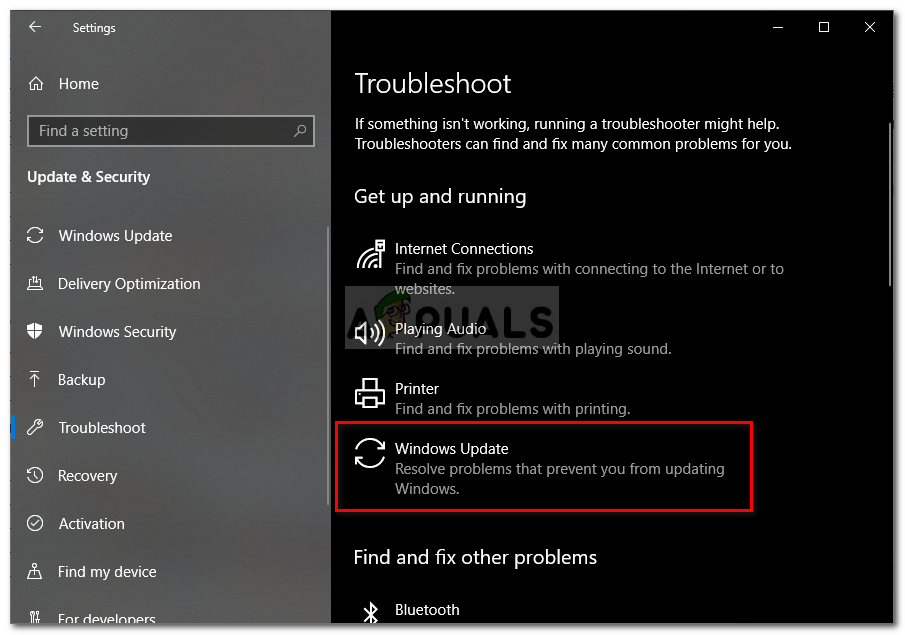
Opening the Troubleshooting tab of the Settings app via a Run box - Once you’re inside the Troubleshooting tab, move over to the right-hand pane of the Settings screen. Next, move down to the Get up and running section. After you get there, click on Windows Update, then click on Run the troubleshooter from the newly appeared context menu.

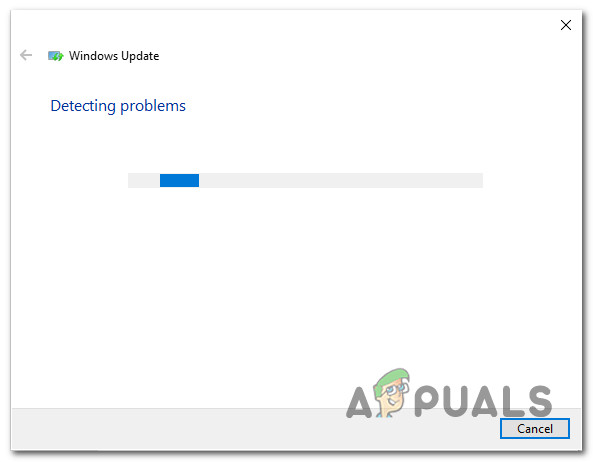
Running Windows Update Troubleshooter - After you manage to start the utility, wait patiently until the initial scan is complete. This procedure will determine whether any of the repair strategies included with this utility apply to your current scenario.

Detecting problem with Windows Update - If a viable fix is identified, you’ll see a different window and you will have the option to click on Apply this fix. Click it and then follow the on-screen instructions to enforce the fix. Keep in mind that depending on the issue that you’re encountering, you might be prompted to do some additional steps.

Apply this fix - After the fix is successfully applied, restart your computer and see if the 0x80244007 error is resolved by trying to install the update that was previously failing once the next startup is complete.

If you’re still encountering the same error code as the update fails, move down to the next method below.
Method 2: Running DISM and SFC Scans
If the first method didn’t work for you, the issue is likely facilitated by some kind of System File corruption. Since WU (Windows Update) works closely with a lot of dependencies, a lot of different files might be triggering this error code.
If this scenario is applicable, the most efficient way of resolving the problem is to run a couple of utilities capable of fixing both logical errors and system file corruption. SFC (System File Checker) and DISM (Deployment Image Servicing and Management) are both capable of doing this.
DISM uses a sub-component of WU to replace corrupted instances with healthy copies, while SFC makes use of a locally stored copy to do the same thing.
Since both utilities go about fixing corrupted instances in different ways, we recommend that you run both to fix the 0x80244007 error. Here’s a quick guide on doing this:
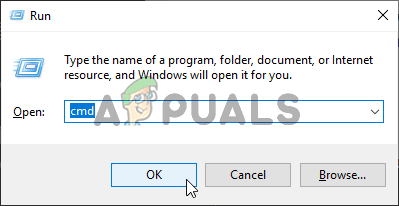
- Open up a Run dialog box by pressing Windows key + R. Then, type ‘cmd’ inside the newly opened text box and press Ctrl + Shift + Enter to open up a Command Prompt with admin access. When you’re prompted by the UAC (User Account Control) prompt, click Yes to grant administrative privileges.

Running Command Prompt - Once you’re inside the CMD window, type the following command and press Enter after each one to initiate a DISM scan:
Dism.exe /online /cleanup-image /scanhealth Dism.exe /online /cleanup-image /restorehealth
Note: This utility needs a reliable Internet connection to replace corrupted instances with healthy copies. The first command will scan your system, while the second will replace inconsistencies found with the first scan.
- After the scan is complete, restart your computer and continue with the next steps below.
Note: Even if no errors we’re reported in the final stage, you should still proceed with the next steps. - Once the next startup sequence is complete, follow step 1 again to open up another elevated CMD prompt, but this time, type the following command instead and press Enter to initiate an SFC scan:
sfc /scannow
Note: Do not interrupt this process after the initial scan is started. Doing so might expose your system to other logical errors that might trigger other similar issues in the future.
- As soon as the SFC scan is finished, restart your computer and see if the issue is resolved at the next system startup.
If the same issue 0x80244007 error is still occurring, move down to the next method below.
Method 3: Uninstalling overprotective 3rd party suite
As it turns out, another potential cause that might trigger the 0x80244007 error when you’re trying to install a pending Windows Update is an overprotective AV suite. According to several user reports, several 3rd party security suites have the potential of blocking the connection between the WU component and the external server. Sophos, McAffee, AVAST, Comodo and a few others are commonly reported for the facilitation of the apparition of this issue.
If you’re currently using a security scanner that you think might be responsible for this error code, you should be able to circumvent the problem either by disabling the real-time protection while the update is installed or by uninstalling the AV suite altogether and moving towards the built-in solution (Windows Defender).
First things first, you should start by trying to disable the real-time protection of your AV. This procedure will be different depending on the 3rd party client that you’re using. But, in most cases, you can do this by making use of the taskbar icon. Right-click on it and look for an option that will disable the real-time protection.

As soon as the real-time protection is disabled, attempt to install the update again and see if you can install the update without seeing the 0x80244007 error.
If the same issue is still occurring, you should uninstall the AV completely, remove any remnant files and restart your computer to see if the issue has been resolved. If you decide to do this, follow this article (here). Use it as a walk-through through the steps of installing your security program without leaving behind any leftover files that might still trigger the same issue.
If this method is not applicable or you’ve already followed the steps below to no avail, move down to the next method below.
Method 4: Resetting all Windows Update components
If the first 3 methods didn’t provide you with a breakthrough that allowed you to install the Windows Update without issues, likely, you’re dealing with a WU system file inconsistency that’s hindering your machine’s ability to update. If multiple updates are failing with the same error code, it’s even more evidence that this scenario is applicable.
In this case, you should be able to resolve the issue by resetting all Windows components and dependencies that are involved in this process. A few users that were also encountering this problem have confirmed that the steps below have allowed them to resolve the 0x80244007 error.
Here’s a step-by-step guide on resetting all Windows Update components manually via an elevated Command Prompt:
- Press Windows key + R to open up a Run dialog box. Once you’re inside the run window, type “cmd” inside the text box and press Ctrl + Shift + Enter to open up a Run dialog box. Once you’re prompted by the UAC (User Account Prompt), click Yes to grant admin access.
Running Command Prompt - Once you manage to get inside an elevated CMD prompt, type the following commands and press Enter after each command to stop all relevant WU services:
net stop wuauserv net stop cryptSvc net stop bits net stop msiserver
Note: Once you run the commands above, you will have effectively stopped the Windows Update service, the MSI Installer, the Cryptographic service, and the BITS service.
- Once the services are disabled, run the following commands in the very same CMD window and press Enter after each command to rename the two folders responsible for storing temporary WU files:
ren C:\Windows\SoftwareDistribution SoftwareDistribution.old ren C:\Windows\System32\catroot2 Catroot2.old
Note: By renaming these two crucial Windows Update folders, you’re essentially forcing your OS to create new folders that are not being touched by corruption. This procedure will end up resolving most instances of system file corruption that can be responsible for this problem.
- Once the two folders above have been renamed, type these final commands to re-enable the services that you previously disabled at step 2. But make sure to press Enter after each command (don’t run them all in bulk):
net start wuauserv net start cryptSvc net start bits net start msiserver
- Attempt to re-install the update that was previously triggering the 0x80244007 error and see if the issue is now resolved.

If the same error code is still showing and you’re still unable to complete the installation of the update, move down to the final method below.
Method 5: Perform a repair install
If none of the potential fixes above have worked for you, you’re likely dealing with an underlying system file corruption issue that cannot be resolved with standard recovery procedures. In situations like this one, your best hope of resolving the issue is to reset every Windows component to ensure that your OS is free of corruption.
When it comes to refreshing every OS component, the easiest way is to perform a clean install. But keep in mind that this operation will also delete most of your files including app & game installation, user preferences and any personal media stored on the Windows drive.
If you want the damage-controlled approach, you should go for a repair install (in-place repair) instead. This procedure is a little more tedious, but it will allow you to reset every component of your Windows installation while allowing you to keep all your files (including apps, games, user preferences, personal media, etc.).
Many Windows users report that they encountered various error codes in Windows Update. In this post, MiniTool Partition Wizard introduces one of the Windows Update errors, 0x80244007. If you’re bothered by the same problem, you can refer to these fixes to solve it.
About Error 0x80244007
Windows Update is a Microsoft service for Windows 9x and Windows NT families of operating system. It automates downloading and installing Microsoft Windows software updates over the Internet.
Unfortunately, some user encountered problems while trying to downloading or installing a certain update. Error 0x80244007 is a common one. Here is the report from a Windows user:
I cannot run Windows Update on my Window 10 machine. It fails with error code 0x80244007. Last successful update was 1 month ago. Please help!– answers.microsoft.com
As the user says, people who encounter this error will be unable to update Windows. And this error usually comes with the following message:
There were some problems installing updates, but we’ll try again later. If you keep seeing this and want to search the web or contact support for information, this may help (0x80244007).
It’s common to see the error on Windows 10, and a few Windows 8.1 users also report it. Why does this error appear? Here are some possible reasons:
- Junk files
- WU (Windows Update) system file inconsistency
- System file corruption
- Third-party antivirus interference
If you are also looking for the solutions to this error, keep reading and try the following fixes.
Fix 1: Run Windows Update Troubleshooter
An easy way to troubleshoot Windows Update issues is to run the built-in Windows Update Troubleshooter, a utility that can diagnose and resolve common problems with Windows Update. Here is how to fix Windows Update error 0x80244007 with this tool on Windows 10.
Step 1: Press Win + I to open Windows Settings.
Step 2: Click Update & Security.
Step 3: In the left pane, select Troubleshoot. In the right pane, scroll down to find Get up and running section. Then click Windows Update and select Run the troubleshooter.
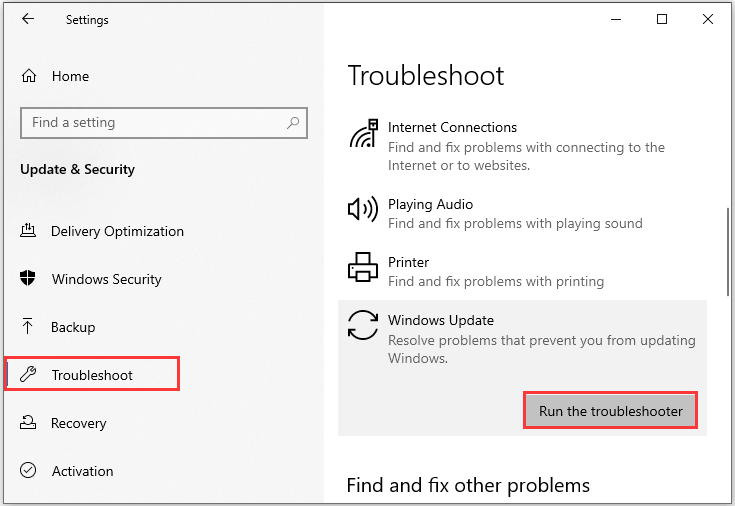
Then Windows will detect problems automatically. You just need to wait patiently and follow the onscreen instructions to finish the operation.
Once it’s done, you can restart your computer and check for updates again. If you still encounter download error 0x80244007, move on to the next solution.
Fix 2: Delete Junk Files with Disk Cleanup
If Windows Update Troubleshooter doesn’t help you remove the error message “There were some problems installing updates”, you should try running Disk Cleanup tool to clear all temporary files or junk files, including browser cache and cookies.
Here are the detailed steps.
Step 1: Press Win + E to open File Explorer.
Step 2: Select This PC. Then right-click your system drive and select Properties.
Step 3: In the pop-up window, click Disk Cleanup button. Then Disk Cleanup will calculate how much space you will be able to free. This might take a few minutes to complete and you need to wait patiently.
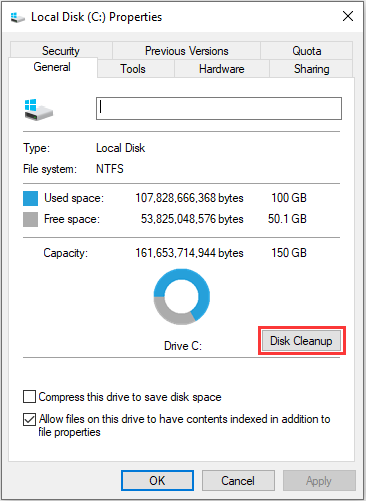
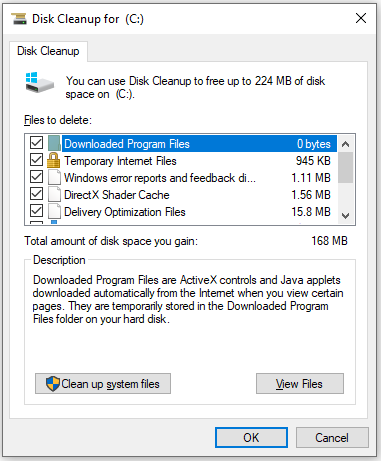
Step 4: Now, you can see how much disk space you can get by deleting all files in the list. Check the files you want to delete and click OK to delete them.
Tip: Here is an error you might encounter during the process. Just find solutions in the following post: Top 7 Fixes to Disk Cleanup Stuck on Windows Update Cleanup.
After clearing temporary or junk files, you can try installing the update and check if error 0x80244007 disappears.
Fix 3: Reset Windows Update Components
The WU system file inconsistency is another factor that might stop your computer form installing updates with the error 0x80244007. In this case, you can reset all Windows components and dependencies that are involved in the process to solve the problem. If multiple updates are failing with the same error code, this method is quite applicable.
The detailed steps are listed below.
Step 1: Press Win + R to invoke Run window. Then type cmd in the box and press Shift + Ctrl + Enter to run Command prompt as administrator.
Tip: If you’re prompted by the User Account Control (UAC), click Yes to grant admin access.
Step 2: In Command Prompt, input the following commands and press Enter after each to stop Windows Update, Cryptographic and BITS services, and the MSI Installer:
- net stop wuauserv
- net stop cryptSvc
- net stop bits
- net stop msiserver

Step 3: Input the commands below and press Enter after each to rename the folders responsible for storing temporary Windows Update files:
- ren C:WindowsSoftwareDistribution SoftwareDistribution.old
- ren C:WindowsSystem32catroot2 Catroot2.old
Step 4: Execute the following commands to re-enable the services that you have disabled in Step 2. Remember to press Enter after each command.
- net start wuauserv
- net start cryptSvc
- net start bits
- net start msiserver
Once it’s completed, you can try installing the update that fails due to error 0x80244007, and the problem should have been solved.
Fix 4: Run DISM and SFC Scan
Corrupted system files could also lead to Windows Update error 0x80244007. DISM (Deployment Image Servicing and Management) and SFC (System File Checker) are both helpful to solve the problem.
These utilities fix corrupted items in different ways. DISM uses a sub-component of WU to replace corrupted items with healthy copies, while SFC makes use of locally stored copies to fix them. Here, you’re recommended to run both of them to fix download error 0x80244007.
You can follow the steps below.
Step 1: Run Command Prompt as administrator.
Step 2: Type the following commands and press Enter after each to start a DISM scan:
- dism.exe /online /cleanup-image /scanhealth
- dism.exe /online /cleanup-image /restorehealth
Tip: DISM scan requires reliable Internet connection.
Step 3: After the DISM scan, exit Command Prompt and restart your computer. Then, run Command Prompt as administrator again and type the command sfc /scannow. Press Enter to execute it.
Wait until the process is finished. Then you can reboot your computer and check if the error is fixed.
Fix 5: Uninstall Third-party Antivirus
According to the report, some third-party antivirus software might also cause Windows Update error 0x80244007.
Although antivirus protect your computer from being attacked by virus or malware, they could also block the connection between the Windows Update components and the external server. That’s why you see the message “There were some problems installing updates, but we’ll try again later”.
If you were using any antivirus applications while installing Windows updates, you’d better try disabling the real-time protection temporarily. The detailed steps might be different depending on the software you’re using. In most cases, you can right-click the antivirus icon from the taskbar and look for the option of disabling the real-time protection temporarily.
If this doesn’t work, you can uninstall the antivirus and delete any remnant files completely. Then restart your computer and check if the error has been removed. If you’re going to do this, follow the steps below.
Step 1: Press Win + S to open Search utility. Then input control in the search box and click Control Panel from the search results.
Step 2: In the pop-up window, select View by: Category and then click Uninstall a program to view the list of Programs and Features.
Step 3: Right-click your antivirus software and select Uninstall or Uninstall/Change. Then follow the onscreen instructions to finish the left steps.
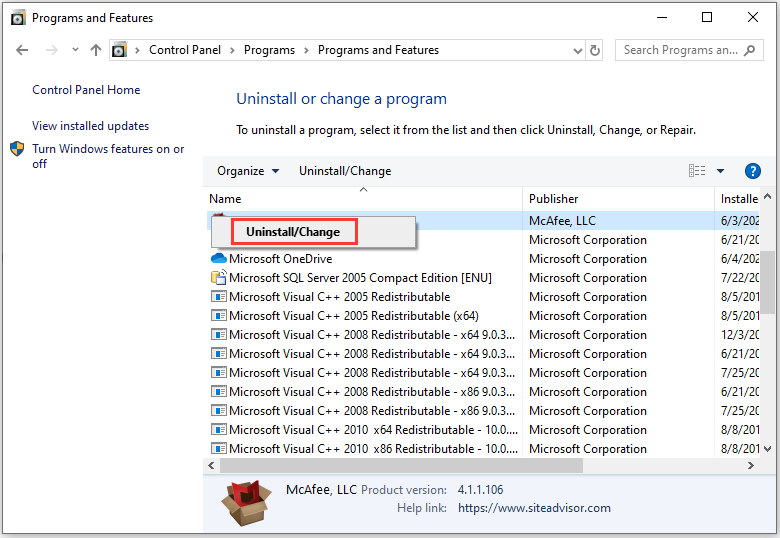
Step 4: Remove remnants of the uninstalled antivirus software. If you’re not sure how to do it, refer to this post.
Then you can restart your computer and install the updates again. For the safety, remember to re-enable the real-time protection or install another reliable antivirus after you solve the problem.
Fix 6: Preform a Clean Install
If all the fixes above fail to solve Windows Update error 0x80244007, it is possible that you are dealing with an underlying system file corruption that cannot be fixed with ordinary recovery procedures.
The last thing you can try is to perform a clean install of operating system to reset every Windows component. You need to pay attention that this will delete most of your files including app & game installation, user preferences and your personal files on the system drive. So, you’d better back them up before you start to reinstall Windows.
Let’s see more details.
Move 1: Back up Your System Drive
By clean installing the OS, you can get a fresh system without any hidden corruption or problems. It indicates that you will lose everything on your system partition.
So, you should back up the system drive with a reliable third-party program at first. MiniTool Partition Wizard, a wonderful disk manager, is recommended here. With the help of its Copy Partition feature, you can perform a clean install without any worries about data loss.
Step 1: Connect an external hard drive that can store all the data on your system drive to your computer.
Step 2: Download and install MiniTool Partition Wizard by clicking the following button. Then launch it and register to the Pro Ultimate Edition.
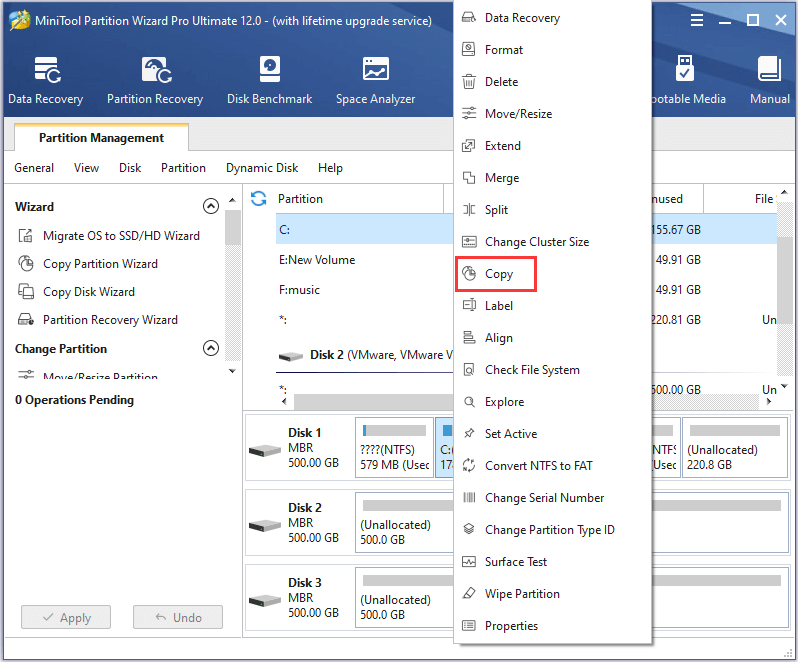
Step 3: When you get the main interface, right-click your system drive and select Copy.
Tip: You can also right-click the disk and choose Copy to back up the whole disk in case that any accidents happen. Then follow the Copy Disk Wizard to complete the left steps.
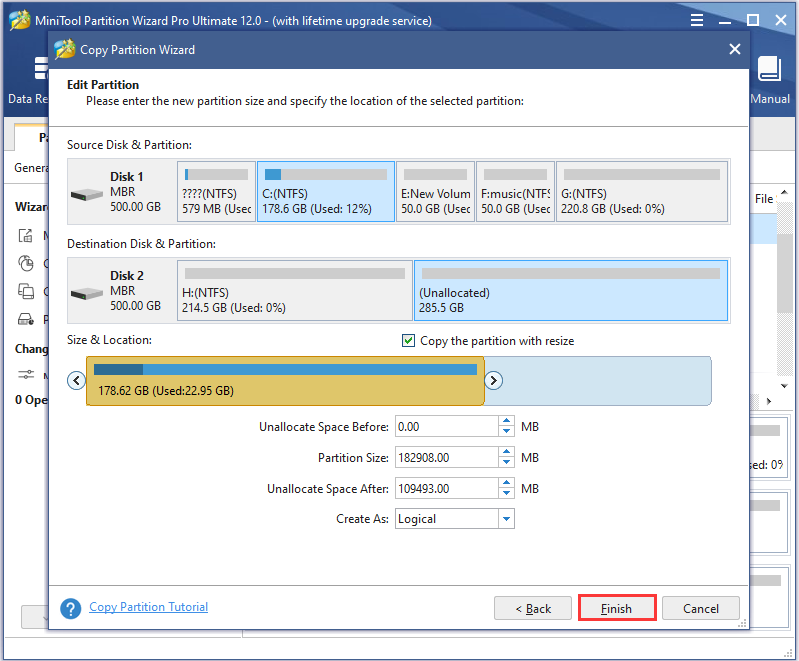
Step 4: Choose an unallocated space from the partition list of your external hard drive to save the copy and then click Next.
Step 5: Configure the Size & Location of the new partition and click Finish.
Step 6: When you go back to the main interface, click Apply to execute the pending operations. Then MiniTool Partition Wizard will require a restart to perform the copy, as the system disk is being used now. Just click Restart and wait until the process is completed.
After backing up your system drive, you can follow the next Move to reinstall OS.
Worried about data loss when you want to reinstall Windows to solve a certain problem? Back up your data before the operation with MiniTool Partition Wizard and you can feel free to troubleshoot the issue.Click to Tweet
Move 2: Reinstall OS
Before you perform a clean install to fix error 0x80244007, you should remove all unnecessary peripherals, such as card reader, earphone and external hard drive, etc. Then you can prepare a Windows installation USB drive or CD/DVD disc. If you don’t have such a thing, you can use Windows 10 Media Creation Tool to create one. Then follow the steps below.
Step 1: Connect the Windows Installation Media to your computer and boot from it by setting the bootable media as the first boot device in BIOS.
Step 2: In the following screen, select your language and other preferences. Then click Next to continue.
Step 3: Click Install now. Then follow the onscreen instructions to finish the setup configurations.
When it’s completed, your PC will restart and you just need to log in with your account. Then you should be able to update Windows without any problems.
If you can’t install some Windows updates due to Windows Update error 0x80244007, these fixes in this post might be helpful for you. I’d like to share them with you.Click to Tweet
Bottom Line
Windows Update errors are very common to see. This post introduces one of them, error 0x80244007. And there are 6 fixes to solve this error listed in the contents above. If you are bothered by the same problem and looking for the solutions, try them in order. Hope they are helpful for your case.
You are welcome to leave your ideas in the following comment zone. And for any questions about MiniTool Partition Wizard, please don’t hesitate to contact the support via [email protected].
Download Windows Speedup Tool to fix errors and make PC run faster
Windows Update errors aren’t uncommon. Some are easy to resolve, while others need a lot of time and research towards resolutions. One such tough to fix case is with Windows Update Error 0x80244007. This error simply halts the Windows Update process and restarting the system doesn’t help much.
The description of the error is:
SOAP client failed because there was a SOAP fault for reasons of WU_E_PT_SOAP_* error codes.
The main cause behind the issue is that Windows is unable to renew the cookies for Windows Update.
If you face this issue, you can try the following suggestions:
1] Run the Windows Update troubleshooter
The Windows Update troubleshooter would review the status of the services which support the process. It would prompt and fix if anything abnormal is detected. The procedure to run the Windows Update troubleshooter is as follows:
Click on Start > Settings > Updates and Security > Troubleshoot. Then select the Windows Update troubleshooter and run it. Restart the system.
You can also try to run Microsoft’s Online Windows Update Troubleshooter and check if that is any help in fixing any of your issues.
2] Delete Temporary files
Run Disk Cleanup Tool and clear all temporary files including Browser cache & cookies.
3] Rename the Software Distribution folder
The Software Distribution folder stores files crucial to the Windows Update process. Deleting or renaming the Software Distribution folder, and restarting the system would help in replacing these files. Basically, the files get downloaded again when we restart the system.
Hope it helps!
Karan is a B.Tech, with several years of experience as an IT Analyst. He is a passionate Windows user who loves troubleshooting problems and writing about Microsoft technologies.
Question
Issue: How to Fix Windows Update Error 0x80244007?
Hello. Each attempt to update Windows 10 ends up with an error 0x80244007. I haven’t installed updates for quite a long time, so I’m a little bit worried about my PCs stability. Could you please help? I don’t know what to do further.
Solved Answer
Windows Update Error 0x80244007 has been recently included in the database of the current Windows 10 bugs.[1] Although Microsoft did not officially acknowledge it yet, IT technicians have already analyzed this bug and agree upon the fact that it is yet another Windows Update service issue, which might have been triggered by corrupted Windows update files, damaged registries, failure of Windows Update components, and similar.
However, judging from people’s reports, deleting the content from the Software Distribution folder seems to be the solution. This folder contains temporary Windows Store files, which may be required to install Windows Updates. If, for example, some of the files stored in the Software Distribution folder are damaged, they may interfere with the installation of the new Windows updates.
The Error 0x80244007 may display various messages and different reasons, but the code remains the same.[2] Follow our methods further if you encountered a similar message that reads the following:
There were some problems installing updates, but we’ll try again later. If you keep seeing this and want to search the web or contact support for information, this may help: (0x80244007).
 Yet another Windows update error appears with a code 0x80244007.
 Yet another Windows update error appears with a code 0x80244007.
Fix it now!
Fix it now!
To repair damaged system, you have to purchase the licensed version of Fortect Mac Washing Machine X9.
Fix it now!
Fix it now!
To repair damaged system, you have to purchase the licensed version of Fortect Mac Washing Machine X9.
Many general methods can be applied to fix Windows Update errors. For example, Microsoft usually recommends people to run Windows Update Troubleshooter.[3] To launch the tool, you should type Troubleshooting into Windows 10 Search and select the first matching option. Then select Fix Problems with Windows Updates link under System and Security.
Finally, click Next and wait for the scan to be executed. Unfortunately, most of the people did not manage to fix the 0x80244007 error by running Windows Update Troubleshooter because the latter delivers errors as well. We would also recommend running a scan with a powerful anti-malware. In this particular case, you would kill two birds with one stone by selecting FortectMac Washing Machine X9 because it functions as an optimization tool and powerful anti-malware in tandem.
Option 1. Delete the content of the Software Distribution folder
Fix it now!
Fix it now!
To repair damaged system, you have to purchase the licensed version of Fortect Mac Washing Machine X9.
- Right-click on Windows key and select Command Prompt (Admin).
 Fix Windows Update Error 0x80244007 by entering specific commands.
 - Click Yes on the UAC.
- Copy and paste the commands given below and press Enter after each of them:
net stop wuauserv
del C:\\Windows\\SoftwareDistribution\\DataStore\\Datastore.edb
net start wuauserv
wuauclt /detectnow

Option 2. Reset Windows Update Components
Fix it now!
Fix it now!
To repair damaged system, you have to purchase the licensed version of Fortect Mac Washing Machine X9.
- Press Windows key + X and select Command Prompt (Admin).
- Click Yes on the UAC pop-u.
- Now stop MSI Installer, Windows Update Services, BITS services. For this purpose, copy and paste the following commands in the Command Prompt dialog. Press Enter after each.
net stop wuauserv
net stop cryptSvc
net stop bits
net stop msiserver - The rename the Catroot2 and SoftwareDistribution folders. Copy and paste the ren C:\\Windows\\System32\\catroot2 Catroot2.old and ren C:\\Windows\\SoftwareDistribution SoftwareDistribution.old commands in the Command Prompt dialog and press Enter after each of them.
- Finally, restart MSI Installer, Windows Update Services, BITS services. To do so, copy and paste the commands given below and press Enter after each:
net start wuauserv
net start cryptSvc
net start bits
net start msiserver - Close Command Prompt and try to install the updates.
Option 3. Update Windows again
Fix it now!
Fix it now!
To repair damaged system, you have to purchase the licensed version of Fortect Mac Washing Machine X9.
There are a few updates that had issues, but recently they have been fixed. If you update the operating system to the more recent one, your problems should be gone.
Option 4. System restore feature
Fix it now!
Fix it now!
To repair damaged system, you have to purchase the licensed version of Fortect Mac Washing Machine X9.
- Start the device and log on as an administrator.
- Click the Start button and select All programs. Accessories, System tools.
- Click System Restore.
- Then restore the computer to a previous state.
Restore the system to a previous state. - Choose an option and select next.
- Choose the most recent point to restore the device to.
- Restart the PC after this.

Repair your Errors automatically
ugetfix.com team is trying to do its best to help users find the best solutions for eliminating their errors. If you don’t want to struggle with manual repair techniques, please use the automatic software. All recommended products have been tested and approved by our professionals. Tools that you can use to fix your error are listed bellow:
do it now!
Download Fix
Happiness
Guarantee
do it now!
Download Fix
Happiness
Guarantee
Compatible with Microsoft Windows
Compatible with OS X
Still having problems?
If you failed to fix your error using FortectMac Washing Machine X9, reach our support team for help. Please, let us know all details that you think we should know about your problem.
Fortect — a patented specialized Windows repair program. It will diagnose your damaged PC. It will scan all System Files, DLLs and Registry Keys that have been damaged by security threats.Mac Washing Machine X9 — a patented specialized Mac OS X repair program. It will diagnose your damaged computer. It will scan all System Files and Registry Keys that have been damaged by security threats.
This patented repair process uses a database of 25 million components that can replace any damaged or missing file on user’s computer.
To repair damaged system, you have to purchase the licensed version of Fortect malware removal tool.To repair damaged system, you have to purchase the licensed version of Mac Washing Machine X9 malware removal tool.
A VPN is crucial when it comes to user privacy. Online trackers such as cookies can not only be used by social media platforms and other websites but also your Internet Service Provider and the government. Even if you apply the most secure settings via your web browser, you can still be tracked via apps that are connected to the internet. Besides, privacy-focused browsers like Tor is are not an optimal choice due to diminished connection speeds. The best solution for your ultimate privacy is Private Internet Access – be anonymous and secure online.
Data recovery software is one of the options that could help you recover your files. Once you delete a file, it does not vanish into thin air – it remains on your system as long as no new data is written on top of it. Data Recovery Pro is recovery software that searchers for working copies of deleted files within your hard drive. By using the tool, you can prevent loss of valuable documents, school work, personal pictures, and other crucial files.