
May 15th 2020

September 16th 2021

Alexenferman
⚠ WARNING:
Alexenferman, Google, Microsoft, XDA Developers, are not responsible for any damages or bricks made to your device. Please do some research if you have any concerns about this installation, the leaked Windows 10 build, features and downsides. You are choosing to make these modifications, you should blame yourself for any mistakes you make. Once installed, the partition 4 of the drive (i.e. C:) will be completely wiped. Make sure you backed up all of your data to another drive or on a computer.
Do not install Windows 10 unless you have followed very carefully the tutorial and have Secureboot disabled! Not disabling Secureboot properly might lead to a unrecoverable soft bricked device as reported by some members.
The download links associated to Yandex Disk are not owned by Alexenferman. The files can be changed at any moment by its owner without further notice. If a file in question is not accessible, please leave a comment below.
BEFORE STARTING
Please read the warning very carefully. You understand that you are responsible for any damages made to your device.
Frequently asked questions
A lot of people have asked the same questions, so here are some of the questions and answers: FAQ: Windows 10 on the Surface RT
You will need:
- Surface RT or Surface 2
- USB Flash drive (Minimum 8GB)
- Keyboard (USB Keyboard or Surface Keyboard
- Basic familiarity with the command prompt (cd / del / file.exe)
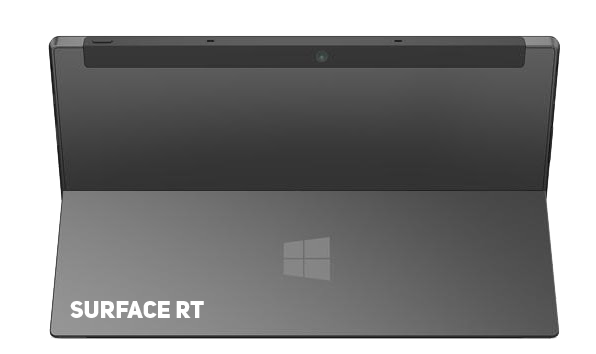
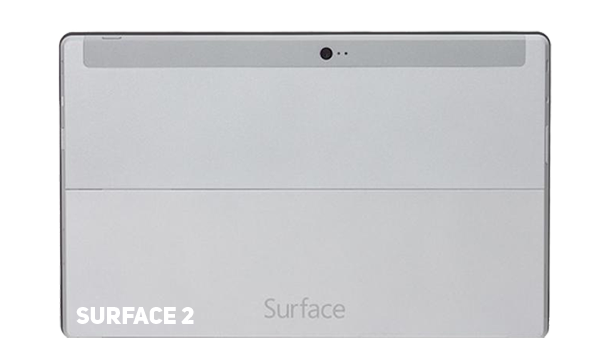
Identifying the Surface tablet generation
There are 2 different models of Surface tablets running Windows RT. You must know the model of your tablet to get the appropriate files for it. Turn your tablet around to see the colour of the metal back cover. The left one is the Surface RT and the right one is the Surface 2.
Download Options
There are different ways to get your files. You don’t have to download them now, as the tutorial will link you to the files when they will be necessary.
Yandex disk: Due to the recent addition of the «Download limit exceeded» message, Yandex Disk is no longer a viable option to download files from. Instead, a Google drive mirror will be offered.

RT Drive (Google Drive)
PART 1: PREPARING THE INSTALLATION
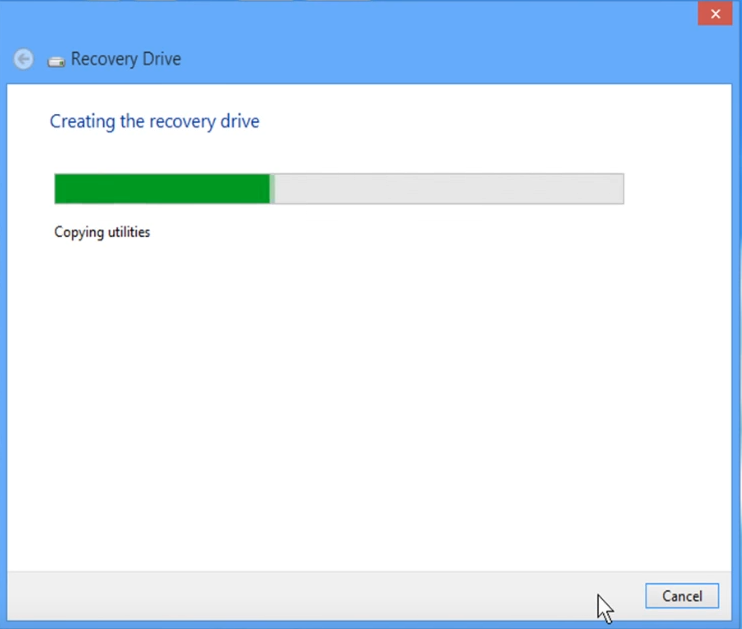
Creating a USB recovery drive
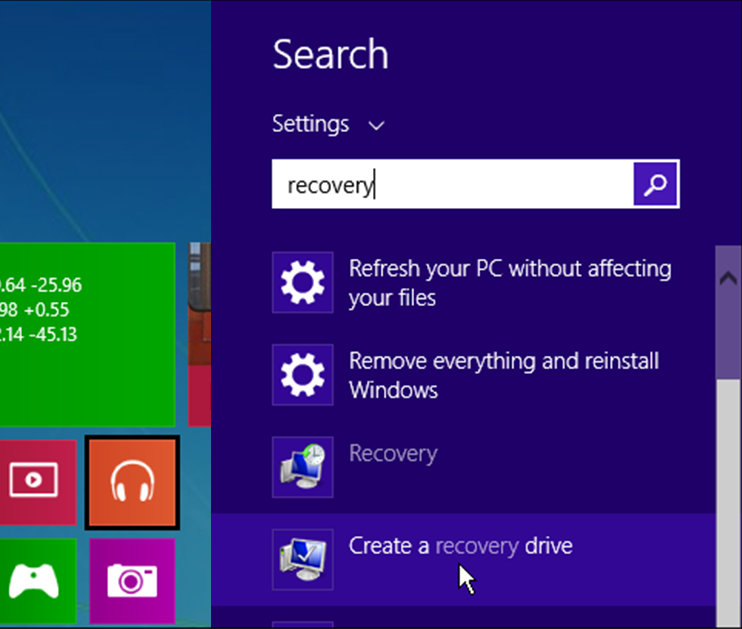
On your Surface RT, Click Start and click on the search icon, type «Create Recovery Drive» and select the search result. You may be asked to enter an administrator password or confirm your choice.
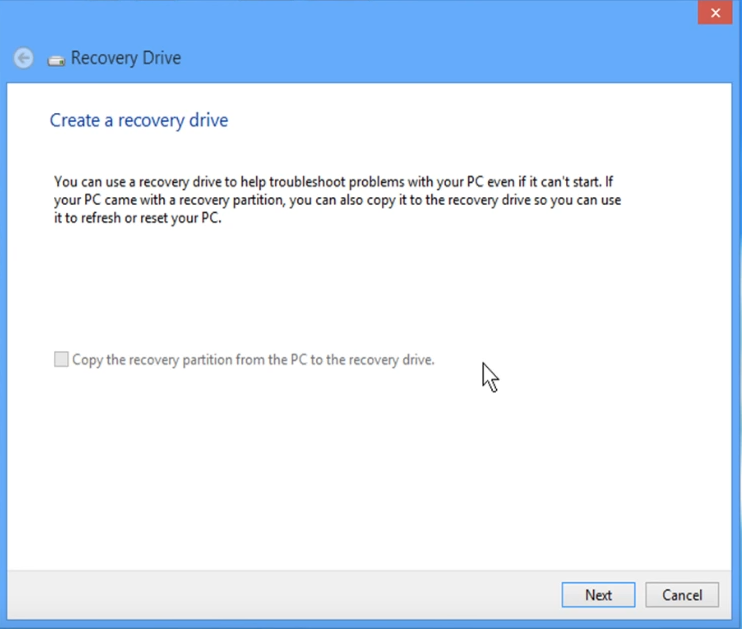
After the tool opens, make sure that «Back up system files to a recovery drive» is not selected, and then select «Next».
Make sure that «Back up system files to a recovery drive» is not selected. If you do not disable this option, it will cause errors in the future.
Connect the USB flash drive to your computer, select it, and then select «Next».
Select «Create». A large number of files need to be copied to the recovery drive, so it may take some time to complete.
It’s time to download the install.wim file. Download the one for your specific device. (Surface RT or Surface 2)
Make sure to download the correct file for your specific device. By installing the wrong image, you will not be able to get past the setup screen.

Windows RT Surface 1 (RT).wim
Windows RT Surface 2.wim
Mega.nz Mirrors: Windows RT Surface 1 (RT).wim and Windows RT Surface 1 (RT).wim
To make the installation process easier, rename the downloaded file to «install.wim».
Copy the install.wim to your flash drive.
PART 2: INSTALLING THE PATCHED WINDOWS RT IMAGE
Basically, this patched Windows image is necessary since it has Bitlocker disabled and updates that patch the secureboot vulnerability are not installed, which allows you to take advantage of the exploit to partially disable secureboot.
Entering Recovery mode
Make sure Surface is turned off.
Plug the USB drive in the USB port of the tablet.
Hold the volume down button and press the Power button once.
When the Microsoft or Surface logo is displayed, release the buttons.
After seeing the prompt, select English US.
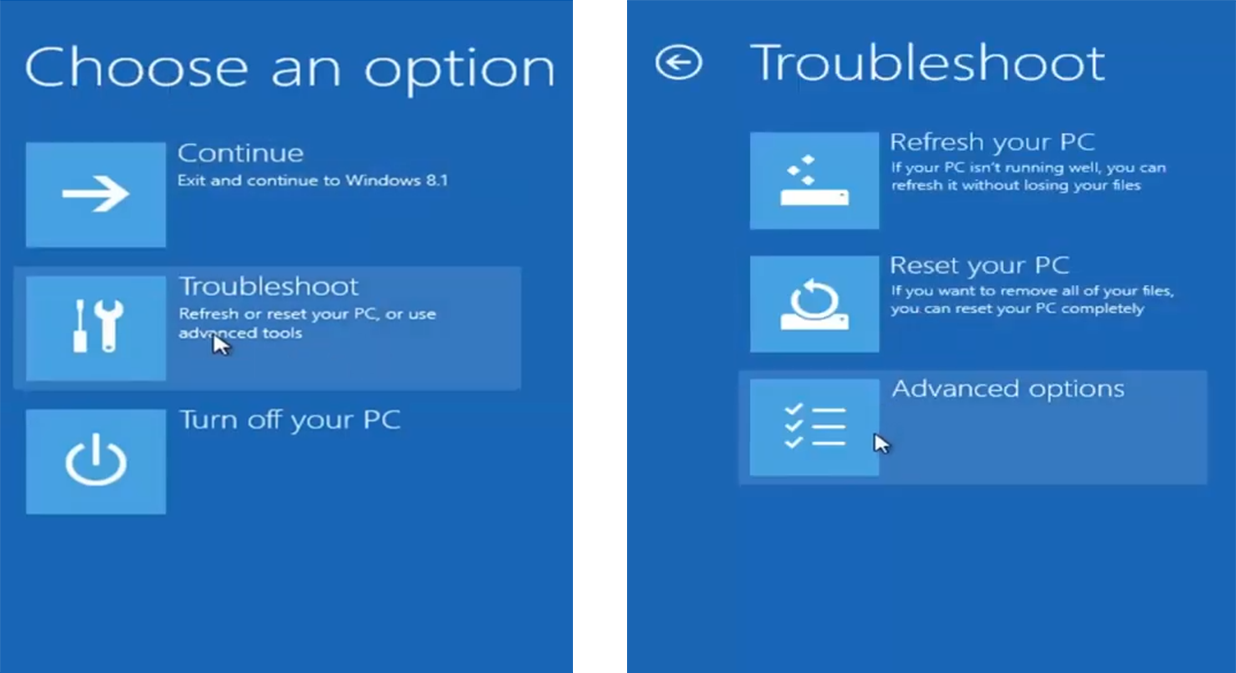
Select «Troubleshooting», «Advanced Options» and «Command Prompt»
If prompted for a recovery key, select «Skip this drive» at the bottom of the screen.

Formatting partition 4
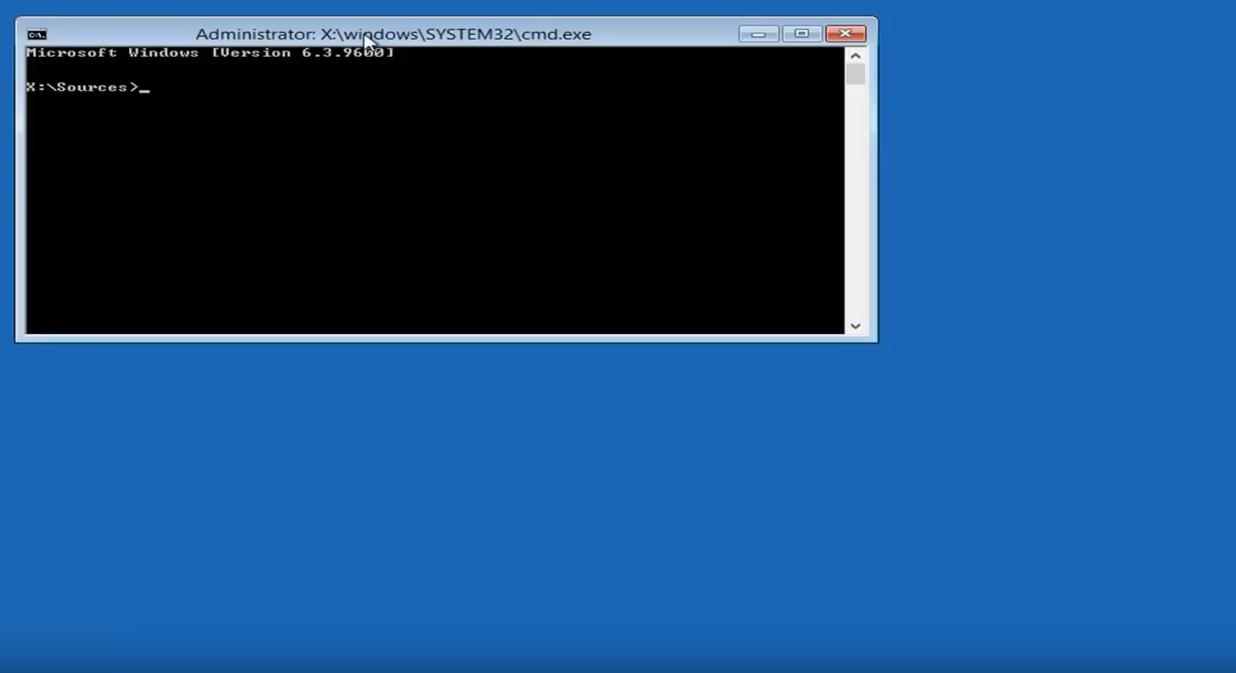
In the command prompt window, type the following commands:
diskpart
sel dis 0
sel par 4
for quick fs = ntfs override
exit
Installing the patched Windows RT image
In the command prompt window, type the following command:
dism /apply-image /imagefile:[DIRECTORY] /applydir:c: /index:1
[DIRECTORY]: Replace this path with the path of the install.wim we copied to the drive.
Example: dism /apply-image /imagefile:d:\sources\install.wim /applydir:c: /index:1
Restart your tablet
Setup the tablet quickly, do not set any Microsoft account, do not connect to the internet.
For Surface 2 users, Windows will be in Chinese. Use Google translate with the camera function. You can change the Windows language in the Settings app.
Once you are done, open file explorer and click on «This PC»
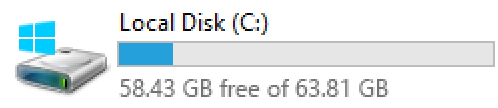
If the C: drive does not have a lock icon, you successfully cracked Bitlocker and have installed the patched Windows 8.1 image!
PART 3: DISABLING SECUREBOOT
Disabling UAC
Download the disabling_uac.reg file.

Disabling_UAC.reg
Mega.nz Mirrors: Disabling_UAC.reg
On your Surface RT, run this file as an administrator.
Restart your tablet.
Modifying Registry keys
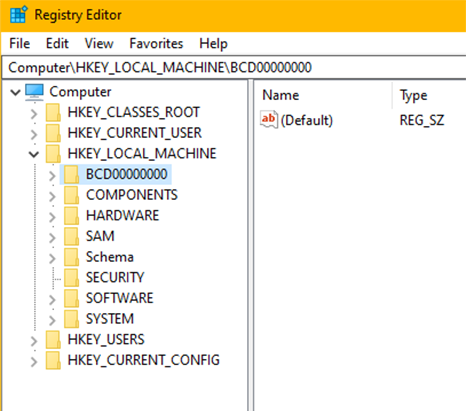
Open the registry editor
Navigate to HKEY_LOCAL_MACHINE \ BCD00000000
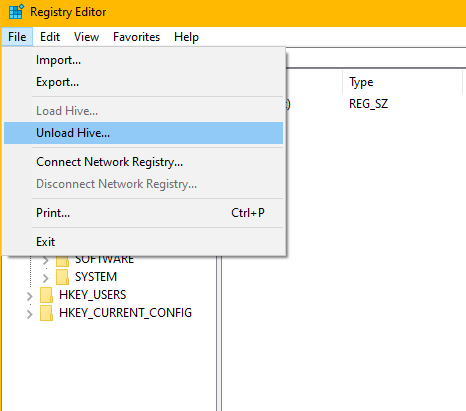
Make sure that the folder BCD00000000 is selected and click [File], [Unload/Uninstall Hive]
Installing the Secure Boot Debug Policy
Download the following file:

SecureBootPatch.zip
Extract the SecureBootPatch.zip and transfer it in the internal storage of the device.
Right-click the InstallPolicy.cmd and click «run as administrator».
Restart your tablet.
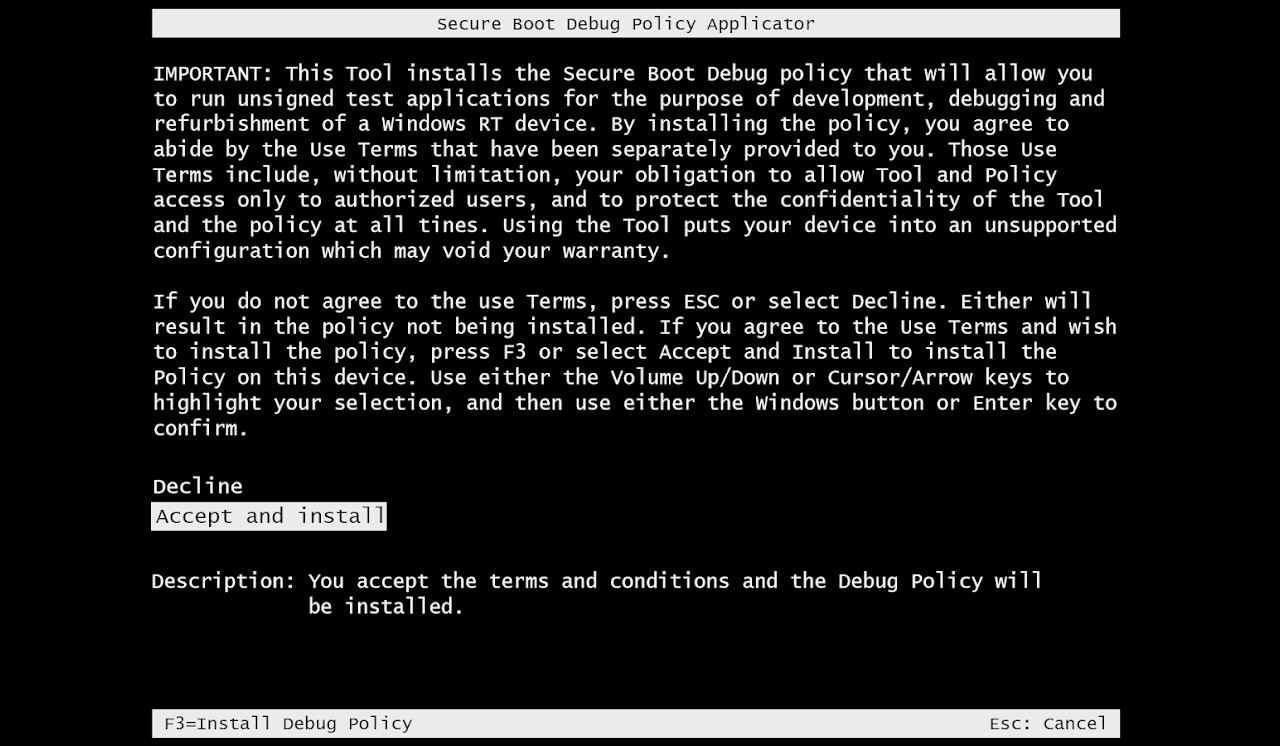
After restarting, you will see a «Secure Boot Debug Policy Applicator» screen.
Using the Volume buttons, select the option «Accept and Install»
Press the Windows button to select the option.
If you see the Windows boot manager error 0xc000000f instead, follow these steps to fix it and come back here
Installing the Secure Boot Debug Policy
Run the command prompt and enter:
bcdedit /set {default} testsigning on
bcdedit /set {bootmgr} testsigning on
bcdedit /set {default} NoIntegrityChecks Yes
Restart your tablet.
If you see an error after applying the commands, follow these steps to fix it and come back here
If your Surface does not turn on anymore, follow these steps to fix it and come back here
To make sure that you have disabled Secure Boot (VERY IMPORTANT)
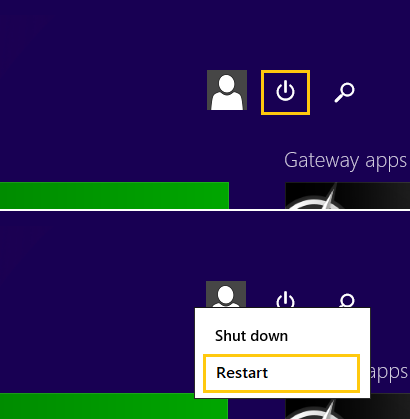
Click Start
Plug in a USB keyboard or your Surface keyboard
Click on the power icon on the top right part of the start menu
Press shift on your keyboard and at the same time click on restart
It will go into the recovery mode on the tablet (not the USB recovery)
Select «Troubleshooting»
Select «Advanced Options»
Select «Command Prompt»
It might ask for a password. Leave it empty and click on next.
You should see this text at the bottom right of the screen:

If you see this, you can now proceed to part 4!
Otherwise, if you don’t know what you did wrong, you can repeat Part 3.
You must make sure that Secure Boot is actually disabled before proceeding! Do not skip this step, otherwise, if you do not disable secureboot, your Surface RT might refuse to boot anything at all! By this stage, Alexenferman, Google, Microsoft, XDA Developers, are not responsible for any permanent damages or bricks made to your device. You are choosing to make these modifications, you should blame yourself for any mistakes you make. You have been warned!
PART 4: INSTALLING WINDOWS 10
It’s time to download the Windows 10 install.wim file. Download the one for your specific device. (Surface RT or Surface 2)
Make sure to download the correct file for your specific device. By installing the wrong image, you will not be able to get past the setup screen.
Windows 10 Surface 1 (RT).wim
Windows 10 Surface 2.wim
Mega.nz Mirrors: Windows 10 Surface 1.wim and Windows 10 Surface 2.wim
To make the installation process easier, rename the downloaded file to «install.wim».
Copy the install.wim to your flash drive.
NOTE: you can delete the old Windows 8 install.wim on your flash drive if the storage space is getting low. You will not need it anymore.
Entering Recovery mode
Make sure Surface is turned off.
Plug the USB drive in the USB port of the tablet.
Hold the volume down button and press the Power button once.
When the Microsoft or Surface logo is displayed, release the buttons.
After seeing the prompt, select English US.
Select «Troubleshooting», «Advanced Options» and «Command Prompt»
If prompted for a recovery key, select «Skip this drive» at the bottom of the screen.
Formatting partition 4
In the command prompt window, type the following commands:
diskpart
sel dis 0
sel par 4
for quick fs = ntfs override
exit
Installing Windows 10 image
In the command prompt window, type the following command:
dism /apply-image /imagefile:[DIRECTORY] /applydir:c: /index:1
[DIRECTORY]: Replace this path with the path of the install.wim we copied to the drive.
Example: dism /apply-image /imagefile:d:\sources\install.wim /applydir:c: /index:1
Restart your tablet.
If you see a blue screen with error 0xc000000f or 0xc000428 instead, follow these steps to fix it and come back here
Booting up Windows 10
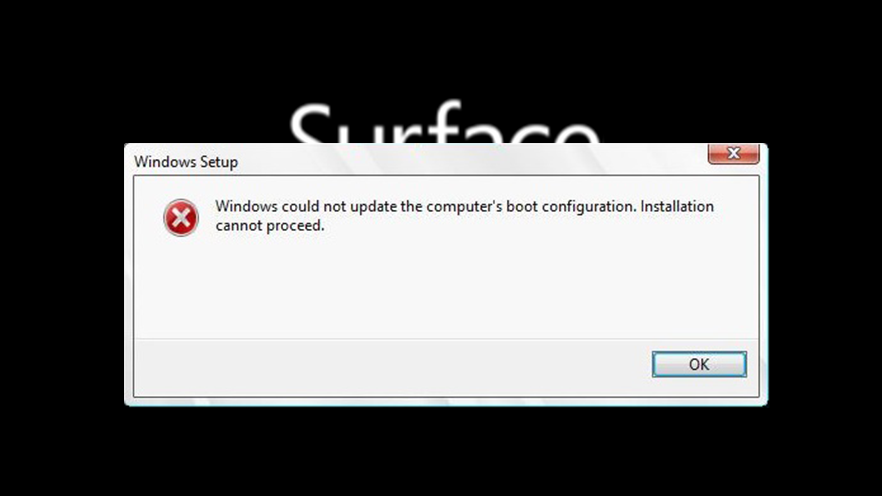
After waiting for a few minutes, you should see an error message. Don’t worry, this is normal.
Using a keyboard, press the following keys:
External USB keyboard: Press SHIFT + F10
Surface keyboard: Press FN + SHIFT + End
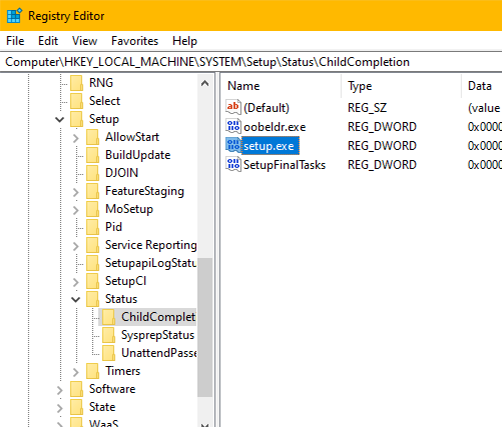
Type «Regedit»
Navigate to HKEY_Local machine/SYSTEM/SETUP/STATUS/ChildCompletion
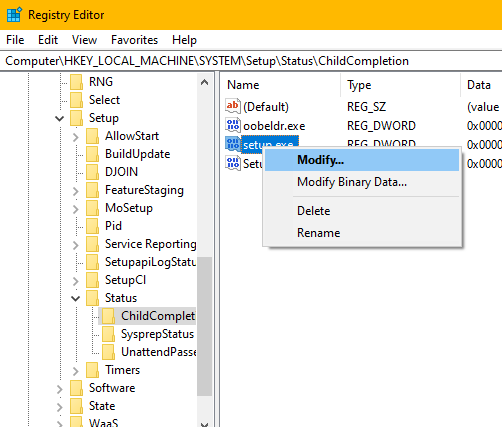
On the right pane, right-click «setup.exe»
Click on «Modify»
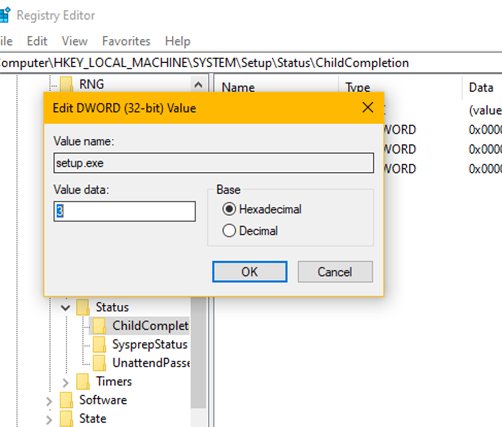
Change the Value to 3
Click OK
On the error message, click on OK.
PART 5: SETTING UP WINDOWS 10
Setting up Windows 10 for the first time
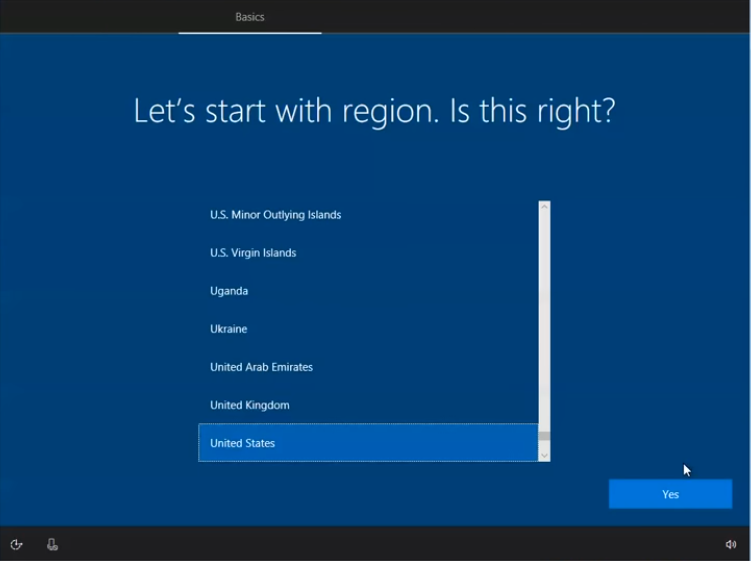
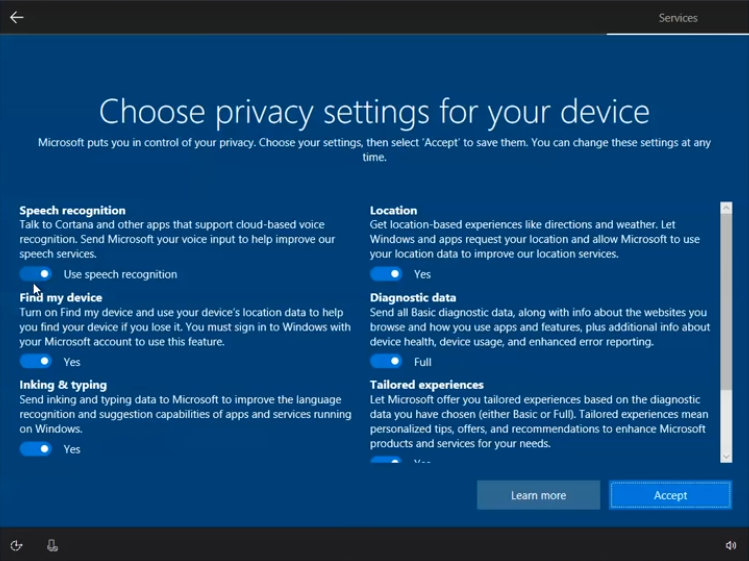
Follow the instructions on the screen to setup Windows 10.

Activating Windows 10
Open Powershell and type:
slmgr.vbs /upk
slmgr /ipk NPPR9-FWDCX-D2C8J-H872K-2YT43
slmgr /skms kms.03k.org
slmgr /ato
slmgr /skms zhang.yt
Installing frameworks and programs
Download the following files:

APPX1.rar

Microsoft.NET.Native.Framework.1.1.appx
Microsoft.NET.Native.Runtime.1.1.appx
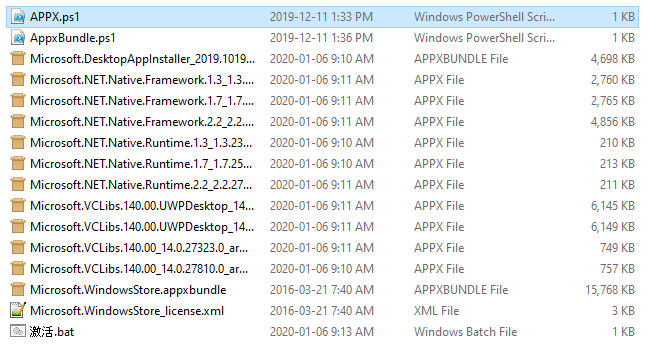
Extract APPX1.zip
Open the APPX1 folder
copy the files on the USB drive and copy them to the Surface RT internal storage.
Right-click Appx.ps1, select «run with powershell».
Right-click AppxBundle.ps1, and select «run with powershell».
From the other files downloaded, install the Microsoft.NET.Native.Runtime.1.1.appx and Microsoft.NET.Native.Runtime.1.1.appx packages by simply running them.
You are done!
EXTRAS
You may notice that the OS is quite bear bones, and might not have all of the Surface features. See this section to install App Updates, Office 2013, and fix a few issues. Visit Extras Section
ALTERNATIVE INSTRUCTIONS
How to install Windows 10 on the Surface RT 💻

YouTube

13:28

Elektrohax
COMMENTS
Уже скоро обновление на Windows 10 April Update, ранее известное как Spring Creators Update и Redstone 4, официально будет доступно для скачивания и установки. Запуск неоднократно отлагался, теперь он ожидается 8-го мая. Мы бы посоветовали вам дождаться официального выпуска, но для тех, кто хочет начать пользоваться обновлением уже сейчас, мы расскажем, как это сделать.
Стоит учитывать, однако, что Microsoft обозначил ряд проблем, которые могут возникнуть. Если вы с ними ознакомлены и являетесь членом программы инсайдеров Windows, то вы можете опробовать ранние версии Windows 10 раньше всех остальных. Это сопряжено с определенными рисками, так как многие моменты еще не доработаны, однако учитывая то, что официальная версия выходит уже скоро, это должно быть относительно безопасно.
И все же, естественно, при установке крупных обновлений ОС могут возникнуть определенные неполадки, поэтому мы настоятельно рекомендуем сначала создать резервную копию. Здесь вы можете прочитать, как.
Также вам стоит создать точку восстановления системы, подробнее об этом вы можете прочитать здесь.
Как только вы со всем этим разобрались, можете приступать к установке обновления.
Как скачать и установить Windows 10 April Update, являясь инсайдером Windows
Перед официальным запуском April Update самый надежный способ скачать и установить обновление – стать инсайдером Windows.
Чтобы сделать это, откройте Настройки Windows 10 (меню Пуск, кнопка с шестеренками), выберите «Обновления и безопасность» и из меню на левой стороне выберите «Windows Insider Programme».
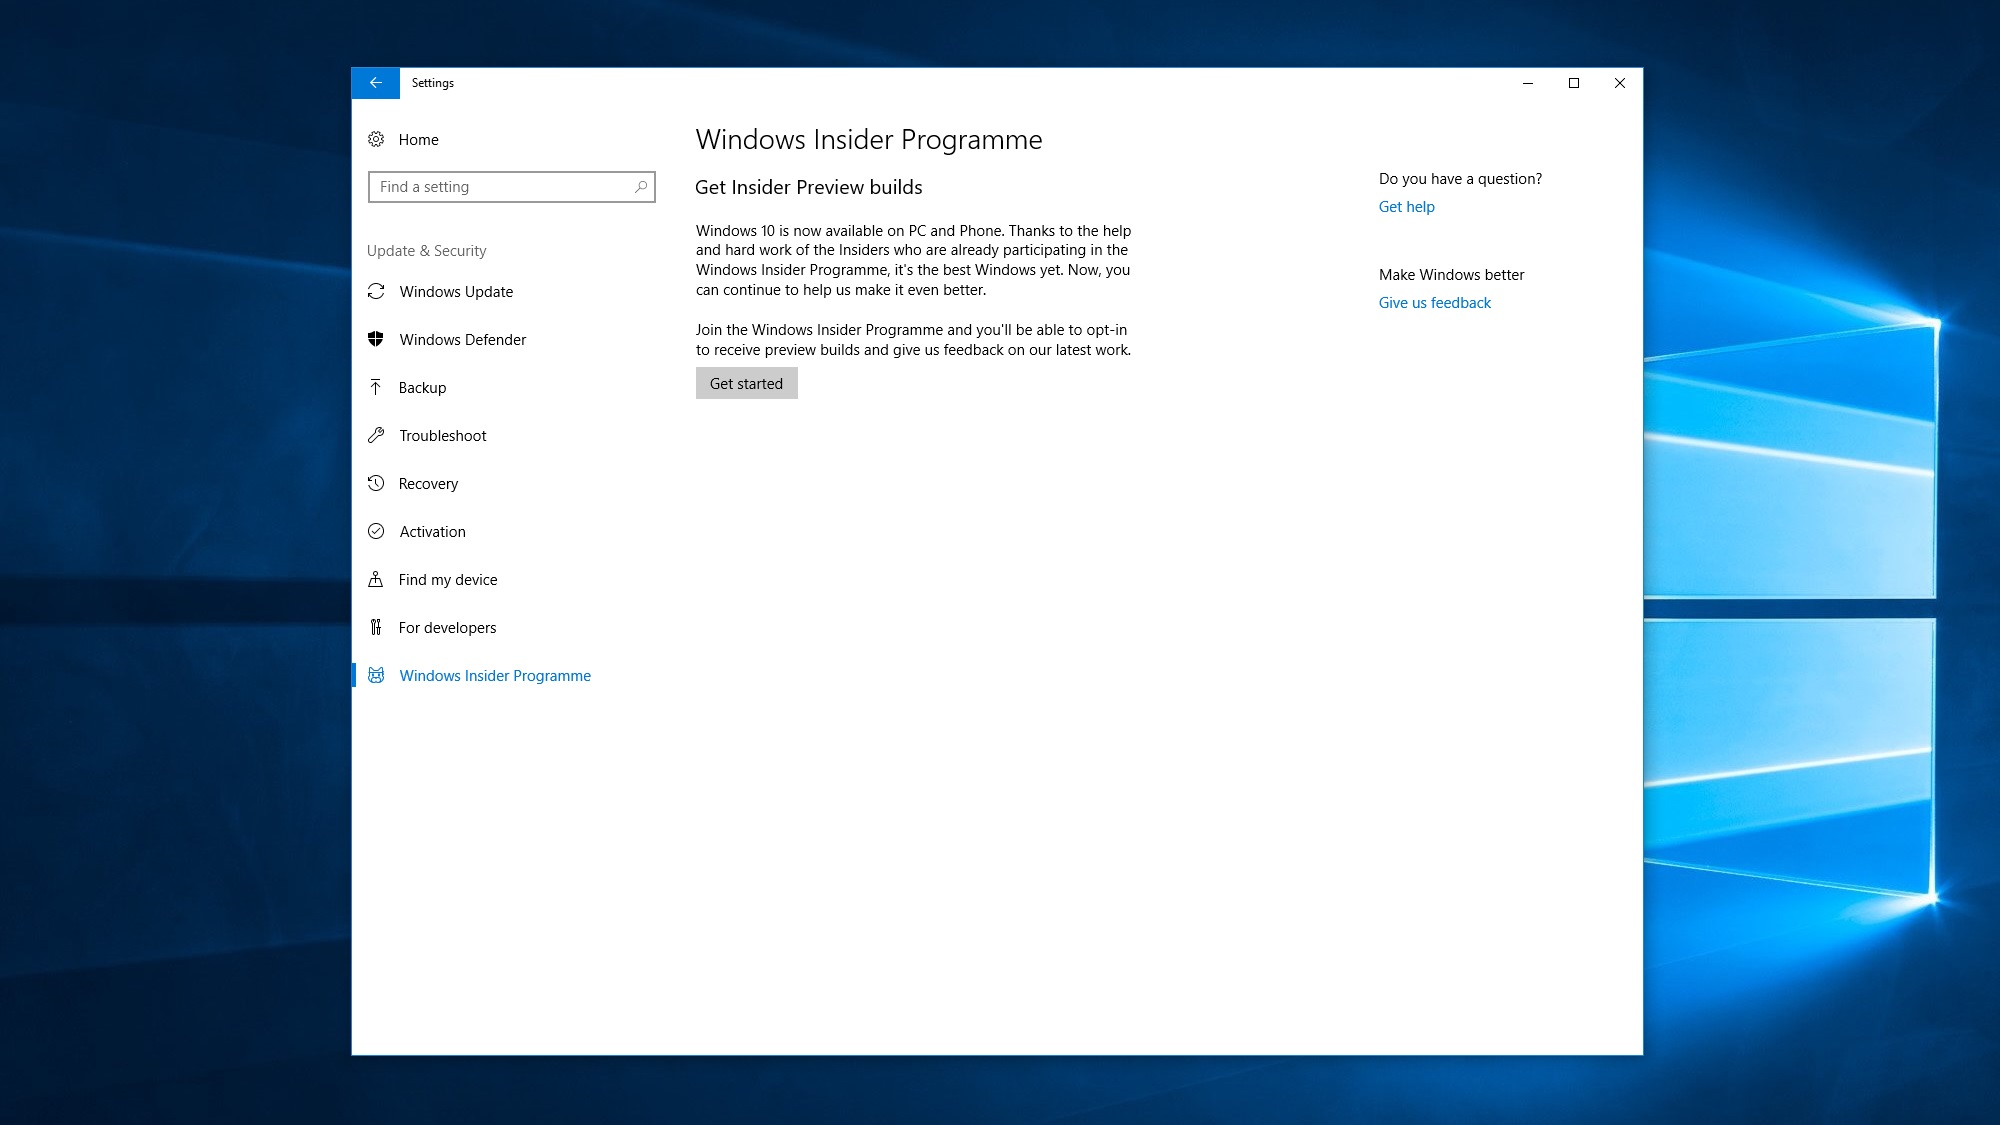
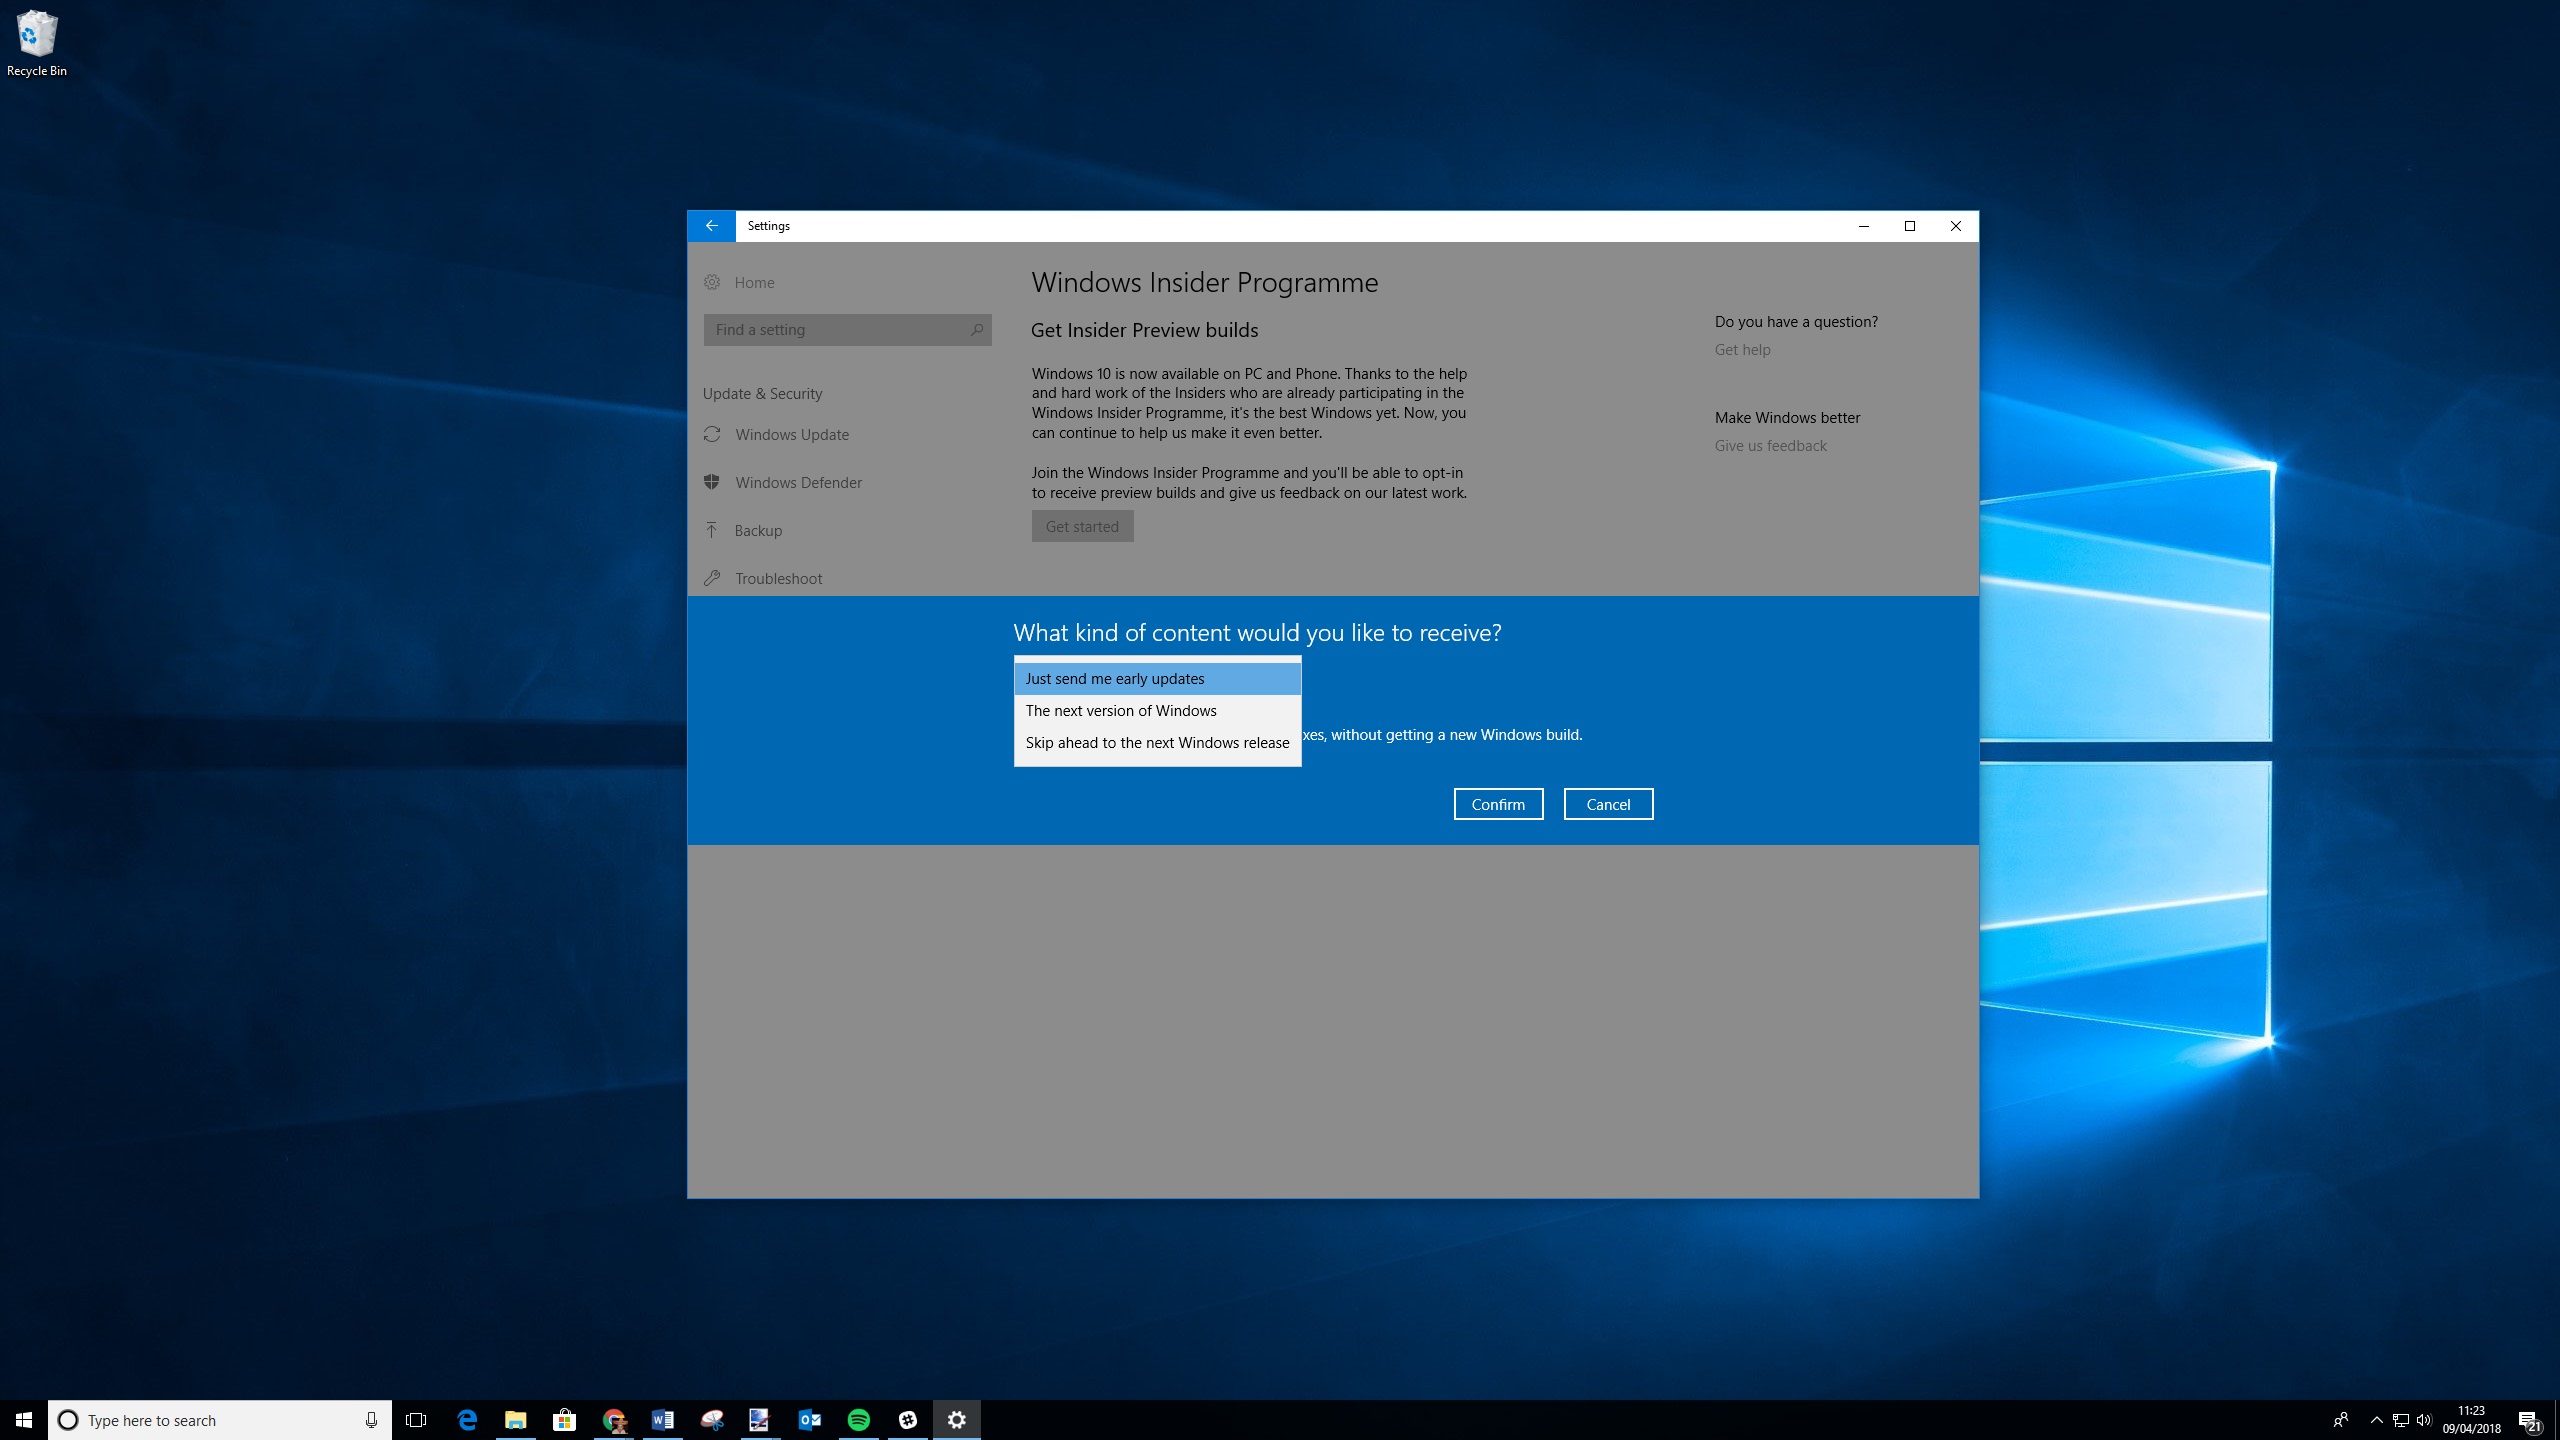
Затем нажмите «Начать», чтобы зарегистрироваться для начала процесса. Вас попросят привязать аккаунт – используйте аккаунт Microsoft, который вы используете, чтобы логиниться в Windows 10. В появившемся окне выберите «Присылать ранние обновления», подтвердите. На следующем экране также нужно нажать «Подтвердить», после чего вам будет предложено перезапустить Windows.
Перезагрузив компьютер, снова откройте окно «Обновления и безопасность» — там вы увидите обновление под названием «Обновление для Windows 10, версия 1803». Это и есть April Update. Обновление начнет скачиваться автоматически.
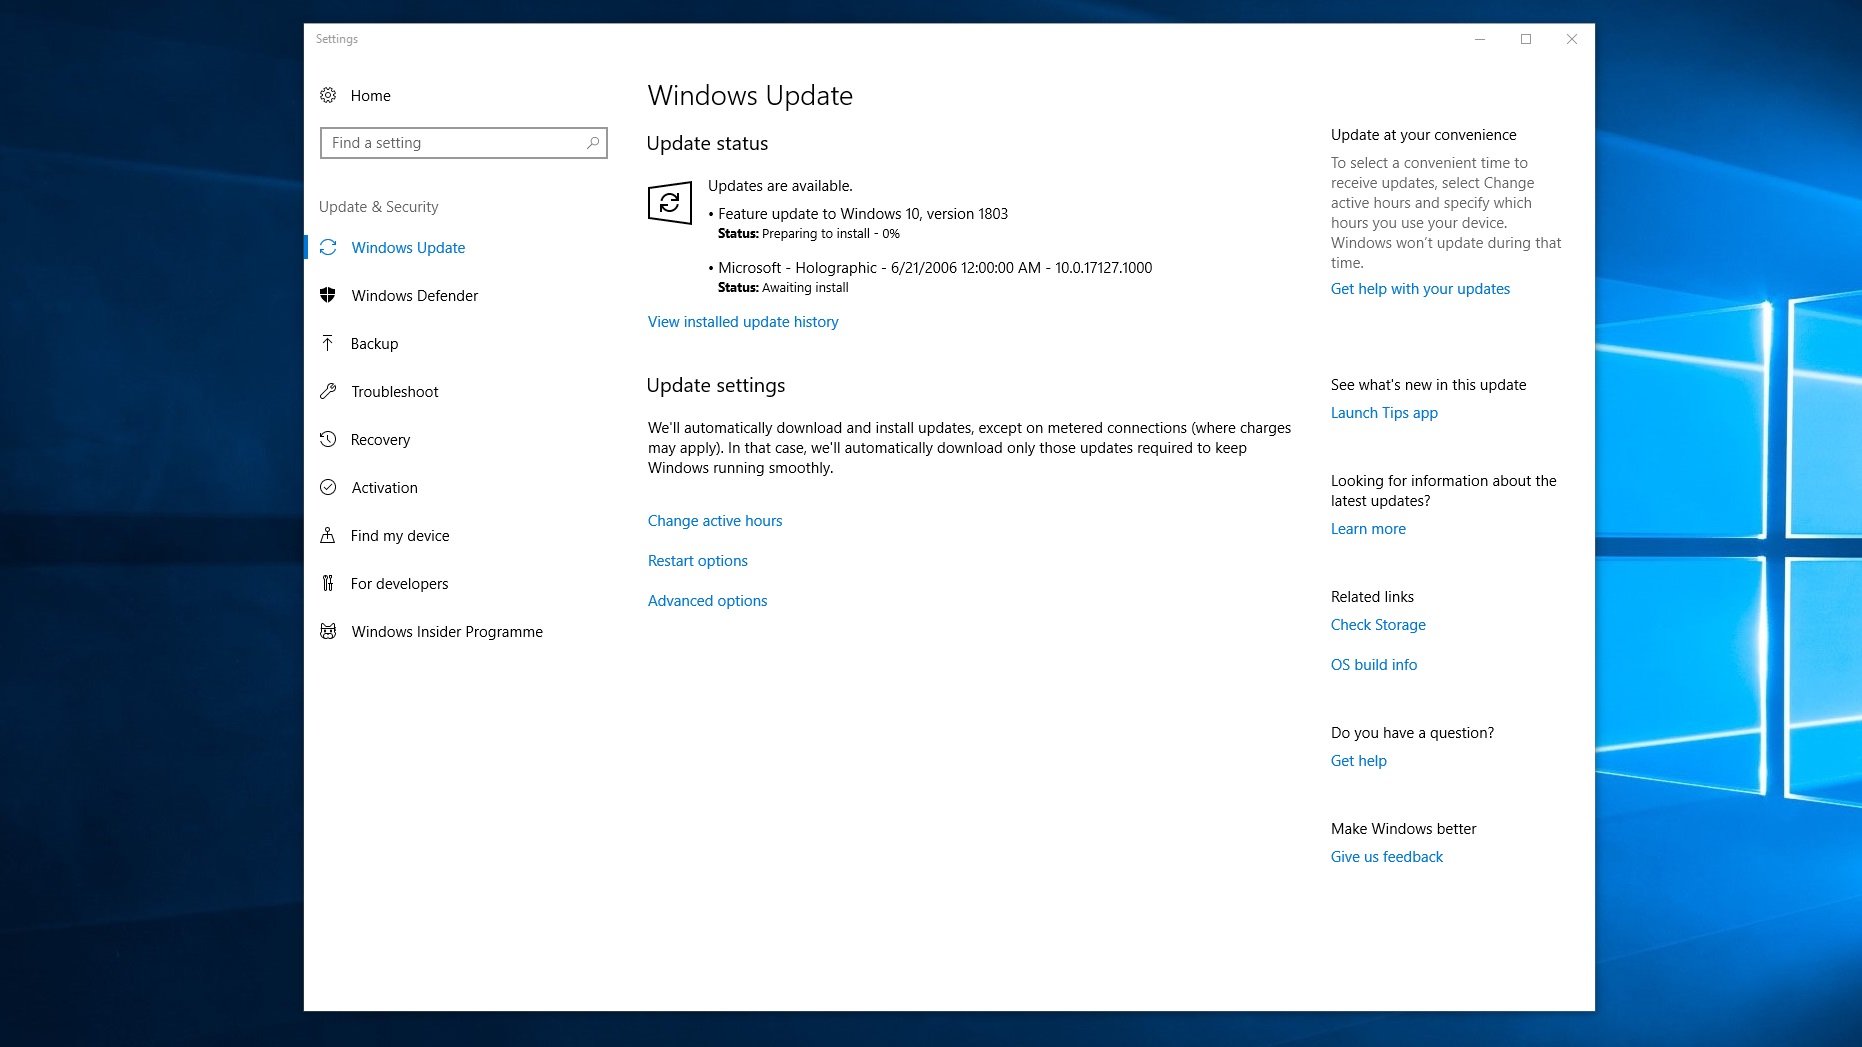
Если вы его не видите, нажмите на «Проверить обновления». Если его все еще нет, проверьте, правильно ли все сделано в разделе Windows Insider Programme.
Если у вас слишком сильные настройки приватности, и Microsoft не получает диагностической информации, вам придется это исправить. Как только вы это сделаете, April Update должно появиться в списке доступных обновлений.
Как скачать и установить Windows 10 April Update не являясь членом программы инсайдеров Windows
Если вы не хотите менять свои настройки приватности или становиться инсайдером Windows, вы можете скачать April Update вручную.
Для этого вам понадобится скачать Windows 10 1803 build 17133 ESD file, который хранится на серверах Microsoft. Как только вы скачаете файл ESD, вам нужно будет конвертировать его в ISO файл, чтобы его можно было записать на диск или на флешку.
Для этого скачайте ESD Decrypter Wimlib tool, который доступен в сжатом виде. Разархивируйте файлы в новую папку, затем поместите скачанный ESD файл в ту же папку. Возможно, вам понадобится скачать для этого приложение 7-Zip.
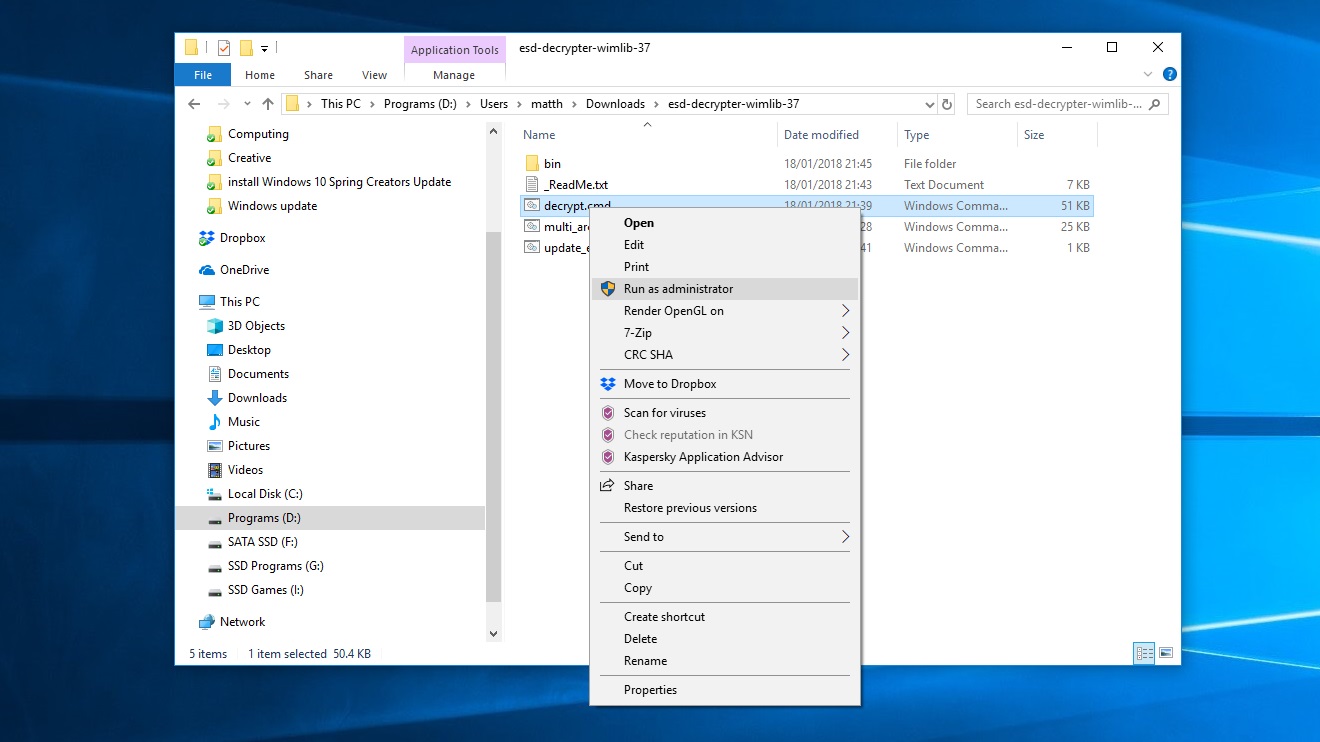
Откройте папку и найдите файл decrypt.cmd. Кликните по нему правой кнопкой мыши и зайдите как администратор. Появится окно, выберите «Продолжить включать все издания», на следующем экране выберите «Создать Full ISO по стандарту install.wim».
Будет создан ISO файл. Теперь вы можете записать его на диск или флешку, используя Microsoft’s Windows USB/DVD Download Tool. Закончив с этим, открывайте файл и следуйте инструкции по установке Windows 10 Update.
Как скачать и установить Windows 10 April Update, используя Update Assistant
Если это все кажется слишком сложным, вы можете просто скачать последнюю версию, используя Update Assistant.
Для этого перейдите на страницу Windows 10 Update Assistant и выберите «Обновить сейчас».
Когда программа скачается, проверьте последние версии Windows 10, среди них должен быть April Update.
Скачав его, запустите и выберите «Обновить сейчас». Программа сделает все остальное за вас. Ваш компьютер перезагрузится несколько раз – так что сохраните все нужное, затем ПК обновится до April Update. Все ваши файлы и настройки останутся нетронутыми.
Не забудьте, это сработает только после официального запуска April Update.
ARM Architecture, ARM CPU, ARM Processor, How To, i12bretro, Install Guide, Install Windows 10 On Surface RT, Microsoft, Microsoft Surface RT, Nvidia, SBC, Single Board Computer, Surface, Surface RT, Surface RT Windows 10 Upgrade, Tegra 3, Tutorial, Windows 10
3 Minutes
View interactive steps on GitHub
Disclaimer
Windows 10 Build 15035 is now [over] five years old and it should not be considered as suitable for daily use. In addition to being outdated, it has numerous bugs and other issues expected of an expired pre-release build. –https://jwa4.gitbook.io/windows/tools/windows-media-builder
This process will overwrite the current Windows 8 RT operating system on the Surface RT tablet. I have tested these steps on my own device (as shown in this video), but I am not responsible if you damage or brick your device. Verify this process will work on your device before starting and make sure to backup any data you do not want to lose before proceeding.
Things You Will Need
- A USB flash drive, at least 8 GB https://amzn.to/3wkR5ju | https://amzn.to/3qkrJ1p | https://amzn.to/3Nhu9b9
- A x86/x64 PC with ~50 GB of free disk space to create the installation media
Creating the Installation Media
💡 NOTE: These steps must be completed on a separate x86/x64 based PC and cannot be done from the Surface RT tablet
- Insert the USB flash drive into the PC and note the drive letter assigned to it
- Download the Windows 10 Media Builder Download
- Extract the downloaded Windows 10 Media Builder .zip file to the root of the c:\ drive
- Navigate into the extracted folder > Right click Build.cmd > Run as administrator
- In the Windows Media Builder application, type the number that corresponds to the target hardware in the list > Press Enter
- Read the notes displayed > type Y and press Enter to continue
- Choose to install the app pack by entering Y or N > Press Enter
- If the app pack is not being installed, Choose to uninstall provisioned apps by entering Y or N > Press Enter
- Choose to uninstall BitLocker by entering Y or N > Press Enter
- Choose to uninstall Cortana by entering Y or N > Press Enter
- Choose to uninstall Windows Defender by entering Y or N > Press Enter
- Choose to set a product key and use KMS activation by entering Y or N > Press Enter
- Choose to install Microsoft Office 2013 RT Home & Student Plus by entering Y or N > Press Enter
- Choose if you need a language other than English for Microsoft Office 2013 RT by entering Y or N > Press Enter
- Choose an update level to include with Microsoft Office 2013 RT by enter 1, 2 or 3 > Press Enter
- Type 1 and press enter to use the default Windows setup mode
- Type 1 to use the Windows Imaging Format (WIM) compression > Press Enter
- Review the displayed summary of selected options > Type Y > Press Enter to continue
- Wait while the Windows 10 files are downloaded and prepared based on the selections made above
- When prompted, type Y to create USB installation media > Press Enter
- Enter the target USB drive letter to write the installation files to and Press Enter
⚠ Double check the drive letter entered, as the drive will be formatted and all data on the drive will be lost
- Type Y and press Enter to confirm formatting the selected flash drive
- Type N and press Enter when prompted to create an ISO image
- Press any key to close out of the Windows Media Builder application
Installing Windows 10
🚨 WARNING: Continuing beyond this point will format the storage on the Surface RT tablet and all files and the Windows 8 RT operating system will be lost
- Insert the prepared USB flash drive in the Surface RT tablet
- Hold Vol- and press the power button, releasing the Vol- when Surface logo appears
- Wait for Windows Setup to begin
- Click Next
- Check the I accept box > Click Next
- Click Custom: Install Windows only (advanced)
- Delete the existing partitions by selecting each one and clicking Delete
- Once all partitions have been deleted, click the Unallocated Space to select it > Click Next
- Wait while Windows 10 RT copies and installs files
- Once the installation completes the tablet will reboot automatically
- Complete the Windows 10 Out of Box Experience (OOBE)
Fixing Some Known Issues
- Open Notepad and paste the following into the new document
Windows Registry Editor Version 5.00
; DISABLE USER ACCESS CONTROL (UAC)
[HKEY_LOCAL_MACHINE\SOFTWARE\Microsoft\Windows\CurrentVersion\Policies\System]
«EnableLUA»=dword:00000000; FIX CAMERA DRIVERS
[HKEY_LOCAL_MACHINE\SOFTWARE\Microsoft\Windows Media Foundation\Platform]
«EnableFrameServerMode»=dword:00000000 - Save the file to the desktop and name it bugfix.reg
- Double click bugfix.reg on the Desktop > Click Yes to confirm the changes
- Click OK to close out of the success popup
Sources: https://jwa4.gitbook.io/windows/tools/windows-media-builder, https://openrt.gitbook.io/open-surfacert/common/windows-10/known-issues
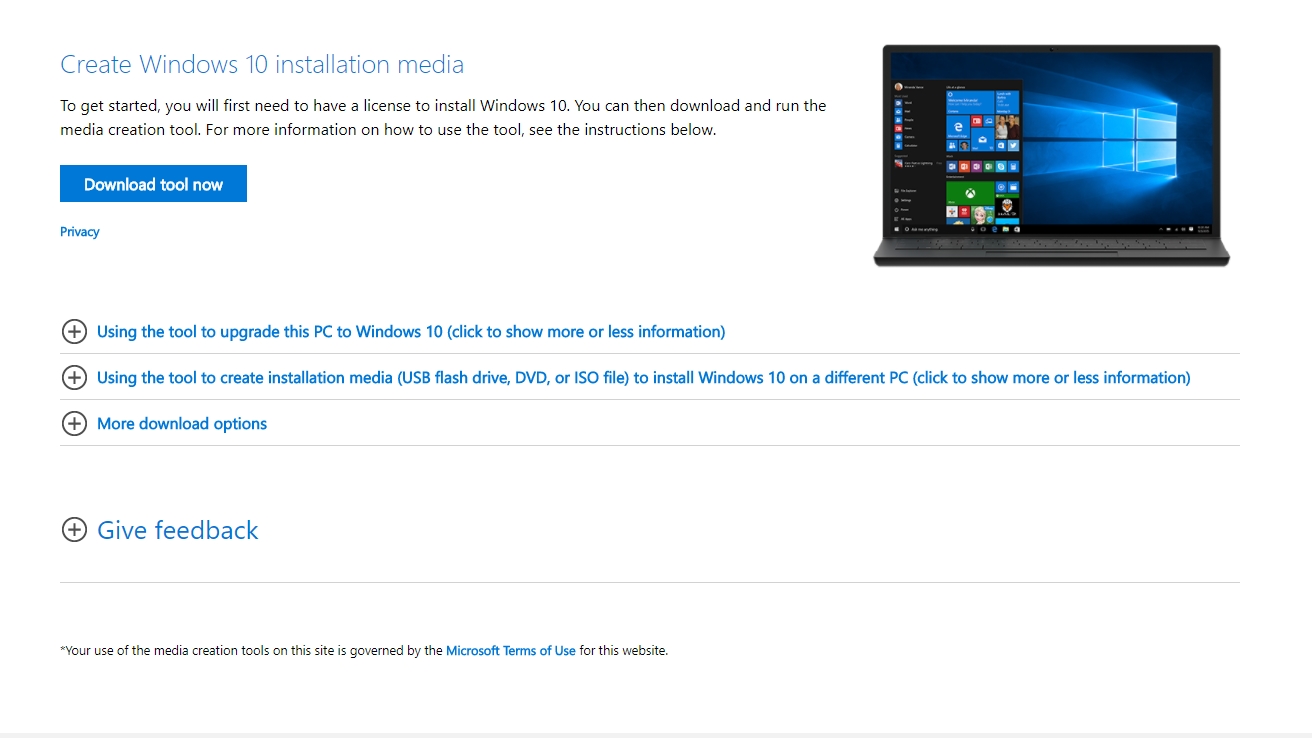
Are you encountering issues with recovery options on your Surface? Microsoft came up with recovery image for each product device to help you to get it working again. All you need is surface version and serial number and serial number. up with download the files you need to get your Surface working
Once you download the file, insert the USB in port and use to recover the device. The Surface brings recovery tool that you can utilize to refresh the product or reset it to its factory condition. See how will you download –
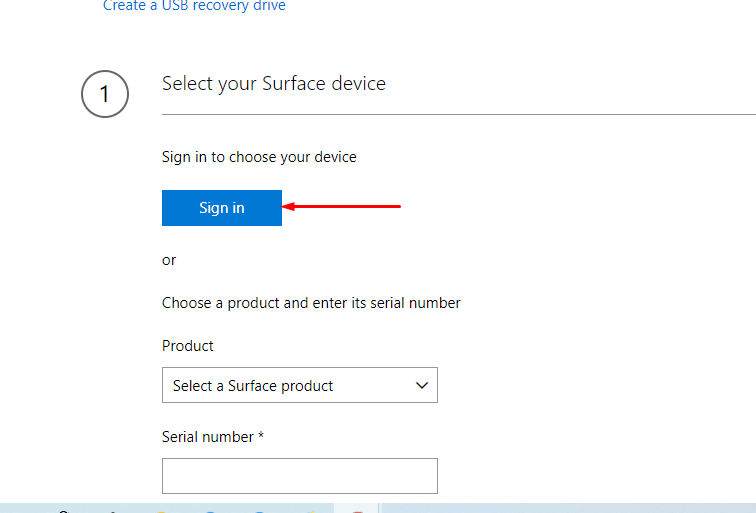
Here is how to download Surface Recovery Image
- First of all, arrange a USB drive having at least 8 GB in size.
- Go to this page.
- Scroll down and click on Sign in button.
- Put in the Microsoft credentials and proceed until login is completed.
- Click on drop-down under Product.
- Now write the Serial number of your Surface device and click on Continue.
- Follow the instructions coming to download Surface Recovery Image.
Requirements –
Important – For Surface RT and Surface 2, USB drive should have minimum 8 GB space in size. For all other Surface models, the USB should be having 16 GB or more.
Format USB drive to FAT32 in preparation for loading a recovery image.
Let the downloading complete and place the hardware into the port of your Surface.
That’s all!!!
TL;DR – Here is a script to get past the Disk0 to Disk2 mapping issue with the new Surface Pro with a 1TB drive.
Surface Hardware
OK, first a bit of history, I used to work for the Surface Imaging team back in 2015 to 2016. Overall a cool job, I learned a lot, and got to sharpen my PowerShell coding skills.
During that time I got to see my first Surface Studio device, even before it was released. Once of the unique features of the device was it’s unique disk architecture, it contains TWO disk drives, one a SSD in a M.2 format, and a Spinning Hard disk in a 2.5″ format. The OS contains a driver that uses the SSD as a cache. The idea is that you get the size of the 2TB hard disk, with (generally) the speed of the SSD.
Of course this creates a problem for OS deployment because we need to load the Special Caching driver into WinPE before deployment, so both drives are properly identified.
The Surface Pro with the 1TB drive is also unique in this manner, on the inside it isn’t a single 1TB drive, instead it’s two 512GB drives running in a Raid 0 configuration.
So you’re probably wondering how this works within WinPE on MDT, well the good news is that the built in 1709 drivers can correctly identify the two SSD disk as a single 1TB drive…
… The only problem is that it’s identified as Disk(2), and that breaks stuff.
ZTIDiskPart
Yes, yes, I know… mea culpa…
MDT (and SCCM/OSD) make an assumption on the “Format and Partition Disk” step: The target disk number is fixed for each Task Sequence. Now, we can change the target disk dynamically within the Task Sequence by chaning the OSDDiskIndex variable. But it will require some coding.
Fix 1
One fix, if you are OK with some WMI queries, is to test for a “Surface Pro” model and a 1TB disk at index 2. I would prefer to test for the ABSENCE of a disk at index 0, but not sure how to do that.
Fix 2
The following is a modification of my ZTISelectBootDisk.wsf script. Designed specifically for this configuration. Just drop it into the scripts folder and add a step in the Task Sequence before the “Format and Partition disk step.
| <job id=«ZTISurface1TBBootDisk«> | |
| <script language=«VBScript« src=«ZTIUtility.vbs«/> | |
| <script language=«VBScript« src=«ZTIDiskUtility.vbs«/> | |
| <script language=«VBScript«> | |
| ‘ // *************************************************************************** | |
| ‘ // | |
| ‘ // Copyright (c) Microsoft Corporation. All rights reserved. | |
| ‘ // | |
| ‘ // Microsoft Deployment Toolkit Solution Accelerator | |
| ‘ // | |
| ‘ // File: ZTISurface1TBBootDisk.wsf | |
| ‘ // | |
| ‘ // Version: <VERSION> | |
| ‘ // | |
| ‘ // Purpose: Given a collection of Storage Devices on a machine, | |
| ‘ // this program will assist in finding the correct | |
| ‘ // device to be processed by «ZTISurface1TBBootDisk.wsf» | |
| ‘ // | |
| ‘ // Currently hard coded to select the *FIRST* disk. | |
| ‘ // | |
| ‘ // REQUIRES that you install the correct WinPE Storage Components! | |
| ‘ // | |
| ‘ // | |
| ‘ // WARNING: If there are any *other* disks that need to be Cleaned | |
| ‘ // and formatted, they should be processed first. | |
| ‘ // And this the global Variable OSDDiskIndex should be | |
| ‘ // set to <blank> when done being processed by ZTIDiskPart.wsf. | |
| ‘ // | |
| ‘ // Variables: | |
| ‘ // OSDDiskIndex [ Output ] – Disk Index | |
| ‘ // | |
| ‘ // Usage: | |
| ‘ // cscript.exe [//nologo] ZTISelectBootDisk.wsf [/debug:true] | |
| ‘ // cscript.exe [//nologo] ZTIDiskPart.wsf [/debug:true] | |
| ‘ // cscript.exe [//nologo] ZTISetVariable.wsf [/debug:true] /OSDDiskIndex:»» | |
| ‘ // | |
| ‘ // *************************************************************************** | |
| Option Explicit | |
| RunNewInstance | |
| ‘//—————————————————————————- | |
| ‘// Main Class | |
| ‘//—————————————————————————- | |
| Class ZTISurface1TBBootDisk | |
| ‘//—————————————————————————- | |
| ‘// Main routine | |
| ‘//—————————————————————————- | |
| Function Main | |
| Dim oWMIDisk | |
| Dim bFound | |
| Dim oDiskPartBoot | |
| Dim oContext, oLocator, objQuery, objStorageWMI, objStorage | |
| oLogging.CreateEntry «—————- Initialization —————-«, LogTypeInfo | |
| IF oEnvironment.Item(«DEPLOYMENTTYPE») <> «NEWCOMPUTER» Then | |
| oLogging.ReportFailure «Not a new computer scenario, exiting Select Boot Disk.», 7700 | |
| End If | |
| IF oEnvironment.Item(«Model») <> «Surface Pro» Then | |
| oLogging.CreateEntry «Not a surface machine OK!»,LogTypeInfo | |
| exit function | |
| End If | |
| bFound = FAILURE | |
| »»»»»»»»»»»»»»»»»»»»»»»»»»»»»»» | |
| ‘ | |
| ‘ 1st Pass – Find any disk that matches the Query | |
| ‘ | |
| Set oContext = CreateObject(«WbemScripting.SWbemNamedValueSet») | |
| oContext.Add «__ProviderArchitecture», 64 | |
| Set oLocator = CreateObject(«Wbemscripting.SWbemLocator») | |
| set objStorageWMI = oLocator.ConnectServer(«»,»root\Microsoft\Windows\Storage»,»»,»»,,,,oContext) | |
| set objQuery = objStorageWMI.ExecQuery(«select number,size,bustype,model from msft_disk where BusType <> 7 and BusType <> 12 and Size > 900000000000») | |
| If objQuery.Count = 0 then | |
| oLogging.CreateEntry «No Disk Drives Found!?!?! Dude, did you install the right storage drivers into WinPE 0x7b.»,LogTypeError | |
| exit function | |
| elseif objQuery.Count > 1 then | |
| oLogging.CreateEntry «more than one disk found»,LogTypeError | |
| exit function | |
| End if | |
| For each objStorage in objQuery | |
| oLogging.CreateEntry «Found Device: N:» & ObjStorage.Number & » S:» & ObjStorage.Size & » M:» & ObjStorage.Model & » T:» & ObjStorage.BusType & » » , LogTypeInfo | |
| oEnvironment.Item(«OSDDiskIndex») = ObjStorage.Number | |
| bFound = SUCCESS | |
| exit for | |
| Next | |
| »»»»»»»»»»»»»»»»»»»»»»»»»»»»»»» | |
| ‘ | |
| ‘ 2nd pass – Use the 1st Partition larger than 15GB on the first disk with a bootable partition. | |
| ‘ | |
| If bFound = FAILURE then | |
| oLogging.CreateEntry «No drive was found using search parameters, Use the 1st \Windows Partition found.», LogTypeInfo | |
| set oDiskPartBoot = GetBootDriveEx( false, oEnvironment.Item(«ImageBuild»), false ) | |
| If not oDiskPartBoot is nothing then | |
| oEnvironment.Item(«OSDDiskIndex») = oDiskPartBoot.Disk | |
| bFound = SUCCESS | |
| End if | |
| End if | |
| TestAndLog bFound = SUCCESS, «Verify OSDDiskIndex was found and set: » & oEnvironment.Item(«OSDDiskIndex») | |
| Main = bFound | |
| End Function | |
| End class | |
| </script> | |
| </job> |
Testing
Now this script has NOT been tested on a 1TB Surface device. However I *AM* available for testing the 1TB surface device. I can forward my home mailing address, if you want to send me one :^).