В этом кратком обзоре о ещё одной такой программе — Windows 11 Debloater и её же варианте для предыдущей версии ОС — Windows 10 Debloater, функциях и использовании.
Использование Windows 11 Debloater и Windows 10 Debloater
На сайте разработчика представлены две версии Windows Debloater — для Windows 11 и Windows 10, обе имеют русский язык интерфейса и очень похожи по функциям, за исключением отдельных пунктов, применимых лишь к одной из версий системы. Скачать каждую из версий можно с официального сайта:
- Windows 11 Debloater
- Windows 10 Debloater
После запуска язык интерфейса будет выбран автоматически, если потребуется его изменить — используйте пункт «Language» в главном меню программы. Как и для других подобных инструментов, перед началом использования рекомендую создать точку восстановления системы.
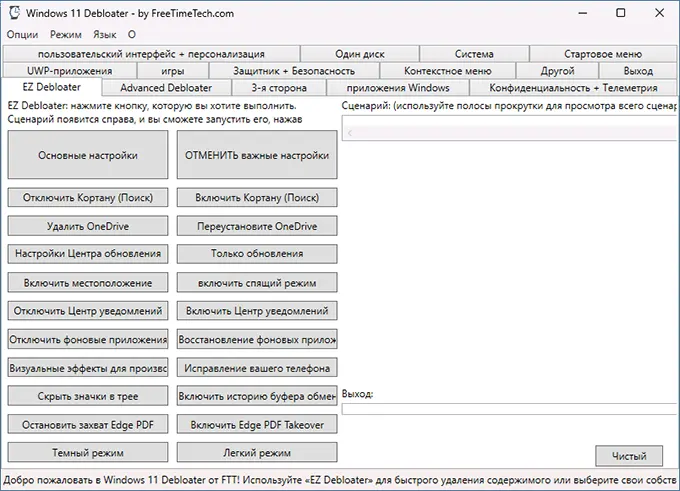
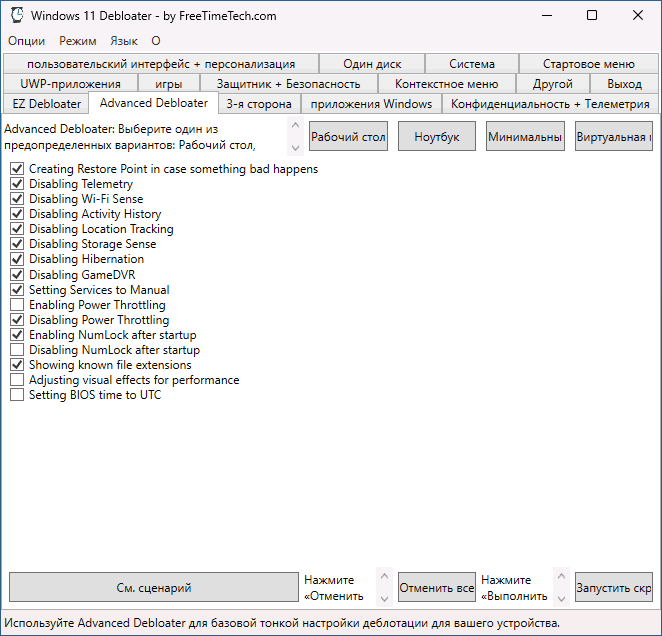
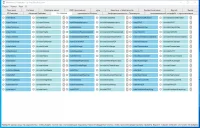
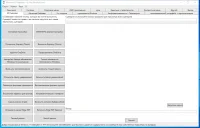
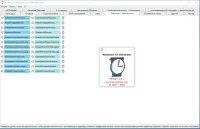
Интерфейс программы разбит на несколько вкладок, на каждой из которых доступны те или иные настройки или действия. В описании далее — Windows 11 Debloater, но и в версии для Windows 10 всё аналогично.
- EZ Debloater — основные действия по отключению функций и элементов Windows или их включению. Здесь же производится запуск применения выбранных базовых настроек с помощью кнопки «Запустить скрипт».
- Advanced Debloater — отключение некоторых системных функций с предустановленными профилями, оптимизированных для ПК, ноутбука, минимального использования ресурсов или виртуальной машины.
- 3-я сторона — установка и удаление популярных сторонних программ.
- Приложения Windows — установка и удаление встроенных приложений Windows 11/10.
- Пользовательский интерфейс и персонализация — настройка поведения элементов пользовательского интерфейса, скрытие и показ системных значков, расположения панели задач и другие. Пункты на английском языке, но если задержать указатель мыши, появится всплывающая подсказка с описанием на русском (актуально и для других разделов программы).
- Конфиденциальность и Телеметрия — отключение или включение соответствующих функций Windows.
- Один диск — пункт для удаления или установки OneDrive.
- Система — настройки системных функций, таких как сетевое обнаружение, гибернация, планы электропитания, показ или скрытие кодов BSoD, автоматическая очистка диска и другие.
- Стартовое меню — настройки меню Пуск, в частности: показ или скрытие недавно установленных приложений, запуск PowerShell от имени администратора из меню Пуск.
- UWP-приложения — отключение или включение автозагрузки встроенных UWP-приложений Teams и Cortana.
- Игры — пара настроек, имеющих отношение к играм: подсказки Xbox и планирование GPU.
- Защитник и безопасность — настройки функций защиты Microsoft Defender, без полного отключения. Если требуется, вы можете полностью отключить Microsoft Defender другими способами.
- Контекстное меню — скрытие и показ стандартных пунктов в контекстном меню Windows.
- Другой — другие параметры, в частности — размер панели задач и изменение некоторых других её параметров.
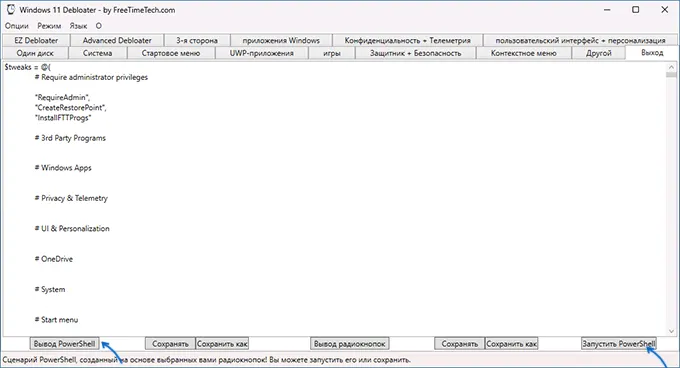
Чтобы применить настройки, сделанные во всех вкладках, кроме первой, перейдите на вкладку «Выход» и нажмите кнопку «Вывод PowerShell».
Это выведет скрипт PowerShell, выполняющий все запрошенные операции, который можно либо сохранить на компьютере, либо запустить прямо с этой вкладки.
Подводя итог:
- Windows 11 Debloater и Windows 10 Debloater — интересный продукт, есть полезные настройки, которые часто востребованы.
- Набор доступных настроек кажется не полным: многие другие общеизвестные и часто используемые опции можно было бы добавить в уже имеющиеся категории (к тому же механизм их применения тот же), но по какой-то причине они отсутствуют.
- Функция вывода всех примененных действий в свой скрипт PowerShell — хорошо и может быть полезным для тех, кто постоянно использует собственный набор твиков системы.
Windows10Debloater
Script/Utility/Application to debloat Windows 10, to remove Windows pre-installed unnecessary applications, stop some telemetry functions, stop Cortana from being used as your Search Index, disable unnecessary scheduled tasks, and more…
Donate a cup of coffee
Be sure to look at the Contributors’ GitHubs to see if they have GitHub sponsorships as well since they have contributed to this open-source project. (https://github.com/Sycnex/Windows10Debloater/graphs/contributors)
Disclaimer
WARNING: I do NOT take responsibility for what may happen to your system! Run scripts at your own risk!
Also, other variants of this repo are not technically «new» versions of this, but they are different in their own respective ways. There are some sites saying that other projects are «new» versions of this, but that is inaccurate.
How To Run the Windows10Debloater.ps1 and the Windows10DebloaterGUI.ps1 files
There are different methods of running the PowerShell script. The methods are as follows:
First Method
- Download the .zip file on the main page of the GitHub and extract the .zip file to your desired location
- Once extracted, open PowerShell (or PowerShell ISE) as an Administrator
- Enable PowerShell execution
Set-ExecutionPolicy Unrestricted -Force - On the prompt, change to the directory where you extracted the files:
e.g. —cd c:\temp - Next, to run either script, enter in the following:
e.g. —.\Windows10DebloaterGUI.ps1
Second Method
- Download the .zip file on the main page of the GitHub and extract the .zip file to your desired location
- Right-click the PowerShell file that you’d like to run and click on «Run With PowerShell»
- This will allow the script to run without having to do the above steps but Powershell will ask if you’re sure you want to run this script.
Remember this script NEEDS to be run as admin in order to function properly.
How To Run the Windows10SysPrepDebloater.ps1 file
For the WindowsSysPrepDebloater.ps1 file, there are a couple of parameters that you can run so that you can specify which functions are used. The parameters are:
-SysPrep, -Debloat and -Privacy.
To run this with parameters, do the following:
- Download the .zip file on the main page of the GitHub and extract the .zip file to your desired location
- Once extracted, open PowerShell (or PowerShell ISE) as an Administrator
- On the prompt, change to the directory where you extracted the files:
e.g. —cd c:\temp - Next, to run either script, enter in the following:
e.g. — .\Windows10SysPrepDebloater.ps1 -Sysprep -Debloat -Privacy
Sysprep, Interactive, and GUI Application
There are now 3 versions of Windows10Debloater — There is an interactive version, a GUI app version, and a pure silent version.
-
Windows10SysPrepDebloater.ps1-> The silent version now utilizes the switch parameters: -Sysprep, -Debloat -Privacy. The silent version can be useful for deploying MDT Images/sysprepping or any other way you deploy Windows 10. This will work to remove the bloatware during the deployment process. -
Windows10Debloater.ps1-> This interactive version is what it implies — a Windows10Debloater script with interactive prompts. This one should not be used for deployments that require a silent script with optional parameters. This script gives you choices with prompts as it runs so that you can make the choices of what the script does. -
Windows10DebloaterGUI.ps1-> There is now a GUI Application named Windows10DebloaterGUI.ps1 with buttons to perform all of the functions that the scripts do. This is better for the average user who does not want to work with code, or if you’d prefer to just see an application screen.
Switch Parameters
There are 3 switch parameters in the Windows10SysPrepDebloater.ps1 script.
-
-SysPrep, which runs the command within a function: get-appxpackage | remove-appxpackage. This is useful since some administrators need that command to run first in order for machines to be able to properly provision the apps for removal. -
-Debloat, switch parameter which does as it suggests. It runs the following functions: Start-Debloat, Remove-Keys, and Protect-Privacy.
Remove-Keys removes registry keys leftover that are associated with the bloatware apps listed above, but not removed during the Start-Debloat function. -
-Privacy, adds and/or changes registry keys to stop some telemetry functions, stops Cortana from being used as your Search Index, disables «unnecessary» scheduled tasks, and more.
This script will remove the bloatware from Windows 10 when using Remove-AppXPackage/Remove-AppXProvisionedPackage, and then delete specific registry keys that are were not removed beforehand. For best results, this script should be run before a user profile is configured, otherwise, you will likely see that apps that should have been removed will remain, and if they are removed you will find broken tiles on the start menu.
These registry keys are
EclipseManager,
ActiproSoftwareLLC,
Microsoft.PPIProjection,
Microsoft.XboxGameCallableUI
You can choose to either ‘Debloat’ or ‘Revert’. Depending on your choice, either one will run specific code to either debloat your Windows 10 machine.
The Debloat switch choice runs the following functions
Debloat,
Remove-Keys,
Protect-Privacy,
Stop-EdgePDF (If chosen)
The Revert switch choice runs the following functions
Revert-Changes,
Enable-EdgePDF
The Revert option reinstalls the bloatware and changes your registry keys back to default.
The scheduled tasks that are disabled are
XblGameSaveTaskLogon,
XblGameSaveTask,
Consolidator,
UsbCeip,
DmClient
These scheduled tasks that are disabled have absolutely no impact on the function of the OS.
Bloatware that is removed
3DBuilder,
ActiproSoftware,
Alarms,
Appconnector,
Asphalt8,
Autodesk SketchBook,
MSN Money,
Food And Drink,
Health And Fitness,
Microsoft News,
MSN Sports,
MSN Travel,
MSN Weather,
BioEnrollment,
Windows Camera,
CandyCrush,
CandyCrushSoda,
Caesars Slots Free Casino,
ContactSupport,
CyberLink MediaSuite Essentials,
DrawboardPDF,
Duolingo,
EclipseManager,
Facebook,
FarmVille 2 Country Escape,
Flipboard,
Fresh Paint,
Get started,
iHeartRadio,
King apps,
Maps,
March of Empires,
Messaging,
Microsoft Office Hub,
Microsoft Solitaire Collection,
Microsoft Sticky Notes,
Minecraft,
Netflix,
Network Speed Test,
NYT Crossword,
Office Sway,
OneNote,
OneConnect,
Pandora,
People,
Phone,
Phototastic Collage,
PicsArt-PhotoStudio,
PowerBI,
Royal Revolt 2,
Shazam,
Skype for Desktop,
SoundRecorder,
TuneInRadio,
Twitter,
Windows communications apps,
Windows Feedback,
Windows Feedback Hub,
Windows Reading List,
XboxApp,
Xbox Game CallableUI,
Xbox Identity Provider,
Zune Music,
Zune Video.
Quick download link
iwr -useb https://git.io/debloat|iex
Allowlist and Blocklist
There may be some confusion, but when using the Allowlist/Blocklist, the checkmark means it is on the blocklist, and that it will be removed.
Credits
Thank you to a60wattfish, abulgatz, xsisbest, Damian, Vikingat-RAGE, Reddit user /u/GavinEke, and all of the contributors (https://github.com/Sycnex/Windows10Debloater/graphs/contributors) for the suggestions, code, changes, and fixes that you have all graciously worked hard on and shared! You all have done a fantastic job!
Search code, repositories, users, issues, pull requests…
Provide feedback
Saved searches
Use saved searches to filter your results more quickly
Sign up
Версия для ПК 2.6.2
Windows 10 Debloater – небольшая утилита для тонкой настройки Windows 10. С ее помощью можно отключить различные службы (в том числе и телеметрию), удалить встроенные приложения, скрыть различные иконки, настроить контекстное меню и многое другое.
Системные требования:
Windows 10 (x86/x64)
Торрент Windows 10 Debloater 2.6.2 Portable подробно:
• Windows 10 Debloater — это бесплатное программное обеспечение с графическим интерфейсом, основанное на известных скриптах с открытым исходным кодом от Chris Titus Tech и farag2.
• После запуска, вы заметите, что он имеет интерфейс с вкладками и несколькими категориями: EZ Debloater, Windows Apps, Privacy & Telemetry и т.д. С этих вкладок можно запускать различные сценарии PowerShell для простого и быстрого удаления ПО из Windows 10.
• Вы можете удалить предустановленные приложения Windows 10, такие как Microsoft Edge, OneDrive, Cortana, Weather, Microsoft News и т.д.
• Также можно отключить некоторые параметры конфиденциальности, а также скрыть элементы в контекстном меню и в меню «Пуск».
• Каждая функция программы имеет кнопку справа от нее, которая позволяет узнать, какой сценарий будет запущен.
• Чтобы удалить Cortana из Windows 10, перейдите на вкладку «Приложения Windows» и нажмите на кнопку справа от «Cortana».
• В открытых окнах вы можете отредактировать сценарий, если хотите, и запустить его, нажав кнопку «Прочитать». После этого процесс удаления и очистки начнется автоматически. Все, что вам нужно сделать, — это дождаться завершения операции.
О Portable:
Портативная версия от разработчика, не требует установки.
Изменения в версии:
UPDATE 2.6.2
Add more option for Fine-tuning debloater and fixed some bugs.
Скриншоты Windows 10 Debloater 2.6.2 Portable торрент:
Скачать Windows 10 Debloater 2.6.2 Portable через торрент:
When it comes to making your Windows 10 computer run quickly and efficiently, there is only so much temporary cleaning you can do. While you can uninstall applications that you do not use, or do a clean wipe of Windows 10, there is still going to be bloat. By bloat, we mean preinstalled applications and settings that the average computer user doesn’t know how to remove. In this guide, we will explain what tools you can use to debloat Windows 10, and show you how to safely use a Windows 10 debloater tool. Ready for an increase in performance and privacy? Keep reading!
A Brief Background of What is PowerShell
The PowerShell application on your Windows 10 computer is a cross-platform task automation solution that combines a command-line shell, scripting language, and a configuration management framework for accepting and returning .NET objects. PowerShell has quite a robust command-line history, a pipeline for chaining commands together, in-console help system, and more.
The PowerShell language used for scripting is a high-level proprietary programming syntax that was created by Microsoft to allow system administrators (you) to automate certain actions and configurations. Though PowerShell can be used for a wide variety of functions, most beginners use it to handle large batches of files, set up new machines in a network, and automate processes for updating security, granting new user access to shared files, or creating backups. In our case, we are going to use one of the available PowerShell scripts to debloat Windows 10.
What Windows 10 Debloater PowerShell Scripts Do
The PowerShell scripts you are going to read about below are designed to uninstall and remove pre-installed applications on Windows 10 that are not useful to you. For instance, maybe you absolutely loathe Cortana, hate that OneDrive always tries to connect, or don’t want that Candy Crush Soda Saga from King on your Windows Start Menu Tiles. And when you went to uninstall these, you found that you couldn’t, right? A PowerShell script can get rid of these for you.

These scripts can also disable telemetry functions, which is data that includes information about system diagnostics. For instance, your Windows 10 computer will track how frequently you use certain features, applications, system files, and collect information on security data from Windows Defender. While you do have some say over what telemetry data is collected, you cannot turn it off completely; unless you use a PowerShell script.
Now that we know the basics of what these PowerShell scripts can do, let’s jump into a few that are available for download.
3 Windows 10 Debloater PowerShell Scripts
1. Windows10Debloater – Sycnex
This is a PowerShell script that debloats Windows 10 by removing pre-installed applications, ceasing some telemetry functions, disabling unnecessary scheduled tasks, and it stops Cortana from being used as your default search index. It can remove files such as: 3D Builder, Alarms, Microsoft News, Microsoft Sticky Notes, OneNote, Skype for Desktop, XboxApp, and much more. This particular script does have the option for a GUI (graphical user-interface) which makes it a lot easier to use for those who are new to PowerShell. You can view the GitHub repository here.
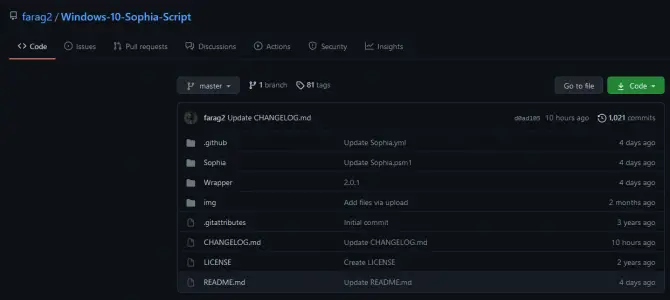
2. Windows 10 Sophia Script – Farag2
This is another powerful PowerShell module script that is designed for fine-tuning and tweaking Windows 10. If you are looking for a much more robust option than the Windows 10 Debloater tool above, this is the one. It includes over 150 functions, is routinely updated, and comes in a “GUI wrapper” for easier use. It allows you to set up Windows security, privacy, telemetry, uninstall unnecessary programs, change the location of default folders, and even create scheduled tasks for cleaning up unused files and updates. You can view the GitHub repository here. It is recommended that you use this after a fresh installation of Windows 10. An alternative option can be found here.
3. Debloat-Windows-10 by W4RH4WK
This is a collection of PowerShell scripts that can be used to disable or remove Windows 10 features and applications. It only works on Windows 10 Professional 64-bit and not Home Edition and only in English. In running this script, basic software components will remain installed, but all gaming-related applications and services will be disabled/removed. It is recommended that you use this after a fresh installation of Windows 10. You can view the GitHub repository here.
How to Safely Install and Use Windows 10 Sophia Script to Debloat Windows 10
In the steps below, we will explain how to install Windows 10 Sophia Script and provide a few basic steps for uninstalling apps.
Step 1: Install the Latest Windows Updates.
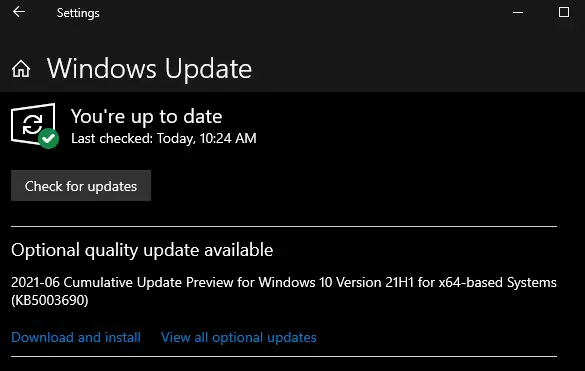
Make sure that your Windows 10 PC is up to date with the latest updates. To check, type in “Windows Updates” into your computer search bar and click on the System Settings option under best results. Click the “Check for updates” button to see if there are any you need to download and install. If there aren’t, move on to the next step.
Step 2: Create a Restore Point.
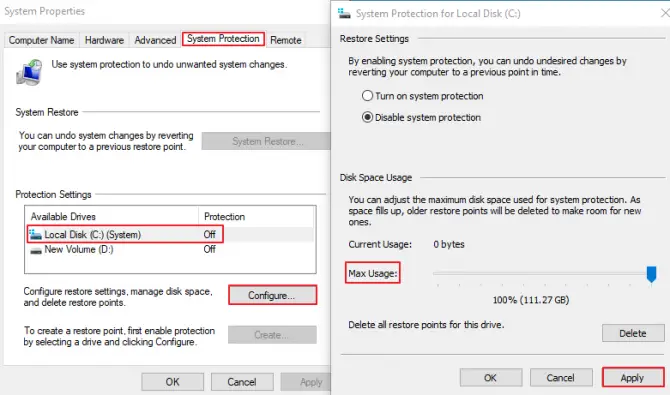
When messing around with powerful command lines, it is always recommended to create a restore point first. This way, if you make any mistakes, you have the option to revert back to the previous state.
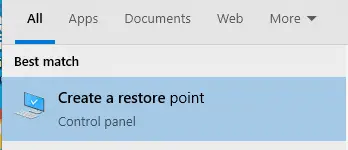
- In your computer’s search menu, type in Create a Restore Point.
- Click into the option it gives you under best results.
- Head to the System Protection tab and hit configure.
- Turn on system protection and choose your max usage.
- Click the create button and name it aptly. “Before debloat” or something similar.
Step 3: Check Your Windows Version.
In order to download the right version of the Windows 10 debloater tool, you need to know which version of Windows you are using. In your computer’s search menu, type in “WINVER” and a small window will pop-up. This will tell you which Windows version you are on – match it with the one on the GitHub repository.

Step 4: Download the Sophia Script and Extract.
Once you’ve matched up the right Sophia Script version with your Windows 10 version, download the script!

After it has downloaded, click on the download to “show in folder” and extract the file to your desktop by dragging it from the download window to your desktop. I have downloaded the Sophia.Script.LTSC.v5.2.8.zip as this works with 21H1 of Windows 10.

Step 5: Download NotePad++ [Optional]
If you plan on editing the preset file with your own command functions, then you will need to download NotePad Plus Plus to open the Sophia.ps1 file. If you are planning on just using the script to debloat Windows 10 of basic features and functions, you do not need to do this step. You can find NotePad ++ download here.
Step 6: Open Sophia.ps1 Preset File to Edit [Optional]
Once you have NotePad Plus Plus downloaded, you can edit the preset file. Just right-click the file and open it with NotePad.
Warning: Editing the preset file requires advanced knowledge of using command lines and editing the PowerShell scripting language, so only do this if you are confident in either a) following scripting instructions or b) fluent in PowerShell language.
Step 7: Run PowerShell As Administrator in the Sophia Script Folder.
In your Sophia Folder is on your desktop, there will be a “File” option in the top left-hand corner. Click it and choose to open Windows PowerShell as an administrator.

Step 8: Set Execution Policy Using the Command Line.
If this is your first time running a script, your Windows computer isn’t going to recognize this as a valid action. So, you may get an error that warns you about running the script.

You can bypass this with an execution policy command line. In the PowerShell tab that has opened up, type in: “Set-ExecutionPolicy -ExecutionPolicy Bypass – Scope Process -Force” and hit Enter.
Step 9: Run the Windows 10 Debloater Script.
Now, on the next line down in the PowerShell window, type in “.\Sophia.ps1” and hit Enter. This command line will run the preset script for you.
Step 10: How to Disable Scheduled Tasks You Do Not Need.
If you want to disable scheduled tasks, run the command line:
.\Sophia.ps1 -Function “ScheduledTasks -Disable”
Hit Enter.
This will pull up the scheduled tasks menu to the right of the PowerShell. Choose which tasks you want to disable by checking them, and then hit the big Disable button.

Step 10: How to Disable Windows Features You Do Not Need with the Debloater.
You would run the same kind of command line as in step eight, but for all of the Windows features you do not want. Let’s run this for 1 feature and then for multiple.
Let’s say you don’t want the Cortana button on your taskbar, you would type in: .\Sophia.ps1 -Function “CortanaButton -Hide”
Hit Enter.
This will hide the Cortana Button from your taskbar. No more accidental clicking on it!
Now, let’s say you do not want telemetry tracking and you want the gathered diagnostic data level to be minimal, you would type in:
.\Sophia.ps1 -Functions “DiagTrackService -Disable”, “DiagnosticDataLevel -Minimal”
Hit Enter.
Alternatively, you can use the “WindowsFeatures -Disable” command line to bring up a pop-up box that allows you to checkmark all the ones you want to disable.
Step 12: Debloat Background Apps, Main Folders, and Universal Windows Platform Packages.
Repeat the process for all of the above. We do highly recommend using the GUI version for this step, since it is much easier to move around within, for those who are completely new to PowerShell.
Note: Steps 8-11 show you how to disable features using the “old” command line way rather than the “tab” way. If you would prefer auto-completing tabs, you can view how to do this here, by scrolling down to the “how to run specific functions” section.
Wrapping It Up
And, that’s how you use a PowerShell script to debloat Windows 10.
If you are interested in using the GUI version of the Sophia Script, download the Sophia Script Wrapper.exe program from the repository, copy and paste the folders within it over to your original Sophia Script folder.
Rename the Sophia.ps1 (preset file) to Sophia-Original.ps1 so that it does not get overwritten by the new GUI version. Then run the Sophia Script Wrapper.exe program.

Now, instead of running command lines, you can use the radial buttons to choose what you want to disable or uninstall.
