Версия nginx под Windows использует “родной” Win32 API (не эмуляцию Cygwin).
В настоящий момент в качестве методов обработки соединений используются
select() и poll() (1.15.9),
поэтому не стоит ожидать высокой производительности и масштабируемости.
В силу этого и ряда других известных проблем версия nginx под Windows
рассматривается пока как бета-версия.
На данный момент в ней доступна практически вся функциональность, что и
в версии nginx под UNIX, за исключением
XSLT-фильтра, фильтра изображений, модуля GeoIP и встроенного языка Perl.
Чтобы установить nginx/Windows, скачайте
дистрибутив последней основной версии (1.25.2),
поскольку основная ветвь nginx содержит все известные исправления.
Затем распакуйте дистрибутив, перейдите в каталог
nginx-1.25.2
и запустите nginx.
Вот пример для корневого каталога на диске C:
cd c:\
unzip nginx-1.25.2.zip
cd nginx-1.25.2
start nginx
Чтобы увидеть процессы nginx, запустите утилиту командной строки
tasklist:
C:\nginx-1.25.2>tasklist /fi "imagename eq nginx.exe"

Image Name           PID Session Name     Session#    Mem Usage
=============== ======== ============== ========== ============
nginx.exe            652 Console                 0      2 780 K
nginx.exe           1332 Console                 0      3 112 K
Один из процессов главный, другой — рабочий.
Если nginx не запускается, нужно искать причину в
в файле лога ошибок logs\error.log.
Если же лог-файл не создался, то причину этого следует искать
в Windows Event Log.
Если вместо ожидаемой страницы выводится страница с ошибкой, нужно также
искать причины ошибки в файле logs\error.log.
nginx/Windows использует каталог, в котором он был запущен, в качестве
префикса для относительных путей в конфигурации.
В вышеприведённом примере префиксом является
C:\nginx-1.25.2\.
Пути в конфигурационном файле должны задаваться в UNIX-стиле с использованием
прямых слэшей:
access_log   logs/site.log;
root         C:/web/html;
nginx/Windows работает как стандартное консольное приложение (не сервис)
и управляется при помощи следующих команд:
nginx -s stop быстрое завершение nginx -s quit плавное завершение nginx -s reload изменение конфигурации,
запуск новых рабочих процессов с новой конфигурацией,
плавное завершение старых рабочих процессовnginx -s reopen переоткрытие лог-файлов
Известные проблемы
-
Хоть и возможен запуск нескольких рабочих процессов, только один из них
реально работает. - Проксирование по UDP не поддерживается.
Возможные усовершенствования в будущем
- Запуск в виде сервиса.
-
Использование портов завершения ввода-вывода (I/O completion ports)
в качестве метода обработки соединений. - Использование нескольких рабочих нитей внутри одного рабочего процесса.
Как установить и запустить сервер Nginx на Windows 10
Nginx — это веб-сервер, который очень популярен в Linux и BSD системах. Многие полагают, что установить Nginx на Windows 10 невозможно. Это совсем не так.
Согласно информации, размещенной на сайте Nginx, установка на Windows 10 возможна, но есть несколько ограничений производительности, которые пока не были устранены. К ним относятся только одно рабочее веб-приложение, отсутствие масштабируемости и возможные проблемы с UDP аутентификацией. На данный момент Nginx уже упоминал, что он решит все проблемы в своих будущих выпусках.
Чтобы успешно установить и запустить Nginx на Windows 10, выполните следующие действия.
Загрузите Nginx Server
Существует много загружаемых версий Nginx для Windows, но Nginx рекомендует использовать “mainline version”. Однако, вы не найдете никаких проблем, если загрузите последнюю стабильную версию этой программы.
Выберите последний ZIP-файл и загрузите его в новую папку.

В качестве первого шага необходимо распаковать его. Вы можете использовать 7-Zip, WinRAR или любое другое популярное программное обеспечение для архивации.

После извлечения содержимого архива из первоначальной директории необходимо переместить папку, которая поставлялась со встроенной загрузочной копией. в «Program Files».

Мы запустим Nginx из этого места в качестве веб-сервиса по умолчанию.

Чтобы установить и запустить Nginx, выберите и дважды щелкните файл Nginx.exe.

На следующем шаге вам нужно проверить, была ли установка успешной. Для этого вы можете перейти в браузер по умолчанию и ввести “localhost”. Если вы увидите следующее окно с сообщением об успешной установке и работе веб-сервера Nginx, то проблем с установкой в Windows 10 не было.

Чтобы остановить Nginx, вы можете завершить его из окна Диспетчер задач.

Запуск Nginx на компьютере с ОС Windows
Для запуска Nginx, вы должны использовать Internet Information Services (IIS), который является веб-сервером Microsoft, обслуживающим запрошенные HTML страницы или файлы. Вы можете включить его в меню Turn Windows Features On or Off в Панели управления. Проверьте необходимые поля для Web Management Tools и IIS Management Console.

Для включения IIS на вашем компьютере потребуется некоторое время.

Менеджер IIS Manager можно открыть непосредственно из меню Пуск. Здесь вы сможете получить доступ к веб-сайту по умолчанию, который обычно расположен по адресу “inetpub wwwroot”. Он также известен как корень веб-приложения.
Полезно изменить физический путь этого корня в более подходящую папку. Я создал новую папку “Work” в C:\ и изменил физический путь на “C:\Work”.

После этого перейдите в папку Nginx, которую переименовали в файлах программы. Нажмите “Conf” и выберите “nginx.conf”. Этот файл можно редактировать с помощью текстового редактора Notepad++.

В Notepad++ измените корень на отредактированный физический путь, о котором мы говорили выше.

Вы можете отредактировать файл index.html в корневой папке на отдельной вкладке. Измените текст на то, что вы хотите, чтобы веб-сервер отображался на экране.

Теперь снова запустите программу Nginx.exe и введите “localhost” в окне браузера. Веб-сервер Nginx выделит сделанные вами изменения.

На сайте ресурсов Nginx представлен полный список веб-приложений, которые можно использовать для запуска на Windows PC.
Вывод
Nginx является одной из ведущих компаний по разработке веб-серверов, которая, как ожидается, затмит Apache в будущем. Кроме того, он быстрее, может справляться с большим количеством параллельных задач и надежен. Подводя итог, можно сказать, что если у вас есть простой сайт, который вы хотите подключить к Nginx, вы можете сделать это прямо сейчас без каких-либо проблем.
Спасибо, что читаете! На данный момент большинство моих заметок, статей и подборок выходит в telegram канале «Левашов». Обязательно подписывайтесь, чтобы не пропустить новости мира ИТ, полезные инструкции и нужные сервисы.
Респект за пост! Спасибо за работу!
Хотите больше постов в блоге? Подборок софта и сервисов, а также обзоры на гаджеты? Сейчас, чтобы писать регулярно и радовать вас большими обзорами, мне требуется помощь. Чтобы поддерживать сайт на регулярной основе, вы можете оформить подписку на российском сервисе Boosty. Или воспользоваться ЮMoney (бывшие Яндекс Деньги) для разовой поддержки:
Заранее спасибо! Все собранные средства будут пущены на развитие сайта. Поддержка проекта является подарком владельцу сайта.
Nginx is a web server that is very popular with Linux and BSD systems. It can also be installed on Windows as long as you can live with performance limitations that have not been mitigated so far. You can still host a web server or a customer/employee portal from the comfort of your Windows laptop. To install and run Nginx successfully on Windows, follow the steps below.
Content
- Installing Nginx in Windows
- How to Start Nginx on Windows
- 1. Using Nginx Application File
- 2. Using PowerShell
- 3. Using IIS Manager
- How to Configure Nginx For Windows
- Example Application of Nginx in Windows
- Frequently Asked Questions
Tip: if all you need is a local web server to test your applications, here are the ways to set up a local web server in Windows.
Installing Nginx in Windows
To get started, we will need to install Nginx on your Windows laptop or PC. There are no conventional Nginx installers with this operating system. You will need to download one of its online versions and save it to a C: drive location of your PC.
- Select the version you want and download its zip file to your PC. Nginx recommends using the «mainline version» as it comes with the latest features. If you don’t need those features, the most recent stable version will work too.

- Once downloaded, extract the new folder by right-clicking on it. You may also use popular compression software such as 7-zip or WinRAR.

- Move the entire folder that came with the built-in download copy into the C: drive. In this example, we moved it to «Program Files» but it can be saved at any location on your PC including D drive.

- Select and double-click the «Nginx.exe» file. It has now been activated for further use. We will run Nginx from this location as a default web service program.

- If you have enabled Windows SmartScreen filter, it may prevent the Nginx installer from running. Click «More info» to bypass the limitation.

- Click the «Run anyway» text to run the nginx.exe file.

- You may further run into a Windows Defender firewall block screen while running the Nginx server, which has to be allowed by you. Once done, you can readily use Nginx on your Windows device.

Do you know: wondering what is the difference between Nginx and Apache? We have the answers here.
There are multiple ways to run Nginx on your Windows PC depending on your end use requirements. You can use these methods simultaneously. For example, you can launch the Nginx server using its application file or from PowerShell.
1. Using Nginx Application File
Nginx has a built-in application file that you can double-click as described in above section. You will need to bypass any restrictions due to SmartScreen or Windows Defender.
- Once done, go to your default browser and type localhost. Microsoft Edge is the browser used in the below example.
- If you see a screen saying the Nginx web server is successfully installed and working, it means there were no problems with your Nginx installation in Windows.

- To stop Nginx, you can end it from the Task Manager window. If you can’t terminate it directly from the Processes, right click to select «Go to details.»

- Identify all instances of Nginx.exe and right click to end each task.

- Ignore any warning such as «do you want to end Nginx.exe.» Click «End process» to continue with the termination.

- When you type localhost, you will see a «can’t reach this page» screen on your browser web page.

2. Using PowerShell
The best part of Nginx is that it can run as an automated script from PowerShell and also the Command Prompt. We will demonstrate that for PowerShell below.
- Launch PowerShell in Administrator mode.

- Go back to the folder where you saved the Nginx application, and right-click to go to its Properties. Here you can copy the exact folder path. In this example, it is «C:\nginx-1.25.1\nginx-1.25.1»

- Change the PowerShell directory to point to the above path.
cd Path of Nginx installer

- To initiate the Nginx server, type the following command.

- You can view Nginx.exe process instances in Task Manager nested under Windows PowerShell.

- On Windows, Nginx can be run as a standard console app. For managing it, the following simple commands are frequently used:
nginx -s stop |
Rapid shutdown |
nginx -s quit |
Graceful shutdown |
nginx -s reload |
Changing configuration, starting new worker processes with a new configuration, graceful shutdown of old worker processes |
nginx -s reopen |
Reopening log files |
- If you encounter any error such as «the command nginx was not found, but does exist in the current location,» PowerShell will prompt you to use a different command. In the following example, we have replaced all instances of
nginxwith/.nginx, using them to reload and quit the program.

3. Using IIS Manager
You can also use Internet Information Services (IIS) to run Nginx which is a Microsoft web server that serves requested HTML pages or files. In the past, it was compulsory but it’s no longer the case.
- You can enable it in «Turn Windows Features On or Off» in the Control Panel. Check the required fields for «Web Management Tools» and «IIS Management Console.»

- It will take a while for IIS to be enabled on your computer as the changes are applied.

- You will see a success status that «Windows completed the requested changes.»

- You can open IIS Manager directly from the Start menu. Always open it in Administrator mode.

- Here, you will be able to access the default website, which is usually located at «inetpub wwwroot.» This is also known as the web application root. You can look for it in File Explorer through a simple search.
- When you double-click on the «default web site» option in IIS Manager, it should lead to this new folder. Alternatively, you can right-click the menu and select «Explore» for the same result.

- Once your IIS Console is enabled, you can view its webpage by typing localhost on your default browser.

How to Configure Nginx For Windows
To run Nginx in Windows, all desired changes are affected from various strings modified in the «index.html» and «nginx.conf» files in the installation folder. These strings are usually edited using the Notepad text editor, but you can use any other editor such as Atom, Notepad++ or Visual Studio Code. In this case, we will edit the configuration file using Notepad++.
- Go to the folder where you saved your Nginx application. Click the «html» subfolder.

- Right click to select «Edit with Notepad++» for the index.html file.

- You can edit the index.html file in the root folder in a new or separate tab. Change the text to what you want the web server to display on the screen.
- Don’t forget to click the «Save» button on top once you’re done.
- Exit the Nginx.exe program using «End Task» as shown in above section and restart it.

- Type localhost in a browser window. The Nginx web server will highlight the edits you made.

- After this, click «Conf» and right click to select «nginx.conf» followed by «Edit with Notepad++.»

- Find the location of the root and change it from the default html to any other physical path.

To know more about Nginx commands, including the documentation, visit this link.
Example Application of Nginx in Windows
Nginx supports multiple applications in Windows, such as web server, load balancer, reverse proxy, or even host your own Youtube site. The Nginx resources site has a full list of web server applications which you can use to run various applications on Windows PC.
For example, you can use Nginx in Windows to link to a webpage such as a customer login page. Once you make the configuration changes in the «nginx.conf» file, your end users will be able to access the login page on their end.
- Go back to the «nginx.conf» file shared in the previous section. Instead of «somename,» you need a domain name for the server to access.

- Go to «location» and modify the text using an «api,» followed by a proxy server added with an «http» ping. This should point to any login page you want this page to direct to. Here we have a «proxy_pass» field which has a «127.0.0.1′ URL local to your Windows machine.
- Save the file and run the «Nginx.exe» program in Admin mode.

- As shown here, 127.0.0.1 is what Nginx.exe points to, and this is the path you can modify in above Conf file to point to an external customer portal or web server.

Frequently Asked Questions
How to solve Nginx’s «The system cannot find the path specified» error in Windows?
Sometimes while running Nginx in Windows Command Prompt/PowerShell, you may run into a «System cannot find the path specificed» error. To avoid it, go to the folder where you saved the Nginx.exe application, and right click on it to view its properties, which will give the exact path it is located. There could be a few other reasons behind this, and we have a detailed guide to fix the issue.
What are the disadvantages of Nginx in Windows?
Even though it supports Windows, Nginx is not the best choice for the operating system. Its biggest disadvantage is that it’s incapable of multitasking. For instance, you can execute only one process at a time. If you are running a web server, your Windows machine will be occupied with that one task. This poses challenges in scalability, and one Windows device isn’t sufficient to work with Nginx.
How popular is Nginx?
Nginx is one of the leading web server companies today. Also, it is faster, can handle more concurrent issues and is reliable. To summarize, if you have a simple website you want to connect to Nginx, you can do it right now without any problems. Read on to check out the comparison of Nginx to OpenLiteSpeed.
All images and screenshots by Sayak Boral.

Sayak Boral is a technology writer with over eleven years of experience working in different industries including semiconductors, IoT, enterprise IT, telecommunications OSS/BSS, and network security. He has been writing for MakeTechEasier on a wide range of technical topics including Windows, Android, Internet, Hardware Guides, Browsers, Software Tools, and Product Reviews.
Subscribe to our newsletter!
Our latest tutorials delivered straight to your inbox
Nginx is an open-source, high-performance HTTP server and reverse proxy server. It also functions as a mail proxy server and a generic TCP/UDP proxy server. Renowned for its stability, rich feature set, simple configuration, and low resource consumption, Nginx is often used as a web server or reverse proxy.
This article provides a comprehensive guide on how to install Nginx on a Windows-based operating system. It is worth noting that while Nginx does provide a Windows version, it is mostly recommended for development and testing purposes. For production environments, Linux distributions are typically preferred.
Prerequisites
Before you start with the installation process, make sure you have administrative rights on your Windows system, as they are required for software installation. Additionally, ensure your system meets the minimum hardware requirements for Nginx.
Step 1: Downloading Nginx
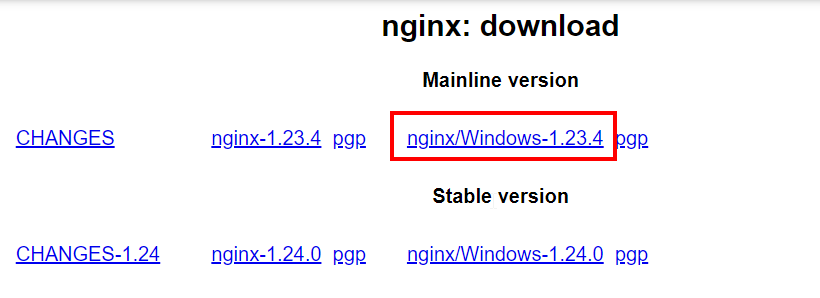
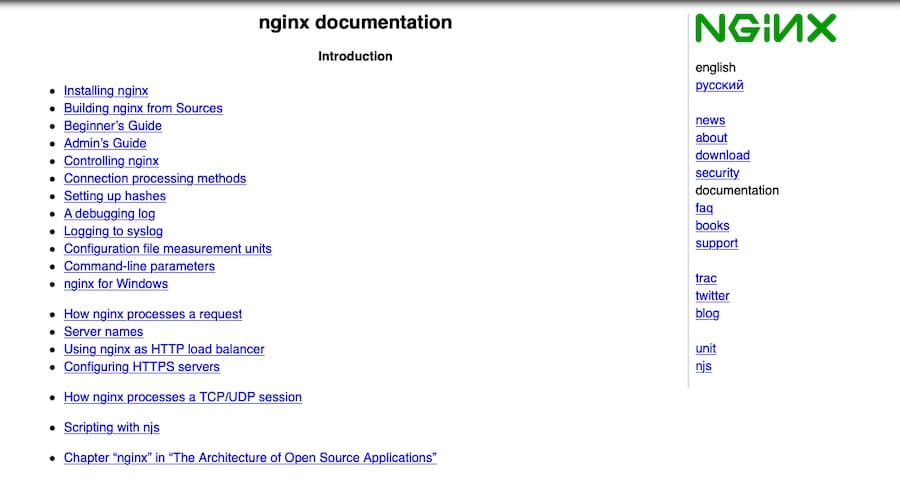
- Go to the Nginx download page.
- Under the “Mainline version”, click on the zip file link for the latest Windows version. The file will start downloading.

Downloading Nginx for Windows
Step 2: Extracting Nginx
- Once downloaded, locate the zip file, typically in your Downloads folder.
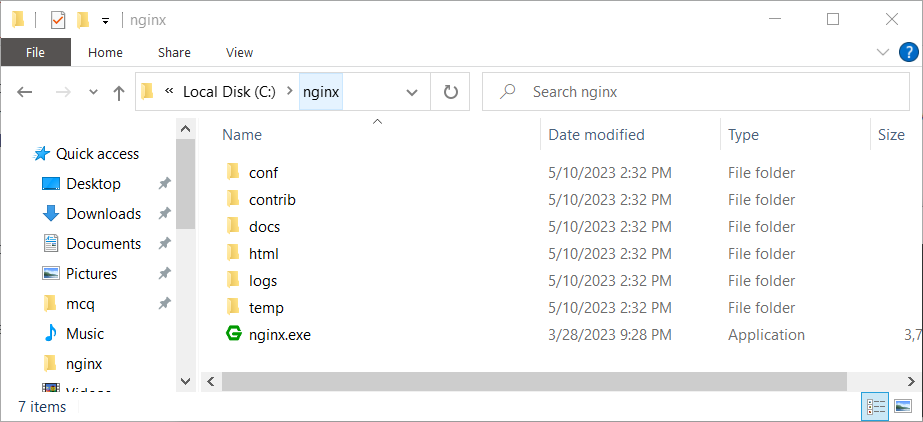
- Extract the zip file to your desired location. For this guide, we will use C:\nginx.

Extracted Nginx code in C:\nginx directory
Step 3: Running Nginx
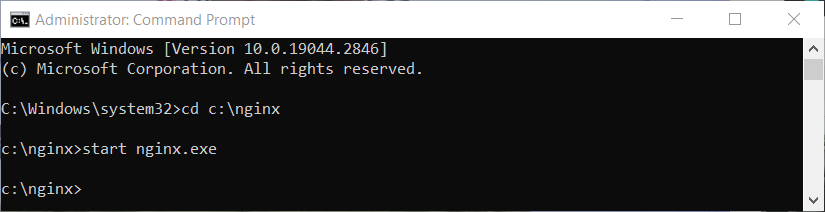
- Open the Command Prompt with administrative privileges. You can do this by searching for ‘cmd’ in the Start menu, right-clicking on Command Prompt, and selecting “Run as administrator”.
- Navigate to the directory where you extracted Nginx. You can do this by typing cd C:\nginx and hitting Enter.
- Start Nginx by typing start nginx and hitting Enter.
cd C:\nginxstart nginx.exe
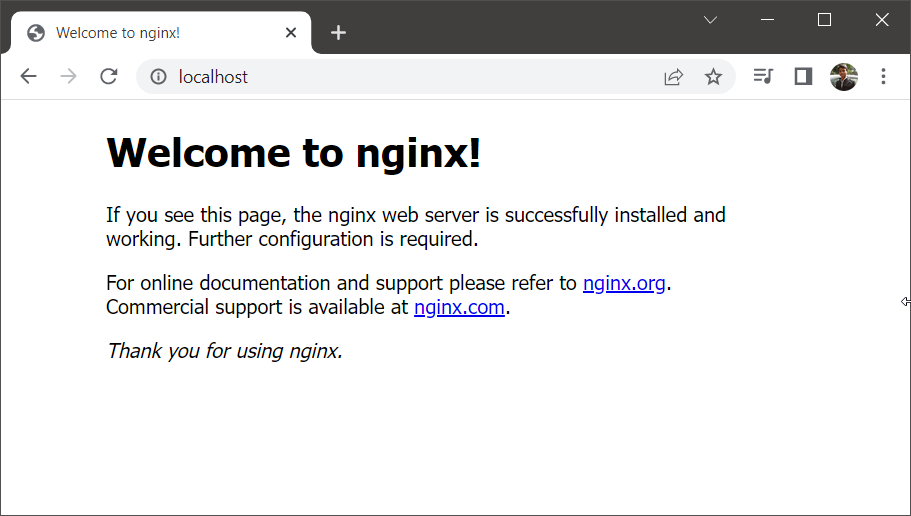
Starting Nginx service on Windows - Nginx should now be running on your Windows machine. You can check this by opening a web browser and navigating to http://localhost. If Nginx has started successfully, you will see a welcome page.

Verify Nginx on Windows
Step 4: Managing Nginx
Here are some basic commands you can use to manage Nginx:
- To stop Nginx, use the command `nginx -s stop`.
- To quit Nginx gracefully, use `nginx -s quit`.
- To reload the Nginx configuration file, use `nginx -s reload`.
- To reopen the Nginx log files, use `nginx -s reopen`.
Remember to run these commands from the directory where Nginx is installed.
Step 5: Configuring Nginx
The primary configuration file for Nginx is nginx.conf, located in the conf subdirectory of the directory where Nginx was extracted. The configuration file is well-commented and provides a good starting point for configuring your server.
For Nginx to serve your website, you need to edit this file with your specific parameters. You may need to set up server blocks (similar to Apache’s virtual hosts) to specify the document root and other parameters for your website.
After making changes to the configuration file, remember to reload Nginx so that the changes take effect.
Conclusion
This guide provided a basic introduction to installing Nginx on a Windows system. While this should get you started, Nginx’s true power comes from its extensive configurability, allowing you to optimize it for your specific needs. Be sure to check out the official Nginx documentation for more detailed information on how to harness this power.
Having a dependable and fast web server is crucial for delivering content efficiently and promptly. It’s no wonder then why Nginx is one of the most popular web servers currently around. Nginx is an open-source web server and reverse proxy server known for its high performance, stability, and ability to handle a large number of simultaneous connections.
It’s also become an essential tool for web developers and system administrators, as it provides an efficient and scalable solution for serving web content and managing network traffic.
Since Nginx has gained popularity for its performance and flexibility, today we’re guiding you through the process of installing Nginx on Windows, macOS, and Linux.
But first, let’s provide some helpful definitions and background info on this server.
What Is Nginx?
Nginx is an open-source web server and reverse proxy server that was developed by Igor Sysoev in 2004. Nginx became very popular because it is fast, versatile, and can be used as a web server and reverse proxy. This popularity has developed since it was first released.
One of the key design goals of Nginx is to provide high performance and handle a large number of simultaneous connections with minimal resource usage. Nginx achieves this by using an event-driven architecture, which allows it to efficiently manage connections without the need for a large number of dedicated worker processes.
It also serves as an excellent choice for serving static content, such as HTML, CSS, and JavaScript files, as well as images and other media files. Nginx can be used as a load balancer as well, distributing incoming network traffic across multiple backend servers to ensure that no single server becomes overwhelmed.
Lastly, Nginx supports a wide range of protocols, including HTTP, HTTPS, WebSocket, and more. This flexibility allows Nginx to be used in a variety of applications, from serving traditional web content to managing real-time communication between clients and servers.
Without a doubt, Nginx has become a crucial tool for web devs and sysadmins since its launch. Haven’t checked it out yet? Take this as your sign! Start here 👇Click to Tweet
Who Uses Nginx?
Nginx is a popular choice among a wide range of professionals, including:
- Web developers: Nginx’s high performance and ability to handle large numbers of connections make it an ideal choice for web developers looking to serve static content or build dynamic web applications.
- System administrators: Its flexibility and extensive configuration options make it a powerful tool for system administrators tasked with managing web servers and network traffic.
- DevOps engineers: DevOps professionals use Nginx as part of their toolkit for deploying, scaling, and managing web applications and infrastructure.
In addition to individual professionals, many well-known companies rely on Nginx for their web server and reverse proxy needs, including:
- Netflix: The popular streaming service uses Nginx as part of its content delivery infrastructure, ensuring smooth and reliable streaming for millions of users.
- Cloudflare: The global content delivery network and web security provider uses Nginx to power its infrastructure, providing fast and secure web experiences for its customers.
- Airbnb: The popular home-sharing platform leverages Nginx to serve its web applications, allowing for efficient handling of high-traffic periods and improved performance for users.
- Zappos: The online fashion retailer uses Nginx to power its websites and keep them running fast and reliably.
These are just a few examples of the many companies that trust Nginx to meet their web server and reverse proxy needs, showcasing the versatility and performance of this powerful tool.
Advantages of Using Nginx
There are several key advantages to using Nginx, which contribute to its widespread adoption:
High Performance With Low Resource Consumption
Nginx’s event-driven architecture makes it so it can handle a large number of simultaneous connections with minimal resource usage. This makes it an excellent choice for serving web content on small and large-scale applications.
Scalable and Extensible
It’s also designed to be easily scalable, allowing it to grow alongside your application as your needs change. Nginx supports a wide range of modules, which can be used to extend its functionality and adapt it to specific use cases.
Flexible Configuration Options
Nginx offers extensive configuration options as well, allowing you to fine-tune its behavior and performance to suit your needs. This flexibility makes Nginx a powerful tool for managing web servers and network traffic.
Supports Reverse Proxy and Load Balancing
As we already mentioned, in addition to serving as a web server, Nginx can also function as a reverse proxy and load balancer. It distributes incoming network traffic across multiple backend servers to prevent the overload of any single server.
Strong Community Support and Documentation
Finally, Nginx has a large and active community, which contributes to its ongoing development and provides support to users.
The official Nginx documentation is extensive and well-organized, making it easy to find the information you need to get started and troubleshoot any issues that arise.
Nginx Prerequisites
Before you install and start using Nginx, it’s helpful to have the following knowledge and skills:
- Basic knowledge of networking and web servers: Familiarity with networking concepts and web server technology will help you understand how Nginx works and how to configure it for your specific use case.
- Familiarity with command line/terminal: Many of the tasks related to installing and managing Nginx will require you to use the command line or terminal, so it’s important to feel comfortable navigating and executing commands in these environments.
System Requirements
Likewise, to install and run Nginx, your system should meet the following requirements:
- Supported operating systems: Nginx is available for a variety of operating systems, including Windows, macOS, and Linux. Be sure to use a supported version of your chosen operating system.
- Minimum hardware requirements: While Nginx is known for its low resource consumption, it’s important to ensure your system meets the minimum hardware requirements for running Nginx. At a minimum, you’ll need 512 MB of RAM and 50 MB of free disk space
These requirements may vary depending on your specific use case, so it’s important to consider your application’s needs when determining the appropriate hardware configuration.
Versions
Nginx is available in two primary release channels:
- Nginx stable release: The stable release channel provides a well-tested, production-ready version of Nginx. This version is recommended for most users, as it prioritizes stability and compatibility.
- Nginx mainline release: The mainline release channel includes the latest features and improvements to Nginx but may not have undergone the same level of testing as the stable release. This version is more suitable for users who require cutting-edge features or who want to participate in testing and providing feedback on new developments.
When choosing which version of Nginx to install, consider your specific needs and weigh the benefits of stability versus access to the latest features.
How To Install Nginx
Though the overall installation process is fairly similar across all platforms, we’ve broken up these instructions below to simplify things.
How To Install Nginx on Windows
This section will guide you through the process of installing Nginx on a Windows computer. Simply follow each step to successfully install and run Nginx.
- Download the Nginx installer for Windows
- Extract the Nginx archive
- Run Nginx
- Verify the Nginx installation
- Configure Nginx as a Windows service (optional)
Step 1: Download the Nginx Installer for Windows
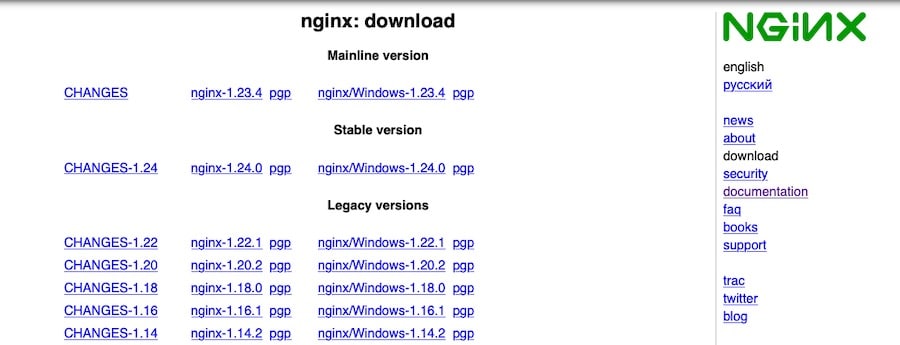
- Visit the Nginx download page.
- Choose either the stable release or the mainline release, depending on your preference for stability or access to the latest features.
- Under the selected release, click on the link for the Windows version to download the Nginx installer.
Step 2: Extract the Nginx Archive
- Locate the downloaded Nginx archive (usually in your Downloads folder), which should be a .zip file.
- Right-click on the archive and select Extract All.
- Choose a location for the extracted files (e.g., C:\nginx), and click Extract.
Step 3: Run Nginx
To open a command prompt with administrator privileges, please follow these steps:
- Click on the Start button.
- Type “cmd” without quotation marks.
- Right-click on the Command Prompt result.
- Select Run as administrator.
Then navigate to the directory where you extracted the Nginx files by entering:
cd C:\nginx(replace C:\nginx with the actual path where you extracted the files).
Finally, start Nginx by running the following command:
start nginxStep 4: Verify the Nginx Installation
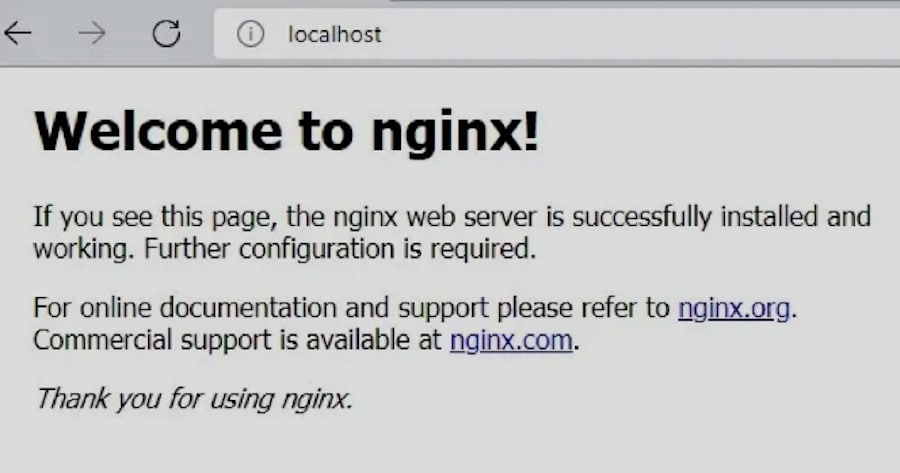
- Open your web browser and navigate to http://localhost.
- You should see the Nginx welcome page, which confirms that the installation was successful.
Step 5: Configure Nginx as a Windows Service (optional)
By default, Nginx does not run as a Windows service, which means it will not automatically start when your computer boots. If you’d like Nginx to run as a Windows service, you can use a third-party tool like NSSM – the Non-Sucking Service Manager.
- Download the NSSM utility and extract it to a folder on your computer.
- Open a command prompt with administrator privileges, as described in Step 3.
- Navigate to the folder where you extracted NSSM by entering cd C:\path\to\nssm (replace C:\path\to\nssm with the actual path).
- Run the following command to install Nginx as a service:
nssm install nginx C:\nginx\nginx.exe(replace C:\nginx\nginx.exe with the actual path to the nginx.exe file).
- Start the Nginx service by running
nssm start nginx.
With Nginx installed on your Windows machine, you’re now ready to start configuring it to serve your web applications and manage network traffic.
How To Install Nginx on macOS
This section will explain how to install Nginx on macOS. We’ll be using Homebrew, a popular package manager for macOS, to simplify the installation process.

If you don’t have Homebrew installed on your system, follow the Homebrew installation instructions before proceeding.
- Update Homebrew
- Install Nginx
- Start Nginx
- Verify the Nginx installation
Step 1: Update Homebrew
Before installing Nginx, it’s a good idea to ensure your Homebrew installation is up to date.
Open a terminal window and run the following command:
brew updateThis command will update Homebrew and its package information to the latest versions.
Step 2: Install Nginx
To install Nginx using Homebrew, run the following command in your terminal:
brew install nginxHomebrew will download and install the latest stable version of Nginx, along with any required dependencies.
Step 3: Start Nginx
Once the installation is complete, you can start the Nginx server using the following command:
brew services start nginxThis command will start Nginx and configure it to run as a background service, automatically starting when your system boots.
Step 4: Verify the Nginx Installation
To verify that Nginx is running, open your web browser and navigate to http://localhost:8080. You should see the Nginx welcome page, indicating that the installation was successful.
Note: By default, Nginx on macOS listens on port 8080, unlike the standard port 80 used by most web servers. You can change this by editing the Nginx configuration file located at /usr/local/etc/nginx/nginx.conf.
And that’s it! You’re now ready to start using Nginx.
How To Install Nginx on Linux
We’ll now walk you through the process of installing Nginx on a Linux machine. The specific steps may vary depending on your Linux distribution, but we’ll cover the most common distributions: Ubuntu, Debian, CentOS, and Fedora.
Ubuntu and Debian
- Update package lists
- Install Nginx
- Start Nginx
CentOS and Fedora
- Add the EPEL repository
- Install Nginx
- Start Nginx
- Verify the Nginx installation
Ubuntu and Debian
Step 1: Update Package Lists
Before installing Nginx, update the package lists for upgrades and new package installations. Open a terminal and run the following command:
sudo apt updateStep 2: Install Nginx
To install Nginx on Ubuntu or Debian, run the following command:
sudo apt install nginxThis command will install the latest stable version of Nginx from the default package repository.
Step 3: Start Nginx
After the installation is complete, start the Nginx service and enable it to start automatically at boot using the following commands:
sudo systemctl start nginx sudo systemctl enable nginxCentOS and Fedora
Step 1: Add the EPEL Repository (CentOS only)
For CentOS users, you’ll need to enable the EPEL (Extra Packages for Enterprise Linux) repository, which provides additional packages not included in the default CentOS repositories. To enable EPEL, run the following command:
sudo yum install epel-releaseStep 2: Install Nginx
To install Nginx on CentOS or Fedora, run the following command:
sudo yum install nginxThis command will install the latest stable version of Nginx from the package repository.
Step 3: Start Nginx
After the installation is complete, start the Nginx service and enable it to start automatically at boot using the following commands:
sudo systemctl start nginx sudo systemctl enable nginxStep 4: Verify the Nginx Installation (all distributions)
To verify that Nginx is running, open your web browser and navigate to http://localhost (or the IP address of your Linux machine if accessing remotely). You should see the Nginx welcome page, indicating that the installation was successful.
And with that, you’ve completed the Nginx installation process on Linux.
Discover how Nginx makes serving web content and managing traffic a breeze with this guide ⬇️Click to Tweet
Summary
Today, we’ve covered the process of installing Nginx on Windows, macOS, and Linux operating systems. By following the steps outlined for your specific platform, you should now have a working Nginx installation ready to handle your web server and reverse proxy tasks.
We encourage you to start using Nginx for your web applications, as it offers excellent performance, scalability, and flexibility. As you continue to work with Nginx, you’ll find a wealth of resources available online to help you learn more and troubleshoot any issues you may encounter. The official Nginx documentation is a great place to start, as well as various community forums and blogs.
Finally, if you’re looking for a reliable hosting solution for your Nginx-powered applications, we recommend Kinsta Application Hosting. Kinsta provides a high-performance, managed hosting environment optimized for Nginx, ensuring your applications run smoothly and securely.
With your new Nginx installation in place, you’re on your way to building and managing powerful web applications and services.