Привет, Хабр! Сегодня делимся гайдом по началу работы с Windows Terminal. Да, поскольку он о начале работы с инструментом, в основном в материале описываются какие-то базовые моменты. Но я думаю, что и профессионалы смогут подчерпнуть для себя что-то полезное, как минимум из списка полезных ссылок в конце статьи. Заглядывайте под кат!
Установка
Windows Terminal доступен в двух разных сборках: Windows Terminal и Windows Terminal Preview. Обе сборки доступны для загрузки в Microsoft Store и на странице выпусков GitHub.
Требования
Для запуска любой сборки Windows Terminal на вашем компьютере должна быть установлена Windows 10 1903 или более поздняя версия.
Windows Terminal Preview
Windows Terminal Preview — это сборка, в которой в первую очередь появляются новые функции. Эта сборка предназначена для тех, кто хочет видеть новейшие функции сразу после их выпуска. Эта сборка имеет ежемесячный цикл выпуска с новейшими функциями каждый месяц.

Windows Terminal
Терминал Windows — это основная сборка продукта. Функции, которые поступают в Windows Terminal Preview, появляются в Windows Terminal через месяц эксплуатации. Это позволяет проводить обширное тестирование ошибок и стабилизацию новых функций. Эта сборка предназначена для тех, кто хочет получить функции после того, как они были изучены и протестированы сообществом Preview.
Первый запуск
После установки терминала вы можете запустить приложение и сразу приступить к работе с командной строкой. По умолчанию терминал включает профили Windows PowerShell, Command Prompt и Azure Cloud Shell в раскрывающемся списке. Если на вашем компьютере установлены дистрибутивы Подсистемы Windows для Linux (WSL), они также должны динамически заполняться как профили при первом запуске терминала.
Профили
Профили действуют как различные среды командной строки, которые вы можете настраивать внутри терминала. По умолчанию в каждом профиле используется отдельный исполняемый файл командной строки, однако вы можете создать столько профилей, сколько захотите, используя один и тот же исполняемый файл. Каждый профиль может иметь свои собственные настройки, которые помогут вам различать их и добавить в каждый свой собственный стиль.
Дефолтный профиль
При первом запуске Windows Terminal в качестве профиля по умолчанию устанавливается Windows PowerShell. Профиль по умолчанию — это профиль, который всегда открывается при запуске терминала, и это профиль, который открывается при нажатии кнопки новой вкладки. Вы можете изменить профиль по умолчанию, установив «defaultProfile» на имя вашего предпочтительного профиля в файле settings.json.
"defaultProfile": "PowerShell"Добавление нового профиля
Новые профили можно добавлять динамически с помощью терминала или вручную. Терминал Windows автоматически создаст профили для распределений PowerShell и WSL. Эти профили будут иметь свойство «source», которое сообщает терминалу, где он может найти соответствующий исполняемый файл.
Если вы хотите создать новый профиль вручную, вам просто нужно сгенерировать новый «guid», указать «name» и предоставить исполняемый файл для свойства «commandline».
Примечание. Вы не сможете скопировать свойство «source» из динамически созданного профиля. Терминал просто проигнорирует этот профиль. Вам нужно будет заменить «source» на «commandline» и предоставить исполняемый файл, чтобы дублировать динамически созданный профиль.
Структура Settings.json
В Терминал Windows включены два файла настроек. Один из них — defaults.json, который можно открыть, удерживая клавишу Alt и нажав кнопку «Настройки» в раскрывающемся списке. Это неизменяемый файл, который включает в себя все настройки по умолчанию, которые поставляются с терминалом. Второй файл — settings.json, в котором вы можете применить все свои пользовательские настройки. Доступ к нему можно получить, нажав кнопку «Настройки» в раскрывающемся меню.
Файл settings.json разделен на четыре основных раздела. Первый — это объект глобальных настроек, который находится в верхней части файла JSON внутри первого {. Примененные здесь настройки повлияют на все приложение.
Следующим основным разделом файла является объект «profiles». Объект «profiles» разделен на два раздела: «defaults» и «list». Вы можете применить настройки профиля к объекту «defaults», и они будут применяться ко всем профилям в вашем «list». «list» содержит каждый объект профиля, который представляет профили, описанные выше, и это элементы, которые появляются в раскрывающемся меню вашего терминала. Настройки, примененные к отдельным профилям в «списке», имеют приоритет над настройками, примененными в разделе «defaults».
Далее в файле расположен массив «schemes». Здесь можно разместить собственные цветовые схемы. Отличный инструмент, который поможет вам создать свои собственные цветовые схемы, — это terminal.sexy.
Наконец, в нижней части файла находится массив «actions». Перечисленные здесь объекты добавляют действия в ваш терминал, которые можно вызывать с клавиатуры и/или находить внутри палитры команд.
Базовая кастомизация
Вот несколько основных настроек, которые помогут вам начать настройку вашего терминала.
Фон
Одна из самых популярных настроек — настраиваемое фоновое изображение. Это настройка профиля, поэтому ее можно либо поместить внутри объекта «defaults» внутри объекта «profiles», чтобы применить ко всем профилям, либо внутри определенного объекта профиля.
"backgroundImage": "C:\Users\admin\background.png"Параметр «backgroundImage» принимает расположение файла изображения, которое вы хотите использовать в качестве фона вашего профиля. Допустимые типы файлов: .jpg, .png, .bmp, .tiff, .ico и .gif.
Цветовая схема
Список доступных цветовых схем можно найти на нашем сайте документации. Цветовые схемы применяются на уровне профиля, поэтому вы можете поместить настройку внутри «значений по умолчанию» или в конкретный объект профиля.
"colorScheme": "COLOR SCHEME NAME"Этот параметр принимает название цветовой схемы. Вы также можете создать свою собственную цветовую схему и поместить ее в список «schemes», а затем установить в настройках профиля имя этой новой схемы, чтобы применить ее.
Начертание шрифта
По умолчанию Windows Terminal использует Cascadia Mono в качестве шрифта. Начертание шрифта — это настройка уровня профиля. Вы можете изменить шрифт, установив «fontFace» на имя шрифта, который вы хотите использовать.
"fontFace": "FONT NAME"`Совет: Терминал Windows также поставляется с начертанием шрифта Cascadia Code, который включает программные лигатуры (см. Gif ниже). Если вы используете Powerline, Cascadia Code также поставляется в PL-версии, которую можно загрузить с GitHub.

Полезные ресурсы
Докуметация Windows Terminal
Скотт Хансельман: как сделать красивым Windows Terminal с помощью Powerline, шрифтов Nerd, кода Cascadia, WSL и oh-my-posh
Скотт Хансельман: Как настроить терминал с помощью Git Branch, Windows Terminal, PowerShell, + Cascadia Code!
Скотт Хансельман: Windows Terminal Feature PREVIEW – Кастомизируйте свои привязки клавиш, цветовые схемы, панели, и многое другое!
>_TerminalSplash – темы Windows Terminal

Welcome to the Windows Terminal, Console and Command-Line repo
This repository contains the source code for:
- Windows Terminal
- Windows Terminal Preview
- The Windows console host (
conhost.exe) - Components shared between the two projects
- ColorTool
- Sample projects
that show how to consume the Windows Console APIs
Related repositories include:
- Windows Terminal Documentation
(Repo: Contribute to the docs) - Console API Documentation
- Cascadia Code Font
Installing and running Windows Terminal
Note
Windows Terminal requires Windows 10 2004 (build 19041) or later
Microsoft Store [Recommended]
Install the Windows Terminal from the Microsoft Store.
This allows you to always be on the latest version when we release new builds
with automatic upgrades.
This is our preferred method.
Other install methods
Via GitHub
For users who are unable to install Windows Terminal from the Microsoft Store,
released builds can be manually downloaded from this repository’s Releases
page.
Download the Microsoft.WindowsTerminal_<versionNumber>.msixbundle file from
the Assets section. To install the app, you can simply double-click on the
.msixbundle file, and the app installer should automatically run. If that
fails for any reason, you can try the following command at a PowerShell prompt:
# NOTE: If you are using PowerShell 7+, please run
# Import-Module Appx -UseWindowsPowerShell
# before using Add-AppxPackage.

Add-AppxPackage Microsoft.WindowsTerminal_<versionNumber>.msixbundle
Note
If you install Terminal manually:
- You may need to install the VC++ v14 Desktop Framework Package.
This should only be necessary on older builds of Windows 10 and only if you get an error about missing framework packages. - Terminal will not auto-update when new builds are released so you will need
to regularly install the latest Terminal release to receive all the latest
fixes and improvements!
Via Windows Package Manager CLI (aka winget)
winget users can download and install
the latest Terminal release by installing the Microsoft.WindowsTerminal
package:
winget install --id Microsoft.WindowsTerminal -e
Note
Due to a dependency issue, Terminal’s current versions cannot be installed via the Windows Package Manager CLI. To install the stable release 1.17 or later, or the Preview release 1.18 or later, please use an alternative installation method.
Via Chocolatey (unofficial)
Chocolatey users can download and install the latest
Terminal release by installing the microsoft-windows-terminal package:
choco install microsoft-windows-terminal
To upgrade Windows Terminal using Chocolatey, run the following:
choco upgrade microsoft-windows-terminal
If you have any issues when installing/upgrading the package please go to the
Windows Terminal package
page and follow the
Chocolatey triage process
Via Scoop (unofficial)
Scoop users can download and install the latest Terminal
release by installing the windows-terminal package:
scoop bucket add extras
scoop install windows-terminal
To update Windows Terminal using Scoop, run the following:
scoop update windows-terminal
If you have any issues when installing/updating the package, please search for
or report the same on the issues
page of Scoop Extras bucket
repository.
Windows Terminal Roadmap
The plan for the Windows Terminal is described here and
will be updated as the project proceeds.
Project Build Status
| Project | Build Status |
|---|---|
| Terminal |  |
| ColorTool | |
Terminal & Console Overview
Please take a few minutes to review the overview below before diving into the
code:
Windows Terminal
Windows Terminal is a new, modern, feature-rich, productive terminal application
for command-line users. It includes many of the features most frequently
requested by the Windows command-line community including support for tabs, rich
text, globalization, configurability, theming & styling, and more.
The Terminal will also need to meet our goals and measures to ensure it remains
fast and efficient, and doesn’t consume vast amounts of memory or power.
The Windows Console Host
The Windows Console host, conhost.exe, is Windows’ original command-line user
experience. It also hosts Windows’ command-line infrastructure and the Windows
Console API server, input engine, rendering engine, user preferences, etc. The
console host code in this repository is the actual source from which the
conhost.exe in Windows itself is built.
Since taking ownership of the Windows command-line in 2014, the team added
several new features to the Console, including background transparency,
line-based selection, support for ANSI / Virtual Terminal
sequences, 24-bit
color,
a Pseudoconsole
(«ConPTY»),
and more.
However, because Windows Console’s primary goal is to maintain backward
compatibility, we have been unable to add many of the features the community
(and the team) have been wanting for the last several years including tabs,
unicode text, and emoji.
These limitations led us to create the new Windows Terminal.
You can read more about the evolution of the command-line in general, and the
Windows command-line specifically in this accompanying series of blog
posts
on the Command-Line team’s blog.
Shared Components
While overhauling Windows Console, we modernized its codebase considerably,
cleanly separating logical entities into modules and classes, introduced some
key extensibility points, replaced several old, home-grown collections and
containers with safer, more efficient STL
containers,
and made the code simpler and safer by using Microsoft’s Windows Implementation
Libraries — WIL.
This overhaul resulted in several of Console’s key components being available
for re-use in any terminal implementation on Windows. These components include a
new DirectWrite-based text layout and rendering engine, a text buffer capable of
storing both UTF-16 and UTF-8, a VT parser/emitter, and more.
Creating the new Windows Terminal
When we started planning the new Windows Terminal application, we explored and
evaluated several approaches and technology stacks. We ultimately decided that
our goals would be best met by continuing our investment in our C++ codebase,
which would allow us to reuse several of the aforementioned modernized
components in both the existing Console and the new Terminal. Further, we
realized that this would allow us to build much of the Terminal’s core itself as
a reusable UI control that others can incorporate into their own applications.
The result of this work is contained within this repo and delivered as the
Windows Terminal application you can download from the Microsoft Store, or
directly from this repo’s
releases.
Resources
For more information about Windows Terminal, you may find some of these
resources useful and interesting:
- Command-Line Blog
- Command-Line Backgrounder Blog
Series - Windows Terminal Launch: Terminal «Sizzle
Video» - Windows Terminal Launch: Build 2019
Session - Run As Radio: Show 645 — Windows Terminal with Richard
Turner - Azure Devops Podcast: Episode 54 — Kayla Cinnamon and Rich Turner on DevOps
on the Windows
Terminal - Microsoft Ignite 2019 Session: The Modern Windows Command Line: Windows
Terminal —
BRK3321
FAQ
I built and ran the new Terminal, but it looks just like the old console
Cause: You’re launching the incorrect solution in Visual Studio.
Solution: Make sure you’re building & deploying the CascadiaPackage project in
Visual Studio.
Note
OpenConsole.exe is just a locally-built conhost.exe, the classic
Windows Console that hosts Windows’ command-line infrastructure. OpenConsole
is used by Windows Terminal to connect to and communicate with command-line
applications (via
ConPty).
Documentation
All project documentation is located at aka.ms/terminal-docs. If you would like
to contribute to the documentation, please submit a pull request on the Windows
Terminal Documentation repo.
Contributing
We are excited to work alongside you, our amazing community, to build and
enhance Windows Terminal!
BEFORE you start work on a feature/fix, please read & follow our
Contributor’s
Guide to
help avoid any wasted or duplicate effort.
Communicating with the Team
The easiest way to communicate with the team is via GitHub issues.
Please file new issues, feature requests and suggestions, but DO search for
similar open/closed preexisting issues before creating a new issue.
If you would like to ask a question that you feel doesn’t warrant an issue
(yet), please reach out to us via Twitter:
- Christopher Nguyen, Product Manager:
@nguyen_dows - Dustin Howett, Engineering Lead: @dhowett
- Mike Griese, Senior Developer: @zadjii@mastodon.social
- Carlos Zamora, Developer: @cazamor_msft
- Pankaj Bhojwani, Developer
- Leonard Hecker, Developer: @LeonardHecker
Developer Guidance
Prerequisites
- You must be running Windows 10 2004 (build >= 10.0.19041.0) or later to run
Windows Terminal - You must enable Developer Mode in the Windows Settings
app
to locally install and run Windows Terminal - You must have PowerShell 7 or later installed
- You must have the Windows 11 (10.0.22621.0)
SDK
installed - You must have at least VS
2022 installed - You must install the following Workloads via the VS Installer. Note: Opening
the solution in VS 2022 will prompt you to install missing components
automatically:- Desktop Development with C++
- Universal Windows Platform Development
- The following Individual Components
- C++ (v143) Universal Windows Platform Tools
- You must install the .NET Framework Targeting Pack to build test projects
Building the Code
This repository uses git
submodules for some of its
dependencies. To make sure submodules are restored or updated, be sure to run
the following prior to building:
git submodule update --init --recursive
OpenConsole.sln may be built from within Visual Studio or from the command-line
using a set of convenience scripts & tools in the /tools directory:
Building in PowerShell
Import-Module .\tools\OpenConsole.psm1
Set-MsBuildDevEnvironment
Invoke-OpenConsoleBuild
Building in Cmd
Running & Debugging
To debug the Windows Terminal in VS, right click on CascadiaPackage (in the
Solution Explorer) and go to properties. In the Debug menu, change «Application
process» and «Background task process» to «Native Only».
You should then be able to build & debug the Terminal project by hitting
F5. Make sure to select either the «x64» or the «x86» platform — the
Terminal doesn’t build for «Any Cpu» (because the Terminal is a C++ application,
not a C# one).
👉 You will not be able to launch the Terminal directly by running the
WindowsTerminal.exe. For more details on why, see
#926,
#4043
Coding Guidance
Please review these brief docs below about our coding practices.
👉 If you find something missing from these docs, feel free to contribute to
any of our documentation files anywhere in the repository (or write some new
ones!)
This is a work in progress as we learn what we’ll need to provide people in
order to be effective contributors to our project.
- Coding Style
- Code Organization
- Exceptions in our legacy codebase
- Helpful smart pointers and macros for interfacing with Windows in WIL
Code of Conduct
This project has adopted the Microsoft Open Source Code of
Conduct. For more information see the Code of Conduct
FAQ or contact opencode@microsoft.com with any
additional questions or comments.
 Впервые новая оболочка для команд Windows 11 и Windows 10 была представлена в мае 2020, а уже осенью была выпущена первая стабильная версия. С тех пор Windows Terminal продолжает обновляться, но уже сейчас более чем пригоден к работе как с командной строкой или PowerShell, так и другими оболочками, например, Ubuntu, установленной в рамках WSL (Подсистема Windows для Linux).
В этом обзоре — базовые сведения о том, где скачать и как настроить Windows Terminal, о некоторых его возможностях и дополнительная информация, которая может оказаться полезной.
Где скачать Windows Terminal
Прежде чем приступить, два важных примечания: в Windows 11 Терминал Windows уже встроен (нажмите правой кнопкой мыши по кнопке Пуск и вы сможете его запустить), а для работы нового терминала в Windows 10 требуется версия 1903 или новее.
Бесплатно скачать Windows Terminal можно из двух официальных источников:
- Microsoft Store — достаточно ввести Windows Terminal в поиске магазина или перейти на страницу приложения https://www.microsoft.com/ru-ru/p/windows-terminal/9n0dx20hk701

- Загрузить последний релиз из GitHub, скачиваем файл .msixbundle из раздела Assets и устанавливаем его как обычное приложение — https://github.com/microsoft/terminal/releases/

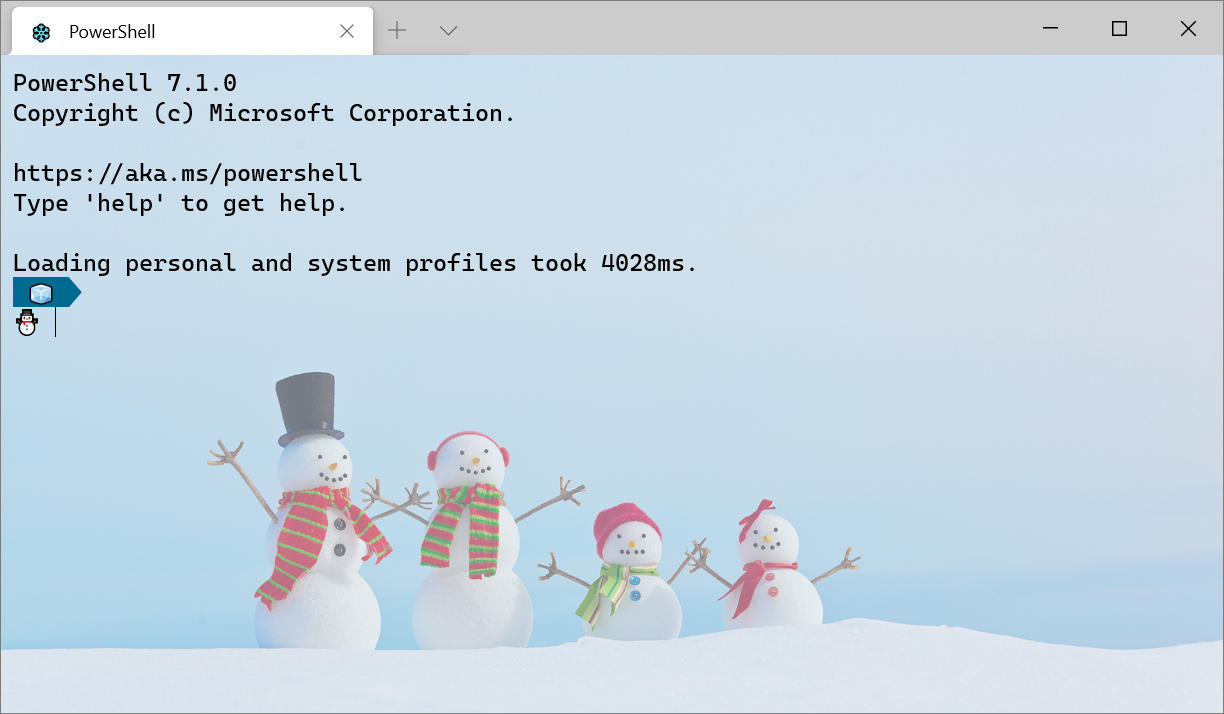
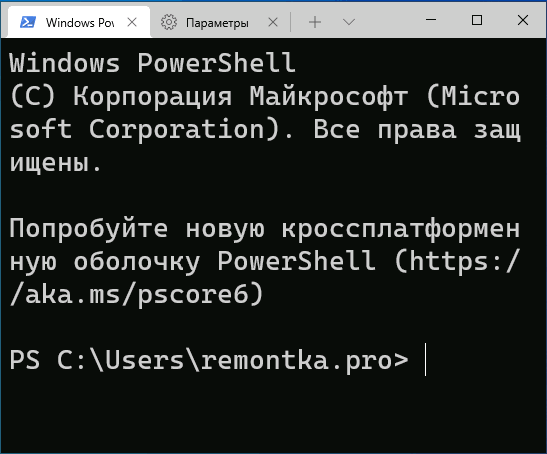
После установки Windows Terminal готов к работе — можно запускать. При первом старте по умолчанию будет открыта вкладка с PowerShell.

Использование Windows Terminal, возможности управления
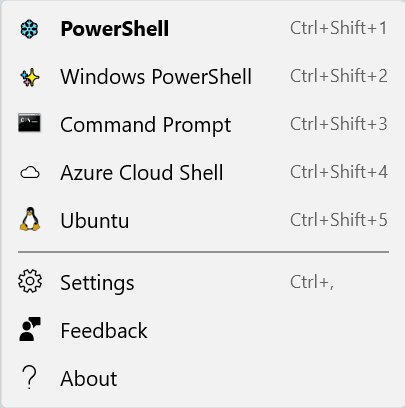
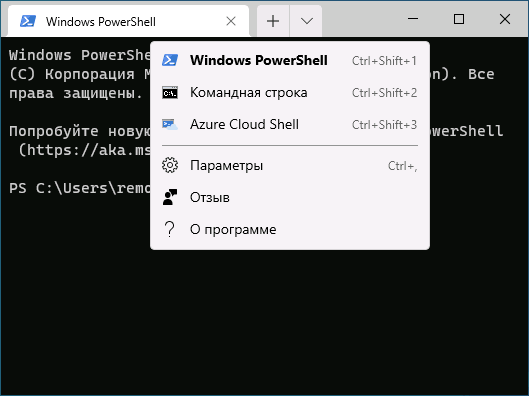
Скорее всего, с открытием новых вкладок с командной строкой, PowerShell и другими оболочками проблем не возникнет, достаточно нажать «+» если требуется открыть новую вкладку с консолью по умолчанию, либо по стрелке и выбрать нужную оболочку, там же можно увидеть и сочетания клавиш для быстрого открытия соответствующих новых вкладок.
Не будем торопиться с переходом к настройкам Windows Terminal, для начала некоторые вещи, которые вы можете сделать, не переходя к ним:
- Сочетания клавиш Ctrl + «+» и аналогичное сочетание с клавишей «минус» позволяет изменить размер текста в текущей вкладке.

- Нажмите клавиши Alt+Shift+D, чтобы разделить текущую вкладку на две панели. Действие можно повторять: выделенная панель будет разделяться при нажатии этих клавиш. Если вместо D использовать клавишу «минус» или «плюс», разделение будет происходить горизонтально и вертикально соответственно.

- Для панелей доступны и другие клавиши: Ctrl+Shift+W — закрыть текущую, Alt+Shift+стрелки — изменение размеров, Alt+стрелки — переключение между панелями.
- Если в Windows включены эффекты прозрачности, удержание клавиш Ctrl+Shift и вращение колеса мыши вниз позволяет сделать активное окно Windows Terminal более прозрачным.
- Windows Terminal добавляет пункт в контекстное меню Windows, позволяющий быстро запустить оболочку по умолчанию в текущей вкладке.

- «Стандартные» сочетания клавиш, такие как копирование и вставка, отмена (Ctrl+Z) и другие здесь также исправно работают.
- Если вам нужно запустить Windows Terminal от имени администратора, можно использовать правый клик по нему в меню «Пуск» и выбор нужного пункта в разделе «Дополнительно» или, поиск в панели задач, как на изображении ниже.


Настройки
Зайти в настройки Windows Terminal можно, нажав по кнопке со стрелкой или же с помощью сочетания клавиш Ctrl + «запятая». Параметры меняются от версии к версии и на момент написания этого обзора выглядят следующим образом:

Большинство вкладок вполне понятны и на русском языке:
- На вкладке «Запуск» можно выбрать оболочку по умолчанию, например, выбрать «Командная строка» вместо «Windows PowerShell», включить автозапуск, изменить режим запуска.
- Вкладки «Оформление» и «Цветовые схемы» позволяют изменить общие параметры оформления приложения, а также отредактировать цветовые схемы (их мы можем указать отдельно для каждой консоли в разделе «Профили»), при необходимости — создать собственную цветовую схему.
- В разделе «Действия» — базовые сочетания клавиш для работы в Windows Terminal. Эти сочетания подлежат редактированию в файле конфигурации.
- Если перейти в подраздел «Профили», мы можем настроить отдельные параметры оформления, запуска, значка, папки запуска, прозрачности и другие для каждой «командной строки». В оформлении можно не только выбрать цветовую схему и настроить прозрачность (акриловый эффект), но и задать обои для соответствующих вкладок.

- Настройки в достаточной мере гибкие и скриншот ниже — далеко не всё, чего можно добиться.

- При нажатии кнопки «Добавить», вы можете добавить собственную консоль в Windows Terminal (или использовать системную — тот же PowerShell или Командную строку, но с другим профилем настроек).
- Кнопка «Открытие файла JSON» позволяет открыть файл конфигурации для редактирования.


Если после проделанных экспериментов с настройками вам потребуется сбросить все параметры Windows Terminal на настройки по умолчанию, достаточно проделать следующие шаги:
- Запустите Windows Terminal и перейдите в его параметры.
- Нажмите «Открытие файла JSON» и откройте его в текстовом редакторе.
- Удалите всё содержимое файла и сохраните файл.
- Закройте и снова запустите Windows Terminal — он будет запущен с настройками по умолчанию.
Windows Terminal is an all-new separate application designed by Microsoft. It comes with powerful and productive features designed for Windows user. In this article, we will talk more about Windows Terminal in details, catch us after the jump!
Why Windows Terminal?
Before starting the talk regarding Windows Terminal, let us first understand why it is even needed?
So, we have default command line available in all version of Windows operating system, and a few years back, Microsoft also added PowerShell to Windows client OS, it was first made available to Windows Server line.
Microsoft continued to enhance both Terminals for various purpose, but as the command-line Terminal was built a long time back in MS-DOS, hence keep on adding new features on an old module was not possible.
Therefore, Microsoft came up with a brand-new Terminal which offers many amazing features those were not possible in the older build of command line terminal.
Features of Windows Terminal:
The main features of Windows Terminal are multiple tabs, i.e. user can run various applications in different tabs in one single app. The numerous tab option allows end-user to open and run as many applications connected to different applications like command-line, PowerShell, Ubuntu on WSL, a Raspberry Pi via SSH, etc.
Accelerate DirectWrite/DirectX-based text rendering engine that includes CJK ideograms new font type, also known as a monospaced font, will be used to change the appearance of the Windows Terminal. Not only this, the font comes pre-loaded with programming ligatures apart from being open-source.
Other features include Unicode and UTF-8-character support, custom themes, styles, and multiple profiles. Rendering technology used to display is much faster and smooth when compared to the old Console’s GDI engine.
System requirements to Install Windows Terminal:
- Windows Terminal can be installed only n Windows 10, 1903 version and should be 10.0.18362.0 or later
- Make sure system is already running on Desktop Bridge Visual C++ v14 redistributable package
- A Microsoft account to sign in to Microsoft Store (optional)
How to install Windows Terminal 1.0 on PC?
Windows Terminal can install in 2 ways:
The first is easy, and however, for the second option, it may require more than a basic understanding of application installation from the GitHub repository.
- Using the Microsoft Store:
To start Windows Terminal installation process, PC must meet the above system requirement. Once all the above criteria are complete, we can follow the below steps to install.
- Go to Microsoft Store app on Windows 10
- Type Windows Terminal -> enter

- List of app options will pop-up, select Windows Terminal and click “Get.”
- The system will check Microsoft login (or can be skipped) and then it will be downloaded and installed
- Once the application is installed, the system will display a launch option -> click on “launch.”

- A command-line window will pop-up, and the user can use it along with default (old school) command-line application to execute commands
- PowerShell and SSH option are also available and can be used parallel to the command line. User can use a toggle option to select and run Terminal of your choice at one place
- By downloading and running executable file for Windows Terminal 1.0 from GitHub:
- Go to Microsoft Terminal GitHub page https://github.com/microsoft/terminal
- Make sure above system requirement is met and along with few more settings mentioned below should be met
- The developer options in Windows settings should be enabled
- Windows 10 SDK version 1903 must be install
- You must have a minimum version of Visual Studio 2019 is installed
- Also, workloads via Visual Studio Installer must be installed. If you are running Visual Studio 2019 version and above, on the launch of the application system will search for missing files and will try to download and add automatically like
- Desktop Development with C++
- Universal Windows Platform Development
- C++ (v142) Universal Windows Platform Tools
- Once pre-requisite ask are met, now it is time to create the build
- Build can be created using PowerShell or command line
- Building in PowerShell
Import-Module .\tools\OpenConsole.psm1

Set-MsBuildDevEnvironment

Invoke-OpenConsoleBuild- Building in Cmd
.\tools\razzle.cmd bcz
Being Windows Terminal an open-source application, user can download Windows Terminal repo from GitHub page above and can make changes to the code according to their requirement.

Windows Terminal can be used to run a wide range of applications like Command Prompt, Ubuntu, or even SSH connections to Azure or IoT devices. There is also an option to create different customized layout and theme and save it as profile to access it at later point of time.
The Terminal’s profiles feature used for each application/tool or shell to connect command prompt, PowerShell, Windows Subsystem for Linux (WSL) or SSH connections to connect Azure, Cloud or IoT based devices remotely.
Different types of settings are saved in profiles, considering font style, glyphs, colour, background bur, theme, transparency level of the UI etc. There is also an option to create your customized profile by picking different available combinations and making them fully customized profile.
Benefits of Windows Terminal:
- Being Windows Terminal an open-source application, it offers comprehensive options for third party developer to create applications on top of Windows Terminal, which will later help Terminal user in the future course.
- User is not required to run multiple for each application like the command line, PowerShell, Windows Subsystem for Linux (WSL) or SSH connection setup. These can be easily done using one single app
- Full support for GPU-based text rendering options, emoji, glyphs, and symbol support
- Wide range of tweaking options to change/modify feature according to taste
Why should we install Windows Terminal in Windows 10?
Windows Terminal is AIO (all in one) application packages to do multiple tasks at one place. Hence, it is not required to use various applications for a different job rather than it is doable in one app.
Windows Terminal 1.0 is the first iteration of Terminal kernel based on Linux. Microsoft is planning to bring the full version of Linux kernel to Windows 10 in a future release, and we can expect more robust features in Windows Terminal.
For now, this is all we have regarding Windows Terminal 1.0, do let us know what you feel about this brand new Terminal, in your comments below.
В постоянно меняющемся мире вычислений интерфейс командной строки остается незаменимым инструментом для пользователей Windows, предлагая прямой и эффективный способ взаимодействия с базовой операционной системой. Windows Terminal, многофункциональный инструмент командной строки, выводит это взаимодействие на новый уровень, предоставляя унифицированную среду, в которой вы можете получить доступ к различным интерфейсам командной строки, включая PowerShell, командную строку и даже дистрибутивы Linux. Независимо от того, являетесь ли вы опытным разработчиком, системным администратором или человеком, которому время от времени необходимо выполнять задачи через командную строку, знание того, как открыть терминал Windows в Windows 10, является первым шагом к использованию всей мощности возможностей командной строки вашего компьютера. . В этом руководстве мы познакомим вас с несколькими способами запуска Терминала Windows в вашей системе Windows 10, гарантируя, что вы хорошо подготовлены к изучению и эффективному использованию его возможностей.
Шаг 1. Сначала в левом нижнем углу экрана нажмите на значокWindows Пусккнопку (обычно представленную логотипом Windows).
Шаг 2. Затем начните вводить «Терминал» в строке поиска. По мере ввода Windows начнет отображать результаты поиска.
Шаг 3. Один разТерминалпоявится в результатах поиска, нажмите на него, чтобы открыть приложение.
Использование диалогового окна «Выполнить»
Шаг 1. Чтобы открытьБегатьдиалоговое окно, нажмите кнопку «Windows«ключ» и «р» одновременно нажмите клавишу на клавиатуре.
Шаг 2. ВБегатьдиалоговое окно, введите «вес» или «wt.exe(без кавычек) и нажмите «Enter».
Этот метод особенно полезен, если вы хотите открыть терминал Windows с определенными конфигурациями или параметрами запуска, которые можно добавить после «вес» вБегатьдиалог.
Закрепление терминала Windows на панели задач
Шаг 1. Откройте Терминал Windows, используя любой из ранее упомянутых методов.
Шаг 2. Щелкните правой кнопкой мыши поТерминал Windowsзначок на панели задач.
Шаг 3. В появившемся контекстном меню выберите «Брать на заметку». Благодаря этому терминал Windows будет всегда доступен на панели задач для дальнейшего использования.
Создайте ярлык на рабочем столе
Шаг 1. Сверните все открытые окна, чтобы открыть рабочий стол (Windows+D).
Шаг 2. Щелкните правой кнопкой мыши пустую область рабочего стола. Откроется контекстное меню.
Шаг 3. В контекстном меню наведите курсор на «Новый».
Шаг 4. В появившемся подменю нажмите «Ярлык».
Шаг 5. В разделе «Создать ярлык» введите местоположение терминала Windows какwt.exe. Если вы установили терминал Windows в другое место, измените путь соответствующим образом.
Шаг 6. После ввода местоположения нажмите кнопку «Следующий» кнопка.
Шаг 7. Дайте ярлыку имя (например, «Терминал Windows«) и нажмите «Заканчивать».
Теперь на рабочем столе у вас появится ярлык, по которому вы можете дважды щелкнуть, чтобы открыть терминал Windows.
Заключение
Терминал Windows — это важный инструмент для опытных пользователей, разработчиков и ИТ-специалистов, работающих с командной строкой в Windows 10. Имея в своем распоряжении несколько методов, вы можете легко открыть Терминал Windows и упростить выполнение задач командной строки. Если вы предпочитаете использовать меню «Пуск», сочетания клавиш, диалоговое окно «Выполнить» или создавать ярлыки, это руководство поможет вам. Итак, начните исследовать мир командной строки с помощью Windows Terminal и узнайте, какие преимущества производительности он предлагает на вашем компьютере с Windows 10.