pg_restore accepts the following command line arguments.
filename-
Specifies the location of the archive file (or directory, for a directory-format archive) to be restored. If not specified, the standard input is used.
-a--data-only-
Restore only the data, not the schema (data definitions). Table data, large objects, and sequence values are restored, if present in the archive.
This option is similar to, but for historical reasons not identical to, specifying
--section=data. -c--clean-
Clean (drop) database objects before recreating them. (Unless
--if-existsis used, this might generate some harmless error messages, if any objects were not present in the destination database.) -C--create-
Create the database before restoring into it. If
--cleanis also specified, drop and recreate the target database before connecting to it.With
--create, pg_restore also restores the database’s comment if any, and any configuration variable settings that are specific to this database, that is, anyALTER DATABASE ... SET ...andALTER ROLE ... IN DATABASE ... SET ...commands that mention this database. Access privileges for the database itself are also restored, unless--no-aclis specified.When this option is used, the database named with
-dis used only to issue the initialDROP DATABASEandCREATE DATABASEcommands. All data is restored into the database name that appears in the archive. -ddbname--dbname=dbname-
Connect to database
dbnameand restore directly into the database. Thedbnamecan be a connection string. If so, connection string parameters will override any conflicting command line options. -e--exit-on-error-
Exit if an error is encountered while sending SQL commands to the database. The default is to continue and to display a count of errors at the end of the restoration.
-ffilename--file=filename-
Specify output file for generated script, or for the listing when used with
-l. Use-for stdout. -Fformat--format=format-
Specify format of the archive. It is not necessary to specify the format, since pg_restore will determine the format automatically. If specified, it can be one of the following:
ccustom-
The archive is in the custom format of pg_dump.
ddirectory-
The archive is a directory archive.
ttar-
The archive is a
tararchive.
-Iindex--index=index-
Restore definition of named index only. Multiple indexes may be specified with multiple
-Iswitches. -jnumber-of-jobs--jobs=number-of-jobs-
Run the most time-consuming steps of pg_restore — those that load data, create indexes, or create constraints — concurrently, using up to
number-of-jobsconcurrent sessions. This option can dramatically reduce the time to restore a large database to a server running on a multiprocessor machine. This option is ignored when emitting a script rather than connecting directly to a database server.Each job is one process or one thread, depending on the operating system, and uses a separate connection to the server.
The optimal value for this option depends on the hardware setup of the server, of the client, and of the network. Factors include the number of CPU cores and the disk setup. A good place to start is the number of CPU cores on the server, but values larger than that can also lead to faster restore times in many cases. Of course, values that are too high will lead to decreased performance because of thrashing.
Only the custom and directory archive formats are supported with this option. The input must be a regular file or directory (not, for example, a pipe or standard input). Also, multiple jobs cannot be used together with the option
--single-transaction. -l--list-
List the table of contents of the archive. The output of this operation can be used as input to the
-Loption. Note that if filtering switches such as-nor-tare used with-l, they will restrict the items listed. -Llist-file--use-list=list-file-
Restore only those archive elements that are listed in
list-file, and restore them in the order they appear in the file. Note that if filtering switches such as-nor-tare used with-L, they will further restrict the items restored.list-fileis normally created by editing the output of a previous-loperation. Lines can be moved or removed, and can also be commented out by placing a semicolon (;) at the start of the line. See below for examples. -nschema--schema=schema-
Restore only objects that are in the named schema. Multiple schemas may be specified with multiple
-nswitches. This can be combined with the-toption to restore just a specific table. -Nschema--exclude-schema=schema-
Do not restore objects that are in the named schema. Multiple schemas to be excluded may be specified with multiple
-Nswitches.When both
-nand-Nare given for the same schema name, the-Nswitch wins and the schema is excluded. -O--no-owner-
Do not output commands to set ownership of objects to match the original database. By default, pg_restore issues
ALTER OWNERorSET SESSION AUTHORIZATIONstatements to set ownership of created schema elements. These statements will fail unless the initial connection to the database is made by a superuser (or the same user that owns all of the objects in the script). With-O, any user name can be used for the initial connection, and this user will own all the created objects. -Pfunction-name(argtype [, ...])--function=function-name(argtype [, ...])-
Restore the named function only. Be careful to spell the function name and arguments exactly as they appear in the dump file’s table of contents. Multiple functions may be specified with multiple
-Pswitches. -R--no-reconnect-
This option is obsolete but still accepted for backwards compatibility.
-s--schema-only-
Restore only the schema (data definitions), not data, to the extent that schema entries are present in the archive.
This option is the inverse of
--data-only. It is similar to, but for historical reasons not identical to, specifying--section=pre-data --section=post-data.(Do not confuse this with the
--schemaoption, which uses the word “schema” in a different meaning.) -Susername--superuser=username-
Specify the superuser user name to use when disabling triggers. This is relevant only if
--disable-triggersis used. -ttable--table=table-
Restore definition and/or data of only the named table. For this purpose, “table” includes views, materialized views, sequences, and foreign tables. Multiple tables can be selected by writing multiple
-tswitches. This option can be combined with the-noption to specify table(s) in a particular schema.Note
When
-tis specified, pg_restore makes no attempt to restore any other database objects that the selected table(s) might depend upon. Therefore, there is no guarantee that a specific-table restore into a clean database will succeed.Note
This flag does not behave identically to the
-tflag of pg_dump. There is not currently any provision for wild-card matching in pg_restore, nor can you include a schema name within its-t. And, while pg_dump‘s-tflag will also dump subsidiary objects (such as indexes) of the selected table(s), pg_restore‘s-tflag does not include such subsidiary objects.Note
In versions prior to PostgreSQL 9.6, this flag matched only tables, not any other type of relation.
-Ttrigger--trigger=trigger-
Restore named trigger only. Multiple triggers may be specified with multiple
-Tswitches. -v--verbose-
Specifies verbose mode. This will cause pg_restore to output detailed object comments and start/stop times to the output file, and progress messages to standard error. Repeating the option causes additional debug-level messages to appear on standard error.
-V--version-
Print the pg_restore version and exit.
-x--no-privileges--no-acl-
Prevent restoration of access privileges (grant/revoke commands).
-1--single-transaction-
Execute the restore as a single transaction (that is, wrap the emitted commands in
BEGIN/COMMIT). This ensures that either all the commands complete successfully, or no changes are applied. This option implies--exit-on-error. --disable-triggers-
This option is relevant only when performing a data-only restore. It instructs pg_restore to execute commands to temporarily disable triggers on the target tables while the data is restored. Use this if you have referential integrity checks or other triggers on the tables that you do not want to invoke during data restore.
Presently, the commands emitted for
--disable-triggersmust be done as superuser. So you should also specify a superuser name with-Sor, preferably, run pg_restore as a PostgreSQL superuser. --enable-row-security-
This option is relevant only when restoring the contents of a table which has row security. By default, pg_restore will set row_security to off, to ensure that all data is restored in to the table. If the user does not have sufficient privileges to bypass row security, then an error is thrown. This parameter instructs pg_restore to set row_security to on instead, allowing the user to attempt to restore the contents of the table with row security enabled. This might still fail if the user does not have the right to insert the rows from the dump into the table.
Note that this option currently also requires the dump be in
INSERTformat, asCOPY FROMdoes not support row security. --if-exists-
Use conditional commands (i.e., add an
IF EXISTSclause) to drop database objects. This option is not valid unless--cleanis also specified. --no-comments-
Do not output commands to restore comments, even if the archive contains them.
--no-data-for-failed-tables-
By default, table data is restored even if the creation command for the table failed (e.g., because it already exists). With this option, data for such a table is skipped. This behavior is useful if the target database already contains the desired table contents. For example, auxiliary tables for PostgreSQL extensions such as PostGIS might already be loaded in the target database; specifying this option prevents duplicate or obsolete data from being loaded into them.
This option is effective only when restoring directly into a database, not when producing SQL script output.
--no-publications-
Do not output commands to restore publications, even if the archive contains them.
--no-security-labels-
Do not output commands to restore security labels, even if the archive contains them.
--no-subscriptions-
Do not output commands to restore subscriptions, even if the archive contains them.
--no-table-access-method-
Do not output commands to select table access methods. With this option, all objects will be created with whichever access method is the default during restore.
--no-tablespaces-
Do not output commands to select tablespaces. With this option, all objects will be created in whichever tablespace is the default during restore.
--section=sectionname-
Only restore the named section. The section name can be
pre-data,data, orpost-data. This option can be specified more than once to select multiple sections. The default is to restore all sections.The data section contains actual table data as well as large-object definitions. Post-data items consist of definitions of indexes, triggers, rules and constraints other than validated check constraints. Pre-data items consist of all other data definition items.
--strict-names-
Require that each schema (
-n/--schema) and table (-t/--table) qualifier match at least one schema/table in the backup file. --use-set-session-authorization-
Output SQL-standard
SET SESSION AUTHORIZATIONcommands instead ofALTER OWNERcommands to determine object ownership. This makes the dump more standards-compatible, but depending on the history of the objects in the dump, might not restore properly. -?--help-
Show help about pg_restore command line arguments, and exit.
pg_restore also accepts the following command line arguments for connection parameters:
-hhost--host=host-
Specifies the host name of the machine on which the server is running. If the value begins with a slash, it is used as the directory for the Unix domain socket. The default is taken from the
PGHOSTenvironment variable, if set, else a Unix domain socket connection is attempted. -pport--port=port-
Specifies the TCP port or local Unix domain socket file extension on which the server is listening for connections. Defaults to the
PGPORTenvironment variable, if set, or a compiled-in default. -Uusername--username=username-
User name to connect as.
-w--no-password-
Never issue a password prompt. If the server requires password authentication and a password is not available by other means such as a
.pgpassfile, the connection attempt will fail. This option can be useful in batch jobs and scripts where no user is present to enter a password. -W--password-
Force pg_restore to prompt for a password before connecting to a database.
This option is never essential, since pg_restore will automatically prompt for a password if the server demands password authentication. However, pg_restore will waste a connection attempt finding out that the server wants a password. In some cases it is worth typing
-Wto avoid the extra connection attempt. --role=rolename-
Specifies a role name to be used to perform the restore. This option causes pg_restore to issue a
SET ROLErolenamecommand after connecting to the database. It is useful when the authenticated user (specified by-U) lacks privileges needed by pg_restore, but can switch to a role with the required rights. Some installations have a policy against logging in directly as a superuser, and use of this option allows restores to be performed without violating the policy.
Время на прочтение
5 мин
Количество просмотров 17K

Автор статьи: технический руководитель проектов внедрения 1С:ERP Внедренческого центра «Раздолье» Дмитрий Малышев.
Введение
pgAdmin — это интерфейс для администрирования баз данных PostgreSQL, в моём понимании это аналог MS SQL Management Studio. Ставится pgAdmin отдельно от PostgreSQL. Инструкцию установки найдите, пожалуйста, в интернет поисковиках. В данной инструкции будет описано как с помощью pgAdmin, bat-файлов и Планировщика заданий Windows организовать резервное копирование, восстановление и хранение копий баз данных.

Открытие pgAdmin
Через пуск или в проводнике открываем приложение.

«C:\Program Files\pgAdmin 4\v6\pgAdmin4.ico»

Вводим пароль доступа (за дается ранее пользователем).

Откроется интерфейс управления базами данных.

Создание резервной копии
Рассмотрим создание резервной копии из pgAdmin и командным bat-файлом.
2.1. С помощью pgAdmin
Выбираем базу в дереве, правой кнопкой мыши открываем контекстное меню, где выбираем создание резервной копии/Backup… Указываем полный путь для сохранения копии, формат Custom и жмем [Создать / Create].

***

***

2.2. С помощью командного файла *.bat
Запускаем двойным кликом мыши командный файл backup_pdadmin_UH_IMD_everyday.bat, в котором уже прописан вызов архиватора формат и путь файла копии.

Копии сохраняются сюда.

Содержимое командного файла:
REM СОЗДАНИЯ РЕЗЕРВНОЙ КОПИИ БАЗЫ ДАННЫХ POSTGRESQL
CLS
ECHO OFF
CHCP 1251
REM Установка переменных окружения
SET PGDATABASE=IMD_UH
SET PGHOST=localhost
SET PGPORT=5432
SET PGUSER=postgres
SET PGPASSWORD=ЗДЕСЬ_УКАЖИТЕ_ПАРОЛЬ_для_пользователя_postgres
REM Формирование имени файла резервной копии и файла-отчета
SET DATETIME=%DATE:~6,4%-%DATE:~3,2%-%DATE:~0,2% %TIME:~0,2%-%TIME:~3,2%-%TIME:~6,2%
SET DUMPFILE=%PGDATABASE% %DATETIME%.backup
SET LOGFILE=%PGDATABASE% %DATETIME%.log
SET DUMPPATH=»E:\UH_IMD\Backup\%DUMPFILE%»
SET LOGPATH=»E:\UH_IMD\Backup\%LOGFILE%»
REM Создание резервной копии
IF NOT EXIST Backup MD Backup
CALL «C:\Program Files\pgAdmin 4\v6\runtime\pg_dump.exe» —format=custom —verbose —file=%DUMPPATH% 2>%LOGPATH%
REM Анализ кода завершения
IF NOT %ERRORLEVEL%==0 GOTO Error
GOTO Successfull
REM В случае ошибки удаляется поврежденная резервная копия и делается соответствующая запись в журнале
:Error
DEL %DUMPPATH%
MSG * «ERROR to create backup!!! See the information E:\UH_IMD\Backup\backup.log.»
ECHO %DATETIME% Ошибка при создании резервной копии %DUMPFILE%. Смотрите %LOGFILE%. >> backup.log
GOTO End
REM В случае удачного резервного копирования просто делается запись в журнал
:Successfull
ECHO %DATETIME% Успешное создание резервной копии %DUMPFILE% >> backup.log
GOTO End
:End
Пояснения:
SET PGDATABASE=IMD_UH — здесь имя базы данных на СУБД равно IMD_UH, у вас будет свое поменяйте обязательно.
E:\UH_IMD\Backup — здесь путь хранения backup у вас будет свой, поменяйте.
C:\Program Files\pgAdmin 4\v6\runtime — папка утилиты pg_dump.exe для создания дампов, пусть может чуть отличаться, например, вместо v6 будет v4. И не забудьте pgAdmin установить, он ставится отдельно.
SET PGPASSWORD=ЗДЕСЬ_УКАЖИТЕ_ПАРОЛЬ_для_пользователя_postgres — тут укажите реальный пароль от пользователя postgres СУБД PostgreSQL
Восстановление резервной копии
Есть несколько способов: Из командной строки, из pgAdmin, заранее подготовленным командным файлом. Мы рассмотрим: pgAdmin.
3.1. С помощью pgAdmin
3.1.1. В существующую базу
Выбираем базу, вызываем правой кнопкой ее контекстное меню, где выбираем действие Восстановить / Restore.

Далее указываем путь к резервной копии, и в настройках ставим предварительно очищать существующую базу (иначе она не восстановится из-за конфликта таблиц).

***

***

***

3.1.2. В новую базу
3.1.2.1. Создаем новую базу в PostgreSQL
На корне дерева баз вызываем правой кнопкой мыши контекстное меню и действие Создать / Create – Базу данных / Database.

Задаем имя новой базы.

Выбираем обязательно схему создания template0 (иначе на следующем шаге база не развернется из backup из-за конфликта таблиц).

Для контроля смотрим итоговый запрос, и жмем кнопку [Сохранить]/[Save].

3.1.2.2. Восстанавливаем базу из архива в PostgreSQL
После создания пустой новой базы, её нужно восстановить из архива. Для этого смотрите пункт выше 3.1.1. Для восстановления в существующую базу, выполняем всё тоже самое только для базы с именем NewBaseName
3.1.2.3. Создаем новую базу 1С NewBaseName
После того как развернули базу на СУБД PostgreSQL её требуется опубликовать на сервере 1С, чтобы пользователи получили к ней доступ. Для этого выполним действия по созданию базы 1С и связывании её с существующей базой на СУБД.

***

***

***

***

Не забываем ставь флаг «Установить блокировку регламентных заданий», если это копия.
Удаление старых резервных копий
4.1. Вручную
Удаляем архивы старше 30 дней вручную. Затем чистим корзину на рабочем столе.
В проводнике папка E:\UH_IMD\Backup.

***

4.2. С помощью командного файла *.bat
Запускаем двойным щелчком мыши командный файл. В файле указана очистка в каталоге файлов старше 30 дней.

Его содержимое:
forfiles /p «E:\UH_IMD\Backup» /S /D -30 /C «cmd /c del /f /a /q @file»
Пояснения:
E:\UH_IMD\Backup — здесь путь хранения backup’ов, у вас будет свое поменяйте обязательно.
30 — срок в днях хранения backup’ов
Автоматическое выполнение резервного копирования
Использован стандартный планировщик заданий Windows каждый день в 5:00 утра запуск, выполнения командного файла (архив рабочей базы примерно 1 час создается).

***

***

***

***

***

***

Автоматическое выполнение очистки копий старше 30 дней
Использован стандартный планировщик заданий Windows каждую субботу в 10:00 утра запуск, выполнения командного файла.

***

***

***

***

***

***

Приложения
Пример содержимого общего файла логов backup.log.

Пример содержимого файла лога конкретной выгрузки UH_IMD 2022-10-07 5-00-00.log

P.S. Коллеги, сразу скажу, что я не системный администратор, а программист 1С. Системщик решил бы, может быть, элегантнее.
Хотя ситуация сложилась такая, что я делал настройки и эту инструкцию с bat-никами по просьбе системных администраторов (как бы странно это ни звучало). Нечасто такими настройками занимаюсь, поэтому не судите строго.
Добавил 2 батника, по обновлению статистики и реиндексации:
Они для регламентного обслуживания. 1С завершать для их работы не обязательно, но 1С будет притормаживать или пойдет блокировка на период реиндексации. В планировщик заданий Windows на эти батники добавьте задачи раз в неделю на свои базы, в Нерабочее время. Также есть служебная база postgres на нее тоже раз в неделю добавьте обслуживание.
Файл vacuumdb_BaseName.bat — обновление статистики.
Его содержимое:
vacuumdb -d UH_IMD -Z -v -j 1
Пояснения:
Обновление статистики базы с именем UH_IMD (тут поставьте свою) в 1 поток.
Можно поменять на обновление статистики во всех базах в 4 потока, тогда будет текст:
vacuumdb -a -Z -v -j 4
Файл reindexdb_BaseName.bat — реиндексация таблиц в базе.
Его содержимое:
reindexdb -d UH_IMD -v -j 1
Пояснения:
Обновление индексов в базе с именем UH_IMD (тут поставьте свою) в 1 поток.
Можно поменять на обновление статистики во всех базах в 4 потока, тогда будет текст:
reindexdb -a -v -j 4
Также обратите внимание на программу Effector Saver — программа резервного копирования 1С:Предприятия (поищите в инете).
Делает копии в MS и PostgreSQL, настройка хранения и удаления. Есть возможность подключать скрипты и выполнять тестирование исправление 1С. Есть бесплатная версия (которой должно хватить), и есть также платная с плюшками.
Ищите для работы вот этот материал с инструкциями для скачивания и использования:
-
backup_pgadmin_BaseName_everyday.bat
-
delete_backup_BaseName_older than 30 days.bat
-
Резервное копирование и восстановление баз PostgreSQL в Windows с помощью pgAdmin, bat-файлов и планировщика.docx
-
vacuumdb_BaseName.bat
-
reindexdb_BaseName.bat
Restoring a database, is the action of copying the backed up data and restoring it at its original or new place. We perform restore action on a database so as to return the data to its original state before being lost, stolen or corrupted. There are several causes due to which one needs to restore a database like – due as human errors sometimes data gets corrupted; some malicious attacks on the database might infect it; due to power outages; natural calamities like floods, storms etc. Thus, in these cases, a data restore makes a usable copy of data and ensures that restored backup data is inline and consistent with the state of the data before the damage occurred.
Approach:
In PostgreSQL also, we can back up and restore the data. To restore a database, we have 2 main approaches:
- To restore via PgAdmin4 GUI
- To restore via command line
Here we are going to see both the approaches in detail.
1. Using PgAdmin GUI
In the first approach, we are going to restore our database from the pgAdmin4. This is a very simple and straightforward process. For this we are going to follow the steps listed as below –
1. Start the pgAdmin database server and login to the pgAdmin4 control panel via valid credentials.
2. Expand the Servers section and navigate till Databases. Now, here you will find all your databases the server is currently hosting (if any).
3. Now we need to create a new database which will serve as a placeholder for our database which is to be restored. For this, right click on the Databases section, select Create -> Database.

4. In the General tab specify the name of your database which is to be restored. Owner must be same as the current postgres Admin username. You can also add optional comments.
5. Now to go Definition tab, select appropriate character encoding, tablespaces etc. Fill all the required details of any in similar ways on the alongside tabs like Security, Parameters tabs as well.
6. After filling all necessary details, select Save option. Database will now be created successfully and will be listed alongside the existing databases in the Databases section.
7. Right-click on the newly created database by you and select Restore option from the list.

8. After clicking Restore option, a new pop-up dialogue box menu of Restore will show up on the screen as below.

9. Now specify the Format of the file. Right-click on the horizontal kebab menu to browse for the location of file, select the role name as postgres (root owner). Hit Restore button.
10. A new restore job is now created on the pgAdmin4 server and usually appears in the bottom right corner of the window.
11. After successful restore operation is a success prompt is displayed at the same position as said above with the success message. In case of a failure of the restore option, a failure message is also given when we click on the More Details (i) button.

12. Success !! Our PostgreSQL database is now completely restored. It is now in fully up and running state.
2. Restoration via command line
To restore a database via the command line, we are going to follow the following procedure –
1. Firstly, we need to login to the PostgreSQL terminal via command line. To do so, type in the following command :-
psql -U <username>

2. We can now see that we are successfully logged into the psql client terminal and have got the postgres command line input prompt.
3. We will now follow the same process as we followed in the above part I, the only difference being here is that, we are going to do this time via the command line terminal of PostgreSQL.
4. Let’s now create a placeholder database for our purpose which will be used to restore the backup. To do so, run the below script.
CREATE DATABASE BackupDB ENCODING='UTF-8' OWNER='postgres';

5. Database is now created. Let us restore it now. To restore the database, we are going to use the pg_restore command supplied with some arguments. It is important to note here that, we need to exit from the psql terminal in order to run pg_restore command. To exit from psql terminal, type “\q” to exit.
6. Key in the pg_restore command with the following arguments –
pg_restore -U postgres -d backupdb -v "D:\Backup.sql"
The detailed explanation of the arguments for PostgreSQL can be found on the PostgreSQL’s official website on the documentation section of pg_restore.
7. After successful restoration of database, we will se that our schema are restored alongwith the tables and their data.

Thus, in this article, we have successfully explored the two ways of successfully restoring the database.
Last Updated :
28 Jul, 2021
Like Article
Save Article
Locally, I use pgadmin3. On the remote server, however, I have no such luxury.
I’ve already created the backup of the database and copied it over, but is there a way to restore a backup from the command line? I only see things related to GUI or to pg_dumps.
![]()
starball
22.1k8 gold badges47 silver badges286 bronze badges
asked Apr 28, 2010 at 19:18
![]()
There are two tools to look at, depending on how you created the dump file.
Your first source of reference should be the man page pg_dump as that is what creates the dump itself. It says:
Dumps can be output in script or
archive file formats. Script dumps are
plain-text files containing the SQL
commands required to reconstruct
the database to the state it was
in at the time it was saved. To
restore from such a script, feed it to
psql(1). Script files can be used
to reconstruct the database even
on other machines and other
architectures; with some modifications
even on other SQL database products.The alternative archive file formats
must be used with pg_restore(1) to
rebuild the database. They allow
pg_restore to be selective about what
is restored, or even to reorder the
items prior to being restored. The
archive file formats are designed to
be portable across architectures.
So depends on the way it was dumped out. If using Linux/Unix, you can probably figure it out using the excellent file(1) command — if it mentions ASCII text and/or SQL, it should be restored with psql otherwise you should probably use pg_restore.
Restoring is pretty easy:
psql -U username -d dbname < filename.sql

-- For Postgres versions 9.0 or earlier
psql -U username -d dbname -1 -f filename.sql
or
pg_restore -U username -d dbname -1 filename.dump
Check out their respective manpages — there’s quite a few options that affect how the restore works. You may have to clean out your «live» databases or recreate them from template0 (as pointed out in a comment) before restoring, depending on how the dumps were generated.
![]()
answered Apr 28, 2010 at 19:25
![]()
Steven SchlanskerSteven Schlansker
37.7k14 gold badges82 silver badges101 bronze badges
16
create backup
pg_dump -h localhost -p 5432 -U postgres -F c -b -v -f
"/usr/local/backup/10.70.0.61.backup" old_db
-F c is custom format (compressed, and able to do in parallel with -j N) -b is including blobs, -v is verbose, -f is the backup file name.
restore from backup
pg_restore -h localhost -p 5432 -U postgres -d old_db -v
"/usr/local/backup/10.70.0.61.backup"
important to set -h localhost — option
![]()
answered May 28, 2012 at 8:55
![]()
Alex DeemannAlex Deemann
3,6162 gold badges14 silver badges9 bronze badges
4
You might need to be logged in as postgres in order to have full privileges on databases.
su - postgres
psql -l                      # will list all databases on Postgres cluster
pg_dump/pg_restore
pg_dump -U username -f backup.dump database_name -Fc
switch -F specify format of backup file:
cwill use custom PostgreSQL format which is compressed and results in smallest backup file sizedfor directory where each file is one tabletfor TAR archive (bigger than custom format)-h/--hostSpecifies the host name of the machine on which the server is running-W/--passwordForcepg_dumpto prompt for a password before connecting to a database
restore backup:
pg_restore -d database_name -U username -C backup.dump
Parameter -C should create database before importing data. If it doesn’t work you can always create database eg. with command (as user postgres or other account that has rights to create databases) createdb db_name -O owner
pg_dump/psql
In case that you didn’t specify the argument -F default plain text SQL format was used (or with -F p). Then you can’t use pg_restore. You can import data with psql.
backup:
pg_dump -U username -f backup.sql database_name
restore:
psql -d database_name -f backup.sql
answered Aug 31, 2013 at 8:42
![]()
TombartTombart
30.7k16 gold badges123 silver badges137 bronze badges
5
POSTGRESQL 9.1.12
DUMP:
pg_dump -U user db_name > archive_name.sql
put the user password and press enter.
RESTORE:
psql -U user db_name < /directory/archive.sql
put the user password and press enter.
![]()
Aamir
16.4k10 gold badges59 silver badges65 bronze badges
answered Sep 12, 2014 at 22:14
![]()
Natan MedeirosNatan Medeiros
1,3491 gold badge11 silver badges15 bronze badges
1
Below is my version of pg_dump which I use to restore the database:
pg_restore -h localhost -p 5432 -U postgres -d my_new_database my_old_database.backup
or use psql:
psql -h localhost -U postgres -p 5432 my_new_database < my_old_database.backup
where -h host, -p port, -u login username, -d name of database
![]()
answered Aug 24, 2016 at 12:43
![]()
Yahor MYahor M
6278 silver badges8 bronze badges
2
Backup and restore with GZIP
For larger size database this is very good
backup
pg_dump -U user -d mydb | gzip > mydb.pgsql.gz
restore
gunzip -c mydb.pgsql.gz | psql dbname -U user
https://www.postgresql.org/docs/14/backup-dump.html
answered Oct 14, 2016 at 7:13
![]()
Sarath AkSarath Ak
7,9512 gold badges47 silver badges48 bronze badges
3
This worked for me:
pg_restore --verbose --clean --no-acl --no-owner --host=localhost --dbname=db_name --username=username latest.dump
![]()
answered Aug 10, 2019 at 6:40
![]()
FrancescoFrancesco
3213 silver badges2 bronze badges
1
Backup:  $ pg_dump -U {user-name} {source_db} -f {dumpfilename.sql}

Restore: $ psql -U {user-name} -d {desintation_db} -f {dumpfilename.sql}
answered Feb 25, 2014 at 15:20
![]()
Aaron LelevierAaron Lelevier
19.9k11 gold badges77 silver badges111 bronze badges
0
Backup & Restore
This is the combo I’m using to backup, drop, create and restore my database (on macOS and Linux):
sudo -u postgres pg_dump -Fc mydb > ./mydb.sql
sudo -u postgres dropdb mydb
sudo -u postgres createdb -O db_user mydb
sudo -u postgres pg_restore -d mydb < ./mydb.sql
Misc
-Fcwill compress the database (Format custom)- List PostgreSQL users:
sudo -u postgres psql -c "\du+" - You may want to add hostname and date to
./mydb.sql, then change it by:./`hostname`_mydb_`date +"%Y%m%d_%H%M"`.sql
answered Oct 7, 2020 at 13:09
![]()
DevonDahonDevonDahon
7,4926 gold badges72 silver badges117 bronze badges
1
try this:
psql -U <username> -d <dbname> -f <filename>.sql
Restore DB psql from .sql file
![]()
Ehsan
6147 silver badges21 bronze badges
answered Nov 19, 2018 at 9:52
![]()
1
1. Open the Terminal.
2. Backup your database with following command
your postgres bin -> /opt/PostgreSQL/9.1/bin/
your source database server -> 192.168.1.111
your backup file location and name -> /home/dinesh/db/mydb.backup
your source db name -> mydatabase
/opt/PostgreSQL/9.1/bin/pg_dump --host '192.168.1.111' --port 5432 --username "postgres" --no-password --format custom --blobs --file "/home/dinesh/db/mydb.backup" "mydatabase"
3. Restore mydb.backup file into destination.
your destination server -> localhost
your destination database name -> mydatabase
Create database for restore the backup.
/opt/PostgreSQL/9.1/bin/psql -h 'localhost' -p 5432 -U postgres -c "CREATE DATABASE mydatabase"
Restore the backup.
/opt/PostgreSQL/9.1/bin/pg_restore --host 'localhost' --port 5432 --username "postgres" --dbname "mydatabase" --no-password --clean "/home/dinesh/db/mydb.backup"
![]()
answered Oct 11, 2013 at 6:09
![]()
Dinesh AppuhamiDinesh Appuhami
7101 gold badge11 silver badges24 bronze badges
If you create a backup using pg_dump you can easily restore it in the following way:
- Open command line window
- Go to Postgres bin folder. For example:
cd "C:\ProgramFiles\PostgreSQL\9.5\bin" - Enter the command to restore your database.
For example: psql.exe -U postgres -d YourDatabase -f D:\Backup\.sql - Type password for your postgres user
- Check the restore process
answered May 30, 2017 at 10:46
I didnt see here mentions about dump file extension (*.dump).
This solution worked for me:
I got a dump file and needed to recover it.
First I tried to do this with pg_restore and got:
pg_restore: error: input file appears to be a text format dump. Please use psql.
I did it with psql and worked well:
psql -U myUser -d myDataBase < path_to_the_file/file.dump
answered Jun 23, 2020 at 14:47
![]()
Igr PnIgr Pn
1312 silver badges3 bronze badges
To restore a dump file
psql -d [Dbname] -U [UserName] -p 5432 < [FileLocation]
To restore a .SQL file
pg_restore -U [Username] -d [Dbname] -1 [FileLocation]
If you get user authentication errors, go to the file pg_hba.conf which is in PSQL/data folder in your program files, and change the «METHOD» to «Trust».
Restart you psql serive in windows services(Win + R —> services.msc).
answered Oct 6, 2021 at 2:44
![]()
1) Open psql terminal.
2) Unzip/ untar the dump file.
3) Create an empty database.
4) use the following command to restore the .dump file
<database_name>-# \i <path_to_.dump_file>
answered Oct 22, 2018 at 6:56
![]()
Vaibhav DesaiVaibhav Desai
2,3322 gold badges25 silver badges29 bronze badges
If you are using docker, this answer may be helpful.
- Start the container
docker start <postgres_container_id> - Access bash inside container
docker exec -it <postgres_container_id> bash - Copy the
.tarbackup file to docker container (In another window)docker cp postgres_dump.tar <postgres_container_id>:/ - Restore the backup
pg_restore -c -U <postgres-user> -d <database-name> -v "postgres_dump.tar" -W - Enter password
![]()
answered Oct 19, 2022 at 12:40
![]()
Henshal BHenshal B
1,58812 silver badges13 bronze badges
try:
pg_restore -h localhost -p 5432 -U <username> -d <dbname> -1 <filename>
answered Nov 19, 2018 at 18:44
![]()
Restoring a postgres backup file depends on how did you take the backup in the first place.
If you used pg_dump with -F c or -F d you need to use pg_restore otherwise you can just use
psql -h localhost -p 5432 -U postgres < backupfile
9 ways to backup and restore postgres databases
answered Oct 14, 2014 at 17:22
![]()
1
The shortest way with no password prompt
psql "postgresql://<db_user>:<db_pass>@<ip>:<port>/<db_name>" < "backup.sql"
If you are using Windows OS
psql.exe "postgresql://<db_user>:<db_pass>@<ip>:<port>/<db_name>" < "backup.sql"
answered Dec 8, 2021 at 13:51
![]()
Masih JahangiriMasih Jahangiri
9,6473 gold badges46 silver badges51 bronze badges
Sorry for the necropost, but these solutions did not work for me. I’m on postgres 10. On Linux:
- I had to change directory to my pg_hba.conf.
- I had to edit the file to change method from peer to md5 as stated here
- Restart the service:
service postgresql-10 restart -
Change directory to where my backup.sql was located and execute:
psql postgres -d database_name -1 -f backup.sql-database_name is the name of my database
-backup.sql is the name of my .sql backup file.
answered Jan 13, 2020 at 21:43
![]()
TimTim
4884 silver badges15 bronze badges
Save and restore the exact same state with compressed dump
Other answers gave all the key bits separately, but hopefully this will provide be the «just works save and restore to exact state» command pair.
Dump to file mydb.psql:
PGPASSWORD=mypassword pg_dump -U my_username -h localhost mydb -Fc -f mydb.psql
Restore:
PGPASSWORD=mypassword pg_restore -U my_username -h localhost \
  --clean -d mydb -v mydb.psql
Some of the flags:
-
-Fc: Format Compressed, as opposed to plaintext.file tmp.psqlsays:tmp.psql: PostgreSQL custom database dump - v1.14-0 -
--clean: destroy the target DB before restoring it, thus returning to the exact same pristine state.Any data created after the dump will be lost.
PGPASSWORD, -U and -h can of course be modified depending on your login method, e.g. without PGPASSWORD you’re prompted for a password, and none of those are needed if you set up peer auth locally.
Tested on Ubuntu 22.04, PostgreSQL 14.5.
answered Nov 18, 2022 at 18:57
![]()
Try to see if the following commands can help you:
sudo su - yourdbuser
psql
\i yourbackupfile
![]()
Fabien
4,8622 gold badges19 silver badges33 bronze badges
answered Aug 9, 2017 at 14:27
![]()
If you have a backup SQL file then you can easily Restore it.
Just follow the instructions, given in the below
1. At first, create a database using pgAdmin or whatever you want (for example my_db is our created db name)
2. Now Open command line window
3. Go to Postgres bin folder. For example:  cd "C:\ProgramFiles\PostgreSQL\pg10\bin"
4. Enter the following command to restore your database: psql.exe -U postgres -d my_db -f D:\Backup\backup_file_name.sql
Type password for your postgres user if needed and let Postgres to do its work. Then you can check the restore process.
answered Mar 20, 2019 at 12:38
![]()
OmarOmar
91111 silver badges14 bronze badges
I was having authentication problems running pg_dump, so I moved my dump file
mv database_dump /tmp
into the temp directory and then ran
su -u postgres
cd /tmp
pg_restore database_dump
If you have a large database dump, you may just want to create another directory where your current user and the postgres user can access and putting the database dump file into that.
answered Jul 19, 2017 at 3:04
![]()
user1876508user1876508
12.9k21 gold badges68 silver badges105 bronze badges
Backup==>
Option1: To take backup along with password in cmd
1.PGPASSWORD="mypassword" pg_dump -U postgres -h localhost --inserts mydb>mydb.sql
Option2: To take backup without password in cmd
2. pg_dump -U postgres -h localhost --inserts mydb>mydb.sql
Option3: To take backup as gzip(if database is huge)
3. pg_dump -U postgres -h localhost mydb --inserts | gzip > mydb.gz
Restore:
1. psql -h localhost -d mydb -U postgres -p 5432 < mydb.sql
answered Sep 21, 2020 at 7:56
![]()
This solution only works for Windows.
First, ensure you have already added the postgres bin folder to the «Path» environment variable (in my case this folder is C:\Program Files\PostgreSQL\12\bin).
Then, open the Windows command interpreter (cmd), go to the folder where you have the .sql file and execute this command:
pg_restore -U userName -d database-1 backupfile.sql
For example:
pg_restore -U sam -d SamDataBase -1 SamDataBaseBackup.sql
(It can ask you for the password of the user so ensure to type it correctly and then click enter)
Pura vida!
answered Jun 14, 2021 at 6:20
![]()
If you have created a new database named mydb, To restore a .sql dump to that database with psql,
psql --file=dump.sql --username=postgres --host=localhost --port=5432 mydb
the password will be prompted by psql
The connection options are
  -h, --host=HOSTNAME      database server host or socket directory (default: "/var/run/postgresql")
  -p, --port=PORT          database server port (default: "5432")
  -U, --username=USERNAME  database user name (default: "xyz")
  -w, --no-password        never prompt for password
  -W, --password           force password prompt (should happen automatically)
answered Aug 25, 2021 at 14:13
![]()
All Іѕ VаиітyAll Іѕ Vаиітy
25k16 gold badges88 silver badges111 bronze badges
If you want to backup your data or restore data from a backup, you can run the following commands:
-
To create backup of your data, go to your postgres \bin\ directory like
C:\programfiles\postgres\10\bin\and then type the following command:pg_dump -FC -U ngb -d ngb -p 5432 >C:\BACK_UP\ngb.090718_after_readUpload.backup -
To restore data from a backup, go to your postgres \bin\ directory like
C:\programfiles\postgres\10\bin\and then type below command:C:\programFiles\postgres\10\bin> pg_restore -Fc -U ngb -d ngb -p 5432 <C:\ngb.130918.backupPlease make sure that the backup file exists.
![]()
tripleee
176k34 gold badges275 silver badges318 bronze badges
answered Sep 17, 2018 at 8:23
![]()
Maybe try this command it will work
psql -U postgres -W -d Test2 < E:\SampleProject\samplebackup.sql
answered Sep 27 at 7:35
![]()
Задача резервного копирования — одна из основных при сопровождении и поддержке PostgreSQL. Для резервного копирования логической схемы и данных можно использовать как встроенные инструменты СУБД, так и внешние. В этой статье мы разберем оба варианта.
Для начала подготовим сервер. Для демо-стенда закажем виртуальный сервер в Облачной платформе. Для этого откроем панель управления my.selectel.ru, перейдем в меню Облачная платформа и нажмем на кнопку Создать сервер.
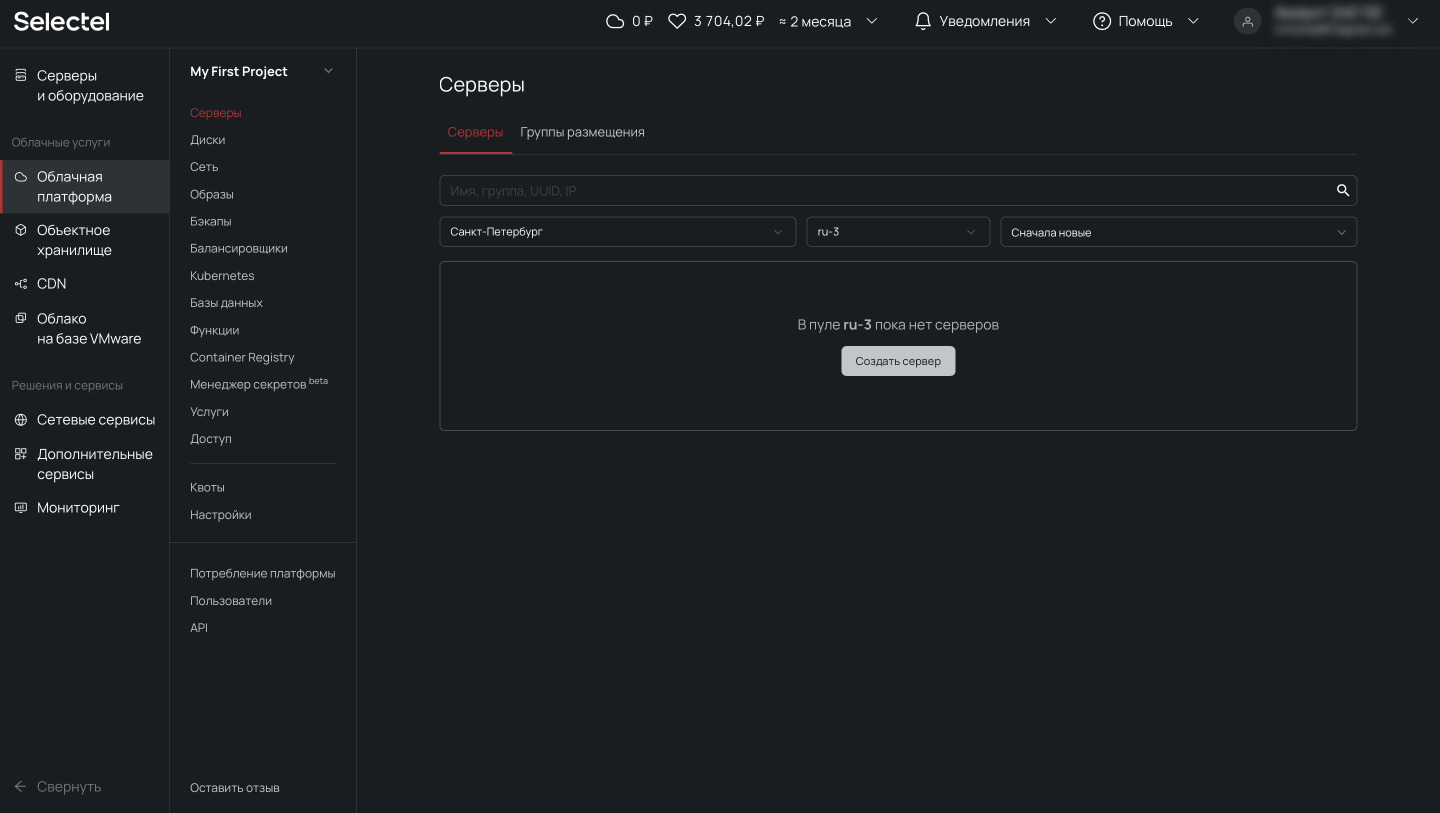
В статье будем использовать виртуальный сервер с конфигурацией 2 vCPU, 4 ГБ RAM и 10 ГБ HDD с операционной системой CentOS 8 Stream 64-bit.

Теперь прокрутим представление ниже, где находятся настройки сети. Важно, чтобы у сервера был внешний плавающий IP-адрес для доступа извне.
После выбора операционной системы, конфигурации сервера и выполнения сетевых настроек переходим к завершению заказа и нажимаем на кнопку Создать. Через несколько минут сервер будет готов.
Перед началом демонстрации возможностей резервного копирования, мы подготовили PostgreSQL. Для целей наполнения базы данных и создания непрерывного потока записи, развернули там Zabbix (некоторое время назад публиковали о нем статью).
Доверьте нам развертывание и администрирование баз данных в облаке.
Создание резервных копий и восстановление из командной строки
В этом разделе мы расскажем как сделать дамп базы данных PostgreSQL в консоли при подключении по SSH, разберем синтаксис и покажем примеры использования утилит pg_dump, pg_dumpall, pg_restore, pg_basebackup и wal-g.
Утилита pg_dump
В PostgreSQL есть встроенный инструмент для создания резервных копий — утилита pg_dump. Утилита имеет простой синтаксис:
# pg_dump <параметры> <имя базы> > <файл для сохранения копии> В простейшем случае достаточно указать имя базы данных, которую в дальнейшем нужно будет восстановить. Резервная копия создается следующей командой:
# pg_dump zabbix > /tmp/zabbix.dumpЕсли требуется авторизация под определенным пользователем, можно воспользоваться ключом -U:
# pg_dump -U zabbix -W zabbix > /tmp/zabbix.dump # pg dump u postgresКлюч -U определяет пользователя, а -W обязывает ввести пароль.
Чтобы сэкономить место на диске, можно сразу же сжимать дамп:
# pg_dump -U zabbix -W zabbix | gzip > /tmp/zabbix.gzРезервное копирование обычно выполняется по расписанию, например, ежедневно в 3 часа ночи. Нижеприведенный пример скрипта не только выполняет бэкап, но и удаляет все файлы старше 61 дня (за исключением 15-го числа месяца).
#!/bin/sh

PATH=/etc:/bin:/sbin:/usr/bin:/usr/sbin:/usr/local/bin:/usr/local/sbin

PGPASSWORD=some_password
export PGPASSWORD
pathB=/mnt/backup
dbUser=dbadmin
database=zabbix


find $pathB \( -name "*-1[^5].*" -o -name "*-[023]?.*" \) -ctime +61 -delete
pg_dump -U $dbUser $database | gzip > $pathB/pgsql_$(date "+%Y-%m-%d").sql.gz


unset PGPASSWORD
Чтобы настроить регулярное выполнение, выполним следующую команду в планировщике crontab:
# crontab -e
3 0 * * * /etc/scripts/pgsql_dump.sh # postgres pg dump
Чтобы выполнить аналогичную команду на удаленном сервере, достаточно добавить ключ -h:
# pg_dump -h 192.168.56.101 zabbix > /tmp/zabbix.dumpКлюч -t задает таблицу, для которой нужно создать резервную копию:
# pg_dump -t history zabbix > /tmp/zabbix.dump # postgres dump tableПри помощи специальных ключей можно создавать резервные копии структуры данных или непосредственно данных:
# pg_dump --schema-only zabbix > /tmp/zabbix.dump
# pg_dump --data-only zabbix > /tmp/zabbix.dump
У утилиты pg_dump также есть ключи для сохранения дампа в другие форматы. Чтобы сохранить копию в виде бинарного файла используются ключи -Fc:
# pg_dump -Fc zabbix > /tmp/zabbix.bakЧтобы создать архив — -Ft:
# pg_dump -Ft zabbix > /tmp/zabbix.tarЧтобы сохранить в directory-формате — -Fd:
# pg_dump -Fd zabbix > /tmp/zabbix.dirРезервное копирование в виде каталогов позволяет выполнять процесс в многопоточном режиме.
Ниже мы перечислим возможные параметры утилиты pg_dump.
-d <имя_бд>, —dbname=имя_бд — база данных, к которой выполняется подключение.
-h <сервер>, —host=сервер — имя сервера.
-p <порт>, —port=порт — порт для подключения.
-U <пользователь>, —username=пользователь) — учетная запись, используемое для подключения.
-w, —no-password — деактивация требования ввода пароля.
-W, —password — активация требования ввода пароля.
—role=имя роли — роль, от имени которой генерируется резервная копия.
-a, —data-only — вывод только данных, вместо схемы объектов (DDL).
-b, —blobs — параметр добавляет в выгрузку большие объекты.
-c, —clean — добавление команд DROP перед командами CREATE в файл резервной копии.
-C, —create — генерация реквизитов для подключения к базе данных в файле резервной копии.
-E <кодировка>, —encoding=кодировка — определение кодировки резервной копии.
-f <файл>, —file=файл — задает имя файла, в который будет сохраняться вывод утилиты.
-F <формат>, —format=формат — параметр определяет формат резервной копии. Доступные форматы:
- p, plain) — формирует текстовый SQL-скрипт;
- c, custom) — формирует резервную копию в архивном формате;
- d, directory) — формирует копию в directory-формате;
- t, tar) — формирует копию в формате tar.
-j <число_заданий>, —jobs=число_заданий — параметр активирует параллельную выгрузку для одновременной обработки нескольких таблиц (равной числу заданий). Работает только при выгрузке копии в формате directory.
-n <схема>, —schema=схема — выгрузка в файл копии только определенной схемы.
-N <схема>, —exclude-schema=схема — исключение из выгрузки определенных схем.
-o, —oids — добавляет в выгрузку идентификаторы объектов (OIDs) вместе с данными таблиц.
-O, —no-owner — деактивация создания команд, определяющих владельцев объектов в базе данных.
-s, —schema-only —добавление в выгрузку только схемы данных, без самих данных.
-S <пользователь>, —superuser=пользователь — учетная запись привилегированного пользователя, которая должна использоваться для отключения триггеров.
-t <таблица>, —table=таблица — активация выгрузки определенной таблицы.
-T <таблица>, —exclude-table=таблица —исключение из выгрузки определенной таблицы.
-v, —verbose — режим подробного логирования.
-V, —version — вывод версии pg_dump.
-Z 0..9, —compress=0..9 — установка уровня сжатия данных. 0 — сжатие выключено.
Утилита pg_dumpall
Утилита pg_dumpall реализует резервное копирование всего экземпляра (кластера или инстанса) базы данных без указания конкретной базы данных на инстансе. По принципу схожа с pg_dump. Добавим, что только утилиты pg_dump и pg_dumpall предоставляют возможность создания логической копии данных, остальные утилиты, рассматриваемые в этой статье, позволяют создавать только бинарные копии.
# pg_dumpall > /tmp/instance.bakЧтобы сразу сжать резервную копию экземпляра базы данных, нужно передать вывод на архиватор gzip:
# pg_dumpall | gzip > /tmp/instance.tar.gzНиже приведены параметры, с которыми может вызываться утилита pg_dumpall.
-d <имя_бд>, —dbname=имя_бд — имя базы данных.
-h <сервер>, —host=сервер — имя сервера.
-p <порт>, —port=порт — TCP-порт, на который принимаются подключения.
-U <пользователь>, —username=пользователь — имя пользователя для подключения.
-w, —no-password — деактивация требования ввода пароля.
-W, —password — активация требования ввода пароля.
—role=<имя роли> — роль, от имени которой генерируется резервная копия.
-a, —data-only — создание резервной копии без схемы данных.
-c, —clean — добавление операторов DROP перед операторами CREATE.
-f <имя_файла>, —file=имя_файла — активация направления вывода в указанный файл.
-g, —globals-only — выгрузка глобальных объектов без баз данных.
-o, —oids — выгрузка идентификаторов объектов (OIDs) вместе с данными таблиц.
-O, —no-owner — деактивация генерации команд, устанавливающих принадлежность объектов, как в исходной базе данных.
-r, —roles-only — выгрузка только ролей без баз данных и табличных пространств.
-s, —schema-only — выгрузка только схемы без самих данных.
-S <имя_пользователя>, —superuser=имя_пользователя — привилегированный пользователь, используемый для отключения триггеров.
-t, —tablespaces-only — выгрузка табличных пространства без баз данных и ролей.
-v, —verbose — режим подробного логирования.
-V (—version — вывод версии утилиты pg_dumpall.
Утилита pg_restore
Утилита позволяет восстанавливать данные из резервных копий. Например, чтобы восстановить только определенную БД (в нашем примере zabbix), нужно запустить эту утилиту с параметром -d:
# pg_restore -d zabbix /tmp/zabbix.bakЧтобы этой же утилитой восстановить определенную таблицу, нужно использовать ее с параметром -t:
# pg_restore -a -t history /tmp/zabbix.bakТакже утилитой pg_restore можно восстановить данные из бинарного или архивного файла. Соответственно:
# pg_restore -Fc zabbix.bak
# pg_restore -Ft zabbix.tar
При восстановлении можно одновременно создать новую базу:
# pg_restore -Ft -С zabbix.tarВосстановить данные из дампа также возможно при помощи psql:
# psql zabbix < /tmp/zabbix.dumpЕсли для подключения нужно авторизоваться, вводим следующую команду:
# psql -U zabbix -W zabbix < /tmp/zabbix.dumpНиже приведен синтаксис утилиты pg_restore.
-h <сервер>, —host=сервер — имя сервера, на котором работает база данных.
-p <порт>, —port=порт — TCP-порт, через база данных принимает подключения.
-U <пользователь>, —username=пользователь — имя пользователя для подключения..
-w, —no-password — деактивация требования ввода пароля.
-W, —password — активация требования ввода пароля.
—role=имя роли — роль, от имени которой выполняется восстановление резервная копия.
<имя_файла> — расположение восстанавливаемых данных.
-a, —data-only — восстановление данных без схемы.
-c, —clean — добавление операторов DROP перед операторами CREATE.
-C, —create — создание базы данных перед запуском процесса восстановления.
-d <имя_бд>, —dbname=имя_бд — имя целевой базы данных.
-e, —exit-on-error — завершение работы в случае возникновения ошибки при выполнении SQL-команд.
-f <имя_файла>, —file=имя_файла — файл для вывода сгенерированного скрипта.
-F <формат>, —format=формат — формат резервной копии. Допустимые форматы:
- p, plain — формирует текстовый SQL-скрипт;
- c, custom — формирует резервную копию в архивном формате;
- d, directory — формирует копию в directory-формате;
- t, tar — формирует копию в формате tar.
-I <индекс>, —index=индекс — восстановление только заданного индекса.
-j <число-заданий>, —jobs=число-заданий — запуск самых длительных операций в нескольких параллельных потоках.
-l, —list) — активация вывода содержимого архива.
-L <файл-список>, —use-list=файл-список — восстановление из архива элементов, перечисленных в файле-списке в соответствующем порядке.
-n <пространство_имен>, —schema=схема — восстановление объектов в указанной схеме.
-O, —no-owner — деактивация генерации команд, устанавливающих владение объектами по образцу исходной базы данных.
-P <имя-функции(тип-аргумента[, …])>, —function=имя-функции(тип-аргумента[, …]) — восстановление только указанной функции.
-s, —schema-only — восстановление только схемы без самих данных.
-S <пользователь>, —superuser=пользователь — учетная запись привилегированного пользователя, используемая для отключения триггеров.
-t <таблица>, —table=таблица — восстановление определенной таблицы.
-T <триггер>, —trigger=триггер — восстановление конкретного триггера.
-v, —verbose — режим подробного логирования.
-V, —version — вывод версии утилиты pg_restore.
Утилита pg_basebackup
Утилитой pg_basebackup можно выполнять резервное копирования работающего кластера баз данных PostgreSQL. Результирующий бинарный файл можно использовать для репликации или восстановления на определенный момент в прошлом. Утилита создает резервную копию всего экземпляра базы данных и не дает возможности создавать слепки данных отдельных сущностей. Подключение pg_basebackup к PostgreSQL выполняется при помощи протокола репликации с полномочиями суперпользователя или с правом REPLICATION.
Для выполнения резервного копирования локальной базы данных достаточно передать утилите pg_basebackup параметр -D, обозначающий директорию, в которой будет сохранена резервная копия:
# pg_basebackup -D /tmpЧтобы создать сжатые файлы из табличных пространств, добавим параметры -Ft и -z:
# pg_basebackup -D /tmp -Ft -z То же самое, но со сжатием bzip2 и для экземпляра базы с общим табличным пространством:
# pg_basebackup -D /tmp -Ft | bzip2 > backup.tar.bz2Ниже приведен синтаксис утилиты pg_basebackup.
-d <строка_подключения>, —dbname=строка_подключения — определение базы данных в виде строки для подключения.
-h <сервер>, —host=сервер — имя сервера с базой данных.
-p <порт>, —port=порт — TCP-порт, через база данных принимает подключения.
-s <интервал>, —status-interval=интервал — количество секунд между отправками статусных пакетов.
-U <пользователь>, —username=пользователь — установка имени пользователя для подключения.
-w, —no-password — отключение запроса на ввод пароля.
-W, —password — принудительный запрос пароля.
-V, —version — вывод версии утилиты pg_basebackup.
-?, —help — вывод справки по утилите pg_basebackup.
-D каталог, —pgdata=каталог — директория записи данных.
-F <формат>, —format=формат — формат вывода. Допустимые варианты:
- p, plain — значение для записи выводимых данных в текстовые файлы;
- t, tar — значение, указывающее на необходимость записи в целевую директорию в формате tar.
-r <скорость_передачи>, —max-rate=скорость_передачи — предельная скорость передачи данных в Кб/с.
-R, —write-recovery-conf — записать минимальный файл recovery.conf в директорию вывода.
-S <имя_слота>, —slot=имя_слота — задание слота репликации при использовании WAL в режиме потоковой передачи.
-T <каталог_1=каталог_2>, —tablespace-mapping=каталог_1=каталог_2 — активация миграции табличного пространства из одного каталога в другой каталог при копировании.
—xlogdir=каталог_xlog — директория хранения журналов транзакций.
-X <метод>, —xlog-method=метод — активация вывода файлов журналов транзакций WAL в резервную копию на основе следующих методов:
- f, fetch — включение режима сбора файлов журналов транзакций при окончании процесса копирования;
- s, stream — включение передачи журнала транзакций в процессе создания резервной копии.
-z, —gzip — активация gzip-сжатия результирующего tar-файла.
-Z <уровень>, —compress=уровень — определение уровня сжатия механизмом gzip.
-c , —checkpoint=fast|spread — активация режима реперных точек.
-l <метка>, —label=метка — установка метки резервной копии.
-P, —progress — активация в вывод отчета о прогрессе.
-v, —verbose — режим подробного логирования.
Утилита wal-g
Wal-g — утилита для резервного копирования и восстановления базы данных PostgreSQL. При помощи wal-g можно выполнять сохранение резервных копий на хранилищах S3 или просто на файловой системе. Ниже мы разберем установку, настройку и работу с утилитой. Покажем как выполнить резервное копирование в Объектное хранилище S3 от Selectel.
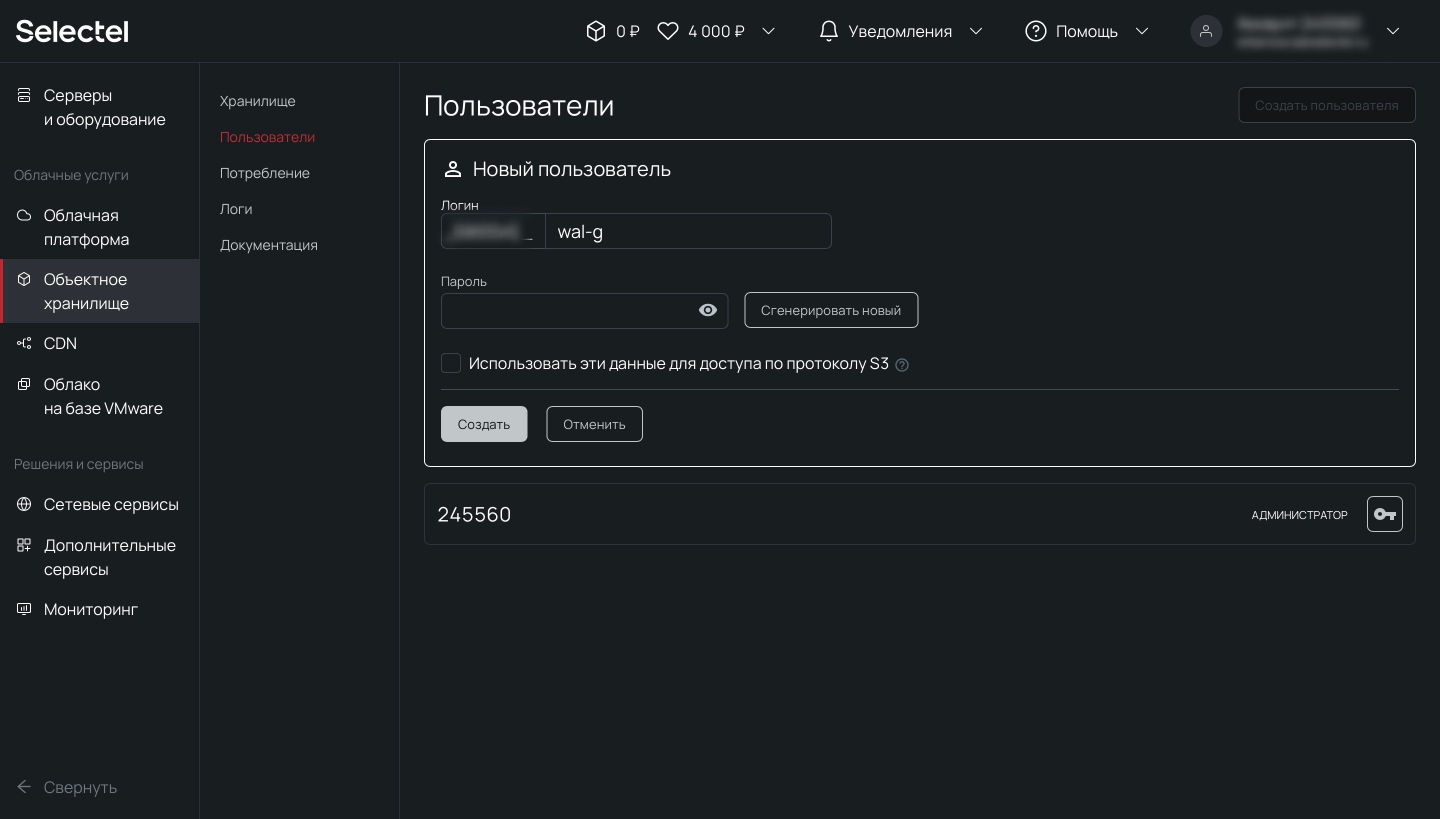
Создадим пользователя для облачного хранилища, учетные данные которого будем потом использовать для сохранения резервной копии. Перейдем в меню Пользователи и нажмем кнопку Создать пользователя:
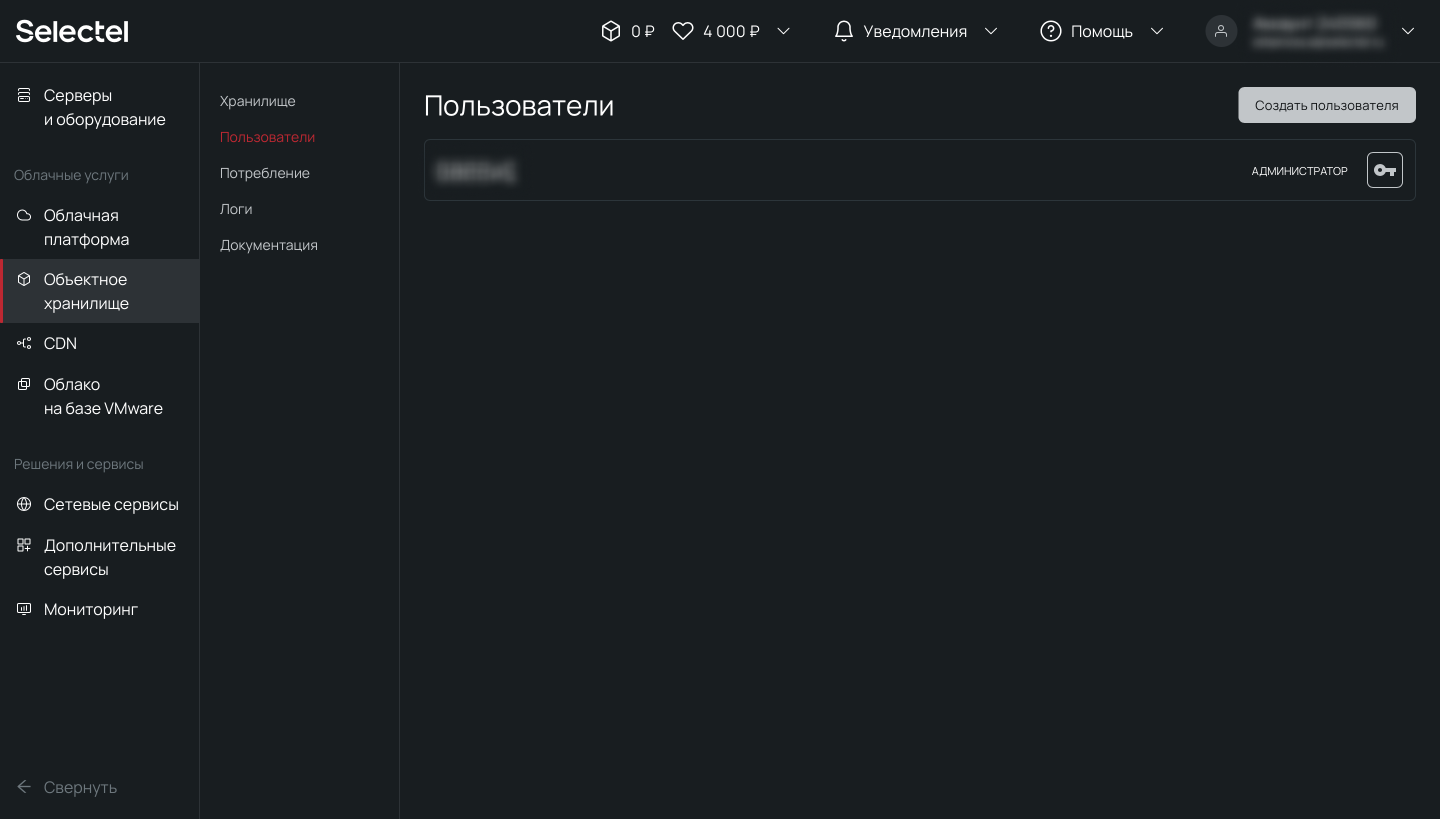
Дополнительную информацию можно получить в нашей Базе знаний. Первую часть логина изменить нельзя — это идентификатор пользователя в панели управления. Вторая часть логина задается произвольно. Например, 123456_wal-g:
Теперь перейдем к установке wal-g. Скачаем готовый установочный пакет из репозитория на github.com, распакуем и скопируем папку содержающую исполняемые файлы:
# cd /tmp
# curl -L "https://github.com/wal-g/wal-g/releases/download/v0.2.19/wal-g.linux-amd64.tar.gz" -o "wal-g.linux-amd64.tar.gz
# tar -xzf wal-g.linux-amd64.tar.gz
# mv wal-g /usr/local/bin/
Заполним конфигурационный файл wal-g и изменим его владельца на учетную запись postgres:
# cat > /var/lib/pgsql/.walg.json << EOF
{
"WALG_S3_PREFIX": "s3://container",
"AWS_ENDPOINT": "https://s3.selcdn.ru"
"AWS_ACCESS_KEY_ID": "123456_wal-g",
"AWS_SECRET_ACCESS_KEY": "password",
"WALG_COMPRESSION_METHOD": "brotli",
"WALG_DELTA_MAX_STEPS": "5",
"PGDATA": "/var/lib/pgsql/data",
"PGHOST": "/var/run/postgresql/.s.PGSQL.5432"
}
EOF
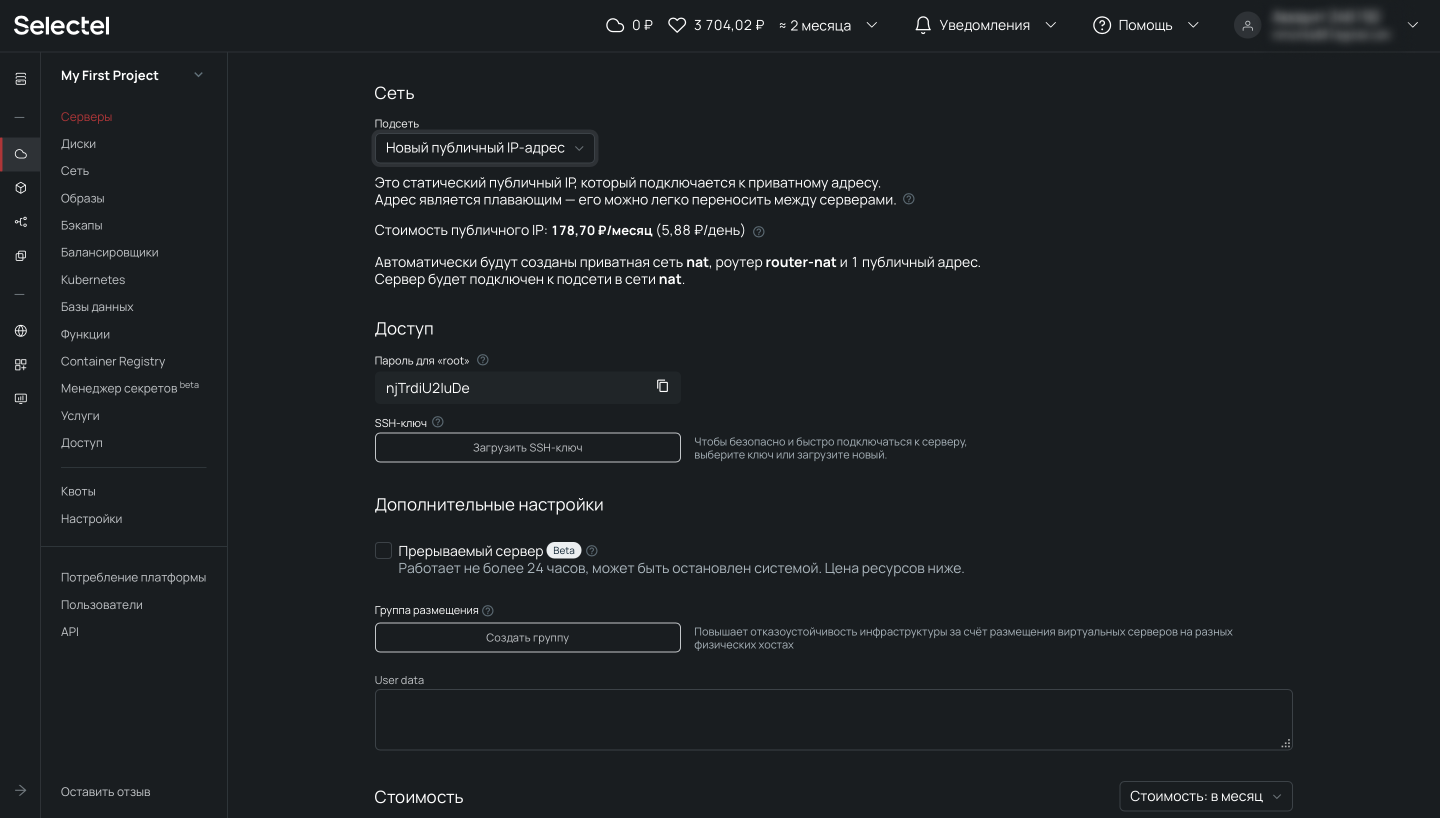
# chown postgres: /var/lib/pgsql/.walg.jsonДалее настроим автоматизированное создание резервных копий в PostgreSQL и перезагрузим процессы базы данных:
# echo "wal_level=replica" >> /var/lib/pgsql/data/postgresql.conf
# echo "archive_mode=on" >> /var/lib/pgsql/data/postgresql.conf
# echo "archive_command='/usr/local/bin/wal-g wal-push \"%p\" >> /var/log/postgresql/archive_command.log 2>&1' " >> /var/lib/pgsql/data/postgresql.conf
# echo “archive_timeout=60” >> /var/lib/pgsql/data/postgresql.conf
# echo "restore_command='/usr/local/bin/wal-g wal-fetch \"%f\" \"%p\" >> /var/log/postgresql/restore_command.log 2>&1' " >> /var/lib/pgsql/data/postgresql.conf
# killall -s HUP postgres
Теперь проверим корректность проведения настроек и загрузим резервную копию в хранилище:
# su - postgres -c '/usr/local/bin/wal-g backup-push /var/lib/pgsql/data'После выполнения процесса резервного копирования, в созданном контейнере появится директория с резервными копиями баз данных:
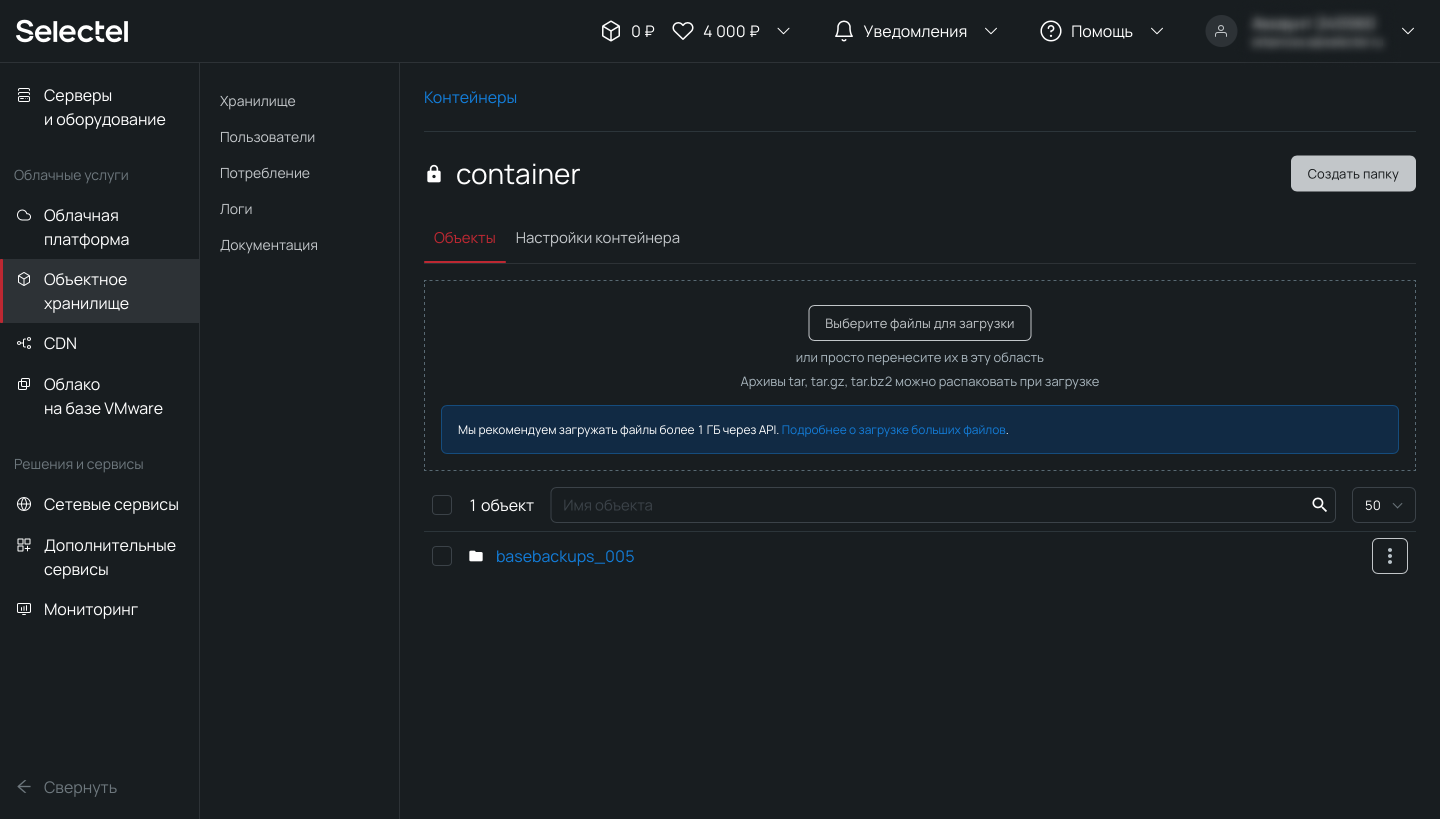
Такой процесс в продакшене может выполняться при помощи планировщика заданий на регулярной основе.
Утилита pgAdmin
Управлять созданием резервных копий возможно также и в графическом интерфейсе. Для этого мы будем использовать утилиту pgAdmin (в примере — работа с утилитой на локальном устройстве, но то же самое можно сделать на сервере). Актуальную версию для Windows или другой поддерживаемой ОС можно свободно скачать с официального сайта.
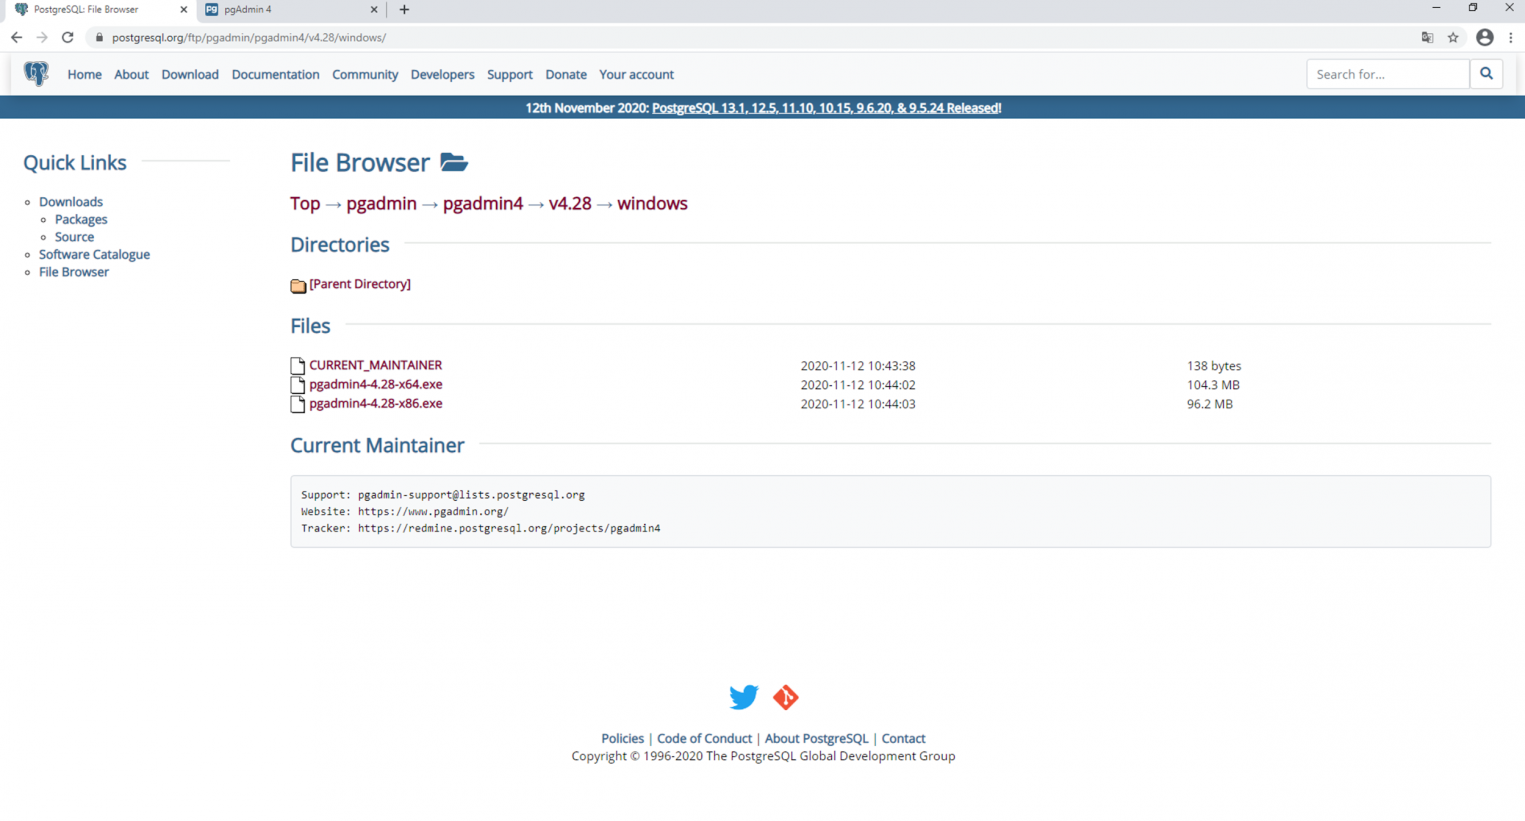
После скачивания утилиту нужно установить и запустить. Она работает в виде веб-приложения через браузер.
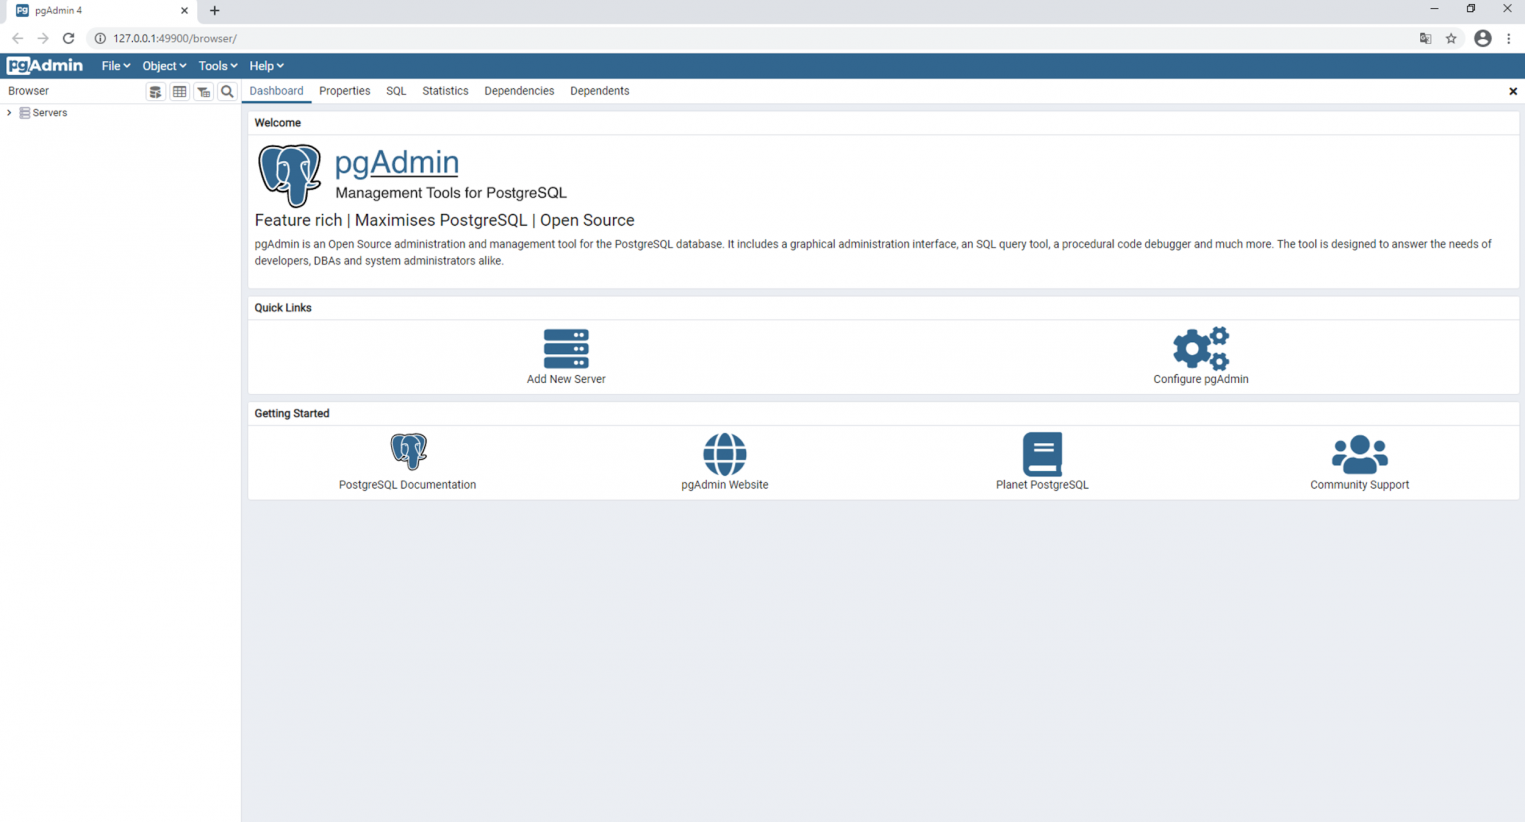
После добавления сервера с базой данных, в интерфейсе появляется возможность создания резервной копии. Аналогичным образом здесь же можно выполнить восстановление из резервной копии.
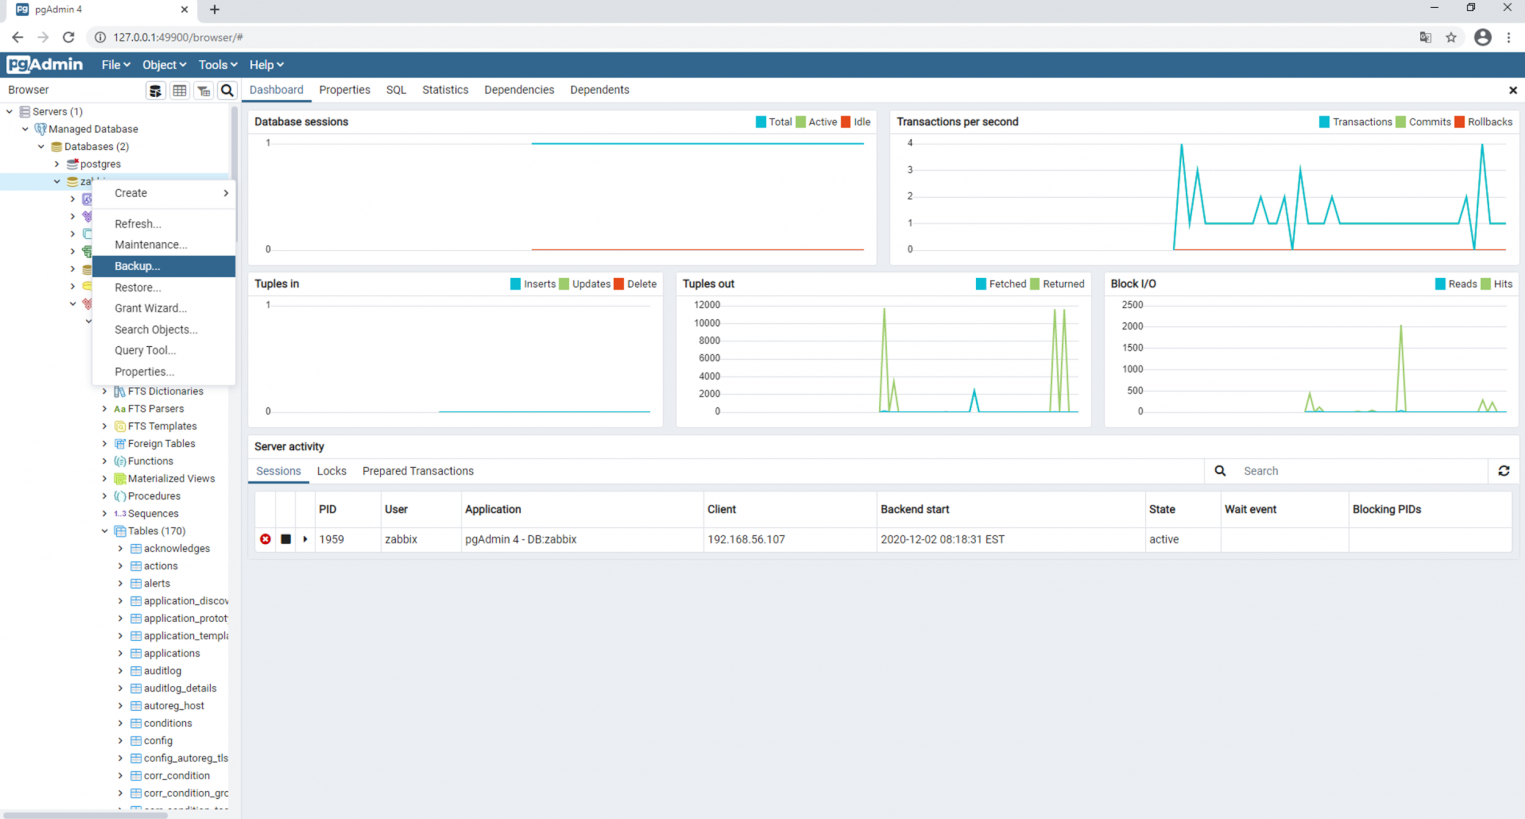
После выполнения команды Backup резервная копия сохраняется в заранее определенную директорию.
Работа с облачной базой данных в панели управления Selectel
В облачной платформе Selectel есть возможность создавать управляемые базы данных (Managed Databases). Такие БД разворачиваются в несколько кликов мыши, однако, их основные преимущества — автоматическое резервное копирование, отказоустойчивость, быстрое масштабирование и управление различными характеристиками из графического интерфейса. Ниже мы создадим экземпляр управляемой базы данных, создадим резервную копию базы данных на виртуальном сервере и восстановим ее в управляемую базу данных.
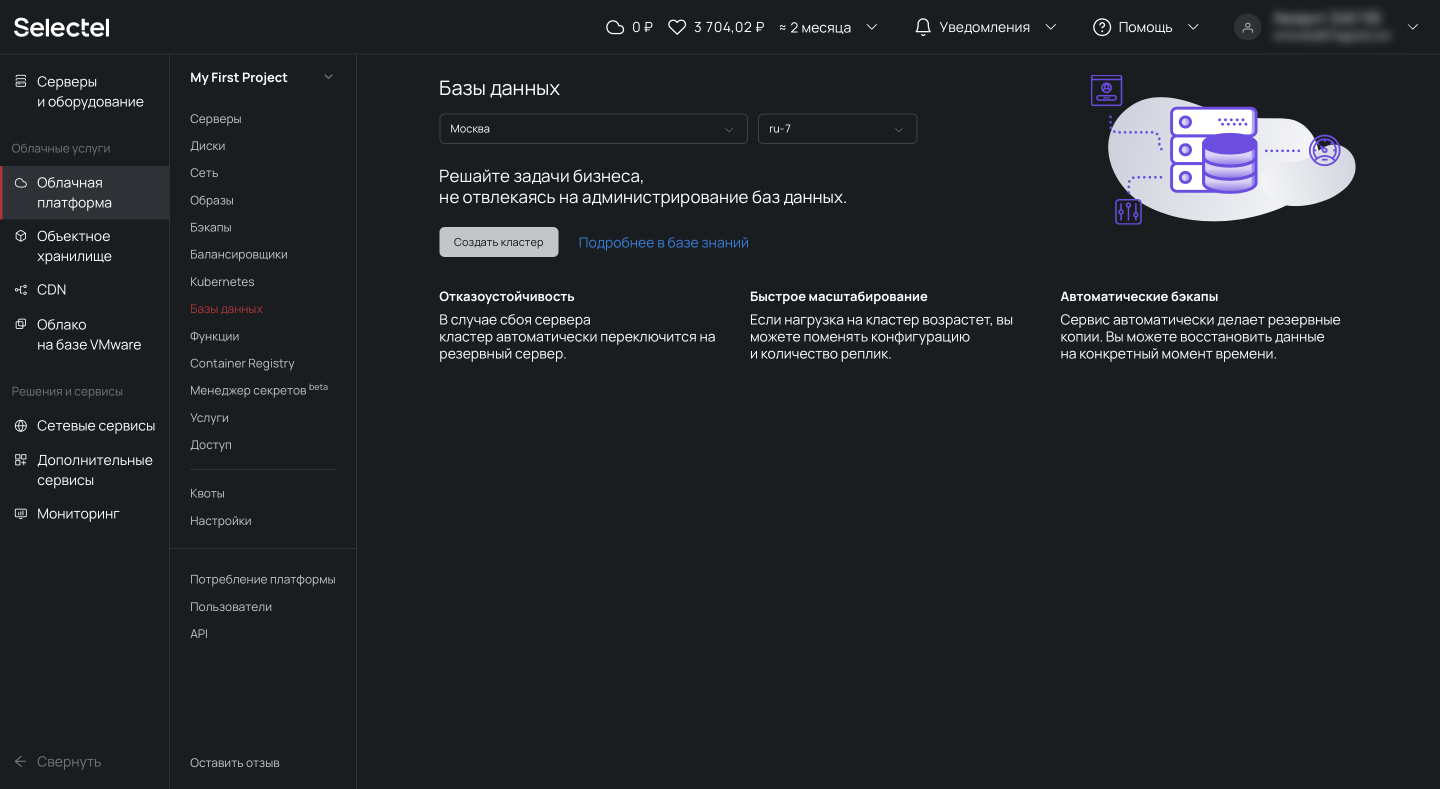
Чтобы создать управляемую базу данных, перейдем в меню Базы данных и нажмем кнопку Создать кластер:
Появится форма создания кластера. Здесь можно выбрать версию PostgreSQL, конфигурацию кластера, настройки сети, режим пулинга и размер пула.
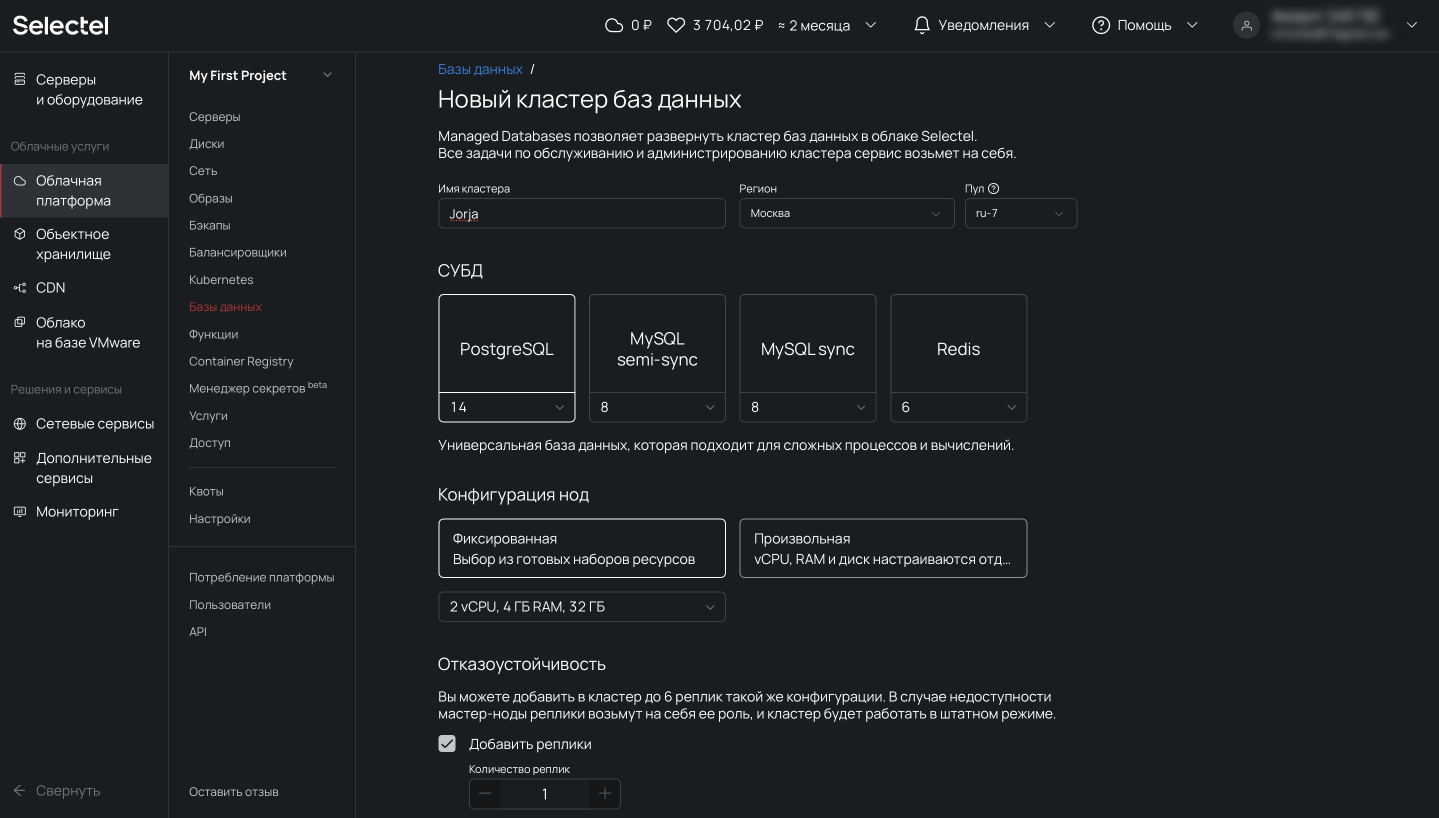
Обращаем внимание на блок Резервные копии, в котором указаны частота резервного копирования, время и срок хранения выгрузок. Под капотом используется механизм wal-g, о котором мы писали выше.
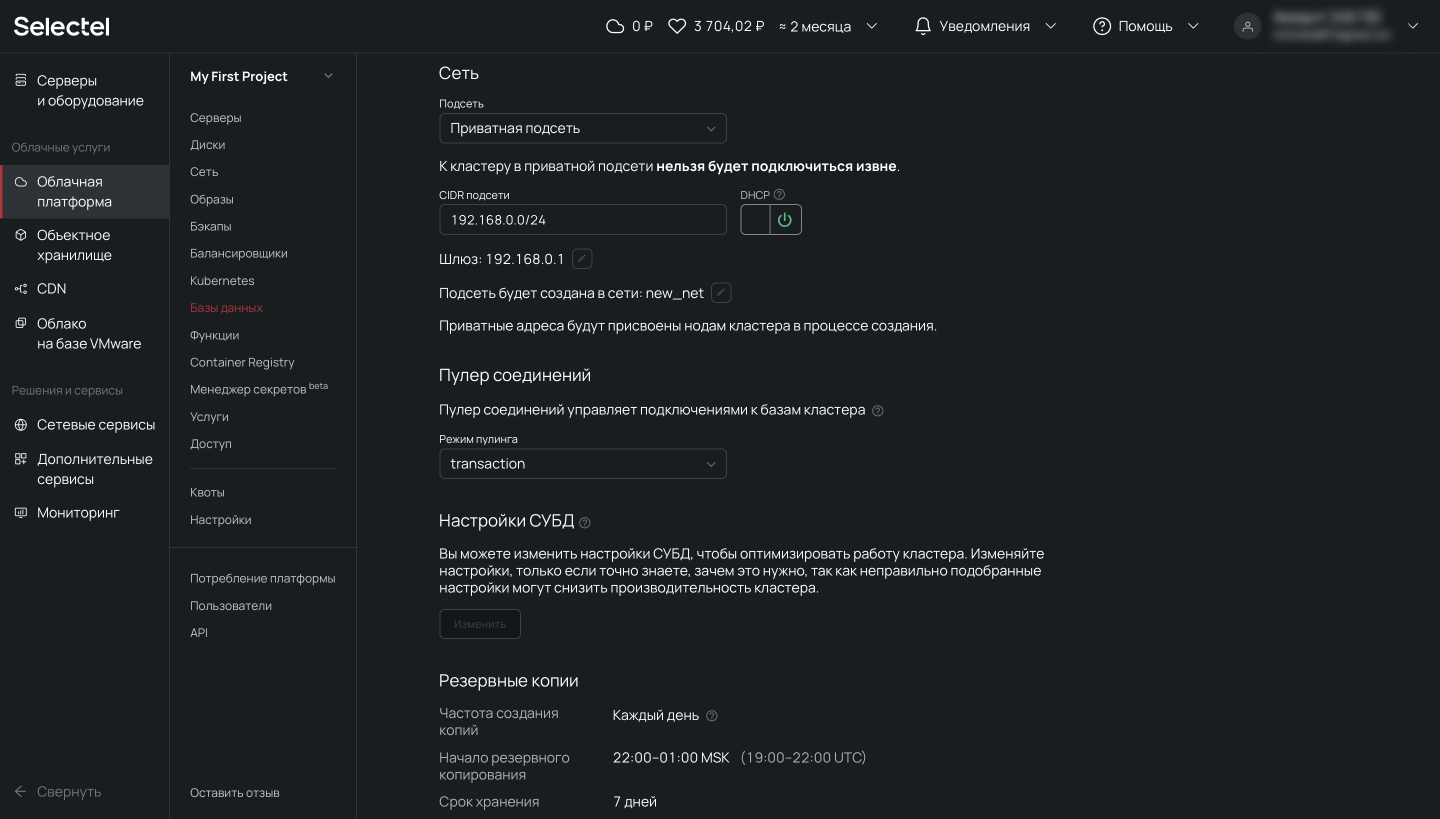
Автоматическое создание резервных копий отключить нельзя.
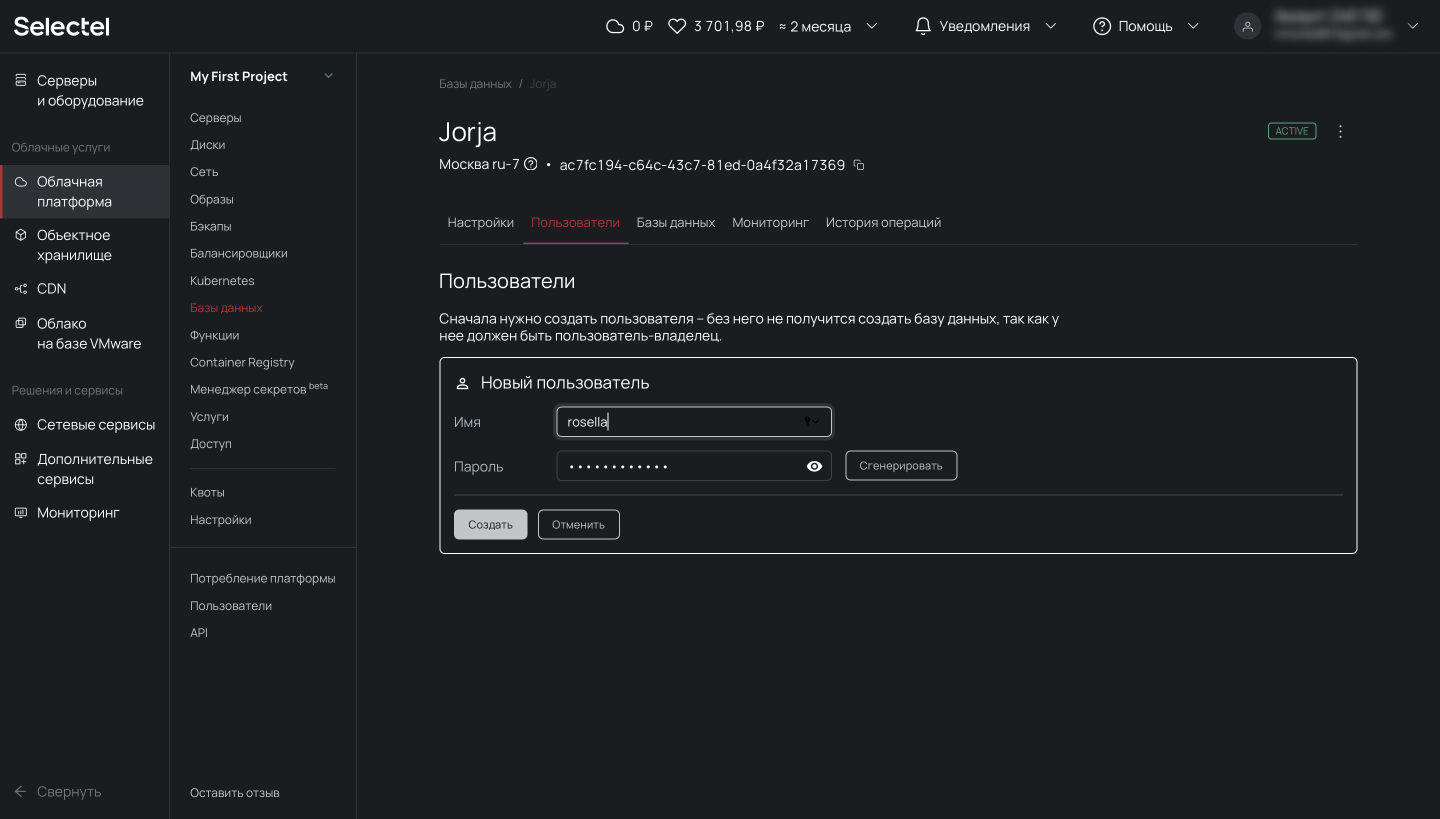
Следующий шаг — создание пользователя, от имени которого мы позже будем обращаться к базе данных. Для этого перейдем на вкладку Пользователи и нажмем на кнопку Создать пользователя.
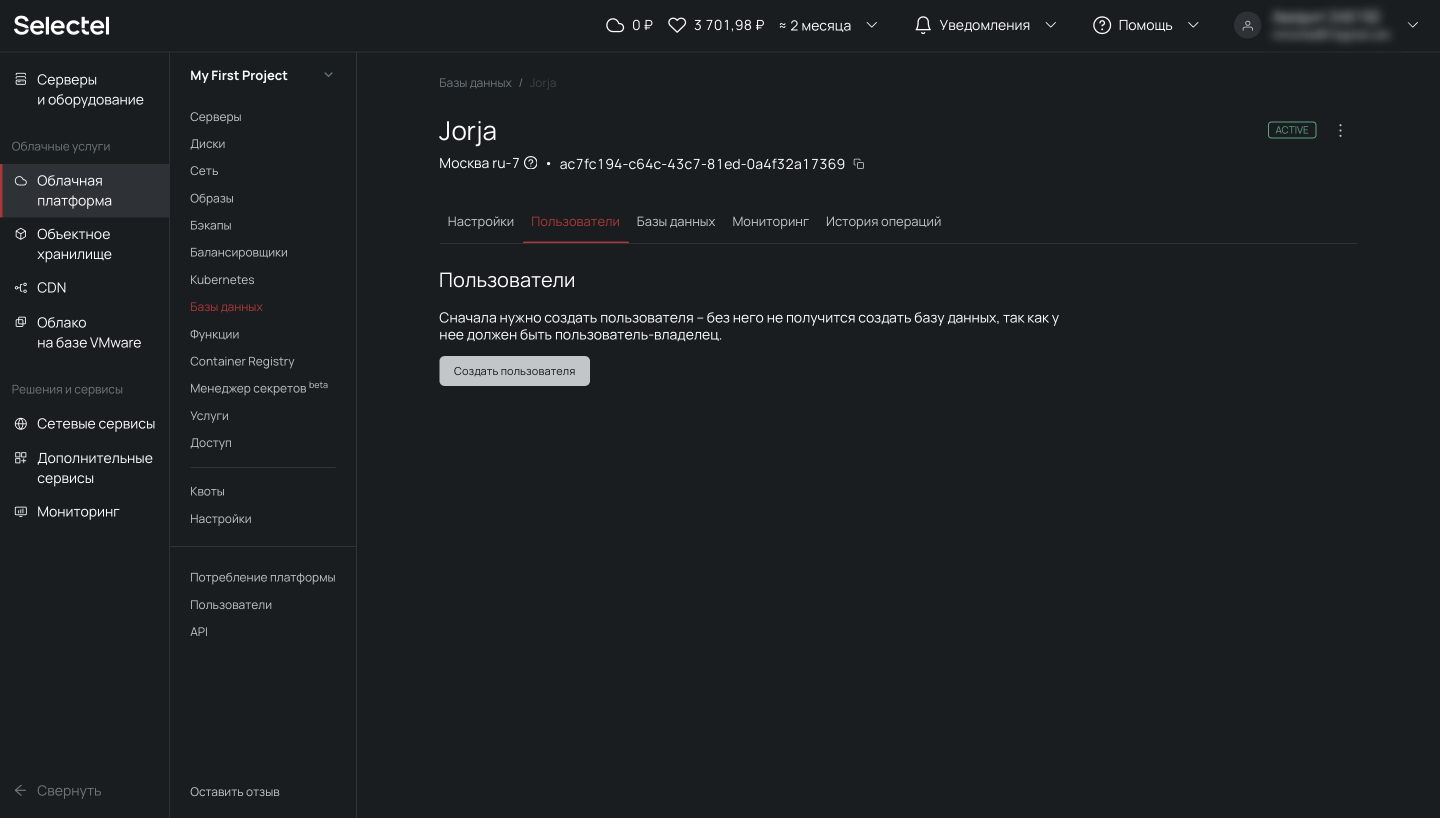
После этого появится приглашение ввести имя пользователя и пароль. После ввода этих данных нажимаем Сохранить.
Пользователь создан и отображается в списке пользователей.
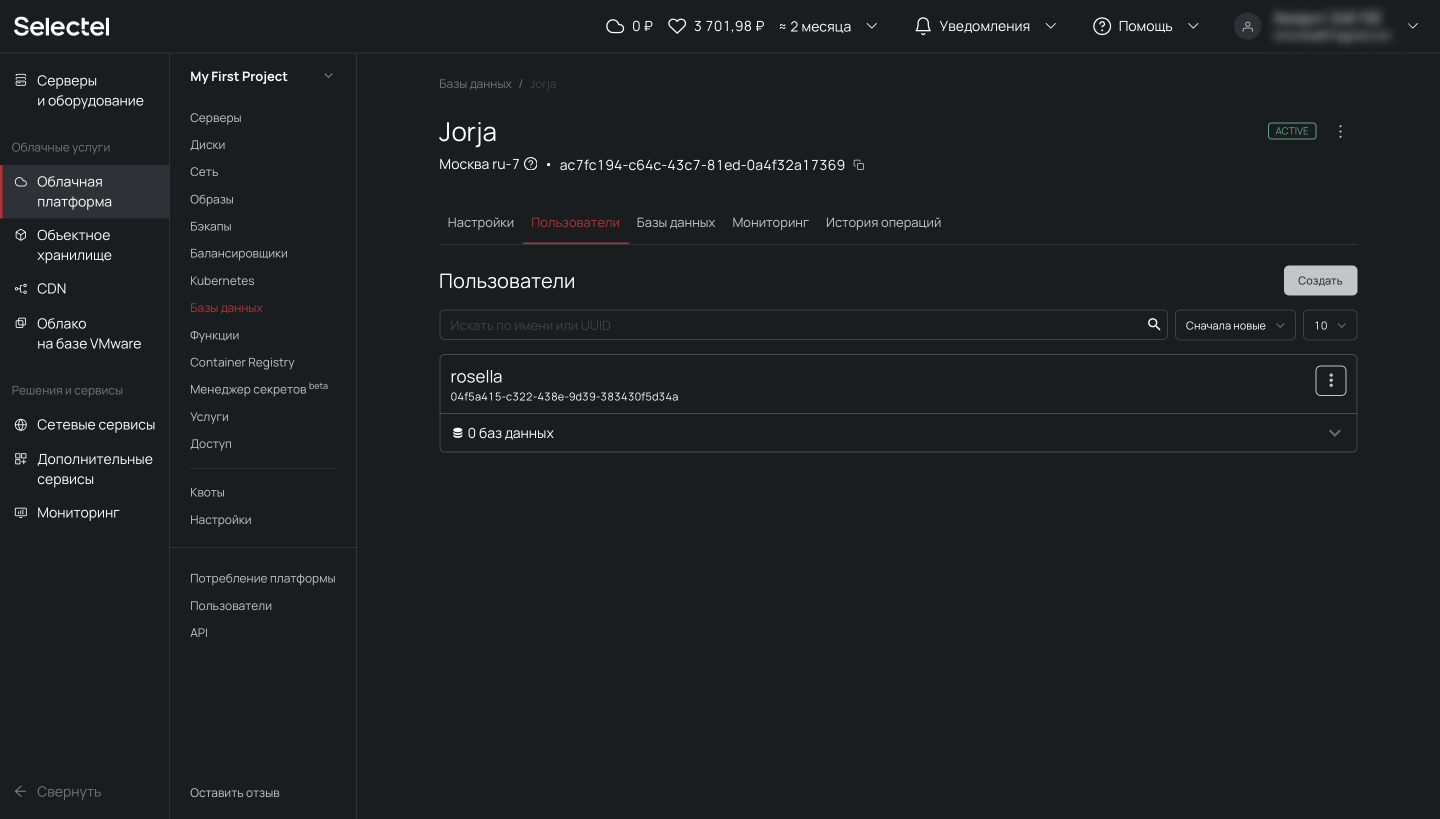
Теперь создадим базу данных. Для этого перейдем на вкладку Базы данных и нажмем на кнопку Создать базу данных.
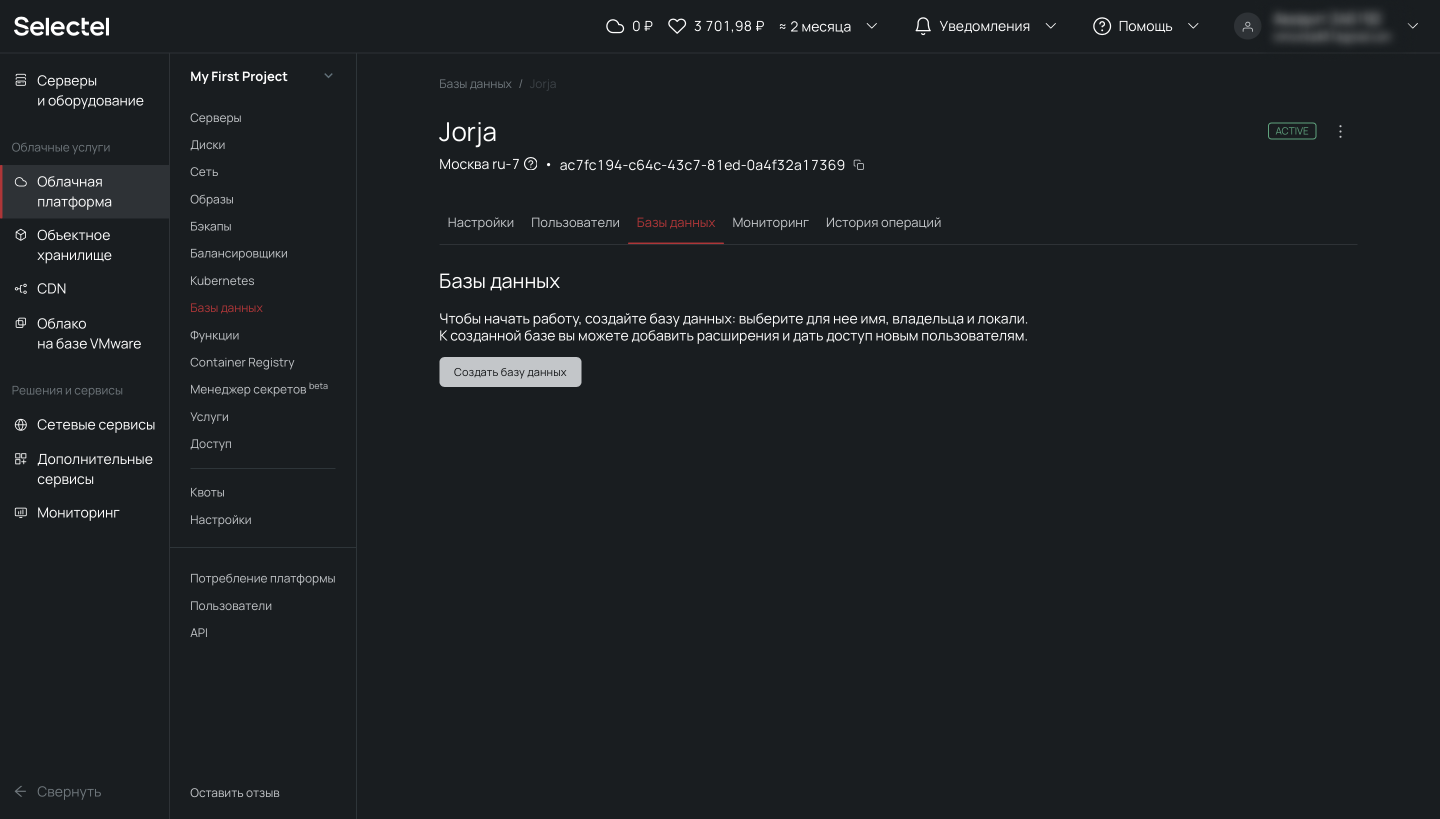
Заполняем необходимые поля и нажимаем кнопку Сохранить.
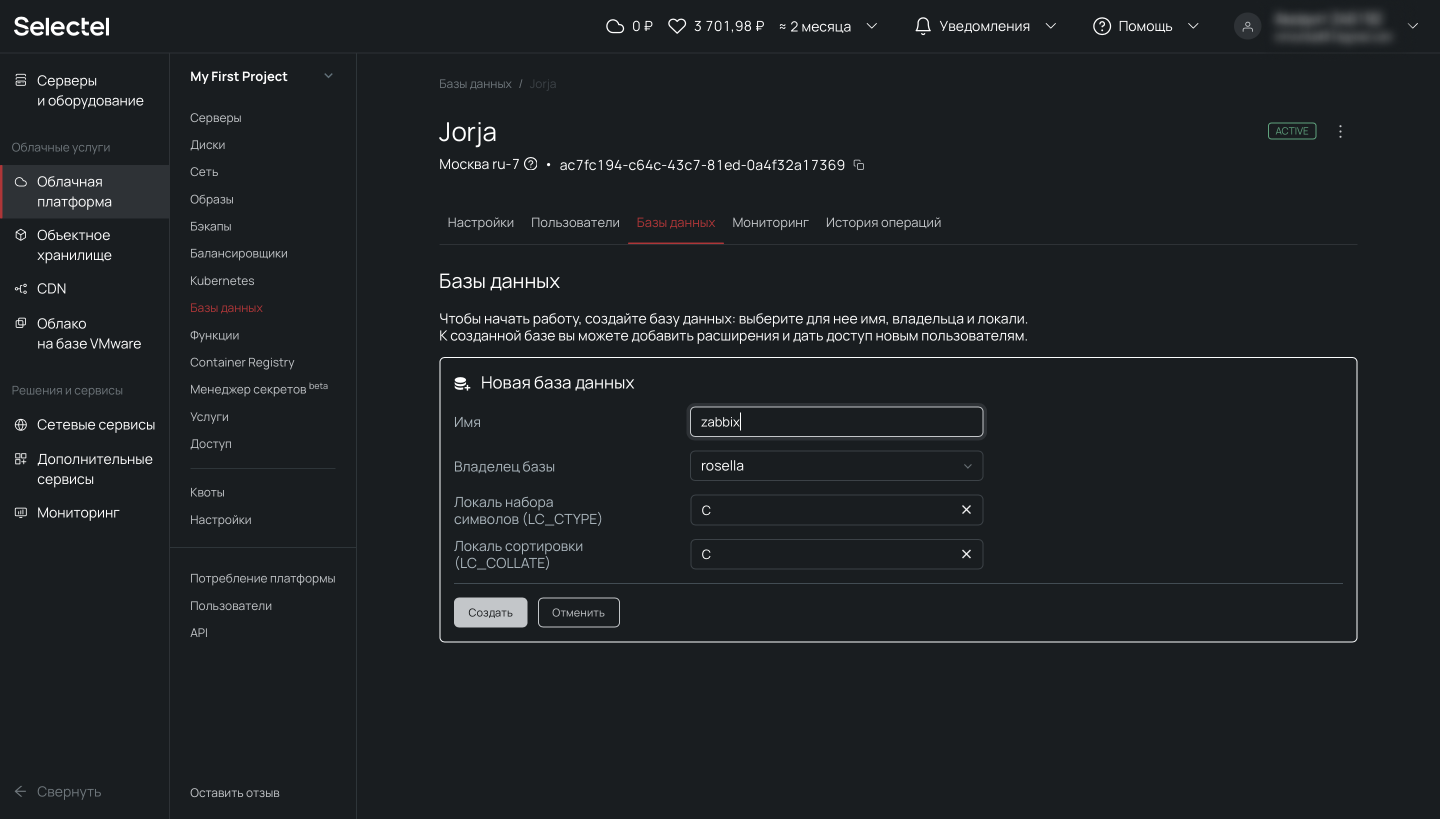
База данных создана и отображается в списке баз данных.

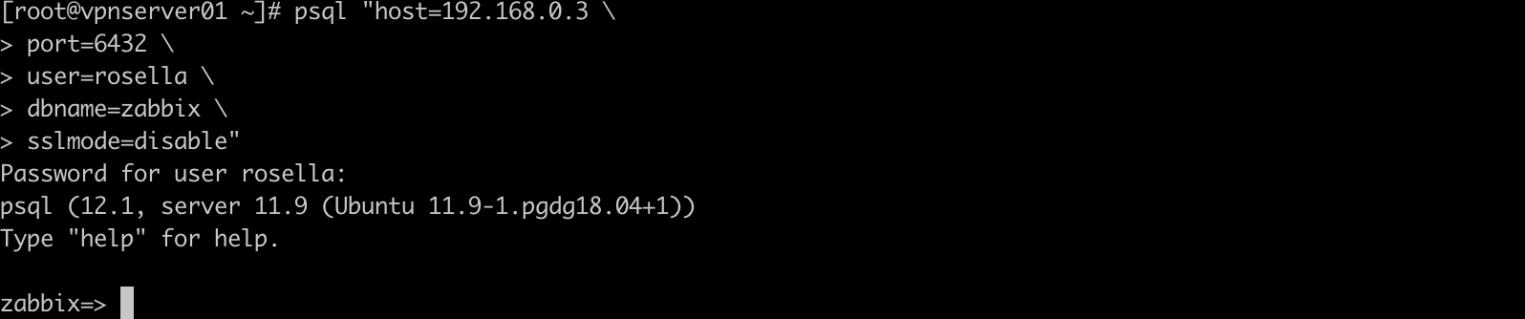
Теперь проверим возможность подключения. Для этого откроем консоль и вводим реквизиты:
# psql "host=192.168.0.3 \
port=6432 \
user=rosella \
dbname=zabbix \
sslmode=disable"
В консоли должно появиться приглашение к вводу SQL-запроса или других управляющих команд.
Выполним резервное копирование при помощи команды pg_dump:
# pg_dump zabbix > /tmp/zabbix.dumpИ следом резервное восстановление в созданную управляемую базу данных:
# psql -h 192.168.0.3 -U rosella -d zabbix < /tmp/zabbix.dumpВ результате выполнения команды выше мы восстановили резервную копию в управляемую базу данных.
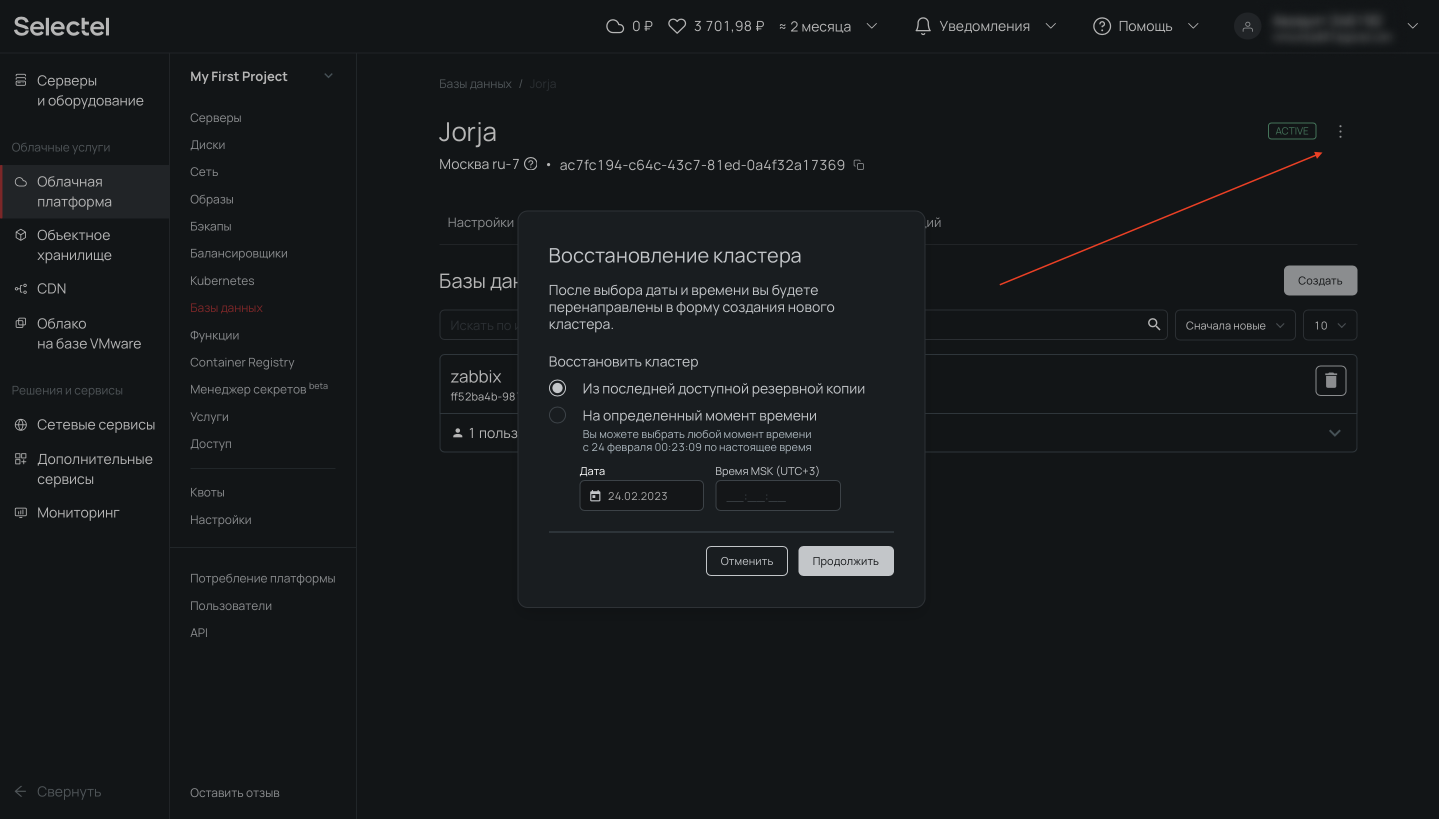
Чтобы воспользоваться восстановлением из резервной копии, которая автоматически создается на платформе Selectel, необходимо нажать на символ с тремя точками. В открывшемся меню нужно нажать на опцию Восстановить. После этого появится модальное окно, в котором можно выбрать резервную копию, а также дату и время, на которое нужно восстановить базу данных. Это так называемый Point-in-Time Recovery из WAL-файлов.
Услуга «Управляемые базы данных в облаке» позволяет перенести существующий кластер PostgreSQL на сервис управляемых баз данных бесшовно и без простоя, обратившись в техническую поддержку. Инженеры Selectel готовы помочь с переносом, а также проконсультировать по всем связанным с этим процессом вопросам.
Заключение
Мы рассмотрели возможности выполнения резервного копирования и показали отличия утилит pg_dump, pg_dumpall, pg_restore, pg_basebackup и wal-g. Вы увидели как можно создать управляемую базу данных, чтобы переложить часть административных задач на облачного провайдера.
Узнать подробнее об управляемых базах данных можно в документации Selectel.