You can manually install VMware Tools on a windows virtual machine. The Guest operating systems that support VMware Tools are Windows 2000 and earlier, Windows XP, Windows Server 2003, Windows Vista and later versions.
For Windows 2000 and later, VMware Tools installs a virtual machine upgrade helper tool. This tool restores the network configuration if you upgrade the virtual machine compatibility from ESX/ESXi 3.5 to ESX/ESXi 4.0 and later or from Workstation 5.5 to Workstation 6.0 and later.
Prerequisites
- Power on the virtual machine.
- Verify that the guest operating system is running.
- If you connected the virtual machine’s virtual CD/DVD drive to an ISO image file when you installed the operating system, change the setting so that the virtual CD/DVD drive is configured to autodetect a physical drive.
The autodetect setting enables the virtual machine’s first virtual CD/DVD drive to detect and connect to the VMware Tools ISO file for a VMware Tools installation. This ISO file is detected as a physical CD by your guest operating system. Use the virtual machine settings editor to set the CD/DVD drive to autodetect a physical drive.
- Log in as an administrator unless you are using an older Windows operating system. Any user can install VMware Tools in a Windows 95, Windows 98, or Windows ME guest operating system. For operating systems later than these, you must log in as an administrator.
- The AppDefense component is not installed by default. You must perform a custom installation and include that component.
Procedure
- On the host, from the Workstation Pro menu bar, select .
If an earlier version of VMware Tools is installed, the menu item is
Update VMware Tools. - If you are installing VMware Tools for the first time, click OK on the Install VMware Tools information page.
If autorun is enabled for the CD-ROM drive on the guest operating system, the VMware Tools installation wizard starts.
To launch the wizard manually if autorun is not enabled, click
and enter
D:\setup.exe, where
D: is your first virtual CD-ROM drive. Use
D:\setup64.exe for 64-bit Windows guest operating system. - Follow the on-screen prompts.
- If the New Hardware wizard appears, follow the prompts and accept the defaults.
Note: If you are installing a beta or RC version of VMware Tools and you see a warning that a package or driver is not signed, click
Install Anyway to complete the installation. - When prompted, reboot the virtual machine.
Results
What to do next
If a new virtual hardware version is available for the virtual machine, upgrade the virtual hardware.
Previously, when you installed Windows 7 SP1 as a guest OS, you could install VMware Tools without problem.
However, since VMware Workstation 16, some warnings and an error occur if the guest OS is not up to date.
- Warnings displayed when installing VMware Tools on Windows 7
- Installation of prerequisites
- Install VMware Tools on Windows 7
1. Warnings displayed when installing VMware Tools on Windows 7
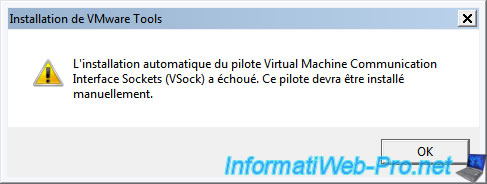
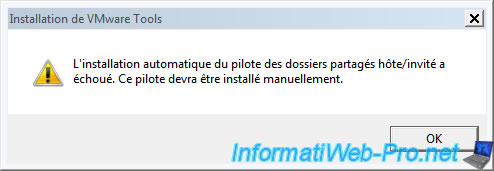
To begin, warnings will be displayed regarding the installation :
- VSock Virtual Machine Communication Interface Sockets driver
- Host Guest Shared Folders driver
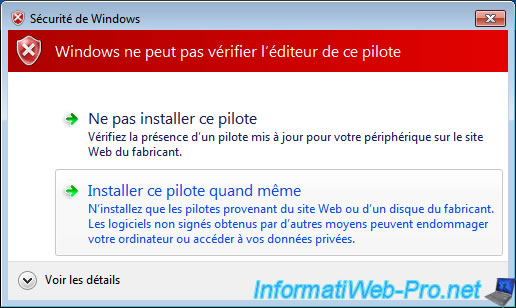
Then, you will get a «Windows can’t verify the publisher of this driver software» error.
This is because VMware has updated the certificates used to sign these drivers using the SHA-2 encryption algorithm. Except that this algorithm is not supported by default by Windows 7.
2. Installation of prerequisites
To find out about the prerequisites required for installing the VMware Tools of VMware Workstation 16 on Windows 7, simply consult the informations regarding VMware Tools 11.1.5.
As you can check on the VMware site, you will see that this new version of VMware Tools requires Windows 7 SP1 with the KB4474419 update.
To get started, install Windows 7 SP1 if you haven’t already.
Otherwise, download the service pack 1 of Windows 7 from the Microsoft Update catalog and install it in the virtual machine.

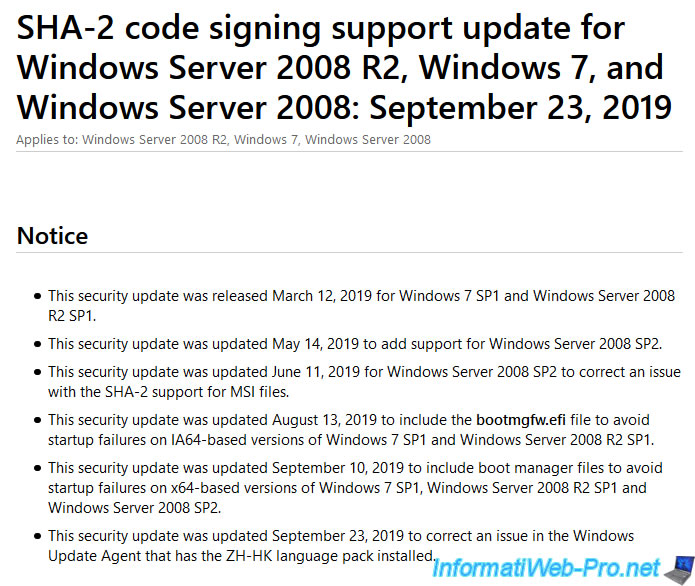
If you click on the «KB4474419» link referenced on the VMware site, you will arrive on a page : SHA-2 code signing support update …
As you can see, this update will add support for the SHA-2 algorithm for code signing.
This will allow Windows 7 to be able to correctly check the signature of the various drivers that will be installed by VMware Tools in your virtual machine.
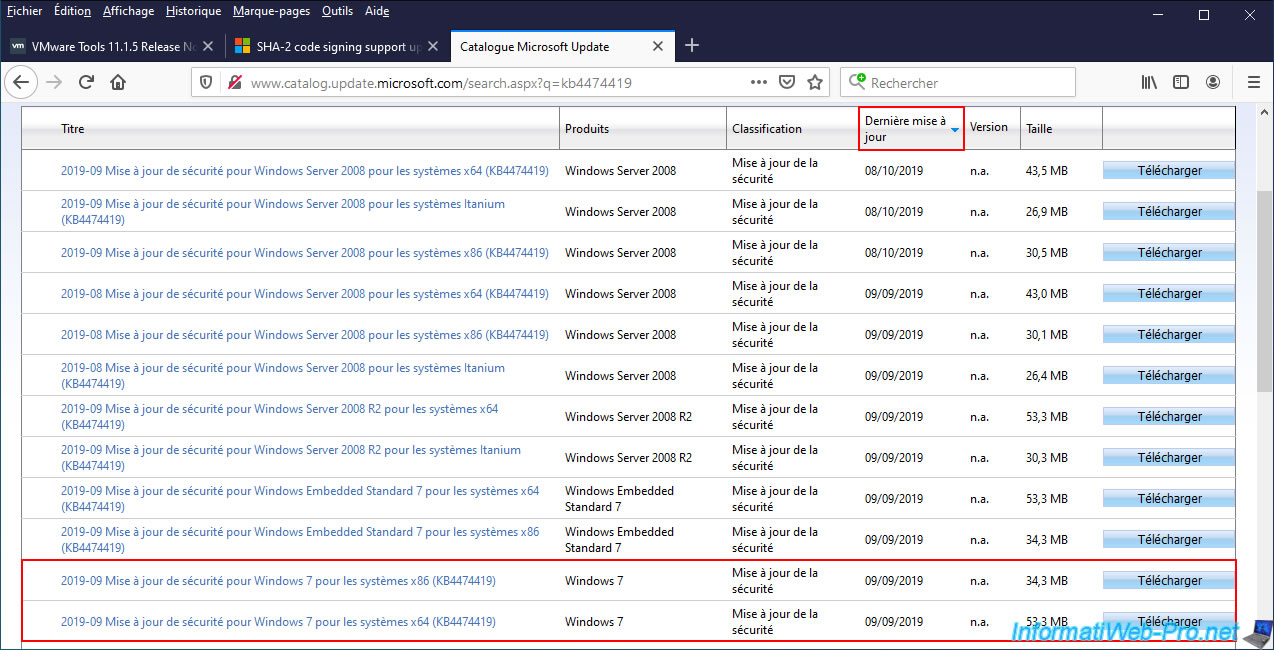
To download this update, you can use Windows Update or download it manually from the Microsoft Update Catalog by clicking on this link : KB4474419.
On the site that appears, sort the list by date of the last update to find the most recent version of this Windows update and download the one adapted to the architecture of Windows 7 that you have installed :
- Windows 7 x86 : Windows 7 in 32-bit
- Windows 7 x64 : Windows 7 in 64-bit
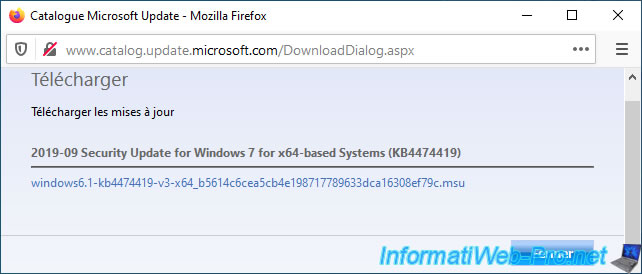
Once you click on the «Download» button, you will have a small window like this with a download link.
Just click on it to download this update.
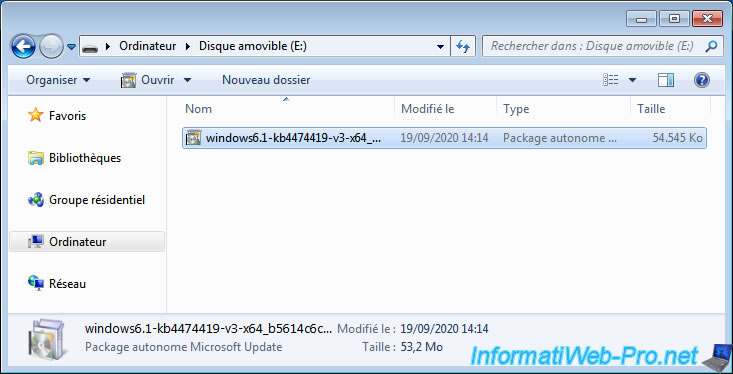
To transfer this update to the virtual machine, you have several options :
- download it directly from the virtual machine
- store it on an USB key and plug it virtually into your virtual machine from the VMware Workstation interface.
Indeed, drag/drop and VMware Workstation shared folders don’t work for the moment since VMware Tools are not installed in your virtual machine.
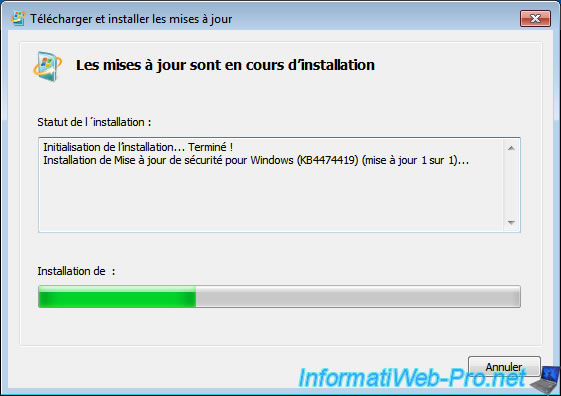
Launch the downloaded file and a window will appear telling you : Security Update for Windows (KB4474419).
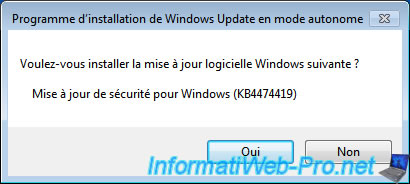
Wait while this Windows update is installed.
Restart the virtual machine after its installation is complete.
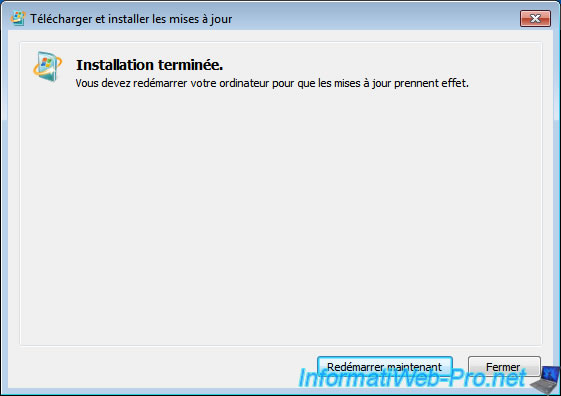
The «Configuring Windows updates» message appears while restarting the virtual machine.

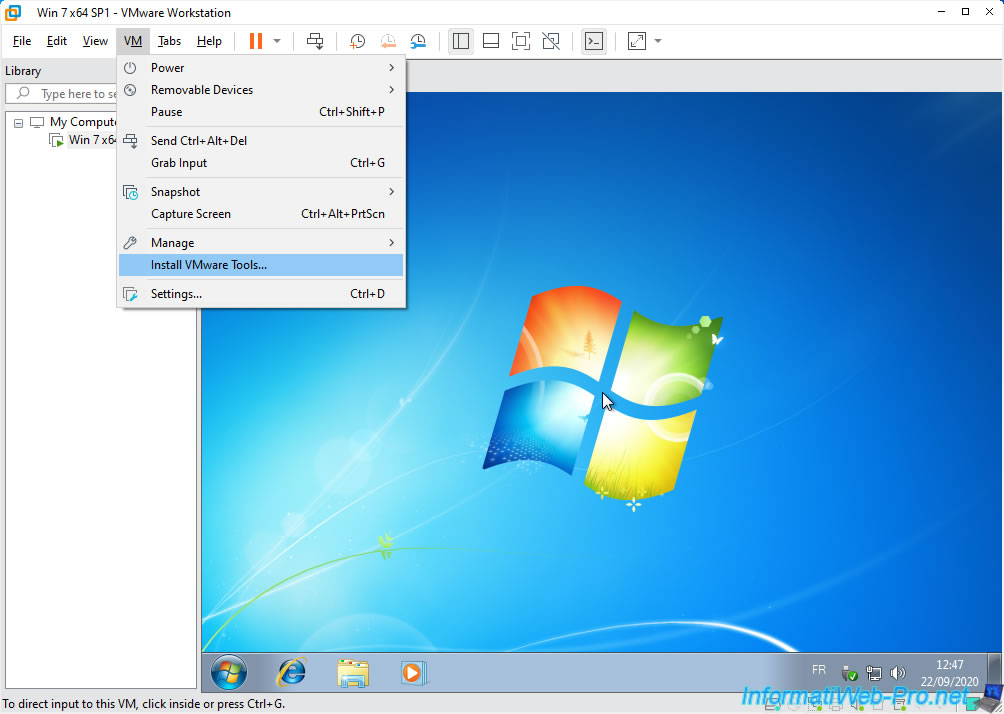
Now, you can install VMware Tools by clicking on : VM -> Install VMware Tools.
Wait while the VMware Tools install.
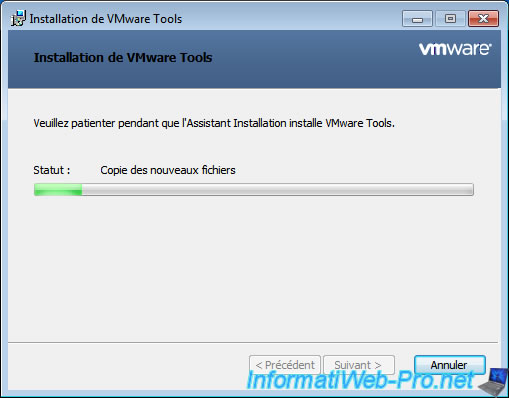
As expected, the installation completes without any warning and without any error.
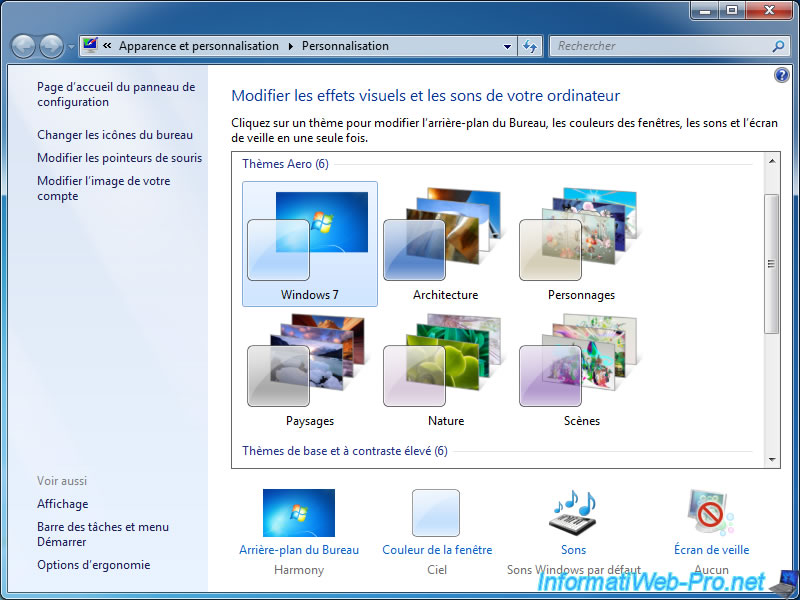
Once the virtual machine has restarted, don’t forget to activate Windows 7 aero, by right-clicking «Personalize» on the desktop, then clicking on the «Windows 7» Aero theme.
In this article, we will build VMware Tools on Win 7 running on VMware Workstation virtual machine.

How to Setup VMware Tools on Windows 7
First, install Windows 7 on your Windows or Linux computer with VM Workstation, and then follow the steps in this article to install Guest Tools on your VM.
After installing a Windows virtual machine using the VMware software on Windows and Linux operating systems, the first thing you should do is install VMware Tools.
VMware Tools provides a variety of functionality for virtual computers. For example, the following are the changes that will occur on the VM after installing VMware Tools on Microsoft Win7;
- Guest machine graphics performance will increase.
- You will be able to share files between the host and the Guest machine.
- You will be able to copy and paste between host and Guest machine.
- The time between the host and the Gues will be synchronized.
- A better mouse function between guest and host.
How to Build VMware Tools on Guest Machine
Virtual machine software are not installed automatically when installing a Windows 7 system on a VMware Guest machine. Therefore, you will need to setup VMware Guest software manually.
Follow the stages below to setup guest sofware on Microsoft Win7.
Step 1
When you review the image below, you can understand if the VM program installed on the Windows 7 machine did not change the screen resolution.

Step 2
To automatically fix the screen resolution of the VM, you must click View / Fit Guest Now. However, this option is disabled because the Guest Tools is not installed.

Step 3
To setup Guest Tools in Win 7, click VM / Install VM Tools.

Step 4
When the VM Tools image is automatically mounted on the system, open My Computer and double-click the drive to start the setup.

Step 5
Click Yes to continue the operation in the User Account Control window.

Step 6
VM tools installation is starting …

Step 7
Preparing the installation …

Step 8
In the VM Tools Setup window, click Next.

Step 9
When installing VM program on a Windows Guest, select Complete. If you install all of the VM Tools, it means that you can run this VM on different VMware platforms in the future.
After selecting Complete, click Next to continue.

Step 10
When VM software is ready for setup, click Install.

Step 11
Wait while setting up VM software on a Win7 operating system.

Step 12
After the VM software installation is completed on the VM, click Finish.

Step 13
Restart your virtual computer for the changes to take effect. To do this, you can click Yes in the following window.

Step 14
When the Windows 7 virtual machine restarts, click on View / Fit Guest Now.

Step 15
As soon as you click Fit Guest Now, the screen resolution of the virtual machine will be changed as shown in the image below.

Step 16
You can now transfer files between your physical computer and the virtual machine!

How to Setup Guest Software on Win 7 VM ⇒ Video
You can watch the video below to setup VM Tools step by step on a Guest virtual machine running on VMware Workstation, and you can also subscribe to our YouTube channel to support us!

Final Word
In this article, we have examined how to install VM Tools on Windows 7 operating system step by step. Installing VMware Tools on Win Guest machines is very important because it is useful for performance. Thanks for following us!
Related Articles
♦ What is VM Workstation?
♦ What is VMware Fusion?
♦ Download VMware Unlocker
♦ How to Increase HDD Space in VM Workstation
♦ How to Install VM Tools in Ubuntu

TolgaBagci
Hello, I’m Tolga! I am a computer specialist who has been specializing in computer technologies for about 20 years. I provide solutions to problems encountered in many areas such as hardware, system, network, virtualization, server systems, and operating systems, and create relevant content on my website by explaining how to solve these problems. My goal is to be a reliable source of expert, quality, and trustworthy solutions for your computer problems. By following innovations and using the latest technologies, I aim to be successful in my job and provide you with the best service. Don’t hesitate to contact me for any questions or curiosity about technology. Have a nice day, stay up to date 
Important notice! The VMWare tools provided here will work on x86 or x64 version of Windows 7, but provided windows update files are for x64 only! If you need them for x86 it’s your goal to find them.
VMware Tools 11.3.5 for Windows 7 x64 with 2 necessary updates!
Without installing the updates, this tools won’t work!!!
Install windows 7 x64 first
Load «vmware_tools_w7_x64.iso» to your vm
Install «windows6.1-kb4474419» update first, then reboot.
Install «windows6.1-kb4490628» then reboot.
Now you can install tools from «VMware-tools-windows-11.3.5» folder.
Congratulations! Now you are using the latest VMware tools supported by your Windows 7 x64 instance, i haven’t seen much advantages over VMware tools 9 that everyone is using, but whatever, the latest and greatest.
comment
Reviews
Reviewer:
Yarpopcat08
—
favoritefavoritefavoritefavoritefavorite —
August 31, 2023
Subject:
Works very good!
It works well on my VM, thankyou! Also it’s nice that You included the needed updates and instructions, special thanks for that!
Reviewer:
ItsIgnacioPortal
—
favoritefavoritefavoritefavoritefavorite —
August 17, 2023
Subject:
It just works
Thanks for the instructions too
As of 12/11/2020, VMware no longer signs Tools for Windows Vista with SHA-1, so you need Windows 7 SP1 or later to use the latest version.
However, you can use an older version of VMware Tools, which is here: https://media.githubusercontent.com/media/thepwrtank18/thepwrtank18/master/VMware%20Tools%20for%20Windows%207%20RTM%20and%20Vista.iso
Link is dead. Instead, here’s a full on guide.
Step 0: Foreword
This is an unsupported operating system, with unsupported drivers. Use this at your own risk.
Step 1: Preparation
You will need:
- Either a:
- x64 Windows Vista ISO
- x64 Windows Vista Disc + Reader
- VMware Workstation (Pro or Player) 15.x, or Pro 16.x and higher.
- An old version of the VMware Tools ISO (10.3.5 to be precise), from here
Step 2: Creation
Note: Do not let VMware scan your ISO or disc, Easy Install may use the wrong version of Windows, whether a wrong edition or architecture.
Make a VM. If you have Pro or Player 15.x, do what you normally do. If you have Pro 16.x, make sure compatibility is set to Workstation 15.x (in Custom settings). After that, customize the settings you want. (Player does not support custom settings, so you either need to get 15.x, which is what you need anyway, or Pro 16.x and higher.)
Step 3: Modification
Make sure you have your ISO or disc selected in the VM options. If there’s a floppy disc or extra DVD drive with «autoinst» or the like on it, remove that drive.
Step 4: Installation
Install as usual. When it tells you to create a user profile, don’t do that for now. Go to the VM settings, then put in the VMware Tools ISO you got earlier. Don’t install VMware Tools via VM>Install VMware Tools. After that, press Shift+F10 in the VM. Put in D:\setup64.exe.
Step 5: Initialization
Do the VMware Tools installation as usual. When it says if it wants to restart the machine, say «Yes», then go to VM>Power>Reset. When it reboots, do the setup as normal. Let it monitor your computer’s performance, as drivers are installed.