
![]()
Здравствуй, юный сисадмин. Сегодня мы с тобой установим Windows Server 2019. Устанавливать будем ознакомительную версию, которая работает 180 дней. Установка производится на виртуальную машину VMware, я использую домашний сервер с ESXi на борту.
Дистрибутив Windows Server 2019
Переходим по ссылке:
https://www.microsoft.com/ru-ru/windows-server
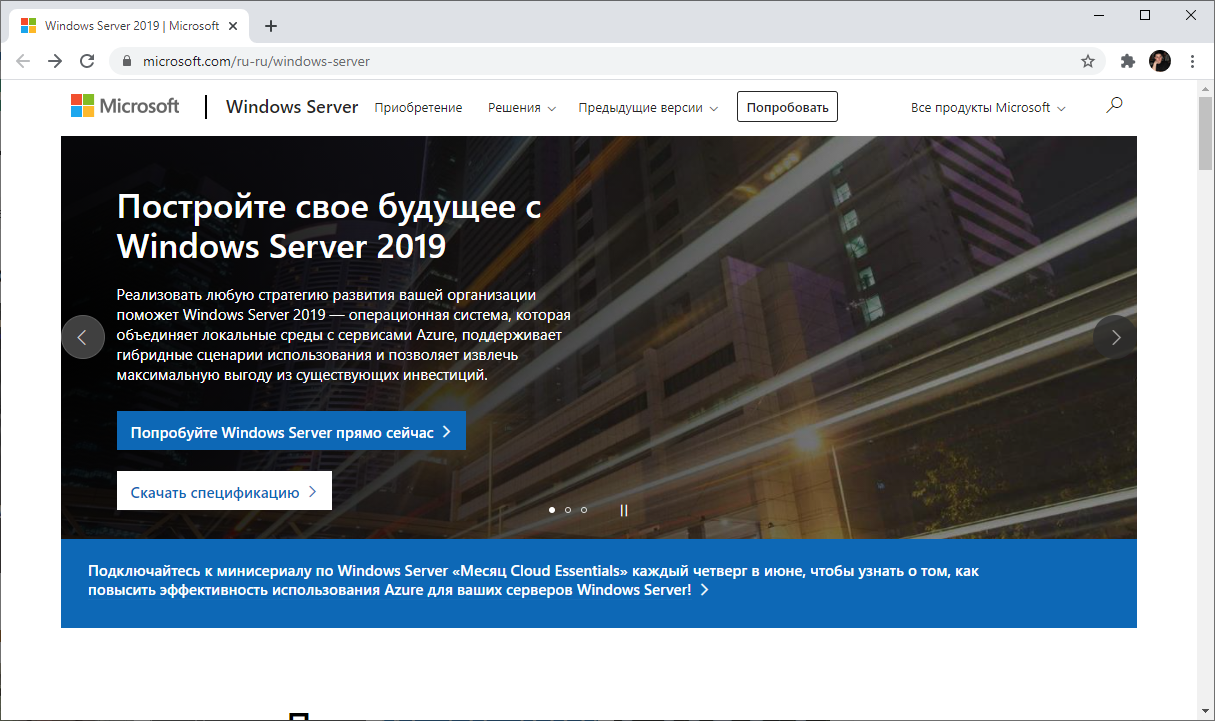
Нажимаем кнопку «Попробуйте Windows Server прямо сейчас».
https://www.microsoft.com/ru-RU/windows-server/trial
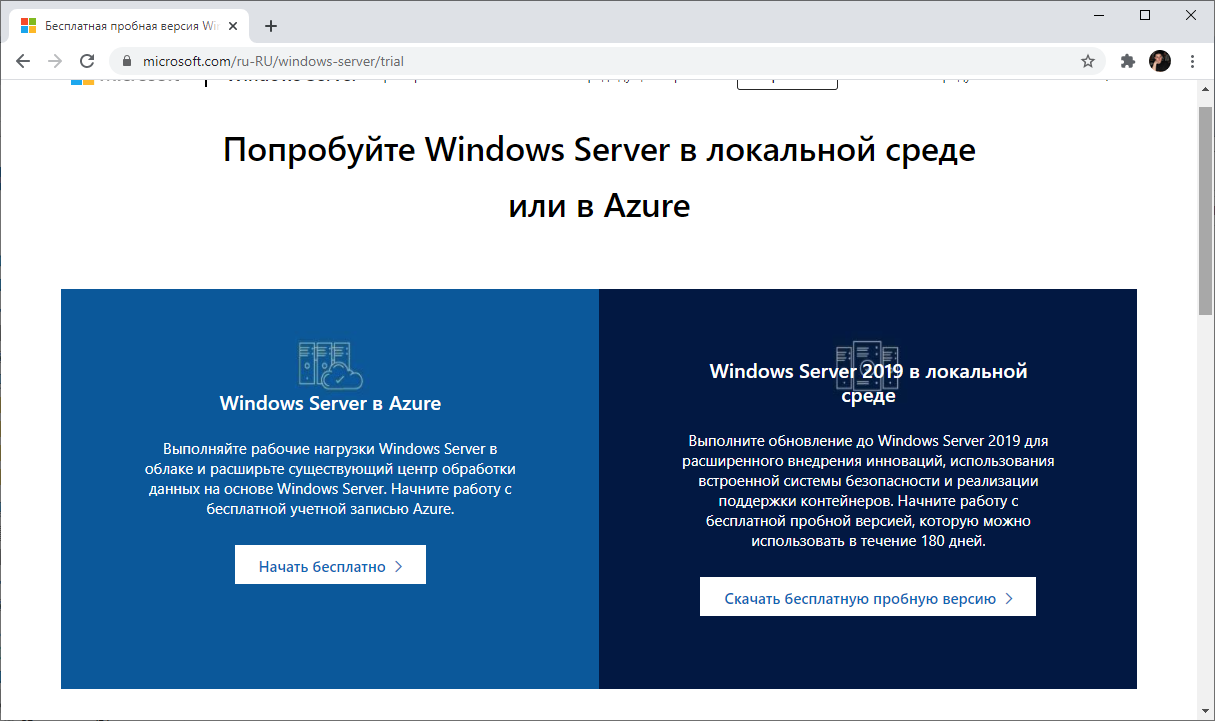
Нас интересуем Windows Server 2019 в локальной среде. «Скачать бесплатную пробную версию».
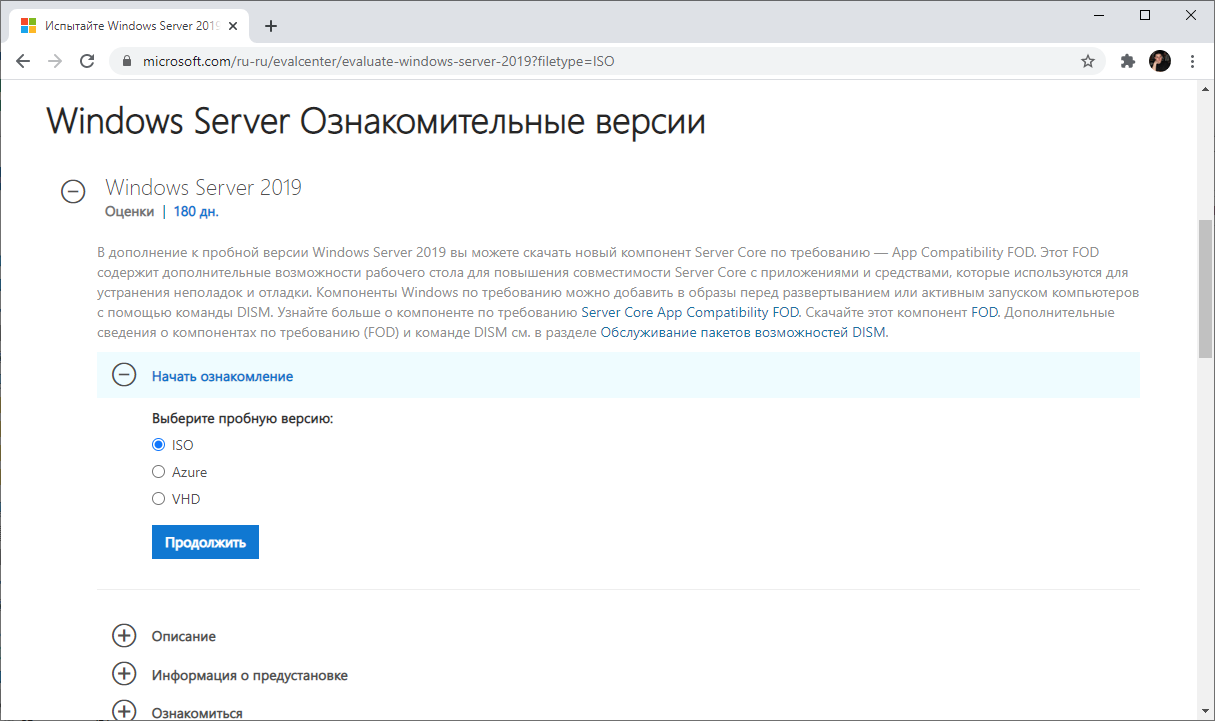
Нам нужен ISO образ, выбираем, «Продолжить».
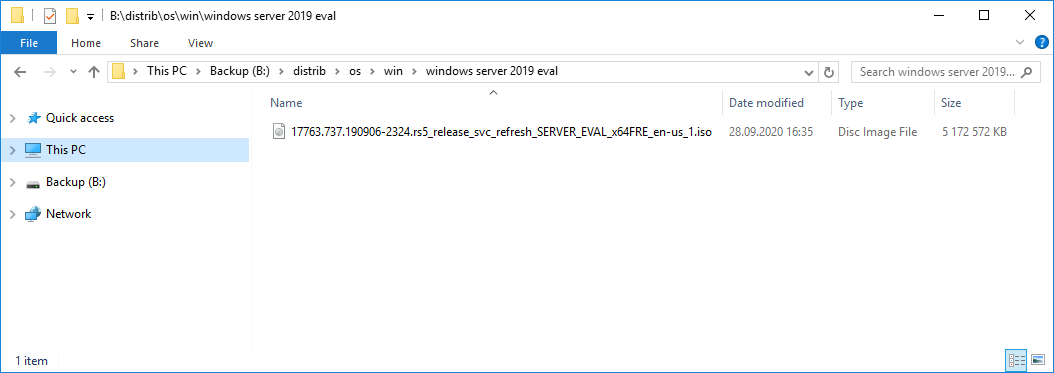
Итак, дистрибутив Windows Server 2019 в виде ISO образа у нас есть.
Системные требования Windows Server 2019
https://docs.microsoft.com/en-us/windows-server/get-started-19/sys-reqs-19
Минимальные системные требования для работы Windows Server 2019:
- Процессор
- 64-разрядный процессор с частотой 1,4 ГГц
- Совместимость с набором инструкций x64
- Поддержка NX и DEP
- Поддержка CMPXCHG16b, LAHF/SAHF и PrefetchW
- Поддержка трансляции адресов второго уровня (EPT или NPT)
- Память
- 512 МБ (2 ГБ для сервера с возможностью установки Desktop Experience)
- ECC (Error Correcting Code) или аналогичная технология для развертывания физического хоста
- Диск
- 32 ГБ для core mode + IIS
- 36 ГБ для GUI mode + IIS
При установке на виртуальную машину минимальных требований (1 процессор и 512 МБ оперативки может быть недостаточно, установка завершится с ошибкой. В этом случае можно сделать следующее:
- Выделите более 800 МБ памяти, после завершения установки можно уменьшить количество памяти до 512 МБ. Если вы используете дополнительный язык, то может потребоваться больше 800 МБ.
- Прервите процесс установки SHIFT+F10. В командной строке используйте diskpart.exe для создания и форматирования раздела для установки. Выполните wpeutil createpagefile /path=C:\pf.sys, где C: — это выделенный раздел. Закройте командную строку и продолжите установку.
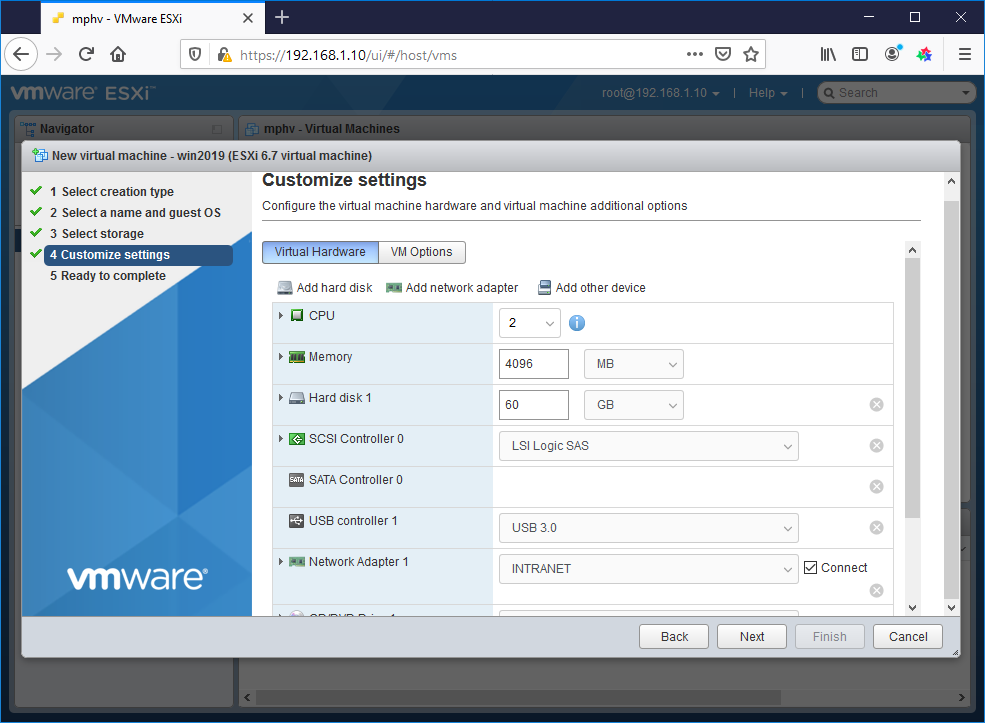
Подготовка виртуальной машины для Windows Server 2019
Создаём виртуалку.
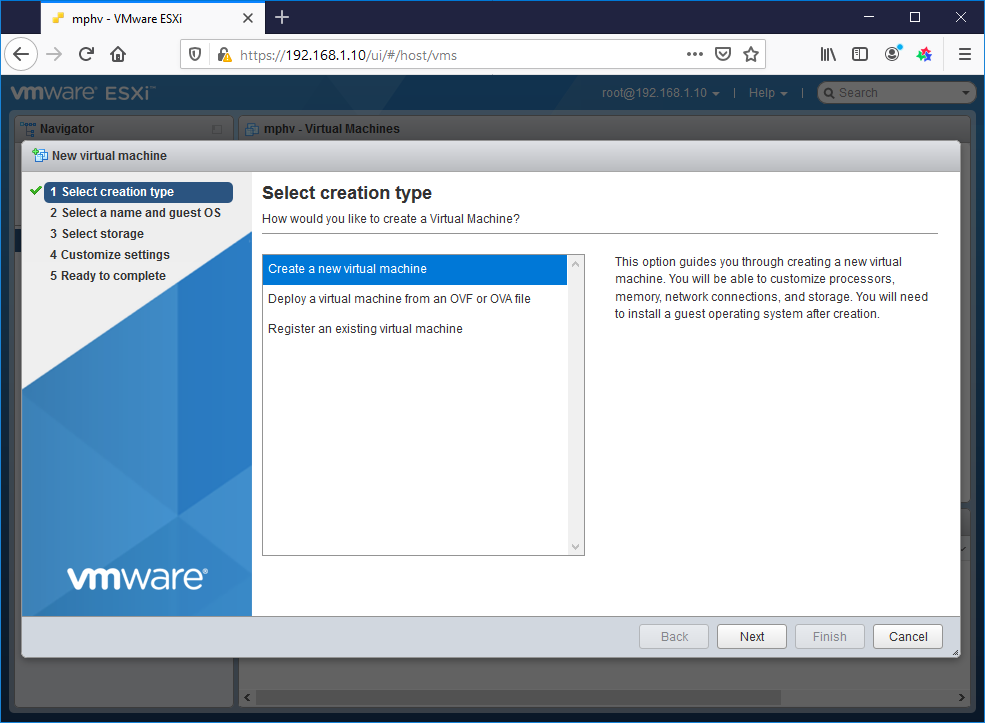
Минимальные требования не будем устанавливать. Я выделил:
- 2 процессора
- 4 ГБ оперативки
- 60 ГБ места на диске
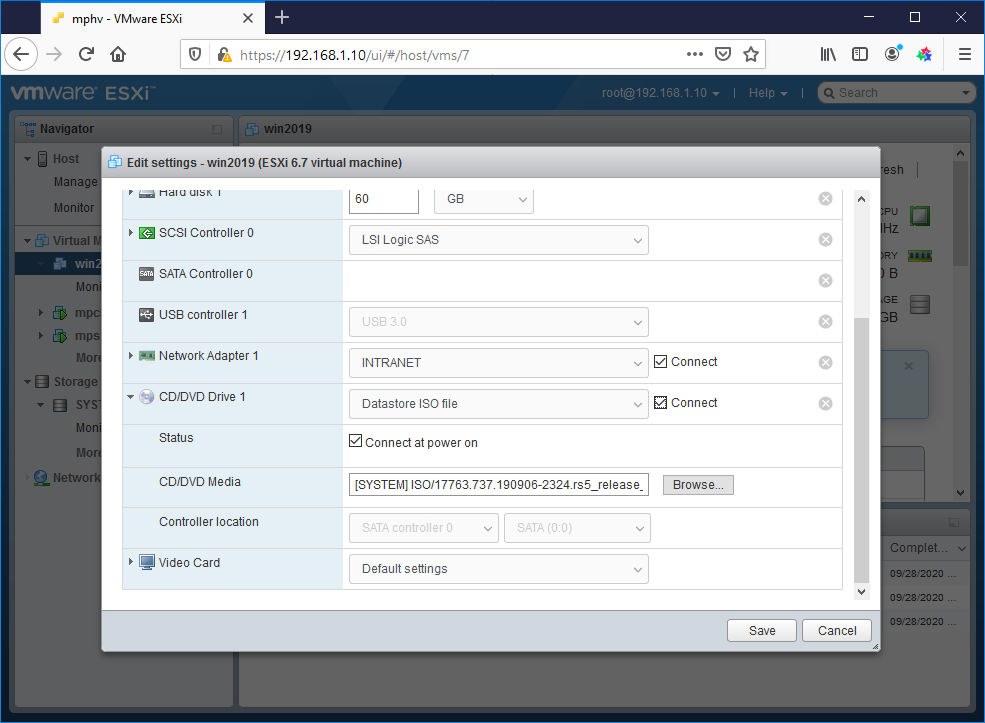
Загружаю в хранилище ISO образ.
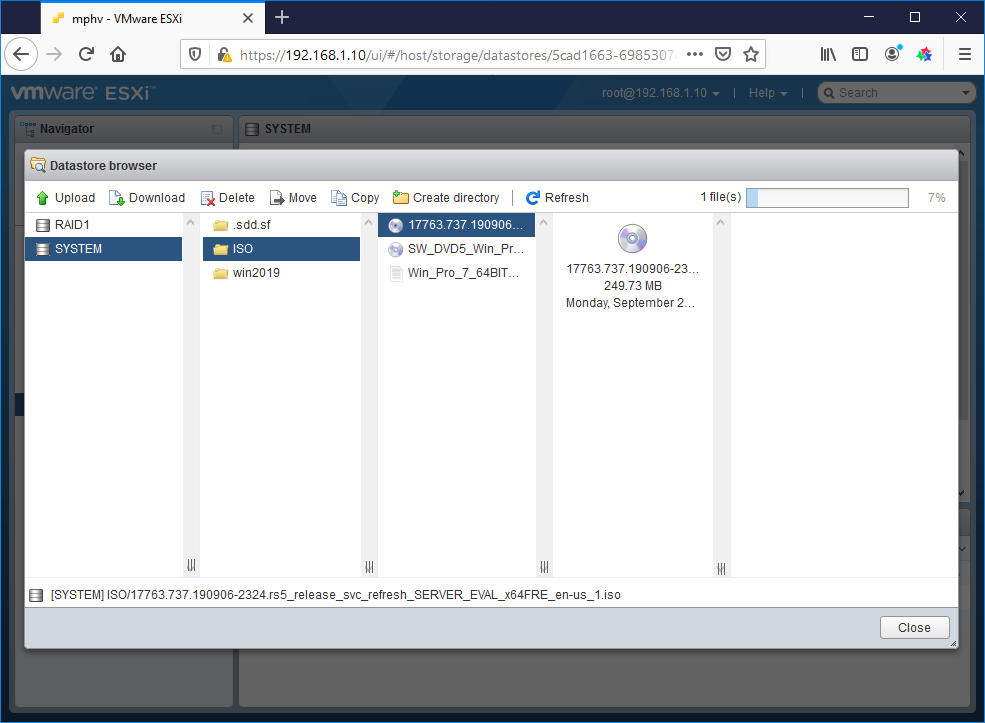
Монтирую ISO образ как CD\DVD.
Для удобства устанавливаю VMware Remote Console.
Установка Windows Server 2019
Включаем виртуалку.
Установочный образ подцепился.

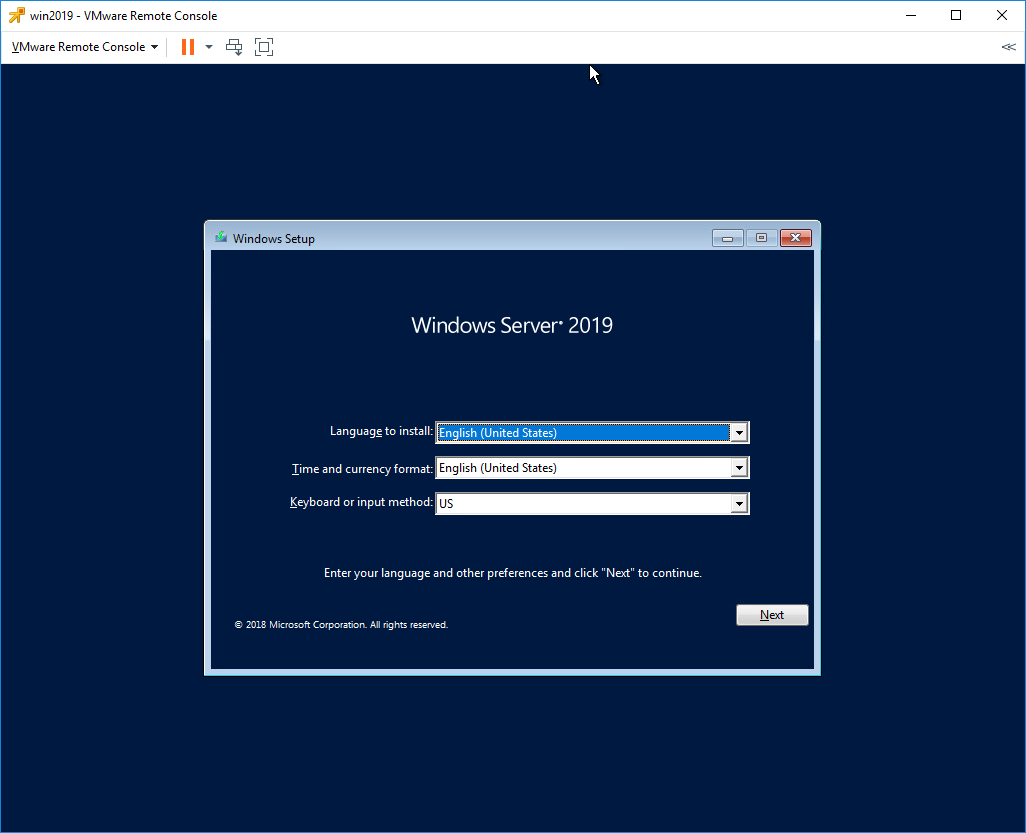
Запускается Windows Setup.
Я предпочитаю устанавливать Windows Server на английском языке, мне так привычнее. Чем меньше лишнего — тем лучше. Единственное исключение делаю для терминальных серверов, так как с ними потом будут работать юзеры.
Выбираем язык установки, Next.
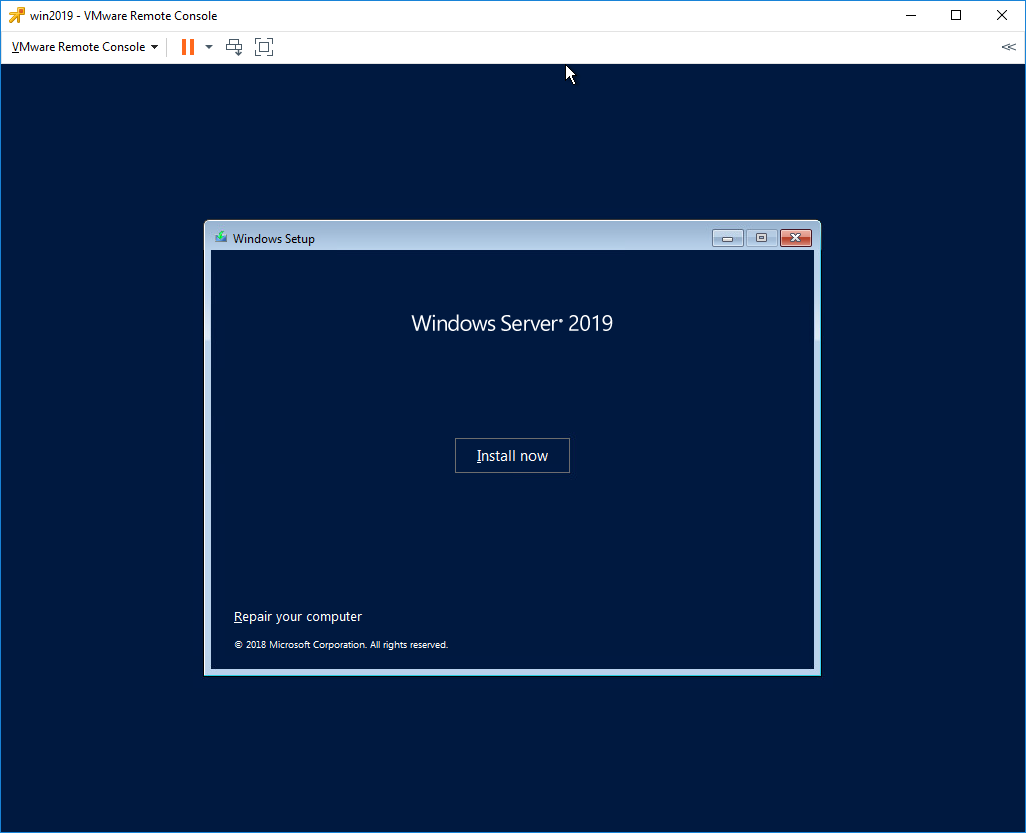
Install now.
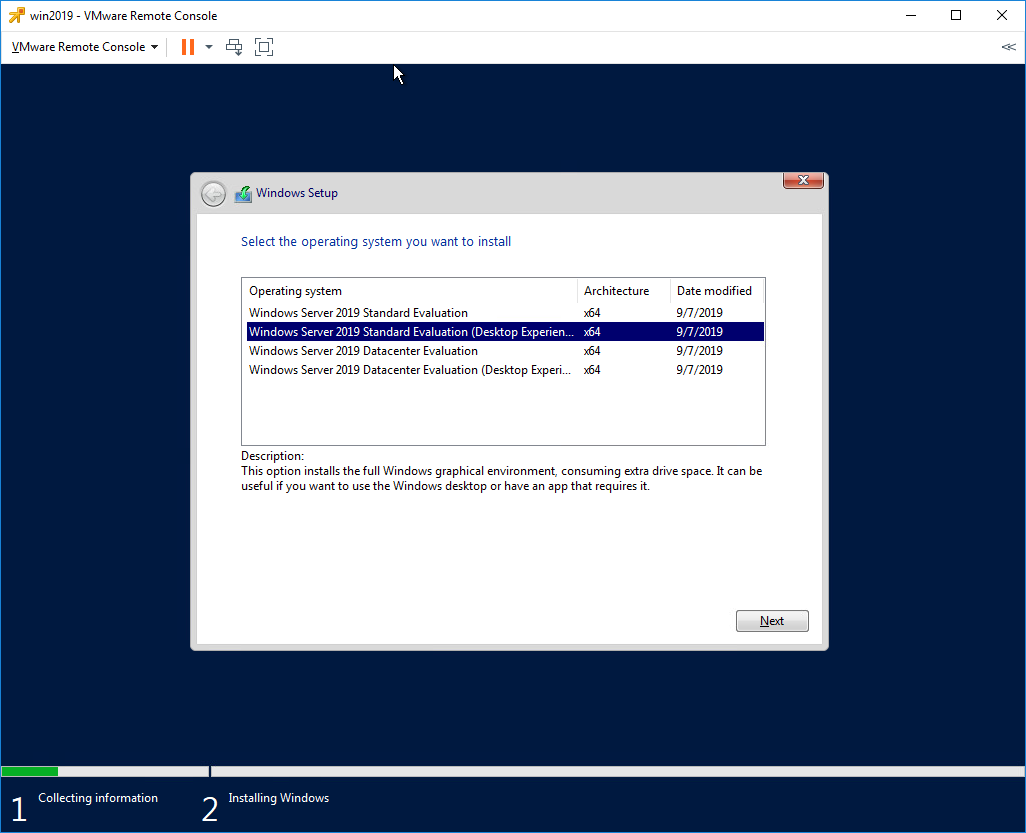
Выбираем Standard версию с GUI. Next.
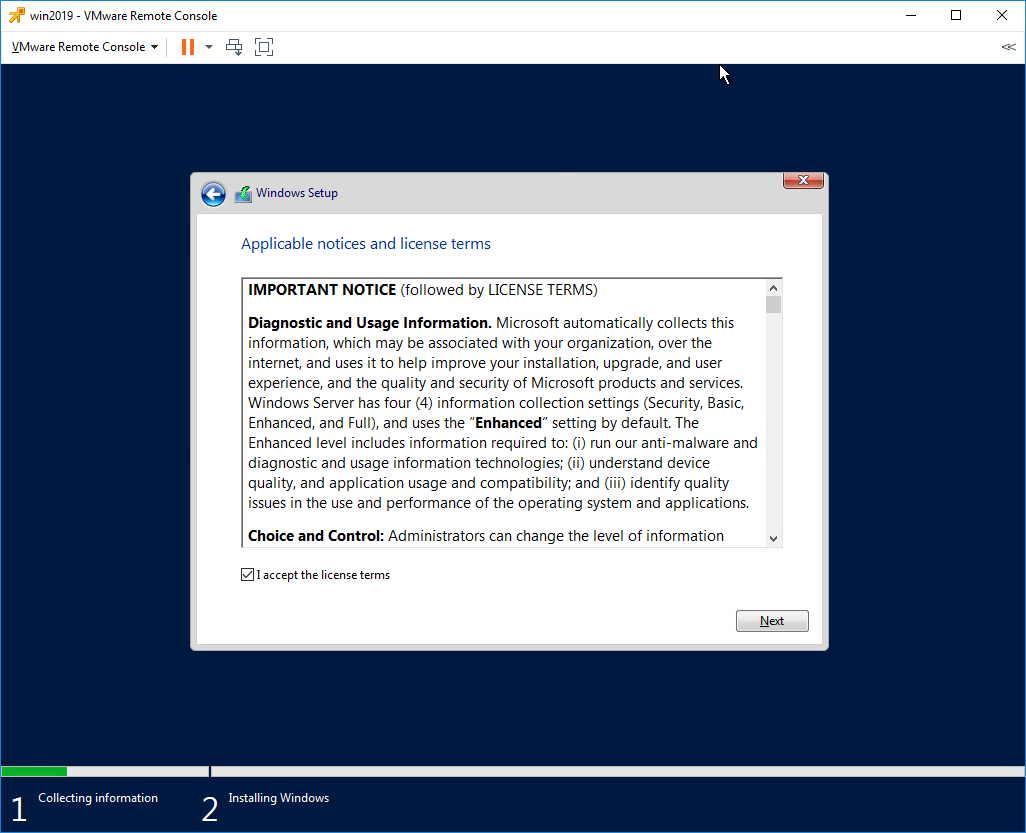
Принимаем лицензионное соглашение. Next.
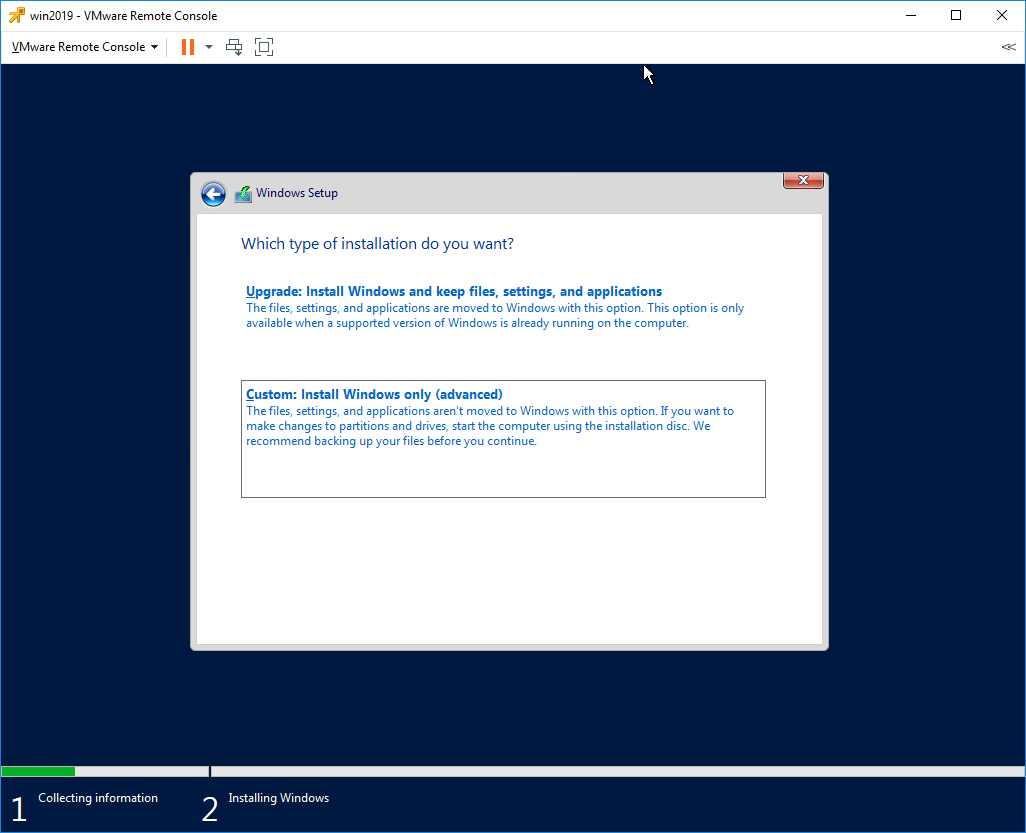
Тип установки — Custom: Install Windows only (advanced). У нас новый сервер.
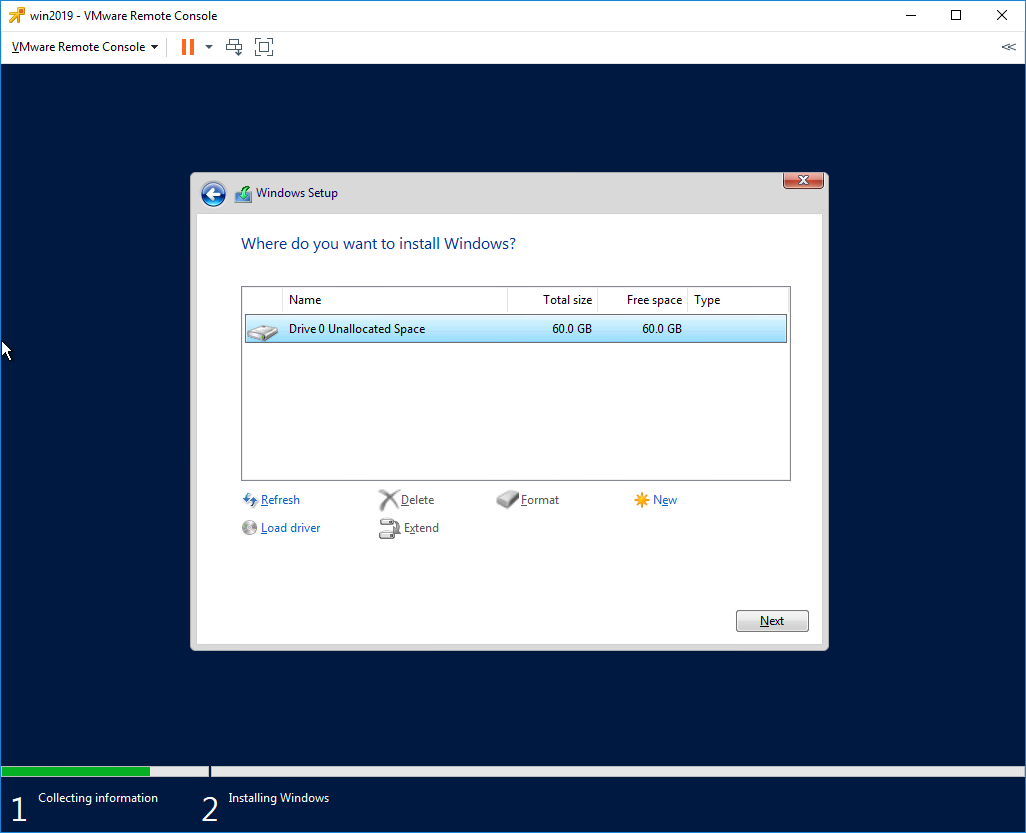
Выбираем диск для установки. На виртуальной машине он у нас выделен один. Next.
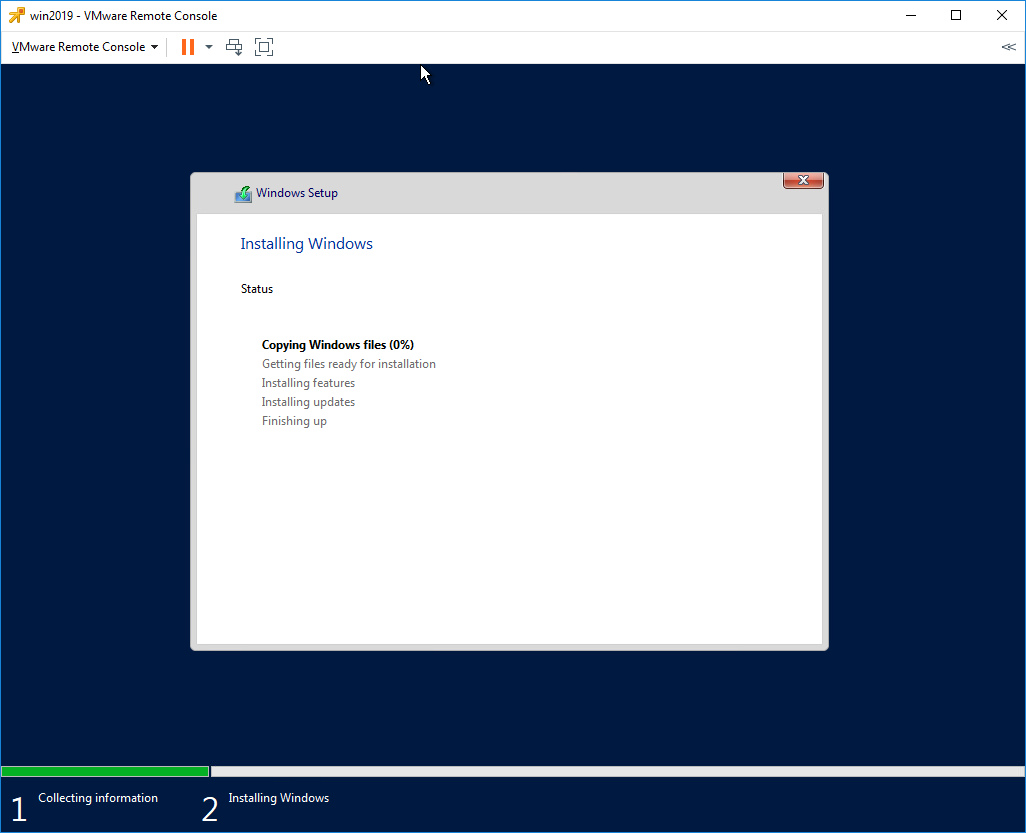
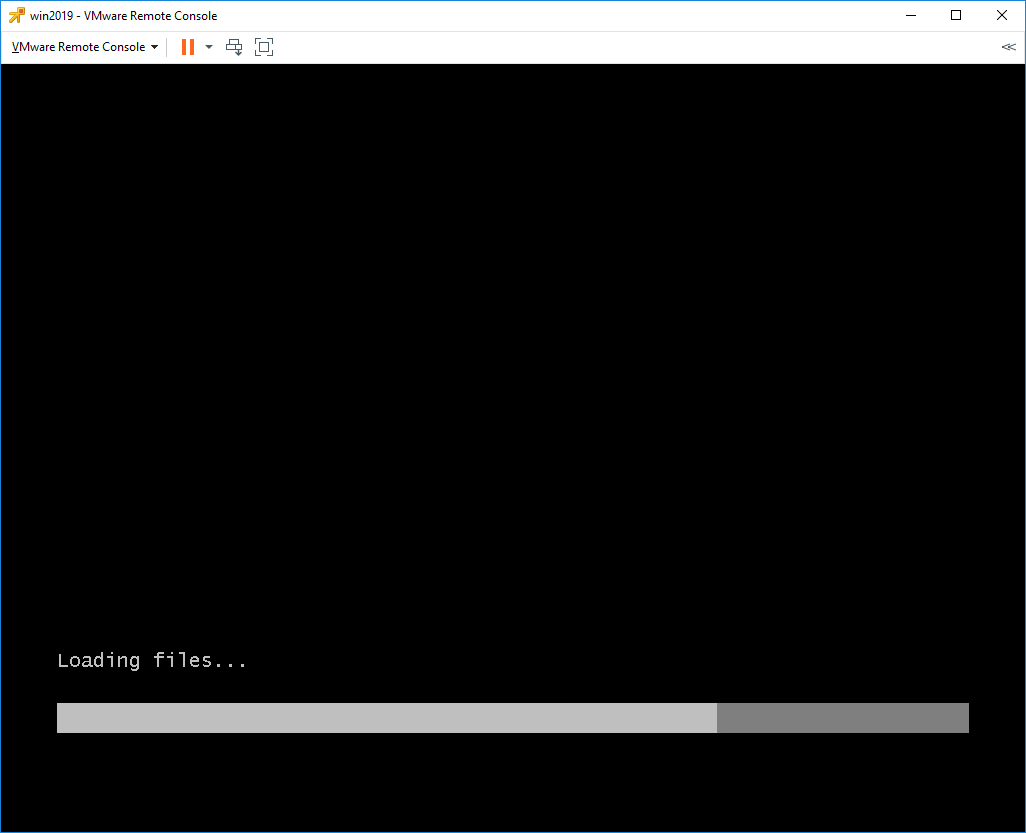
Откиньтесь на спинку кресла, начинают копироваться установочные файлы.
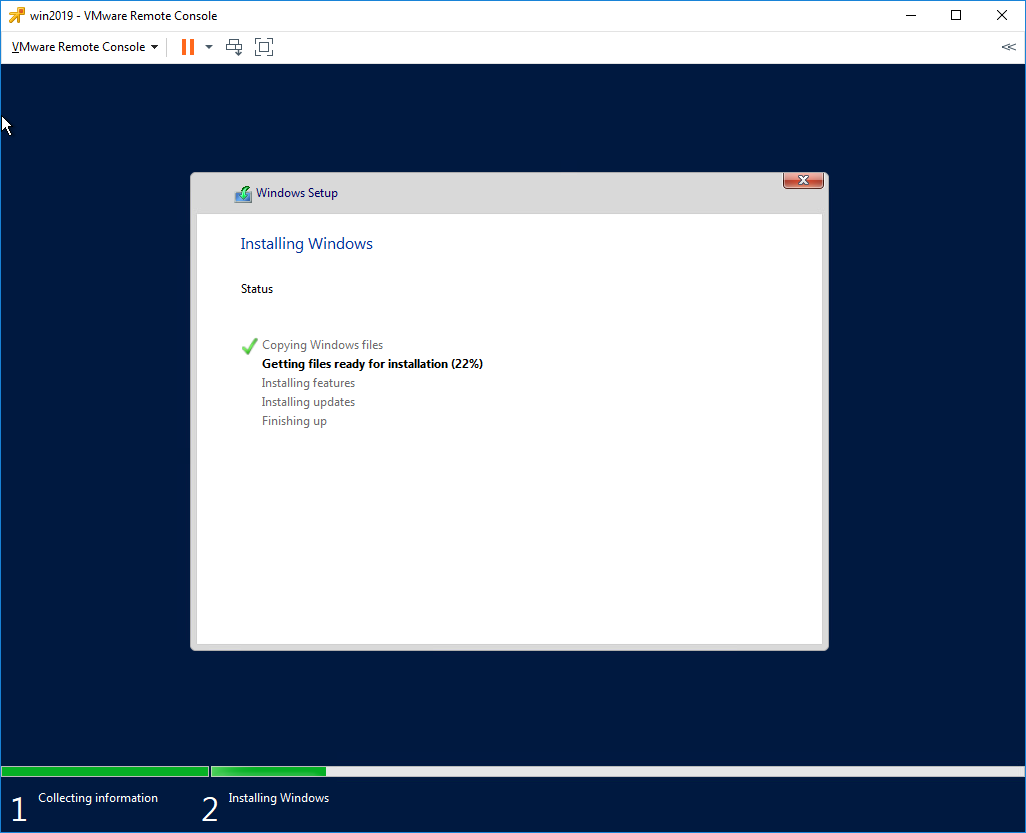
Идёт подготовка для установки Windows Server 2019.

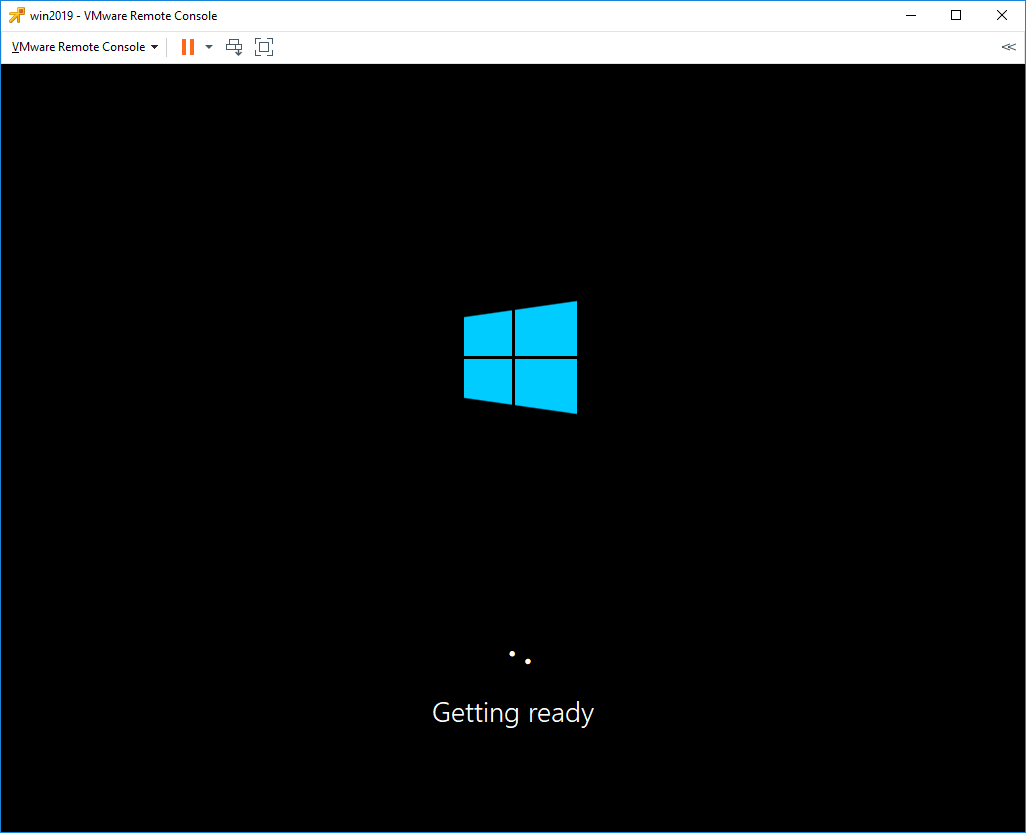
В процессе установки Windows может несколько раз перезагрузиться.

Нужно запастись терпением.
Открывается окно для установки пароля администратора.
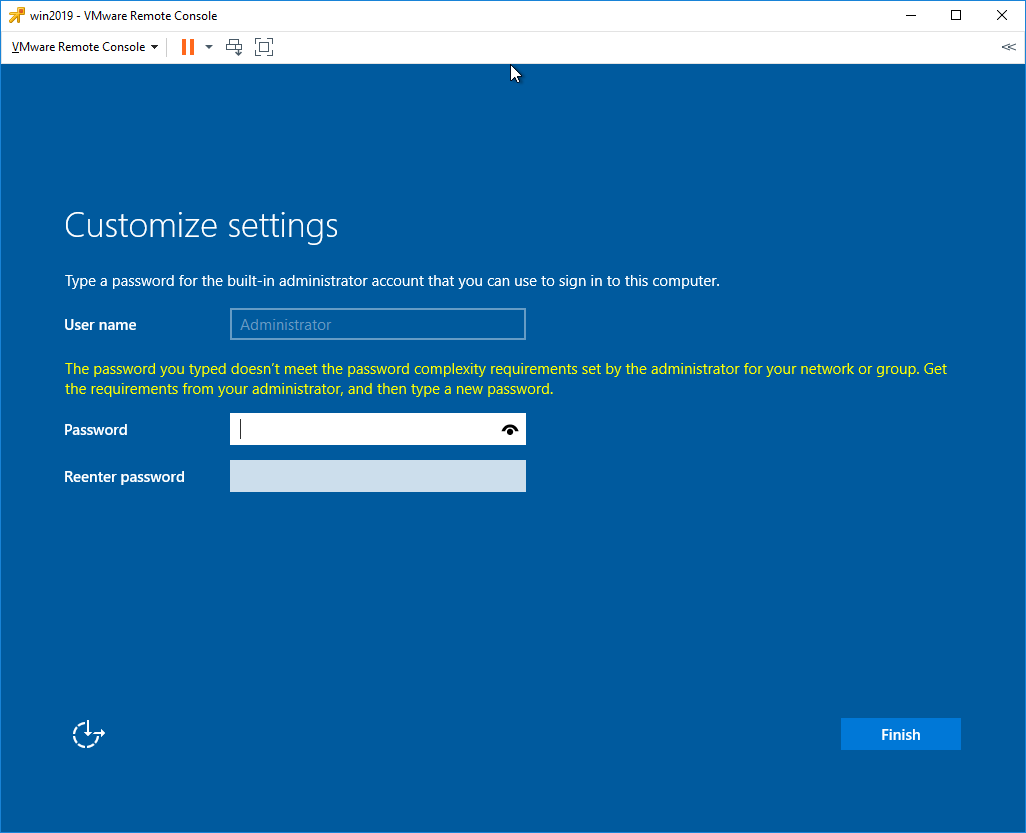
Требования к сложности пароля усилились. Два раза вводим пароль для администратора. Finish.
Первоначальная настройка завершена.
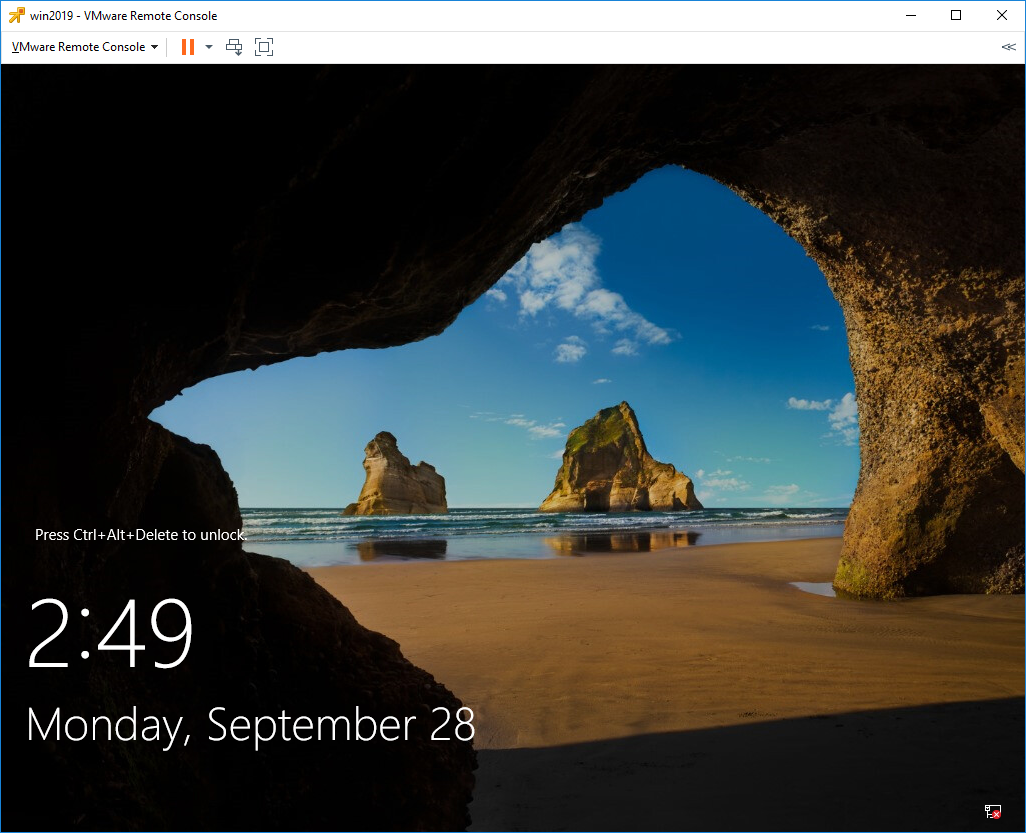
Для входа нужно нажать Ctrl+Alt+Del. Установка Windows Server 2019 завершена.

Windows Server 2022 Operating System builds on the existing Server 2019 and will become part of the long-term servicing channel program. Just like the predecessor “Windows Server 2019“, this operating system can also be installed locally without much focus on cloud integration. This allows classic (legacy) server roles such as WDS, DHCP, DNS, ADFS, Active Directory Domain Services (Domain Controller), and Internet Information Services (IIS) to be configured on the server. In this article, we shall learn how to install Windows Server 2022 on VMware Workstation.
This is a pre-release software. It is provided for use “as-is” and is not supported in production environments at the time of writing this article. Users are responsible for installing any updates made available from Windows Update.
If you would like to install Windows Server 2022 on a VirtualBox, please see the guide “How to install Windows Server 2019 on Virtualbox“. All you need is to select the Windows Server 2022 ISO instead of Windows Server 2019 ISO. What are the new capabilities in Windows Server 2022.
Windows Server 2022 Features and Installation
Windows Server 2022 brings a lot of innovations on IT security, portal integration, and Windows Containers support on Kubernetes. With the secured-core Server, the server should be protected at the hardware, firmware, and operating system level.
A Trusted Platform Module 2.0 is used for this. Also, see this guide on how to perform an in-place upgrade from Windows Server 2016 to Windows Server 2019. If you would like to install and test the features of Windows Server 2022, please follow the steps below.
There are various ways to create a New Virtual Machine on a VMware workstation. Launch the VMware console and on the menu, click on File and select New Virtual Machine.

VMware Workstation installation of Windows Server is pretty fast compared to VirtualBox. Select Typical and follow the installation steps as described below.

On the guest operating System window, please select the second option “Installer disk image file (iso) and browse to the location of your Windows Server 2022 Preview ISO. When selected, click on Next to continue.

In the next window, select next to continue. Currently, VMware have not updated the list of the various Windows Server versions. So I will be selecting Windows Server 2019.

Enter your desired Virtual machine name. Note: At this point, you can choose a different location to have your Virtual Machine files saved.

Enter your desired Maximum disk size and select how you would like your virtual disks to be saved. I selected the first option “Store virtual disk as a single file”.
See the following guides on how to perform Post OS Installation configuration of Windows Server 2019 Properties, how to install Windows Server 2016 Operating System, and how to install and configure Ubuntu Linux.
Specify the Disk capacity and the Virtual Disk Type

When you are done, click on Finish as shown in the figure below.

You may also want to see how to Install Windows 10 on VMware Workstation, The security database on the server does not have a computer account for this workstation trust relation [Part 1], How to extend a VM Hard Disk on VMware Workstation, and Taking ownership of a VM: How to fix this error.
Server Installation Activation
To proceed with the server installation, click on “Power on this Virtual Machine”. At this step, if you run into any issues relating to boot failure “EFI network timeout“.

This will launch the following windows below. In the Windows setup, select your desired input method, language to install and time format. When you are done, click on Next to continue.

Click on “Install now” to continue with the installation of Windows Server 2022.

Below, I entered I do not have a product key. Please refer to this link if you prefer unlimited activations

Below are the available Operation systems. Please select the one you would like to install. I will be installing Windows Server 2020 Datacenter (Desktop Experience) as shown in the figure below.

Accept the license Terms and click on next to continue

I will be selecting the Custom installation as I do not want to keep any existing settings.

You may also want to see how to fix VMware and HyperV are not compatible, and What Is the NTUSER.DAT File in Windows?
Format or create a new partition
I do not need to format or create a new partition. Therefore I will be selecting Next to continue.

Furthermore, As you can see below, Windows is currently being installed.

Enter your Password and click on Finish to complete your installation.

As you can see, the installation is complete. Now enter the newly created password


Note: Ensure you have VMware Tools installed after the setup of Windows server 2022 on VMware Workstation.

Let’s access Windows Server 2022 About (Properties). Launch the Windows Settings and click on Systems and then click on About as shown below.

Windows Server 2022 ISO can be downloaded as a preview. This requires a Microsoft account that is registered as a Windows Insider member. Refer to this guide for the Post OS Installation and configuration of Windows Server 2019 Properties (Configure TCP/IP Parameters). This hyperlink will guide you on configuring the Windows Server 2022 Properties such as TCP/IP.

I hope you found this blog post helpful. If you have any questions, please let me know in the comment session.
— Advertisement —
Microsoft is preparing the arrival of the new version of Windows Server. Naturally, it will be full of new features and special functions for users and administrators. The final version is not yet available. However, it is possible to access a preview from the Windows Insider program. In the following lines, we will see how to install Windows Server 2022 on VMware.
Some features of Windows Server 2022
- SMB Direct protocol over RMDA networks supports AES-256 encryption
- SMB 3.1.1 protocol adds enhanced security and performance capabilities
- AES-256-GCM and AES-256-CCM cryptographic suites are supported for all SMB encryption-related issues
- It is possible to copy files to SMB using compression with the Robocopy, compress, and Xcopy/compress commands.
- In this edition, the SMB Direct protocol over RMDA networks supports AES-256 encryption.
- Native management with Windows Admin Center
- AFS Tiering support preview function has been added. Therefore, it will help SMS with data migration tasks to a server configured with Azure File Sync.
Prerequisites
As mentioned, Windows Server 2022 is still in the testing phase. Consequently, it is possible to access it through the insider program. With this in mind, go to this link.

Please note that you need to register for the Windows Insider program. Don’t worry, it’s a simple and free process. You just need a Microsoft account. On the other hand, these versions are not yet stable enough to be used in a production environment. Therefore, it is advisable to use a virtualization program. In this opportunity VMware Workstation Player.
Installing Windows Server 2022 on VMware.
Creating the new virtual machine.
VMware is a very intuitive and easy to use program. Check out our tutorial. The first thing you have to do is click on Create a new virtual machine.

A wizard will be displayed immediately. Consequently, you must click on the ISO option. Next, browse to select the image.

As mentioned, it is necessary to locate the Windows Server 2022 ISO.

When you are ready, press Next.

In the next window, you have to set the operating system type. Accordingly, select Microsoft Windows Server.

Next, assign a name to the virtual machine. Also, set the location of it.

At this point, it is necessary to assign a virtual hard disk size.

Finally, the wizard provides a summary of the installation. In any case, you can customize the configuration:

Once there, you can customize several aspects. For example, the RAM memory allocated to the system.

If you are sure, press Finish to create the new virtual machine.

Running Windows Server 2022 virtual machine.
From the application menu, click on Play virtual machine.

Please press a key to boot from the ISO. Then the system installation will start.

In the next screen you set the installation parameters. I.e. language, time format and input method.

Then press Install to start the process.

Next, you need to enter a code to activate Windows Server. However, you can skip this step. It is possible to activate the system at a later time.

Next, select the version to install. It is recommended to choose a version with graphical environment.

Then, please accept the license terms.

Now please select the Windows installation option.

At this point, you must select the hard disk where you will install the system.

Finally, the installation will start. Therefore, you must wait while the necessary files are loaded. In addition, the services also start to be configured:


After a few moments, the wizard will prompt you to create an administrator password.

Now, enter the newly created password.

After a few seconds, we will see Windows Server 2022 correctly installed.

All right, we have finally seen how to install Windows Server 2022 on VMware. In subsequent installments we will see more tutorials on this operating system. See you later!
In today’s post, I’ll be showing you how to install Windows Server 2016 on VMware ESXi with Desktop Experience on an ESXi 6.5 U1 host managed by a vCSA 6.5 U1 instance. This step-by-step how-to install Windows Server 2016 on VMware vSphere guide is aimed at readers who have yet to install a Windows OS on a VMware hypervisor. For something a little bit more advanced in relation to installing Windows Server on VMware, you can take your pick from the complete list of published posts to date.
Windows Server Flavors and Requirements
Windows Server 2016 comes in 3 flavors; Server Core (no GUI), Server with Desktop Experience (with GUI) and Nano Server. The latter is Microsoft’s headless server, one that is completely managed remotely with no local logon capabilities making it a perfect solution cloud deployments. Nano server has recently been refactored to primarily support and run containers.
Windows Server 2016 also comes in 3 editions; Essentials, Standard, and Datacenter. Have a look at this link to learn how each edition differs from the rest.
As far as hardware requirements go, Microsoft’s documentation suggests the following.
-
- Processor: 1.4 GHz 64-bit. The CPU must support NX, DEP, CMPXCHG16b, LAHF/SAHF, PrefetchW and second-level address translation.
-
- RAM: 512MB or 2GB for a Desktop Experience installation. 800 MB is the required minimum when installing Windows Server 2016 as a VM.
-
- Storage: 32GB absolute minimum
-
- NIC: 1 Gigabit
As often is the case, the minimum hardware requirements quoted by Microsoft rarely come close to mirror what’s actually needed to run production boxes. With that in mind, consider increasing the resources allocated in accordance with the role(s) assigned to the server and its anticipated workload.
Some optional requirements are;
-
- UEFI firmware to support secure boot where applicable.
-
- Trusted Platform Module (TPM) capabilities to enable encryption features such as BitLocker.
Creating the base VM
I’ll be using the new vSphere client (HTML5) to create the base VM. Here are the steps.
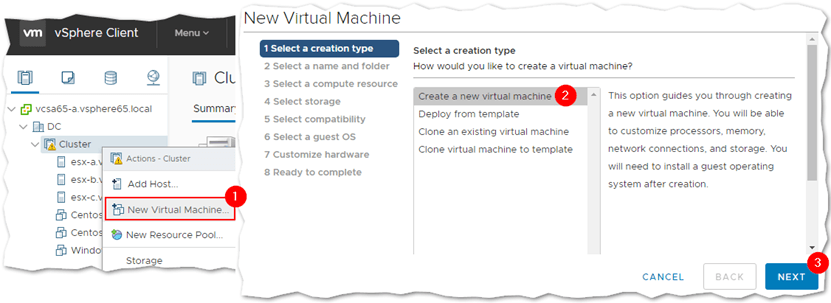
Step 1 – Right-click on a cluster, or host, and select New Virtual Machine (1). Select Create a new virtual machine (2) from the wizard. Click Next.
Step 2 – Type in a name for the virtual machine (1) and select a location (2), such as a datacenter, where you want it installed. The Windows folder shown is something I created.

Step 3 – Select the ESXi host where the VM will be deployed to. In the example, I selected a DRS enabled cluster (1) so placement is done automatically.

Step 4 – Select a datastore (2) where the VM will be created. If you’re using storage policies, make sure to select the correct one from the VM Storage Policy drop-down box (1).

Step 5 – Select the correct compatibility mode according to the ESXi version installed. In my case, I’ve selected ESXi 6.5 or later.

Step 6 – Select Microsoft Windows Server 2016 (64bit) guest OS Family and Version types. If you’re running this on older versions of ESXi, select Microsoft Windows Server 2012 (64 bit) instead.

Step 7 – For the hardware requirements, I’m sticking with the values suggested to me by the wizard. The only hardware settings I changed are the ones for the SCSI controller, which I set to VMWare Paravirtual, and the vNIC driver which I set to vmxnet3. This should improve the overall performance of the virtual machine. I also set the VMDK type to thin since I’m a bit short on storage space.

To use the Secure Boot feature, change the BIOS firmware setting to EFI by navigating to Boot Options -> Firmware under the VM Options tab.

Step 8 – Review the configuration and press Finish to create the VM.

Installing Windows Server 2016
Now that the VM has been created, it’s time to install the guest OS. For this task, I’ll be using the Remote Console client as I find it easier to use when mounting ISOs on VMs and such.
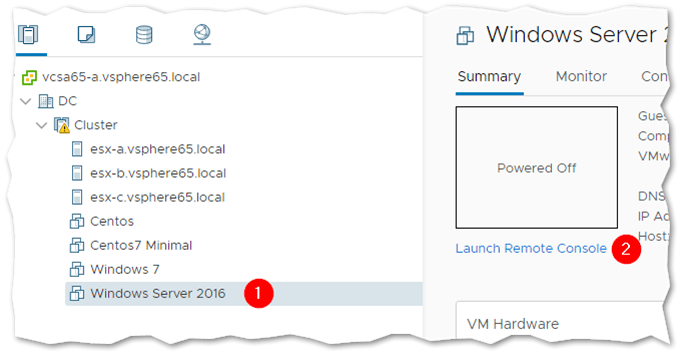
Step 1 – Highlight the VM just created and click on Launch Remote Console link.
Step 2 – Power up the VM and select Connect to Disk Image File (iso) from the VMRC -> Removable Devices -> CD/DVD drive 1. Navigate to the folder containing the Windows Server 2016 ISO image and select it.

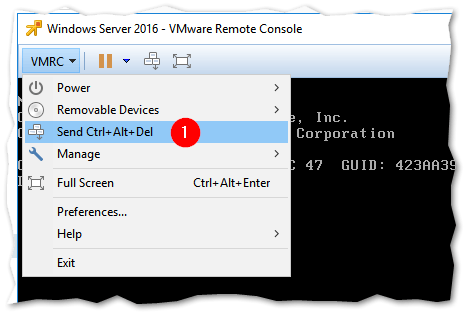
Step 3 – Select Send Ctrl+Alt+Del from the VMRC drop-down menu. You should see the Windows installer booting up.
Step 4 – Select the language and localization settings matching your time zone and country and click Next.

Step 5 – Click on Install now to kick off the installation.

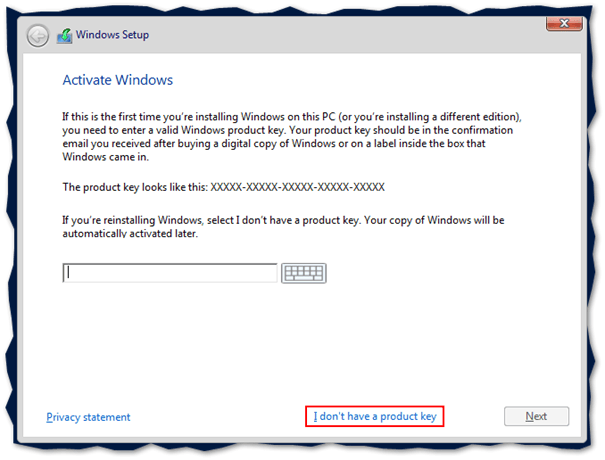
Step 6 – Type in the product key, if you have one, and press Next. If you don’t, just click on the I don’t have a product key link to install Windows Server in evaluation mode.
Step 7 – Select the Windows Server edition and deployment type. For this example, I’ve selected Windows Server 2016 Standard (Desktop Experience). Press Next.

Step 8 – Accept the license terms by ticking on the option at the bottom and press Next.

Step 9 – Select Custom: Install Windows only (advanced)

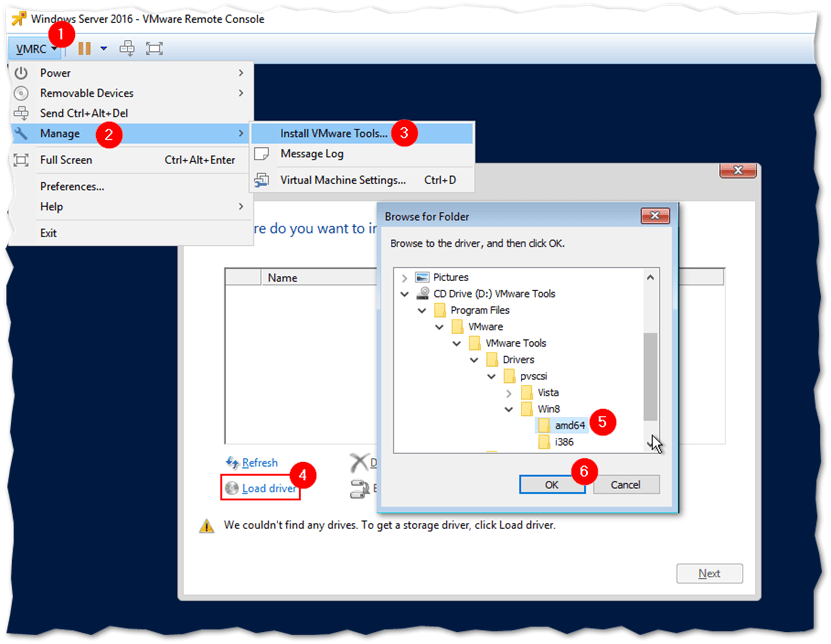
Step 10a – At this point on how to install Windows Server 2016 on VMware vSphere, I must mount the vmtools ISO image since I selected VMware Paravirtual as the SCSI controller. This step is not required if you stick by the default setting (LSI Logic SAS). To this, we simply select Install VMware Tools from VMRC -> Manage. This will mount the corresponding ISO image on the VM. Once you do, click on Load driver, select the CD drive labelled VMware Tools and drill down to the /Program Files/VMware/VMware Tools/Drivers/pvscsi/Win8/amd64 folder as shown next.
Step 10b – The VMware PVSCSI Controller driver is automatically selected for you. Click Next to continue.

Step 11 – If you see Drive 0 Unallocated Space listed, it means that the paravirtual driver has correctly detected the VMDK specified for the VM.
Before pressing Next, disconnect the VMware Tools ISO image and reconnect the one for Windows Server 2016. You won’t be able to proceed with the process of installing Windows Server on VMware unless you do this.

Once you reconnect the Windows Server ISO, press Refresh and make sure that the Windows can’t be installed … at the bottom clears. Press Next to use the entire disk for the Windows Server installation.

Step 12 – Wait for the installation of Windows to finish.

Step 13 – Set a password for the administrator account and press Finish.

Step 14 – Log in and install the VMware Tools. Disconnect the Windows Server ISO image as described and mount the VMware Tools ISO image still using the VMware Remote Console client (VMRC -> Manage -> Install VMware Tools). Click on the mounted DVD Drive or taskbar notification to run the vmtools installer. Follow the instructions and reboot the VM when done.

Congratulations! You now have Windows Server 2016 with Desktop Experience running on VMware. For production environments, you should go for the Server Core version for better performance and improved security. Also, note that the steps covered today apply to installing Windows Server 2016 on both physical ESXi hosts as well as nested ones. If you wish to learn how to set up a nested vSphere environment, have a look at this post.
What to do next?
Although these were easy steps, they were rather time-consuming, especially if you deploy several VMs a week. This is why installing Windows Server in a VM is usually done with the aim to convert it to a template afterwards. That way you can simply deploy a new VM from the template and ensure consistency in terms of custom configuration and installed applications.
Once you’ve installed Windows Server and the VMware Tools, it is usually a good measure to set whatever settings you want across the board when deploying a new VM.
A lot of these can be done via GPO or deployment tools but you may get the odd change you want to be done locally. For instance:
-
- Add a specific local user
-
- Add specific user in the remote desktop group
-
- Install agents for monitoring, backup, antivirus…
-
- Install tools such as BGInfo
-
- Run Windows Update and clean up files
-
- …
You can find interesting resources on how to prep a Windows environment with the VMware OS Optimization Tool that is used for Horizon Desktops.
Conclusion
Note that the steps on how to install Windows Server 2016 on VMware ESXi covered today also apply to installing Windows Server 2016 on both physical ESXi hosts as well as nested ones.
Installing Microsoft Windows Server 2016 on a virtual machine hosted on VMware ESXi is straightforward if you follow our steps and perform the operations explained above with illustrations.
The illustrated practices show how you can build a virtual machine for Windows hosted by VMware ESXi.
It is a fantastic opportunity for anyone willing to get started with virtualization.
If you wish to learn how to set up a nested vSphere environment, have a look at this post.
The magic dcpromo command that we used during the installation of Active Directory Domain Services in Windows Server 2003, Windows Server 2008 and Windows Server 2008 R2 is now out of our lives with Windows Server 2012.
When you run this command on Windows Server 2012, Windows Server 2012 R2, Windows Server 2016 and Windows Server 2019, you get the following error.

Before proceeding with the installation and configuration of the Active Directory Domain Services role, we do the following steps.
- Editing the Computer Name of our server.
- IP Address configuration on our server
Do not lower your security standards by using Windows Server updates and configuring the recommended security settings using a weak AD administrator password.
Some new features in Windows Server 2019
With Server 2019, Azure Backup plans to significantly improve File Sync features such as computing, storage and network connections that will make it easier to connect to Microsoft Cloud services for disaster recovery situations.
Microsoft plans to reduce the size of the Server core image to 5 GB. Windows Admin Center full compatibility. Windows Defender Advanced Threat Protection. Extended Sets with Cluster Sets. Windows Defender ATP Exploit Protection. Protected VM: Offline Mode, VMConnect and Protected Linux support. Performance history for Direct Storage Spaces.
Setting the server name
The first thing we need to do after the server is installed is to change its name and IP address. While giving the IP address, we take care to give an empty IP address outside the DHCP pool.
We edit the Computer Name of our server as follows.

Setting a STATIC IP address
After editing the Computer Name of our server, we make the Internet Protocol Version 4 (TCP / IPv4) configuration. We write the IP Address of our server in the “Preferred DNS server” section. Together with Active Directory Domain Services, we configure it in this way as our server will operate as a Domain Name Server (DNS) Server in the environment. Every server that acts as a Server in your environment should always have an IP Address.
We follow the picture below to configure the computer network settings.

Aşağıdaki sayfada “Adaptör seçeneklerini değiştir” i tıklıyoruz.

Following the steps on the following page, “We enter the IP address and DNS. Since the DNS address is itself, we enter the same IP address.

Installing Windows Server 2019 Domain
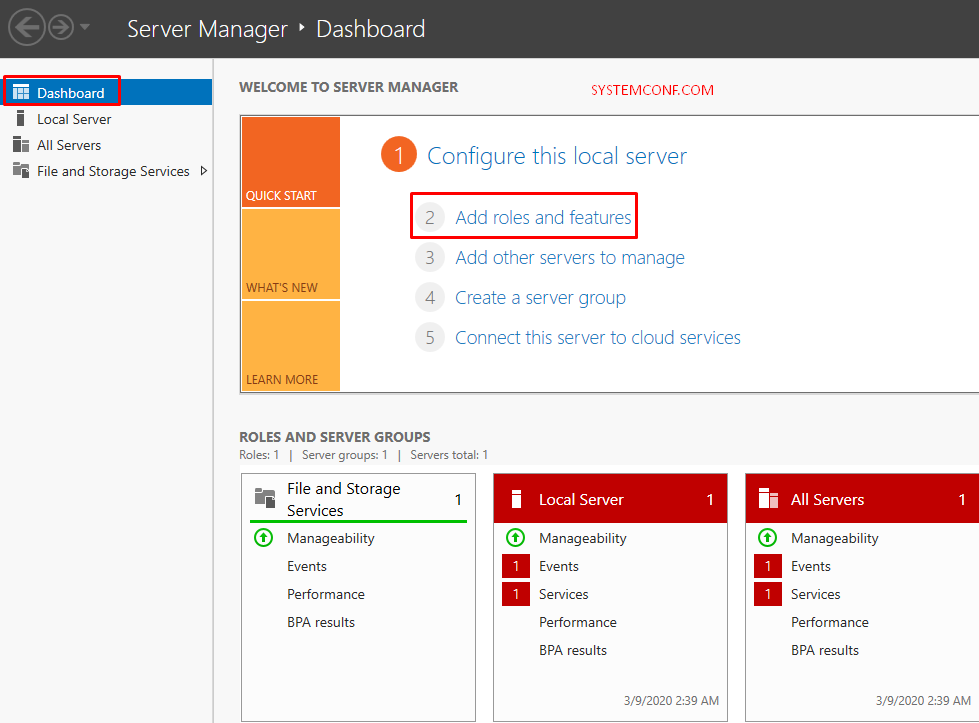
After completing the necessary configuration on our server, we open the “Server Manager” console.
We click “Add Roles and Features” on the “Dashboard” screen. If you wish, we can open the “Add Roles and Features” wizard with the “Manage” menu in the upper right corner.
On the “Before You Begin” screen, we continue by saying “Next” to install and configure “Active Directory Domain Services Roles”.

The “Role-based or feature-based installation” option on the “Select Installation Type” screen is the option that we install and configure. Roles and Features that we need on Windows Server 2019 can be installed and configured with this option.
“Remote Desktop Services installation” option You can do Remote Desktop Services (RDS) Remote Desktop installation and configuration with this option, which is formerly known as Terminal Service (TS).
Since we will configure the Active Directory Domain Services role on the “Select Installation Type” screen, we continue by saying “Next” with the “Role-based or features-based Installation” option.

On the “Select destination server” screen, we need to select the server on which server it will be installed. Since we will configure the “Active Directory Domain Services” role on ADSRV, we select this server and continue to configure it by saying Next.

In the “Select server roles” screen, we mark the “Active Directory Domain Services” role as we will configure it by installing the “Active Directory Domain Services” role on our server.

When we select the “Active Directory Domain Services” role, we see the “Add Roles and Features Wizard” screen. We continue by saying “Add Required Features” to continue the installation and configuration of “Group Policy Management” and “Remote Administration Tools” roles along with the role of “Active Directory Domain Services“.

Since the “Select server roles” screen is ready to install and configure the “Active Directory Domain Services” role on our server, we continue by saying “Next“.

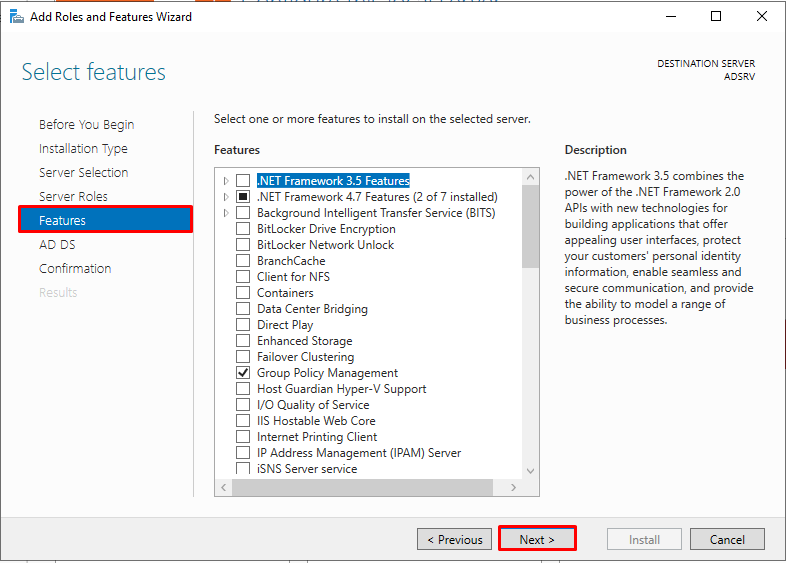
In the “Select features” screen, we see the Features that we can install on our server. When we selected the Active Directory Domain Services role, we permitted to install the Active Directory Module for Windows Powershell, Active Directory Administrative Center, AD DS Snap-Ins and Command Line Tools Features, which are required under the Group Policy Management and Remote Administration Tools required for the Active Directory Domain Services role. For this reason, we will not choose any Features of the Select features screen.
We continue by saying “Next” on the “Select features” screen without selecting anything.
The “Active Directory Domain Services” screen appears this screen is one of the innovations we came across with Windows Server 2016. Here, we can enable the “Active Directory Domain Services” role that we will configure with “Configure Office 365 with Azure Active Directory Connect” option to work with “Office 365” and “Azure Cloud” Platform. We continue by saying “Next” on this screen.

Here is a summary of our choices up to now on the “Confirm installation selections” screen. Let’s start the installation by selecting “Install“.

In the “Installation progress” screen, we see that the Active Directory Domain Services role and other features have been installed. Let’s continue by choosing “Close”.


Installation progress
We also see that the “Active Directory Domain Services” role has been installed and needs to be configured on the Server Manager.

We have three options on the Deployment Configuration screen.
Add a domain to an existing domain: We need to select this option to configure a new Domain Controller within our existing Forest structure. So when we make an Additional Domain Controller configuration to our environment, we tick this option.
Add a new domain to an existing forest: We need to select this option to configure a new Domain within our existing Forest structure. In other words, there is a Domain named systemconf.local in our existing Forest structure and we mark this option when we are going to configure another Domain named systemconf.local in this Forest structure.
Add a new forest: We mark this option when we will make a new Forest and Domain configuration to our environment. In other words, if there is no Domain Controller structure in our environment, we continue with this option.

We mark the “Add a new forest” option as we will establish and configure a new Domain structure in a new Forest for our environment. We write the Domain Name that we will configure in the “Root domain name” section and continue by saying “Next”.

On the “Domain Controller Options” screen, “Forest functional level” and “Domain functional level” levels were the same as the current version. However, Windows Server 2016 Forest functional level and Domain functional level levels are used on Windows Server 2019.
In the “Specify domain controller capabilities” section, Domain Name System (DNS) Server has a similar hierarchical naming structure that can be presented as both Active Directory and DNS, both Active Directory objects and DNS domains and resource records. As a result of this integration, computers on the Windows Server Network use DNS Servers to locate computers running certain services that are specific to Active Directory. Windows Server requires pre-creating the DNS infrastructure of the Domain to be created before installing the Active Directory organization. If the DNS infrastructure of the Domain to be created is not prepared before the installation, the DNS infrastructure can be installed during the installation.
Global Catalog (GC): Global Catalog is the information store that carries a subset of the properties of all objects in Active Directory. These hosted features, by default, are the most commonly used features during queries.
Read-Only Domain Controller (RODC): It is the feature that comes with Windows Server 2008. Read-Only Domain Controller (RODC) has a different structure than Active Directory Domain Services servers. It is precisely a type of Domain Controller that hosts the Active Directory database but does not have the right to write to the database.
Directory Services Restore Mode (DSRM) password: This is the special method we use to return Active Directory backup in Microsoft Domain environments. To use Directory Services Restore Mode (DSRM), you need to select the directory services to restore mode section by pressing the F8 key while your computer or server is starting up.
In the Domain Controller Options screen, we are writing Complex Password that we will use for Active Directory Restore Mode in the password section without making any changes in the Specify domain controller capabilities section. We continue by saying “Next”.
NOTE: You can change the password you set for Directory Services Restore Mode (DSRM) later.

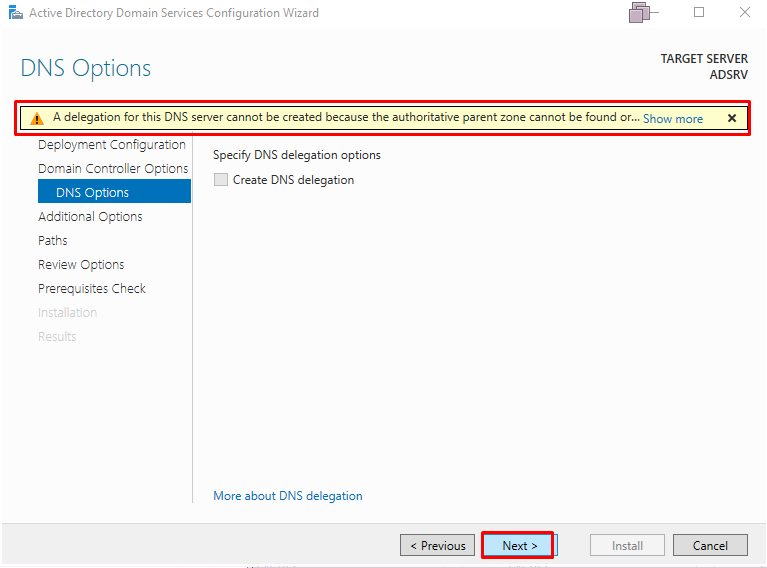
In the “DNS Options” screen, if we already have a DNS Server structure on our server, a Delegation assignment can be made to our newly established DNS Server server on the existing DNS Zone. We do not make any selection on the “DNS Options” screen, we continue by saying “Next”.
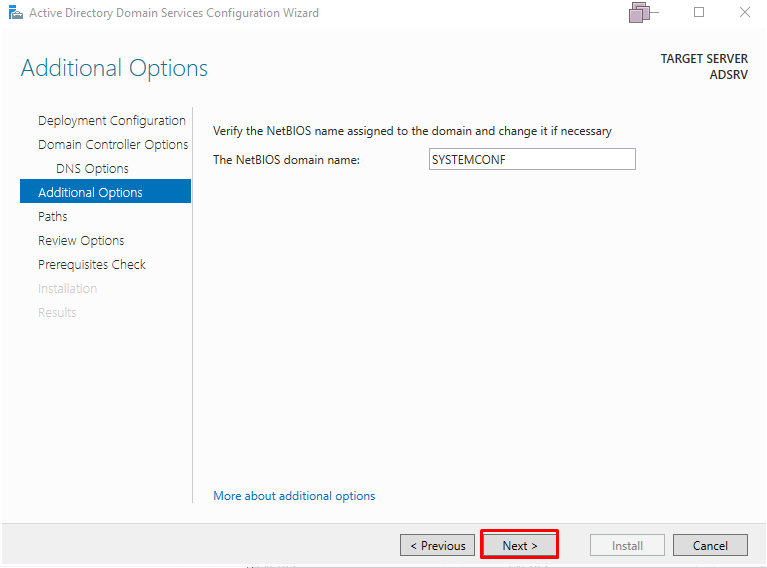
In the “Additional Options” screen, we see the name NETBIOS name that we will use for the Domain structure. We continue by saying Next.
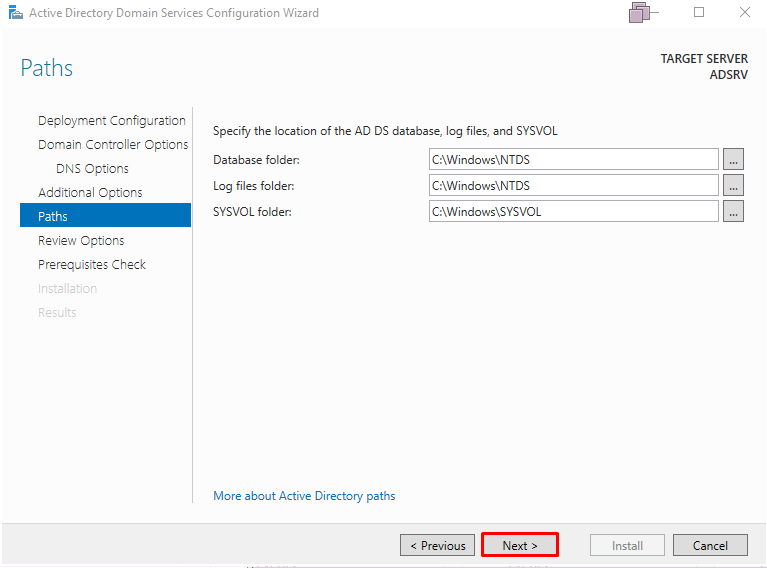
In the “Paths” screen, we determine the directories where our Active Directory Domain Services structure will be installed in the Database folder, Log files folder and SYSVOL folder. We do not make any changes to the default directories on the Paths screen and continue by saying “Next”.
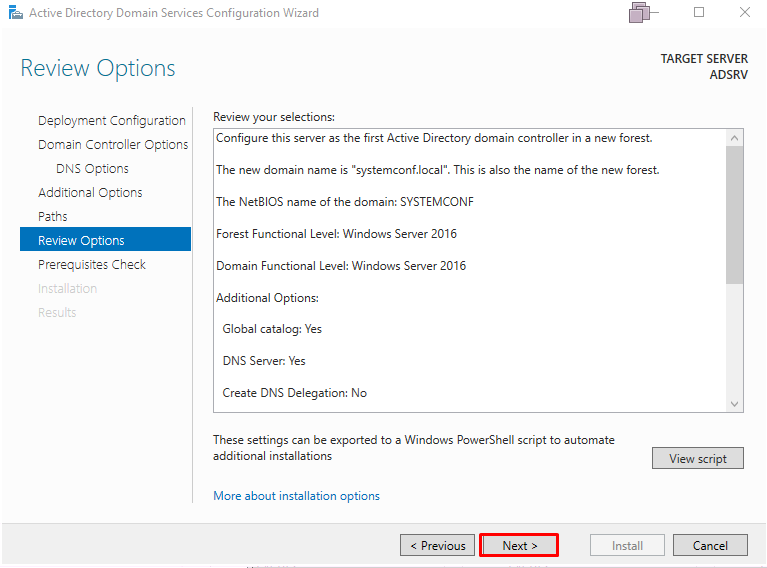
On the “Review Options” screen we see a list of the options we made during the configuration of the Active Directory Domain Services role. By clicking the “View Script” section, we can install the configuration we made for the role of Active Directory Domain Services as the “PowerShell” command.
We continue by saying “Next” to configure the Active Directory Domain Services role in the “Review Options” screen.
The “Prerequisities Check” screen will also check for the role of Active Directory Domain Services on our Windows Server 2019 server to check for any problems or deficiencies. When the necessary checks for the Active Directory Domain Services role are completed, “All Prerequisite check passed successfully. Click” Install “to begin installation”. We see the message. We can start the installation by saying “Install”

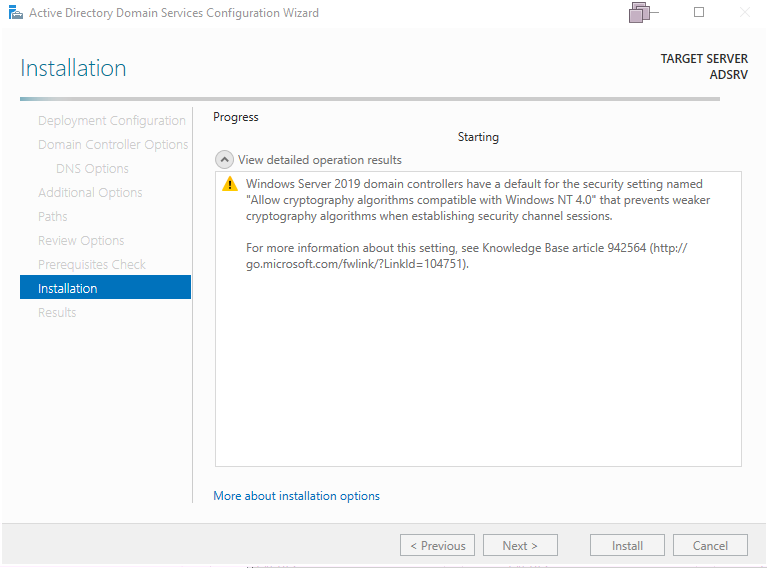
We see that the configuration of the Active Directory Domain Services role on the “Installation” screen has started on our server.
Configuration of the Active Directory Domain Services role on our server is completed. We get the information that our presentation will be restart.
After our server is restarted, we see that Active Directory Domain Services (AD DS) and Domain Name Server (DNS) roles come to the Server Manager console.
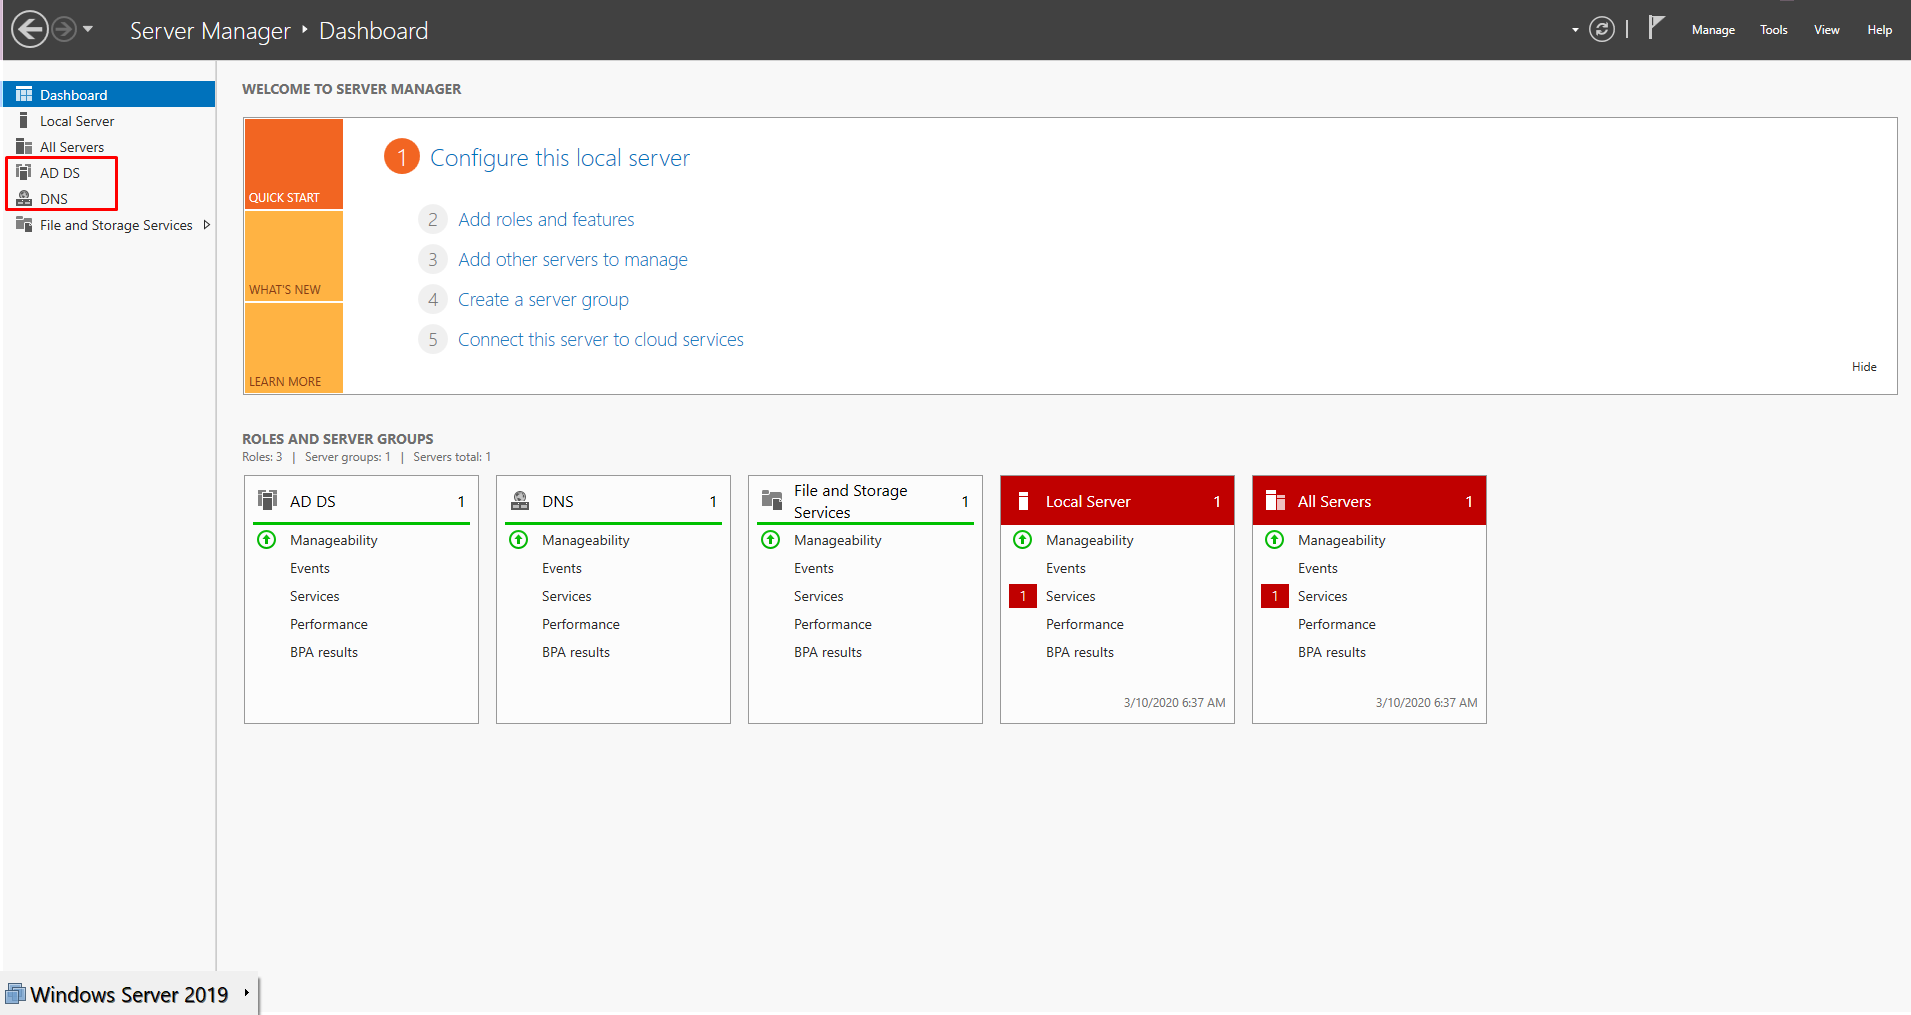
We see consoles related to the role of “Active Directory Domain Services” under “Administrative Tools“.
