
![]()
VMware Tools — бесплатный набор утилит для улучшения взаимодействия виртуальной машины и платформы VMware. Если у вас Windows Server, то рекомендую установить VMware Tools для смены сетевой карты на vmxnet3, меньше глюков. Как показала практика, другие сетевые карты работают не очень стабильно.
Про сбой сети на виртуальной машине Windows Server 2012 R2 в среде VMware можно почитать здесь.
Про установку VMware Tools на Ubuntu можно почитать здесь.
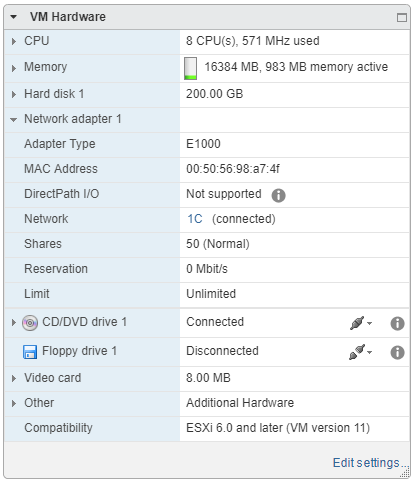
Стандартный тип сетевого адаптера в vCenter 6.0: E1000.
После долгой эксплуатации на сервере начинаются проблемы — неожиданно пропадает сеть, хотя ОС показывает, что всё в порядке. Но пинги не идут. Помогает disable-enable сетевого адаптера, но для этого необходимо войти на сервер через консоль VMware. Также иногда помогает смена vlan сети, но не всегда. Если заменить сетевой адаптер на vmxnet3 никак нельзя, можно написать простой скрипт, который будет пинговать контроллер домена, и если шлюз недоступен, то передёргивать сеть на сервере.
Проще изменить сетевой адаптер на vmxnet3. Но для этого необходимо установить VMware Tools, что мы и будем делать.
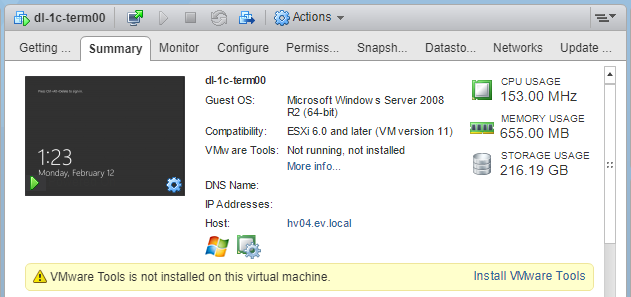
vCenter показывает, если на сервере не стоит утилита:
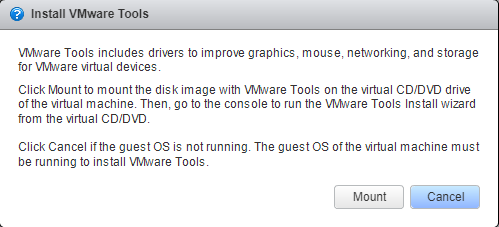
Кликаем Install VMware Tools. vCenter переспрашивает, действительно ли мы хотим примаунтить инсталляционный диск. Соглашаемся.
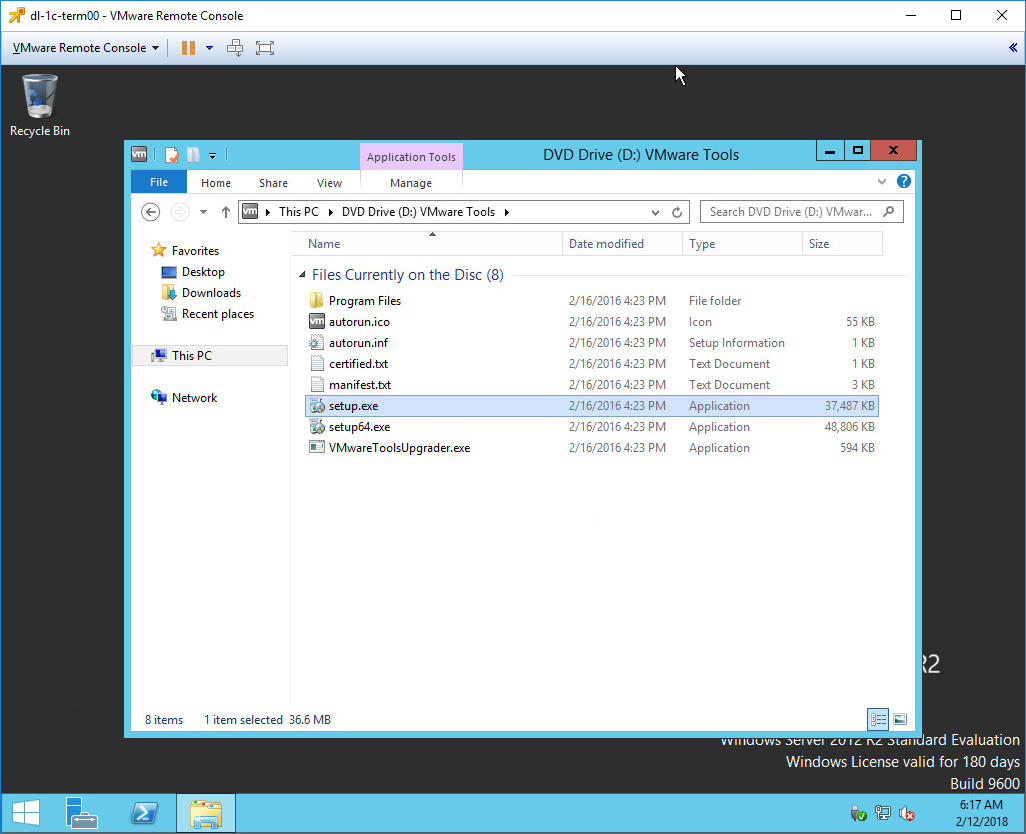
На виртуальном сервере появляется новый диск.
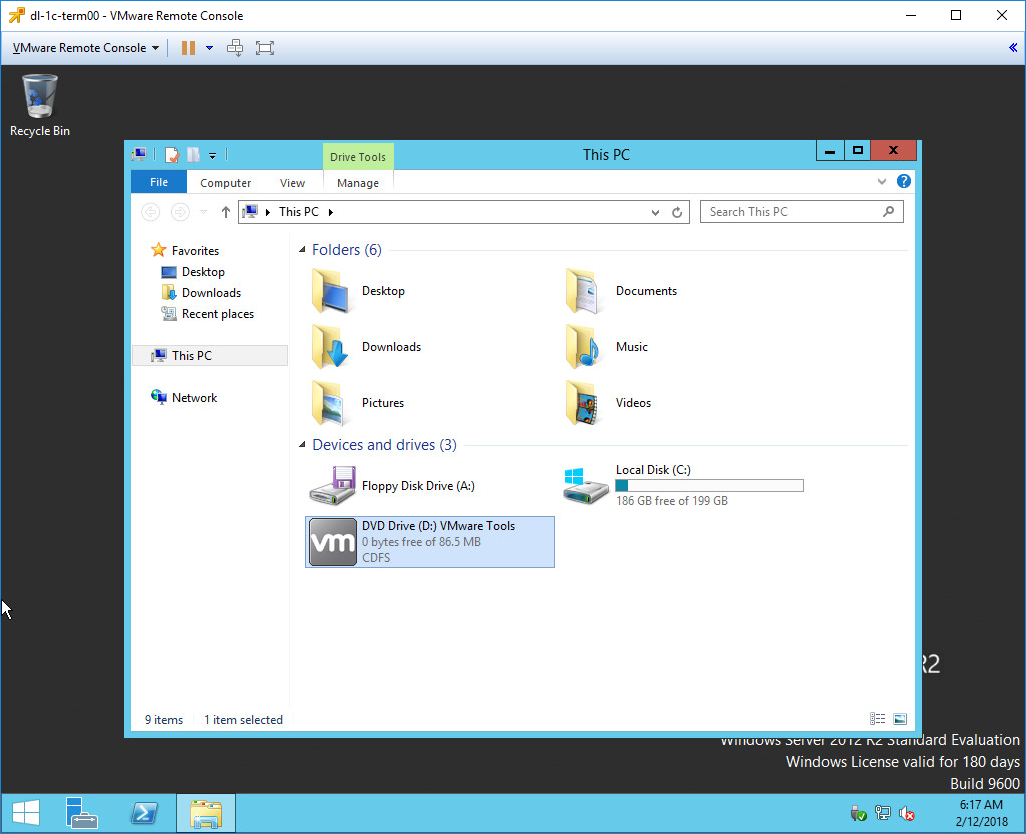
Раскрываем диск и запускаем setup.exe.
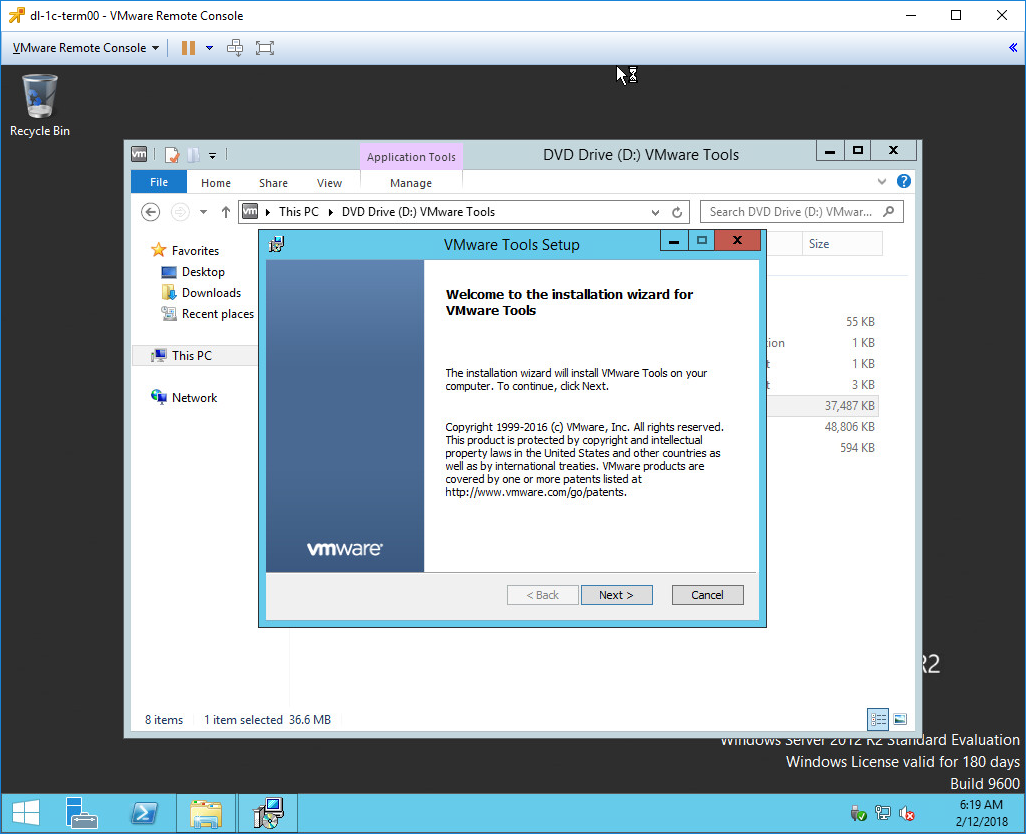
Запускается инсталлятор, нажимаем Next.
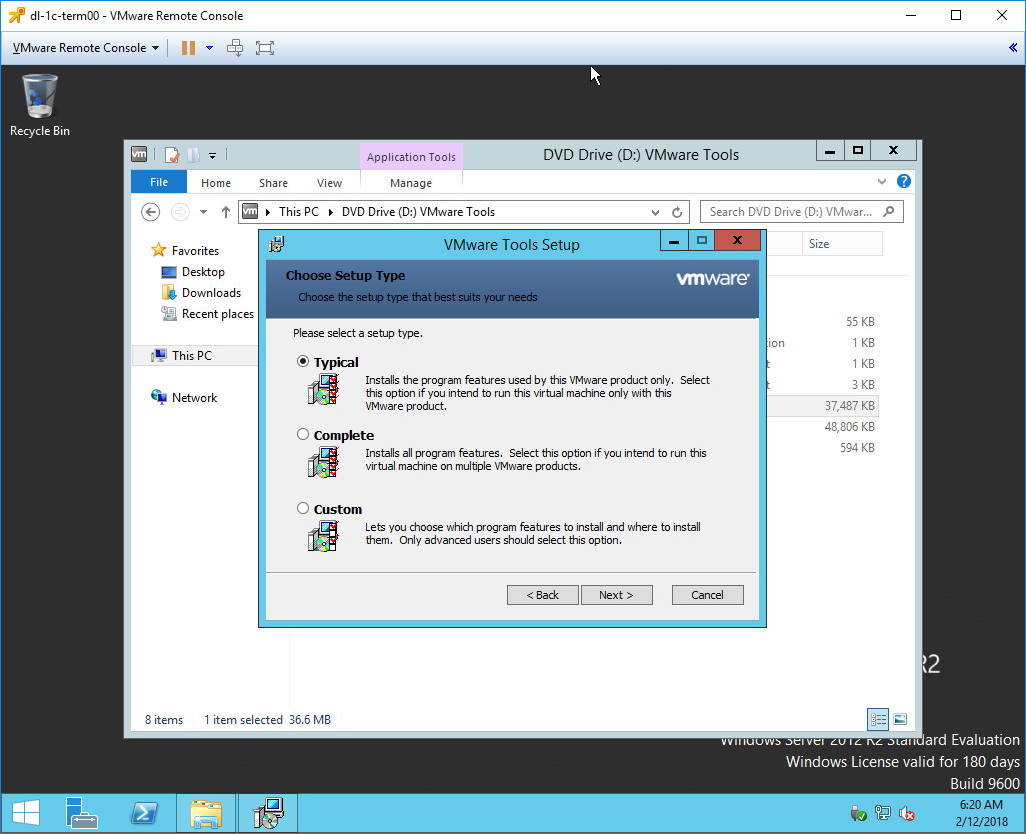
Выбираем тип установки. Я выбираю Typical — меньше телодвижений. Кастомизация в данном случае меня не интересует, но вы можете при желании выбрать другие типы установки.
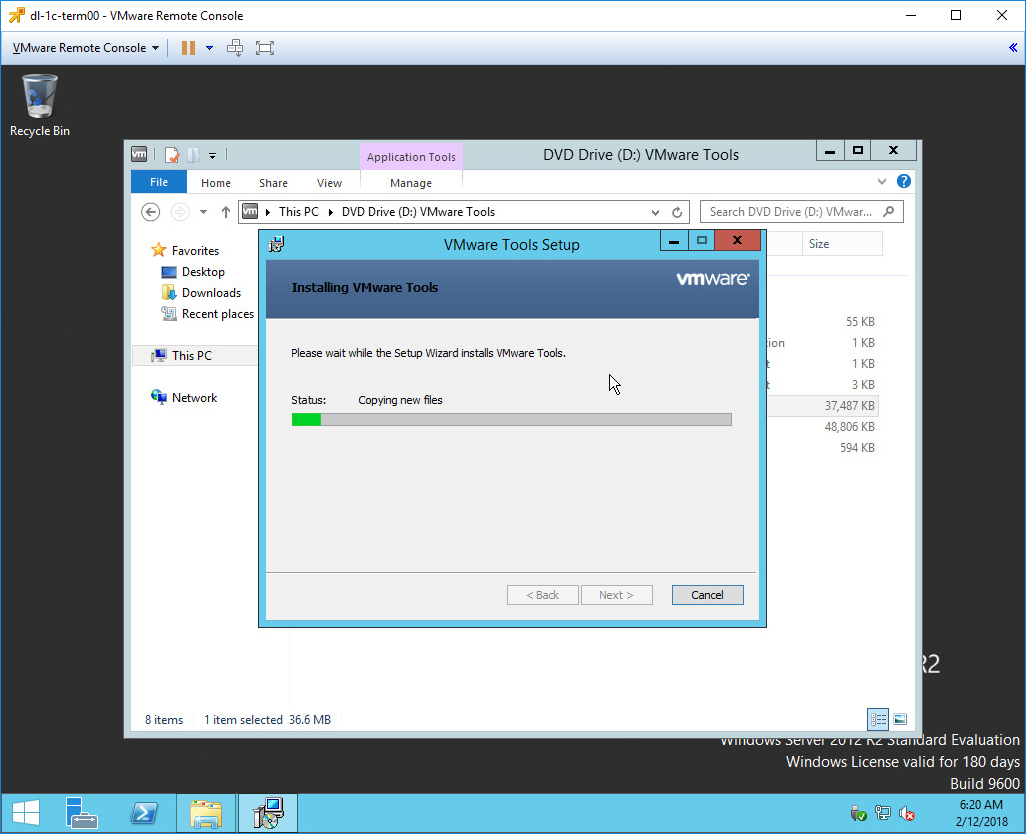
Начинается процесс установки.
После окончания установки мы видим экран Completed the VMware Tools Setup Wizard.
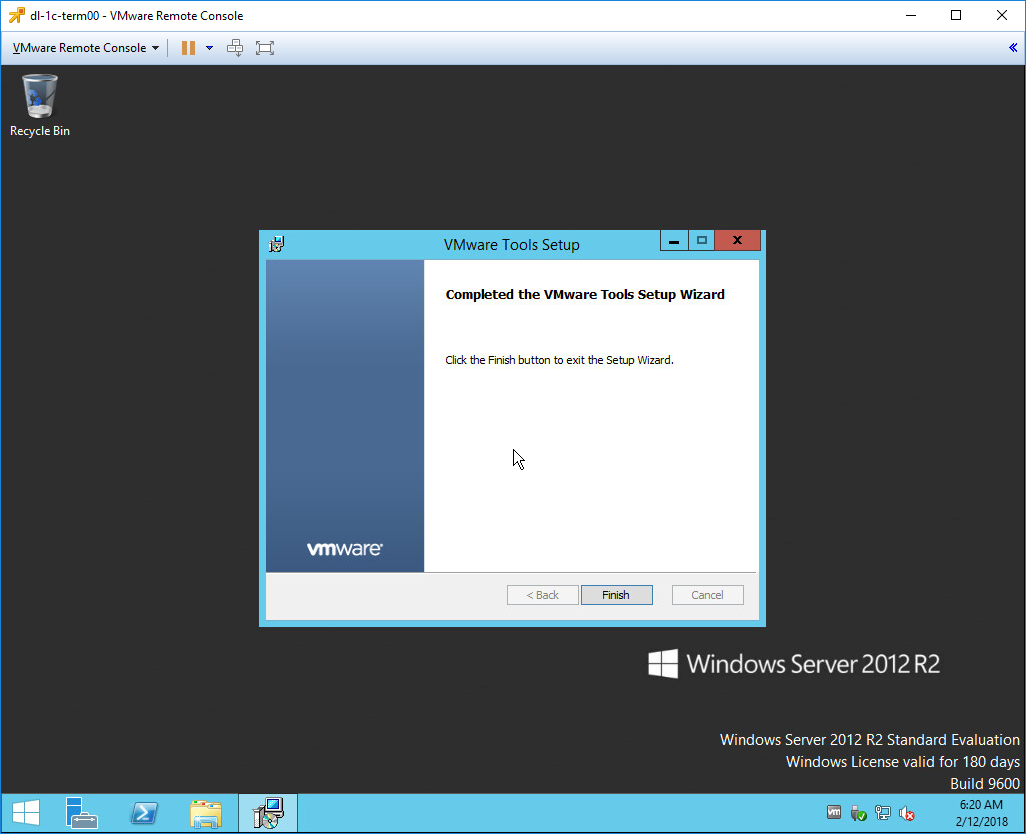
После нажатия на Finish инсталлятор попросит перезагрузку.
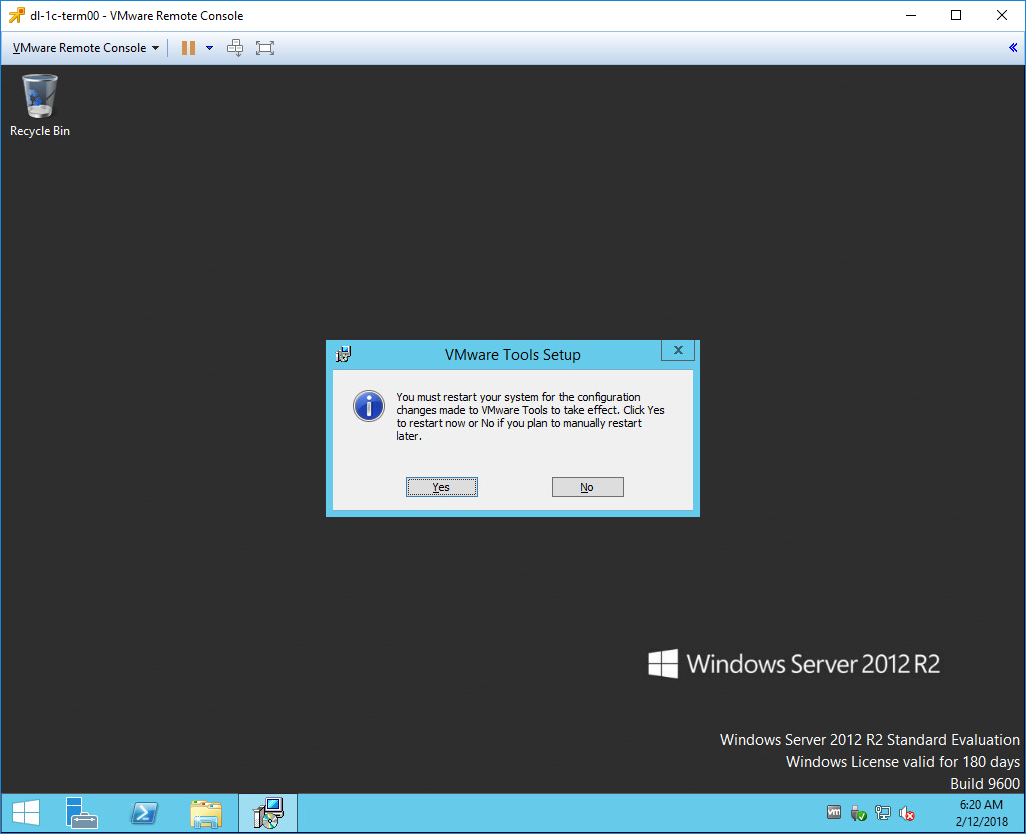
На этом установка VMware Tools на Windows Server 2012 R2 завершена.
Здравствуйте, дорогие читатели. Сегодня мы займемся установкой операционной системы Windows Server 2012 R2 на эмуляторе виртуальных машин VMware Workstation 9 или 10 версии. Для начала необходимо скачать архив самой ОС. Архив должен быть в формате ISO (.iso). После скачивания операционной системы запускаем VMware.
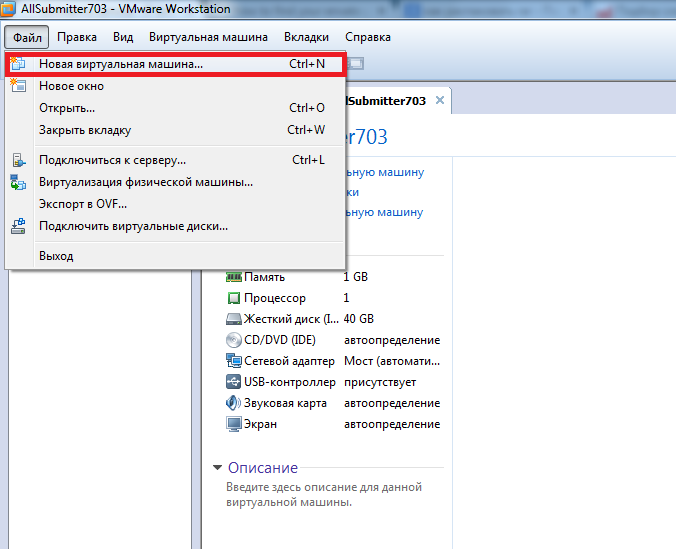
После запуска заходим в меню Файл — Новая виртуальная машина (или в программе нажимаем комбинацию клавиш CTRL+N).
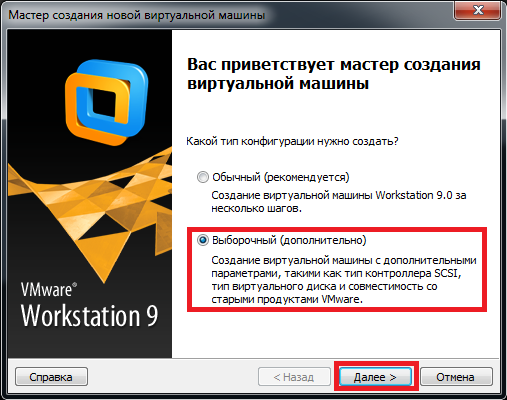
Программа спросит какой тип конфигурации необходимо создать, необходимо выбрать Выборочный (дополнительно) и нажать кнопку далее.
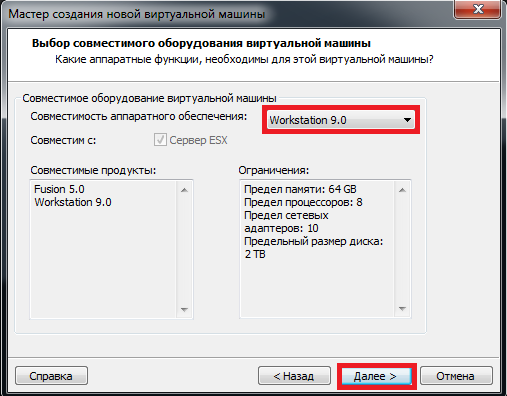
В совместимости аппаратного обеспечения выбираем Workstation 9 и нажимаем Далее.
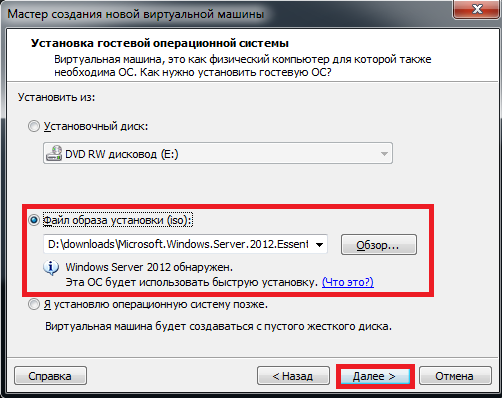
Указываем место расположения нашего файла-образа (скачанный образ Windows Server 2012) если образ находится на DVD диске выбираем 1-й пункт (установить с диска), если образ находится на жестком диске выбираем 2-й пункт и нажимаем кнопку Далее
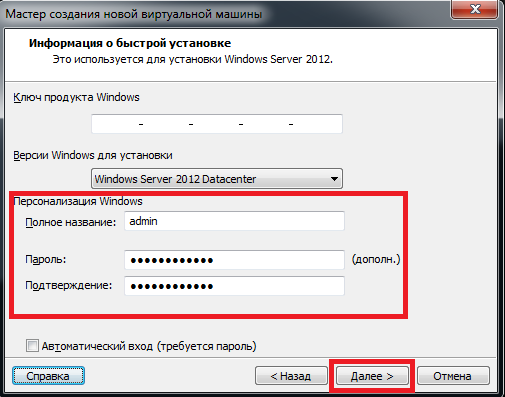
Программа просит ввести лицензионный ключ к Windows и учетные данные (пользователь/пароль) для последующего входа в систему.
Если лицензионного ключа нет (как в моем случае), его можно не вводить (а с помощью windows loadrer и других подобных программ активировать нашу операционную систему позднее).
Заполняем имя пользователя и дважды вводим пароль и опять же нажимаем далее.
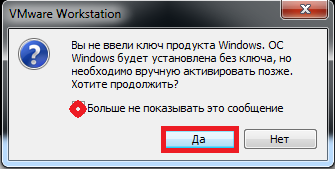
Программа предупредит нас, что мы не ввели ключ продукта и что его можно ввести в последствии, мы соглашаемся и нажимаем Да
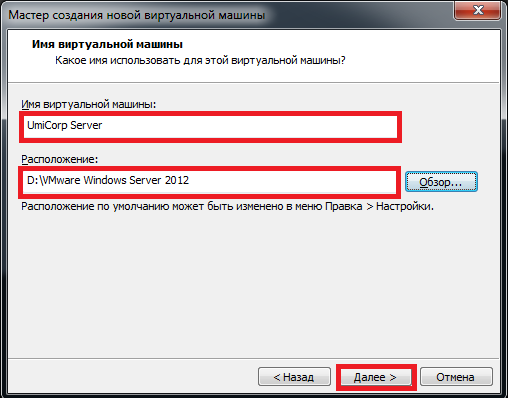
Присваиваем имя для нашей виртуальной машины и указываем путь установки и подтверждаем наши действия.
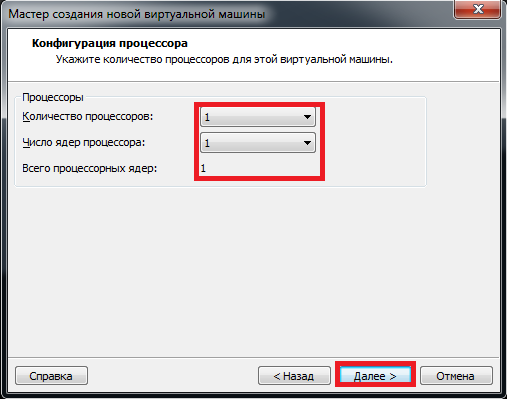
Указываем количество выделяемых для ОС процессоров и ядер (позже это количество можно изменять в большую или меньшую сторону), на своем ПК я выбрал 1 процессор и 1 ядро (у меня Intel Core i7 3630QM).
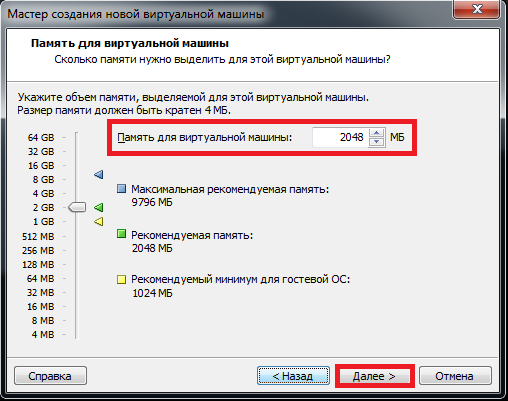
Выделяем оперативную память для Windows Server 2012. По рекомендуемым требованиям необходимо 2 Гб оперативной памяти (минимум 512 Мб), для жесткого диска рекомендуется 80 Гб и более.
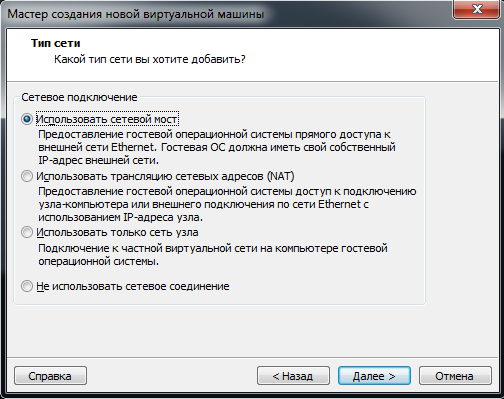
Далее программа спросит: Какой тип сети вы хотите выбрать? Я обычно выбираю 1-й пункт (сетевой мост), т.к. данный тип позволяет виртуальной машине находиться в единой сети с реальными компьютерами. Выбираем необходимый нам пункт и подтверждаем выбор.
В типе контроллера ввода-вывода выбираем рекомендуемый программой пункт (LSI logic SAS) и нажимаем Далее.
После программа спросит какой диск мы хотим использовать. Я выбрал пункт Создать новый виртуальный диск и нажал Далее.
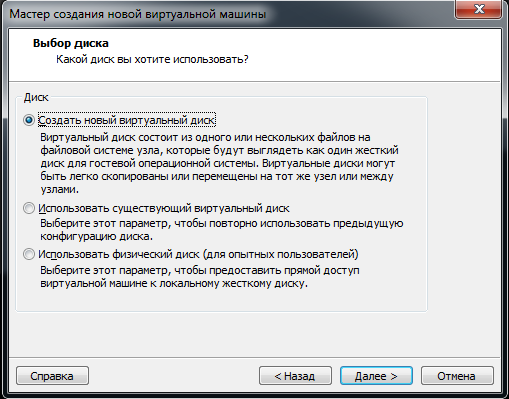
Затем выбираем тип виртуального диска, который по умолчания предлагает нам VMware (SCSI).
В максимальном размере диска я указал рекомендуемый Microsoft объем равный 80 Гб, также для производительности я выбрал пункт выбелить все дисковое пространство сейчас.
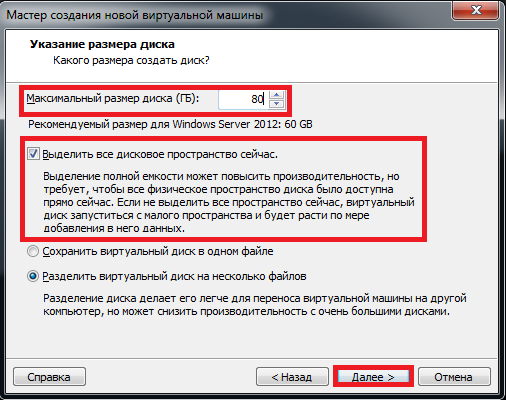
Программа спросит где хранить файлы диска, я указал директорию установки схожей с директорией основных файлов нашей операционной системы.
В конце программа выведет список всех наших настроек, проверяем их, оставляем «галочку» на пункте запустить виртуальную машину после создания (если желаем сразу приступить к установке) и жмем кнопку готово.
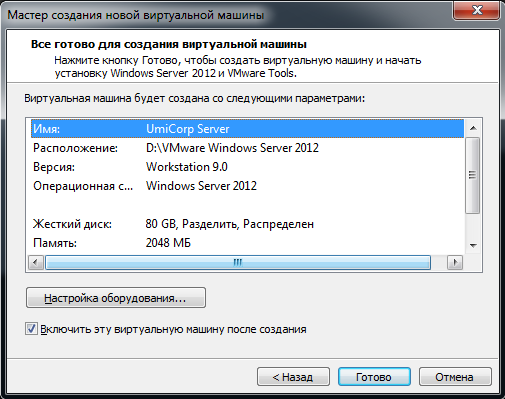
Программа создает диск и приступает к установке.
Многие сталкиваются с проблемой, на экране выскакивает ошибка:
 (This virtual machine is configured for 64-bit guest operating systems. However, 64-bit operation is not possible.) Как справиться с данной проблемой я писал в своей статье.
Первым шагом установки является выбор устанавливаемой операционной системы:
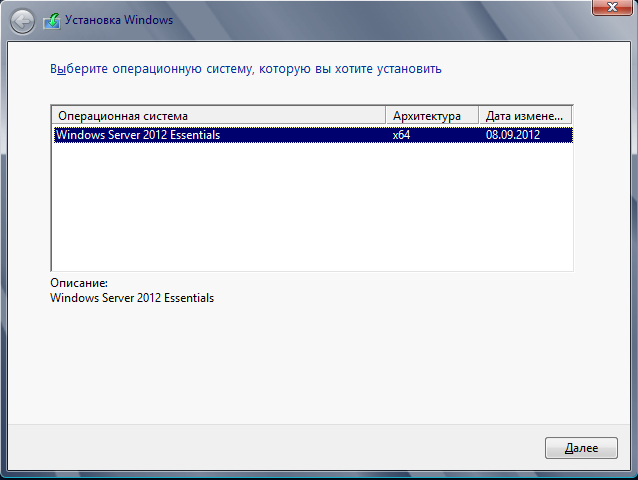
После подтверждения начинается процесс установки Windows Server 2012.
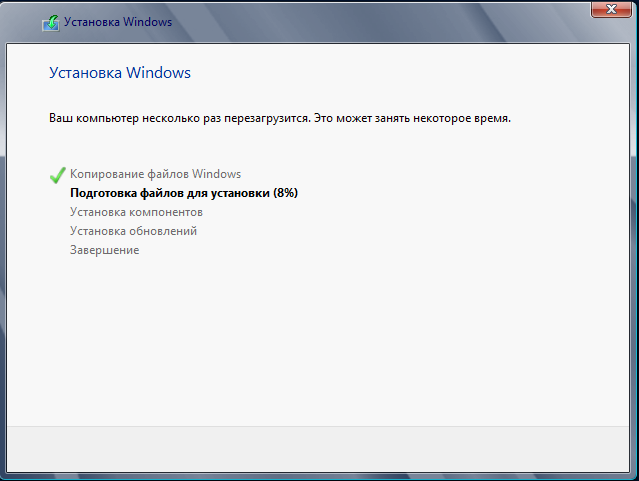
Процесс установки занимает от 15 до 50 минут (у меня система установилась за 25 минут). В процессе установки VMware перезагружает систему несколько раз. И вот спустя 25 минут ОС установлена и просит нажить CTRL+ALT+DEL, для этого во вкладке Виртуальная машина выбираем пункт Отправить команду CTRL+ALT+DEL.

Затем вводим ранее заданные учетные данные логин+пароль и нажимаем ENTER.
После входа в систему сервер готов к работе.

После установки Windows Server 2012 можно продолжить настройку ОС. Если сервер будет использоваться в организации первой ролью можно установить роль домен контроллера.
Про установку AD DS на Windows Server 2012 я писал в одной из своих статей.
На этом все, надеюсь статья Вам понравилась, если у кого-то возникнут вопросы или ошибки в процессе установки пишите, попробую Вам помочь.
Right-click the virtual machine and select Guest OS > Install VMware Tools. If you are using vCenter Server and are performing an upgrade or reinstallation, in the Install/Upgrade VMware Tools dialog box, select Interactive Tools Installation or Interactive Tools Upgrade and click OK.
Why is VMware tools not installing?
Since VMware Tools cannot be installed without a CD-ROM drive, the incorrect network driver is also assigned to the NIC. To resolve this issue, you must assign the correct driver. To assign the correct driver: select add a new device and select the CD-ROM under Disk, Driver and storage.
How do I force VMware tools to install?
Procedure. Select the menu command to mount the VMware Tools virtual disc on the guest operating system. Right-click the virtual machine and select All vCenter Actions > Guest OS > Install/Upgrade VMware Tools. To locate a virtual machine, select a datacenter, folder, cluster, resource pool, host, or vApp.
How do I fix VMware tools installed?
Do not skip a step.
- Verify that the guest operating system you are trying to install VMware Tools in is fully certified.
- Verify that the correct guest operating system is selected.
- Verify that the correct ISO image is being loaded.
- Verify that the VMware Tools ISO image has not been corrupted.
What happens if VMware tools not installed?
For example, if you do not have VMware Tools installed in your virtual machine, you cannot interact with the Guest OS to perform a graceful / clean shutdown or restart. This means you can only use the VM power options to perform a hard power off or power on of the virtual machine from the toolbar.
Can Windows 10 run VMware?
VMware Workstation runs on standard x86-based hardware with 64-bit Intel and AMD processors, and on 64-bit Windows or Linux host operating systems. For more detail, see our System Requirements documentation. VMware Workstation Pro and Player run on most 64-bit Windows or Linux host operating systems: Windows 10.
Should I install VMware tools?
Without VMware Tools installed in your guest operating system, guest performance lacks important functionality. Installing VMware Tools eliminates or improves these issues: Provides the ability to take quiesced snapshots of the guest OS. Synchronizes the time in the guest operating system with the time on the host.
How do I manually update VMware tools?
Procedure
- Start the vSphere Web Client and log in to the vCenter Server.
- Select the virtual machines.
- Power on the virtual machines to upgrade.
- Right-click your selections.
- Select Guest OS > Install/Upgrade VMware Tools and click OK.
- Select Interactive Upgrade or Automatic Upgrade and click Upgrade.
Should I update VMware tools?
Following the vCenter Server and vSphere host upgrades it is always recommended that you have a plan for upgrading the VMware Tools running inside your virtual machines. Note: Although upgrading VMware Tools is optional, it is still highly recommended.
How to install VMware Tools on Windows 2012 server?
Manually install Update Package (KB2919355) from here 3. In Add Role and Feature, install .NET 3.5 Framework. 4. Install VMTools normally 06-11-2020 01:03 PM
Why is VMware Tools not running but installed?
If I attempt to restart via services.msc it hangs around the 50% mark and throws back an error that says “Windows could not stop on local computer. Error 1053, could not stop in a timely fashion”. I haven’t checked Event Viewer because I’m so darn new to Windows server I didn’t think about it.
Can you install VMware Tools on Windows 98?
Any user can install VMware Tools in a Windows 95, Windows 98, or Windows ME guest operating system. For operating systems later than these, you must log in as an administrator. If you use vSphere and plan to install the Guest Introspection Thin Agent driver, see the system requirements listed in the vShield Quick Start Guide.
How to uninstall VMware Tools in vCenter Server?
Uninstall VMware Tools via “Programs and Features” Uninstall asks to reboot upon completion and I agree to reboot. After guest reboot, log into vCenter Server and install VMware tools for said guest VM. Attempt to take manual snapshot in vCenter Server and snapshot fails with quiescing error.

With VMWare recently releasing VSphere 6 products, I will show you how to install VMWare VCenter 6 on Windows Server 2012 R2 using MS SQL Server 2014 as the backend Database. As similar to my VCenter 5.5 Update 2 install guide, please read the Prerequisites section first before beginning! The installation is split into 3 sections. The 1st section is getting the SQL Server Prepared, the 2nd Section is getting the VCenter Server Prepared, and the 3rd Section being the VCenter Installation itself. Please note that this installation may not be Best Practice as this is just a guide to quickly get VCenter Running.
Prerequisites
1) An AD Service Account created for running the VCenter Service and accessing the SQL Server Database. Create the account to only be a Domain User privileges and Password to not Expire. (In this guide we will use this account name as an example. “svc_vcenter1service”).
2) This guide assumes you already have a MS SQL Server 2014 installed and configured.
3) .NET Framework 3.5 needs to be installed on the VCenter Server before installation.
Section 1) SQL Server Preparation
1) Log into your SQL Server Instance using “SQL Server Management Tool” (In this example, I am using SQL1.PZ.LOCAL as the SQL Server Backend).

2) Right click on “Databases” and click on “New Database…”

3) Name the Database appropriately and then click on “OK” to create the Database. You can also go into the “Options” Tab to change the Recovery Model if needed (In this example I named the Database “VCDB6”).

4) Go to the “Security” Drop down box and click on the “+” to bring down more folders. Right click on “Logins” and click on “New Login…”.

5) Ensure that the Login name you select is your VCenter Service Account (In this example “svc_vcenter1service” and that the VCenter Database that you created is set as the Default Database.

6) Click on “User Mapping” in the left tab. Ensure that you map the “msdb” and VCenter Database to the User Account and also make it the “db_owner” for both Databases. Once done click on “OK”.

7) Right click on the SQL Server itself and click on “Properties”.

 In the SQL Server Properties Menu, go to the “Permissions” Tab. Select the VCenter Service account and ensure that you grant the account permissions for “View any definition” and View server state”.

Section2) Prepare the VCenter Server before Installation
1) You will need to make the VCenter Service Account to be a Local Administrator on your VCenter Server (In this example VCENTER1.PZ.LOCAL will be my new VCenter Server and “svc_vcenter1service” is the VCenter Account).

2) You will then need to open the “Local Security Policy” Window to make your VCenter Service account have “Log on as a service” Privilege.

3) Ensure to log into your VCenter Server (VCENTER1.PZ.LOCAL) with your VCenter Service Account (svc_vcenter1service).

4) Download the MS SQL Server 2012 Native Client X64 from the following link and install only the “Client Components”.
http://go.microsoft.com/fwlink/?LinkID=239648&clcid=0x409
5) Open “Administrative Tools” and go to “ODBC Data Sources (64-bit)”.

6) In the “ODBC Data Source Administrator (64-bit)” Window, click on the “System DSN” Tab and then click on the “Add” button.

7) Select “SQL Server Native Client 11.0” and then click on “Finish”.

In this Window, put in the Name of the connection and also the SQL Server you want the VCenter Server to connect to. Click on “Next” when finished.

9) Make sure “Integrated Windows Authentication” is selected and click on “Next”.

10) Make sure that the VCenter Database you created on the SQL server is the Default Database. Once that is complete click on “Next”.

11) In this Window, Click on “Finished”.

12) Click on “OK” to close this Window.

Section2) Installing VCenter Server
1) Mount the VCenter 6 ISO into your VCenter Server and have Autorun execute. A VCenter Installation Window will appear. Make sure “vCenter Server for Windows” is selected and click on “Install”.

2) The VCenter Server Setup Window will appear. Click on “Next”.

3) Accept the License Agreement and click on “Next”.

4) Choose the “Embedded Deployment” and click on “Next”.

5) Ensure that your System Name DNS is correct and then click on “Next”.

6) This warning may come up if you have IPv6 enabled. If you are only using the FQDN for IPv4 then you can ignore this and click on “OK”.

7) For the vCenter Single Sign-On Configuration, we will go with the defaults and create a new vCenter Single Sign-On domain. Type in the password for the administrator account, the Site name, and then click on “Next”.

We will choose to “Specify a user service account” and we will use the VCenter Service Account that we are currently using (In this example it is svc_vcenter1service).

9) Choose “Use an external database” and select the OBDC Connection you created earlier. Click on “Next” when finished.

10) Leave the Ports to the defaults and click on “Next”.

11) You can change the location where VCenter installs itself. Once finish, click on “Next”.

12) Review the installation settings. Once done, click on “Install”.

13) Wait for the installation to finish.

14) Once the installation is finished, click on “Finish”.

After this is all done, your VCenter Server is up! You can now access your VCenter with your favorite browser on the HTTPS Port 443(HTTPS://VCENTERSERVER.LOCAL/VSPHERE-CLIENT/). Also remember to install the VSphere Web Plugin for your browser in order to make the VCenter experience better. You can then log in with the username you set during the VCenter Installation. After you are able to login you can add AD Authentication later.
I hope this has been helpful for you guys! 🙂
![]()
With new VMware vSphere version 6 much more people choose vCenter Server Appliance instead of vCenter on Windows because now it has same limits. However there are still organisations which prefer to use vCenter Server on Windows Server. In first post — VMware vCenter Server 6 on Windows Server 2012 R2 with Microsoft SQL Server 2014 — Part 1 I will describe Microsoft SQL Server 2014 preparation and installation. In next post I will continue with database creation and vCenter Server installation.
Software versions
As usual below you will find software version I am using when writing this post.
Operating System — Windows Server 2012 R2 Standard
Database — Microsoft SQL Server 2014
vCenter Server 6 — vCenter Server 6.0.0b released 07.072015, build 2800571
Software minimal requirements
Windows Server 2012 R2 requirements — https://technet.microsoft.com/en-us/library/dn303418.aspx
Microsoft SQL Server 2014 requirements — https://msdn.microsoft.com/en-us/library/ms143506(v=sql.120).aspx#pmosr
vCenter Server 6 requirements — http://www.vmware.com/files/pdf/techpaper/VMW-vCTR-SRVR-Deployment-Guide-6-0.pdf page 6
By my calculation you need for the smallest environment (lab installation) we will need 2 vCPU, 12GB of RAM and about 140GB of storage and I will assign those resources to virtual machine.
Windows Server preparation
Even though this post describes installation for smallest environment which will be used as lab I want to show you how it should be installed in professional way. This involves correct disk alignment and SQL Server 2014 configuration.
I used following disk layout as described as in TechNet document http://blogs.technet.com/b/dataplatforminsider/archive/2012/12/19/disk-and-file-layout-for-sql-server.aspx.
- Disk C: OS — 60 GB
- Disk E: SYSDB — 10 GB
- Disk F: Tempdb — 10 GB
- Disk G: Tempdb logs — 10 GB
- Disk H: User databases — 10 GB
- Disk I: User DB logs — 10 GB
- Disk J: Database backup — 10 GB
- Disk K: vCenter Server binaries -20 GB
Another thing that we have to do before installation is enabling of .Net Framework 3.5 Service Pack 1. We can do it simply from PowerShell by executing following command. Start Powershell console as Administrator and connect Windows Server 2012 R2 to CD Drive.
Install-WindowsFeature Net-Framework-Core -Source D:\sources\sxs
Wait for installation to finish and start SQL Server installation.

Microsoft SQL Server 2014 installation
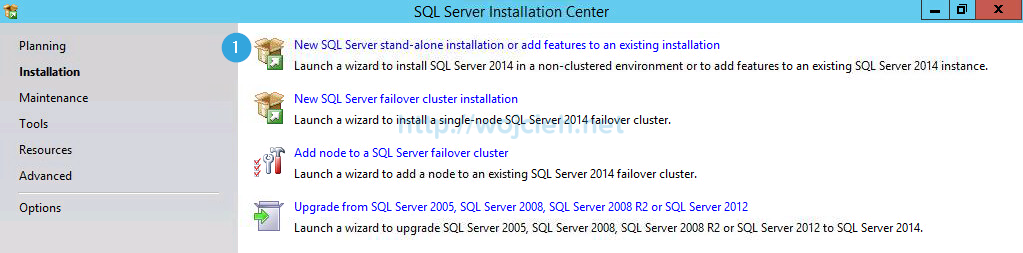
- Launch SQL Server installation and select first option.

- Select instance to install. I will use this SQL Server as evaluation but if you have product key enter it below.
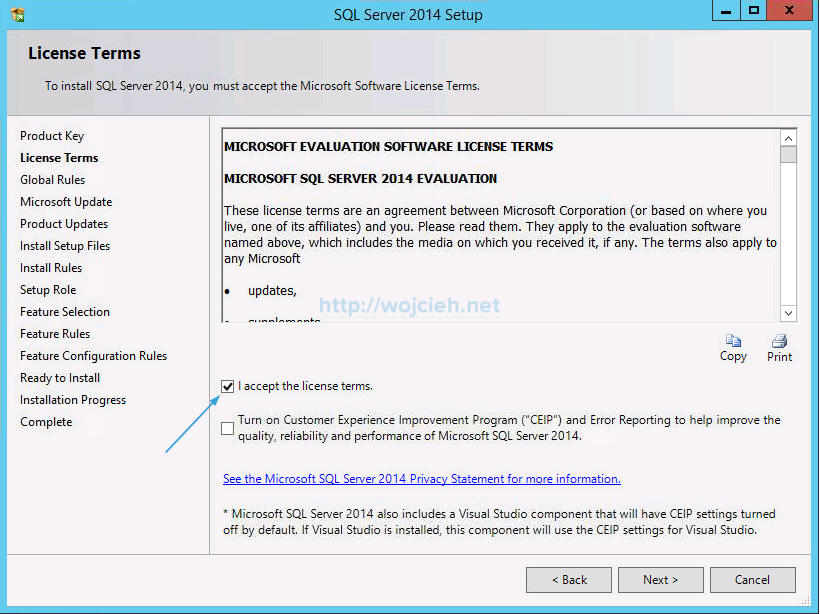
- Accept license terms and click next.
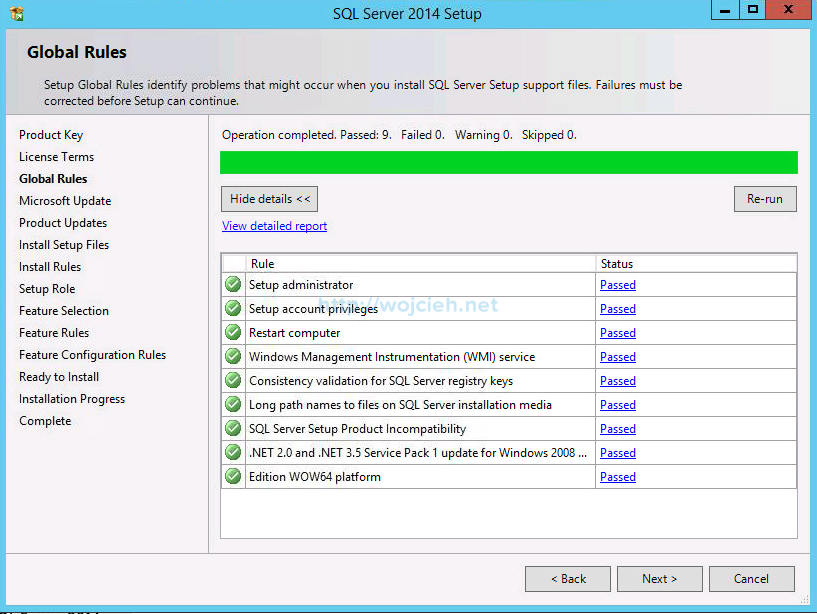
- On the next screen you will see simple checkup if all components needed for setup are installed.
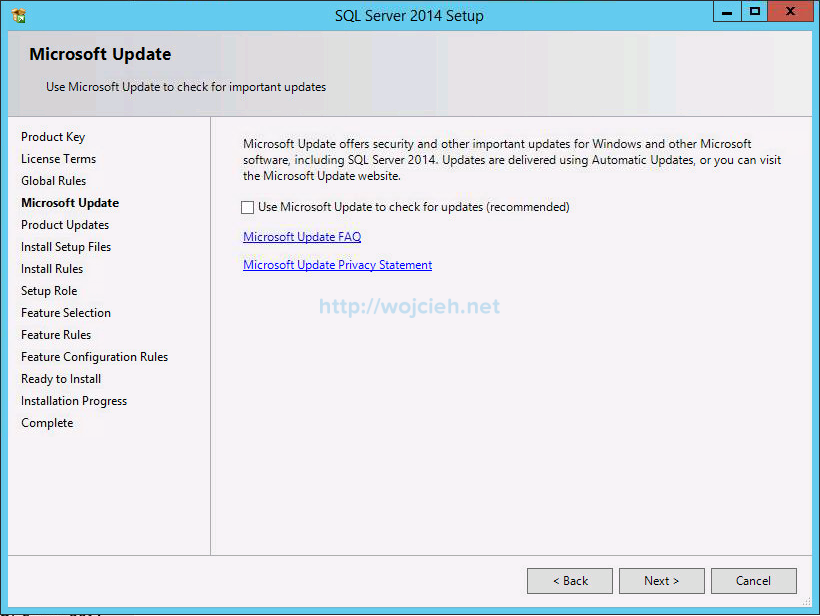
- Choose if you want to use Microsoft Update to check for updates.
- Wait for SQL Server installer installs binaries.
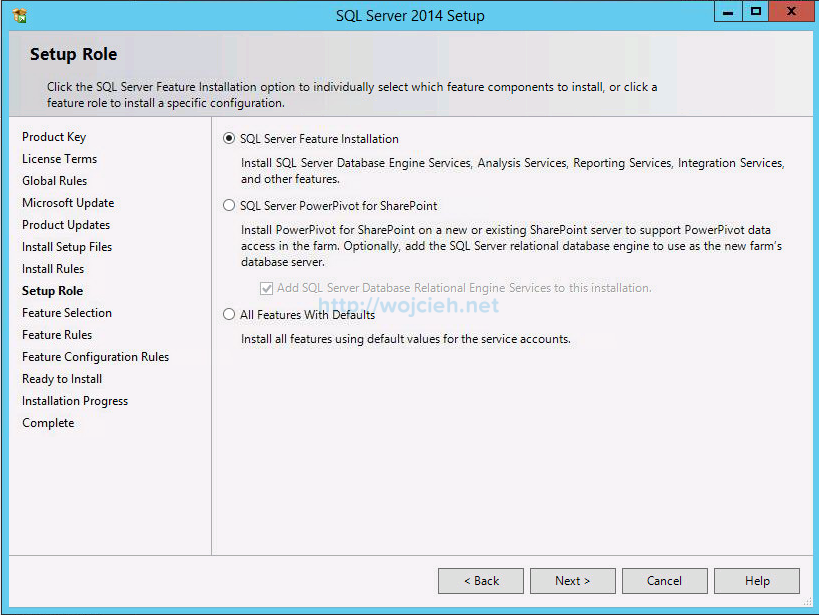
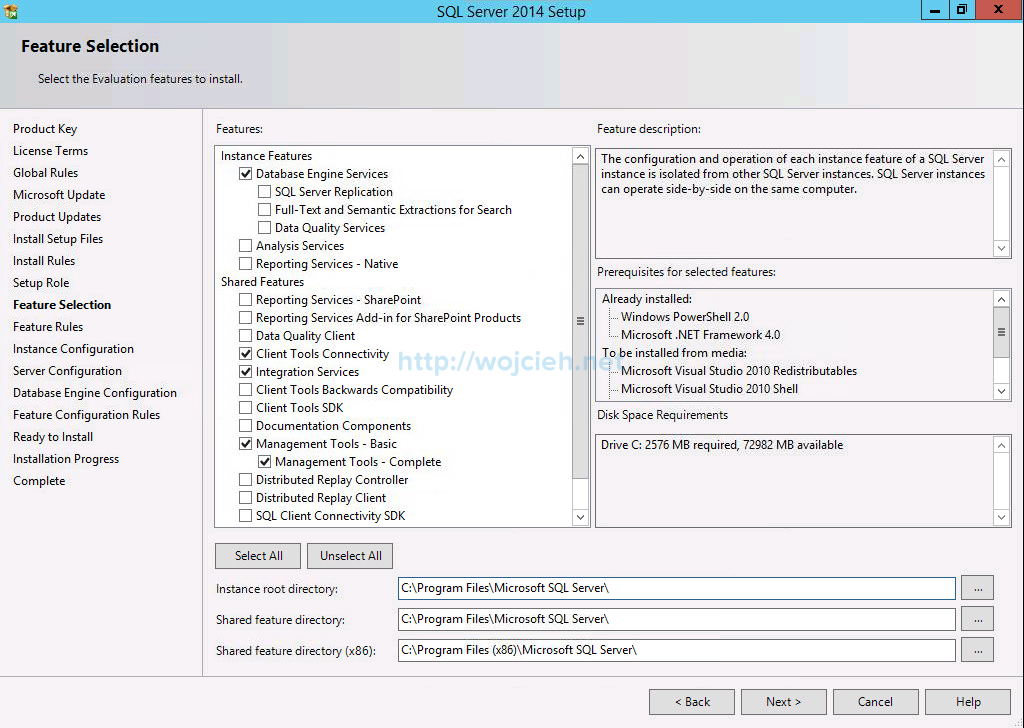
- On next screen we need to choose which features will be installed. Choose SQL Server Feature Installation.
- Select following features:


- Database Engine Services
- Client Tools Connectivity
- Integration Services
- Management Tools – Basic
- Management Tools – Complete
- Specify the name and instance ID for SQL Server. I choose default one — MSSQLSERVER.
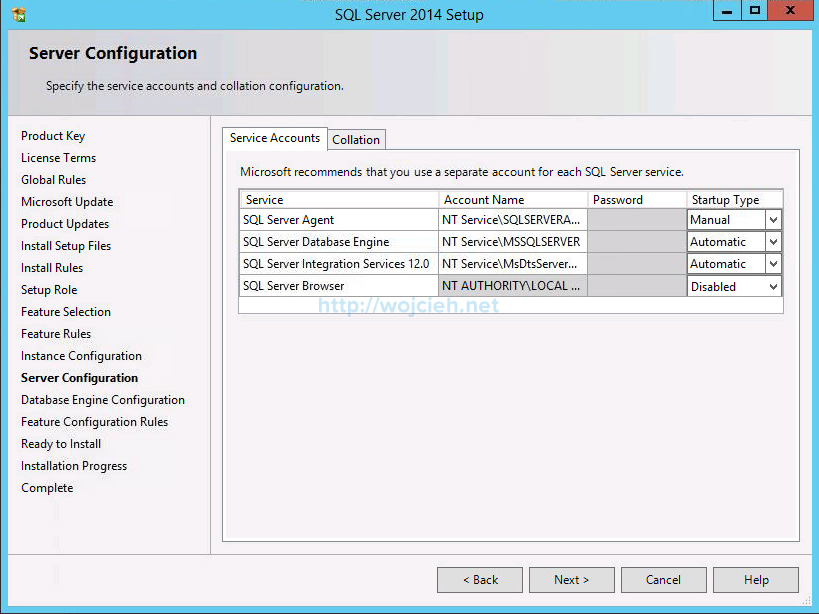
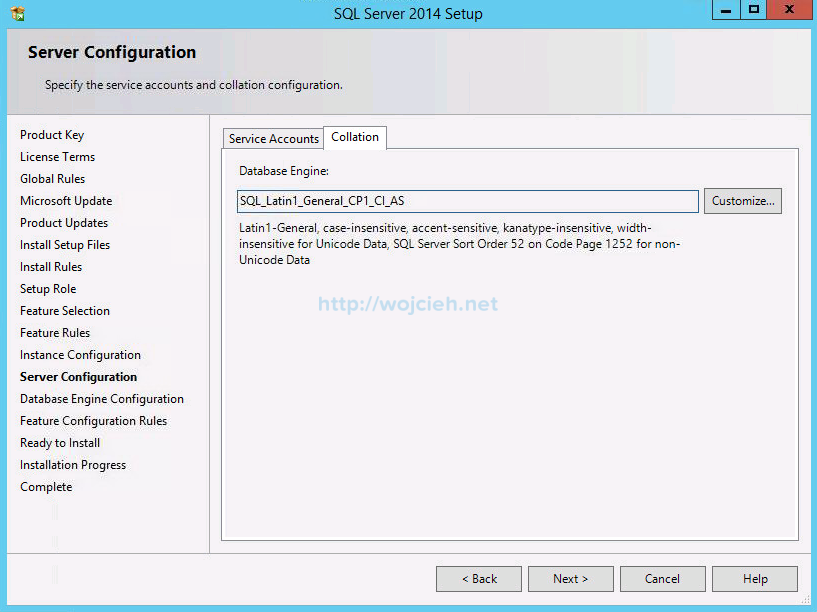
- In Server Configuration section — Service Accounts tab leave defaults.
- Switch to Collation to check if you have **SQL_Latin1_General_CP1_CI_AS **collation.
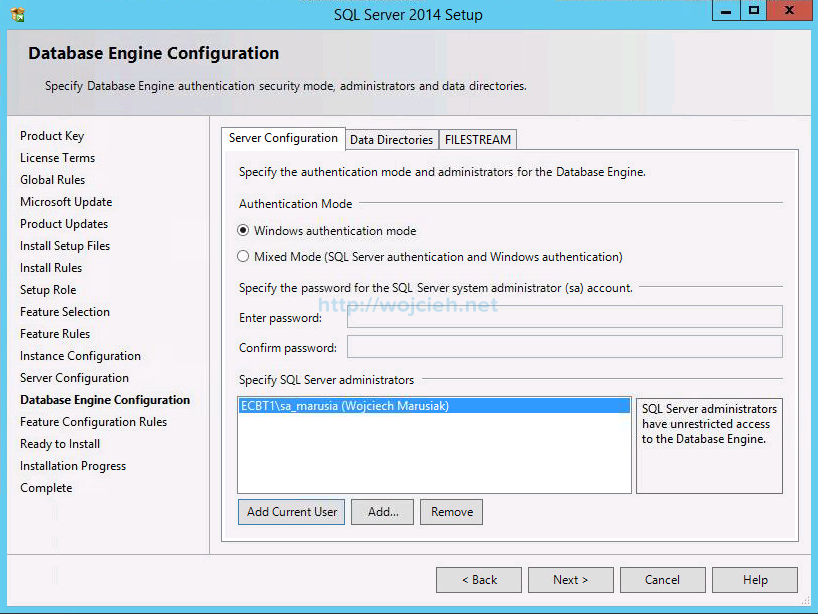
- Click next and first we will configure authentication mode and SQL Server administrators. I suggest to use Windows authentication mode because you can specify Active Directory group instead of local SQL Server accounts. I added my account to admin group but it might be that someone else in your organization will be SQL Server administrator.
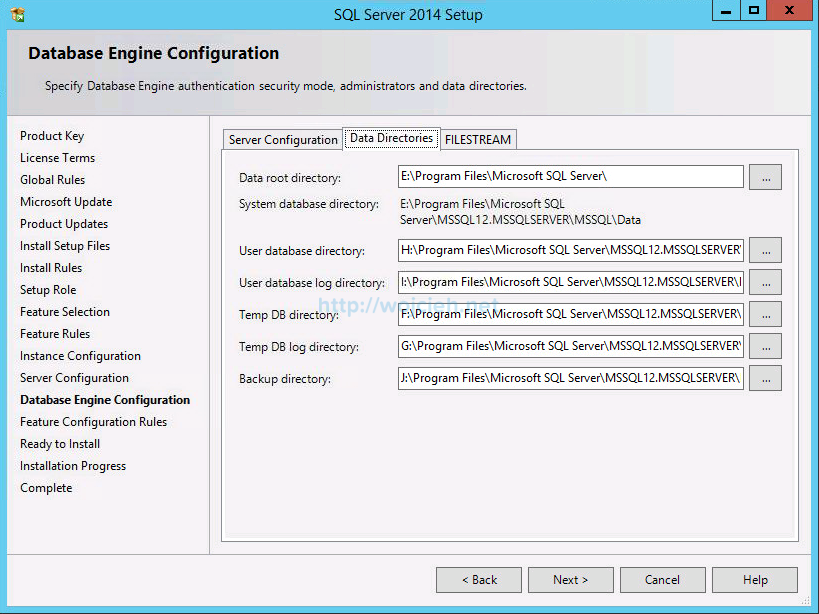
- Switch to Data Directories tab. I changed pretty much every directory to avoid filling up database disk by transactional logs. I suggest you do the same to ensure smooth SQL Server operation.
- Click Next and review settings you provided. Please bare in mind that you can use ini file to install new services with your setting you just provided. Simply start setup.exe from iso file and point to ini file.
Setup.exe /ConfigurationFile=MyConfigurationFile.INI

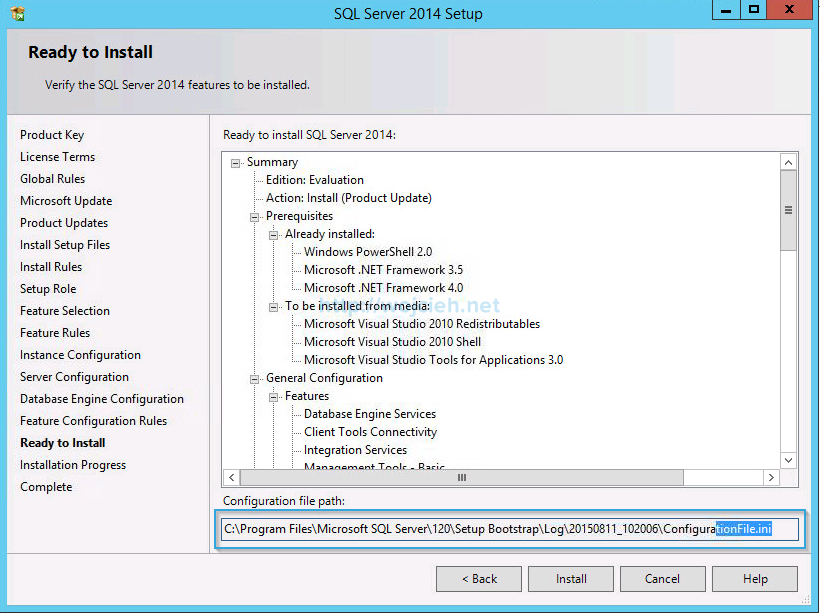
14. Click Install and wait for installation to finish.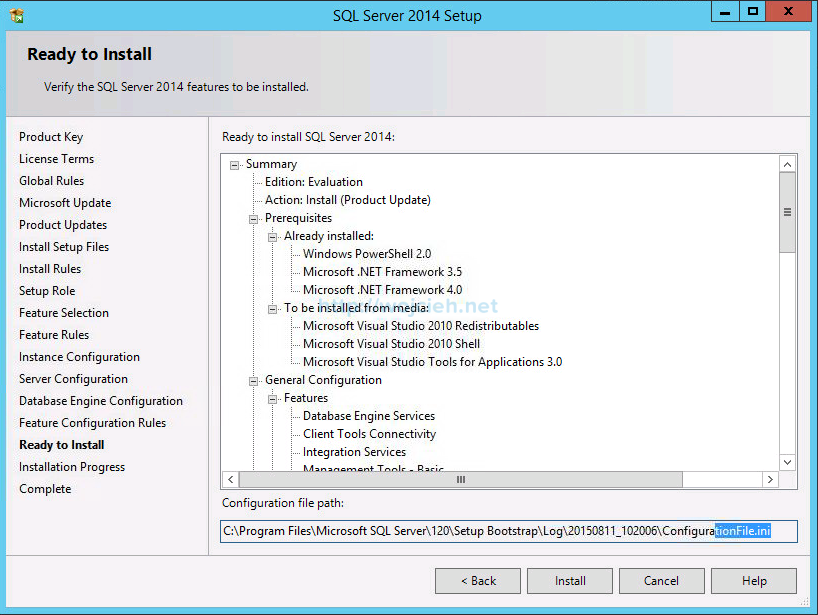
15. Success!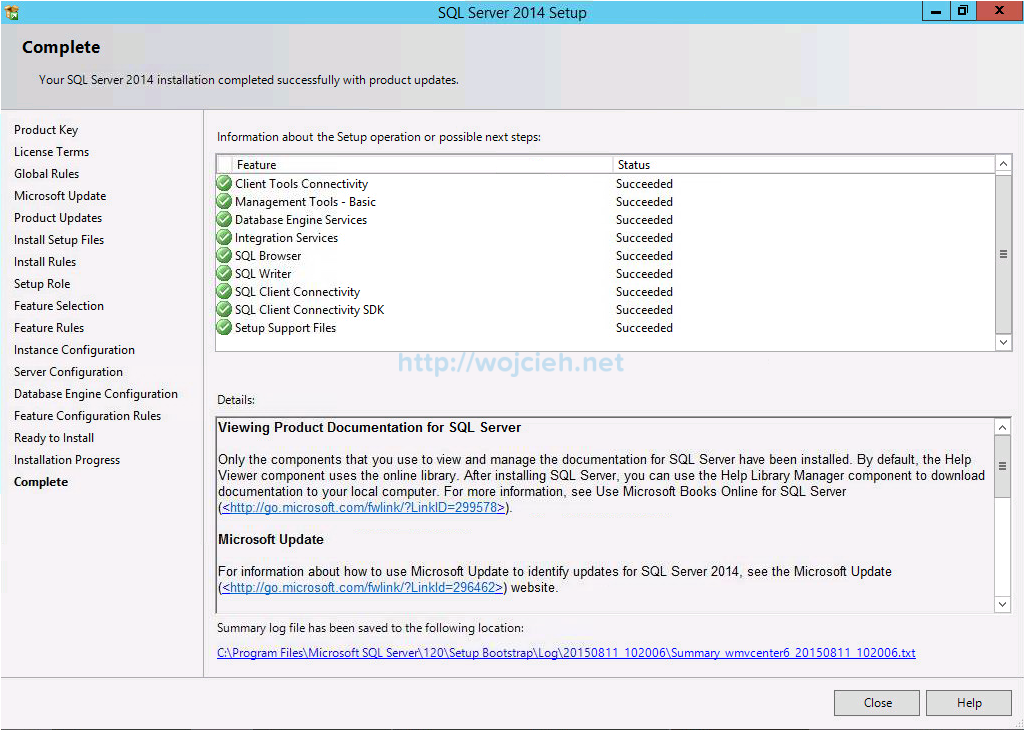
Next steps
In next post I will guide you through vCenter Server database and ODBC creation. Here is the link to next part of article VMware vCenter Server 6 on Windows Server 2012 R2 with Microsoft SQL Server 2014 – Part 2.