Если вы работаете на Windows версии ниже 10 или хотите получить изолированную операционную систему Linux, да ещё и с графическим окружением, то можно воспользоваться сторонним бесплатным программным продуктом под названием VirtualBox.
Общая информация о технологии виртуализации
Вам потребуется:
-
Инсталлятор Oracle VM VirtualBox для Windows Hosts
Ссылка на скачивание: Download Oracle VM VirtualBox -
Образ операционной системы Ubuntu Linux в формате ISO
Ссылка на скачивание: Download Ubuntu Desktop
Для начала необходимо установить и запустить приложение VirtualBox.

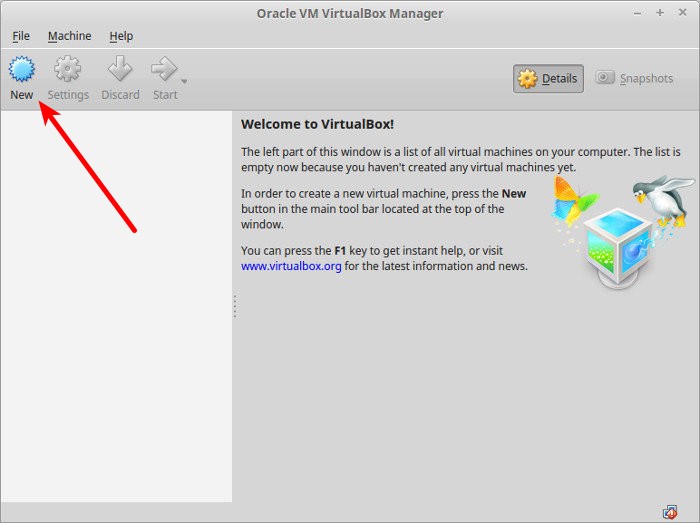
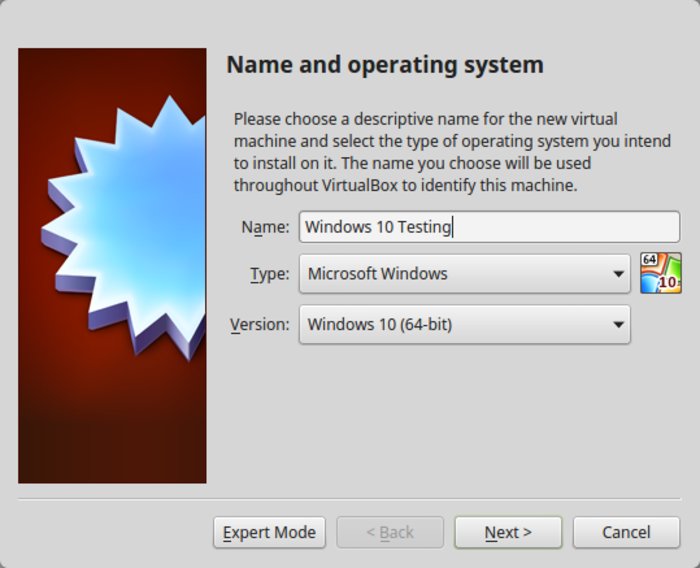
Нажимаем кнопку «Создать», выбираем из списка тип операционной системы «Linux», если нет своих предпочтений по дистрибутиву, то выбираем версию «Ubuntu» 32 или 64 битной архитектуры, а название можно ввести любое.

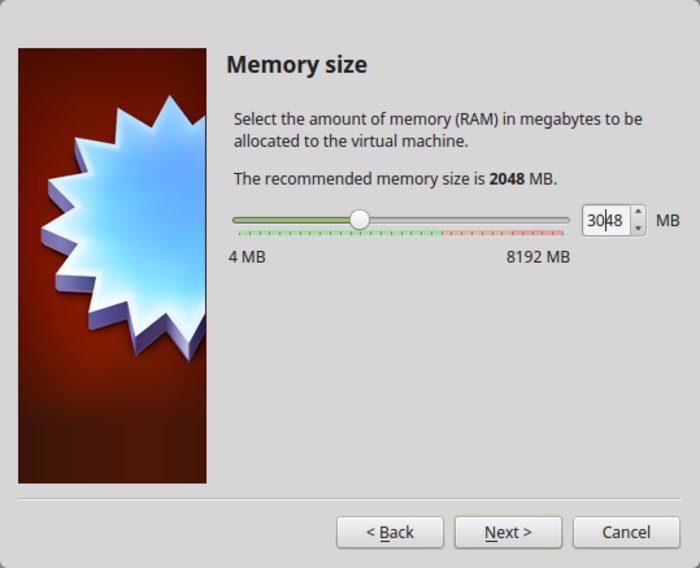
Указываем объём оперативной памяти выделенной под виртуальную систему. Рекомендованный объём составляет 1024 MB.

Указываем объём дискового пространства выделенного под виртуальную систему. Рекомендованный объём составляет 10 GB.
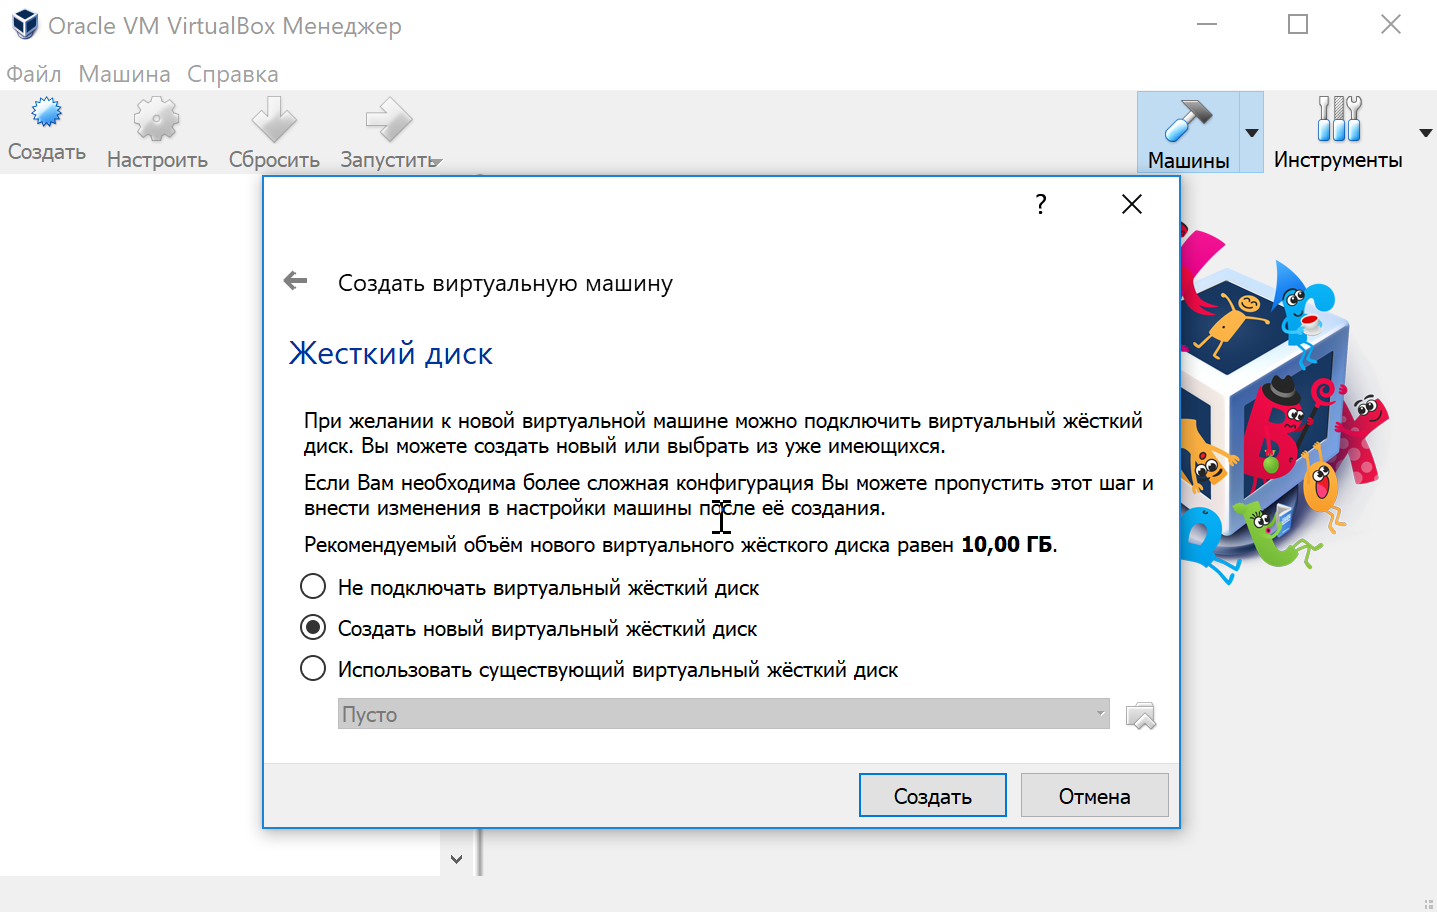
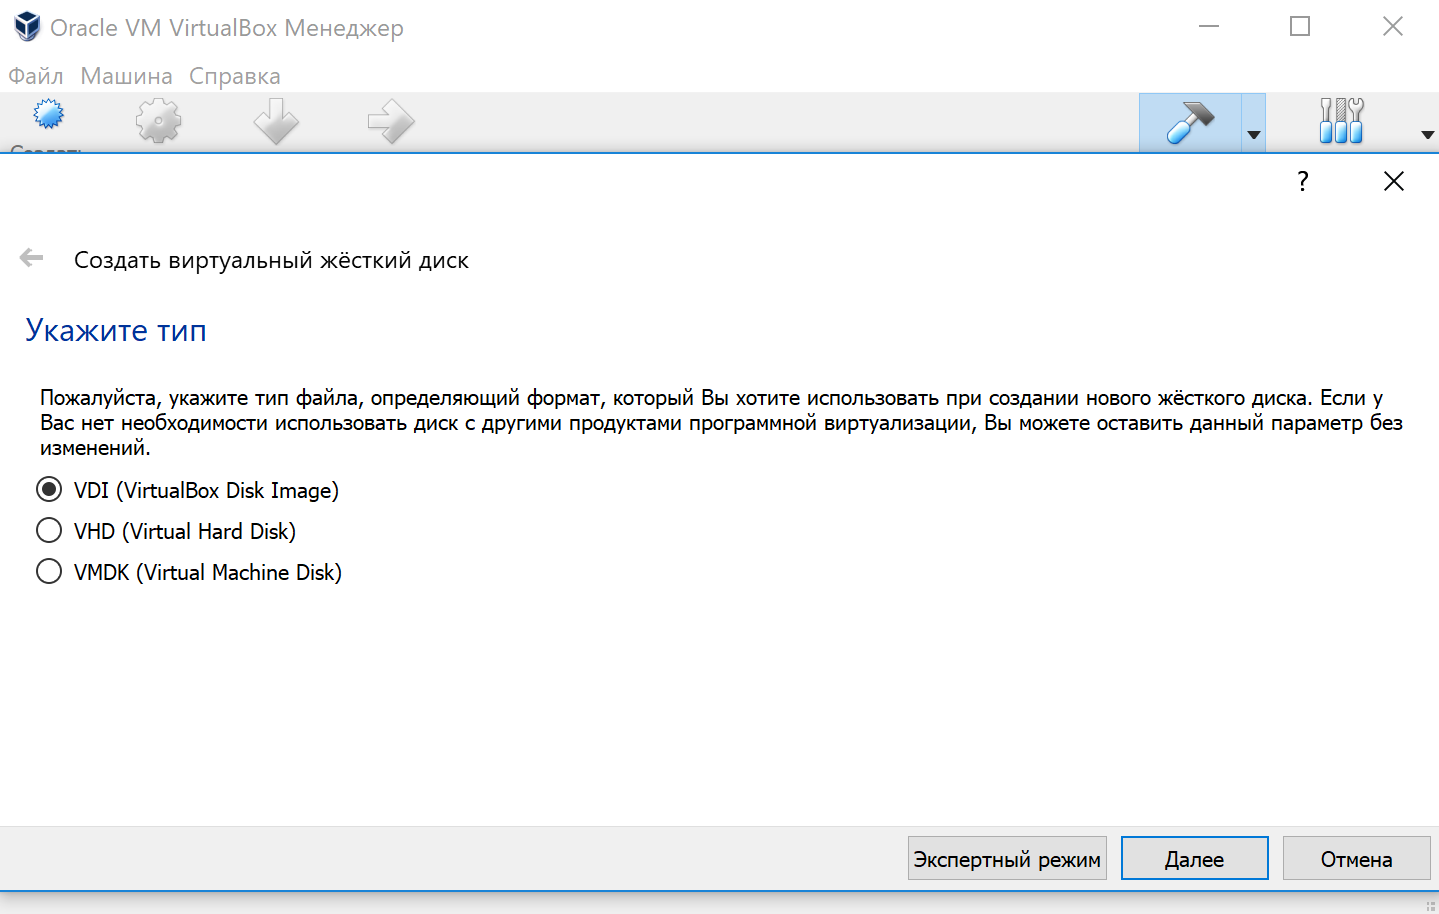
Тип виртуального жёсткого диска можно оставить как есть — VDI (VirtualBox Disk Image).
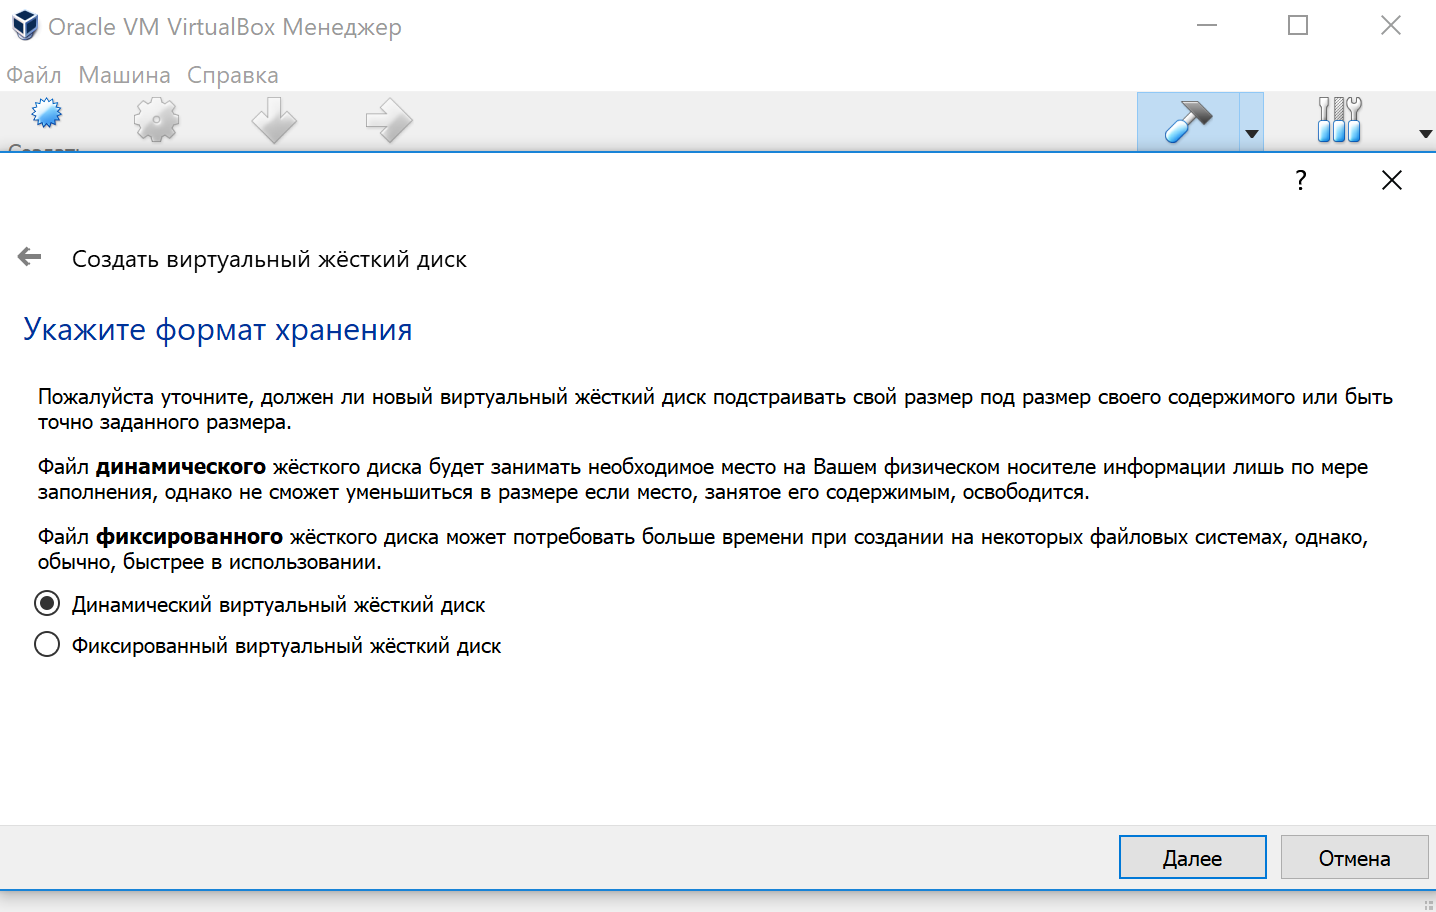
Формат хранения данных выберите исходя из личных предпочтений. Динамический виртуальный жёсткий диск растёт по мере заполнения, а фиксированный создаётся сразу того размера, который был указан на предыдущем шаге.
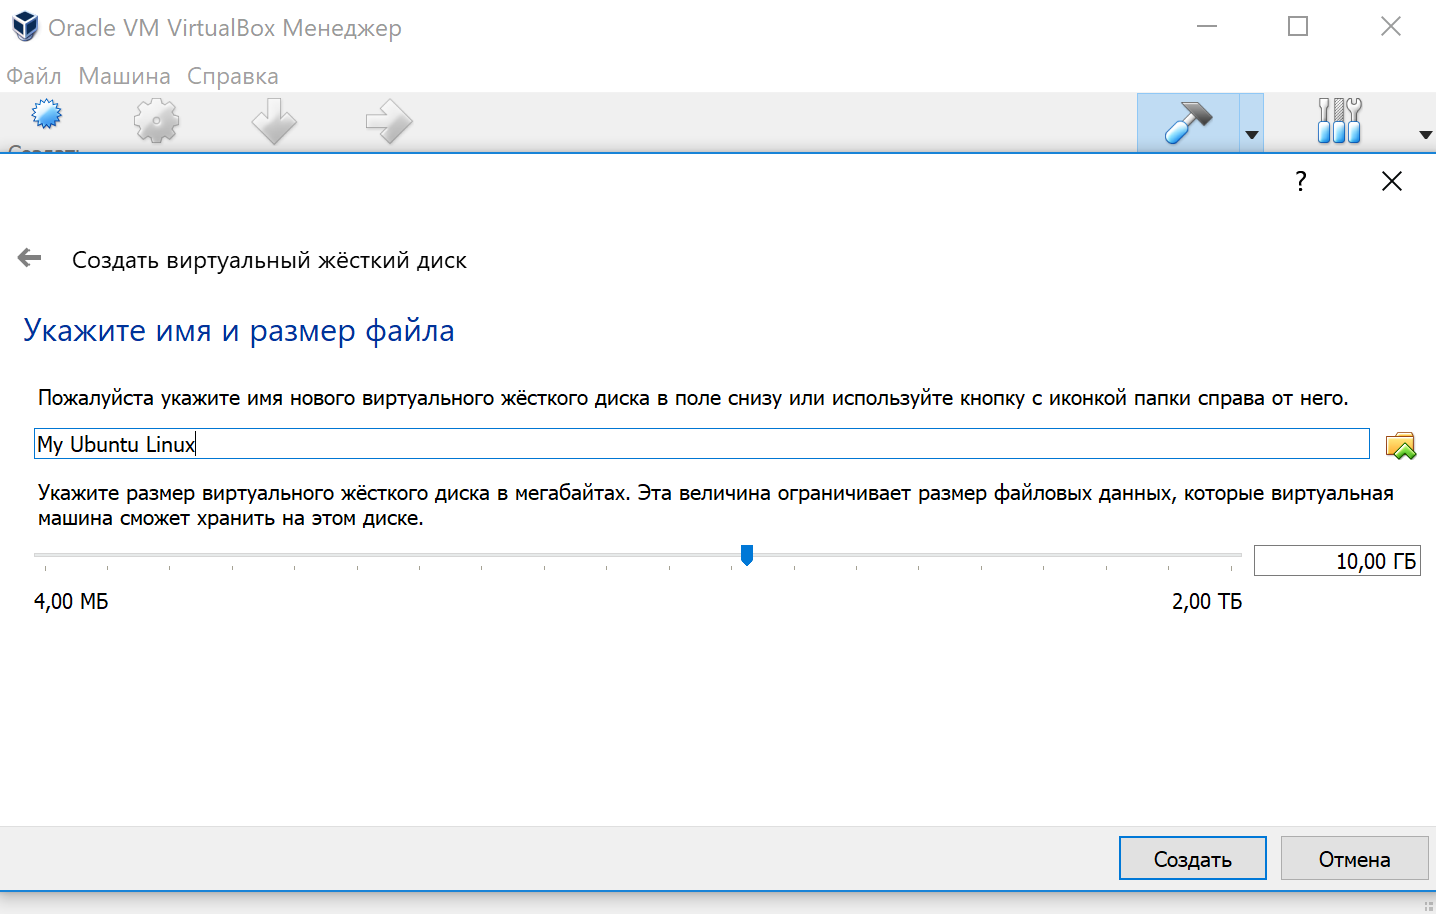
Имя и размер файла можно оставить без изменений и сразу нажать на кнопку «Создать».
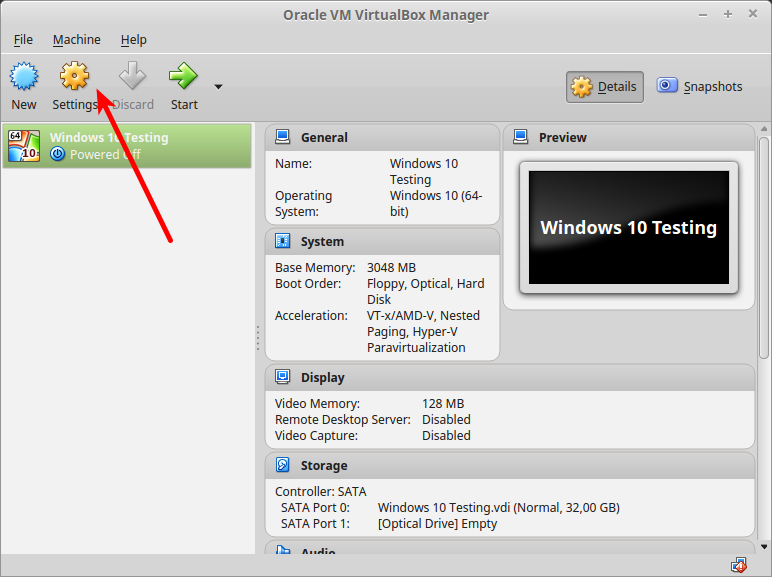
По завершению у вас будет создана виртуальная машина, но она пока без операционной системы. Для того чтобы её установить, нужно скачать Ubuntu Linux (32-bit или 64-bit, в зависимости от того, что было выбрано на шаге, где мы указывали тип ОС).
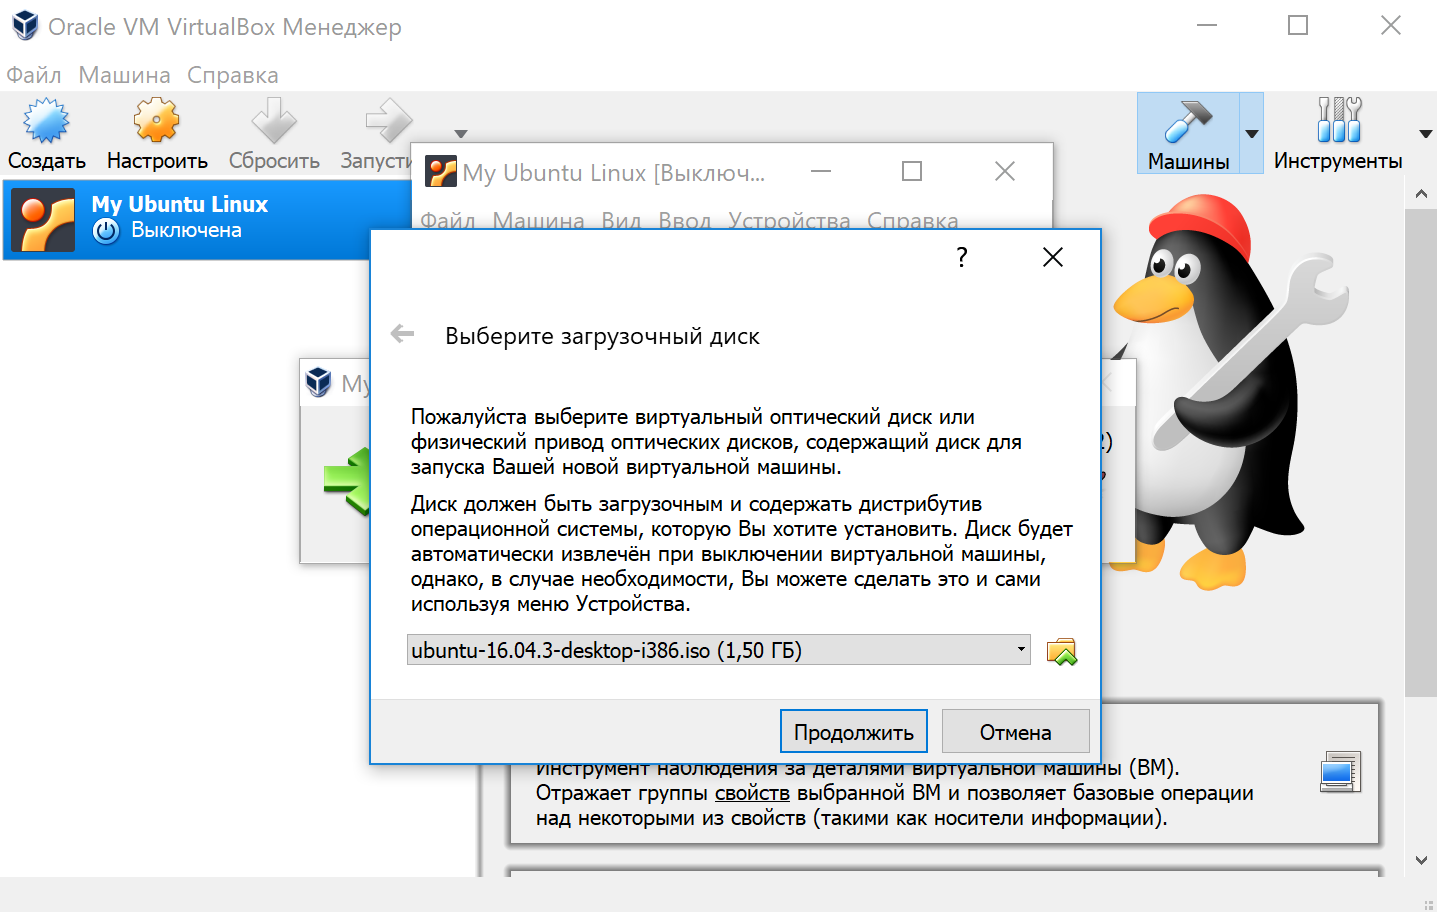
Нажатие на кнопку «Запустить» должно привести к появлению диалогового окна с предложением указать путь до скаченного ISO образа. Сделайте этого и нажмите кнопку «Продолжить»
Виртуальная машина автоматически будет выполнять часть процессов, но в некоторых операциях всё же потребуется участие пользователя.
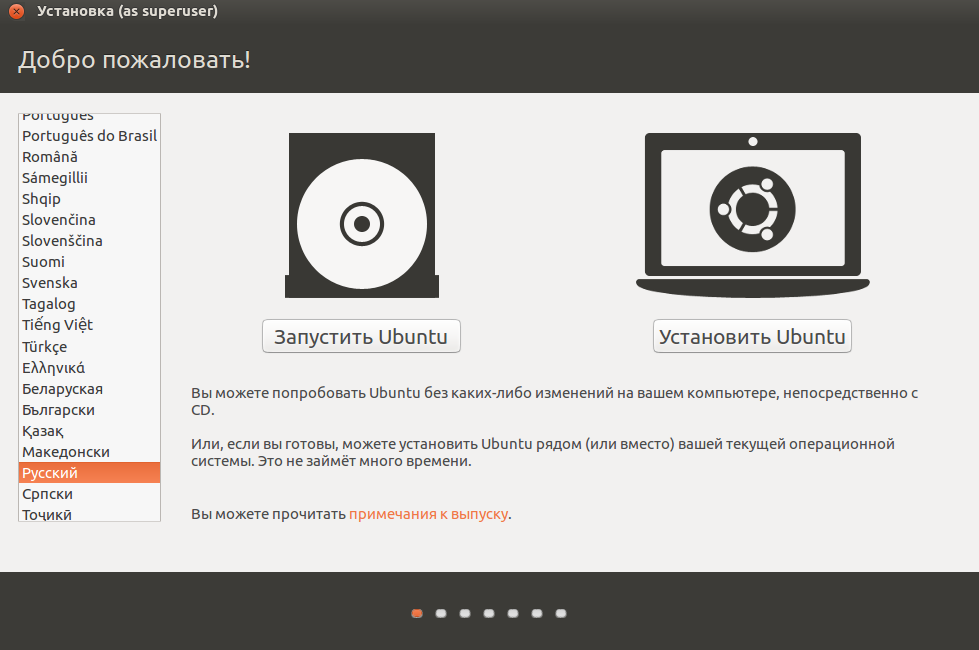
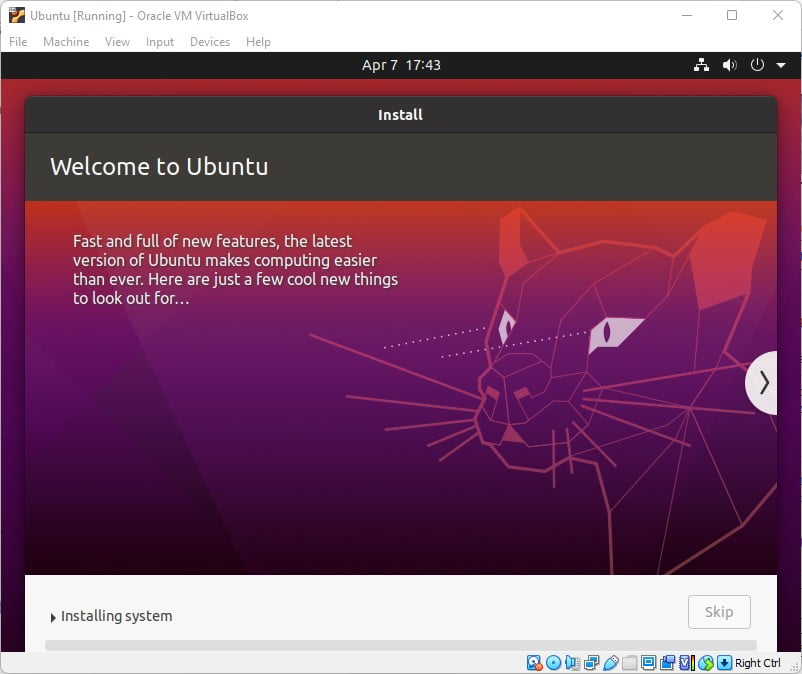
Выберите языковую поддержку в списке слева и нажмите «Установить Ubuntu».
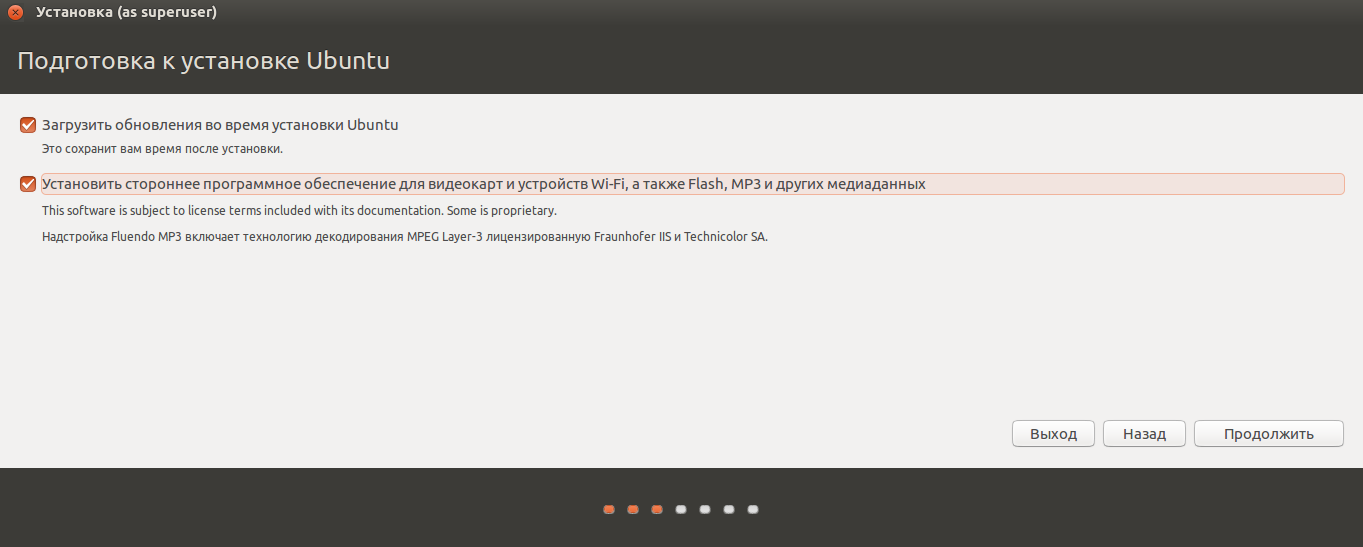
Можно загрузить обновления сразу на этапе установки.
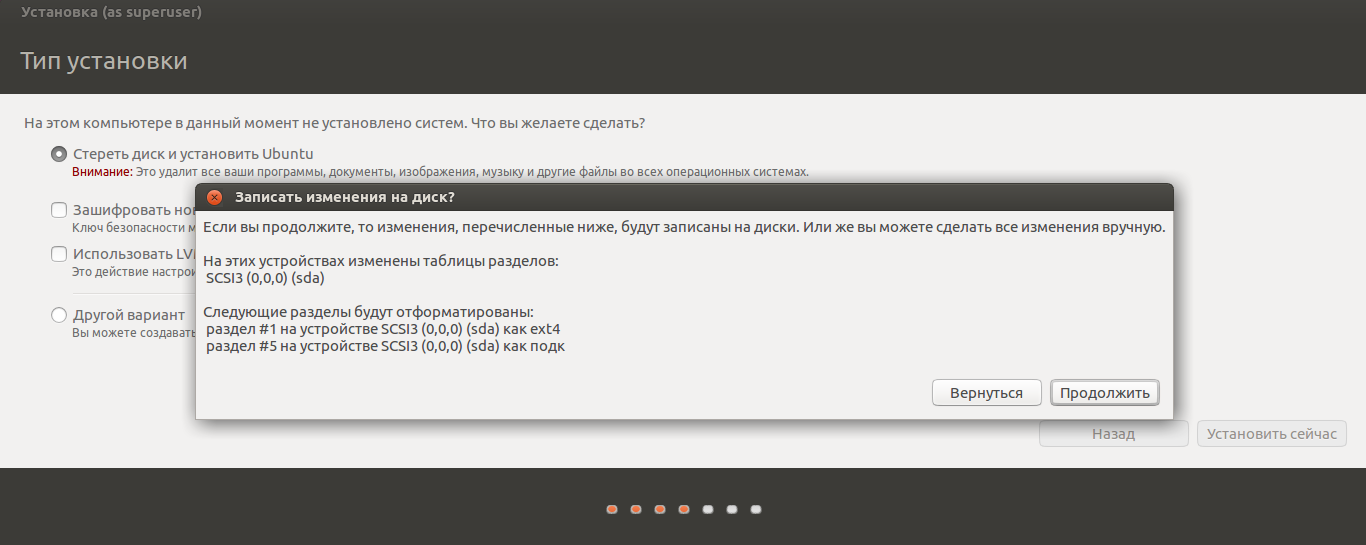
Без особых опасений выбираем пункт «Стереть диск и установить Ubuntu» и двигаемся дальше.
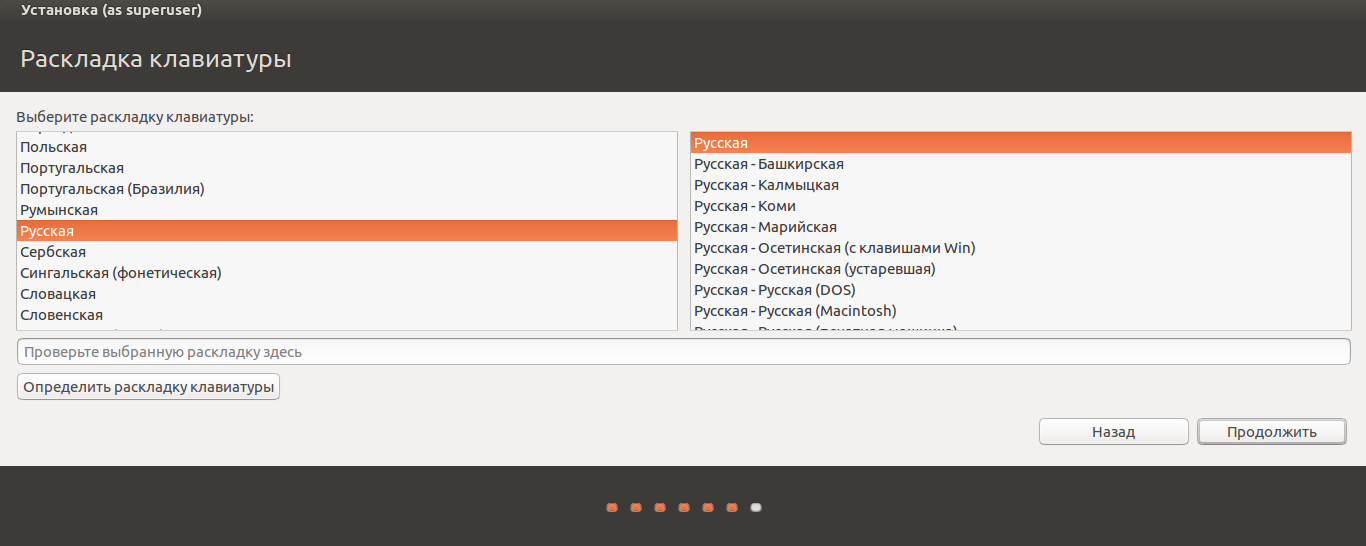
Если вы выбрали русский язык на первом этапе установки, то вам предложат русскую раскладку клавиатуры в качестве дополнительной.
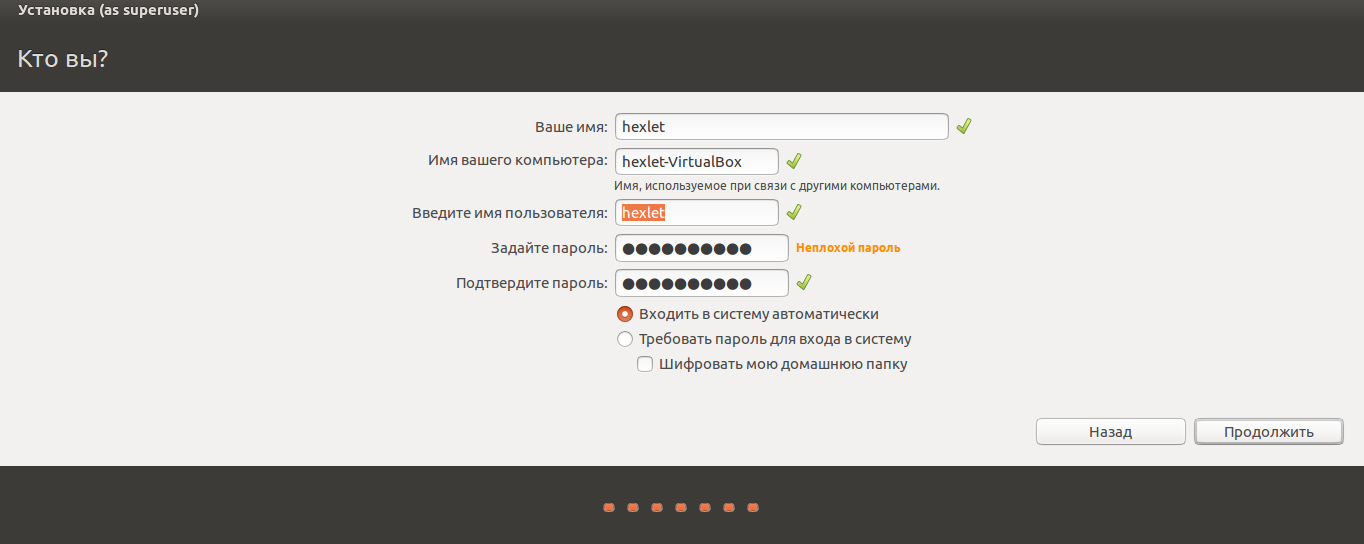
Заполните поля и выберите режим входа в систему.
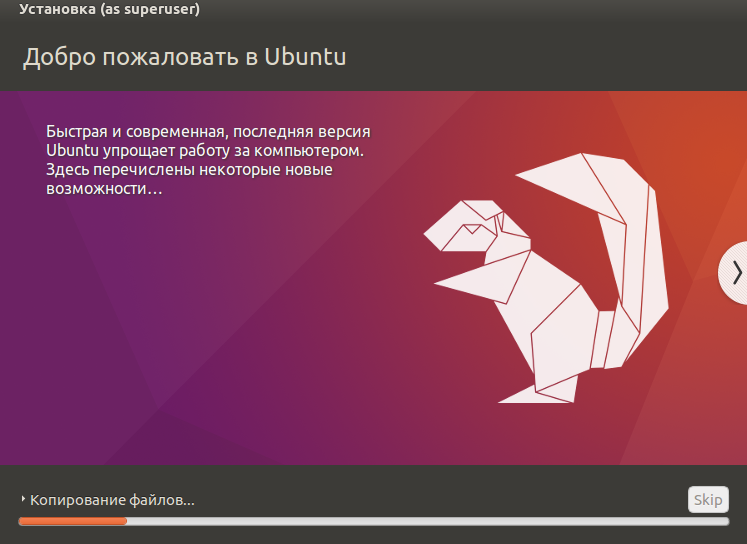
Далее начнётся процедура разметки диска, переноса файлов, установка обновлений и другие процессы, которые не потребуют прямого участия пользователя.
По завершению виртуальный компьютер перезагрузится и вы попадёте в уже установленную среду Ubuntu Linux.
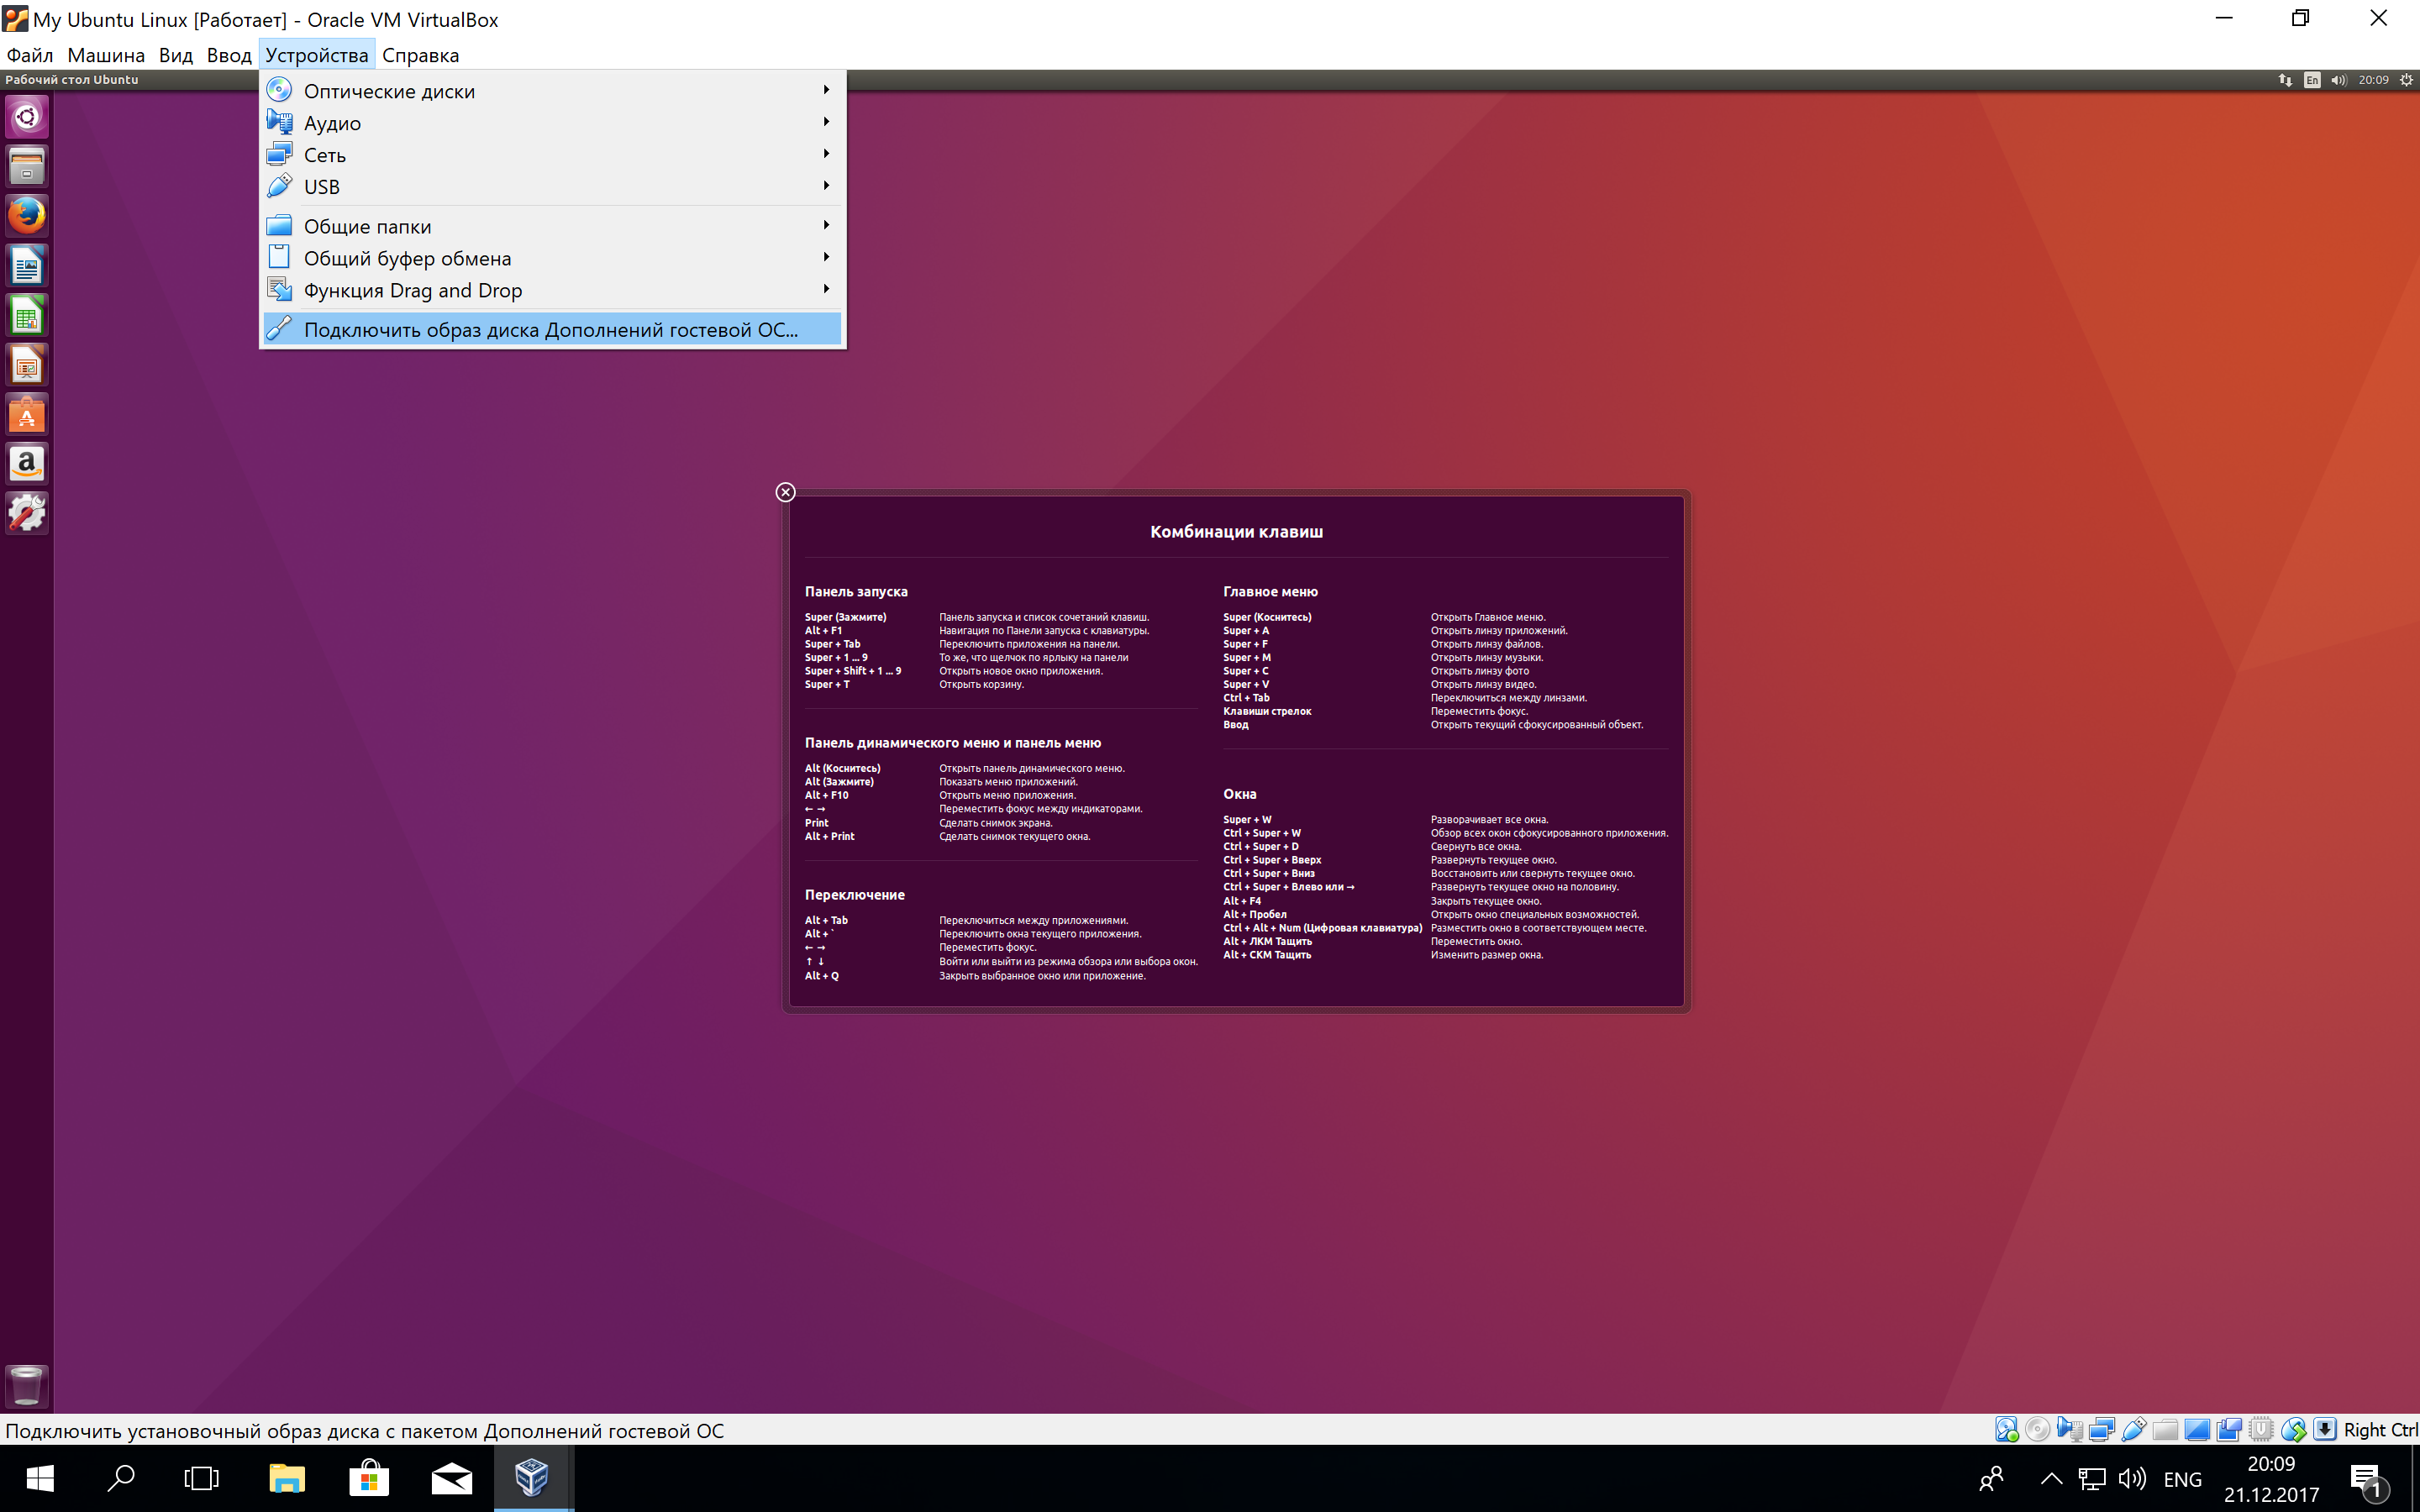
Но это ещё не всё. Весьма желательно установить так называемые «Дополнения гостевой ОС». Они содержат драйверы и прочие системные файлы, необходимые для наилучшей производительности и обеспечения дополнительных функциональных возможностей между виртуальной и гостевой операционными системами.
Выберите пункт меню «Устройства» программы VirtualBox, подпункт «Подключить образ диска Дополнений гостевой ОС…» и дождитесь предложение запустить приложение для автоматического запуска с виртуального привода.
Виртуальная ОС Ubuntu Linux установлена и готова к работе.
Ссылка на официальную документацию: Oracle VM VirtualBox User Manual
Ubuntu is a popular Linux distribution that offers users a wide range of features and applications. Ubuntu is a great choice for those new to Linux who want to explore its capabilities. However, it can be difficult to set up and configure on a Windows desktop.
Fortunately, there is a way to get Ubuntu up and running quickly and easily with VirtualBox and Vagrant. This tutorial will guide you through setting up Ubuntu with VirtualBox and Vagrant on a Windows desktop, creating a secure and isolated virtual environment for testing and experimenting.
What is Vagrant?
Vagrant is an open-source software for building and managing virtual machine environments in a single workflow. With Vagrant, you can define a configuration file that specifies the details of the virtual machine you want to create and then use a single command to create and configure the virtual machine. This makes it easy to set up and maintain a consistent development environment across multiple machines and to share that environment with others.
Vagrant works with various virtualization software, including VirtualBox, VMware, and Hyper-V, and can manage both Linux and Windows virtual machines.
What is VirtualBox?
VirtualBox is a free, open-source virtualization software platform developed by Oracle that allows you to run multiple operating systems on a single physical machine. With VirtualBox, you can create and run virtual machines (VMs) on your computer, each of which runs a separate operating system and can be configured with its virtual hardware.
VirtualBox is designed to be easy to use, with a simple graphical user interface (GUI) that allows you to create and manage virtual machines. It supports a wide range of operating systems, including Windows, Linux, macOS, and many others, and can be used for various purposes, such as testing software, running legacy applications, and more.
How would Vagrant and VirtualBox work?
When you use Vagrant with VirtualBox, Vagrant creates and manages virtual machines in the VirtualBox environment. You define the operating system type, the amount of memory, and other resources the virtual machine should have in the Vagrant configuration file. Vagrant then uses this configuration to create and configure the virtual machine in VirtualBox.
Once the virtual machine is up and running, you can use Vagrant to manage it by SSHing into it or running provisioning scripts to set up the environment.
Prerequisite
To follow along with this article, you need to have the following:
- A computer with
- at least 8 GB RAM
- Windows 10 x64-bit operating system (OS)
- A modern multi-core Intel/AMD CPU
- Virtualization is enabled in its BIOS settings. Find out how to here.
- Have a basic knowledge of Powershell or Gitbash.
Installing VirtualBox
To install VirtualBox, you will need to follow these steps:
Step 1: Visit the VirtualBox website using this link, and you will see a page similar to the one below.

Step 2: Click on “Download VirtualBox” and then on Windows hosts to download VirtualBox and its extension pack.

Step 3: After downloading it, click on the “New” icon in the top right-hand corner to create a new virtual machine.

You would see a prompt like this.

Step 4: Name the new machine you want to create and choose the type and version that suits your taste.

Step 5: Click next and assign the memory size you want to allocate to the virtual machine using the up and down arrow keys.

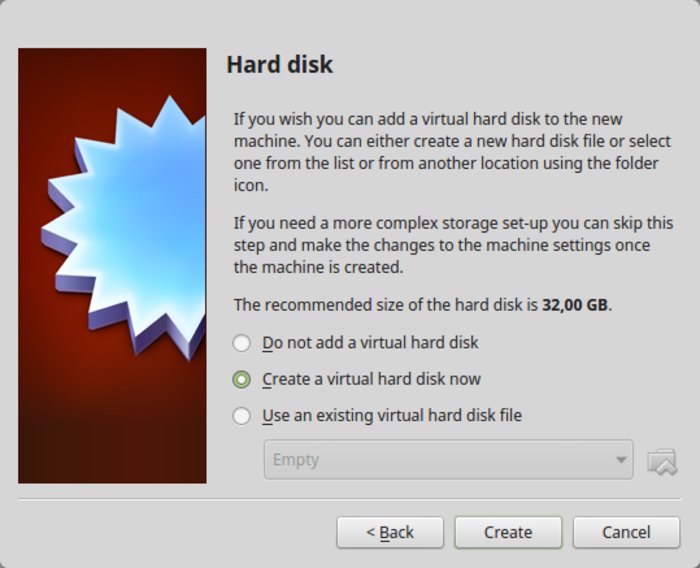
Step 6: Click Next, select “Create a virtual hard disk now”, and create.

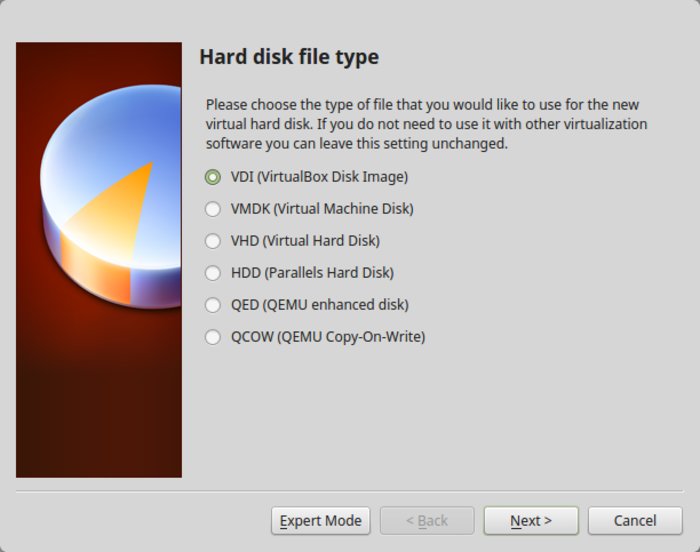
Step 7: Choose the hard disk file type (using the default setting is recommended except there are other preferences).

Step 8: Next is to allocate storage space for your hard disk. Choose if you want a flexible or fixed space.

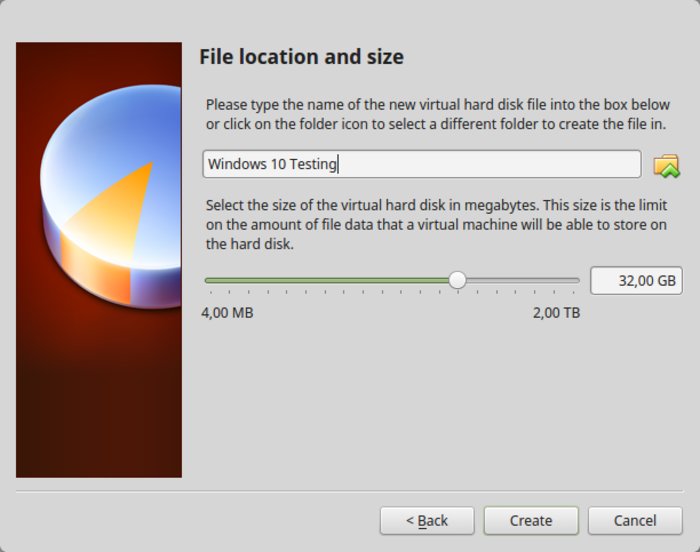
Step 9: Choose the file location and size and create.

Step 10: Click Create, and you’ve successfully set up your virtual machine…
Installing Vagrant
To install Vagrant using a graphical user interface (GUI), you will need to download the Vagrant installer from the Vagrant website and then run it. Here are the steps:
Step 1: Go to the Vagrant download page at https://www.vagrantup.com/downloads.html, and under the «Operating System» heading, click on the appropriate “Binary” for your computer. The installer will be downloaded to your computer.

Step 2: Locate the installer file on your computer and double-click it to start the installation process.

Step 3: Follow the prompts in the installer to complete the installation.
Step 2: Once the installation is complete, you can start using Vagrant by opening a terminal or command prompt and typing vagrant.
Setting up the Ubuntu machine
After downloading Vagrant, to confirm that it was successfully installed, open the terminal/cmd of your choice and head to the home directory using the $ c``d ~ as in the image below.

Note: ~ is used to move into the home directory in the command line.
List out the files in that directory using the ls command to check if Vagrant was successfully installed.
$ ls

After confirming the installation, create a directory for the Ubuntu setup using the mkdir command below.
$ mkdir Ubuntu_20.04

Change into the directory that you created using the following command:
$ cd Ubuntu_20.04

Run vagrant init ubuntu/focal64 command. Running this command automatically places a Vagrantfile in the directory created above. A Vagrantfile is a file that instructs Vagrant to create new Vagrant machines or boxes. ubuntu/focal64 is an existing Vagrant box for the Linux Ubuntu distribution.
$ vagrant init ubuntu/focal64

Start the Virtual Machine using vagrant up and watch it spin up the Virtual machine.
$ vagrant up

Ensure your VirtualBox looks like this:

Connect to the VM using vagrant ssh
$ vagrant ssh

Conclusion
This tutorial has shown you how to set up your Linux OS (Ubuntu) on Windows using Vagrant and VirtualBox. Vagrant is a great tool and a very easy way of using Ubuntu on Windows rather than having to dual boot. To learn more about Vagrant and VirtualBox, Check out these resources :
- Vagrant and VirtualBox Simplified
- Vagrant and VirtualBox Tutorial
- Automating Linux Installation using Vagrant and VirtualBox
I regularly encourage people to use Linux, and when I give them reasons to switch, I always mention that they can use Windows and Linux together if they’re ‘scared of Linux’.
One way to use the two systems together is to dual boot Windows and Linux. It works well, except you have to switch between the operating systems by restarting them. This is somewhat inconvenient.
If, like me, you’re an infrequent user of Windows and don’t want to trouble yourself with dual booting Ubuntu and Windows 10, I suggest installing Windows 10 inside Linux by creating a virtual machine.
In an earlier tutorial, I showed you how to install VMWare on Ubuntu, but in this one, we’ll be using Oracle VirtualBox to create virtual machines and installing Windows 10 on them.
What is VirtualBox and what are its advantages?
VirtualBox is open-source virtualization software from Oracle for creating virtual machines. With a virtual machine, you can run an operating system like an application inside your current operating system. It’s like a computer inside a computer.
These are called virtual machines because they’re basically emulating other operating systems, but they’re not really interacting with the computer system like a true operating system would.
The bottom line is that with virtual machine software, you can use Windows like an application inside Linux. Unlike regular applications, it will consume lots of RAM. But this way, you can use Windows-specific software and programs inside Linux without needing to install Windows fully.
Install Windows 10 in VirtualBox on Ubuntu and Linux Mint
Before installing Windows 10 in VirtualBox, let’s see what you need first:
- An internet connection with good speed, or a Windows 10 ISO that you’ve already downloaded.
- At least 4 GB of RAM. The more RAM you’ve got, the better.
- Around 20 GB of free storage for installing Windows 10.
Once you’ve made sure you have the prerequisites, let’s see how to do it. If you prefer, you can watch this tutorial as a video. Do subscribe to our YouTube channel for more Linux tutorials:
Step 1: Download Windows 10 ISO
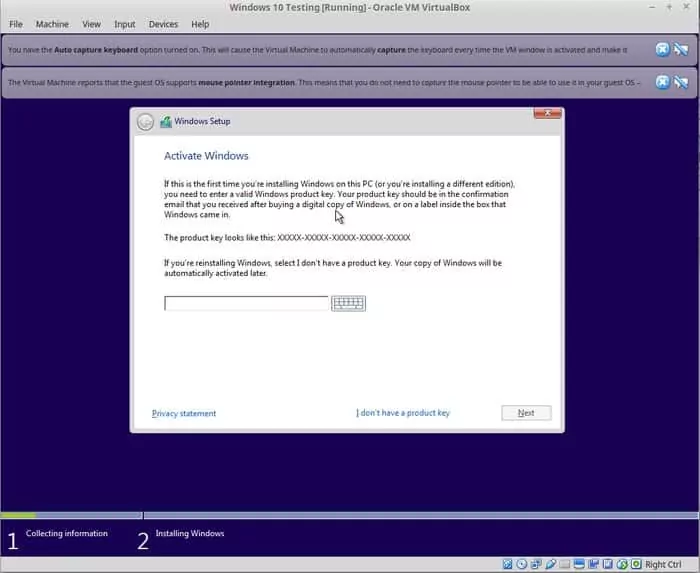
First and foremost, you need to download a Windows 10 ISO. You can download Windows 10 32-bit or 64-bit, depending on your system. Go to the link below and choose which version of Windows 10 you’d like to download:
You’ll have to choose the edition and language and then pick between a 32-bit or 64-bit system before you download the ISO.
Step 2: Install VirtualBox on Ubuntu and Linux Mint
It’s very easy to install VirtualBox on Ubuntu. All you need to do is to use the command below:
sudo apt install virtualboxStep 3: Install Windows 10 in VirtualBox
Start VirtualBox. You should see a screen like the one below.
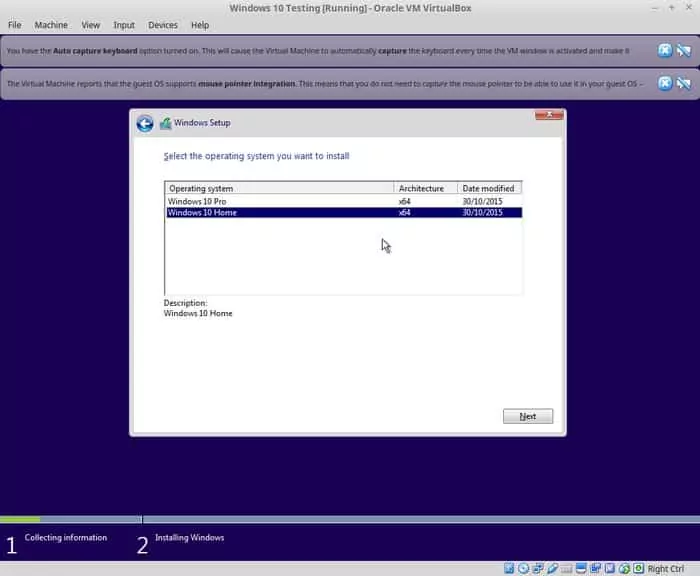
Name the VM anything you like. Also select the operating system and version. In this case I’ve chosen Windows 10 and 64-bit.
Choose the RAM size. The recommended RAM size for 64-bit Windows 10 is 2 GB, while for 32-bit Windows 10 it’s 1 GB. But I suggest you have a little more than that for a smoother experience.
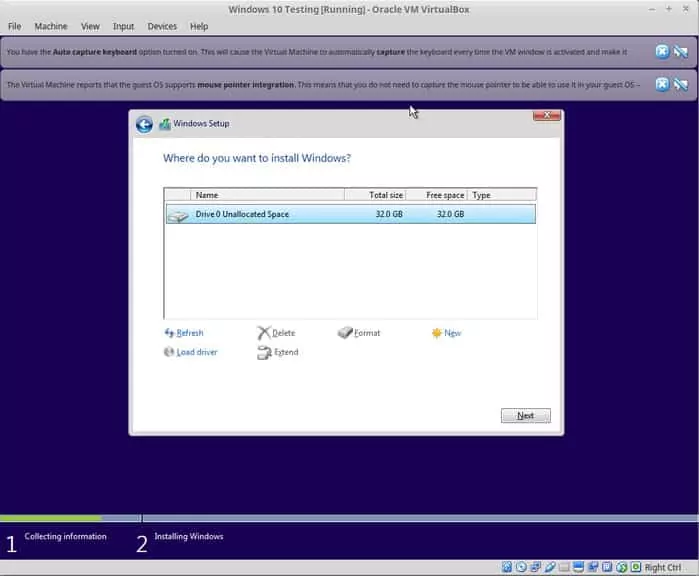
Next is the size for the virtual machine. If you’re crunched on space choose the recommended size, otherwise make it a little more than the recommended size.
For the format, go ahead with the VDI format.
Confused about the dynamic or fixed size? If you choose dynamic, the installed VM will grow beyond its allocated size later. If you won’t use Windows extensively, I suggest you go with the fixed size.

Now it’s time to finalize the installation size. You can choose where to create the virtual disk. The default location (Home directory) works fine.
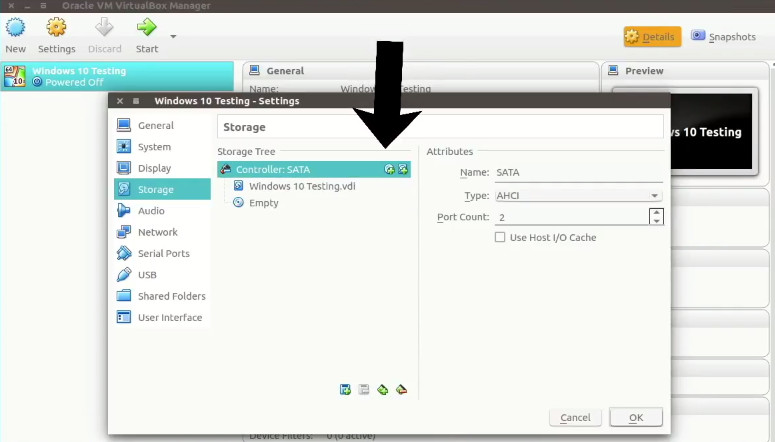
You should now be back at the start screen. But wait, we haven’t used our Windows 10 ISO yet, have we? Now’s the time to actually use the ISO. Click on Settings.
In here, go to Storage and add a new optical drive. I added this screenshot later because a few readers had difficulties finding it.
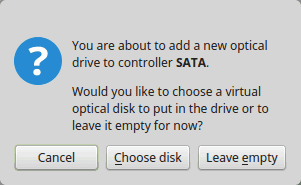
Click Choose disk and point to the Windows 10 ISO.
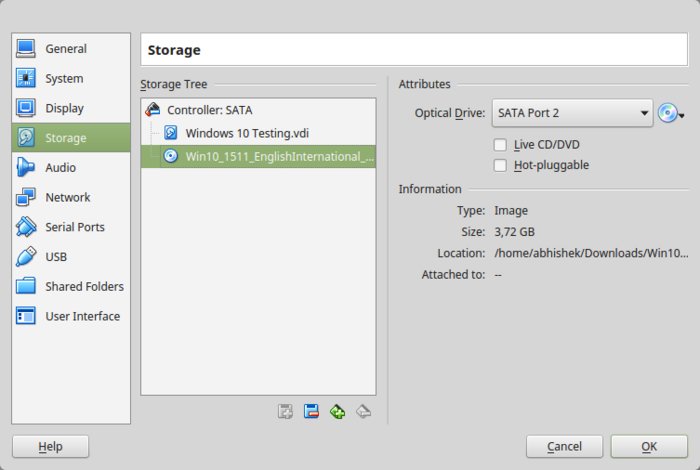
Now you should see the Windows 10 ISO listed under Storage. Press OK.
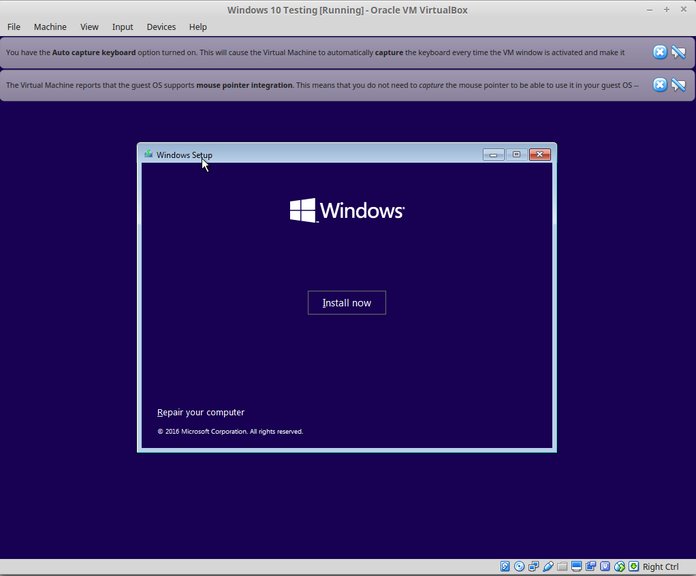
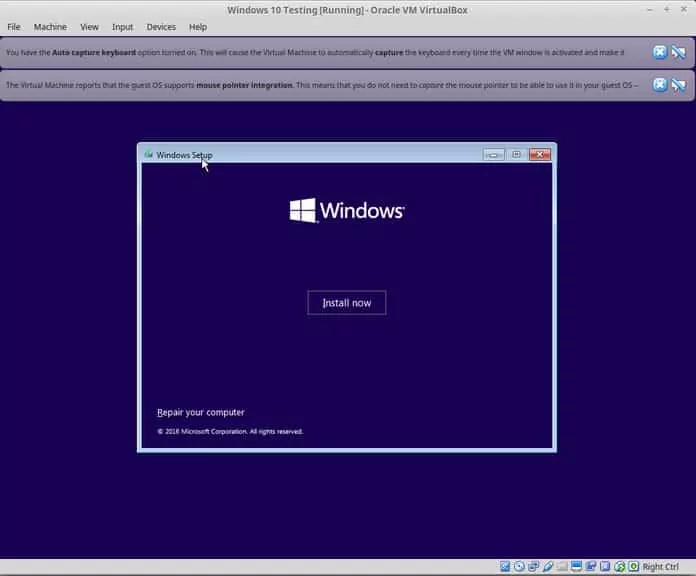
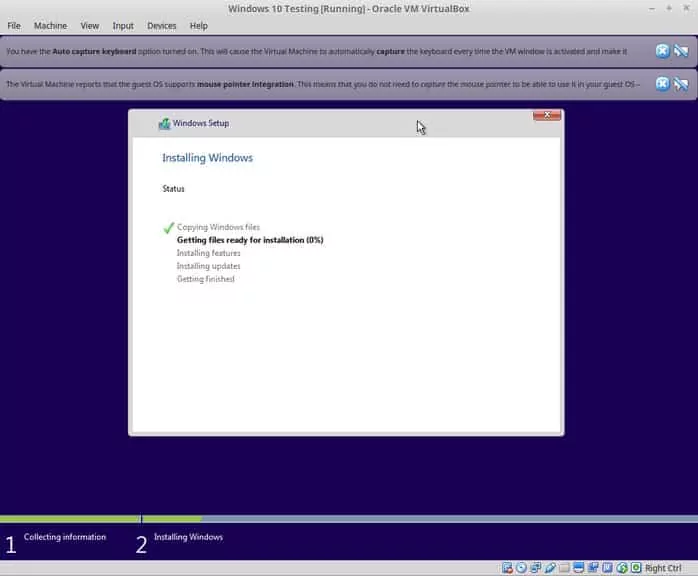
You should now be back at the main screen of Oracle VirtualBox. Now everything is ready. The next step is to install Windows 10. Click on Start from the main screen:
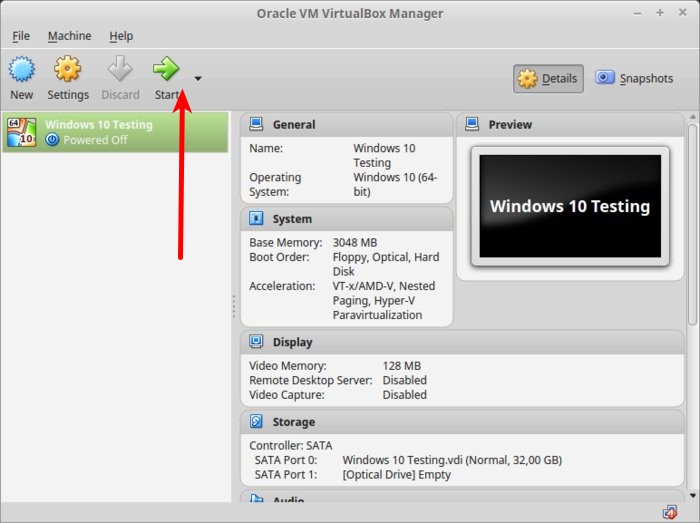
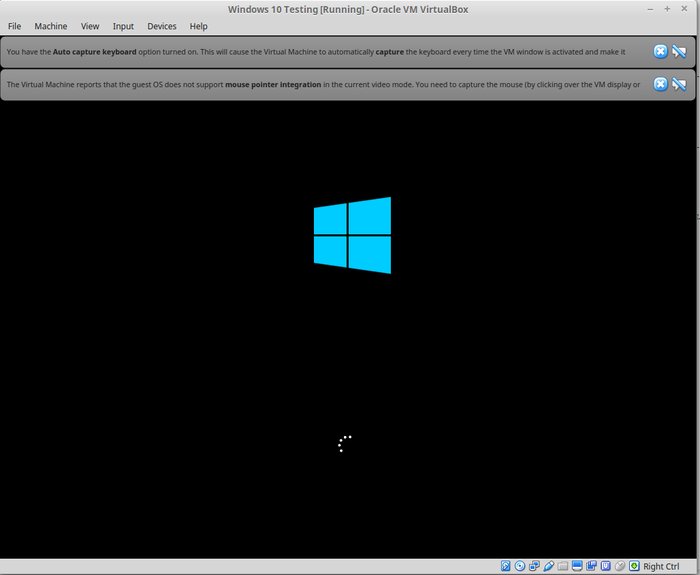
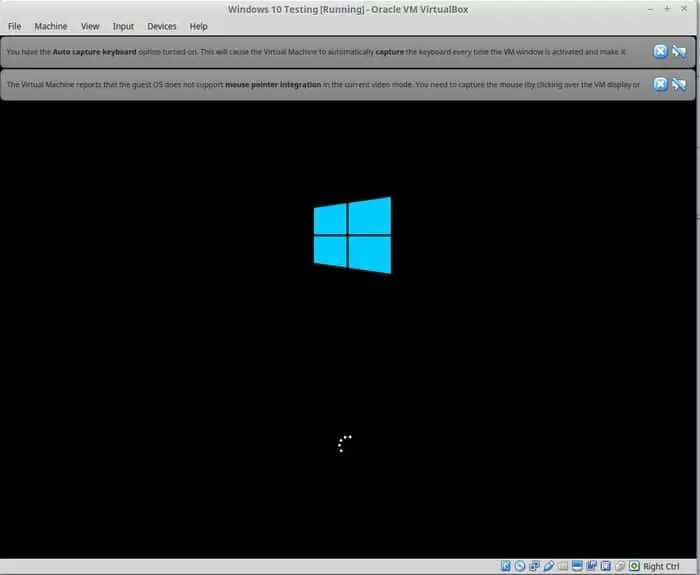
Voila!! You should see the familiar Windows boot screen:
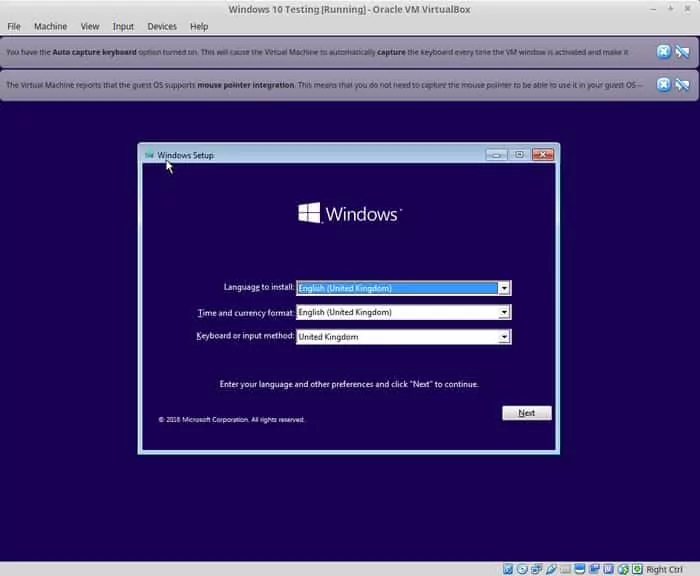
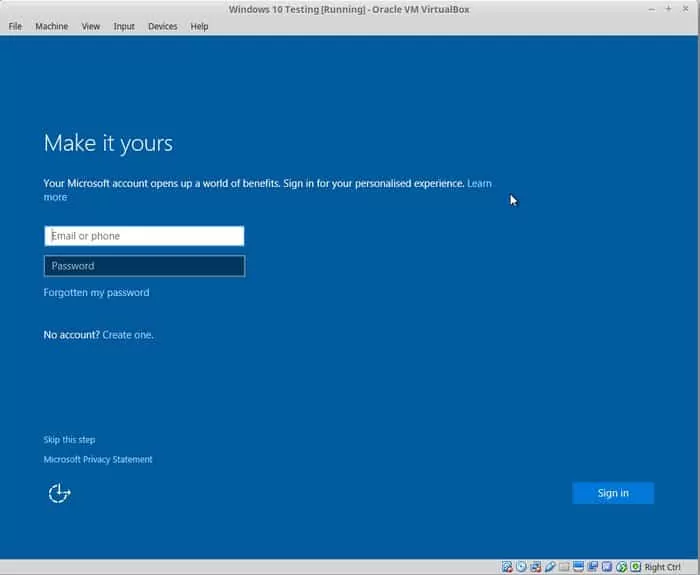
A couple of seconds later, you should see the option to install Windows:
🚧
At this point, if you see the Windows logo with a black background and it never starts to install, you may have to perform a little tweak.
As It’s FOSS reader Larry points out, “There seems to be an incompatibility between Virtualbox and Windows 10 1703. A virtual machine that runs W10 1607 fine will fail to boot W10 1703 -UNLESS- the following parameter is set: Under System – Acceleration you must set Paravirtualization to None and then reboot.”
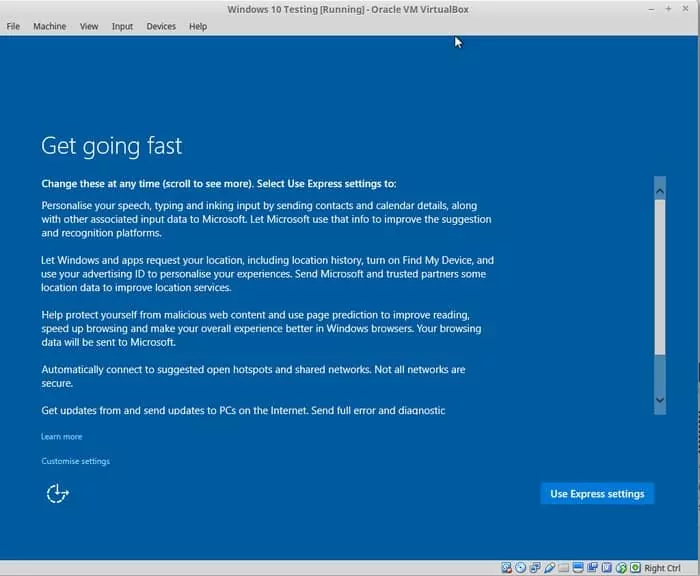
I think you can handle things from here, as installing Windows is just a matter of a few clicks. For your convenience, I’ve added the screenshots in a gallery. Click on the images to enlarge them if you need any hints.


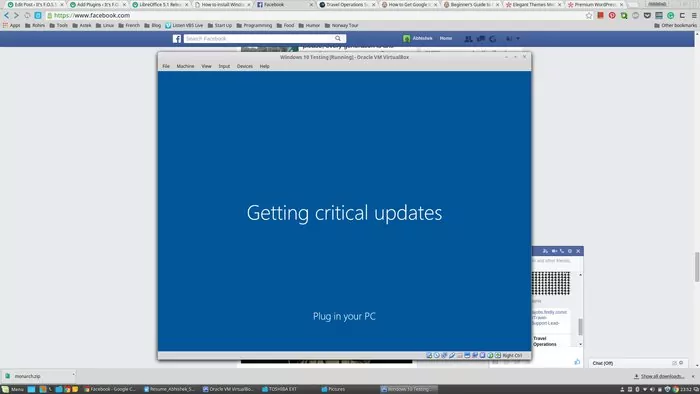

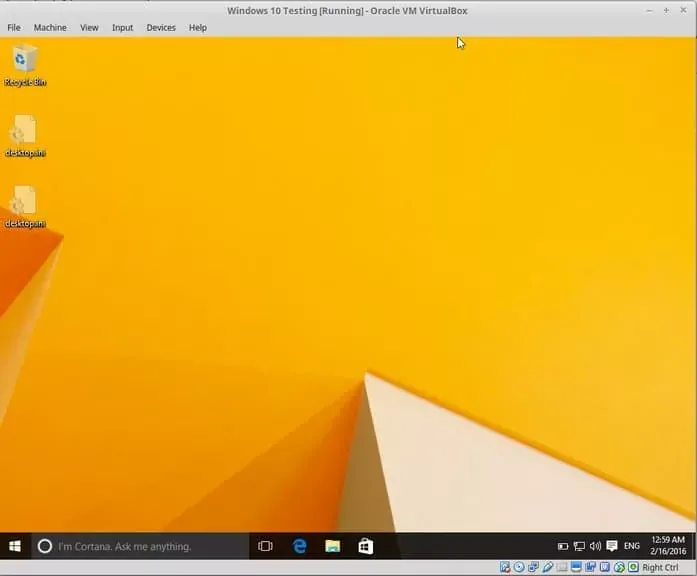
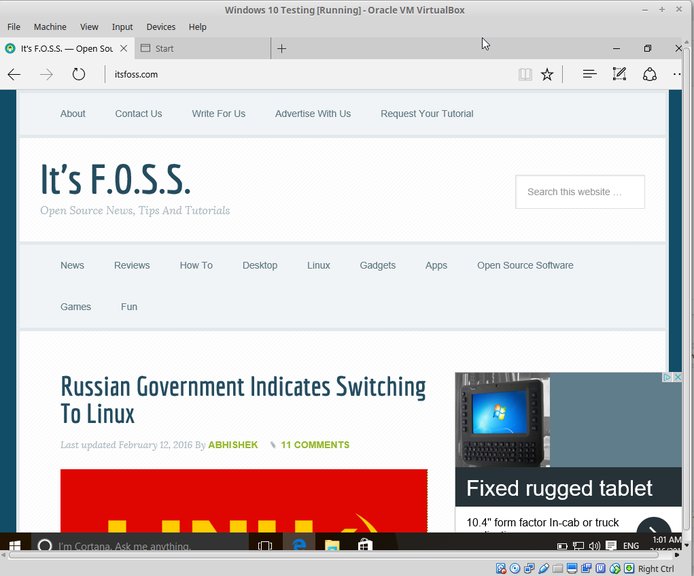
Once you’ve successfully installed Windows 10, you’ll find that the internet connection is shared with the virtual Windows as well: no need for further configuration. Here’s It’s FOSS on the Edge browser in Windows 10 inside a VM.
When you’re done using the virtual Windows, you can go back to the main screen and switch off the virtual machine from there:
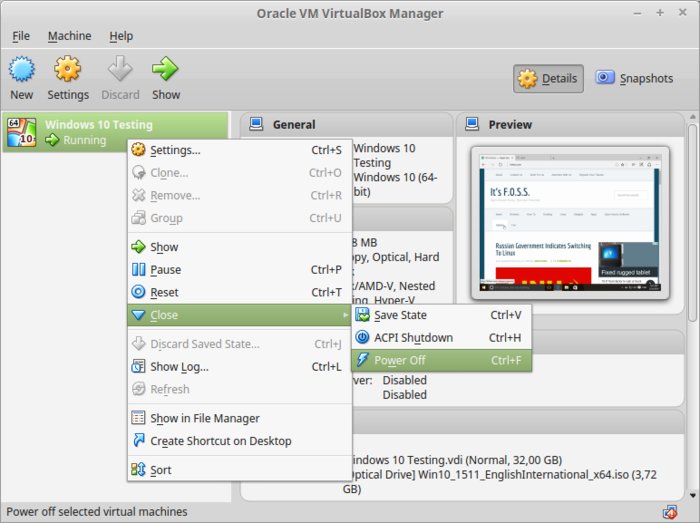
To start the virtual OS again, just click on Start (green arrow) on the main screen of VirtualBox again. That’s it. More on using virtual operating systems later. I think this gives you a good idea of how to install Windows in Ubuntu or Linux Mint to begin with 
In a related post, you can learn how to create a bootable Windows USB in Linux.
Your take?
Did this tutorial help you install Windows on Linux using VirtualBox? If you have questions or suggestions, feel free to drop a comment.
Installation Ubuntu Linux for testing or learning purpose on Windows 10 can be achieved by simply installing it on a virtual machine. The two popular virtualization software for Windows are Virtualbox from Oracle and VMware’s VM Player. Today, this guide will show you how to download and install the Ubuntu on Windows 10 with help virtualization software Virtualbox without deleting any data of your Windows 10 OS. The benefit of this tutorial is that the Ubuntu VM will run on Windows 10 when you command and doesn’t require any alteration in the Windows boot file or partitioning.
We are using the Virtualbox but the procedure is almost same for VMware Virtual Player too for installation of Ubuntu or any other Linux operating system.
Things you need to Install Ubuntu Linux on Windows 10
The prerequisites to Install Ubuntu on Windows 10 are:
1. Oracle Virtualbox (link available below in the steps)
2. Ubuntu ISO bootable image (link provided below)
3. Virtualbox Guest Additions
4. Windows 10 as host operating system
Steps to perform the Ubuntu system installation on Windows 10 VirtualBox
1. Download and Virtualbox Windows 10 Installation
2. Ubuntu ISO download
3. Install Virtualbox
4. Create an Ubuntu VM
5. Install Ubuntu on Virtualbox Windows 10
6. Install Virtualbox Guest Additions
Note: The step by step guide given below is also same for the Ubuntu installation on Windows 7 and Windows 8 using Virtualbox
1. Download and Virtualbox Windows 10 Installation
Step 1: First we need to download the Oracle’s Virtualbox virtualization software on Windows 10. For that use the link: www.virtualbox.org. Click on the Download VirtualBox button and select VirtualBox platform package for Windows.
Step 2: After downloading the setup which is around 109 MB, right click on it and select Run as administrator to install it.
Note: Before Installing the Virtualbox on Windows be sure that your system supports the Virtualization and it enabled in the BIOS.
Ubuntu ISO download
Step 1: The open source Ubuntu Linux comes in different flavors and you can download any of them from the official Ubuntu’s website. Here is the Link: www.ubuntu.com/download/desktop.
Note: If you already have the Ubuntu.iso file then leave this step.
Step 2: Right now while performing this guide the two versions of Ubuntu are available: Ubuntu 16.04.3 LTS and Ubuntu 17.10. The Ubuntu 16.0.4.3 is the stable and Long terms support version while the Ubuntu 17.10 is the latest build but struggling with some bugs. So, it is good to do download the stable and LTS ISO file.
Note: If already have installed the Virtualbox then skip this step.
Step 1: Right-click on the downloaded Virtualbox.exe file and run it as administrator to install it.

Step 2: Click on the next button.

Step 3: At this, if you want to change the installation location of Virtualbox rather than default C: drive then click on browse button and select the folder or drive where you want the custom installation.
Leave all the checkboxes as it is and click on next and install the Virtualbox on Windows 10.
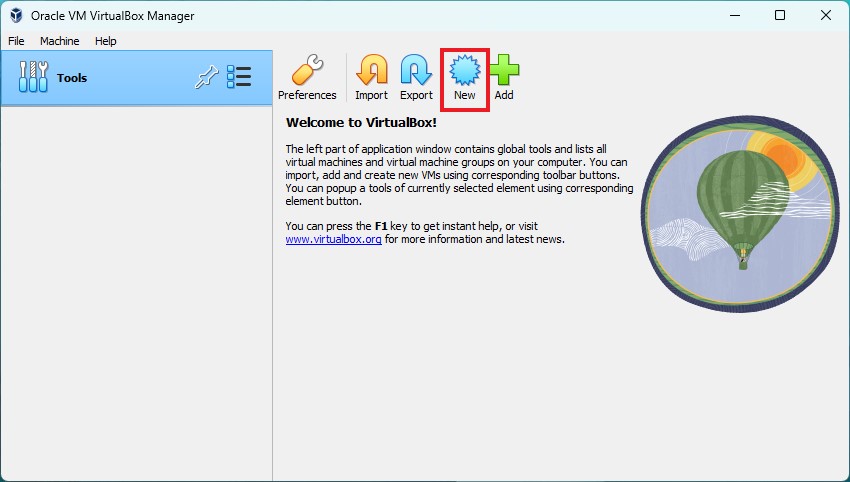
Create an Ubuntu VM (Virtual Machine)
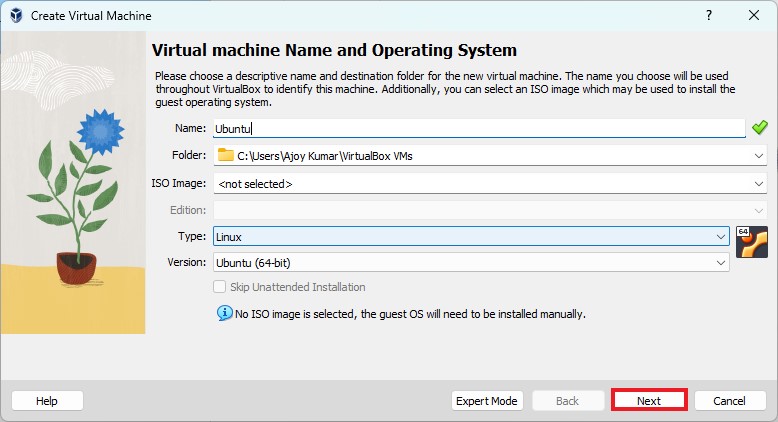
Step 1: After successful Virtualbox installation, run it to create an Ubuntu VM. Click on New and give some name to your Ubuntu VM. For example, here we have used H2S. From the type drop-down box select the OS type which is Linux and Version is Ubuntu 64 bit. If you have Ubuntu 32 bit version then please select that.
How Much Memory Do You Give Your Virtual Machine
Step 2: In this step, the Vitrualbox will ask to set the Virtual Machine Memory Size for Ubuntu VM. The recommended RAM for Ubuntu OS is 2 GB or 2048 MB but you can assign more for better performance. For example here in our Windows 10 PC, we have maximum 8GB memory and out of that, we are going to assign 4GB to Ubuntu VM.
Don’t Miss: How To Install Ubuntu From a USB Stick on Windows 10 PC
Create A Virtual Hard Drive For Ubuntu VM (Virtual Machine)
Step 3: After assigning the memory, its time to provide some space for the installation of Ubuntu VM. To create a new virtual hard disk select the option “Create a virtual hard disk now” and click “Create”.
Choose Virtual Hard disk Type
Step 4: The Virtualbox offers three type of Virtual hard drives:
1.VDI- Virtual Disk Image
2.VHD- Virtual Hard Disk
3.VMDK- Virtual Machine Disk
If you are planning to use the Virtual hard drive with some other virtualization software in future such as with VM player or Windows Hyper-V then you choose according to that otherwise leave it as it is “VDI” and click on NEXT.
There are a number of different hard drive types that you can choose from. Choose “VDI” and click “Next”.
Storage on Physical Hard disk for Ubuntu VM
Step 5: To install Ubuntu Virtual Machine files on physical storage of Windows 10, the Virtualbox offers two options:
- Dynamically allocated
- Fixed Size
The Dynamically allocated hard disk option will only use space as it required. For example, you assigned 30 GB to Ubuntu VM but if it requires 10Gb initially then the Virtualbox uses only that and not going to block the whole 30GB. And in future, it requires more, expands according to that. It is good in terms of disk space but not performance wise.
Fixed Size on another hand block whole space you have assigned to the VM. For example, if you allocated the 30GB, then the machine will straight away assign that portion from the physical hard drive to Ubuntu VM. The Fixed size allocation is better for performance but take some time to create if you are assigning a large amount of space.
Choose the option you would like and click “Next”.

Virtual Hardrive File location and Size
Step 6: Give some name to your virtual hard disk and select the amount of space you want to assign the Ubuntu VM. The minimum recommended space is 25GB. You can assign more for better performance.

Assign Ubuntu ISO to Virtualbox
Step 7: Go to setting and from storage click on the empty CD-Rom icon and from the Optical drive option choose the Virtual optical Disk File and select the Ubuntu.iso file which is our downloaded beginning of this article. After selecting the ISO file click OK.

Install Ubuntu On Your Virtual Machine
Step 1: On the top of the Virtual box you will an option “START“, click on that to initialize the Ubuntu installation process on Windows 10.
Step 2: The Ubuntu first screen will load two options Try Ubuntu or Install Ubuntu.
Select the installation language and after that the “Install Ubuntu” option.
Step 3: If you have enough internet bandwidth and then you can select the option download the updates while installing Ubuntu.
The second option doesn’t require an internet connection and recommended to select it to install third party software such as graphics driver, Mp3 player, flash and other media files.
Click “Continue”.
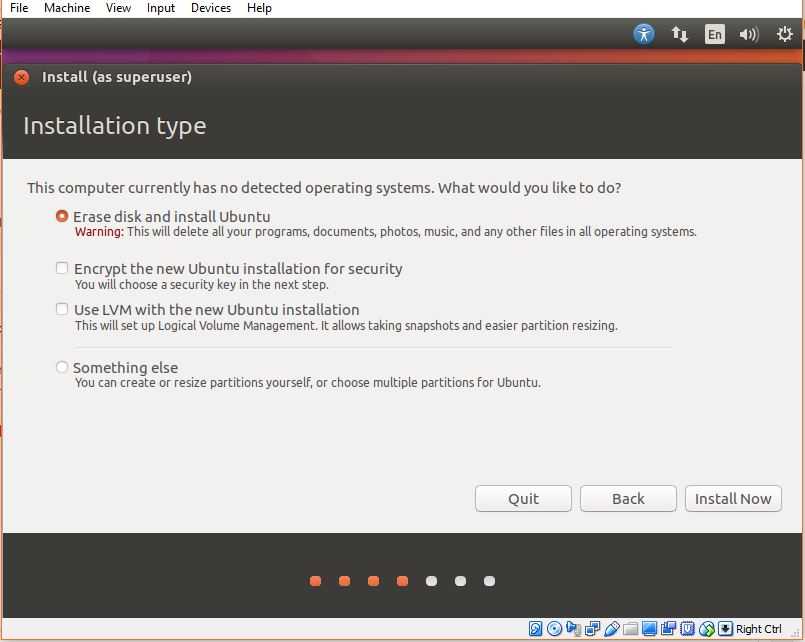
Step 4: In this step, you will decide how you want to decide the Ubuntu either clean installation or dual boot with some other OS. Leave the default option the “Erase disk and install Ubuntu” option because it is on the virtual machine won’t going to affect the physical Windows 10 machine.
Click “Install Now” and “Continue“.
Step 5: Select your country to sync the Ubuntu OS time zone with your’s and click “Continue”.
Step 6: Click on the “Detect Keyboard Layout” to automatically detect your keyboard layout and if the machine not able to do it, you can select it manually. Click “Continue”.
Step 7: Create a user and set the password for your Virtual Ubuntu machine and click on continue to install the Ubuntu Virtualbox.
Don’t Miss: How To Install Hyper-V on Windows 10
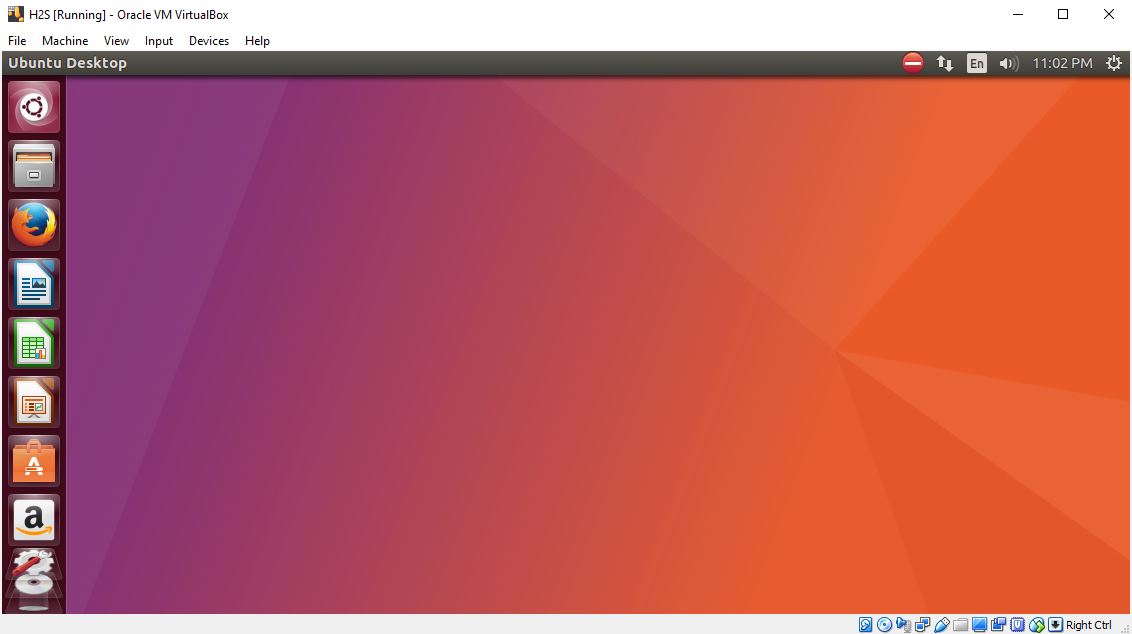
Finally, the Ubuntu is installed on VirtualBox on Windows 10 as host machine and you and I together have done a great job!
Do you want to install Ubuntu on Windows 11 without affecting your Windows operating system? If your answer is yes, then you are at the right place. Here is a beginner’s guide on; how to install Ubuntu 22.04 LTS on VirtualBox on your Windows PC. Here, we have provided you with the step-by-step processes with proper screenshots.
Ubuntu is a free and open-source operating system based on Linux. Before installing Ubuntu 22.04 LTS, you have to download and install VirtualBox on the Windows 11 operating system. For that, you can check out our linked guide. Once you have installed VirtualBox, you can follow the guide.
We are going to use VirtualBox to install Ubuntu on our Windows computer. First, let me clarify that VirtualBox is free and open-source software. With the help of this software, we can install multiple operating systems within a single host operating system.
1. Download Ubuntu ISO File
So before discussing how we can install Ubuntu on Windows 11. You have to download the Ubuntu ISO file on Windows 11. For that, visit ubuntu.com, click on the download option from the menu select Ubuntu Desktop, and download the LTS version for the Windows operating system.
Here are the recommended system requirements to install Ubuntu to your system:
- 2 GHz dual-core processor
- 4 GB system memory
- 25 GB of free hard drive space
- Internet access is helpful
2. Creating a Virtual Machine for Ubuntu
Now, to install Ubuntu on Windows 11 using VirtualBox, we have to create a virtual machine for that. To create a virtual machine, you can follow the steps mentioned below:
1. Open the VirtualBox software and click on the New icon to create a virtual machine for Ubuntu.
2. After that, name your machine, and select the type of Operating System as Linux and the version that you had downloaded (32-bit or 64-bit).
3. After selecting all this just click the Next button. Don’t worry we will select the ISO file later on.
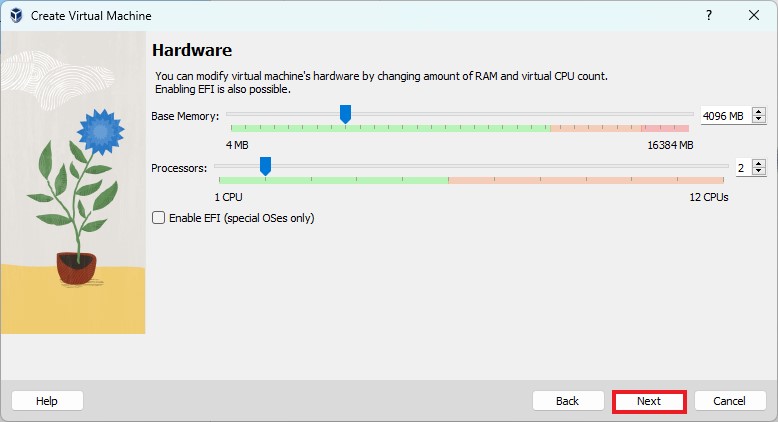
4. Assign the amount of RAM you want to give to your Ubuntu Virtual Machine. 4GB is the recommended one, however, for better performance you can allow more if your host system (Windows 11) has enough spare memory block. From here, you can also assign a CPU core.
5. Then click on the Next button.
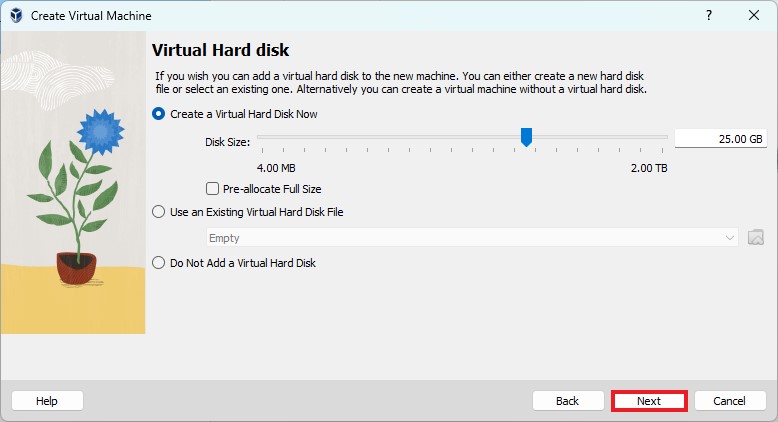
6. After that, you also need to allocate hard disk space. For that, click on the Create a Virtual Hard Disk Now option, let the default option be selected, and just click on the Next button.
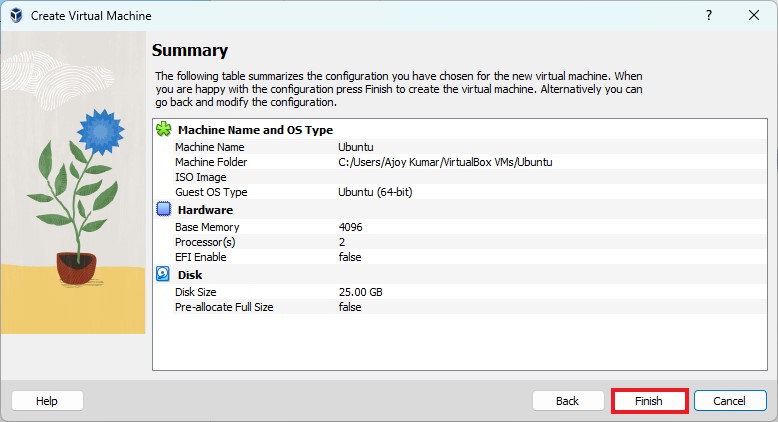
7. Now, review the virtual machine setup and click on the Finish button.
8. Now, you have to select the Ubuntu ISO file. For that, select the operating system name in VirtualBox, then click Settings > Storage > Controller ID > Empty > Optical Drive.
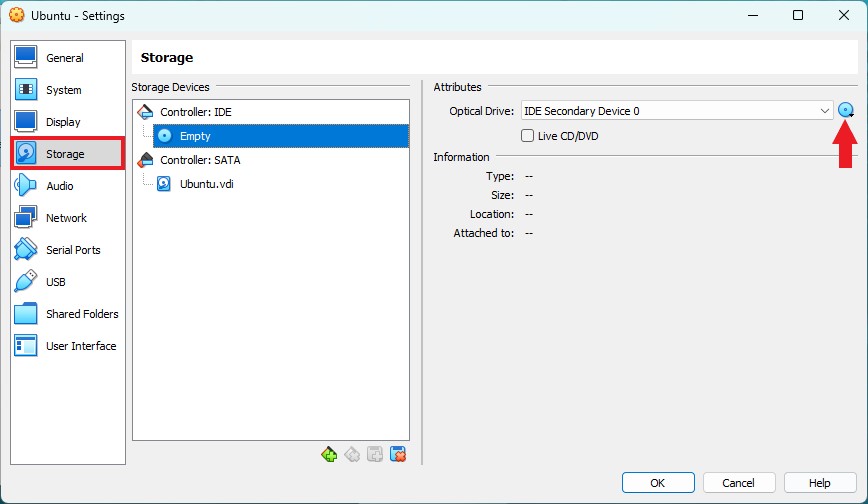
8. After that, click on the optical drive drop-down menu and select the Choose disk file option. Select the Ubuntu ISO image file from your downloaded location, then click the OK button.

Note: If the OK button does not work, then you have to enable Virtualization settings on your system BIOS. For that, you can check out our guide on; how to enable virtualization on Windows 11.
That’s it! This is how you can create a virtual machine for the Ubuntu operating system. Once the virtual machine is created, you can proceed to the next step.
3. Installing Ubuntu on VirtualBox
Now, our virtual machine is ready for the installation process. You can proceed with the installation and setup process of Ubuntu 22.04 LTS.
To do so, you can follow the steps mentioned below:
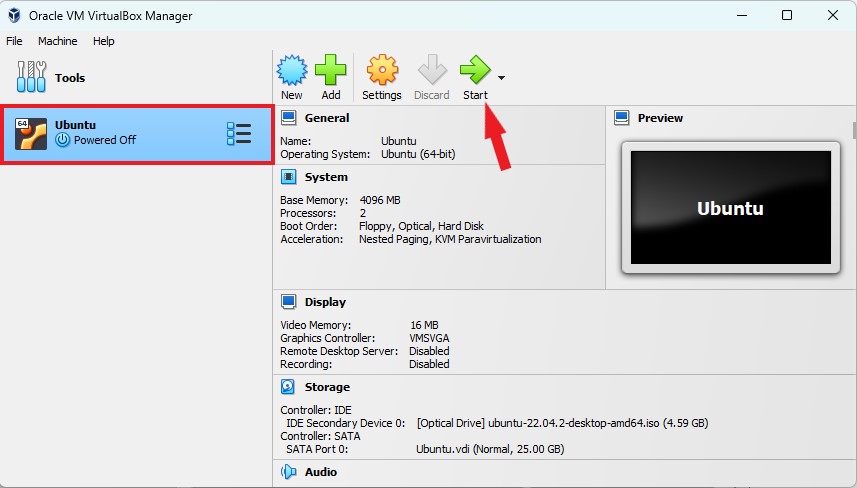
1. To install Ubuntu 22.04 LTS on a Virtual Machine, select your virtual machine name and click the Start button.
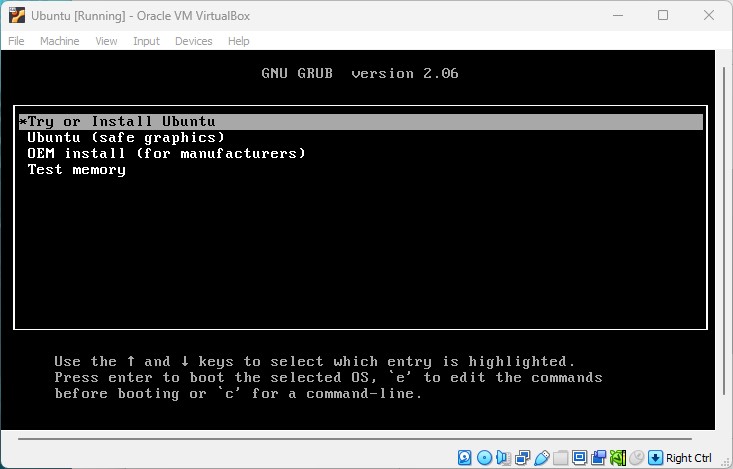
2. After that, you will get the GUN GRUB window. Here, select Try or Install Ubuntu and hit the [Enter] key.
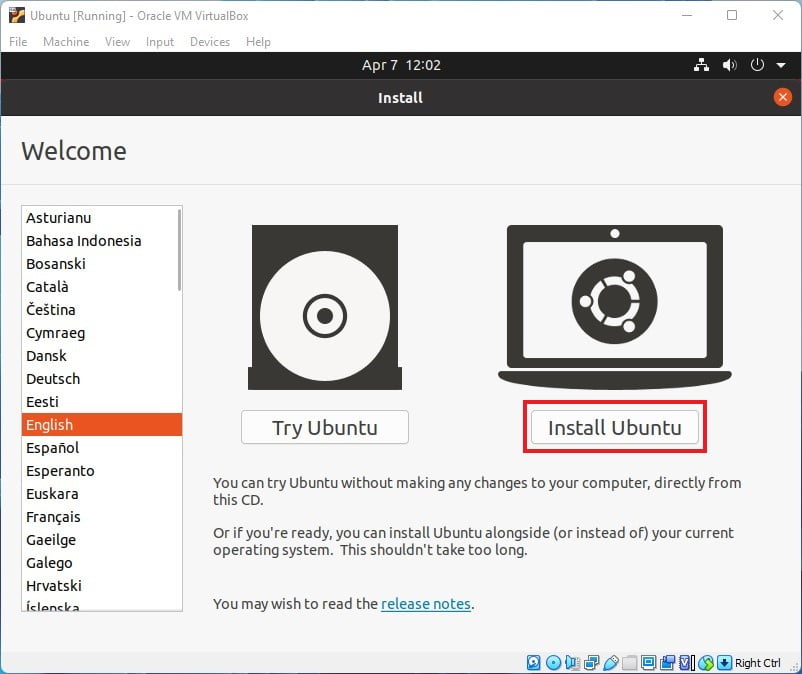
3. After that, it will open the Ubuntu installation window.
4. Here, you have to set up your Ubuntu installation. For that, select your language, and click on the Install Ubuntu button.
5. After that, select the Keyboard language and layout and then click on the Continue button.
6. On the Updates and other software window. You have to select the normal installation, download updates while installing Ubuntu, and Install third-party software of graphics and Wi-Fi hardware and additional media formats.
7. Then click on the Continue button.

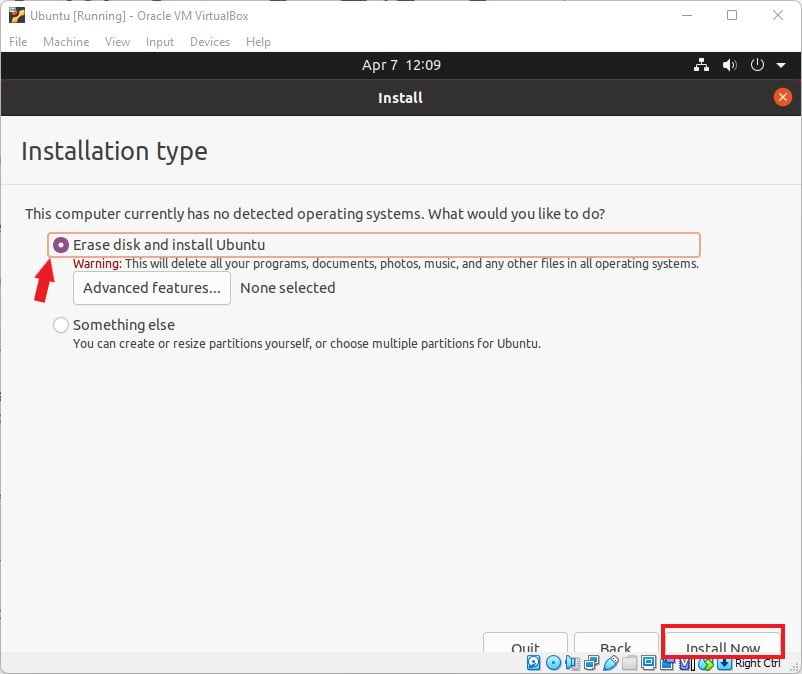
8. After that, select the installation type as the Erase disk and install the Ubuntu option. Don’t worry, it will not erase any of the data because we are installing it on a virtual machine.
9. Finally, click on the Install Now button to continue.
10. After that, click on the Continue button, select a location, register a user, and click on Continue. It will take approximately 30 minutes to install the Ubuntu operating system on VirtualBox.
After the installation is completed restart the virtual machine, on the booting windows press the [Enter] to reboot. Now, you are ready to use Ubuntu 22.04 LTS on Windows 11. If you are getting a screen resolution problem then you can check out our guide on; how to change the Ubuntu screen resolution in VirtualBox; to fix it.
Conclusion
By following the above-mentioned methods you can install Ubuntu 22.04 LTS on the Windows operating system using the VirtualBox. However, if you want to install the Non-LTS version of Ubuntu then the process will be the same instead of Ubuntu 22.04 LTS you need to download the iso file of Ubuntu 23.04.
That’s it! We hope this guide was helpful to you. If you liked the article then you can share it with your friends. If you have any doubts regarding the installation process you can ask them in the comments section below. We are always there to assist you.