Contents
- Introduction
- Required: Virtualbox Guest Additions
- Creating a shared folder
-
Prepare the folder
- Linux
- Windows
-
Troubleshooting
- The name was not valid
- Ubuntu 10.04 host
Introduction
This explains how to share files and folders (directories) between host and guest. (Files are shared over a network, in other words, you access remote files. For virtual machines, the network between host and guest is virtual since they are on the same real machine. But the steps you take are similar to setting up file sharing over real networks.)
Required: Virtualbox Guest Additions
Before sharing folders, you must install Guest Additions. For instructions on how to do this, see Guest Additions.
-
Create a folder on the Host computer (ubuntu) that you would like to share, for example ~/share
-
Boot the Guest operating system in VirtualBox.
-
Select Devices -> Shared Folders…
- Choose the ‘Add’ button.
-
Select ~/share
- Optionally select the ‘Make permanent’ option
Prepare the folder
Linux
With a shared folder named share, as above, the folder can be mounted as the directory ~/host with the command
sudo mount -t vboxsf -o uid=$UID,gid=$(id -g) share ~/host
Windows
On the Windows Guest, run
net use x: \\vboxsvr\share
Now anything placed in this folder should be visible from the host in the ~/share folder.
Troubleshooting
This can be done more generically with the following:
sharename="whatever.you.want.to.call.it";
sudo mkdir /mnt/$sharename
sudo chmod 777 /mnt/$sharename
sudo mount -t vboxsf -o uid=1000,gid=1000 $sharename /mnt/$sharename
ln -s /mnt/$sharename $HOME/Desktop/$sharename
For the above command if you get the following error:
mount: unknown filesystem type 'vboxsf'
Then just change the vboxsf to vboxfs
If you want to have it mount automatically upon each boot, put the mount command in /etc/rc.local Debian distros (e.g. Ubuntu 10.04 and later) HOWTO Use Shared Folders
See Section 4.4 «Folder Sharing» in the VirtualBox documentation.
Note: if you want to mount the directory as owned and writable only by root, omit the -o uid=1000,gid=1000 option to the mount command
/sbin/mount.vboxsf: mounting failed with the error: Protocol error
The above error could be one of the following.
The name was not valid
Make sure you specified the right name on the bash commands. If the guest machine is expecting «share» (as we did in the Prepare Host section) and you wrote
sharename="donotshare"
sudo mkdir /mnt/$sharename
sudo chmod 777 /mnt/$sharename
sudo mount -t vboxsf -o uid=1000,gid=1000 $sharename /mnt/$sharename
ln -s /mnt/$sharename $HOME/Desktop/$sharename
it will not work.
Ubuntu 10.04 host
Note: Running on Ubuntu 10.04 host and Mint 14 as virtual system, the system would not accept a ~/share. It complained that it was not an absolute address. I entered /home/jim/share and it worked fine.
e. g.
-
Create a folder on the Host computer (ubuntu) that you would like to share, for example ~/share
-
Boot the Guest operating system in VirtualBox.
-
Select Devices -> Shared Folders…
- Choose the ‘Add’ button.
-
Select ‘/home/<user>/share’ for Folder Path
- Select ‘share’ for Folder Name
- Optionally select the ‘Make permanent’ option
Если вы часто работаете с виртуальными машинами, то довольно часто возникает необходимость обменяться файлами между виртуальной машиной и реальной системой. Виртуальные машины часто используются для тестирования новых систем, программного обеспечения или для пользователей Linux это еще один способ иметь под рукой полноценную Windows, запущенную одновременно с основной операционной системой.
В этой небольшой статье мы рассмотрим как сделать общую папку в Virtualbox. Для этого можно было бы использовать различные обходные пути, например, применять USB накопитель, доступный в обоих системах, но это лишнее, все что нужно поддерживается по умолчанию.
Мы будем рассматривать как выполняется настройка общей папки Virtualbox, как для систем Windows, так и для Linux. Настройка самой виртуальной машины идентична в обоих случаях, но настройка гостевой системы немного отличается. Первым делом необходимо, чтобы в гостевой машине были установлены дополнения гостевой ОС. Это обязательное условие. Мы не будем рассматривать как это сделать, поскольку это уже описано в отдельной статье.
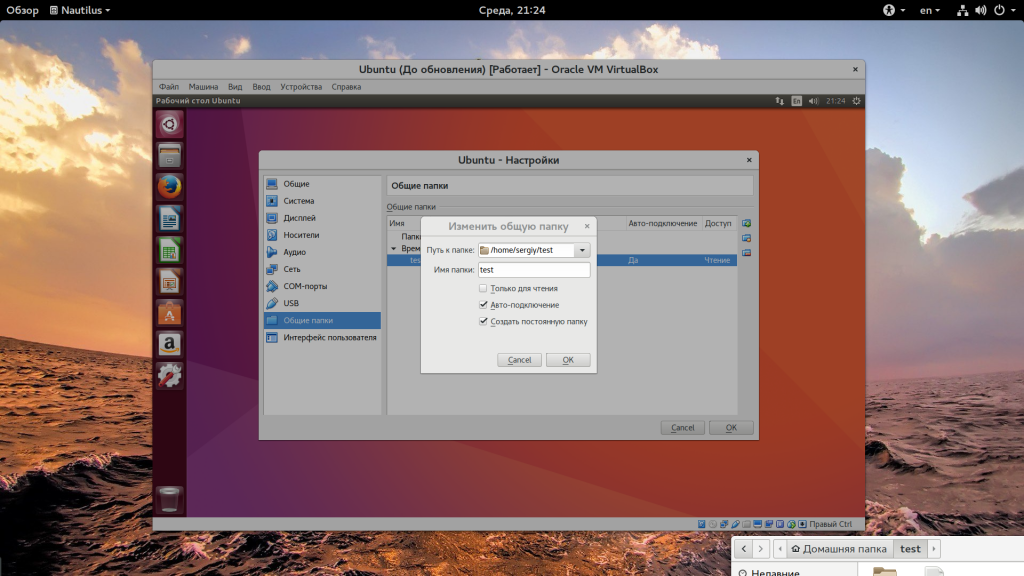
Начнем с Windows, я буду предполагать, что дополнения гостевой системы уже установлены. Откройте меню «Устройства», затем «Общие папки» и выберите «Настроить общие папки»:
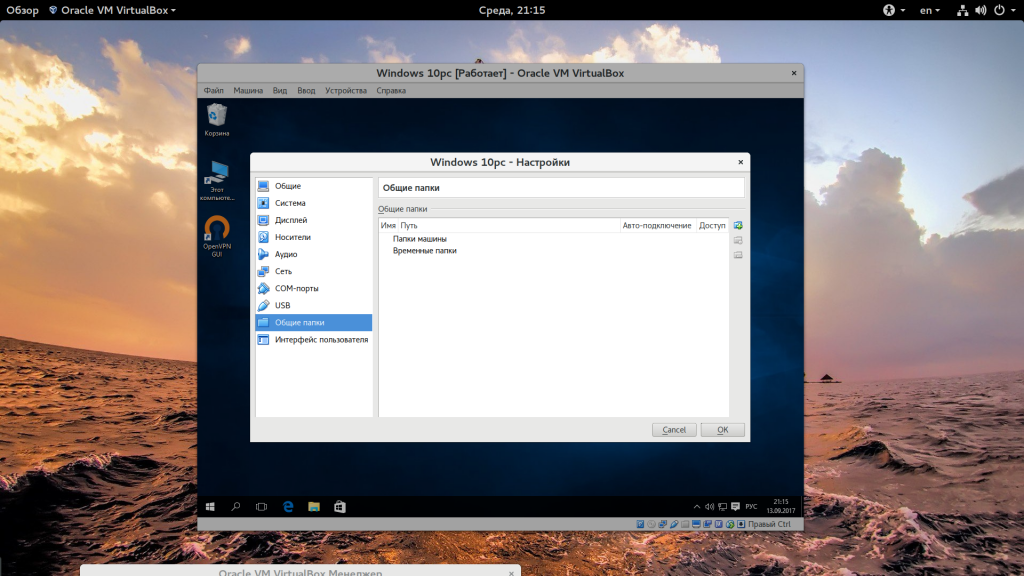
Здесь нажмите кнопку со знаком «+»:
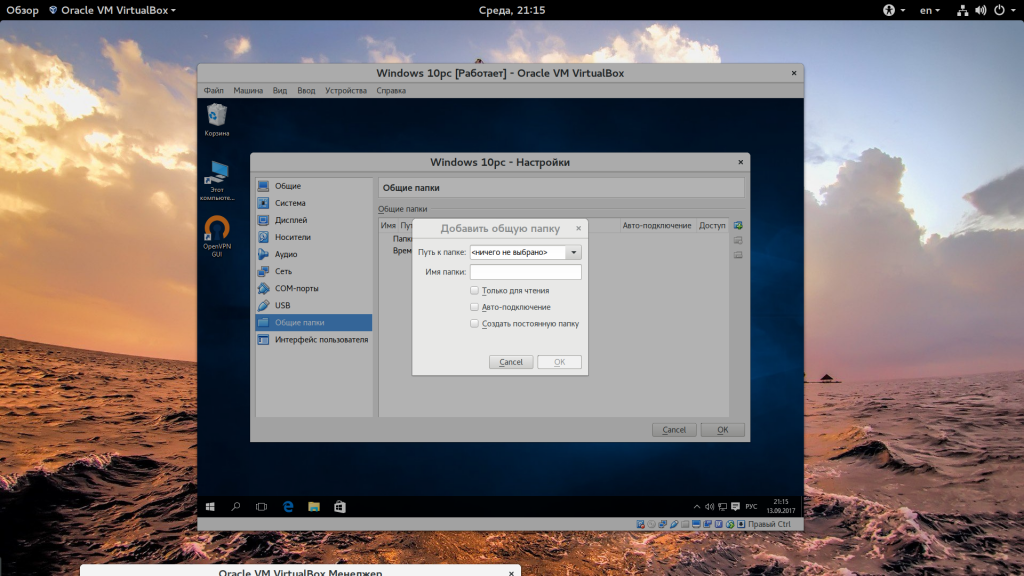
В открывшемся окне необходимо выбрать путь к папке:

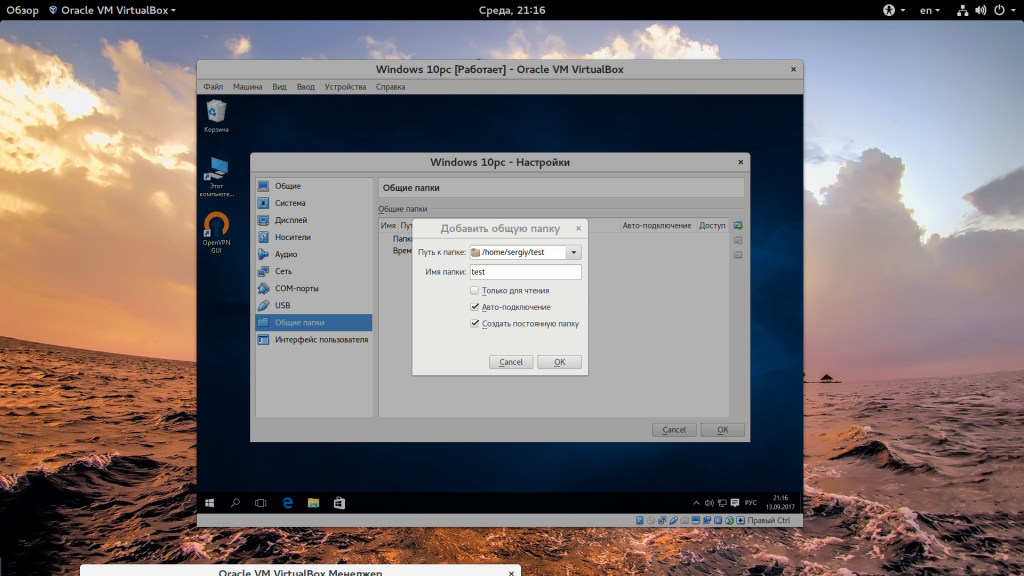
Затем установить галочки «Автоподключение» и «Создать постоянную папку»:
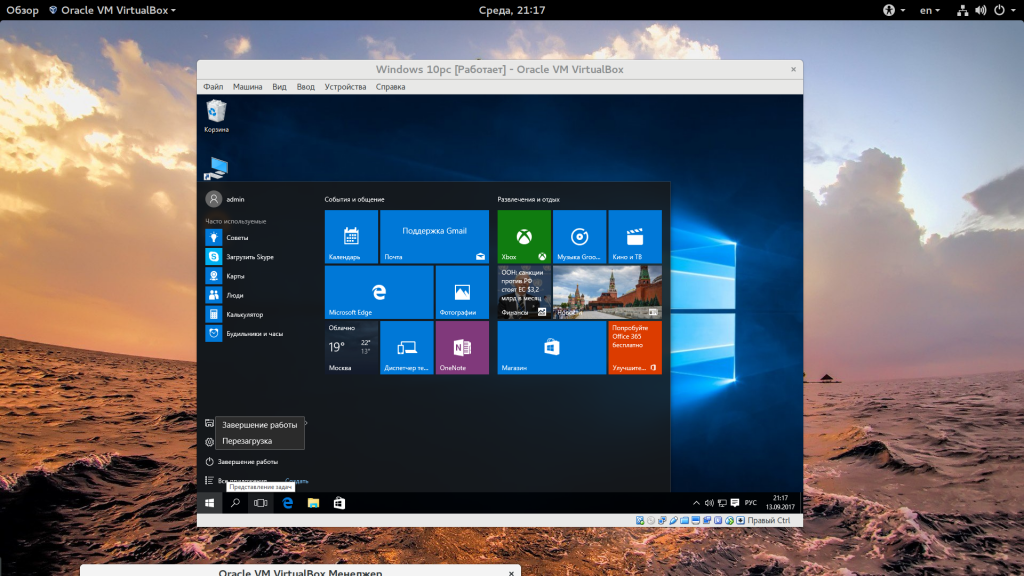
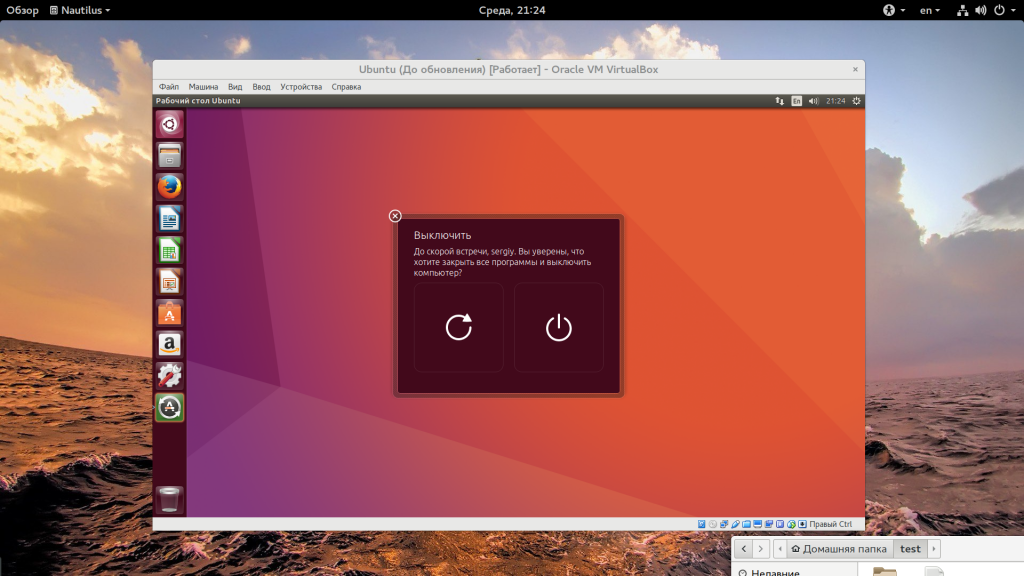
Дальше нажмите «Сохранить» и еще раз «Сохранить» чтобы закрыть оба окна. После этого новая папка не будет подключена к вашей системе. Вам придется перезапустить компьютер:
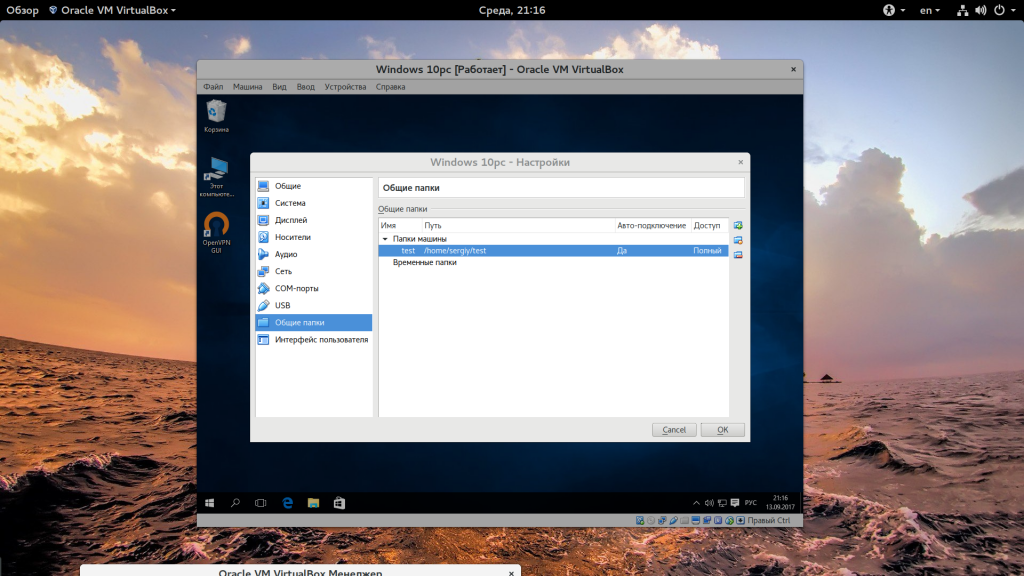
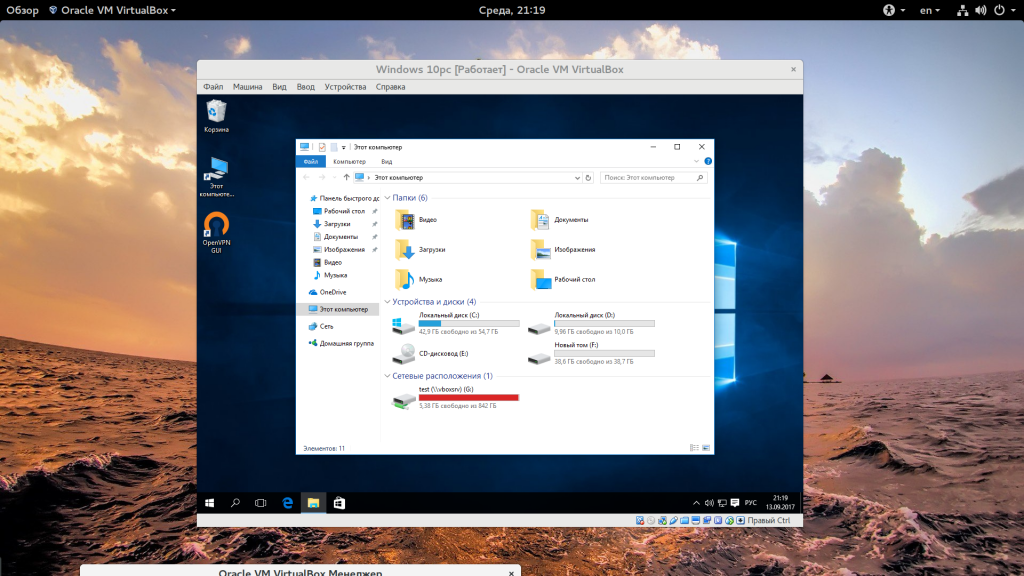
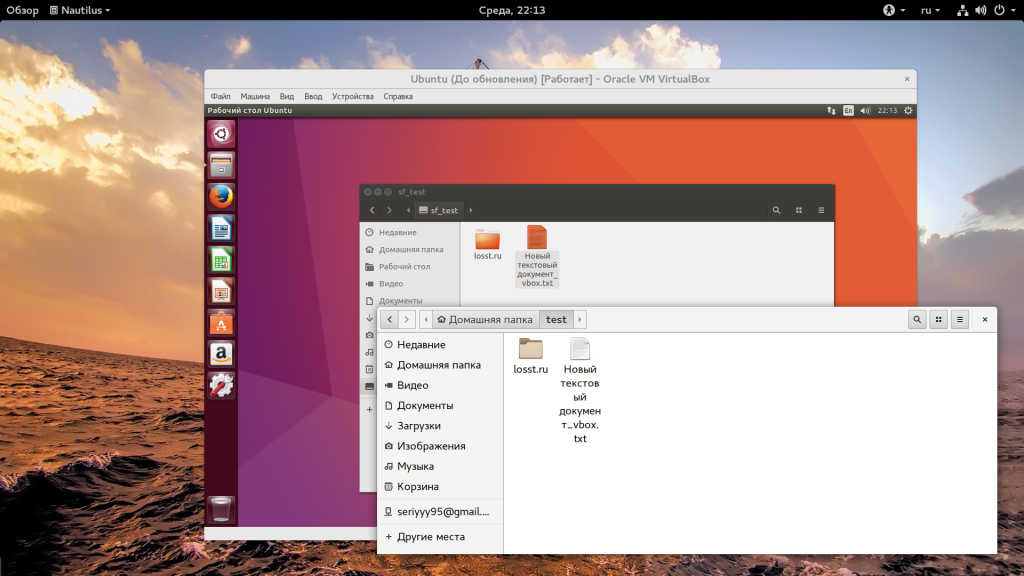
И только после перезагрузки общая папка virtualbox будет готова к использованию. Здесь можно создавать файлы, и они сразу же будут видны в обоих системах.
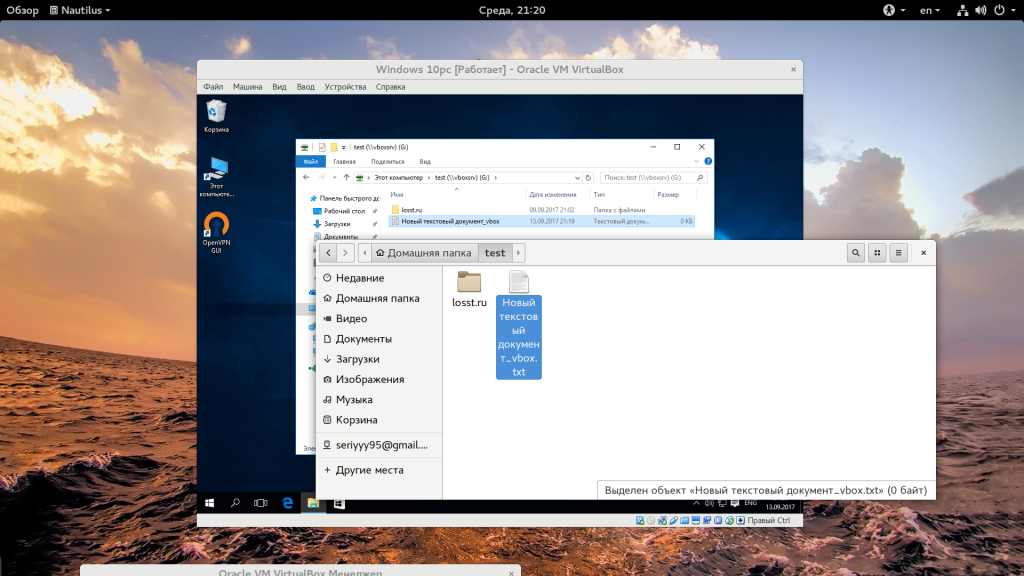
Настройка общей папки VirtualBox в Linux немного отличается. Вы выполняете все те же пункты, как сделать общую папку в virtualbox, но не спешите перезагружать компьютер:
После этого папка появится в списке устройств файлового менеджера. Но есть одна проблема. У вас не будет прав доступа к ней. Чтобы ее решить нужно добавить своего пользователя в группу vboxsf. Для этого выполните такую команду:
sudo usermod -aG vboxsf user
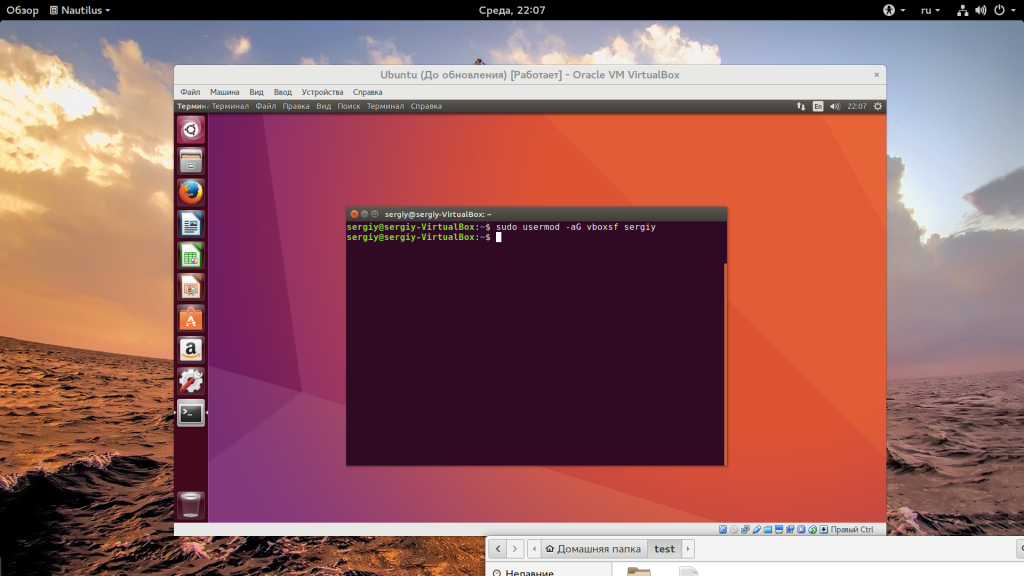
Вместо user вам нужно указать имя пользователя, от имени которого вы будете запускать файловый менеджер. Эту команду желательно выполнять до перезагрузки, так как вам снова придется перезапустить компьютер. Только после этого ваша общая папка virtualbox ubuntu или в другом дистрибутиве Linux будет работать правильно.
Выводы
В этой статье мы рассмотрели как создать общую папку в virtualbox в различных операционных системах. Основная операционная система не имеет значения, тогда как настройка для гостевых систем немного отличается. Но эти отличия минимальны. Общие папки в Linux VirtualBox и в Windows настраиваются очень просто. Если у вас остались вопросы, спрашивайте в комментариях!
Обнаружили ошибку в тексте? Сообщите мне об этом. Выделите текст с ошибкой и нажмите Ctrl+Enter.
Об авторе
![]()
Основатель и администратор сайта losst.ru, увлекаюсь открытым программным обеспечением и операционной системой Linux. В качестве основной ОС сейчас использую Ubuntu. Кроме Linux, интересуюсь всем, что связано с информационными технологиями и современной наукой.
Ubuntu is the alternate Linux operating system that I use in VirtualBox hypervisor on my windows 10 host machine. Because of which I can switch between the Ubuntu guest and windows host anytime I want. One important thing when you work with Linux VM in VirtualBox, how do I transfer files between the operating system and what is the simplest way.
In our last blog, I have covered how you can install Ubuntu operating system on VirtualBox. And In this one, I will show you how you can create a folder in windows and share them with Ubuntu vm in VirtualBox.
How do I create a shared folder between Windows and virtual machines?
There are different ways you can create a folder in a windows machine and share it with the virtual machines. The first option is to create a folder in the windows machine and share permission to the user, and from Ubuntu, you try to access the shared folder using the smb protocol via the host and guest networking. So your host machine must have reachability to the guest VM. I have covered this in more detail here.
The second and easiest way is to share the folder with the help of VirtualBox guest addition. In that, you create a folder and share the folder via VirtualBox settings. You should be able to see them in the guest operating system. We are going to do just that in the lab as a step-by-step guide.
- Install VirtualBox guest additions.
- Create a folder in windows.
- Connect the shared folder to the VirtualBox.
- Test the VirtualBox shared folder access.
1. Install VirtualBox guest additions.
You can think of VirtualBox guest additions as a VirtualBox driver for the guest machine. After the installation, you will observe the overall guest operating system performance is improved. The guest addition is an ISO file located in the VirtualBox installation location. And most of the operating systems out there are supported with guest additions.
You will end up with many performance issues if you don’t have VirtualBox guest additions are not installed on the Guest VM’s. For that reason, you must install VirtualBox guest additions right after you deploy the guest VM.
Follow the instruction below to install the guest additions on a ubuntu-desktop.
- Power on the VM.
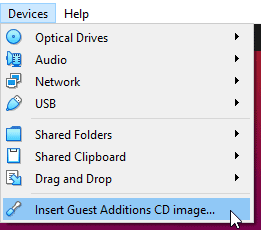
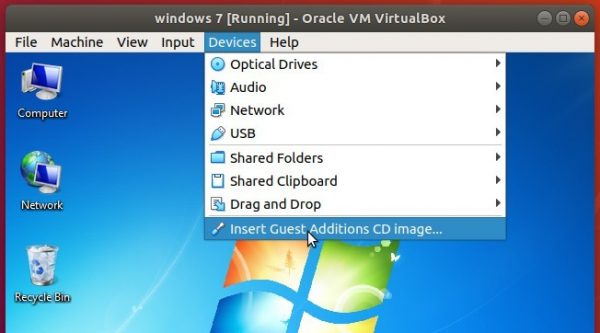
- In the VirtualBox Devices drop-down, click on Insert Guest Additions CD image..
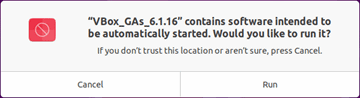
- You should see the CD drive was automatically mounted, and you would get a prompt that says Vbox_Gas_6.x.x contains software intended to be automatically started. Would you like to run it?
You can click on Run on that prompt.
- It will prompt you for authentication, enter the password for your ubuntu account
- You should see the guest additions have been installed on the terminal screen, and you may hit enter to exit out of the terminal.
- Let’s go ahead and reboot the VM now.
We have now successfully installed the virtual box guest addition on the ubuntu VM. To confirm the installation, you can run the command lsmod | grep vboxguest
saif@saif-gld:~$ lsmod | grep vboxguest
vboxguest              45056  5
saif@saif-gld:~$
2. Create a folder in windows.
We now have to create a folder in the windows machine that we can use between the guest VM and the windows host.
I created a folder called Ubuntu share on my windows machine in my C drive. You can create the folder anywhere you want.
3. Connect the shared folder to the VirtualBox.
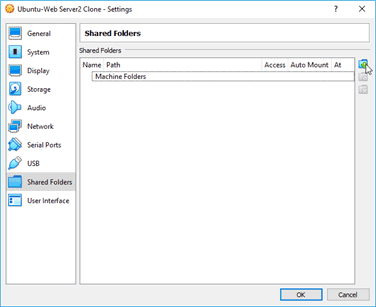
Shut down the Ubuntu VM, and right-click on it, and click on settings. You should get settings pop up in that choose Shared folders.
Click on the plus icon to add the shared folder that we created in our last step.
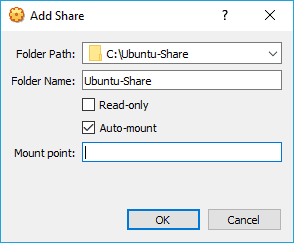
In the folder path, choose the shared folder that we have created.
You may provide a user-friendly name for the share.
You can decide whether this folder is read-only or read-write, I want this folder as read-write hence I unchecked the option Read-only.
Check the option Automount, which will automatically mount the share to the guest when the system reboots.
Mount point: You can choose the location for the mount point. I recommend leaving this blank so the guest will pick up the best path for mounting the folder.
Click on Ok and Ok on the VirtualBox settings.
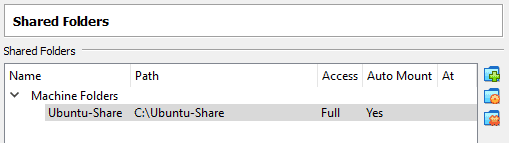
At any time, if you changed your mind and wanted to adjust the existing shared folder, you can come back to the shared folder option in VirtualBox and click on the gear icon to edit the settings.
4. Test the VirtualBox shared folder access.
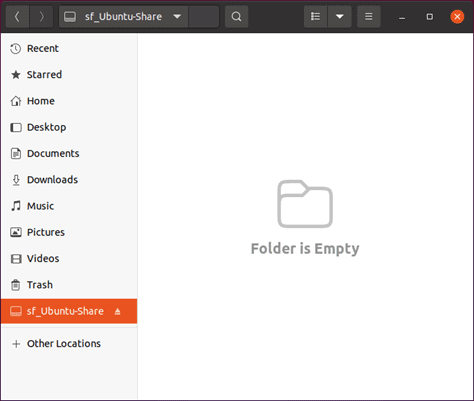
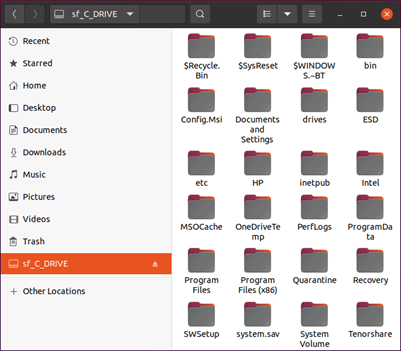
You may go ahead and start the VM now. Once the VM has been started, you should be able to see the shared folder under files. As you can see, the folder is empty at the moment. Let’s go ahead and create a folder in it now.
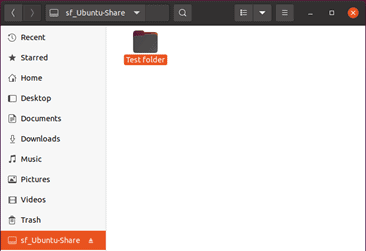
I created a test folder in the Ubuntu share folder.
You may now go back to the windows folder and make sure you can see the folder in the windows share.
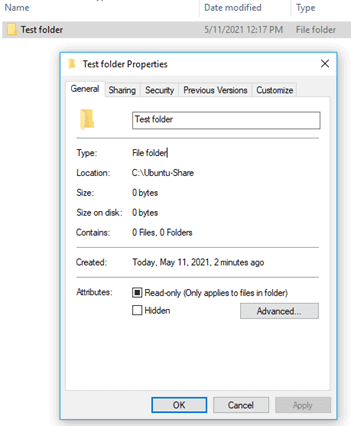
As you can see, the folder has been shown. You can now start sharing files back and forth from windows to Ubuntu and vice versa.
Can I share entire hard disk drive to Guest VM in VirtualBox?
If you wanted to share the entire hard disk drive, maybe the whole C drive instead of a specific shared folder with a Guest Virtual machine, Ubuntu in our case, which is also possible. All we have to do is instead of attaching the newly created folder. You can connect the entire C drive itself, and it should work fine.
As you can see below, I have attached the C drive instead of a specific folder.
And C drive showed up in the Ubuntu file manager app.
The conclusion is, you can not only share just a folder with the guest VM. You can even share the entire hard disk with it, giving the guest virtual machine access to the whole hard disk. And one thing to keep in mind is that you must always install the VirtualBox guest additions before proceeding with any of the above steps.

This quick tutorial shows how to share a folder in Virtualbox Ubuntu host and get access within Windows virtual machine.
One of the top things after installed a virtual machine via VirtualBox is how to transfer files between host OS and guest OS. And this can be done via Shared Folder feature.
1. In Virtualbox (6.0.8 in the case), open Settings of the Windows Guest OS. Then do:
- Navigate to Shared Folders in left pane.
- Click ‘Adds new shared folder’ button in the right.
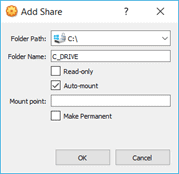
- In next pop-up dialog do:
- Folder Path, choose a folder in the Host OS to share with.
- Folder Name, auto generated after chosen folder.
- Enable ‘Auto-mount‘.
- Enable ‘Read-only’ if you DON’T want to add/edit the folder files in Guest.
- Mount point:, leave it empty.

2. Boot up the Guest OS (Windows 7 in the case), and then go to menu Devices -> Insert Guest Additions CD image.
If you don’t see the Guest window menu, press right-Ctrl + C on keyboard.
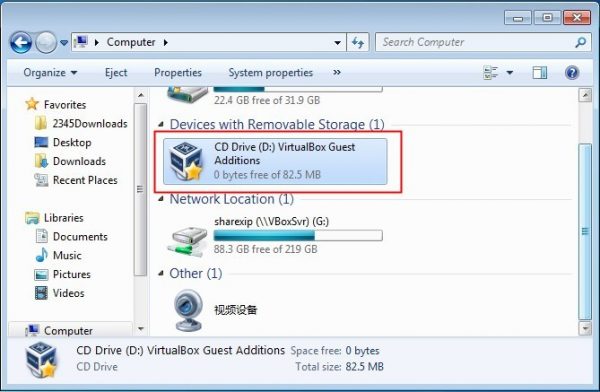
3. Open Computer, you’ll see CD Driver marked as ‘VirtualBox Guest’.
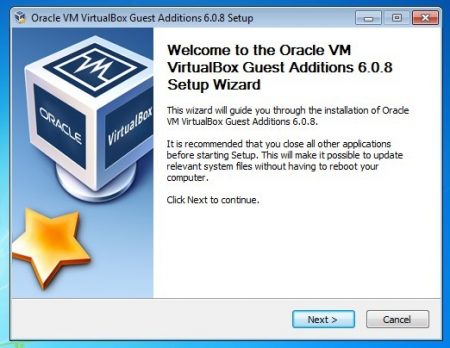
4. Go to the CD Driver and click install the exe file to bring up guest addition install wizard.
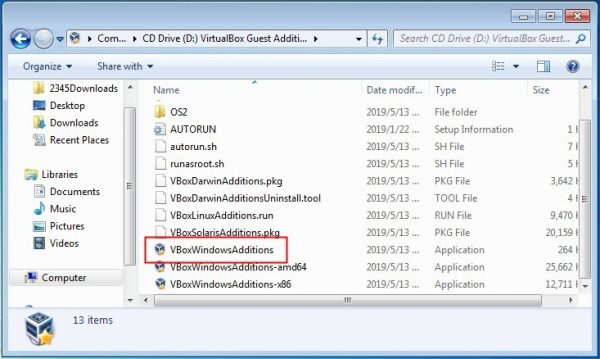
5. Follow the install wizard until done.
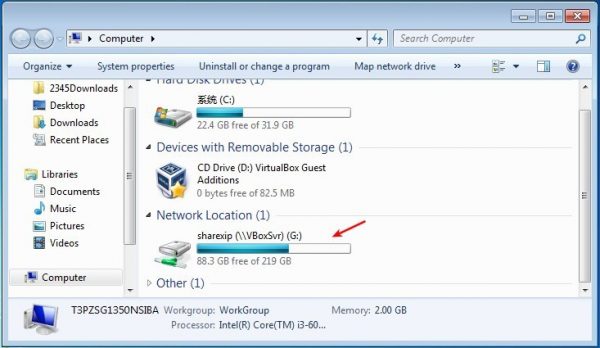
6. Finally reboot the Windows guest OS, and shared folder should be there in ‘Computer’
How to create a shared folder between host Operating System and Guest Operating system?
This is the scenario that you run Windows as your host operating system and Ubuntu in a VirtualBox, and that you want to access a specific Windows folder from Ubuntu.
In short-
Share a folder between Host OS-> Windows and Guest OS ->Ubuntu(Virtual box)
Step 1
Install install Guest Additions from VirtualBox’s menu go to Devices->Install Guest Additions
This will mount a virtual CD on your /media/cdrom. As root user Open this /media/cdrom added folder using Open with terminal option(Right click with mouse).
Step 2
Run the program VBoxLinuxAdditions.run. When the program completes reboot your VirtualBox.
$ sudo ./VBoxLinuxAdditions.run
Step 3
Create a shared folder. From Virtual menu go to Devices->Shared Folders then add a new folder in the list, this folder should be the one in windows which you want to share with Ubuntu(Guest OS).
Make this created folder auto-mount.
Example -> Make a folder on Desktop with name Ubuntushare and add this folder.
Step 4
When done with you shared folder(s) specification, we mount folder from Ubuntu(Guest OS).
Create a mountpoint, this a directory in Ubuntu that will share files with the shared folder from Windows.
Run this to create a directory in Ubuntu
$ sudo mkdir ~/Desktop/windowsshare
Step 5
With your mountpoint created you can now mount the shared folder.
Run this command to share the folder:
$ sudo mount -t vboxsf Ubuntushare ~/Desktop/windowsshare
Ubuntushare is the name of folder we add in VirtualBox Devices section this folder is in Windows(Host OS).
~/Desktop/windowsshare is the directory in Ubuntu(Guest OS)
CONGRATULATIONS->
Now you can share the files between Windows and Ubuntu. Try adding any file in windows(Host OS) Ubuntu share folder now check Ubuntu(Guest OS) windowsshare directory the file will be reflected.
This article is contributed by SHAURYA UPPAL. If you like GeeksforGeeks and would like to contribute, you can also write an article using contribute.geeksforgeeks.org or mail your article to contribute@geeksforgeeks.org. See your article appearing on the GeeksforGeeks main page and help other Geeks.
Please write comments if you find anything incorrect, or you want to share more information about the topic discussed above.
Last Updated :
30 Mar, 2019
Like Article
Save Article