 Не все знают, но в состав стандартных приложений Windows 10 входит и видеоредактор с базовыми возможностями редактирования видео, являющийся по факту составной частью встроенного приложения «Фотографии».
В этом обзоре о том, как запустить встроенный редактор видео Windows 10 и о его возможностях, которые с некоторой вероятностью способны заинтересовать начинающего пользователя, которому требуется обрезать или соединить видео, добавить музыку, текст и эффекты. Если же требуется выполнять более серьезные задачи по редактированию, рекомендую статью Лучшие бесплатные видеоредакторы, также вас могут заинтересовать и видеоредакторы для Android.
- Использование видеоредактора Windows 10
- Видео обзор
Использование видеоредактора Windows 10
Запустить встроенный видеоредактор Windows 10 вы можете следующими способами:
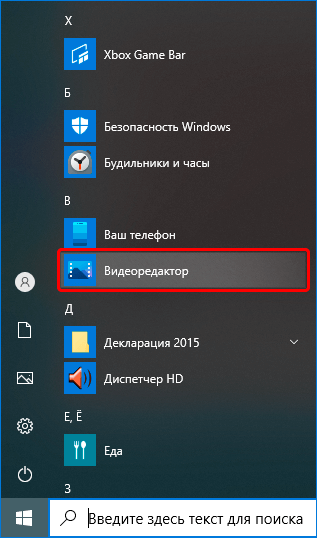
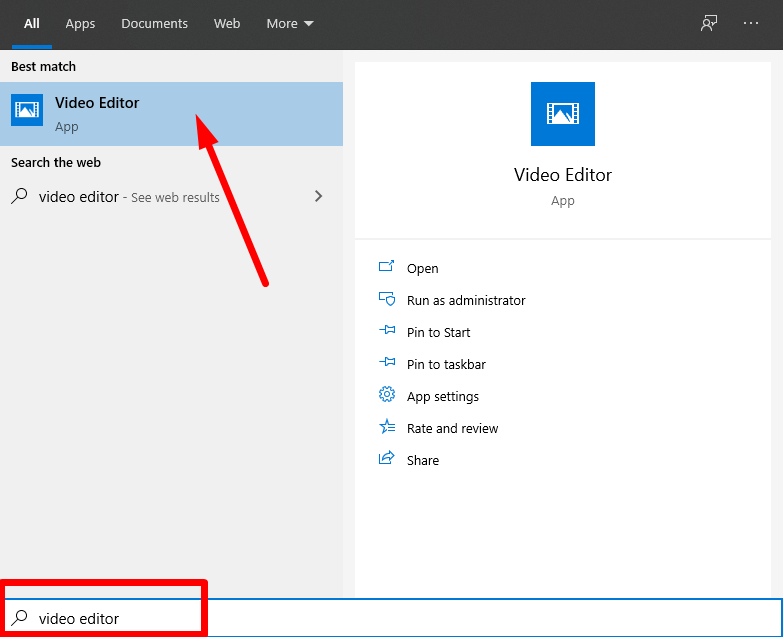
- Найти пункт «Видеоредактор» в меню Пуск (но учитывайте, что в ранних версиях системы он отсутствовал в указанном расположении).

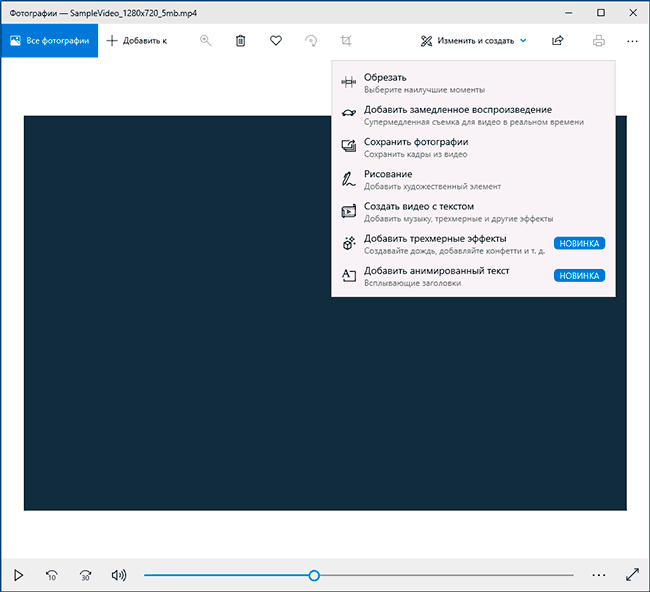
- Нажать правой кнопкой мыши по любому видео и выбрать пункт «Открыть с помощью» — «Фотографии», затем нажать по кнопке «Изменить и создать» в строке открывшегося приложения и выбрать в меню желаемое действие: обрезать, создать видео с текстом, добавить музыку и другие.

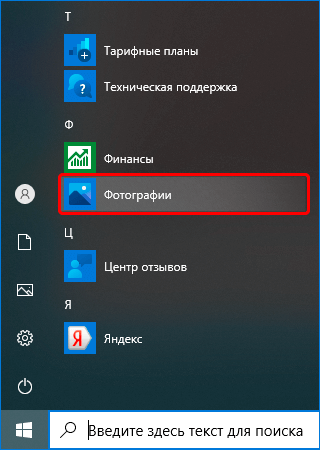
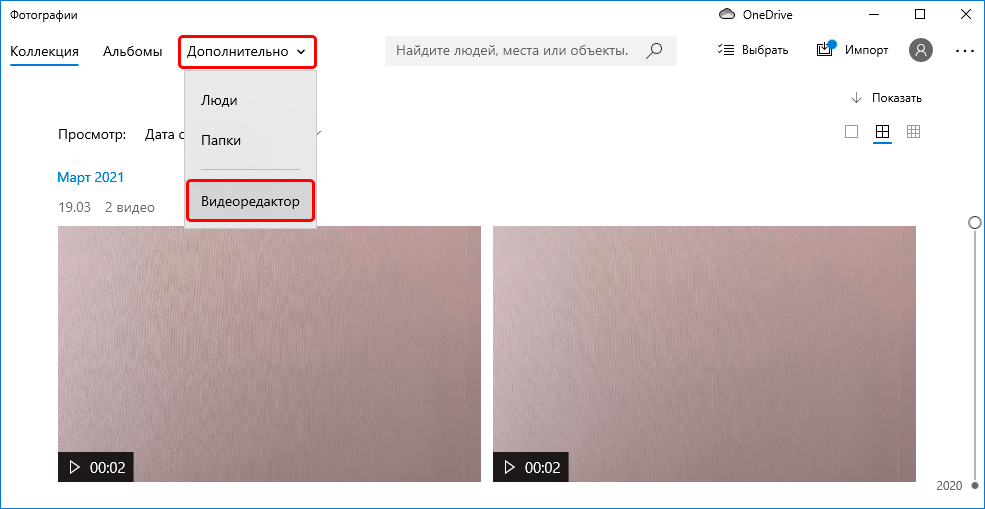
- Из меню Пуск (или любым другим способом) запустить встроенное приложение «Фотографии», затем в главном меню выбрать пункт «Видеоредактор» (если он не отображается, нажмите «Дополнительно», а затем выберите нужный пункт).
- Также в приложении «Фотографии» вы можете открыть меню, затем либо создать новый видеопроект, либо, при желании — создать автоматическое видео с музыкой (например, из ваших фотографий).


Далее будет рассмотрено использование видеоредактора Windows 10 при создании видеопроекта с «чистого листа» — после запуска первым, третьим или четвертым способом.
Порядок использования в данном случае будет следующим:
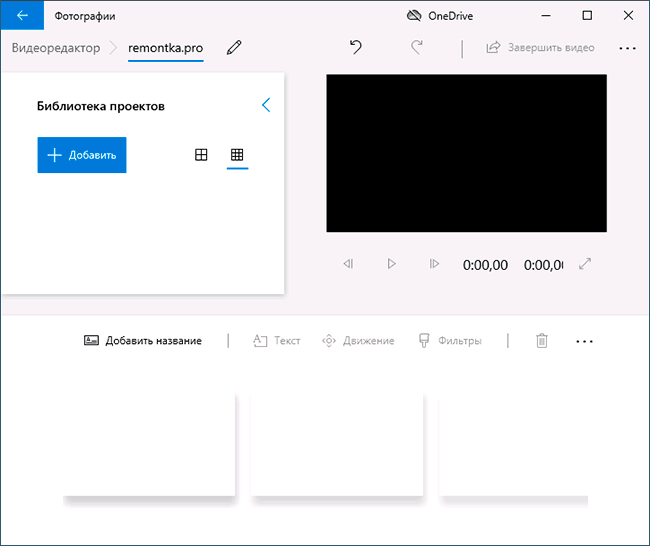
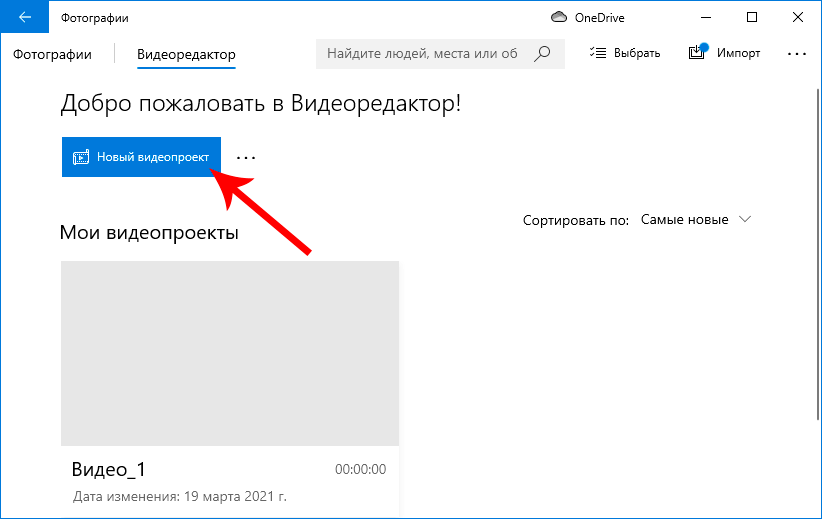
- Нажмите кнопку «Новый видеопроект».

- Укажите название для создаваемого видео.
- В разделе «Библиотека проектов» нажмите кнопку «Добавить» и добавьте файлы видео, фото и изображений, музыки, которые будут использоваться в вашем проекте.

- После того, как нужные элементы добавлены, вы можете выбирать их в библиотеке проекта и перетаскивать в нижнюю часть видеоредактора так, чтобы расположить их в требуемом вам порядке (процесс показан ниже в видео обзоре редактора).
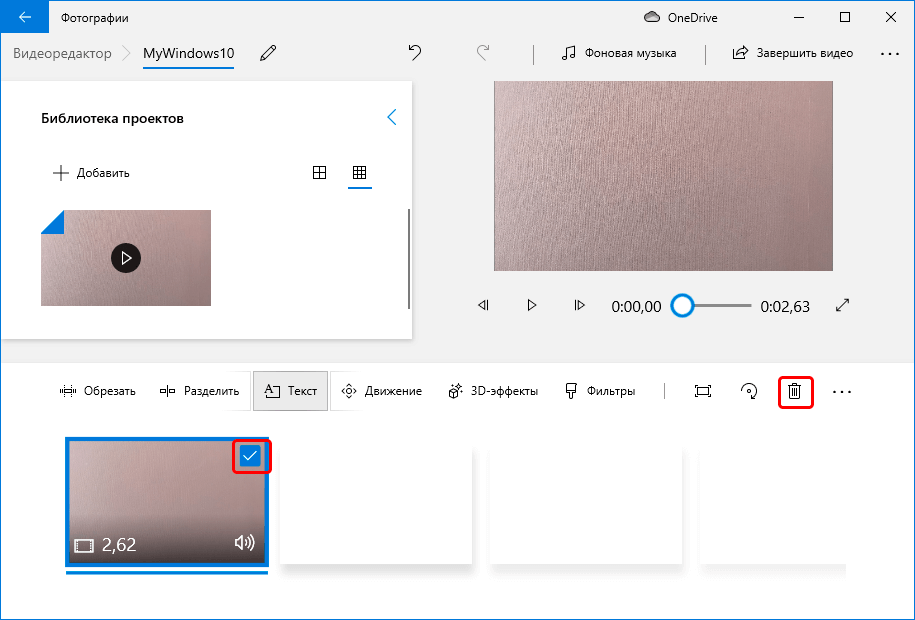
- Нажав по кнопкам «Обрезать», «Разделить», «Текст» или «Движение» вы можете выполнить соответствующие действия над видео или изображением, выделенном в нижней части видеоредактора.
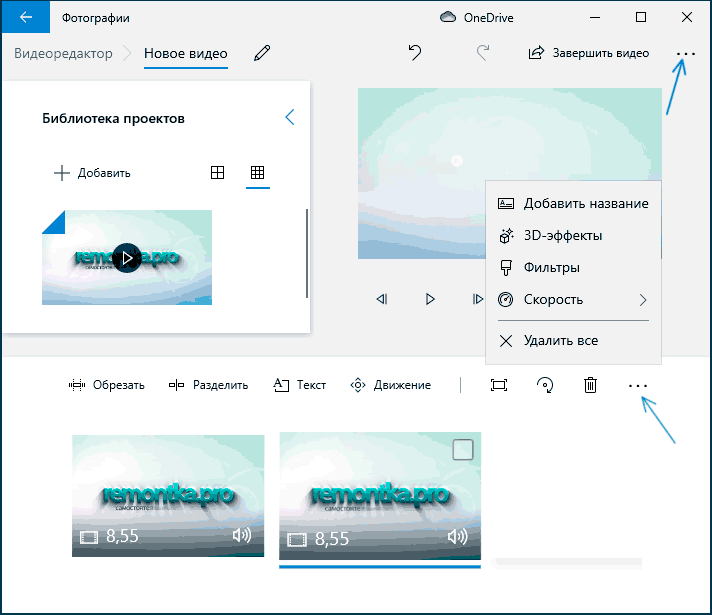
- Обратите внимание на две кнопки меню: нижняя работает с выделенным фрагментом видео, верхняя — позволяет изменить параметры всего итогового видео (добавить фоновую музыку, изменить соотношение сторон). Они могут пригодиться, если элементы не помещаются в окне видеоредактора — при узком окне часть кнопок управления скрываются в эти меню.

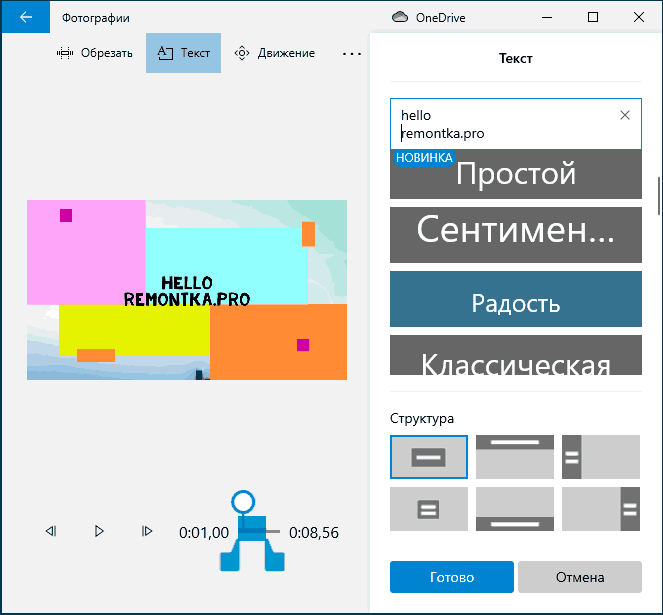
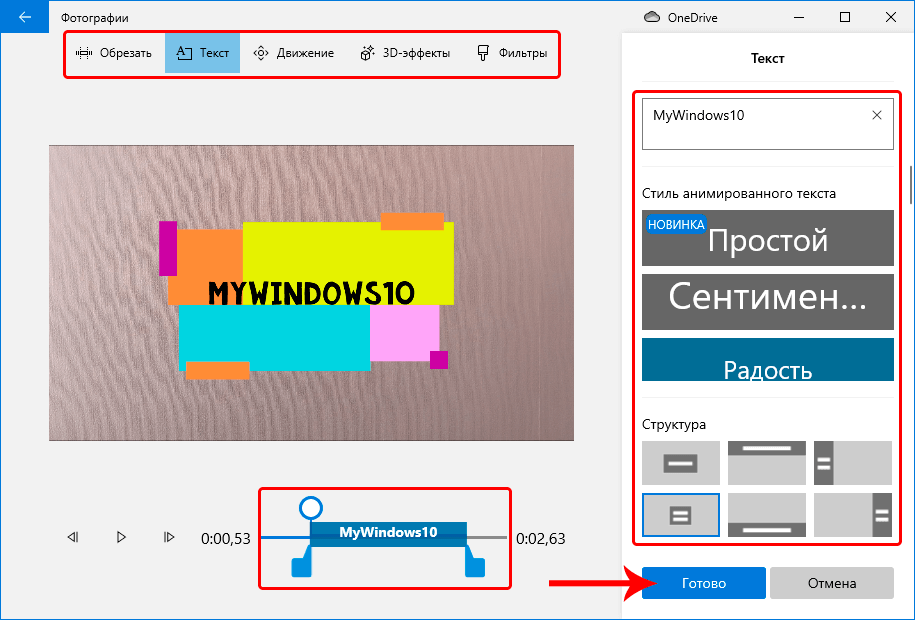
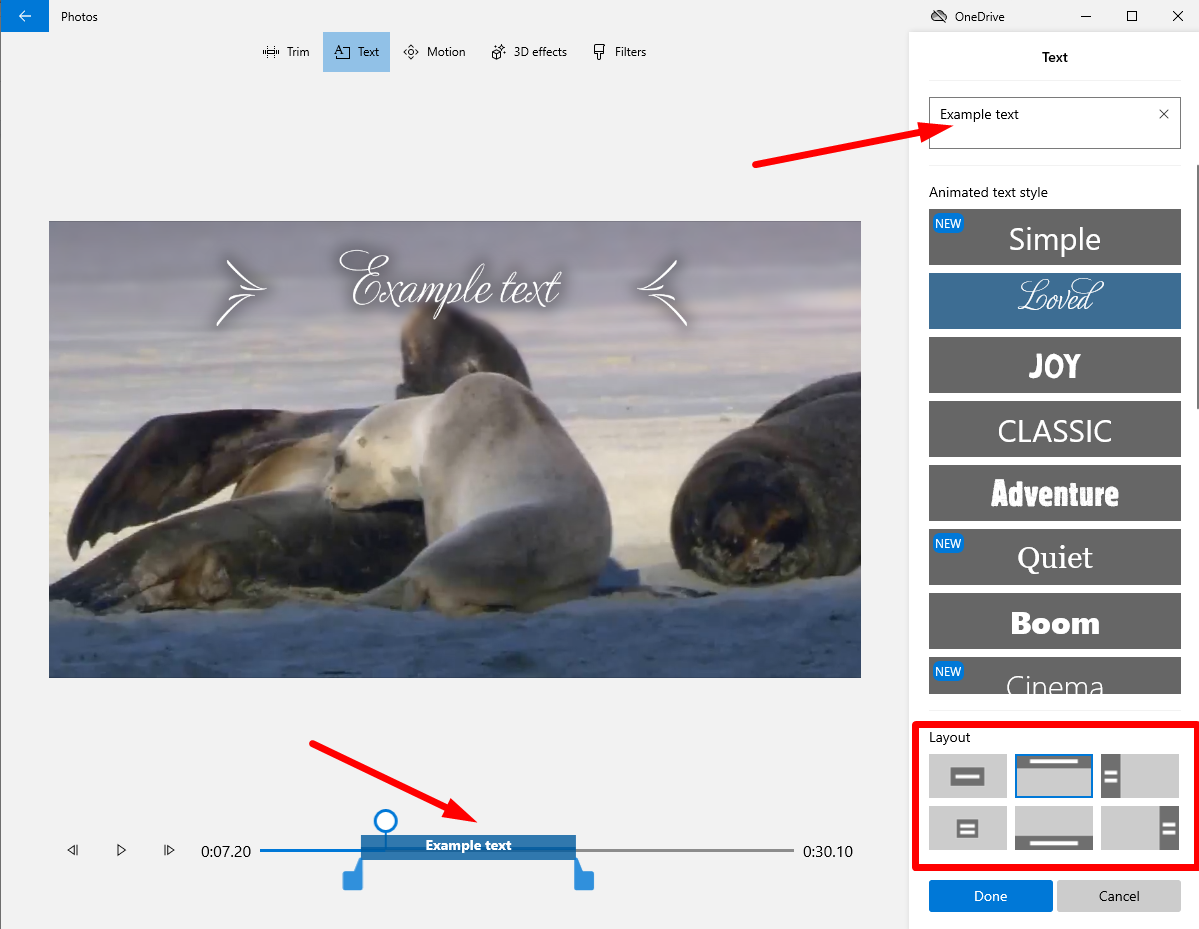
- Использование инструментов работы с видео реализовано так, чтобы быть понятным даже самому начинающему пользователю. К примеру, на следующем изображении — добавление анимированного текста к текущему видео: выбираем шаблон, вводим текст, с помощью маркеров указываем, на каком отрезке видео нужно показать текст, а раздел «Структура» служит для его расположения в кадре.

- Далее — окно «Фильтры» для добавления эффекта к выделенному видеоролику, тоже ничего сложного.

- С помощью пункта «3D-эффекты» можно добавить что-то поверх вашего видео, эффекты включают в себя и звуковое сопровождение, которое можно отключить.

- Дополнительно рекомендую изучить контекстное меню, открывающееся при клике правой кнопкой мыши по фрагменту вашего видео внизу.


Все выполняемые вами действия сохраняются в файл проекта, который доступен для последующего редактирования, но не является файлом видео, которым можно поделиться.
Если требуется сохранить готовое видео, в виде файла mp4 (доступен лишь этот формат), нажмите кнопку «Завершить видео» вверху справа, укажите разрешение видео (здесь же можно открыть пункт «Дополнительно» и включить аппаратное ускорение кодирования видео), а затем нажмите кнопку «Экспортировать».

После нажатия кнопки потребуется указать место сохранения готового видео и дождаться завершения экспорта: учитывайте, что в некоторых случаях он может занять продолжительное время. По завершении процесса, готовое видео откроется автоматически.
Видео обзор
Подводя итог, встроенный видеоредактор Windows 10 — полезная вещь для рядового пользователя (не инженера видеомонтажа), которому нужна возможность быстро и просто «слепить» красивое видео для личных целей, без необходимости изучать сторонние программы редактирования видео.
![]() Далеко не все пользователи Windows 10 знают, что в этой операционной системе есть собственный видеоредактор.
Далеко не все пользователи Windows 10 знают, что в этой операционной системе есть собственный видеоредактор.

Штатный видео редактор Windows 10 является своего рода правопреемником такой известной и полюбившейся многим программы для создания и обработки видео, как «Киностудия Windows» (ранее Windows Movie Maker), входившей в состав ОС Windows 7 и Vista.
Обратите внимание, что поддержка набора Основных компонентов Windows 2012, в состав которых входило приложение «Киностудия», закончилась ещё 10 января 2017 года. Основные компоненты Windows 2012 официально больше не доступны для загрузки.
Далее рассмотрим, как запустить встроенный видео редактор Windows 10, а также рассмотрим некоторые его возможности, которых будет более чем достаточно начинающем пользователям для базовой обработки видео (обрезать или объединить видеофрагмент, создать слайд-шоу из фотографий, добавить музыку или текст к видео, применить различные фильтры и эффекты, и прочее).
При этом стоит отметить, что приложение «Видеоредактор» совершенно бесплатно и не требует установки в систему каких-либо дополнительных или сторонних компонентов. Для использования достаточно лишь запустить данное приложение, как это сделать смотрите далее.
Как найти и открыть
Через поиск Windows 10
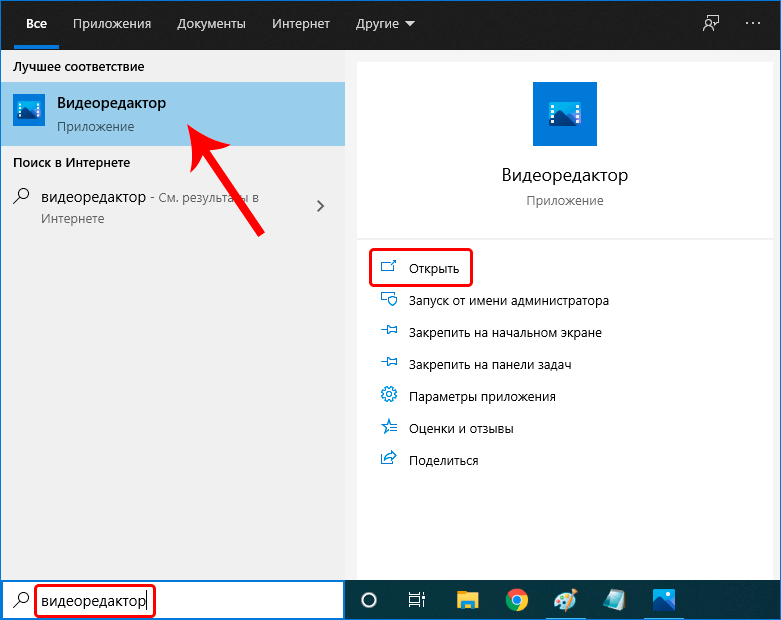
- Начните вводить слово «видеор…» → откройте приложение (смотрите скриншот).


С помощью встроенного приложения «Фотографии»
Как работать с встроенным видеоредактором Windows 10
Далее рассмотрим общие примеры возможного использования данного приложения.
- Нажмите кнопку «Новый видеопроект»;

- Назовите своё видео (в нашем примере «alpinefile») → нажмите ОК;
- Для добавления файлов (это может быть видеофайл или цифровое фото), которые вы планируете использовать, необходимо нажать кнопку «Добавить» в разделе «Библиотека проектов»;
- Далее перетащите выбранные вами элементы из Библиотеки проектов в нижнюю часть редактора, расположив их в желаемом порядке;

- Для добавления собственной музыки в проект используйте кнопку «Пользовательский звук»;
- Или воспользуйтесь одной из предустановленных музыкальных дорожек;
- Теперь с каждым из фрагментов в нижней части редактора можно производить некоторые простые действия, к примеру, добавить текст с использованием различных стилей;
- Так, например, чтобы добавить анимированный текст к выбранному фрагменту, необходимо в левой части редактора → ввести желаемый текст → выбрать стиль → выбрать текстуру (то, как текст будет располагаться на видео) → далее указать время начала и конца появления текста на выбранном видеофрагменте;
- Чтобы обрезать видео, достаточно указать время начала и конца нового фрагмента на временной шкале в нижней части редактора → нажать «Готово»;
- Инструмент разделения позволяет разбить один видео фрагмент на две части (если требуется создать больше фрагментов, то операцию придётся повторить) → на временной шкале просто установите время (оно будет концом первого фрагмента и началом второго) → Готово;
- К видео можно добавлять и довольно интересные 3D-эффекты со звуком («Бенгальские огни», «Взрыв», «Огонь», «Дождь» и многие другие). Длительность такой анимации также можно регулировать, используя временную шкалу;
- Аналогично к цифровым изображениям и видео можно применять различные фильтры («Деним», «Латунь», «Чернила», «Радость» и так далее, смотрите скриншот).

")


Подводя итого, можно отметить, что встроенный редактор Windows 10 время от времени может быть весьма полезен, когда требуется базовая обработка видео, например, чтобы создать слайд-шоу из фотографий, или быстро смонтировать видеоролик для публикации на YouTube. Интерфейс и элементы управления видеоредактора просты и интуитивно понятны, а следовательно, с ним будет легко работать простым пользователям.
Видео обзор возможностей
Как сохранить полученный результат
На этом всё. Дождитесь завершения процесса экспорта, после чего начнётся автоматическое воспроизведение, сохранённого файла.
А вдруг и это будет интересно:
- Восстановление документов Word | Как открыть файл asd
- Дополнение ZenMate для Mozilla Firefox
- Как отключить рекомендуемые приложения в меню пуск Windows 10
- Как включить тёмную тему Dark Mode в Google Chrome для Windows
- Как управлять мышью с клавиатуры
- Как добавить Корзину в панель быстрого запуска Windows 10
Дата: 2021-04-26 | Размещено в Статьи
На чтение 5 мин Просмотров 4.3к. Опубликовано
Миллионы пользователей операционных систем Виндовс прошлых лет полюбили Windows Movie Maker — программу для создания и редактирования видеороликов. Однако разработчики корпорации Microsoft решили не добавлять эту программу в «десятку». И, несмотря на то, что в интернете есть много сайтов, на которых можно якобы скачать Movie Maker для последней версии ОС («Основные компоненты Windows 12»), на самом деле поддержка продукта официально прекращена еще в 2017 году. Поэтому даже если Вам удастся найти и загрузить установочные файлы, то запустив их, вероятнее всего, вы столкнетесь с ошибками, и процесс инсталляции не будет успешно завершен. Также, не стоит забывать о риске заражения компьютера вирусами при скачивании софта со сторонних ресурсов.
Но не стоит отчаиваться, ведь разработчики Windows 10 предлагают альтернативные встроенные приложения — Киностудию и Видеоредактор. И если первый программный продукт у многих пользователей вызывает вопросы касательно функциональных возможностей, удобства интерфейса и т.д., то последний считается хорошим аналогом Movie Maker, поэтому его мы и рассмотрим подробнее.
Содержание
- Запуск Видеоредактора
- Использование Видеоредактора
- Заключение
Запуск Видеоредактора
Смотрите также: «5 лучших бесплатных видеоплееров для Windows 10: описание, где скачать»
Программу можно найти и открыть разными способами (информация применима при своевременном обновлении системы):
- Классический вариант — заходим в меню «Пуск», находим требуемый пункт в списке и щелкаем по нему.

- В строке Поиска вводим название программы и кликаем по найденному варианту (либо по команде открытия в правой части окна).

- Запускаем через меню «Пуск» приложение «Фотографии».
 В открывшемся окне кликаем по пункту «Дополнительно» и выбираем «Видеоредактор».
- Все в той же программе «Фотографии» жмем по троеточию в правом верхнем углу окна, в раскрывшемся меню выбираем команду «Новое видео», затем — «Новый видеопроект». В этом случае редактор не просто откроется, но и автоматически будет создан новый проект в нем.


Итак, где в «десятке» находится встроенный Видеоредактор мы выяснили, движемся дальше и посмотрим, как им пользоваться.
Использование Видеоредактора
- Чтобы начать работу над новым проектом, жмем кнопку «Новый видеопроект» (если был выбран пункт 4 из раздела выше, этот шаг пропускаем).
 Также здесь представлены ранее созданные проекты, которые можно отсортировать по дате изменения или алфавиту.
 - Вводим название видео и щелкаем OK.

- Откроется пустой проект, куда мы можем импортировать файлы путем нажатия кнопки «Добавить» и выбора источника, откуда требуется выполнить импорт (в нашем случае — «С этого компьютера»).

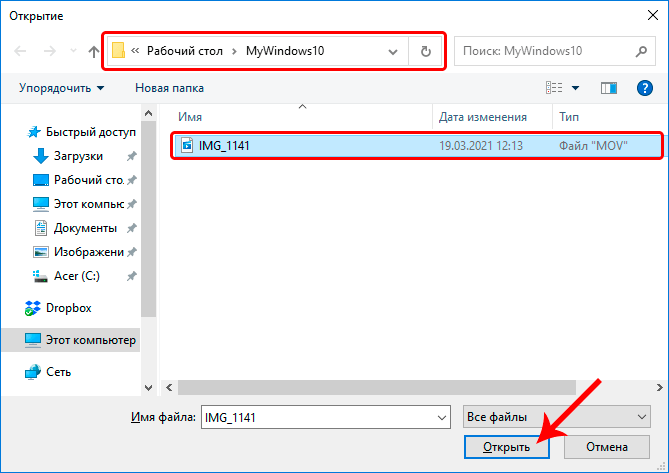
- В появившемся окошке переходим в папку с расположением требуемого файла, отмечаем его и жмем кнопку «Открыть».

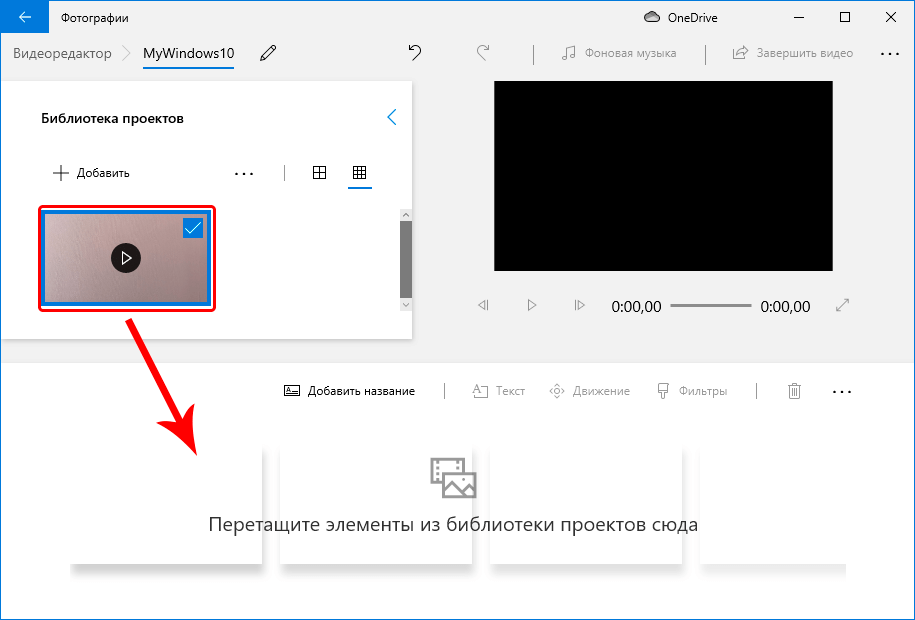
- Видим, что в «Библиотеке проектов» появилось выбранное нами видео. Теперь с помощью зажатой левой кнопки мыши перетаскиваем его в раскадровку. Сюда потом можно добавить второй и последующие файлы, при необходимости, меняя их порядок.

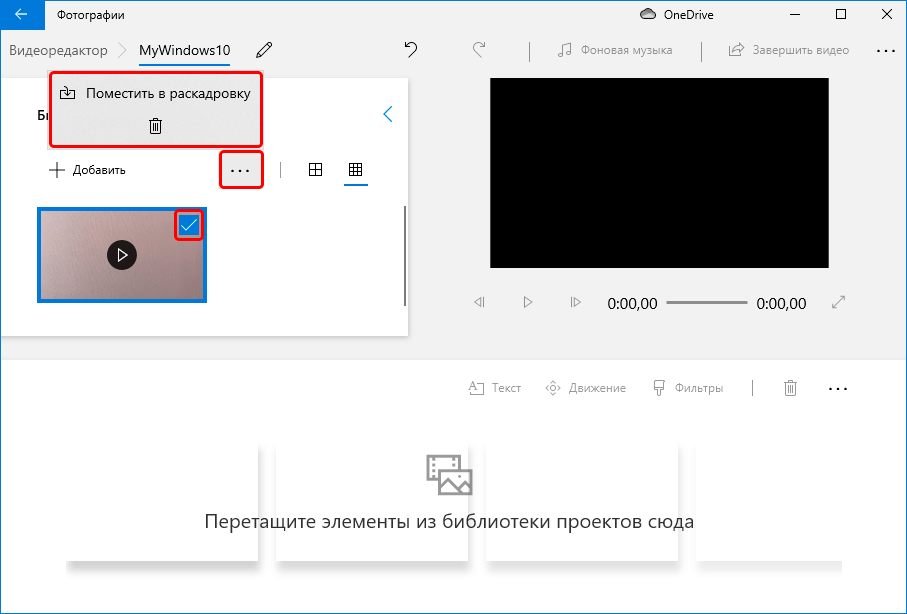
Примечание: чтобы удалить проект из библиотеки, кликаем по нему, чтобы выбрать (должна отображаться галочка в верхнем правом углу), щелкаем по троеточию, затем — по значку корзины. Здесь же есть возможность добавить его в раскадровку (вместо перетаскивания).
 Удаляется видеофрагмент из раскадровки так же, как и из библиотеки — выбираем его и жмем соответствующий значок.
 - Теперь мы можем приступить к обработке ролика, предварительно выбрав его. У нас есть возможность его:
- обрезать;
- разделить;
- наложить текст;
- добавить движение камеры;
- добавить 3D-эффекты;
- применить фильтры;
- удалить или, наоборот, показать черные полосы;
- повернуть.Т.к. интерфейс программы интуитивно понятен и прост в освоении, мы не будем детально описывать каждую из перечисленных функций. В качестве примера давайте добавим текст, щелкнув по соответствующей кнопке.
- В специальном отведенном поле вводим текст, выбираем для него стиль и местоположение, задаем временной промежуток, в течение которого он должен отображаться (с помощью контрольных точек на ползунке под областью предпросмотра), после чего жмем кнопку «Готово».
Примечание: здесь же у нас есть возможность переключиться к другим инструментам обработки.
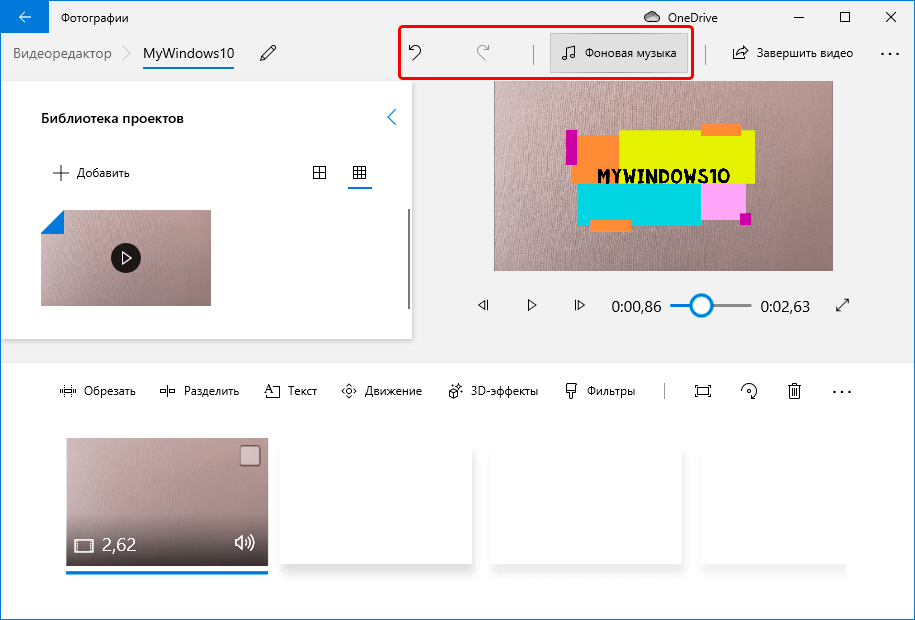
- В верхней строке меню программы представлены кнопки для отмены/возврата действия, а также функция добавления фоновой музыки.
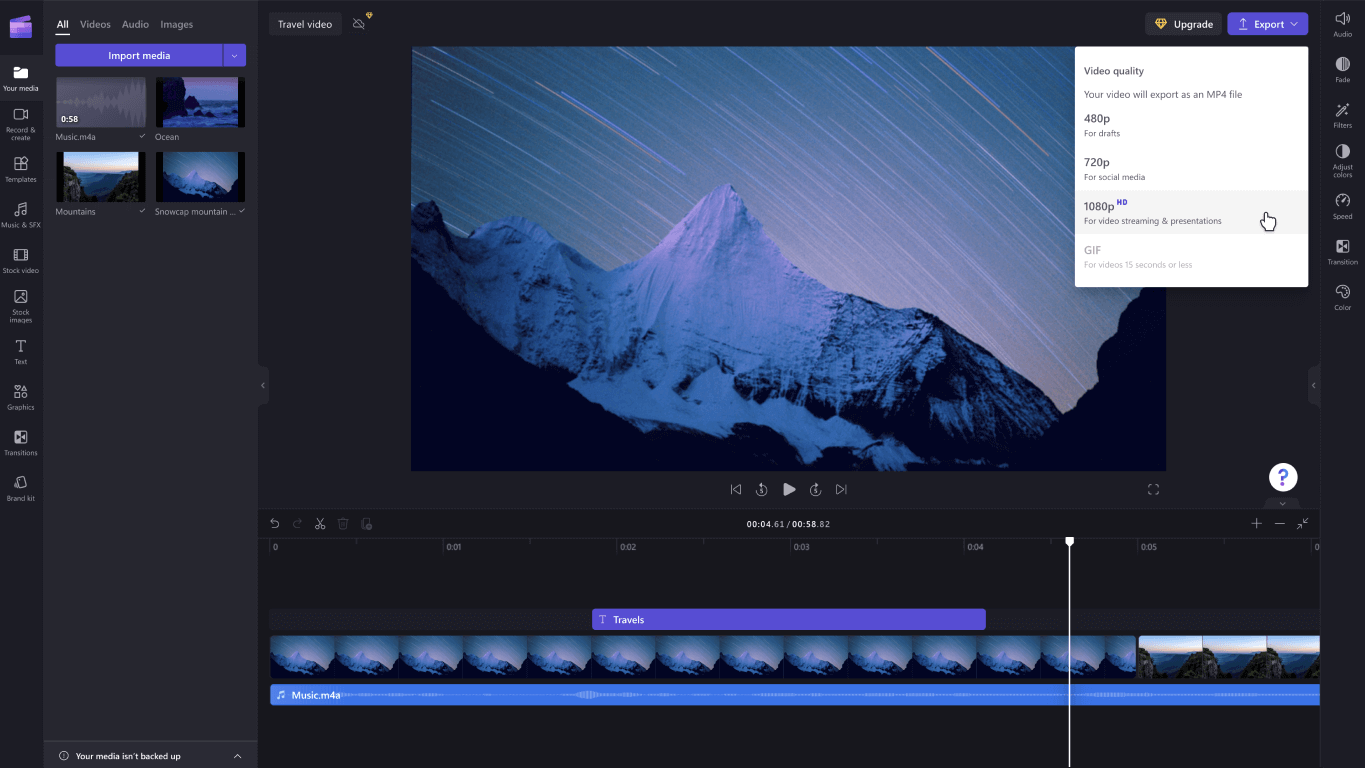
- Когда все необходимые действия выполнены, жмем кнопку «Завершить видео». В открывшемся окошке выбираем качество (рекомендуется высокое, т.е. 1080p), в дополнительных параметрах оставляем включенной опцию кодирования с аппаратным ускорением (за искл. случаев искажения цветов при экспорте видео) и жмем кнопку «Экспортировать».

- Задаем имя файла, выбираем папку для его сохранения и щелкаем «Экспортировать».
- Ждем завершения выполнения операции, после чего видео будет сохранено в формате MP4. Когда все будет готово, оно откроется автоматически. Также мы его можем найти в папке, которую выбрали для экспорта.


Заключение
Смотрите также: «Бесплатные программы для записи видео с экрана компьютера в Windows 10»
Итак, некоторые пользователи могут не знать, что в операционной системе Windows 10 есть стандартный Видеоредактор, который является достойной заменой устаревшей программы Movie Maker, предназначенной для работы с видео. Приложение подойдет как для новичков, так и для более продвинутых пользователей, которым будет достаточно базовых инструментов видеомонтажа для того, чтобы «собрать» свой собственный относительно простой видеоролик.
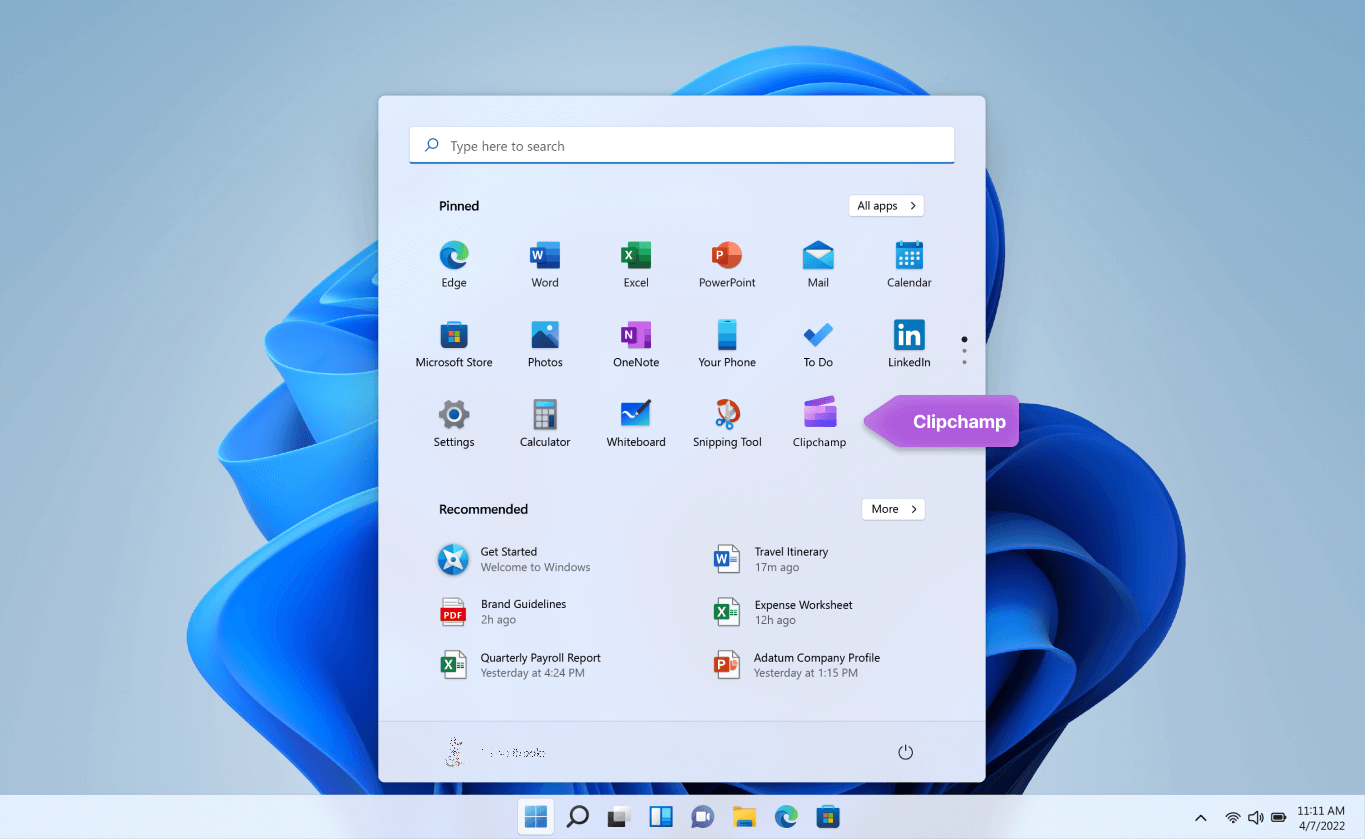
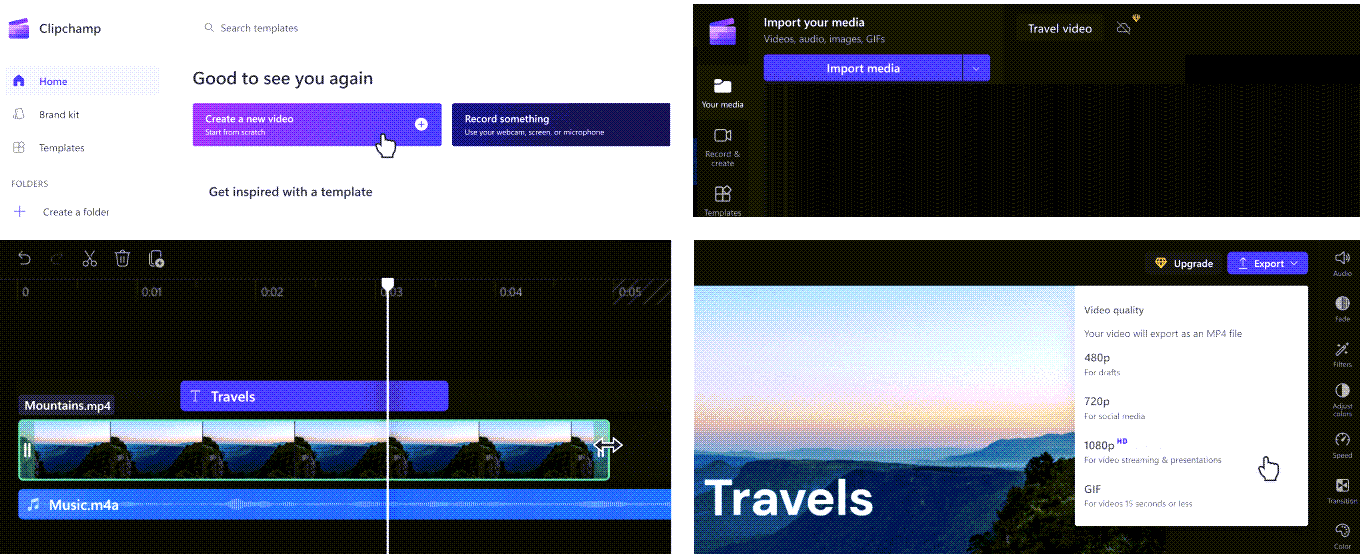
For fast and simple editing, we’ve added Clipchamp to the Microsoft family, and it will be preinstalled on Windows 11. To open Clipchamp, go to the search box on the taskbar, type Clipchamp, and select it from the results. Or you can select Start , then select All apps and scroll down to find Clipchamp in the list of apps.
The Clipchamp video editor empowers anyone to make amazing videos. With Clipchamp’s user-friendly interface, templates, and intelligent shortcuts, you can edit your video and add special effects, text, transitions, music, and more with ease. You can also record your screen and webcam securely, and enjoy advanced features like green screen editing, overlays, and AI voiceovers.
To access Clipchamp:
Clipchamp is the built-in video editor for Windows 11. To access Clipchamp, you can:
-
Go to the search box on the taskbar, type Clipchamp, and select it from the results.
-
Select Start , then select All apps, scroll down, and select Clipchamp in the list of apps.
A browser-based version can also be accessed by typing https://app.clipchamp.com/ in Microsoft Edge or Google Chrome.
To create a new video that you can edit from start to finish:
-
Select Start , then select All apps, scroll down, and select Clipchamp in the list of apps.
-
Upload your videos, images, and audio files to the Your media tab. Drag and drop media files onto the timeline.
-
Rearrange your media on the timeline and edit your video with accessible features like trim, crop, split, and rotate.
-
Add special effects like text and captions, overlays, filters, background music, and more. Try our more advanced features like AI voiceovers, green screen, and picture-in-picture effects.
-
Preview your video in full-screen mode, make any final adjustments, then export your video in 1080p HD video resolution.
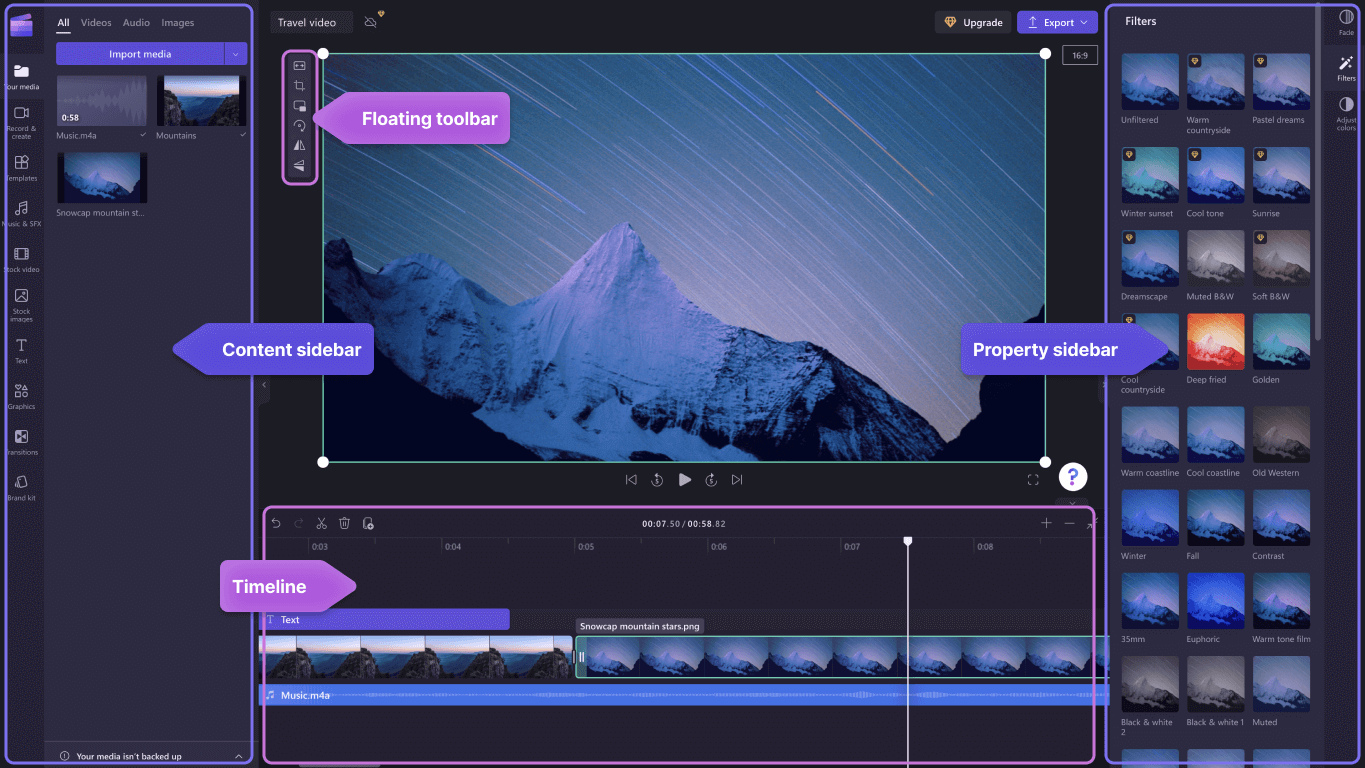
Get familiar with Clipchamp’s editing functions:
Clipchamp’s beginner-friendly interface helps you quickly locate all the professional editing functions, including the stage, timeline, sidebars and the floating sidebar.
-
Use efficient editing functions like trim, split, delete, duplicate, undo, and redo in the timeline.
-
Crop, fill, rotate, flip, and add picture-in-picture effects on videos with the floating toolbar visible on the stage.
-
Speed up or slow down your video or audio file with the speed controller in the right sidebar.
-
Resize videos to suit any social media platform with popular aspect ratio presets near the right sidebar.
-
Enhance the color balance and appearance of your video clip using pro filters like green screen, blend mode, disco, VHS, or black and white removal—with more options available in the right sidebar.
-
Add traditional or quirky transitions between clips—and exclusive overlays on top of your video—in the left sidebar.
-
Search through over 1 million royalty-free videos to find the right aesthetic and genre in the left sidebar.
-
Select a background music track or fun sound effects from our stock audio library in the left sidebar.
-
Choose from a wide range of unique animated text and captions and customize them with various fonts, colors, and positions.
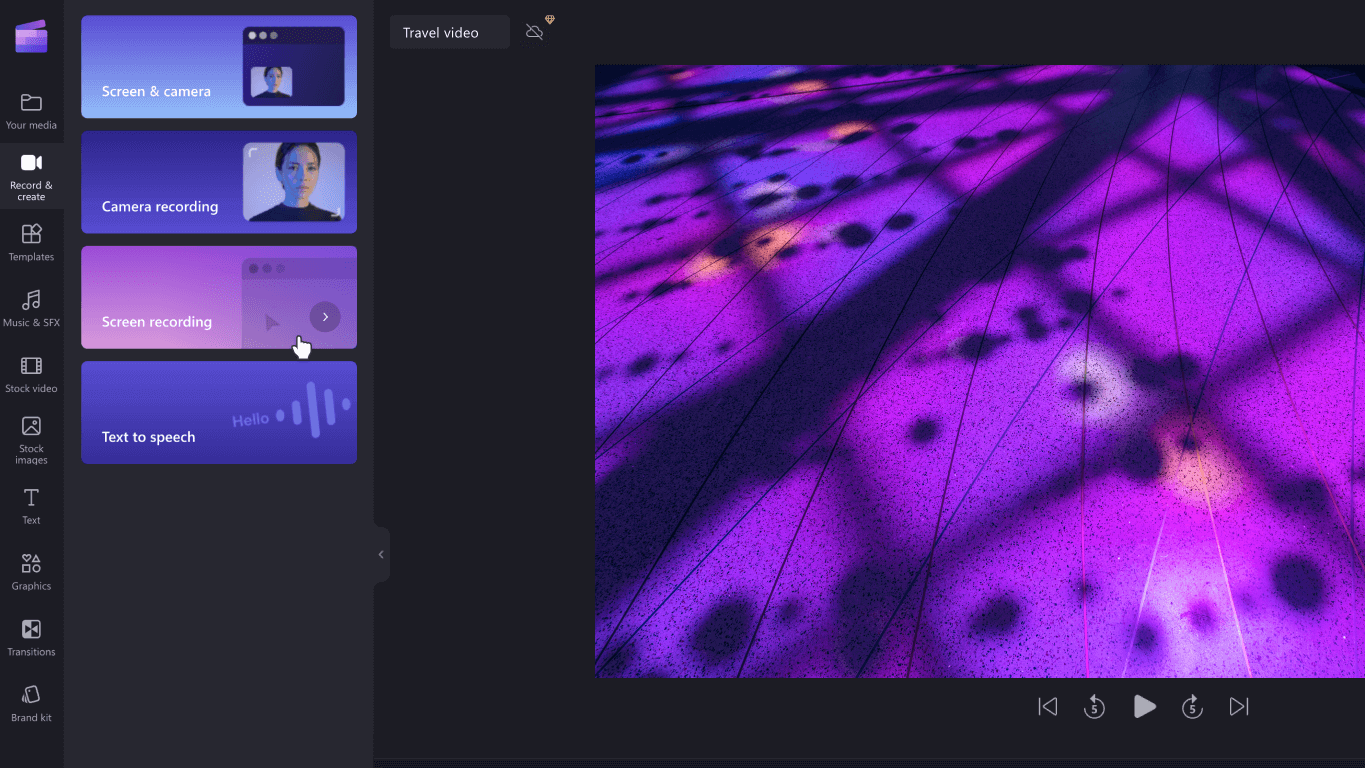
To record videos:
-
Select Start , then select All apps, scroll down, and select Clipchamp in the list of apps. Inside the editor, select the Screen and camera recording tab.
-
Select the screen and camera recording, camera recording, or screen recording feature.
-
Select Record to select a tab, window, entire screen, or webcam. Retake your video as many times as you need.
-
Adjust your recording with editing features like trim, crop, flip, and rotate. Personalize your video with our picture-in-picture effect, filters, stickers, text, and more.
-
Save your recording in 1080p high-definition video resolution.
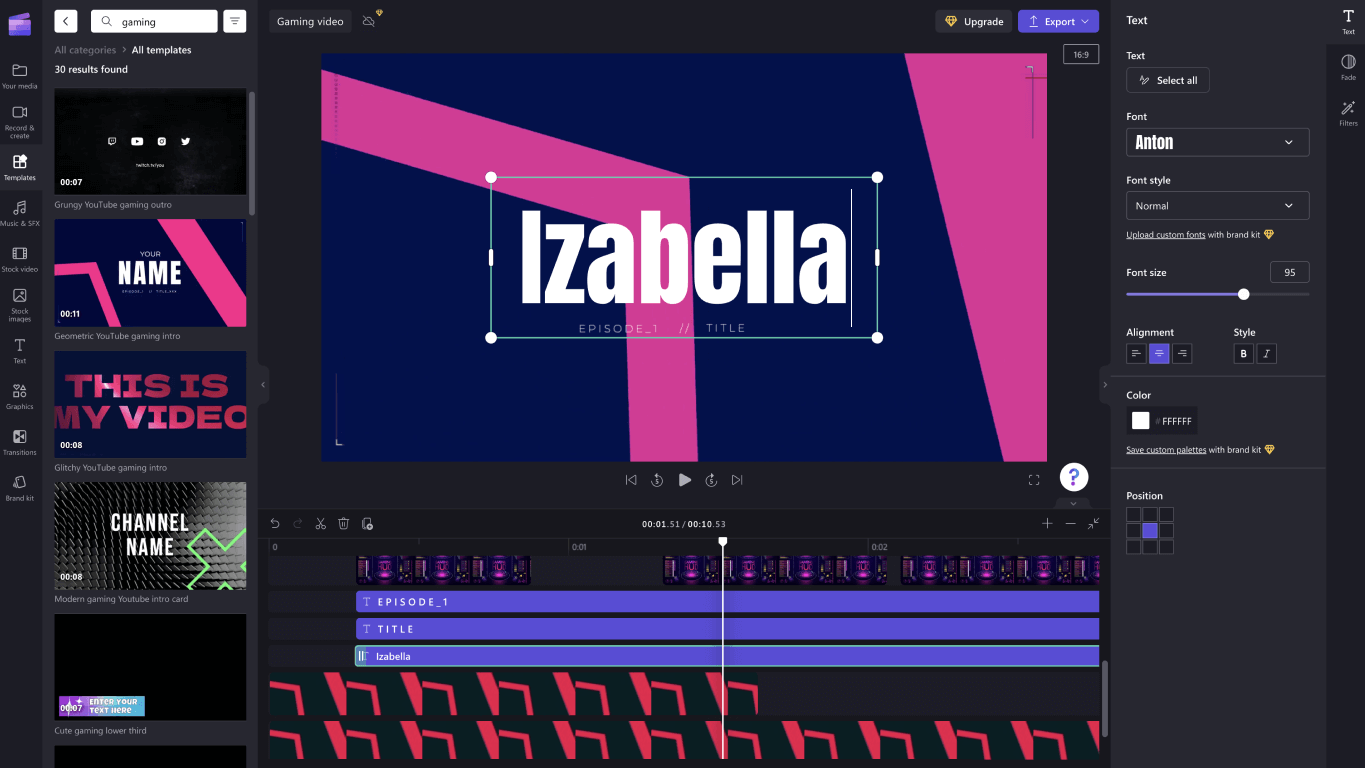
To use a template:
-
Select Start , then select All apps, scroll down, and select Clipchamp in the list of apps. Inside the editor, select a template from the categories in the template library.
-
Personalize the template with your own videos and images or search the stock library for options.
-
Customize your text with a variety of fonts, sizes, colors, and placement. Plus, edit background music with royalty-free stock audio and adjust the volume to suit your needs.
-
Add your personalized brand kit to your video using your unique color palette, font, and logos. You can even turn your logo into a watermark for your video.
-
Export your video in 1080p video resolution and share it directly to social media platforms, including YouTube and TikTok.
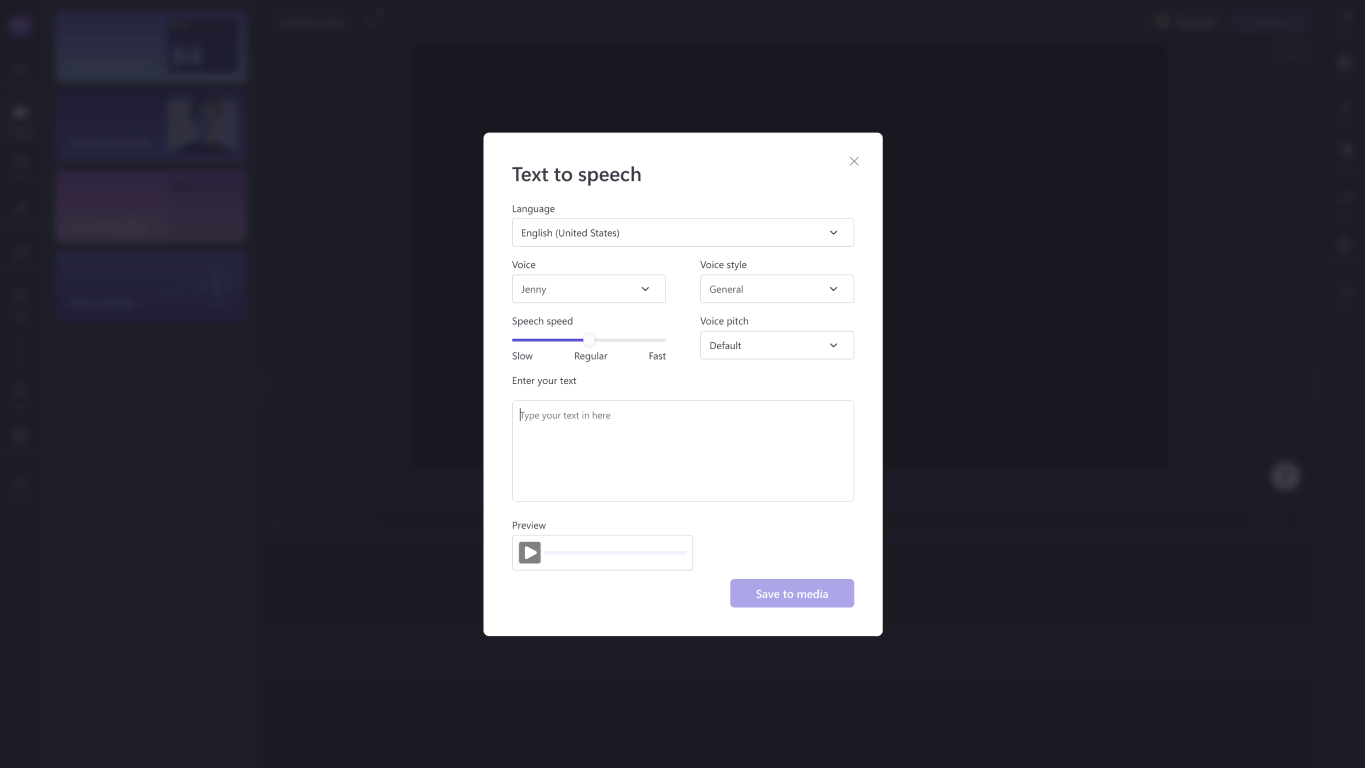
To generate voiceovers using text-to-speech:
-
Select Start , then select All apps, scroll down, and select Clipchamp in the list of apps. Inside the editor, select the text to speech tab in the sidebar.
-
Type in your phrase or sentence, and pick the language, voice, style, and pitch you would like to use. Adjust the speed of your voiceover to be faster or slower.
-
Add your voiceover to the editing timeline to finish.
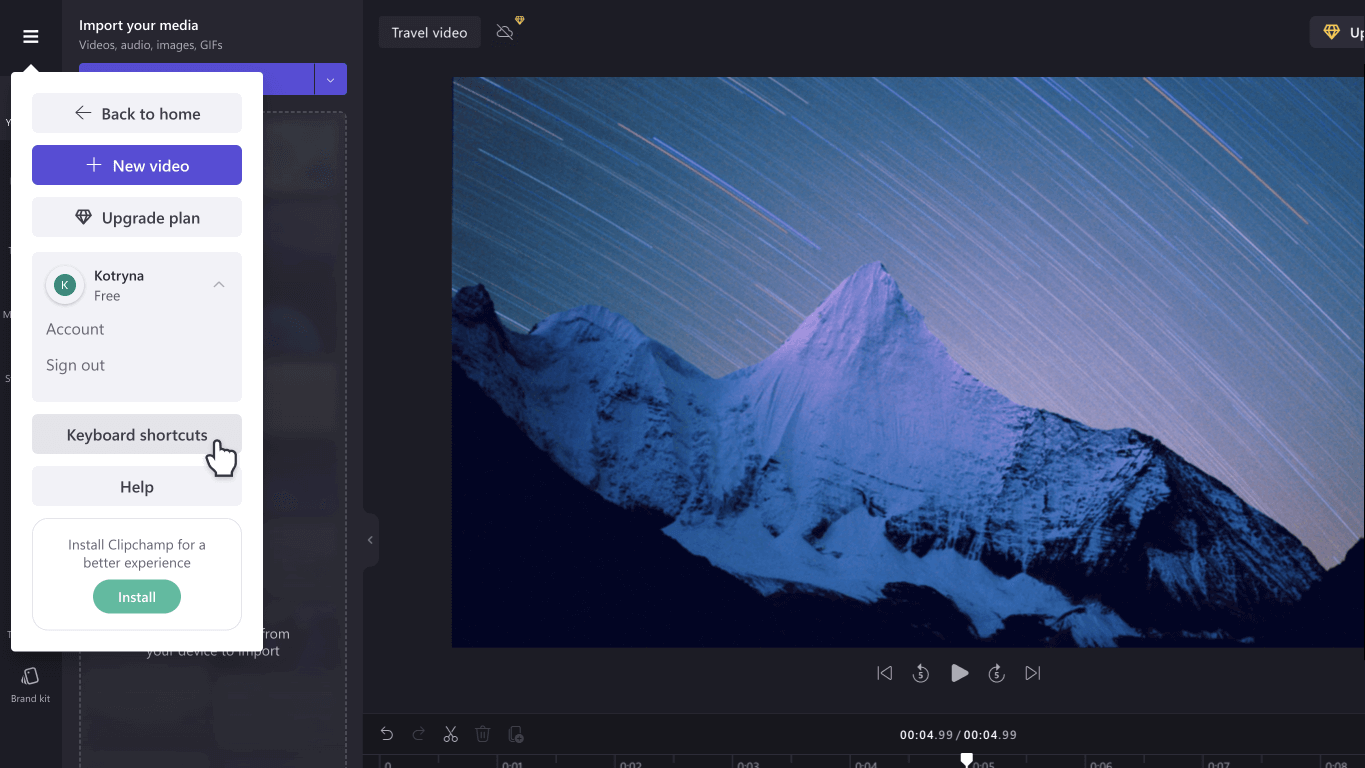
To edit with keyboard shortcuts:
-
Find a list of keyboard shortcuts by selecting the Clipchamp logo at the top left corner of the editor and selecting Keyboard shortcuts.
-
Browse through the helpful list of all shortcuts ranging from display, navigation, selecting items, moving items, and trimming items.
-
Use shortcuts to suit any accessibility needs or save time while editing videos.
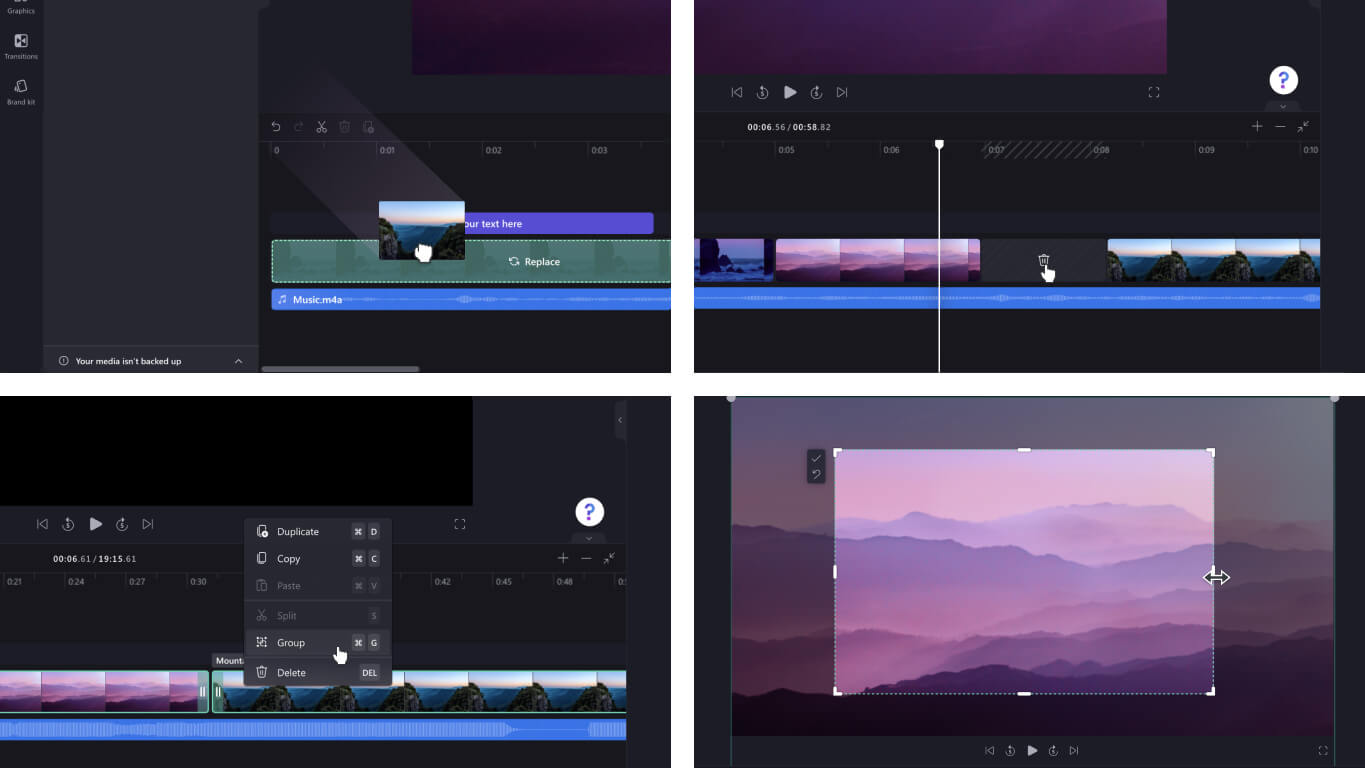
Enjoy special time-saving features:
-
Use keywords to search the stock library, which has over 1 million stock videos, audio, and images.
-
Replace existing stock or assets on your timeline by dragging and dropping the media in the exact position of the existing media.
-
Delete gaps created on your timeline by selecting the trash can icon that appears between media.
-
Group and ungroup assets on your timeline by dragging your cursor over the media, right-clicking, and selecting Group or Ungroup from the dropdown menu.
-
Crop certain areas of your videos, images, and stickers with the freehand crop feature. Adjust the corners inside the stage to change the aspect ratio with your cursor.
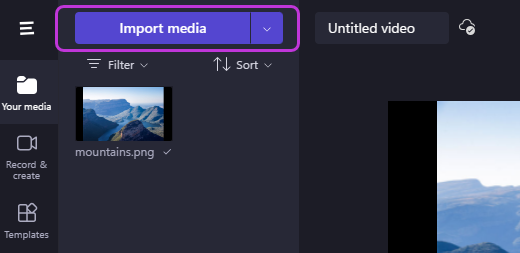
To import your media:
There are many options to upload compatible videos, audio, images and GIFs you want to edit in Clipchamp, including:
-
Import from device
-
Import from phone (known as Clipdrop)
-
Import from cloud storage like OneDrive, Dropbox and Google Drive and Google Photos
To access helpful integrations:
Clipchamp offers integrations to make your editing experience seamless. For example, the GIPHY integration allows you to add trending GIFs to your videos from the Graphics tab in the sidebar. Further integrations are listed below.
Import and save videos directly to and from:
-
OneDrive
-
Google Drive
-
Google Photos
-
Dropbox
Integrations to share videos:
-
YouTube
-
TikTok
-
LinkedIn
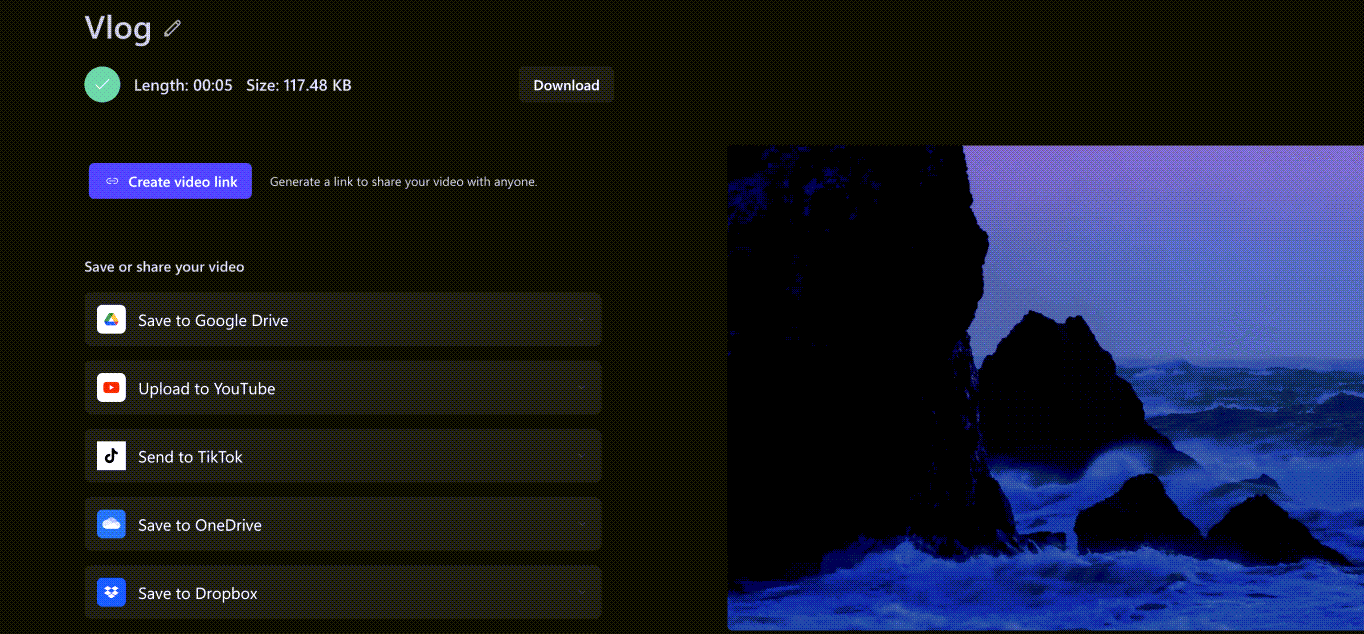
To save a video:
-
Select the Rename box to name your video above the stage.
-
Select the Export button to save your video. Select from a range of video resolutions, including 480p, 720p, or 1080p. You can also save any video under 15 seconds as a GIF.
-
Download your video to your device and share your video with an embed code or with the Share page link to view the video hosted privately on Clipchamp. You can also share directly to social media platforms like TikTok and YouTube.
Looking for further support? Find more answers when you go to Clipchamp Support.
Windows 10 might not be the most popular operating system Microsoft released to date. Despite its many drawbacks, it does come with quite a few surprising features that many people are unaware of, which can come quite in handy.
One such feature is a built-in video editor. While not an advanced tool for professional video editors by any means, Windows 10 video editor is better than you’d expect.
In this article, we’ll go over the video editor’s features, explain what you can do with it, provide you with a handful of free alternatives, and show you how to make videos with InVideo, in minutes.
Let’s jump right in!
Firing up the Windows 10 Video Editor
If you’re an average PC or laptop user, the fact that Windows has a built-in video editor won’t exactly be apparent. While the tool isn’t hidden either, it’s a part of the Photos app, and you’d have to know where to look for it to find it.
In the File Explorer, you’ll see an option labeled Videos. Unless you have a video on your device, there’s nothing that would indicate you can start up the video editor from there. Even if you do have a video you’d like to edit, right-clicking on it and selecting the Open With option will give you the impression that the only thing you can do with the video is to play it.
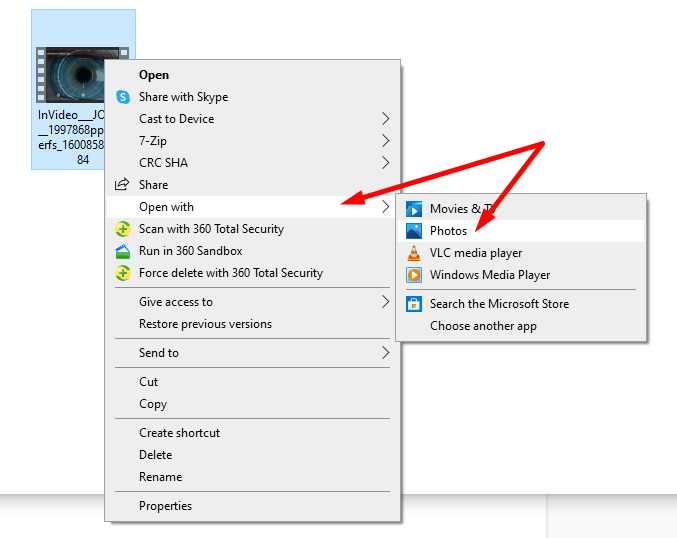
Very few people would guess that you could actually open and edit the video with the Photos app—yet that seems to be the case. The funny thing is, Windows 10 also has a Video Editor app (which we’ll get to in a moment), yet the option isn’t present here. In our opinion, this is an oversight on Microsoft’s part.
Once you open the video through the Photos app, it will start playing automatically. In the top right corner, you’ll see the Edit & Create button.
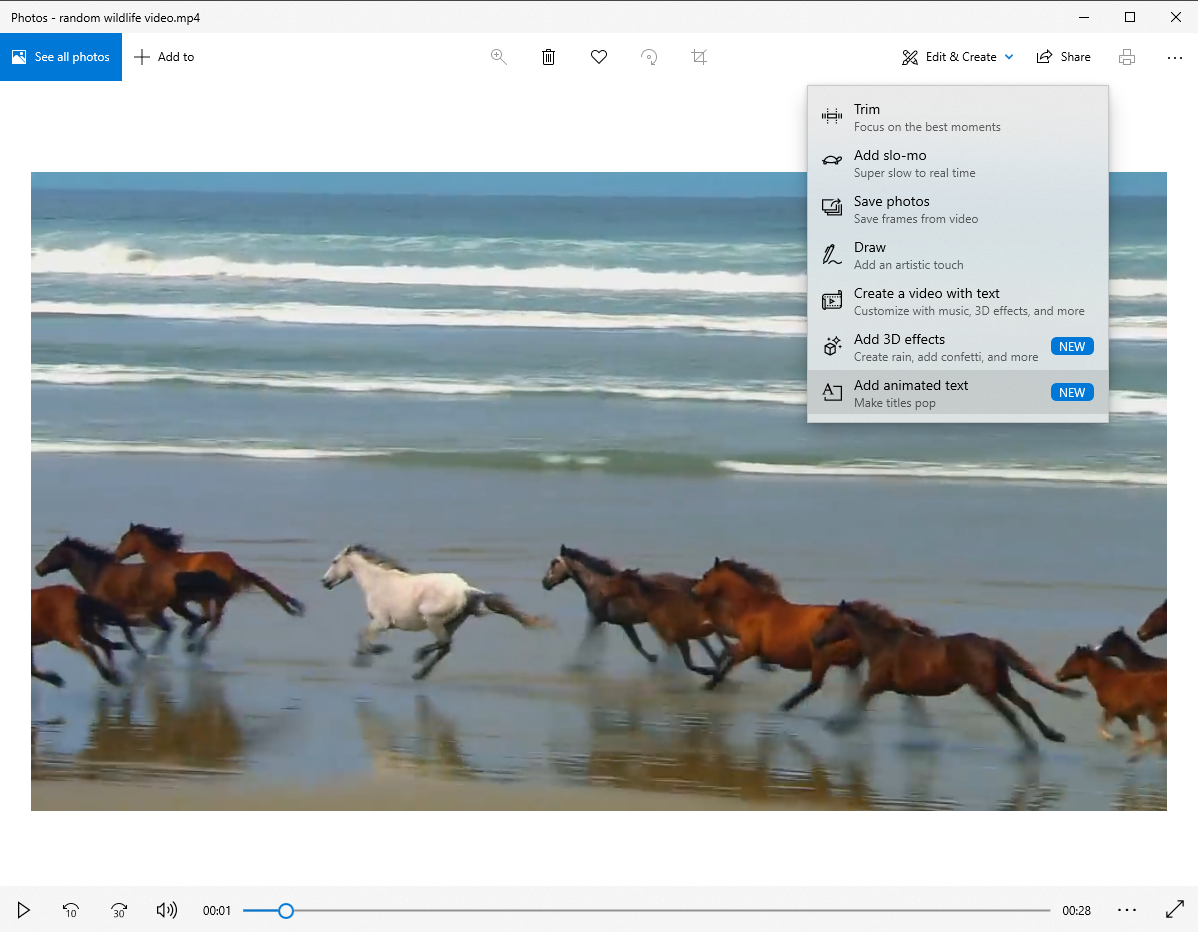
Clicking on it will reveal a drop-down menu with all the different editing options:
(1) Trim
Trimming allows you to cut your video and choose the desired portion you wish to keep. Selecting this option will reveal two handles on the timeline, which you can slide left and right to select a specific part of the video.
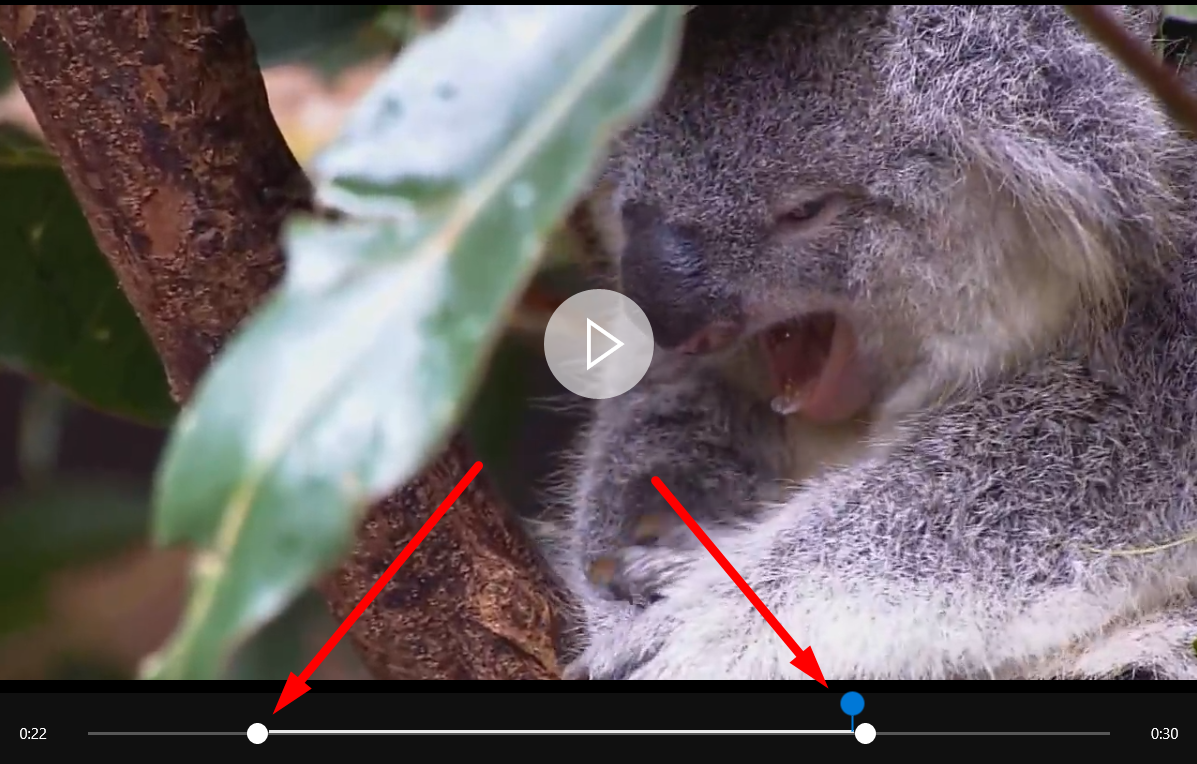
Once you’re done, click Save As, rename the new video, and choose where you want to save it.
(2) Add Slo-Mo
The slow-motion option allows you to slow down a portion of your video. Above the video, you’ll see two icons—one representing a human, and the other representing a turtle.
By default, the slider will be set all the way down to the turtle, which is a super slo-mo option. This only allows you to select one point in the video, which will be super-slow, to the point where it may look like the video froze.
In order to add actual slow motion, you must set the slider to the middle, like in the image below.
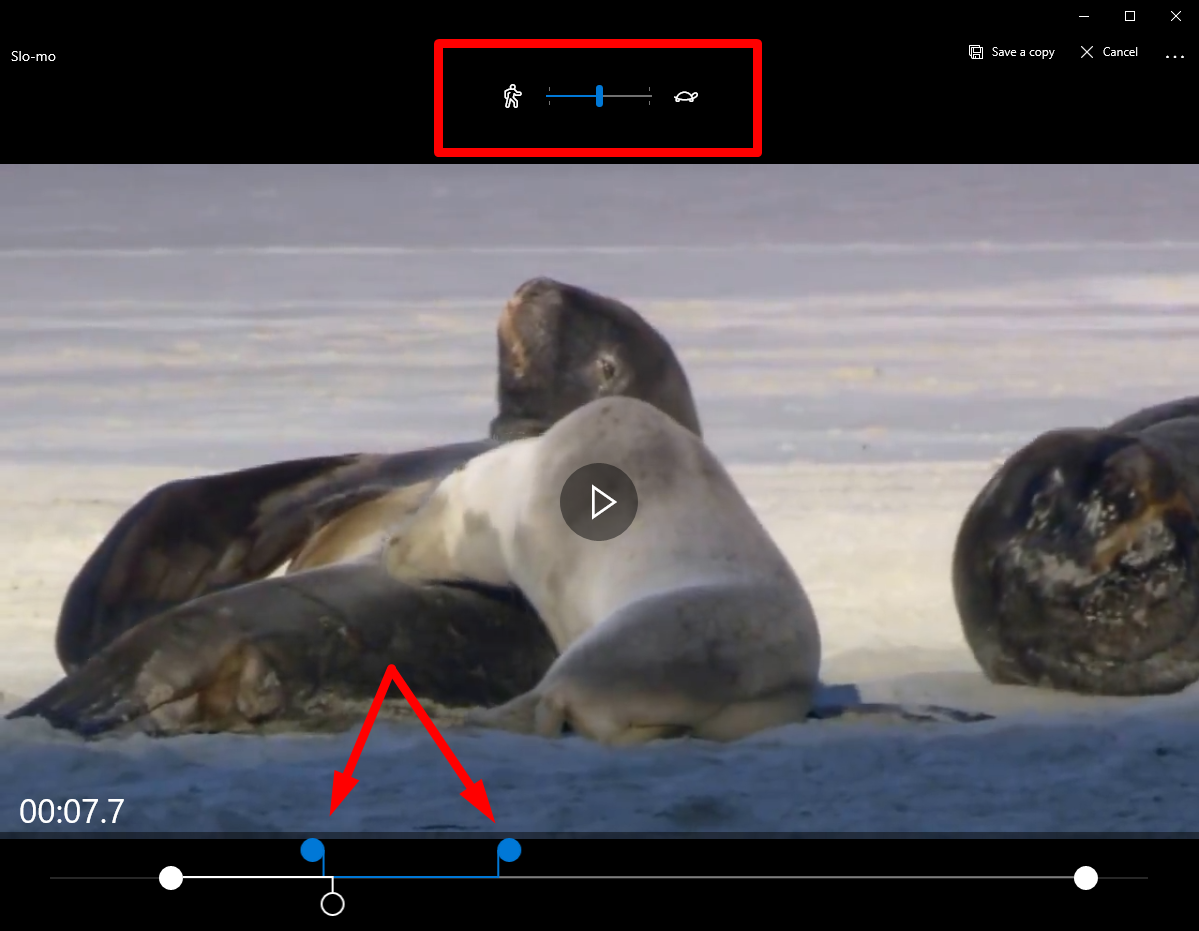
Once again, you’ll see two handles which you can slide to choose the part of the video you want to be in slow motion. There is no way to adjust the actual speed, so you’re stuck with the one option the tool provides.
You can play the video to see if you’re satisfied with the result. When you’re done messing with slow motion, click Save a copy in the top right corner.
(3) Save Photos
We wouldn’t categorize the Save Photos option under video editing.
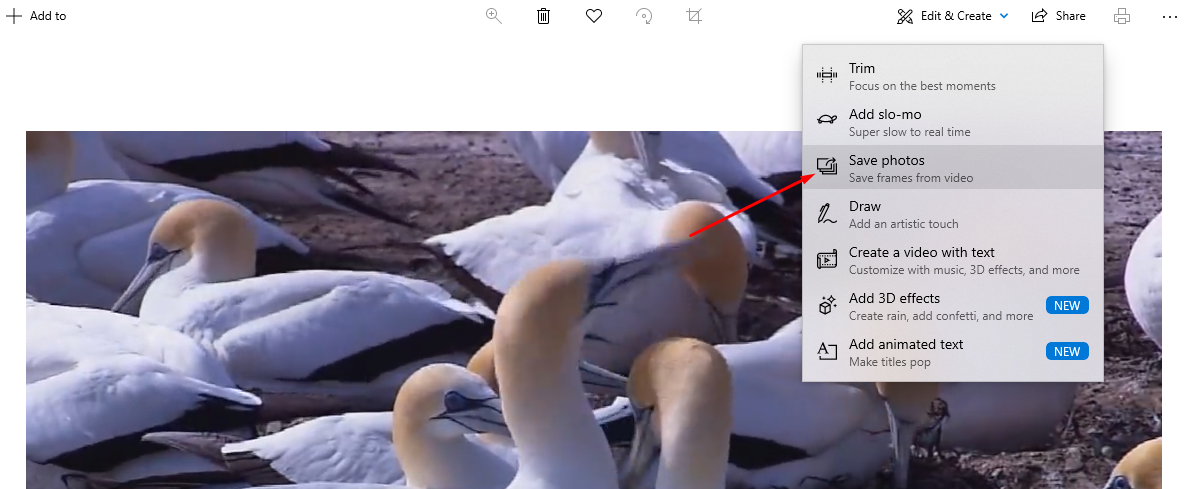
As the name suggests, you can use this feature to save specific frames from the video as photos. This can come in handy if you want to capture some memorable moments from a home video and perhaps frame them or create a photo album.
(4) Draw
The Draw feature lets you alter your video by drawing over it.
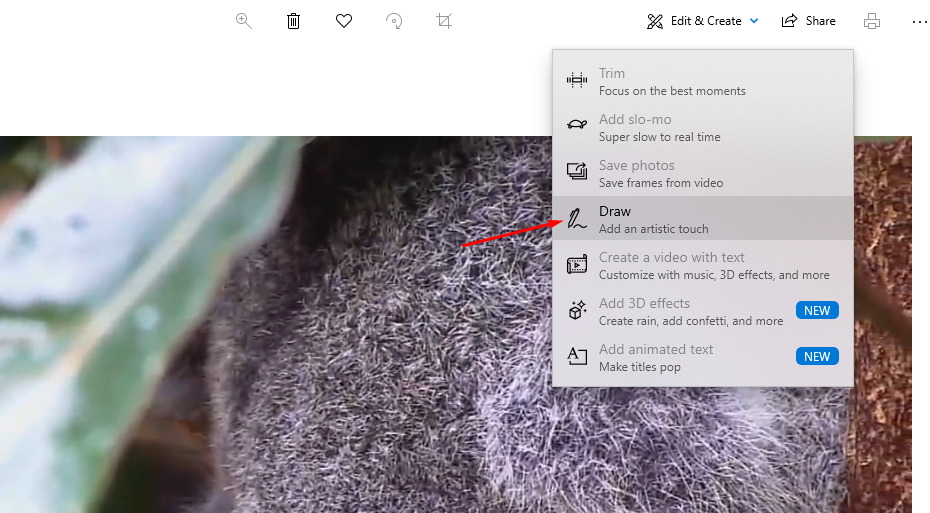
This feature is reminiscent of MS Paint, but with fewer options. You can only choose between:
— A pencil
— A ballpoint pen
— A calligraphy pen
(5) Create a video with text
Selecting the Create a video with text option actually opens up the video editor, which is a completely separate tool from Photos.
From here, you can add text to different portions of your video. There are 17 different styles/fonts to choose from, as well as six different text placements.
You can adjust when the text appears in the video by moving the handles on the timeline. The option is rather simplistic, but it can be useful when creating video presentations or if you want to embellish your home videos.
(6) Add 3D Effects
The ability to add animated 3D effects is a new feature of the Windows 10 Photos app. You can choose between 30 or so different effects and add rain, confetti, fireworks, lightning, or dust explosions to your video.
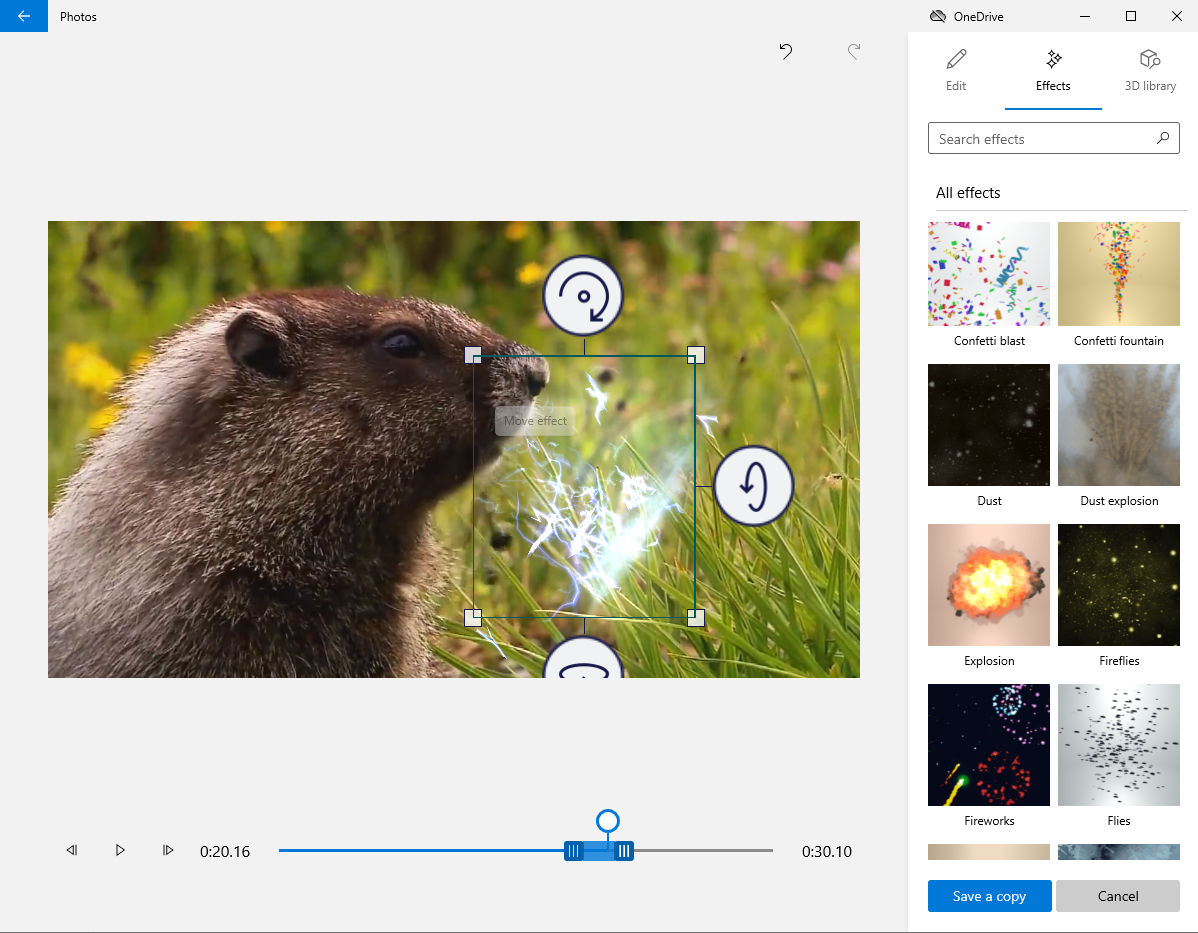
Choose the effect you want to add on the right-hand side of the screen and follow the on-screen instructions to adjust them. The process is fairly simple—you just choose where you want the effects to appear on the screen and select at which point they’ll show up by adjusting the slider on the timeline.
Apart from that, you can rotate the 3D effect to match the video and set the volume. As with all other options Photos offers, 3D effects are cool and easy to add but aren’t something you’d likely use when creating professional videos.
The overall impression of the video editing options the Photos tool lets you use is that they’re bare-bones, although they can add a few fun elements to your videos. One thing to note is that the tool is quite buggy. Don’t be surprised if the program stops working all of a sudden or if it makes certain options unavailable, practically forcing you to restart it and start editing from scratch unless you save your progress every couple of minutes.
What we fail to understand is why Microsoft made this watered-down version of a video editing tool, given that the operating system features an actual video editor, albeit with limited capabilities.
To start the actual built-in video editor, you’ll have to use the search bar. Type in “video editor” and select the tool that shows up in the results.
Once you open up the app, select the video you want to edit and add it to the storyboard. You’ll see all the different editing options above the clips you’ve added to the storyboard.

Since all of the other features are identical to the ones you’ll find in Photos, we’ll only go over the three additional options Video Editor provides.
(1) Background Music
Through the video editor’s Background Music feature, you can add music to complement your videos. In the top right corner of the tool, select the Custom audio option and upload the audio sample you want to use in your video.
After you’ve uploaded the desired audio, select the Background Music option and choose the music track you’ve uploaded.
Keep in mind that the track will be adjusted to the length of the video automatically. The only thing you can adjust manually is the volume of the music.
In other words, you will have to cut the audio to match the length of the video, using a different program. Otherwise, the Video Editor might cut off portions of the track you want to use if the track lasts longer than the video.
(2) Filters
Filters are a quick way to give your video a brand new look and feel. There are 14 filters in total you can choose from, including Black and white, Arcade, Pixel, Adventure, Sepia, Denim, and many more.
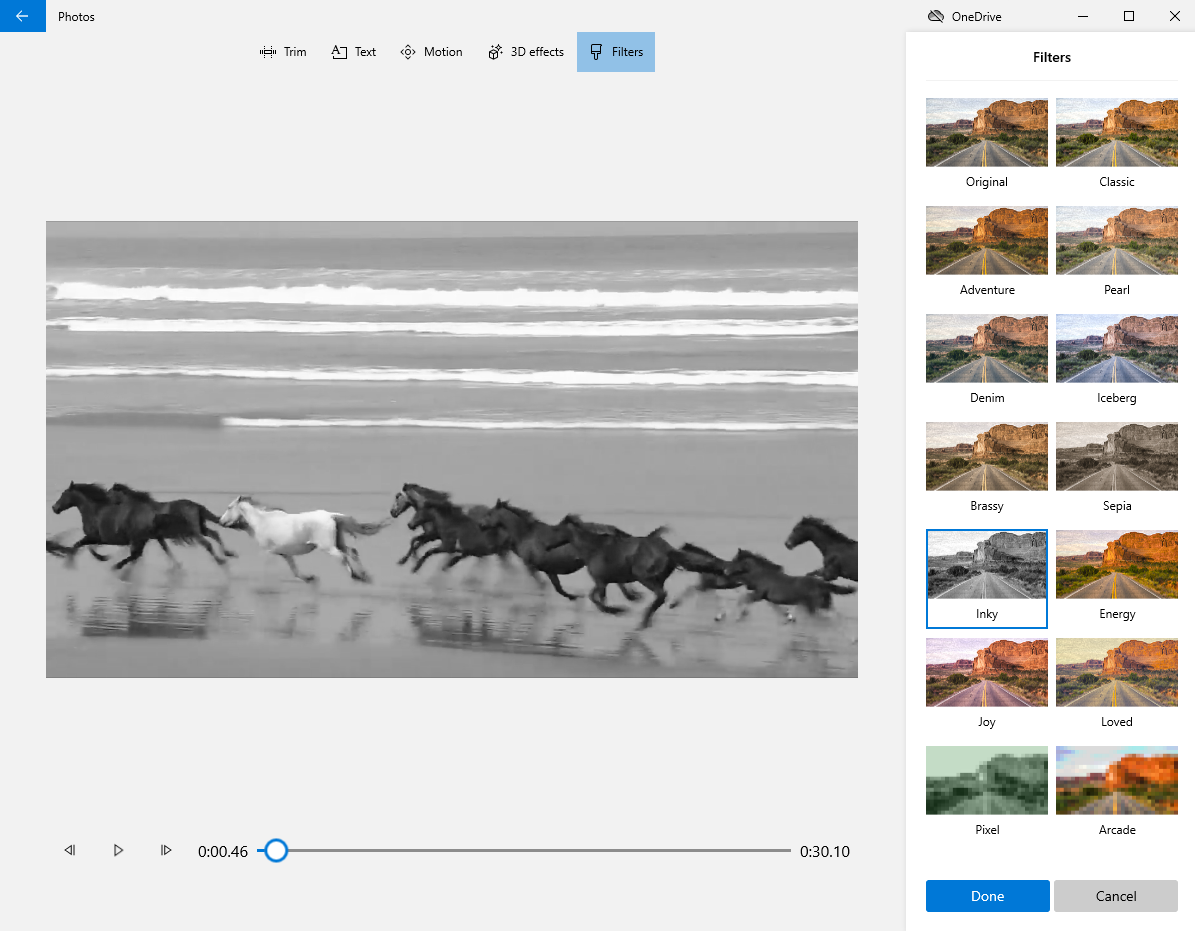
Once you select a filter and click on Done, it will be added to the entire video. There are no options to choose a specific portion of the video to add the filter to, and you cannot add multiple filters to the same video.
(3) Motion
With the Motion option, you can choose between 11 different styles of camera motion for your video. The differences are slight yet noticeable, but just like with filters, you can only apply a camera motion to the entire video—you can’t select a part of the video or add different motion styles.
How Good Are the Windows 10 Built-In Video Editing Tools?
Microsoft’s Video Editor that comes with the Windows 10 operating system is pretty basic. That said, it is pretty intuitive and beginner-friendly. If you have no previous video editing experience and are looking for a way to spice up your personal videos, Windows 10 Video Editor might suffice.
For anything a bit more serious, such as YouTube videos, Facebook and Instagram ads, as well as the explainer and marketing videos, you will have to look for a slightly more advanced video editor.
We’ve put together a list of the best free video editing software for Windows 10, so you can start editing videos like a pro!
Top five tools you can use to edit videos on Windows 10
(1) InVideo
InVideo is a cloud-based video editing platform that lets you create gorgeous videos in minutes, regardless of your video editing experience. Since our platform is web-based, you don’t need to download any software and can use it on any device and operating system, Windows 10 included.
InVideo boasts a feature-rich, intuitive drag-and-drop video editor, making it as simple as possible to add stunning effects, layers, filters, voiceover, animations, and more. There are over 5000 professionally designed video templates to choose from, and new ones are added regularly.

Some of our most popular templates include:
— Facebook and Instagram stories
— Facebook ads
— YouTube videos
— Snapchat stories
— Promo videos
— Marketing videos
Regardless of the type of video you want to create, InVideo makes the whole process simple, straightforward, and fun. We have dozens of tutorial videos for beginners and aspiring video editors, so you can get started right away.
All you need to do is create an account on our website, and you’ll be able to create and export up to 60 videos per month for free!
Apart from pre-made templates, InVideo also gives you the option of converting a script into an awesome video, as well as the ability to create a video from scratch. Our tool also features an extensive media library—images, music, stickers, effects, etc.—that you can leverage to embellish your videos. There’s also an option to upload your own logo, music, and visuals to create that perfect video just the way you imagined it.
| Key Features | Pricing |
|
More than 5000 stunning video templates Advanced video editing capabilities Dozens of video tutorials Text-to-video conversion Intelligent Video Assistant (IVA) that recommends corrections in real-time |
Free plan available
From $10/month for the Small Business plan, billed annually |
Create professional videos in minutes
With 5000+ InVideo templates
 Get started now
(2) Shotcut
Shotcut is a decent open-source video editor compatible with the Windows 10, Mac, and Linux operating systems. While Shotcut’s interface may seem simplistic at a glance, the tool does provide quite a few advanced video editing options, such as chroma keying, footage stabilization, multi-track timelines, and film restoration.
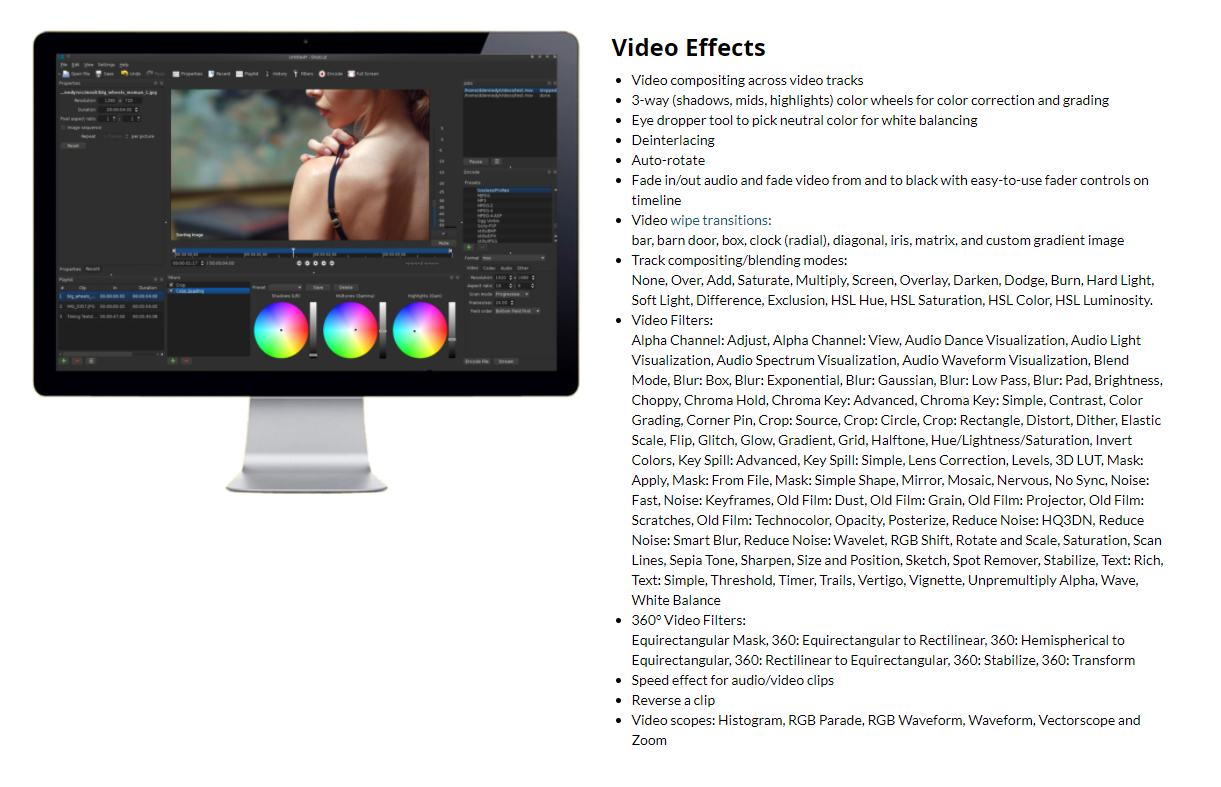
While the sheer number of features Shotcut offers is impressive, especially considering it’s a free tool, you’ll have trouble navigating the tool if you’re not an experienced video editor.
That said, all of the edits you make will be conveniently listed on the left-hand side of your screen, so even if you do accidentally mess something up, you can always uncheck the box to remove a specific effect.
| Key Features | Pricing |
|
Supports a wide range of image formats Multi-format timeline Three-way color wheels 360° Video Filters Speed effects for audio and video |
Free |
(3) OpenShot
As the name suggests, OpenShot is an open-source video editor, meaning it’s completely free to use. You can download and use it on Windows, Mac, and Linux.
Though the tool isn’t exactly a cutting-edge video editor for filmmakers, producers, and video editing professionals, it does offer all the basic features and a few advanced ones.
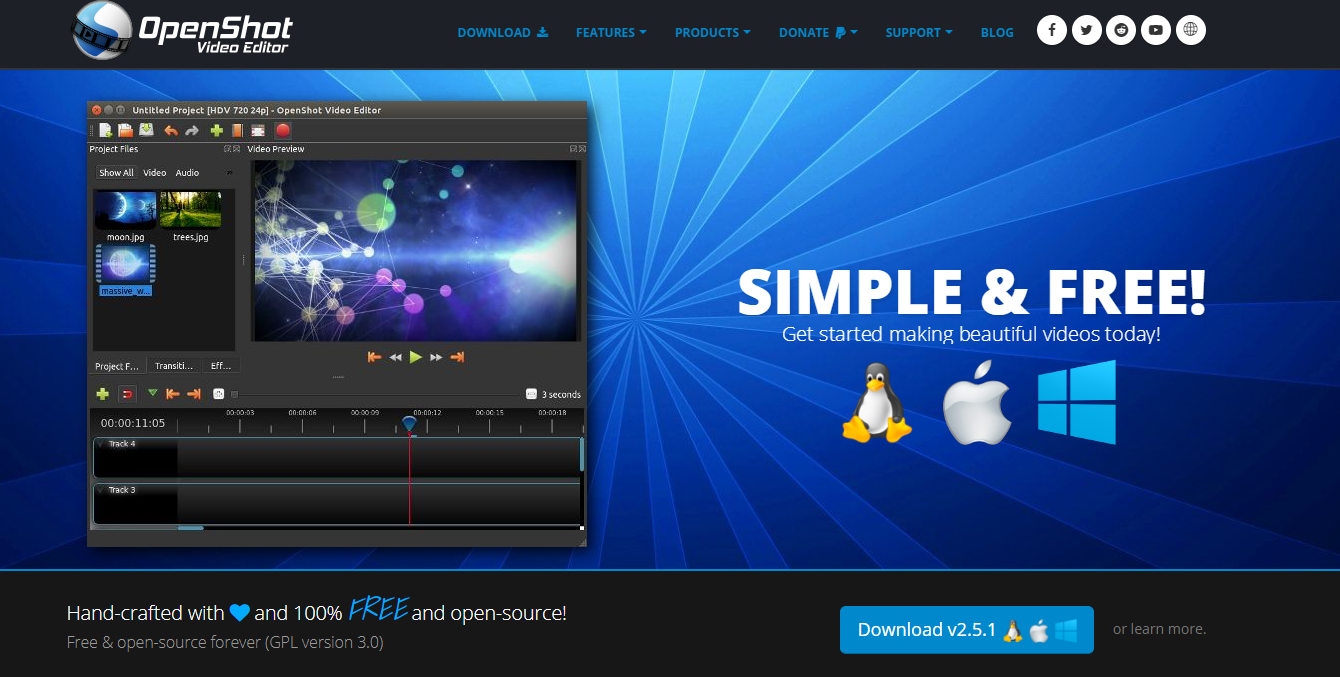
The beauty of OpenShot lies in the fact that everything’s done through a drag-and-drop editor. In addition, short tutorials will pop up each time you’re using a new feature, making the editing process a bit easier.
The creators also provide an extensive user guide on their website, making sure that everyone can create beautiful videos through their software, regardless of their video editing experience.
| Key Features | Pricing |
|
Support for a wide range of video, audio, and image formats Unlimited track layers 3D animated titles Time-mapping and speed changes Advanced features—chroma key, brightness, gamma, hue, etc. |
Free |
(4) VSDC
VSDC is an excellent multi-purpose tool—it can help you edit videos, create slideshows, record your screen, convert video and audio, and more. The tool is free to use, all the while offering a variety of advanced editing options.
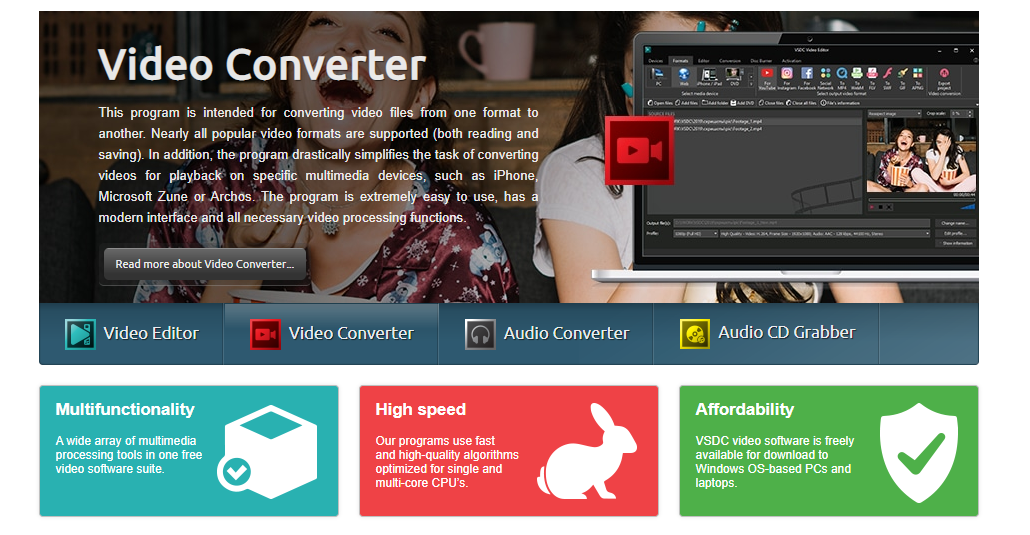
One thing worth noting about VSDC is that it isn’t beginner-friendly. The tool features a non-linear video editor and offers a variety of video editing options, so people new to video editing are likely to be overwhelmed by all the different possibilities VSDC offers.
That said, there is a user manual you can download on the website, which can help you get started. You should be prepared to invest some time into learning the ins and outs of the VSDC free video editor, but once you get the hang of it, you’ll be able to create stunning videos with the tool.
The major advantage of VSDC is the fact that it’s well-optimized. It doesn’t pull too many resources, meaning you can run the tool and edit your videos even on low-end computers with as little as 2GB Ram.
| Key Features | Pricing |
|
Non-linear video editor Built-in Instagram filters Masking and motion tracking Supports 4K and HD videos Desktop video capture |
Free |
(5) Videopad
Videopad is a decent video editing tool that’s quite reminiscent of the Windows 10 Movie Maker, only it comes with few more advanced features. The tool features a non-linear editor, allowing you to add multiple videos and audio tracks, and images to the timeline, and edit them simultaneously.
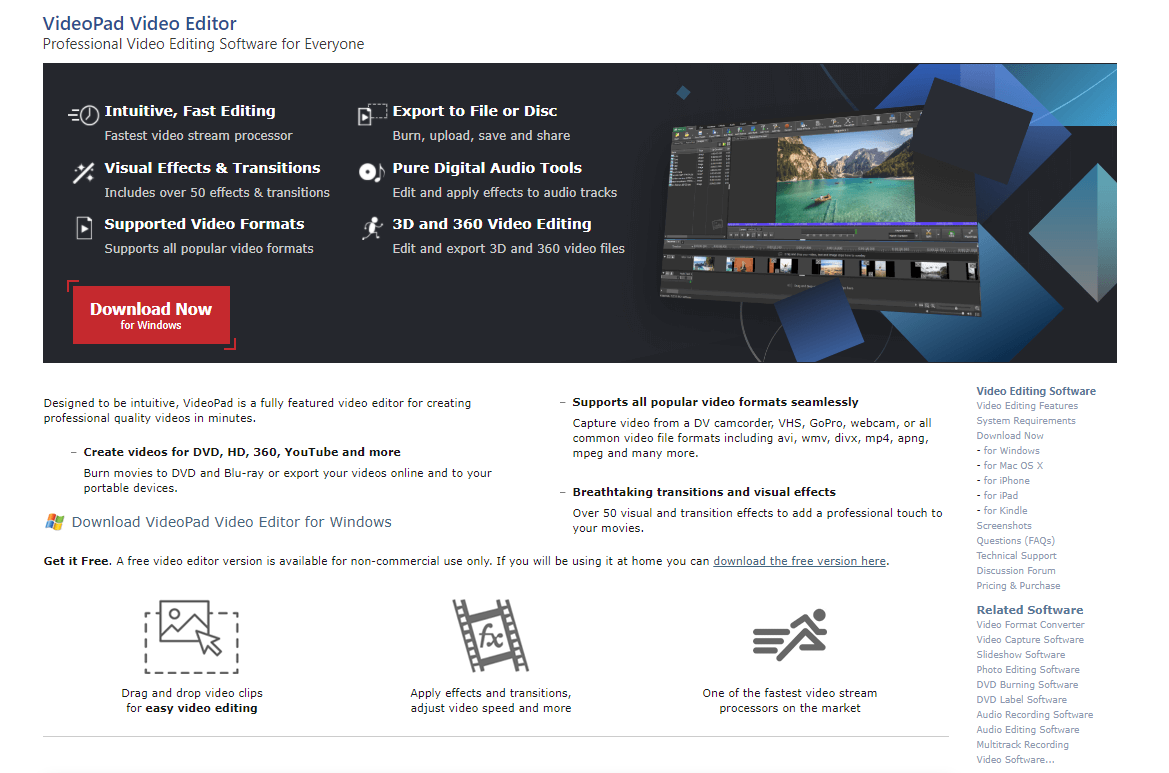
Apart from the standard video editing features, Videopad stands out from similar software due to its advanced text editing capabilities. The tool lets you add subtitles in real-time, ensuring perfect accuracy. There are also plenty of different styles, fonts, and animation effects you can choose from.
Another commendable feature of Videopad is masking, which is done in a separate window that appears once you right-click on a portion of the video and select the Effects option.
| Key Features | Pricing |
|
Over 50 effects and transitions 3D and 360 video editing The ability to slow down, speed up, or reverse a video Video stabilization and camera shake reduction Easy video sharing |
Free |
Start creating videos like a PRO today
All five of the free video editors for Windows 10 we’ve listed here are infinitely better than the built-in video editing software the operating system provides. Admittedly, some of them take a bit of getting used to and you might be overwhelmed and confused by the sheer number of options they offer.
That’s why InVideo is the perfect option—our video editor doesn’t have a learning curve. Thanks to the pre-built templates, an intuitive UI, and an easy-to-use drag and drop editor, you’ll be able to create stunning, professional-looking videos in under five minutes!
Click here to create an account and get started today for free. Once you see how easy it is to create outstanding videos with our web-based editor, you’ll fall in love with InVideo!