This article includes steps that advise executing commands using Diskpart, which has no confirmation system to prevent mistakes. Failure to understand how to use Diskpart or typos may cause issues. Please take your time and double-check each command is correct for your environment before executing them. Steps that involve specifying disk numbers or partition numbers must be reviewed closely; the disk and partition numbers used in this article’s examples may not match your environment.
Challenge
The Veeam Recovery Media Creation process is encountering an error, which typically presents as follows:
Cause
The Veeam Recovery Environment is built on top of the Windows Recovery Environment, which, in turn, is created from the Windows Preinstallation Environment. If a system is missing the necessary Windows PE/RE components, the creation of Veeam Recovery Media will fail.
Solution
Please note that the steps outlined in the resolution below will require 8GB or more of free space on the disk specified in the DISM commands.
Part 1: Preparing the Image File
To resolve the issue of missing Windows Recovery Environment files, you will need to copy them from the Windows Installation media to the running system. Perform the following steps on the machine that is having the issue:
- Mount the Windows Installation ISO or insert the installation media.
- Using Windows Explorer, check the «sources» folder on the Windows installation media:
- If
install.wimis present, skip to Part 2: Using Diskpart Check if the Recovery Partition is Present - if
install.esdis present, proceed to step 3
- If
- Use the DISM Export-Image function to extract the install.wim from the install.esd file in the installation media.
How to export install.wim from install.esd file
Using the DISM Get-ImageInfo function, determine which Index ID inside the install.esd matches the installed version of Windows.
Modify file paths as needed for your environment.
Next, use the Export-Image function to export the install.wim for the Index ID that you need. For the example command below, the machine had Windows 10 Pro installed, and Index #6 matched that edition.
Be sure to include the /Compress switch; if it is not included, the resulting WIM file will fail to mount using DISM.
Part 2: Using Diskpart Check if the Recovery Partition is Present
Open an elevated Command Prompt, and run the following commands in Diskpart:
- List all available disks:
- Select the disk where the OS is installed. (Usual Disk 0)
- List all partitions on the selected disk:

Example of Recovery Partition
With the state of the Recovery partition now known, proceed to Part 3 of this article.
Part 3: Recovery Image Handling
Below are three expandable sections that provide information on the next actions to take based on whether the Recovery partition is available.
Scenario Summaries:
-
Scenario 1: Replace the Existing Recovery Image in the Recovery Partition
The Recovery partition is present, and you would prefer to update it instead of storing the recovery image on the OS partition.
-
Scenario 2: Create a New Recovery Partition
There is no Recovery partition, but you would like to create one and store the Recovery image there.
-
Scenario 3: Place the Recovery Image on the OS Volume
There is no Recovery partition, and you don’t want to create one.
Scenario 1: Replace the Existing Recovery Image in the Recovery Partition
In this scenario, you will assign a drive letter to the existing Recovery partition, replace the recovery image on that partition with the one from the ISO, and then reinitialize the recovery environment.
- Assign a Drive letter to the existing Recovery partition:
- Open an elevated Command Prompt
- Run Diskpart:
- List all available disks:
- Select the disk where the OS is installed. (Usual Disk 0)
- List all partitions on the selected disk:
- Select the Recovery partition.
- Assign the selected Recovery partition a drive letter:
The letter R:\ is used throughout this section to make the steps consistent.
- Exit Diskpart, and complete the remaining steps in this Scenario guide from the existing elevated Command Prompt.
- Disable the recovery environment:
- Using the DISM Mount-Image function, mount the install.wim:
Correct file paths as needed depending on the location of the install.wim. For example, if you had to extract the install.wim from the install.esd on the ISO, correct the imagefile path to match where you exported that install.wim.
- Copy WinRe.wim and ReAgent.xml files from the mounted image to the system’s C:\Windows\System32\Recovery folder:
Note: The example command will overwrite all data in the C:\Windows\System32\Recovery folder with content from the mounted image. (WinRe.wim is a system file and is hidden by default, as such, you won’t be able to see the file once it’s copied to the target location.)
- Unmount the image:
- On the Recovery partition that you assigned a Drive letter to in Step 2 of this scenario, check if there is a folder named Recovery and within it is a folder named WindowsRE.
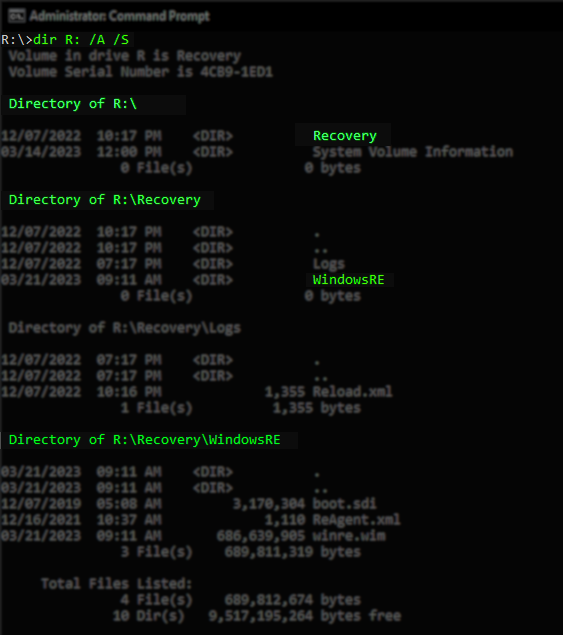
- If the folders are present (R:\Recovery\WindowsRE), skip the mkdir command and proceed to Step 8.
- If those folders are not present, create them:
- Copy the recovery environment image to the R:\Recovery\WindowsRE folder:
- Enable Recovery image using REAgentC:
- Enable the recovery environment:
- Check that the Recovery environment is pointed to the correct partition:
- Remove the drive letter from the Recovery partition:
- Open Diskpart
- List all available disks:
- Select the disk where the OS is installed. (Usual Disk 0)
- List all partitions on the selected disk:
- Select the Recovery partition.
- Remove the drive letter from the Recovery partition:
- Exit Diskpart, and close the Command Prompt
With those steps completed, the Veeam Recovery Media Creation process should function properly. If it continues to fail, please create a Veeam support case and mention this KB article and the scenario you completed.
Scenario 2: Create a New Recovery Partition
In this scenario, you will shrink the last partition on the OS disk, create a new partition, assign it the Recovery type, copy the recovery image into that new partition, then reinitialize the recovery environment.
Note:
- If the last partition on the OS disk is not large enough to shrink, you may have to shrink the next-to-last partition to make space for the Recovery partition.
- Shrink the last partition on the OS disk and create the new Recovery partition:
- Open an elevated Command Prompt
- Run Diskpart:
- List all available disks:
- Select the disk where the OS is installed. (Usual Disk 0)
Tip: Take note of whether the disk you select is marked as GPT or not, you’ll need to know that in a future step.
- List all partitions on the selected disk:
- Select the last partition on the disk, which you are going to shrink to make space for the new Recovery Partition. (Usually, it is the OS partition)
Critical Note: The partition you select must have sufficient space to be shrunk by 8GB. If the last partition on the disk is unable to be shrunk by 8GB, you may need to shrink the next-to-last partition instead and insert the new Recovery partition before the last partition.
- Shrink the partition to create space for the new Recovery partition:
- Create a new Primary partition:
- After the partition command in the previous step completes, the new partition will be selected. Now, format it as NTFS and give it the label «Recovery»
- Update the partition type ID:
- If the disk was not marked as GPT, use the command:
set id = 27
- If the disk was marked as GPT, use the command:
set id = "de94bba4-06d1-4d40-a16a-bfd50179d6ac"
- If the disk was not marked as GPT, use the command:
- Assign the new Recovery partition a drive letter:
The letter R:\ is used throughout this section to make the steps consistent.
- Exit Diskpart, and complete the remaining steps in this Scenario guide from the existing elevated Command Prompt.
- Disable the recovery environment:
- Using the DISM Mount-Image function, mount the install.wim:
Correct file paths as needed depending on the location of the install.wim. For example, if you had to extract the install.wim from the install.esd on the ISO, correct the imagefile path to match where you exported that install.wim.
- Copy WinRe.wim and ReAgent.xml files from the mounted image to the system’s C:\Windows\System32\Recovery folder:
Note: The example command will overwrite all data in the C:\Windows\System32\Recovery folder with content from the mounted image. (WinRe.wim is a system file and is hidden by default, as such, you won’t be able to see the file once it’s copied to the target location.)
- Unmount the image:
- Create the Recovery folders:
- Copy the recovery environment image to the R:\Recovery\WindowsRE folder:
- Enable the Recovery image using REAgentC:
- Enable the recovery environment:
- Check that the Recovery environment is pointed to the correct partition:
- Remove the drive letter from the Recovery partition:
- Open Diskpart
- List all available disks:
- Select the disk where the OS is installed. (Usual Disk 0)
- List all partitions on the selected disk:
- Select the Recovery partition.
- Remove the drive letter from the Recovery partition:
- Exit Diskpart, and close the Command Prompt
With those steps completed, the Veeam Recovery Media Creation process should function properly. If it continues to fail, please create a Veeam support case and mention this KB article and the scenario you completed.
Scenario 3: Place the Recovery Image on the OS Volume
In this scenario, you will extract the recovery image from the install.wim to the C:\Windows\System32\Recovery folder and then initialize the recovery environment to use that recovery image.
- Using the DISM Mount-Image function, mount the install.wim:
Correct file paths as needed depending on the location of the install.wim. For example, if you had to extract the install.wim from the install.esd on the ISO, correct the imagefile path to match where you exported that install.wim.
- Disable the recovery environment:
- Copy WinRe.wim and ReAgent.xml files from the mounted image to the system’s C:\Windows\System32\Recovery folder:
Note: The example command will overwrite all data in the C:\Windows\System32\Recovery folder with content from the mounted image. (WinRe.wim is a system file and is hidden by default, as such, you won’t be able to see the file once it’s copied to the target location.)
- Enable the Recovery image using REAgentC:
- Unmount the image:
- Enable the recovery environment:
With those steps completed, the Veeam Recovery Media Creation process should function properly. If it continues to fail, please create a Veeam support case and mention this KB article and the scenario you completed.
To submit feedback regarding this article, please click this link: Send Article Feedback
To report a typo on this page, highlight the typo with your mouse and press CTRL + Enter.
I have a tenant with a single 2012 R2 server capturing full bare metal backups with a B&R 9.5 server and getting this warning message after each backup.
Collecting recovery media files Details: The specified image file did not contain a resource section
I’ve installed Windows ADK v8 (on the tenant’s server) and rebooted the server but still this message persists.
I have case number 03407174 opened for it. Any ideas what it’s looking for or how to fix?
My natural fear is that there is some terrible failure and will be unable to restore a bare metal backup because of this.
Recovery ISO file creation naturally fails as a result.
EDIT: Got it working.
I’m not sure if it was turning off AV or the registry entry shown at the bottom of this KB article
https://www.veeam.com/kb2685
Specifically adding this
(On the target machine)
-
Open Regedit
-
Browse to “HKEY_LOCAL_MACHINE\SOFTWARE\Veeam\Veeam Endpoint Backup”
-
Create a new Registry key with these details:
Name: ForceUseAdkForRecoveryMedia
Type: REG_DWORD
Value: 1
4. Restart the “Veeam Agent for Microsoft Windows” service
Either way, the job ran with no warnings and I was also able to create the bare metal recovery iso once that job completed.
I’ll see tonight when it runs again if the AV being turned back on generates another warning or if that only needed to run and grab those files once and wouldn’t care from that point on or what.
New post on NS IT Automation |
 |
by NS IT Automation |
Table of Contents
- Purpose of document
- High level Overview of Veeam Backup
- Veeam Backup Warning
- Resolution
- End of Document
Read Document
Go To Home
Tags: Collecting recovery media files Details: Windows recovery image file not found, DisableRECollection, Registry Entry for Veeam Warning, Veeam Backup Warning, Veeam Endpoint Backup | Categories: Tips and Tricks | URL: https://wp.me/pbsJKd-Gl
| Comment | See all comments |
Unsubscribe to no longer receive posts from NS IT Automation.
Change your email settings at Manage Subscriptions.
Trouble clicking? Copy and paste this URL into your browser:
https://nsitautomation.in/tips-and-tricks-veeam-backup-warning/